How do I use Arcserve UDP with Wasabi?
Arcserve UDP is validated for use with Wasabi. To use this product with Wasabi, please follow the config guidelines below. More info on how Wasabi works with Arcserve can be found here.
The Arcserve UDP platform can be used with Wasabi for the following functions:
Copying of Recovery Points/Upload Recovery Point - This task copies the recovery points from the backup destination to Cloud.
File Copy - This task lets you copy individual files to the specified destination.
File Archive - This task allows you to delete the source data after it has been copied to Cloud.
To configure Arcserve UDP 9 Cloud Console with Wasabi, click here.
Note: Your specific backup software application handles the data restoration process. As there are many potential variables that will affect your unique environment, it is strongly recommended that you seek the guidance of your backup software's technical support team if you encounter difficulty or have application-specific inquiries.
Table of Contents
1. Prerequisites
Active Wasabi account
Arcserve UDP
2. Adding Wasabi as a Cloud Account
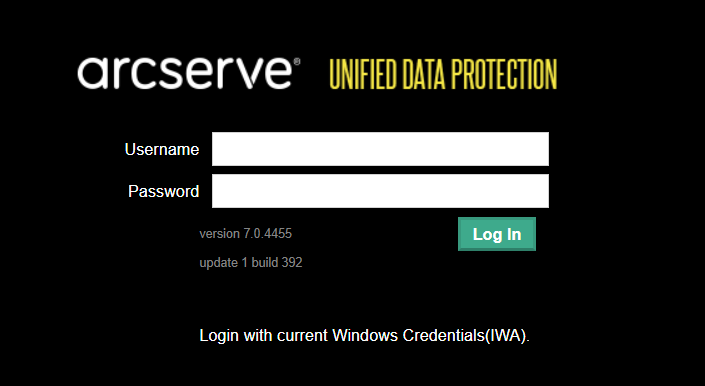
2.1. Log in to the Arcserve UDP Console
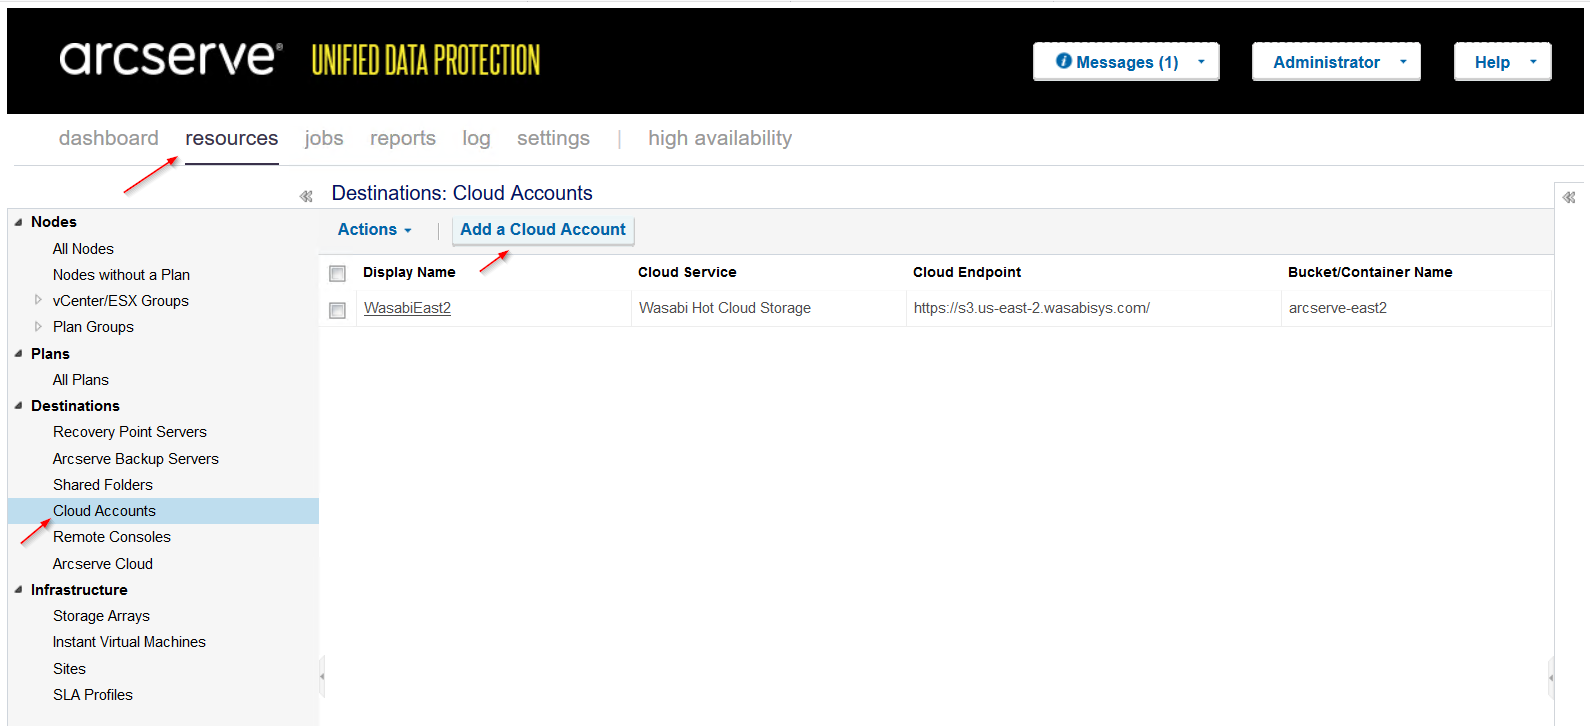
2.2. Click Resources, then Cloud Accounts, and finally Add a Cloud Account as shown below.
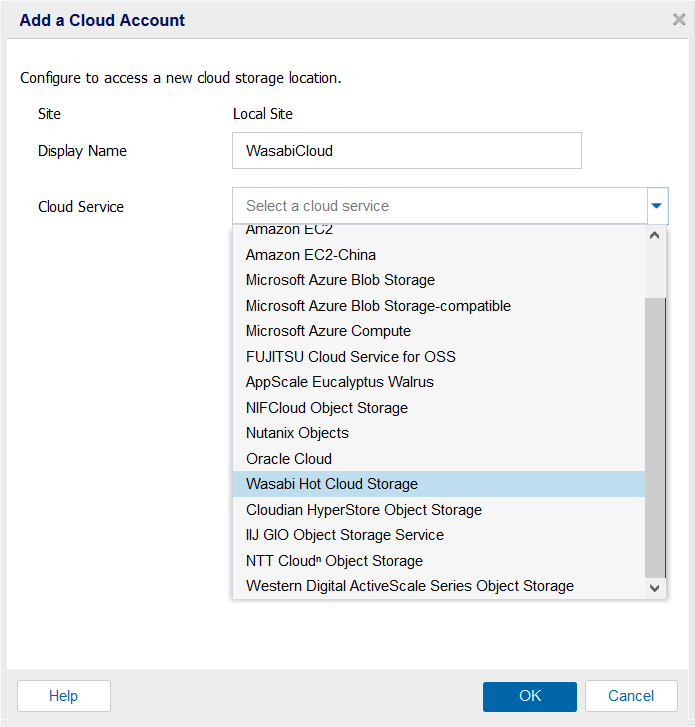
2.3. Enter a Display Name and select Wasabi Hot Cloud Storage from the drop-down selection box. Click OK.
2.4. Enter your credentials (access-key and secret access key) and a bucket name.
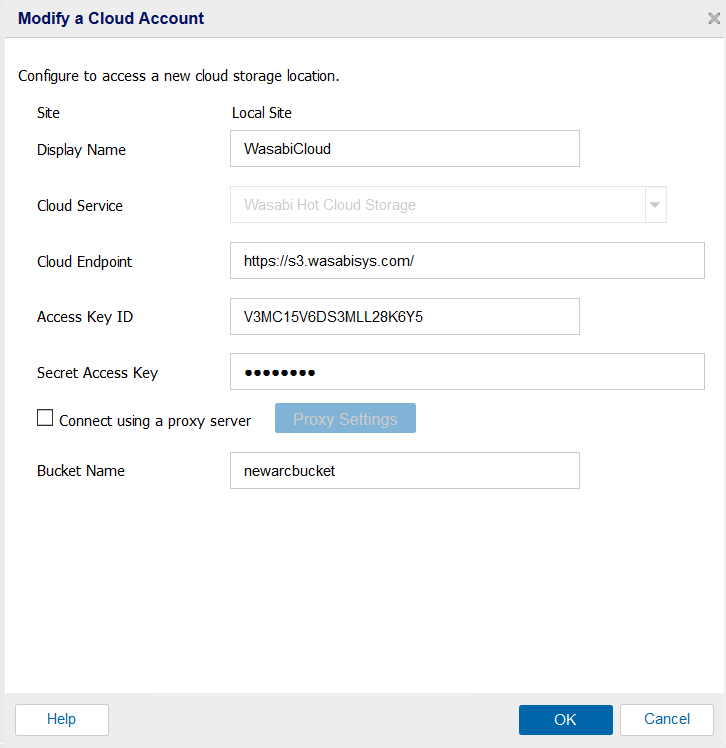
Note: This config example discusses the use of Wasabi's us-east-2 storage region. To use other Wasabi storage regions, please use the appropriate Wasabi service URL as described in this article.
2.5. At this point the connection between Arcserve UDP and Wasabi has been completed successfully. Now, we can configure Plans to copy recovery points (backups) to Wasabi.
Navigate back to Resources, click on the appropriate Plan and Add a Task, as shown below.
As mentioned above Arcserve UDP can be used to perform Copy Recovery Points, File Copy and File Archive with Wasabi as the Cloud destination. Below we have listed the steps to perform all these functions.
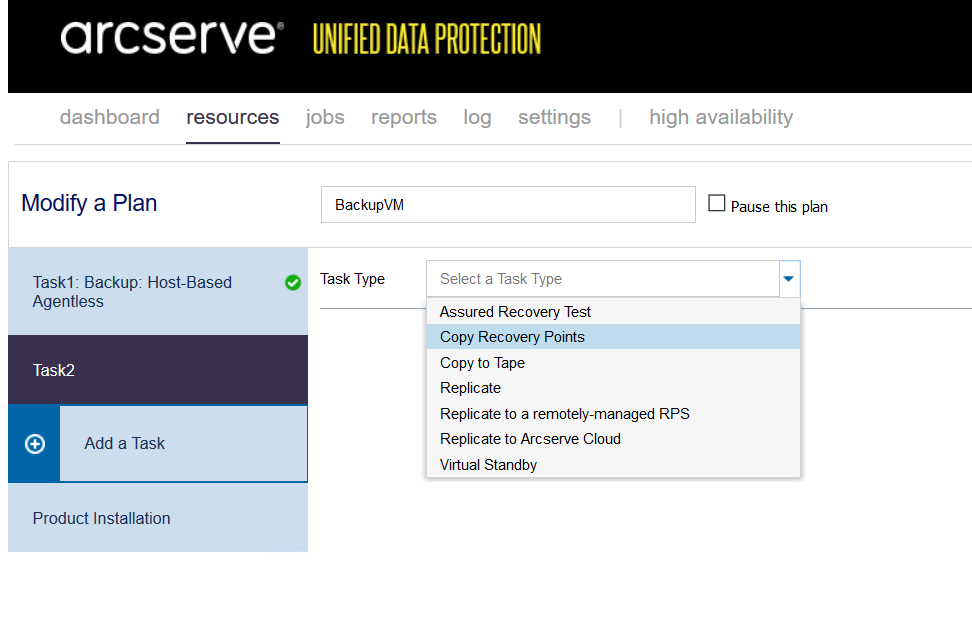
3. Copy Recovery Points
3.1. Select Task Type Copy Recovery Points.
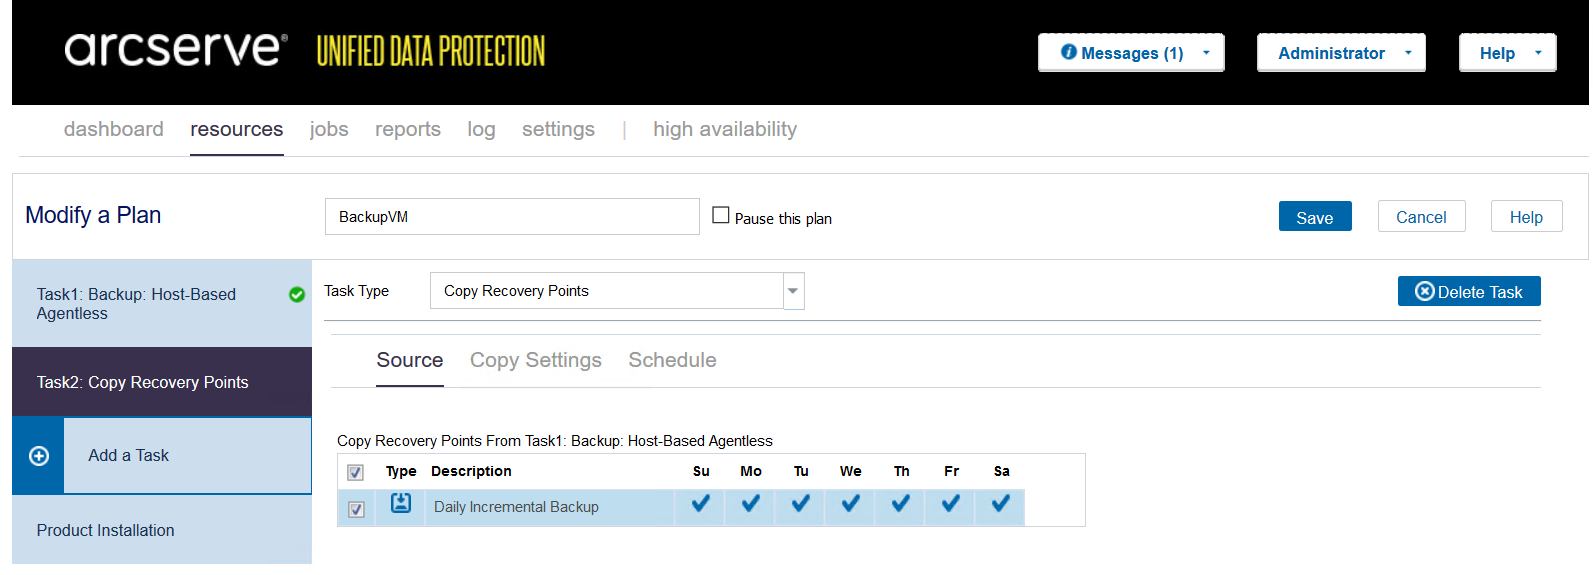
3.2. Select the Source settings as appropriate.
3.3. Click Copy Settings. Select Cloud Storage as the Destination Type, Wasabi Hot Cloud Storage as the Cloud Service, and WasabiCloud for Cloud Storage, set up above. The remaining settings can be default or changed as needed. See example below.
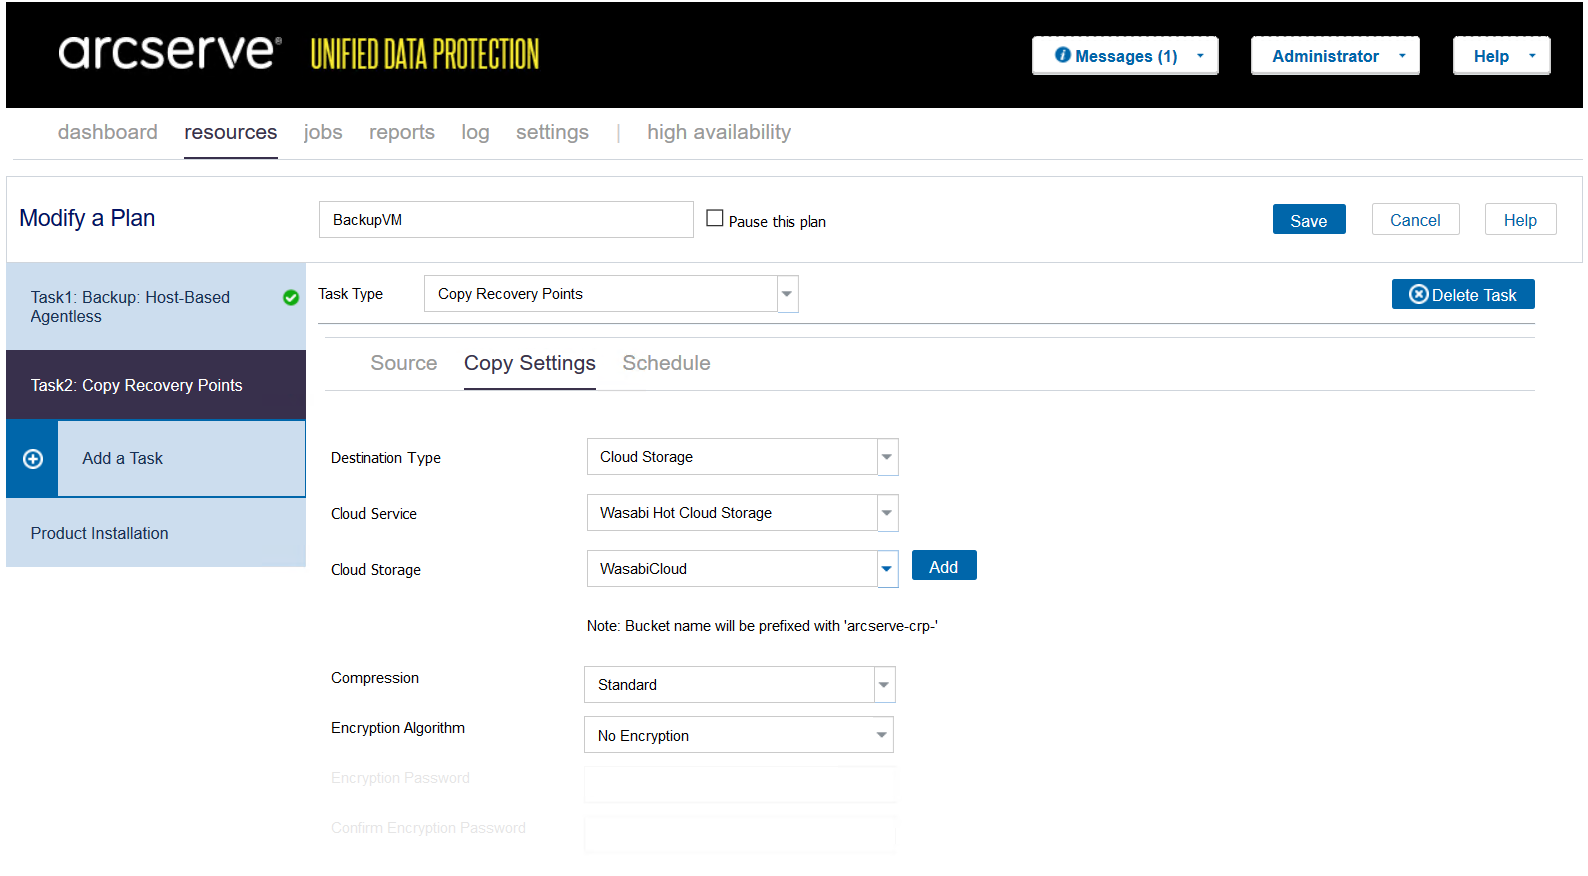
Note: Based on the task, the Arcserve application creates a bucket with a prefix. In this case the prefix is "arcserve-crp-".
3.4. Configure a Schedule as per your requirement. Click Save.
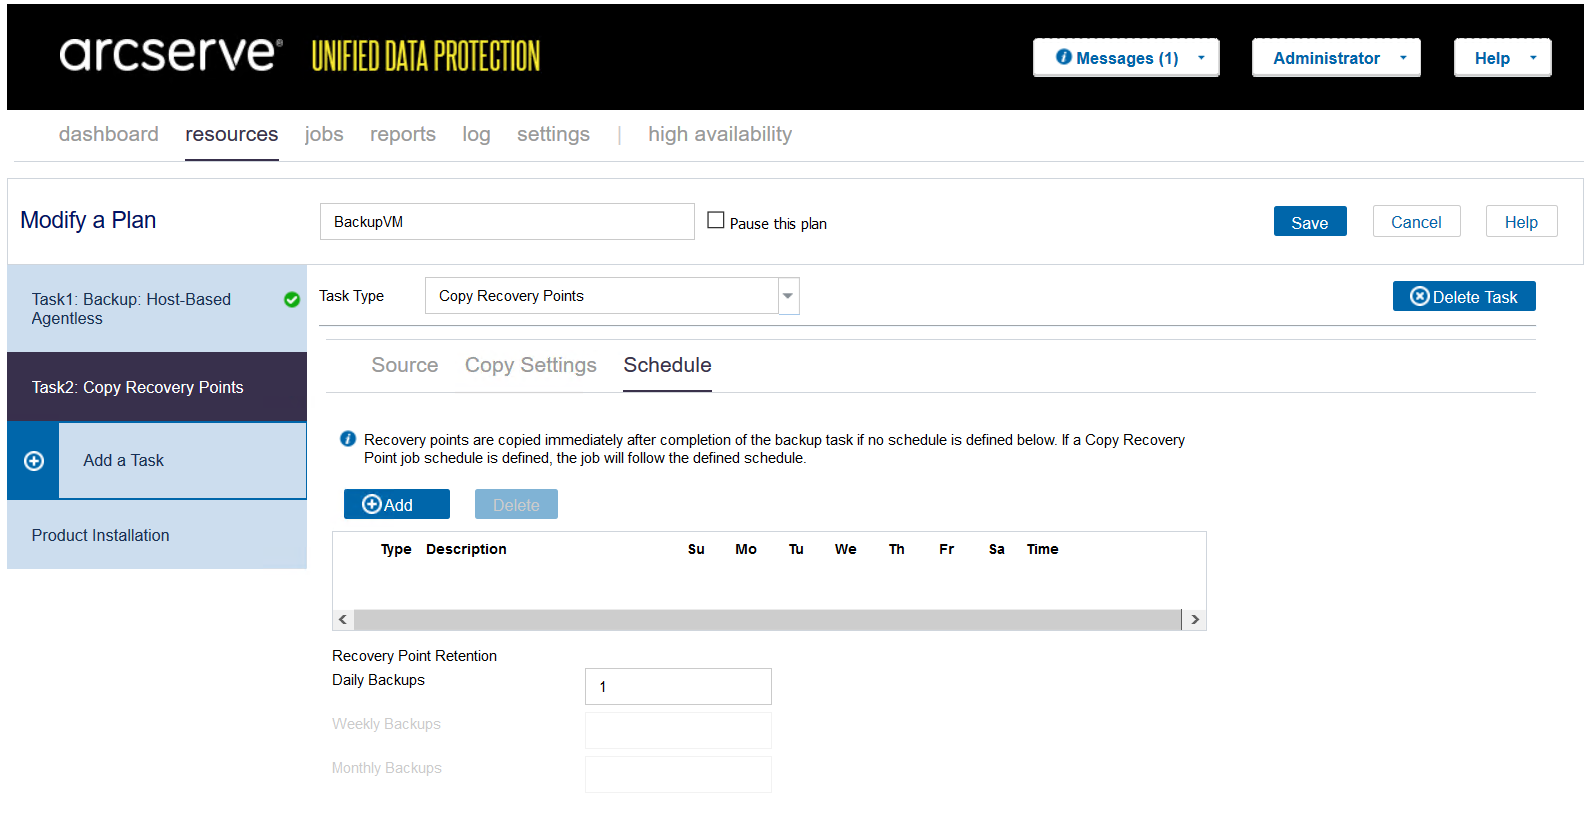
Note: Recovery Points are copied immediately after the backup task is completed, if no schedule is defined.
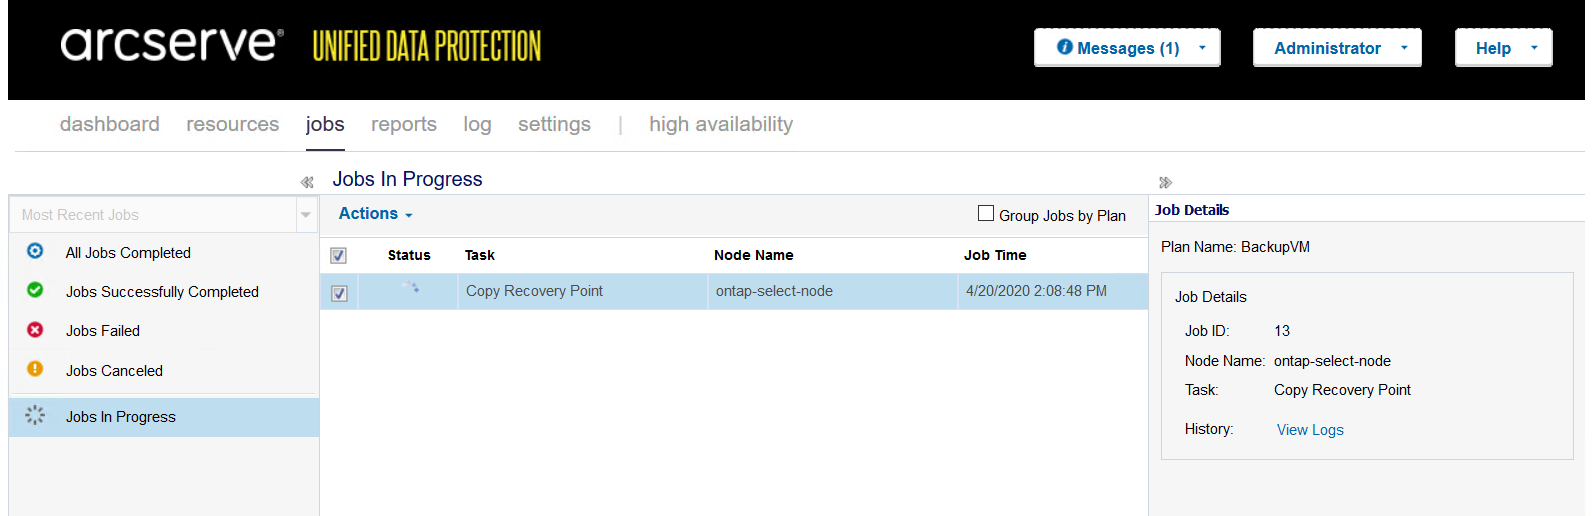
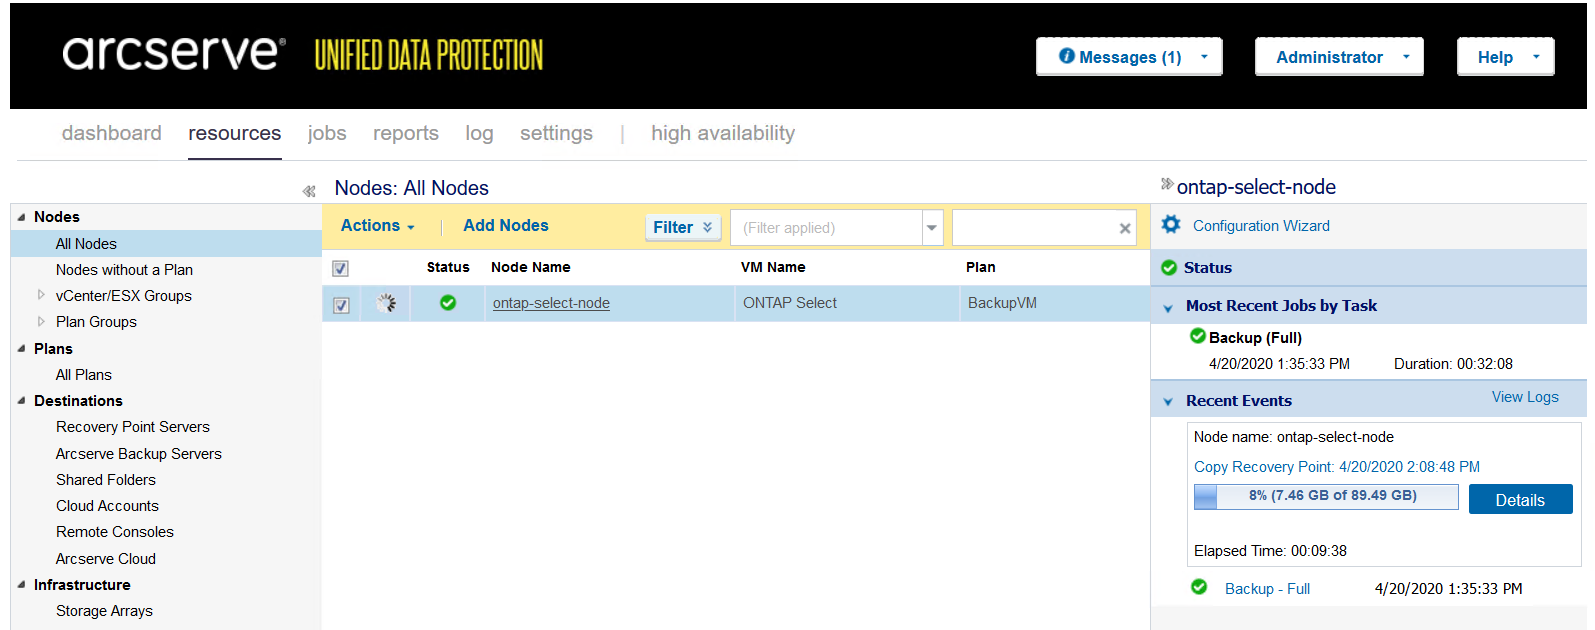
3.5. Based on the Schedule, Arcserve UDP will copy the recovery points to Wasabi.
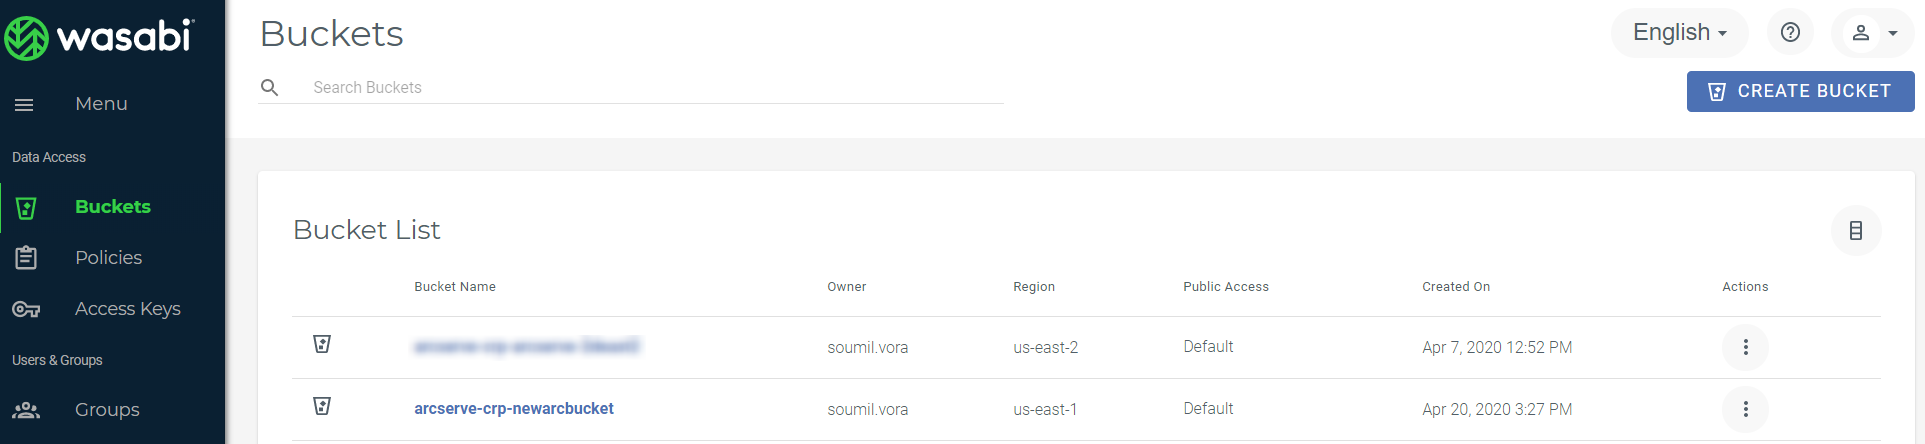
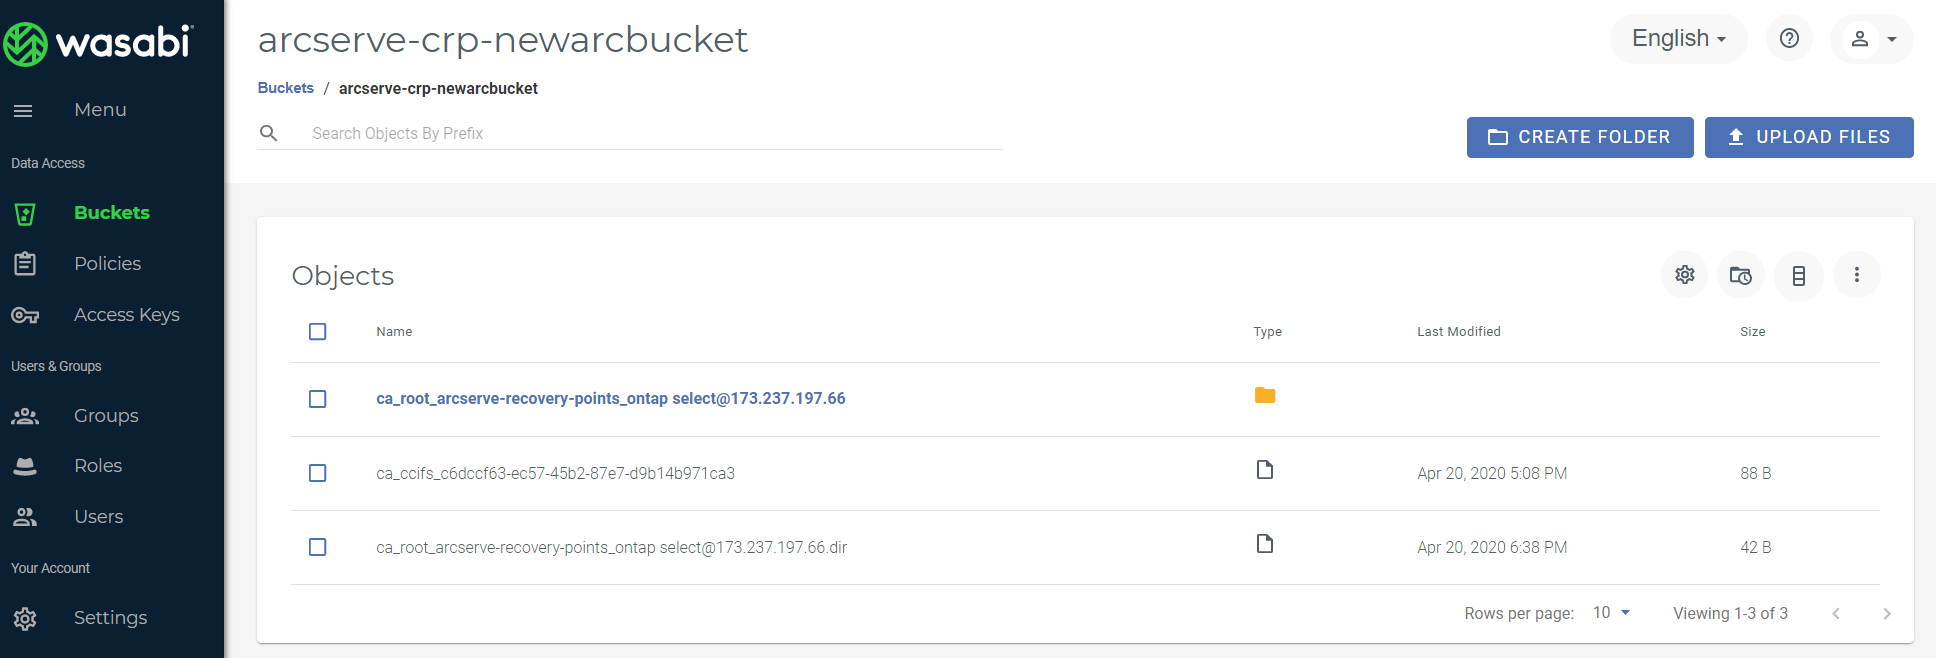
3.6. You can verify that the data is getting stored in your Wasabi bucket using the Wasabi console.
4. File Copy
File Copy allows you to copy individual files to a specified destination. Note: File Copy can only be added to an agent-based backup plan.
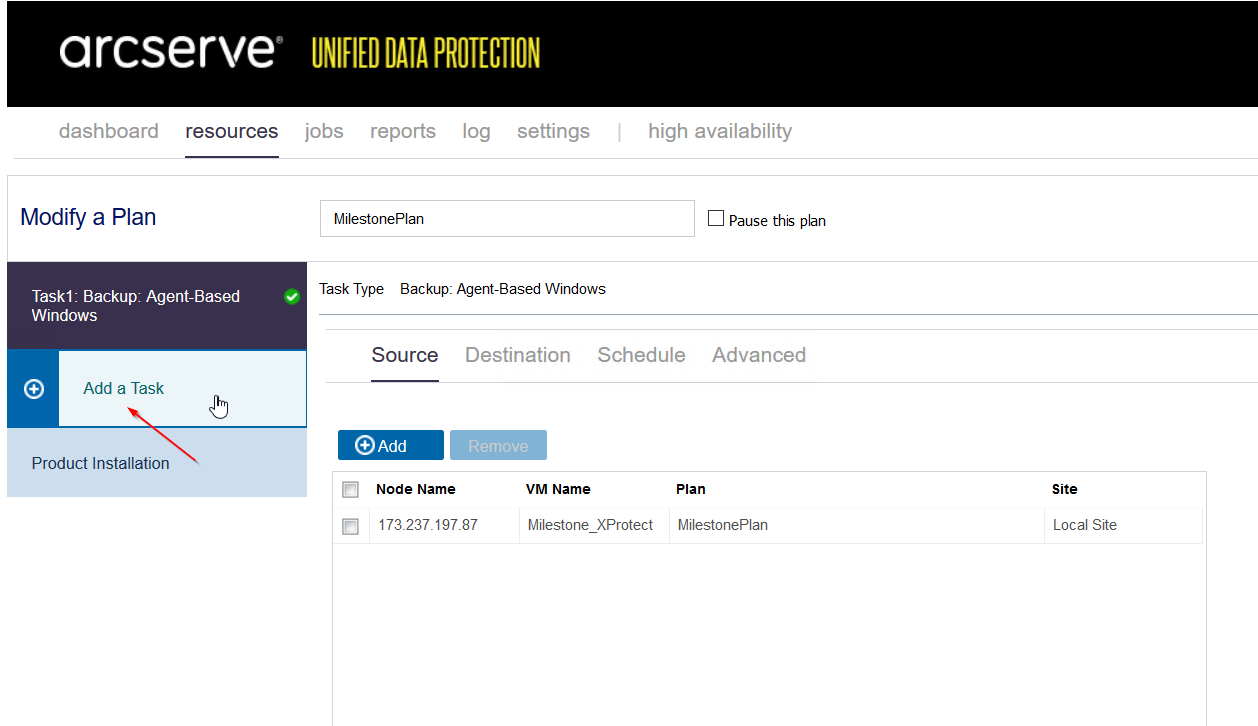
4.1. In this case, we will modify an existing Backup plan to add a File Copy task. Click Add a Task as shown below.
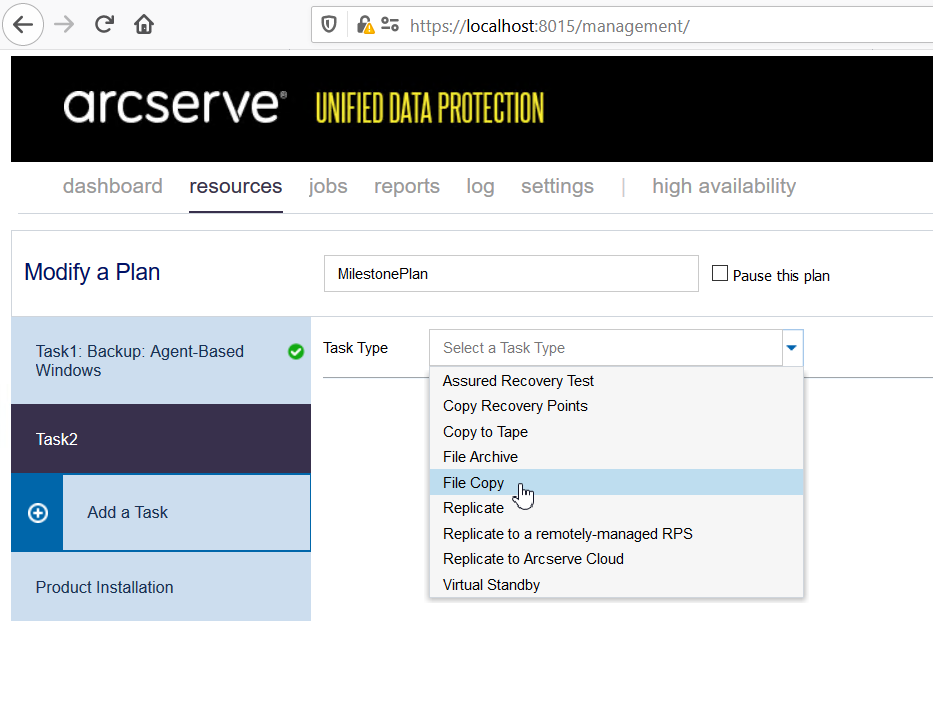
4.2. Select File Copy from the drop-down selection box.
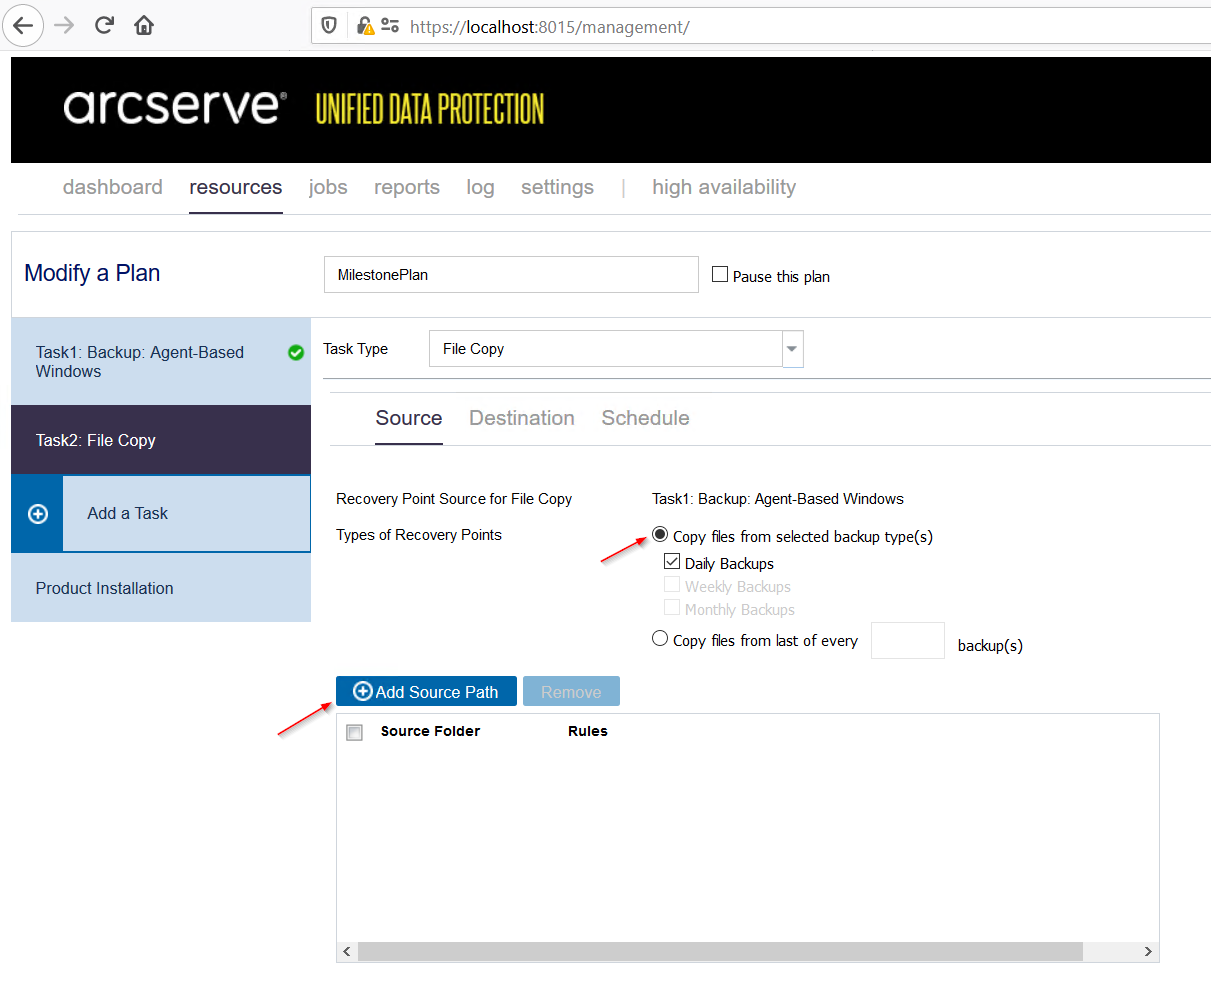
4.3. From the Source tab, first select whether the file needs to be copied from Daily Backups or the last of every 'x' backups. Then, click Add Source Path to select the File/Folder
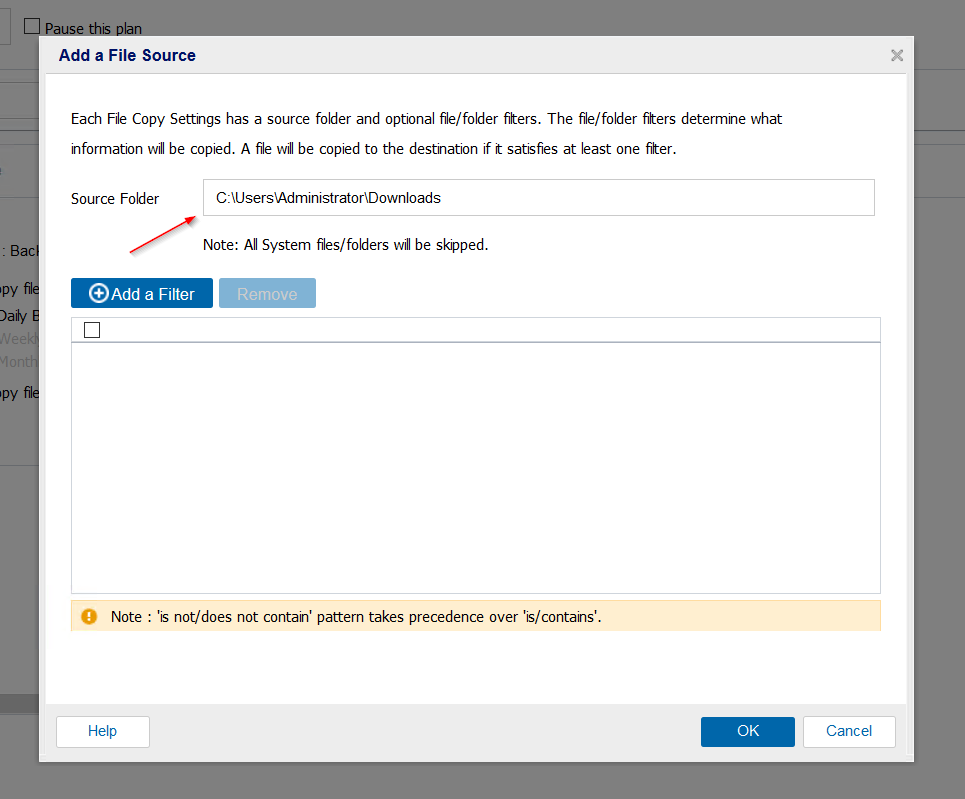
4.4. In the popup window, enter the Source Path to the file or folder to be copied. Click OK.
4.5. Click Yes if you did not intend to enter any filter. Verify the Source Path on this page before moving to the Destination tab.

4.6. Click Destination. Select Cloud Storage as Destination Type, Wasabi as Cloud Service and finally the Cloud Account name entered for Wasabi.
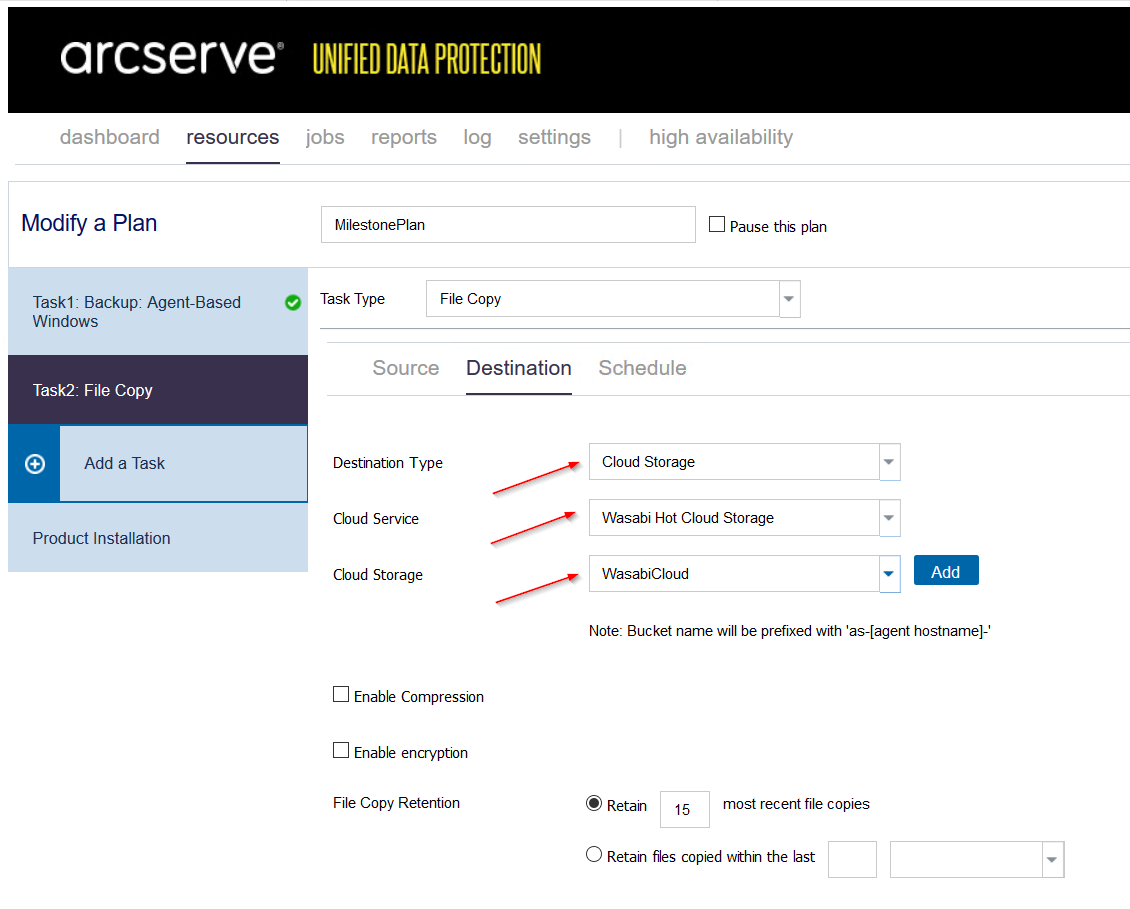
You can enable compression and encryption as required.
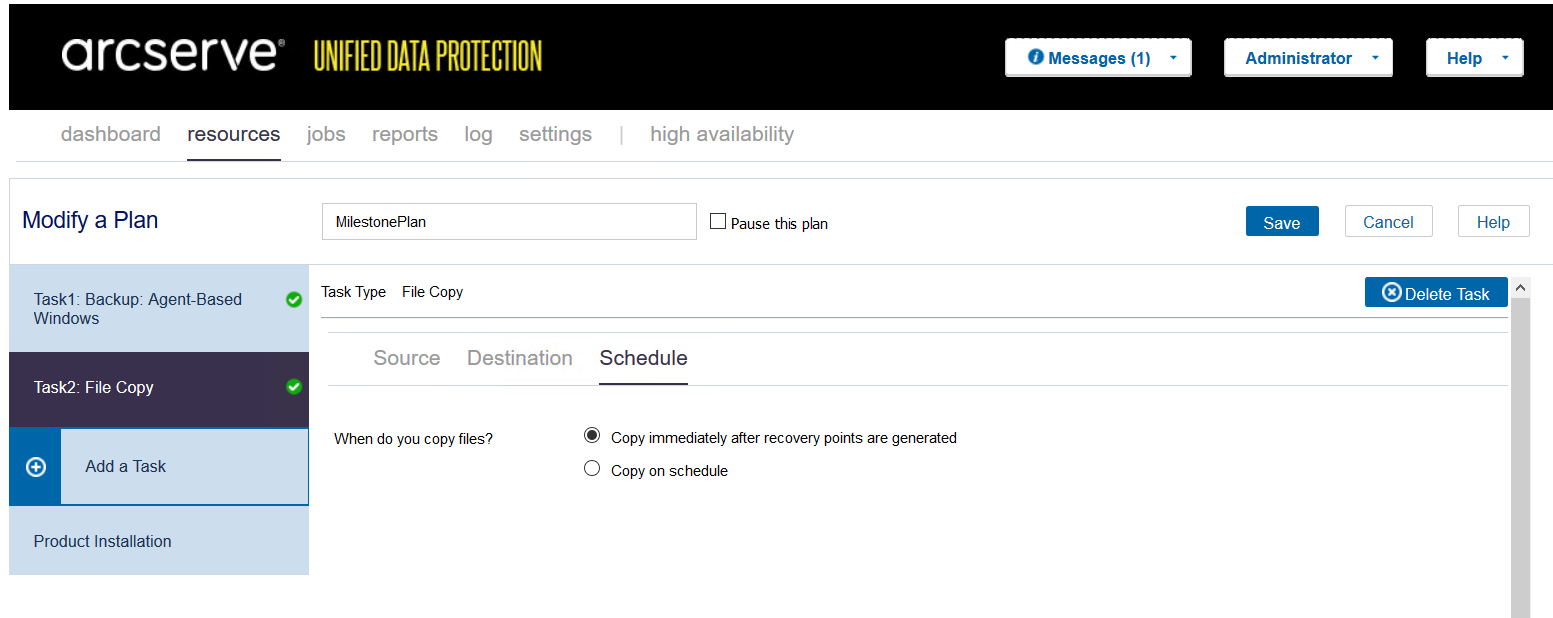
4.7. Click Schedule. Select the appropriate option and finally click Save to save the changes.
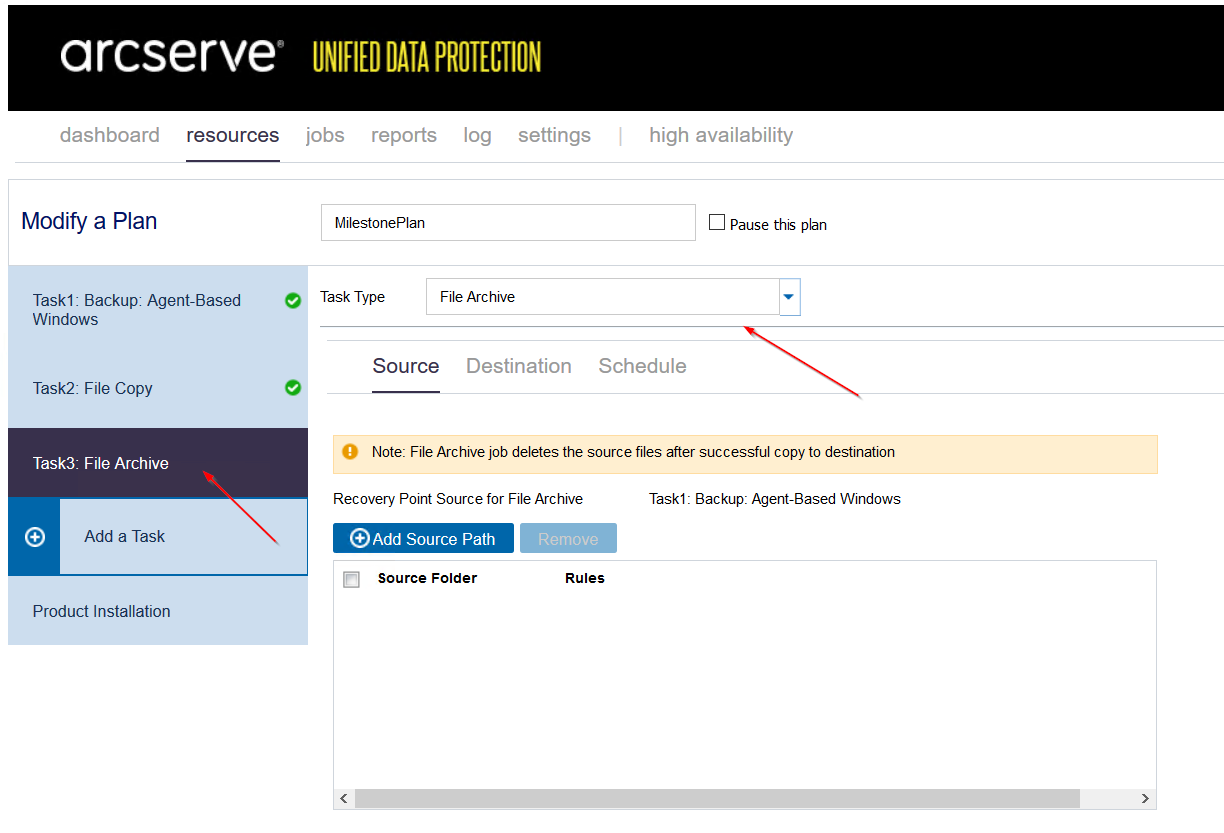
5. File Archive
5.1. We will continue with the same Plan as above and add another task for the File Archive now. See screenshot below.
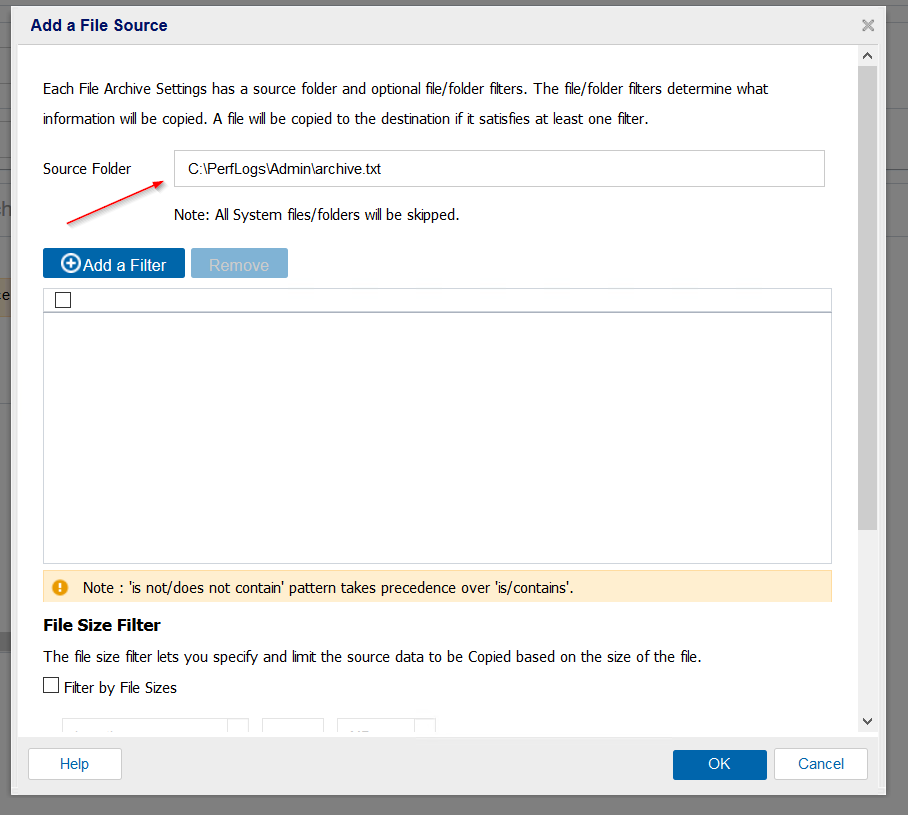
5.2. In the Source Folder path, enter the path for the source file or folder that needs to be archived to the cloud. Click OK.
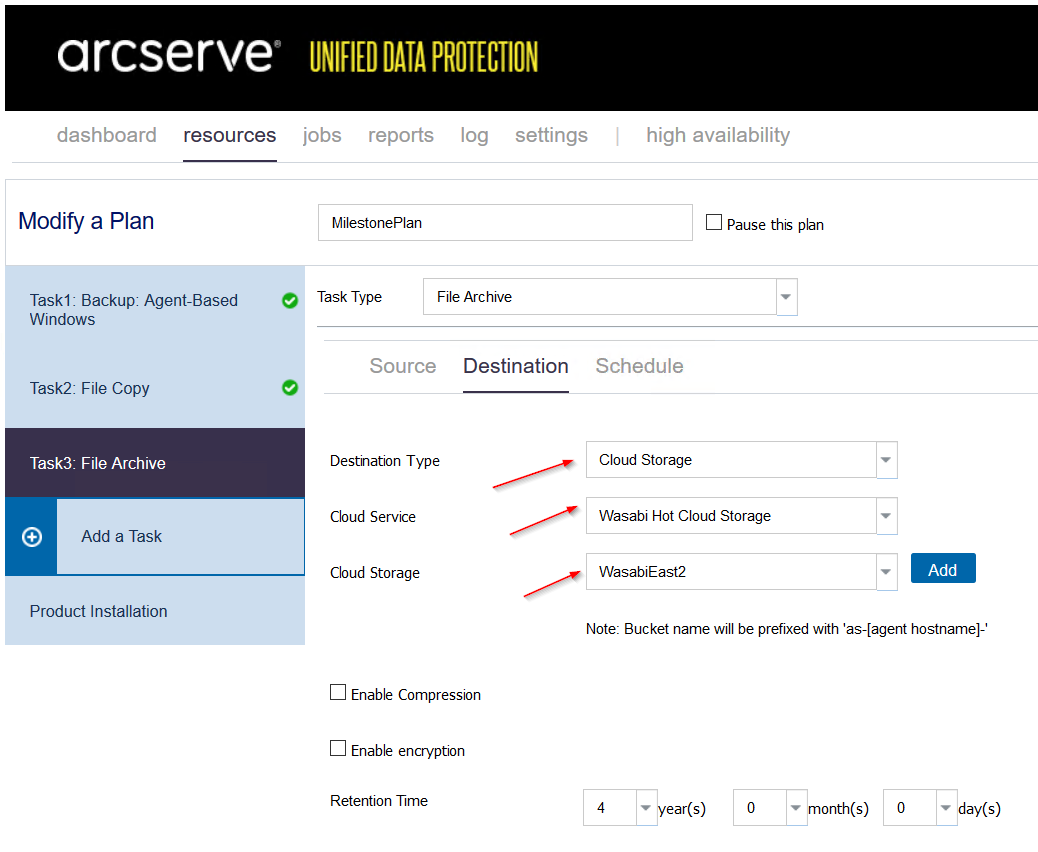
5.3. Now, click Destination. Select Cloud Storage for Destination Type, Wasabi Hot Cloud Storage for Cloud Service and your Cloud Account name for Cloud Storage.
Note: Arcserve requires separate Cloud Storage destinations for File Copy and File Archive. You can use your Wasabi account and add it twice, each with a unique name.
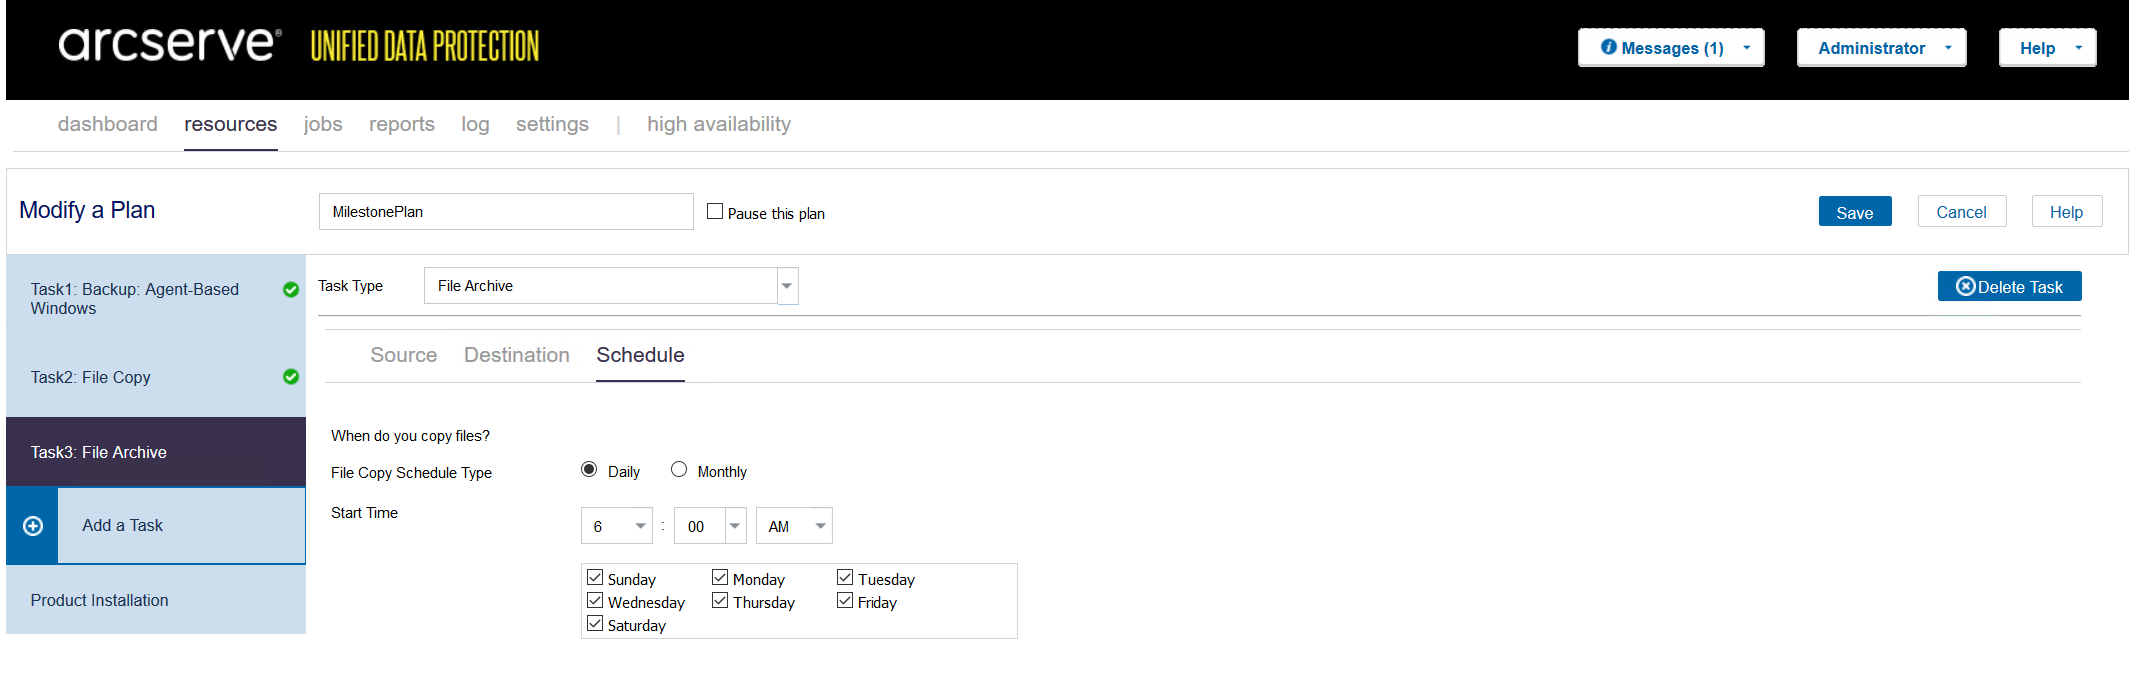
5.4. Click the Schedule tab. Set the appropriate schedule and then click Save to save all the changes.
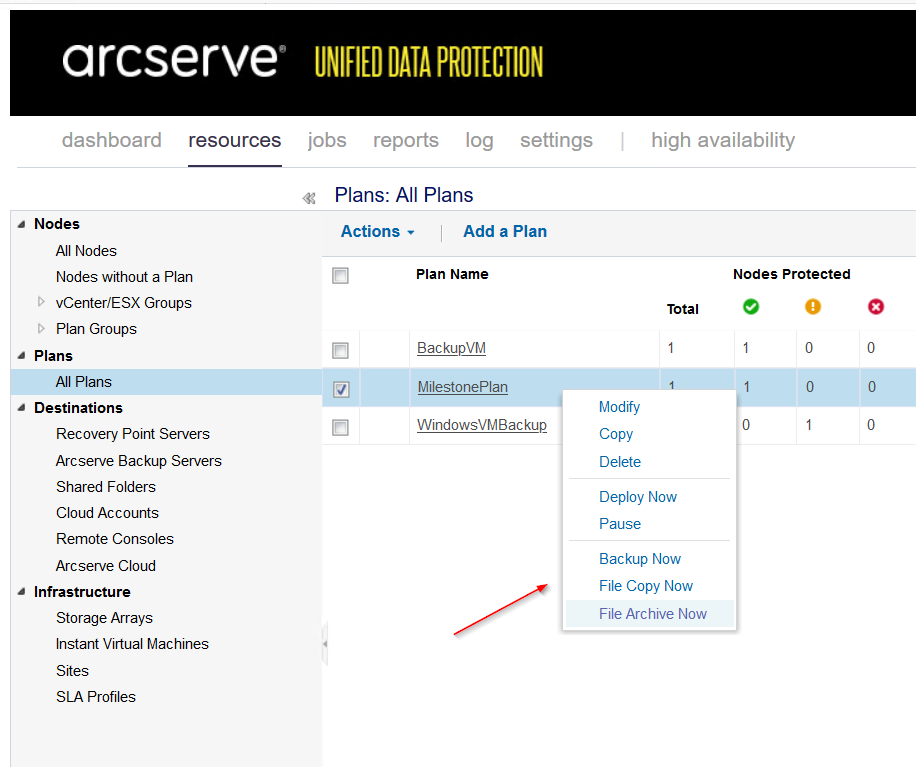
Finally, if you want to execute any of the above functions manually, you can go back to All Plans, select the appropriate Plan and right-click to see the different options to run a Backup, File Copy or File Archive as shown below.
6. Configuring immutability
You can now use Wasabi’s Object Lock feature with Arcserver UDP starting with v9 and above to make your backups immutable.
Arcserve UDP 9 supports both the Compliance and Governance modes of Object Lock.
Note: For more information on Wasabi Object Lock, please click here
Follow the steps below to configure immutable backups to Wasabi.
Please note that as of now, UDP 9 supports immutability only with the "Copy Recovery Point" job.
6.1. Create a Copy Recovery Point task following the steps 3.1 -3.2 in the section Copy Recovery Points.
6.2. Click on Copy Settings. Select Cloud Storage as Destination Type, Wasabi as Cloud Service, and the Cloud Storage we set up above. Select the Enable Object Lock checkbox.
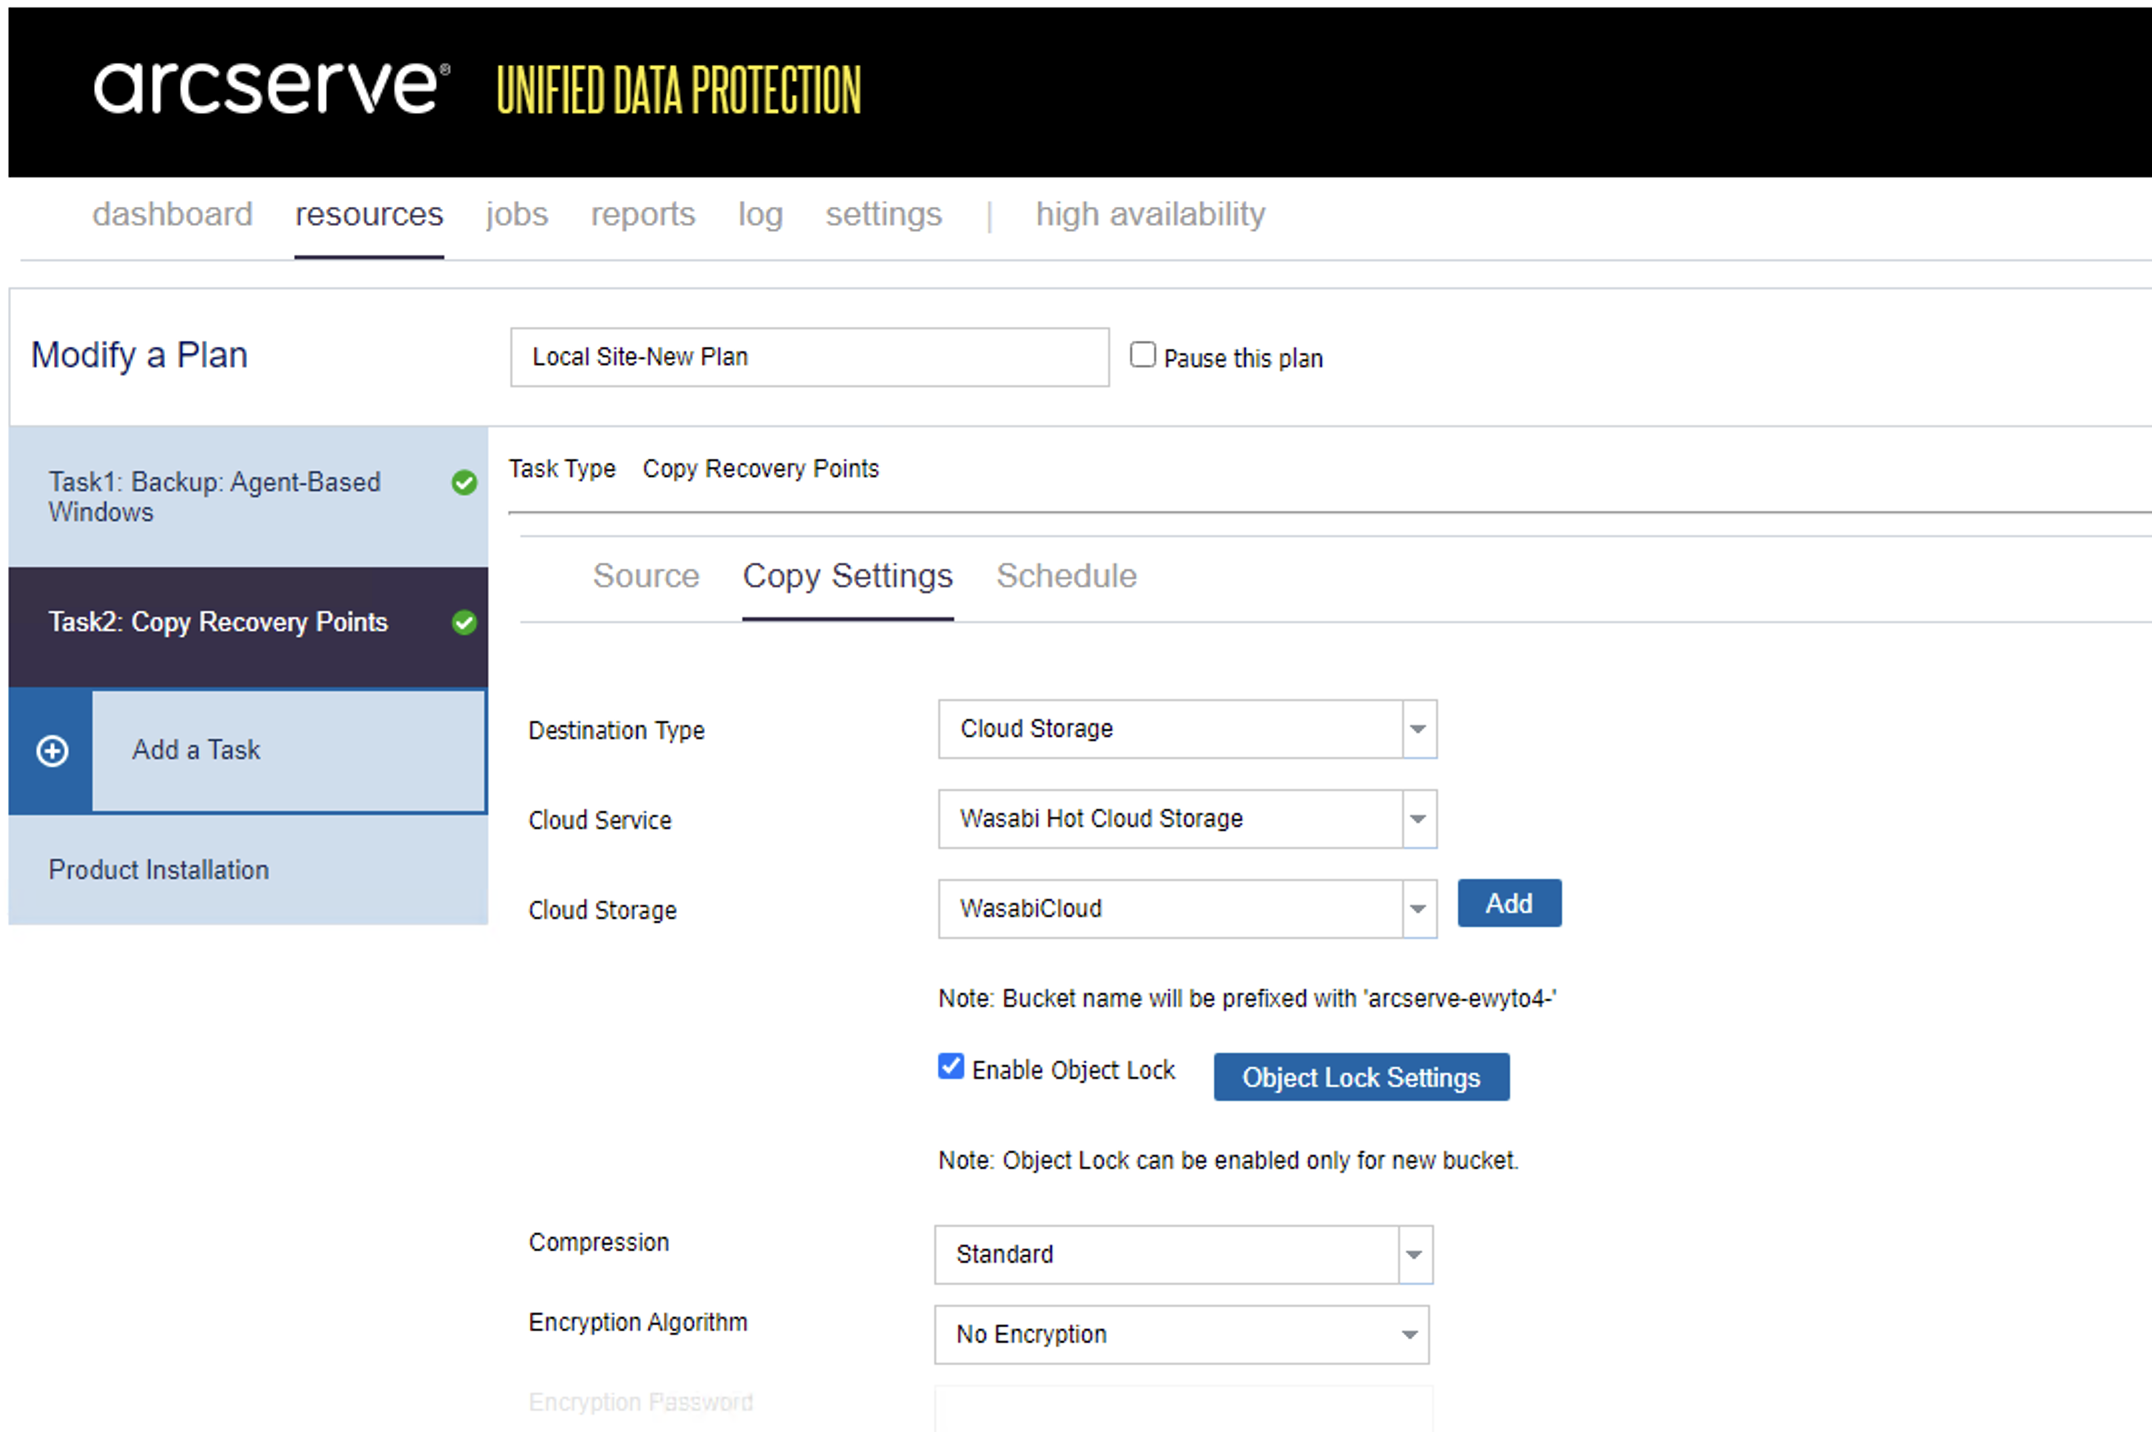
Note: Based on the task, the Arcserve application creates an Object Lock-enabled bucket with a prefix. In this case, the prefix is "arcserve-ewyto4-".
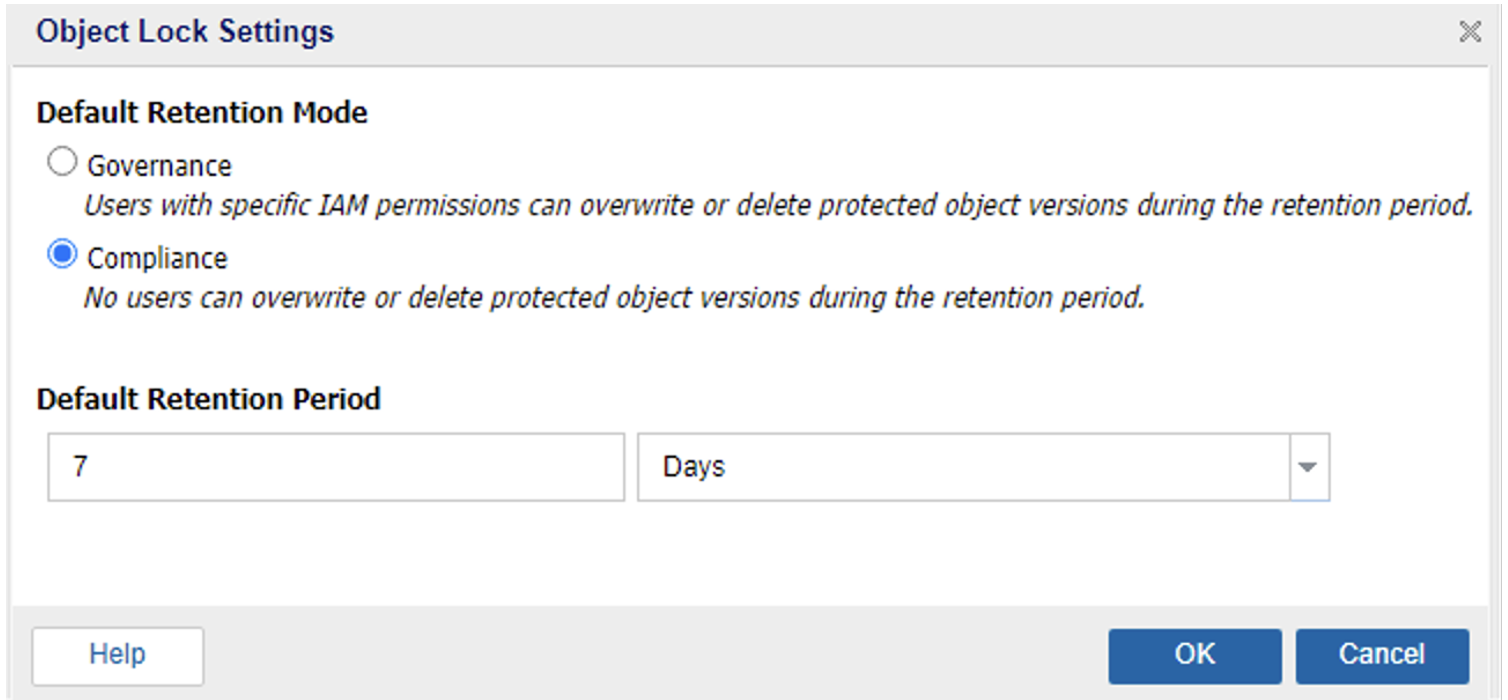
6.3. Click Object Lock Settings. Select Compliance as the Default Retention Mode and provide the desired Default Retention Period, then click OK.
6.4. Configure a Schedule as required and click OK. (refer to steps 3.4 - 3.5 in the Copy Recovery Points section).
Based on the Schedule, the recovery points copied to Wasabi will be immutable for the configured retention period.