Flexify.io (Flexify) is a ,multi-cloud storage and zero-downtime migration solution that allows migrating data to Wasabi from other clouds or on-premise file storage, migrating data between Wasabi buckets and regions, and duplicating or distributing data across multiple clouds or buckets. Flexify.IO is available both as a cloud-hosted service and free host-yourself Community Edition. To use Flexify.IO with Wasabi, please follow the instructions below.
Create an account with Flexify.IO (faster) or install Flexify.IO Community Edition (free).
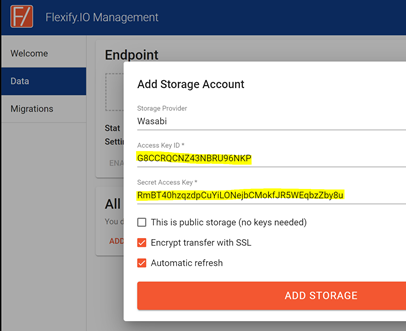
In Flexify.IO Management Console switch to the Data tab and click Add Storage.
Select Wasabi from the list of providers, copy-paste Wasabi access keys and click Add Storage. You can get Wasabi access keys here.
Click Add Storage again and select your previous storage provider. Flexify.IO supports Amazon S3, Microsoft Azure, Google Cloud Storage DigitalOcean Spaces and many other cloud storages.
Enter Secret Key and Access key that you can get on your previous provider’s portal and add the storage.
Click Transfer Data.
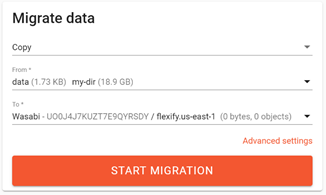
Chose mode (Copy or Move), buckets you want to migrate from, and Wasabi as destination. This will automatically use or create buckets with the original names. Alternatively, you can select an any existing Wasabi bucket.

Optionally, click Advanced settings and fine tune incremental migration options, conflict resolution, performance settings, regions, or define a pattern to migrate only some of the objects.
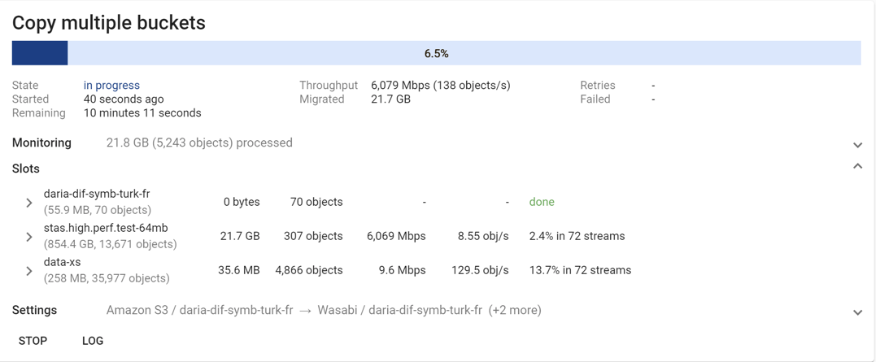
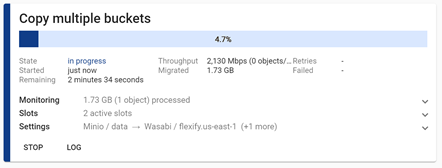
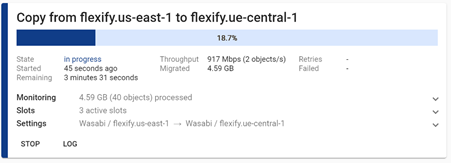
Click Start Migration and monitor the migration progress. If you use a cloud-hosted service, you will get an email when the migration completes.
How do I use Flexify.IO to migrate data from on-premise or self-hosted file storage to Wasabi?
If not already installed, download and install Docker on your file server.
Run Minio container pointing it to your files (/mnt/storage directory in this example).
$ docker run -p 9000:9000 \
  -e "MINIO_ACCESS_KEY=AKIAIOSFODNN7EXAMPLE" \
  -e "MINIO_SECRET_KEY=wJalrXUtnFEMI/K7MDENG/bPxRfiCYEXAMPLEKEY" \
  -v /mnt/storage:/data \
  minio/minio server /data
Hint: You may consider pointing Minio to a directory one level above your data directory in order to present all the files and directories as a single bucket.
Open http://:9000, sign in with the keys you used to start Minio and check that your data is visible in Minio Browser.
Create an account with Flexify.IO or install Flexify.IO Community Edition.
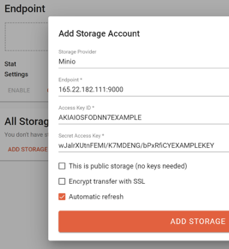
In Flexify. IO Management Console, switch to the Data tab, click Add Storage, and select Minio from the providers list.
Specify the server’s IP address as the endpoint and copy-paste the keys you specified when starting Minio. Make sure to uncheck Encrypt transfer with SSL checkbox (or configure SSL on the server).
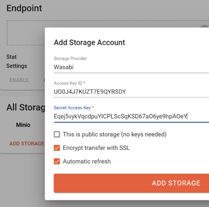
Add the storage and click Add Storage again to add your Wasabi account.
Select Wasabi from the list, copy-paste keys from Wasabi’s Access Keys page, and add the storage.
Click Transfer Data to open the Migrate data page.
Select Minio in the From field and Wasabi in the To field. Alternatively, you can expand storage accounts and select individual bucket to avoid bucket names conflicting with other Wasabi buckets.
Optionally, click Advanced settings and fine-tune the migration.
Click Start Migration and monitor the migration progress.
How do I use Flexify.IO to migrate data between Wasabi buckets or regions?
Create an account with Flexify.IO (faster) or install IO Community Edition (free).
In the Flexify.IO Management Console switch to the Data tab and click Add Storage.
Select Wasabi from the list of providers, copy-paste keys from Wasabi portal and add the storage.

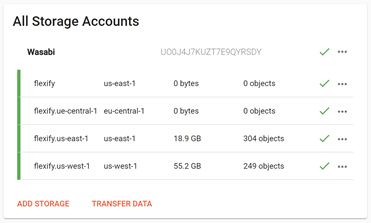
Click the Wasabi storage account to view the list of Wasabi buckets and their regions.
Click Transfer Data.
Select mode (Copy or Move), source bucket, and destination bucket.
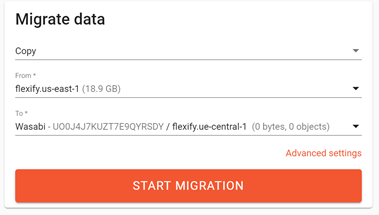
Click Advanced settings and fine-tune the migration.
Click Start Migration and monitor the progress.
How do I use Flexify.IO to duplicate or distribute data across multiple buckets or build multi-cloud storage?
Flexify.IO provides a virtual stateless S3-compatible endpoint that combines data from multiple storages into a single unified namespace.
This walkthrough demonstrates how to transparently duplicate data between Amazon S3 and Wasabi, with extra data from Azure Blob Storage, all accessible via a single S3 endpoint.
Create an account with Flexify.IO (faster) or install Flexify.IO Community Edition (free).
In the Flexify.IO Management Console switch to the Data tab.
Click Add Storage, select Amazon S3, copy-paste S3 keys, and add the storage.
Click Add Storage again, select Wasabi, copy-paste Wasabi keys, and add the storage.
Click Add Storage one more time, select Microsoft Azure. Copy-paste Azure’s storage account name and secret key, and add the storage.
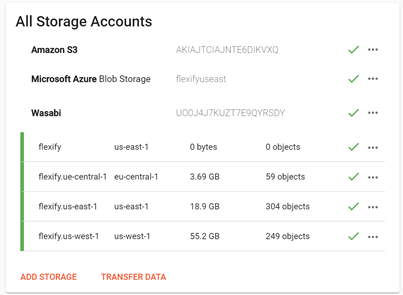
You should have three storage accounts in the list. Click on a storage account to see a list of buckets.
Click on the Endpoint card, select Amazon S3 storage account from the list. Click Attach.
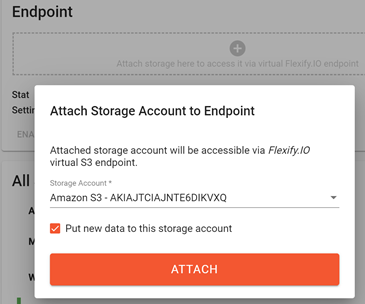
Repeat the operation for Wasabi storage account.
Repeat the operation for the Azure storage account, but this time make sure to uncheck Put new data to this storage account.
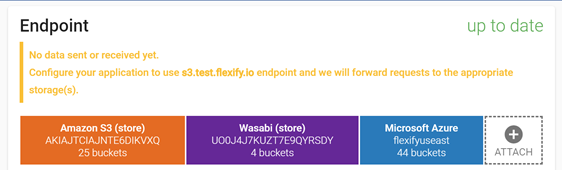
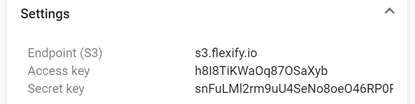
Click on Settings heading to see endpoint address and keys.
Configure your application to use Flexify.IO endpoint and keys.
For example, if you use AWS CLI, you can type:
$ aws configure set aws_access_key_id h8I8TiKWaOq87OSaXyb
$ aws configure set aws_secret_access_key snFuLMl2rm9uU4SeNo8oeO46RP0Rbs
$ aws s3 --endpoint-url https://s3.flexify.io ls
Note that the list of buckets contains buckets from all three attached clouds.
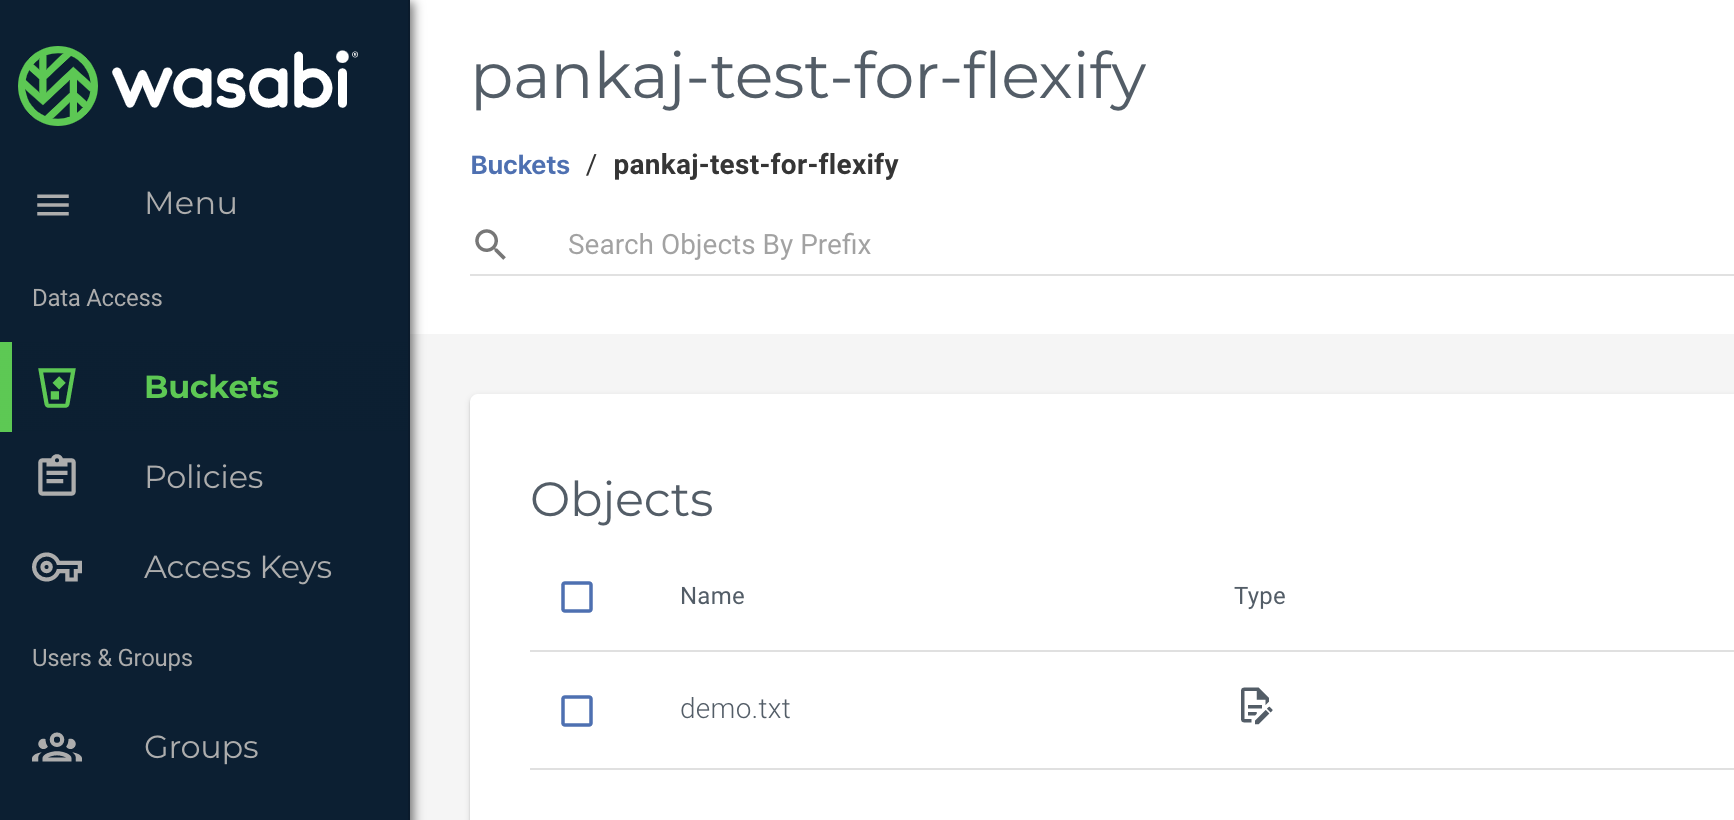
Create a new bucket. Make sure to choose a unique bucket name that does not exist in any of the attached clouds.
$ aws s3api --endpoint-url https://s3.flexify.io \
create-bucket --bucket flexify-demo
Hint: To map bucket names or use non-unique names, consider configuring a Virtual Bucket by clicking New Virtual Bucket.
Put an object in the new bucket.
$ echo 'demo' |
aws s3 --endpoint-url https://s3.flexify.io \
cp - s3://flexify-demo/demo.txt
Verify that the bucket and the object are duplicated to both Wasabi and Amazon S3 (but not to Azure).
In the Azure Portal, manually create the Flexify-demo container and upload any object there.
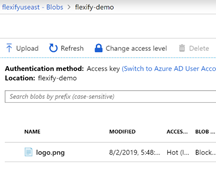
List objects though Flexify.IO. Note that the result contains both objects from Wasabi/Amazon and Azure.
$ aws s3 --endpoint-url https://s3.flexify.io ls s3://flexify-demo
2019-08-02 09:33:34 5 demo.txt
2019-08-02 09:48:03 8470 logo.png
Download object through Flexify.IO.
$ aws s3 --endpoint-url https://s3.flexify.io cp s3://flexify-demo/logo.png.
download: s3://flexify-demo/logo.png to ./logo.png
We have configured a multi-cloud virtual storage that combines and reads data from Wasabi, Amazon S3 and Azure, and duplicates new data between Wasabi and Amazon S3.
How do I avoid downtime when migrating data with Flexify.IO?
Downtime is necessary when data is being migrated, while it is actively changing at the same time. There are two ways to avoid downtime during migration with Flexify.IO:
Minimized Downtime
Migrate all data as-is, even if it’s changing in the source.
Pause updates, for example, by stopping the application.
Run the same migration again in incremental mode. All Flexify.IO migrations are incremental by default.
Reconfigure the application to point to the migration destination, then restart it.
Delete data from the source.
The incremental migration analyzes differences and copies only the changes, thereby significantly reducing migration duration and required downtime.
Zero Downtime
Configure IO virtual endpoint to combine and duplicate data in both the source and the destination.
Re-configure the application to point to the Flexify.IO virtual endpoint.
Run the migration normally in either copy or move mode.
Re-configure the application to point to the destination.
Disable Flexify.IO virtual endpoint.
If you used copy migration mode, delete data from the source.
At any time, your application will see data in both the source and the destination and will not need to be brought offline. You can configure updates to be duplicated to both the source and the destination, or to be saved to the destination only.
How to install Flexify.IO Community Edition?
Flexify.IO Community Edition is a free host-yourself tool limited to a single machine. It’s recommended for smaller projects and proofs of concept.
Provide a machine with at least 2 GB RAM. Flexify.IO will not start if you have less than 2 GB.
Install Docker.
Start Flexify.IO Community Edition.
# docker run -d -p 80:80 -p 443:443 flexifyio/ce
Open http:// (or http://10.0.75.1 if you use Docker on Windows), wait for Flexify.IO CE to start, create an account, and configure Flexify.IO.
For increased bandwidth capacity and reliability, consider using Flexify.IO Standard/Enterprise Edition or Flexify.IO cloud-hosted service.