Wasabi offers Single Sign On (SSO) functionality for Wasabi accounts using the Google (identity provider) system, based on SAML2 (Security Assertion Markup Language) integration.
This article provides configuration instructions for both the IdP administrator and the SSO user to properly configure and complete a Wasabi Console login using your organization's Google SSO service. It also includes additional details beyond those provided in the Wasabi Management Console Guide for this feature.
Configuring the SAML App in Google (IdP Side)
Sign in to your Google admin account (https://admin.google.com) as an Administrator.
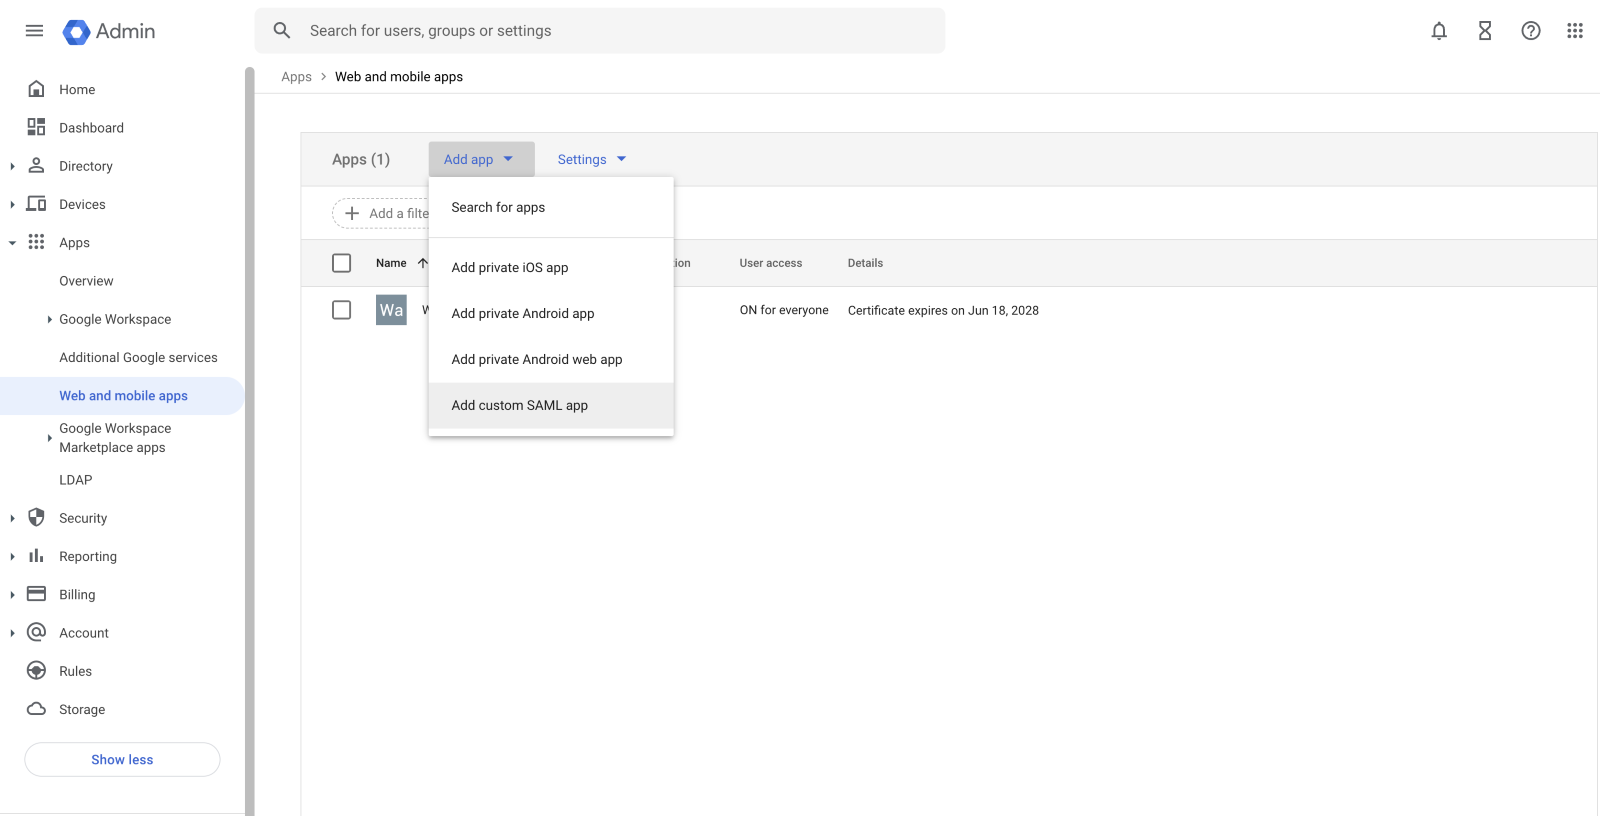
Navigate to the Apps tab in the left menu and select Web and Mobile Apps. Click Add app and select Add custom SAML app.
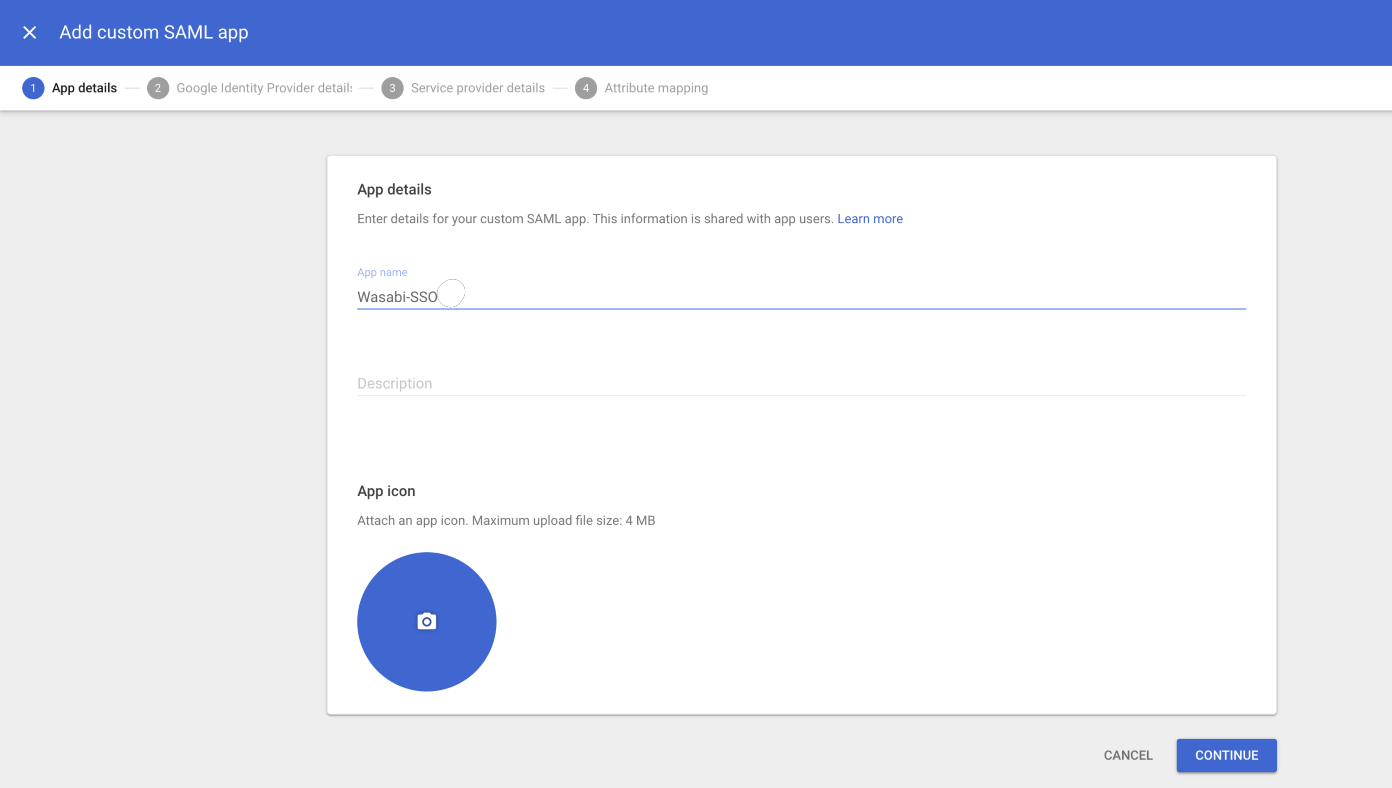
In the App details panel, enter a display name for the SAML app, for example, "Wasabi-SSO." Click Continue.
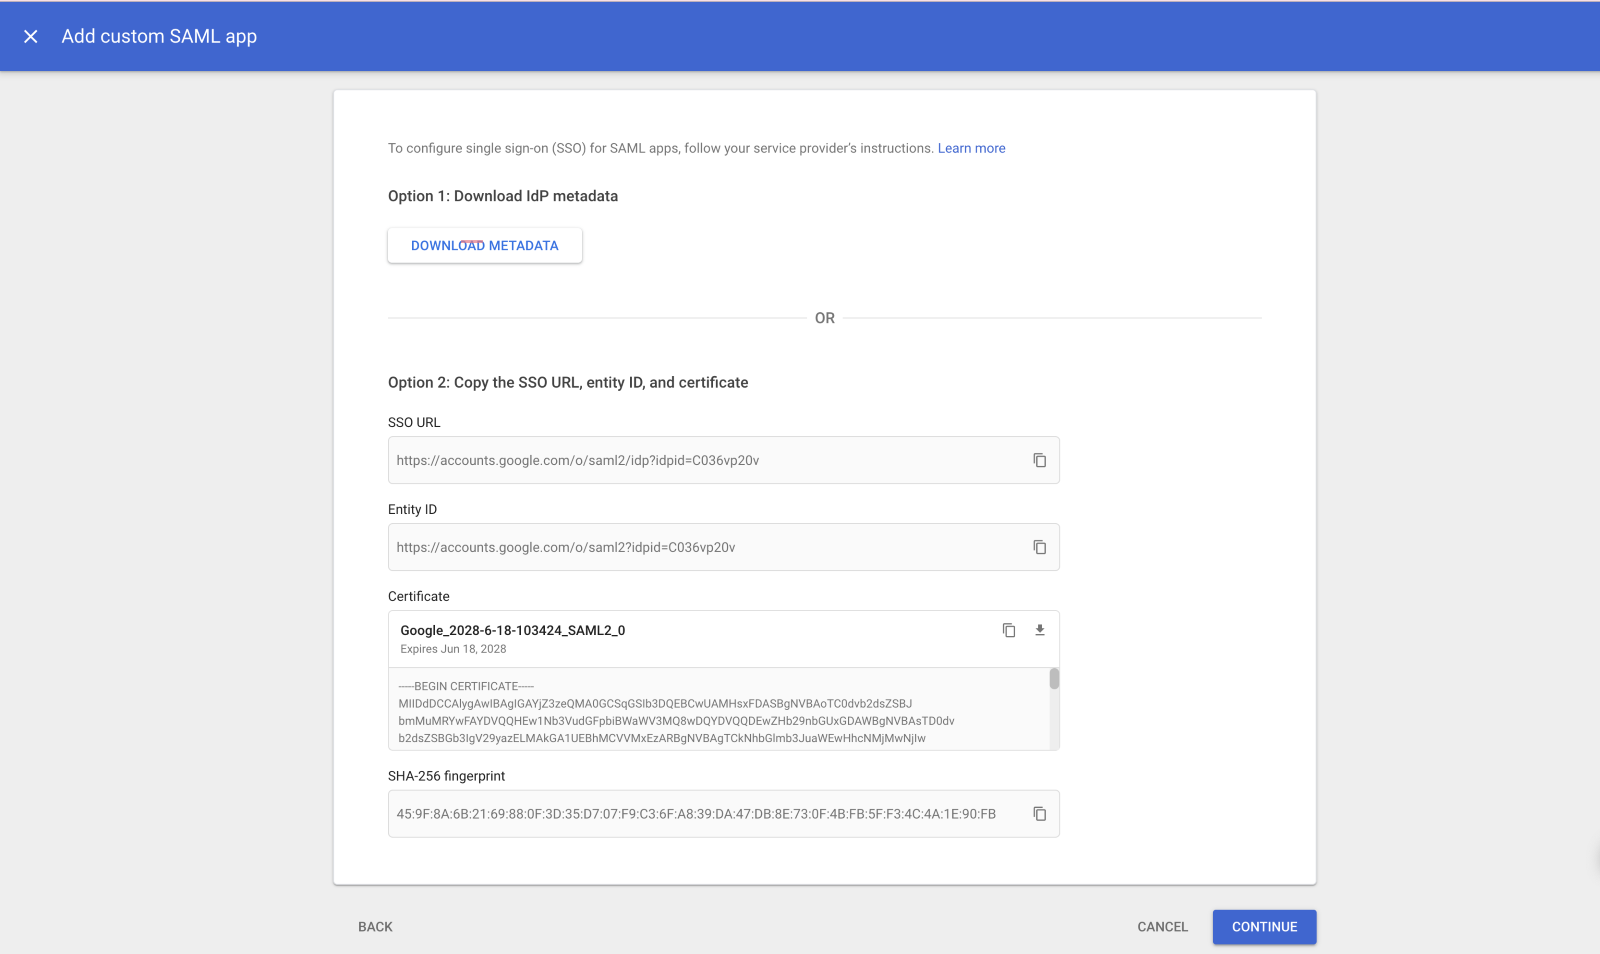
In the Google Identity Provider details panel, Option 2 section, copy the SSO URL and then download the Certificate. You will use this information later in the Wasabi Web Console. Click Continue.
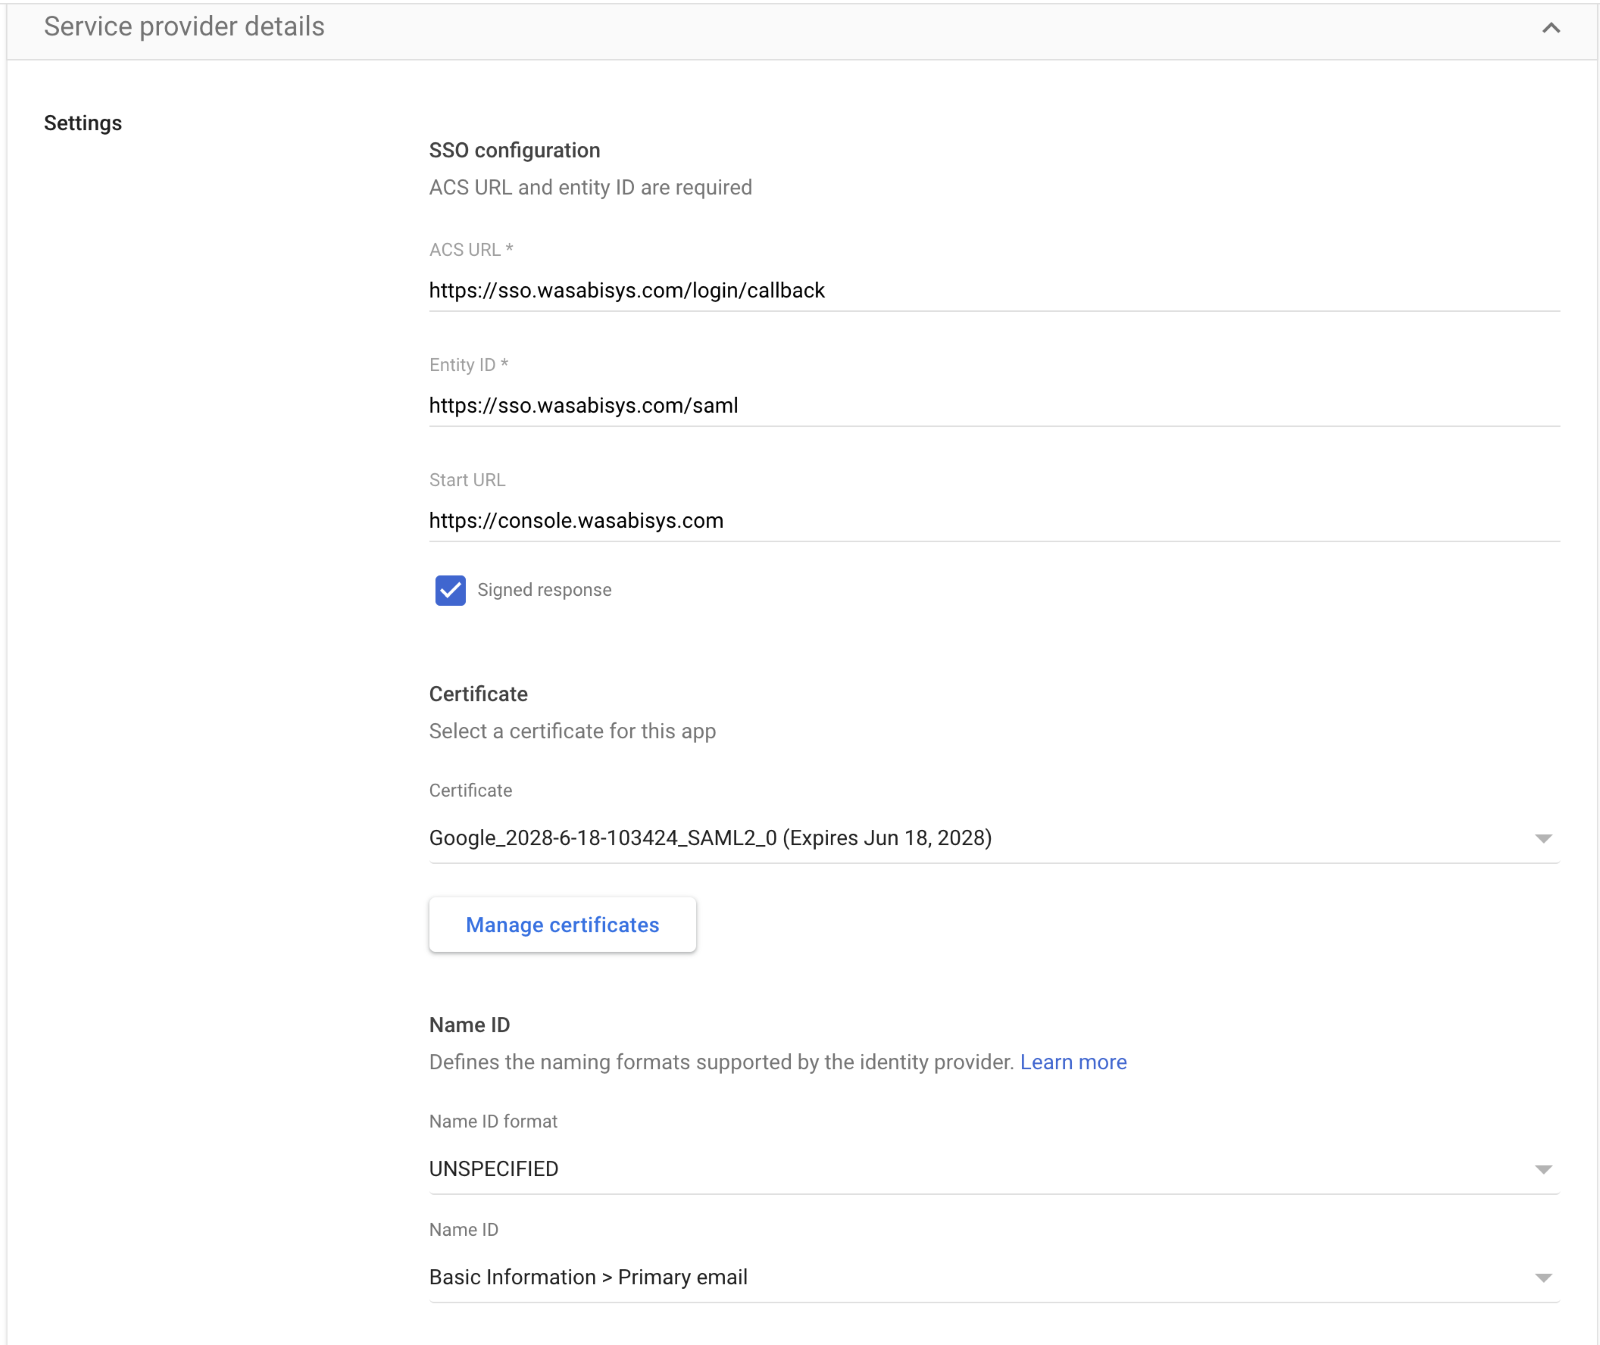
In the Service Provider details panel, copy the following links and paste them into their corresponding fields:
ACS URL: https://sso.wasabisys.com/login/callback
Entity ID: https://sso.wasabisys.com/saml
Start URL: https://console.wasabisys.com
Check "Signed Response"
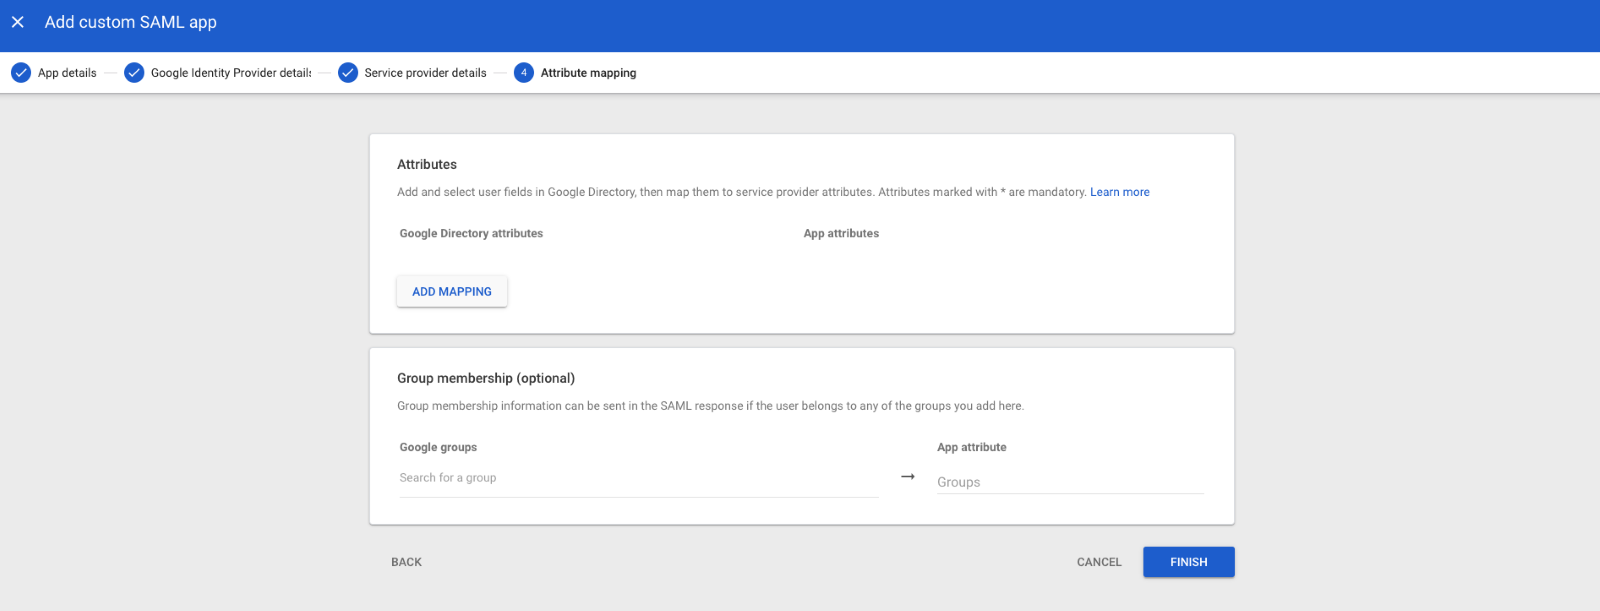
In the Attribute mapping panel, click Finish.
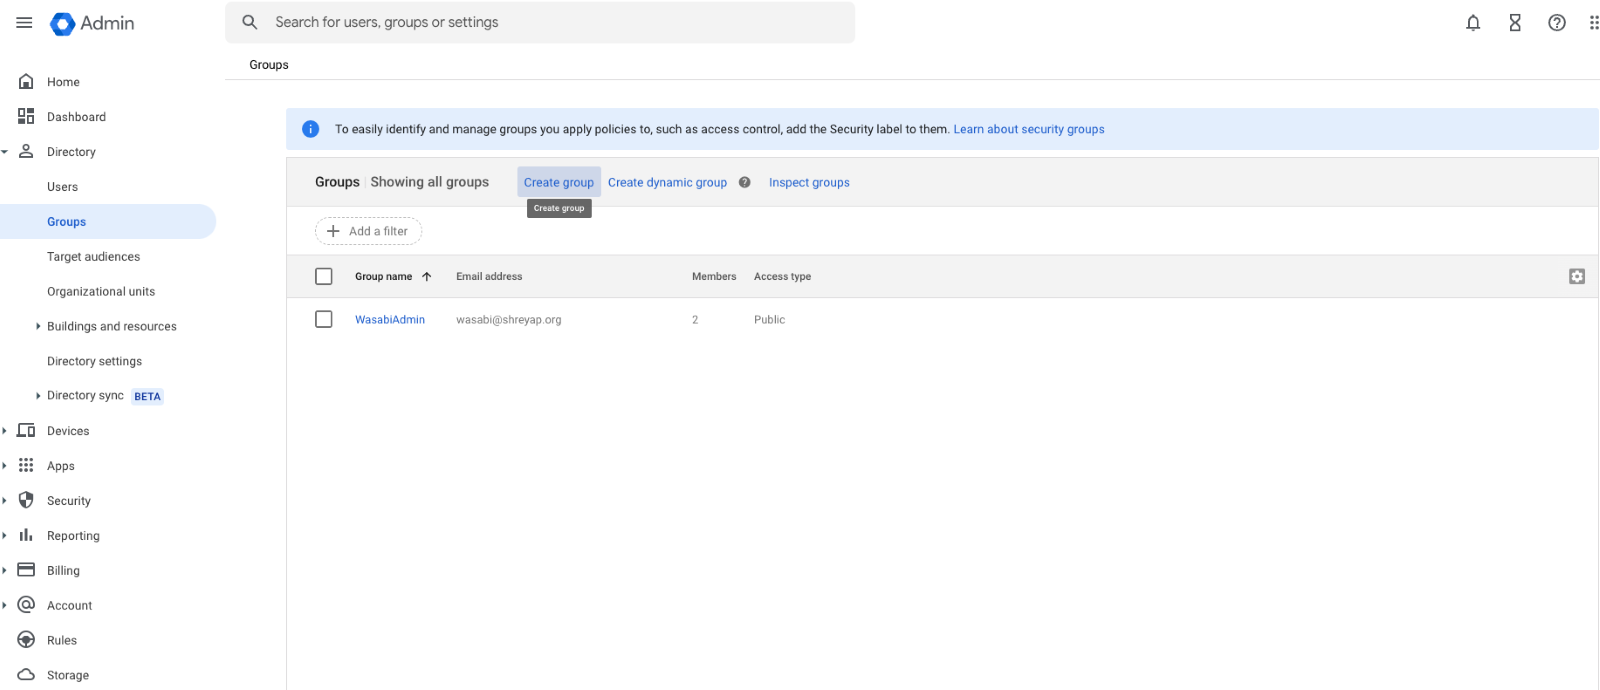
Navigate to the Directory tab and select Groups, then click Create group.
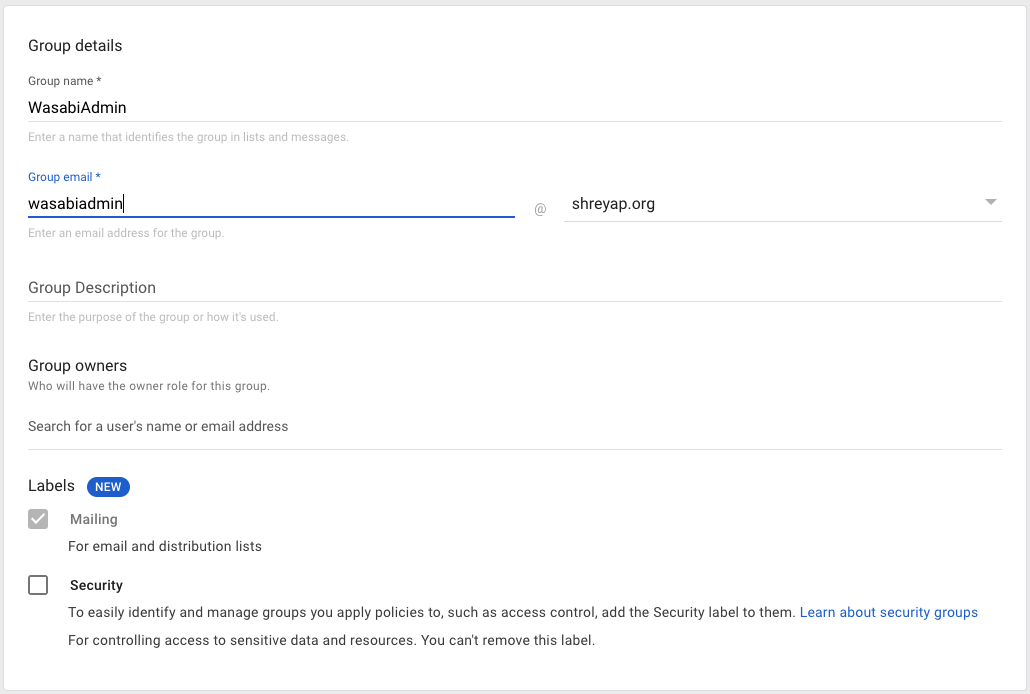
In the Group details panel, enter the Group name: "WasabiAdmin."
NOTE: The group name must match the Wasabi role name used in the Wasabi Console, which we will create later.
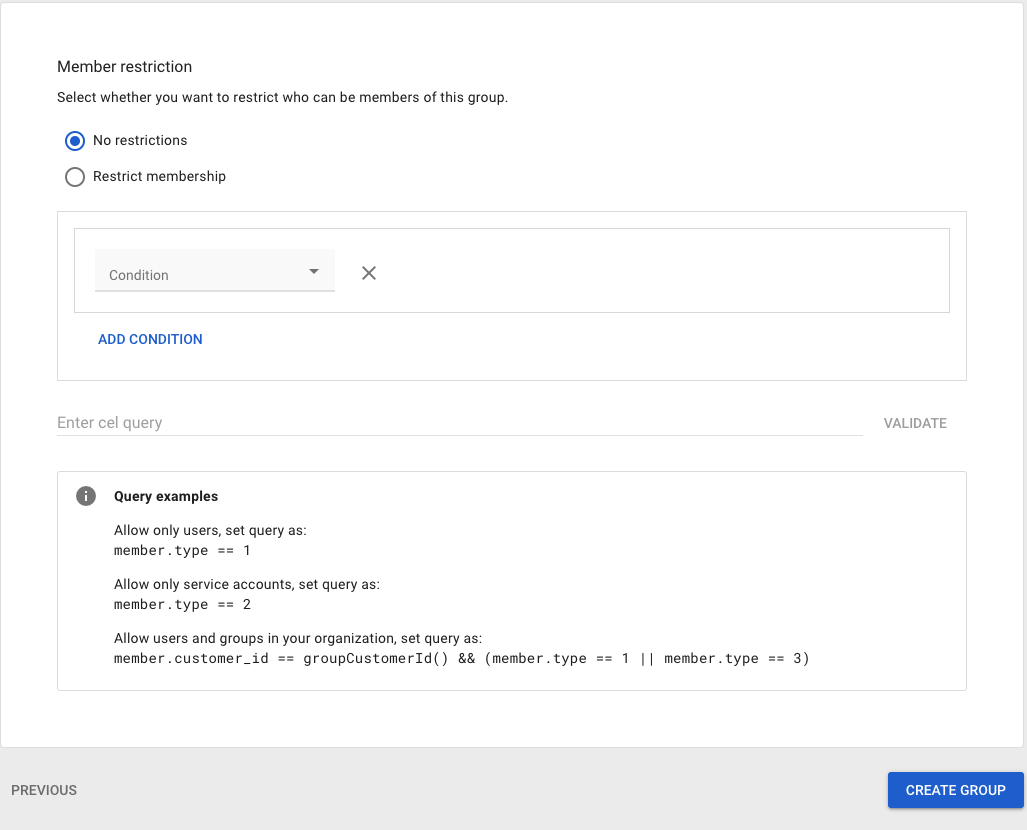
In the Member restriction panel, configure the access type and security settings per your organization’s requirements. In this example, these values are set as the default. Click Create Group.
Navigate to the Directory tab and select Users. From the Users list, select a user to open their account page.
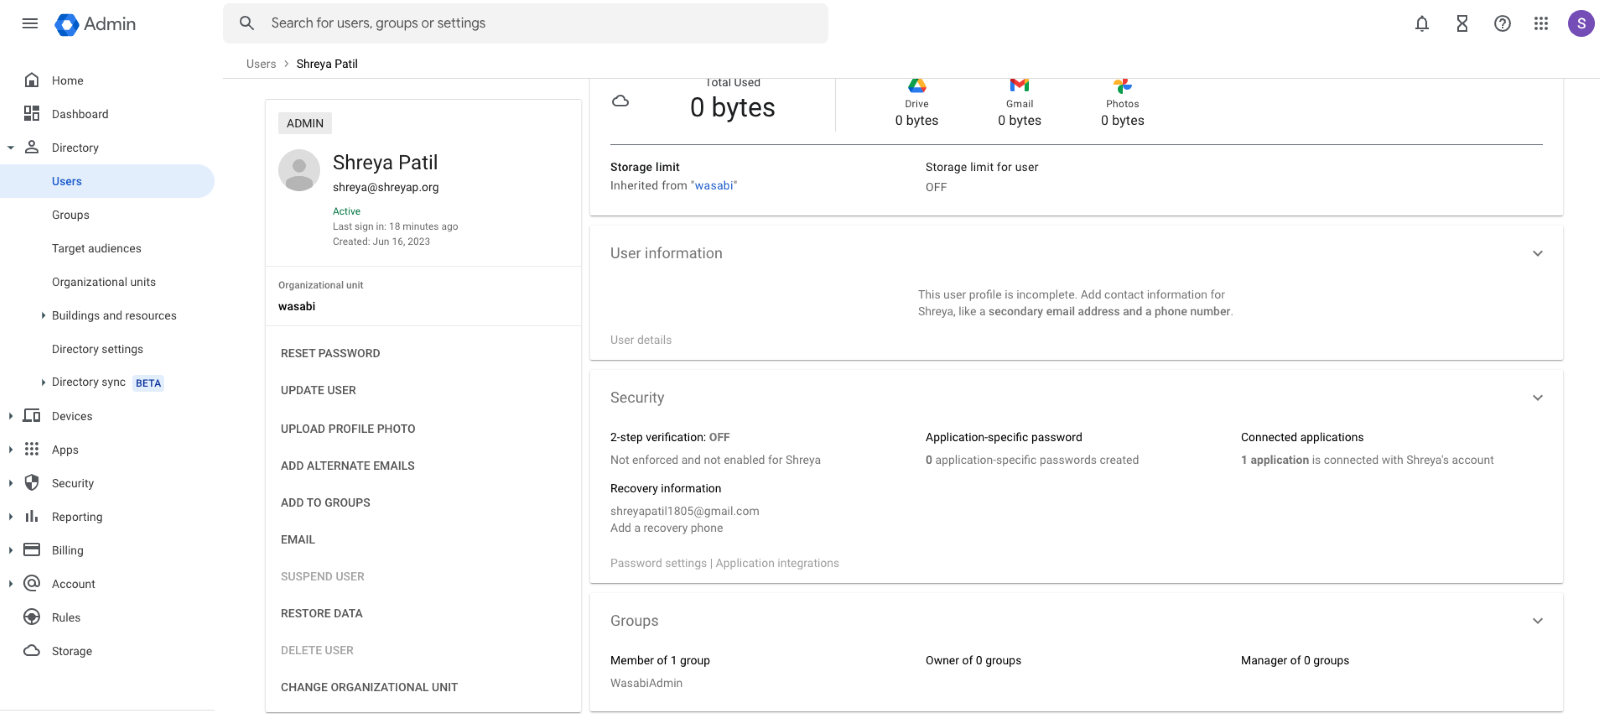
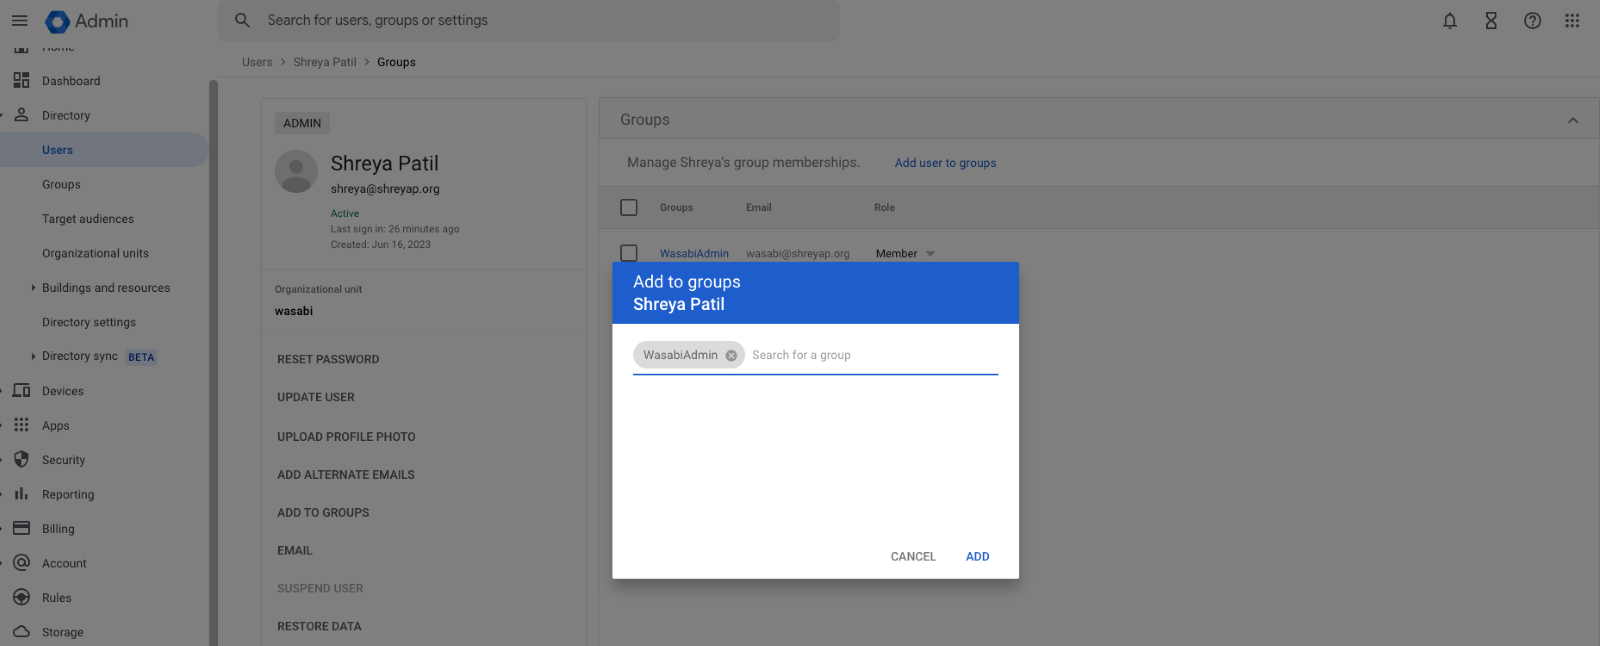
In the user account, select Groups and click Add user to groups. Enter the group name as "WasabiAdmin" and then click Add.
NOTE: You must add all users to the group you want to use to access the Wasabi Console through Google SSO.
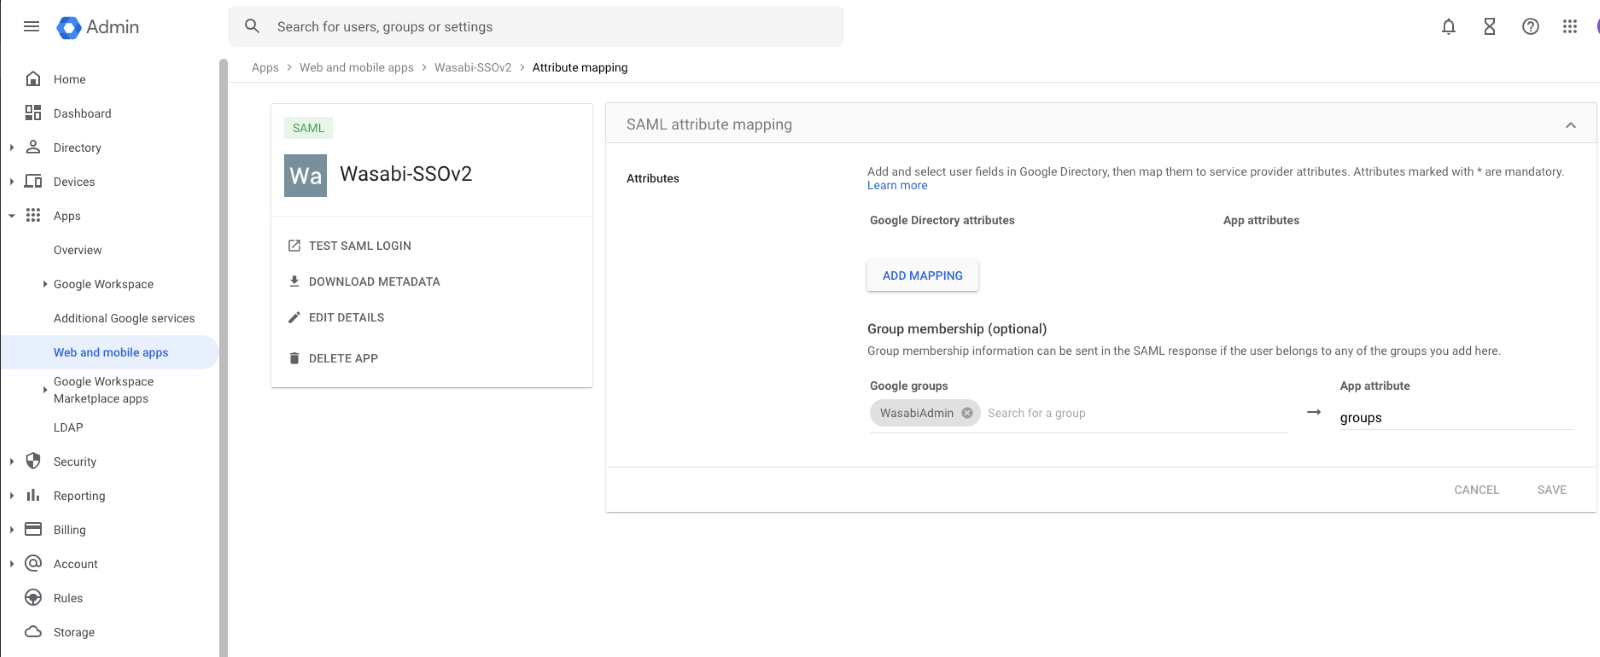
Go back to the Apps tab in the left menu and select Web and Mobile apps. Click the application you just created for Wasabi Console SSO, then select SAML attribute mapping.
In the Group membership section, select the group created for Wasabi SSO and type groups in the App attribute field.
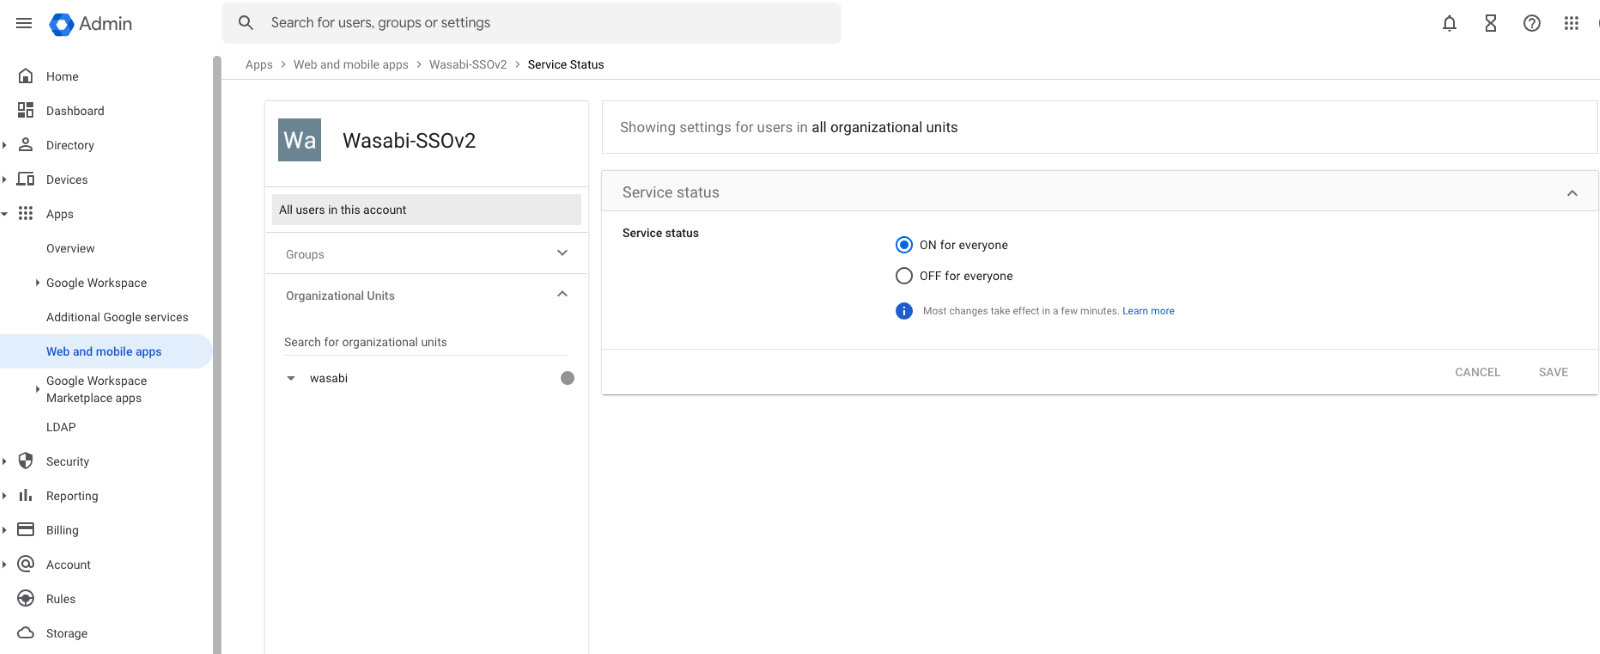
Go back to the Apps tab in the left menu again and select Web and Mobile apps. Click your SAML app and select User access. To turn on Service Status for everyone in your organization, click ON for everyone. Click Save.
Configuring SAML Settings for Wasabi Console (SP /Client Side)
Sign in to the Wasabi Console (https://console.wasabisys.com/login) using a Root account email.
On the Wasabi menu, click Settings, then select SSO (Single Sign On).
In the SSO (Single Sign On) panel, from the Select Configuration drop-down, choose SAML.
In the SAML Connection section, paste the Sign In URL previously copied from the Google Identity Provider details panel into the General box.
In the X509 Signing Certificate box, upload the certificate from the Google Identity Provider details panel.
Click Save Connection.
NOTE: If you do not see the SSO (Single Sign On) panel, then you are using a Wasabi trial account. This feature is only for paid accounts.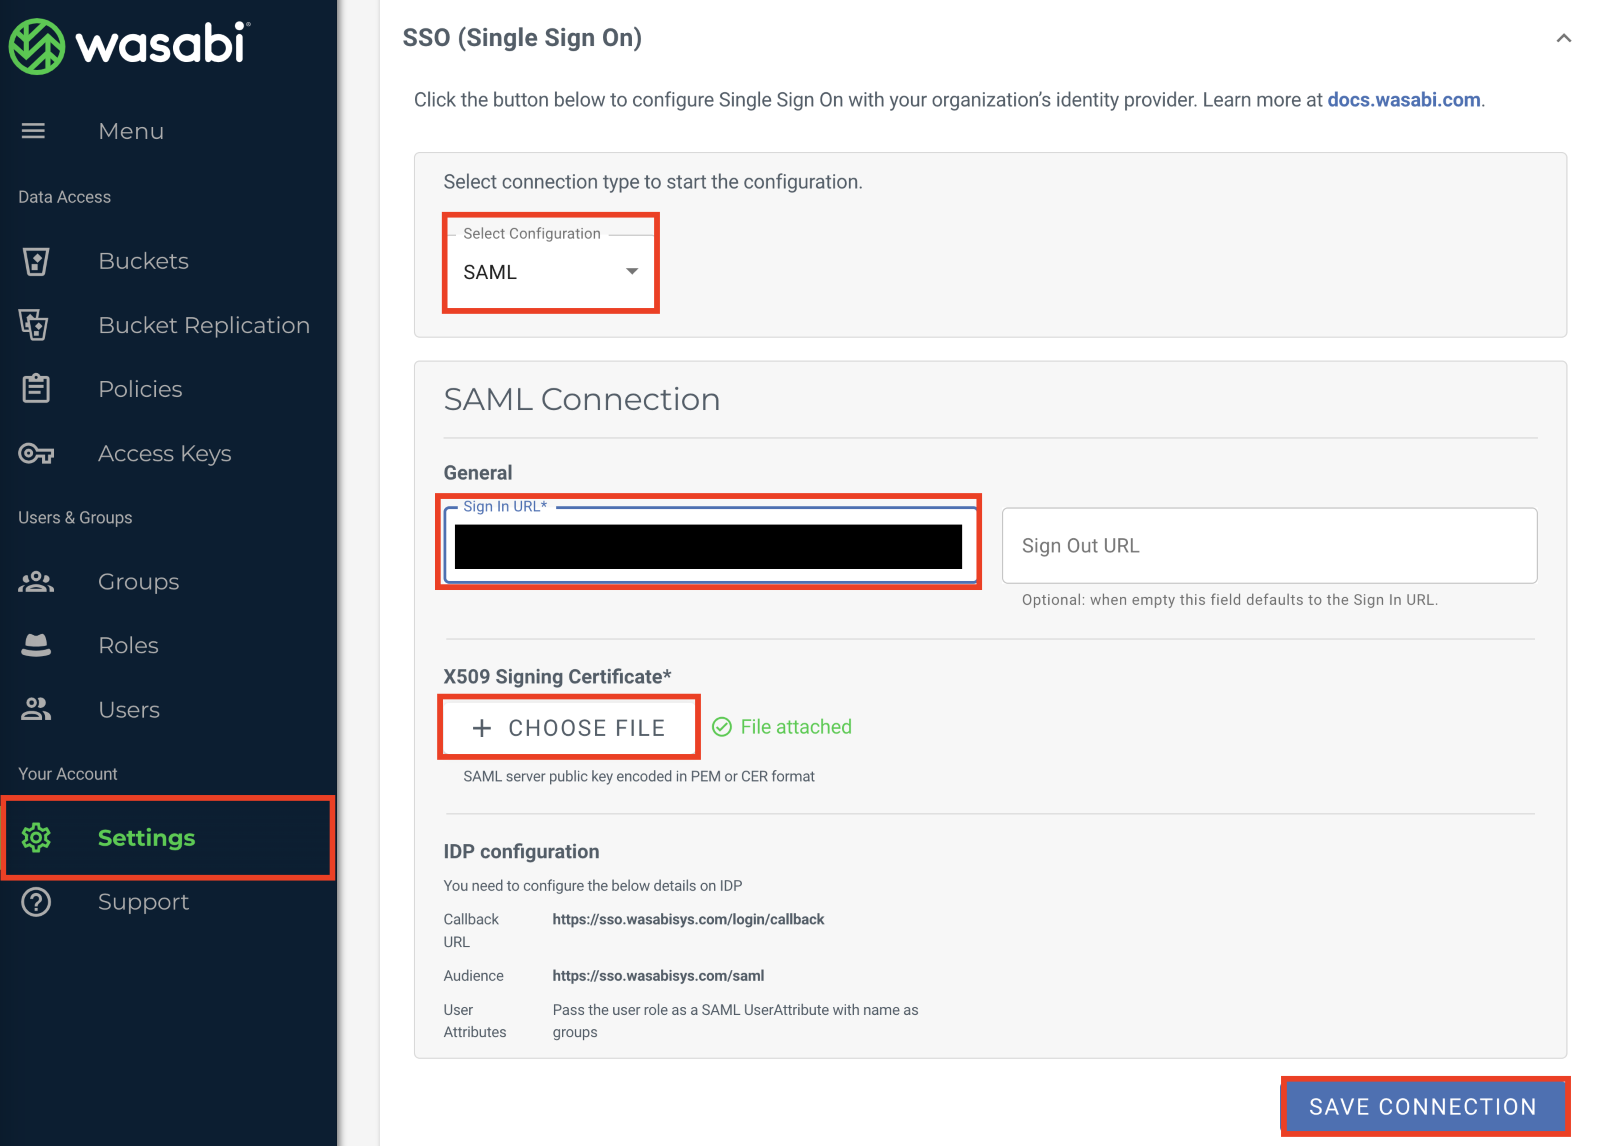
For SSO roles to work in the Wasabi Console, you must create a role. Click Create Role in the SSO (Single Sign On) section in Settings.
NOTE: Do not create the role through the Roles tab in the left menu. SSO roles must be created in Settings under SSO (Single Sign-On).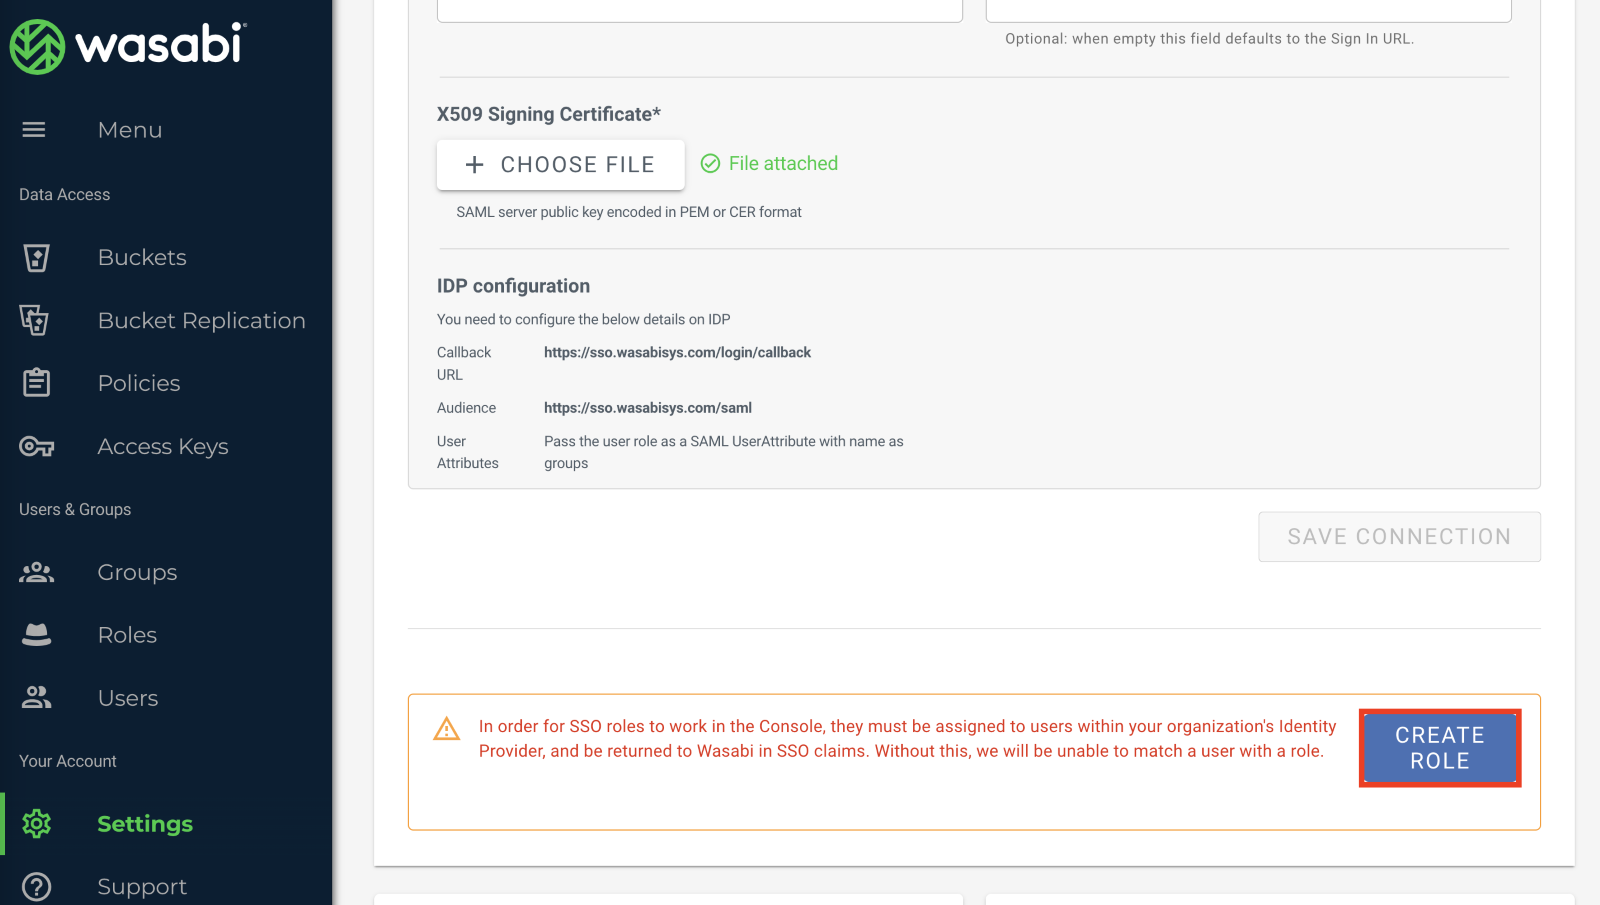
The Create Role dialog is displayed. Enter the group name: "WasabiAdmin" previously created and click Next.
NOTE: For the Wasabi Console role name, use the same name as the Google Group name previously created, or use the same group name used in your existing group.

In the Assign Role Policies panel, select one or more policies for this new role to provide user-specific access. Click Create Role.
For more information on default policies or creating your own IAM policies for the Wasabi Console, see What are the default policies available in the Wasabi Console?
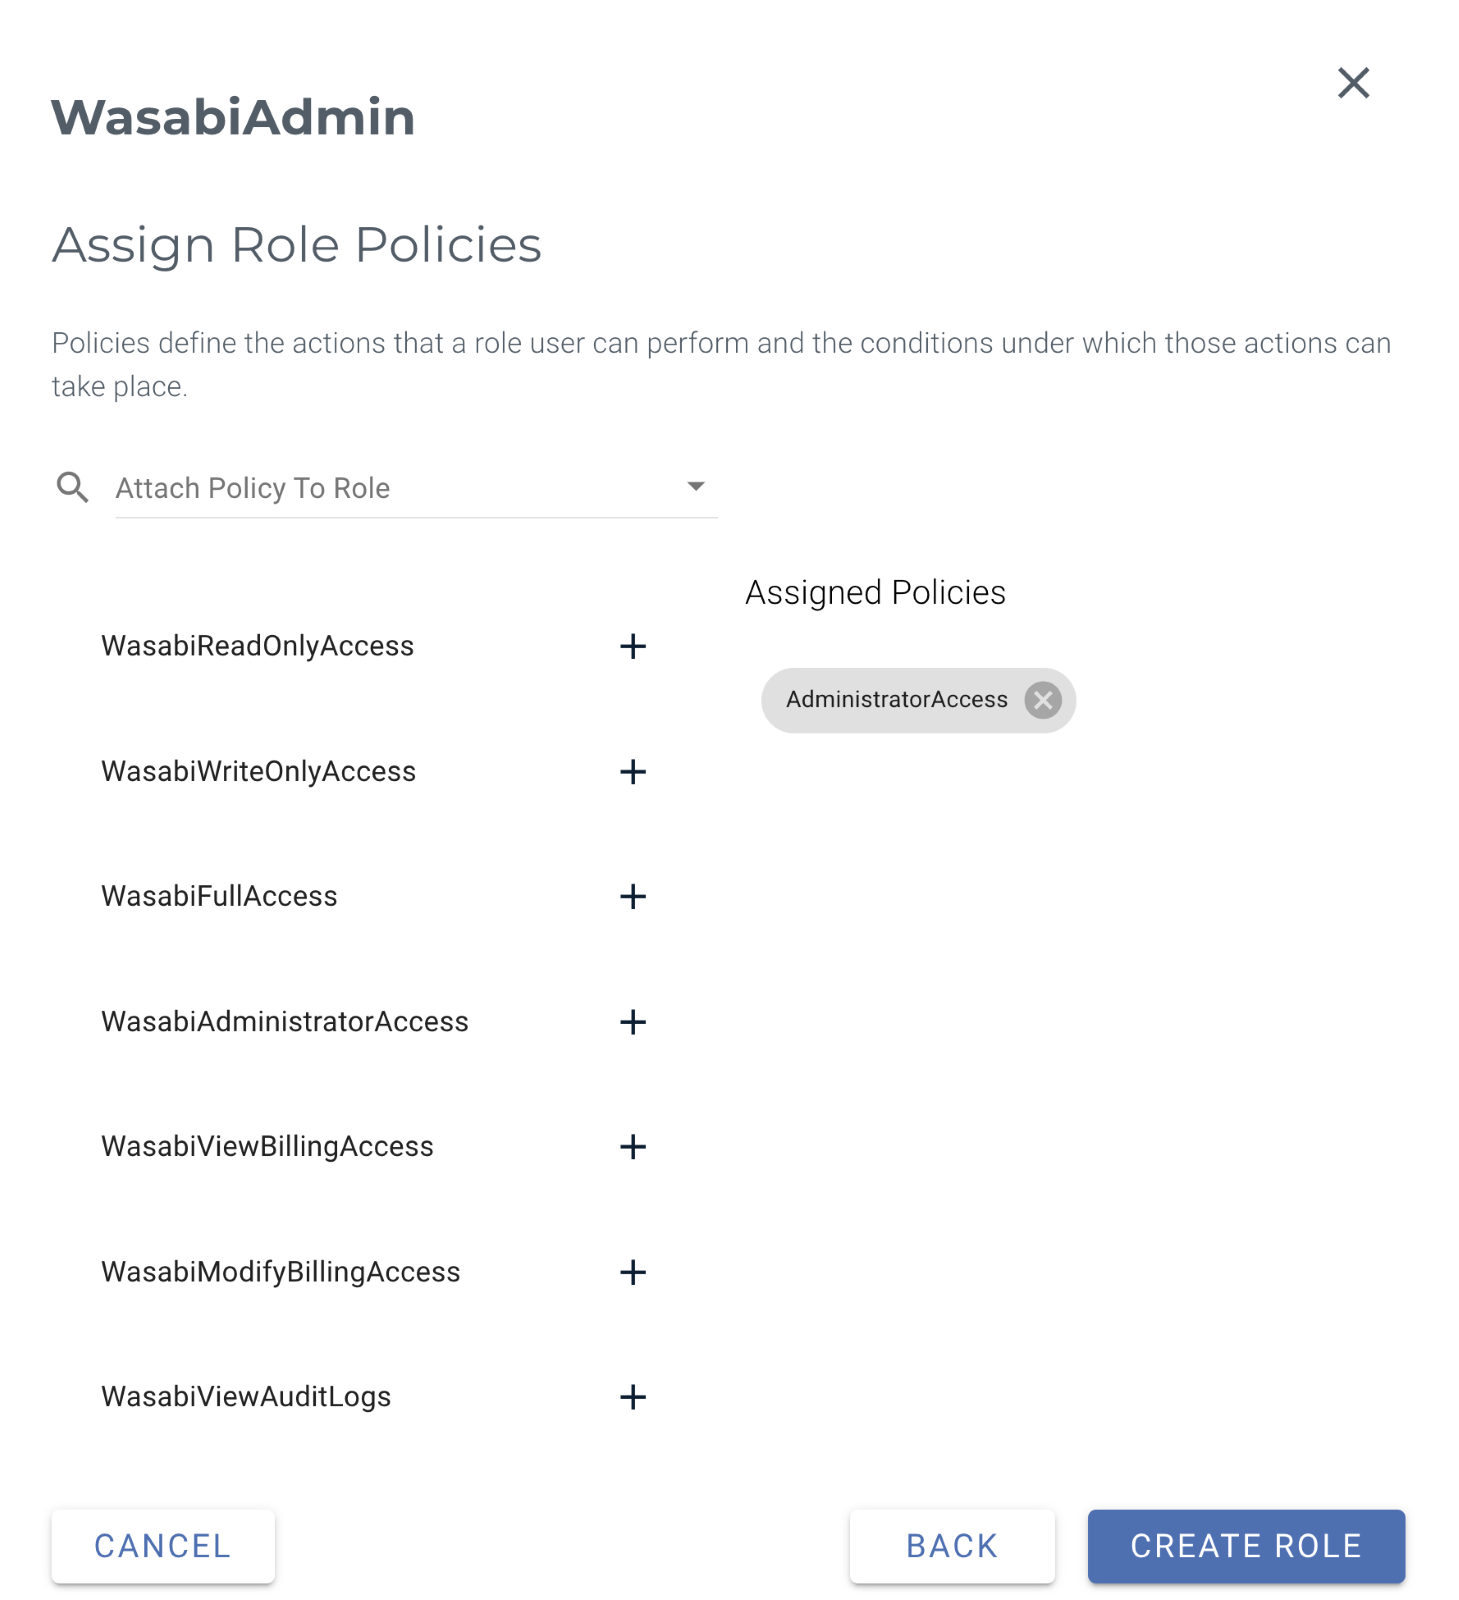
NOTE: This example uses the AdministratorAccess policy. You may attach any Wasabi-managed policy/user-managed policy based on your requirements.
You should not see the Wasabi role you created in the SSO panel within Settings.

Testing the Integration
Sign in to the Wasabi Console (https://console.wasabisys.com) to test the SSO configuration.
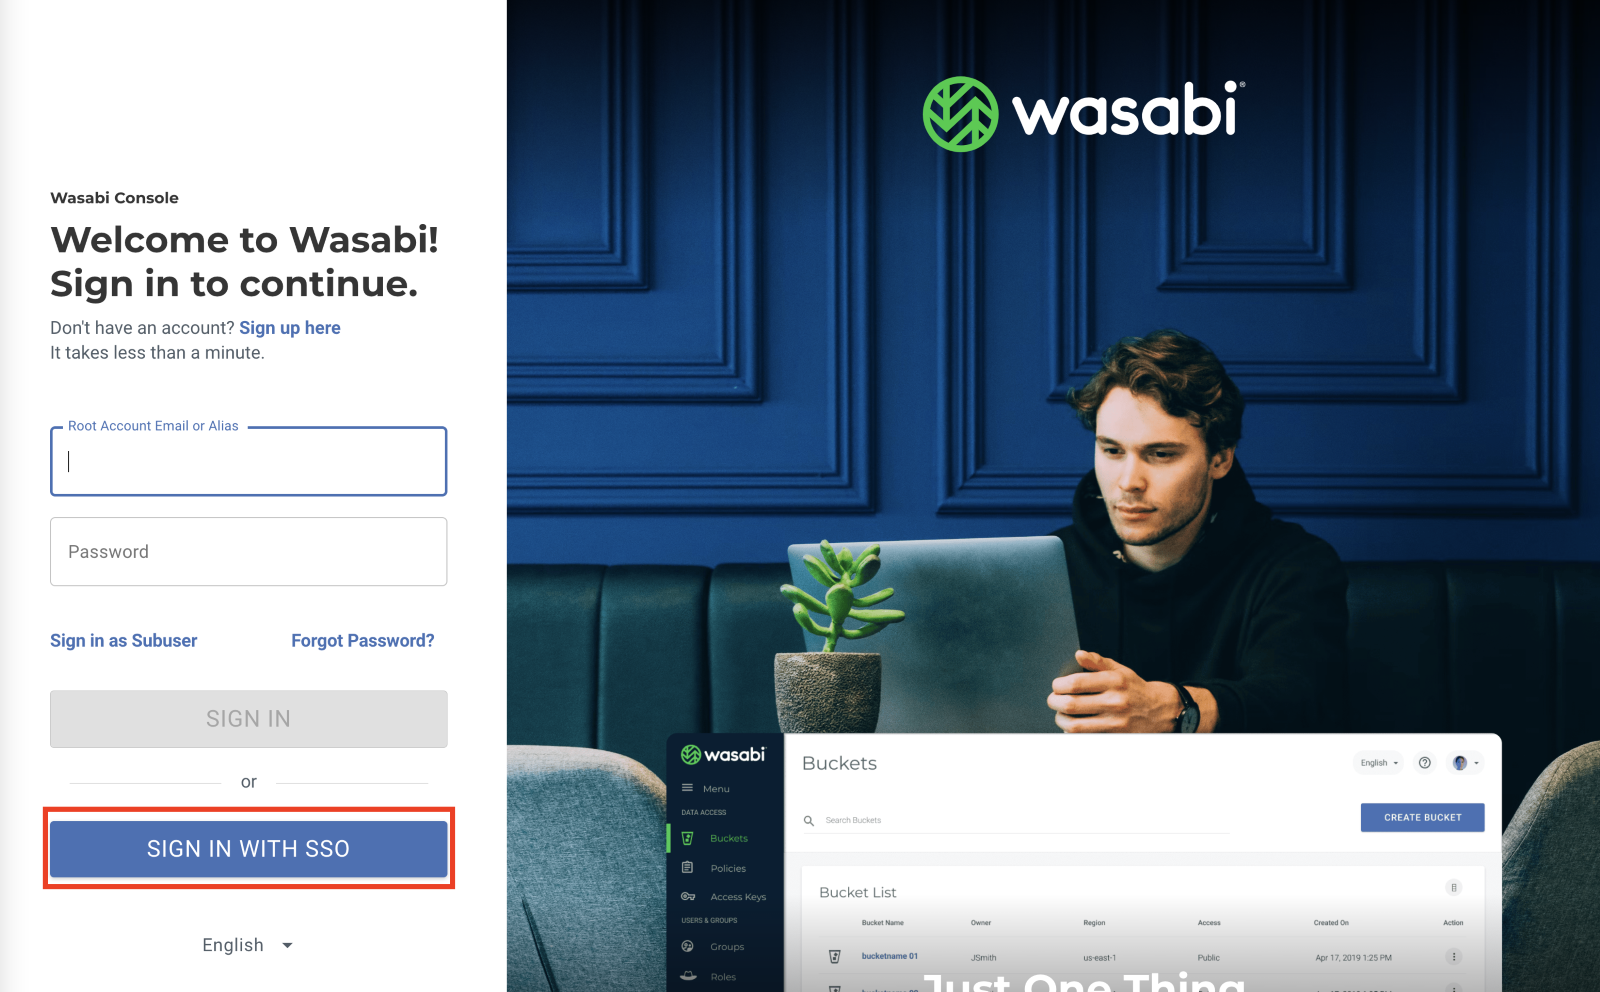
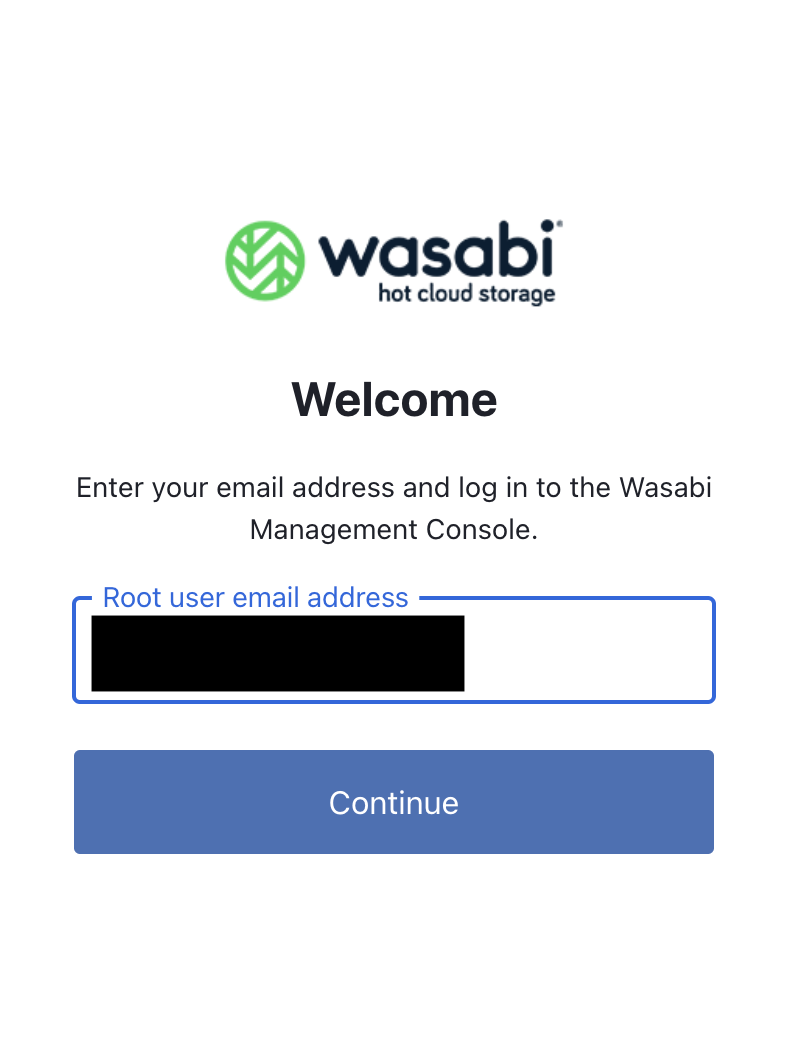
Enter your Root user email address for the Wasabi Console. Click Continue.
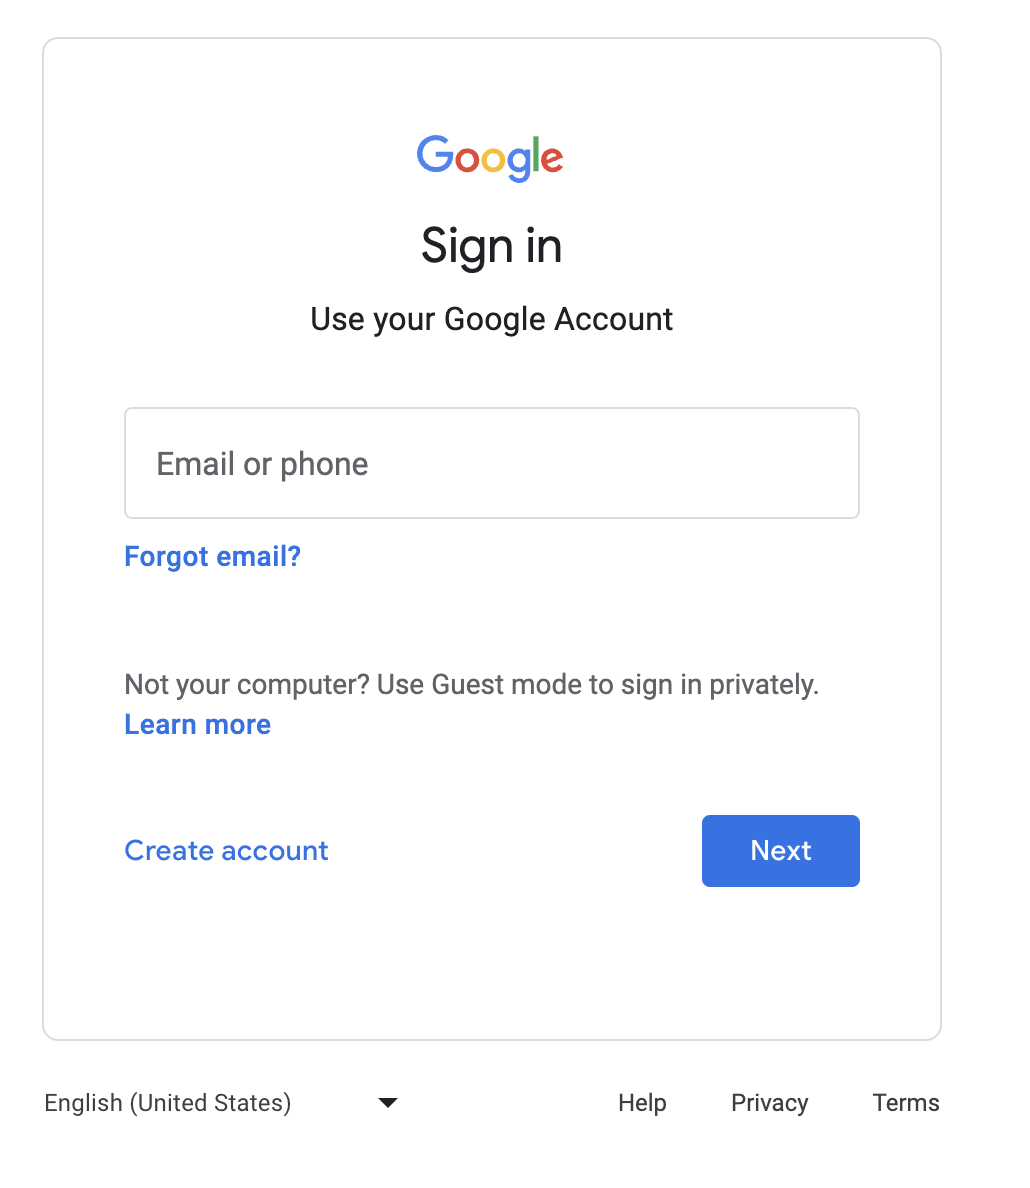
You are redirected to your Google sign-in page. Sign in as the user who has access to the Wasabi Console application created in the Google Admin Console.
Once you have successfully signed in with your company's Google username/password, you are then redirected to the Wasabi Console.
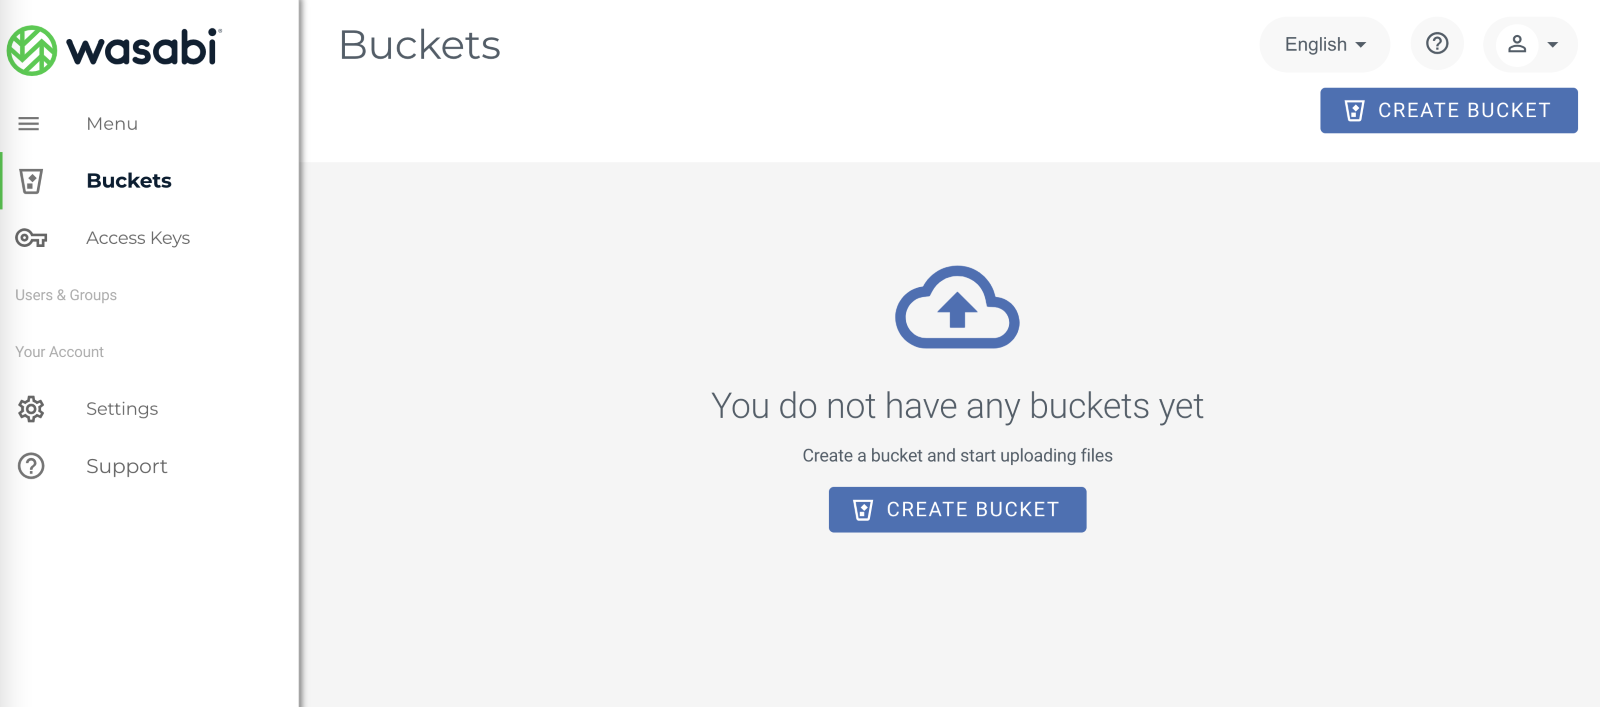 NOTE: Your view of the Wasabi Console may differ depending on the IAM policy set for the SSO role you created.
For any issues or questions, contact Wasabi Support.