Wasabi is a member of Veeam's cloud partner ecosystem. We have worked with Veeam closely to offer both a seamless implementation and a smooth transition to cloud storage. Veeam with Wasabi Solution Overview provides more information on the Wasabi-Veeam partnership and solutions.
Veeam's Backup and Recovery software version 12 provides direct to Wasabi object storage functionality for Veeam agents for Windows, Linux and Mac.
The data restoration process is handled by your specific backup software application. As there are many, potential variables that will affect your unique environment, Wasabi strongly recommends that you seek the guidance of your backup software's technical support team in the event that you encounter difficulty or have application-specific inquiries.
If you are going to leverage immutable Veeam backups, follow the steps in Object Lock: Enabling.
Enabling bucket versioning only is not a proper configuration for immutable Veeam backups and can cause problems. If you are simply going to use regular Veeam backups with Wasabi buckets, bucket versioning is not required.
Requirements
Active Wasabi Storage account.
Veeam Backup and Recovery version 12 software installed and licensed.
A valid Veeam license that supports capabilities for object storage.
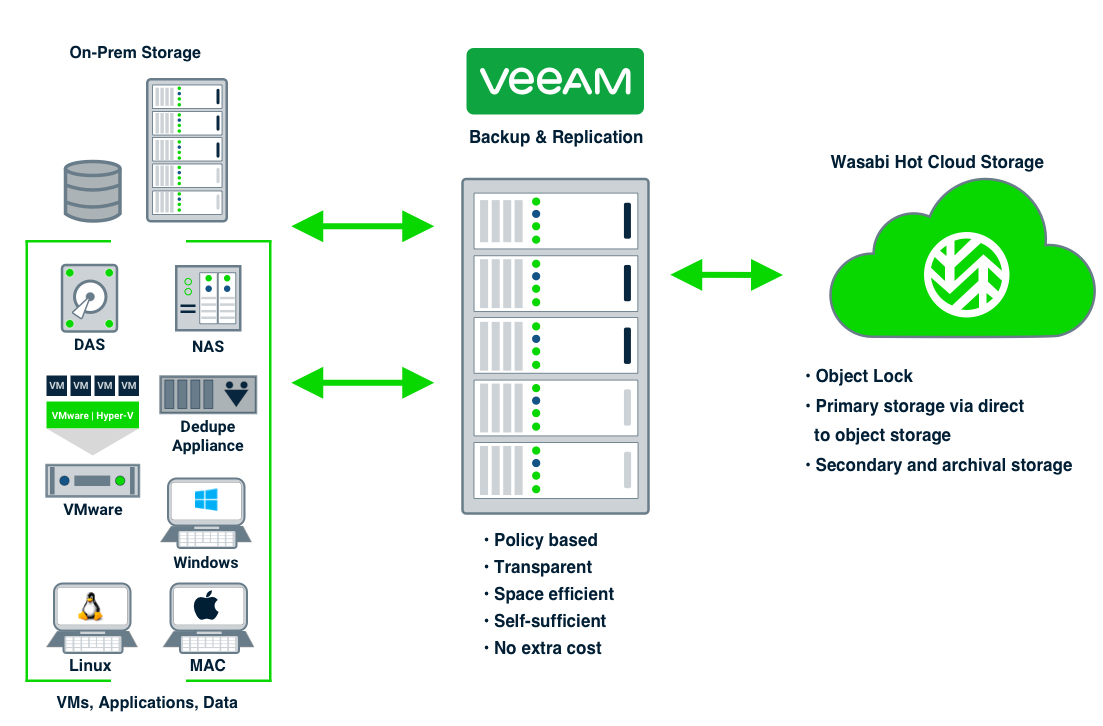
Architecture Diagram
Creating a Wasabi Object Storage Repository
Follow the steps below to create the Wasabi Object Storage repository in the cloud.
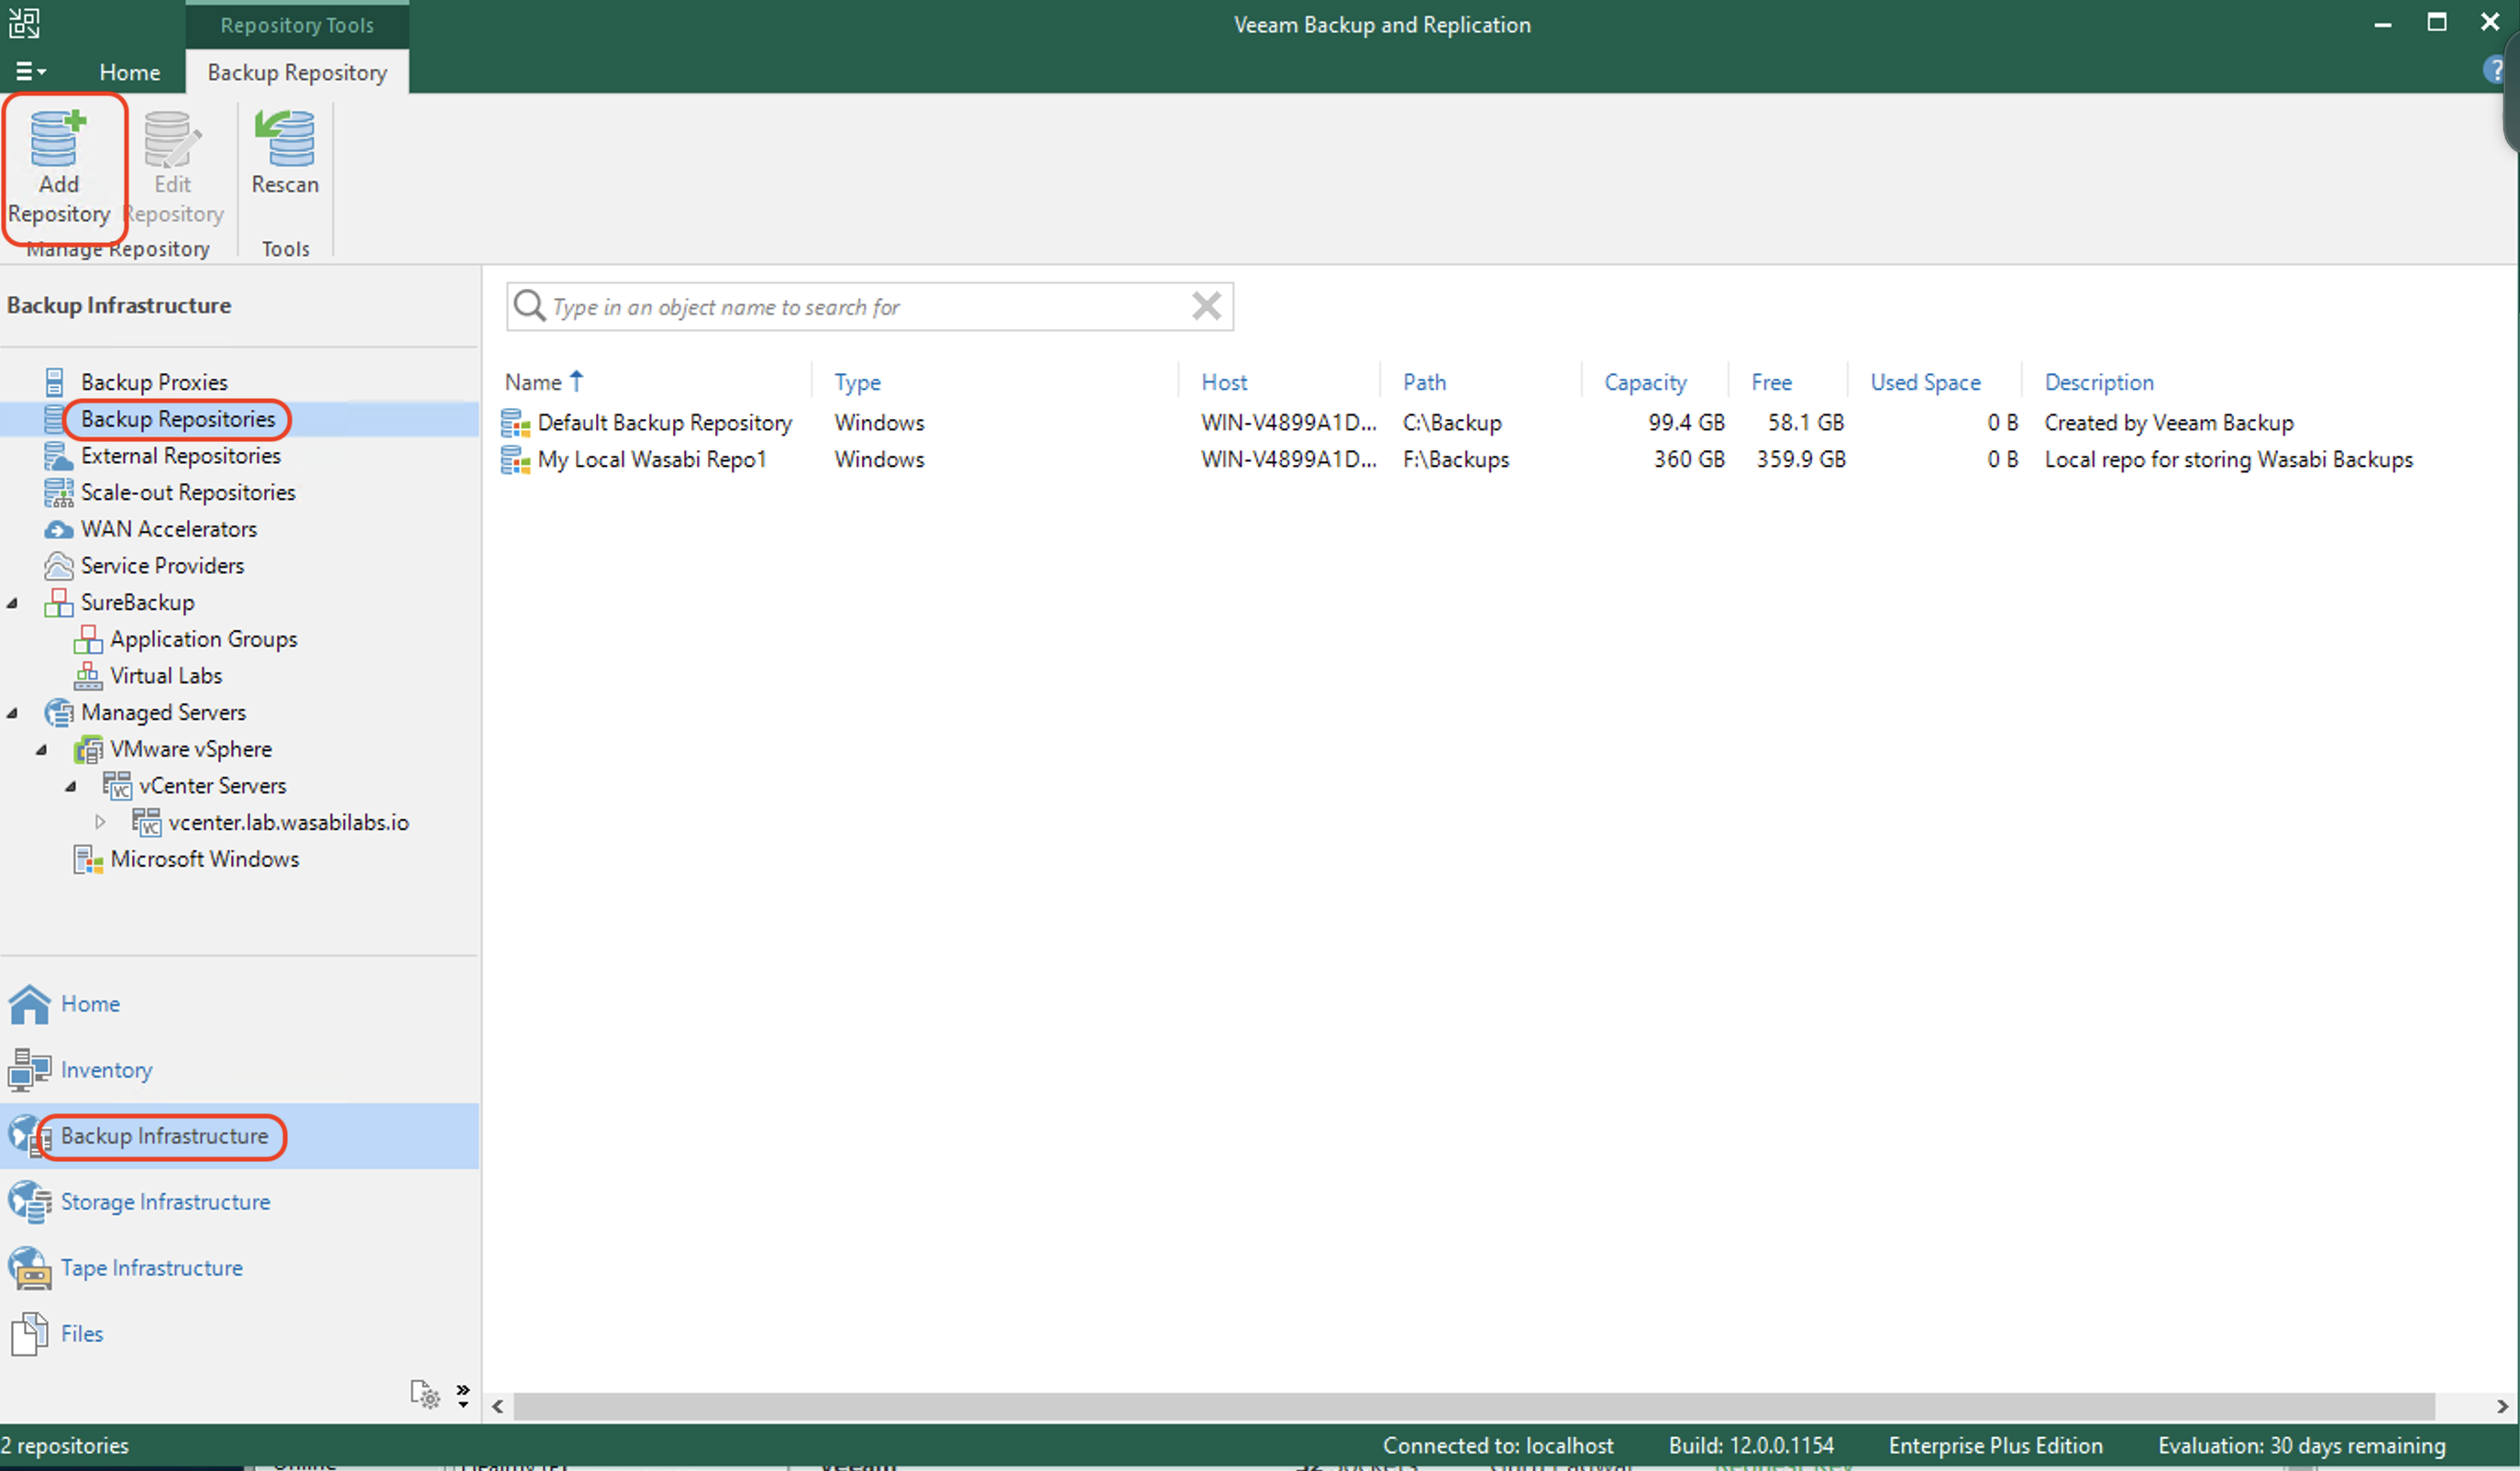
On Veeam Backup and Replication, click the Backup Infrastructure tab and click Backup Repositories. Click Add Repository.
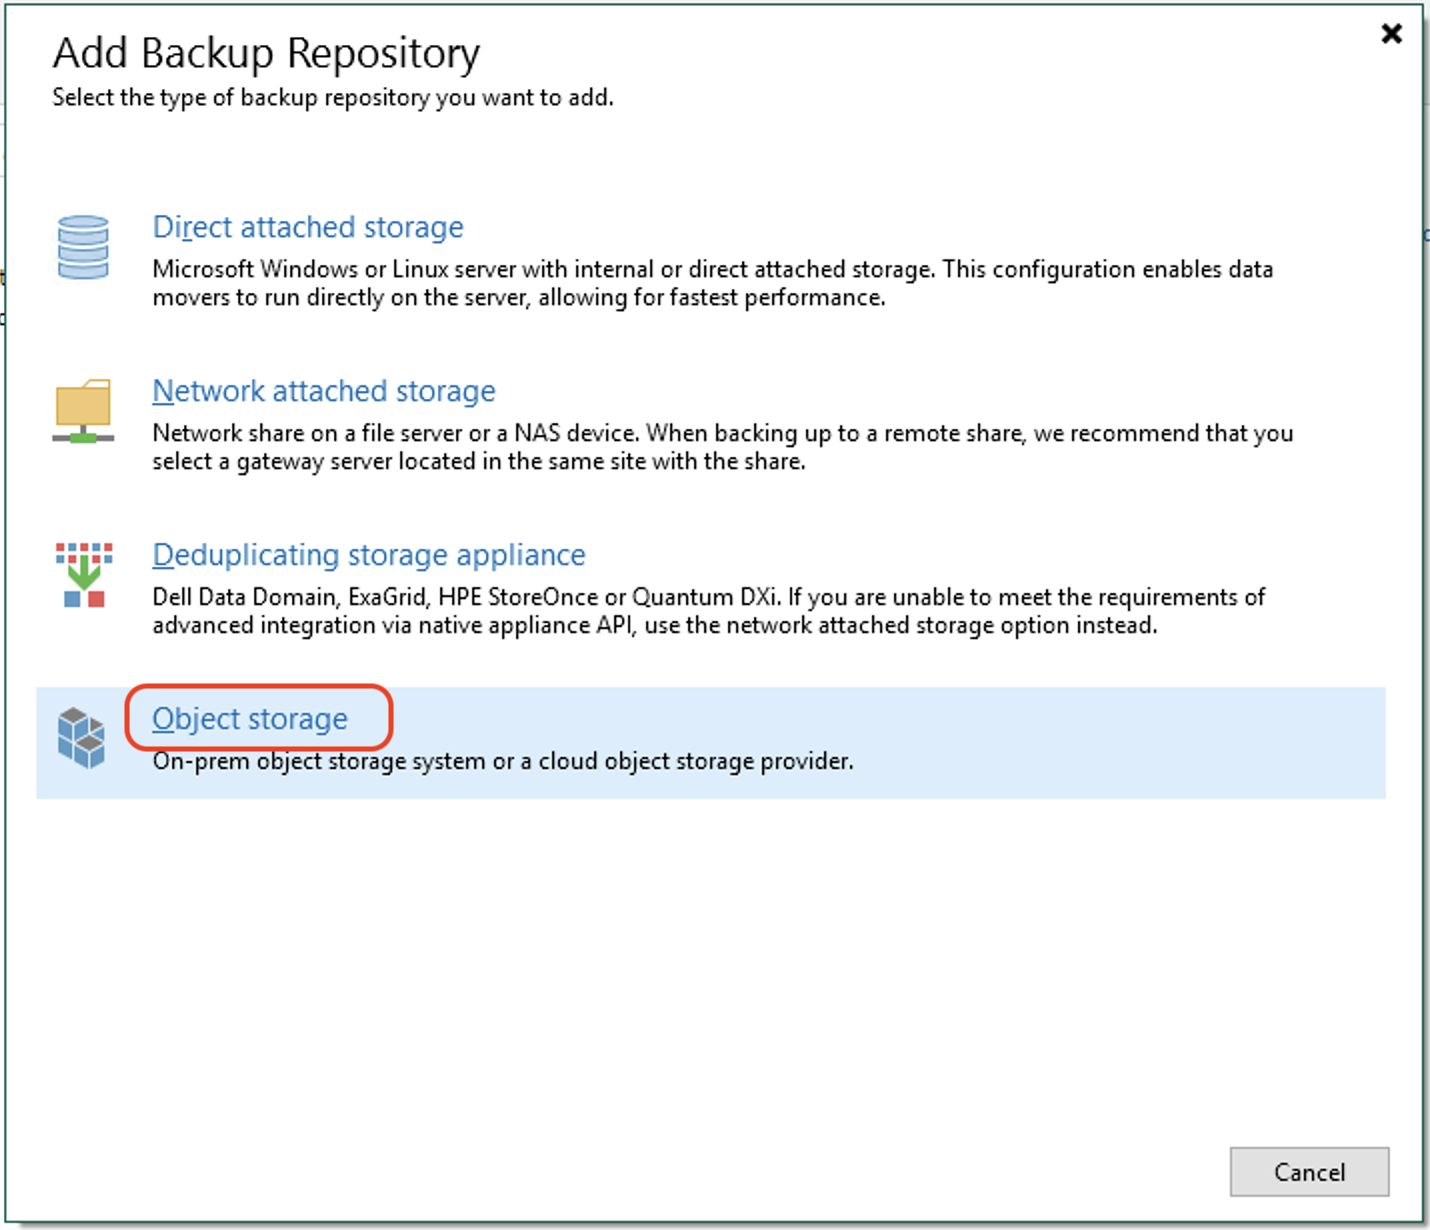
Click Object Storage to create an Object repository.
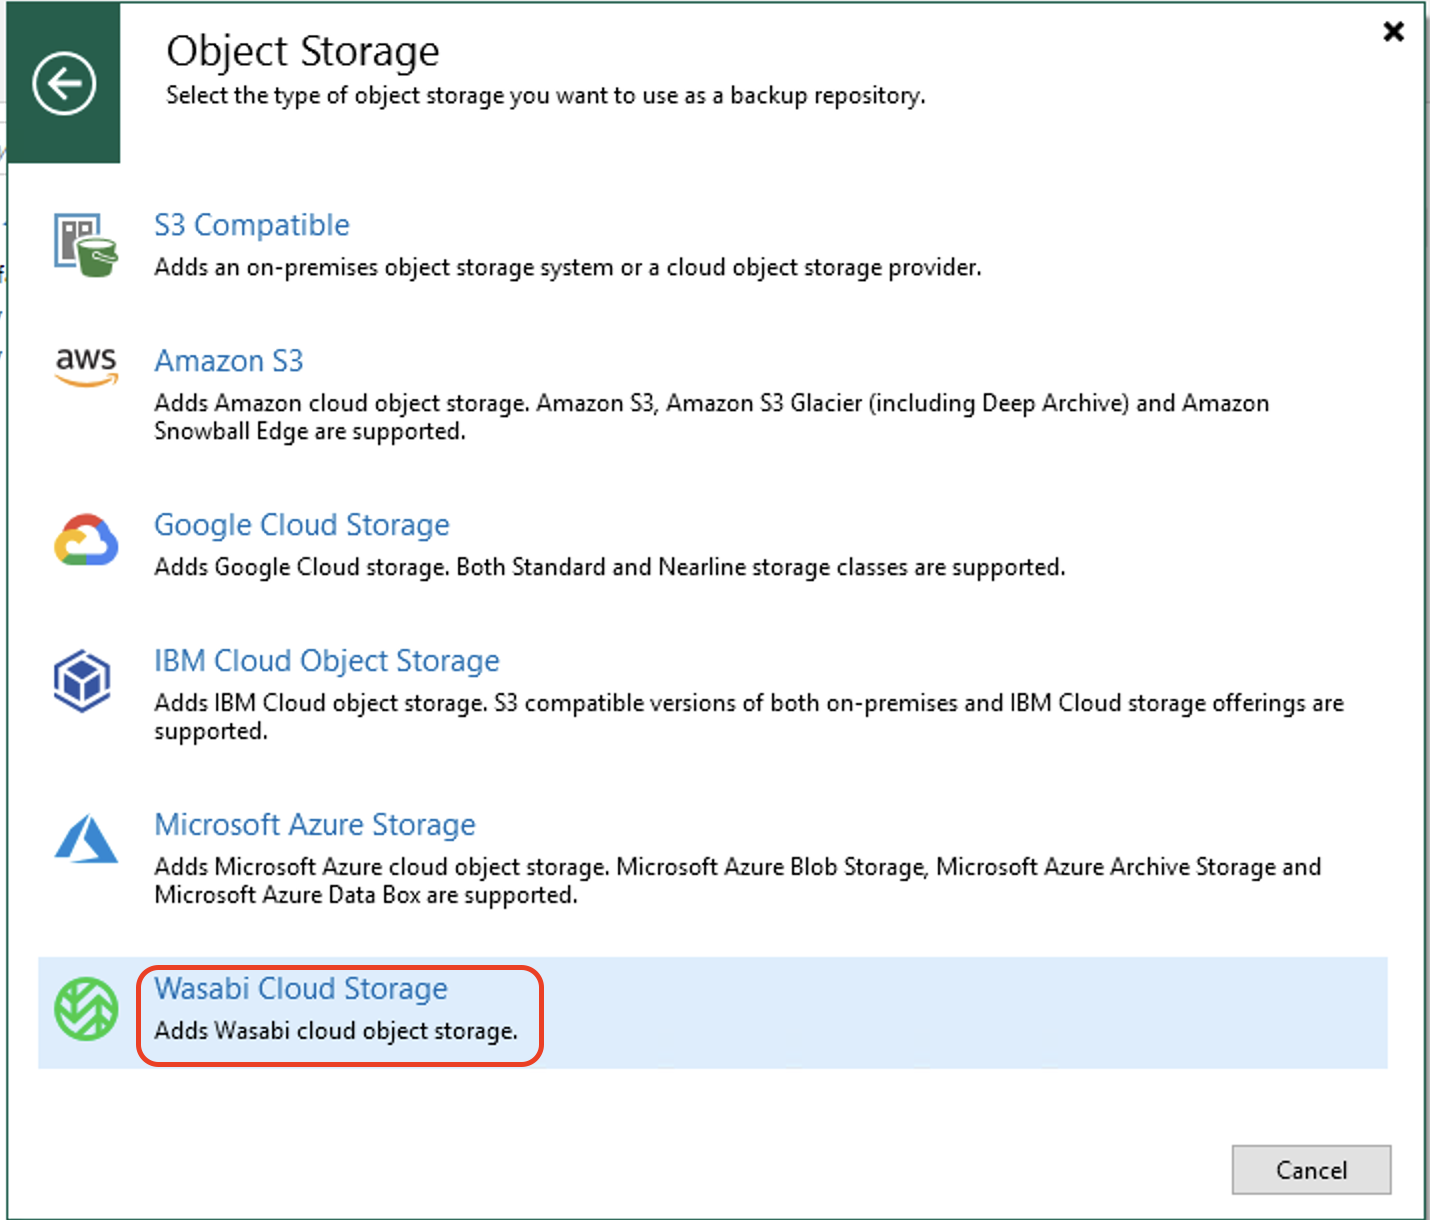
Click Wasabi Cloud Storage to continue.
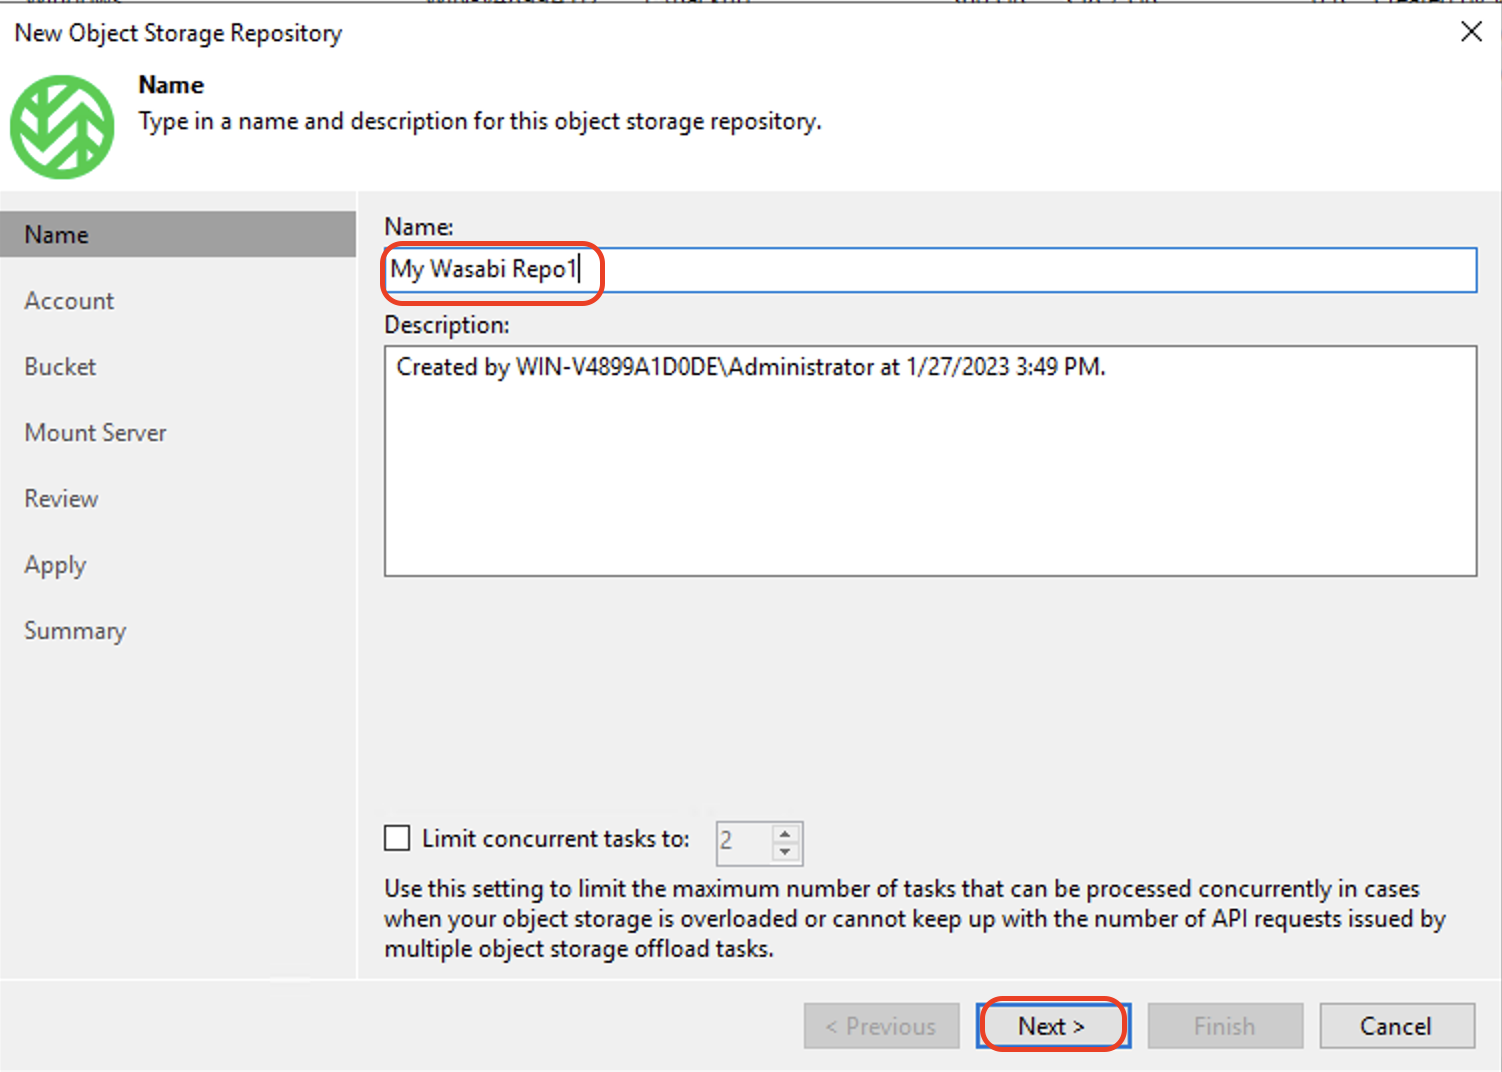
Enter a Name for the repository. Click Next.
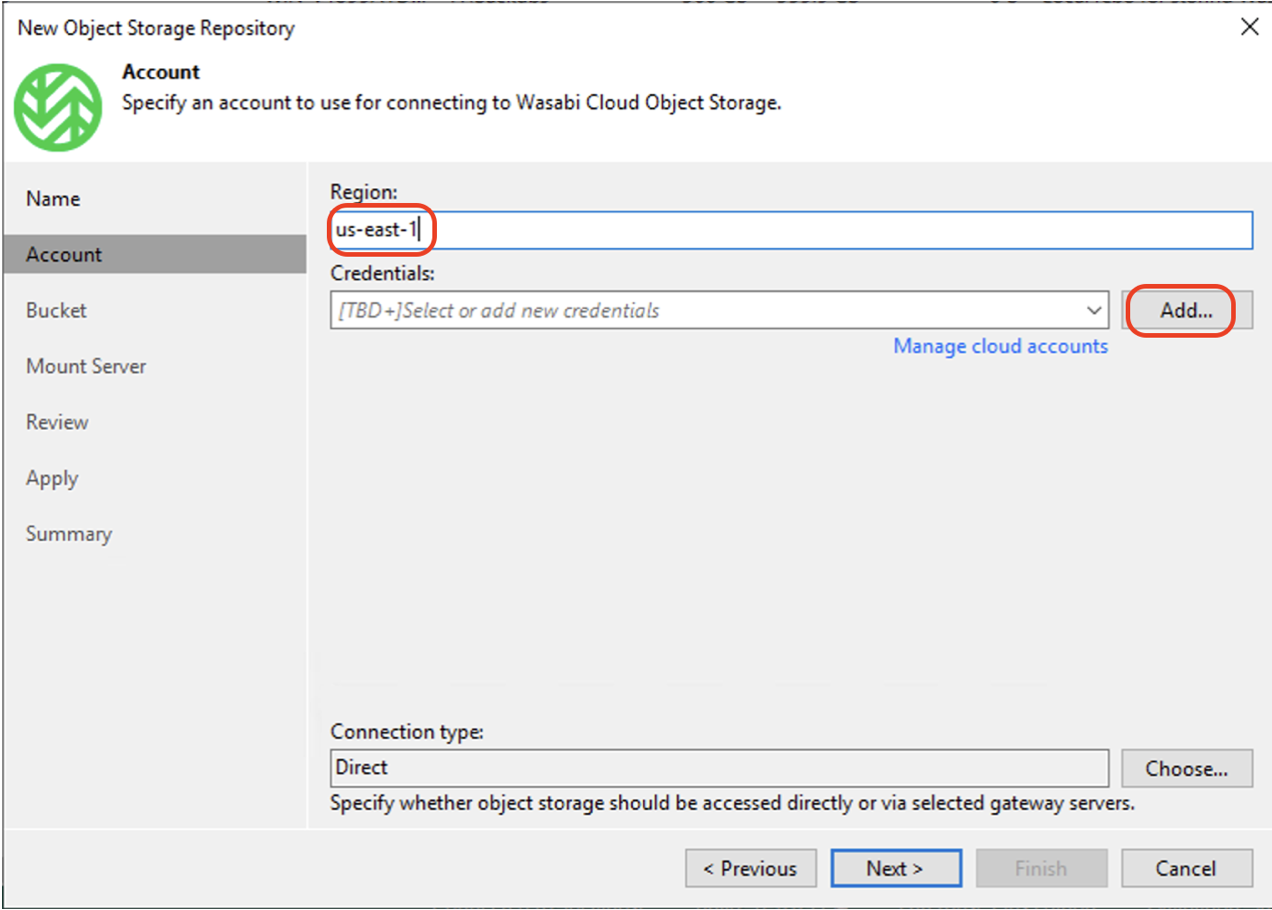
Enter the Wasabi region. In this example, we are using us-east-1 region. To get a list of Wasabi regions, refer to Service URLs for Wasabi's Storage Regions.
Click Add to add the credentials for your Wasabi account.
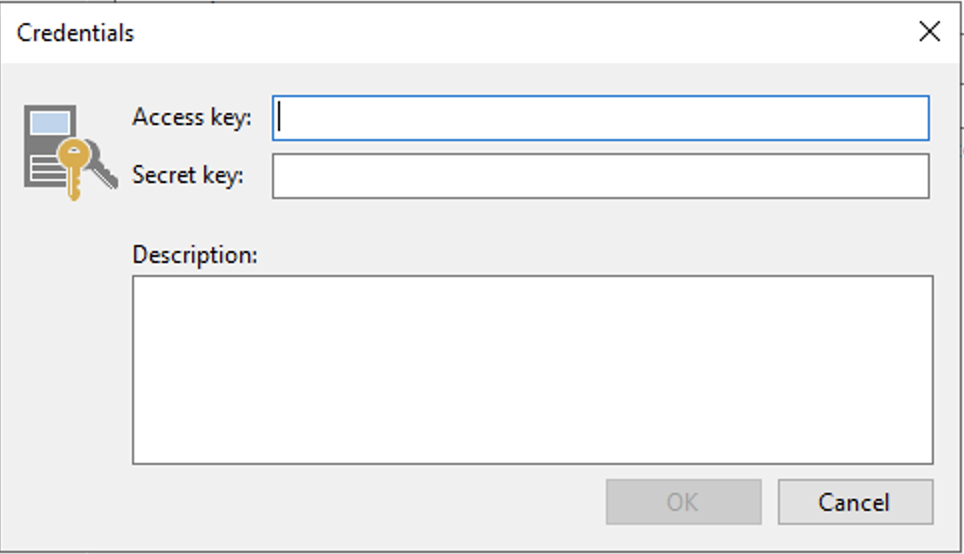
Enter the Access and Secret keys for your Wasabi account. For more information, refer to creating a sub-user and access and secret keys. Click OK to continue.
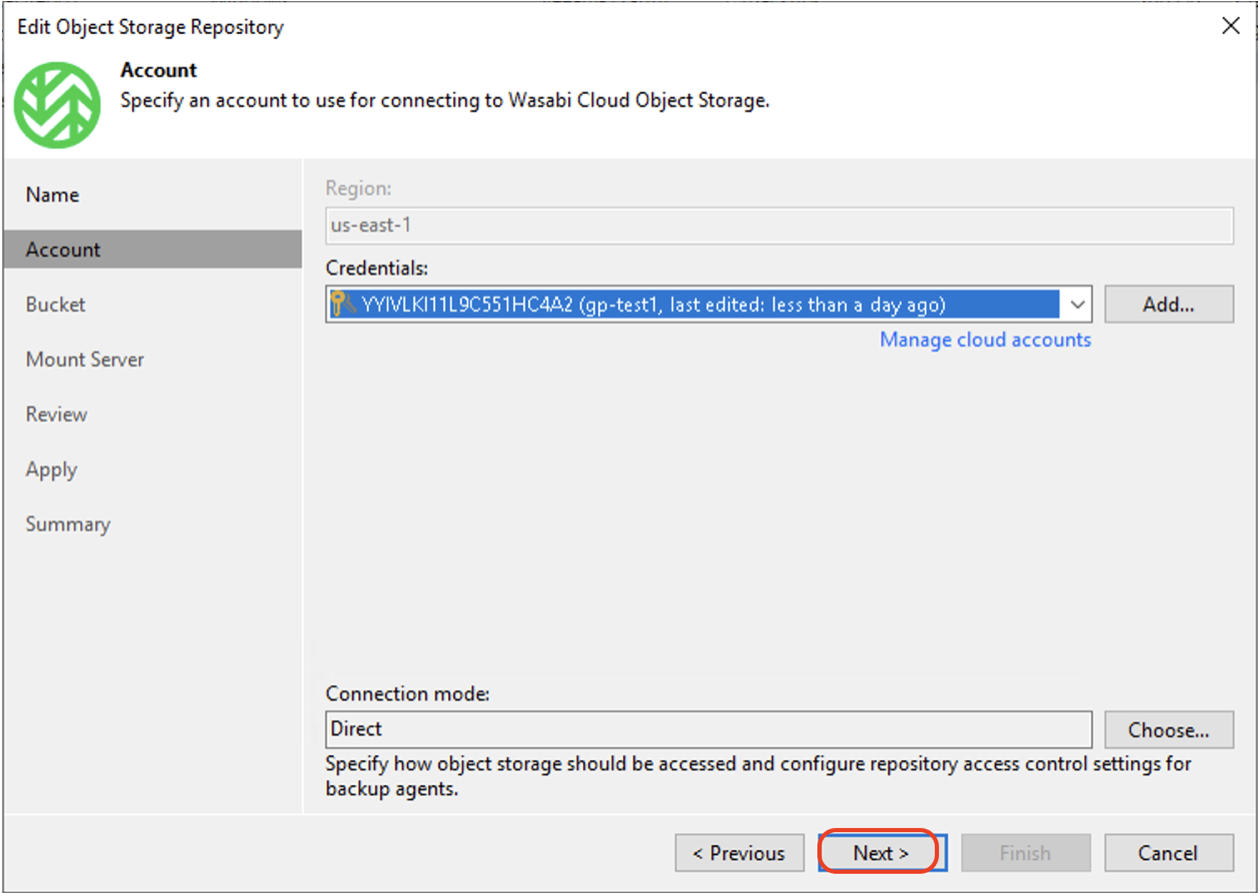
Click Next to continue.
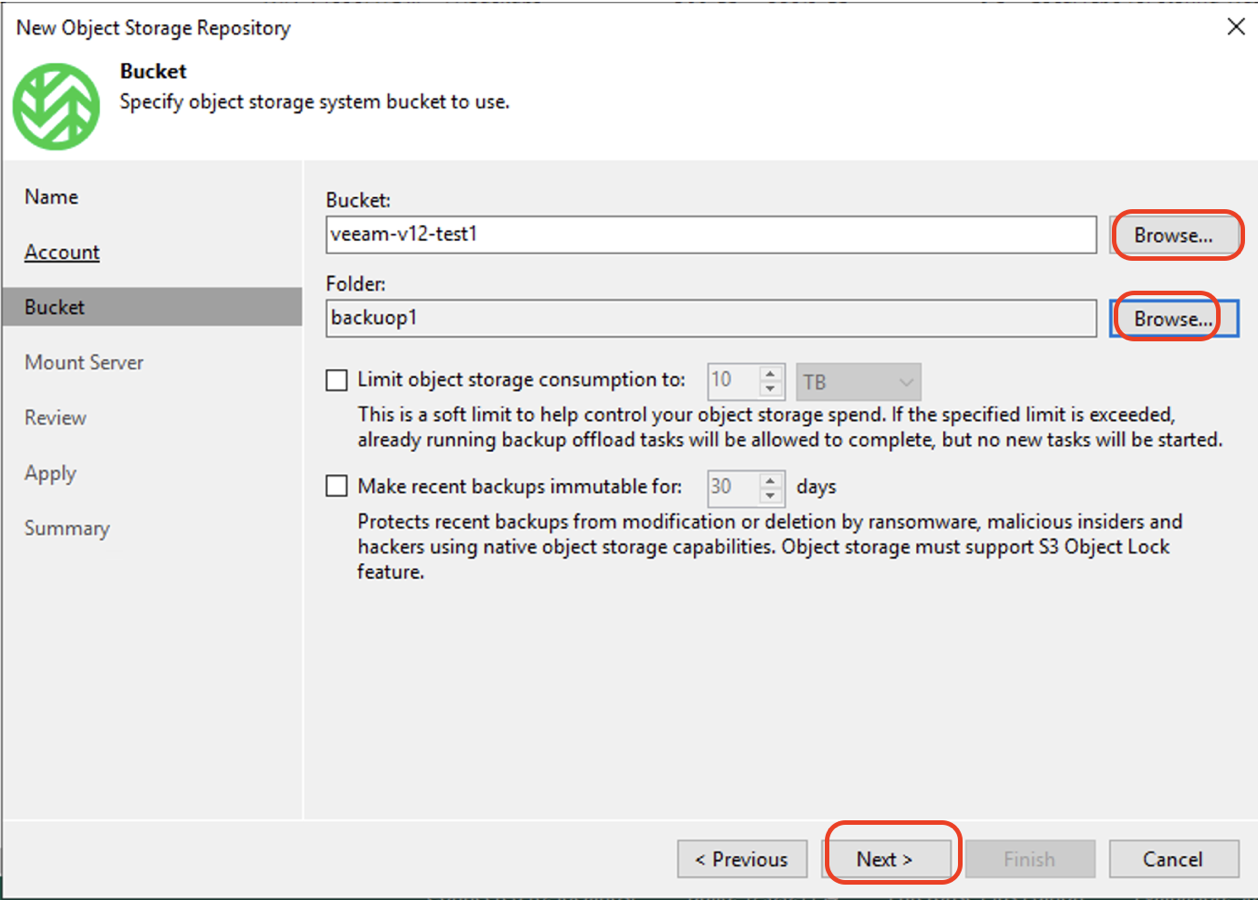
Click Browse beside the Bucket field to select an existing Wasabi bucket. Click Browse beside the Folder field and create a new folder by clicking New Folder in the folder window. Input a Name for the folder and click OK. Click Next.
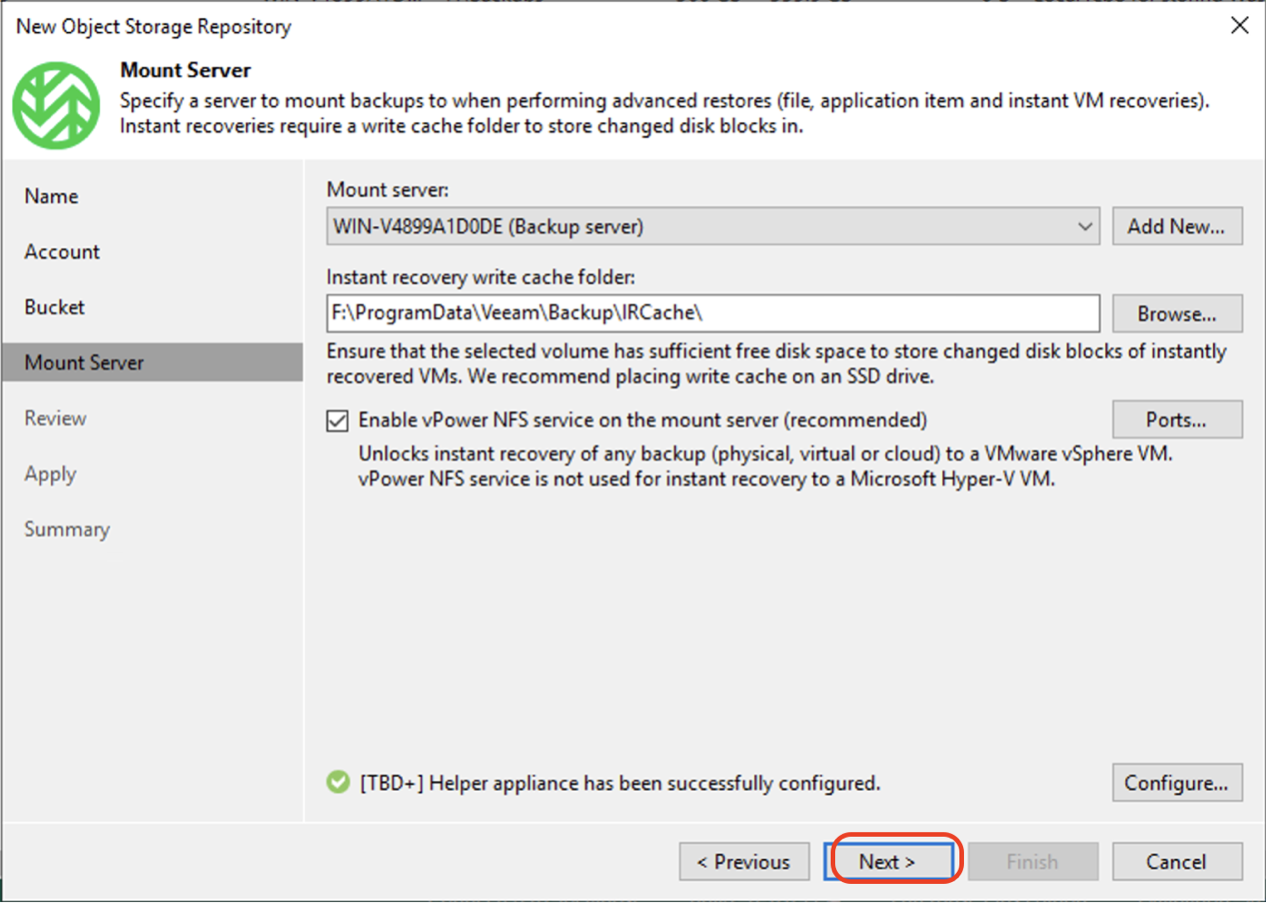
In the Mount server tab, keep the default values. Click Next.
In the Review tab, click Apply.
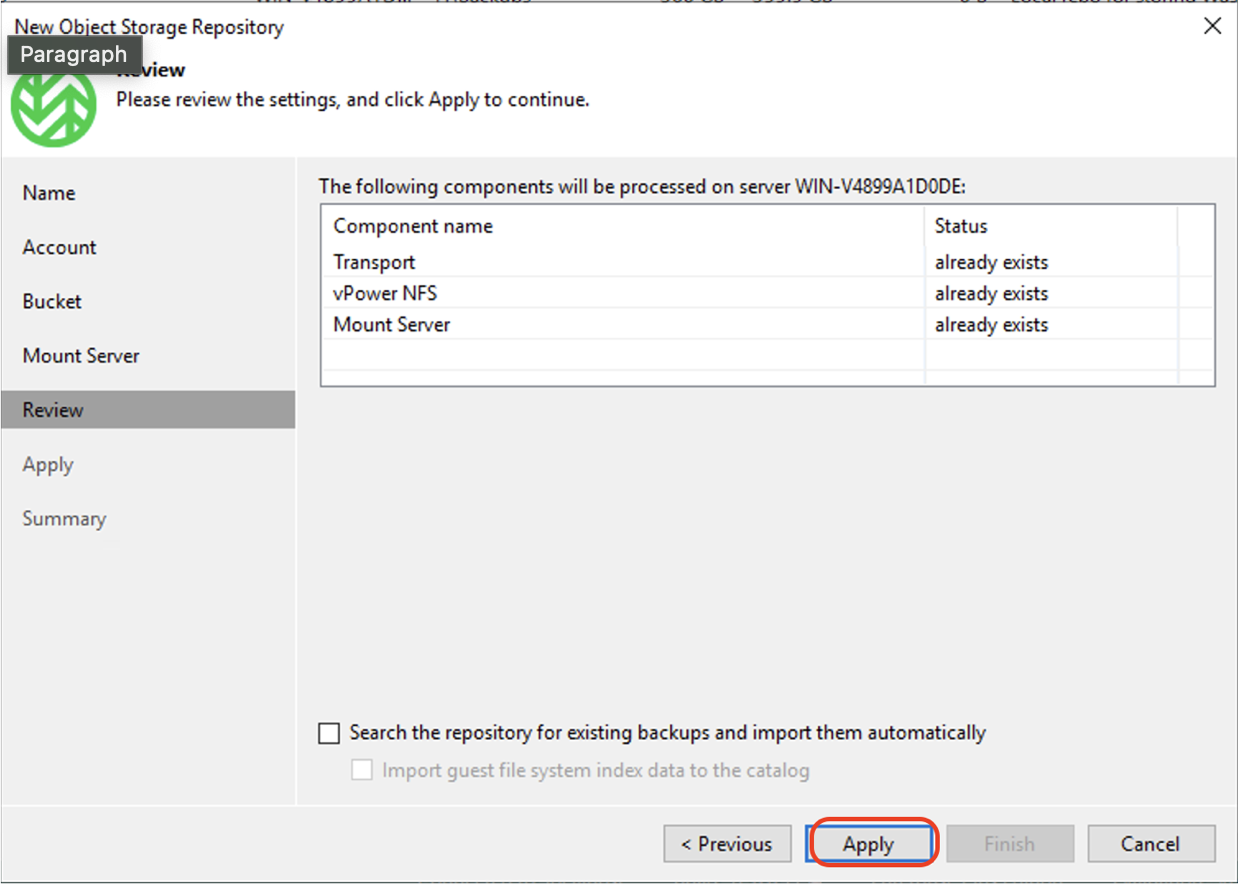
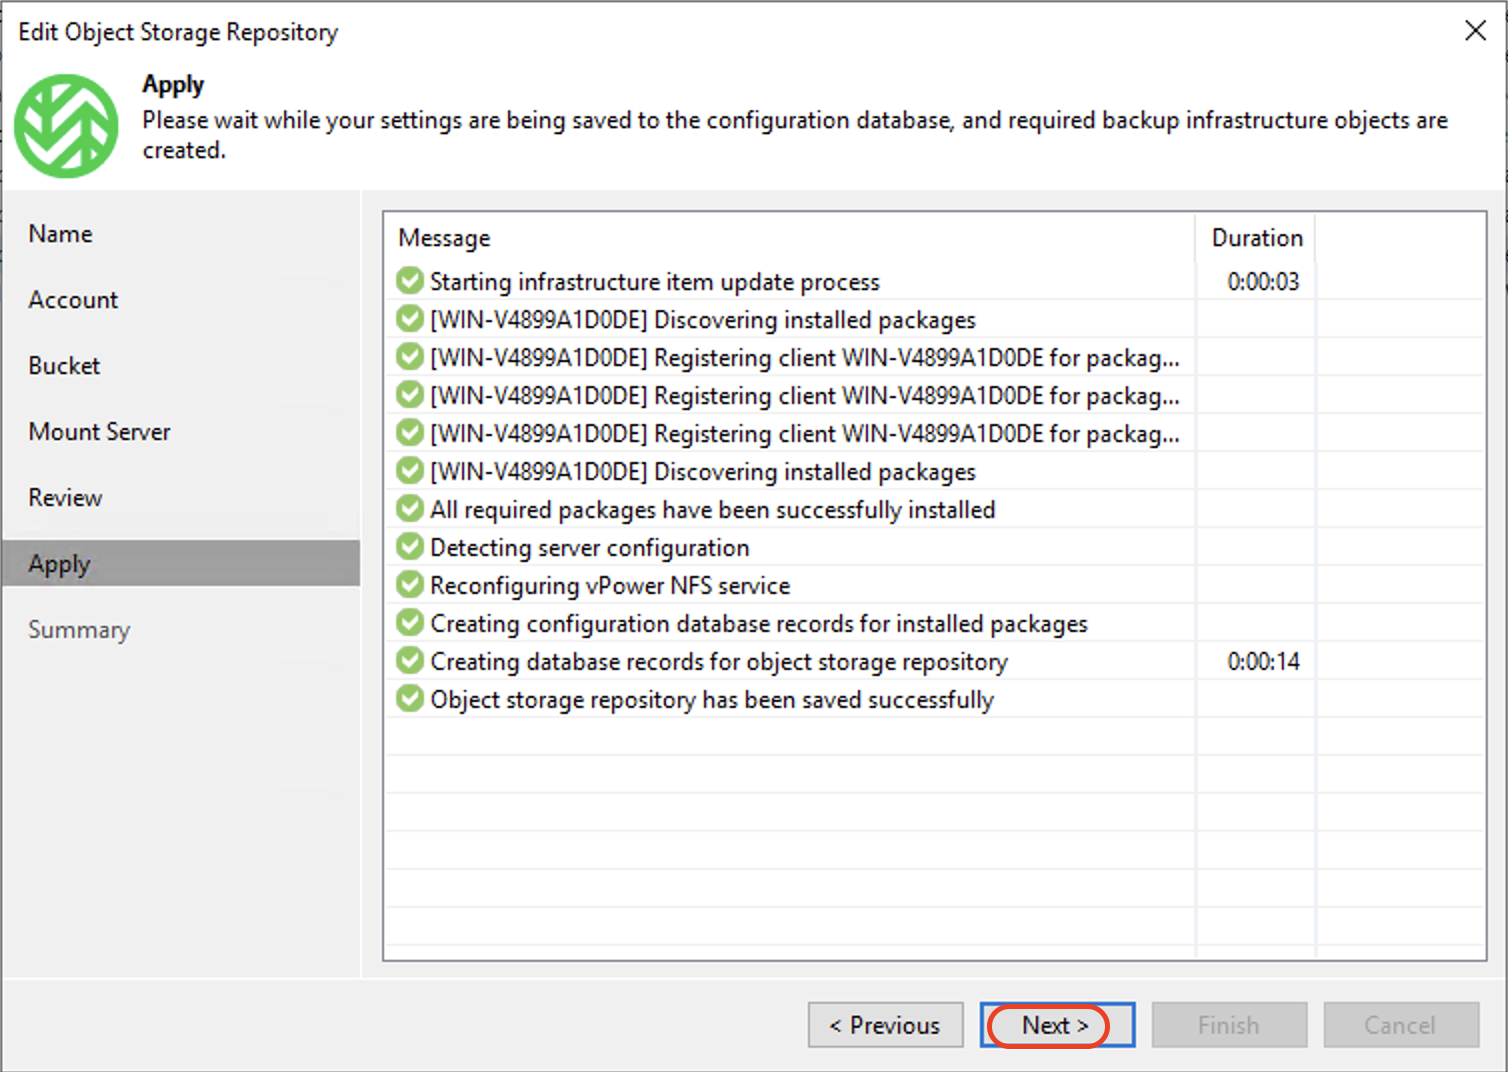
In the Apply tab, click Next to continue.
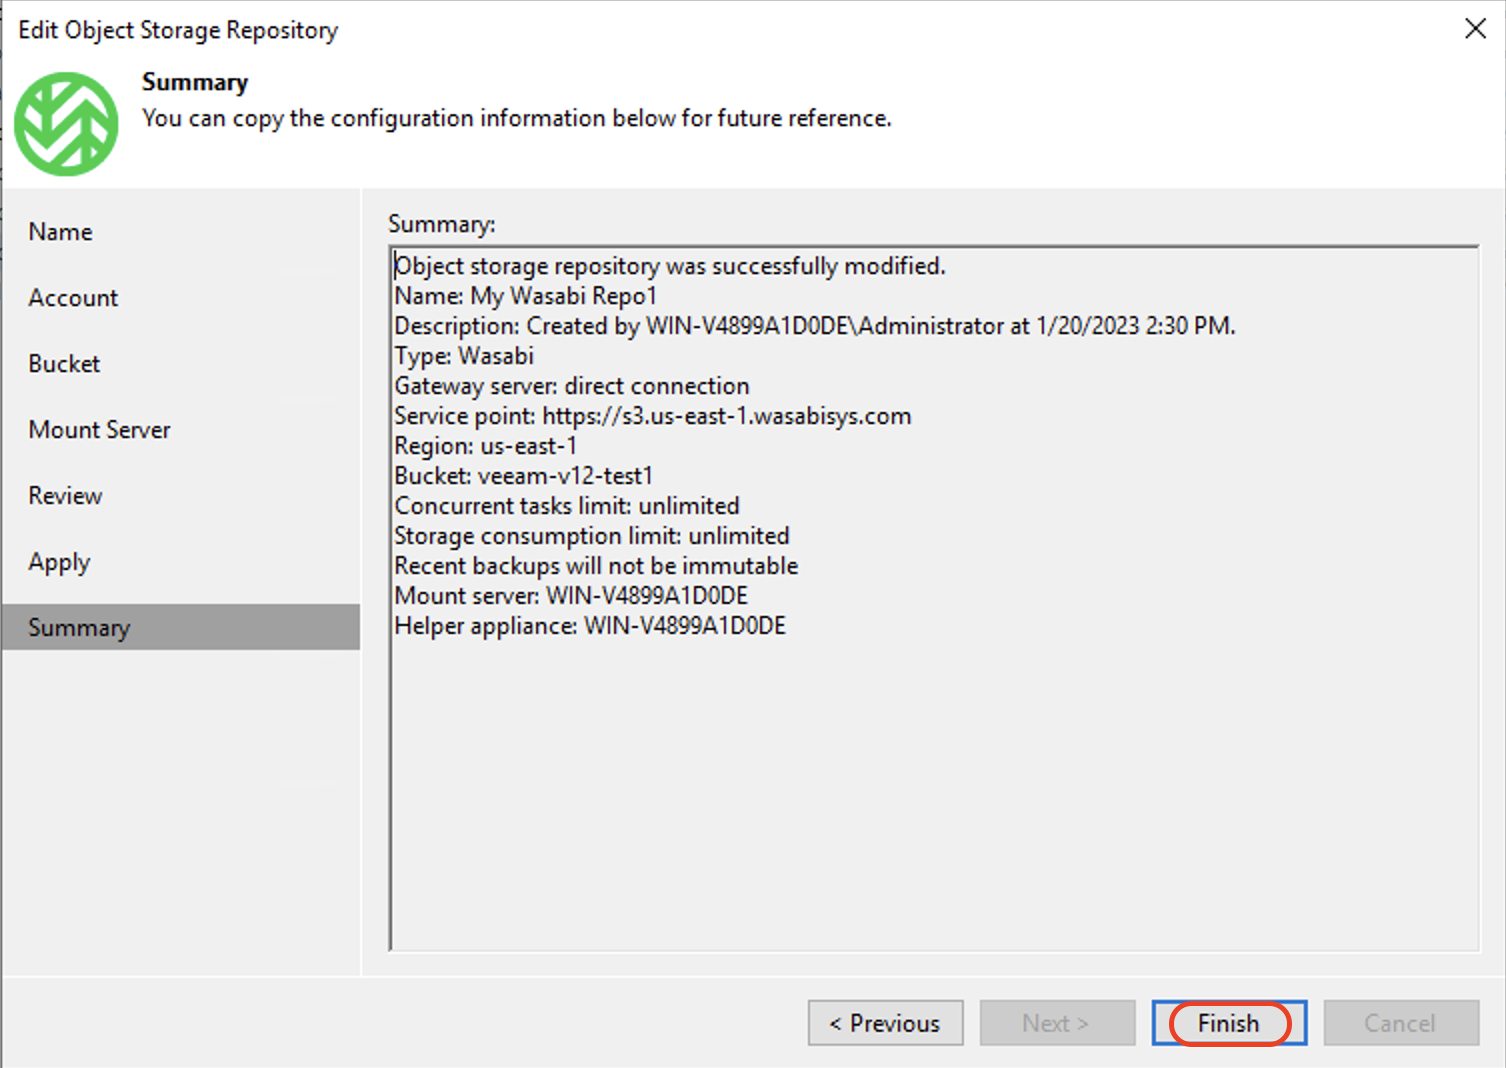
Review the Summary. Click Finish to create the Wasabi repository.
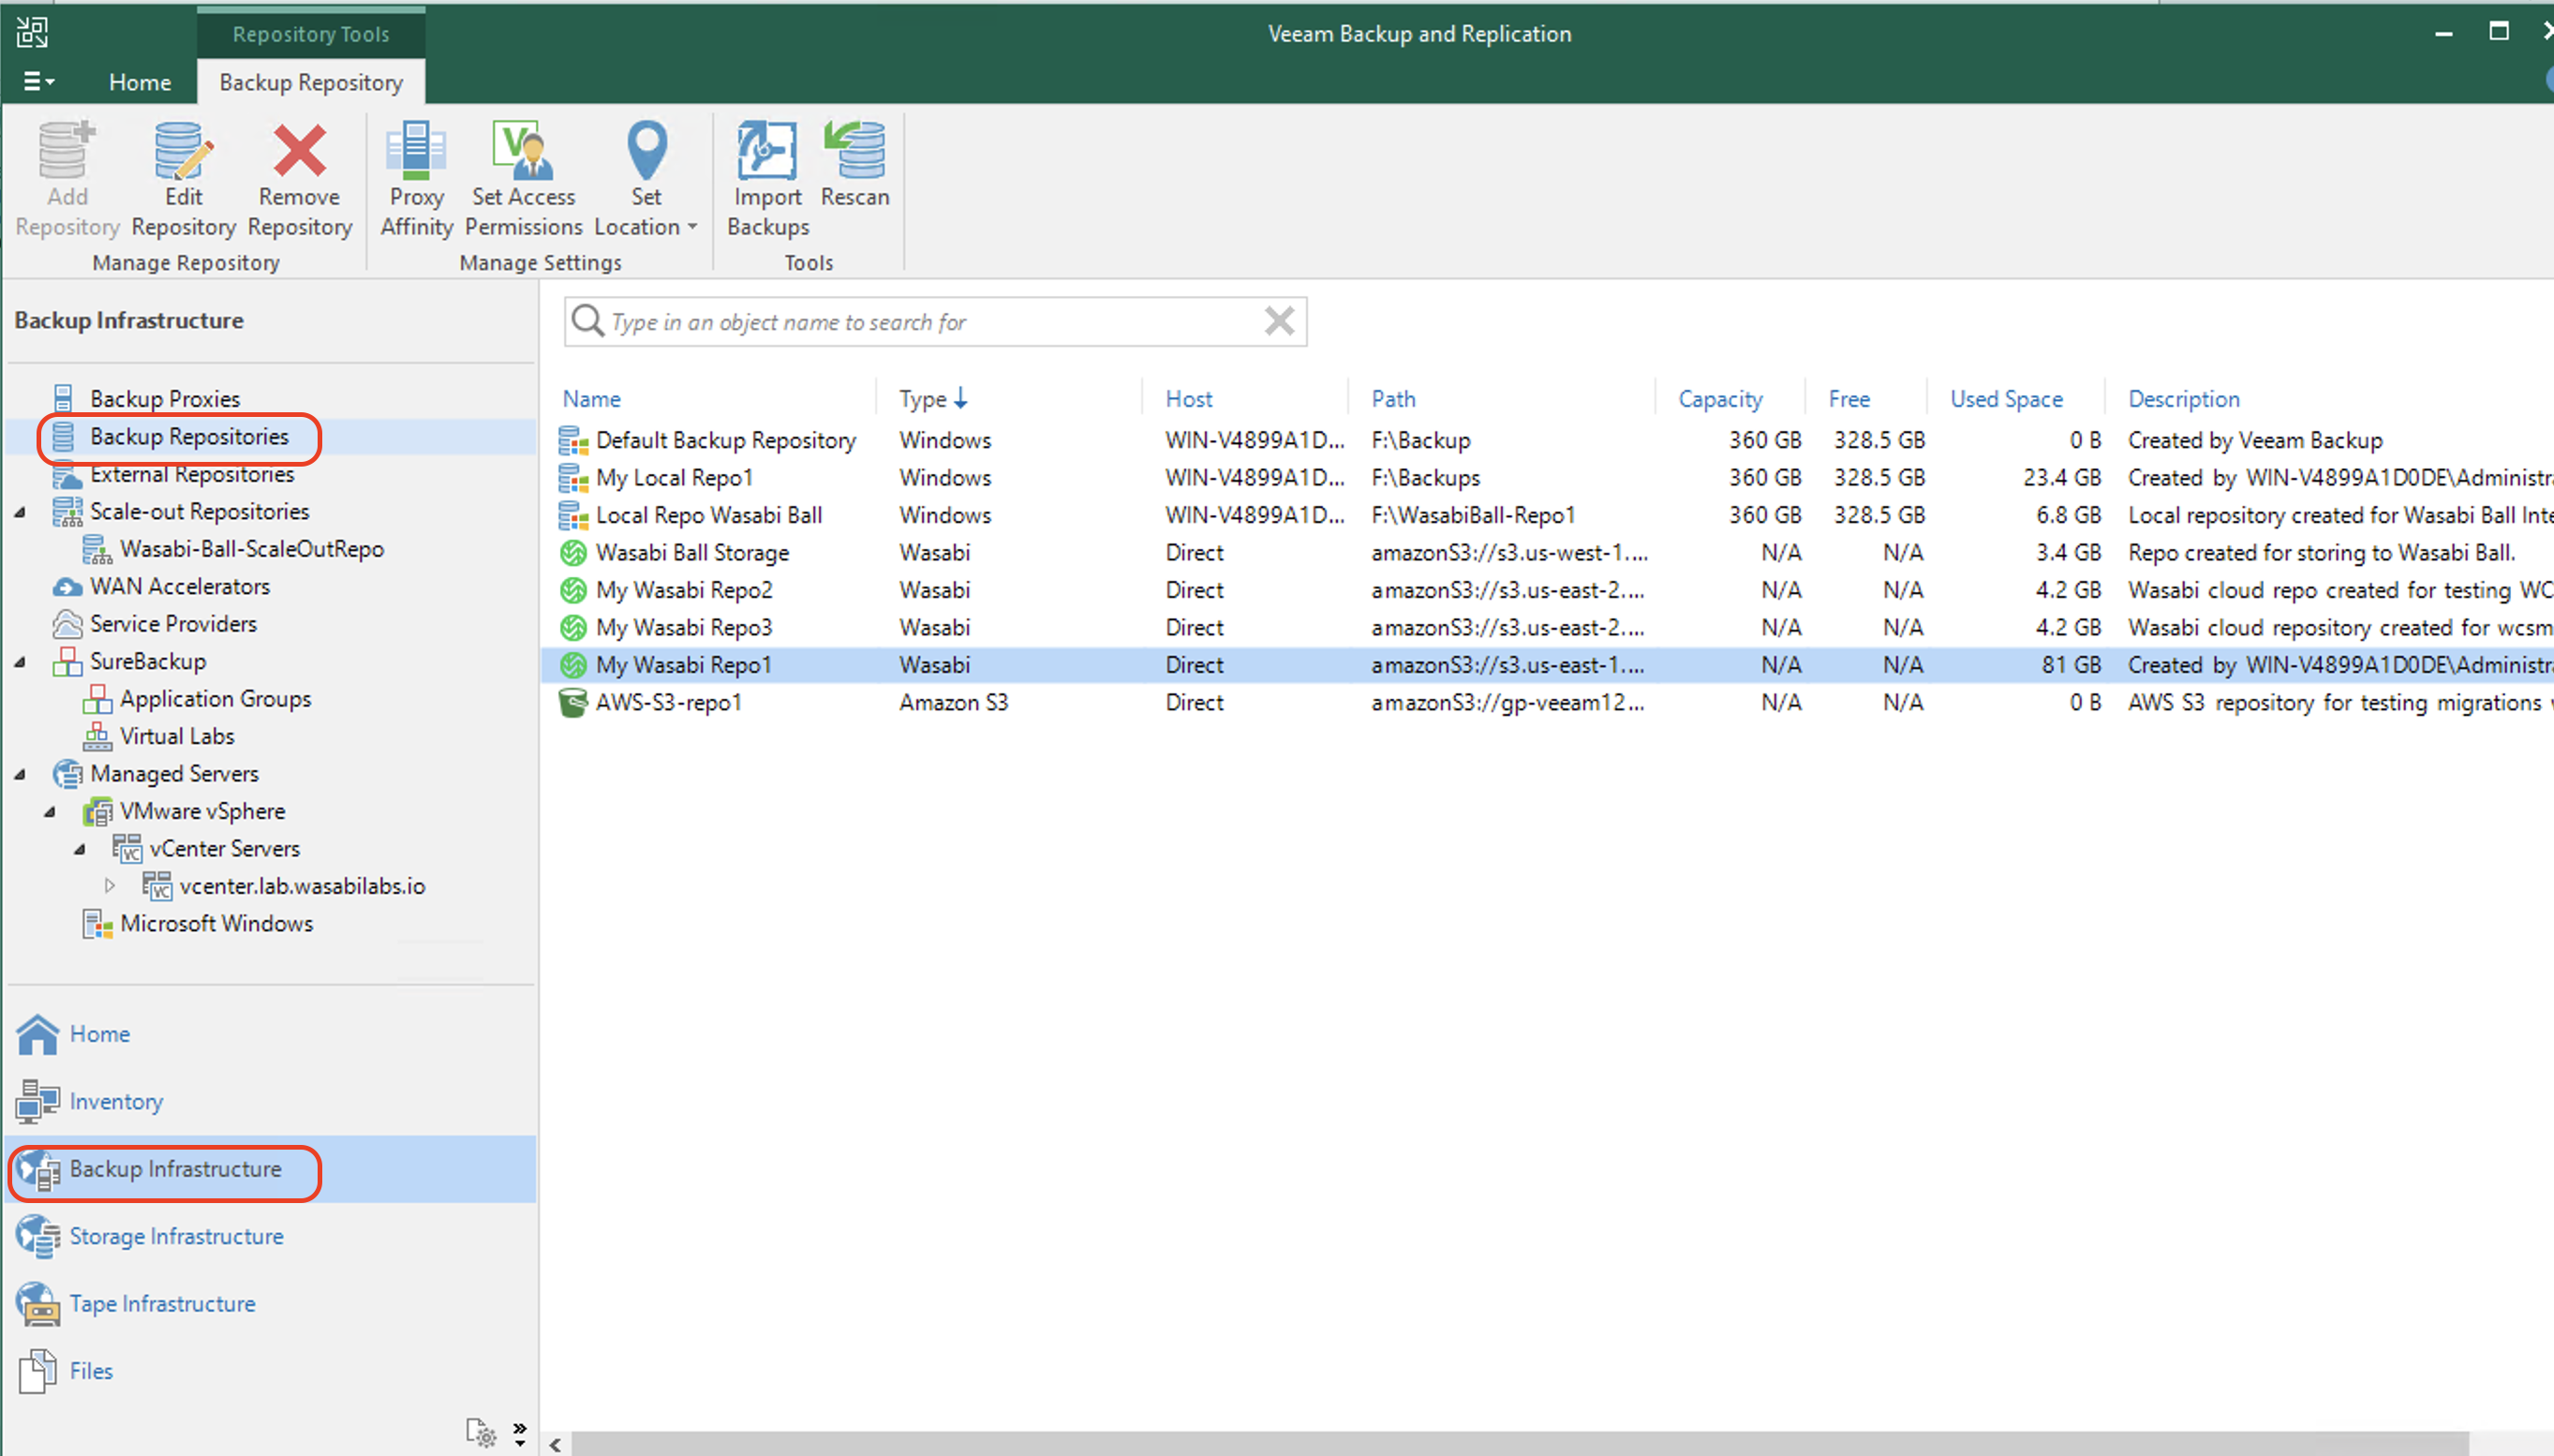
In the Backup Infrastructure tab, click Backup Repositories to view the newly created Object repository.
Modifying Access Permissions on Wasabi Repository
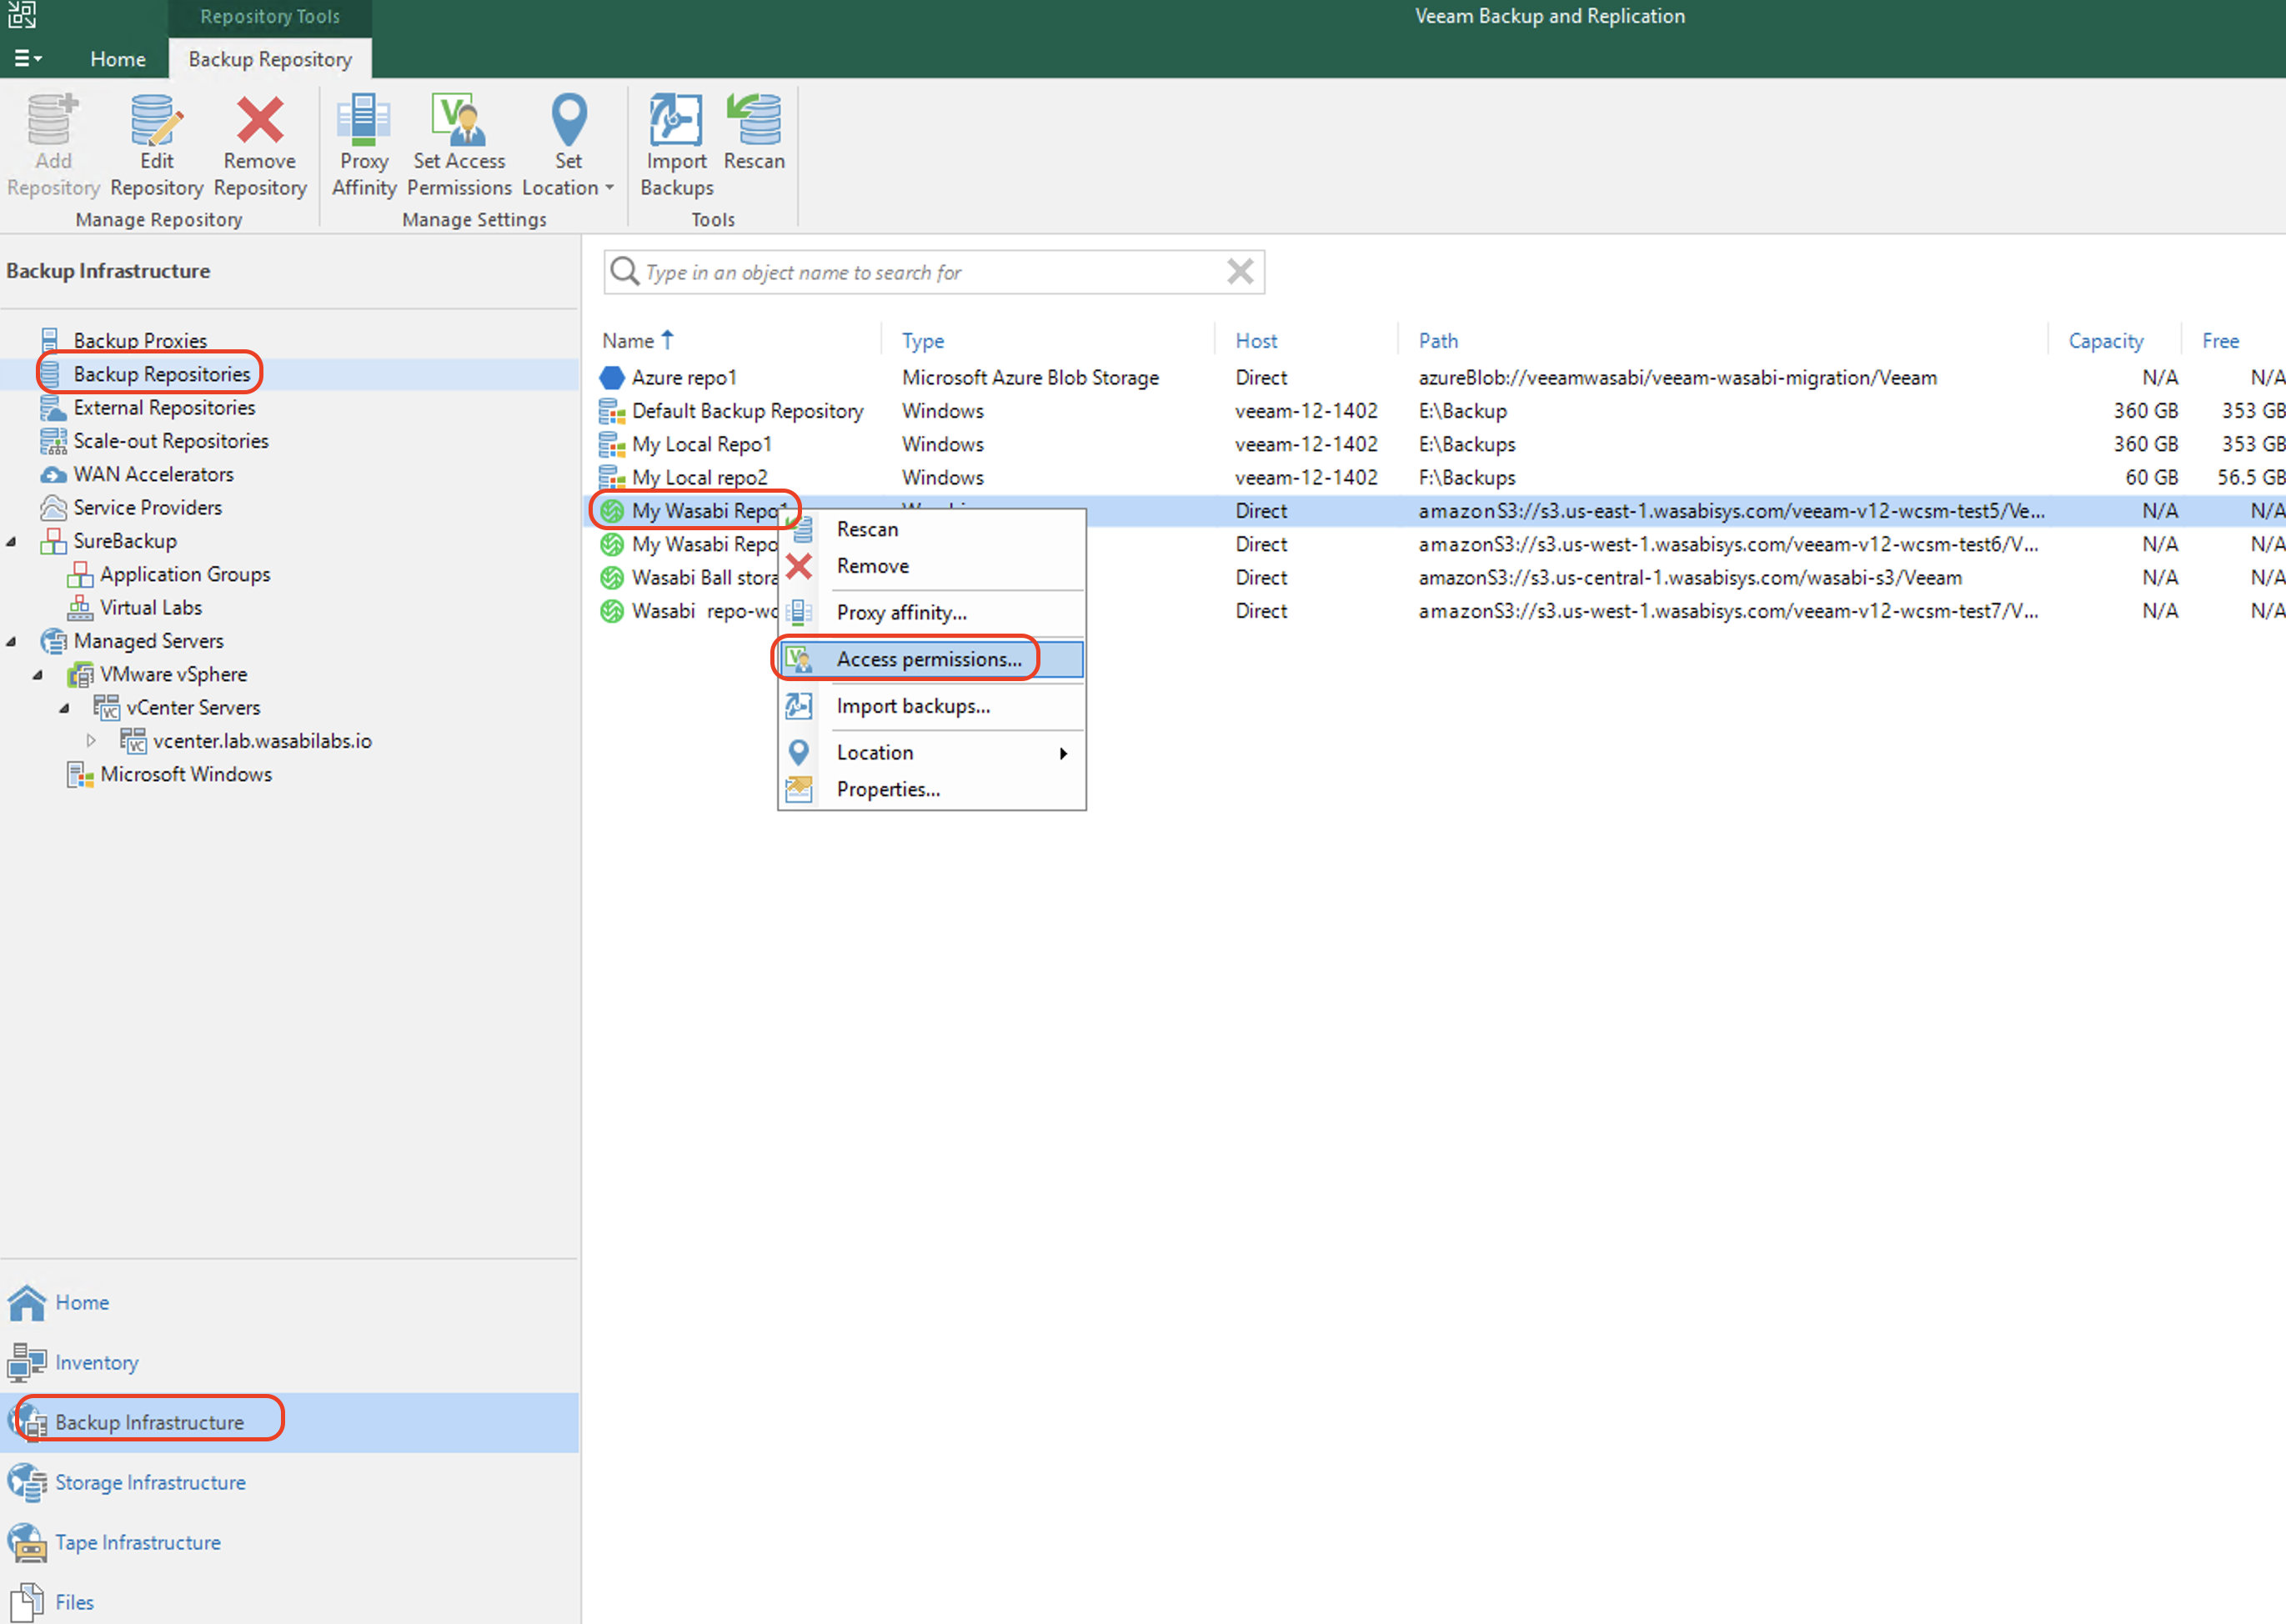
In order for the NAS device to backup to Wasabi, modify the permissions on the Wasabi repository.
From the Backup Infrastructure tab, click Backup Repositories. Right-click the Wasabi Repository that will be used to backup the NFS share. Click Access Permissions.
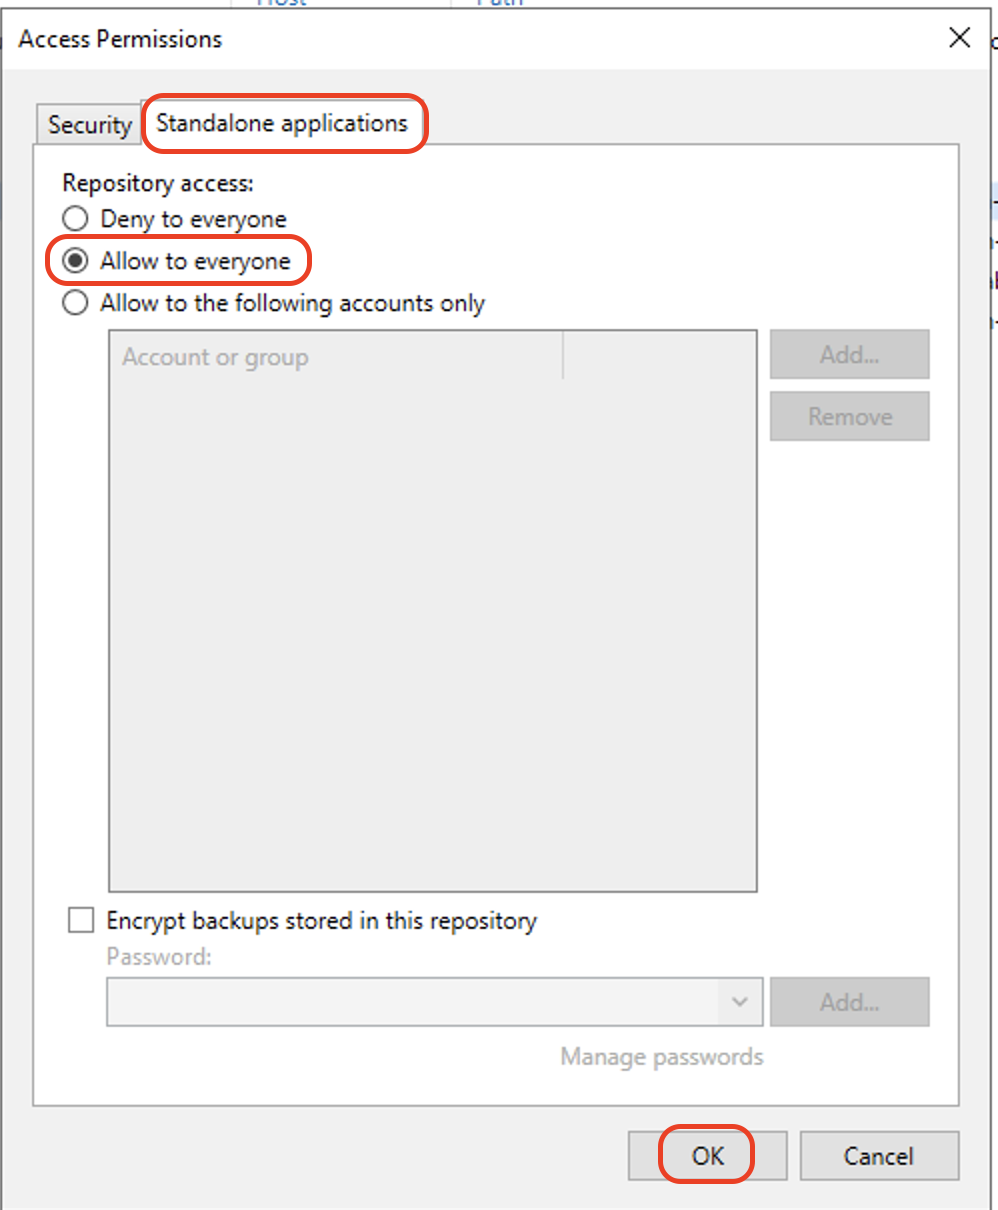
Click the Standalone applications tab. Select Allow to everyone as the repository access. Click OK to save the changes.
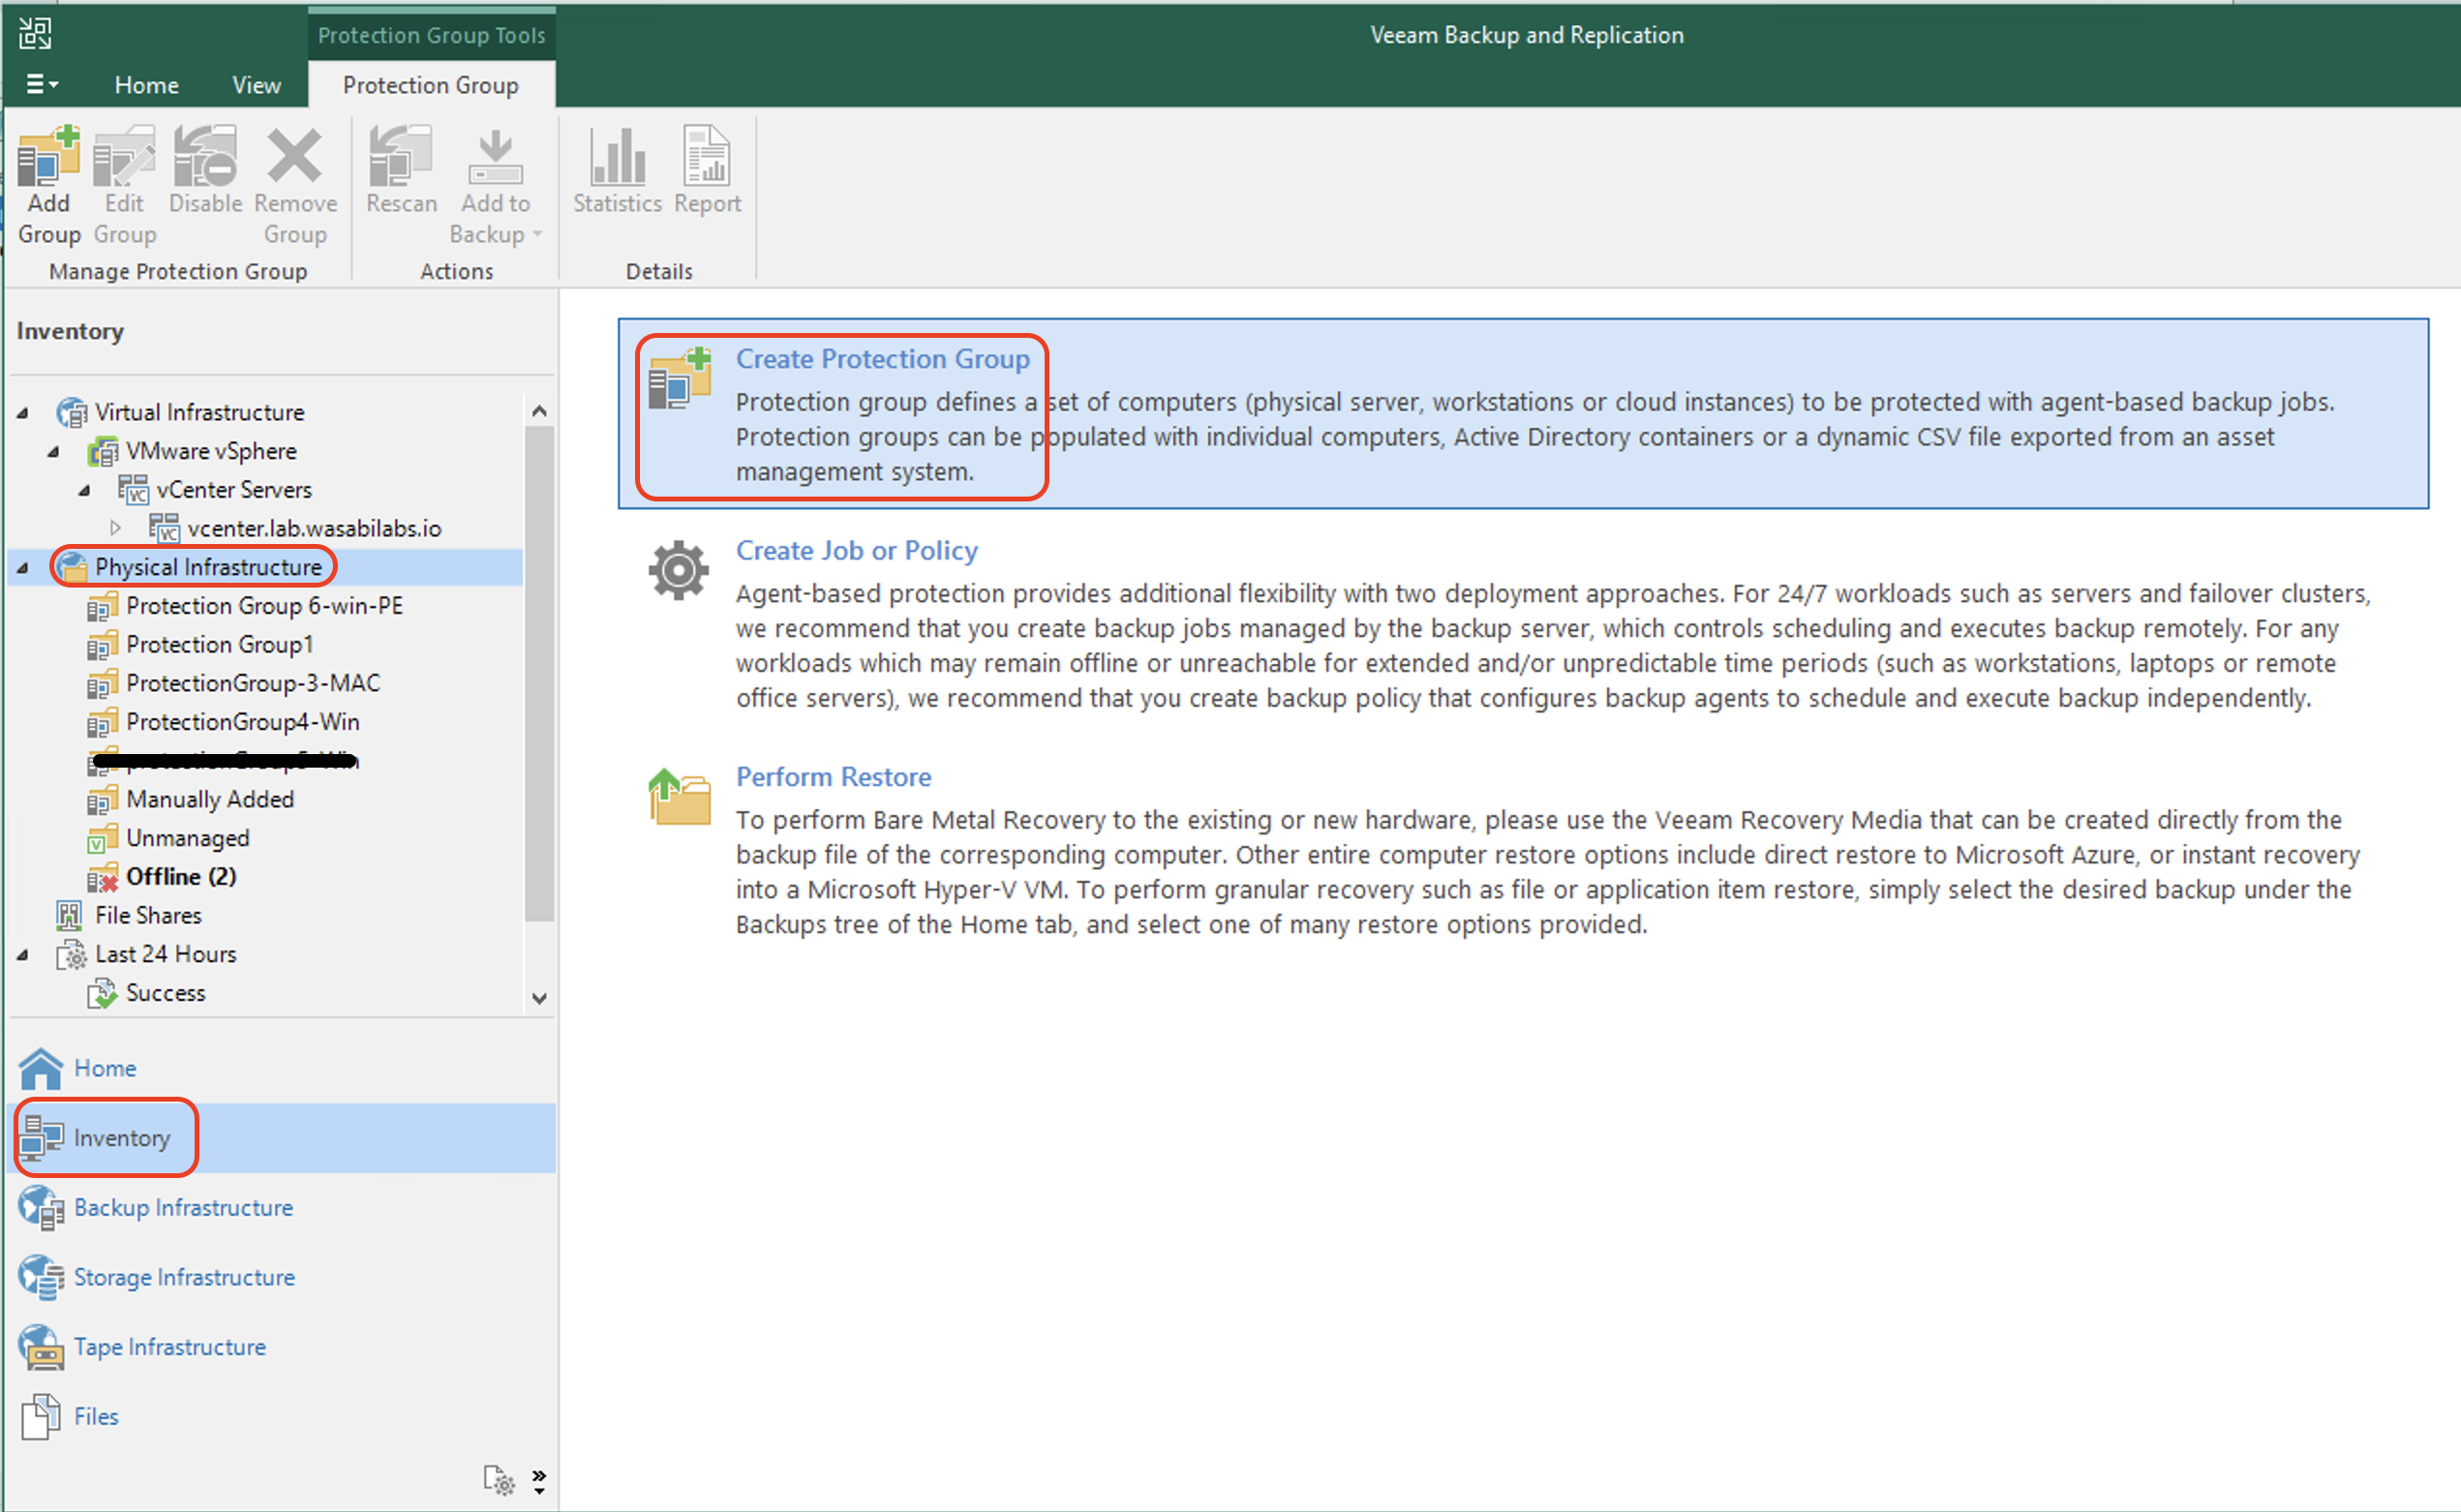
Creating a Protection Group to add the Device to be Backed up
Follow the steps below to create a Protection group for a Windows computer. We will be using this protection group in Section 6 while adding a backup job.
From the Inventory tab, click Physical Infrastructure. Click Create Protection Group.
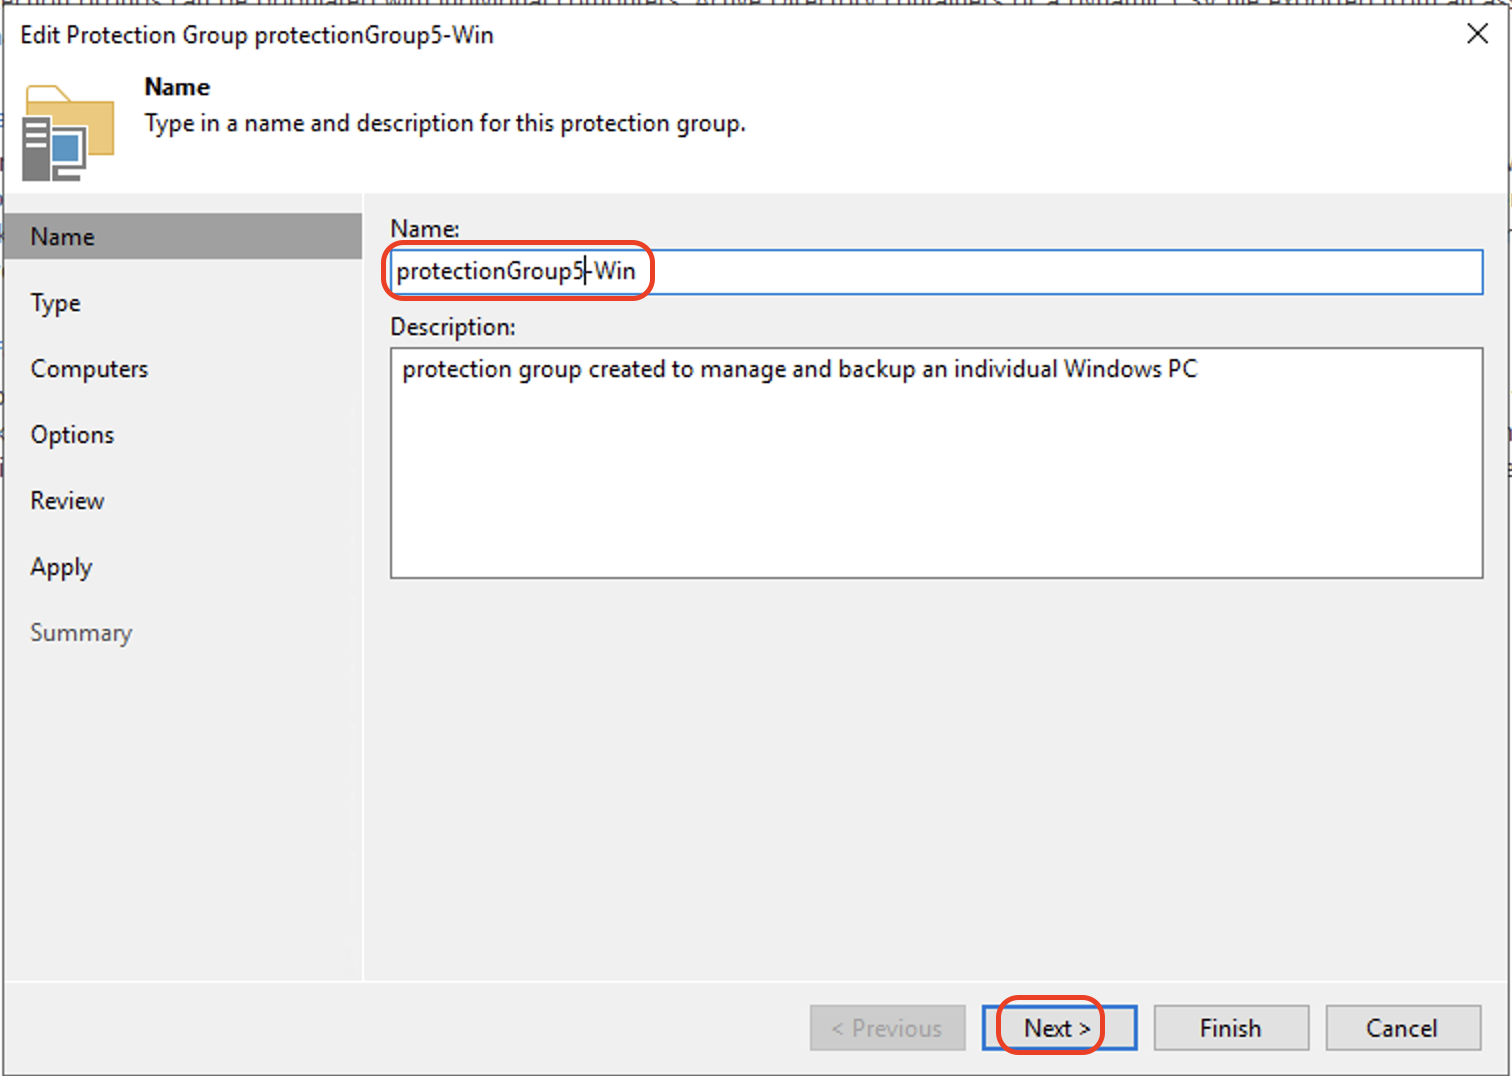
Input a Name for the protection group. Click Next.
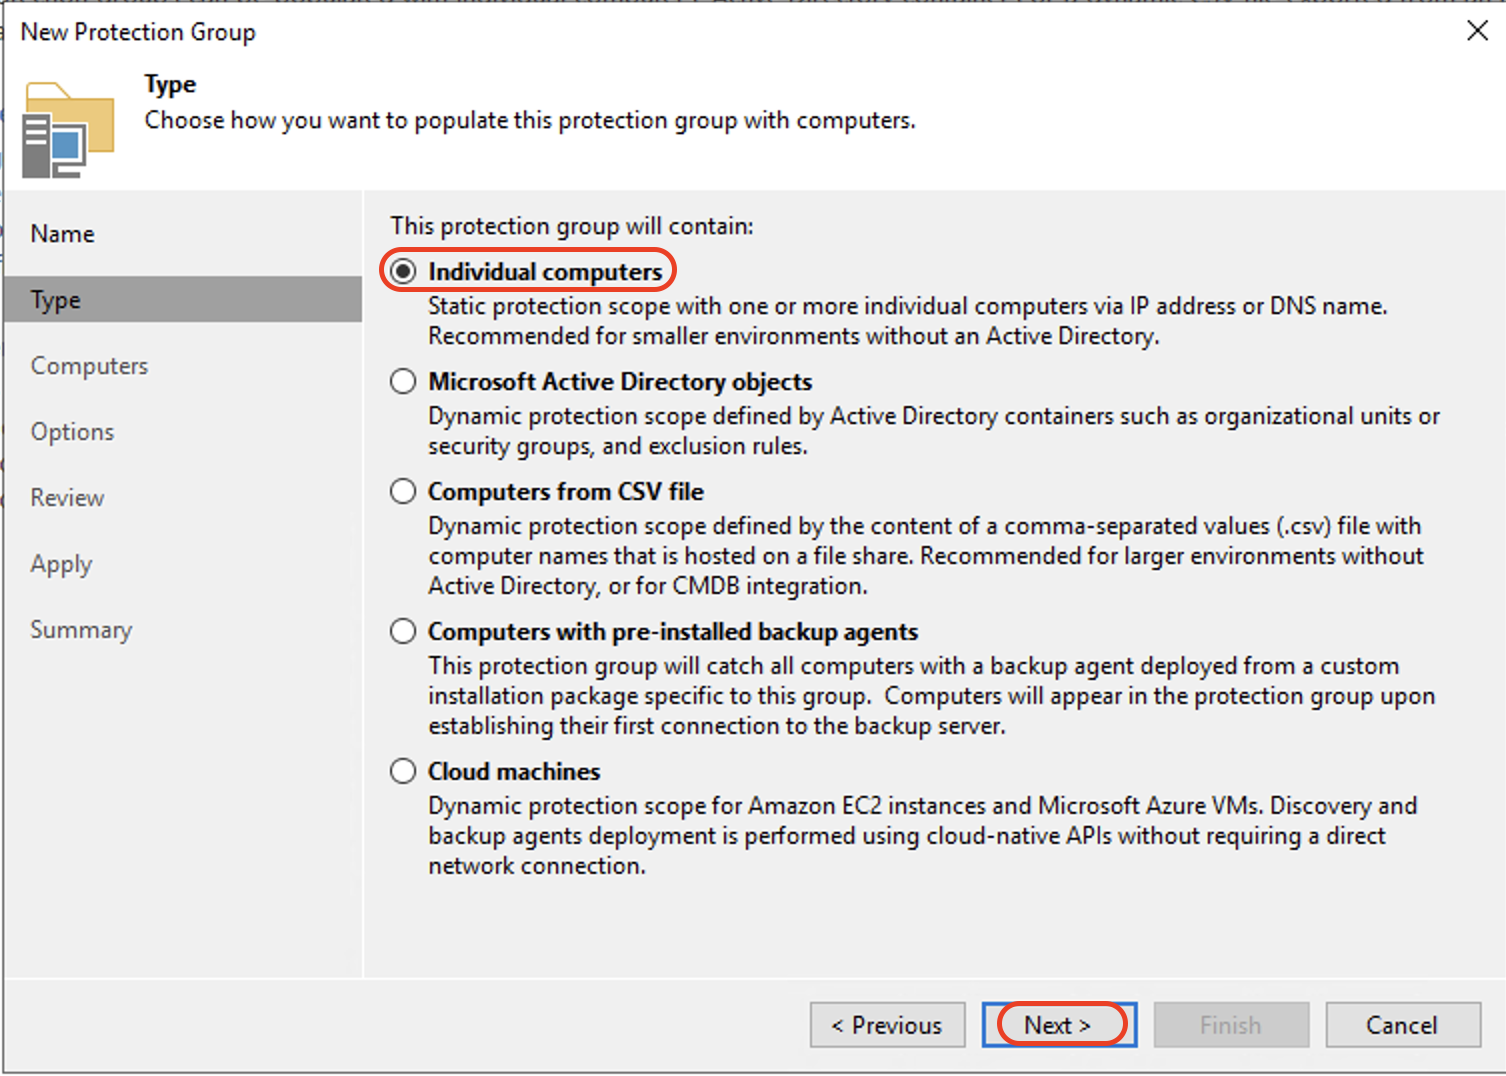
For the type, select Individual computers. Click Next.
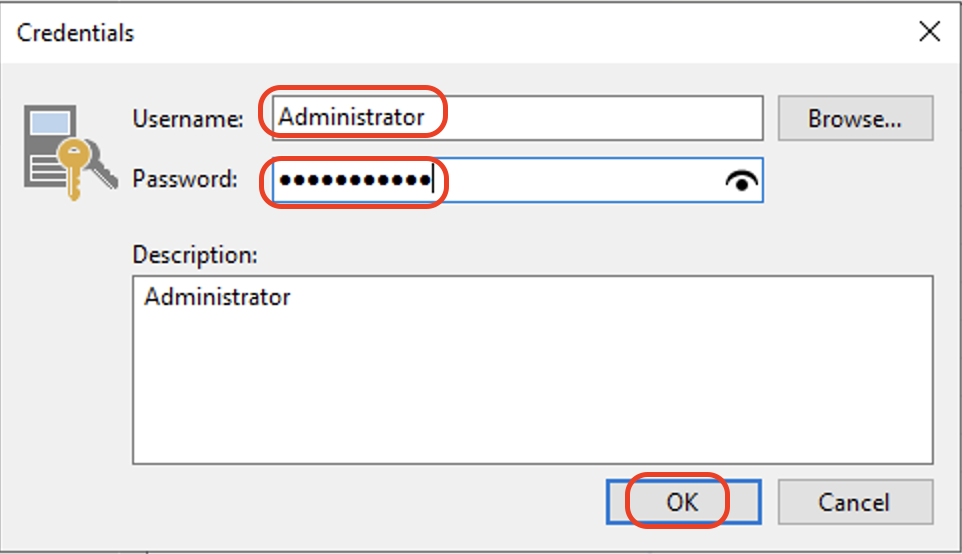
To add a computer, click Add. Enter the Host name or IP address of the computer. Click Add and then Stored. Select Standard account.
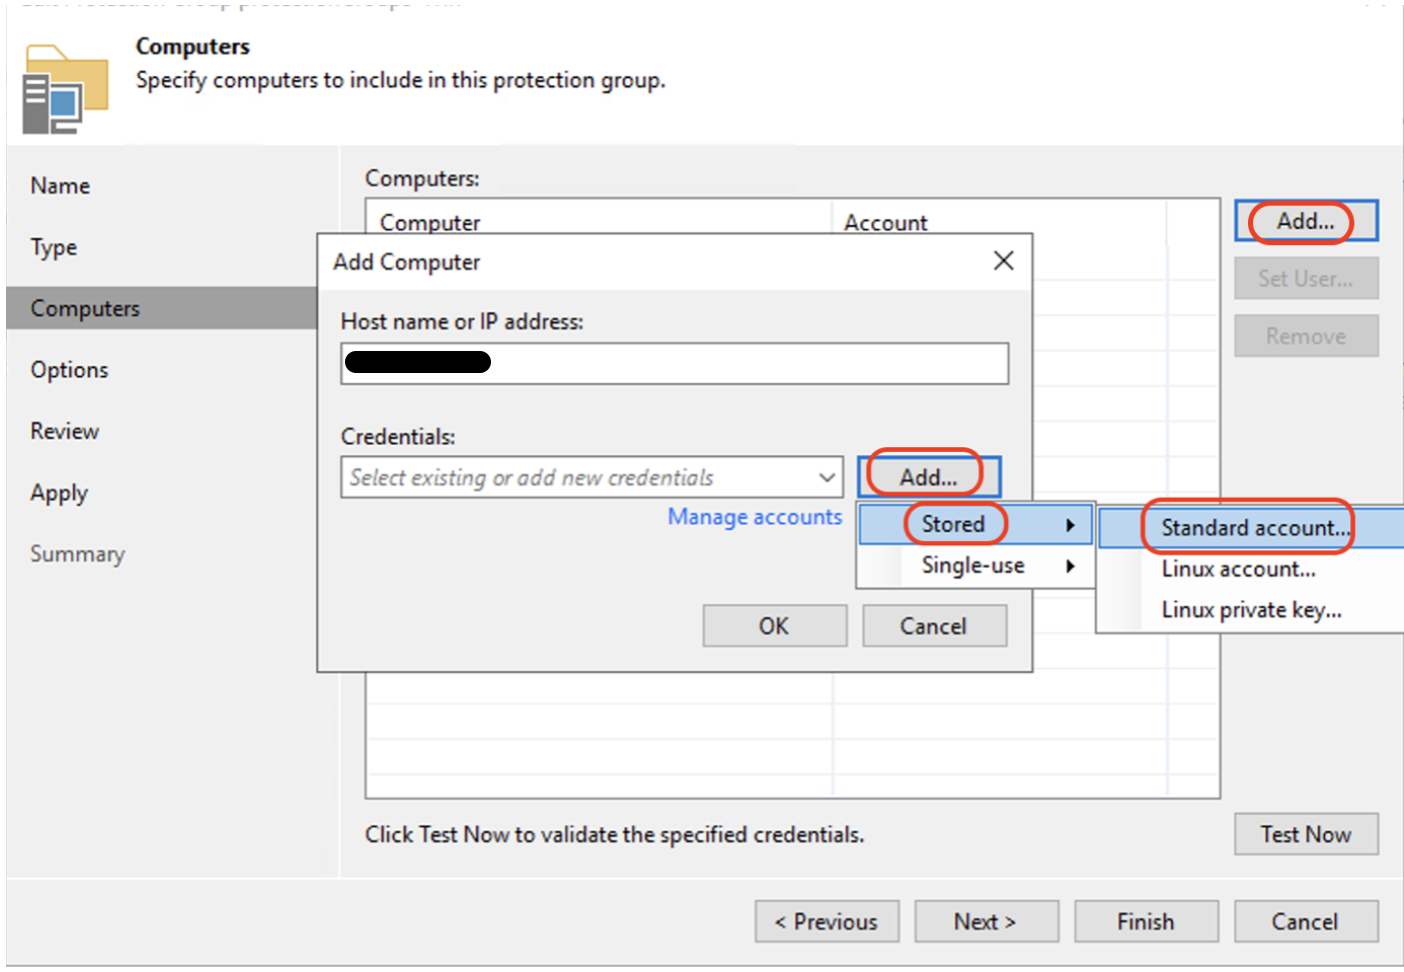
Input the Username and Password of an administrative account for the Windows machine. Click OK.
Once the computer has been added, click Next.

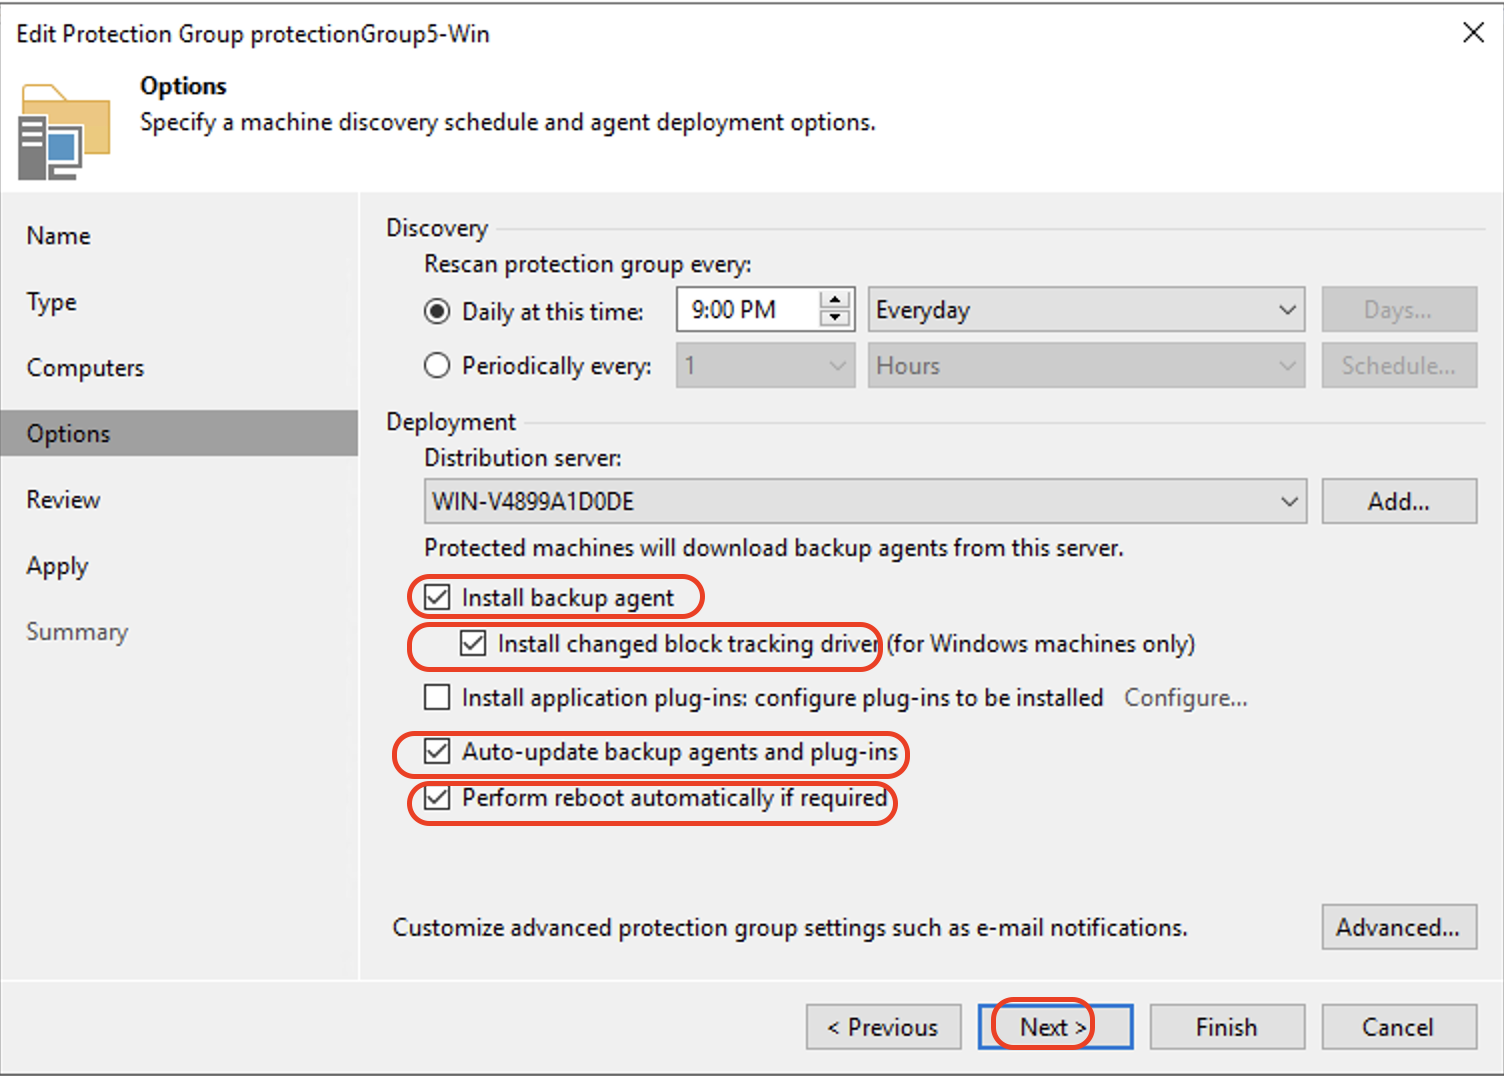
Select the following options and click Next.
Install backup agent.
Install the Changed Block Tracking (CBT) driver - The CBT driver helps Veeam Agent for Microsoft Windows track changed data blocks more efficiently.
Auto-update backup agents and plug-ins.
Perform reboot automatically if required.
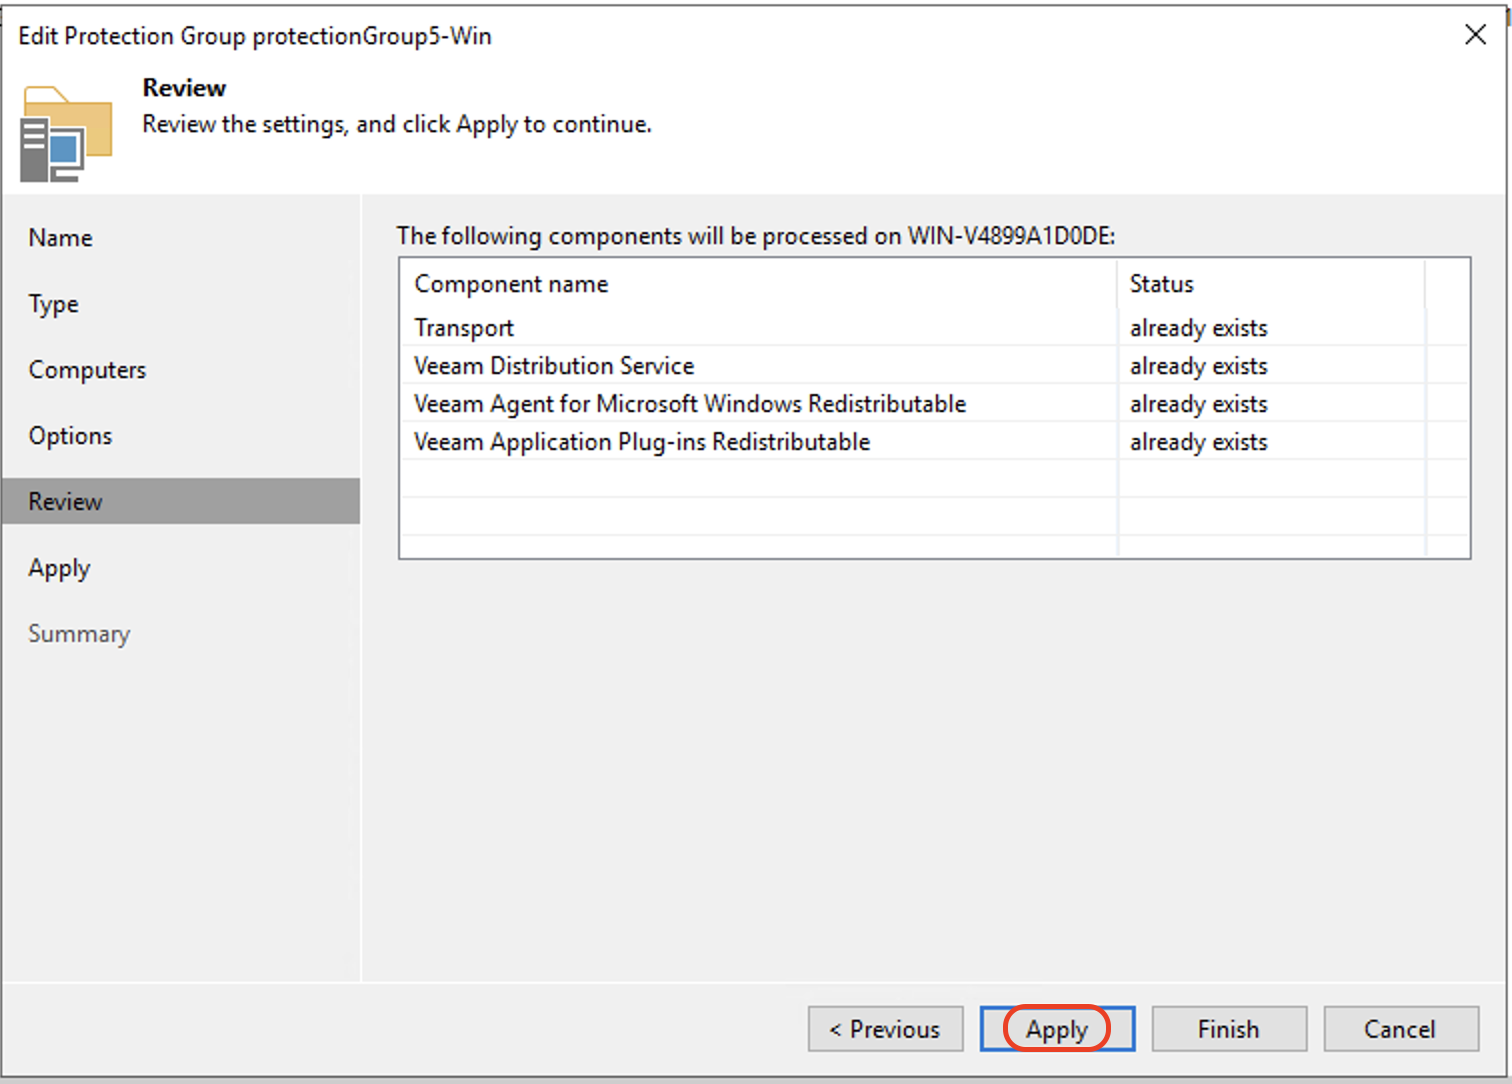
In the Review tab, click Apply.
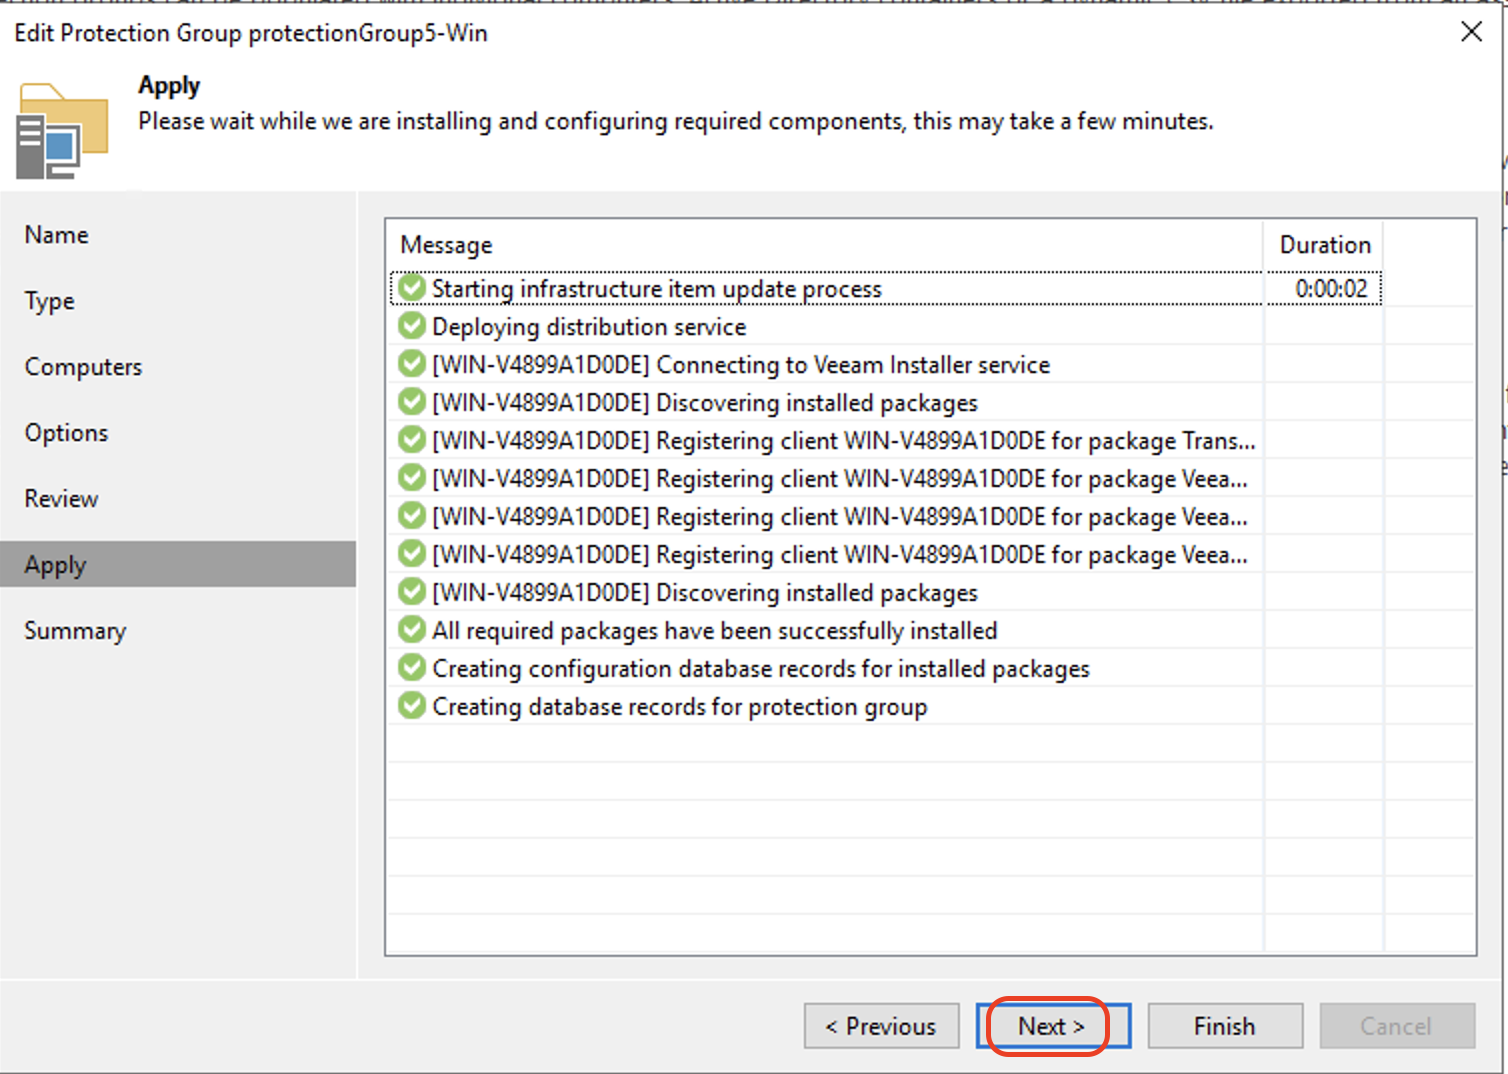
On the Apply tab, click Next to continue.
Review the Summary and click Finish.
Creating a Backup Job to Backup to Wasabi
Creating a Backup job for Windows Computers
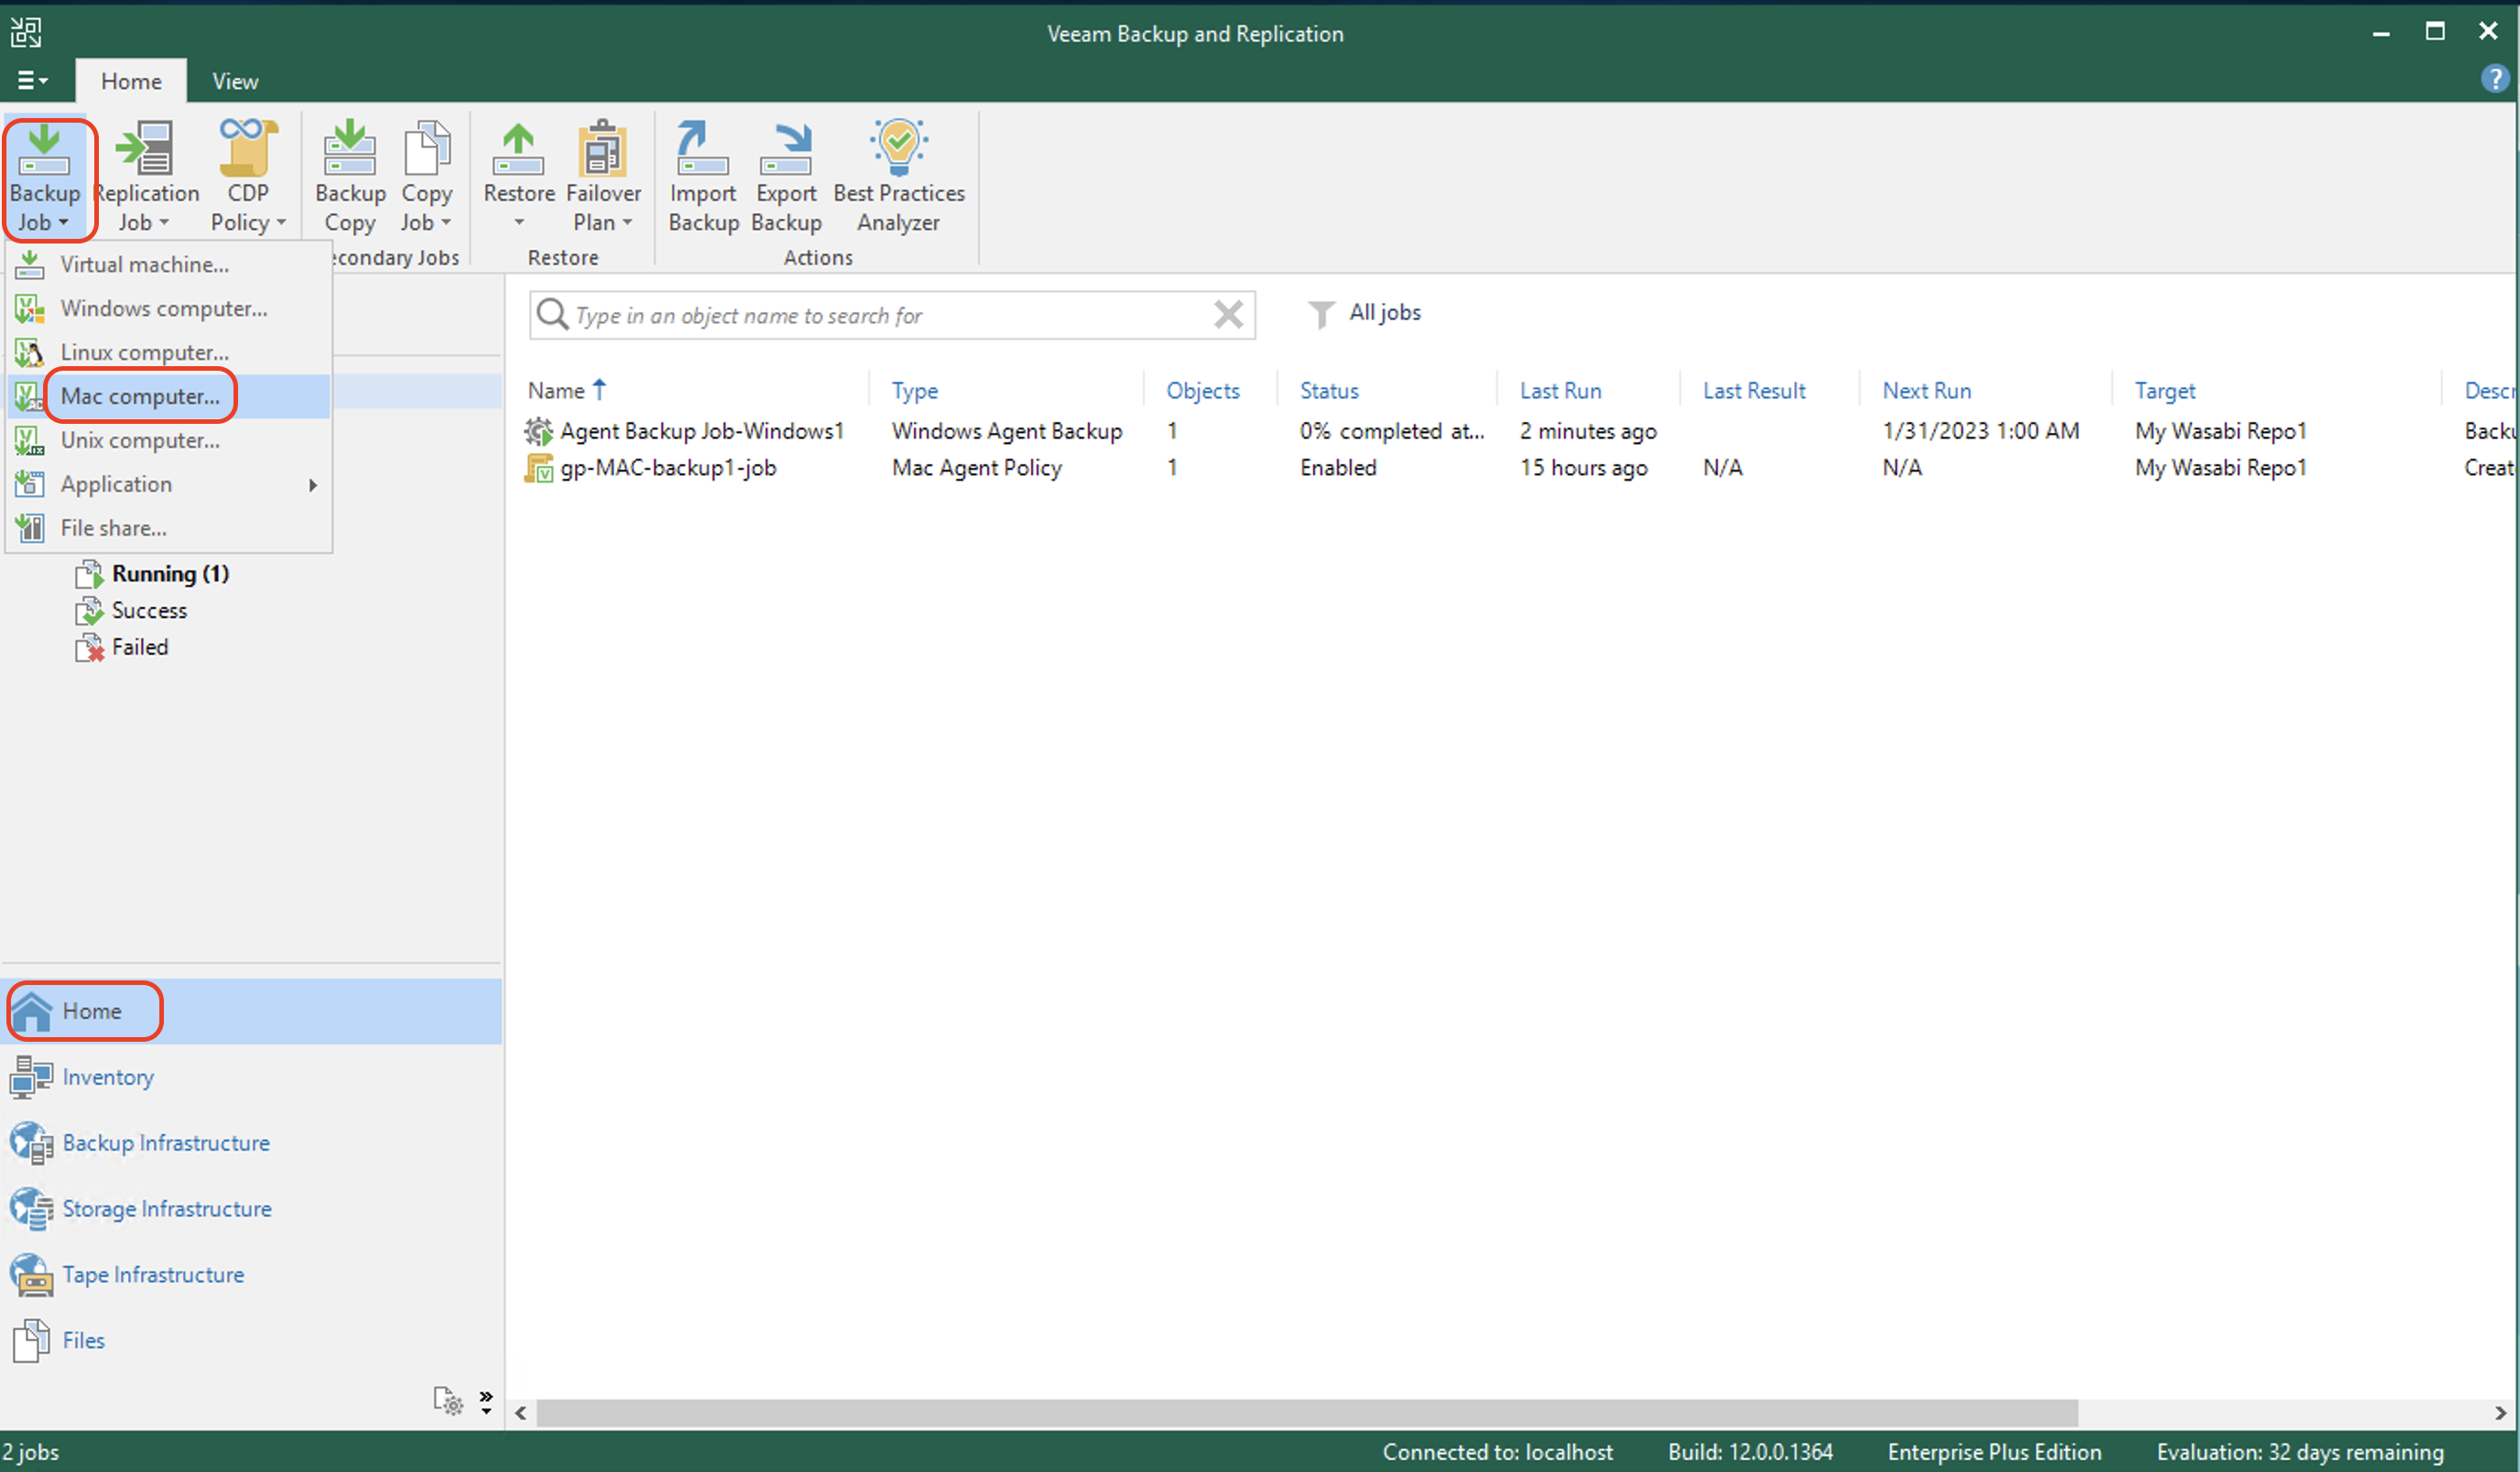
On the Home tab of Veeam Backup and Replication, click Backup Job. Click Windows Computers.
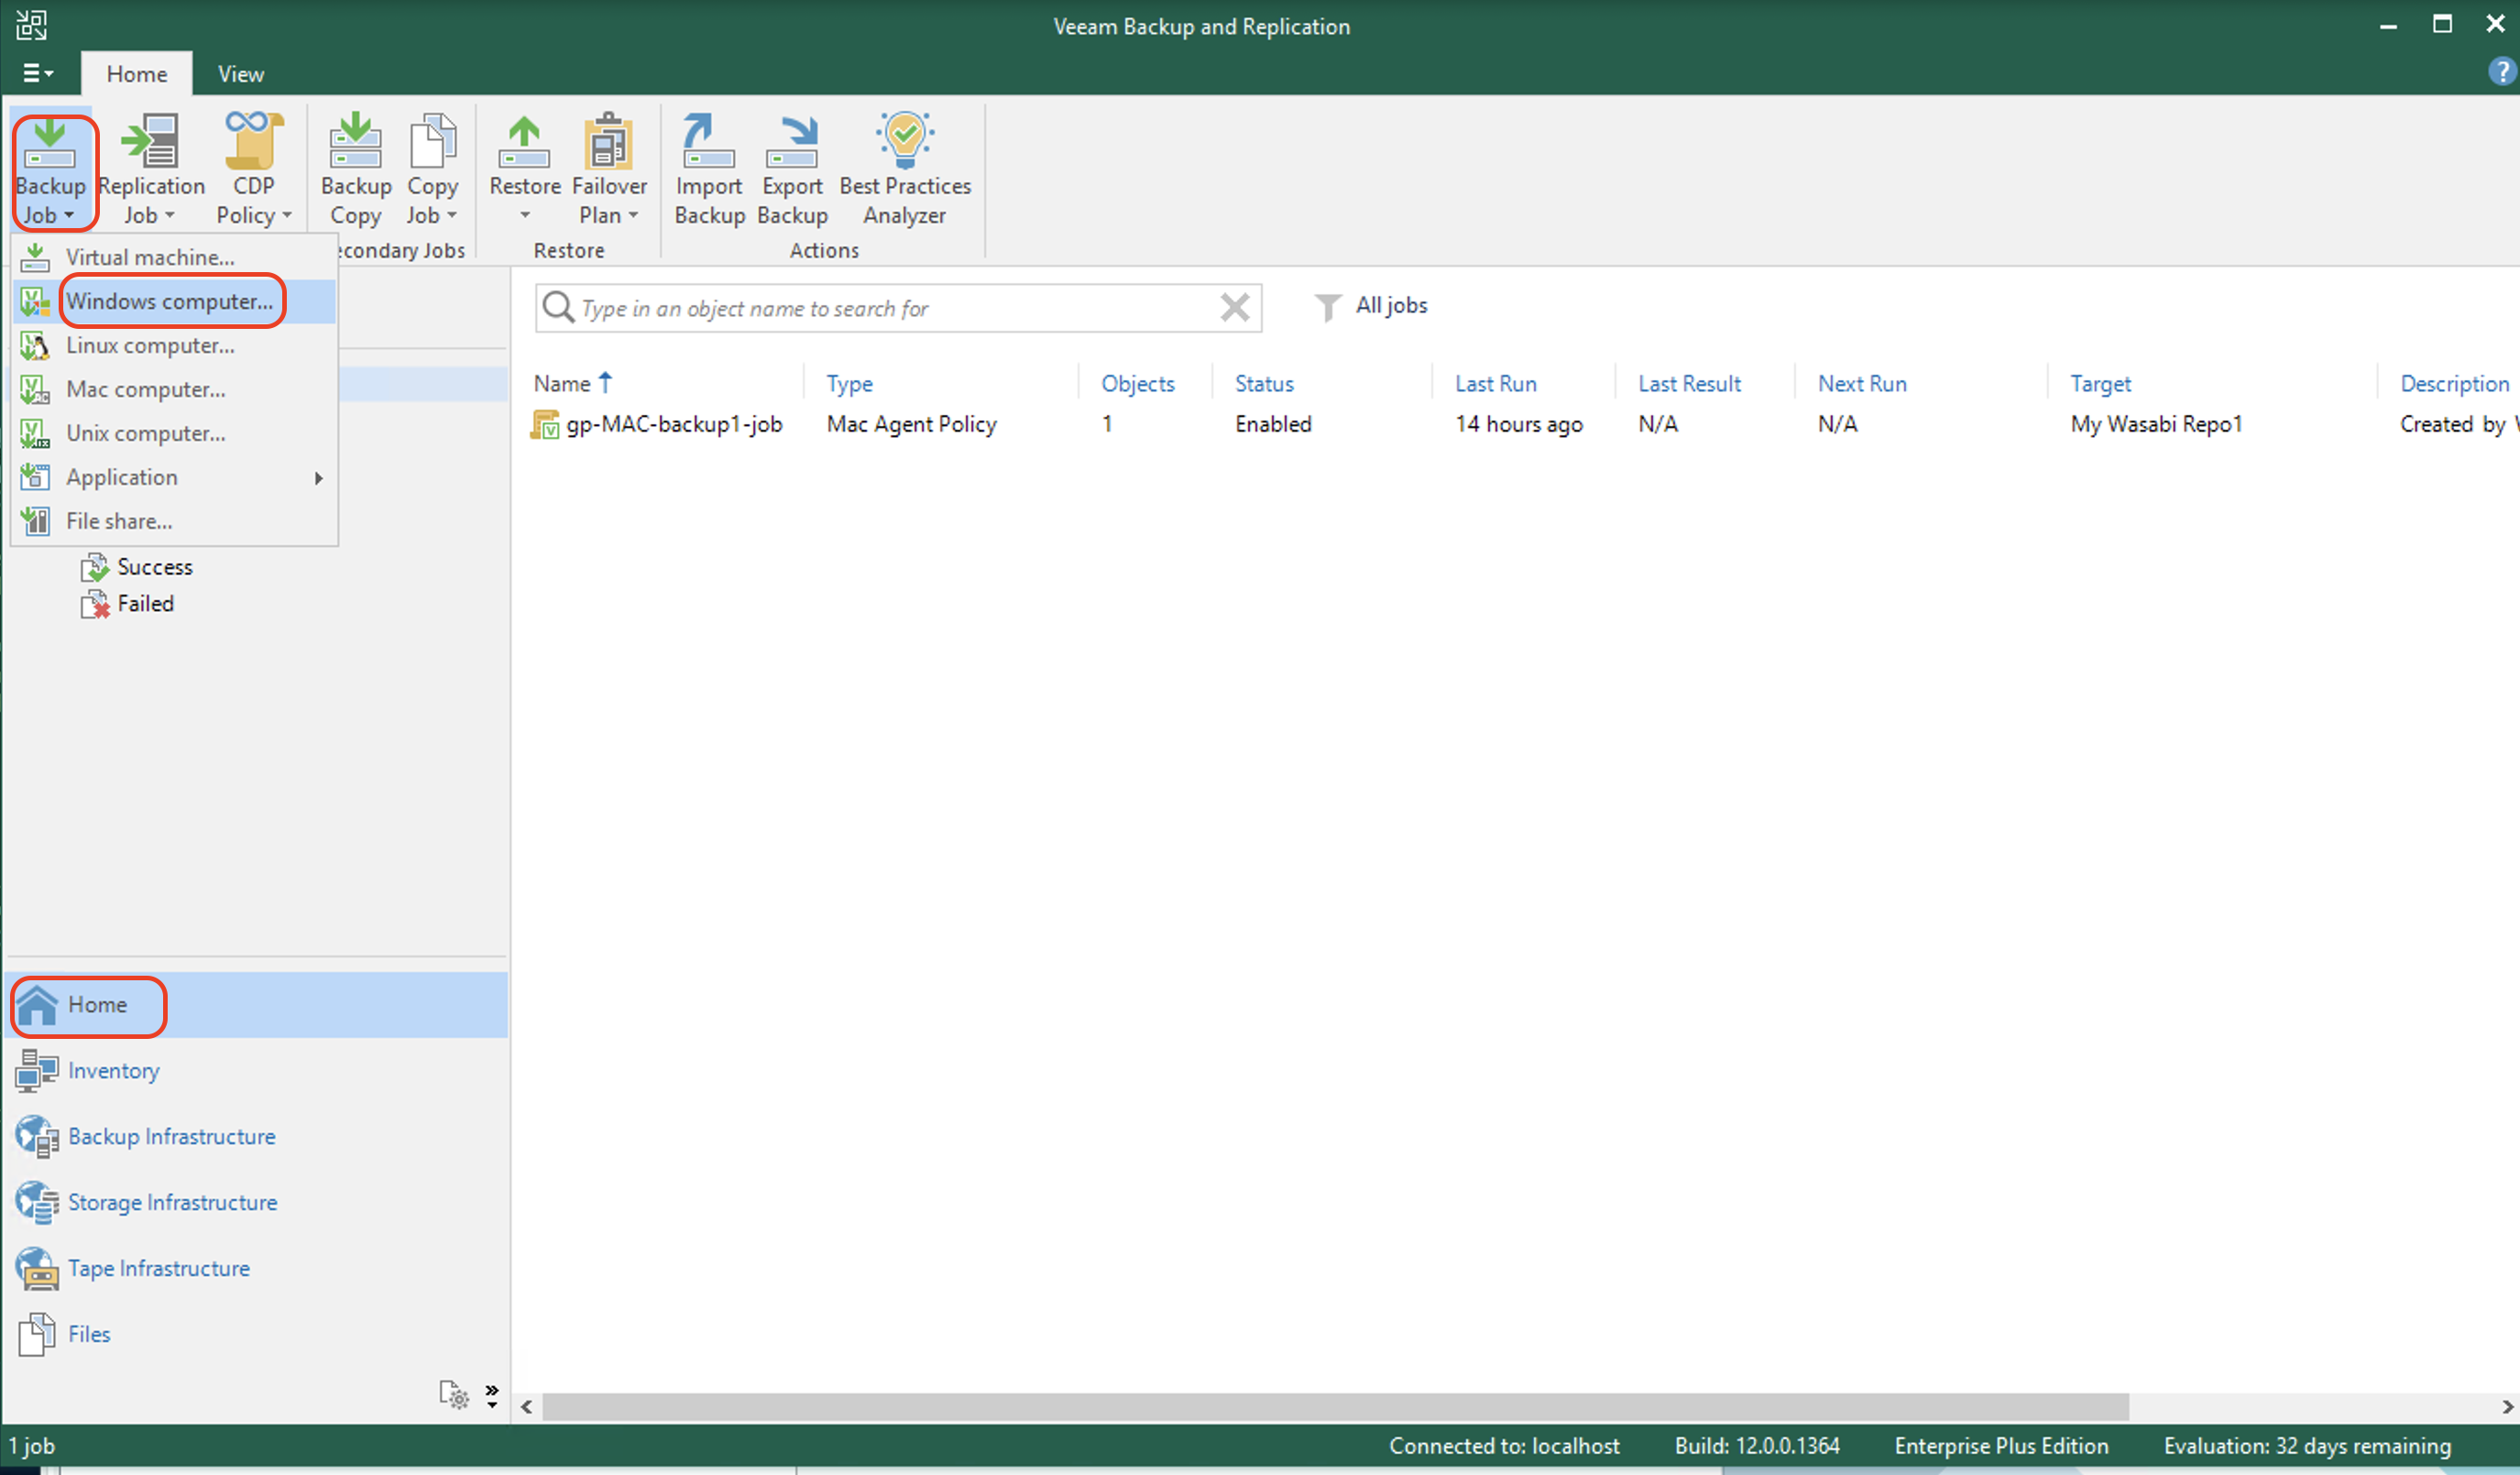
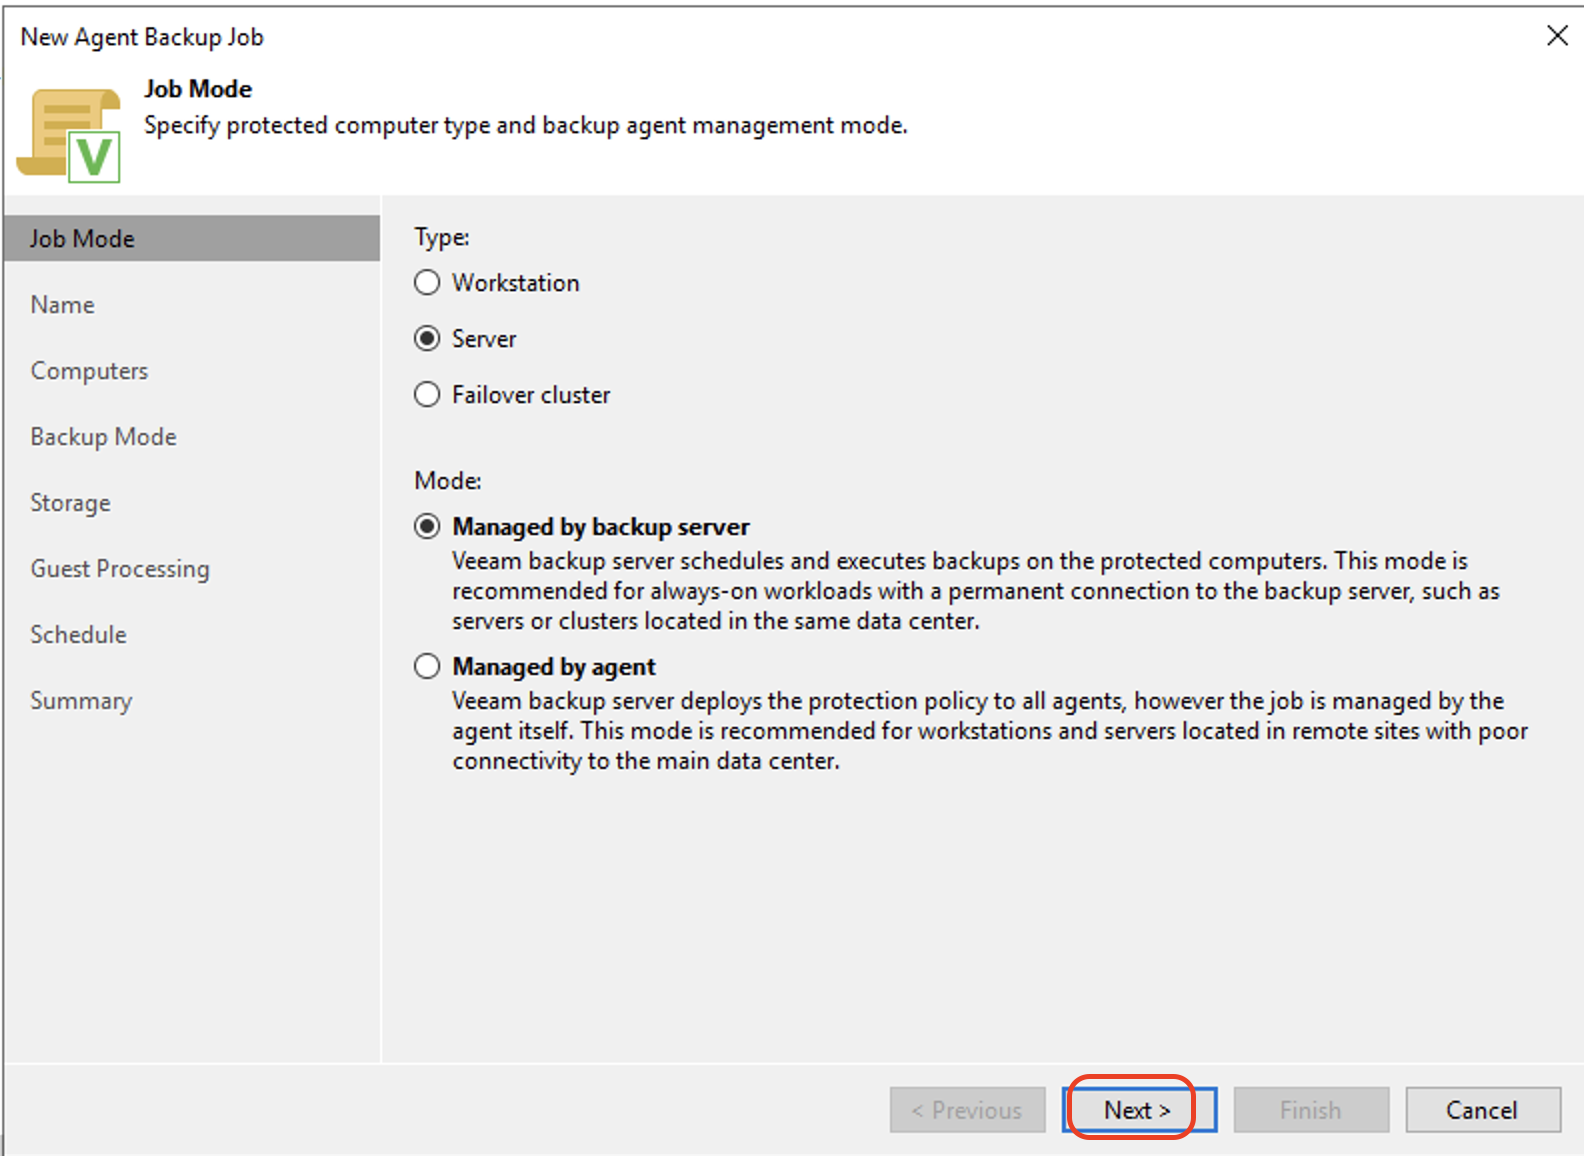
Keep the default selections (for example, Type as Server and Mode set to Managed by backup server). Click Next.
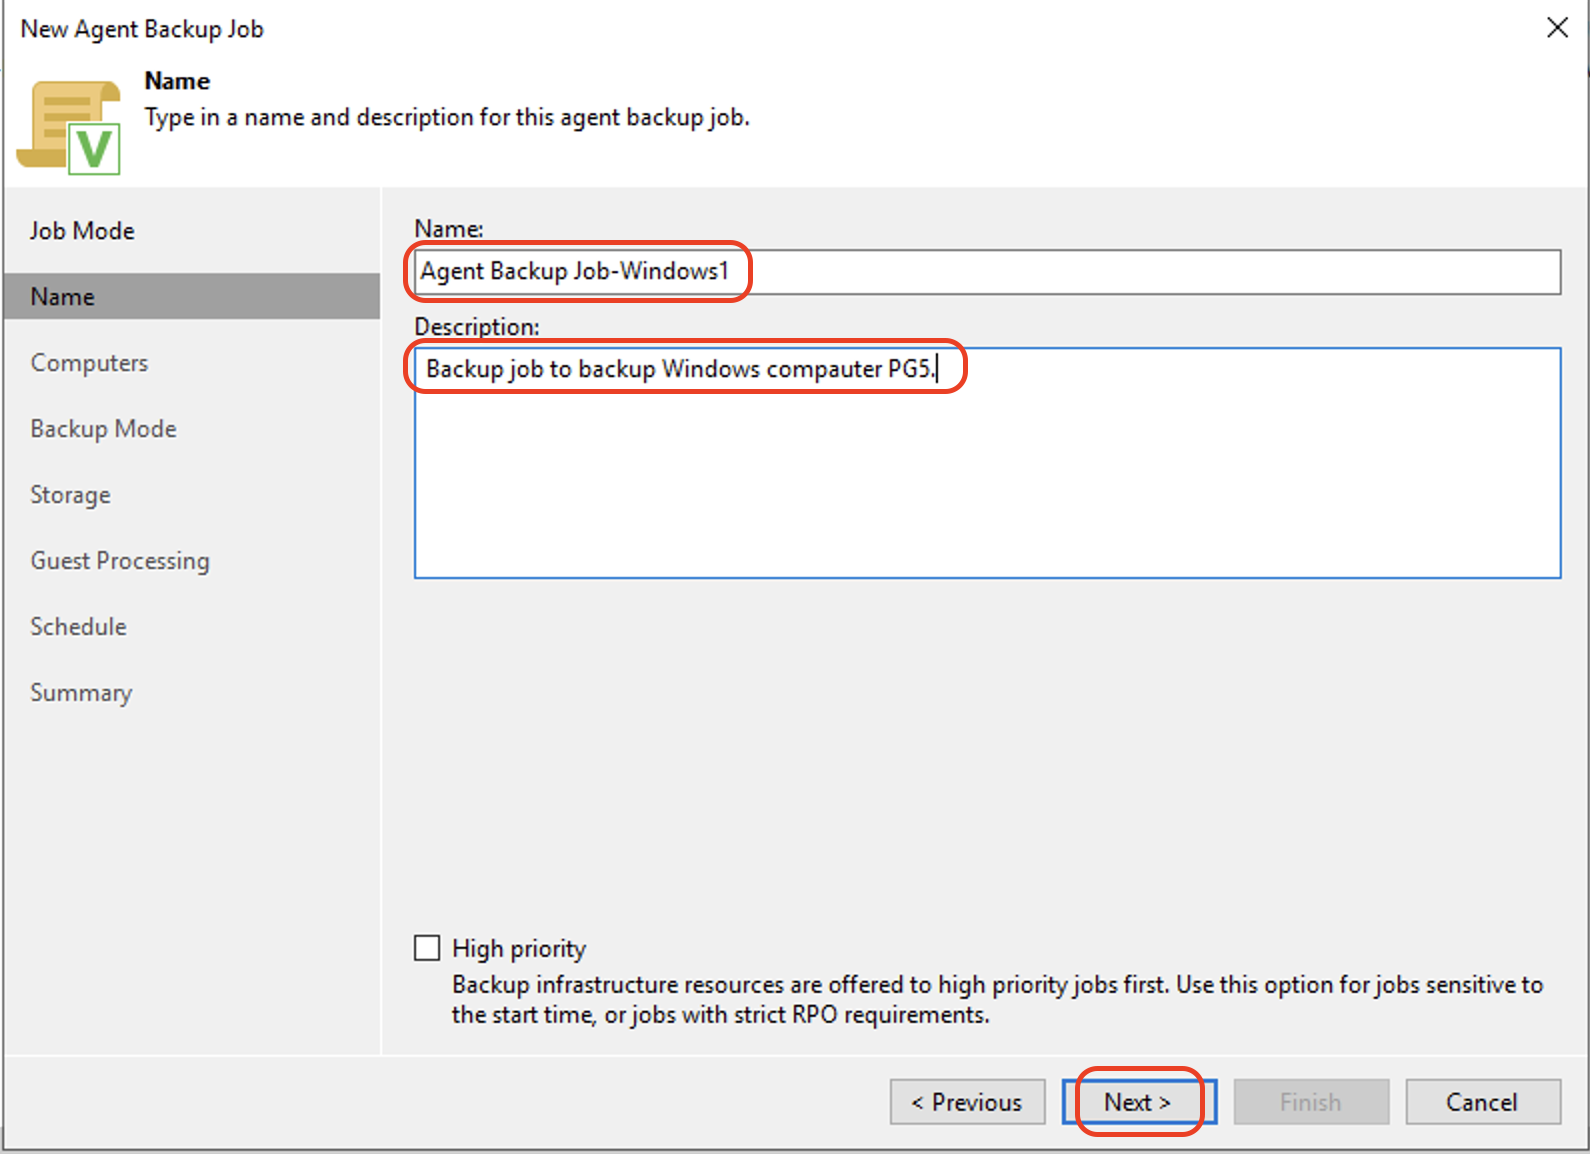
Enter the Name for the backup job and, optionally, a Description. Optionally, select High priority to run the job with a higher priority. Click Next.
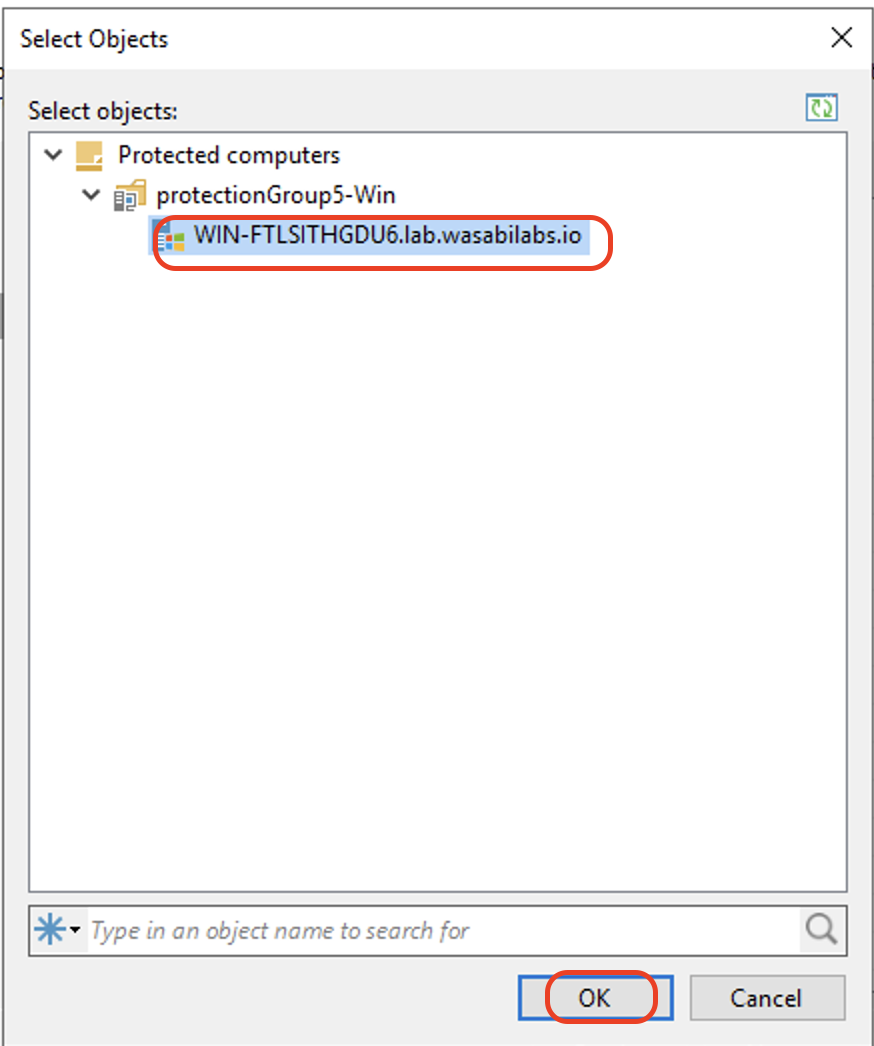
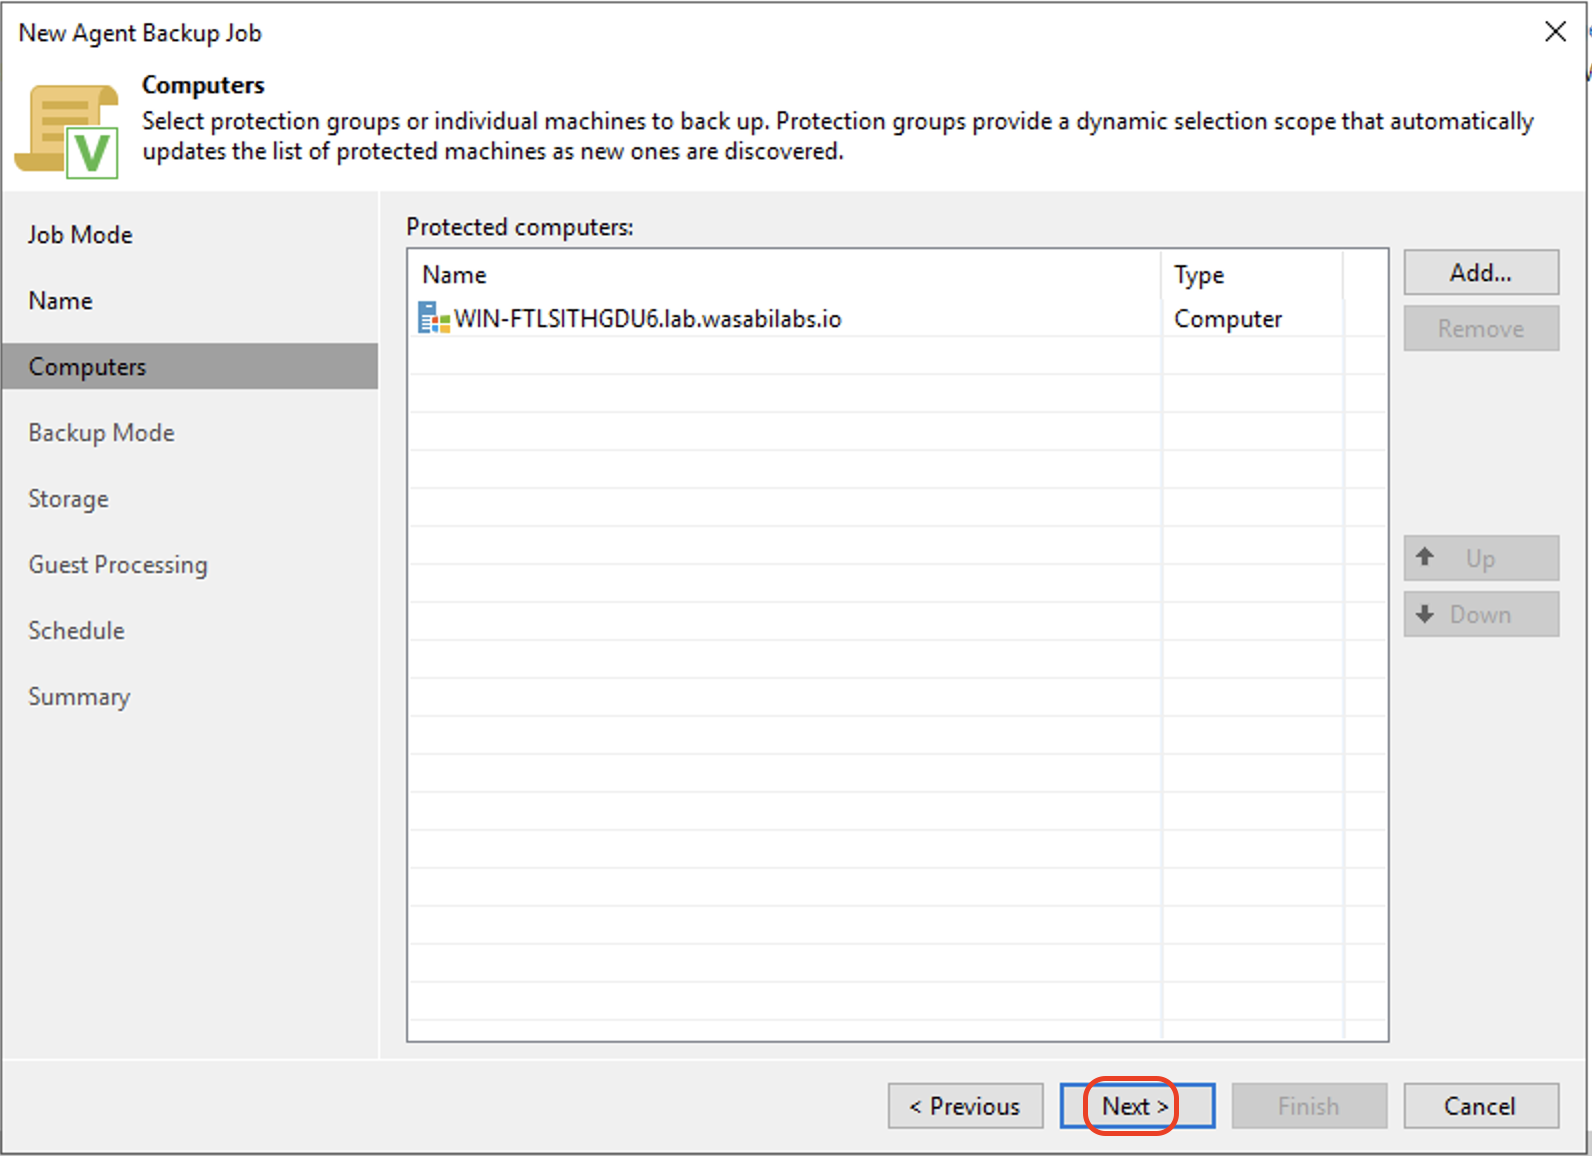
To add a computer for backup, click Add. Click the Protection group to add the VM from the protection group that was created in section 5.

Select the desired computer from the protection group. Click OK.
Once the Windows computer is added, click Next to continue.
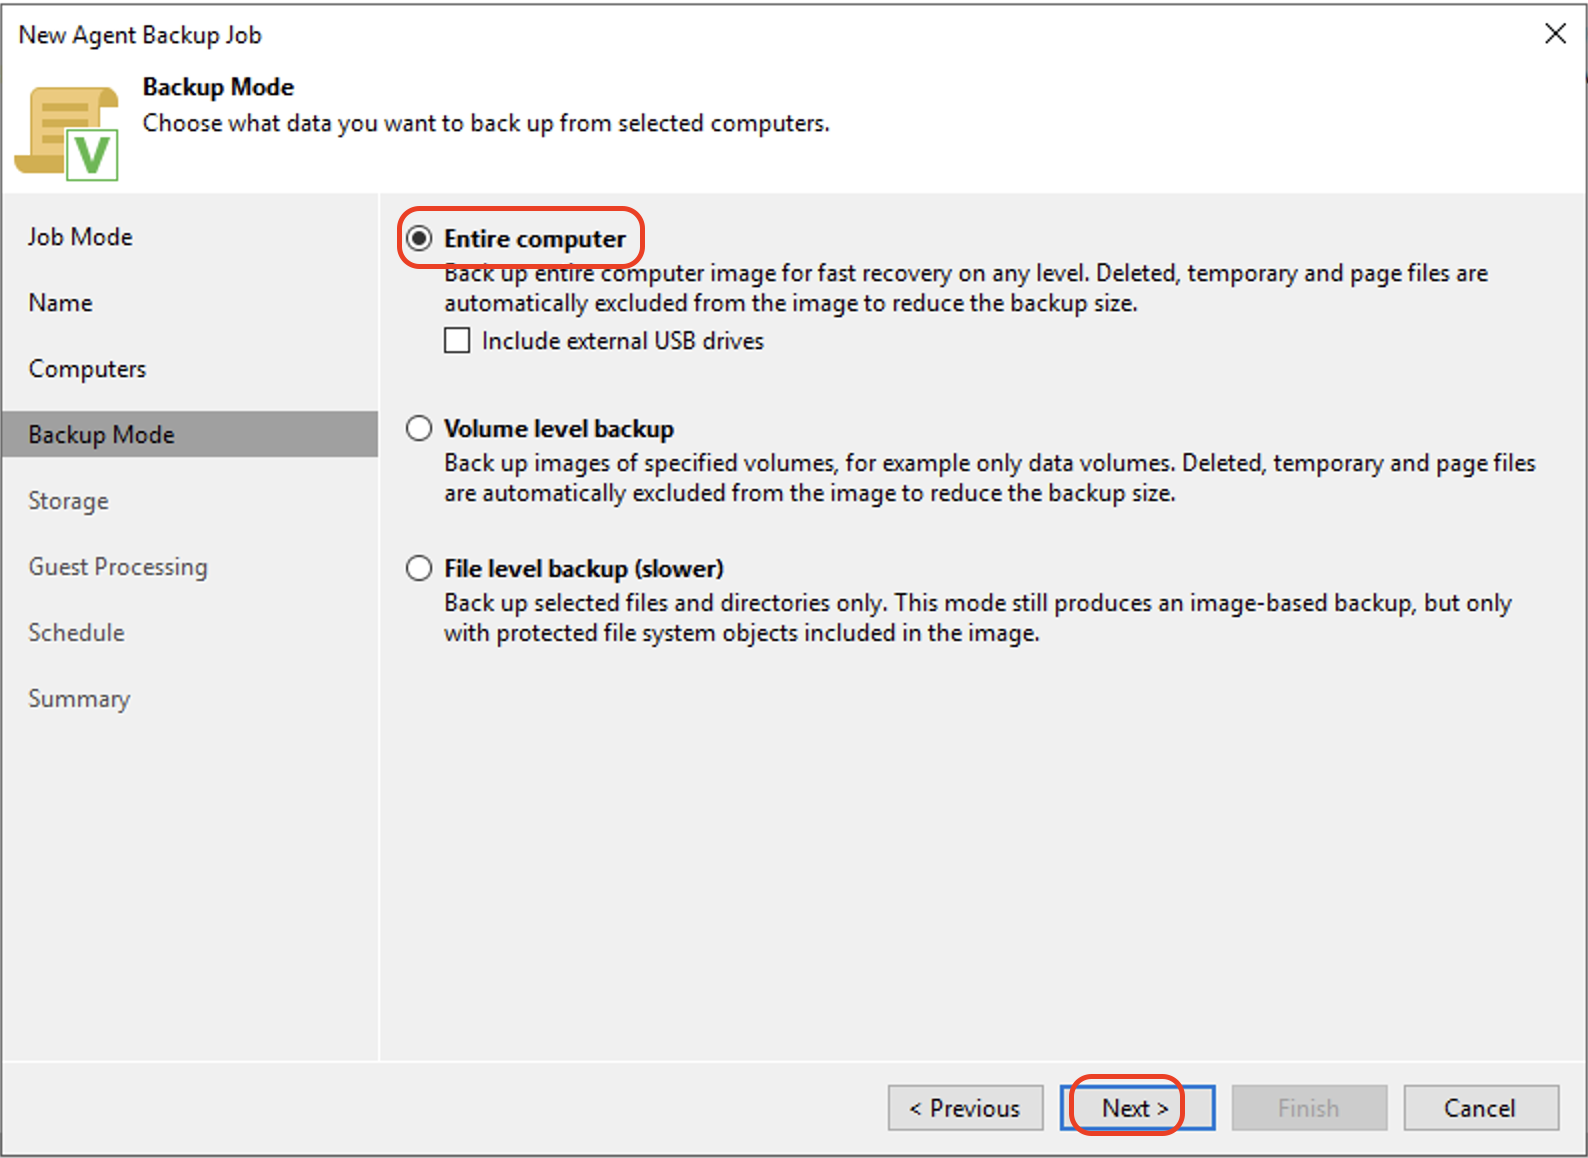
Select the desired data to back up and click Next. In this example, we elected to backup the entire computer.
In the Storage tab, select the Wasabi repository as the Backup repository to backup directly to Wasabi Cloud storage. Optionally, set the retention period. Click Next to continue.

In the Guest Processing tab, keep the default settings. Click Next.

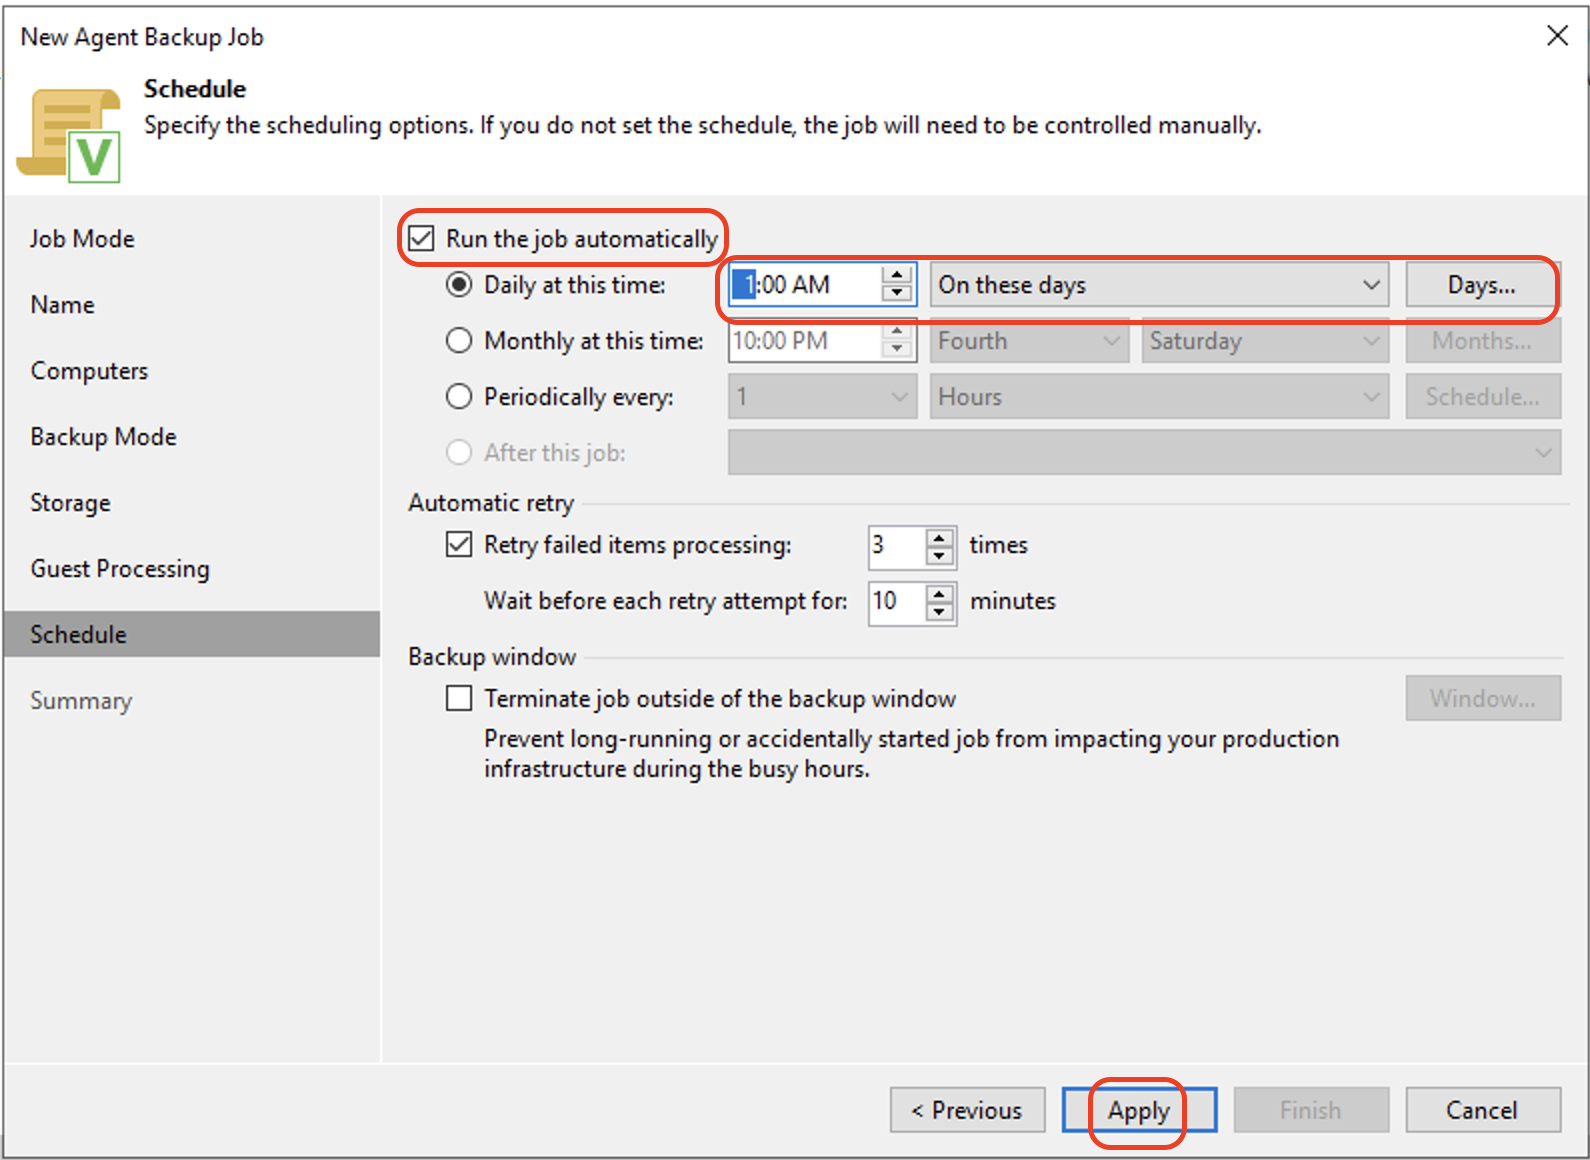
Optionally, in the Schedule tab, check Run the job automatically and set the time to run the job. Click Apply to continue.
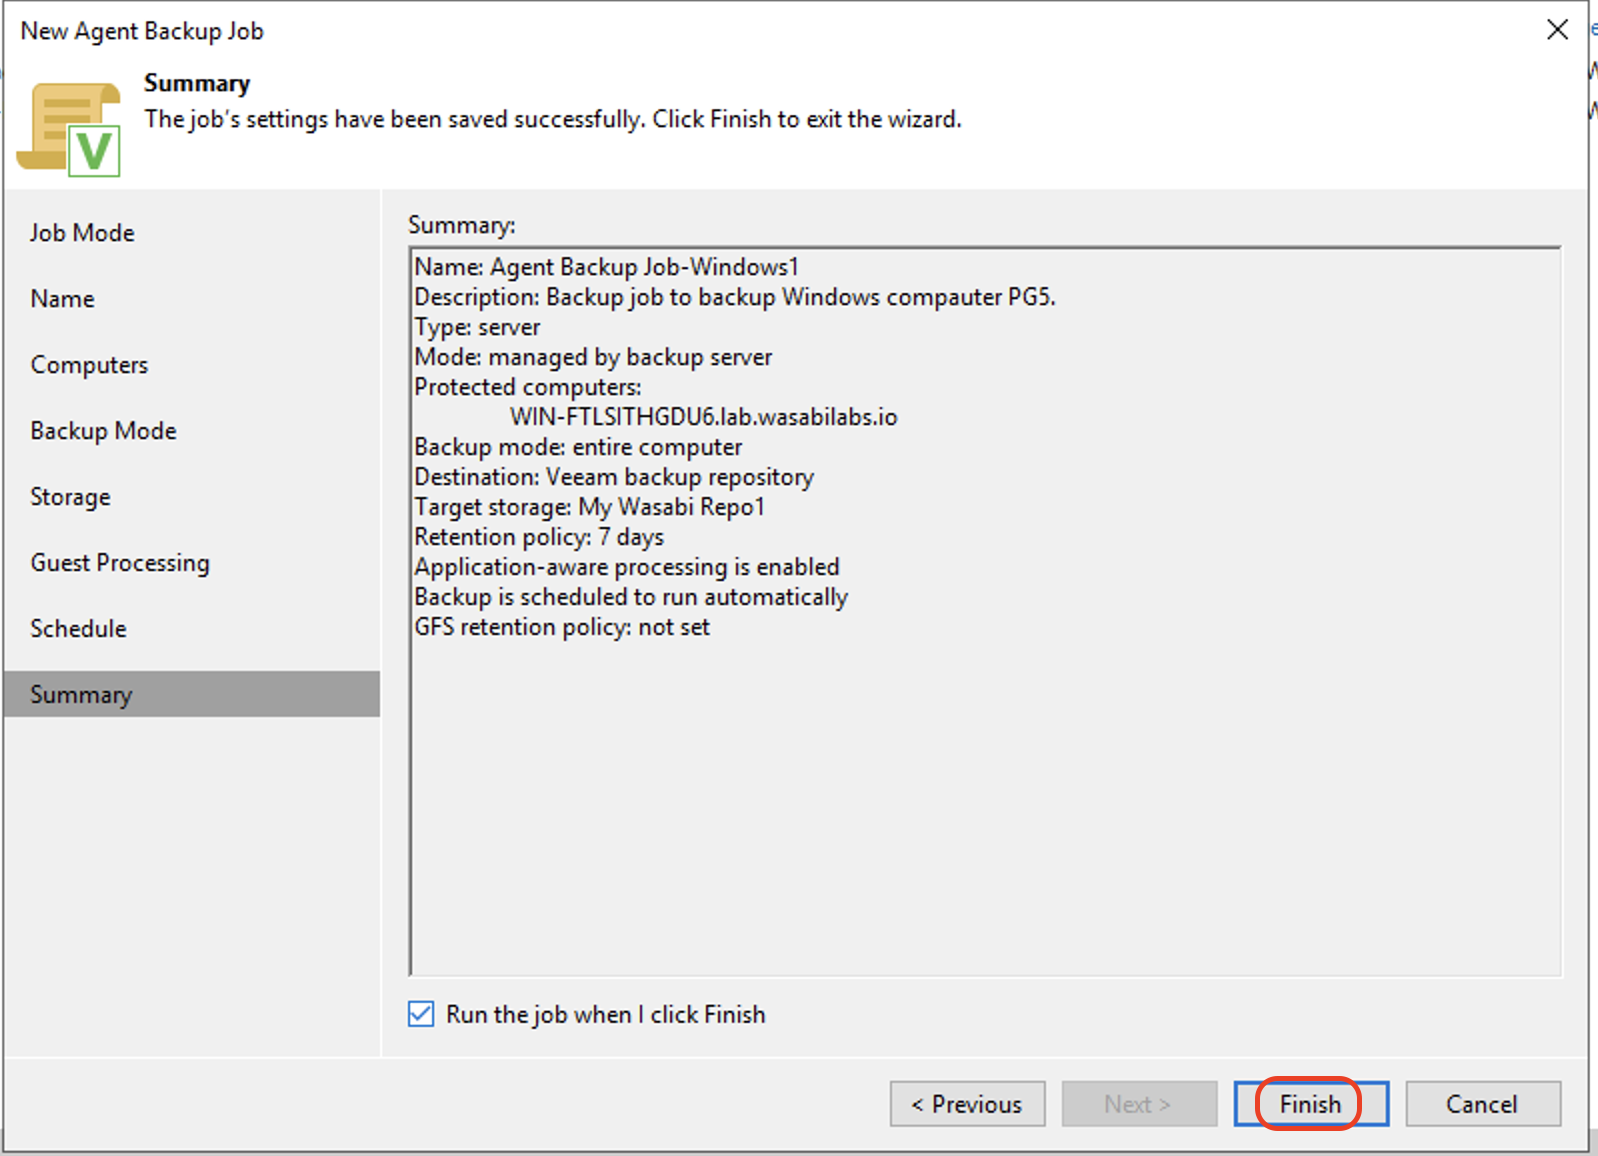
In the Summary tab, review the Summary of the backup job. Optionally, check Run the job when I click Finish to immediately run the backup job once created. Click Finish to create the backup job.
Creating a Backup job for Linux Computers
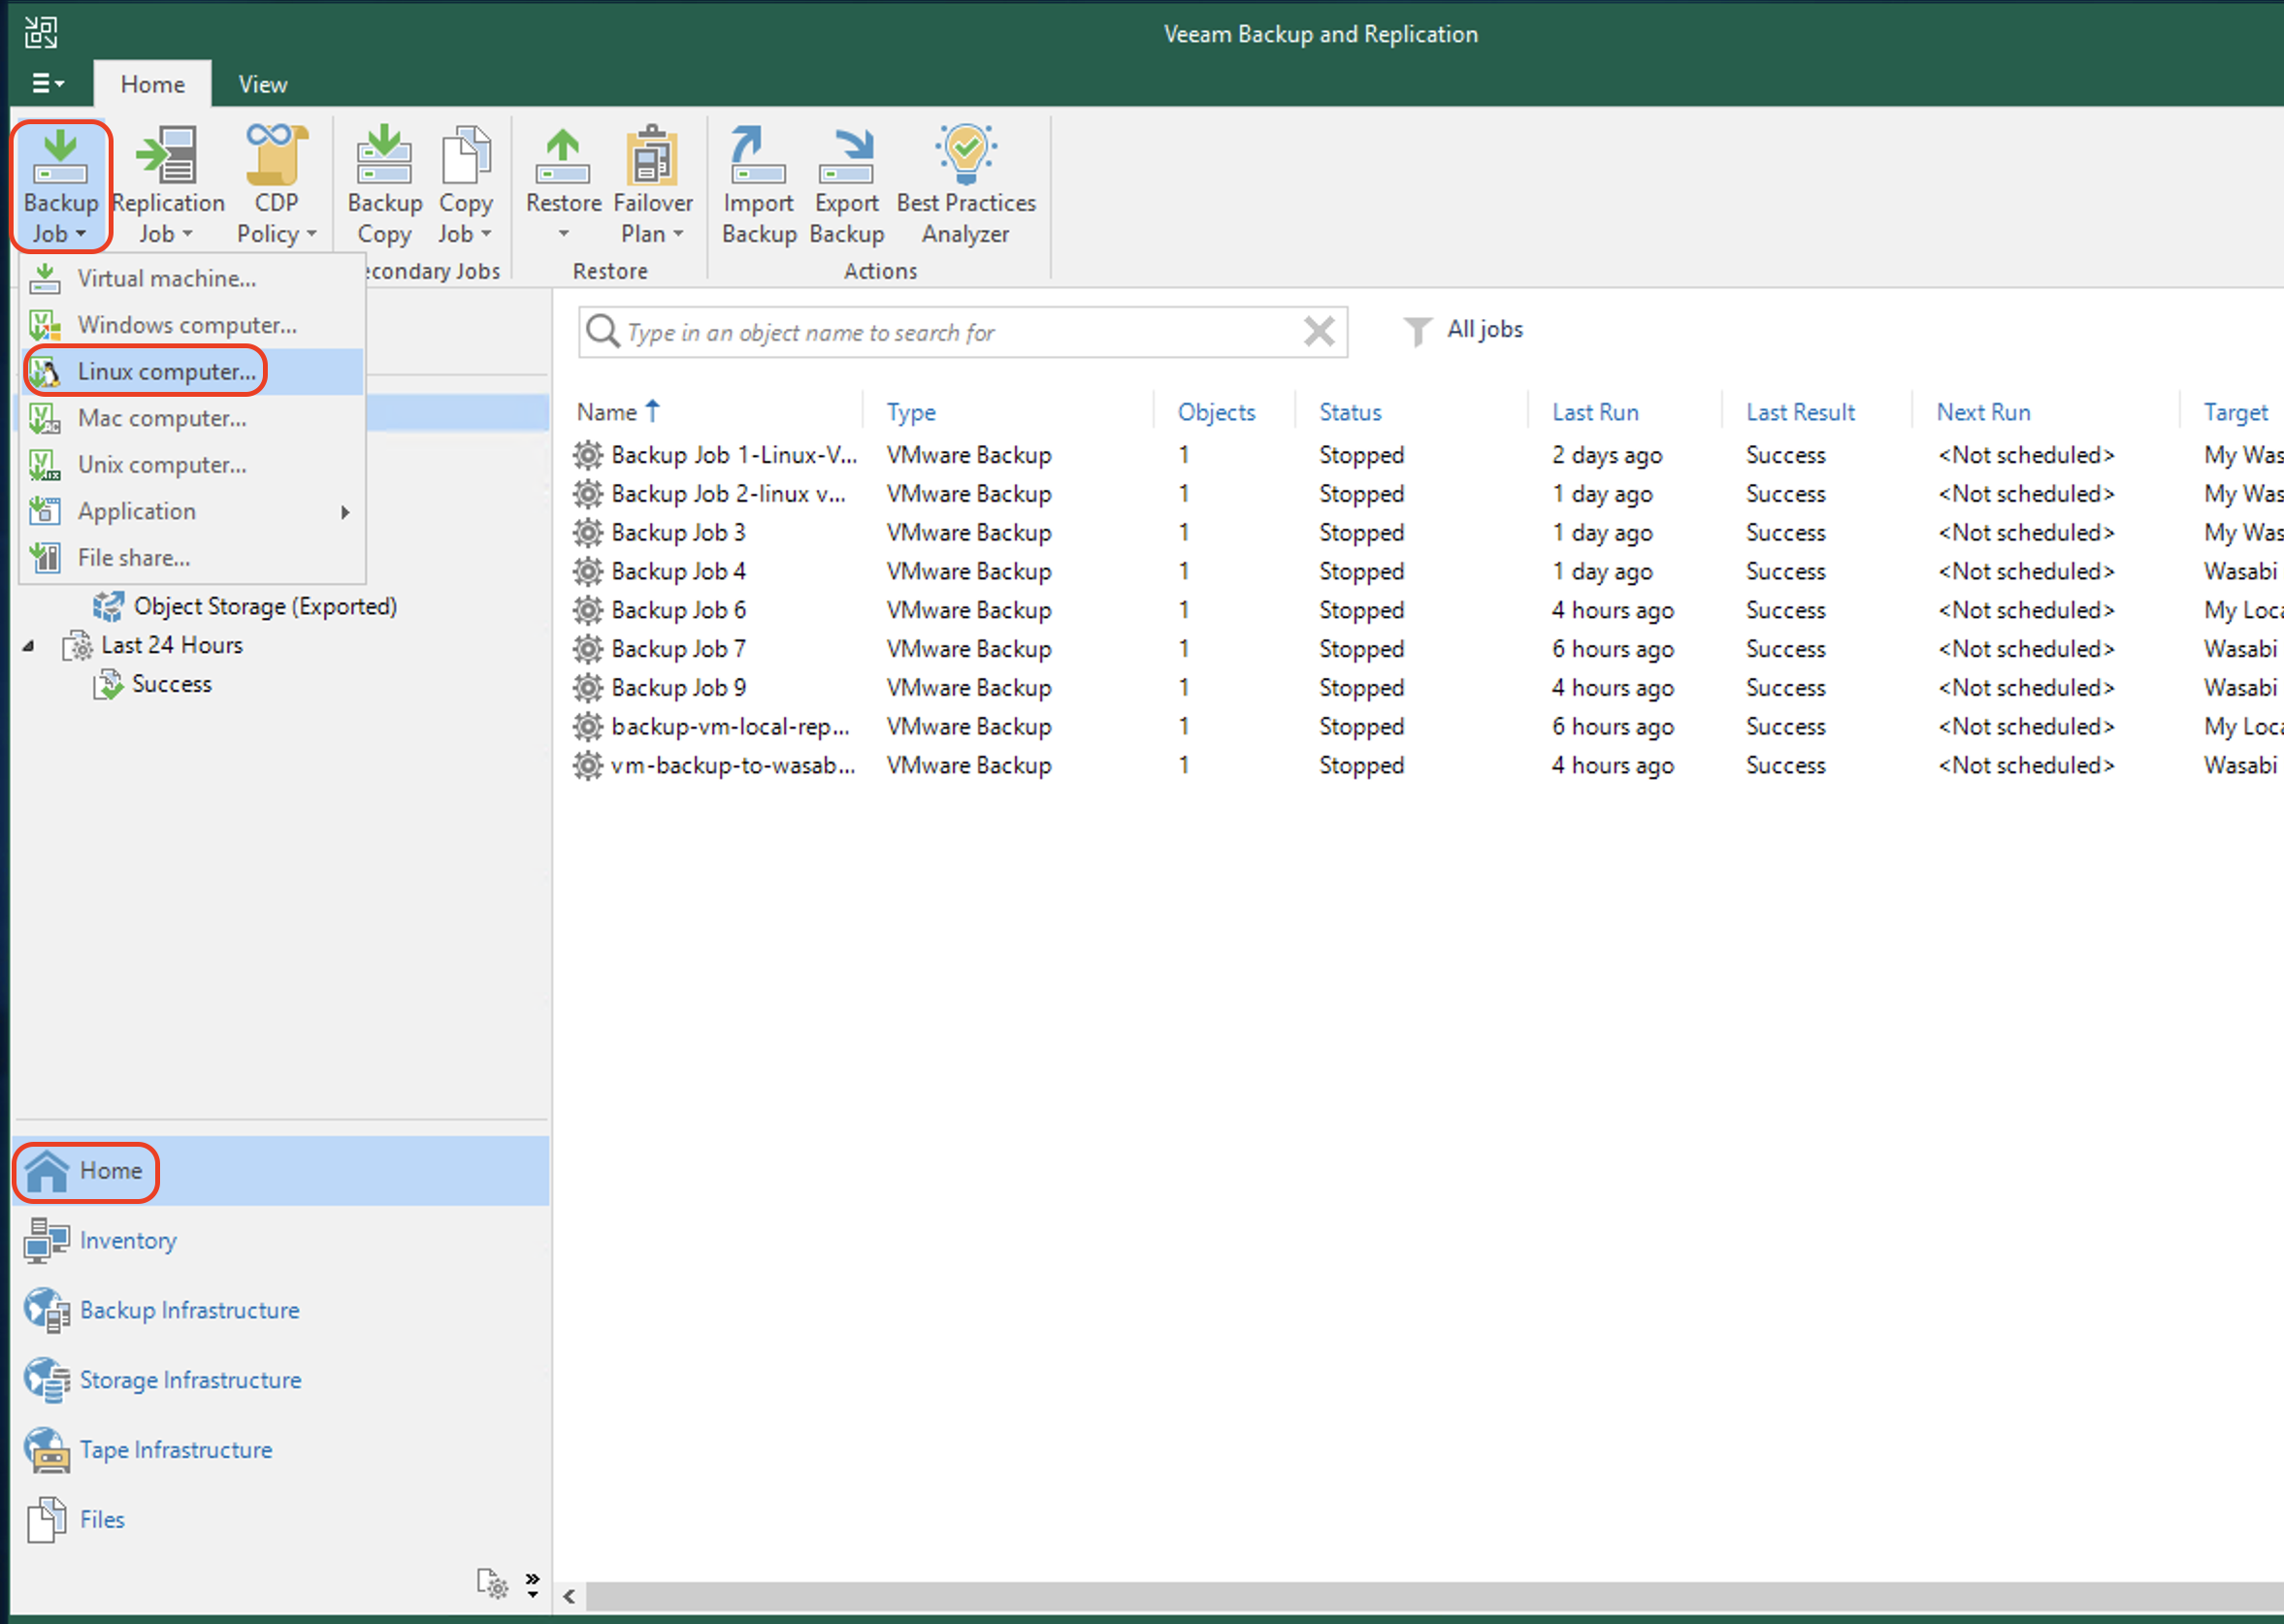
On the Home tab, click Jobs. Click Backup Job and then Linux computer.
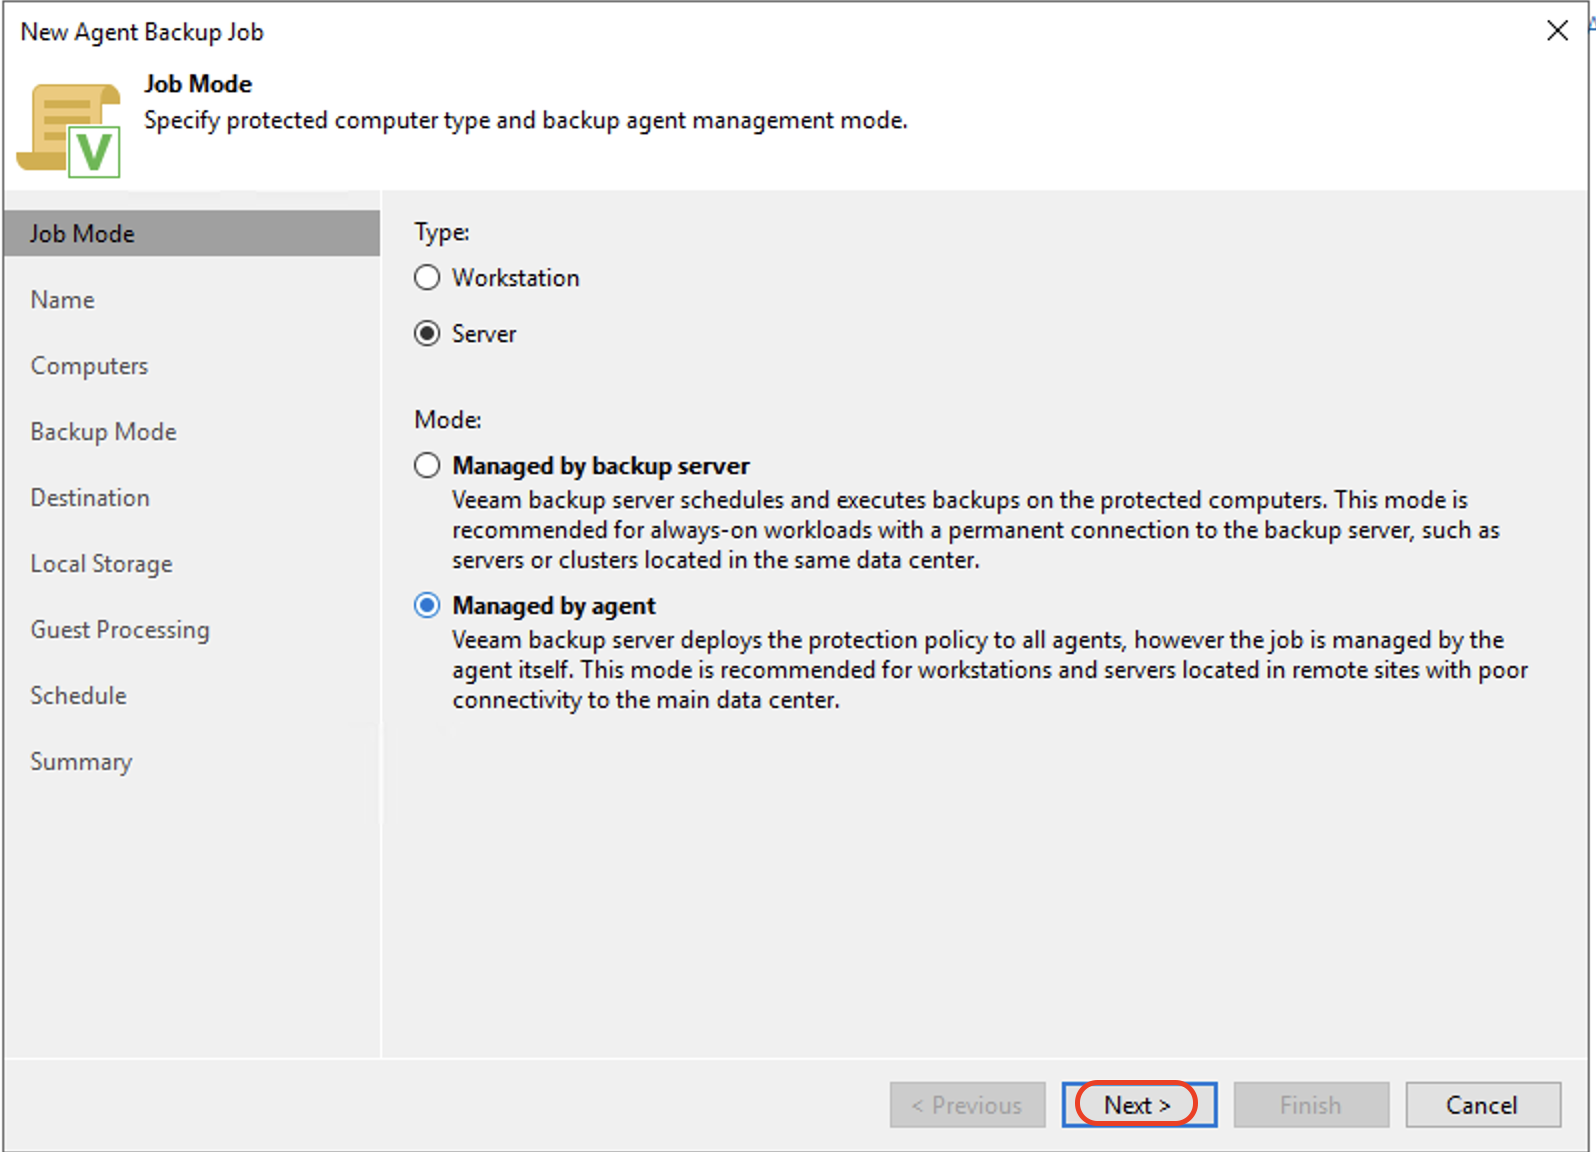
In the Job Mode window, select Server as the Type and select Managed by agent as the Mode. Click Next.
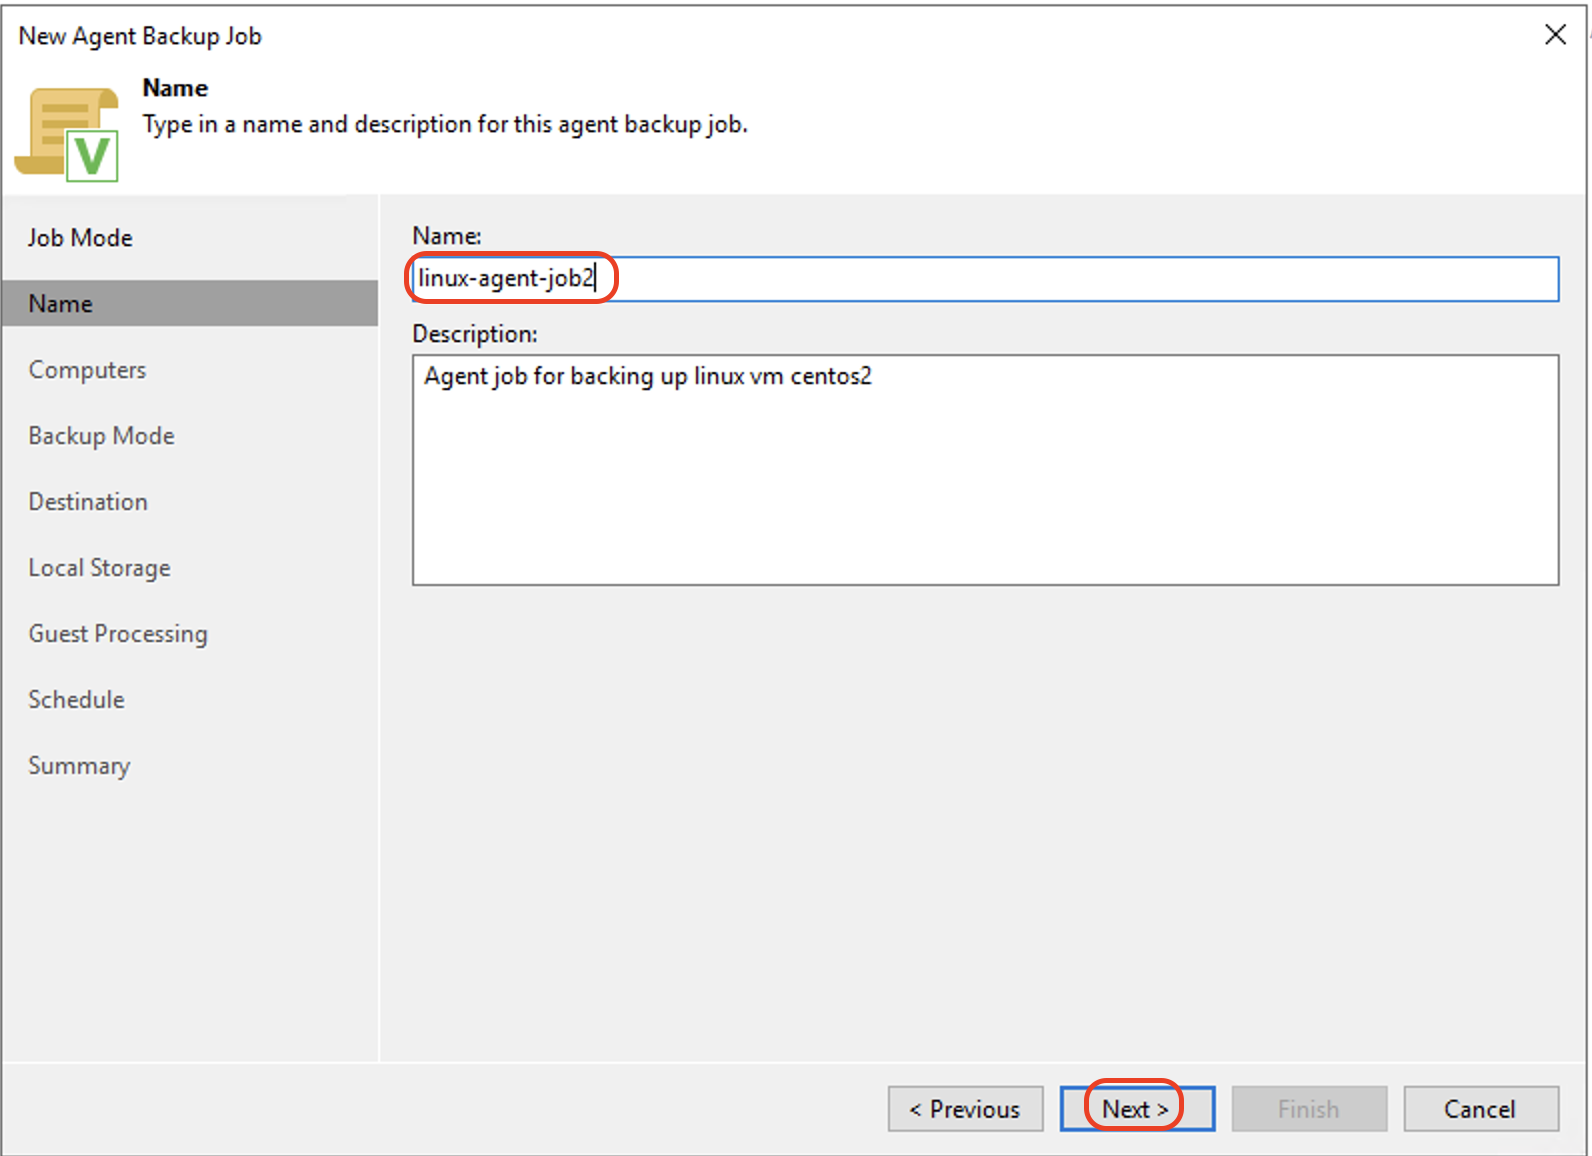
Enter the Name for the backup job and, optionally, a Description. Optionally, select High priority to run the job with a higher priority. Click Next.
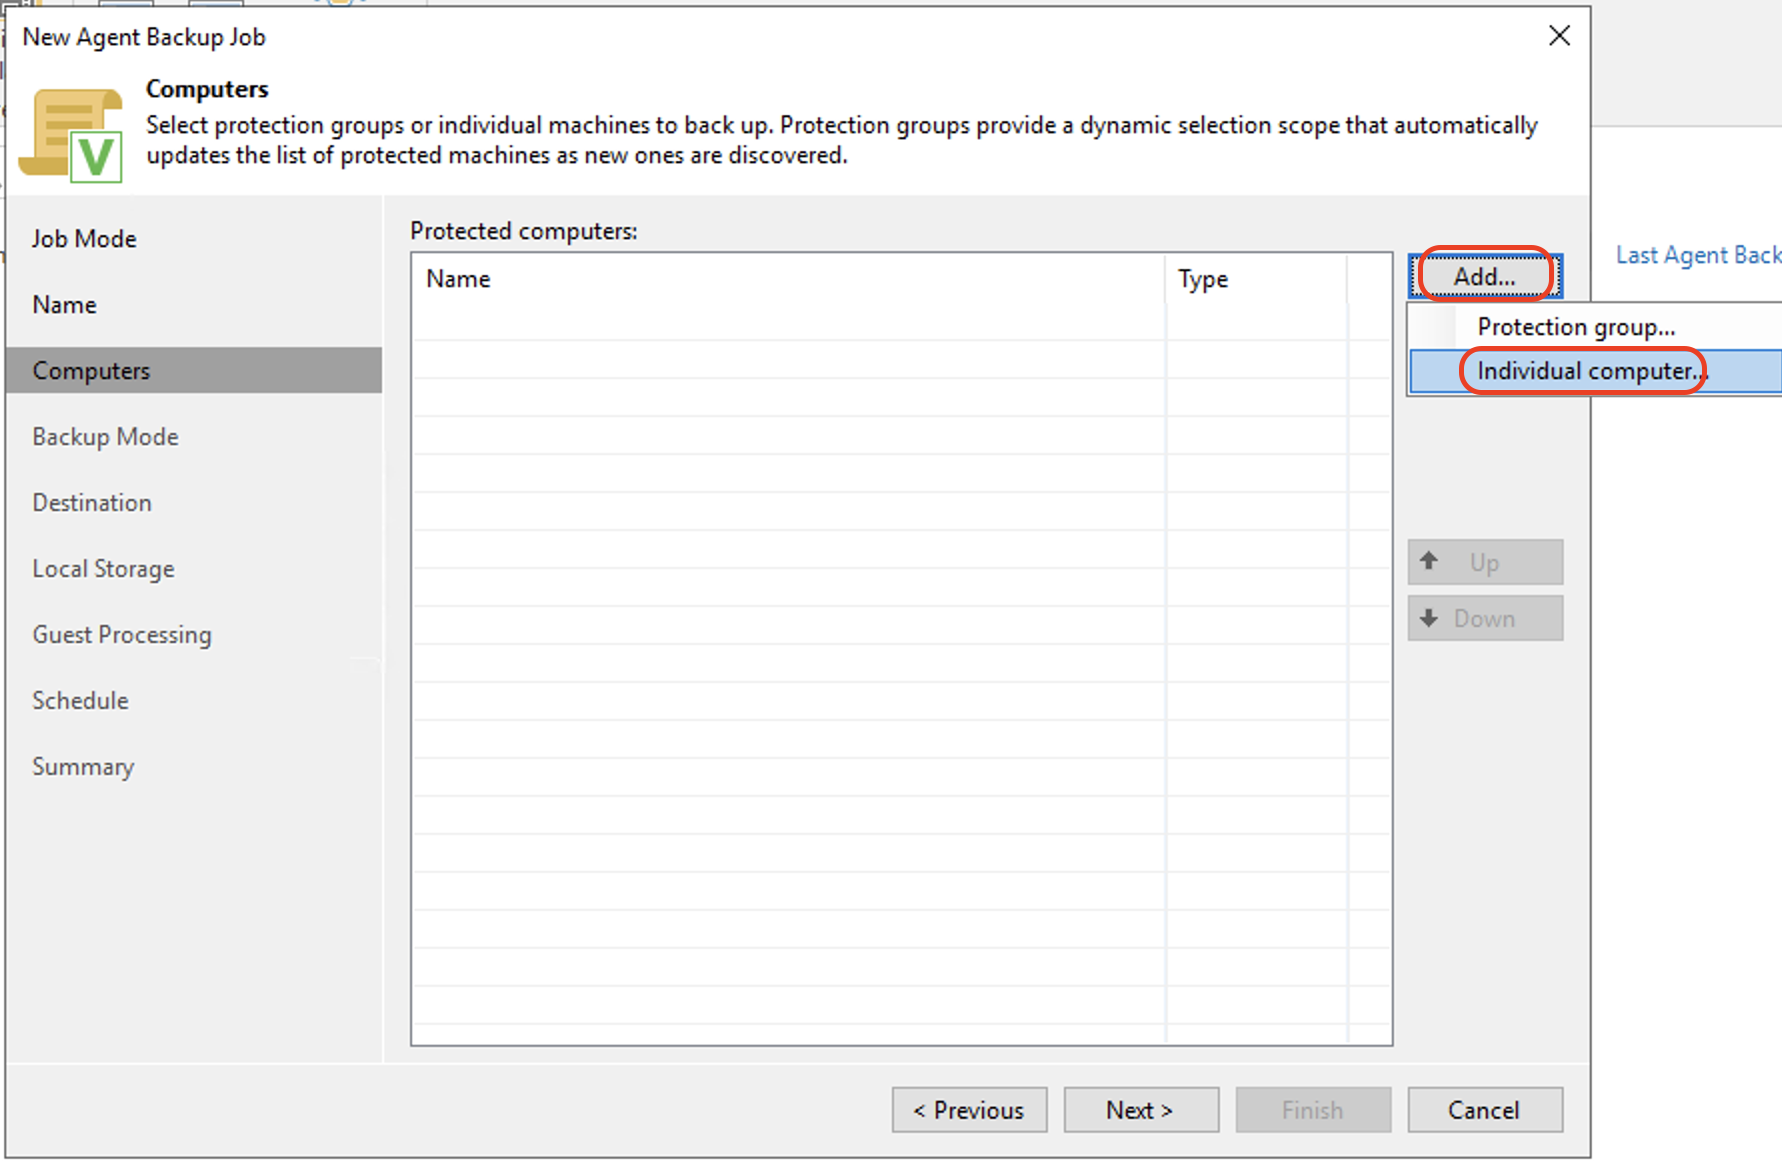
To add a computer to be backed up, click Add. Click Individual computer.
Enter the Host name or IP address of the computer to be added. Click Add to add credentials.
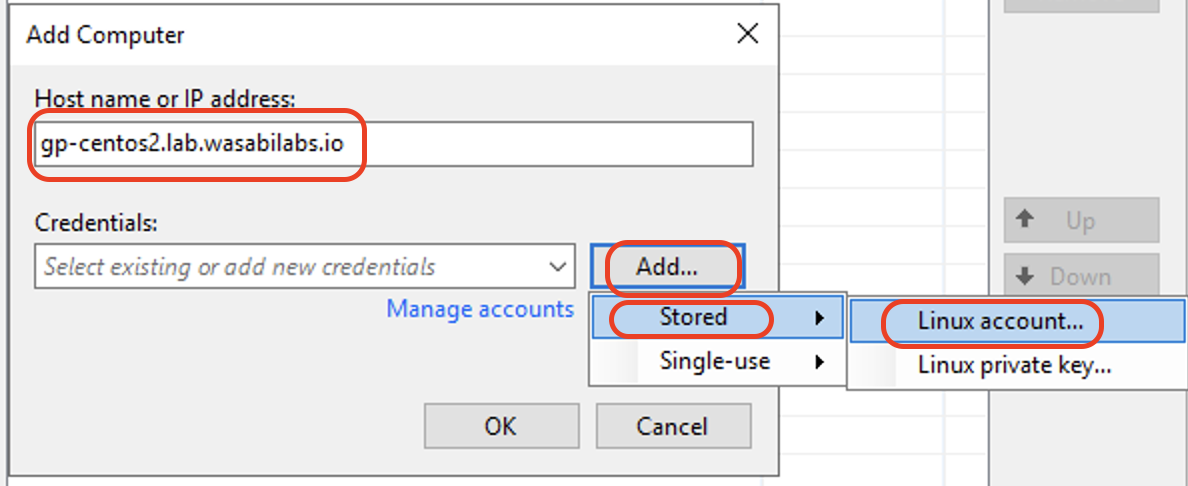
Enter the following information in the Credentials window and click OK.
Username: Username to access the Linux server.
Password: Password for the above username.
Select Elevate account privileges automatically.
Select Add account to the sudoers file.
Select Use “su” if “sudo” fails.
Enter the Root password.
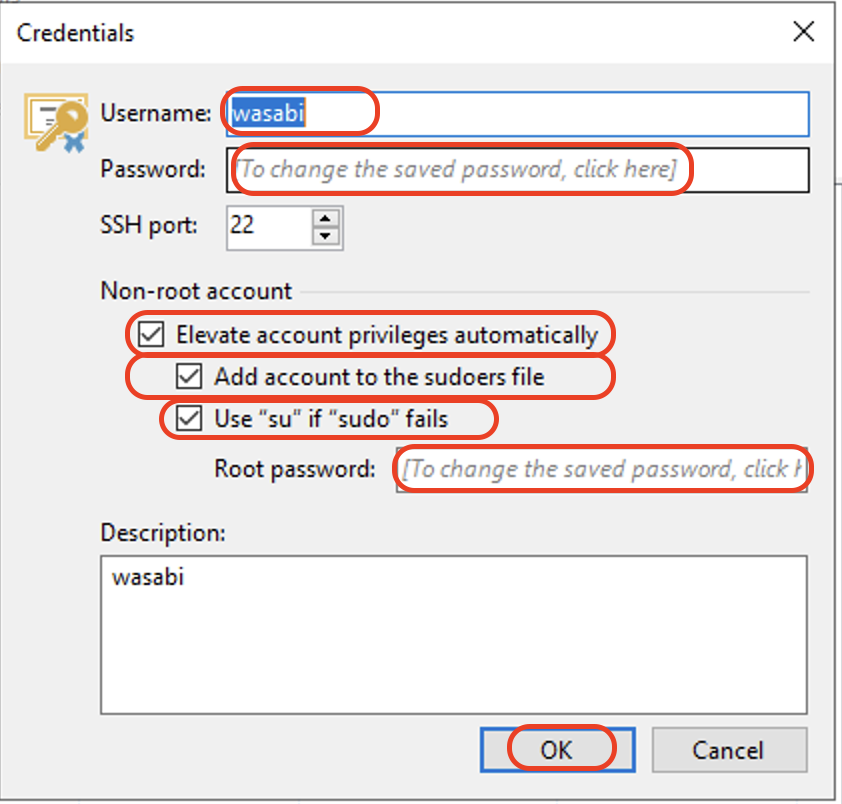
Click OK to continue adding the server.
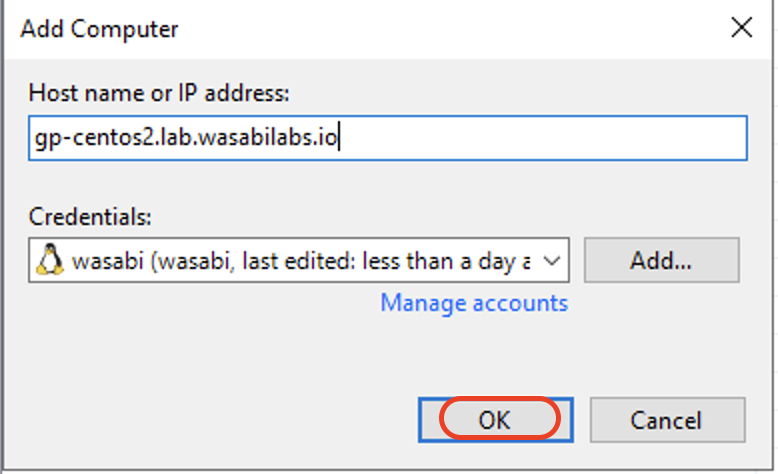
Click Next.
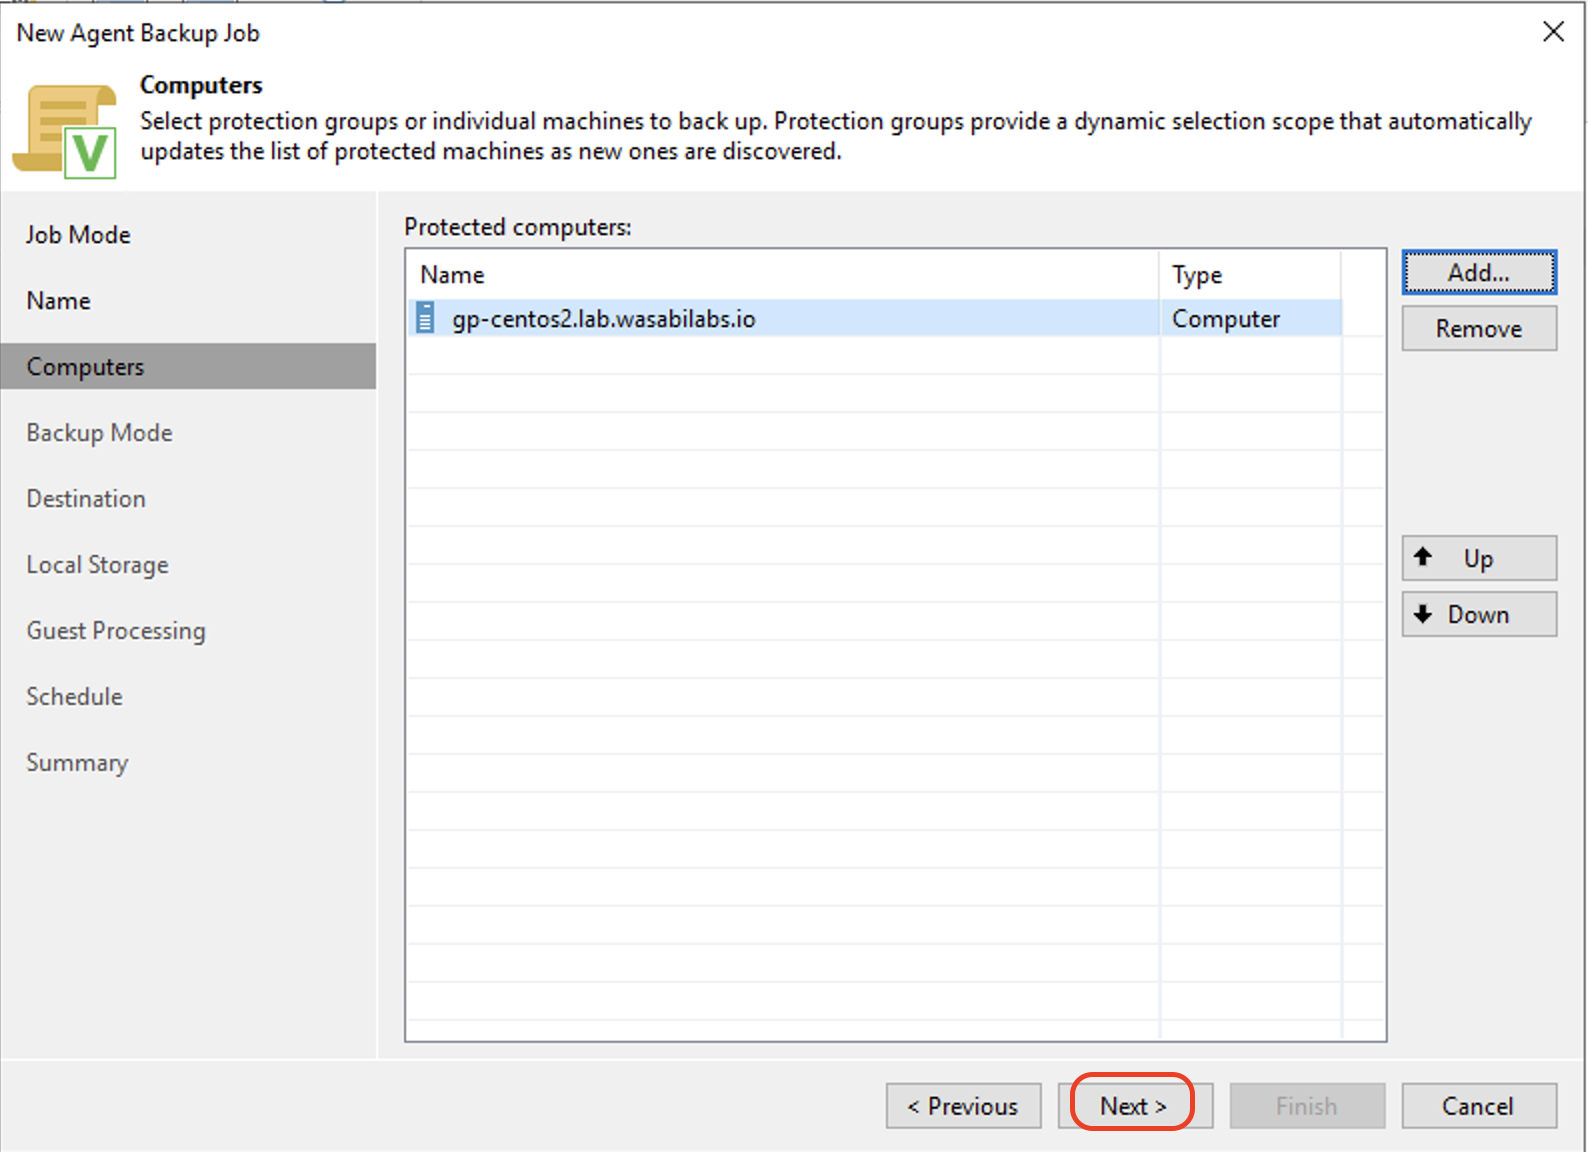
Select Enter computer and click Next.
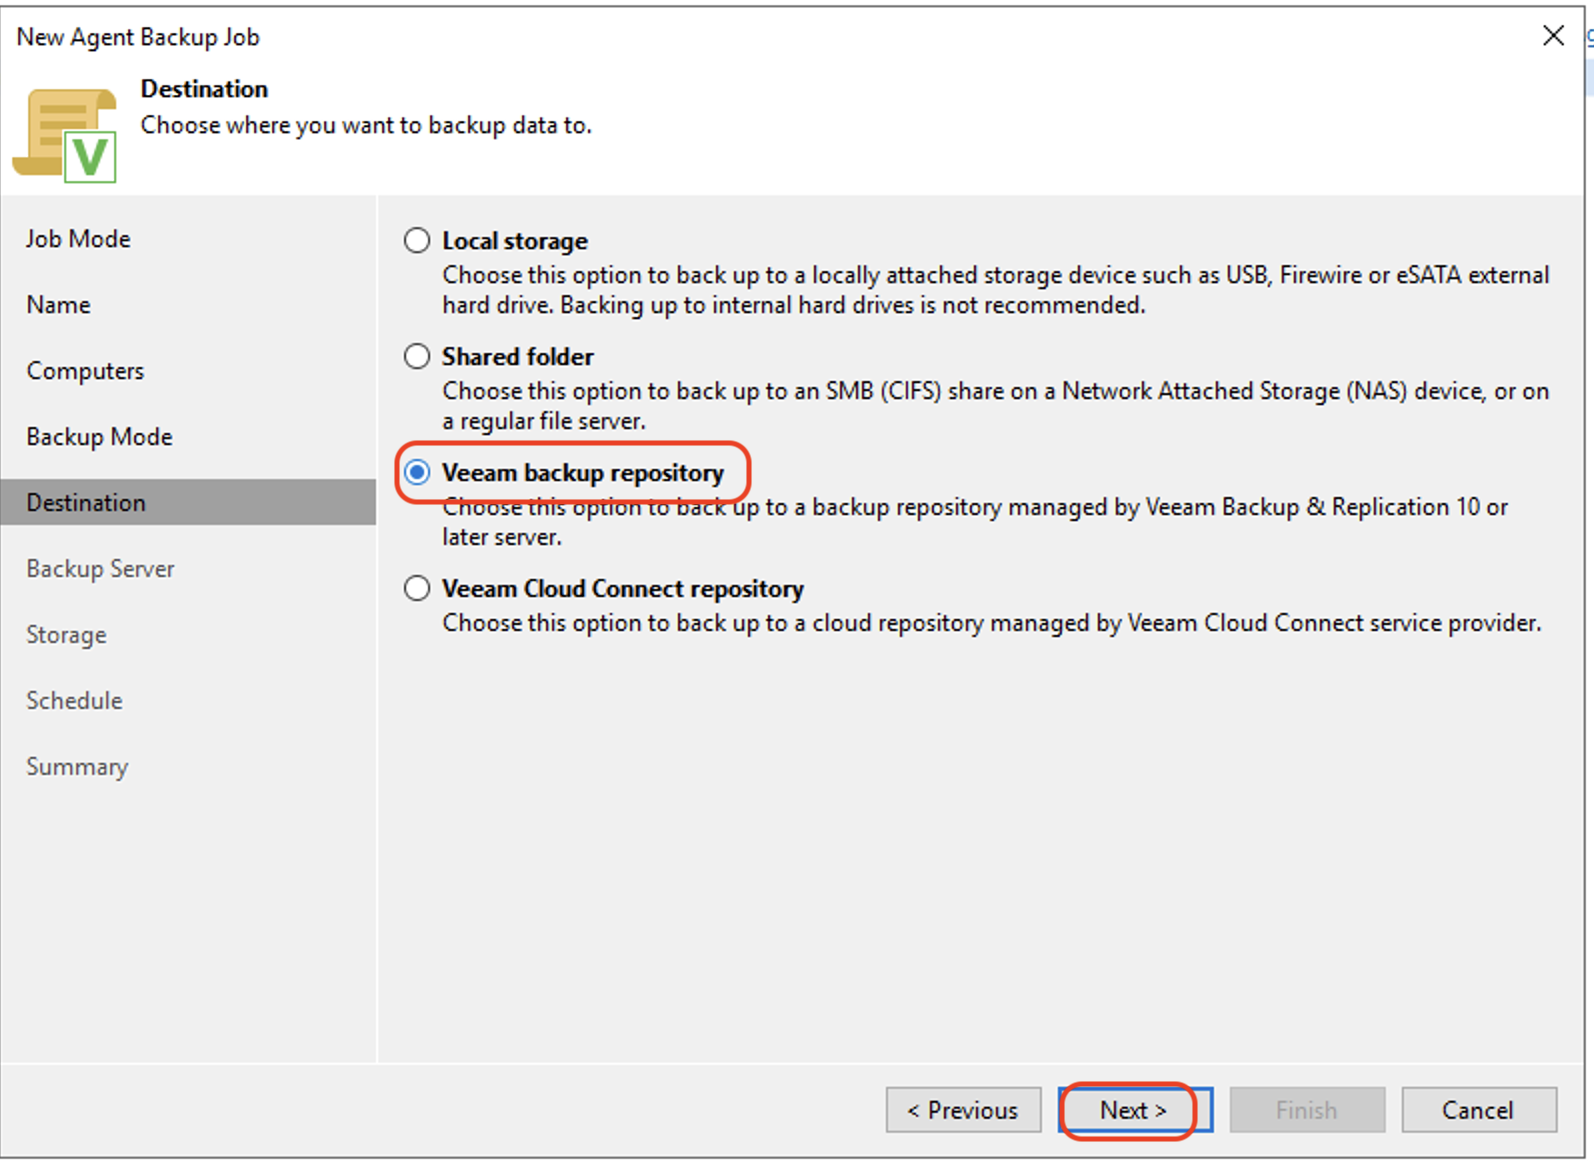
Select Veeam backup repository and click Next.
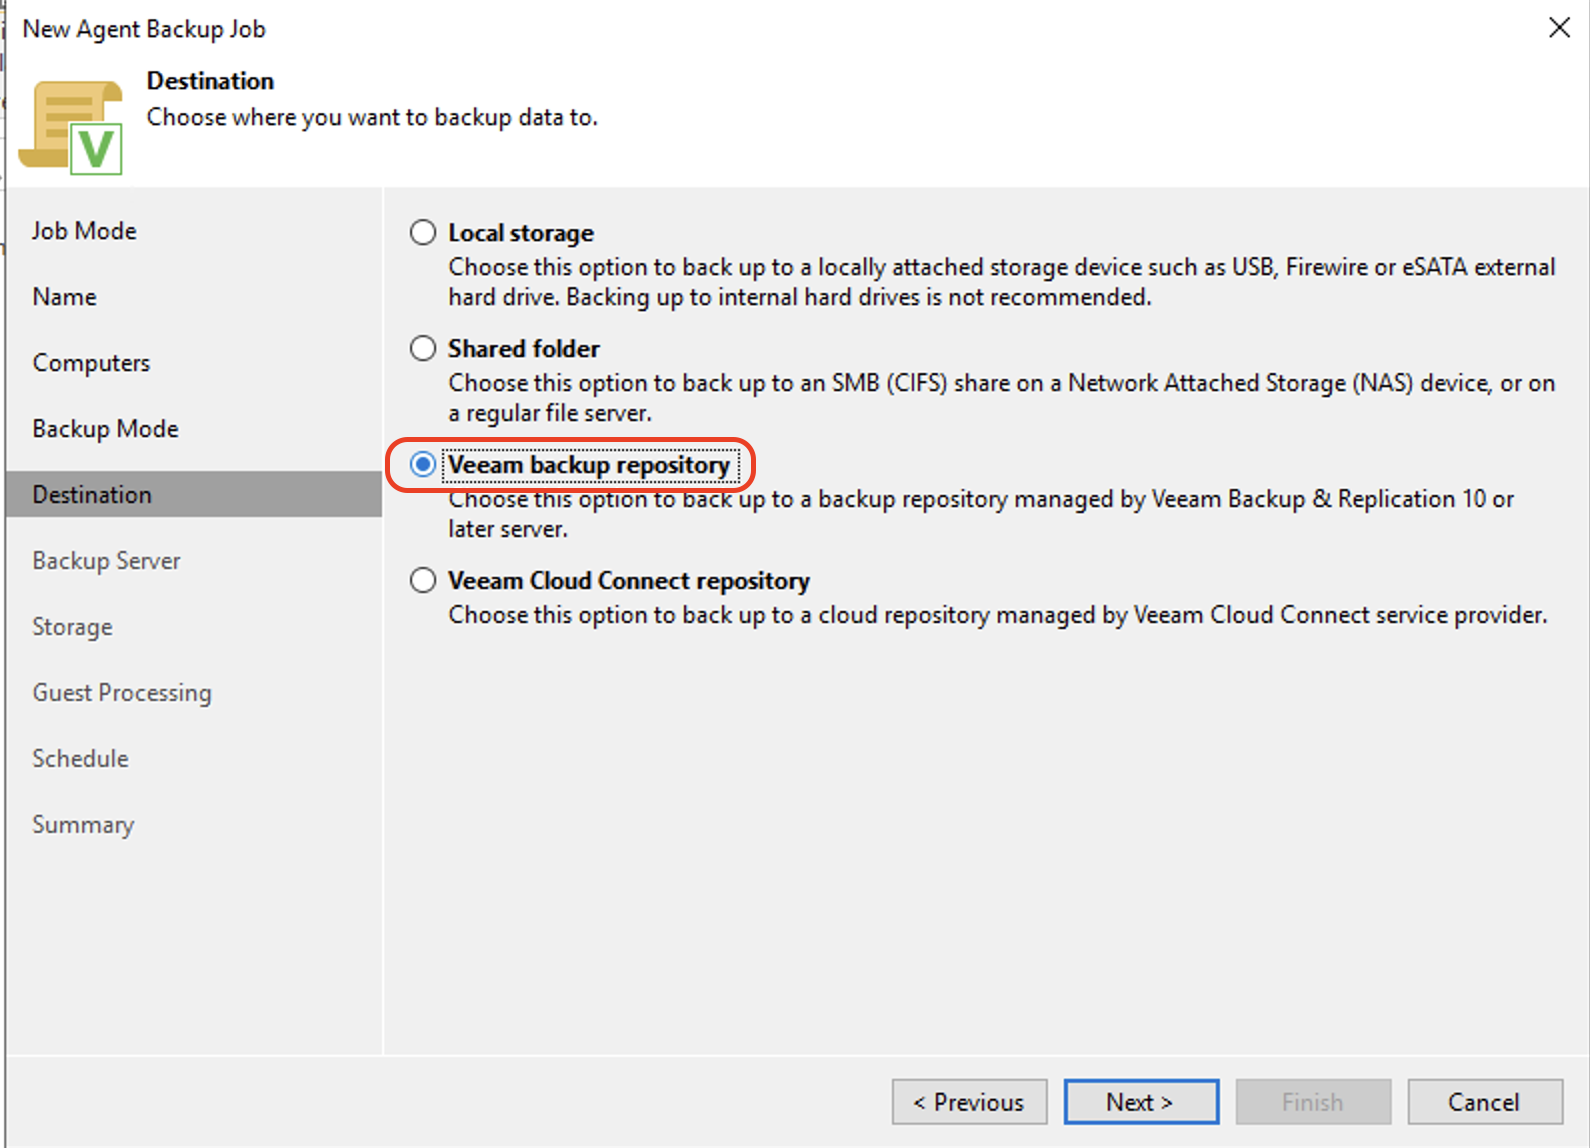
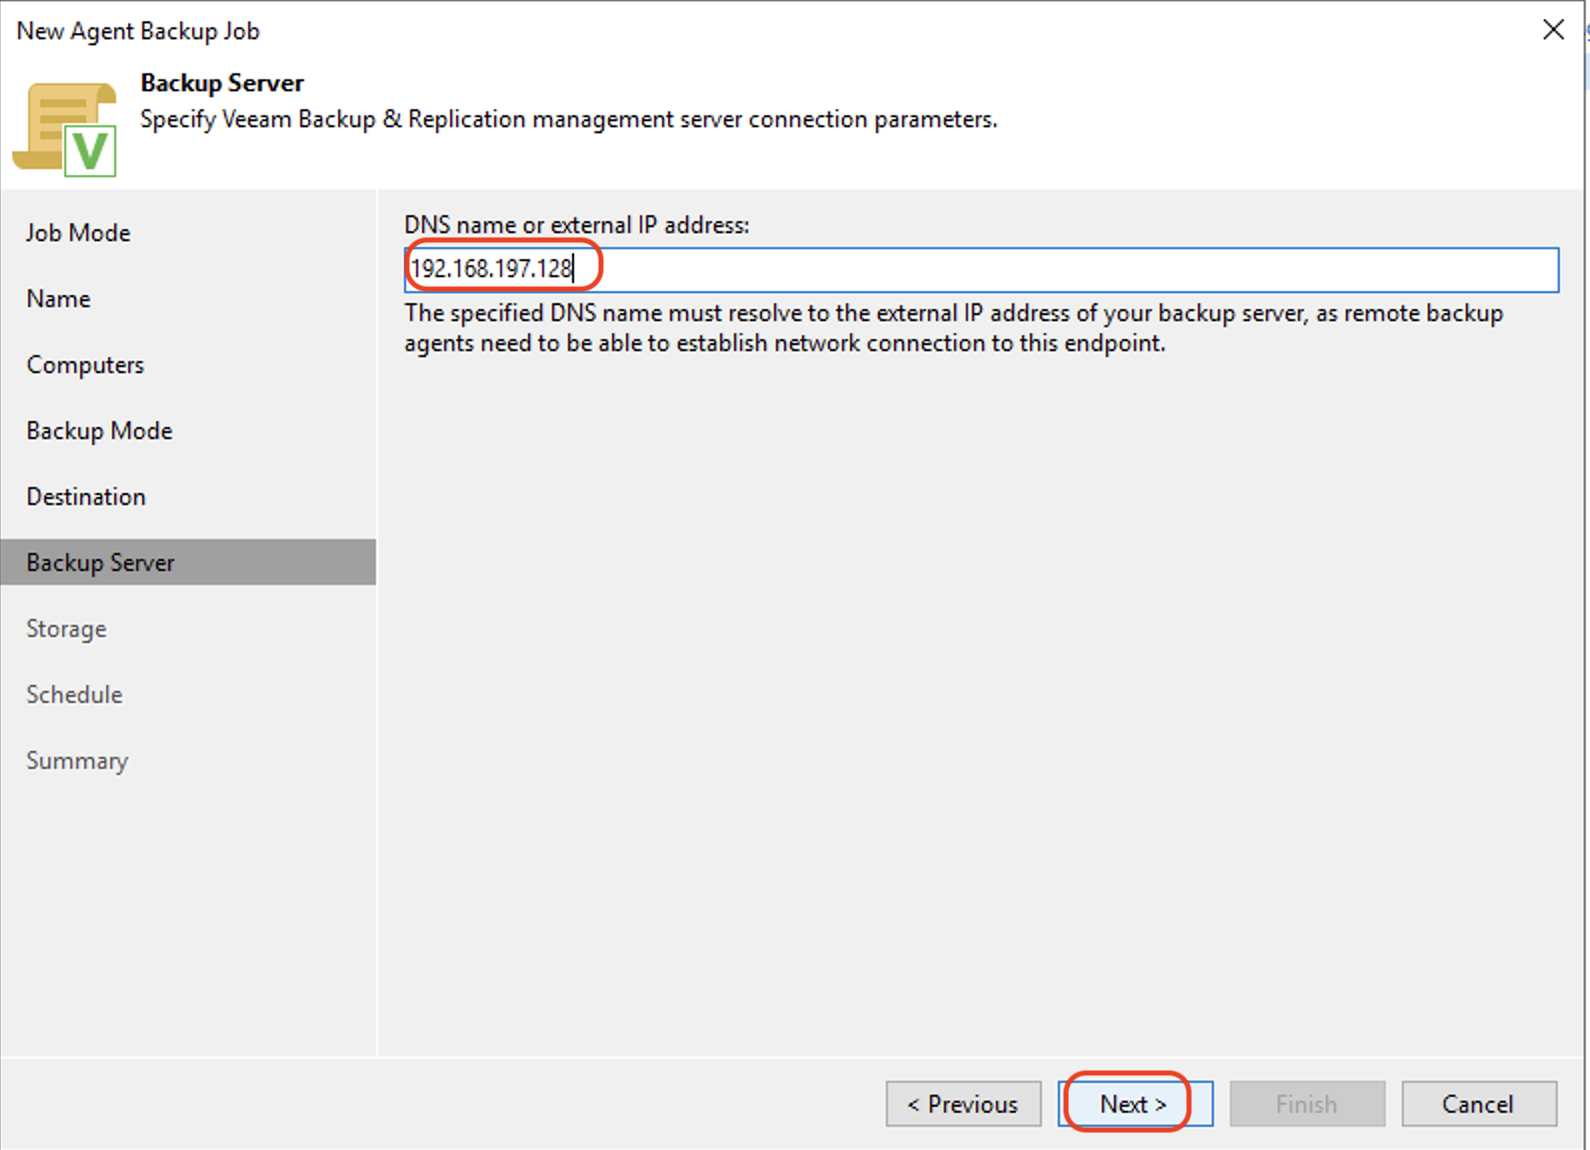
Enter the FQDN or IP address of the backup server running Veeam B&R. Click Next.
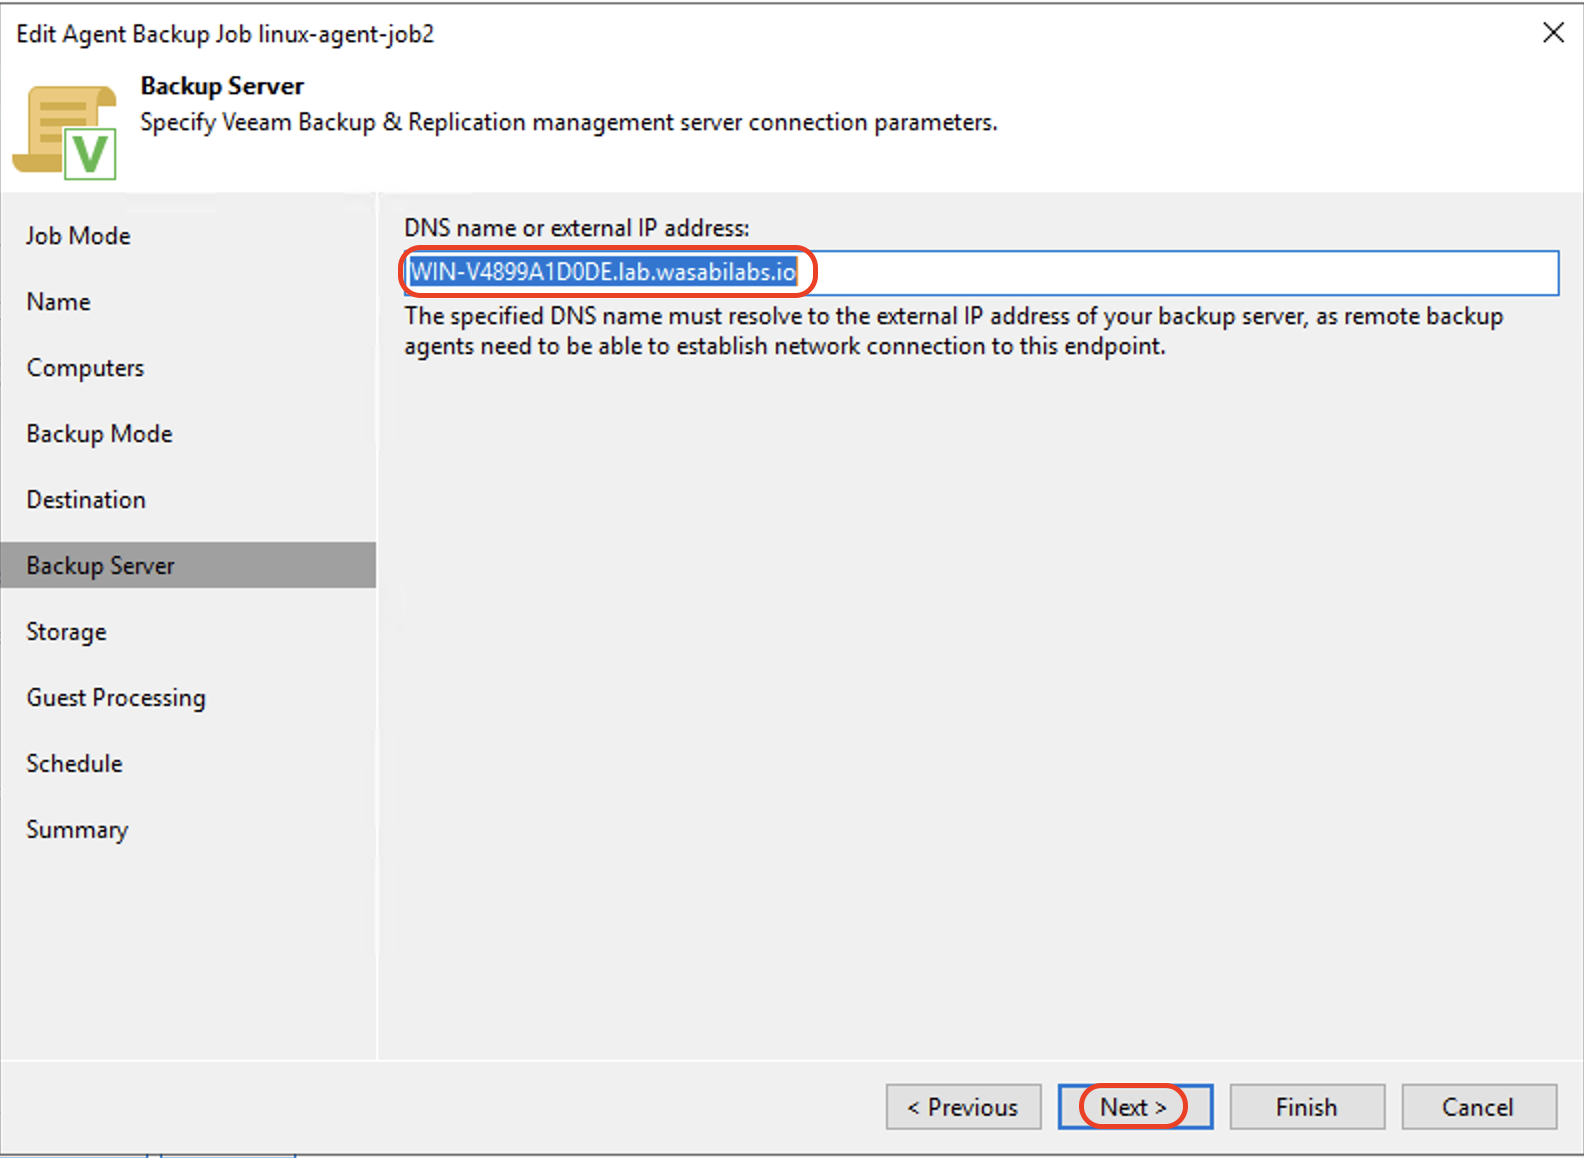
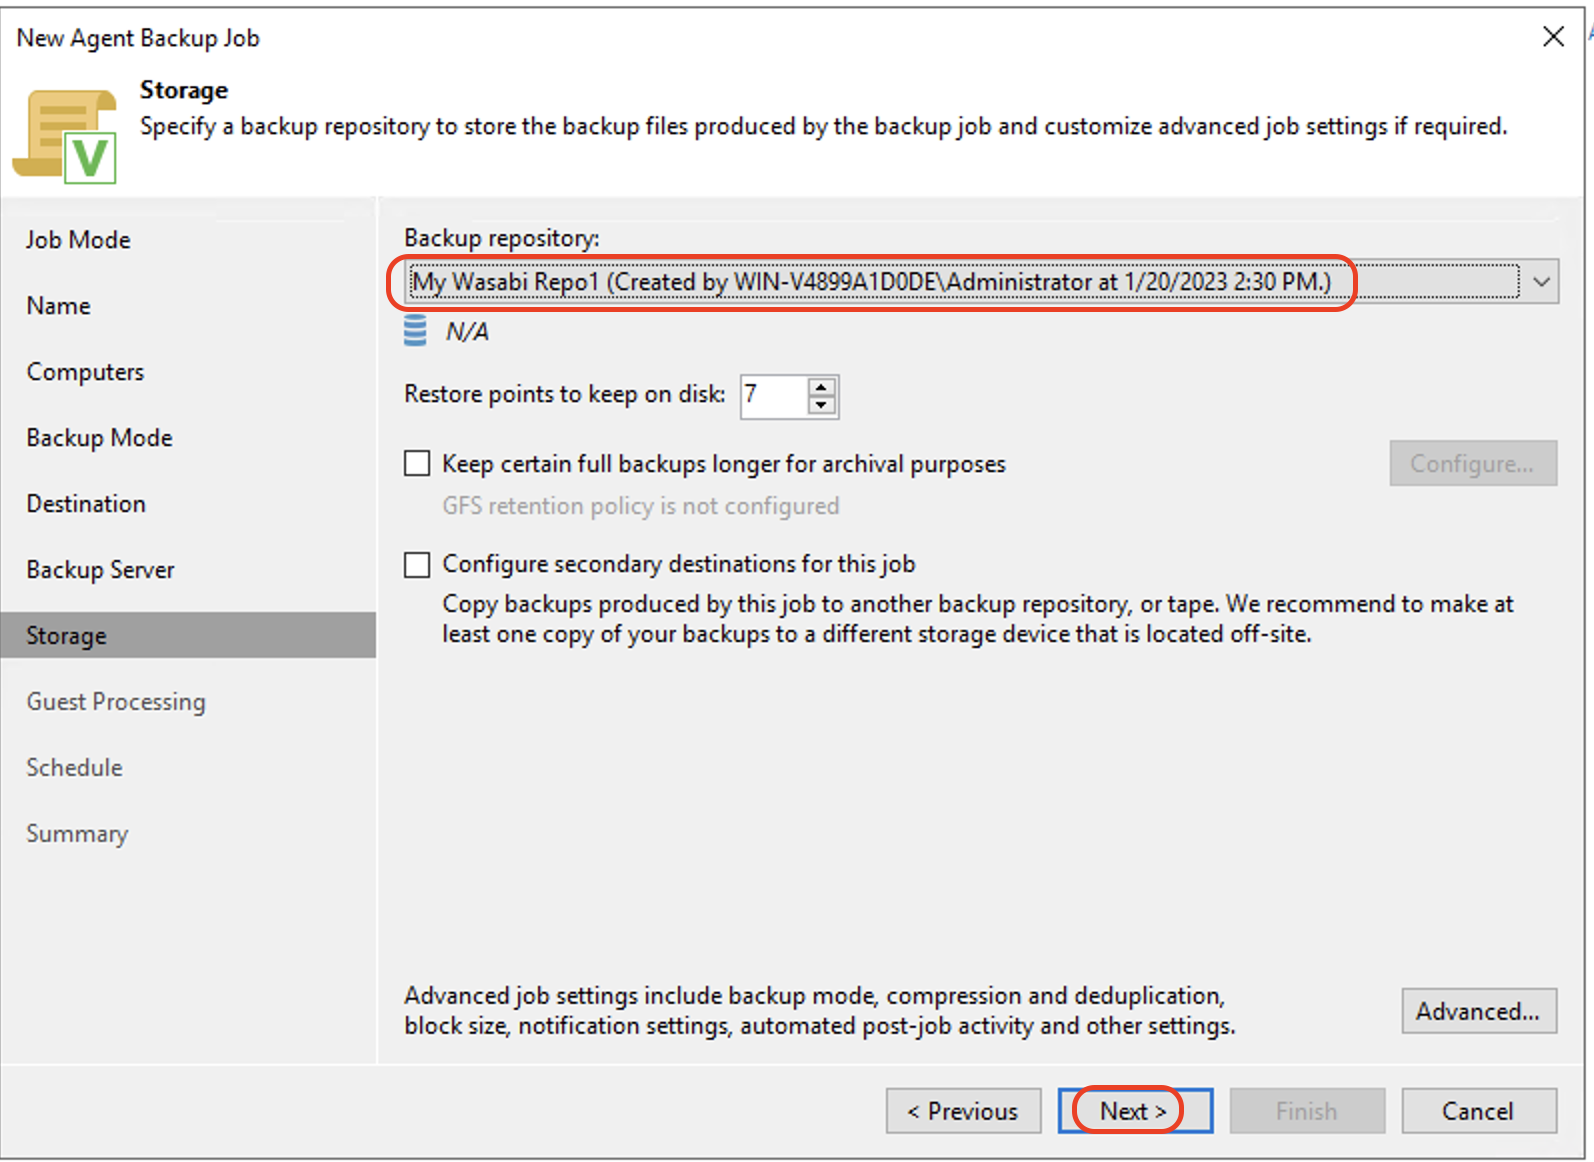
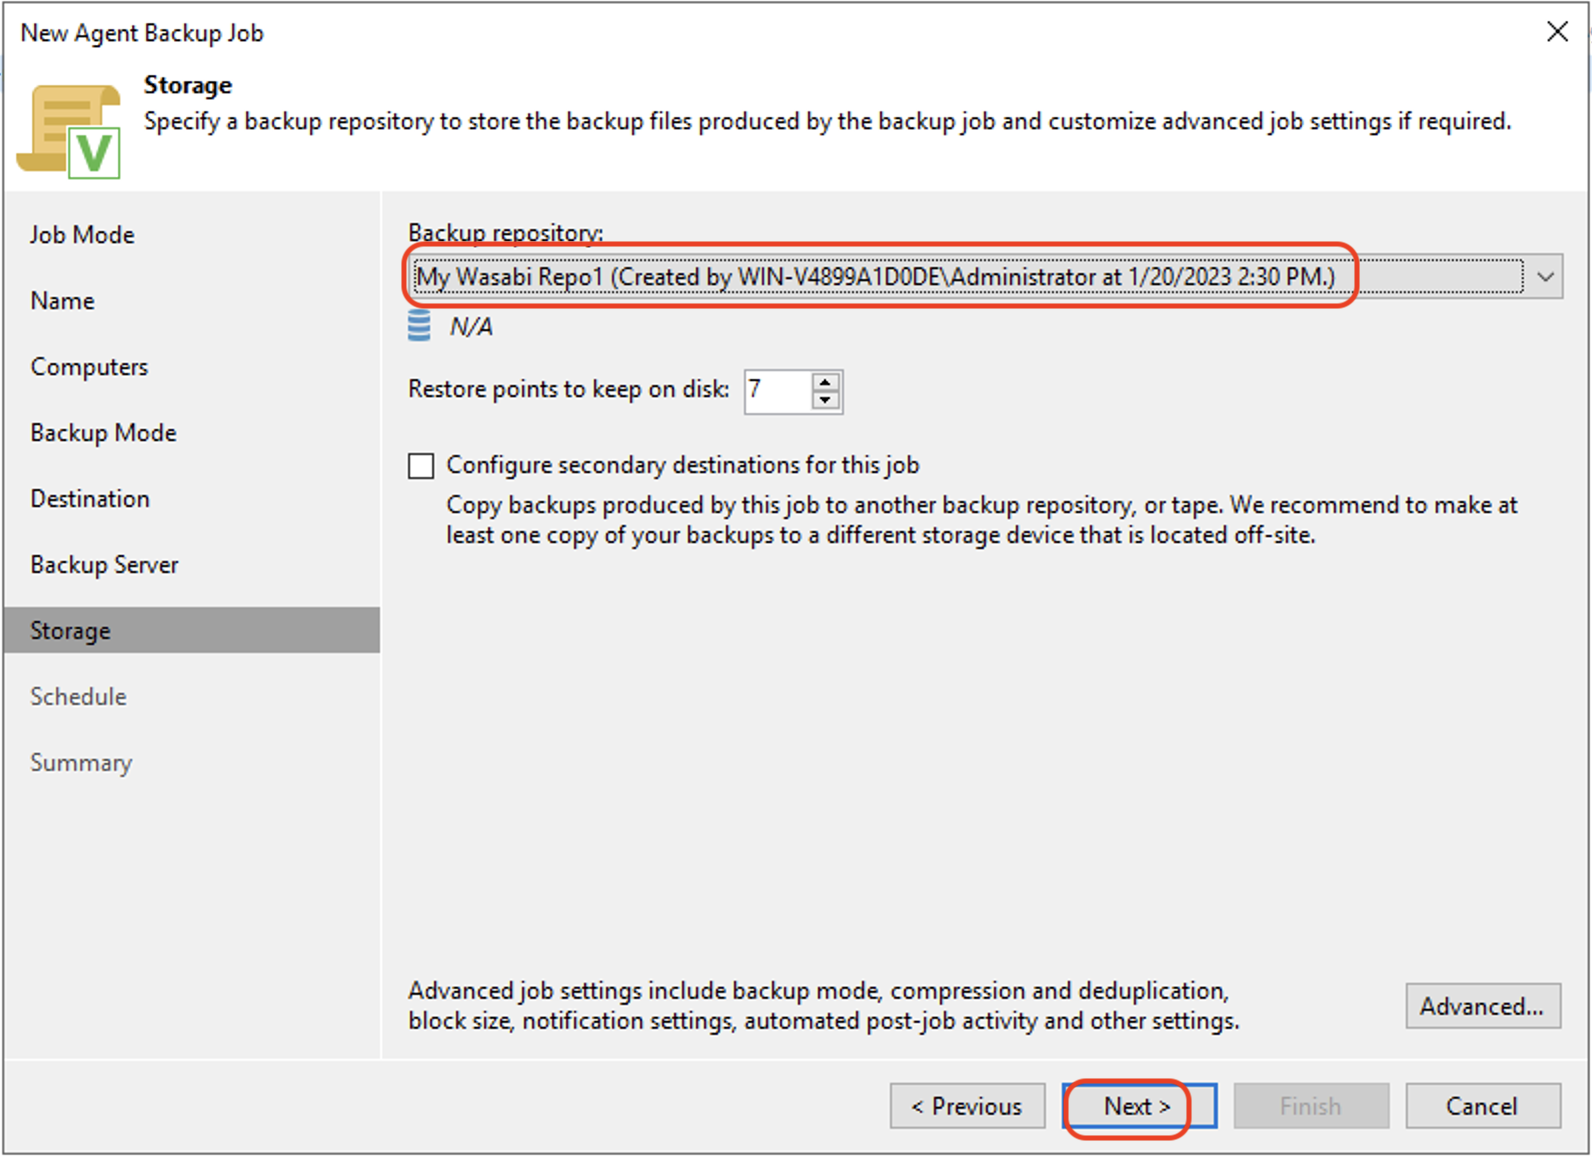
Select the Wasabi repository from the list of backup repositories. Click Next.
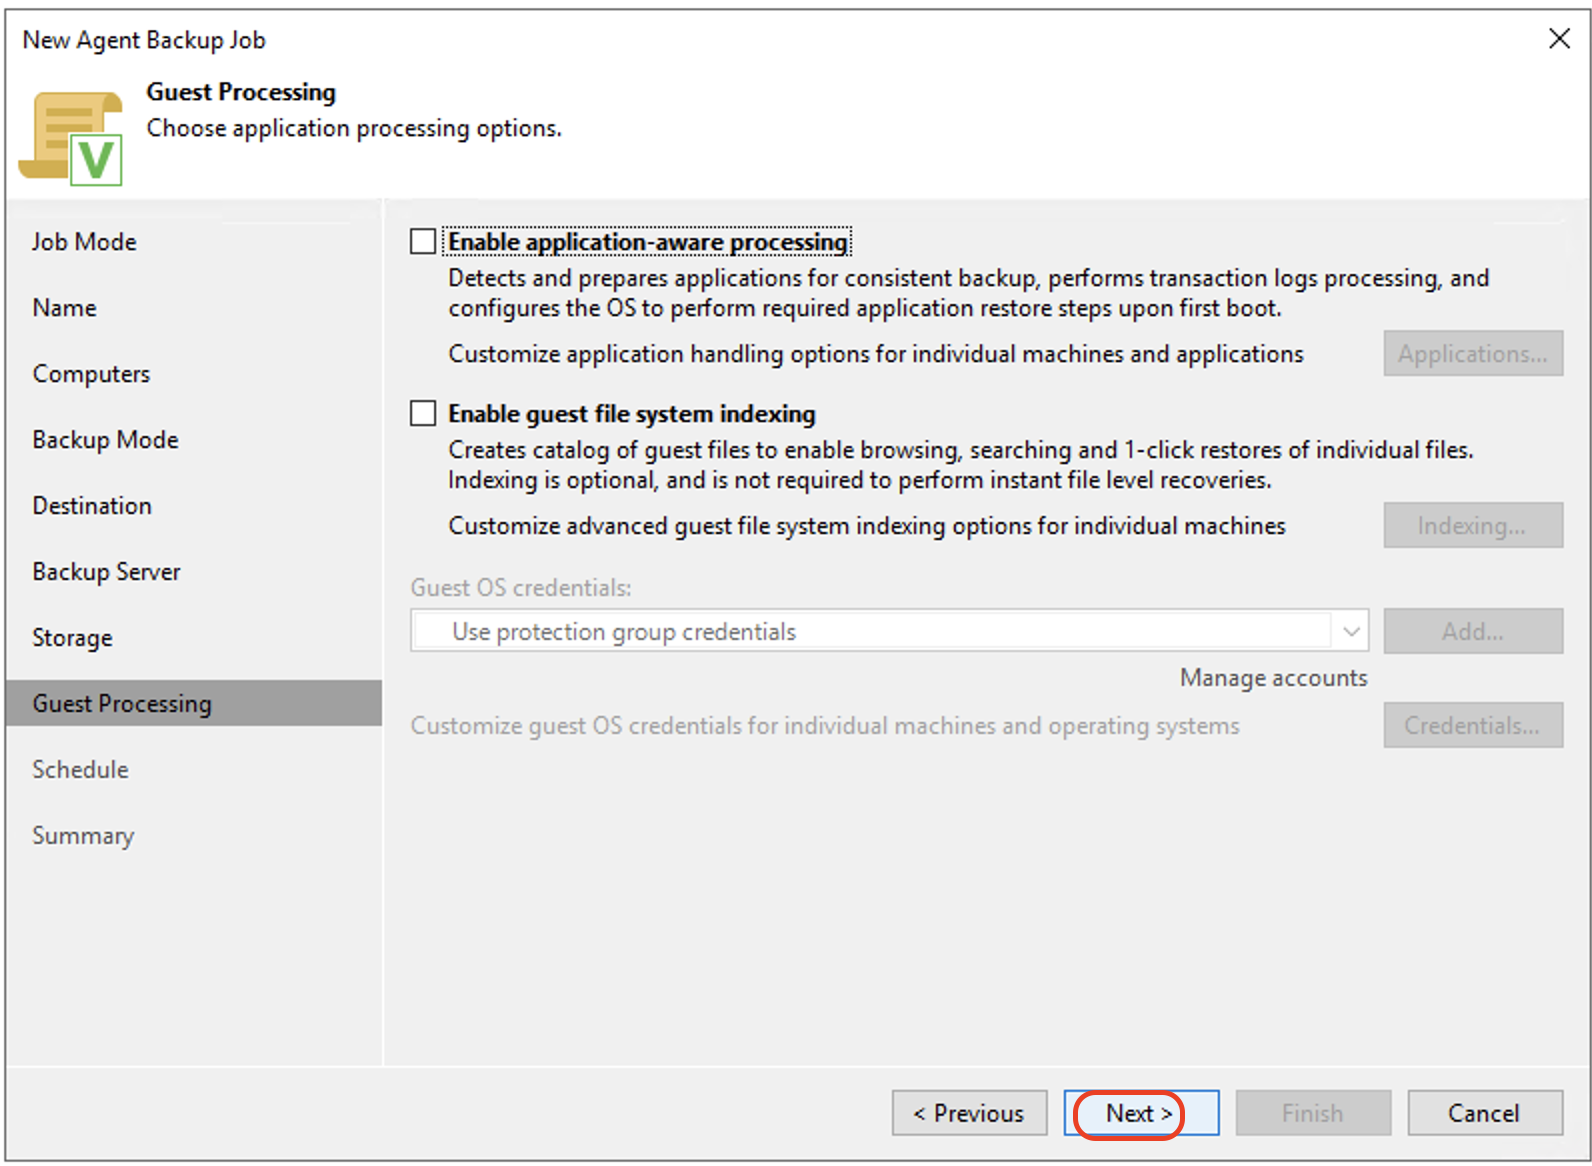
In the Guest Processing window, keep the default settings. Click Next.
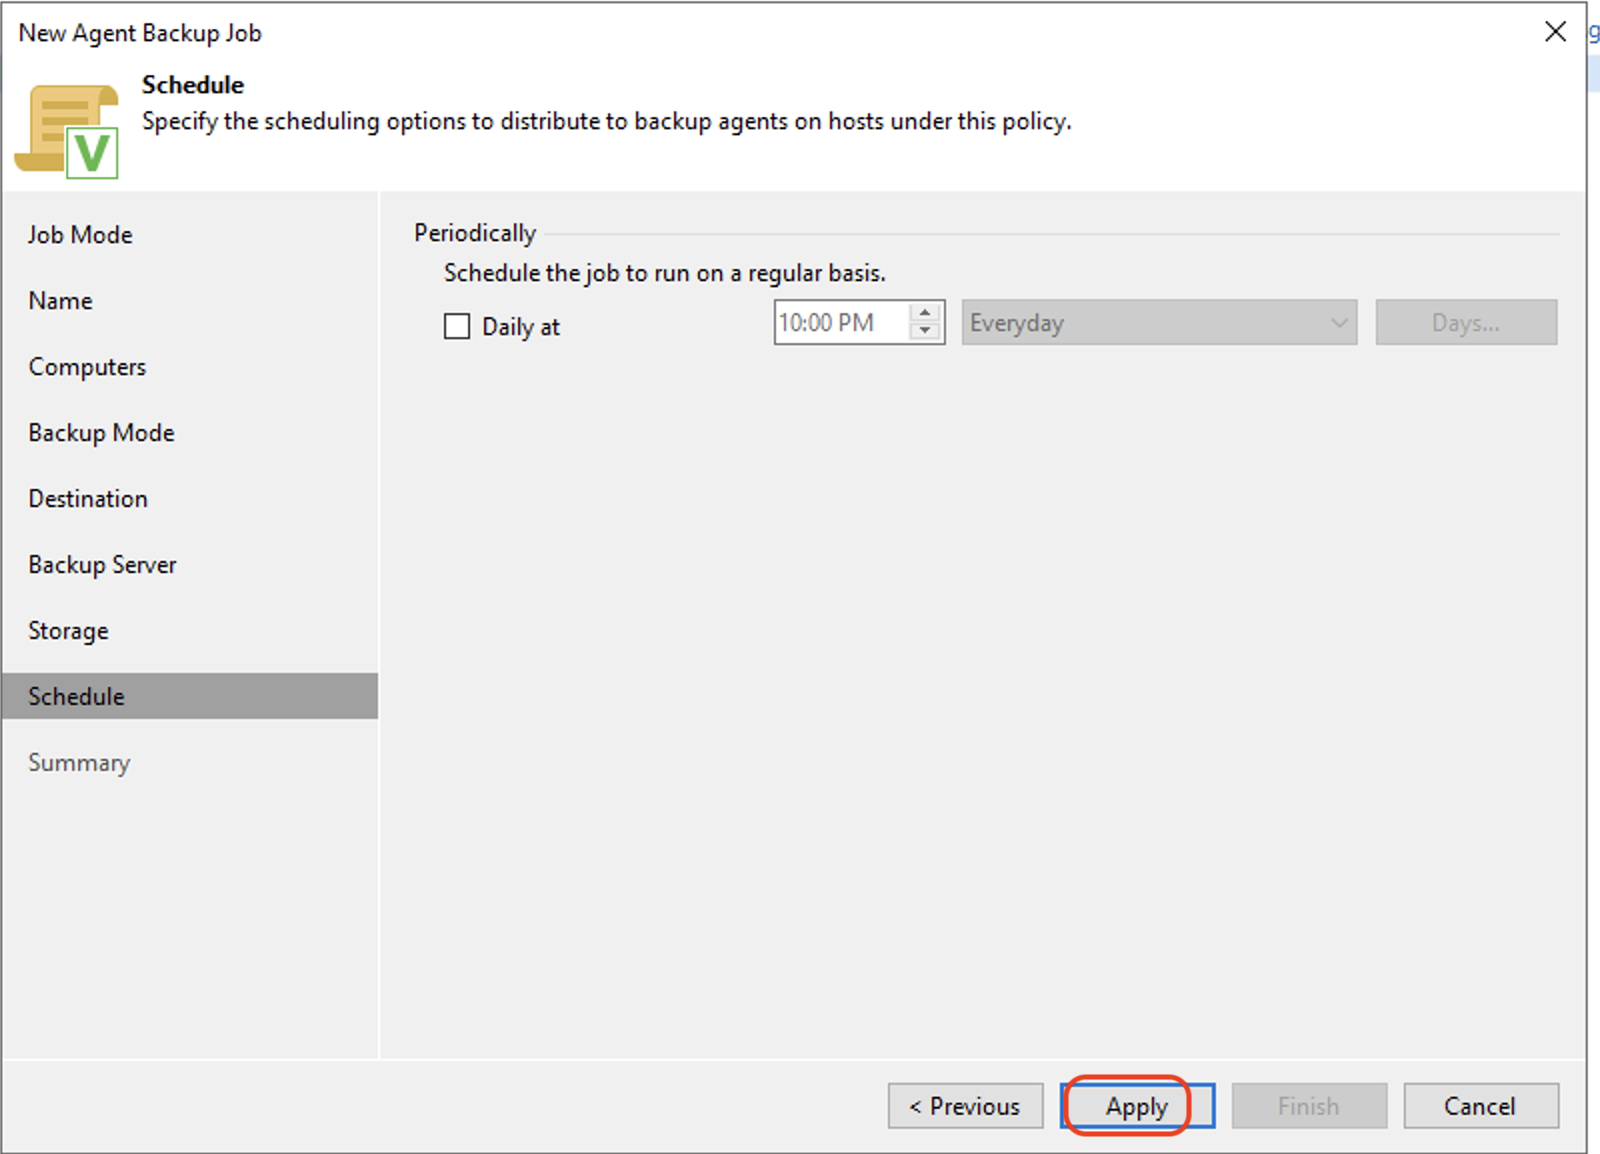
Check Run the job automatically and set the schedule settings as needed. Click Apply to continue.
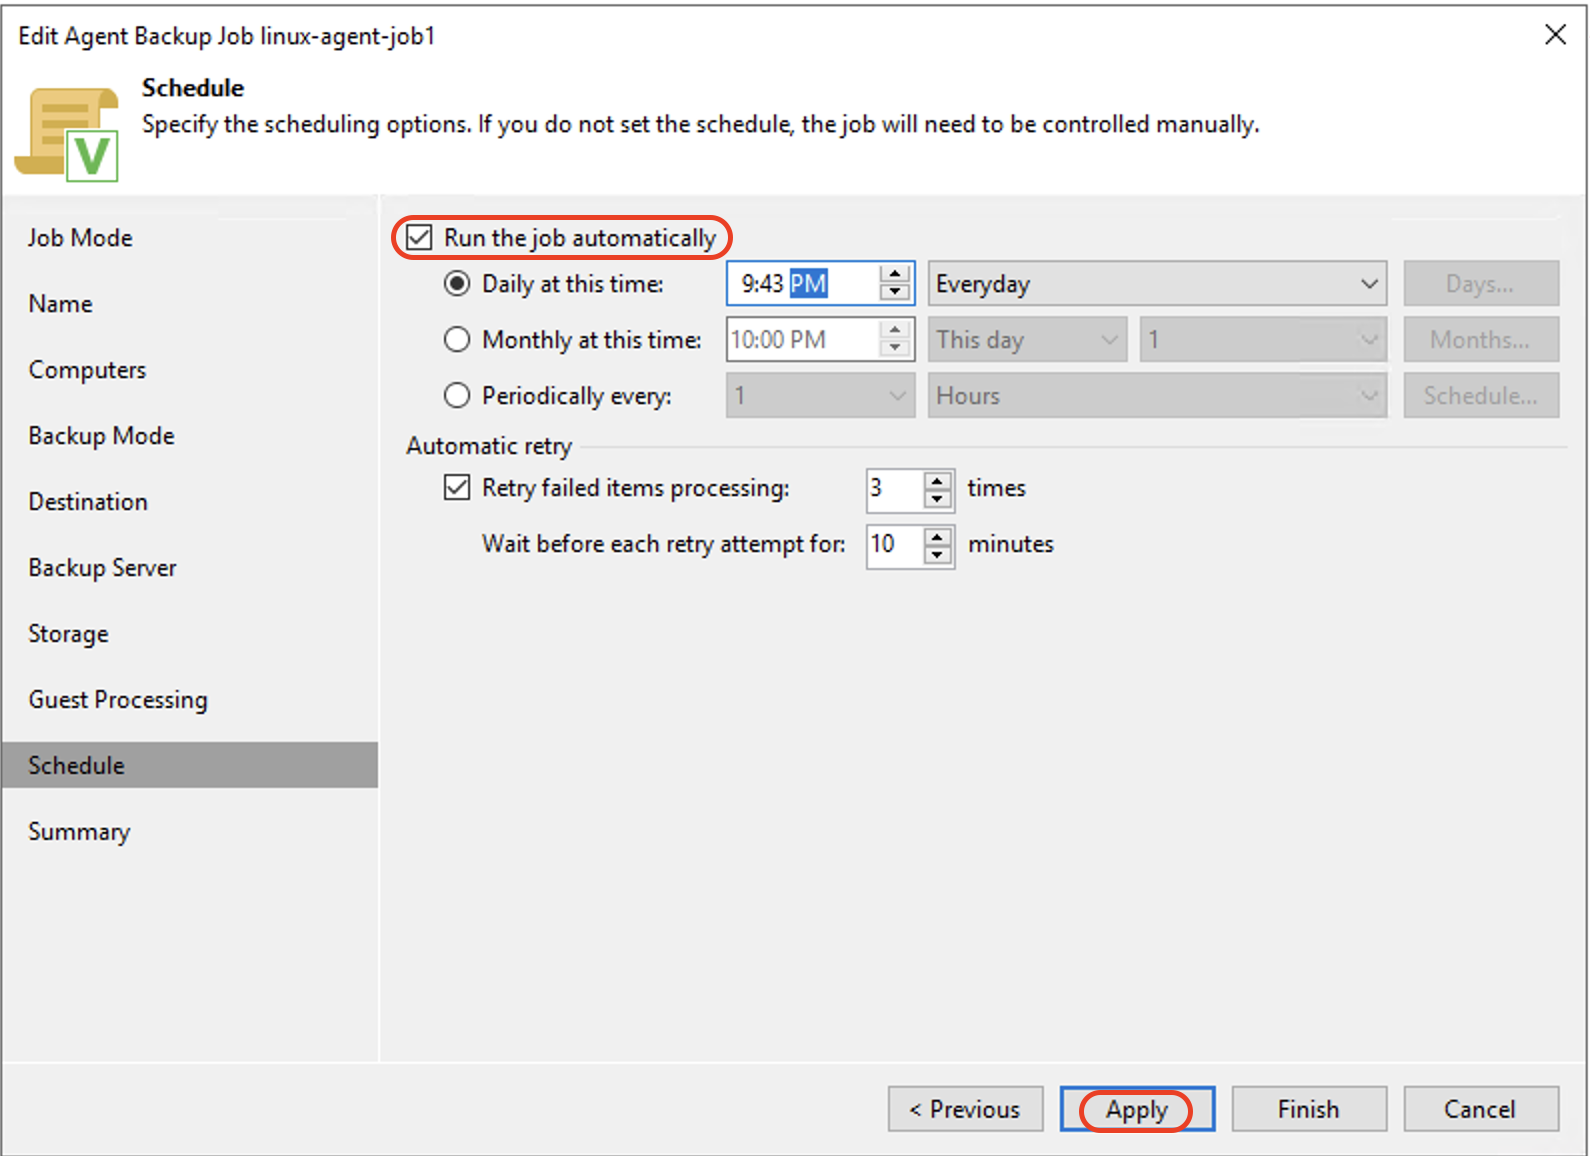
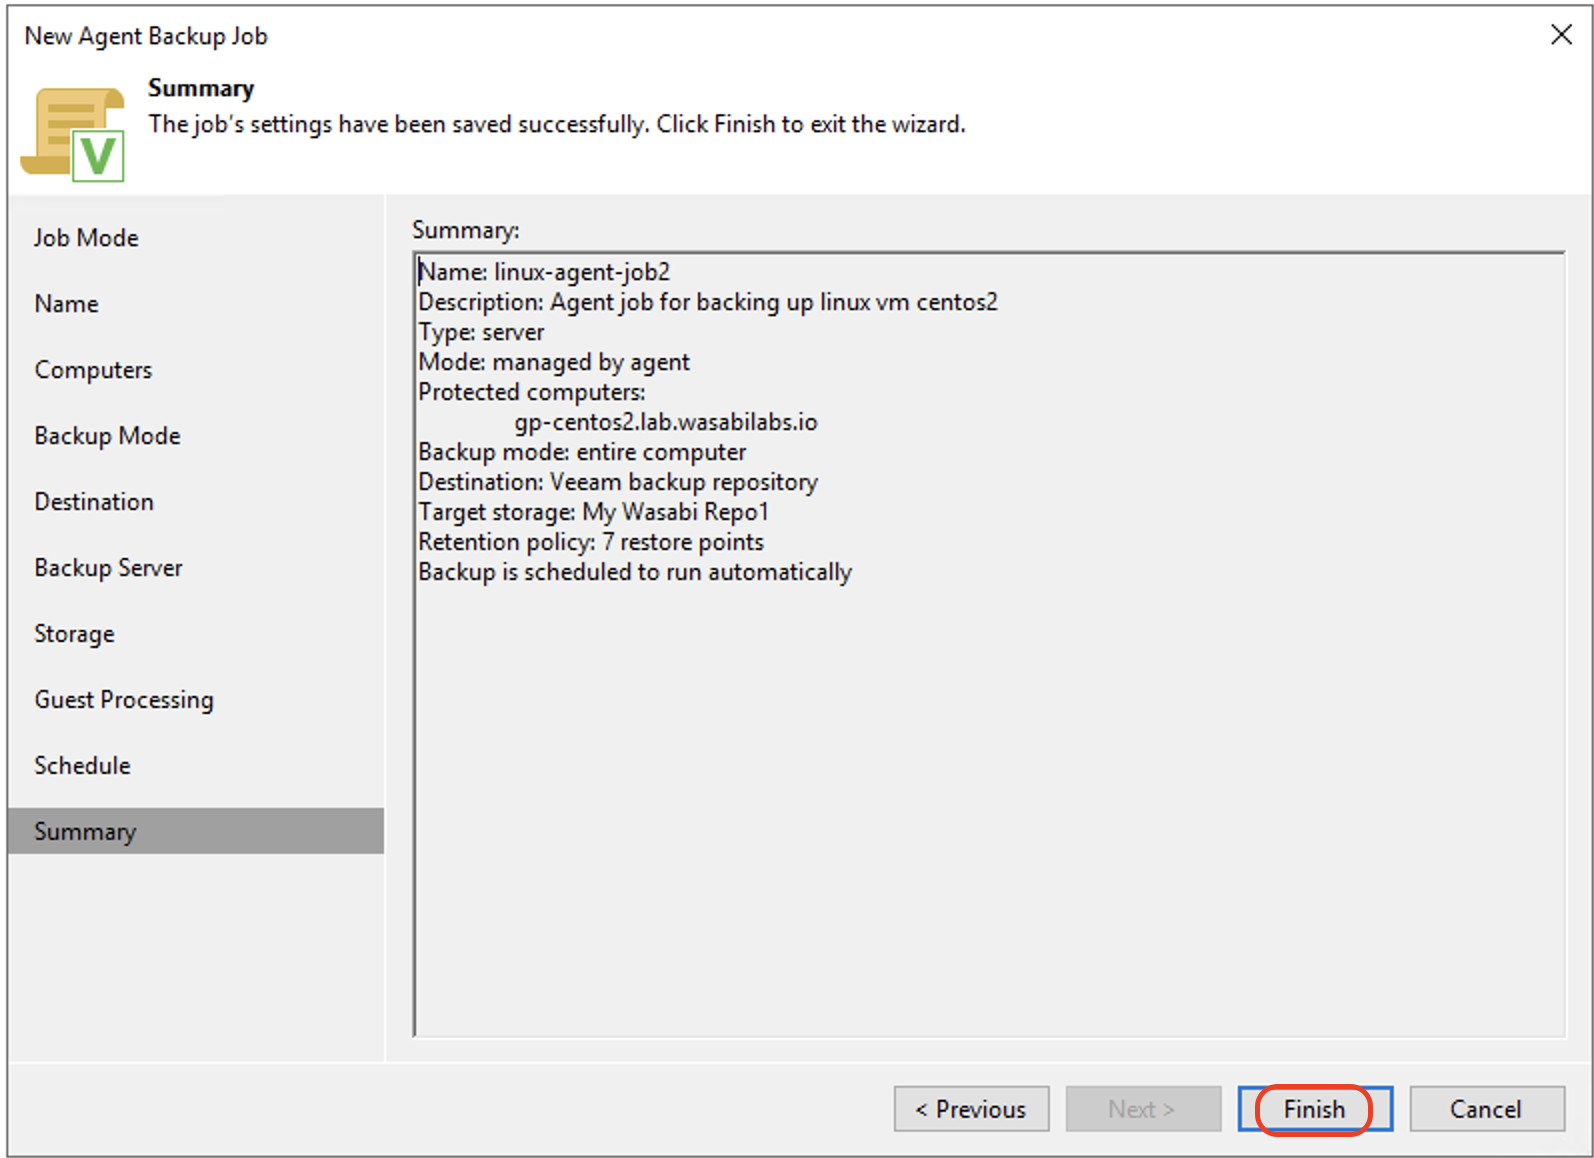
Review the Summary. Click Finish to complete creating the Agent Backup Job.
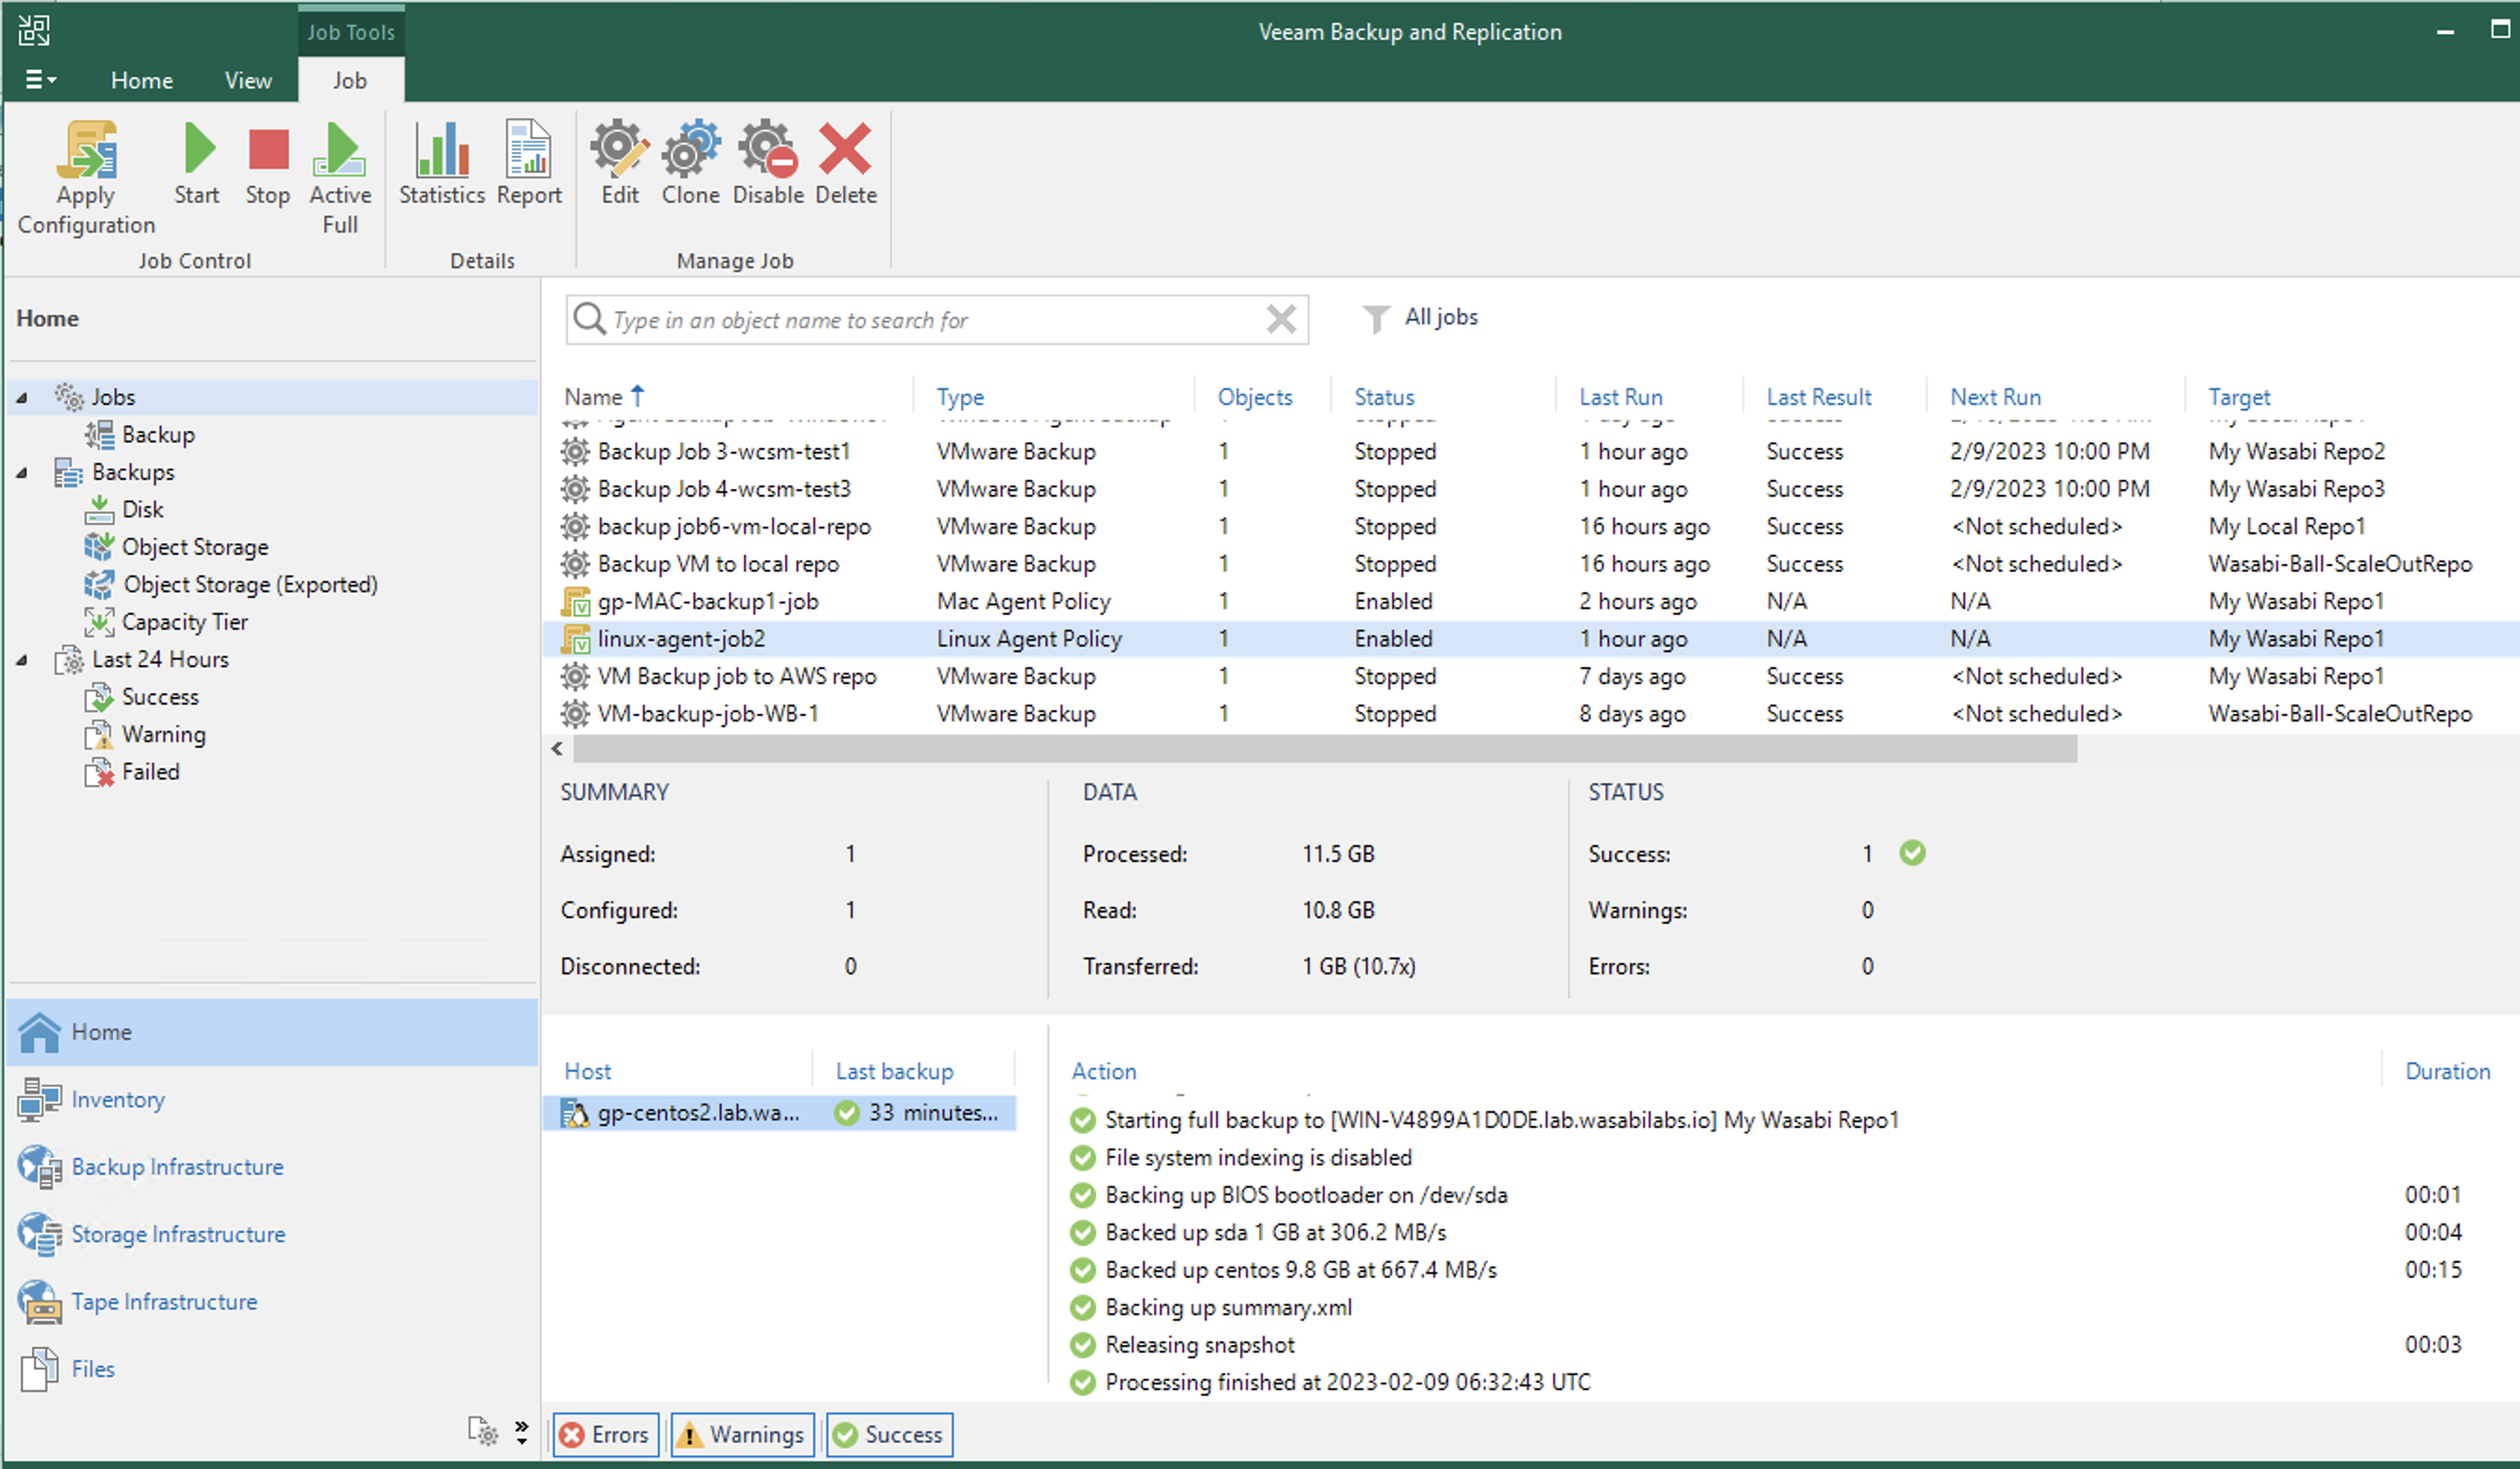
The backup job for agent can be viewed by clicking on the job after it runs, per the configured schedule.
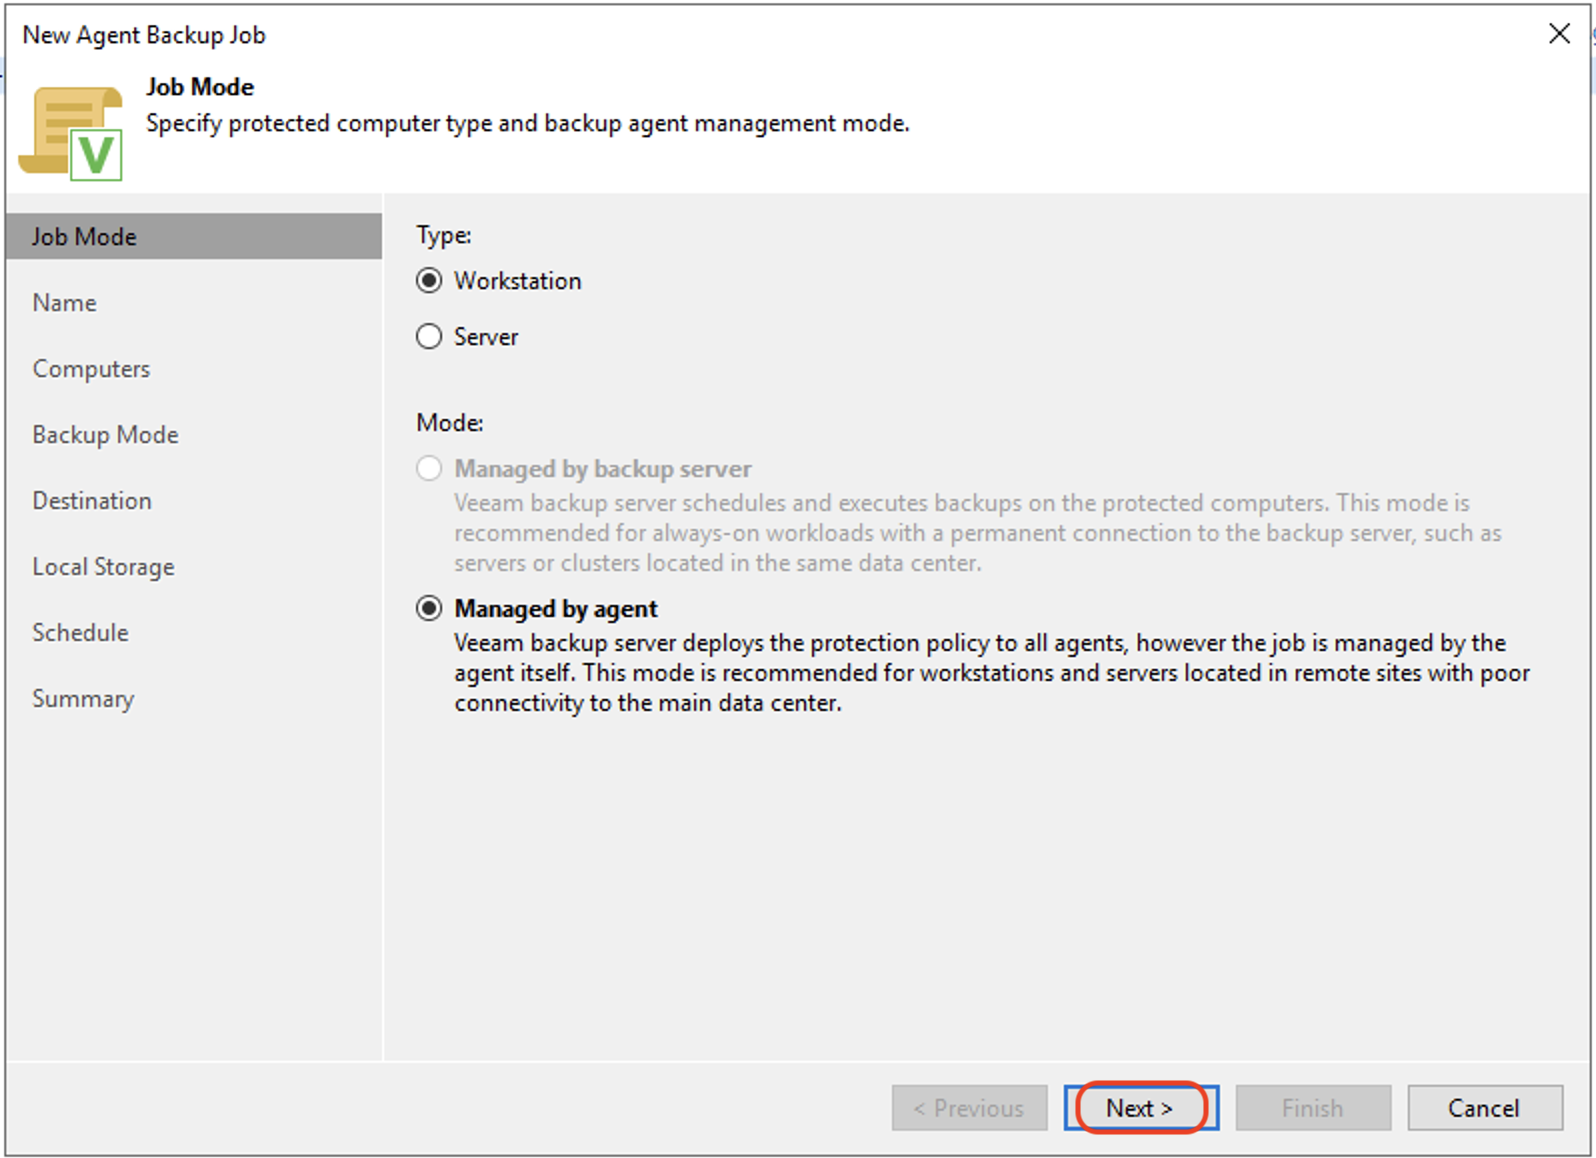
Creating a Backup job for Mac Computers
Follow the steps below to create a backup job on Veeam Backup and Replication using Veeam agent for Mac.
On the Home tab of Veeam Back and Replication, click Backup Job. Click Mac Computer.
Select the computer Type. Click Next.
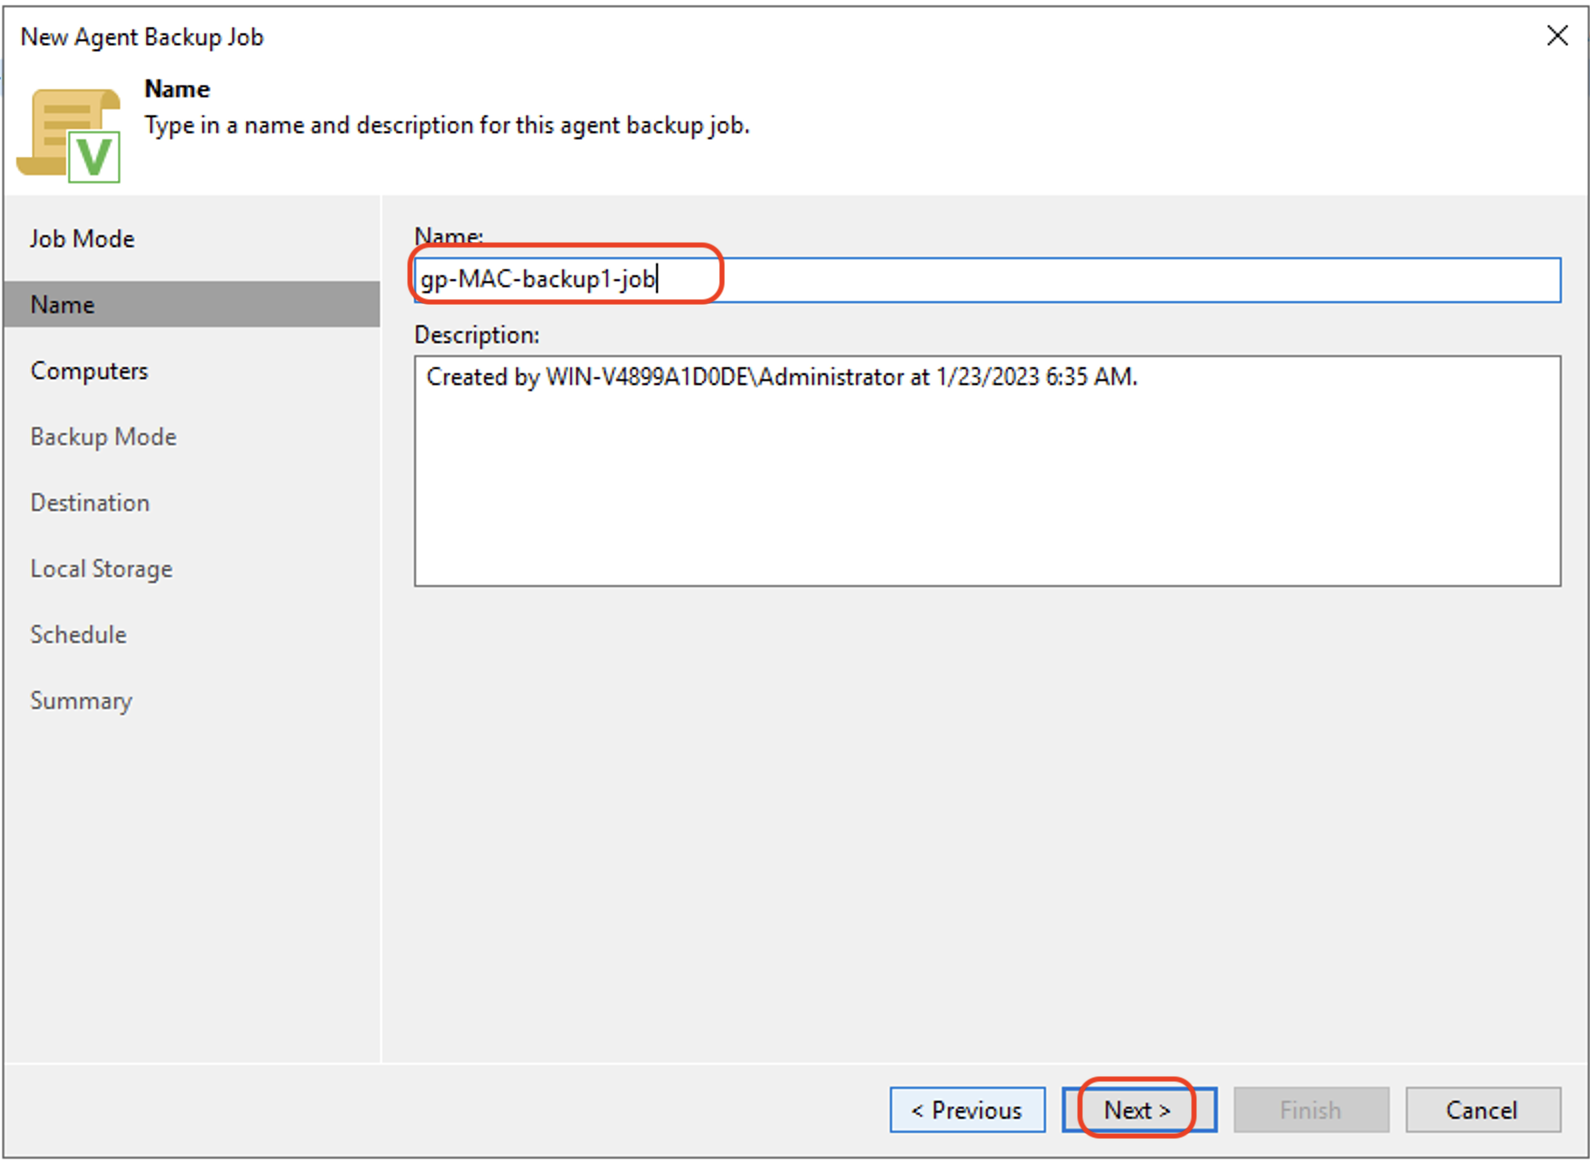
Enter a Name for the Backup job and, optionally, a Description. Click Next to continue.
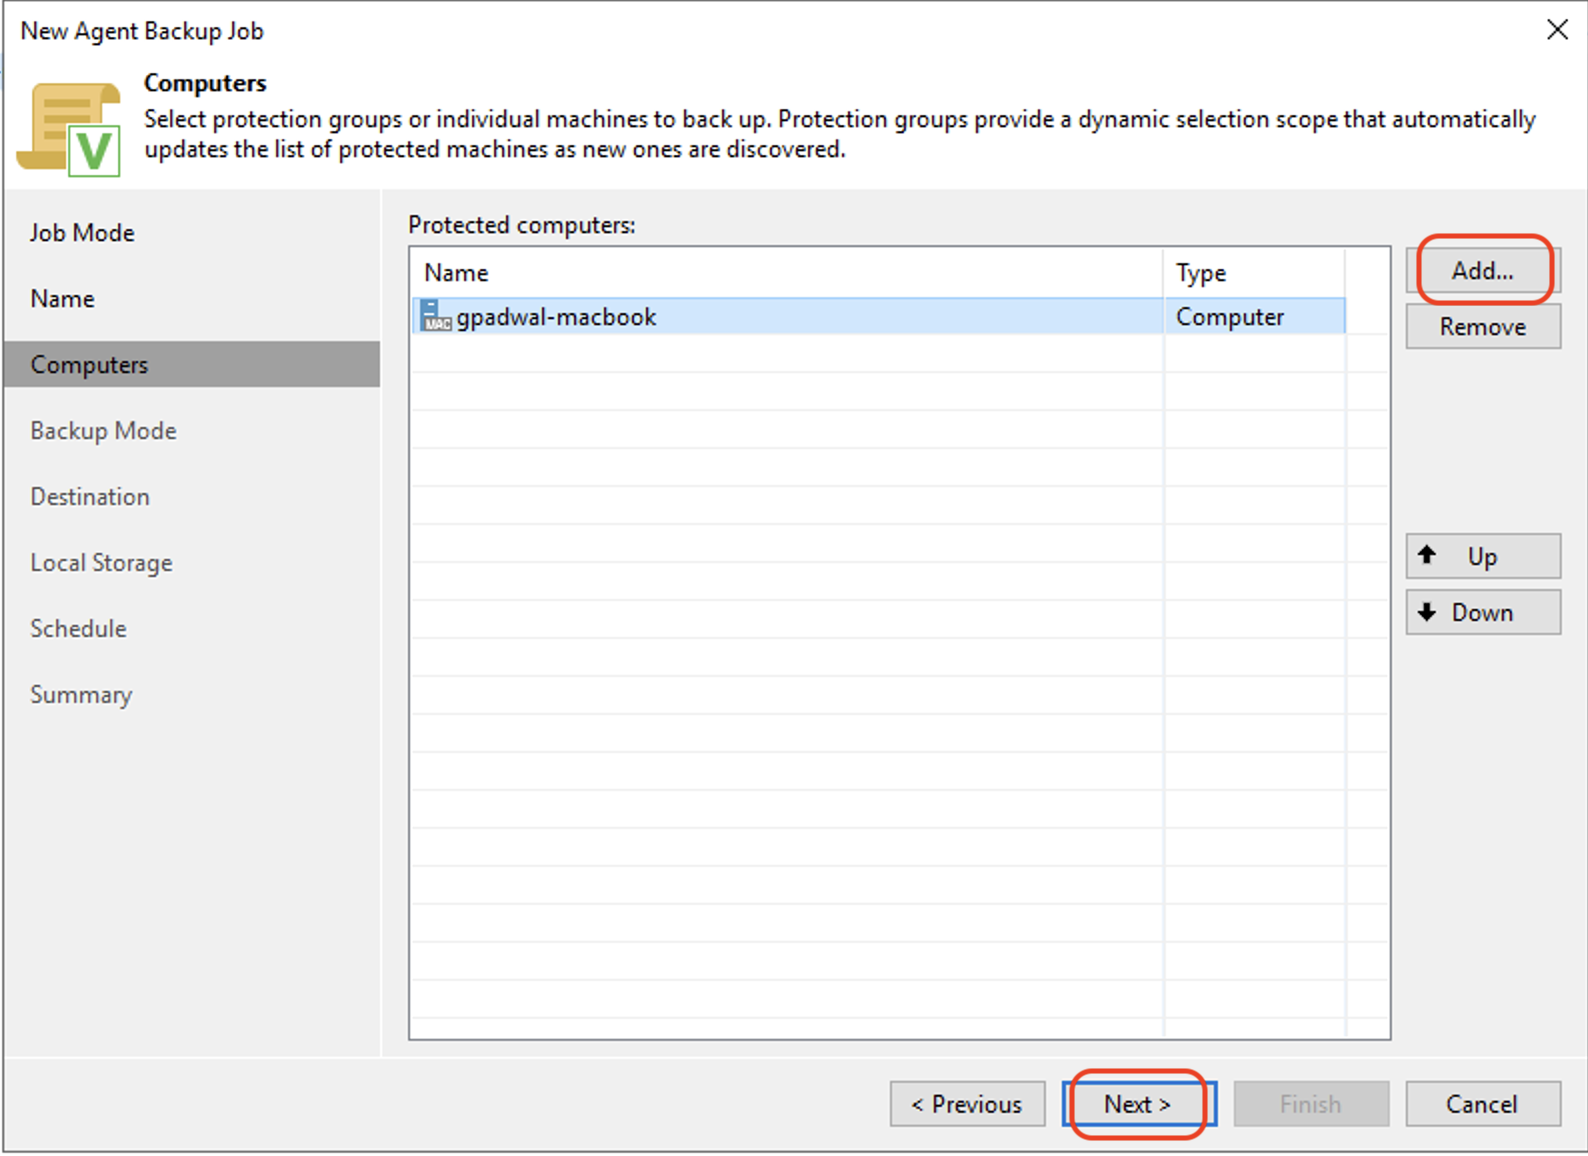
To add a computer from a configured Protection group, click Add and then Protection group. Select the computer and click OK. Click Next.
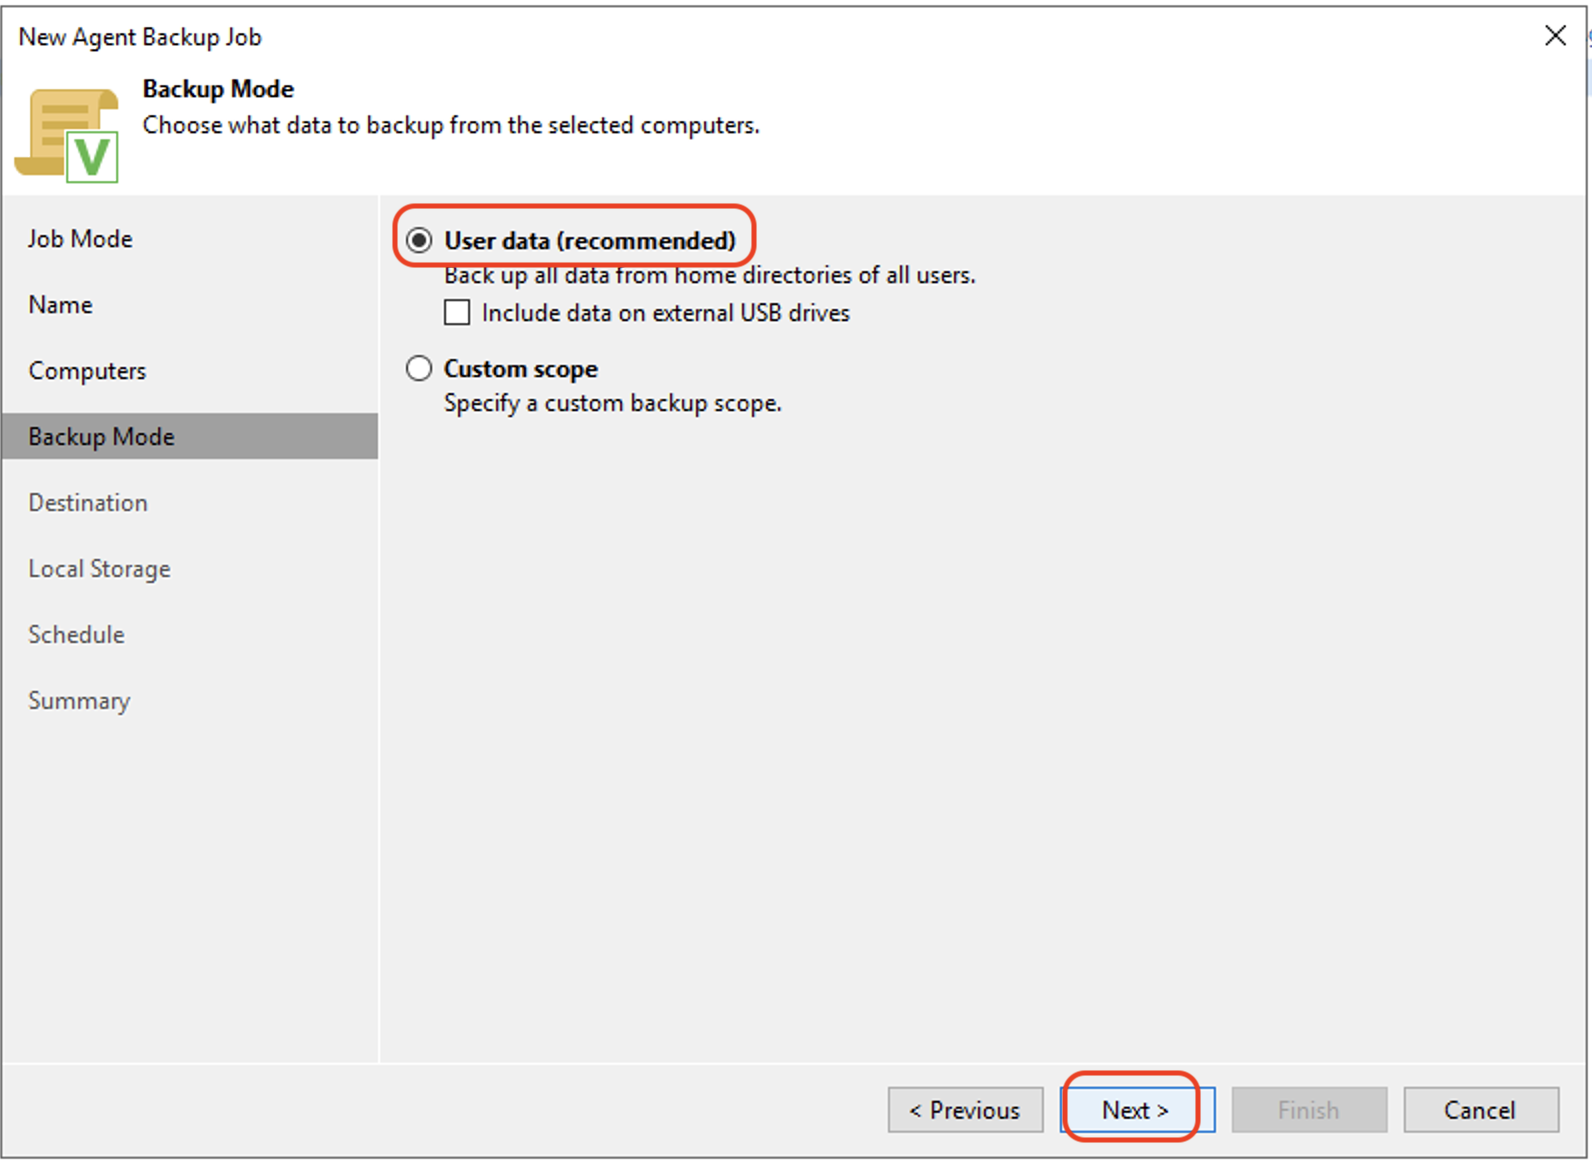
Select the data to be backed up by checking either User data (recommended) or Customer scope. If Customer scope is selected, add the path of files to be backed-up. Click Next.
In the Destination tab, select Veeam backup repository to backup directly to Wasabi. Click Next.
Enter the IP address or FQDN of the server running Veeam Backup and Replication. Click Next.
Select the Wasabi backup repository that was created in Section 3 to backup Wasabi directly.
Optionally, set a schedule to run the backup job on a regular basis by checking Daily at, entering the time to start the backup job, and selecting the frequency of backup in days.
Review the Summary and click Finish to create the backup job.
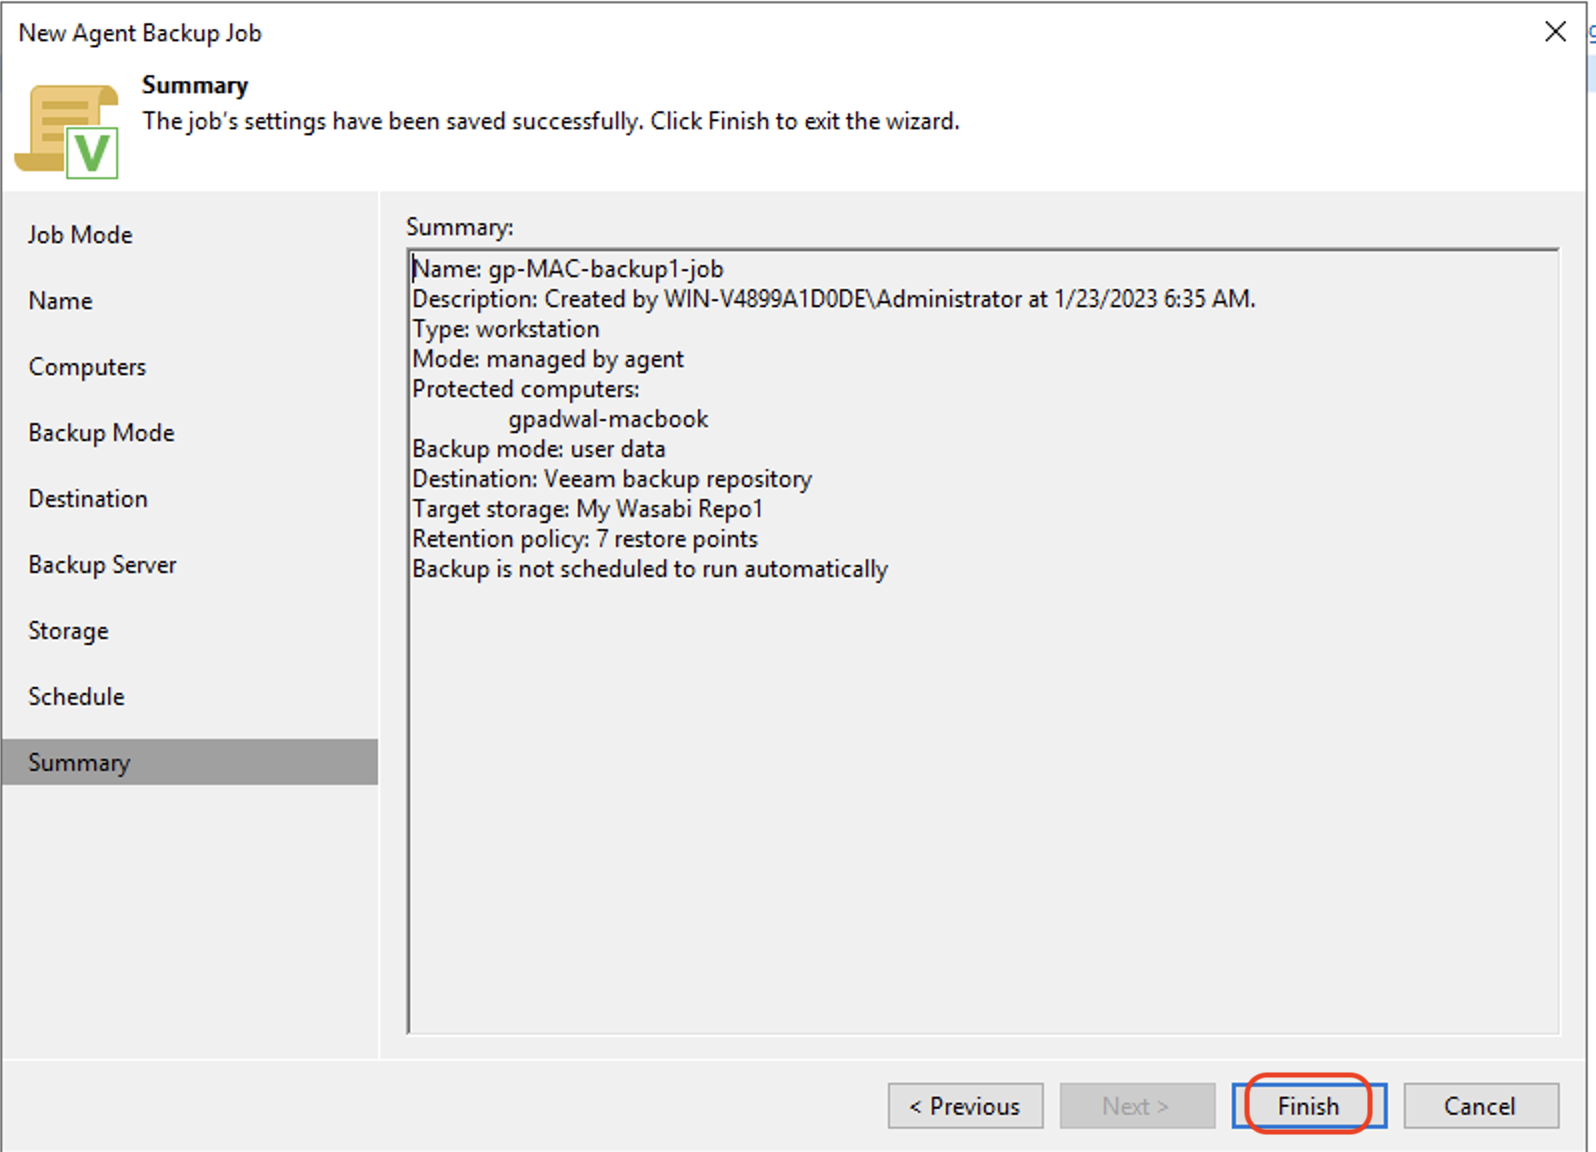
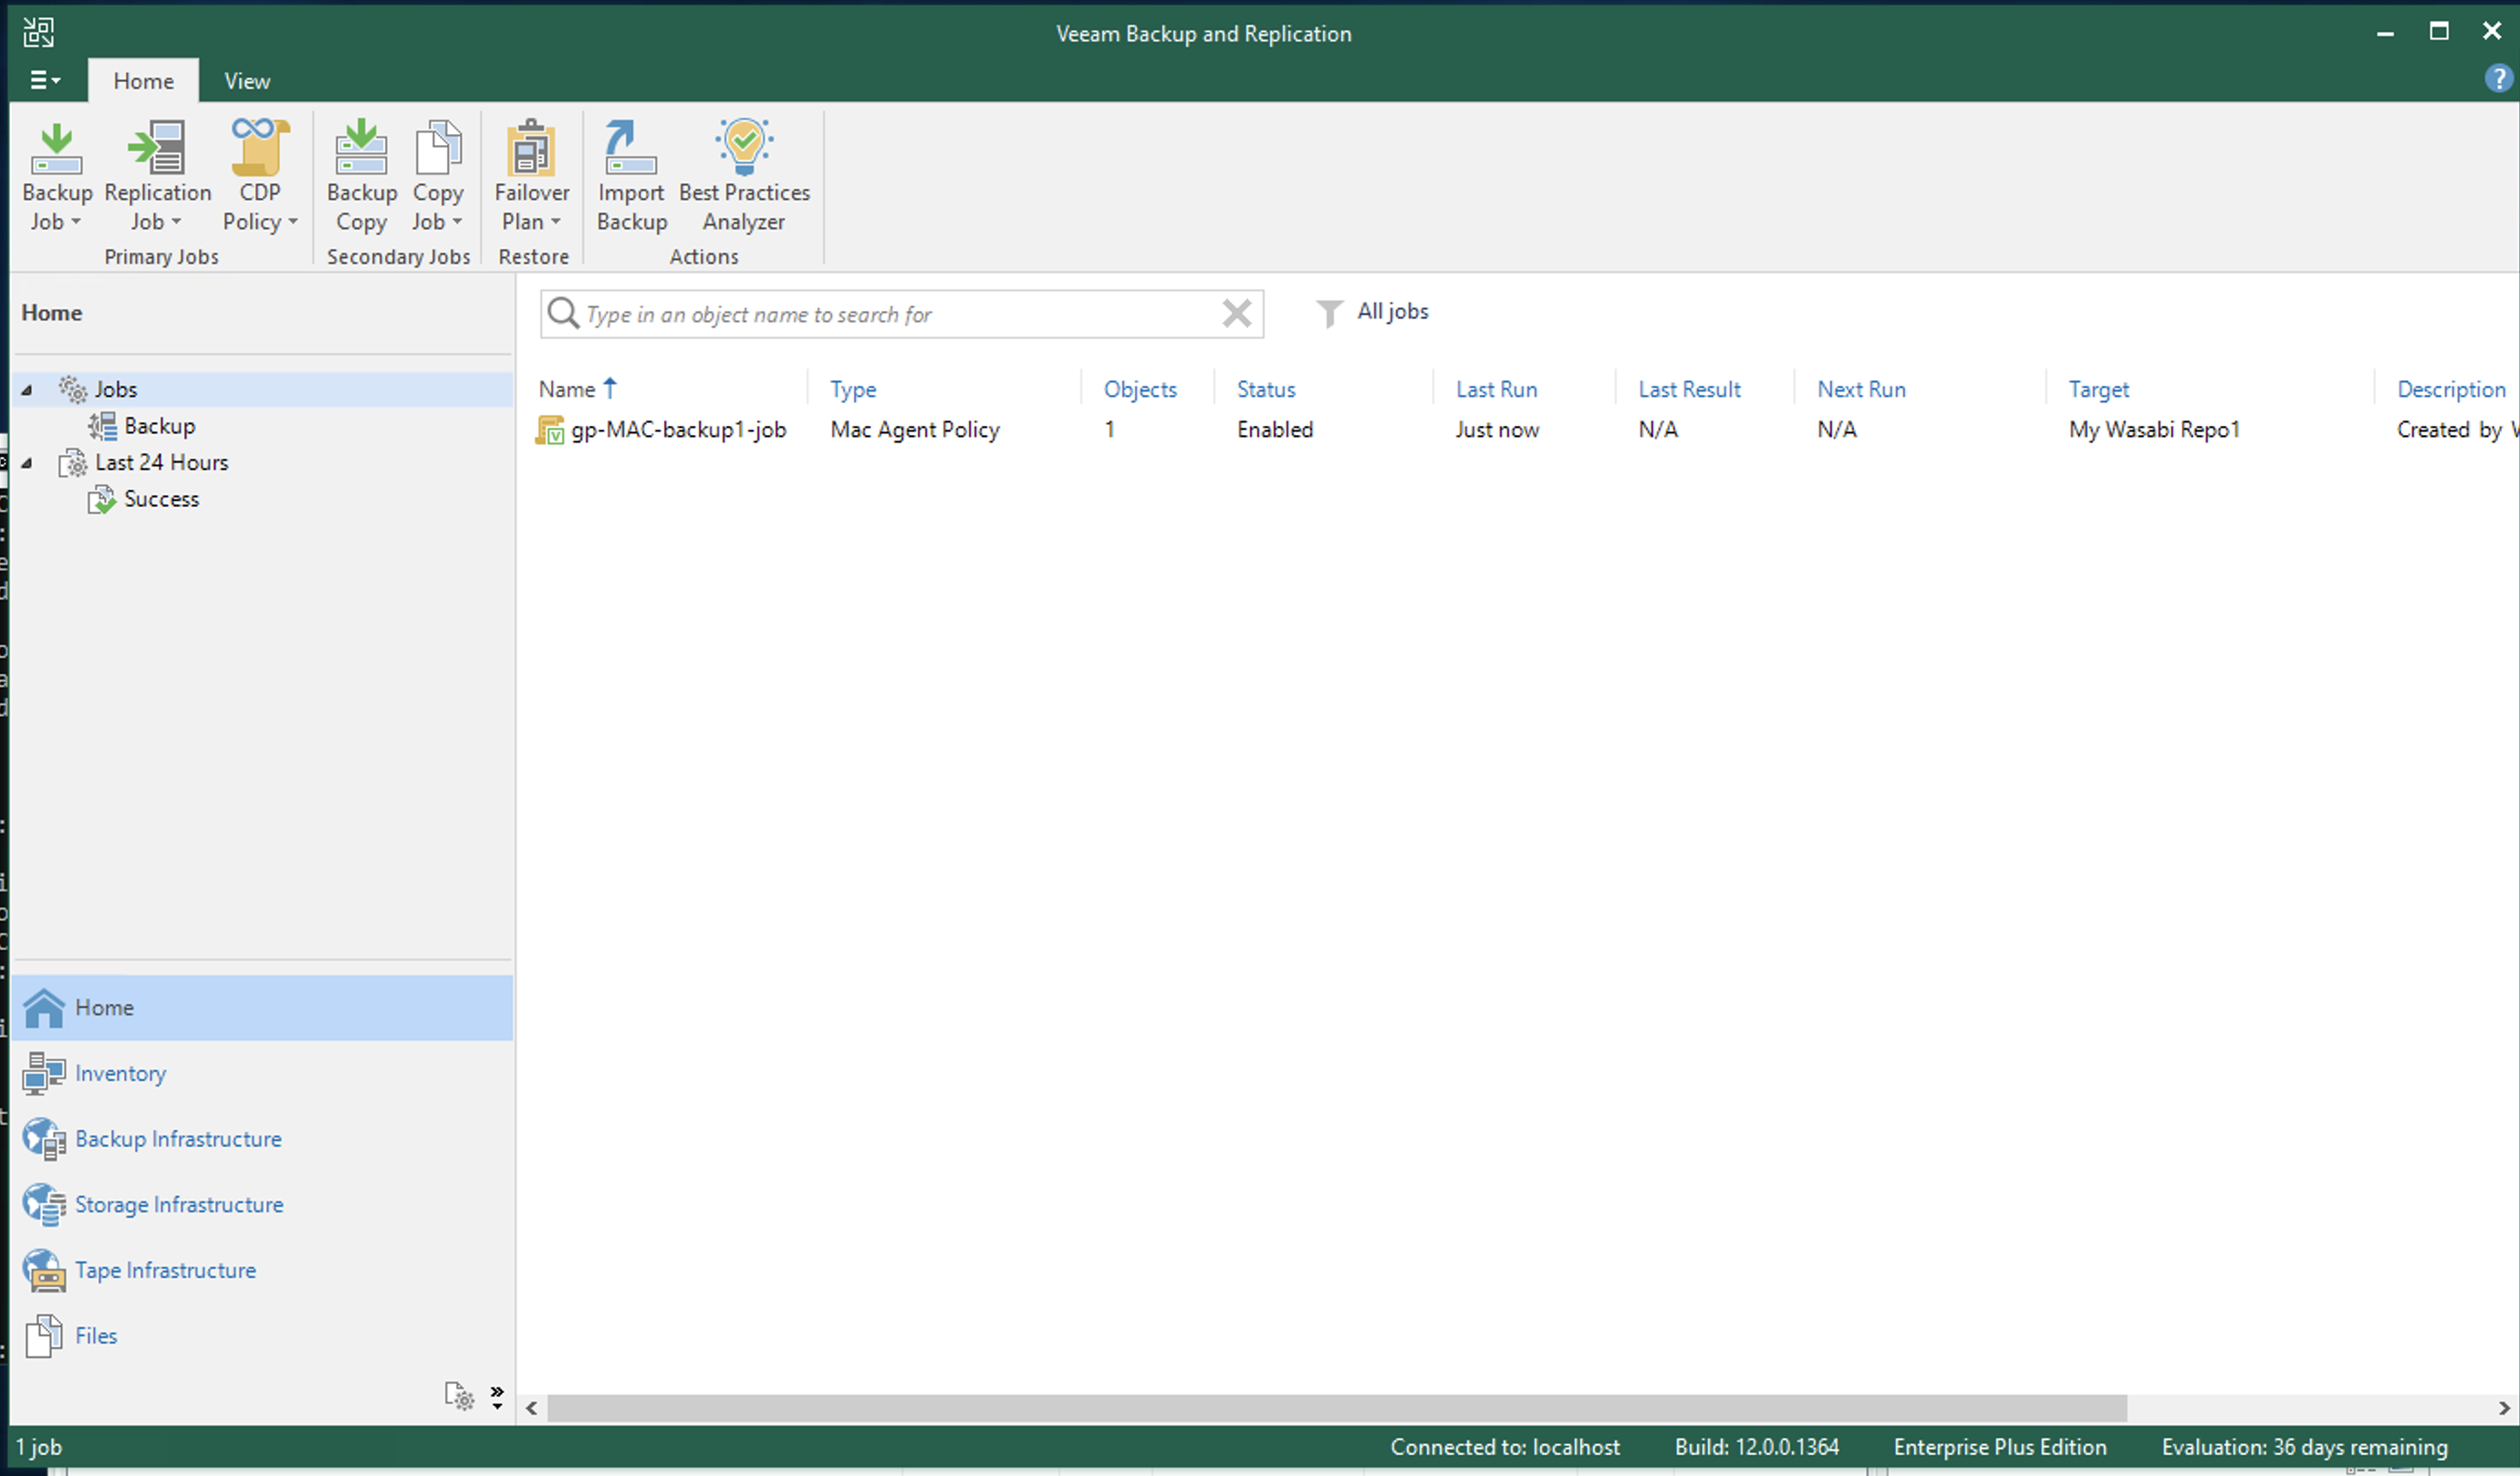
The backup job can be viewed under Jobs in the Home tab.
After creating a Backup Job for a Veeam Agent for Mac, you may need to synchronize them. Veeam Agent synchronizes with Veeam Backup & Replication every six hours. To run the backup job immediately, perform a manual sync using the command below on the Veeam Agent.
veeamconfig mode syncnow
Manually Running the Backup Job
Backups can be scheduled or run manually. To run manual backups for Veeam agents, follow the steps below.
Run a Backup job for a Windows Computer
To initiate a manual backup from the Windows computer, use the below command line, where the unique job ID is generated by Veeam Agent for Microsoft Windows.
"C:\Program Files\Veeam\Endpoint Backup\Veeam.EndPoint.Manager.exe" /backup ""Run a Backup job for a Mac Computer
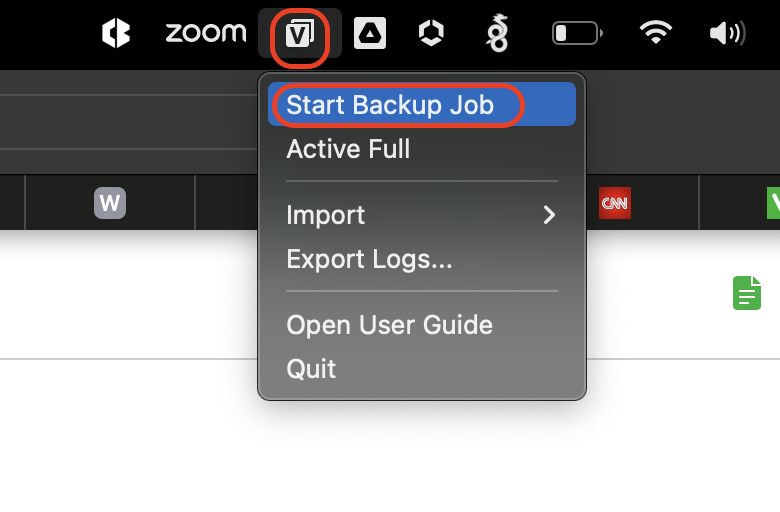
Backups on a Mac OSX computer can only be manually started from the Veeam agent and deployed on the Mac computer.
Click the Veeam Agent icon on the Menu bar of the Mac computer. Click Start Backup Job to start the backup.
Alternatively, backup jobs can be started using command line. Use the below command on the terminal application of a Mac to start a backup job.
veeamconfig job start --nameOr:
veeamconfig job start --idWhere:
— Name of the backup job that you want to start.
— ID of the backup job that you want to start.
Use the following command to get details of the configured backup jobs on the Mac.
veeamconfig job listUse the following command to list the current running backup sessions along with their states.
veeamconfig job list