For a source, you can use a locally mounted NTFS/ReFS volume, an SMB/NFS network share, or just a folder on the volume/share. You cannot use a folder as a source if the folder’s parent folder is already paired with a bucket (i.e., is set as a source itself).
You can add as many sources as you wish.
NAS Source Prerequisites and Setup
For each network share you want to use as a source, you must assign an empty folder on a locally mounted volume on the WCN computer. This folder is used as a shadow copy location and contains a copy of each file on the NAS source in the form of a stub file. The shadow copy folder acts as a gateway between the NAS source and the bucket.
With Data Replication, there is no difference from the local volume source. However, when the Wasabi Cloud NAS Space Reclaiming mechanism needs to replace the actual file on the NAS source with a stub file, it creates the stub file only in the shadow copy folder. This way, if you want to retrieve a nearline file manually, you need to operate on the stub file located in the shadow copy folder. The same applies to the Active Sync mechanism unless you have configured the mechanism to automatically retrieve the source-synchronized data from other sources. When you need to synchronize the contents of the source and bucket, you need to operate on the shadow copy folder, and all restored data will appear there in the form of stub files, which you can then manually restore on the NAS source.
As stub files are located only in the shadow copy folder, to allow retrieving them on demand, you must export the shadow copy folder as a SMB/NFS share on your network. Users and applications should then attempt to open a nearline file on the exported shadow copy folder in order to automatically retrieve it directly on the NAS source.
As a general rule, the capacity of the shadow copy folder must be at least 15% of the capacity of the NAS source itself.
Adding a Source
- In the Wasabi Cloud NAS Configuration interface, click Wasabi Cloud NAS in the left pane.
- Click the Add source button at the bottom left of the window.
- Do one of the following:
- To add a whole volume as a source, select the root of the volume and click OK.
- To add an existing folder as a source, browse to and select the folder and click OK.
- To create a new folder as a source, browse to the location where you want to create it, click New Folder, enter a name of the new folder, and click OK.
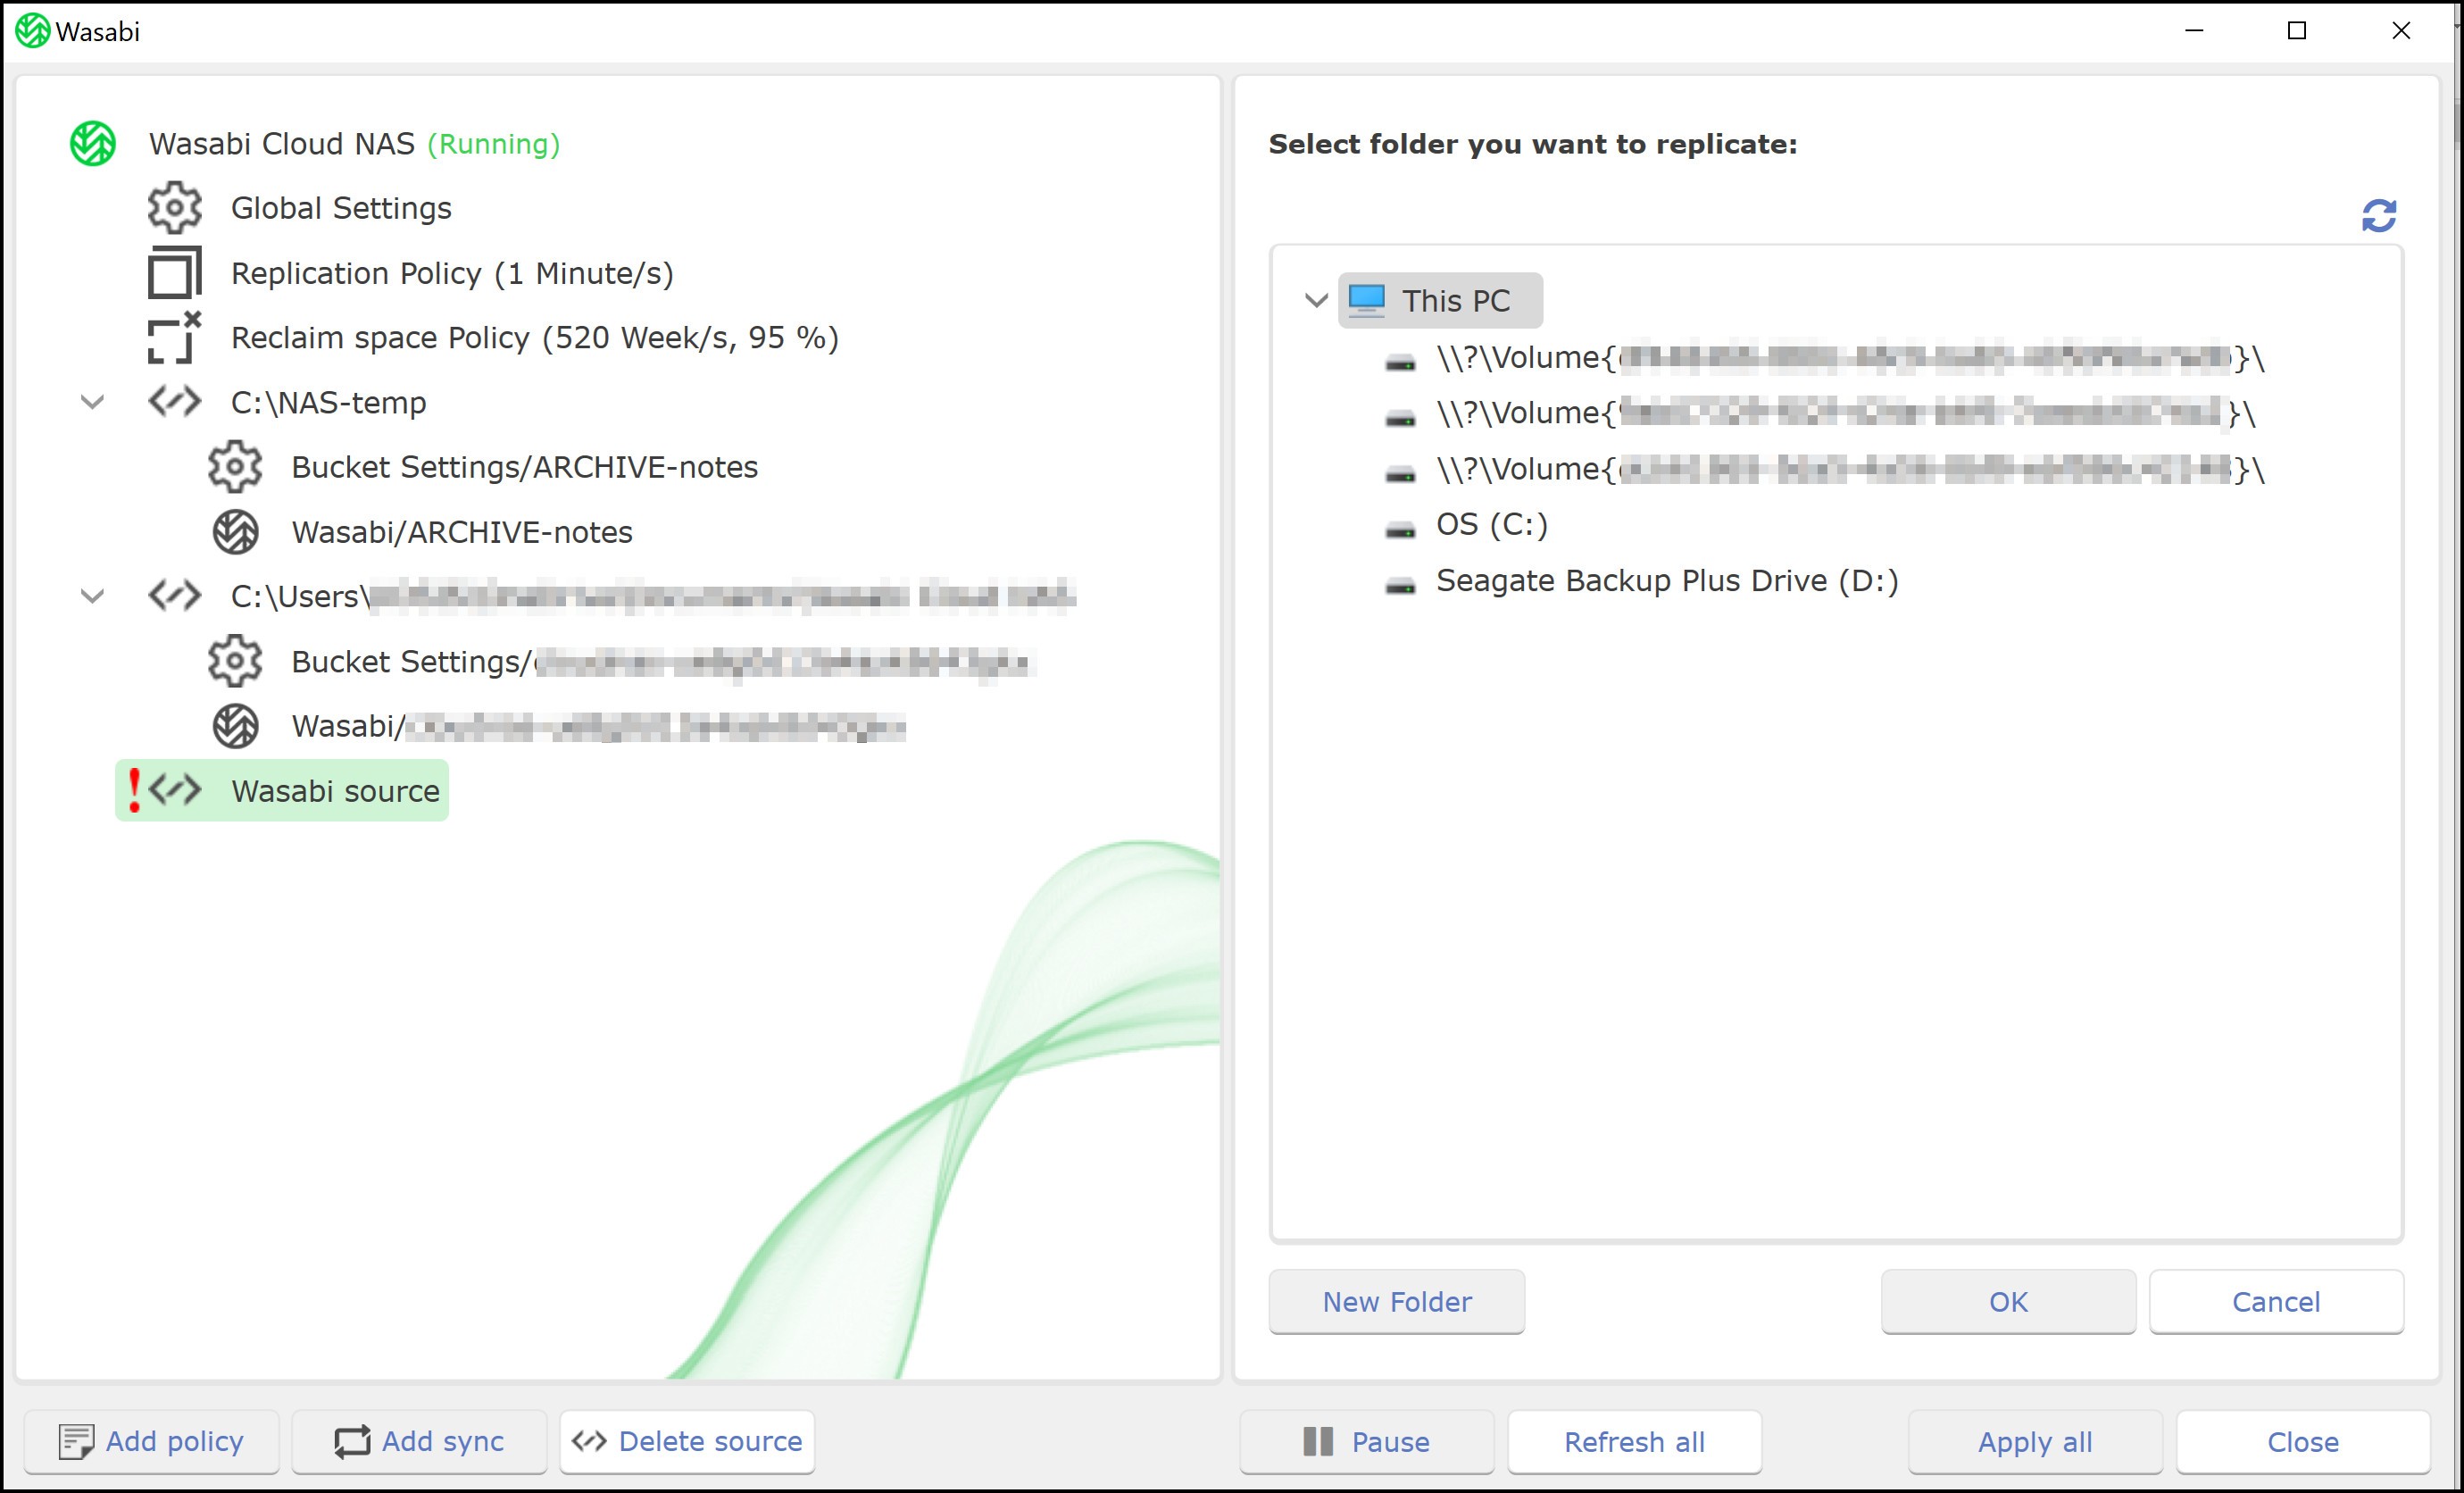
- After you add a local source, you are ready to enter bucket information.
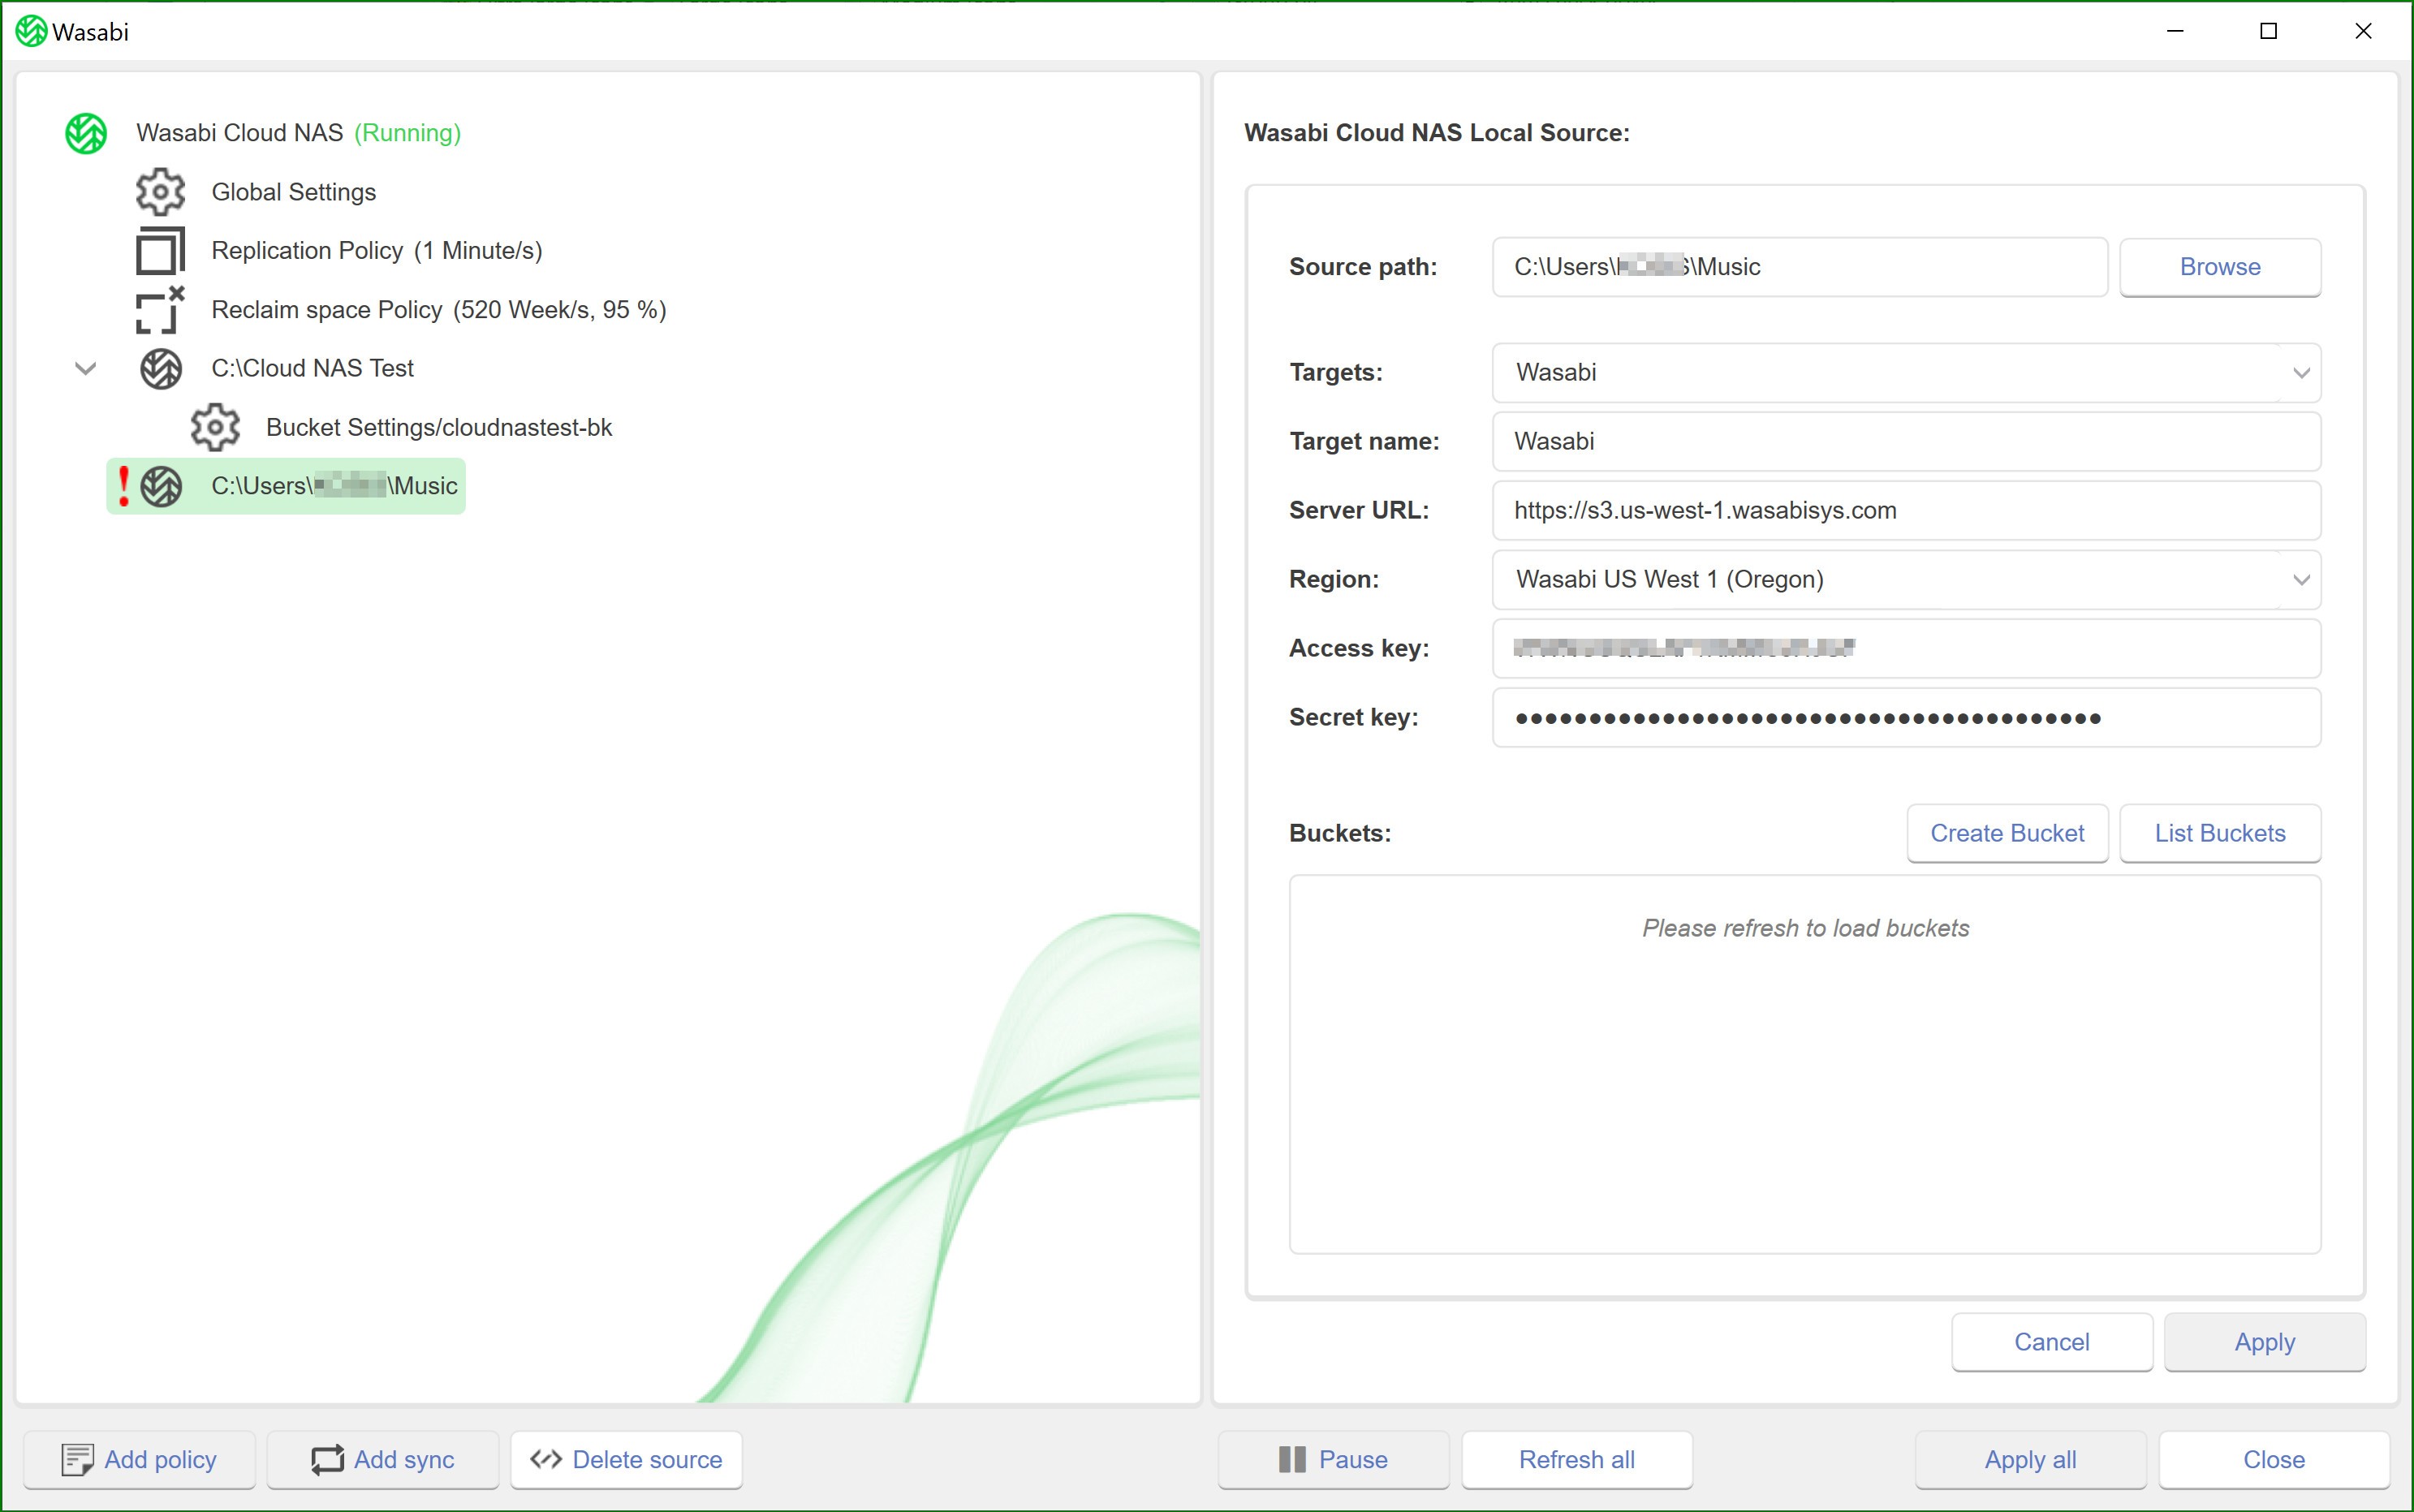
- In Source path (in the right pane), enter the full path to the network share you want to use as a source.
- Select a target and enter a Name for the target.
TIP: Specifying a unique name of the target lets you reuse its parameters when you pair another source with the same target. The target and its parameters will appear in the Targets drop-down box.
- Select the Region. Based on the region you select, the Server URL is auto-populated.
- Enter the Access and Secret keys of the Wasabi bucket.
- You can perform one of these two options:
- Create a new bucket by clicking Create Bucket. Then, enter a name for the new bucket. (For naming conventions, refer to the bucket naming rules)
- Use an existing bucket. Click the List Buckets button and select a bucket from the list to pair it with the newly added source.Do not use the same bucket for two or more sources on the same server.
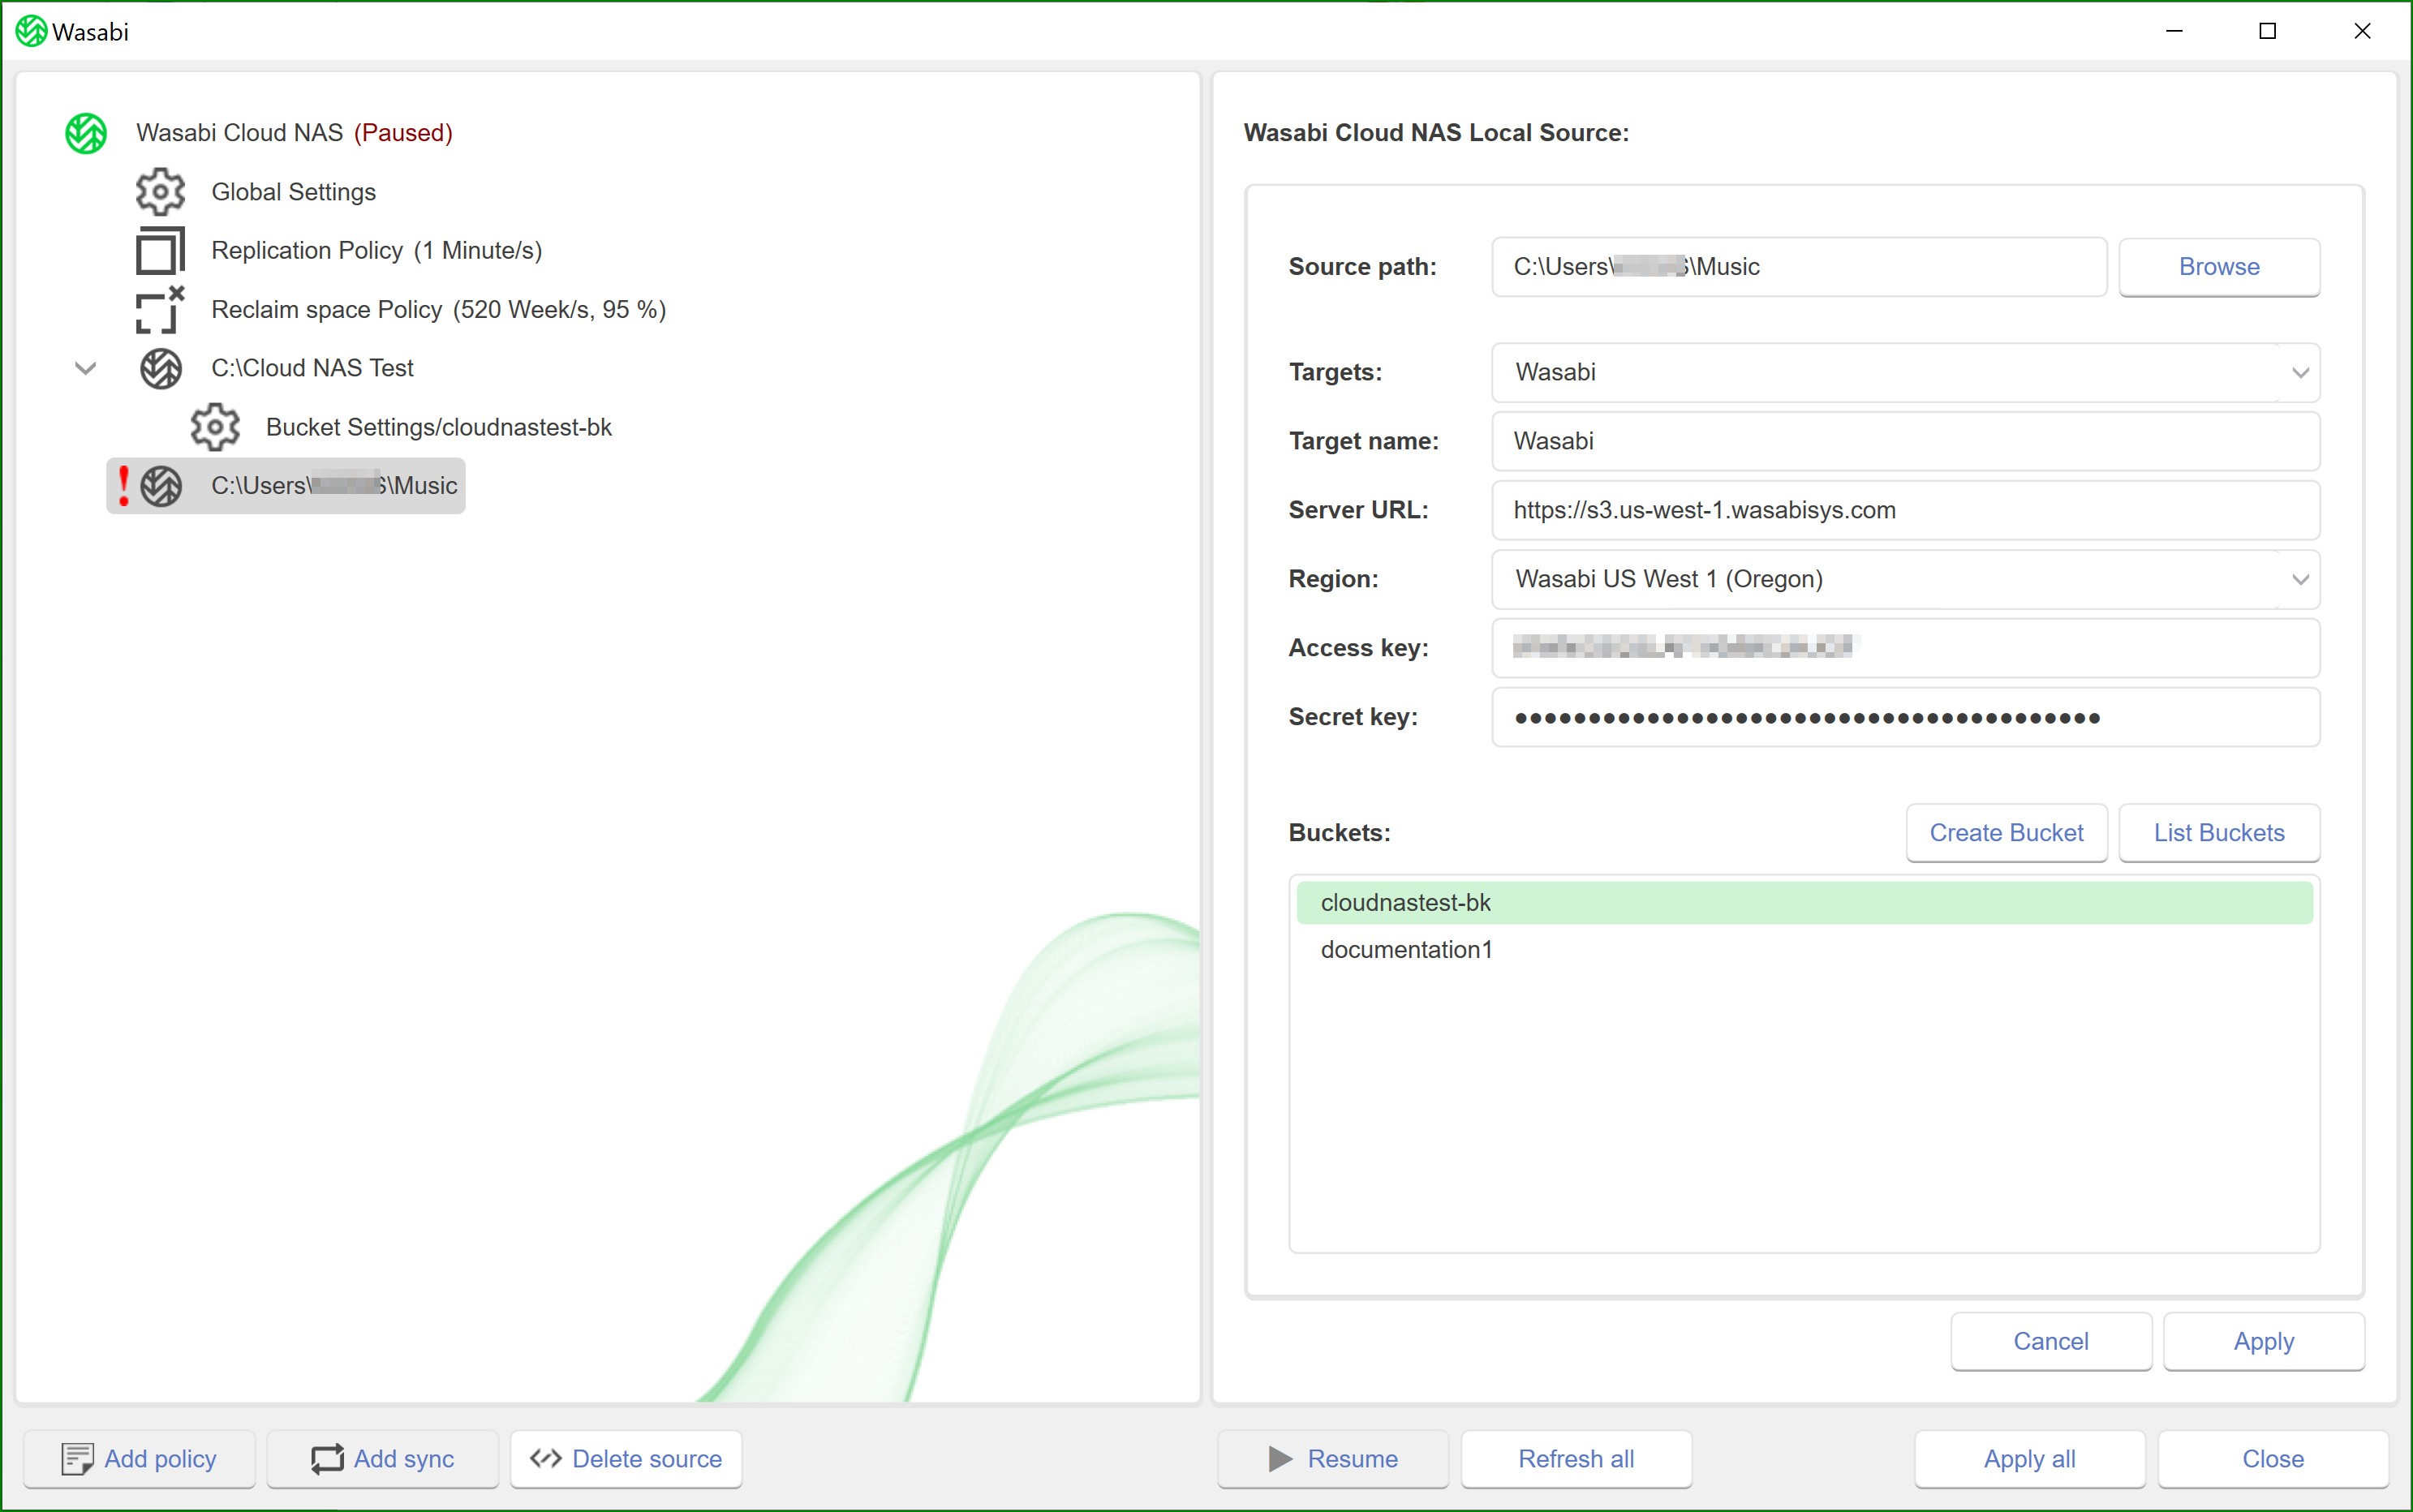
- Click Apply.If you do not have sufficient permissions to list all buckets on the bucket, enter the name of the bucket for which you have permissions in the respective field and then click Apply.
- If you have existing data in the bucket, choose the action to be taken on that data:
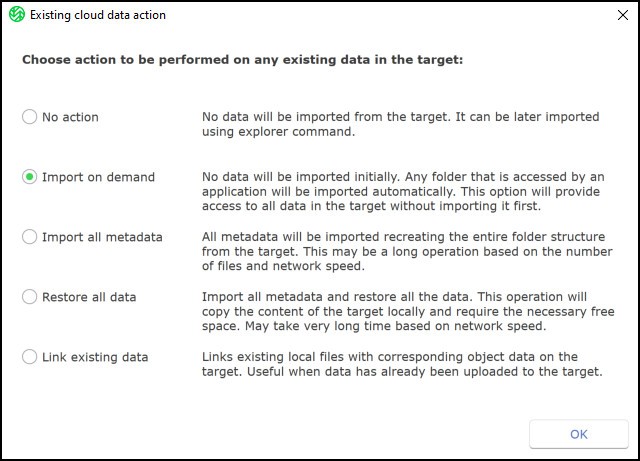
When pairing the source with an object storage bucket, Wasabi NAS allows you to select what to do with already existing data in the bucket. You can choose between the following options:
- No action—No data will be imported on your source. You can import it later, following the steps in Synchronizing Data on the Source and the Bucket.
- Import on demand—Wasabi NAS creates a stub file (nearline file) for each file from the bucket, only when you browse the containing folder on your source. For example, consider that there are two files (“one.xml” and “two.xml”) and a folder “bucket folder” containing a file “three.xml” in the bucket. If you choose to import these on demand, once you browse the root of your source, Wasabi NAS will create stub files “one.xml” and “two.xml” as well as “bucket folder.” The “bucket folder” will remain empty until you open it on your source, at which time Wasabi NAS will create a stub file, “three.xml.”
- Import all metadata—Your source will be populated with all folders and files from the bucket, but the files will be represented by stub files (nearline files), which you can retrieve either on demand (by attempting to open them) or manually through Wasabi NAS.
- Restore all data—Wasabi NAS retrieves on your source all files and folders from the bucket, keeping their hierarchical structure. All retrieved files will be with replicated status.The operation may take time, and the free space on your source must be enough to accommodate all the data found only in the bucket.
- Link existing data—All files with matching metadata (name and size) found both on your source and the bucket are linked and represented as replicated. If there is a file in the cloud for which there is no match in the source, Wasabi NAS will not create a stub as it expects that the user deleted and no longer needs it.
- Click OK.
Continue by Configuring Bucket Settings.