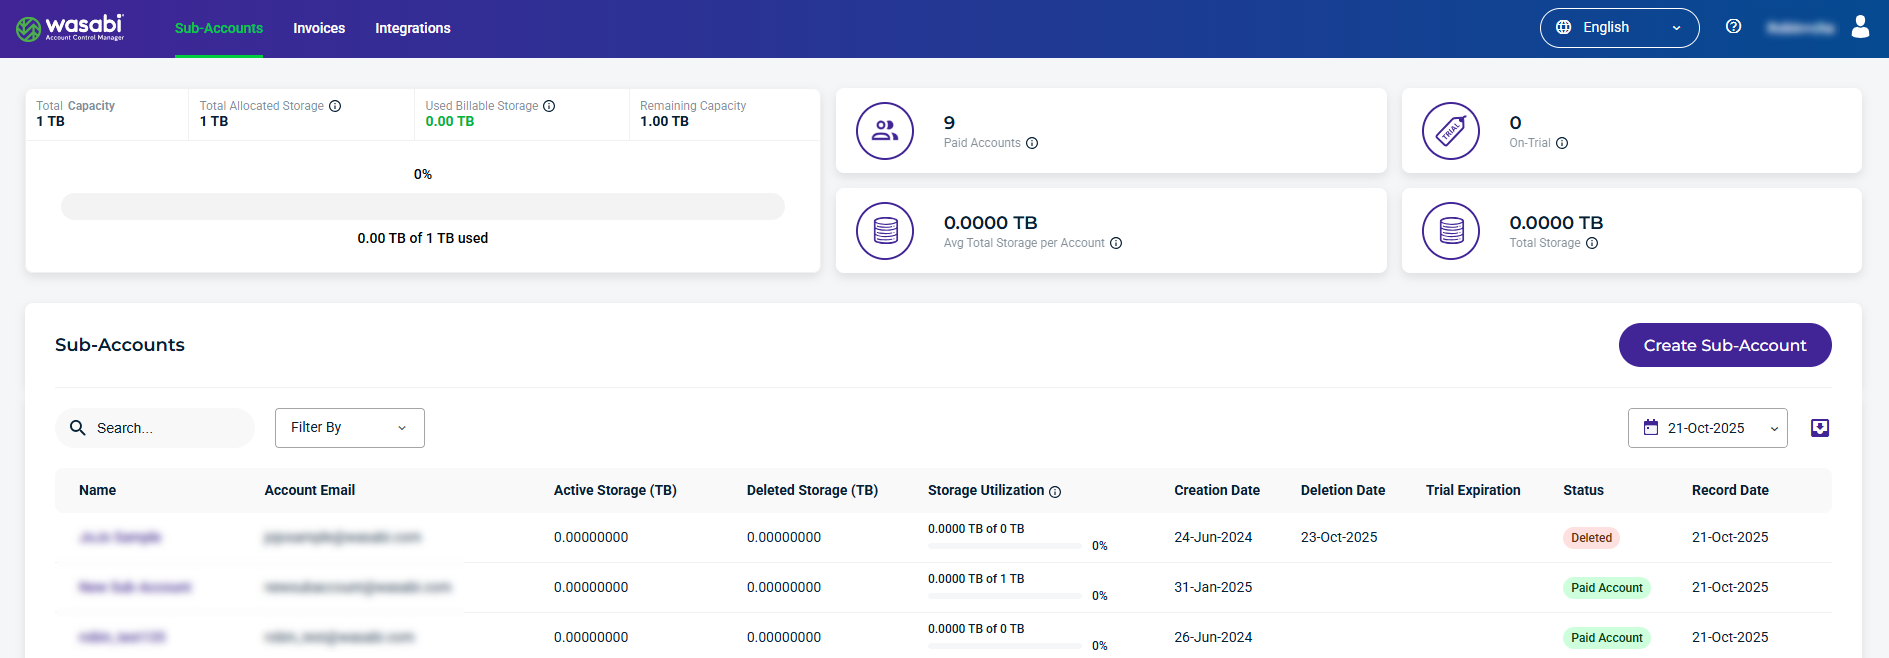
From the Sub-Accounts page, you can manage the following sub-account information:
Usage—Storage data, account details, and metrics.
Buckets—Details and metrics for each bucket.
Invoices—Details and metrics for each invoice.
Account—Allows you to manage Sub-Account information.
Members—A list of members and details about their accounts. You can also deactivate and delete members from this page.
Regions—Enable and disable regions for a sub-account.
The Sub-Accounts page provides control account information, a list of sub-accounts, and a data card with storage details. Select a sub-account from the list to display details.
Usage Tab
From the Usage tab, you can view the following details for a Sub-Account:
Data Card—Shows total current storage, total current objects, last month's invoice, and the account date.
Account Details and Metrics—Shows details about storage usage for the sub-account.

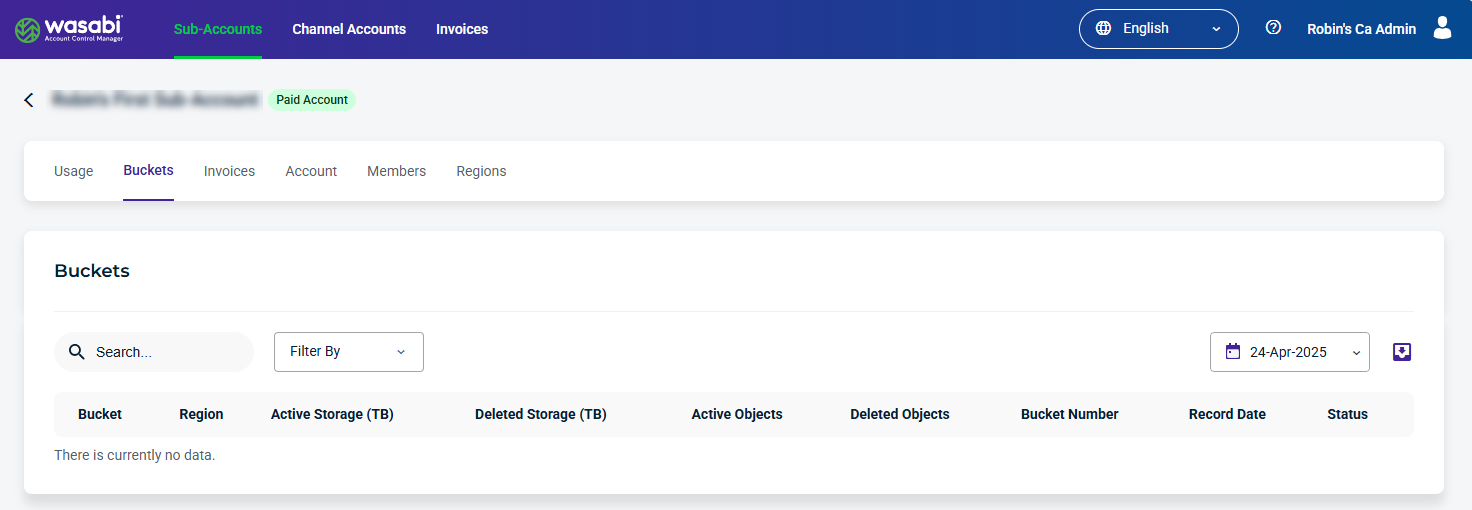
Buckets Tab
From the Buckets tab, you can view details and metrics about each bucket.
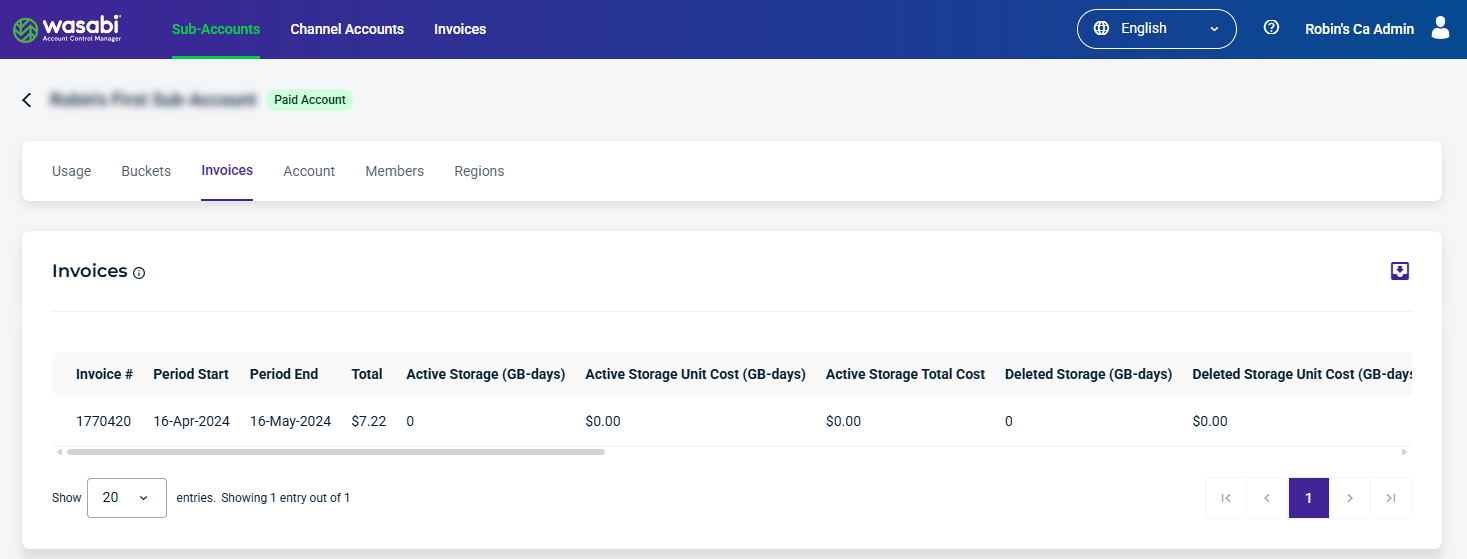
Invoices Tab
From the Invoices tab, you can view details and metrics for each invoice.
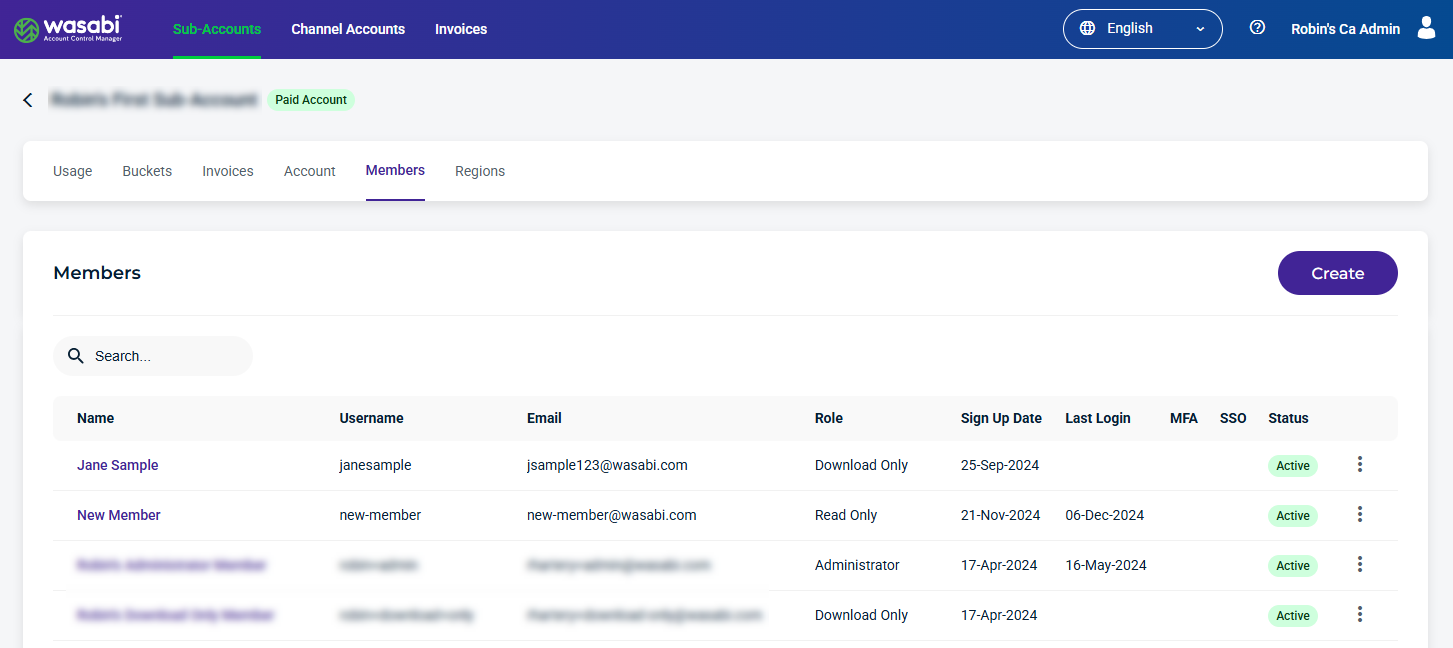
Members Tab
From the Members tab, you can view a list of members and details about their accounts. You can also choose to view a member, deactivate a member, and delete a member from the menu icon.
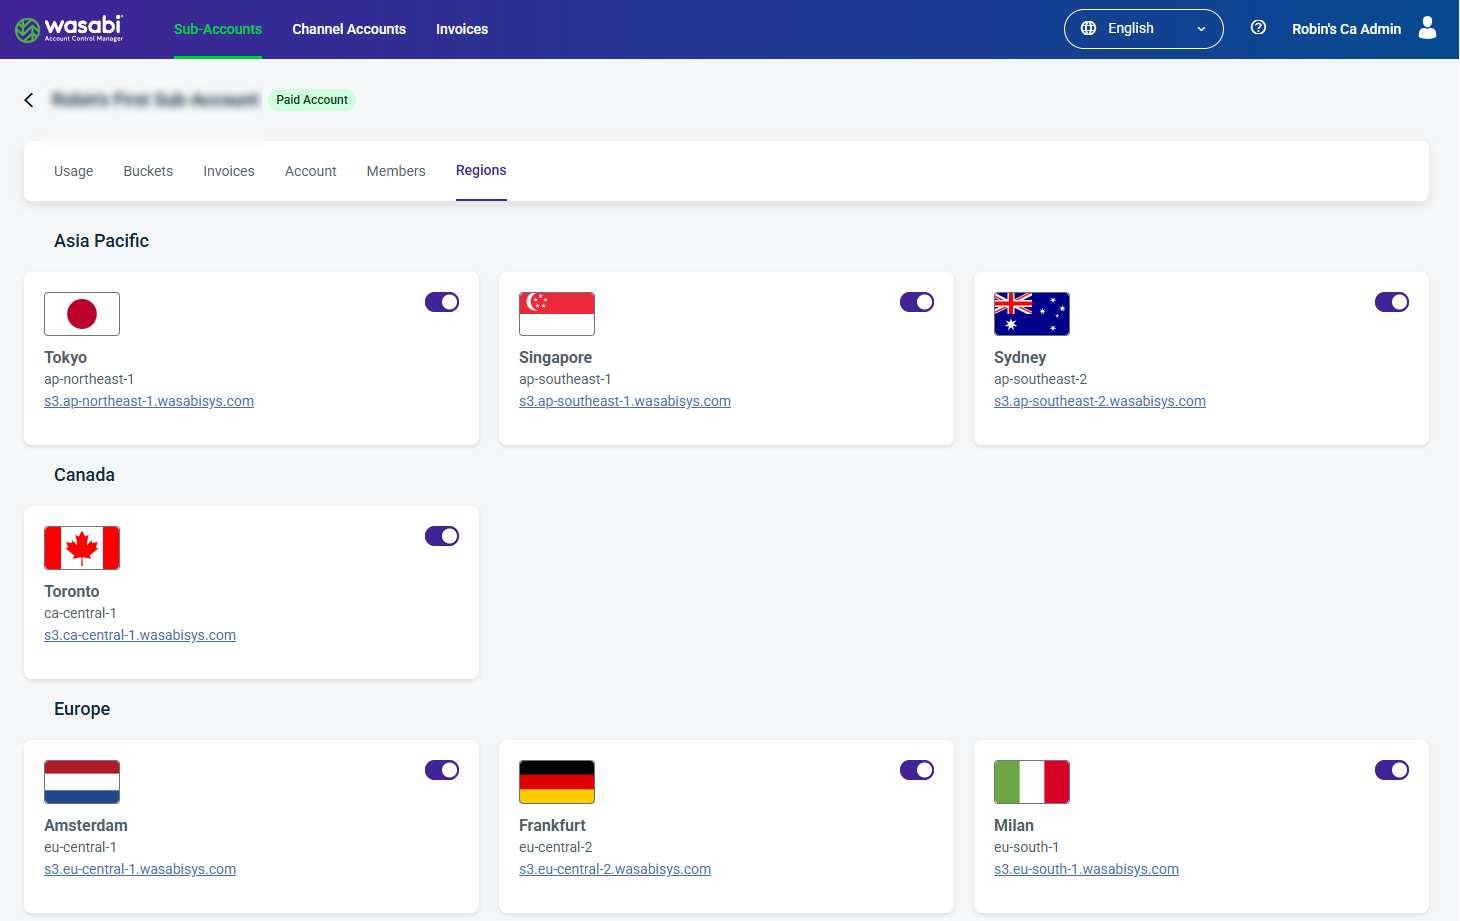
Regions Tab
From the Regions tab, you can enable/disable regions.
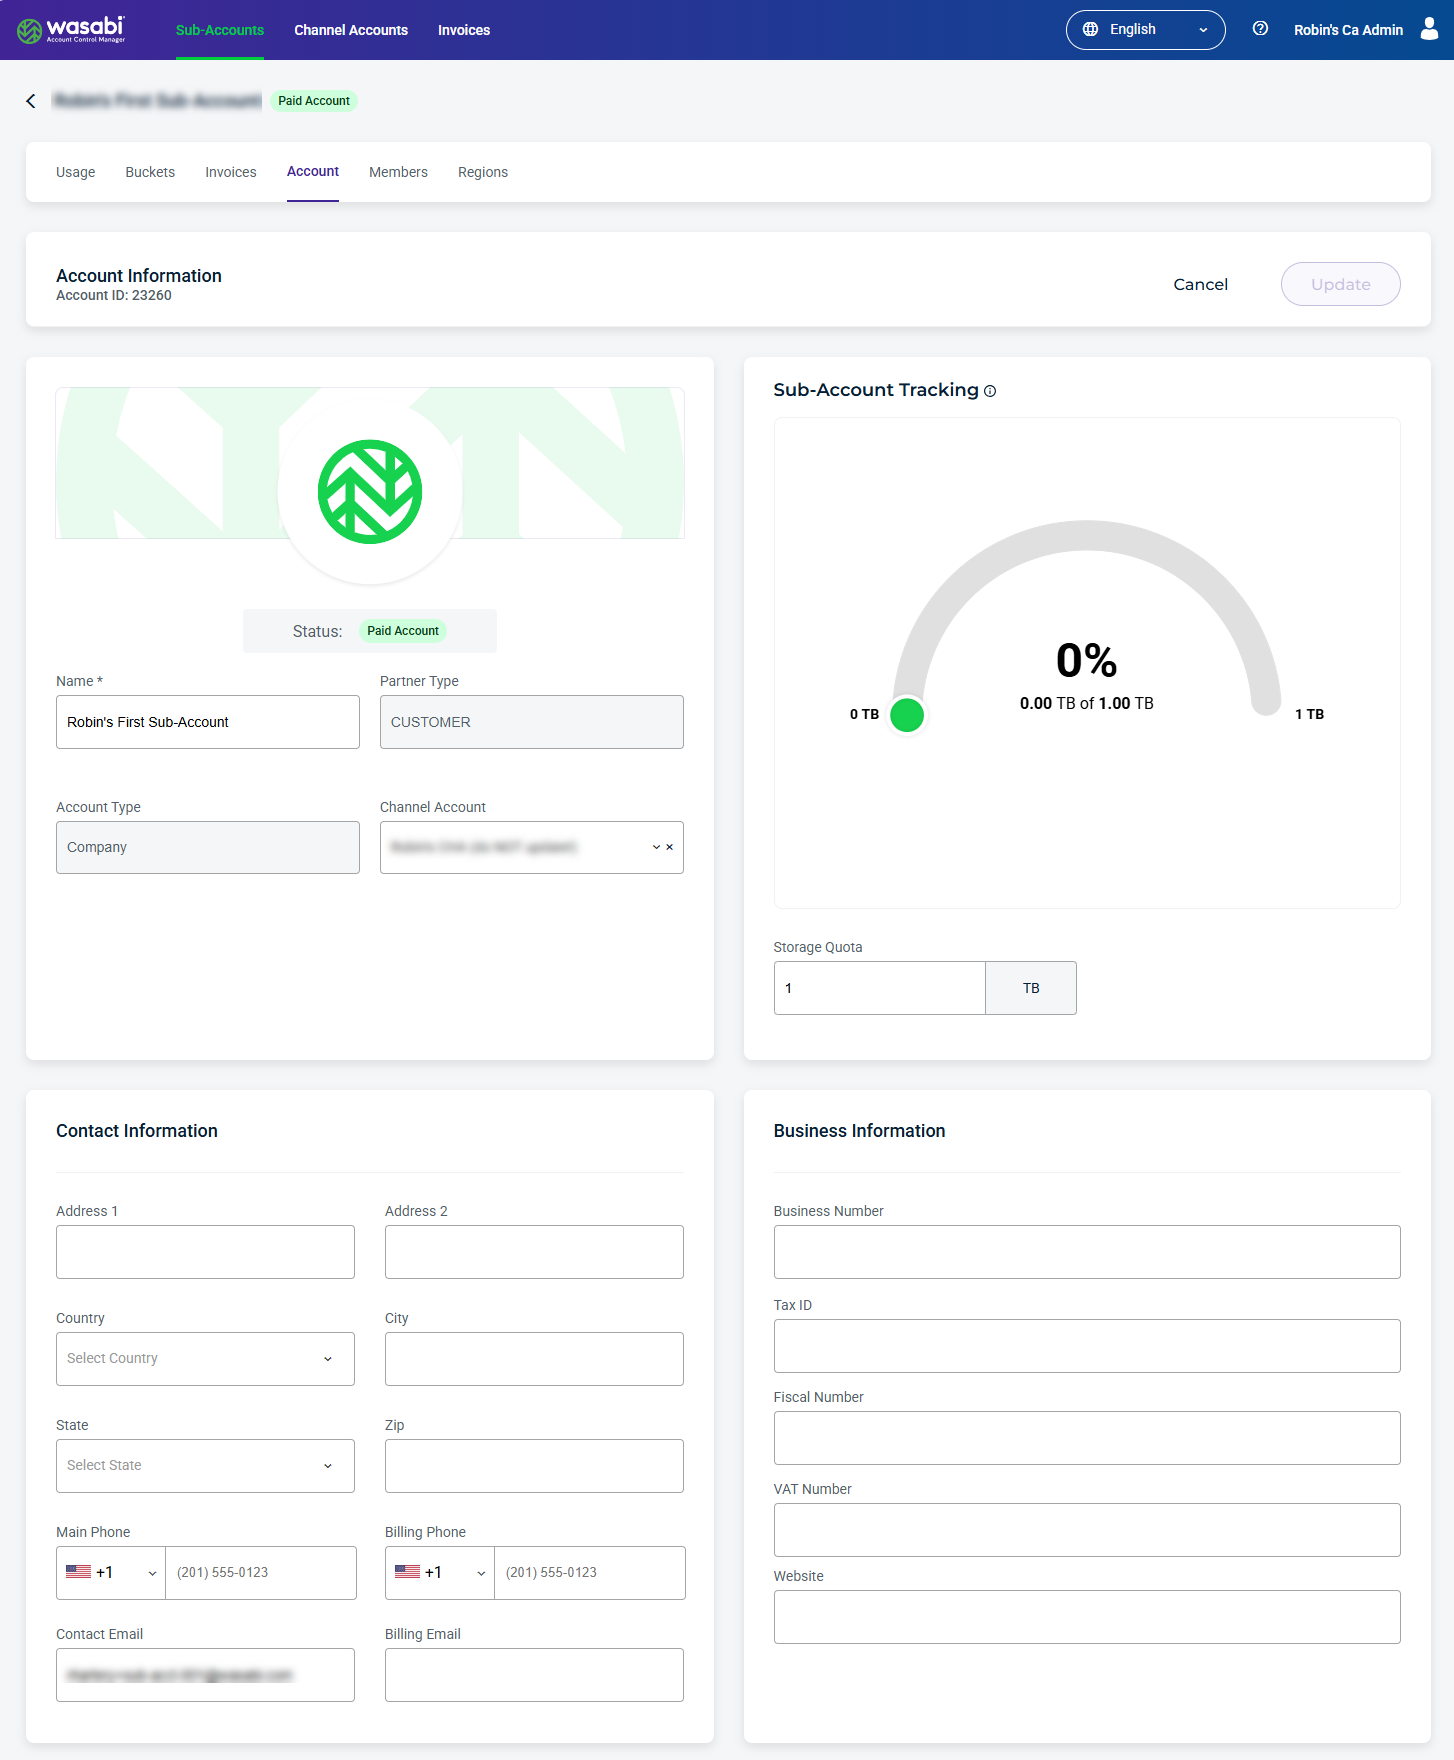
Account Tab
From the Account tab, you can manage the following Sub-Account information:
Account Information—Change the Account Name and the Channel Account selected. You can also delete the Channel Account by clicking the X symbol. In the Sub-Account Tracking section, you can view the storage usage and change the Storage Quota.
Contact Information—Add or change the address, phone, contact, or billing email.
Business Information—Add or change business and tax information and website.
Sub-Account Information—Manage the password, email, and access key, and suspend or delete the account.
To manage Sub-Account Information, scroll to the bottom of the page.
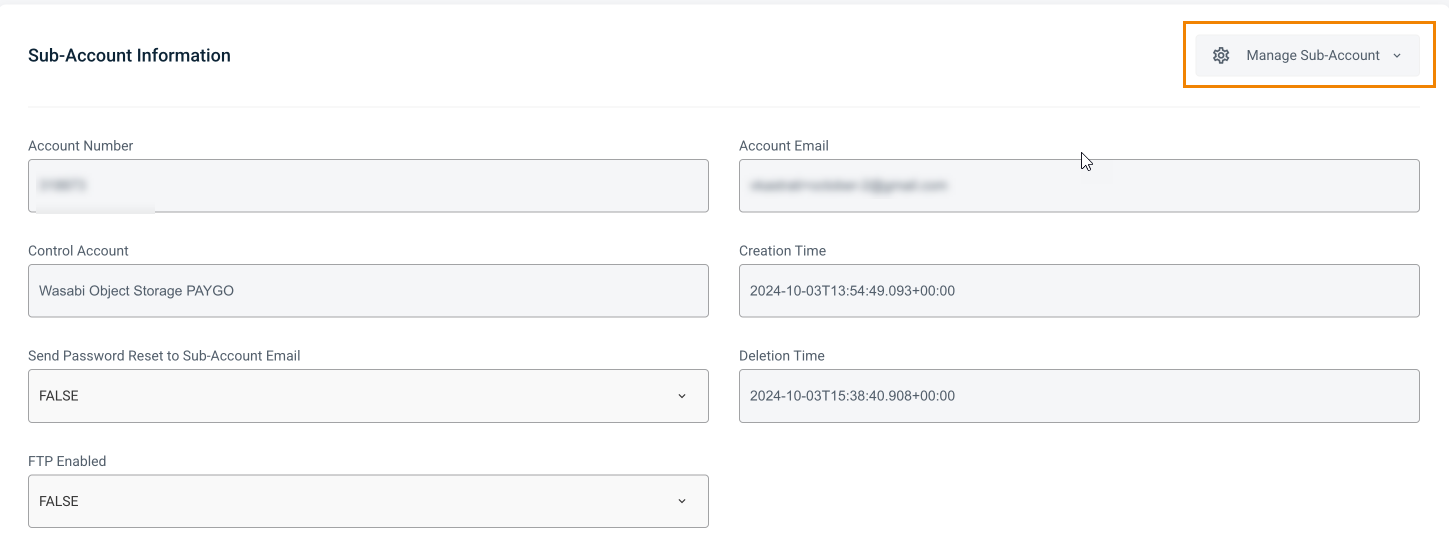
Select the Manage Sub-Account drop-down to perform the following management tasks:
Change Password
Change Account Email
Reset S3 Access Key
Suspend/Restore a Sub-Account
Delete a Sub-Account
Changing a Password
Changing a Root User Password
Select the Manage Sub-Account drop-down and then choose Change Password. The Change Password dialog is displayed.
Enter a new password and confirm the new password.
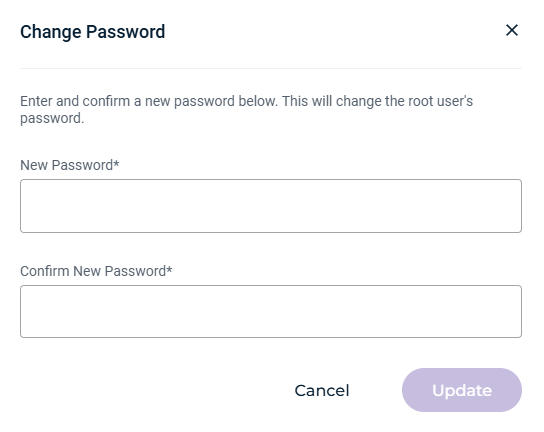
Click Update.
Changing Account Email
Select the Manage Sub-Account drop-down and then choose Change Account Email. The Change Account Email dialog is displayed.
Enter a new email account.
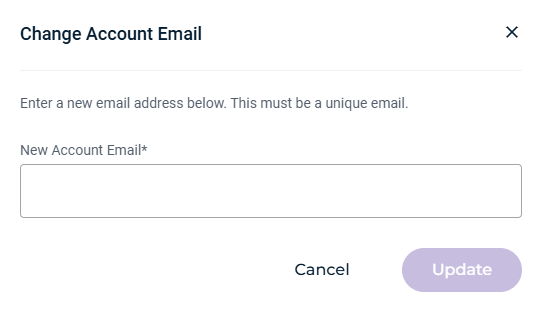
Click Update.
Resetting an Access Key
Select the Manage Sub-Account drop-down and then choose Reset Access Key. The Reset Access Key dialog is displayed.
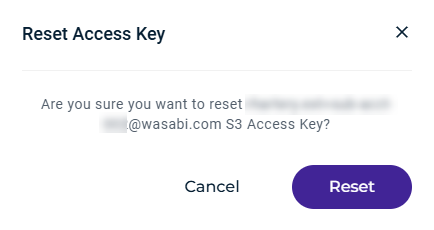
Click Reset. The new S3 credentials are generated and displayed.
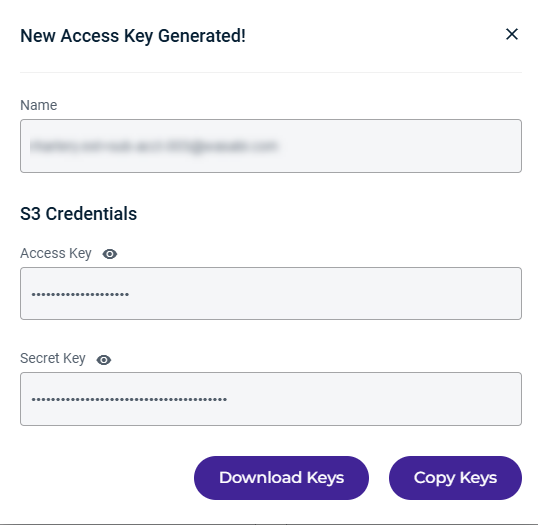
Click Download Keys or Copy Keys.
Suspending a Sub-Account
An Admin user can suspend a WACM sub-account. Once a sub-account is suspended, the account's access to Wasabi Console and all S3 access/secret keys is suspended. Restoration of the sub-account is required to reinstate access to the stored data.
Select the Manage Sub-Account drop-down and then choose Suspend Account. The Suspend Sub-Account dialog is displayed.
Click Suspend to confirm.
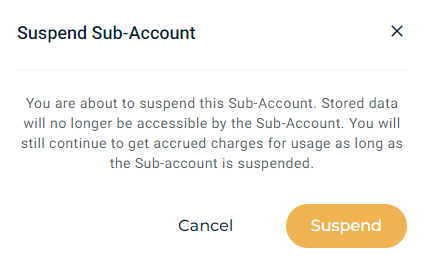
The Control account will continue to accrue charges for this Sub-Account. The data stored in the account is not affected by the suspension; only access to the data is suspended.
Return to the Sub-Account page to confirm the sub-account is Suspended. For example:
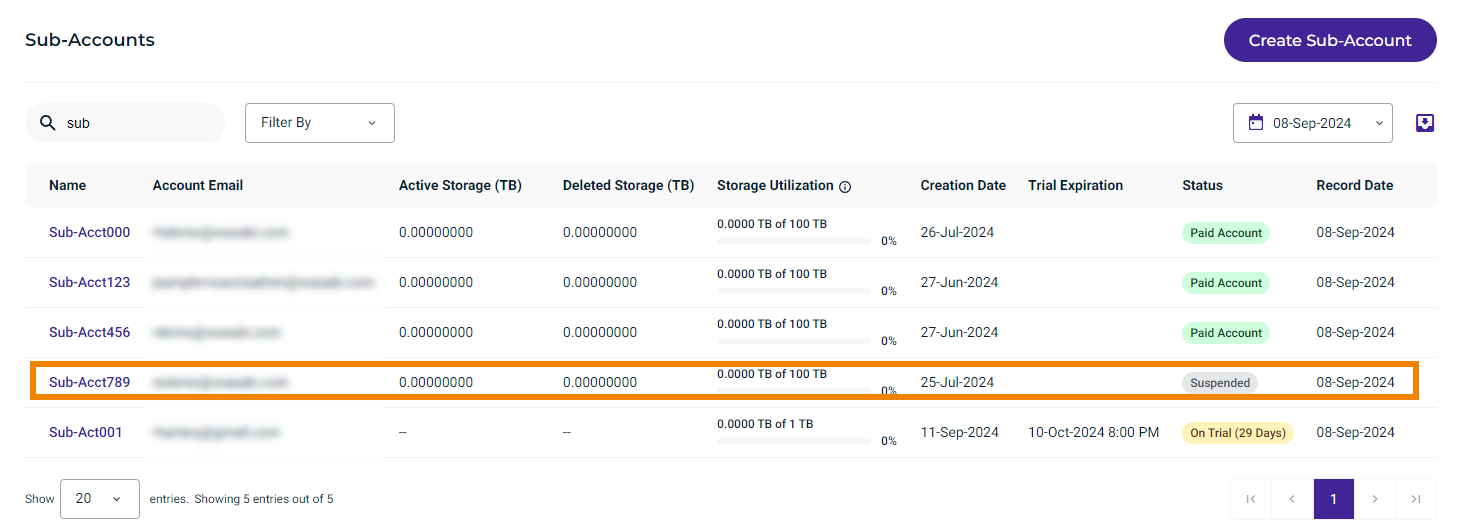
The Sub-Account's access to the Wasabi console and all s3 access/secret keys will be suspended at this point. Restoration of the Sub-Account is required in order to re-instate access to the data stored.
Restoring a Suspended Sub-Account
An Admin user can restore a suspended sub-account. When you restore a suspended account, access to the sub-account will be fully restored, including access to Wasabi Console and S3 access/secret keys.
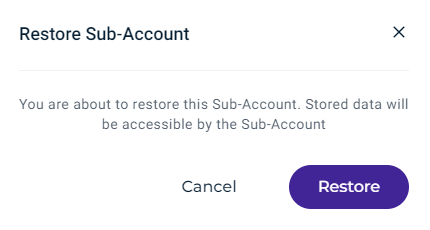
Select the Manage Sub-Account drop-down and then choose Restore Account. The Restore Account dialog is displayed.
Click Restore to confirm.
Return to the Sub-Accounts page to confirm the account has been restored to a Paid Account.
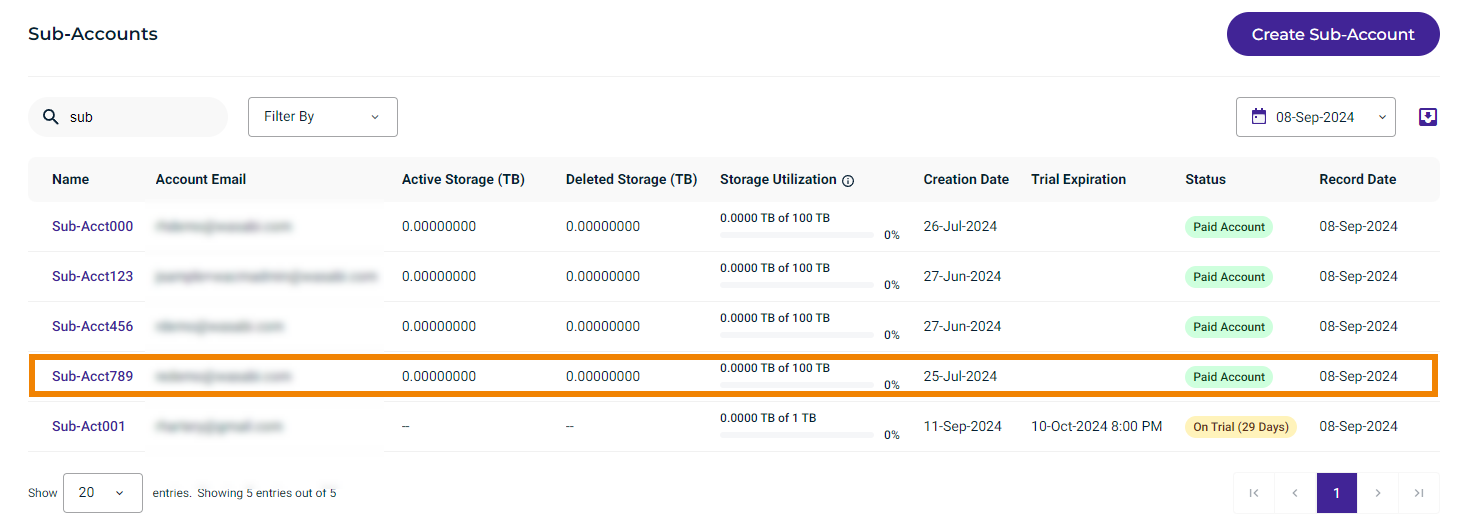
At this point, access to the sub-account, including S3 access/secret keys and console access, will be fully restored.
Deleting a Sub-Account
You cannot undo the deletion once you confirm that you want to delete a sub-account and all of its data.
Select the Manage Sub-Account drop-down and then choose Delete Account.
The Delete Sub-Account dialog is displayed.
Type DELETE in the text box.
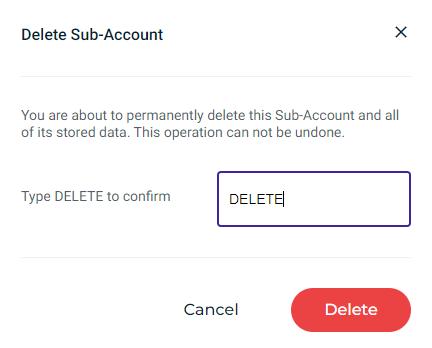
Click Delete.