A Sub-Account is used to separate storage environments within a hierarchy, allowing you to organize resources, manage access, and monitor usage under a parent Control Account or Channel Account.
To create a Sub-Account:
Sign in to WACM (https://wacm.wasabisys.com/en/wasabi/auth/login) as Control Account or Channel Account Admin.
In the Sub-Accounts section, click the Create Sub-Account button.
The Create Sub-Account form is displayed.
Enter the Account Name and Account Email for the new Sub-Account. Sub-Account names for previously deleted Sub-Accounts can be reused.
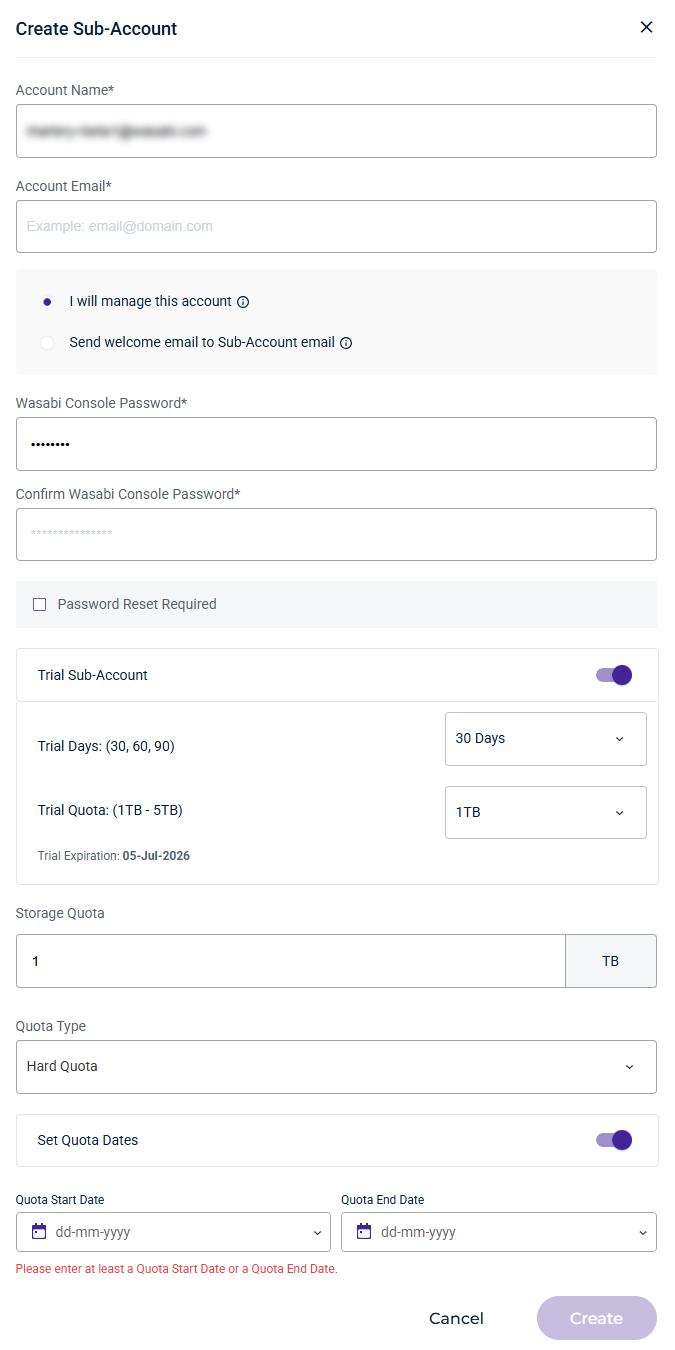
Select an option to manage the new Sub-Account.
I will manage this account option—No email will be sent to this Sub-Account. You will manage the account using the Wasabi Console account password you enter here. Sub-Accounts will not receive notifications, and password reset requests will default to the Control Account (this can be changed later).
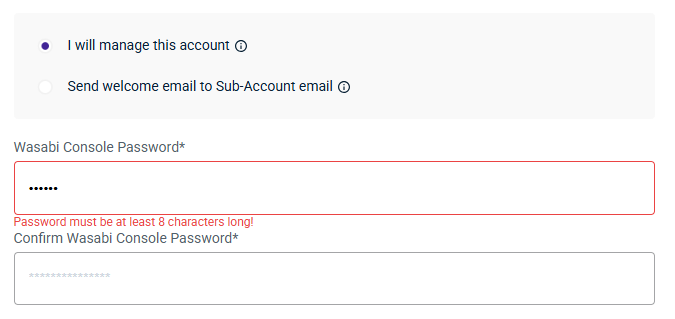
Send welcome email to Sub-Account email option—A welcome email is sent to the Sub-Account, allowing the user to set their password and log into the Wasabi Console. Password reset requests will also be sent to the sub-account by default.

Select the box Password Reset Required, if applicable.

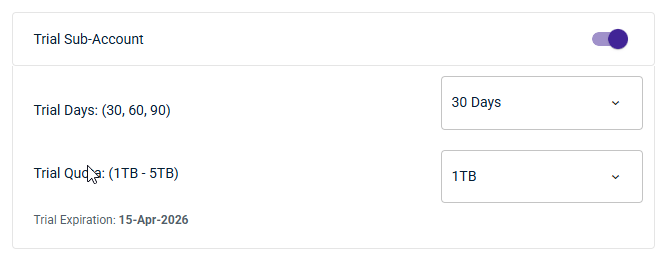
In the Trial Sub-Account section, enable Trial Sub-Account if required. Select the number of Trial Days (30, 60, 90) and the Trial Quota (up to 5 TBs). When the trial duration expires, the trial account is automatically converted to a paid account.
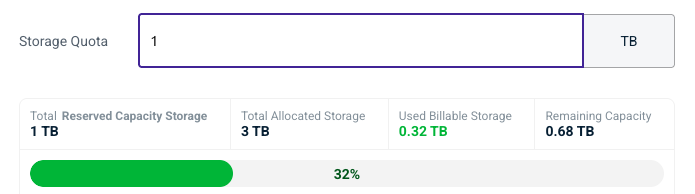
Enter the storage amount purchased for this Sub-Account in the Storage Quota section. The purchased storage is used to calculate the storage utilization value. This amount can be modified at any time in the Sub-Account profile.

Select the Quota Type from the drop-down. The available Quota Type depends on whether a hard quota or a soft quota is enabled. If you do not see the Quota Type drop-down, the quota will be a soft quota used only for altering. Most users will have the Soft Quota type enabled. For more information on storage quotas, see Storage Quota - RCS Status and Warning Messages, below.

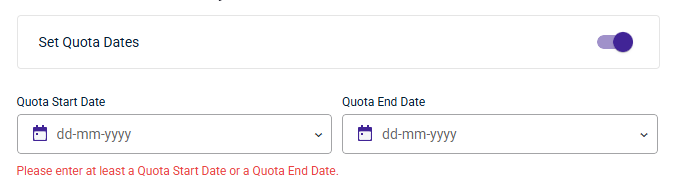
Enable Set Quota Dates to specify the time period for tracking Sub-Account storage usage. Select the desired start and end dates from the Quota Start Date and Quota End Date dropdown menus.
Click Create.
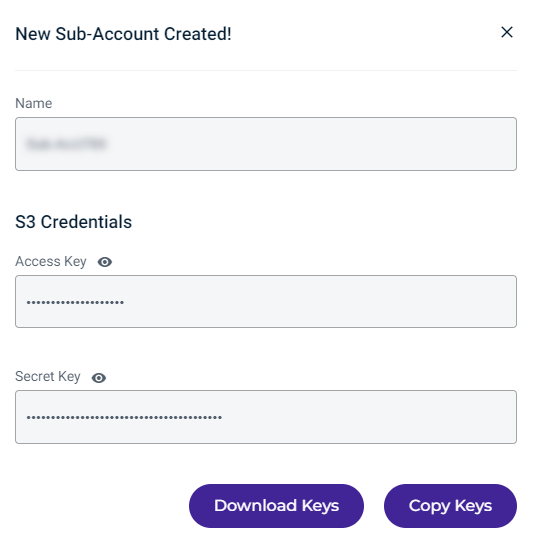
Once the new Sub-Account is created, a panel confirms the creation and provides S3 access keys if you have selected “I will manage this account.” To download the keys as a text file, click Download Keys. Or click Copy Keys to copy the keys to the clipboard.
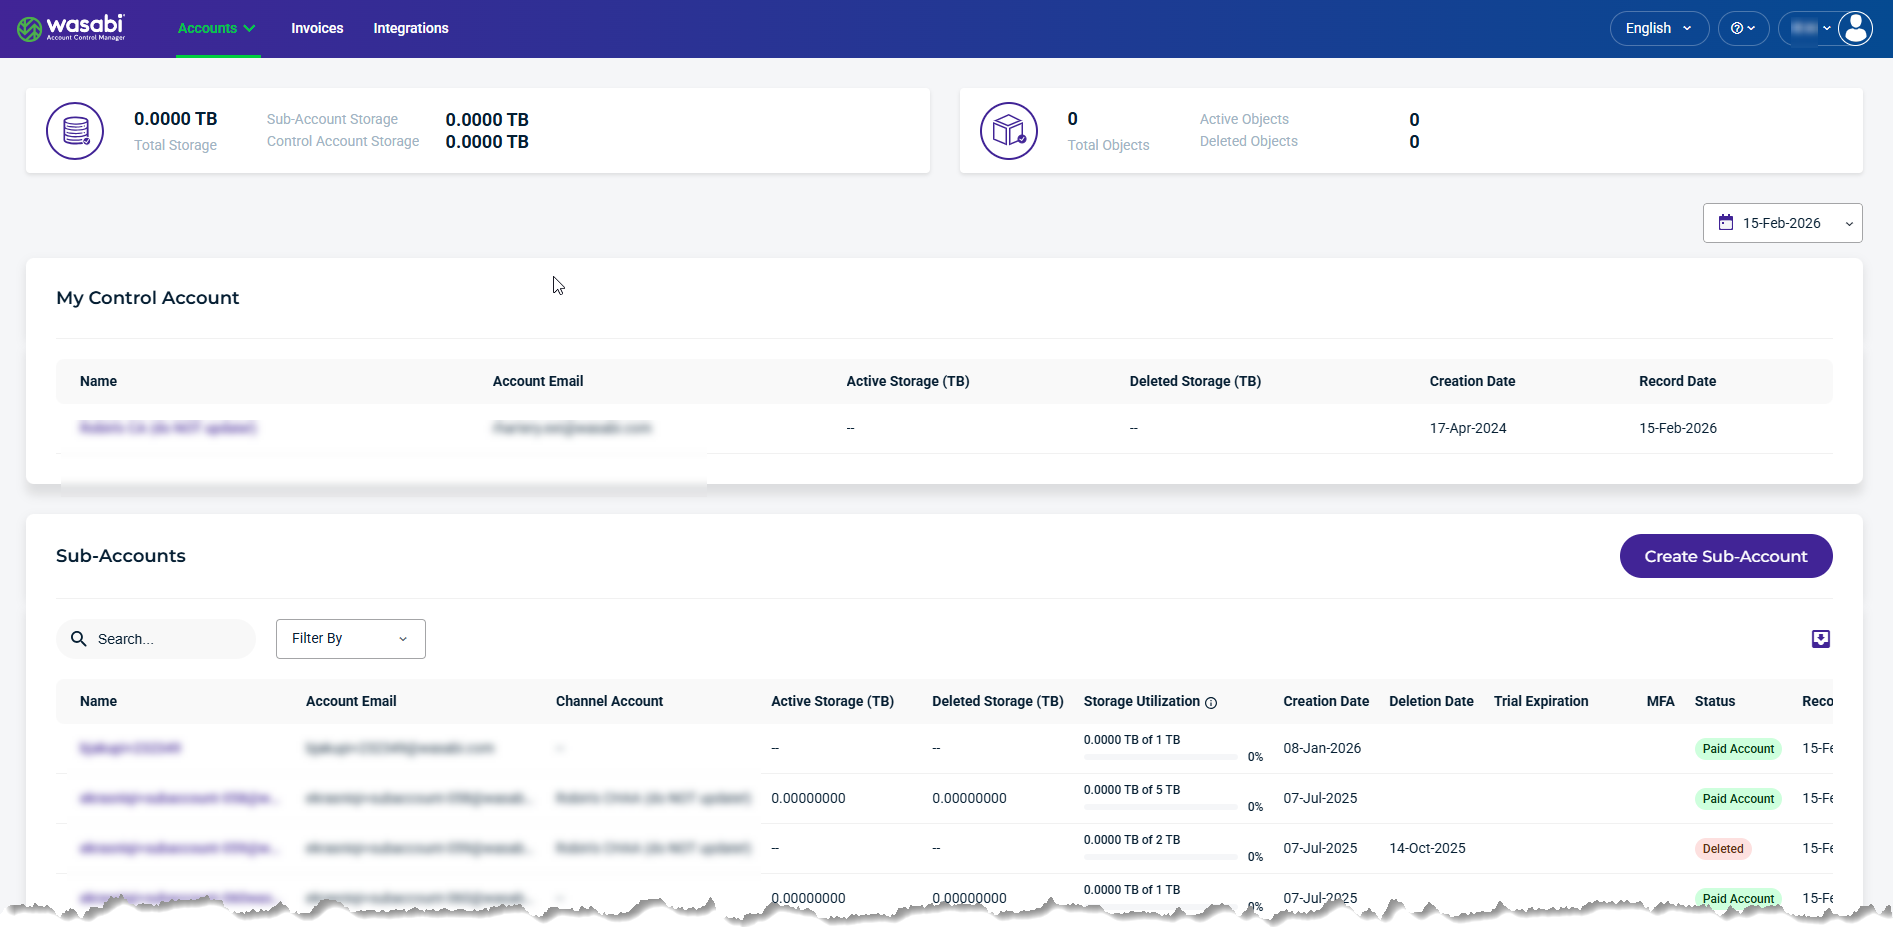
WACM displays the information for the new sub-account on the Sub-Accounts page. For example:
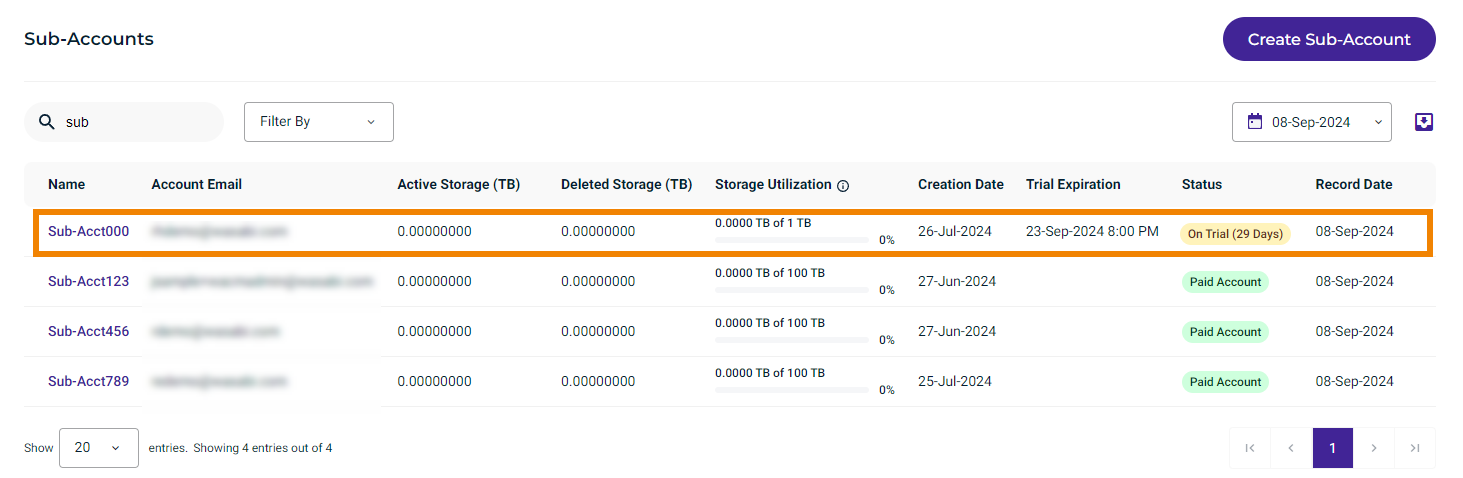
You have successfully created a trial account. Notice the new sub-account Status: On Trial (29 days).
Repeat the steps above to create additional sub-accounts.
Sub-Accounts users will not receive an email after the account creation. It is the responsibility of the Control Account user to share their login information with the sub-account owner.
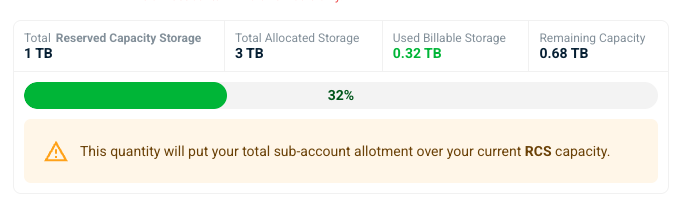
Storage Quota - RCS Status and Warning Messages
When setting the Storage Quota for a Sub-Account in the Create Sub-Account modal, the following RCS status and warning messages are displayed.
RCS Status—This message shows the current RCS status and allotments.
Total Remaining Storage—This message warns that the storage quota is greater than the total remaining RCS capacity. This storage quota is permitted; the warning is strictly informational.
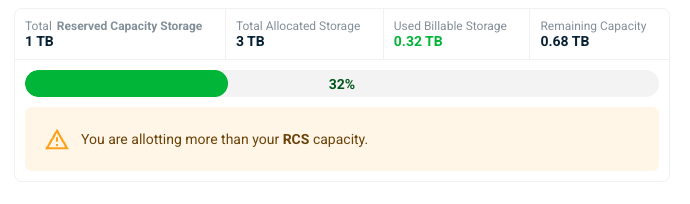
Total Allocated Storage—This message warns that the storage quota combined with the total allocated storage is greater than the total remaining RCS capacity.
This storage quota is permitted; the warning is strictly informational.