Revolutionize Your Workflow with Triofox.ai and Wasabi Hot Cloud Storage.
Prerequisites
Active Wasabi storage account.
Wasabi access and secret keys.
A Wasabi non-Object-Lock (non-immutable) bucket. See Creating a Bucket for details.
A Triofox.ai account with login credentials.
Freemium for basic connection to Wasabi or Business edition for Advanced Ai features
Configuring Triofox.ai
Log in to triofox.ai. If you don't have an account, please register a free account.
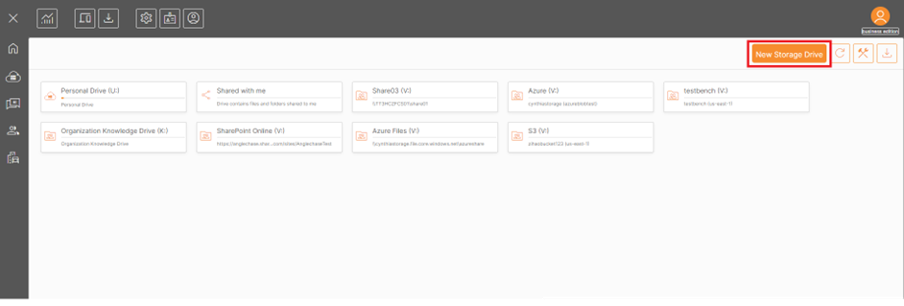
Click on the "New Storage Drive" button.
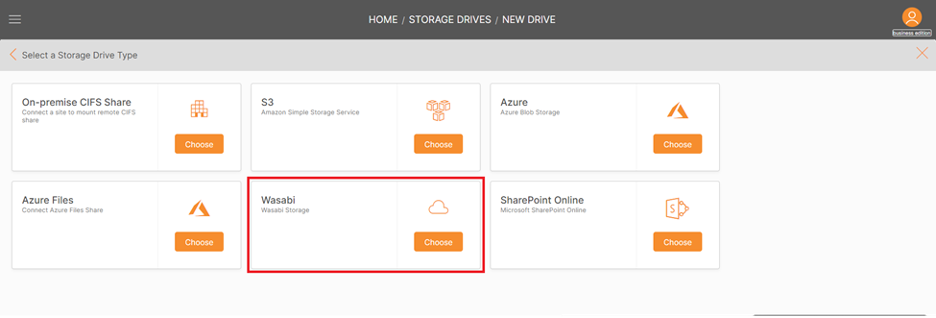
Click on "Choose" button under "Wasabi" tile.
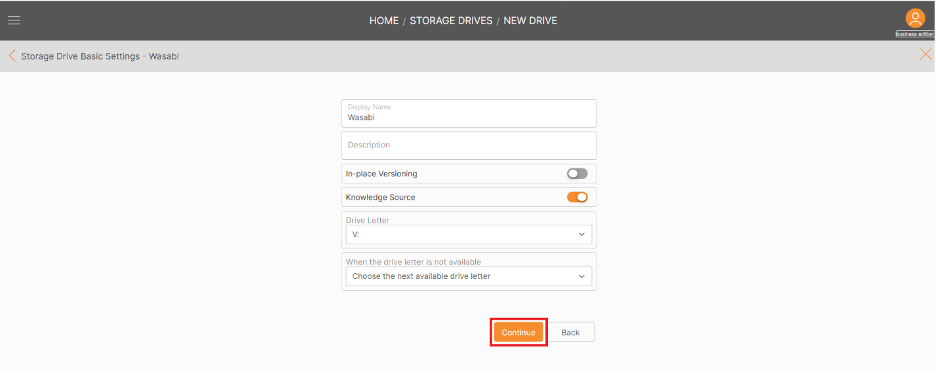
Enter the basic information for the new drive and click on the "Continue" button.
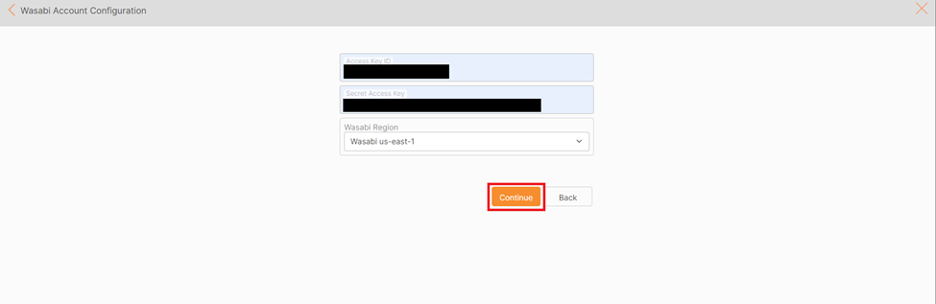
Copy and paste your Wasabi Access Key and Secret Key into the fields, then click on the "Continue" button.
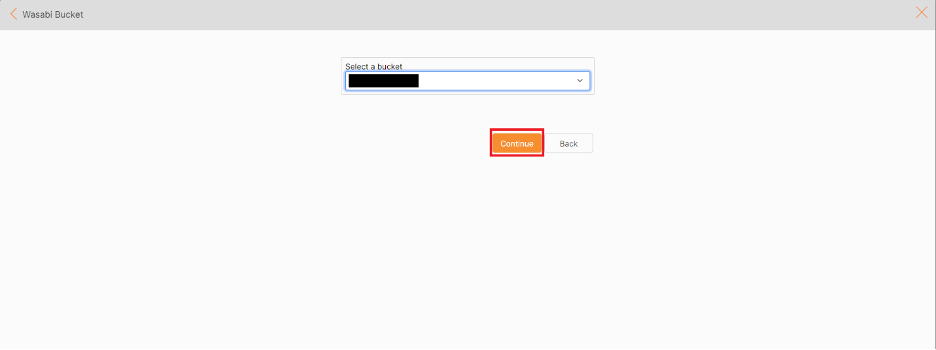
Choose the bucket or you can create a new bucket, then click on the "Continue" button.
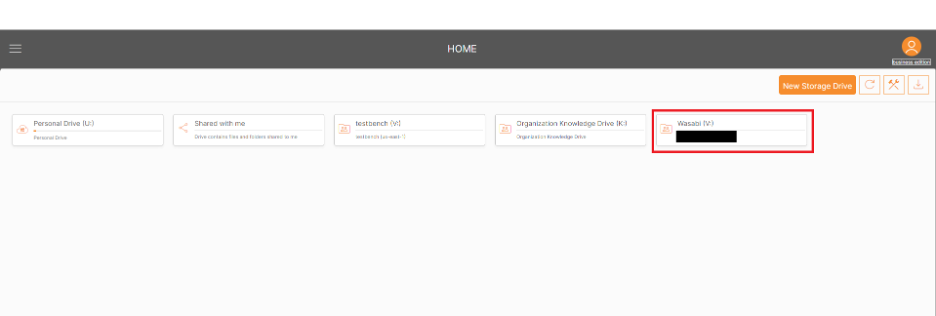
Go back to the home page. The drive will be created.
Please refer to the KB article here for further details: https://support.triofox.com/hc/en-us/articles/21986977073559-How-to-Publish-Wasabi-Drive-on-Triofox-AI
Step by Step Instructions for Windows and Mac Client Agents
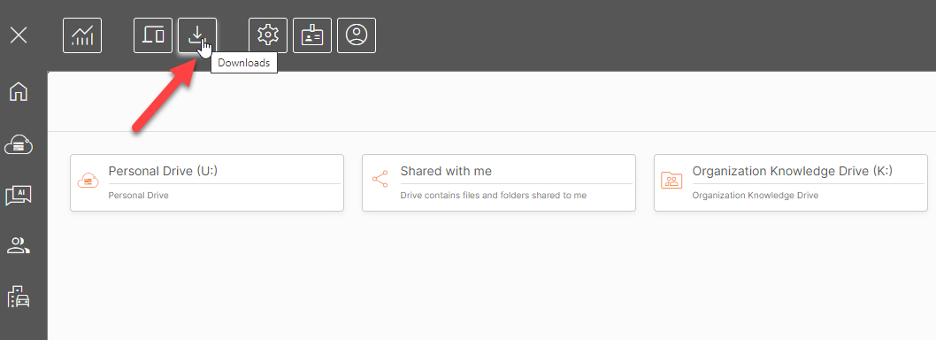
Log in to triofox.ai.
Click on the ‘Downloads’ icon (down arrow) in the web portal.
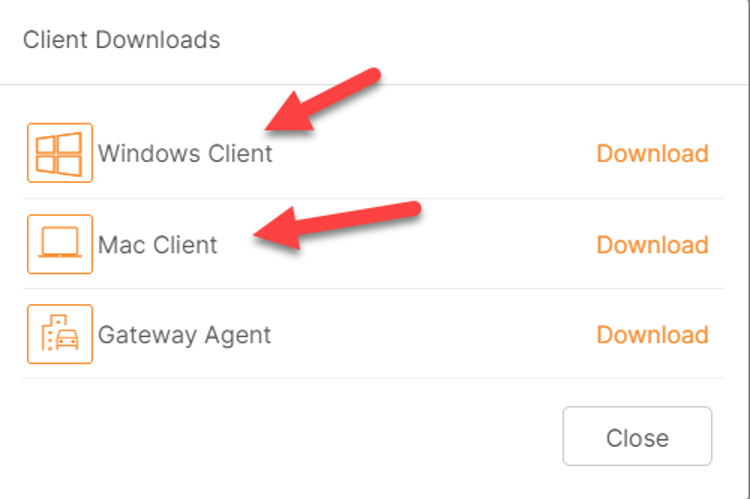
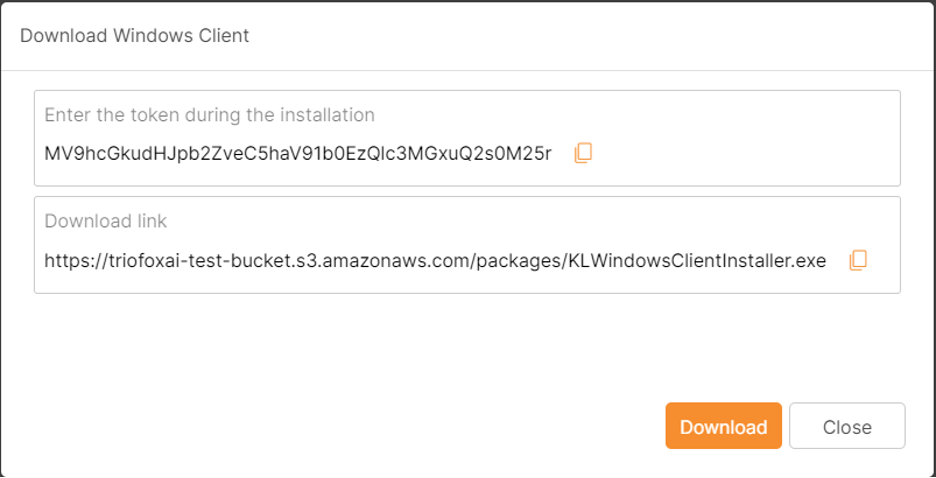
Choose the Windows or the Mac Client.
For the Windows client, copy the installation token and the download link to a notepad file. You will be required to enter the token during the installation.
Run the executable to install the client with all the default options.
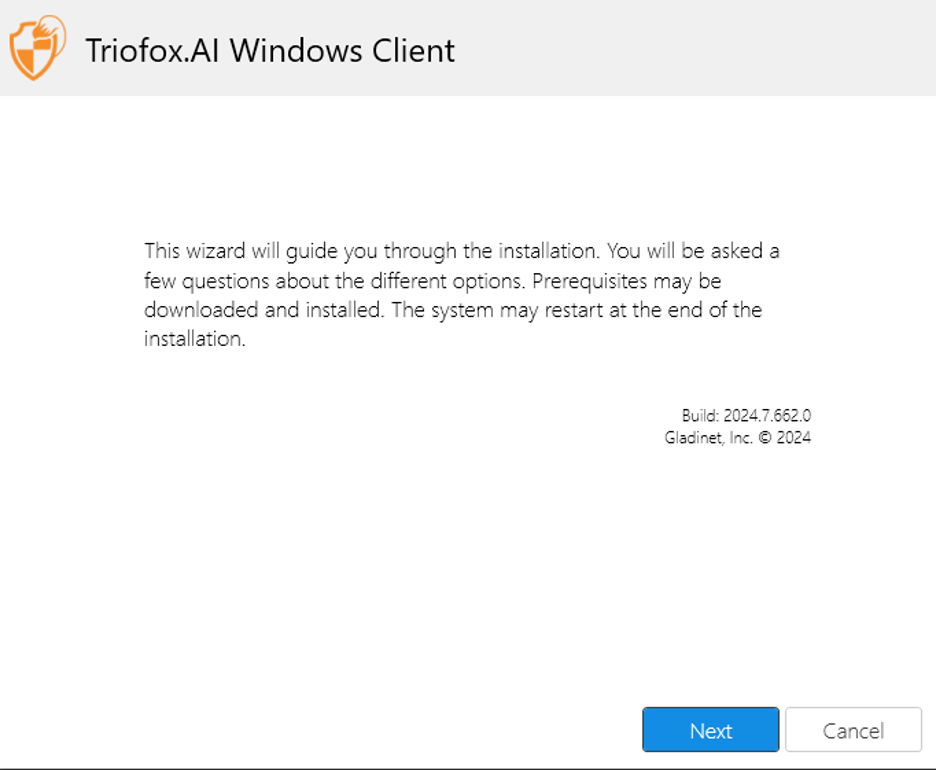
Enter the token that was previously displayed and click Install.

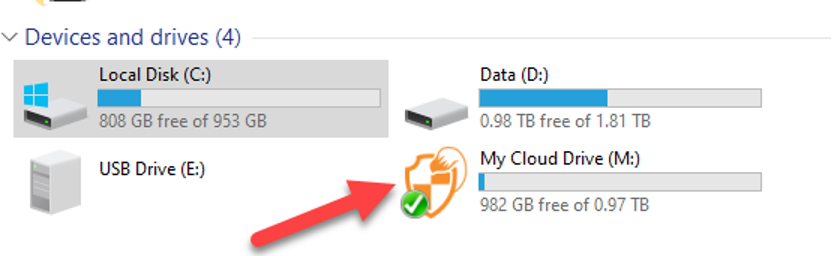
After the installation is finished, you will see a cloud mapped drive in your file explorer.
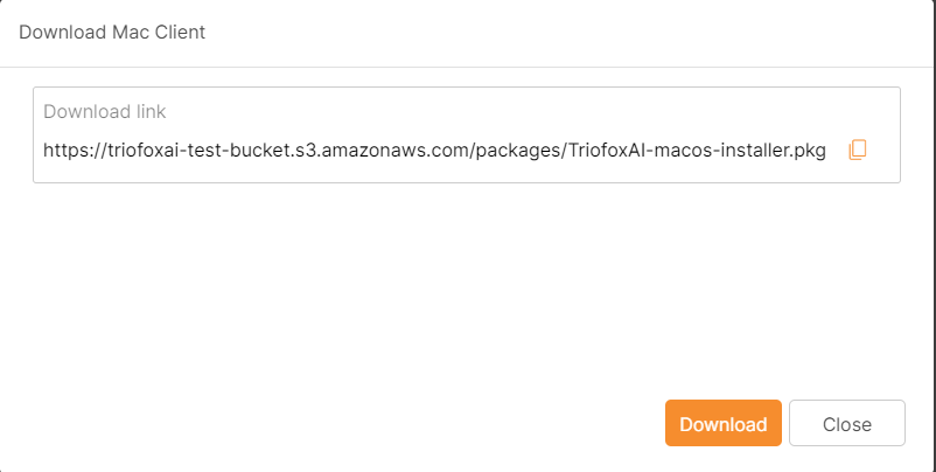
The procedure is virtually the same for the Mac client.
Once the Mac client is installed on Macs, you will see the cloud mapped drive under the Finder.