This article lists WCN installation prerequisites and describes basic configuration steps.
Prerequisites
Minimum system requirements are:
64-bit Microsoft Windows 7/Server 2008 R2/Windows 8/Server 2012/Server 2012 R2/ Windows 10/Server 2016/Server 2019/Server 2022 and newer versions supported. Microsoft Windows 7/Server 2008 R2 computers must run at least Service Pack 1 and have the KB976932 and the KB3033929 security updates installed.
A minimum of four GB of physical RAM.
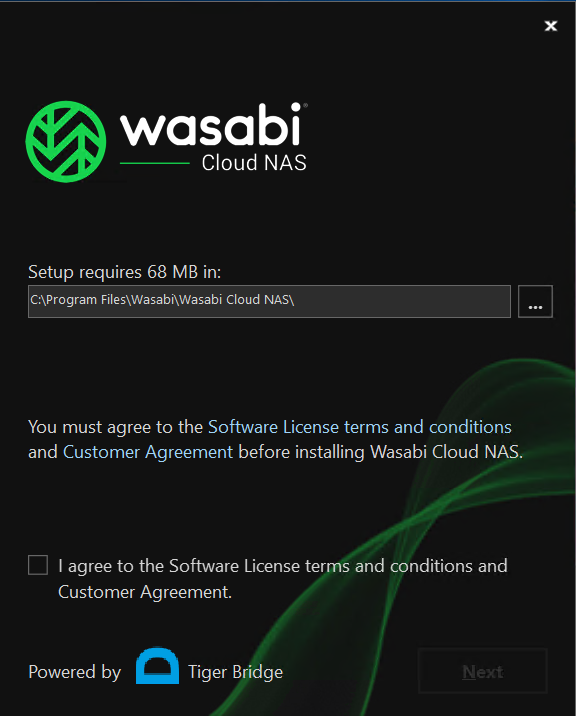
A minimum of 68 MB of available hard-disk space for installation.
Download and Installation
Once the download is complete on the Windows machine, begin the installation by running the WCN installer file as Administrator.
Click the checkbox to agree to the license terms and conditions. Then, click Next.
Click Install to continue the installation.

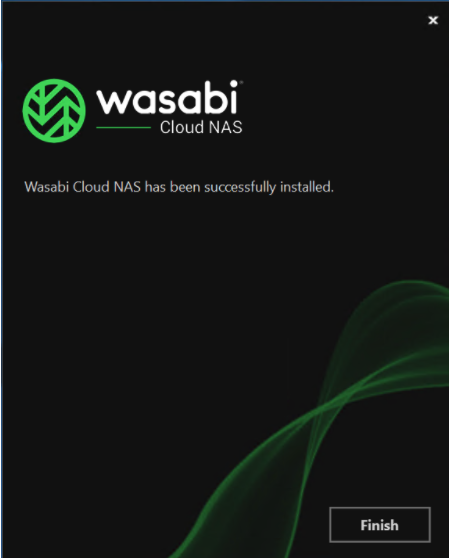
Click Finish to complete the installation.
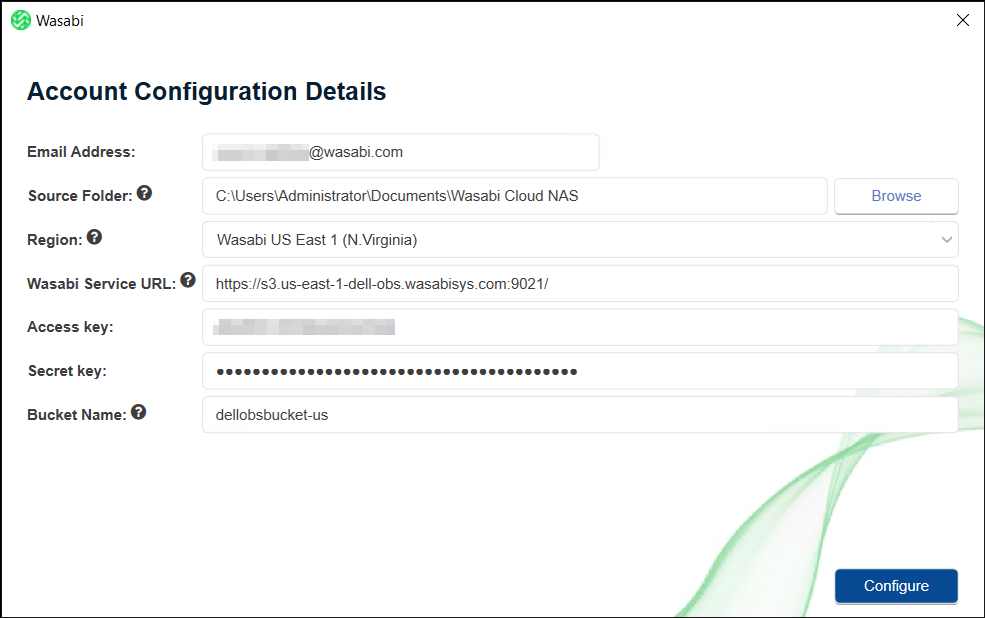
Once the installation is complete, the WCN software will display the Account Configuration Details window. Enter the following information to activate the software.
Email Address — Enter your Wasabi account email address.
Source folder — Indicate the folder you want to replicate/offload to Wasabi.
Region — Select the appropriate region from the drop-down options.
Wasabi Service URL — This will be auto-populated based on your region choice.
Access key — Enter your access key.
Secret key — Enter your secret key.
Bucket Name — Enter a unique name for the new bucket in your WCN account. The data will be stored in this bucket.
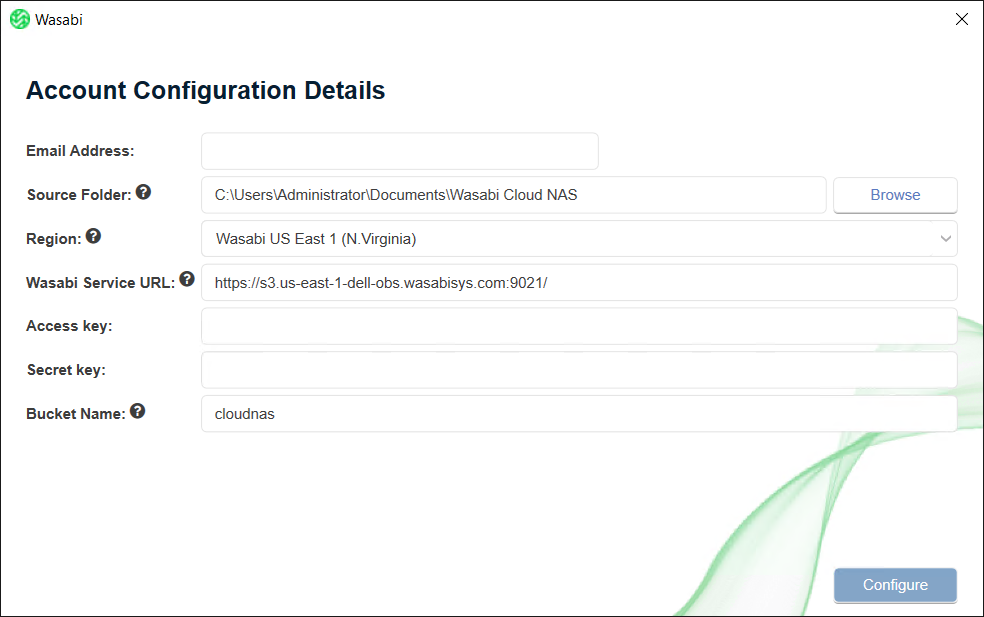
Click Configure to apply the configuration.
Once the configuration is applied successfully, you will see a Configuration Summary window. Click Finish to complete the configuration process.
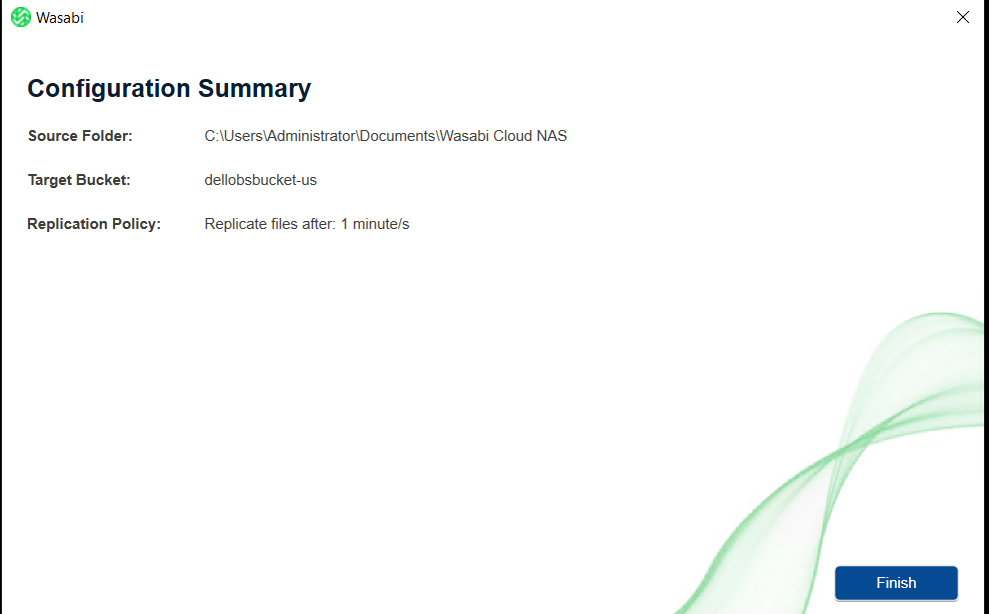
Your WCN software is configured and begins replicating data from the source folder to the target bucket in your account.
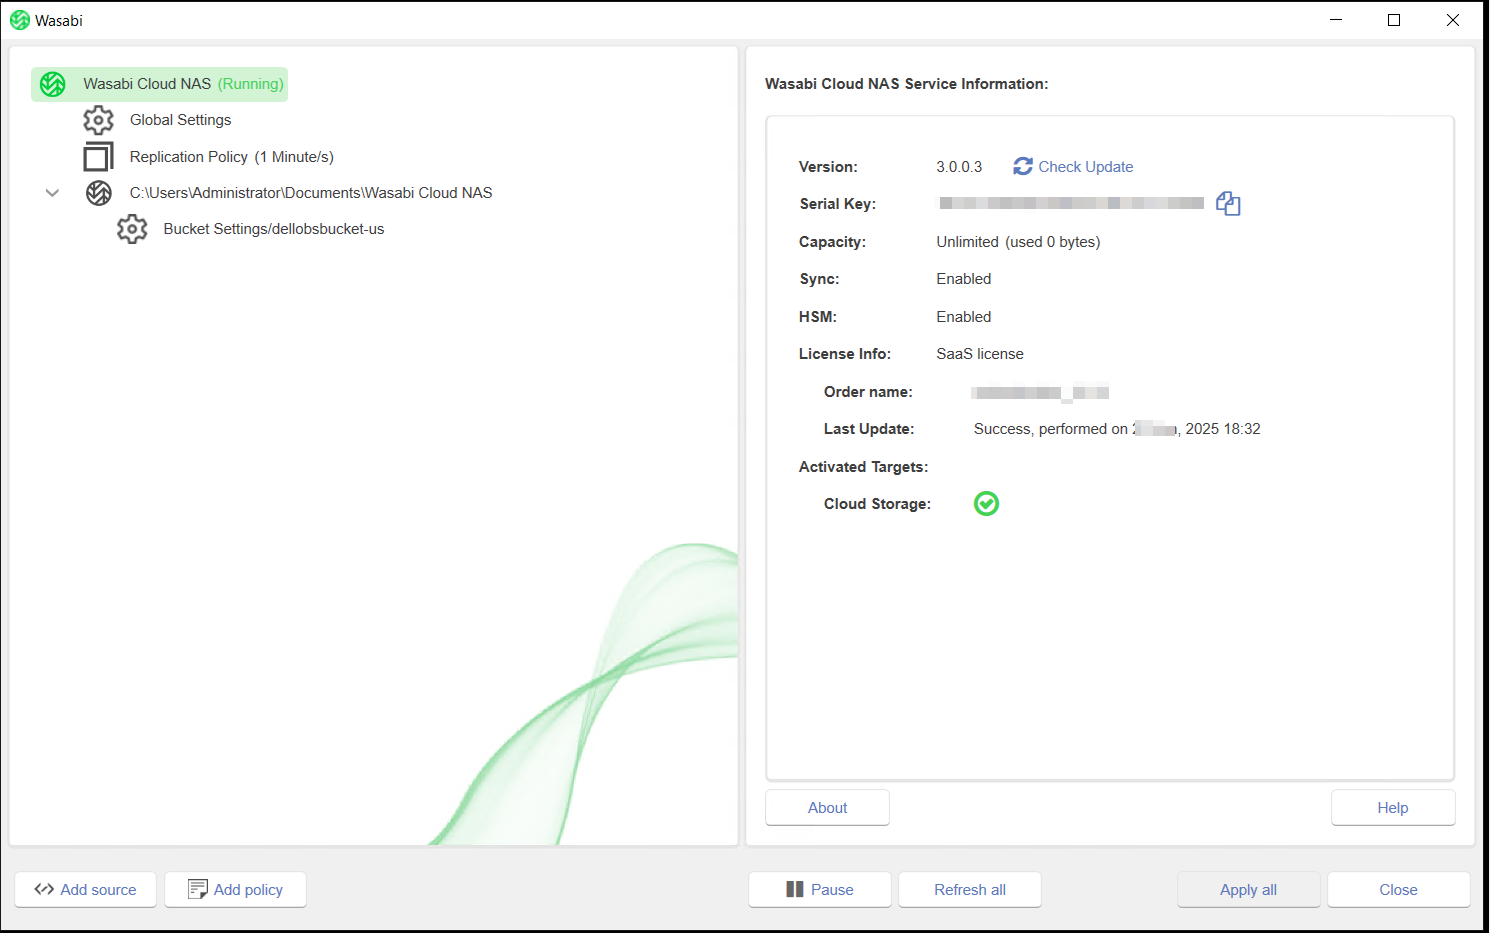
For additional information on Wasabi Cloud NAS and its features, refer to the Product Guide for Wasabi Cloud NAS.