This article offers guidance on using Wasabi Identity and Access Management (IAM) and Console APIs to manage Multi-Factor Authentication (MFA), Multi-User Authentication (MUA), session timeout, administrative logging, and advanced security options. Additionally, you can automate security configurations and follow security best practices using these APIs.
Wasabi’s object storage service supports AWS-compatible IAM APIs and additional console APIs for managing account-level security features. These APIs enable programmatic control over multi-factor authentication, session timeout settings, and administrative logging to enhance account security and compliance.
Prerequisites
Access and secret key credentials for your Wasabi account root user or sub-user with appropriate permissions.
The base URL for console API requests: https://console.wasabisys.com
An MFA device configured and activated in the Wasabi Management Console. Alternatively, it can be configured using the CreateVirtualMFADevice API.
Use encoded email addresses and passwords when passing URL parameters to avoid authentication errors.
Recommendations
Always encode special characters in the email and password parameters when performing authentication to prevent errors.
Use temporary credentials obtained through the CreateTemporaryAccessCredentials API to provide secure, scoped access.
Attach IAM policies to users and roles that enforce MFA for sensitive operations.
Regularly review and download the administrative logs for compliance auditing.
Adjust session timeouts based on your organization’s security requirements and consider usability impacts.
Key IAM and Console Operations
Using IAM APIs
The following IAM CLI commands and API requests require either a configured AWS CLI profile or your Access Key and Secret Key in the Postman Authorization tab using the AWS Signature authentication type. This uses IAM APIs supported by Wasabi. For more information on APIs below, refer to the CreateVirtualMFADevice and EnableMFADevice API documentation.
Creating an MFA Device Using AWS CLI
To create an MFA device for a user using AWS CLI-compatible commands, use the following command:
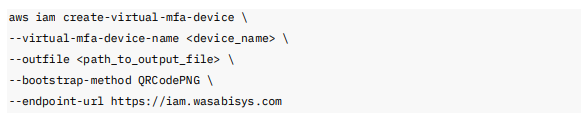
Where:
<device name>—is the name of your MFA device, for example, MyVirtualMFA.
<path_to_output_file>—is the output file parameter that specifies the path to save the QR code image, for example, C:/QRCode.png.
bootstrap-method—defines the format for seeding the virtual device, for example, QRCodePNG.
endpoint URL—is the endpoint, for example, https://iam.wasabisys.com
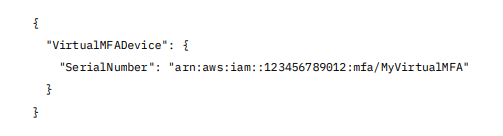
The output includes a JSON structure that shows the MFA device serial number, which is required later to enable the device.
Example Output:
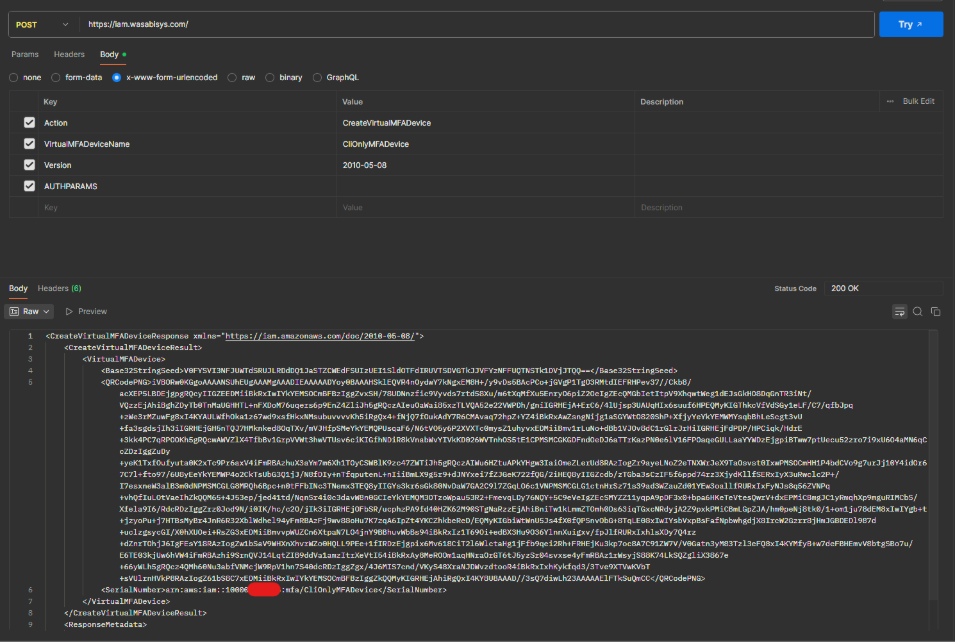
Creating an MFA Device in Postman (API Format)
To create an MFA device, use the following POST request to the Wasabi IAM API endpoint.
Endpoint:
![]()
Request Body:

Where:
<device_name>—is the preferred name for the MFA device, for example, MyVirtualMFA.
A successful response returns details of the created virtual MFA device, including the serial number and the provisioning ARN.
Example Response:
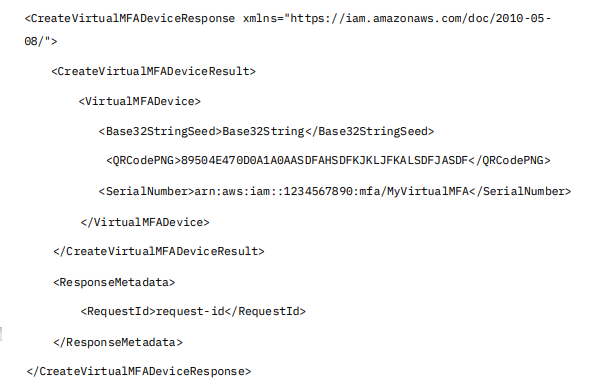
Where:
<Base32StringSeed>—contains the seed key for the virtual MFA device, which is used to generate TOTP codes.
<QRCodePNG>—contains a base64-encoded PNG image of the QR code used to configure virtual MFA apps.
<SerialNumber>—is the unique ARN identifying the virtual MFA device.
<RequestId>—is a unique identifier for this API request.
Enabling MFA Using AWS CLI
To activate an MFA for a user, use the following AWS CLI-compatible commands:
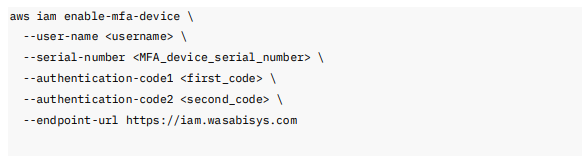
Where:
<username>—is blank for the root user or enter the target Wasabi IAM username.
<MFA_device_serial_number>—is the serial number or ARN of the MFA device. You can retrieve the MFA device serial number using the ListMFADevices API.
<first_ code> and <second_code>—two consecutive MFA token codes are required to validate the setup.
endpoint-url—points to the Wasabi IAM API endpoint to ensure request routing.
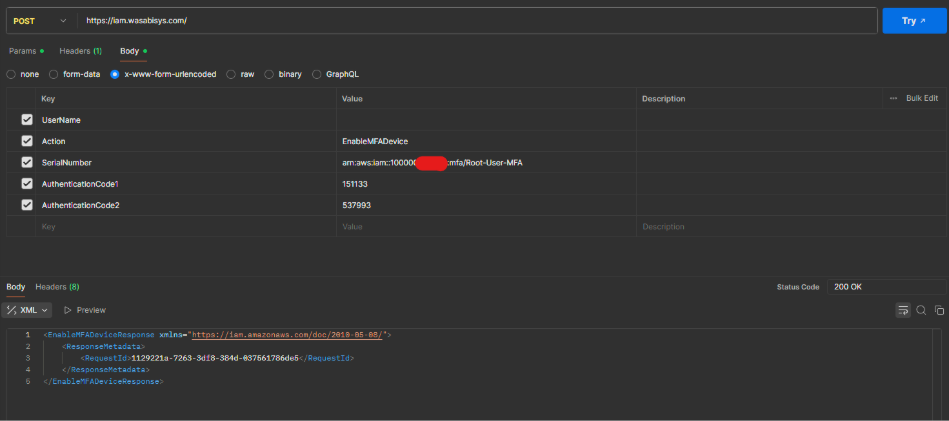
Enabling MFA Using Postman (API Format)
To enable MFA for a user, use the POST request to the Wasabi IAM API. This example uses the Postman EnableMFADevice IAM API.
Endpoint:

Request Body:

Where:
<username>—is the Wasabi IAM username.
<MFA_device_serial_number>—is the serial number of the MFA device.
<first_ code> and <second_code>—two consecutive MFA token codes are required to validate the setup.
This request enables the MFA device for the specified user, enforcing multi-factor authentication for subsequent logins.
Using Console APIs
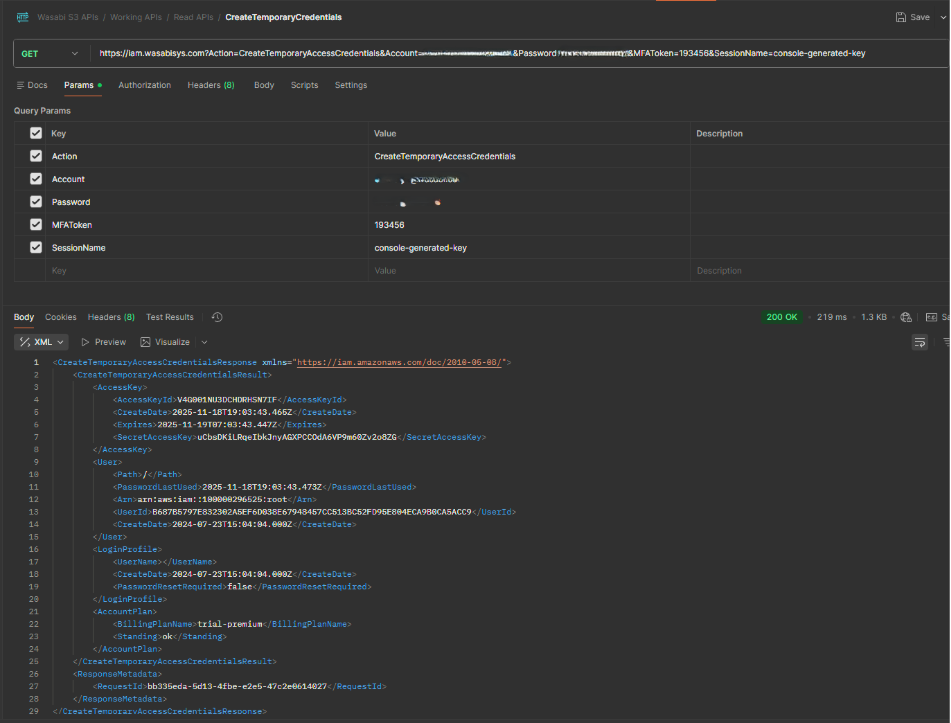
After you have enabled MFA, use temporary credentials from the CreateTemporaryAccessCredentials to call Console APIs.
The following requests require authentication and service identification headers:
x-wasabi-authorization—TemporaryAccessKey:TemporarySecretKey
x-wasabi-service—console_service
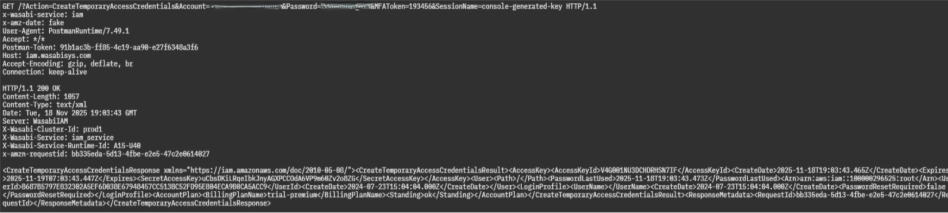
The following image shows access key and secret key values for x-wasabi-authorization, which are:

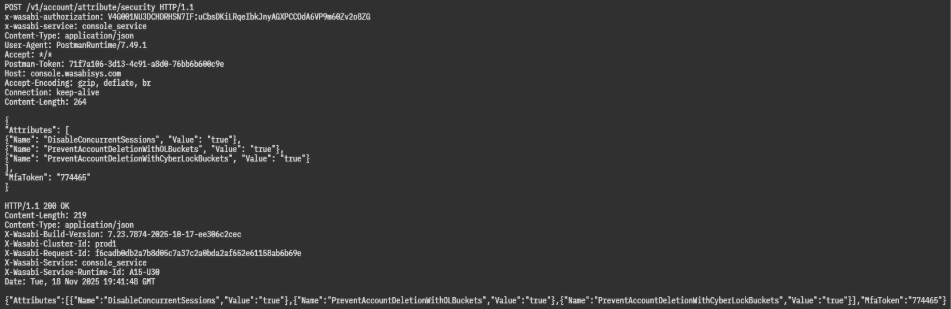
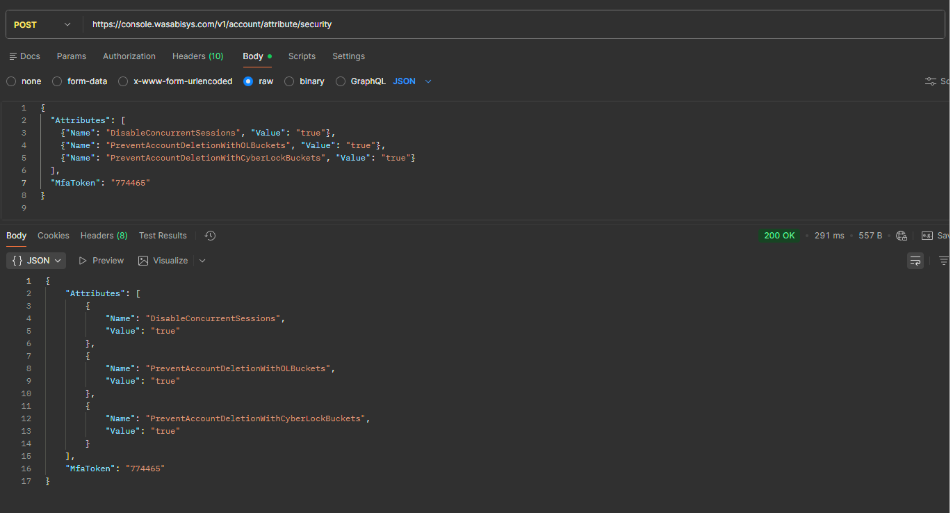
Enabling Advanced Security Options
Security option controls affect user authentication and access governance. Enable or disable advanced account security options, such as preventing concurrent sessions and account deletions when certain buckets exist.
Endpoint:

Request Body Example:
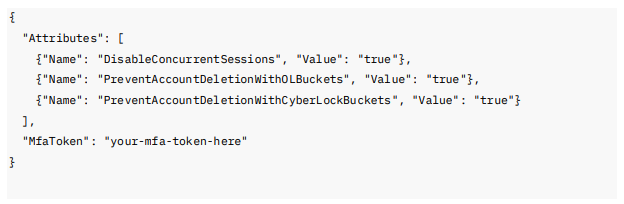
This request requires an MFA token for authorization.
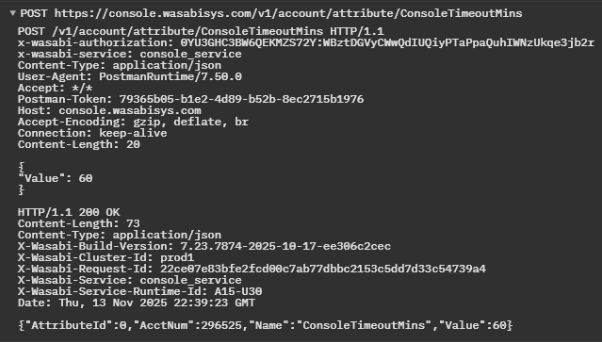
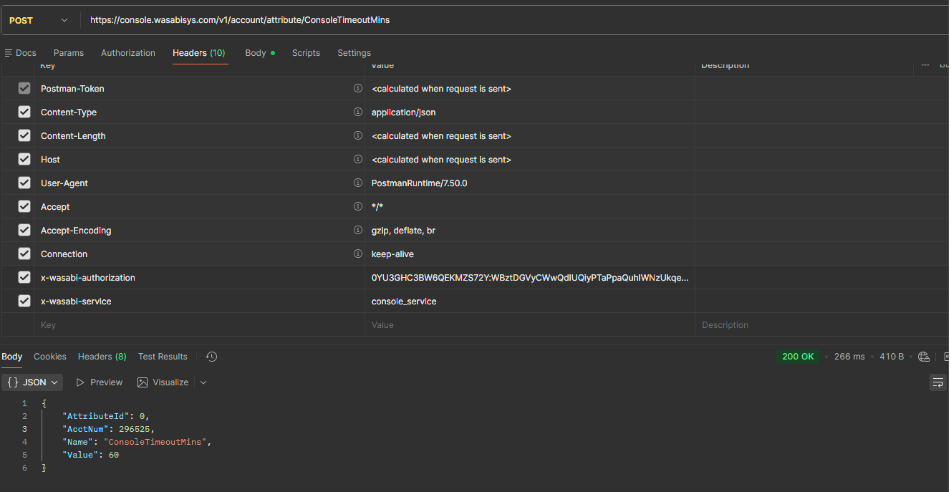
Setting Console Session Timeout
Console session timeout controls the session lifetime. Set the console session timeout length to log out inactive sessions automatically.
Endpoint:

Request Body Example:

The value is the timeout in minutes (15 to 120, default is 60).
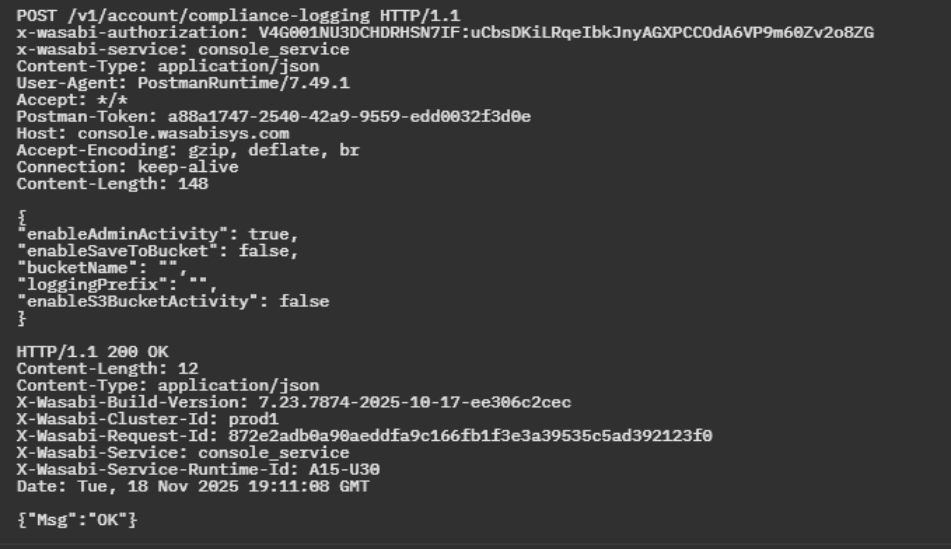
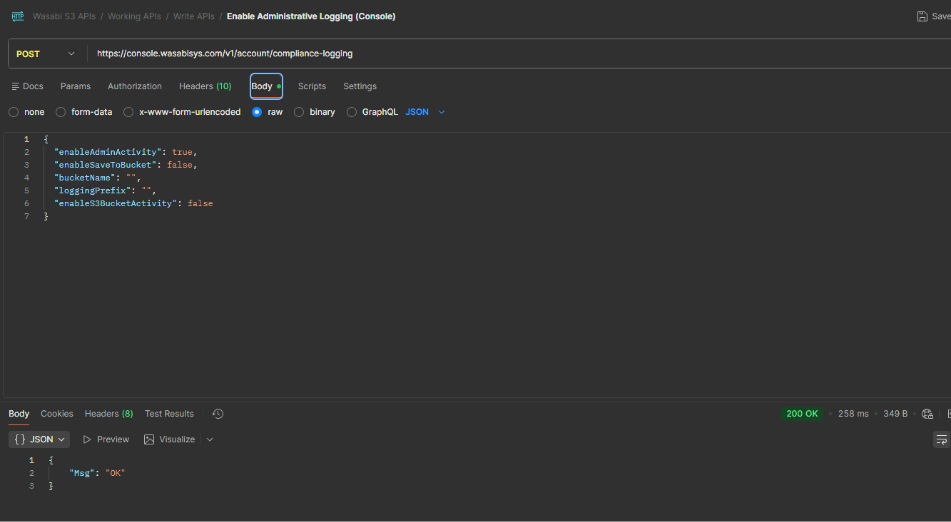
Enabling Administrative Logging
Administrative logging is responsible for auditing MFA events and credential issuance. Enable logging of administrative activities such as logins, password resets, and MFA changes.
Endpoint:

Request Body Example:
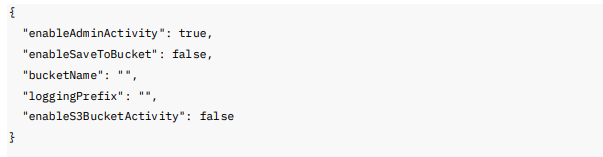
To save logs to a bucket, specify enableSaveToBucket set to true and specify a bucketName with object lock and compliance mode enabled.
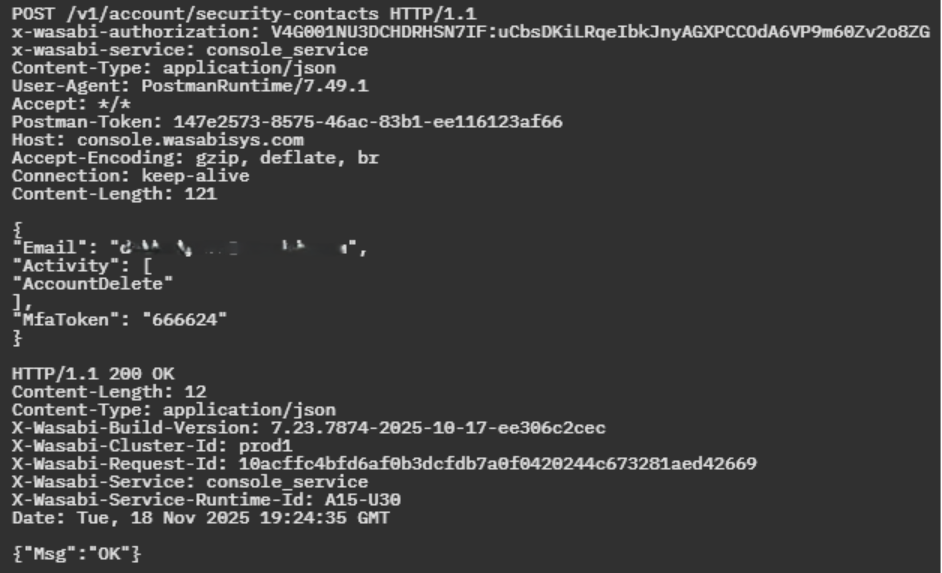
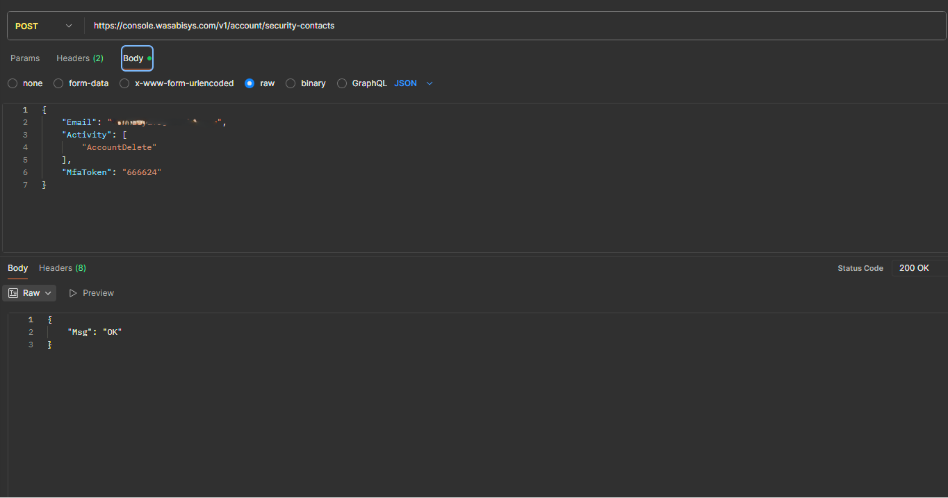
Enable Multi-User Authentication (MUA):
MUA enforces MFA device creation and enforcement. Set security contacts and enable MUA for specific activities.
Endpoint:

Request Body Example:
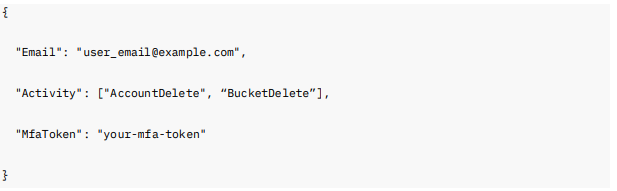 This request must include a valid MFA token in the body. A successful response returns an HTTP 200 OK with a message indicating success: {"Msg":"OK"}. It allows you to activate MUA and add a security contact for Account and Bucket Deletion using user credentials with enforced multi-factor authentication.