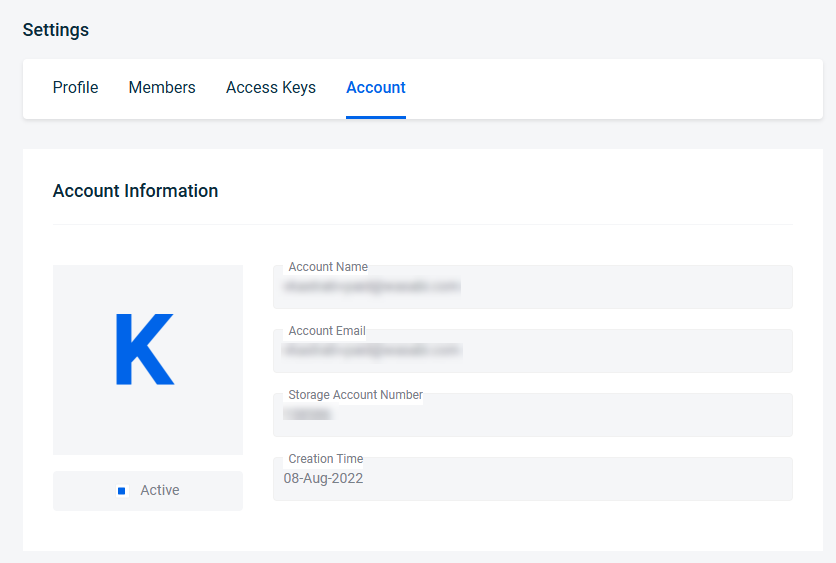
Custom Cloud Console members can manage their Account Information settings by enabling and configuring their SSO identity.
- Click Settings under the Profile in the right corner. The Profile page is displayed.
- Click the Account tab.

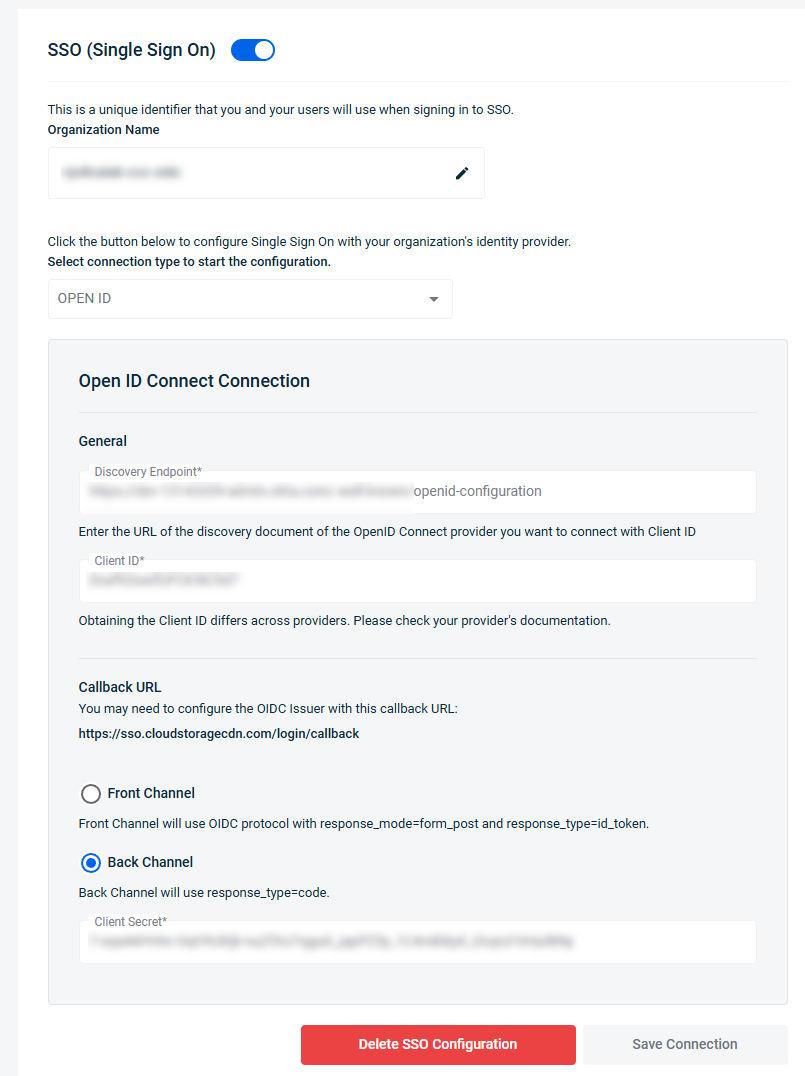
- Scroll down to the SSO (Single Sign On) section.
- Optionally, update the Organization Name. This is a unique identifier used to sign in to SSO.
- Select the authorization protocol Open ID Connect or SAML in the Select connection type section. In this example, Open ID was selected.
- Enter the URL to connect with the Client Id in the Discovery Endpoint field.
- Enter the Client Id.
- Configure the OIDC Issuer in the Callback URL, if necessary.
- Select the Front Channel or Back Channel response type option.
- Click Save Connection.
