The Account represents the organizational boundary with account-level settings and policies.
Account Page
The Account page provides a centralized view of your organization’s account settings and configuration. From here, you can view account details, monitor storage capacity, generate WACM Connect and integration API keys, set default storage quota thresholds, and manage identity integrations, including SSO and SCIM token configuration.
Be sure to click Update (in the upper-right corner) to apply any changes made on this page.
The Account page displays the following information for each user:
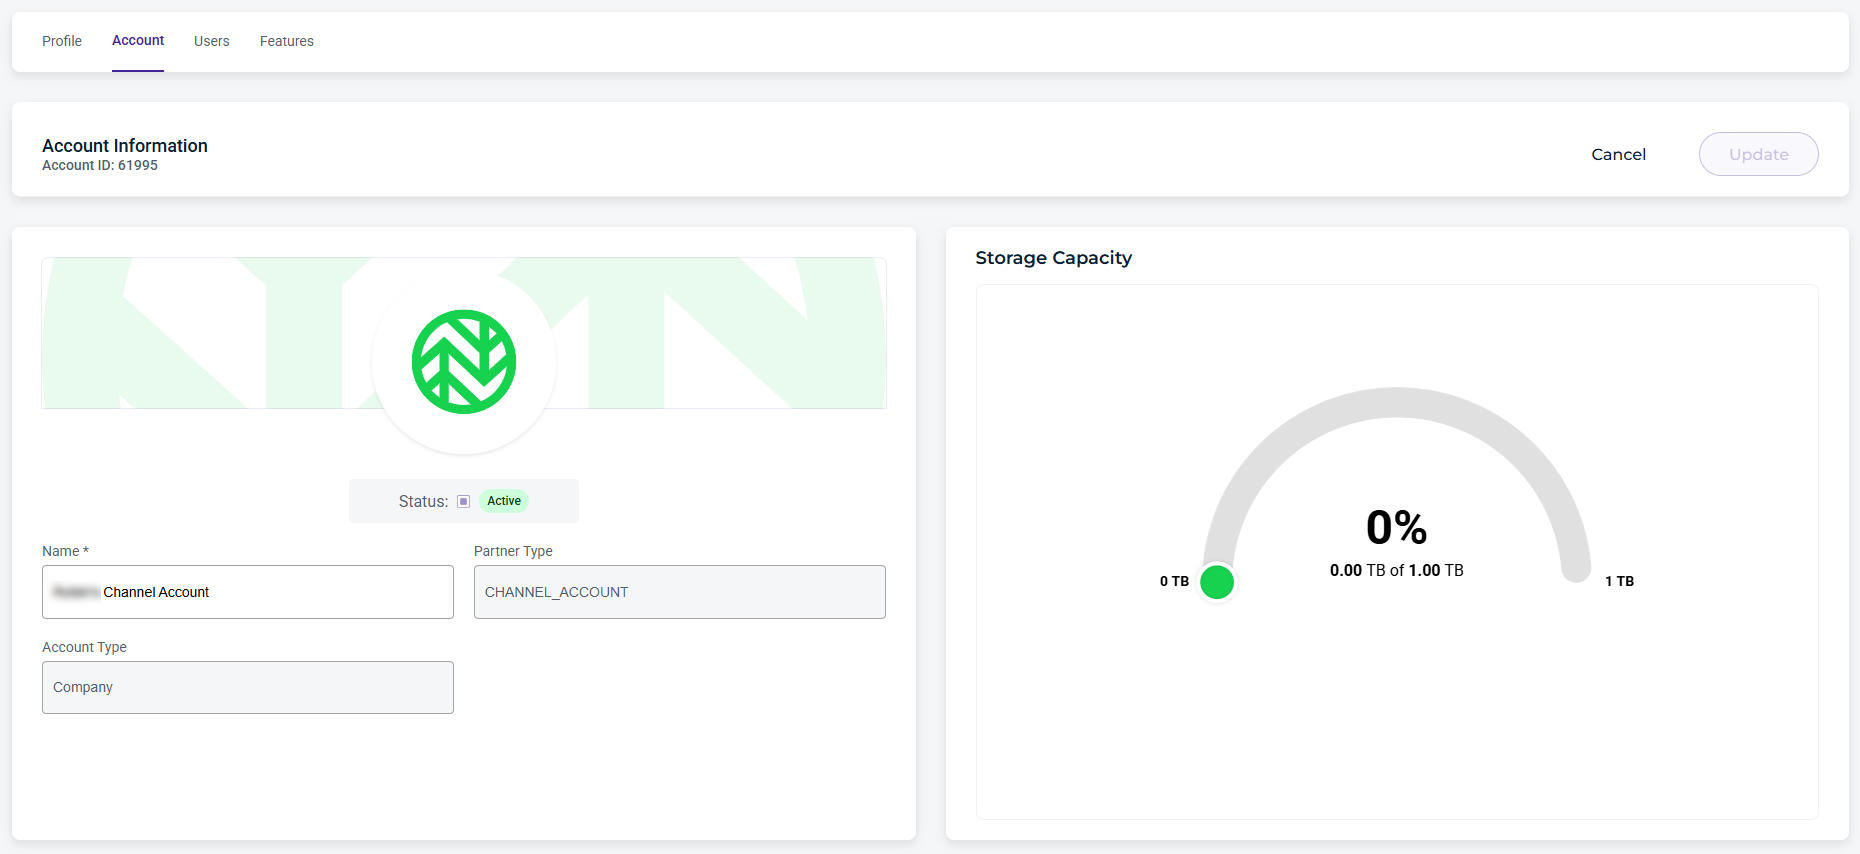
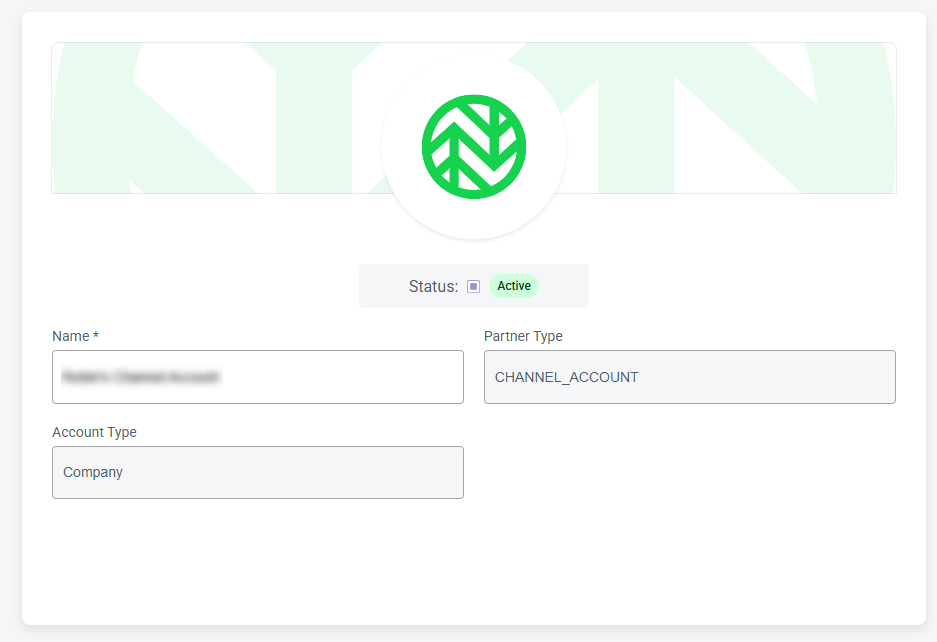
Account Status—The account user status, account name, partner type, and account type.
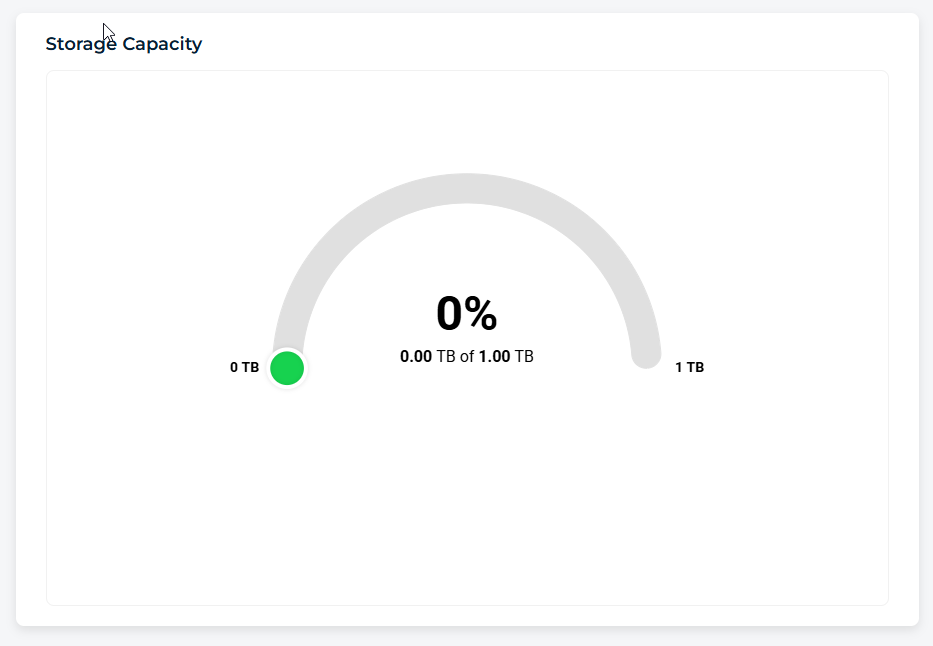
Storage Capacity—Provides current storage utilization for the account.
WACM Connect API Key—Allows you to generate an API key for accessing the WACM Connect API.
Integration API Keys—Provides a link to WACM Integrations for enabling secure communication with third-party services.
Contact Information—The address and contact information for the account.
Business Information—The tax information for the company.
Defaults—Allows you to set a Storage Quota value for all Sub-Accounts under a Control Account.
Carbon Footprint—View emissions from Wasabi storage under your management.
SSO (Single Sign On)—Enables authentication for this account.
SCIM Token—Allows you to generate a unique bearer token for an Identity Provider (IdP).
Security Settings—Schedule Delay Delete of a Sub-Account.
Account Overview
Shows basic account details, including account status, partner, and account type. From this page, you can only update the name.
Storage Capacity
Storage Capacity displays the account’s current storage utilization, helping you quickly monitor usage and avoid capacity limits.
WACM Connect API Key
The WACM Connect API key lets you access WACM data for automation and can be rotated or deleted as needed for security purposes.

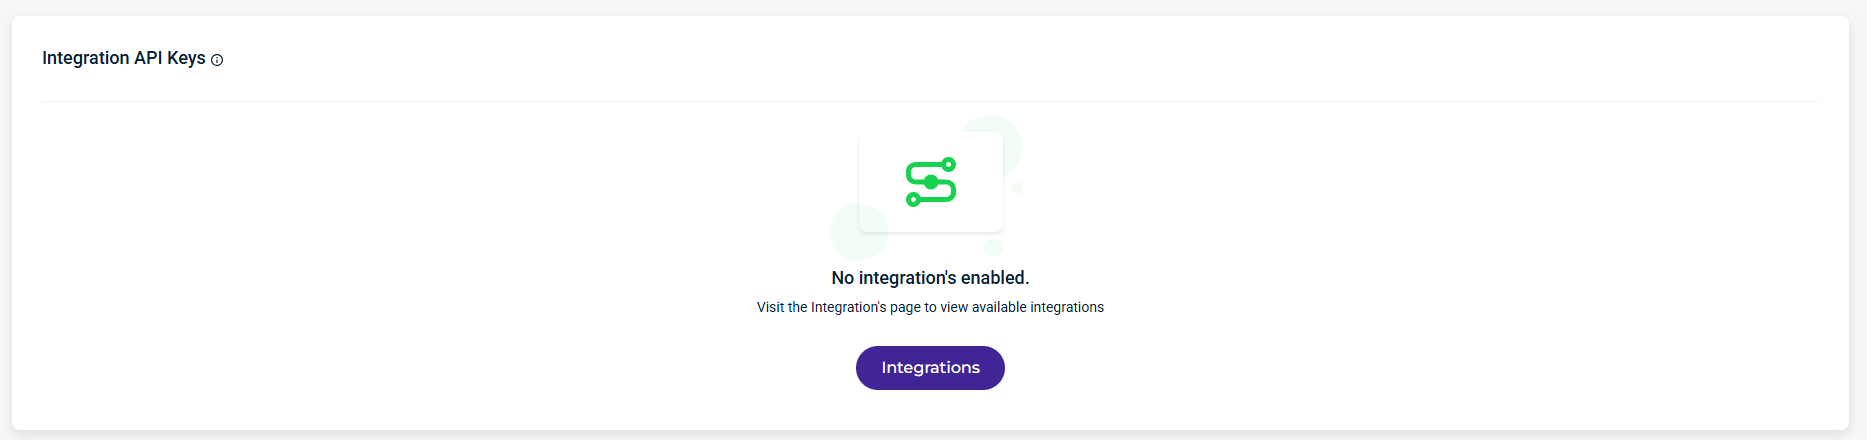
Integration API Keys
Integration API keys enable secure communications with third-party services. WACM Integrations provides details to enable partner integrations.
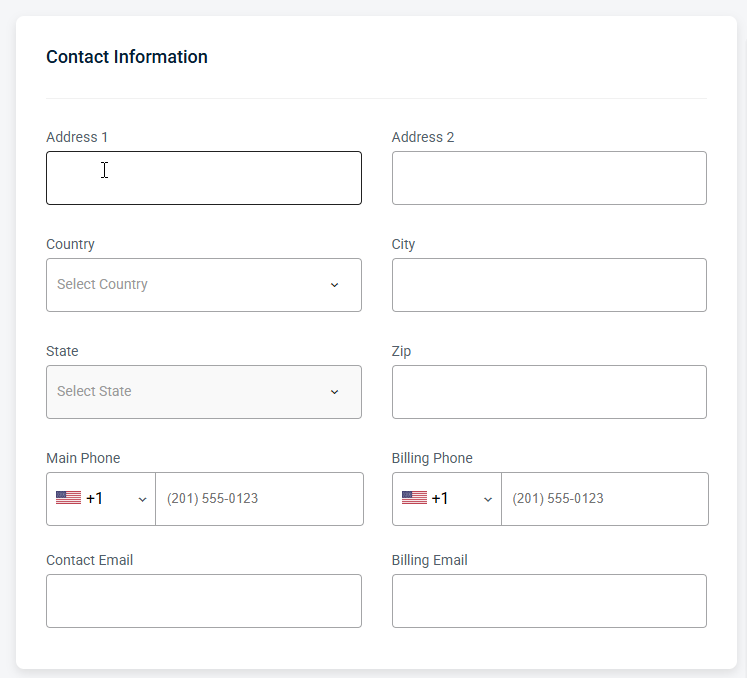
Contact Information
Provides editable fields for the user’s contact details, including the email address and other associated contact information.
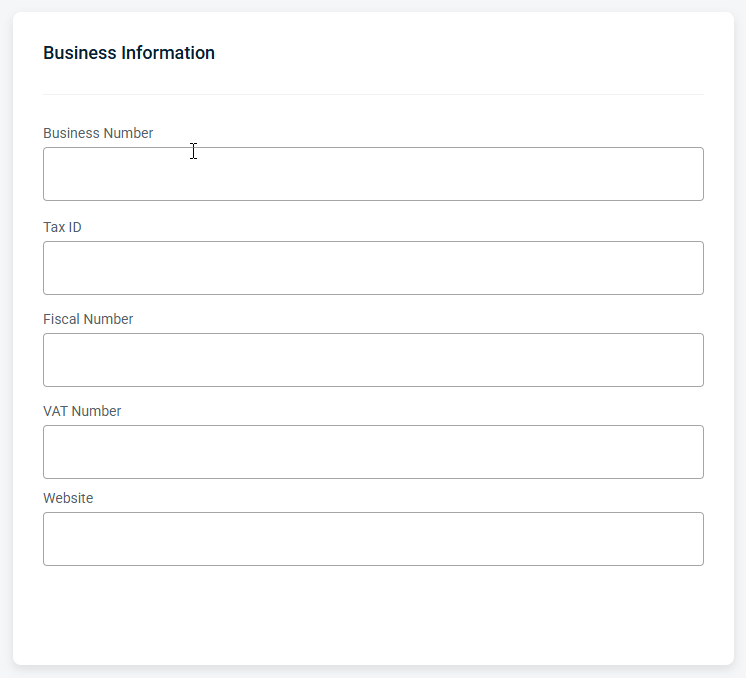
Business Information
Displays your organization’s registered business details, including business number, tax ID, fiscal number, VAT number, and company website. This information is used for billing, compliance, and official account records.
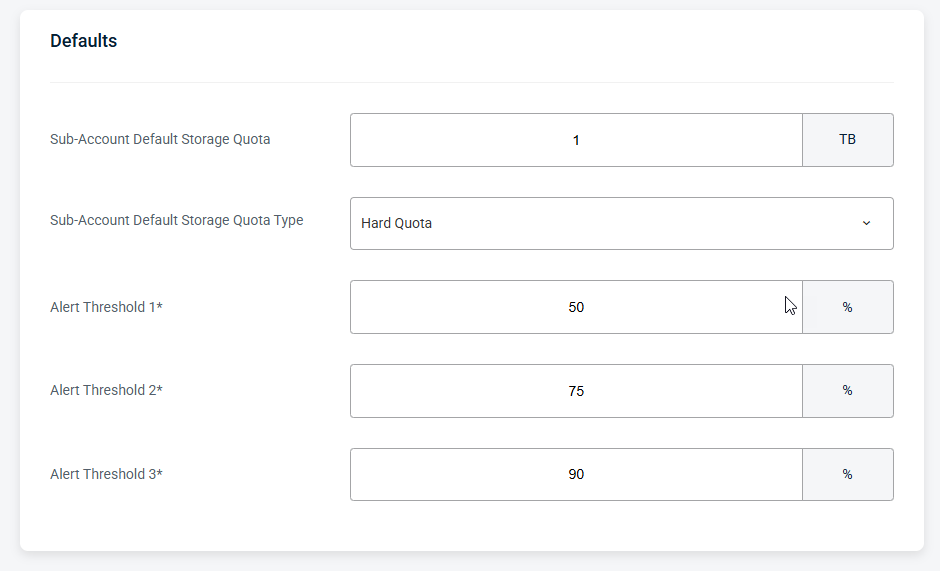
Defaults
The Defaults section allows you to set a Storage Quota value for all Sub-Accounts for a Channel Account at once.
The Sub-Account Default Storage Quota field allows users to assign a set amount of purchased storage to each Sub-Account, except for those that have already been modified. This amount can be changed at any time, and all Sub-Accounts that have not been modified previously will be updated to the new value.
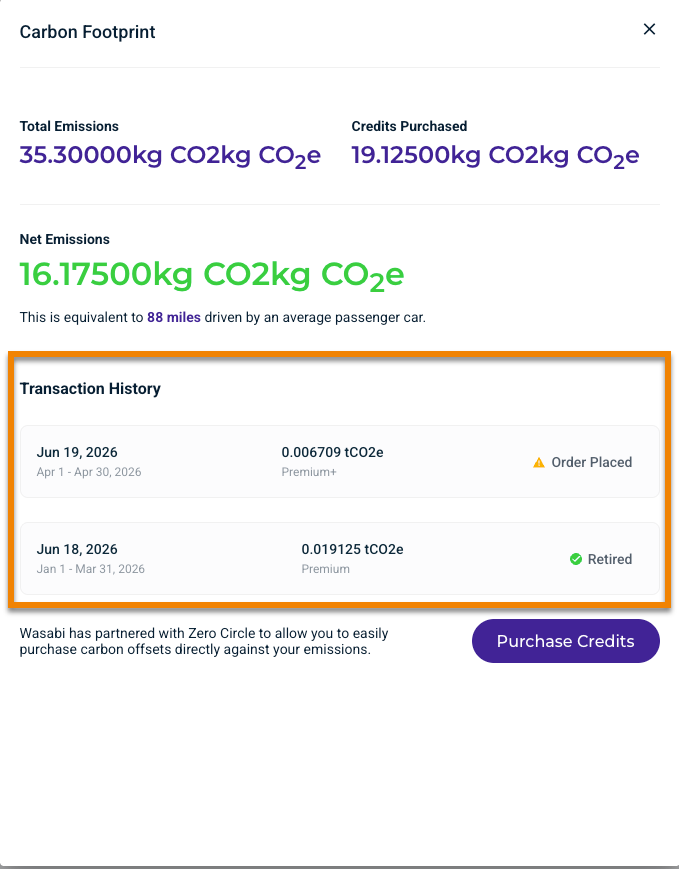
Carbon Footprint
With Carbon Footprint, you can view emissions from Wasabi storage under your management directly in WACM. These values are calculated at the regional level and updated monthly. You can also purchase additional credits using the Purchase Credits button. Use the Date Range filter to limit and analyze usage data for a specific time period.
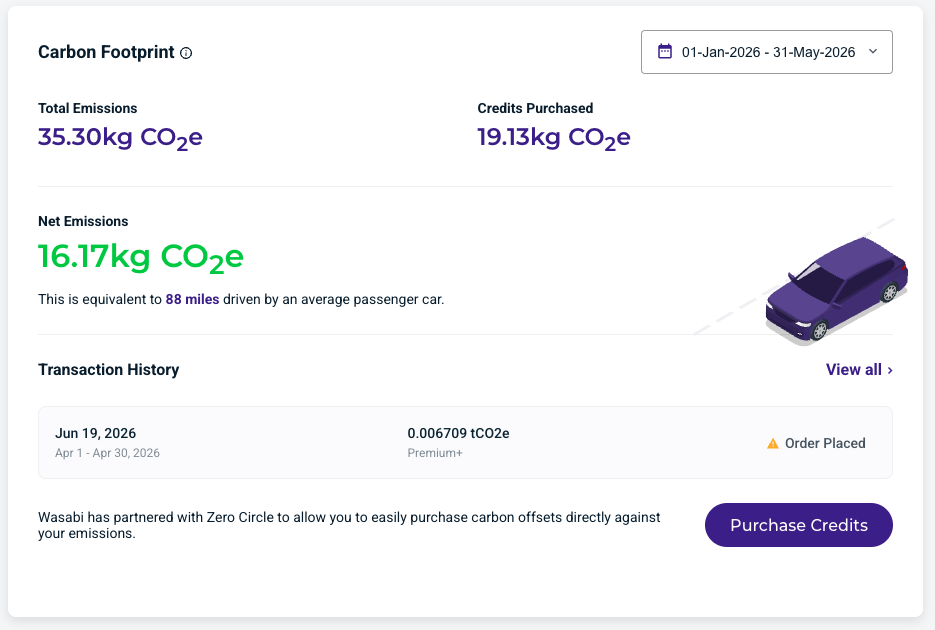
Carbon footprint provides the following details and metrics:
Total Emissions—The total emissions generated from storage under your management for the selected date range.
Credits Purchased—The credits, or emissions offsets, you have purchased from our partner to offset your total emissions for the selected date range.
Net Emissions—The total emissions generated for the selected date range, less the credits purchased to offset those emissions, leaving your net emissions.
Transaction History—Displays the latest transaction history. Click View All to see the status of the last three transactions, such as Order Placed, Retirement in Progress, or Retired.
Wasabi Impact Circle
Wasabi Impact Circle is our commitment to making cloud storage genuinely sustainable, and the carbon offset program, delivered through our partnership with Zero Circle, is how we put that commitment into practice. The program offsets the carbon footprint tied to the data customers store with Wasabi by funding verified environmental projects worldwide. This program is available exclusively in the Wasabi Account Control Manager console for Wasabi partners as a free strategic differentiator for sustainable-focused organizations. For more information, refer to Wasabi Carbon Footprint (https://cust.zerocircle.eco/wasabi).
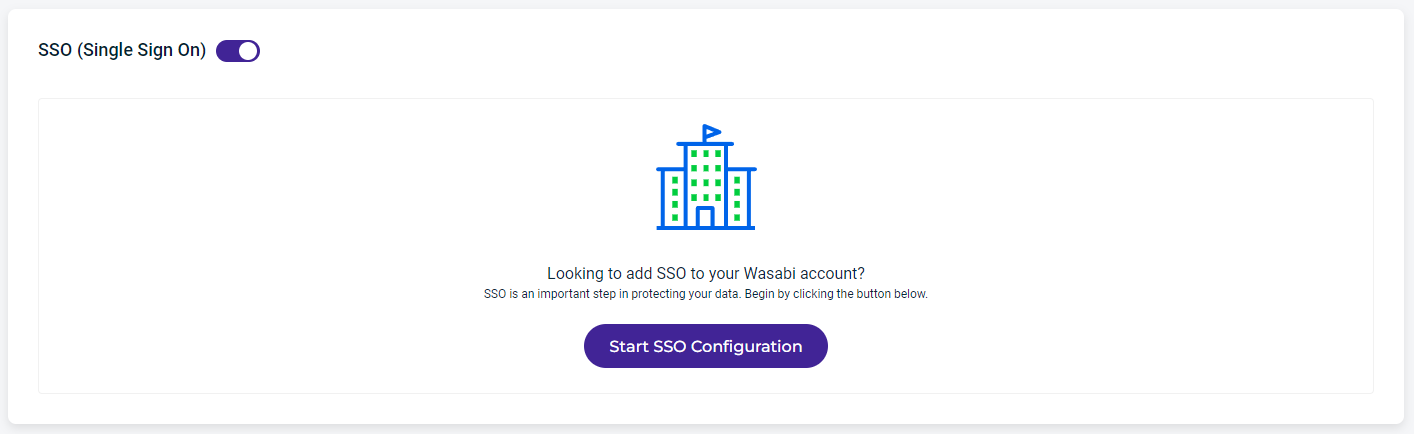
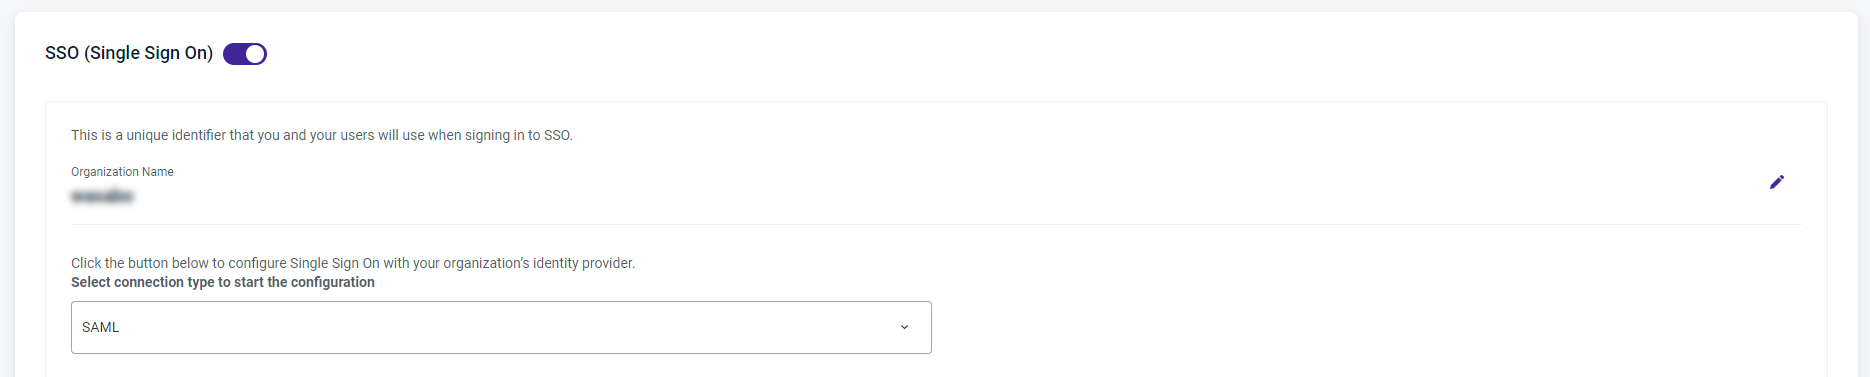
Single Sign On (SSO)
Click Start SSO Configuration.
Enter your organization name, which is a unique identifier that you and your users will use when signing in to Wasabi using SSO.
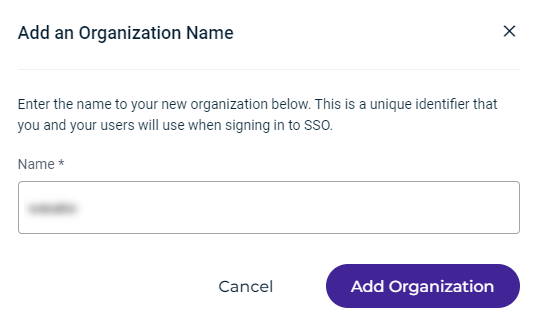
Click Add Organization. The organization name is displayed along with a drop-down menu to select the SSO connection:
Click the SSO Connection drop-down to select the connection type. You can select one of these protocols:
SAML
OPEN ID
SAML Connection
If you select SAML, a screen similar to the one shown below is displayed. Work through the instructions on the screen.
Enter the Sign In URL (Callback URL) and Sign Out URL (optional). Then click Browse File and select the X509 Signing Certificate.pem file.
Complete the IDP configuration.
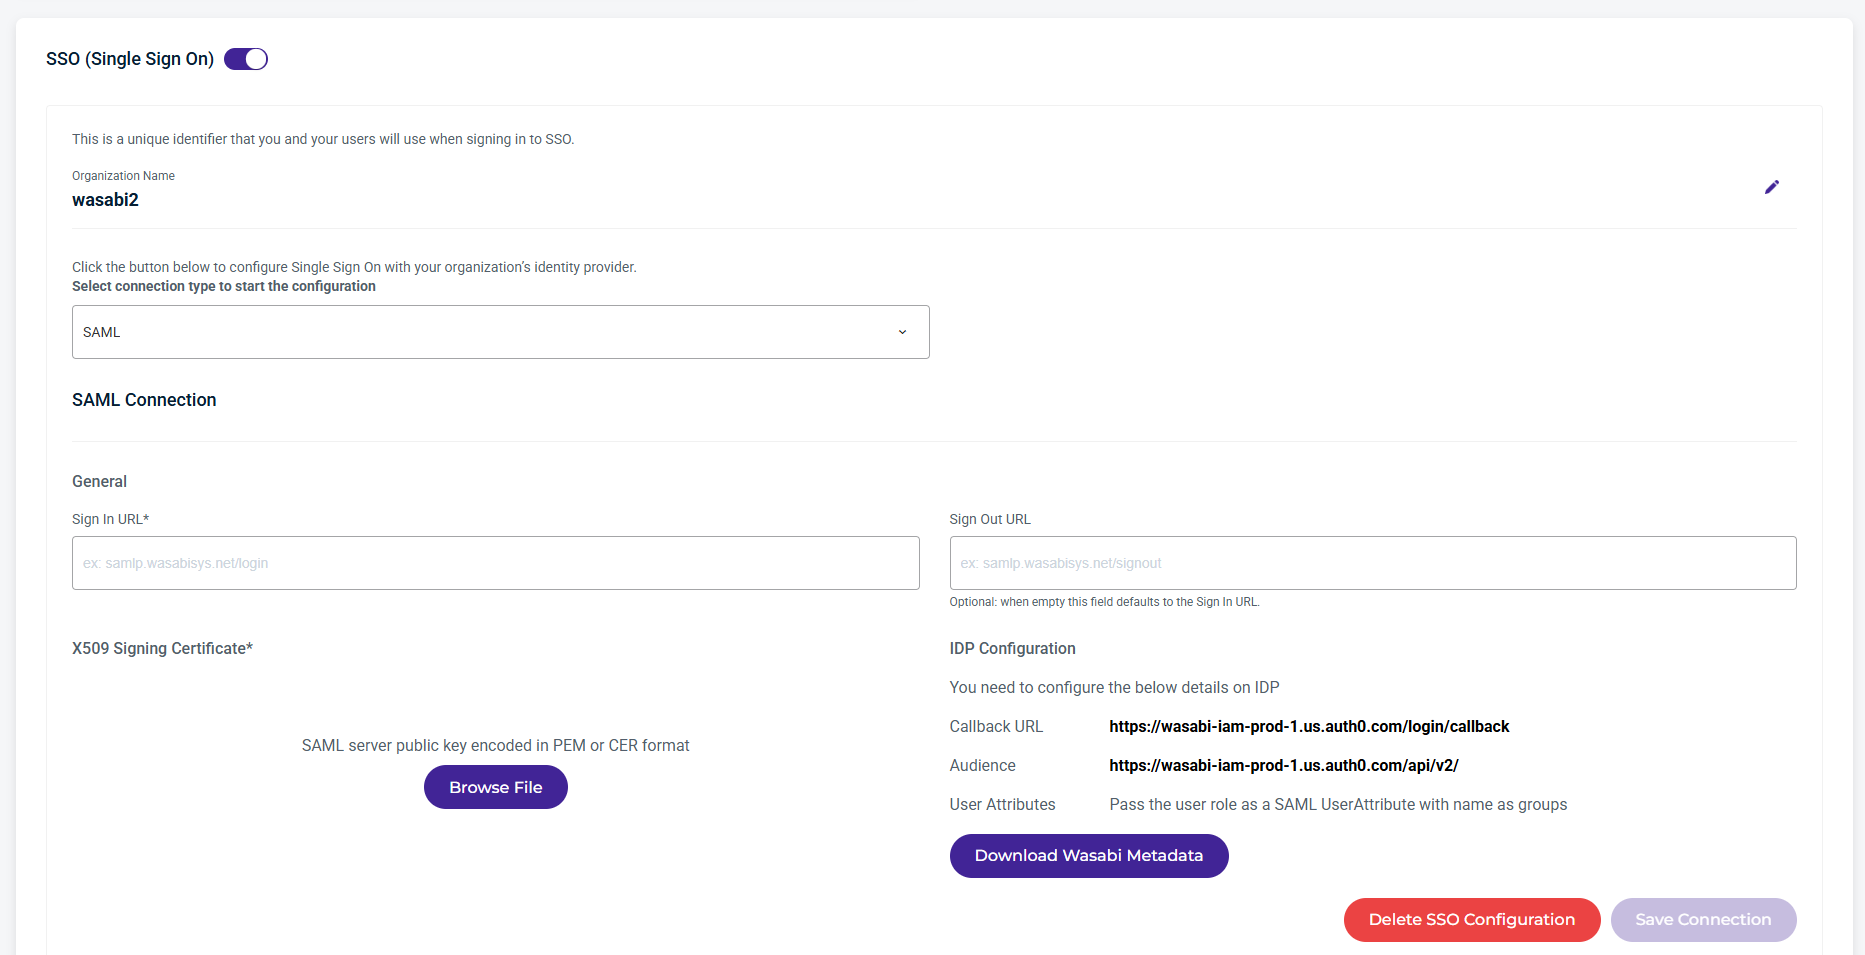
Click Save Connection.
Open ID Connection
If you select OPEN ID, a screen similar to the one shown below is displayed. Work through the instructions on the screen.
Enter the Discovery Endpoint and Client ID information.
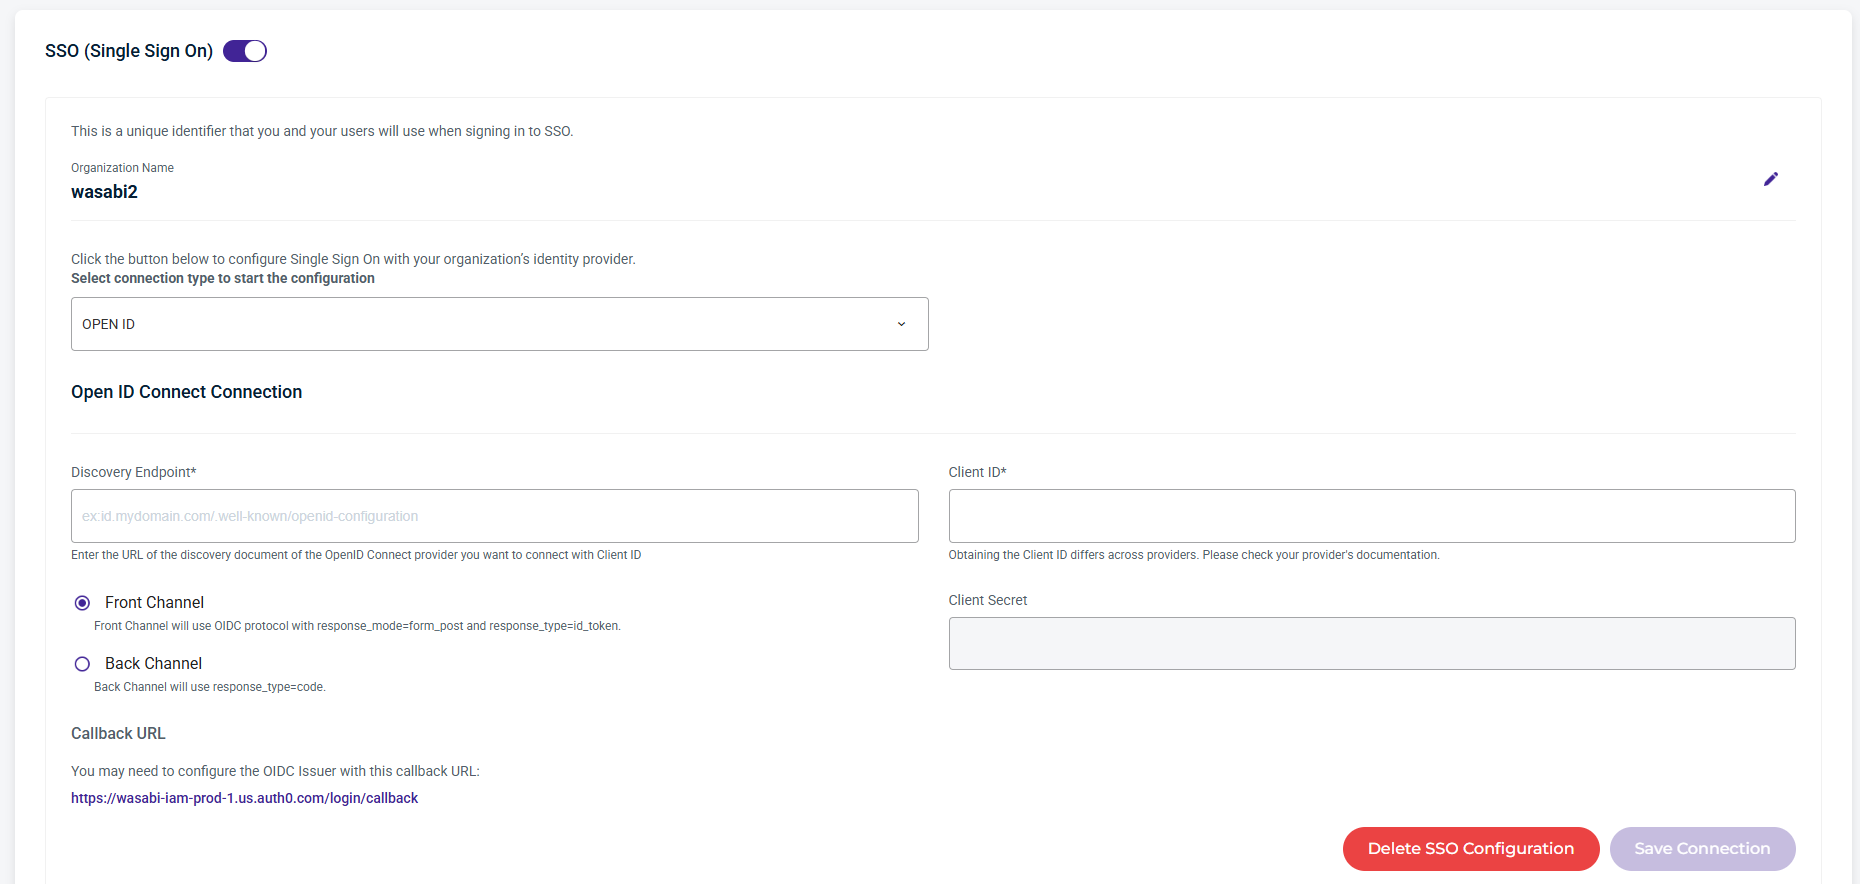
Click Save Connection.
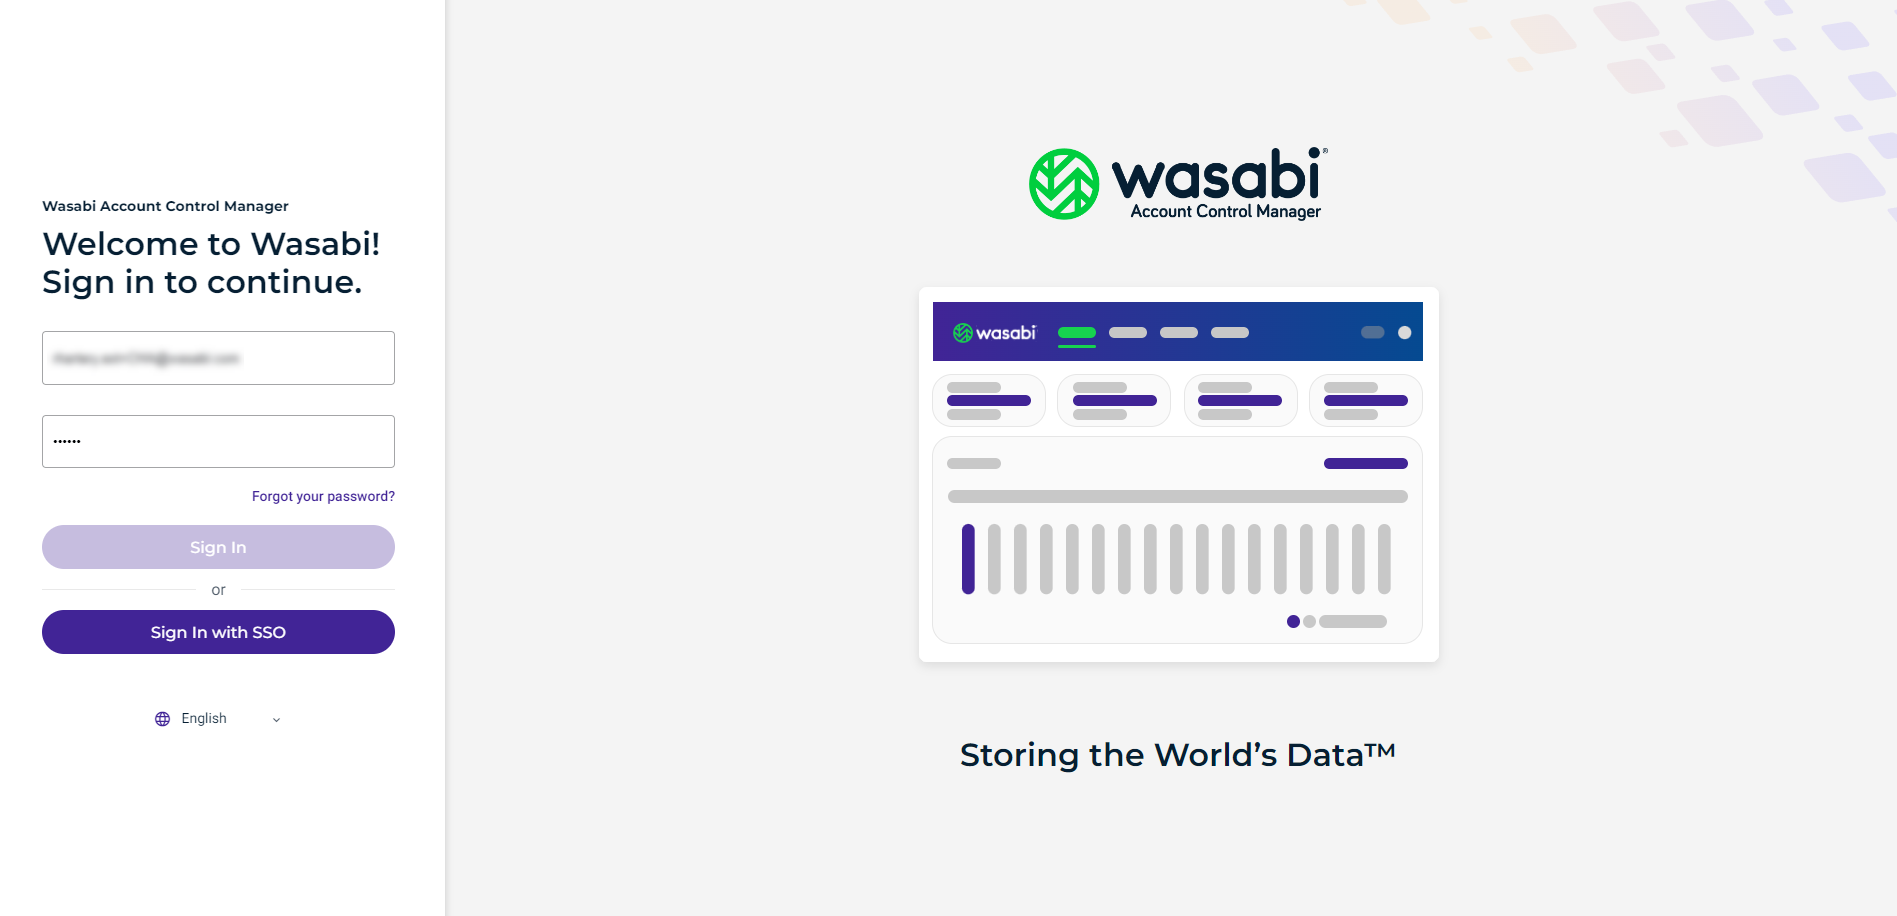
Sign In With SSO
When SSO is configured, a user can sign in with SSO on the Welcome screen:
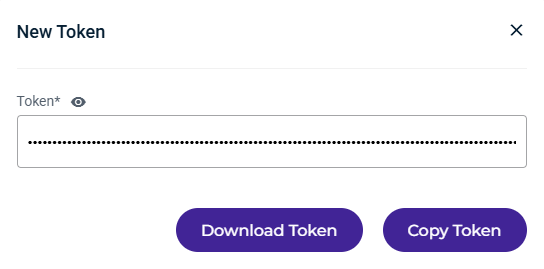
SCIM Token
When configuring SCIM, you will need a token to enable SCIM provisioning.
Click Generate Token.

Click Download Token or Copy Token to the clipboard.
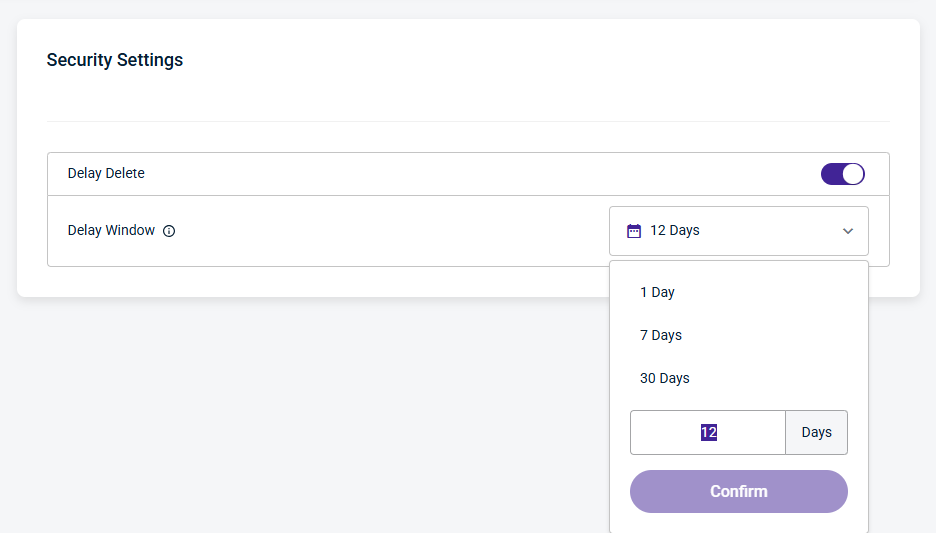
Security Settings
Delay Delete provides a window of time after a deletion is scheduled during which a user can cancel the deletion of a Sub-Account before it is processed. It also provides notifications when an account deletion is initiated, canceled, or completed, enhancing visibility and security.
While a Sub-Account is in the Pending Delete status, it will remain active for use and billed as normal. If you wish to restrict access during this time, you can suspend the account before scheduling the deletion.
Security Settings allows Admin users (Governance, Control, and Channel Account) to enable or disable Delay Delete for Sub-Accounts. When enabled, this setting does not inherit to other accounts and must be configured individually for each account.
When Delay Delete is enabled, the Sub-Account deletion delay defaults to 1 day (24 hours) and can be configured up to 30 days. When a Sub-Account is scheduled for deletion, it remains active until the configured delay period expires. During this delay window, the deletion can be canceled. Once the delay window expires, the Sub-Account is permanently deleted.
Use the Delay Window dropdown to select the number of days to wait before a scheduled deletion is completed. You can update the Delay Window setting at any time.
By default, Admin users have notifications enabled. All other users can optionally enable them on their Profile page. Notifications are sent when:
A Sub-Account is scheduled for deletion.
A user cancels a Sub-Account scheduled for deletion within the Delay Window.
A Sub-Account is deleted once the delay window has elapsed.