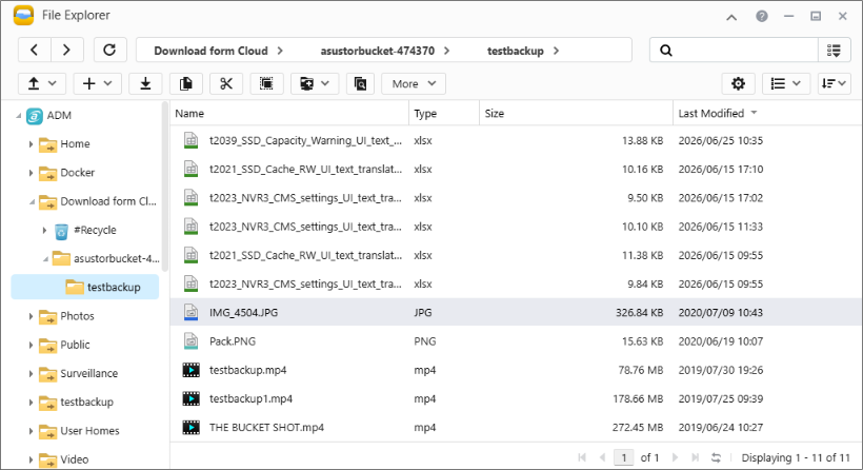
ASUSTOR NAS Cloud Backup Center empowers you to create a secure hybrid cloud environment with instant and scheduled backups, keeping your data protected both online and offline. With Cloud Backup Center, users can back up files from the NAS to Wasabi or download files from Wasabi to the NAS. Users can also select an existing Wasabi bucket or create a new bucket directly during the backup job setup process. For more information, refer to the ASUSTOR Cloud Backup Center documentation.
Requirements
Wasabi Hot Cloud Storage account
Wasabi bucket (see Creating a Bucket)
Wasabi Access & Secret Key (see Creating a User Account and Access Key)
The Access Key and Secret Key must have the required permissions to read/write to the target bucket.
Cloud Backup Center must be installed on the ASUSTOR NAS.
ADM 4.3
Cloud Backup Center 1.0.3.r449 or later
ADM 5.0
Cloud Backup Center 1.0.4.r549 or later
Architecture Reference Diagrams
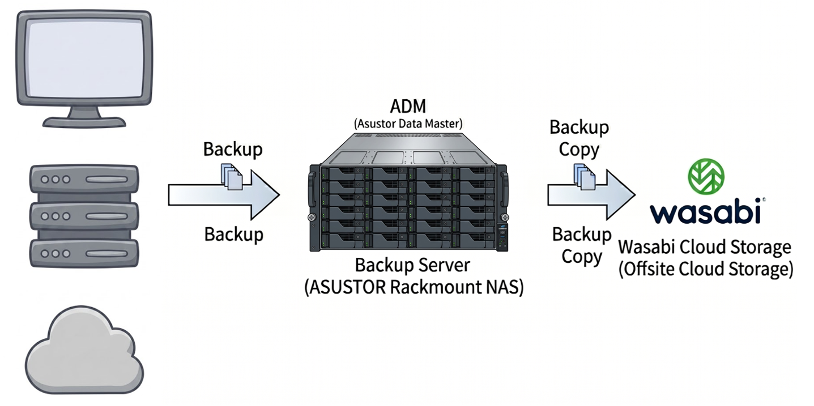
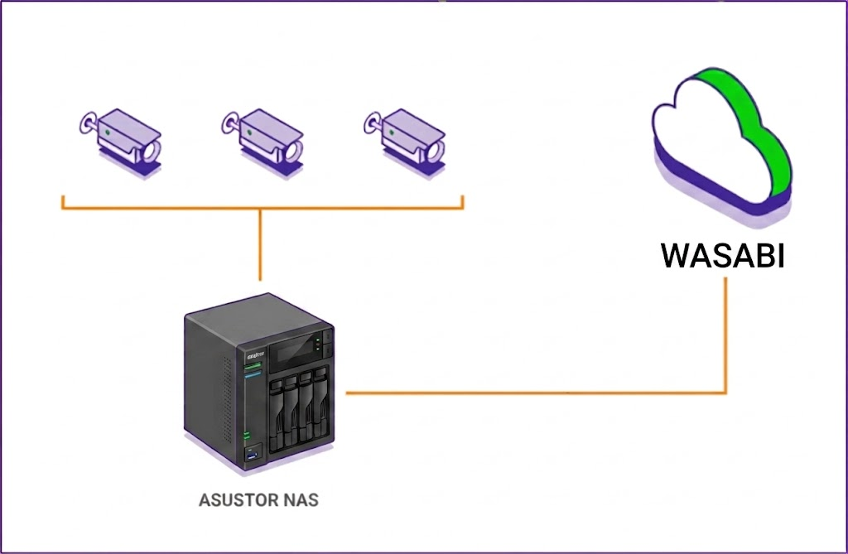
Configuring Cloud Backup Center With Wasabi
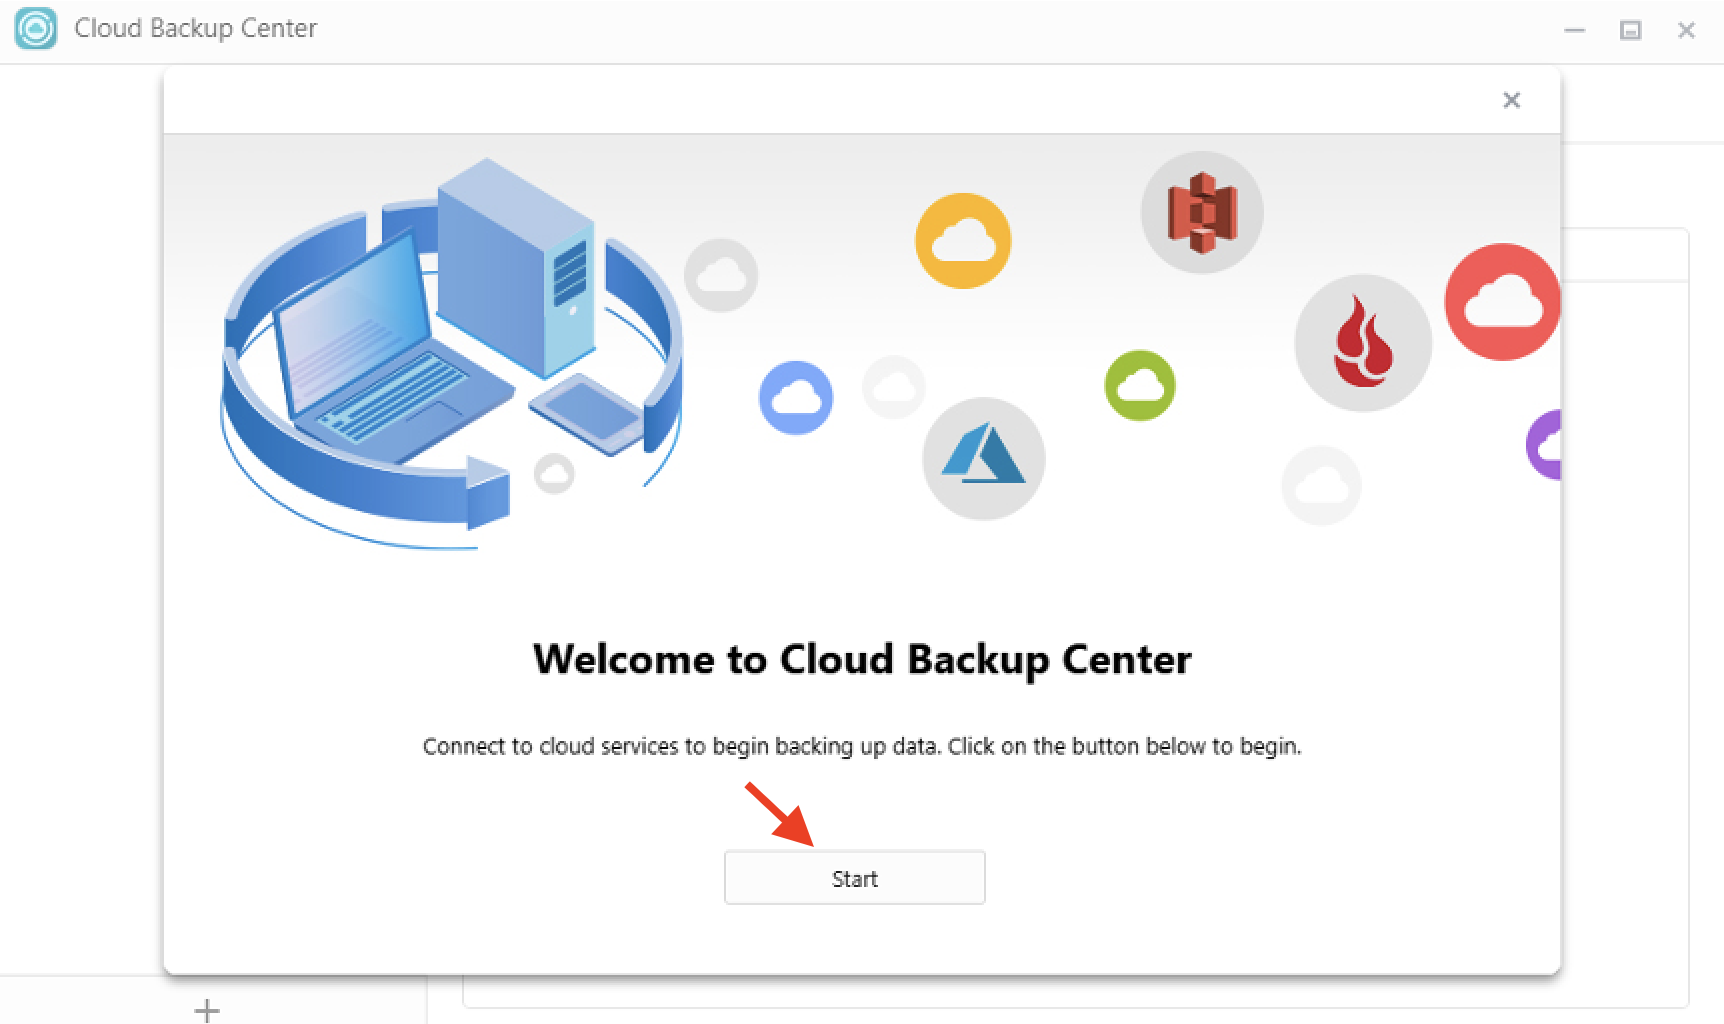
Open Cloud Backup Center on the NAS. If this is the first time using Cloud Backup Center, click Start to begin creating a cloud backup job.
In the Create New Backup Job wizard, select Wasabi S3 as the cloud service provider.
Click Next to continue.
provider.
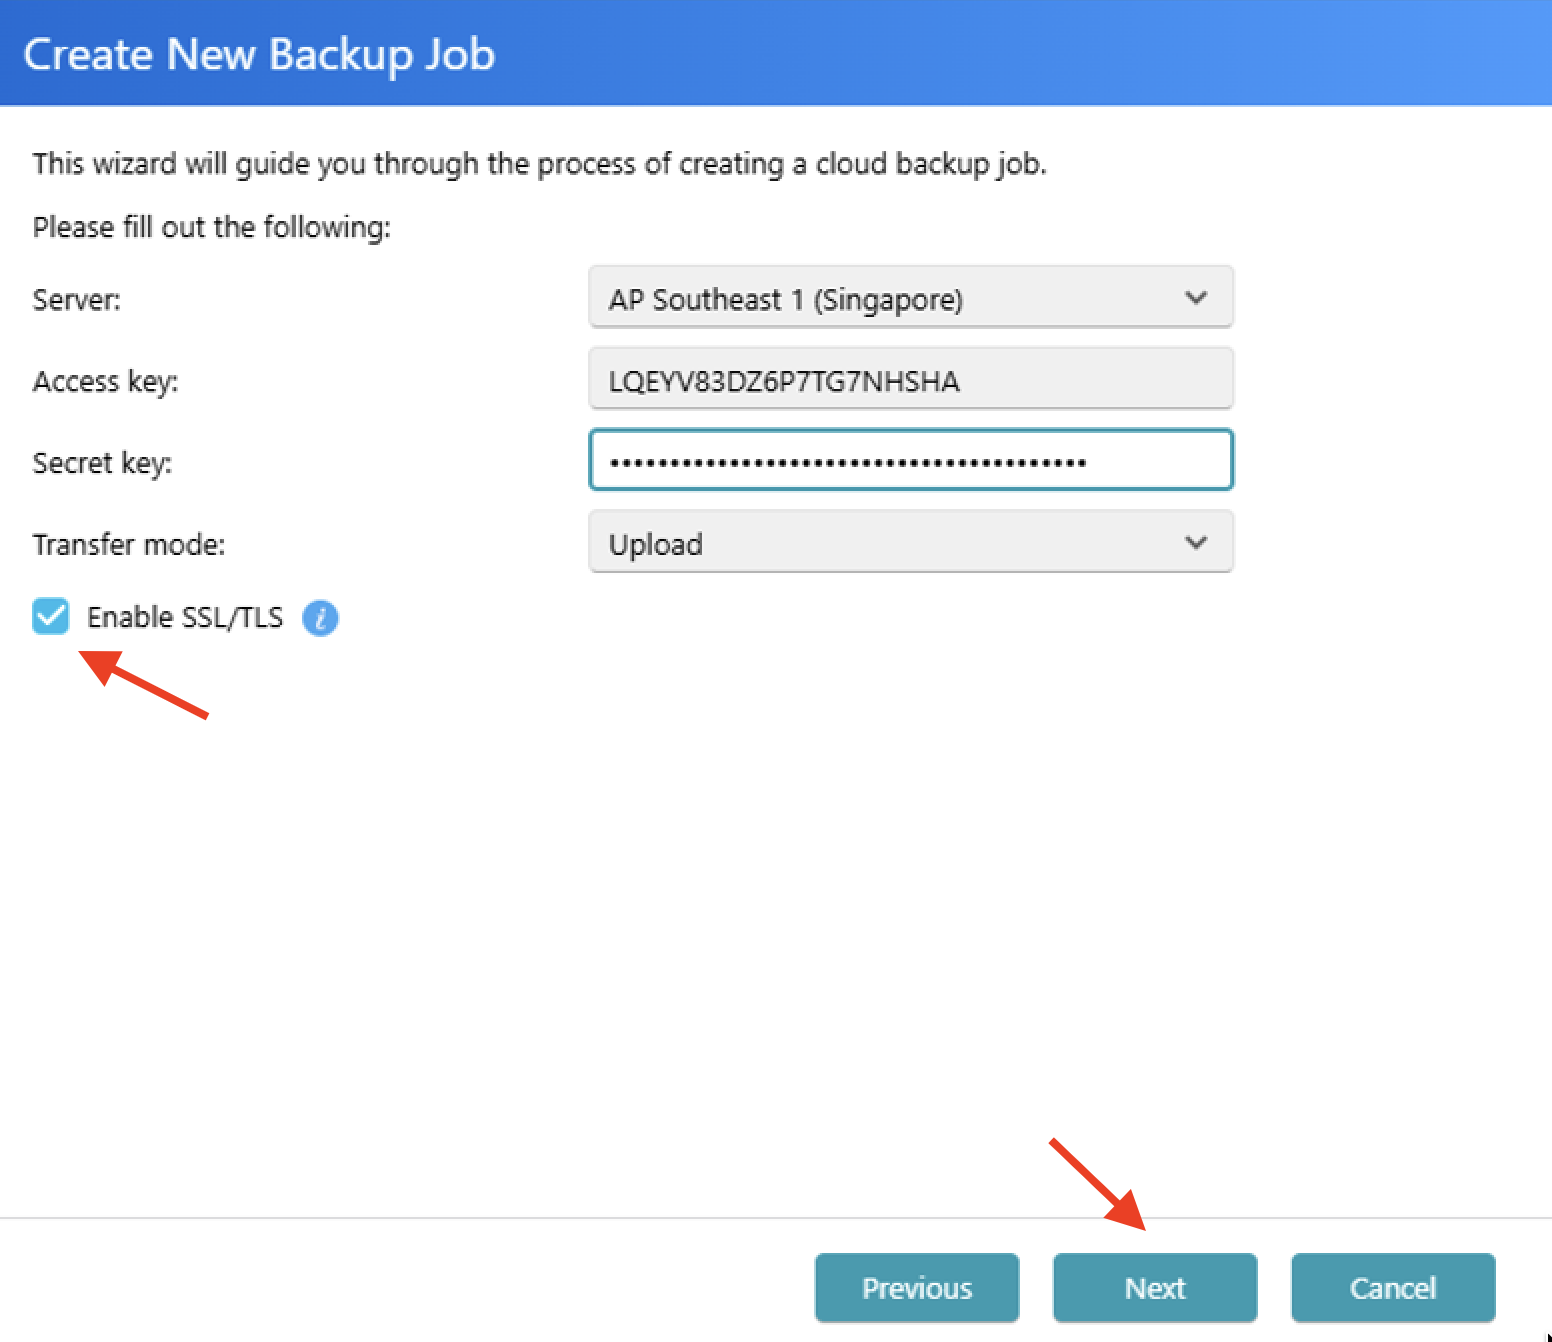
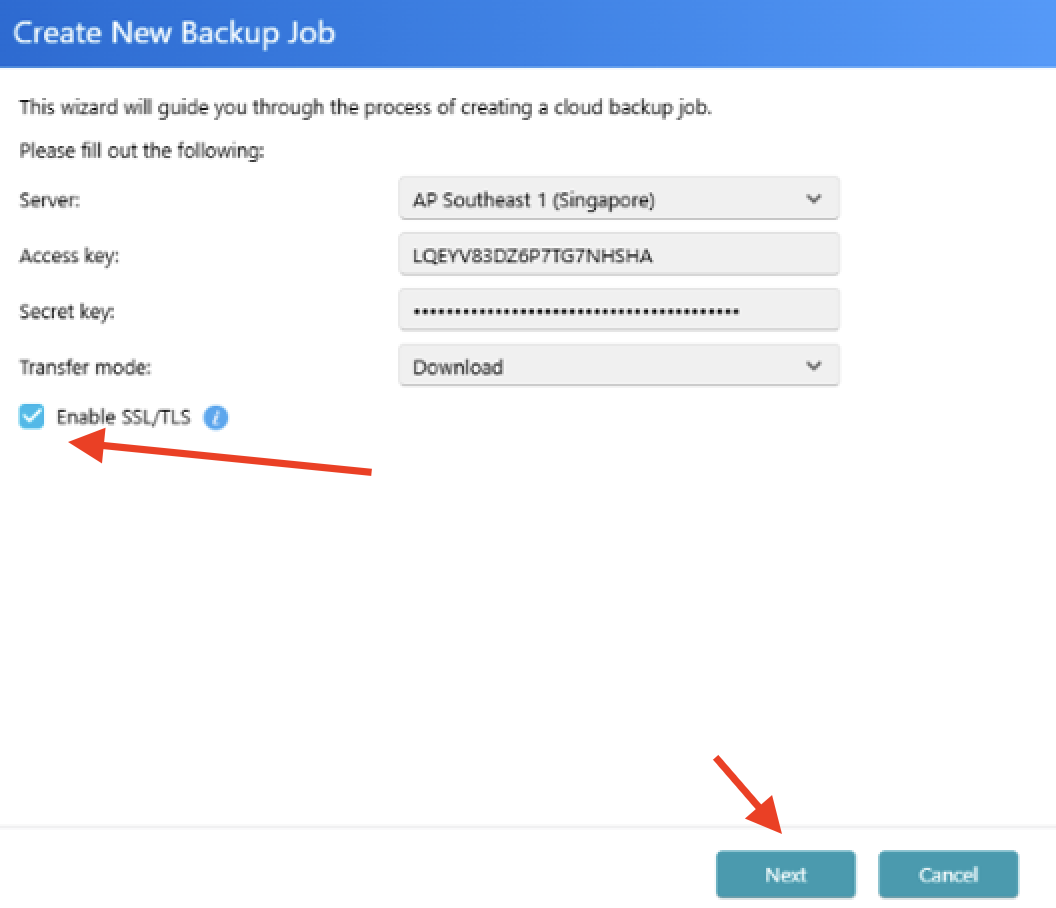
Enter the following information.
Select the Wasabi server region.
Click the checkbox to enable SSL/TLS to use an encrypted connection.
Input your Wasabi Access Key.
Input your Wasabi Secret Key.
Set the transfer mode to Upload to back up files from the NAS to Wasabi.
Click Next.
This configuration example discusses the use of Wasabi's ap-southeast-1 storage region. Use the region your bucket is located in. For a list of regions, see Service URLs for Wasabi's Storage Regions.
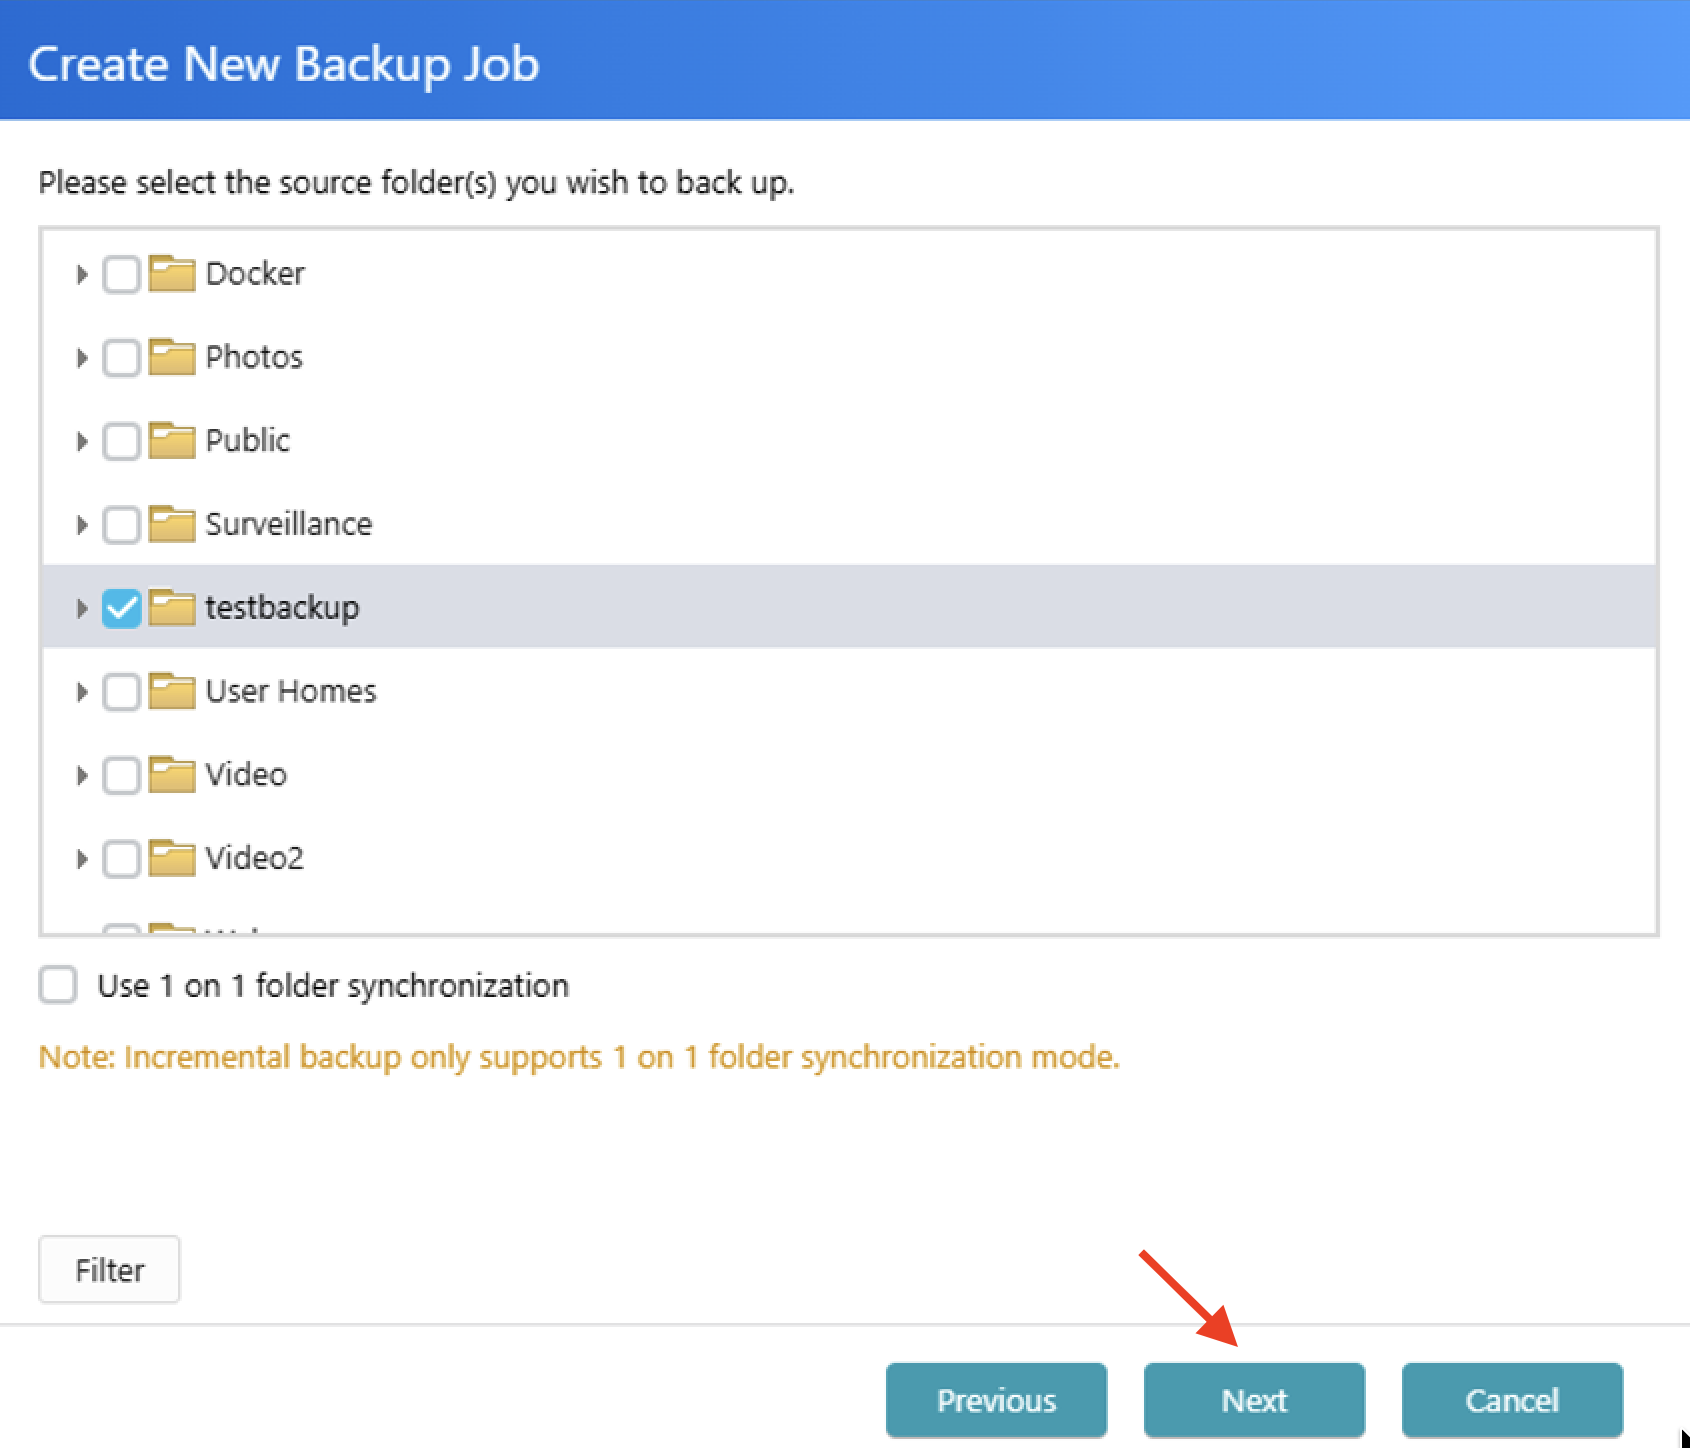
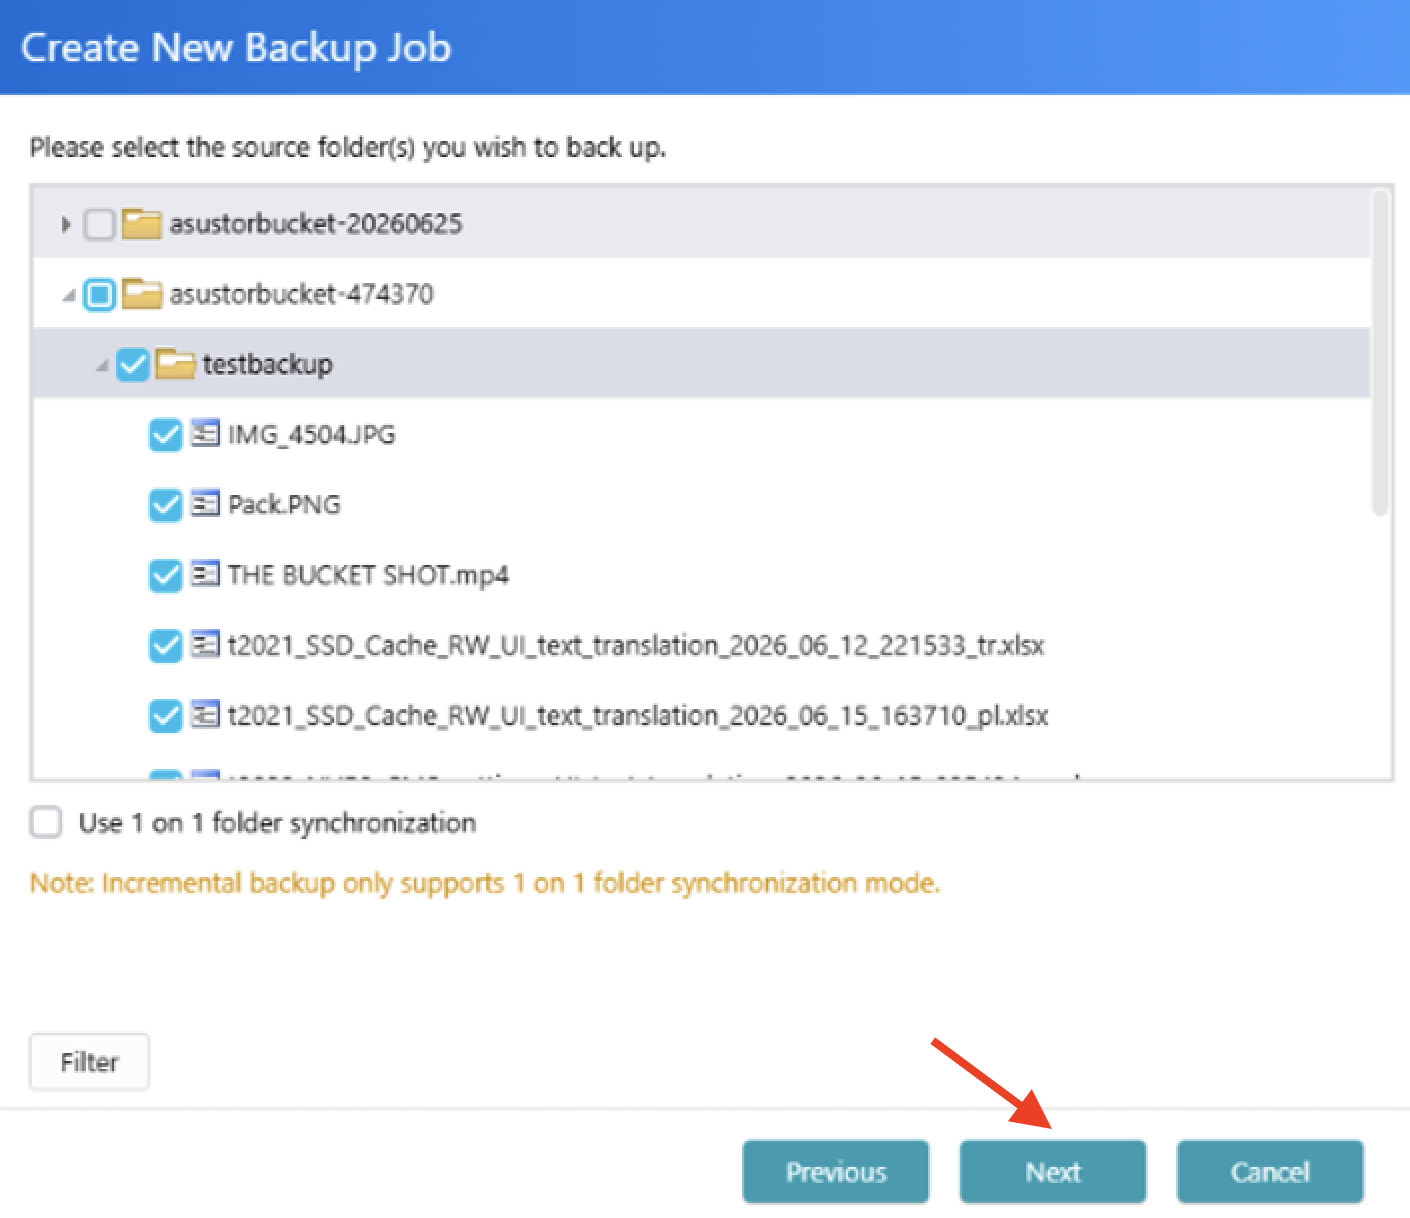
Select the source location NAS folder to back up to Wasabi.
Optionally, enable 1-on-1 Folder Synchronization.
Incremental backup only supports “1 on 1 Folder Synchronization” mode.
Select the source folder.
Click Next.
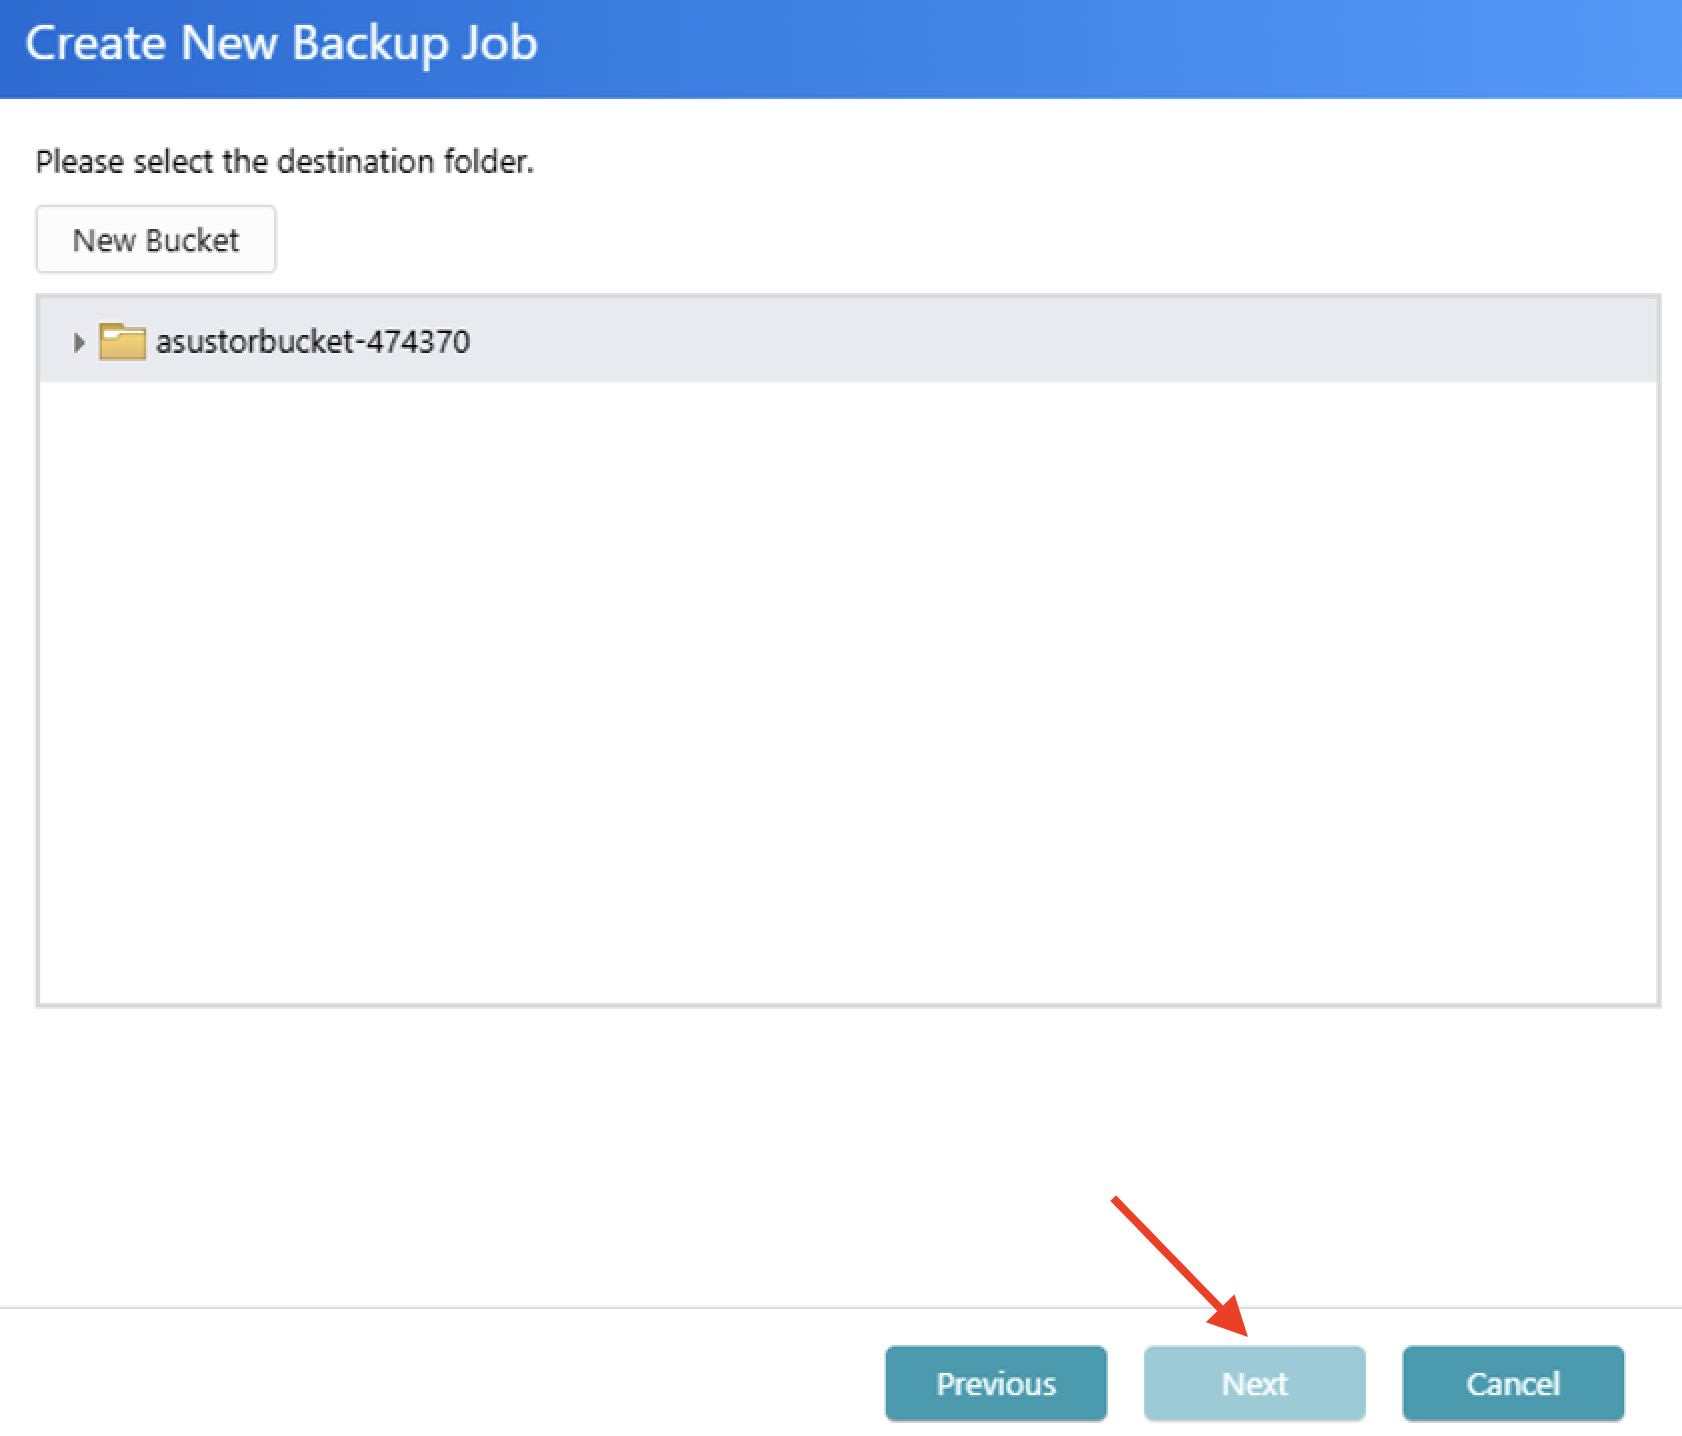
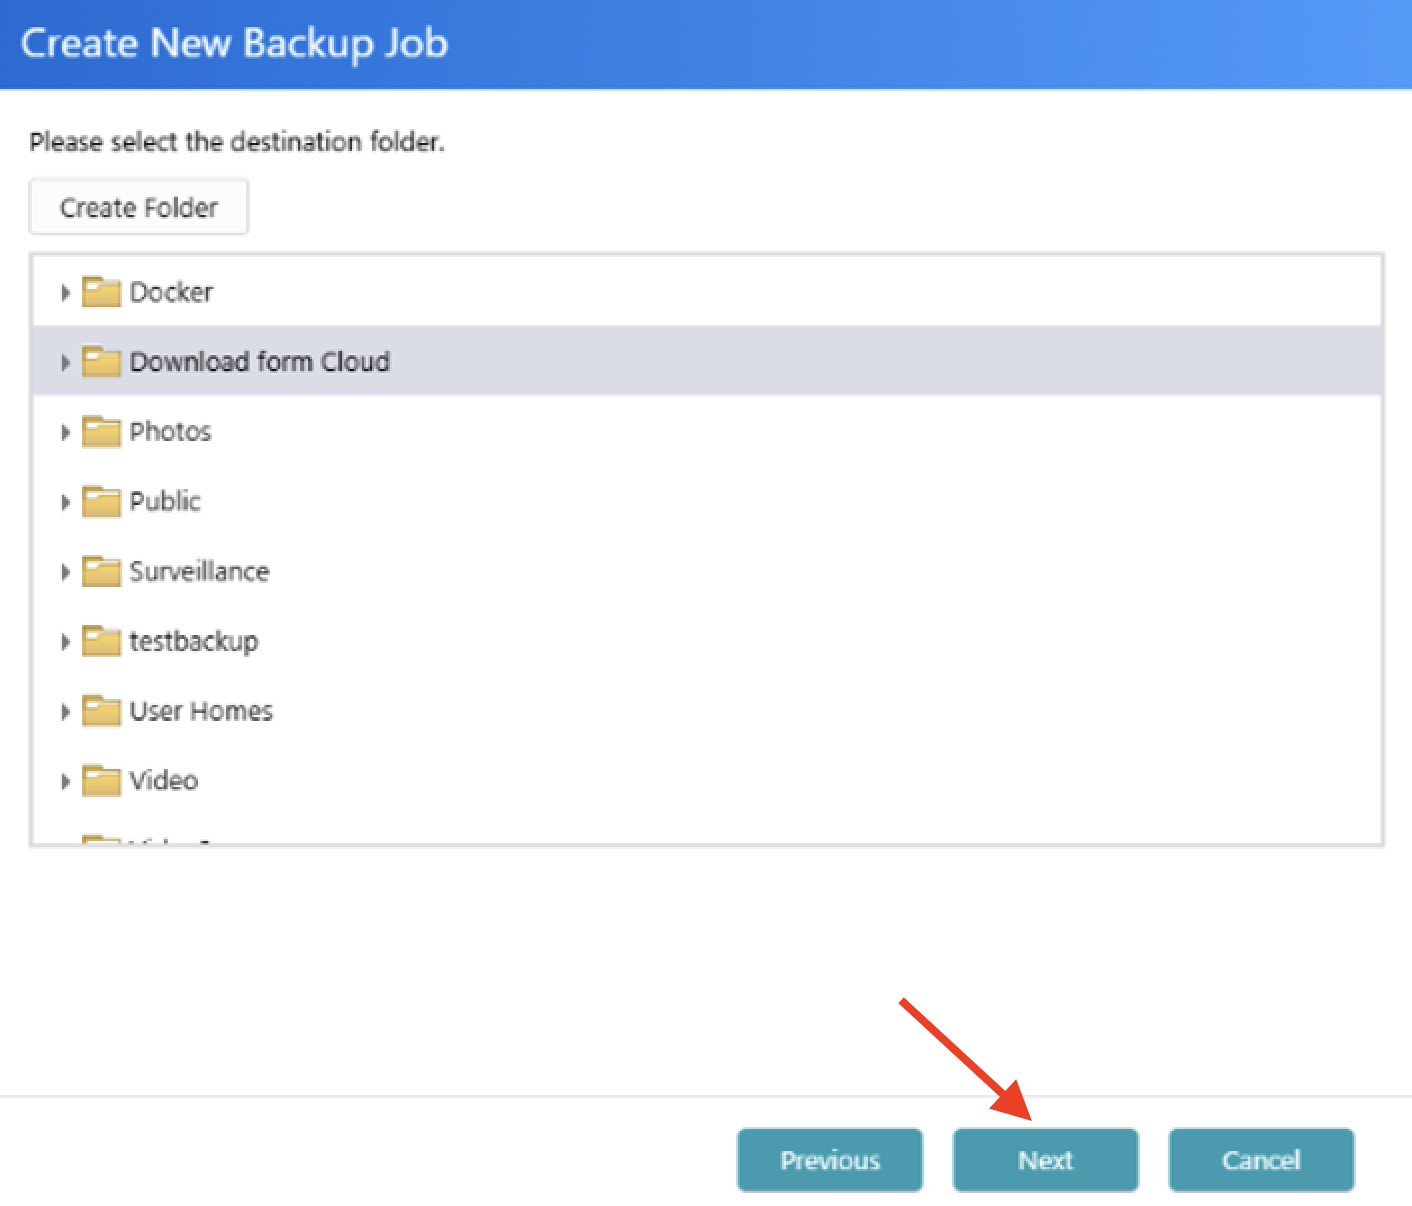
Select the destination location for the backup job.
For Upload, select the destination bucket in Wasabi.
If no bucket is available, click New Bucket to create a new Wasabi bucket directly from Cloud Backup Center.
After selecting the destination, click Next.
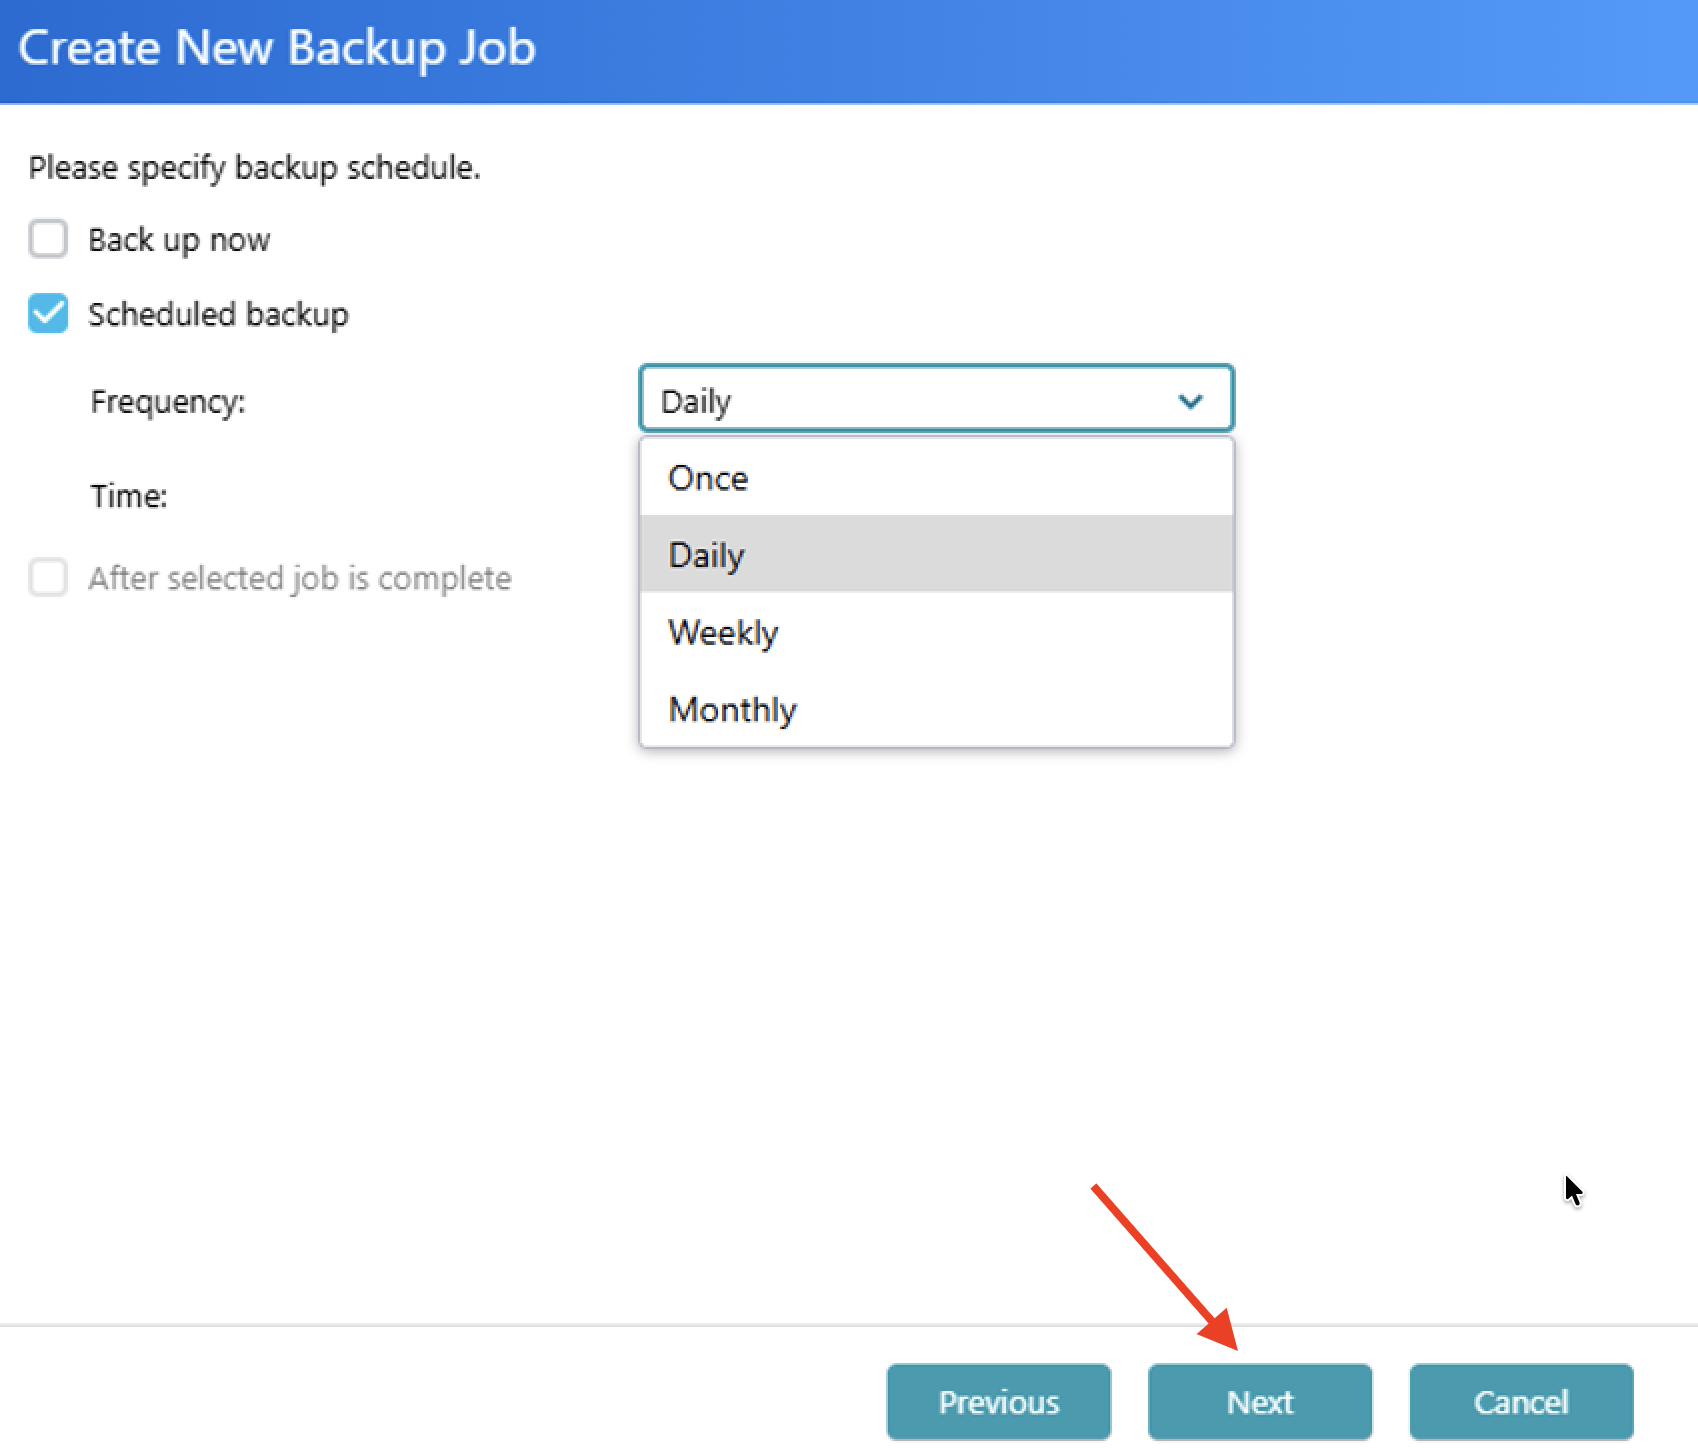
Choose how the backup job should be executed. Available options include:
Back up now
Scheduled backup
For scheduled backup, configure the backup frequency and schedule settings.
After the selected job is complete
After the selected job completes, select an existing job to run this backup job once that job completes.
Configure advanced settings. These settings can be adjusted based on the user’s backup requirements. Optionally, if no special configuration is required, keep the default settings and click Next.
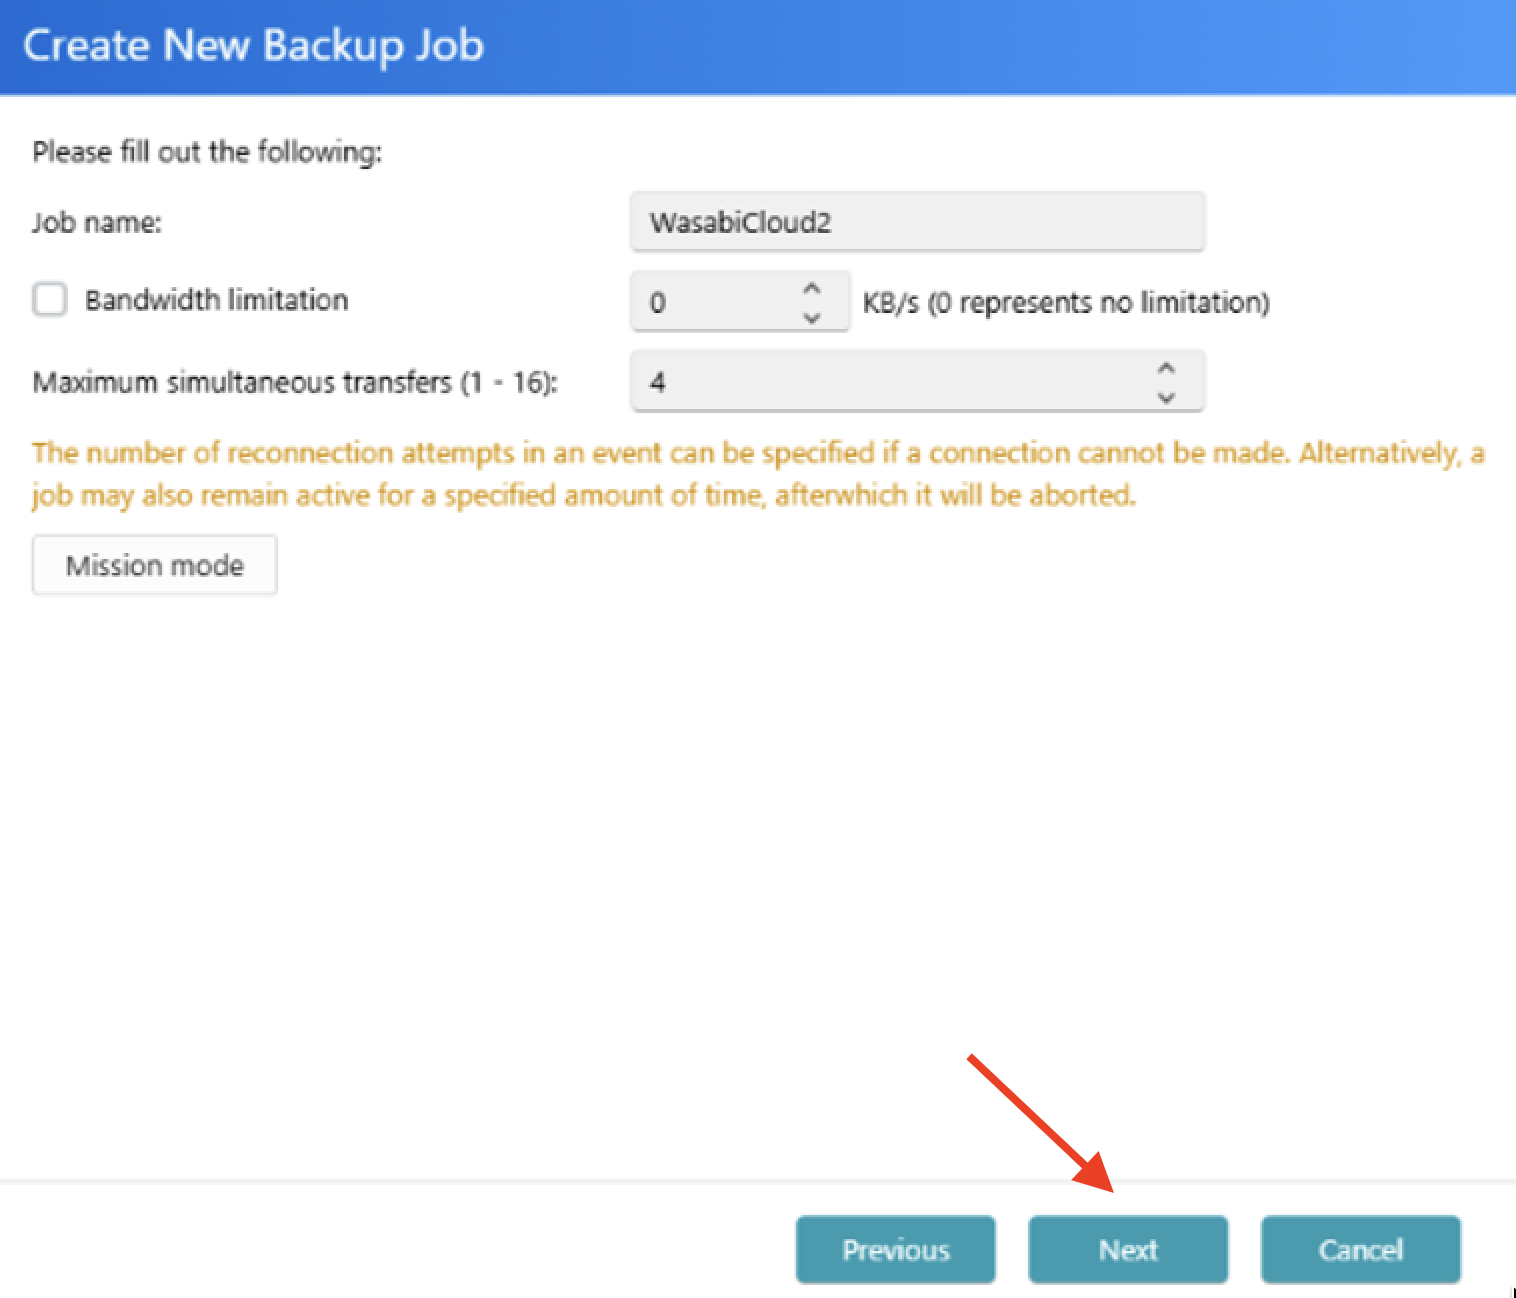
Enter the job name.
(Optional) Bandwidth limitation.
(Optional) Maximum simultaneous transfer.
(Optional) Storage class.
(Optional) Enable multipart uploads.
(Optional) Mission mode.
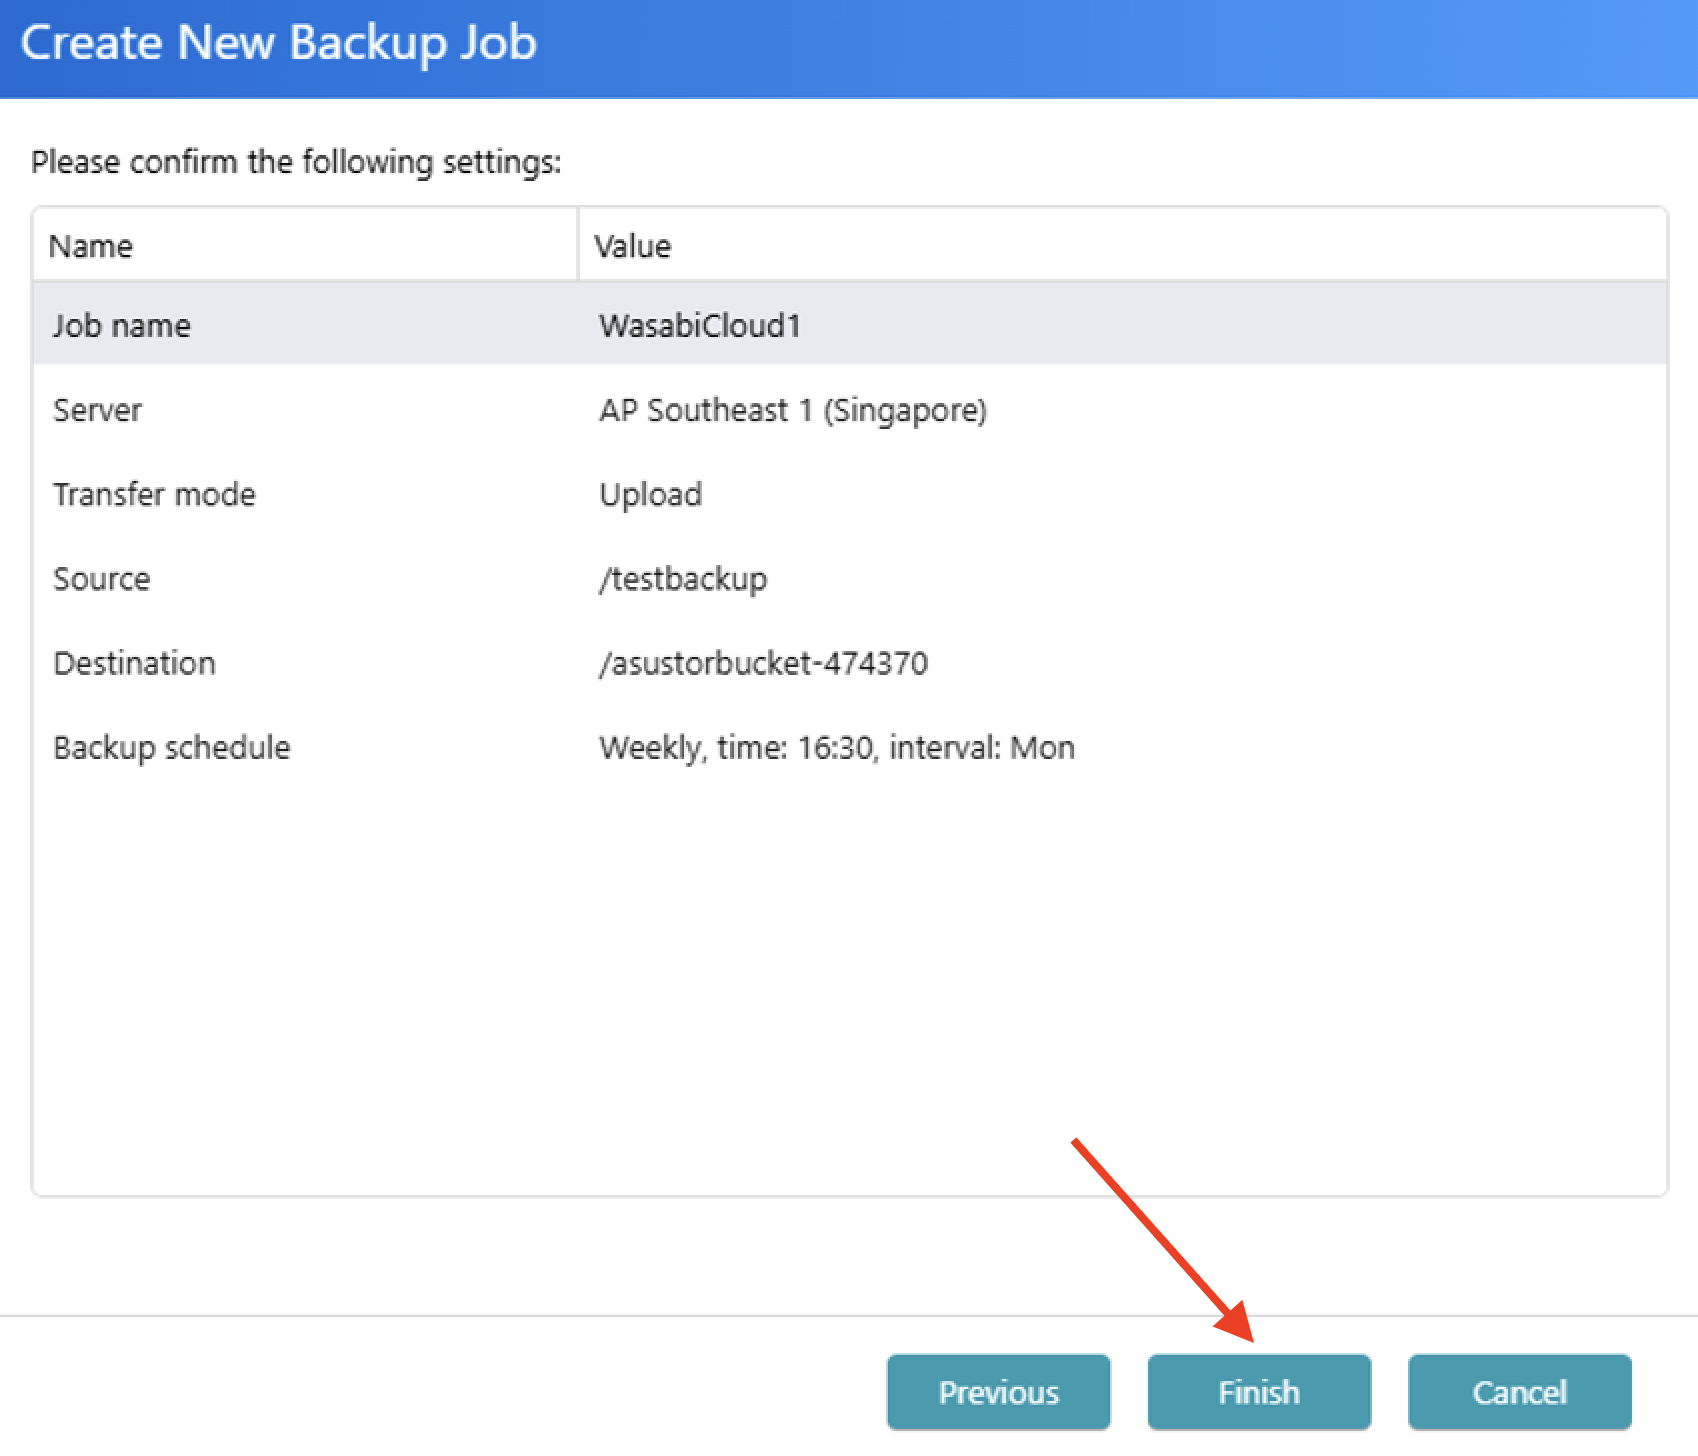
Confirm the backup job settings. Click Finish to complete the backup job creation.
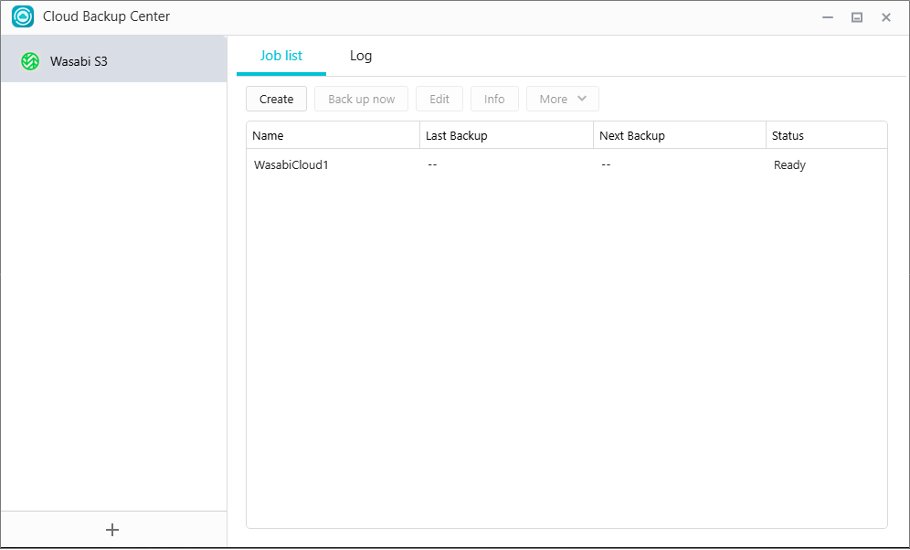
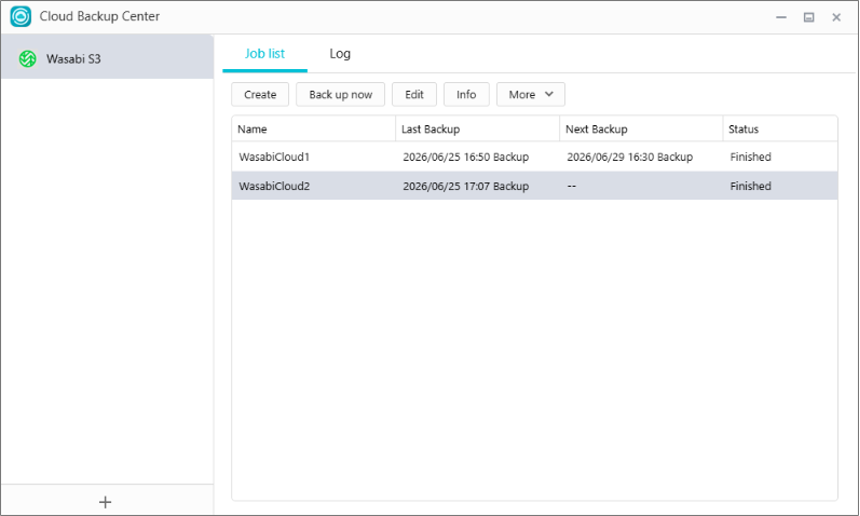
After the backup job is created, it will appear in the Cloud Backup Center job list. The job status will show whether the job is ready, running, completed, or failed.
Verifying the Backed-Up Data
Log in to the Wasabi Console.
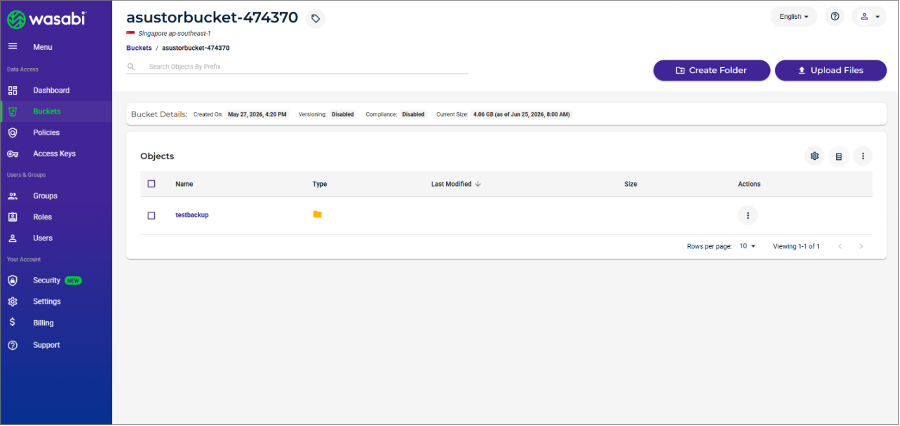
Navigate to your configured Cloud Backup Center bucket to confirm data has been written.
Restoring Data From Wasabi
The data restoration process is handled by your specific backup software application. As there are many, potential variables that will affect your unique environment, Wasabi strongly recommends that you seek the guidance of your backup software's technical support team in the event that you encounter difficulty or have application-specific inquiries.
Open Cloud Backup Center on the NAS.
Create a backup job that runs in the opposite direction of the original path (a Download job).
Click Next.
Select the source folders and click Next.
Select a destination for the backup and click Next.
Name this backup job.
Optionally, set the bandwidth.
Click Next.
Check the Cloud Backup Center interface to see the backup job that was just created.
Confirm that the files in the folder actually exist.