Attimis OneBucket can serve as a front end for Wasabi and other cloud storage providers. It allows you to write data to your OneBucket once, and then replicate it to Wasabi and other clouds. The opportunistic replication feature copies data to Wasabi when reading from other clouds, allowing you to start using Wasabi with your existing data immediately.
Requirements
Active Wasabi Cloud Storage Account.
Access to the Wasabi Console as the account root user.
Wasabi bucket created. Do not enable Versioning or Object Lock (see Creating a Bucket for details on this procedure).
Access to the Attimis OneBucket console.
Configuring Wasabi
Log in to the Wasabi Console as the account root user.
Configure a policy for an attimis user (that will be created below) using the following policy. See Creating a Policy for instructions on how to create a policy. Change YOUR_WASABI_BUCKET_NAME to your own Wasabi bucket name. Adjust the Actions to meet your organization’s requirements.
{
  "Version": "2012-10-17",
  "Statement": [
    {
      "Effect": "Allow",
      "Action": "s3:ListAllMyBuckets",
      "Resource": "arn:aws:s3:::*"
    },
    {
      "Effect": "Allow",
      "Action": [
        "s3:Get*",
        "s3:List*",
        "s3:Put*",
        "s3:Delete*",
        "s3:AbortMultipartUpload"
      ],
      "Resource": [
        "arn:aws:s3:::YOUR_WASABI_BUCKET_NAME",
        "arn:aws:s3:::YOUR_WASABI_BUCKET_NAME/*"
      ]
    }
  ]
}
Create an attimis user and attach the previously created policy to it. For more information, see Creating a User.
Allow programatic-only access, not console access.
Do not require Multi-Factor Authentication (MFA).
It is not necessary to assign the user to a group.
Save the access and secret keys in a secure location.
Configuring OneBucket
Log in to the OneBucket console.
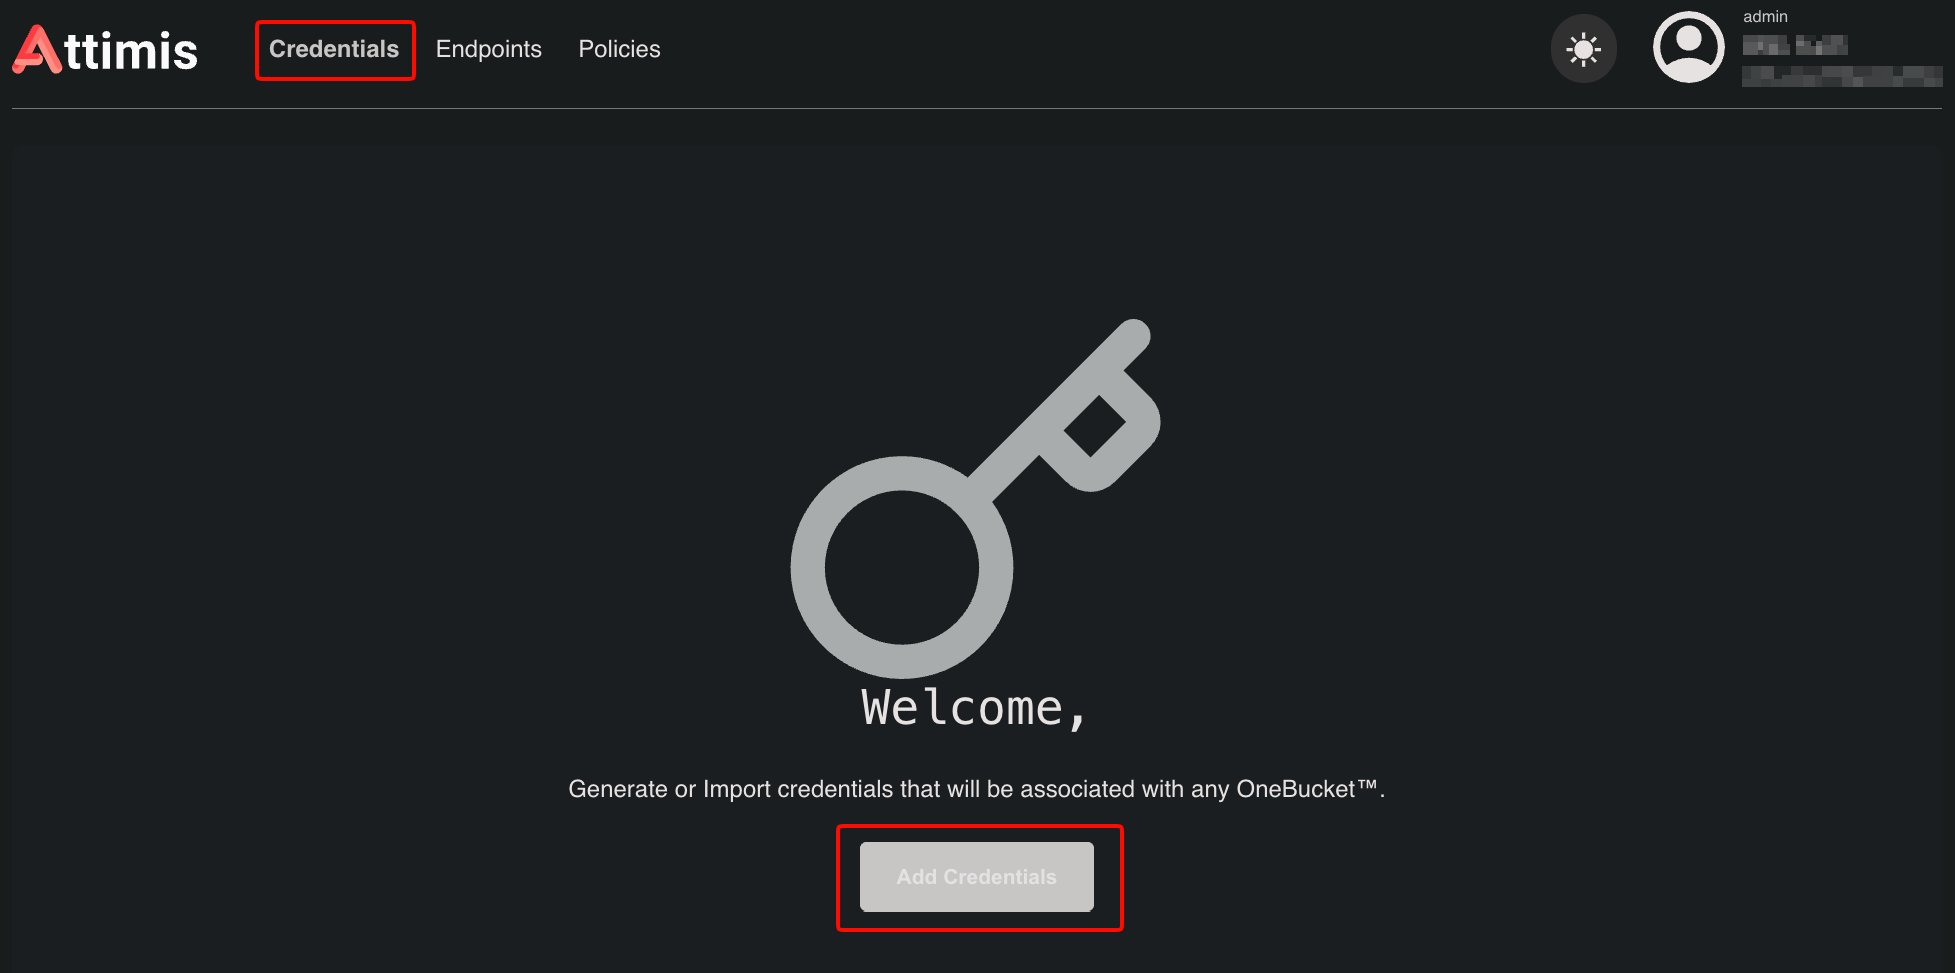
On the Credentials tab, click Add Credentials.
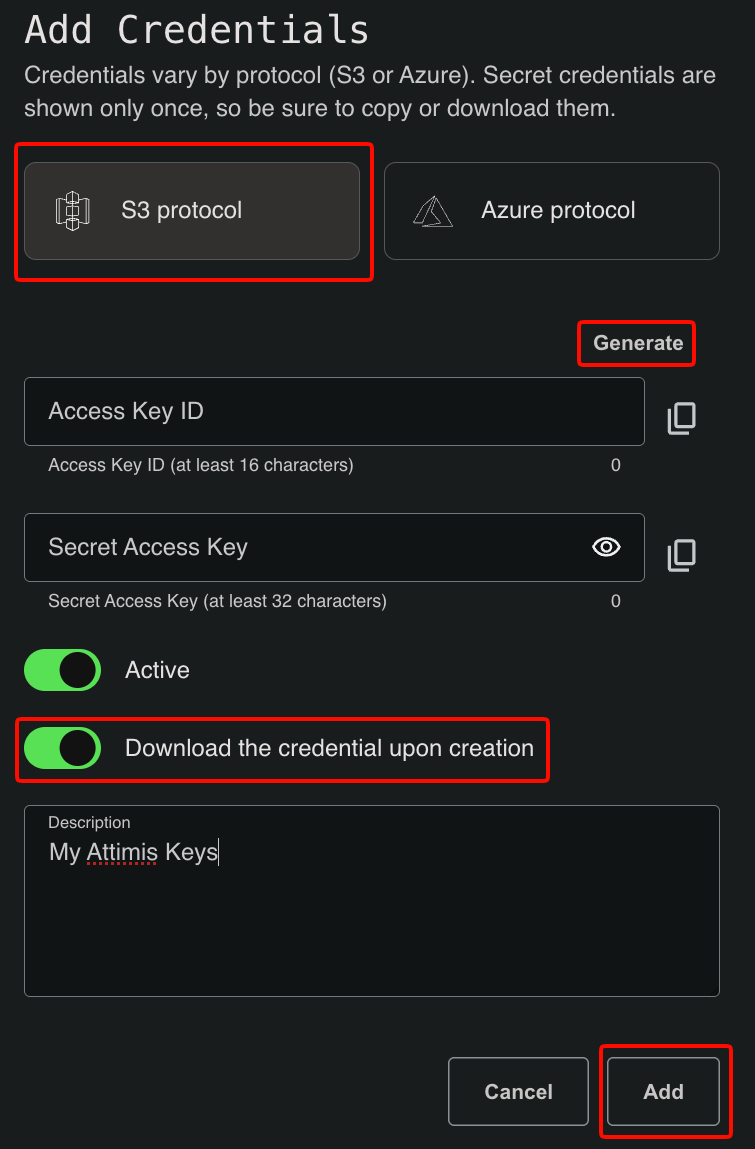
Select S3 protocol and enable the slider next to Download the credentials upon creation.
Click Generate to generate an access and secret key pair for OneBucket.
Optionally, enter a description.
Click Add.
Save the downloaded file in a secure location.
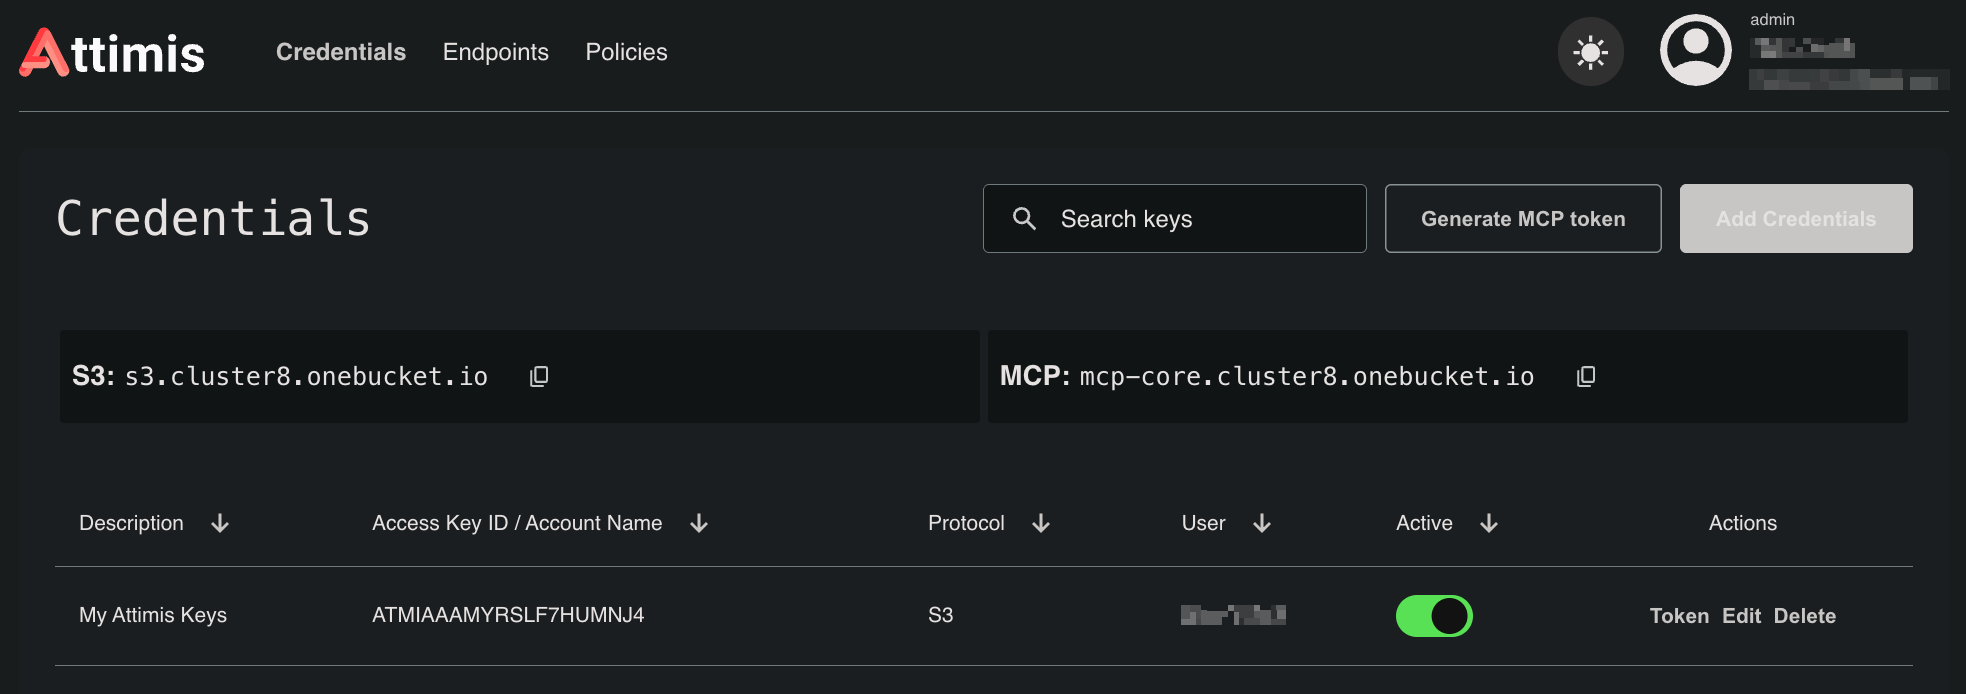
You will see your new OneBucket access key on the Credentials screen.
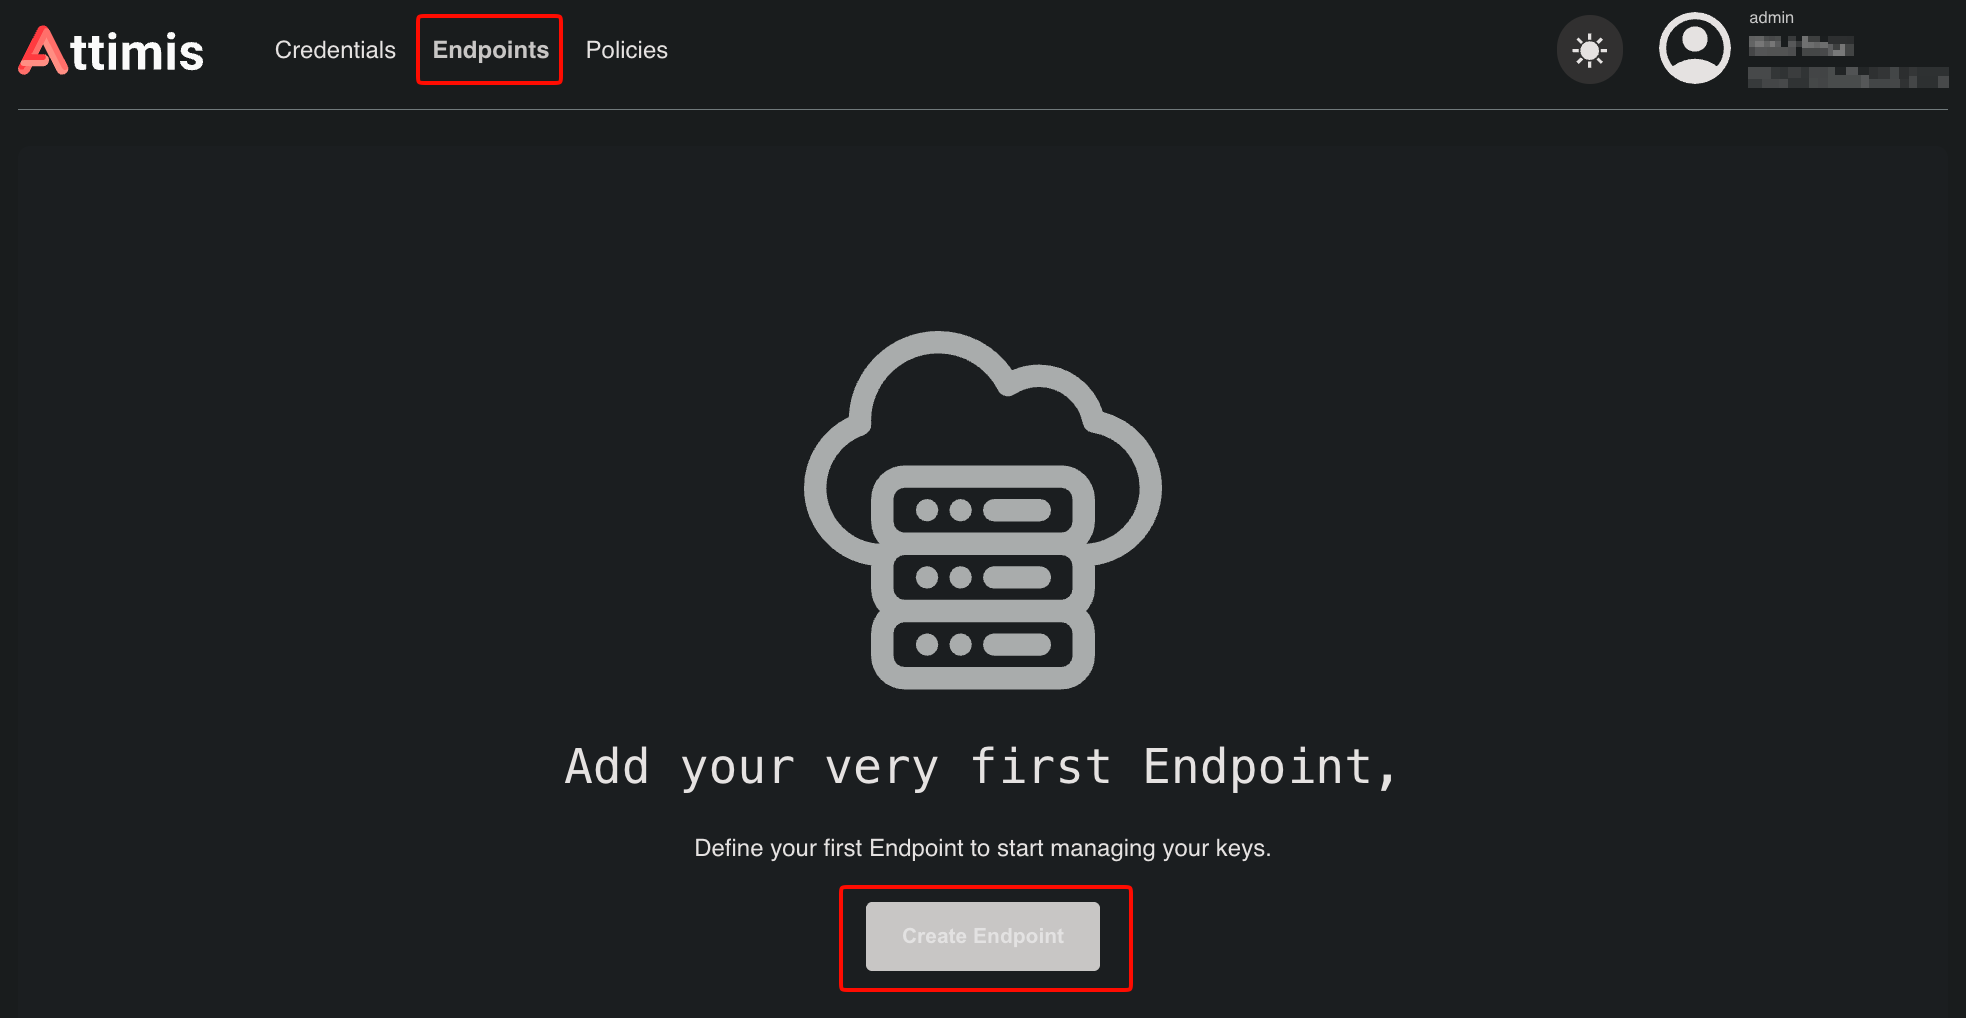
Click Endpoints.
Click Create Endpoint.
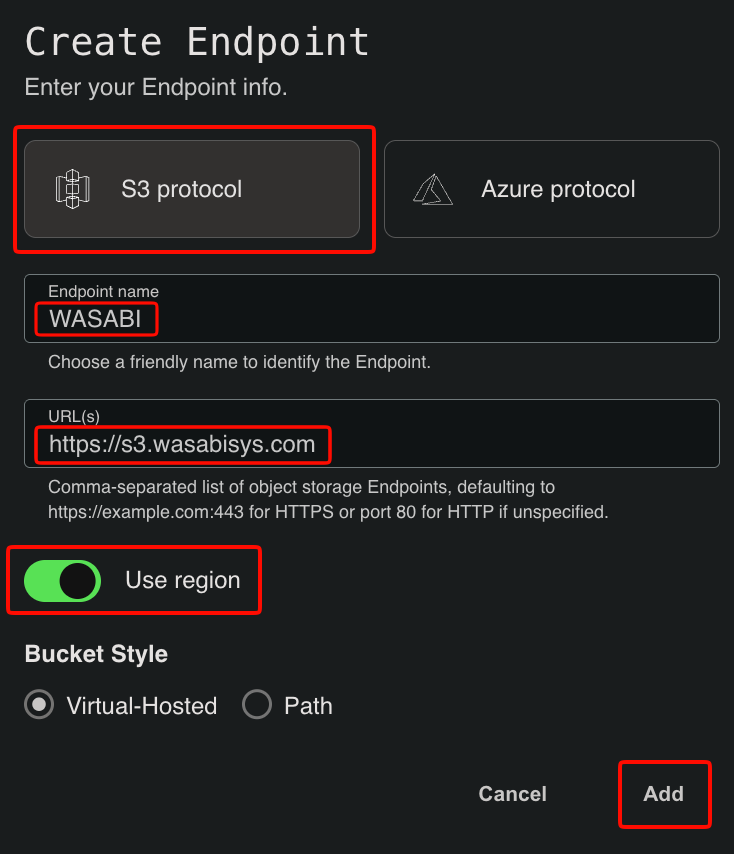
Click S3 protocol and give the endpoint a name (for example, Wasabi).
Enter https://s3.wasabisys.com as the URL and enable Use region.
Click Add.
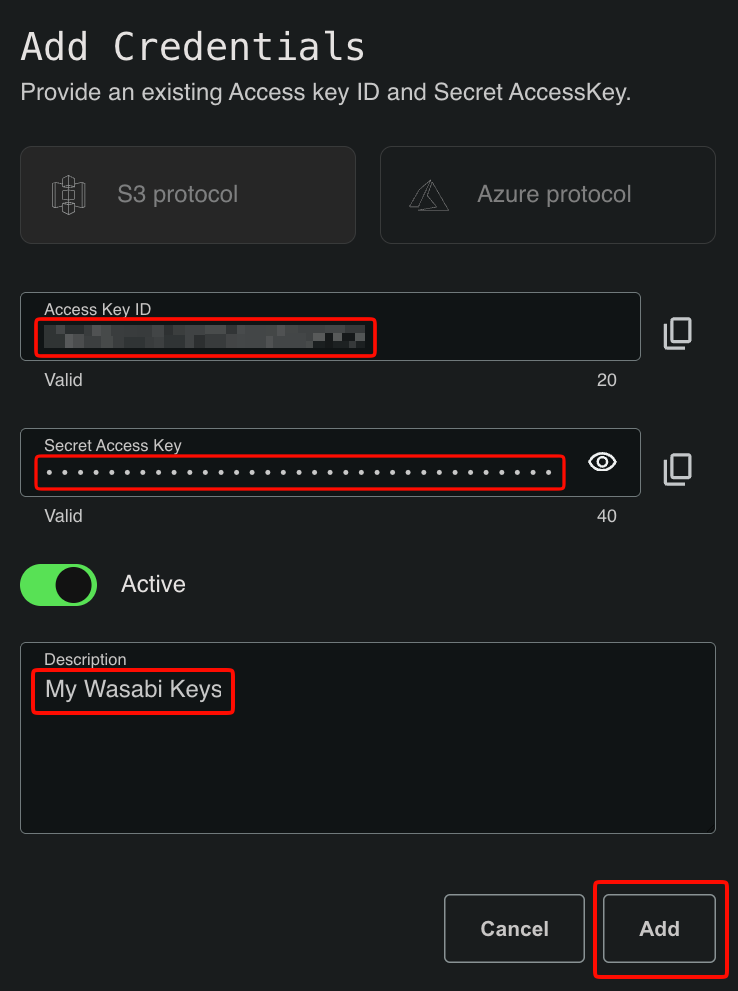
Click Add Credentials.
.png)
Enter your Wasabi access key and secret key, give a description.
Click Add.
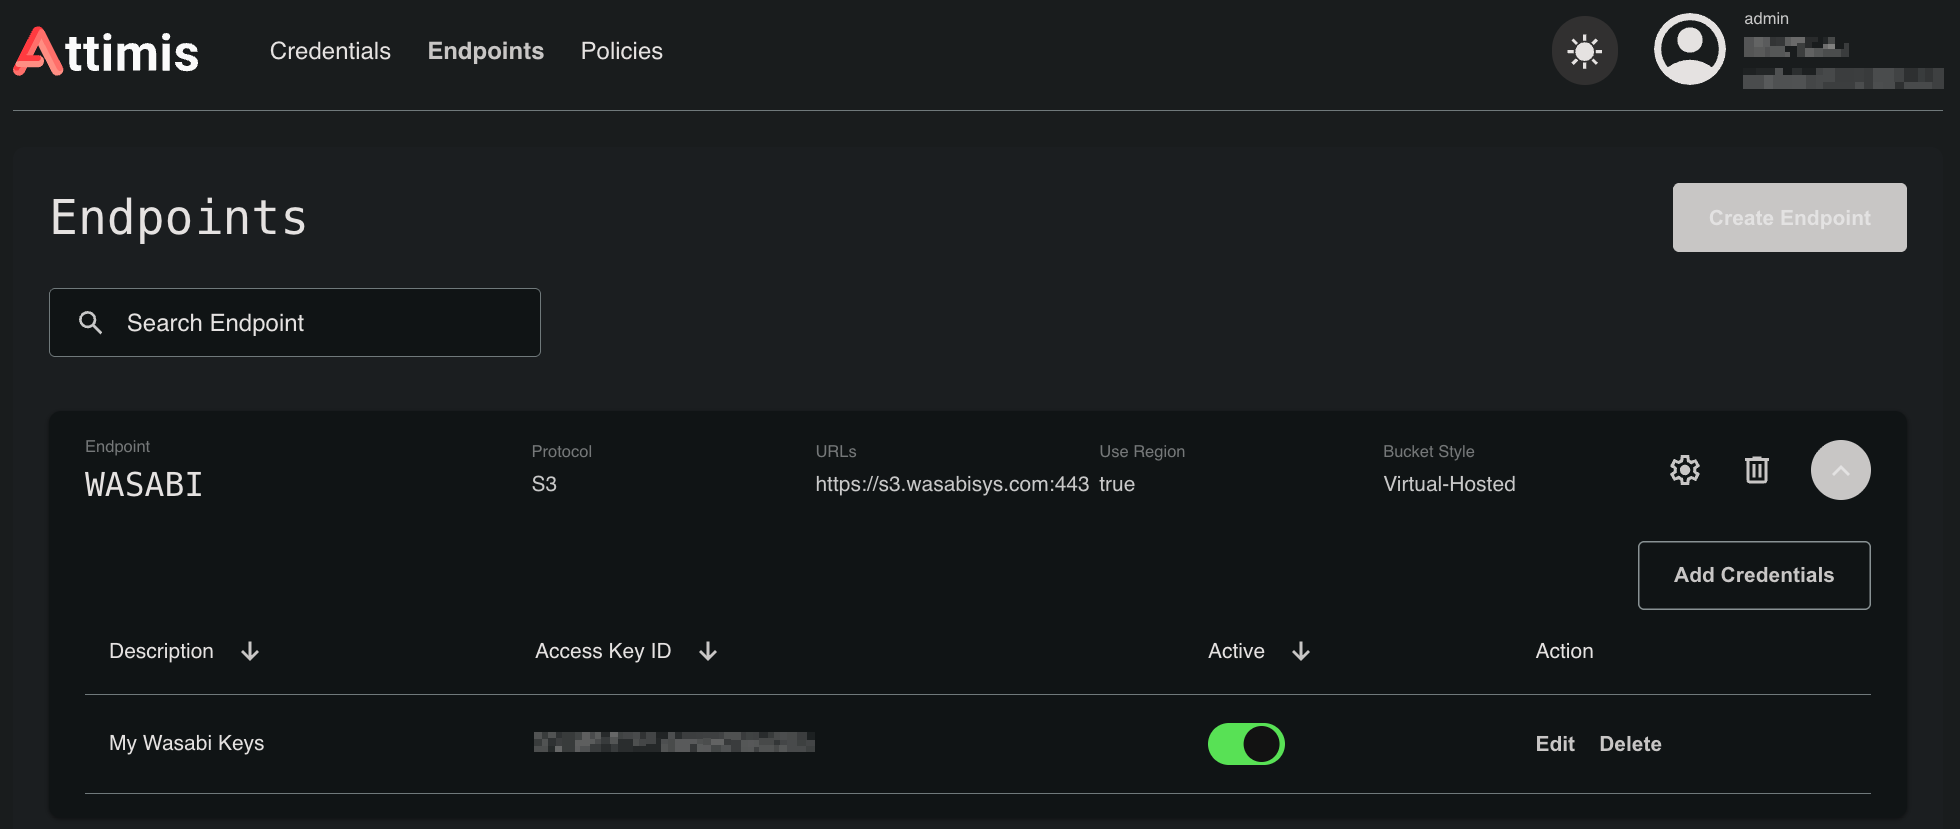
Your Wasabi keys will now show up under your Wasabi endpoint.
Click Policies.
Click Create Policy.
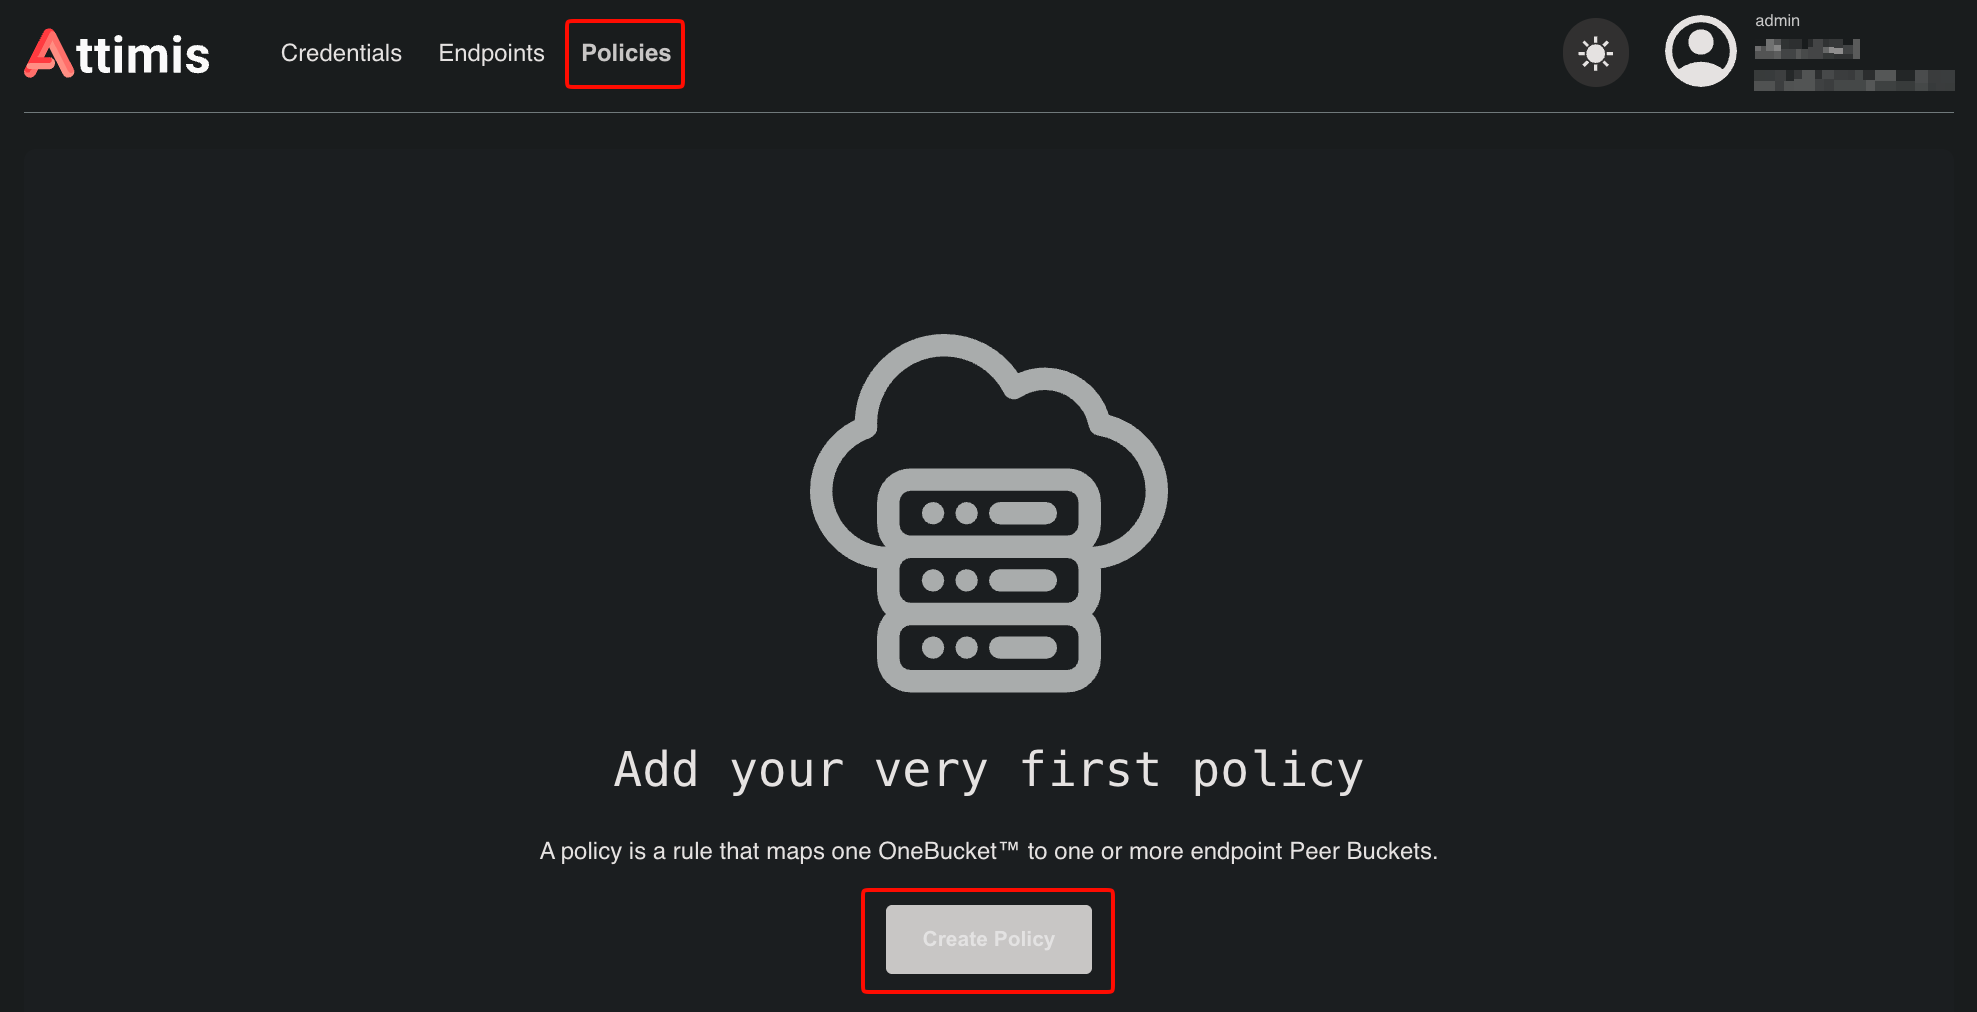
Enter a name for your Attimis bucket and click Next.
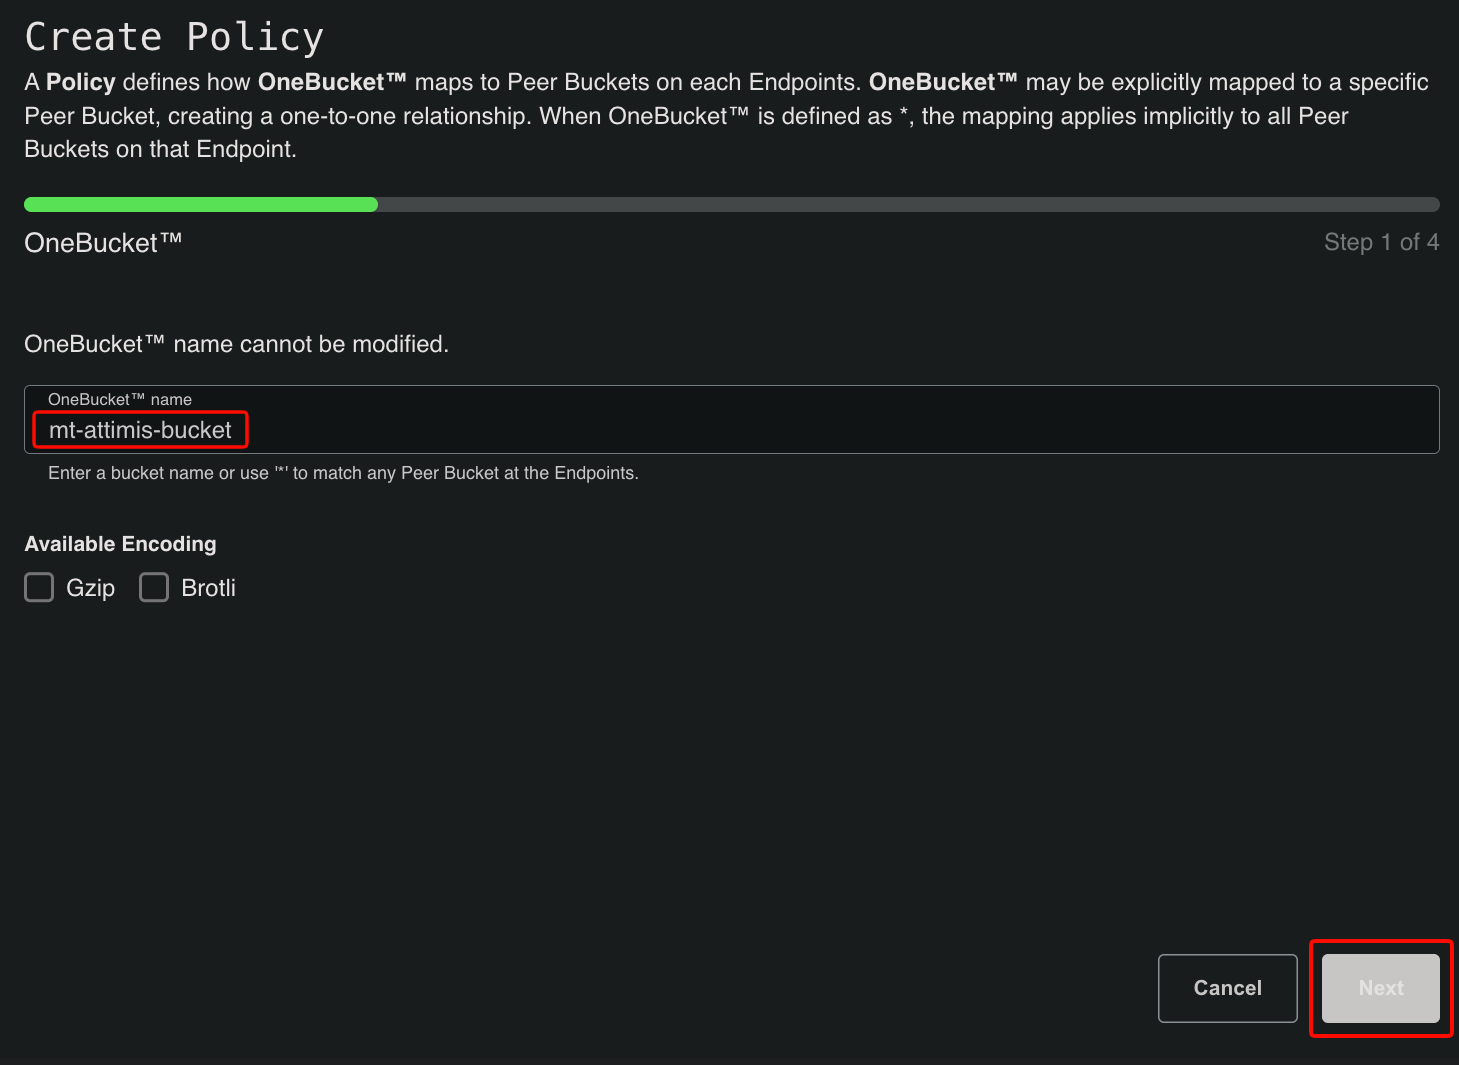
Click Add Peer Bucket.
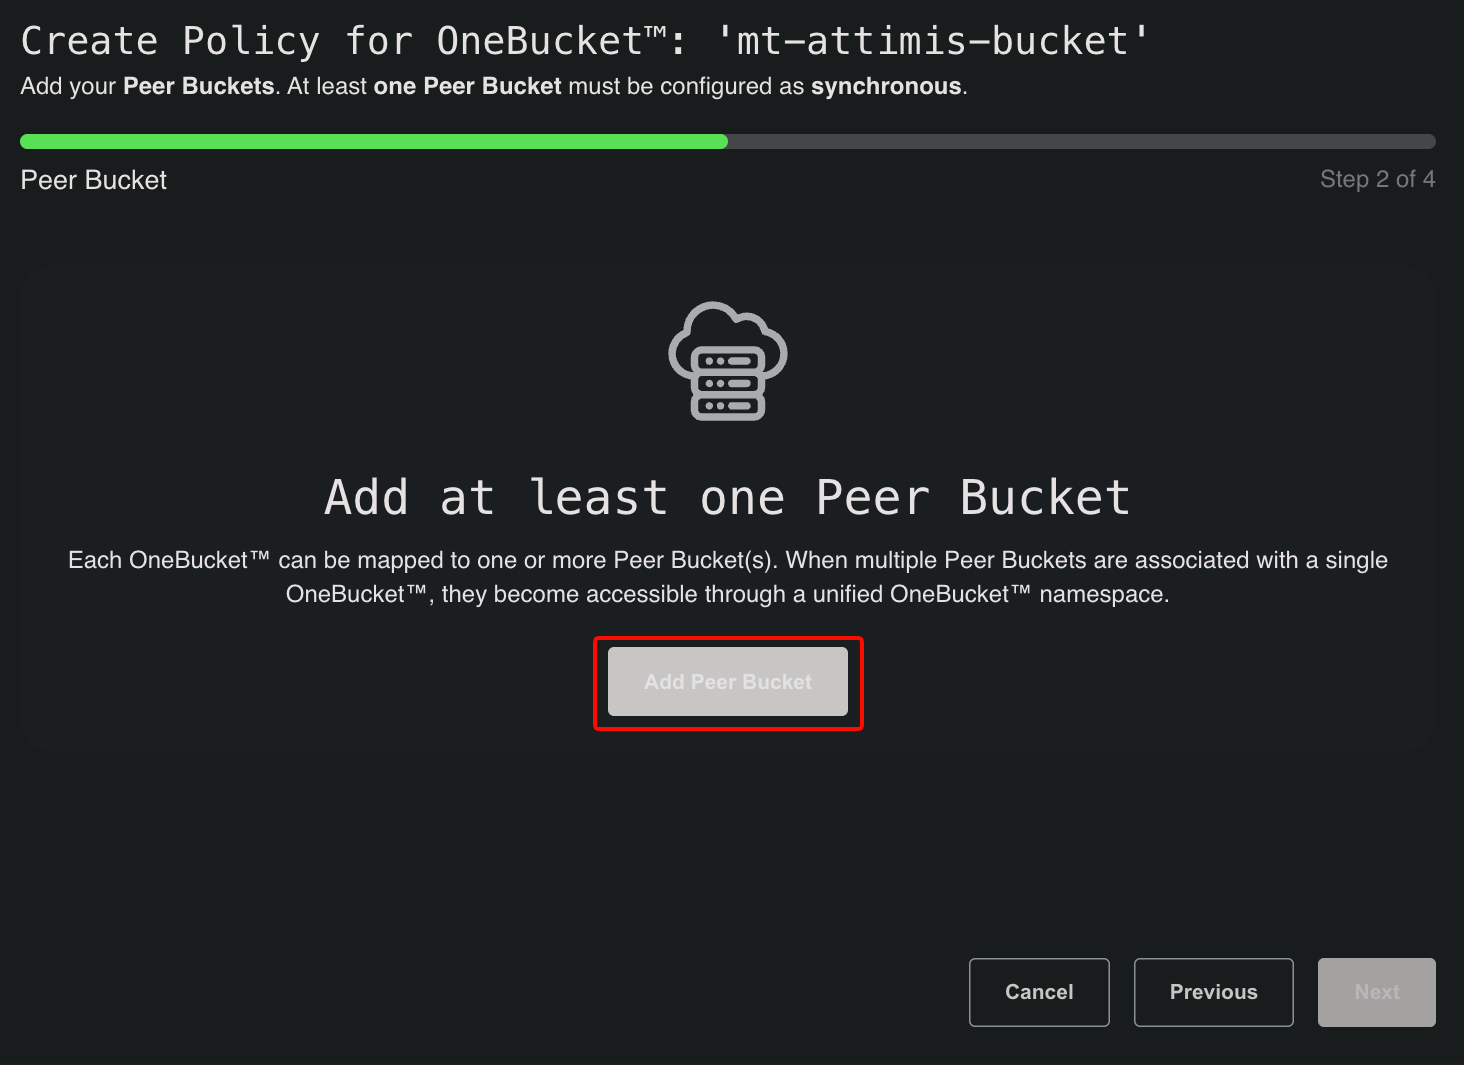
Configure the policy.
Select Synchronous, Asynchronous, or Cache. Since we are only configuring our Wasabi bucket here, we selected Synchronous. Hover your cursor over each type of bucket for a description.
Enable the slider next to Active.
Check the box(es) next to the permissions that apply to your organization.
Select the checkbox next to Turn on the opportunistic replication. When data is read from other buckets under this policy, it will be copied to your Wasabi bucket.
Select your Wasabi endpoint from the drop-down.
Scroll down.
Enter the Wasabi region your Wasabi bucket is located in.
This configuration example discusses the use of Wasabi's us-east-2 storage region. Use the region where your Wasabi bucket is located. For a list of regions, see Available Storage Regions.
Select your Wasabi access key and Wasabi bucket from each drop-down.
Click Apply.
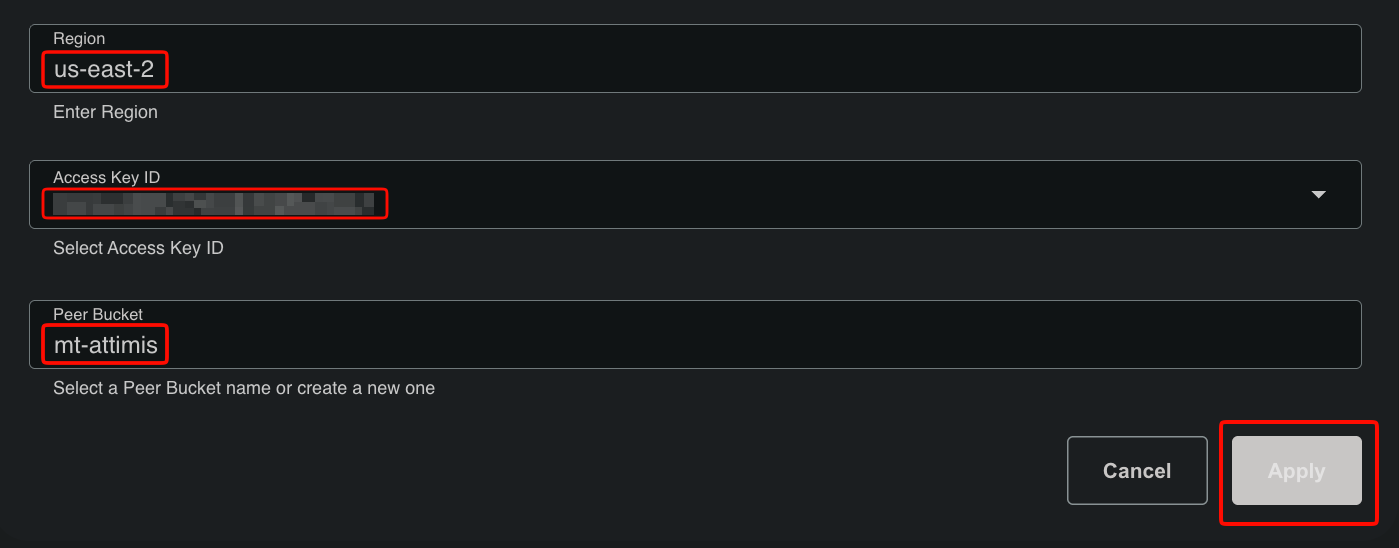
Click Next.
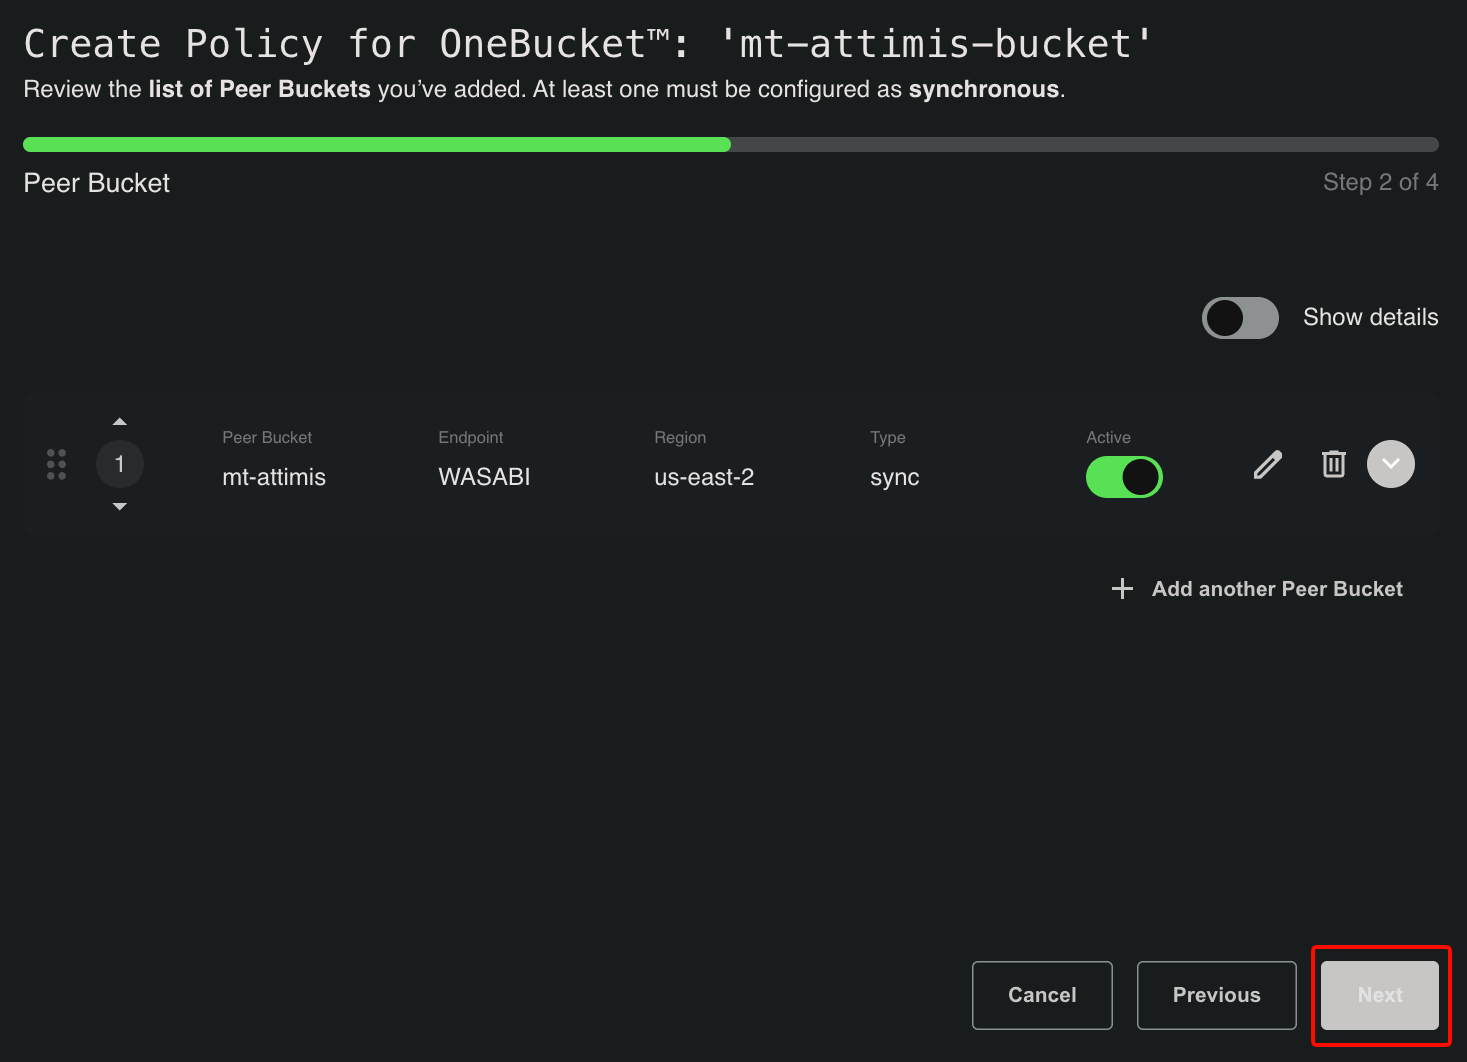
Click Next.
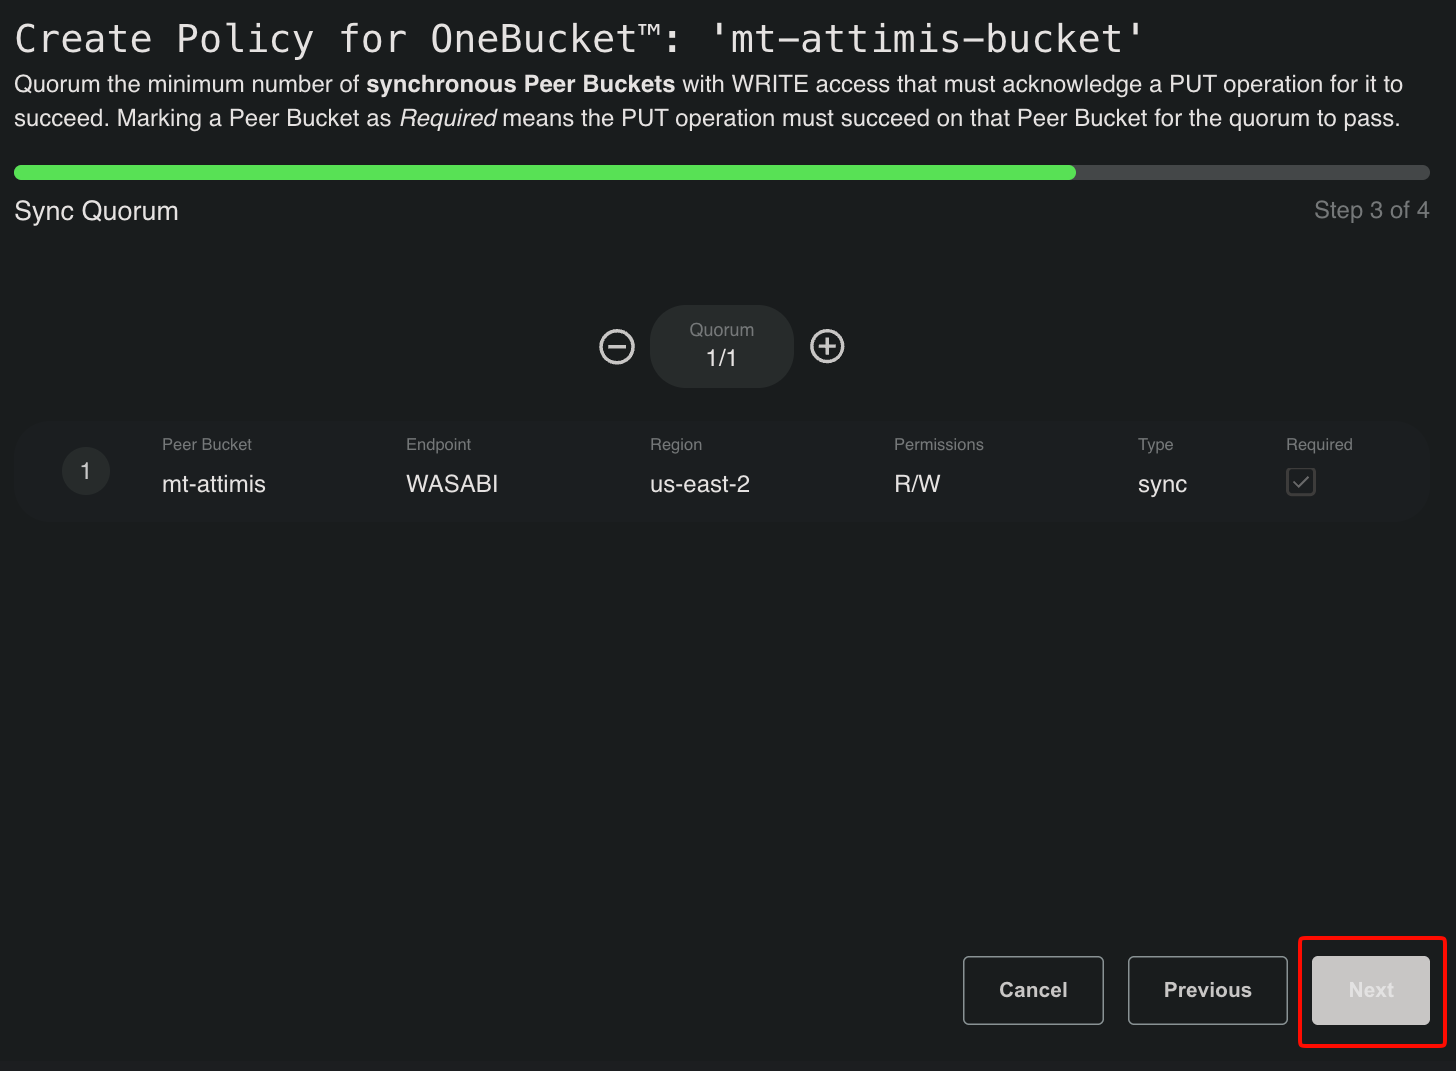
Select the checkbox next to your Attimis access key.
Click Create Policy.
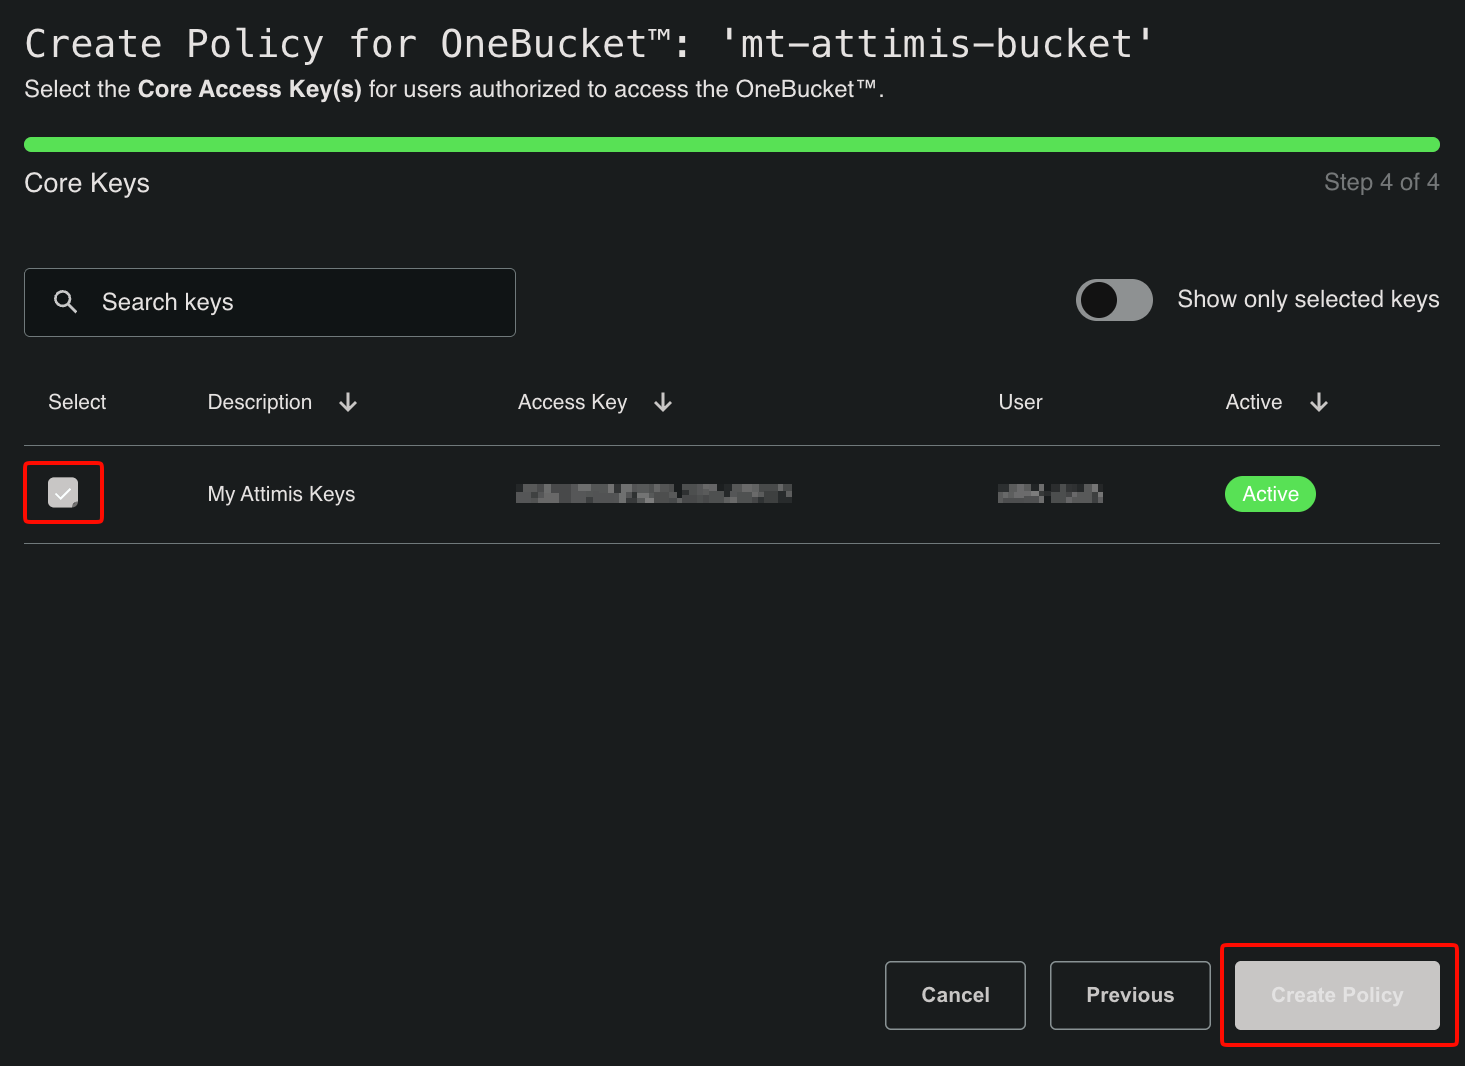
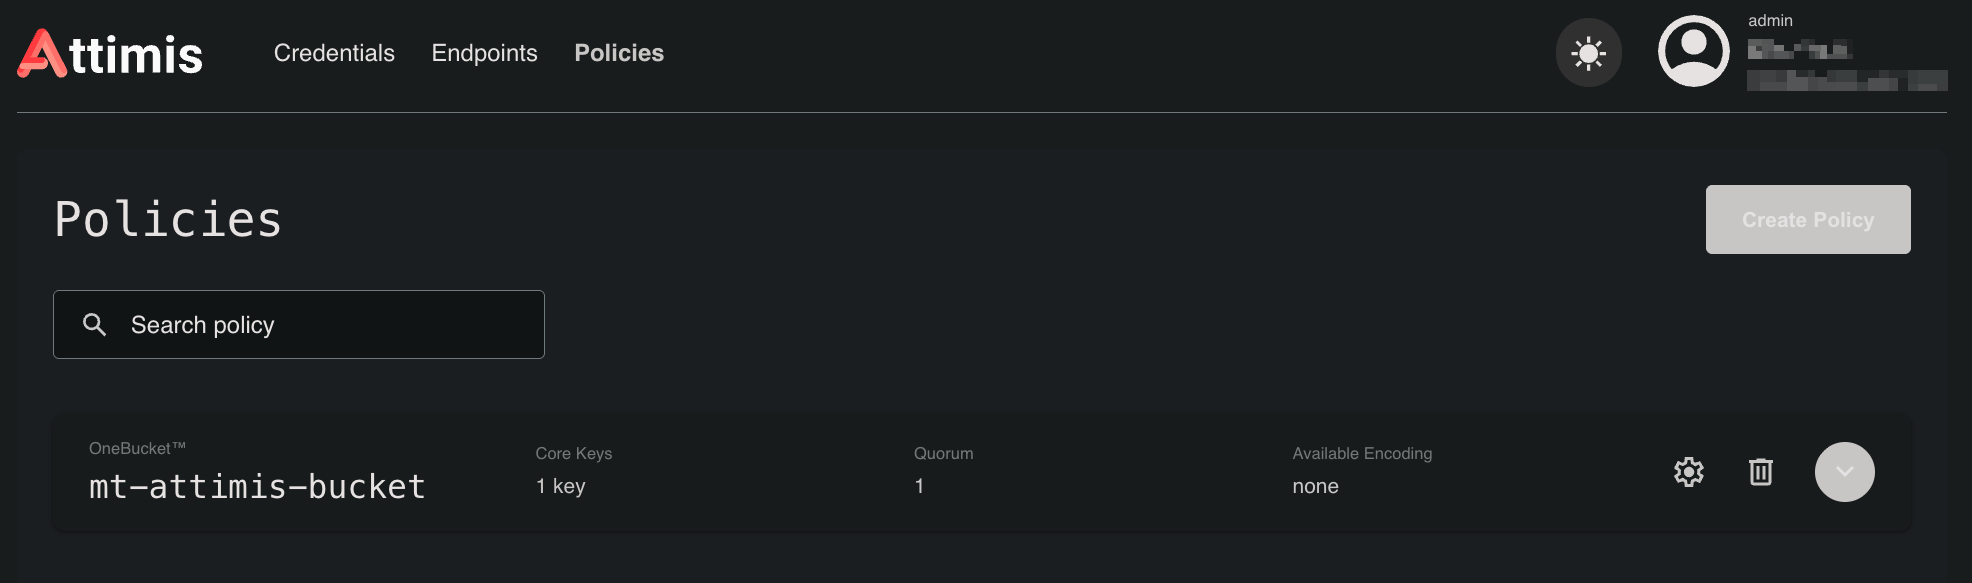
Your OneBucket will now show up on the Policies tab.
Testing
We are going to use the AWS CLI to test putting a file into our Wasabi bucket via our Attimis OneBucket. For more information, refer to AWS CLI With Wasabi.
Create a profile that contains your Attimis access and secret keys. Enter your Attimis access and secret keys when prompted. Leave the default region blank and keep the default output format of json.
aws configure --profile attimisCreate a Wasabi profile. Enter your Wasabi access and secret keys when prompted. Enter “us-east-1” as the default region and keep the default output format of “json”.
aws configure --profile wasabiCreate a test file. In this example, we will just create a zero-byte “test.txt” file.
touch test.txtUpload the file to your Attimis OneBucket. Replace YOUR_ONEBUCKET with the name of your OneBucket.
aws s3 cp ./test.txt s3://YOUR_ONEBUCKET/test.txt --profile attimis \
--endpoint-url https://s3.cluster8.onebucket.io
Verify you can see the file in your Attimis OneBucket. Replace YOUR_ONEBUCKET with the name of your OneBucket.
aws s3 ls s3://YOUR_ONEBUCKET/ --profile attimis \
--endpoint-url https://s3.cluster8.onebucket.io
Verify you can see the file in your Wasabi bucket. Use the appropriate endpoint URL for your Wasabi bucket. Replace YOUR_WASABI_BUCKET with the name of your Wasabi bucket.
This configuration example discusses the use of Wasabi's us-east-2 storage region. To use another Wasabi storage region, use the appropriate URL in Service URLs for Wasabi's Storage Regions.
aws s3 ls s3://YOUR_WASABI_BUCKET/ --profile wasabi \
--endpoint-url https://s3.us-east-2.wasabisys.com
The issued commands and their results are shown below. The Wasabi profile was omitted for brevity. After each
lscommand, you will see the test.txt file in the output, confirming it is present.