A login password is the first level of security for your Wasabi account. However, a system password can be compromised. Multi-factor authentication (MFA) offers additional security control. A virtual MFA device (such as a smartphone) uses a software application to generate an authentication code. Account access is granted only after a user successfully provides this code—as identity evidence—during Wasabi sign-in.
You can create one virtual MFA device per Wasabi account or user.
Requirements for All Users
MFA can be set up in several ways:
A Root account user can set up MFA by following the instructions below.
A Root account user can set up MFA for a sub-user by:
Clicking Users on the Wasabi menu.
Clicking the name of a specific sub-user.
Clicking MFA Settings.
Following the instructions below. (Repeat these steps for each sub-user.)
A sub-user can set up MFA by following the directions below if:
The sub-user has full access to the Wasabi Console as described in the Policies section of Reviewing Details and Editing an Existing User.
The Root account user has provided permissions via a policy as described in Defining a Policy for Sub-Users to Change Passwords and Enable MFA.
MFA Applications Tested With Wasabi
Wasabi has successfully tested with the following virtual MFA applications for use in protecting the Wasabi Console:
You are welcome to try other virtual MFA applications and, if you have any problems or feedback, contact Wasabi Support.
Creating a Virtual MFA Device
Before you get started, you must have access to the device that will host the virtual MFA application. For example, if the MFA will provide a code in a smartphone application, you must have access to the smartphone application when creating the virtual MFA device.
Click Security on the Wasabi menu.
The MFA option is displayed, offering two ways to assign MFA: scanning a QR code or using a secret key.
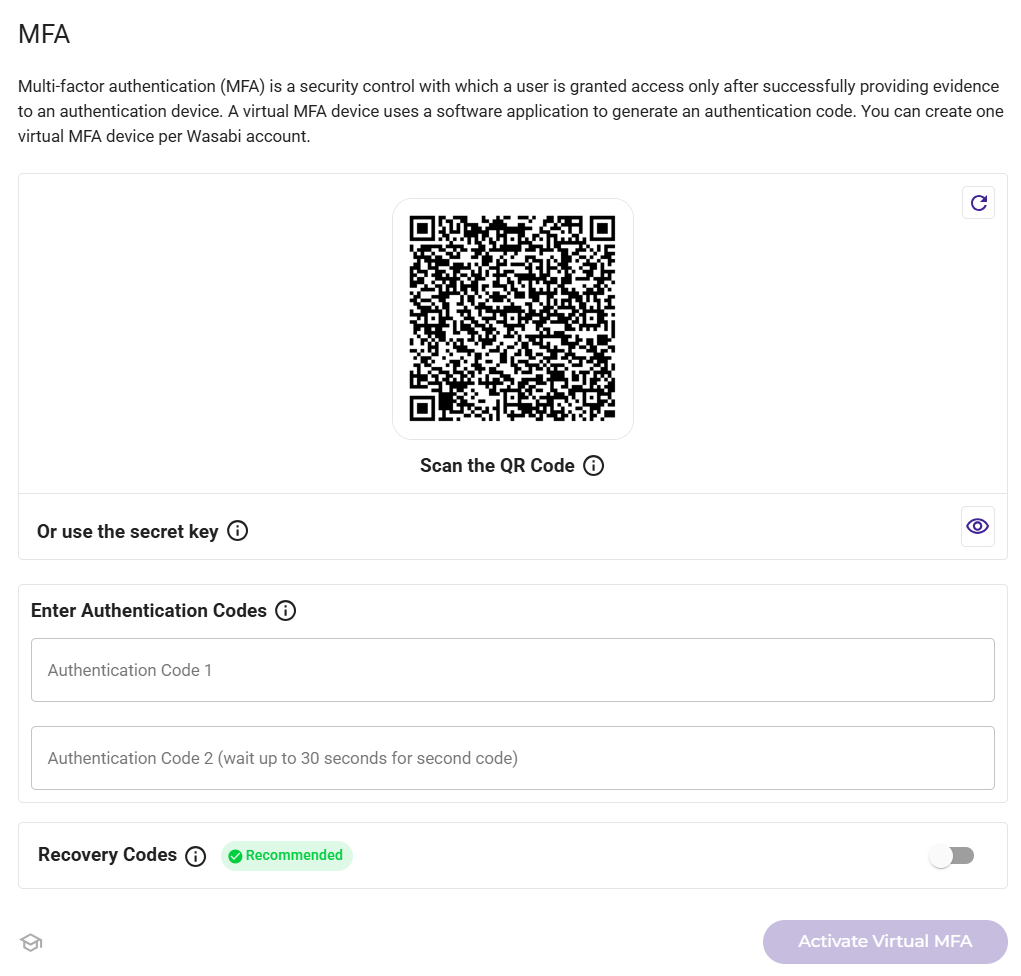
Click
 to display the secret key if you want to set up MFA with that key (rather than scanning the QR code).
You can click
 to refresh/change the QR code and secret key.
Save a copy of the secret key in a secure place. You can click
 to copy it to the clipboard. If you lose the MFA device or need to reinstall the MFA software application, you can reconfigure it using the same virtual MFA without creating a new virtual MFA.
Wasabi recommends you generate recovery codes. These codes can be used to access your Wasabi account if you lose your authentication device. Enable the toggle for Recovery Codes.

Alternatively, you may opt to reset your MFA to acquire recovery codes when you re-enable MFA.
Timing is important for the following steps, so you may want to review the remainder of this procedure before proceeding.
Open the virtual MFA application (such as on the smartphone). If applicable, choose the option to create a new account (a new virtual MFA device).
Scan the QR code graphic (such as by using your smartphone camera). Or, enter the secret key, where appropriate, in the MFA application.
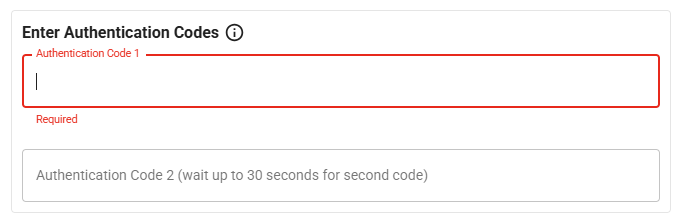
When a one-time code appears in the MFA application, enter this code in the Wasabi area labeled “Authentication Code 1.”
Enter this code in Wasabi immediately after you receive it because it is time-based and will expire quickly.
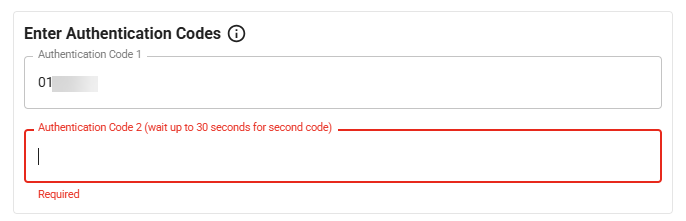
After approximately 30 seconds, the device will generate a second one-time code. Enter this code in the Wasabi area labeled “Authentication Code 2.” (Enter it immediately because it, too, is time-based and will expire.)
If you did not enable the Recovery Codes option, click Activate Virtual MFA to complete the setup.
If you enabled MFA recovery codes (Step 3 above), continue with the instructions below.
Using MFA Recovery Codes
If you enabled MFA recovery codes, a window similar to the following is displayed.
Be sure to Copy, Download, or Print these codes. Once you click Finish or close this window, you can no longer access the codes from the Wasabi Console.
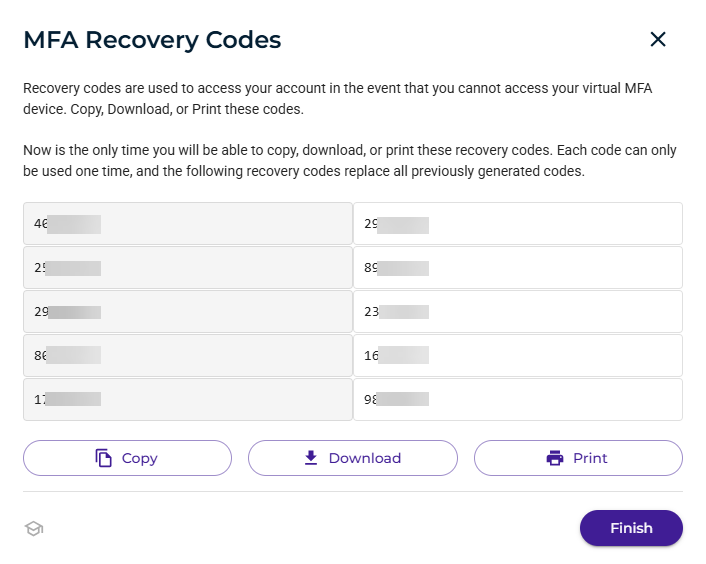
Click Finish after you copy, download, or print the codes.
If you lose access to an MFA device, you will have the option to use one of these recovery codes to regain access to the Wasabi Console. Signing in with a recovery code is described below.
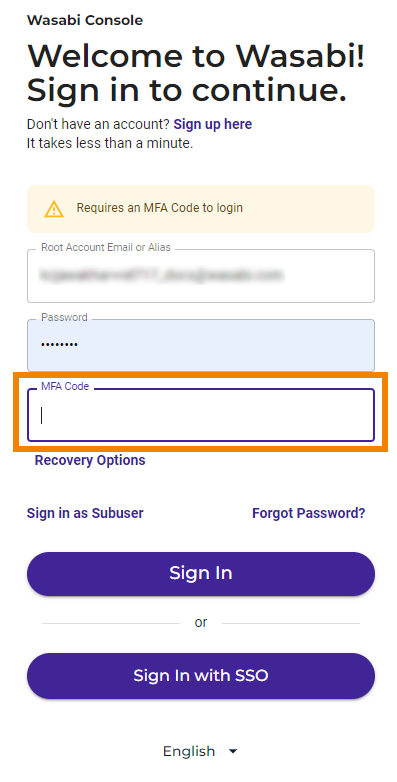
Signing In With an MFA Code
When you have enabled MFA, the MFA Code area appears on the Wasabi Sign In page. Enter the code displayed on your virtual MFA device.
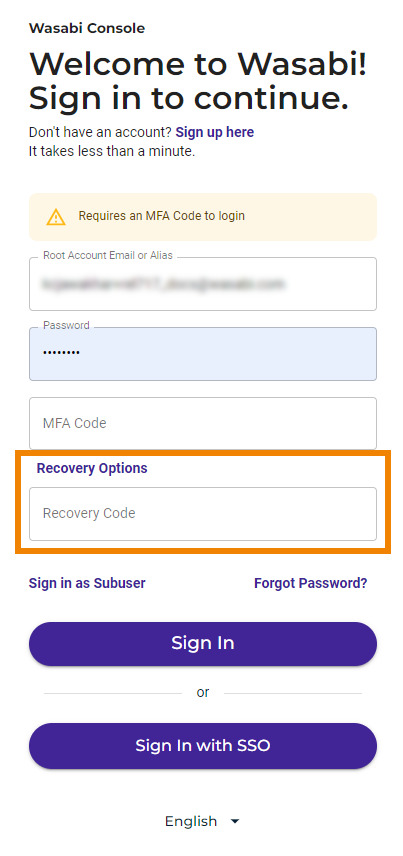
If you need to recover using a code, click Recovery Options on the Sign In panel. Then enter one of the recovery codes.
Deactivating an MFA Device
Once an MFA device is activated, you will see this screen when you click MFA Settings under Security Settings.
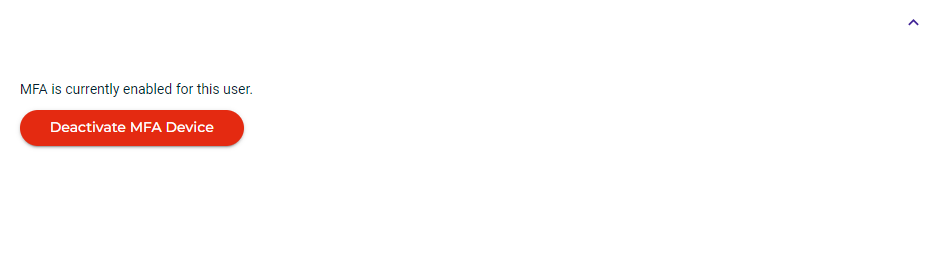
To deactivate the device:
Click Deactivate MFA Device.
A screen is displayed indicating that an MFA code (newly generated or recovery code) is required to disable MFA. This provides an extra layer of protection for Wasabi's MFA feature. Enter an authentication code OR a recovery code.
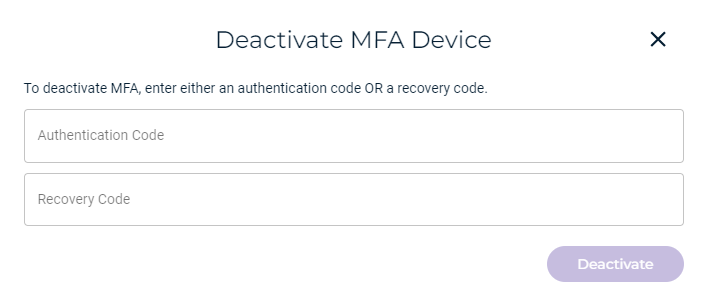
Click Deactivate.