Wasabi Account Control Manager (WACM) supports SSO (Single Sign On) functionality for enterprise and educational accounts using Azure Active Directory based on SAML2 (Security Assertion Markup Language).
This article will provide instructions for the administrator and SSO user to properly configure and complete a WACM login using the Azure Active Directory IdP for your organization. This article offers additional information beyond what is provided in the WACM: Wasabi Account Control Manager documentation.
Creating a WACM SSO Login
Log in to the Azure Portal (https://portal.azure.com).
Navigate to the Azure Active Directory.
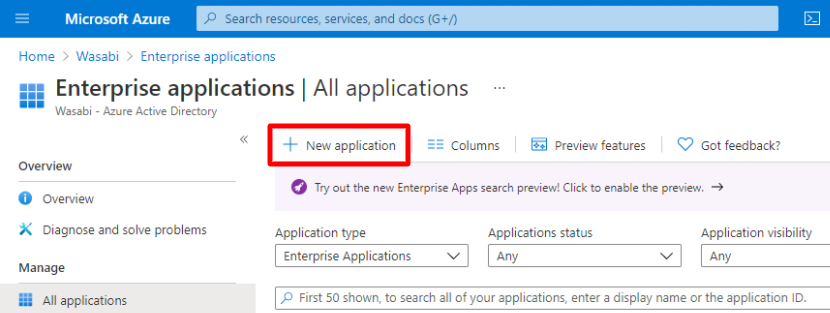
Navigate to Enterprise application.
Click New application.
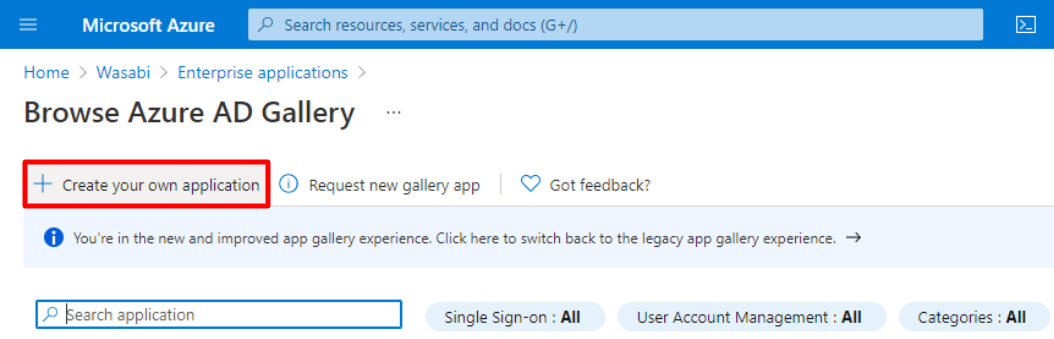
Click Create your own application.
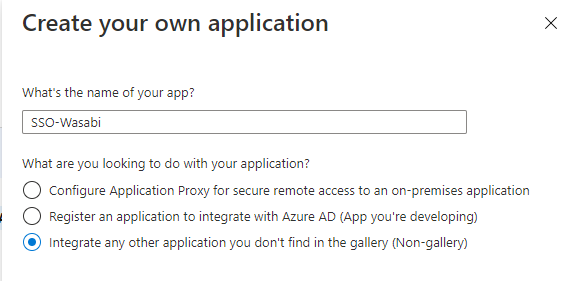
Name your Enterprise application and leave the application with the defaults. Click Create.
Navigate to the newly created Enterprise application.
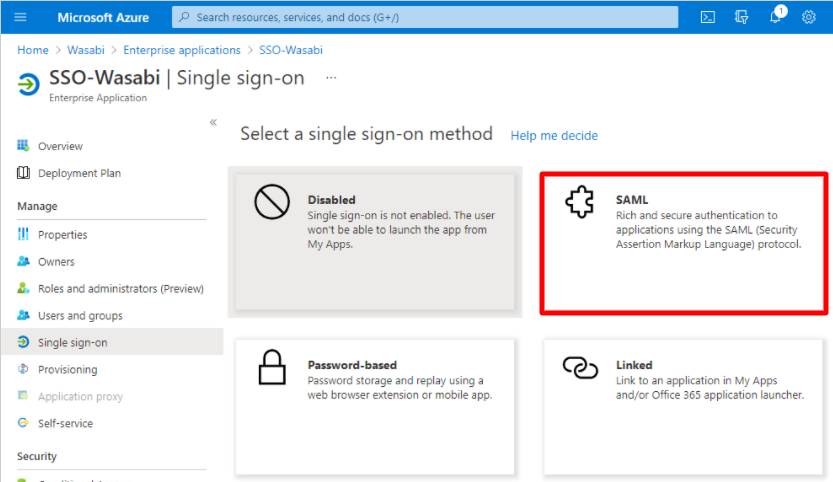
Click Single sign-on and select SAML.
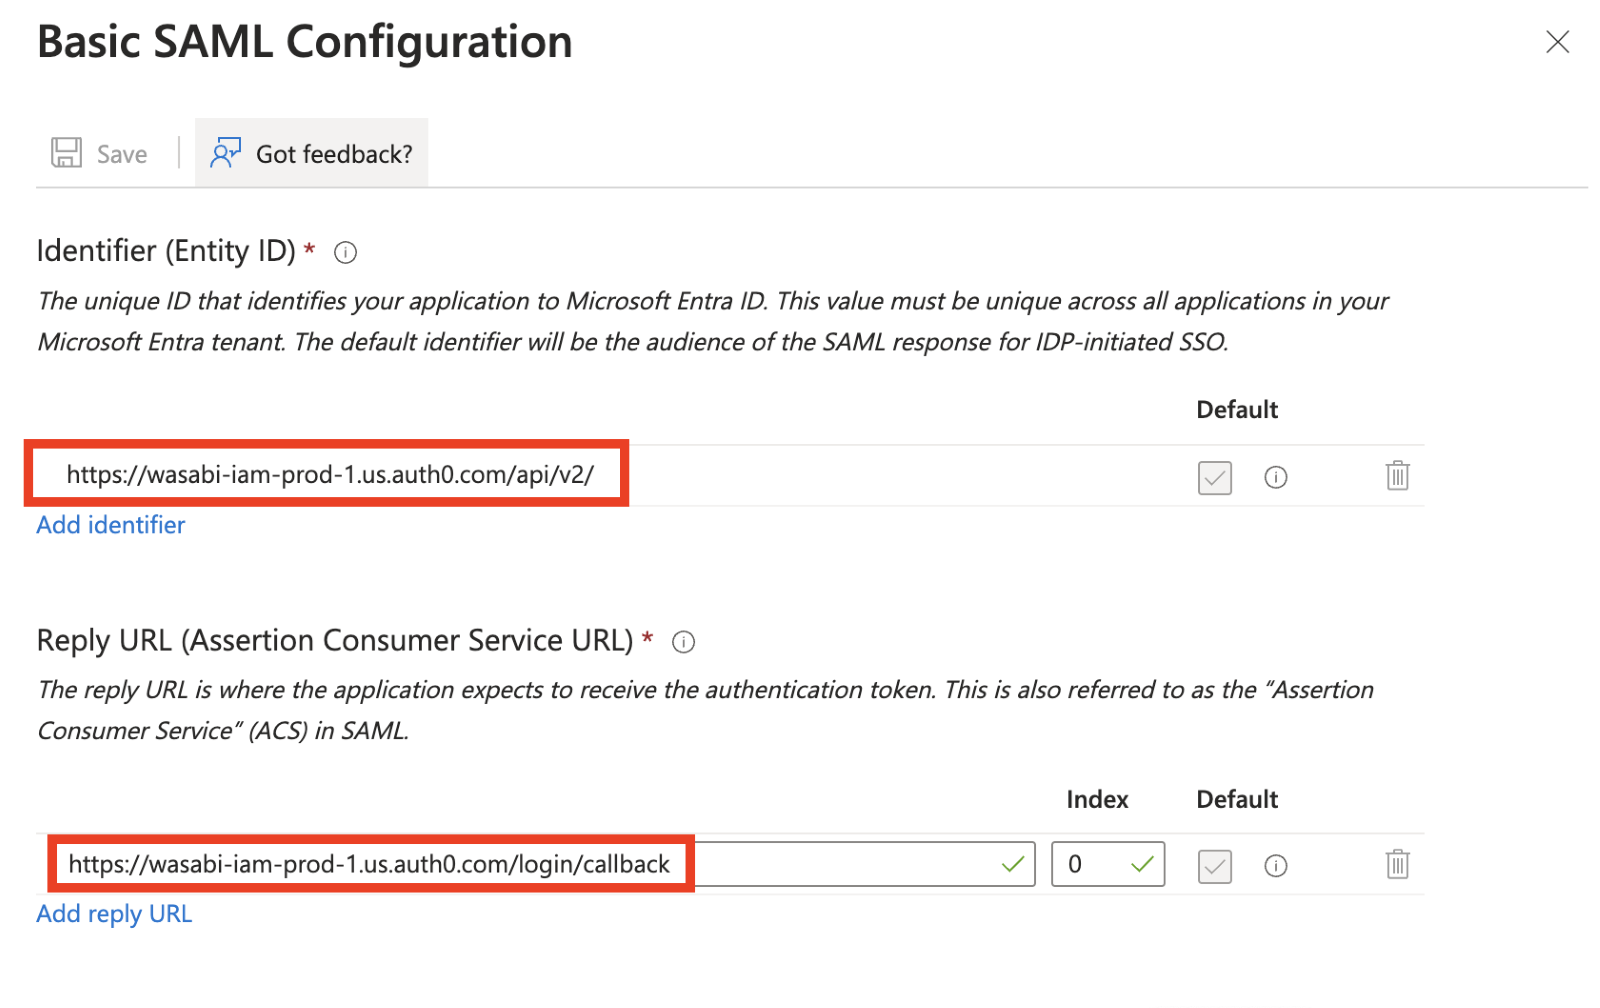
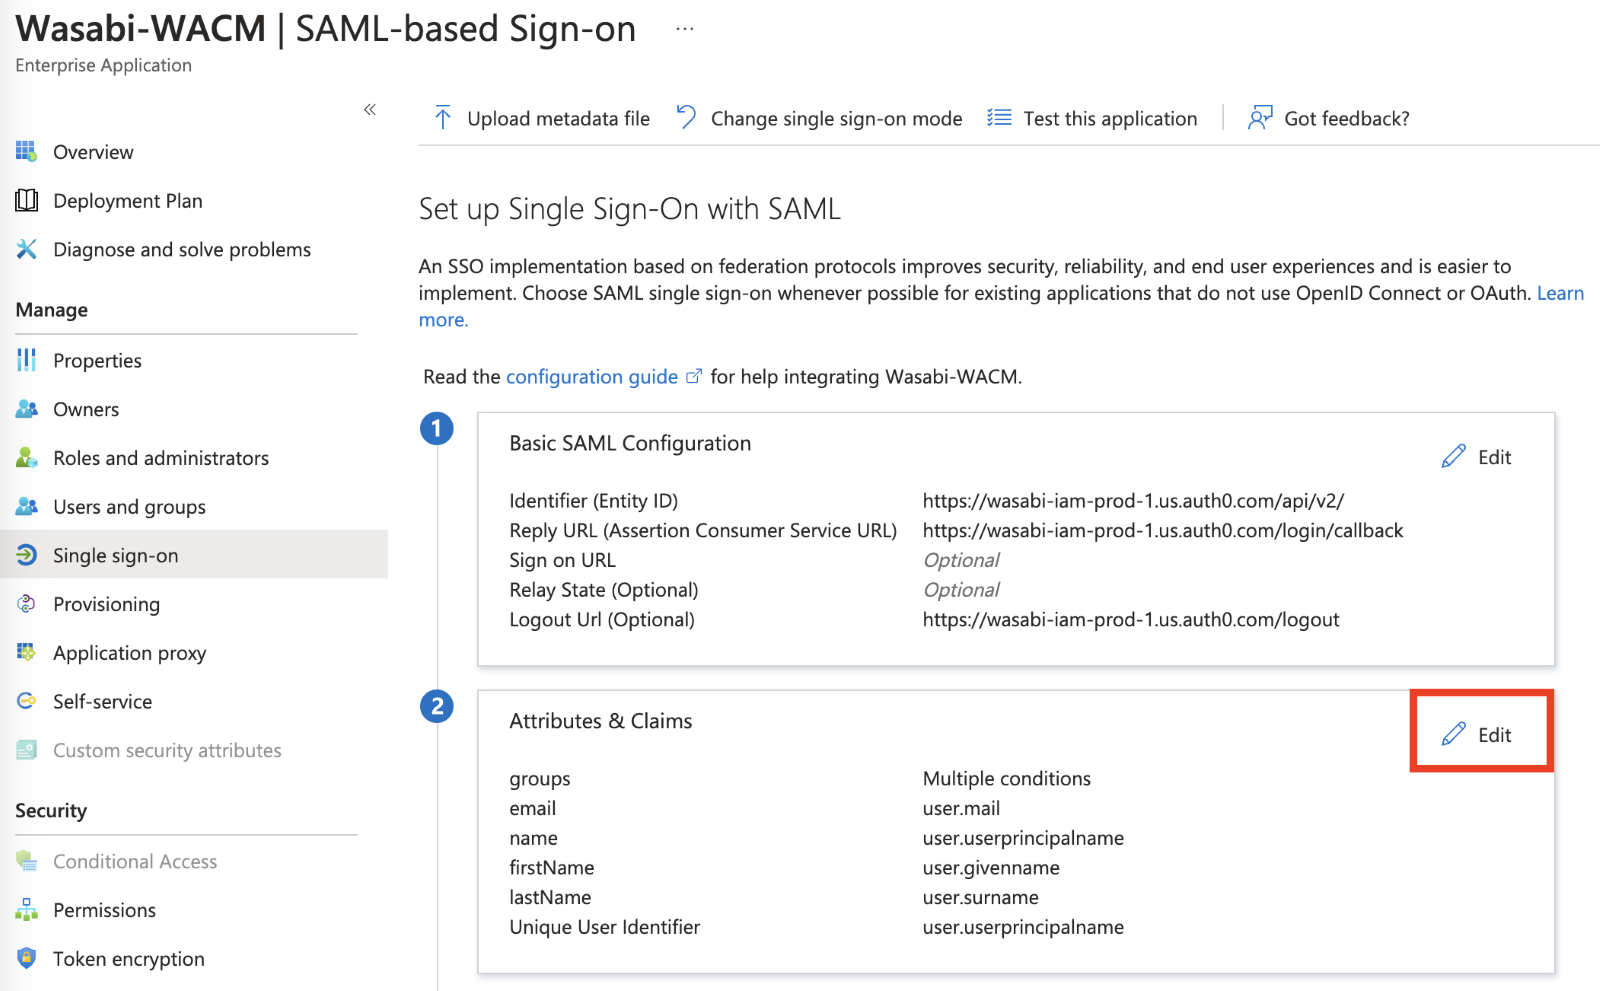
On the Basic SAML Configurations, click Edit.
Click Save once the URLs are pasted.
Copy and paste the following to the corresponding entries:
Audience URL (SP Entity ID) / Identifier (Entity ID) (https://wasabi-iam-prod-1.us.auth0.com/api/v2/)
Single Sign On URL/ Reply URL (https://wasabi-iam-prod-1.us.auth0.com/login/callback)
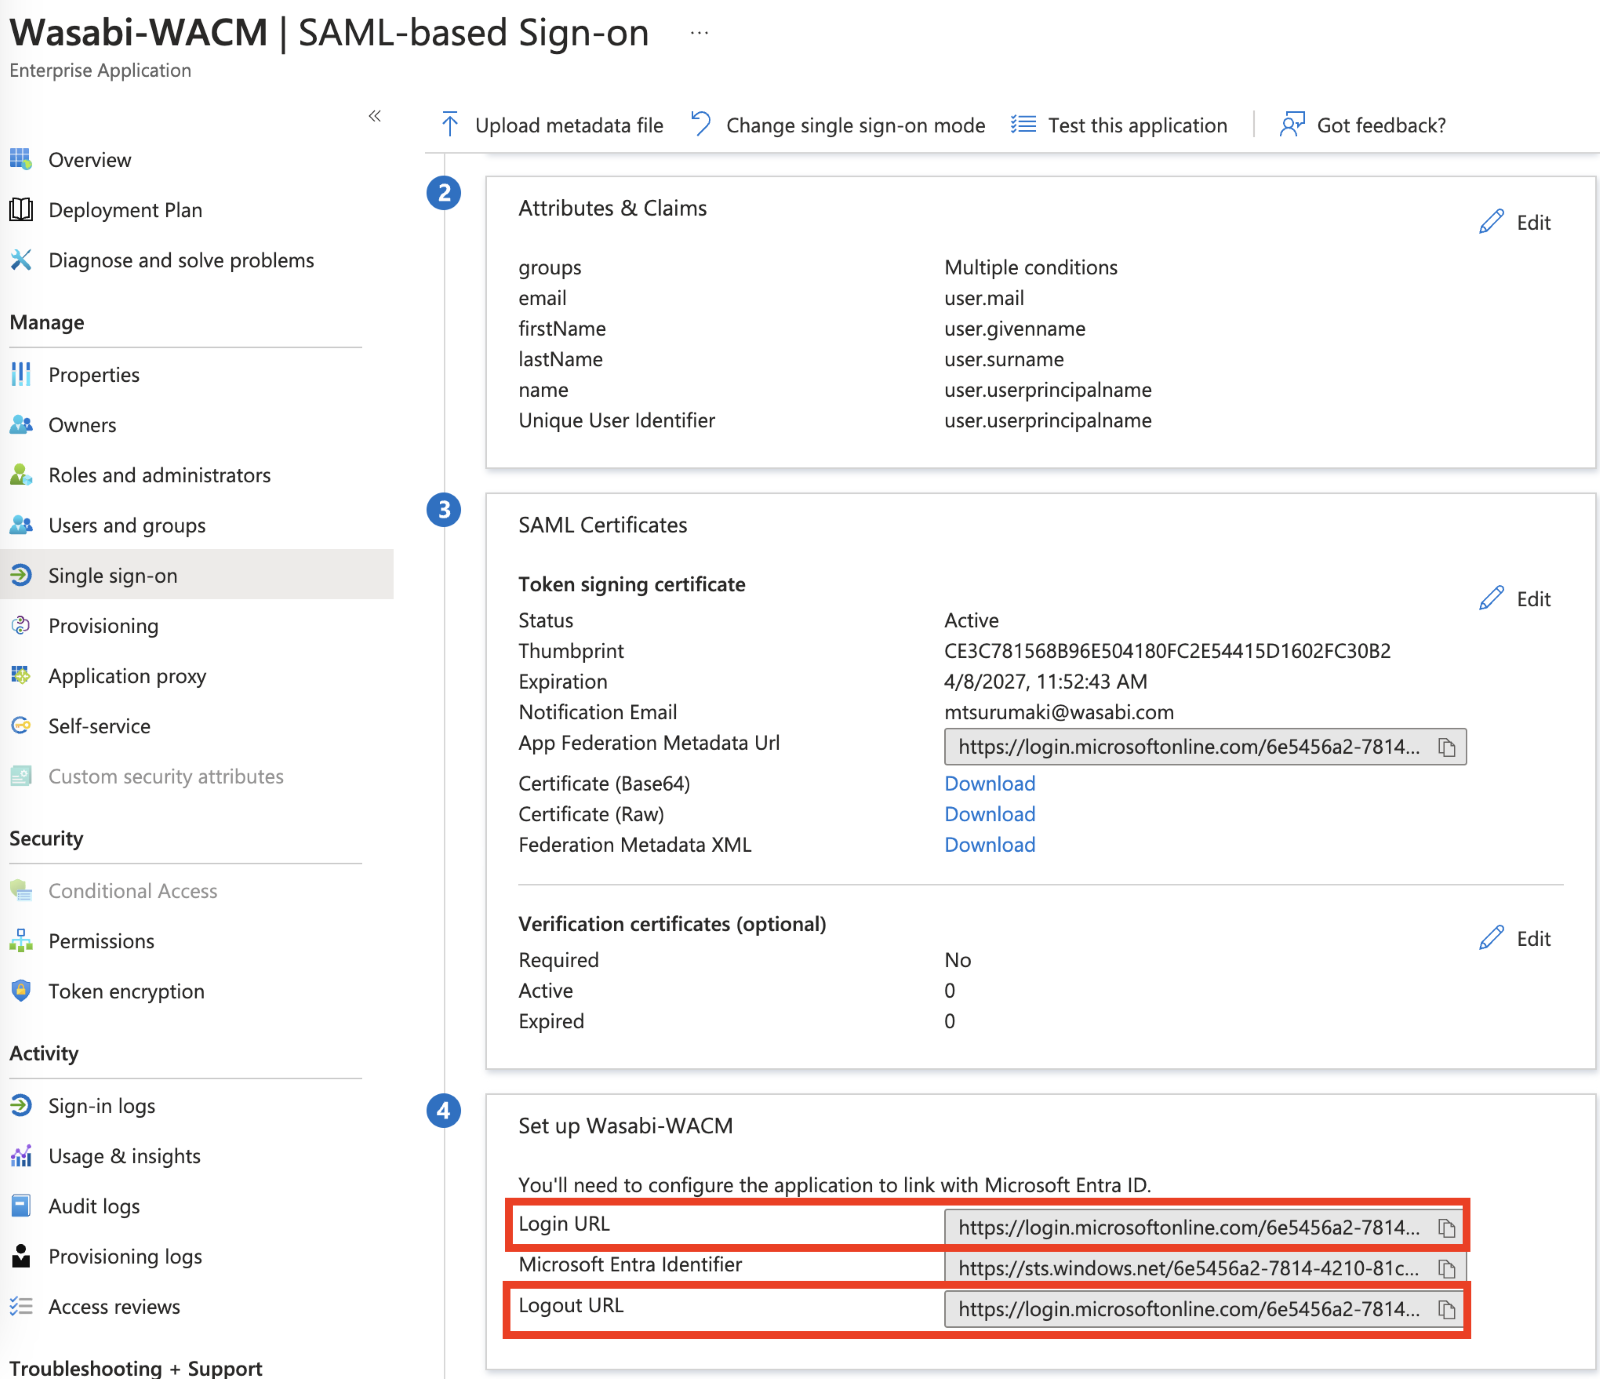
On the Single sign-on page, note the Login URL and Logout URL. You will need this when Adding User Attributes, Step 14.
To include your organization's name in the login URL, configure SSO settings where "orgname" is your organization name, for example:
WACM (https://wacm.wasabisys.com/en/wasabi/auth/login?organization=orgname)
CCC (yourconsole.poweredbywasabi.com/login?organization=orgname)
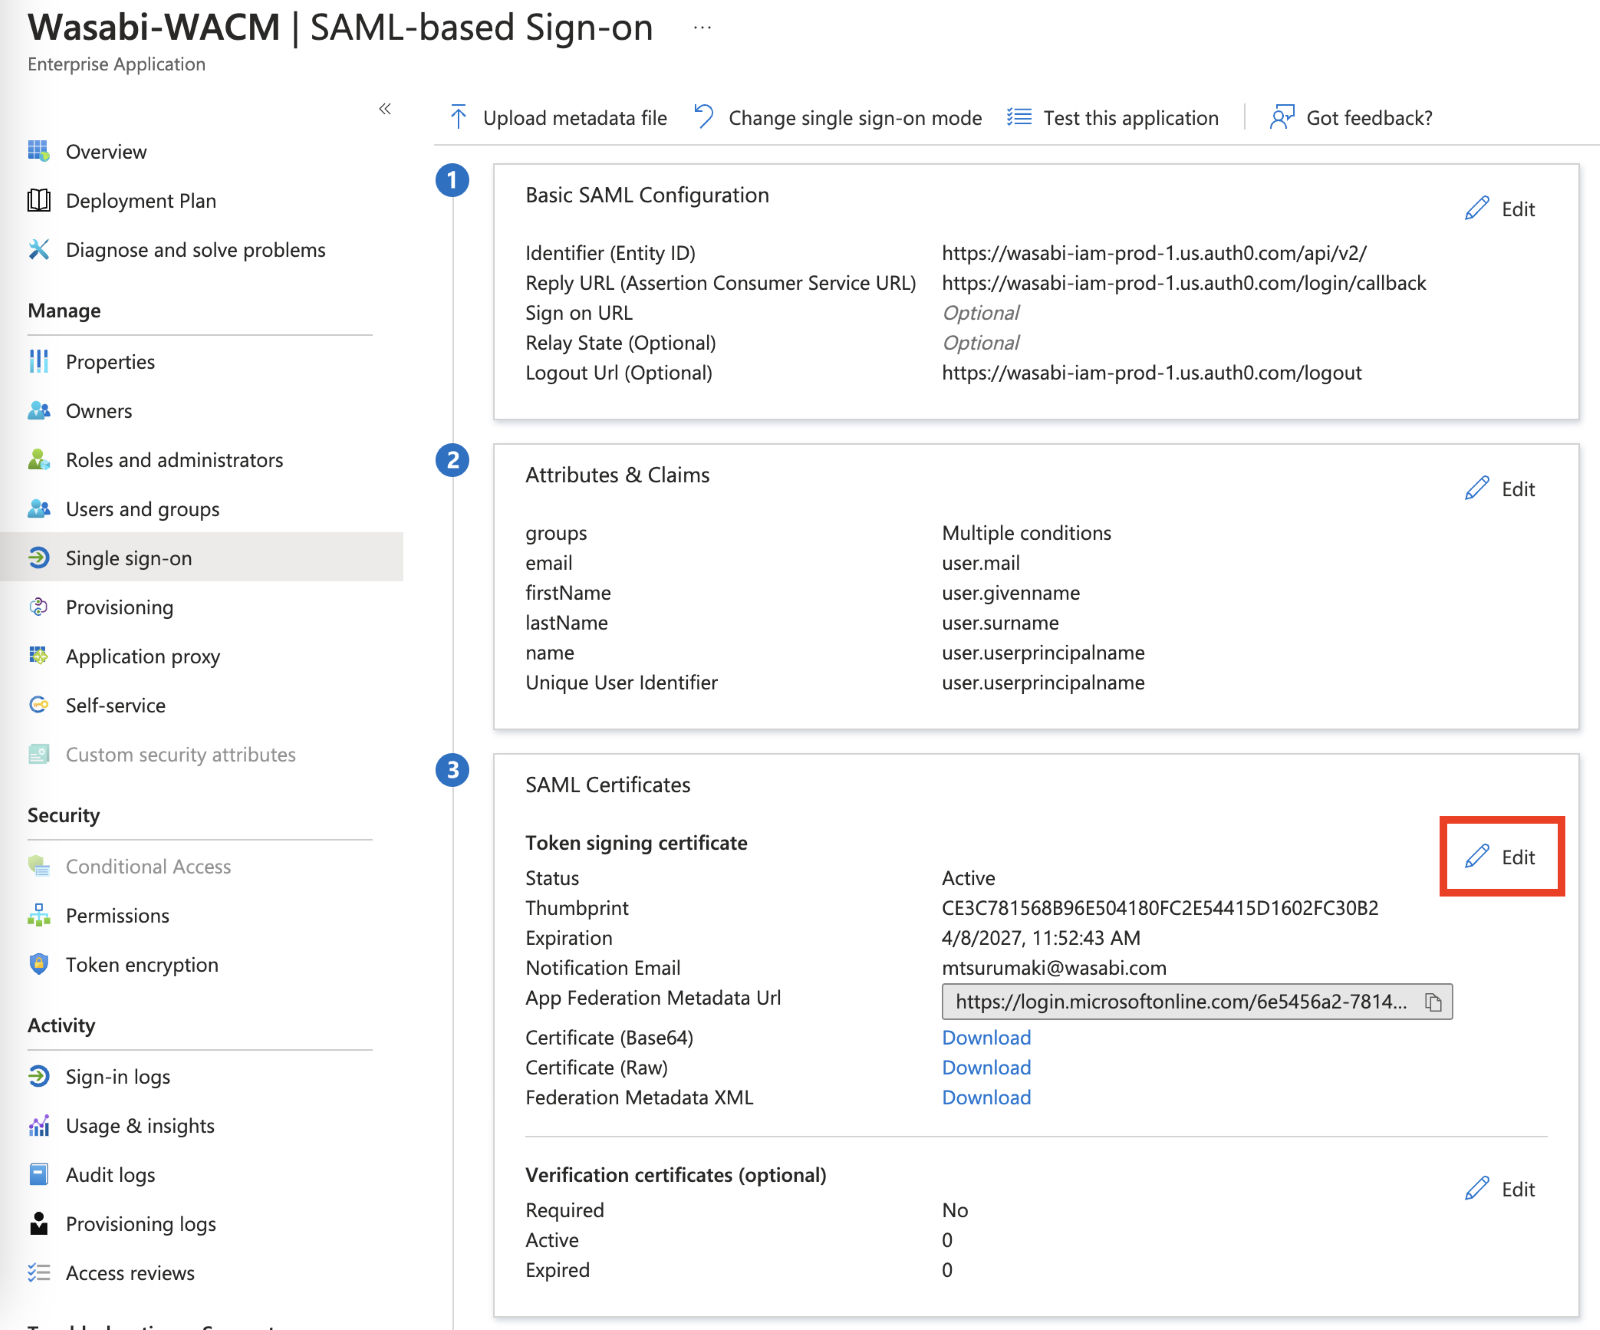
Under SAML Certificate, click Edit. Download the SAML Signing Certificate as a PEM certificate.
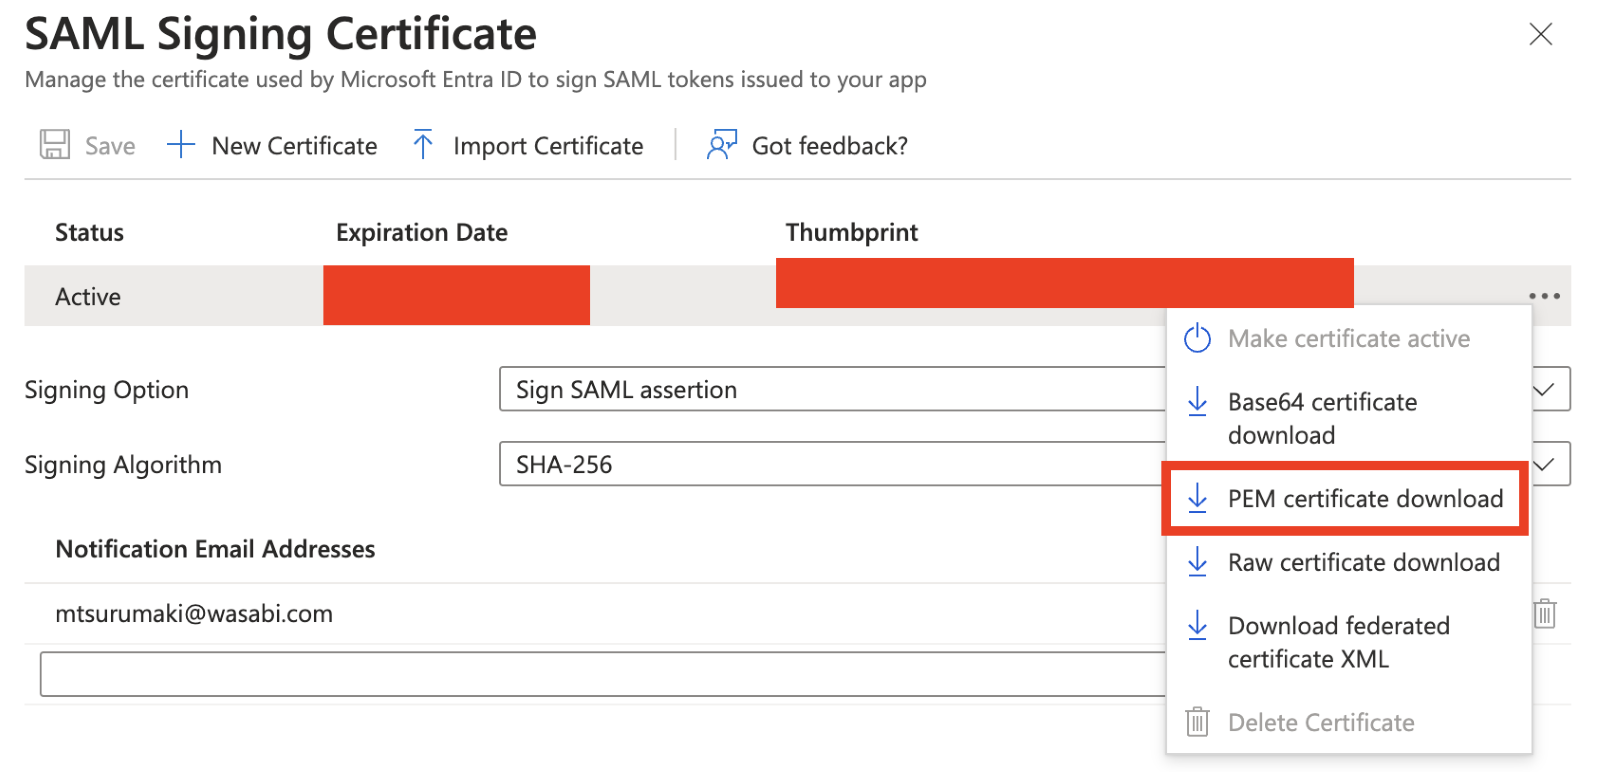
When the SAML Signing Certificate window appears, click ... to the right of the active certificate.
Click PEM certificate download. A .pem file will download. This file is needed for Adding User Attributes, Step 14 when configuring the SSO in WACM.
Creating a Role
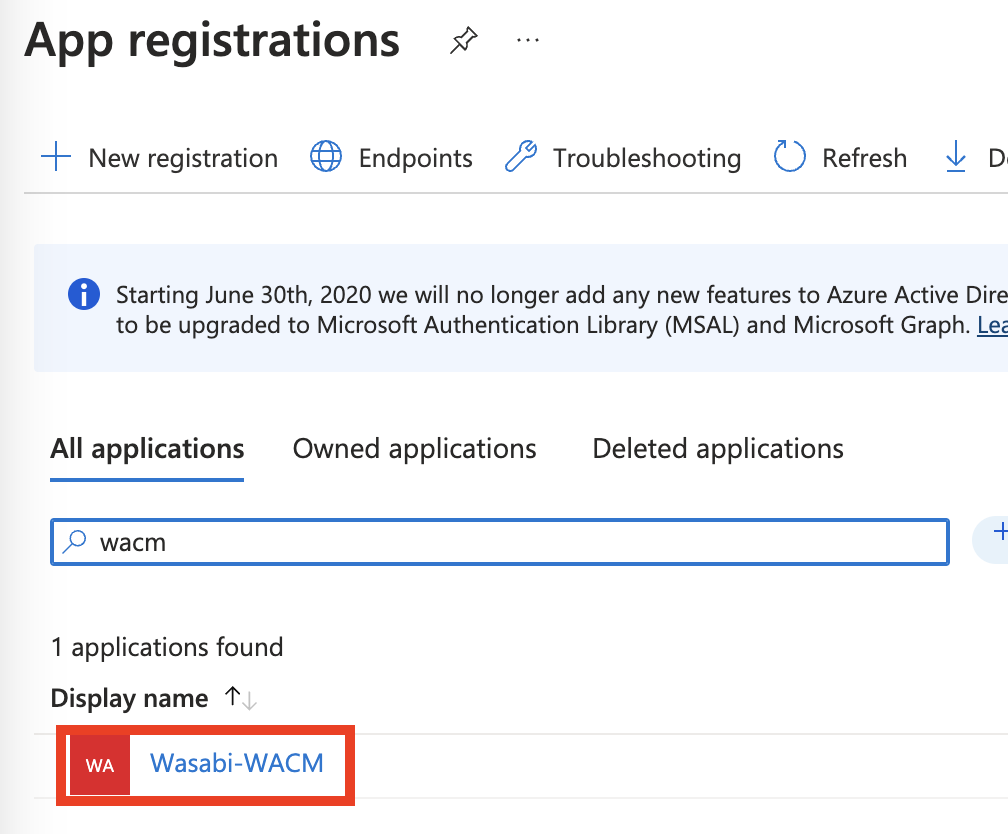
Return to the Azure Active Directory. Click App registrations.
Select the Enterprise application that you created.
Click App role on the left-hand side. Click Create app role.
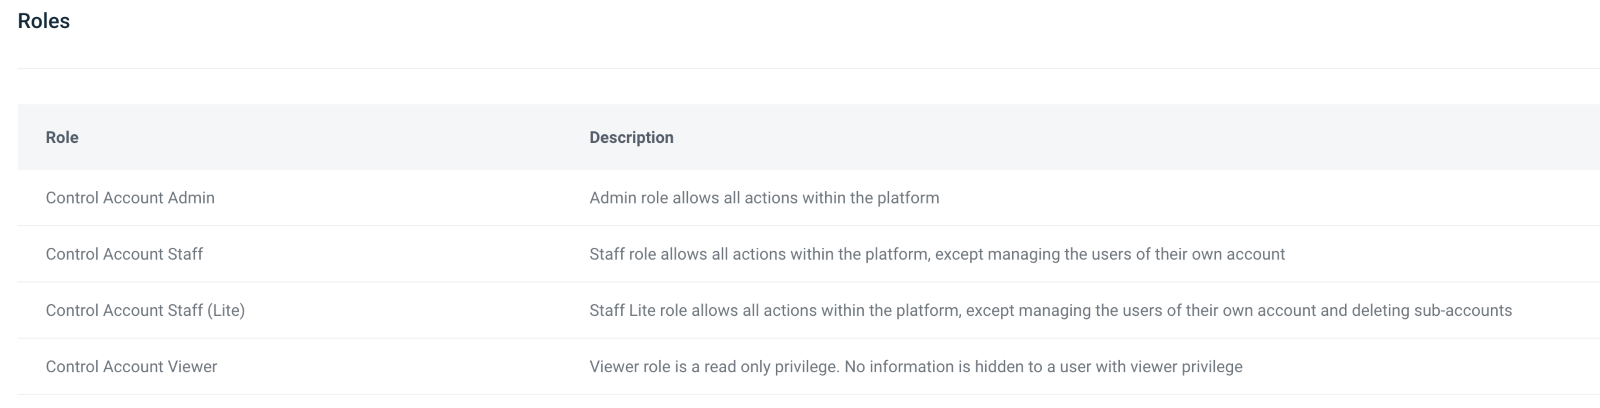
The name/value of the role should match the role name of one of the following WACM Roles.
Uses dashes (-) instead of spaces. Example: For “Control Account Admin” use the Azure application role name "Control-Account-Admin".
Below are the WACM roles:
For the Value, enter the same name as the display and role name that you will be creating in Wasabi.
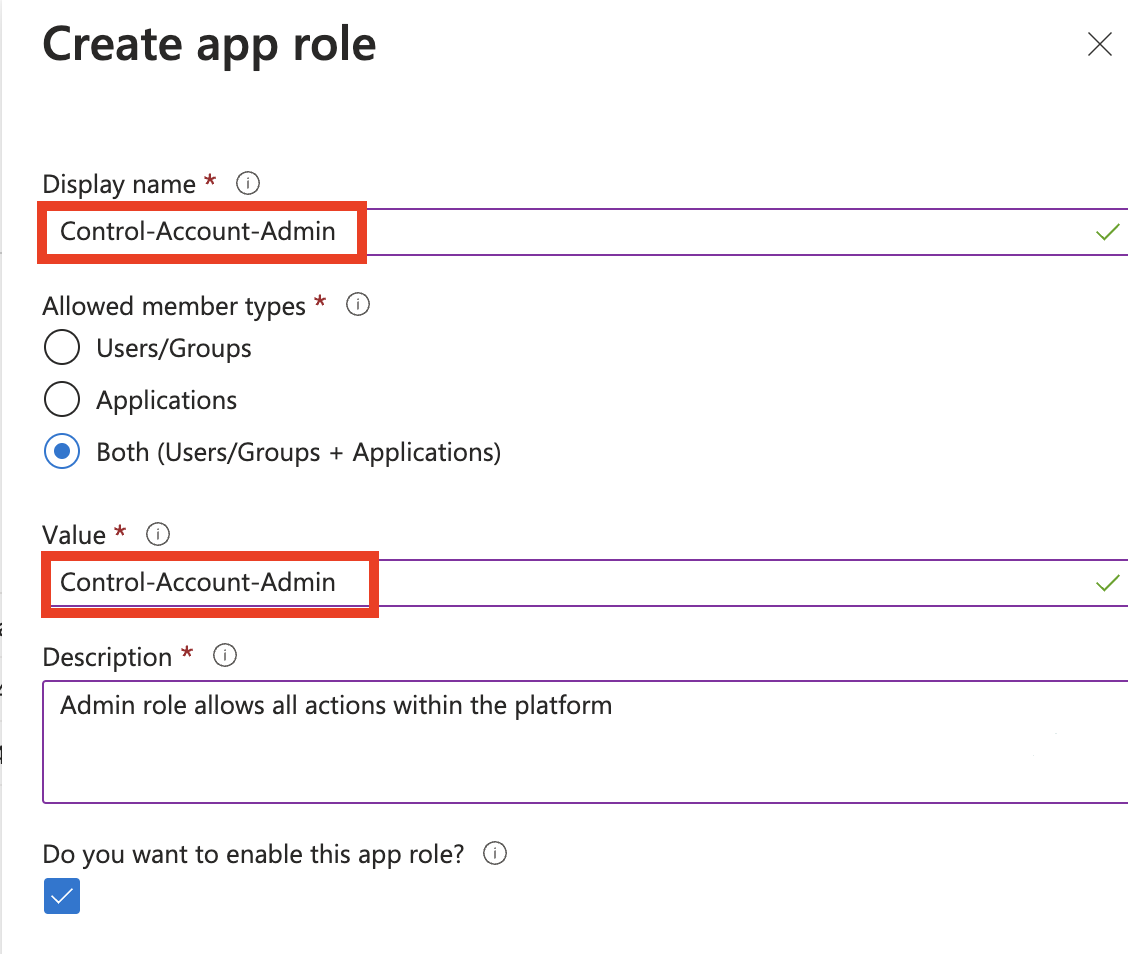
Click Apply when done.
Assigning User(s) or Group(s) to a Role
You can assign user(s) or group(s) to a role that you created within the application so that the user(s) or group(s) can access WACM.
Return to the Enterprise application.
Navigate to users and groups.
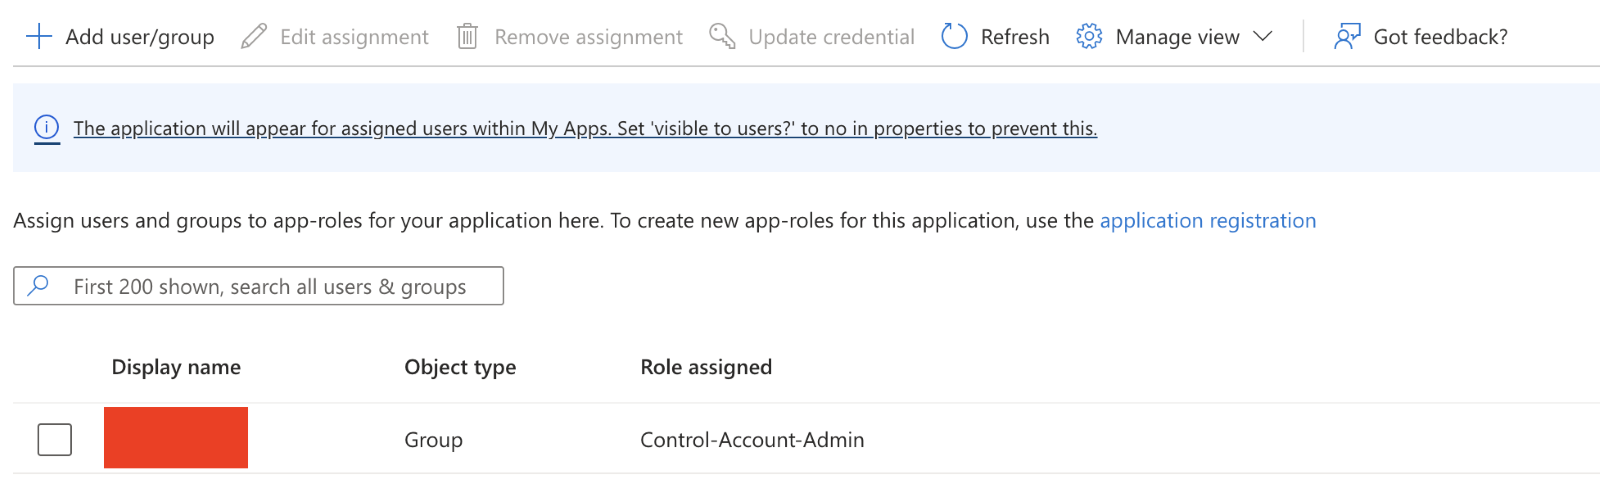
Click Add user/group.
Choose the role created in Creating a Role, Step 3.
Click Assign.
Optionally, you can add multiple users/groups to other WACM roles in this step.
Adding User Attributes
In the Enterprise application, navigate to Single Sign-On.
Under Attributes & Claims, click Edit.
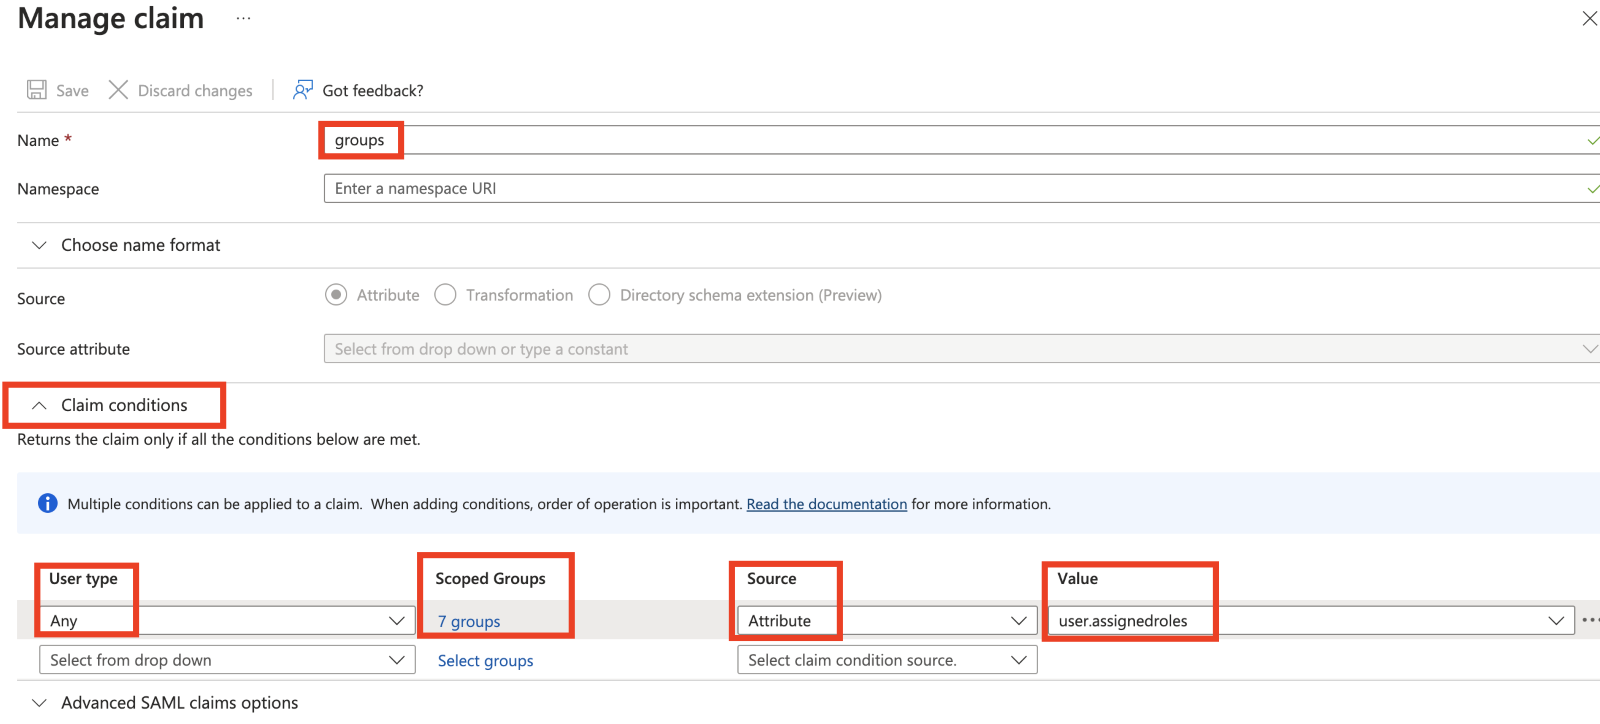
Click Add new claim.
In the Name field, type "groups."
Click Claim conditions. Include the following information in the new claim:
User type—Any (or another value that will match your use case)
Scoped Groups—Group(s) in Azure AD that you want to add (Add any user(s) granted access to the WACM Console to the group you select. The scoped group will have the “groups” attribute that is needed for WACM SSO.)
Source—Attribute
Value—user.assignedroles
Click Save.
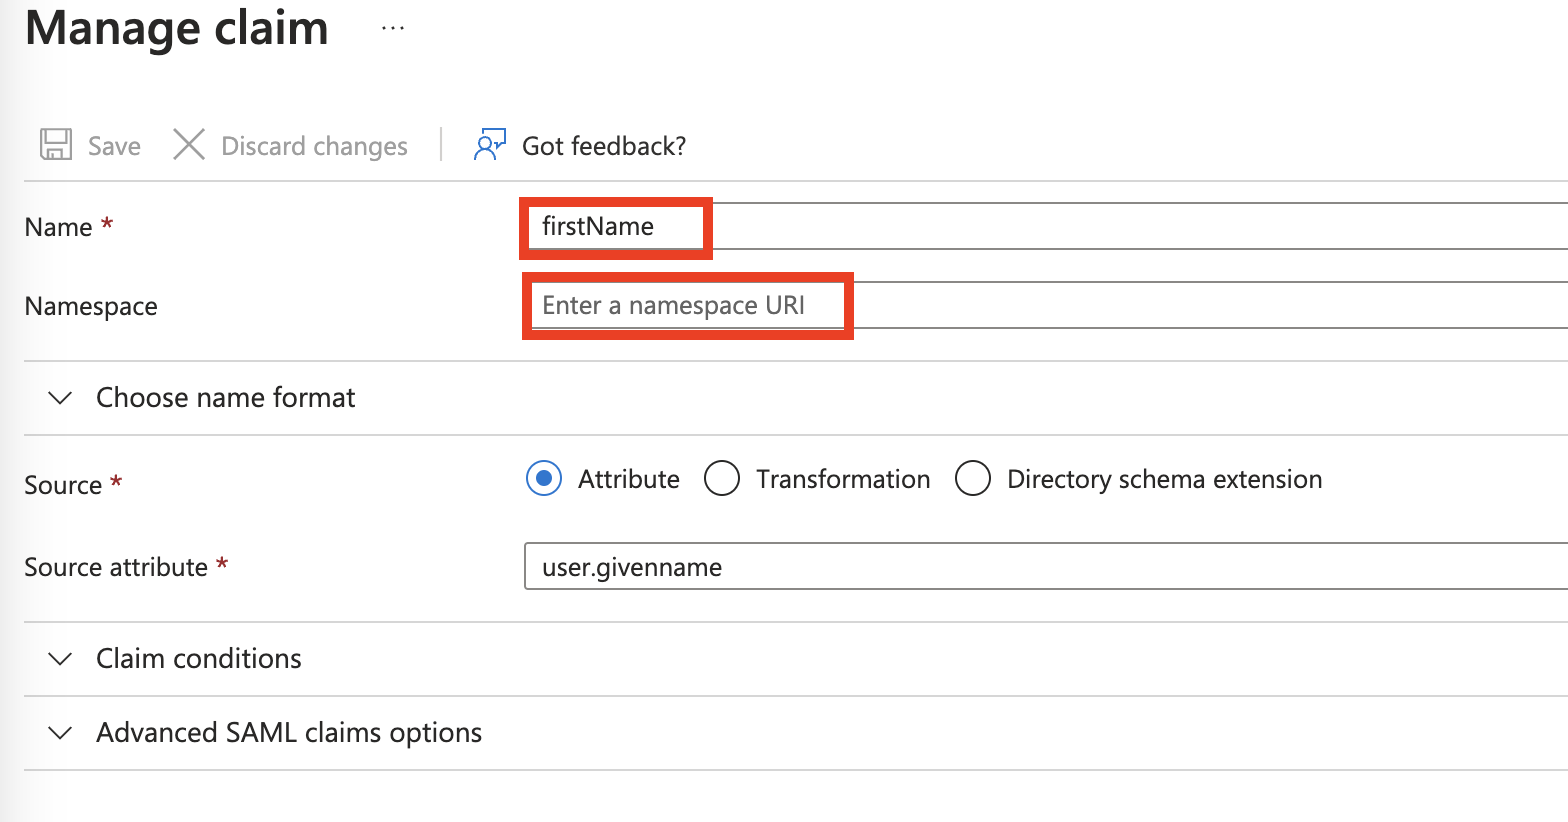
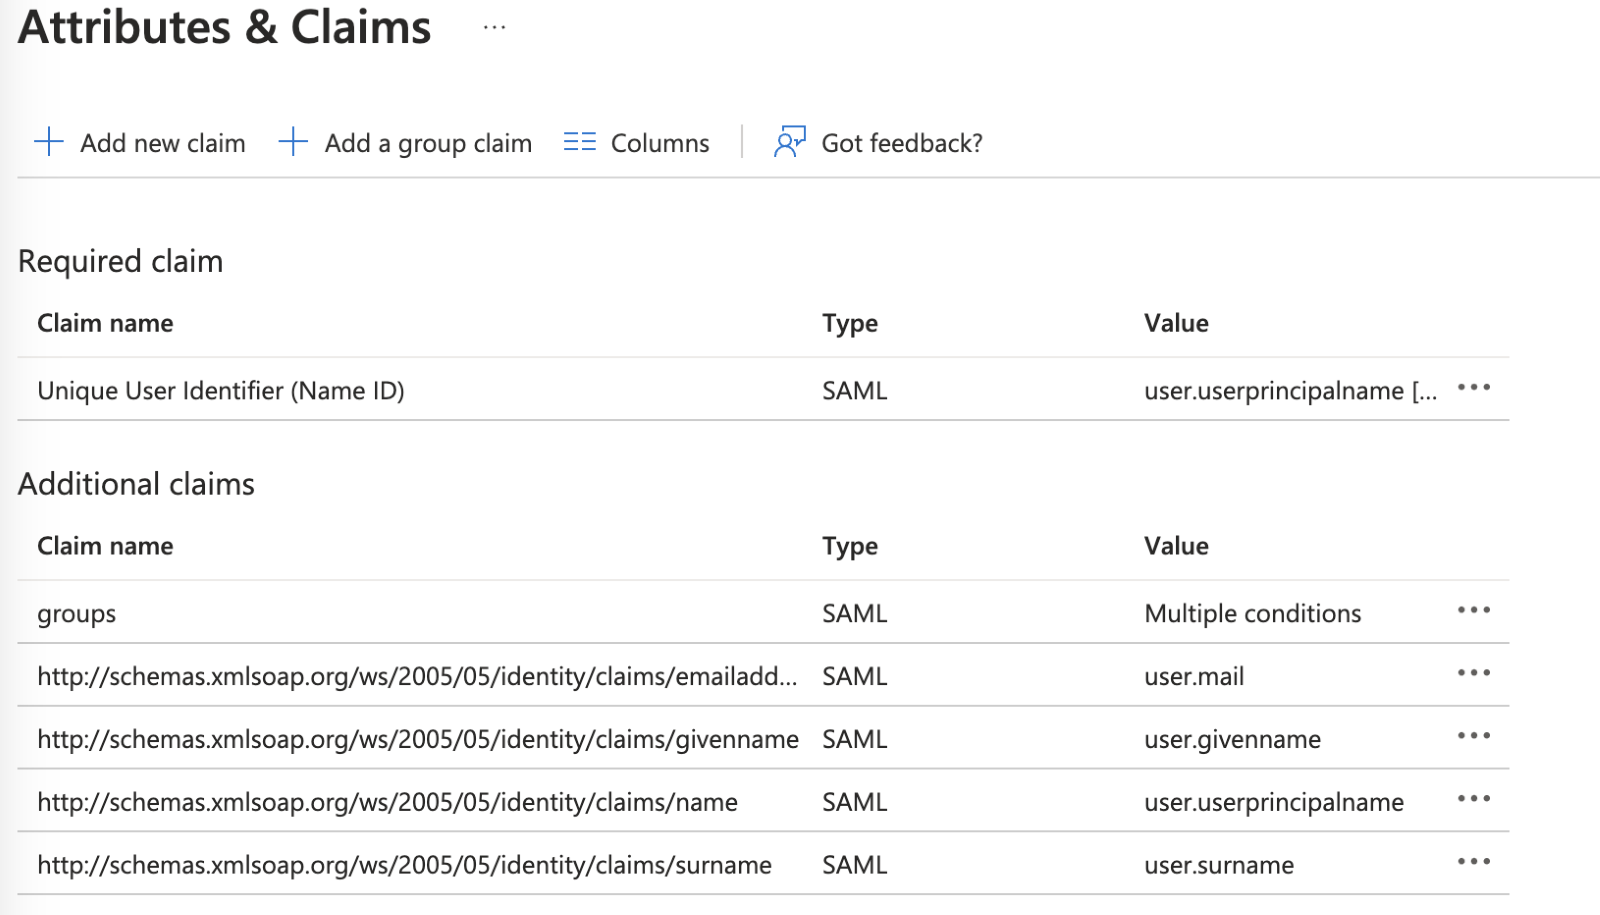
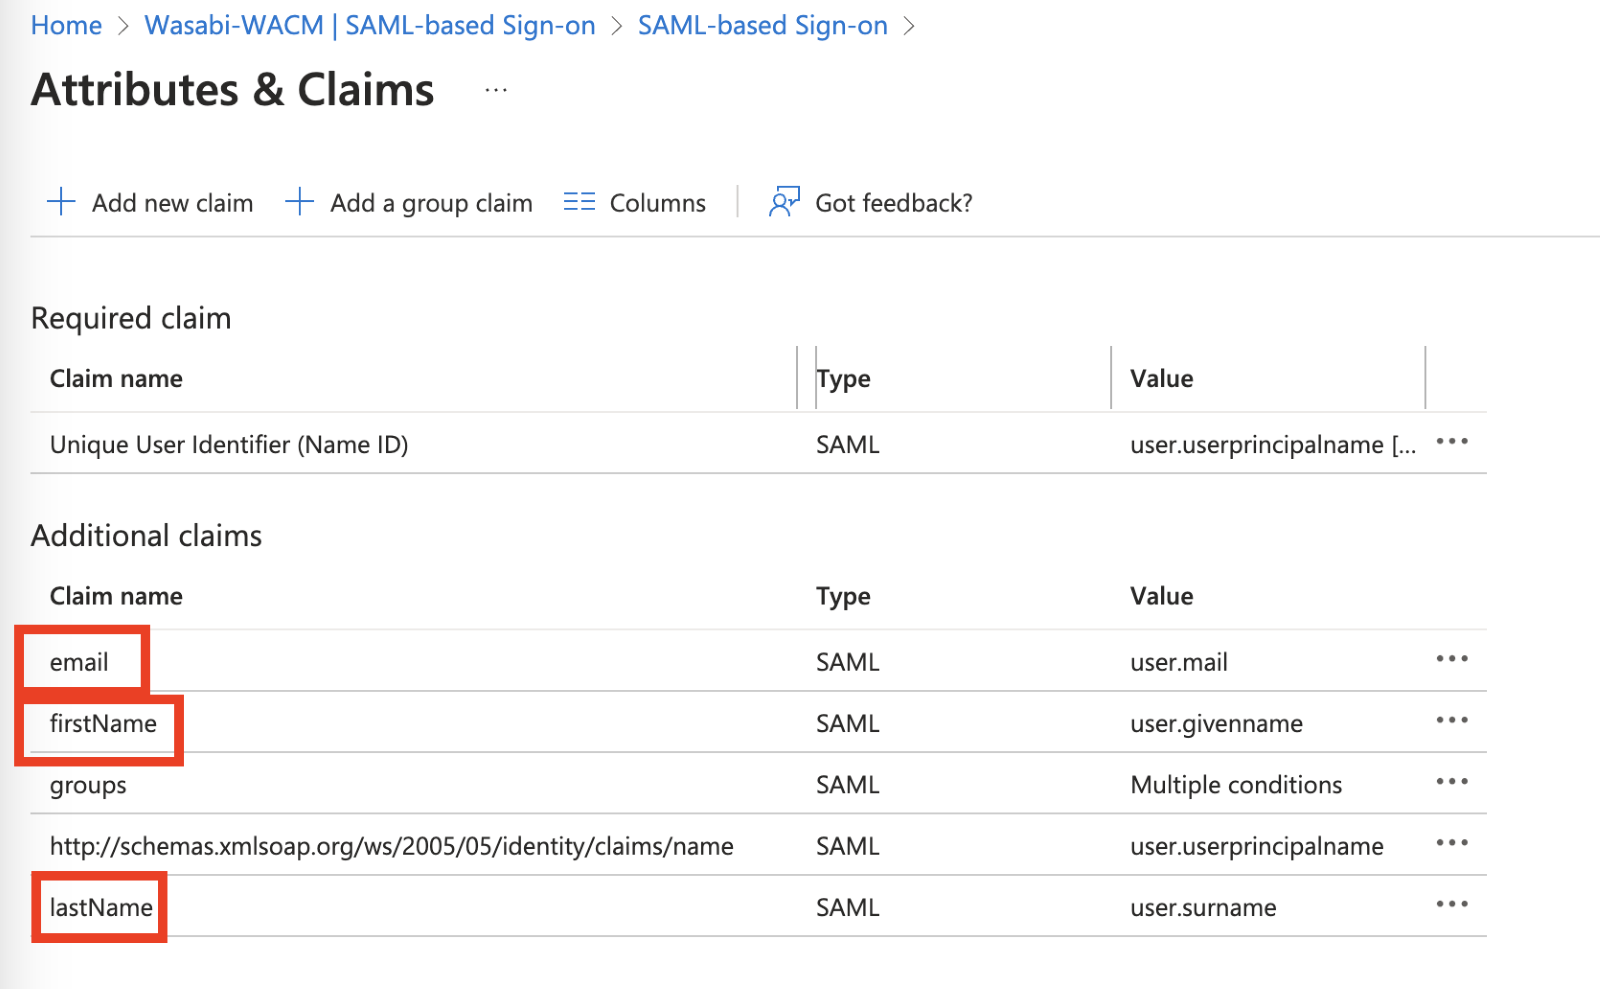
Change the attributes Claim Names from the default names and delete the default value of the Namespace. Leave the claim value with the default values. Change the following Claim Names to authenticate to WACM. For more information, review the WACM Metadata file in the WACM Console.
From “emailaddress” to “email”
From “givenName” to “firstName”
From “surname” to “lastName”
For example:
Rename “Name” to “firstName”
Remove the “Namespace” value so it is empty.
Default Values view:
Values after change:
Log in to the WACM Console you want to set up SSO for at the Wasabi Account Control Manager login page.
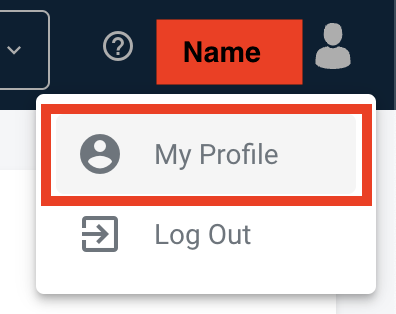
Navigate to the top right corner where your name is displayed. Click My Profile.
Once in your profile, select the Account tab.

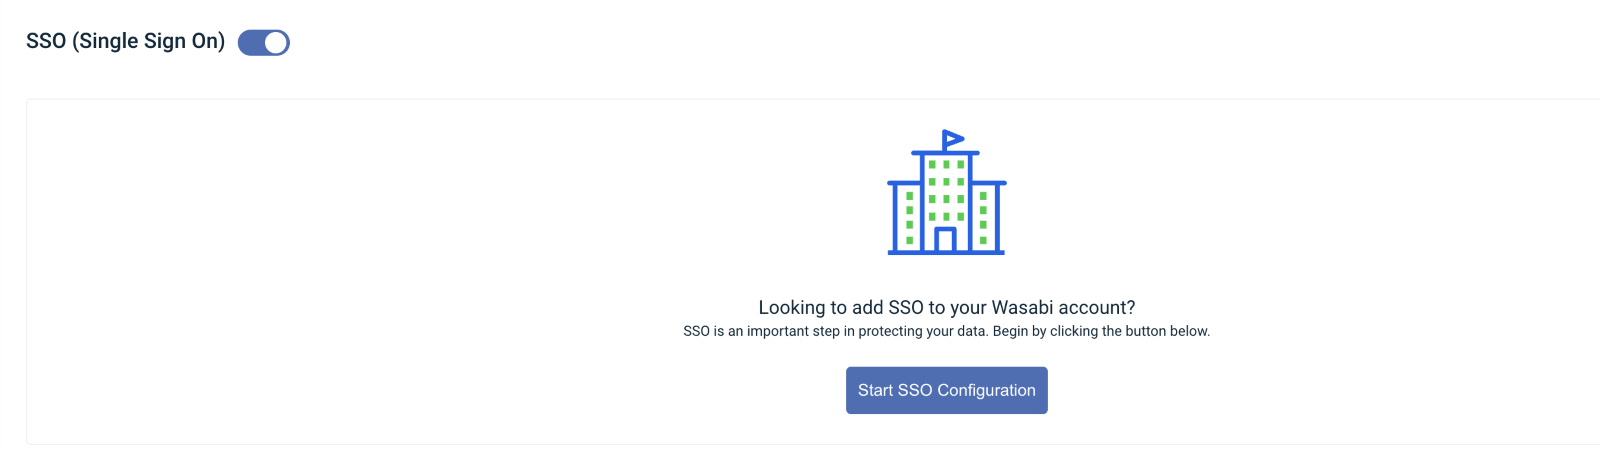
Scroll down and toggle the SSO (Single Sign On).
Click Start SSO Configuration.
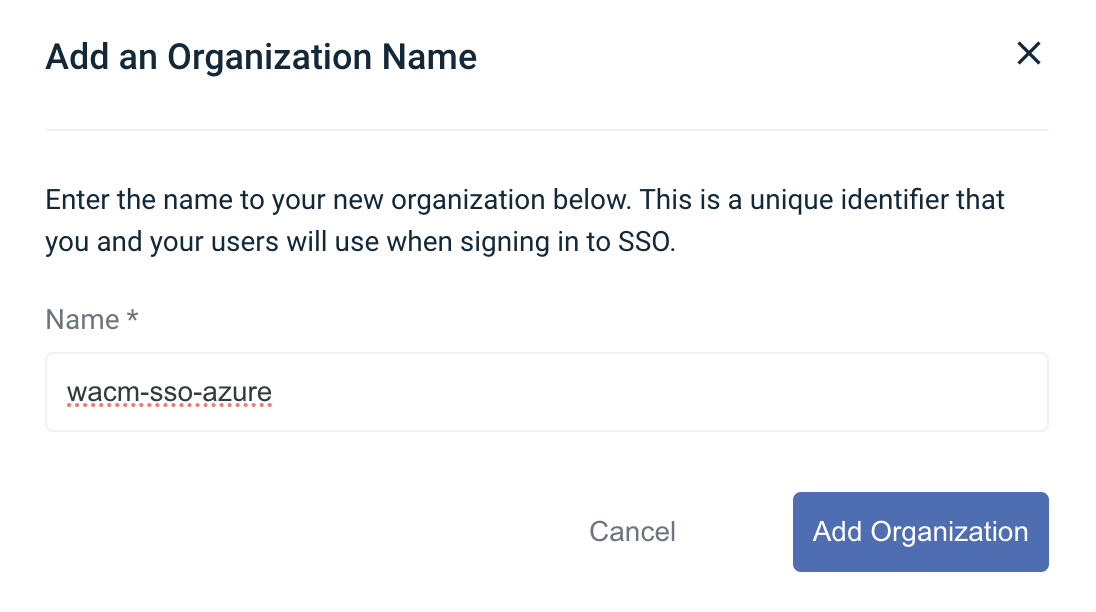
Create an Organization Name. This Organization Name should be unique. You will need this Organization Name each time you sign in using WACM SSO. Once complete, click Add Organization.
Change the Connection Type from OpenID to SAML. Add the Login URL and, optionally, add the Logout URL (as described in Creating a WACM SSO Login, Step 12). Upload the .pem file (as described in Creating a WACM SSO Login, Step 13). Click Save Connection.
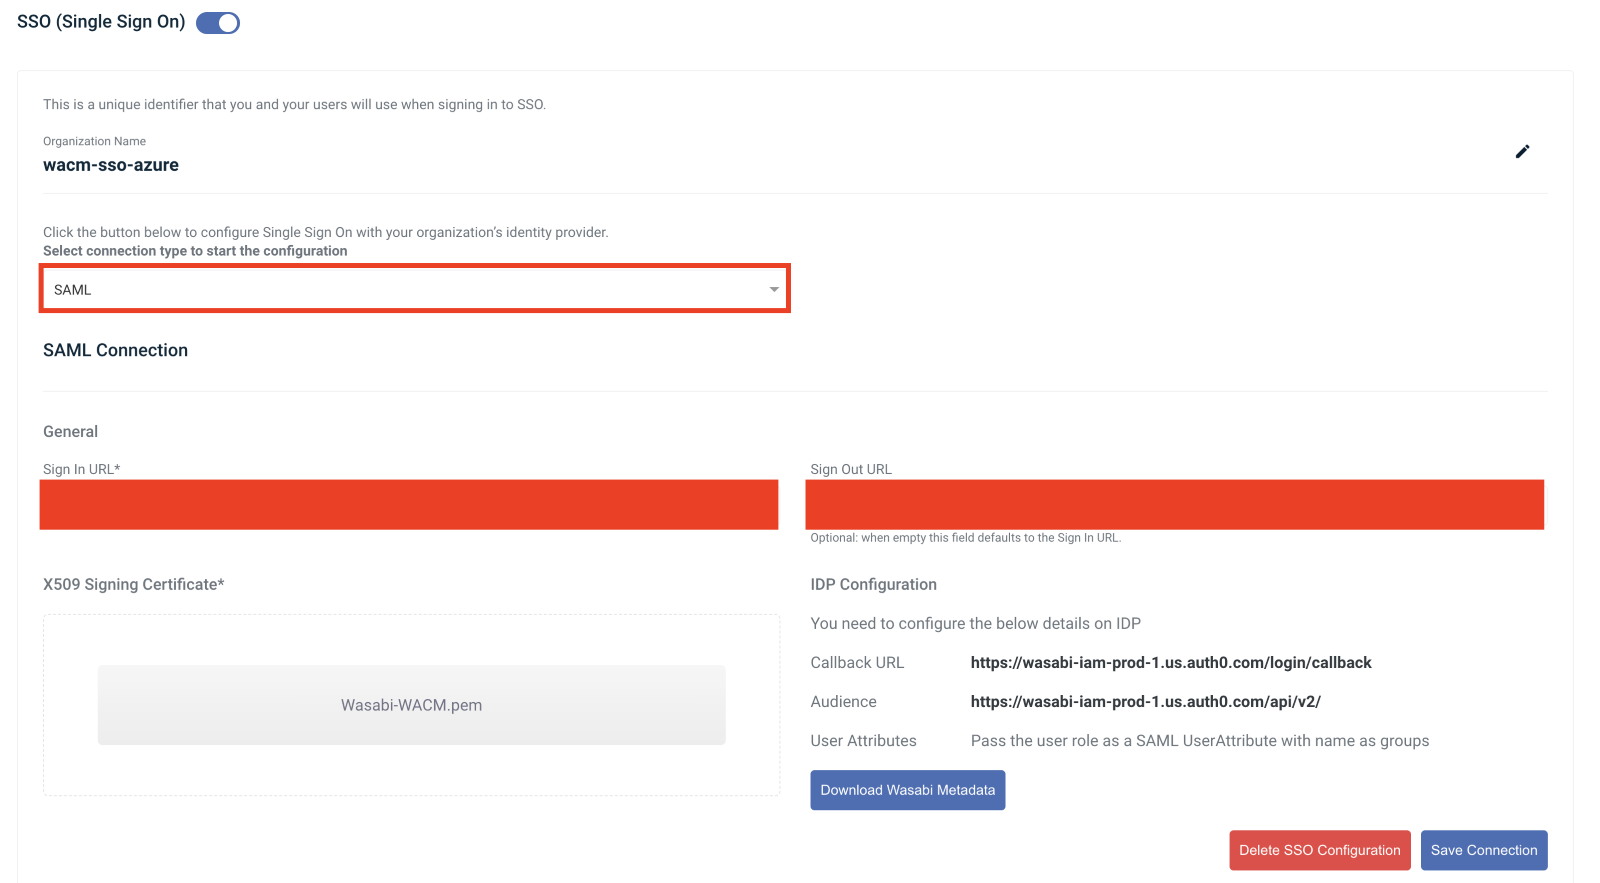
WACM SSO will match the WACM role names to the Azure Role in the “groups” name attribute. Any user with the Control-Account-Admin Azure role will be assigned the Control Account Admin role in WACM.
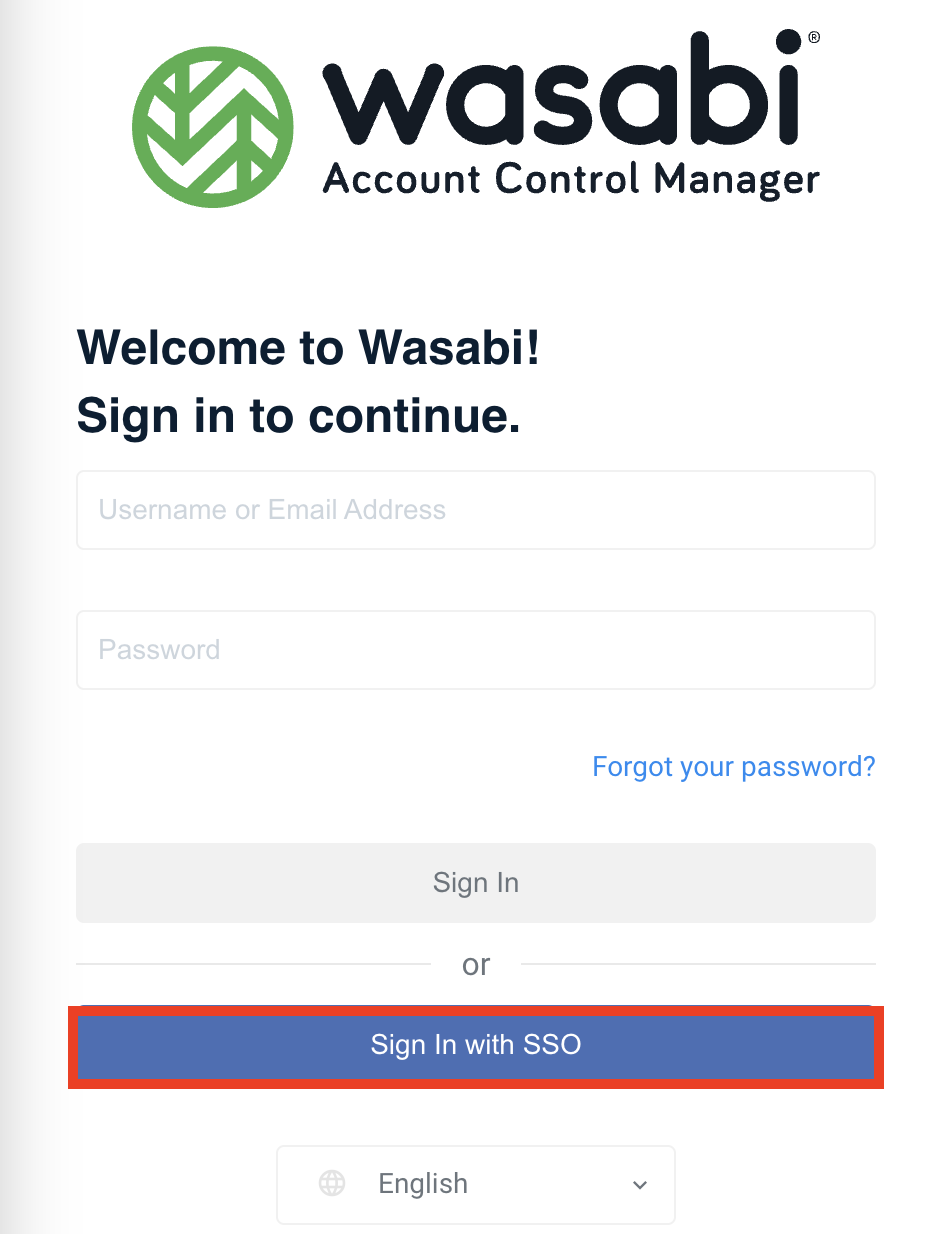
Test the WACM SSO (https://wacm.wasabisys.com/).
Click Sign in with SSO.
Enter the Organization Name you created in Step 13 above.
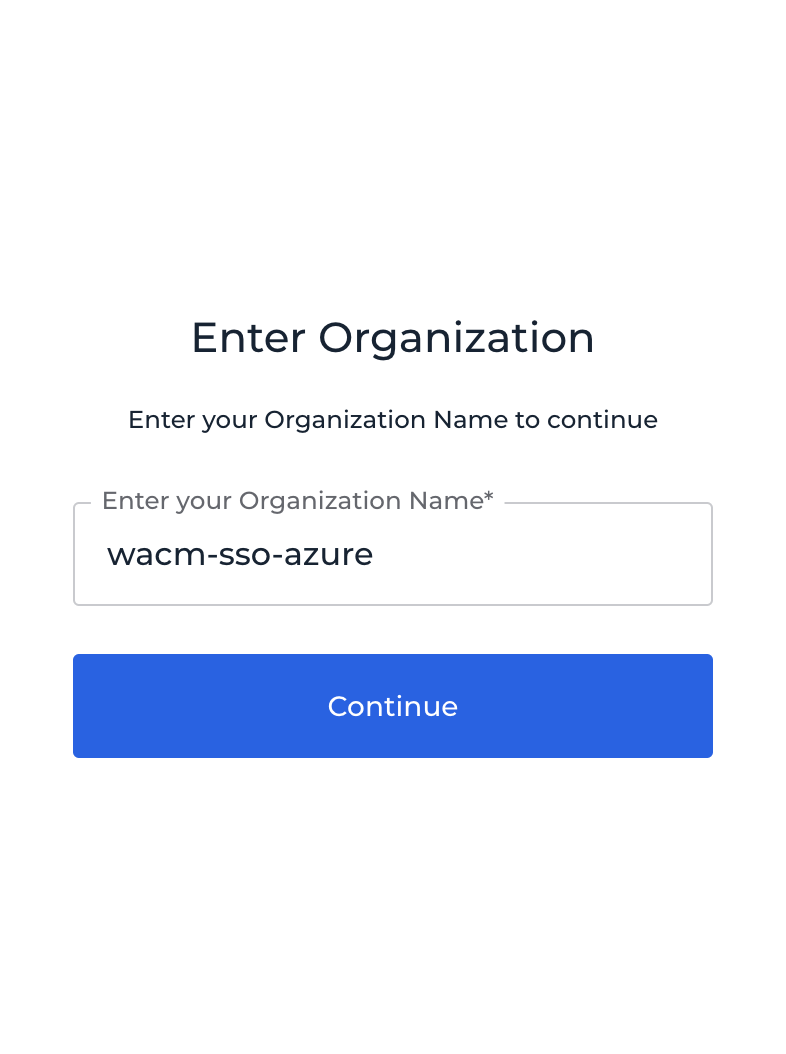
You will be redirected to the Azure AD login page.
Complete the Azure AD login.
Once authenticated, you will be redirected back to the WACM Console where you can perform the necessary functions based on the role assigned to the user.