Veeam Backup for Microsoft 365 v7 empowers customers to securely back up Office 365 to on-premises or cloud object storage. Wasabi has been validated to work with Veeam Backup for Microsoft 365 v7.
This article details the procedure to create a Backup job to backup a Microsoft 365 organization to Wasabi. For more detail about specific features, refer to Veeam's Documentation.
The data restoration process is handled by your specific backup software application. As there are many, potential variables that will affect your unique environment, Wasabi strongly recommends that you seek the guidance of your backup software's technical support team in the event that you encounter difficulty or have application-specific inquiries.
Veeam Backup for M365 supports immutability only for backup copies. Refer to Backup Copy for Veeam Microsoft 365 v7 article for more detail.
If you are going to leverage immutable Veeam backups, follow the steps in Object Lock: Enabling.
Enabling bucket versioning only is not a proper configuration for immutable Veeam backups and can cause problems. If you are simply going to use regular Veeam backups with Wasabi buckets, bucket versioning is not required.
Requirements
Veeam Backup for Microsoft 365 v7 installed and licensed.
Active Microsoft 365 account with two-step authentication turned On.
Active Wasabi Cloud Storage account.
A standard Wasabi bucket created with Access keys.
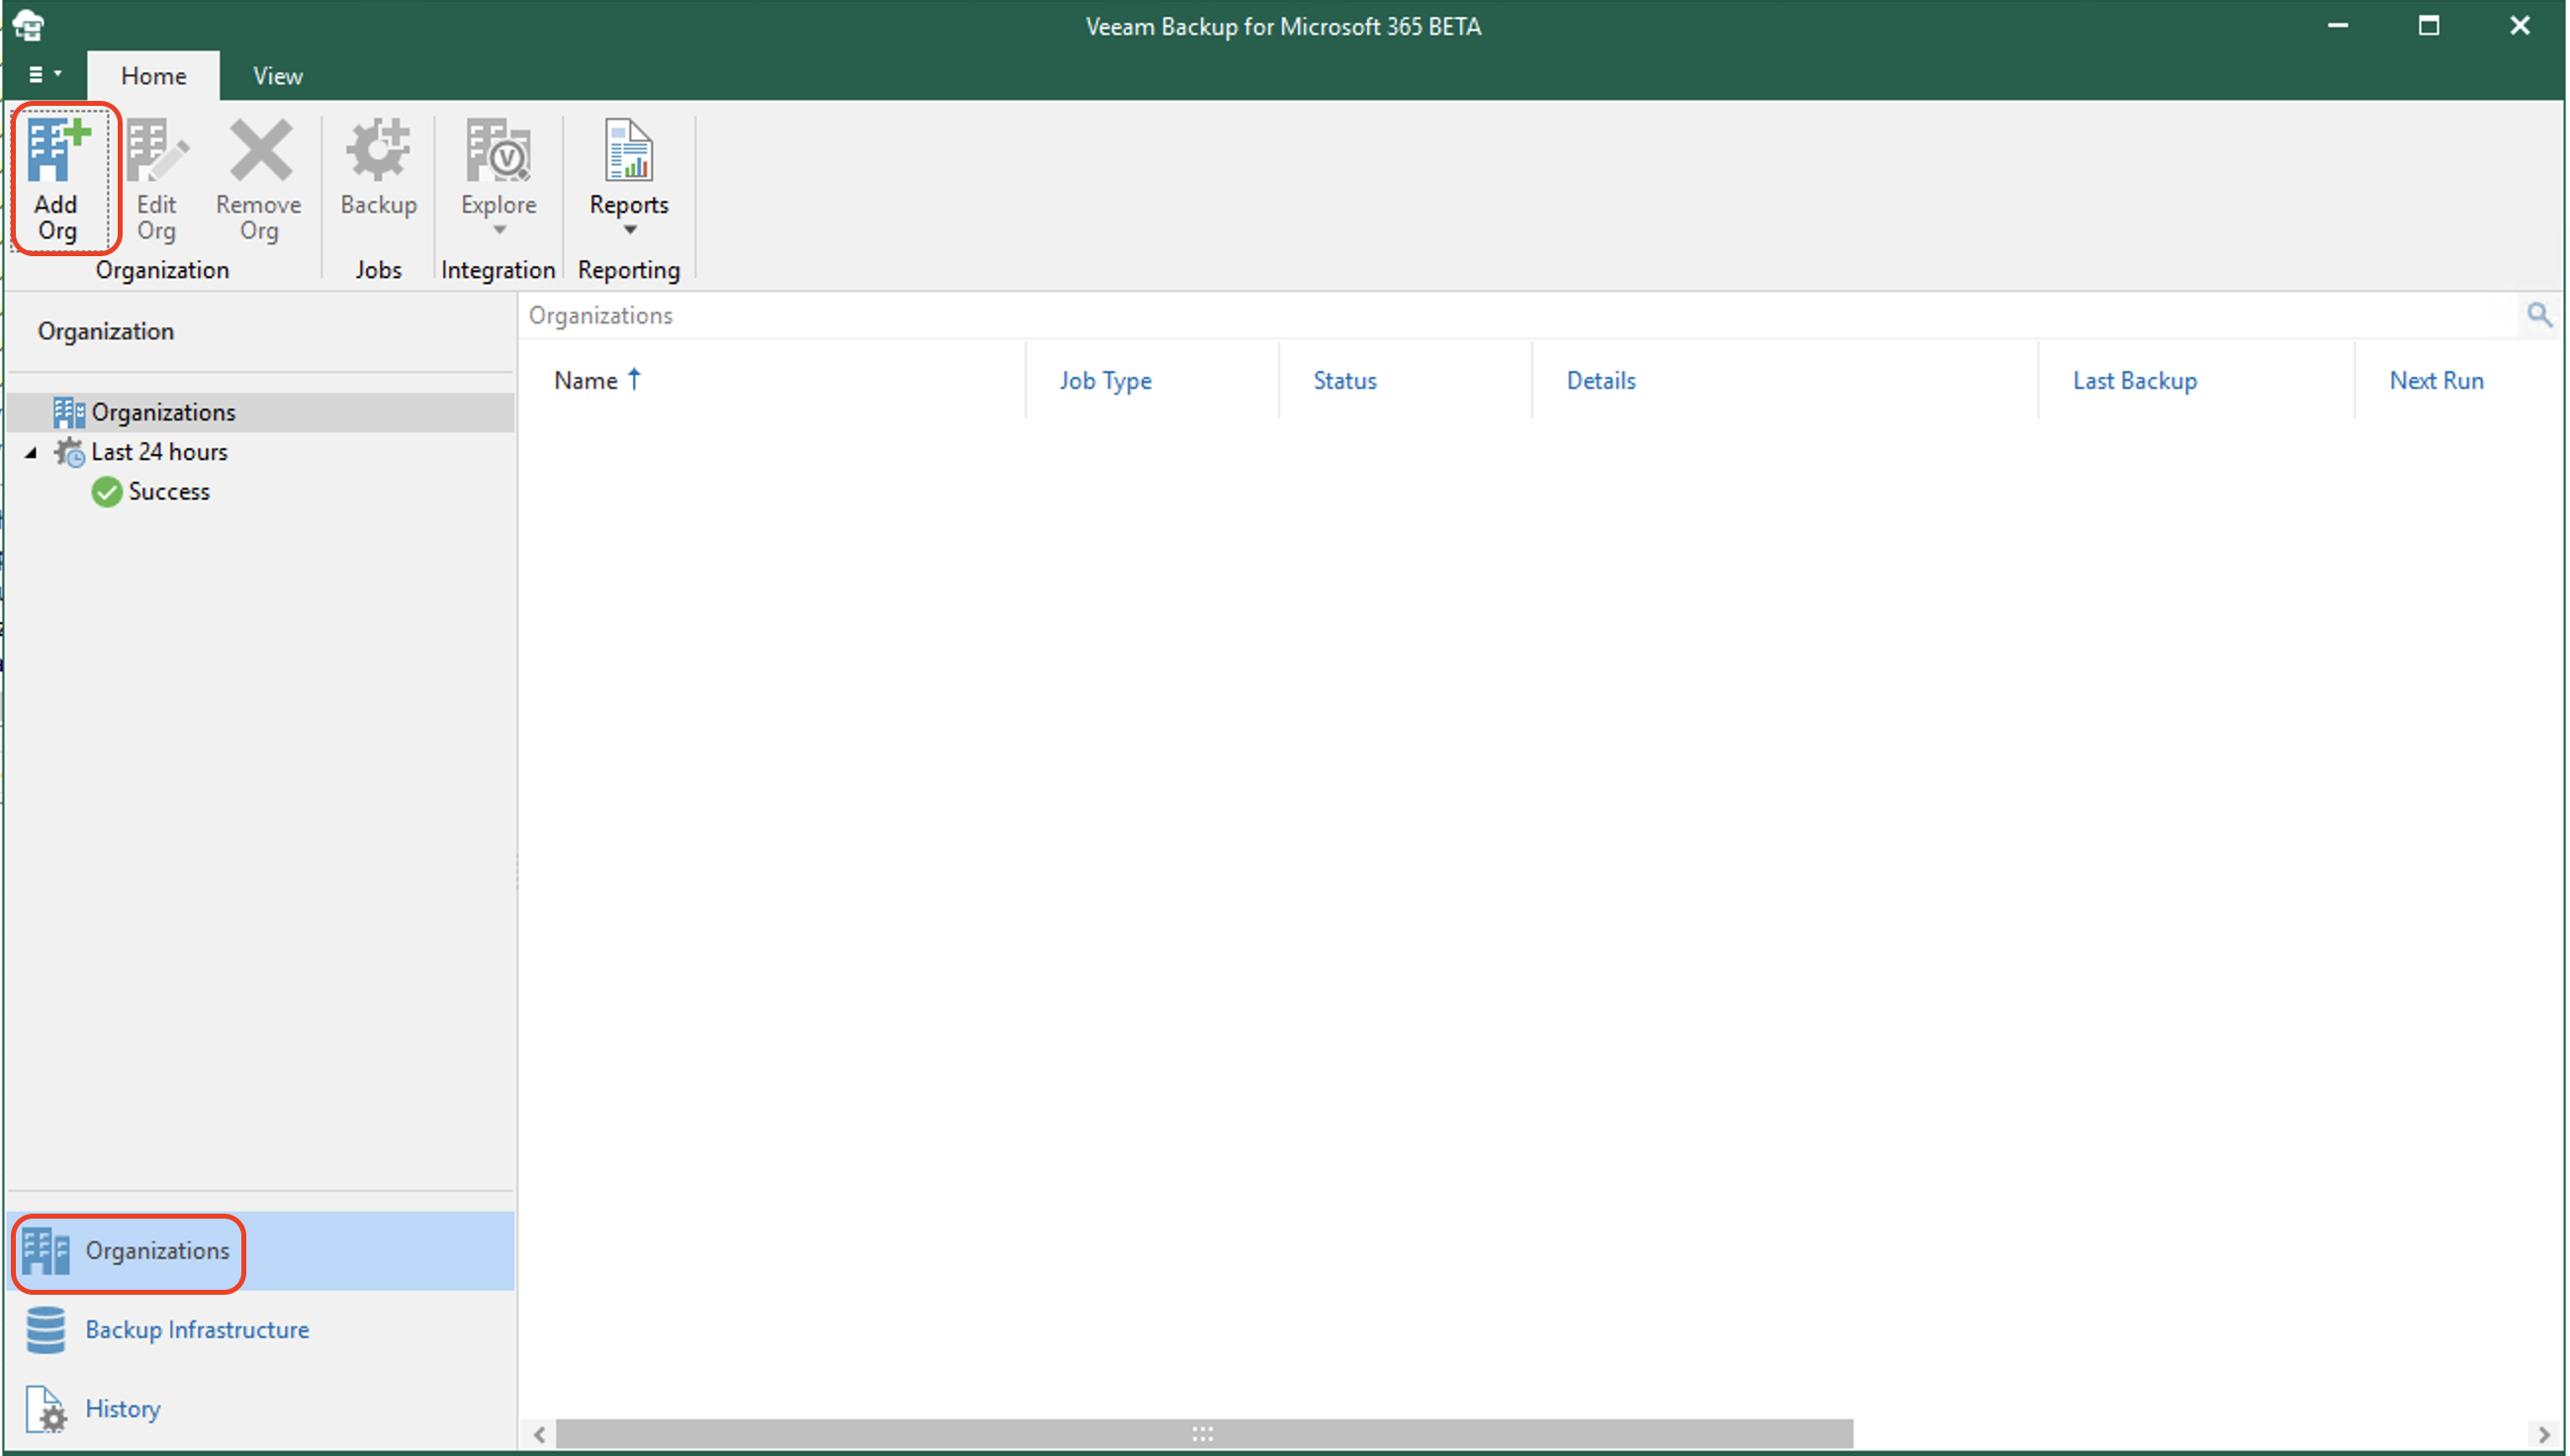
Adding an Organization
Navigate to the Organizations tab and click Organizations. Click Add Org.
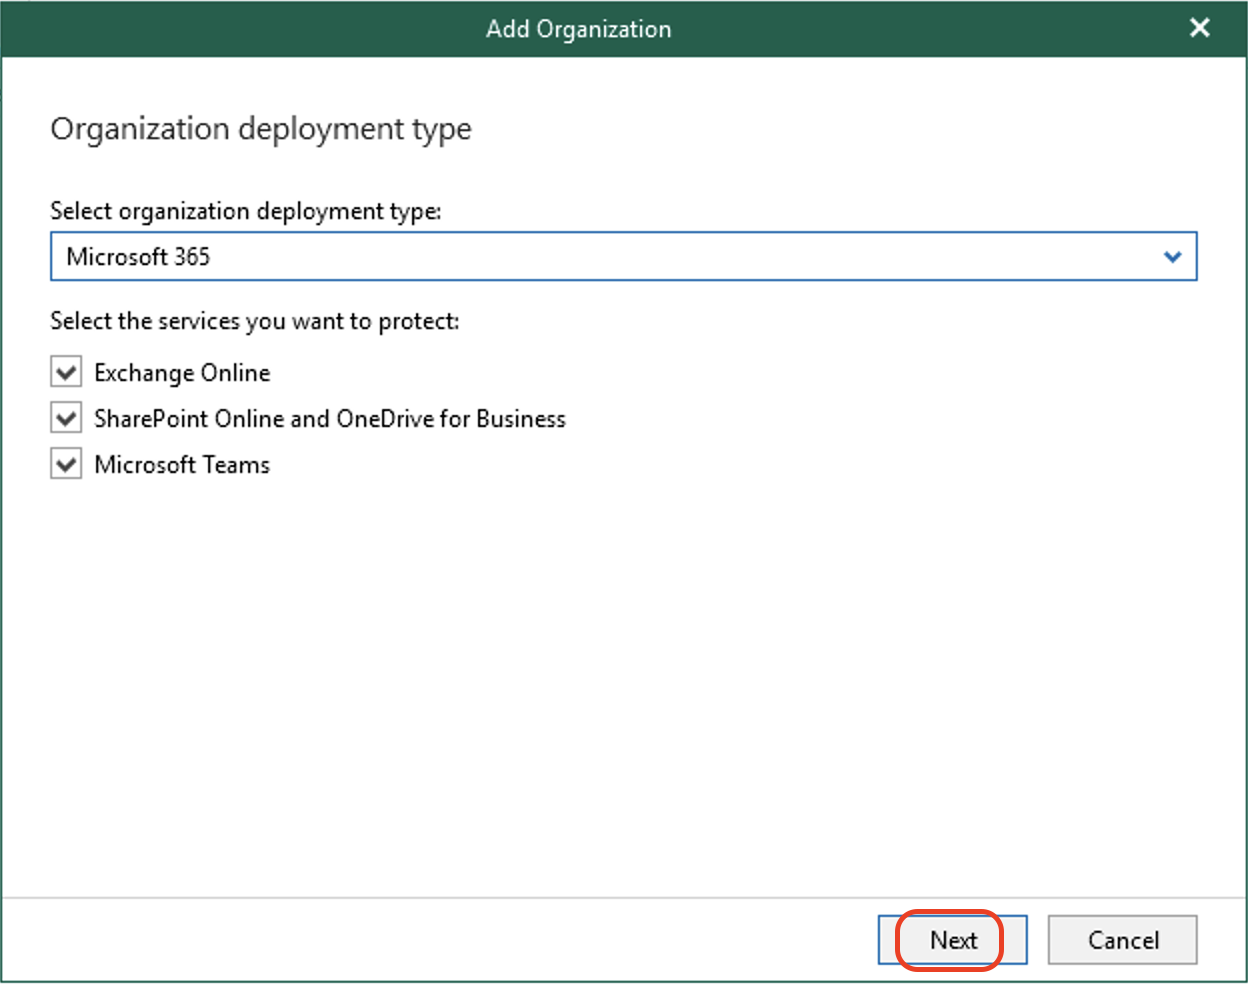
Select Microsoft 365 from the drop-down, then check the boxes for the services you want. Click Next.
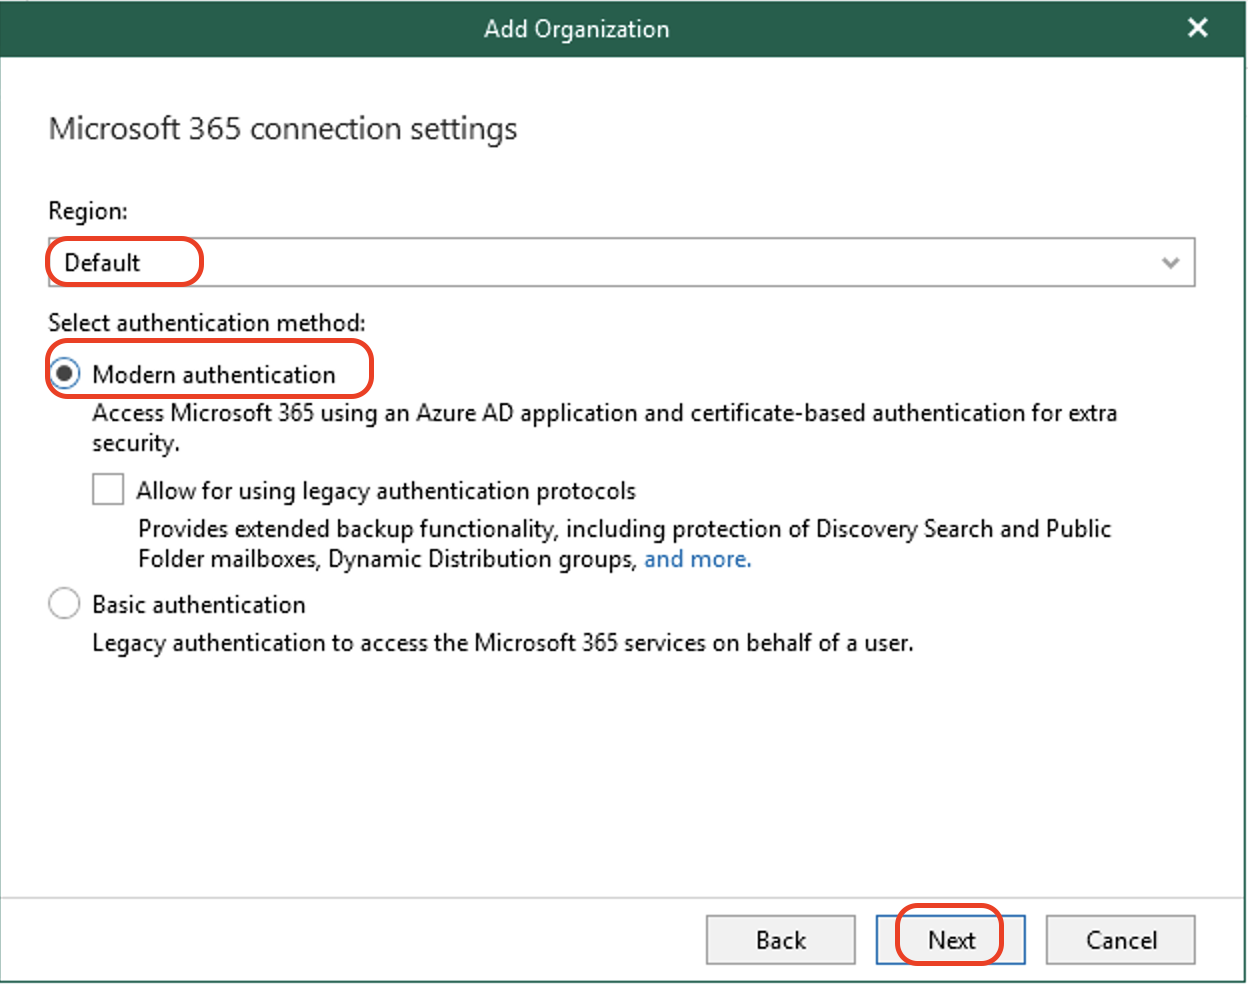
Select the Default region from the drop-down menu. Select Basic Authentication or Modern Authentication, depending on your configuration. Click Next.
In this example, we use Modern Authentication with no legacy authentication protocols.
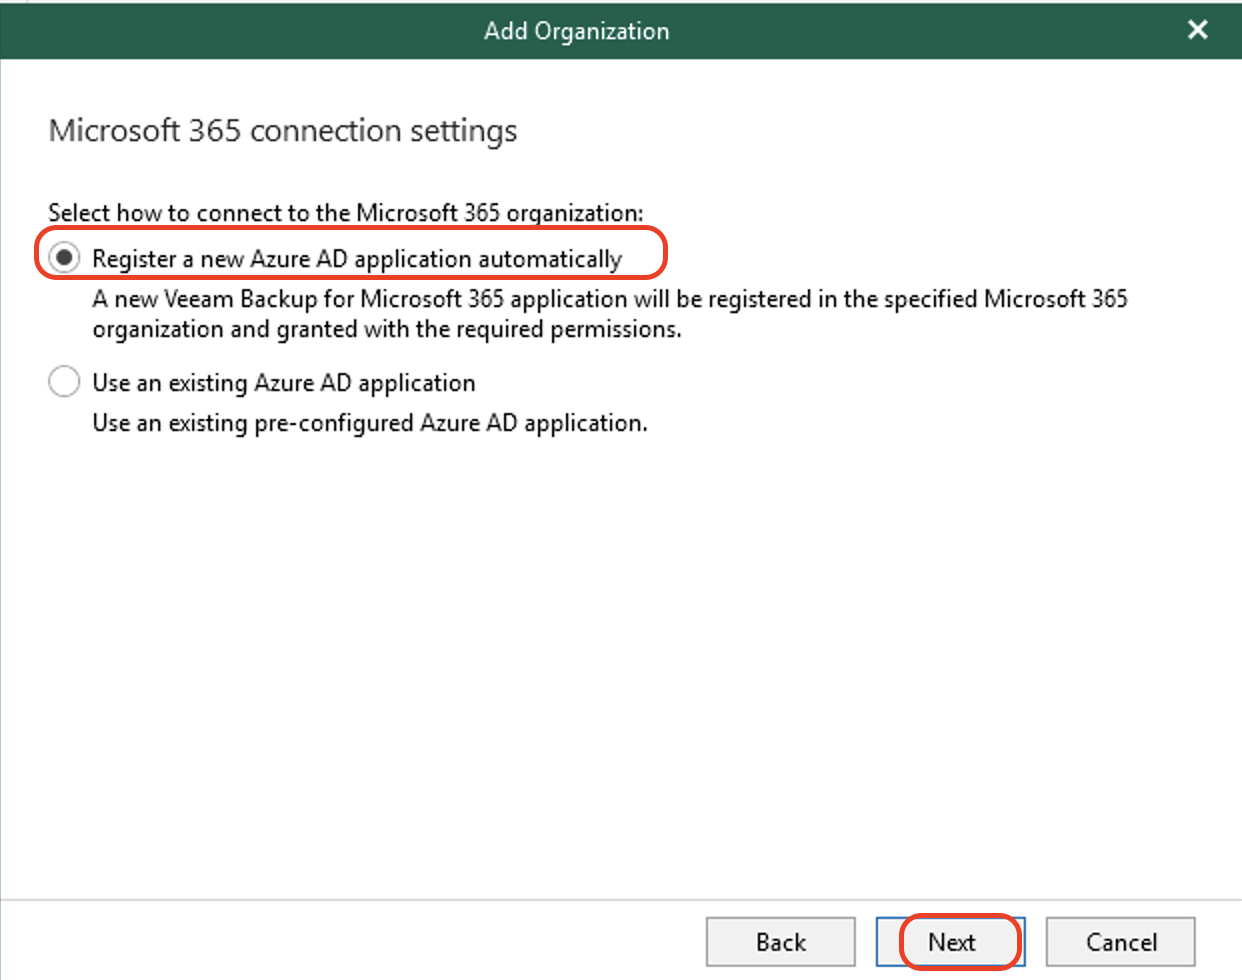
Select Register a new Azure AD application automatically. Click Next.
In this example, we are going to let Veeam register a new Azure AD user with required permissions.
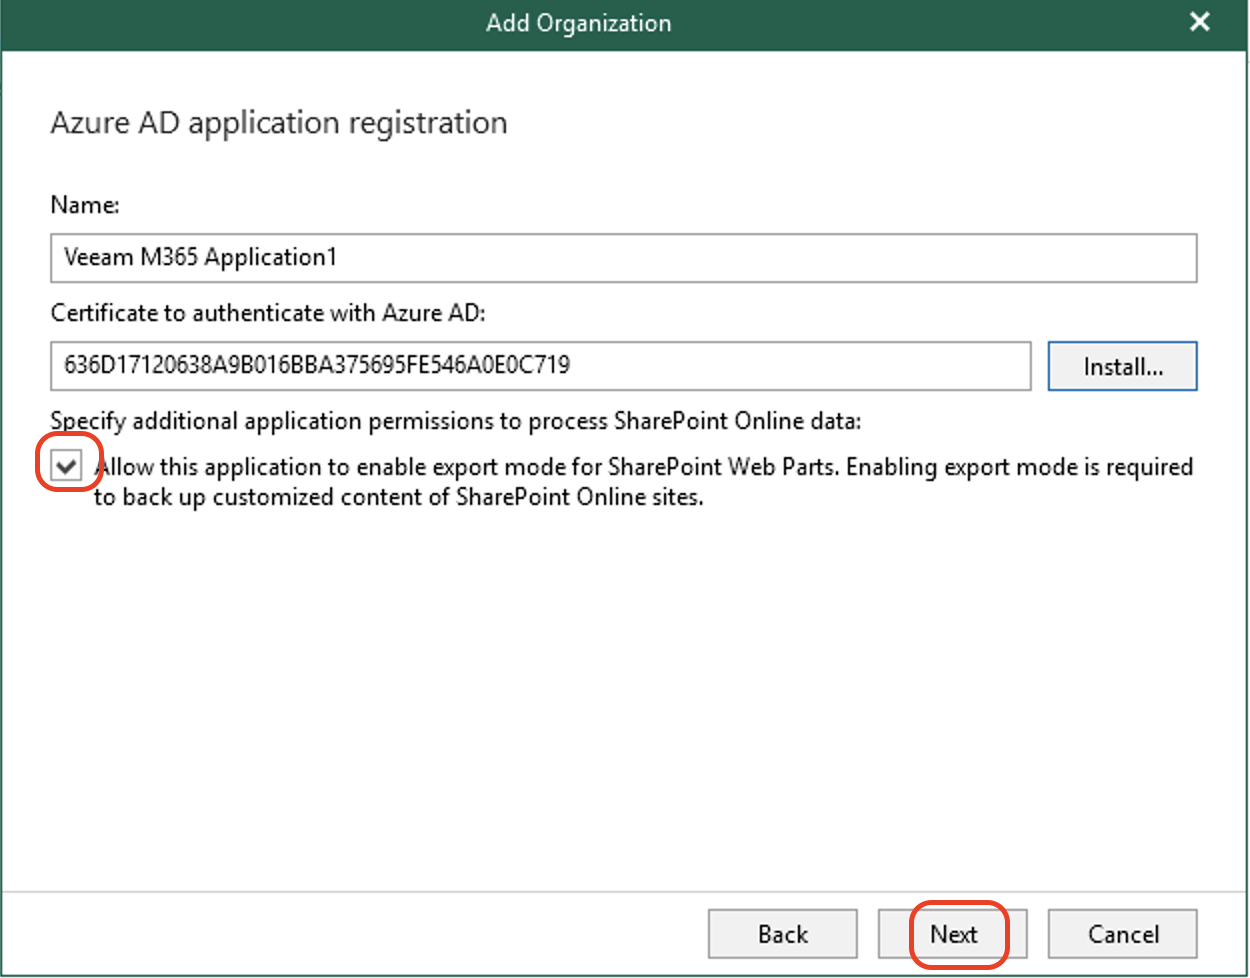
Type in a name for Veeam to register with Azure AD. Click Install.
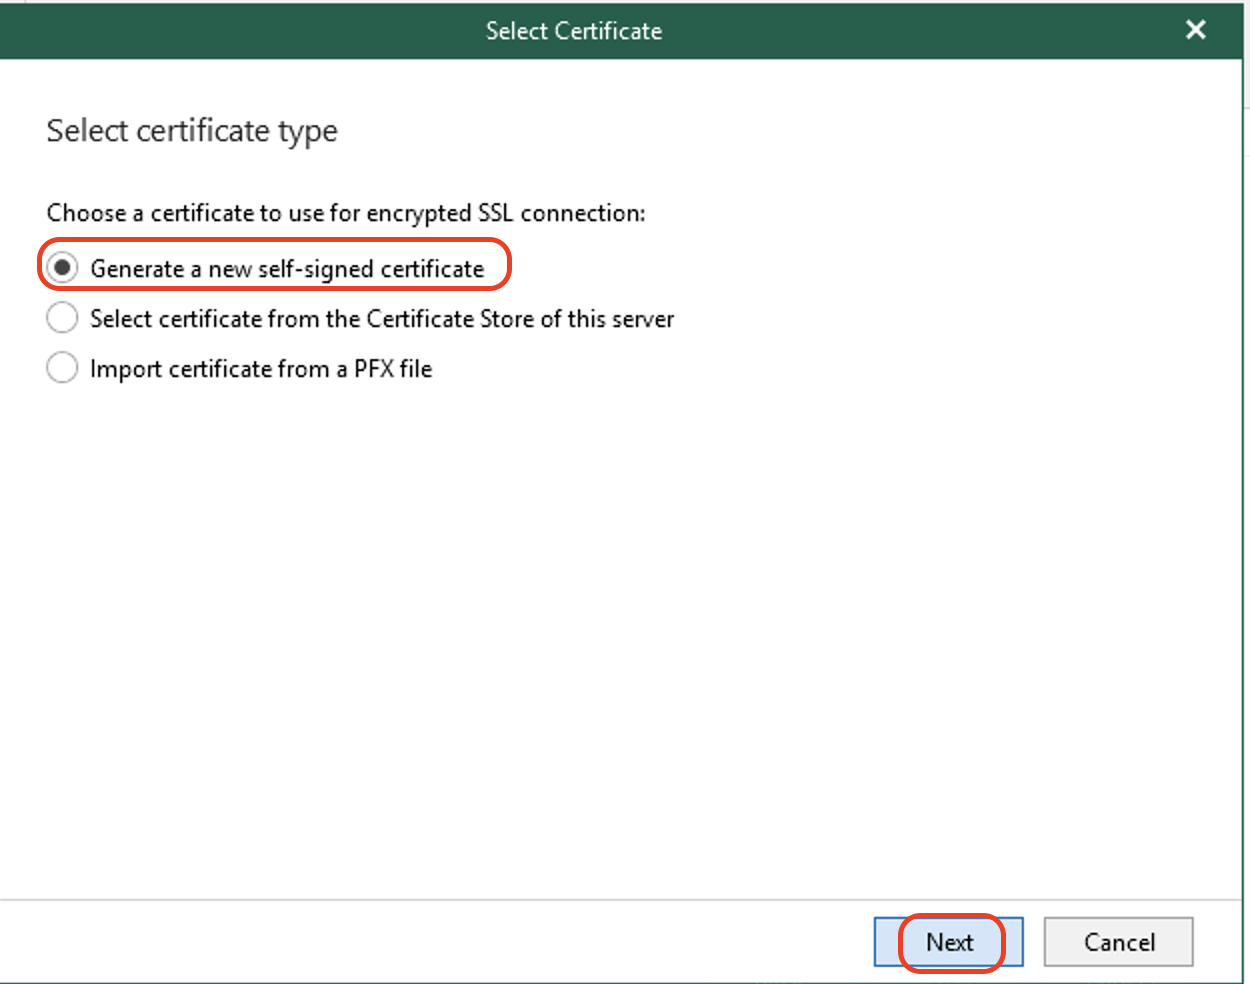
Select your certificate type. Click Next.
We are generating a new, self-signed certificate. Wasabi recommends selecting/importing your own SSL certificates. For more information, refer to Veeam’s Installing SSL Certificates.
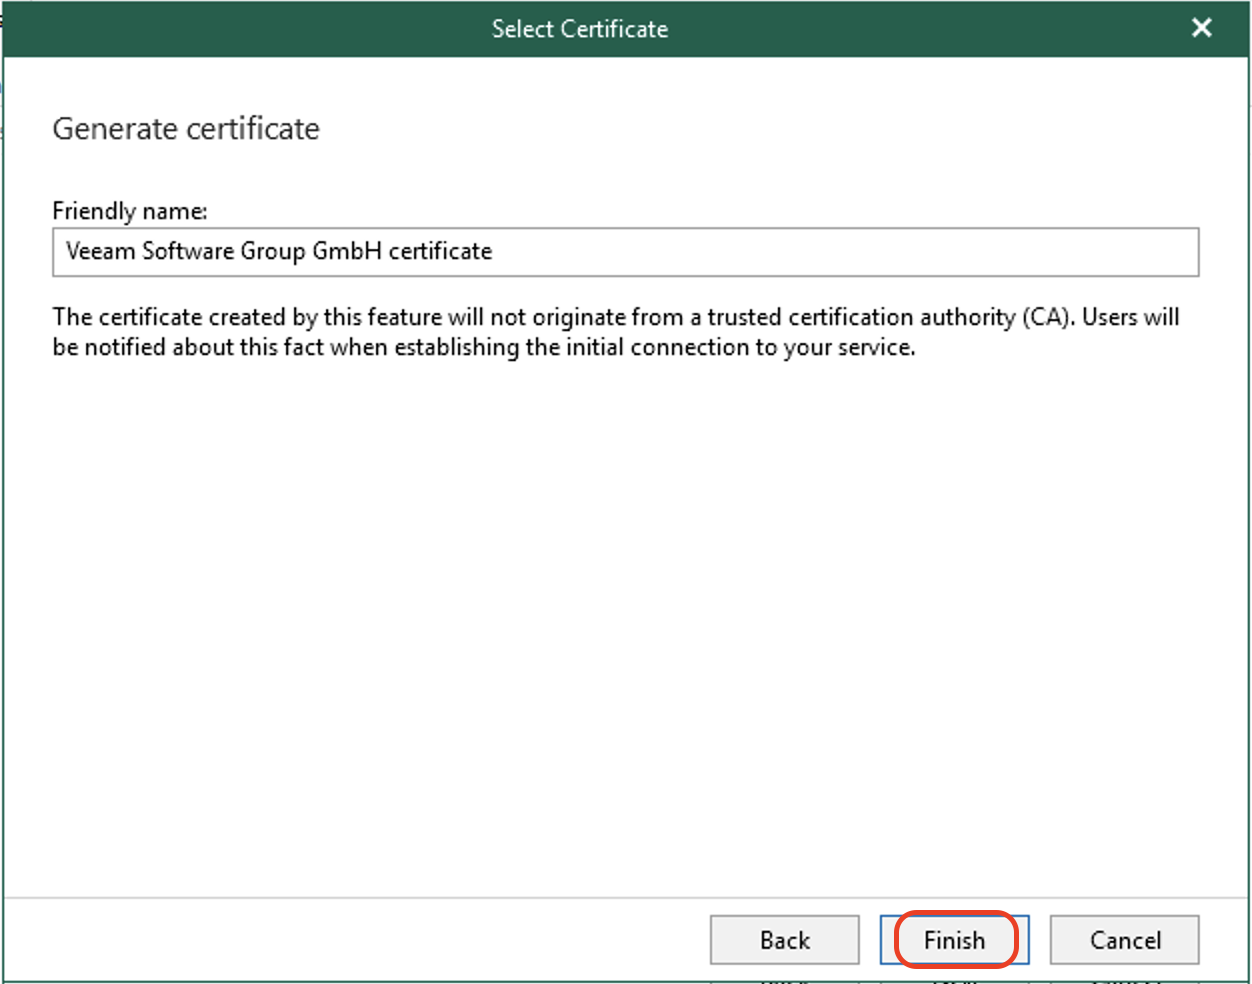
Leave the default certificate name or update it. Click Finish.
The registration information is now complete. Click Next.
Optionally, you can check Allow this application to enable export mode for Sharepoint Web Parts... if you want Veeam to back up customized SharePoint Online sites.
Authenticate with Microsoft 365 and click Copy Code. Click the URL provided.
Once you click the URL (https://microsoft.com/devicelogin), a browser window will pop up. You must complete the authentication with Microsoft 365 using the browser window.
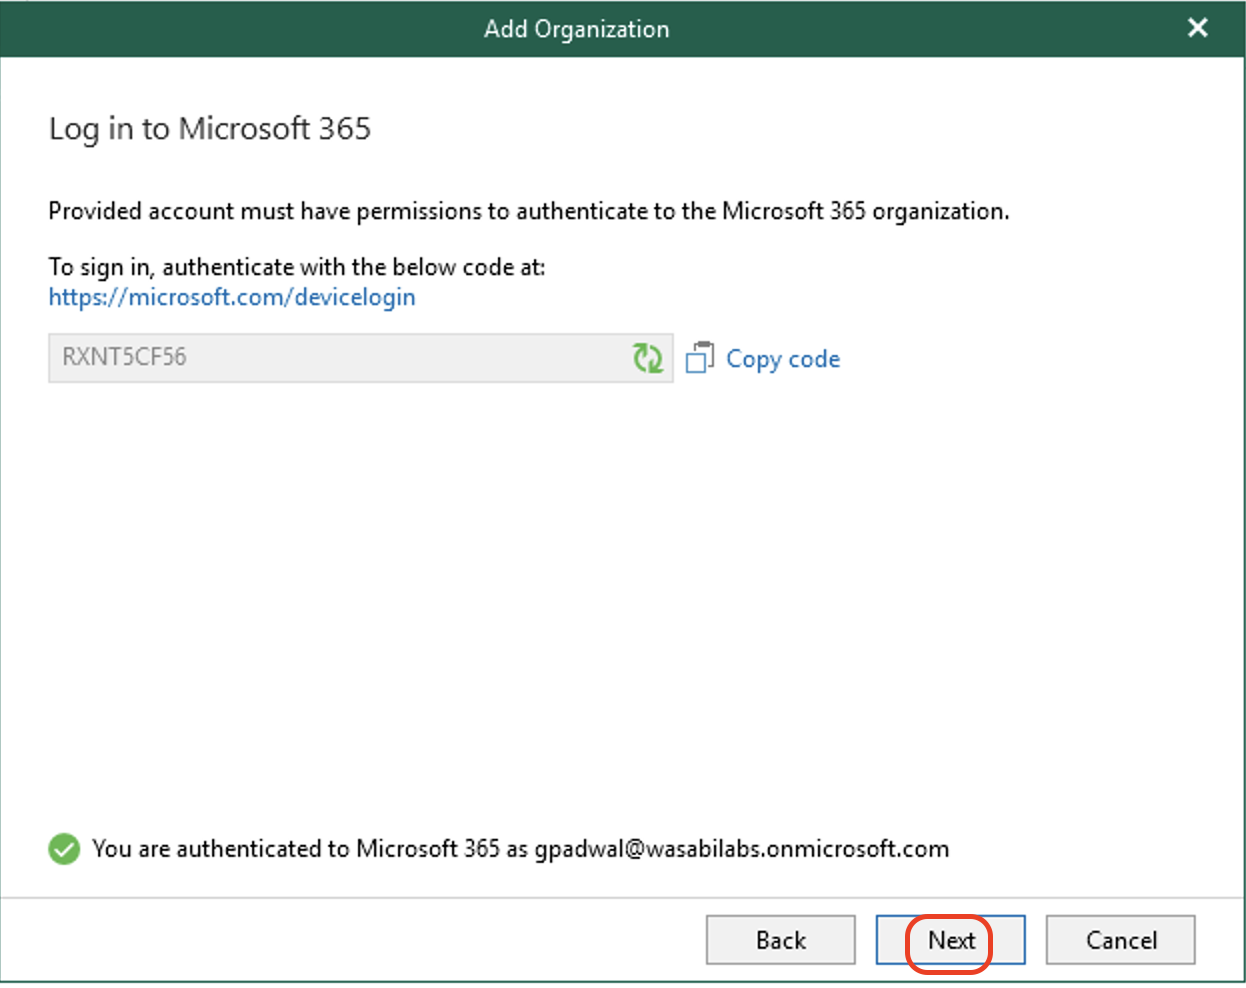
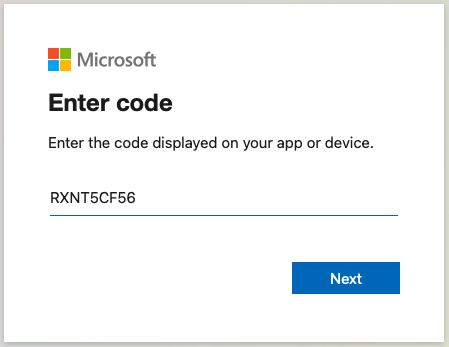
Enter the code previously copied. Click Next.
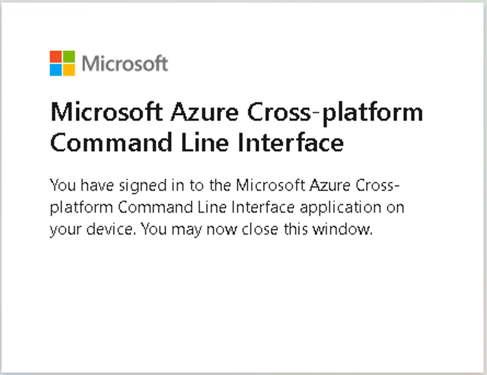
This screen shows that you have completed the authentication process. You may now close the window.
If you have not previously set up two-factor authentication to your AD account, you may have to go through the process of setting up two-factor authentication. Once you finish setting up two-factor authentication, you should see a successful sign-in to the Command Line Interface Application, and can close the window.
If you have multiple Microsoft accounts signed in, select the one that you need to add to Veeam for backup. Click the account name to do so.
Return to the Veeam Organization Setup. Click Next.
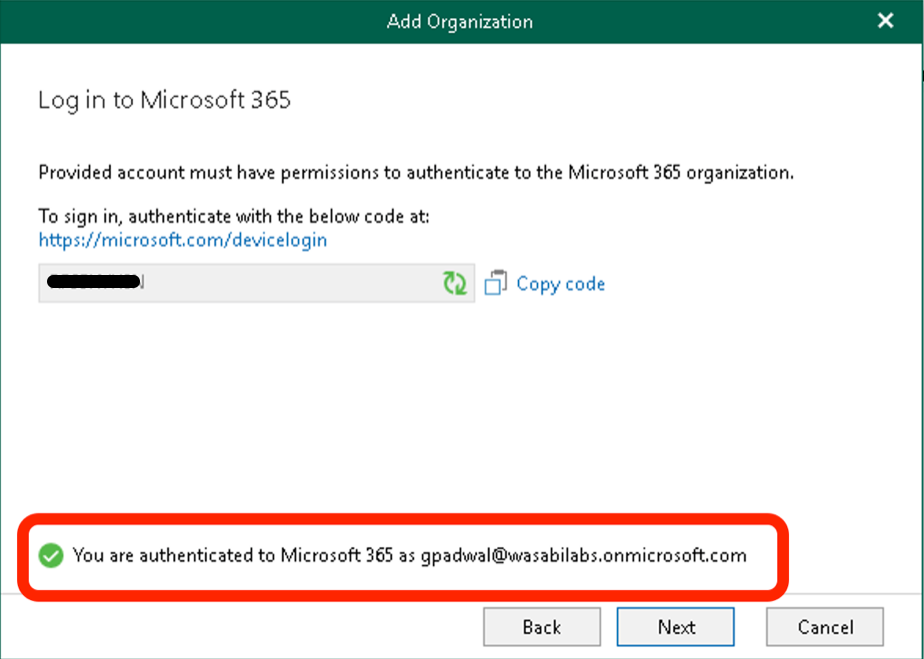
You should see a green checkbox that says you are now authenticated to Microsoft 365. If not, work with your Veeam Support Team and Microsoft Support Team to resolve the issue.
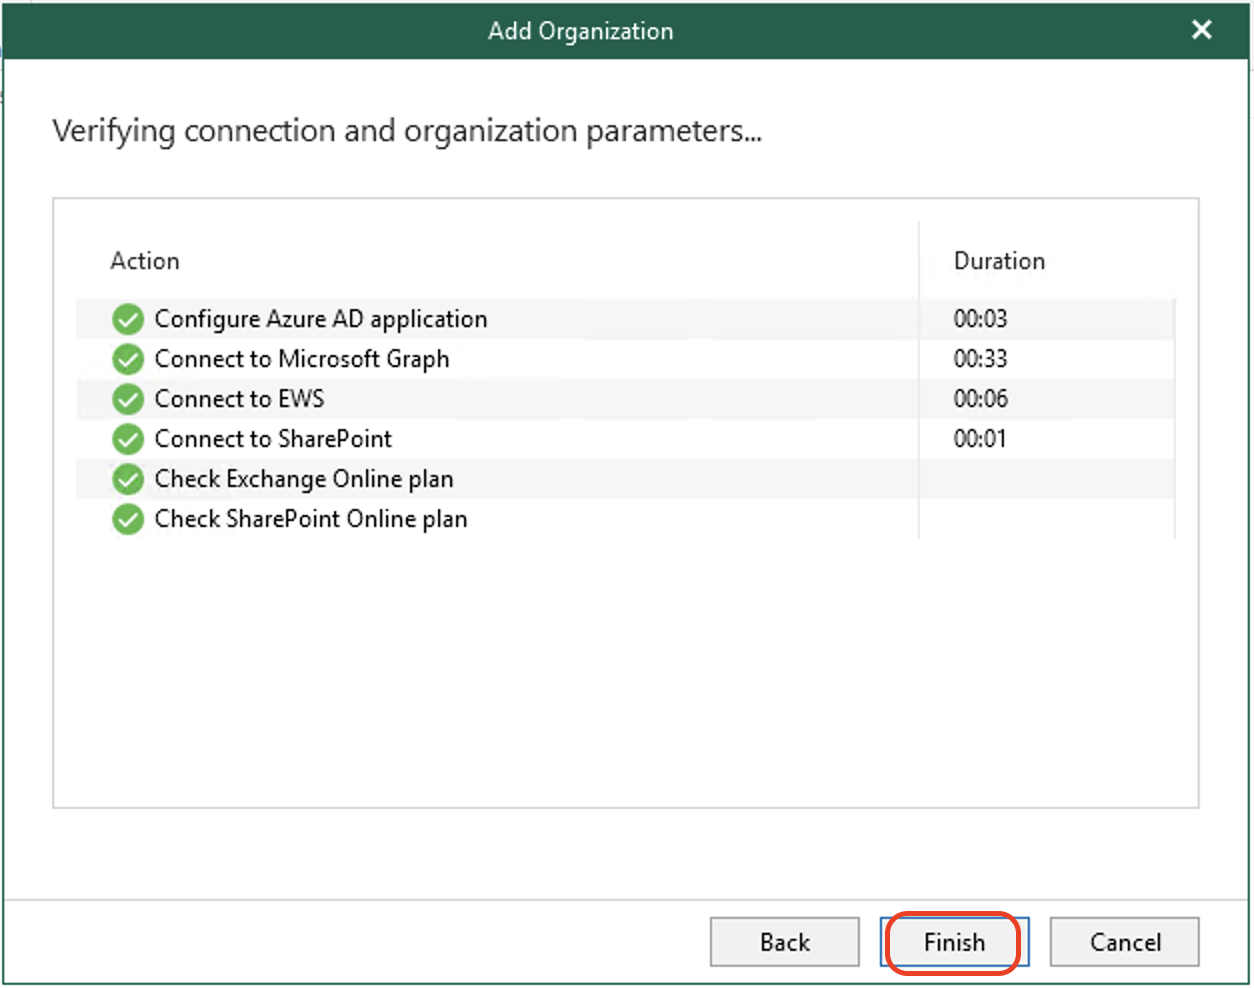
Verify connection and organization parameters. Click Finish.
All of these steps should complete successfully. If not, work with your Veeam Support Team and Microsoft Support Team to resolve the issue.
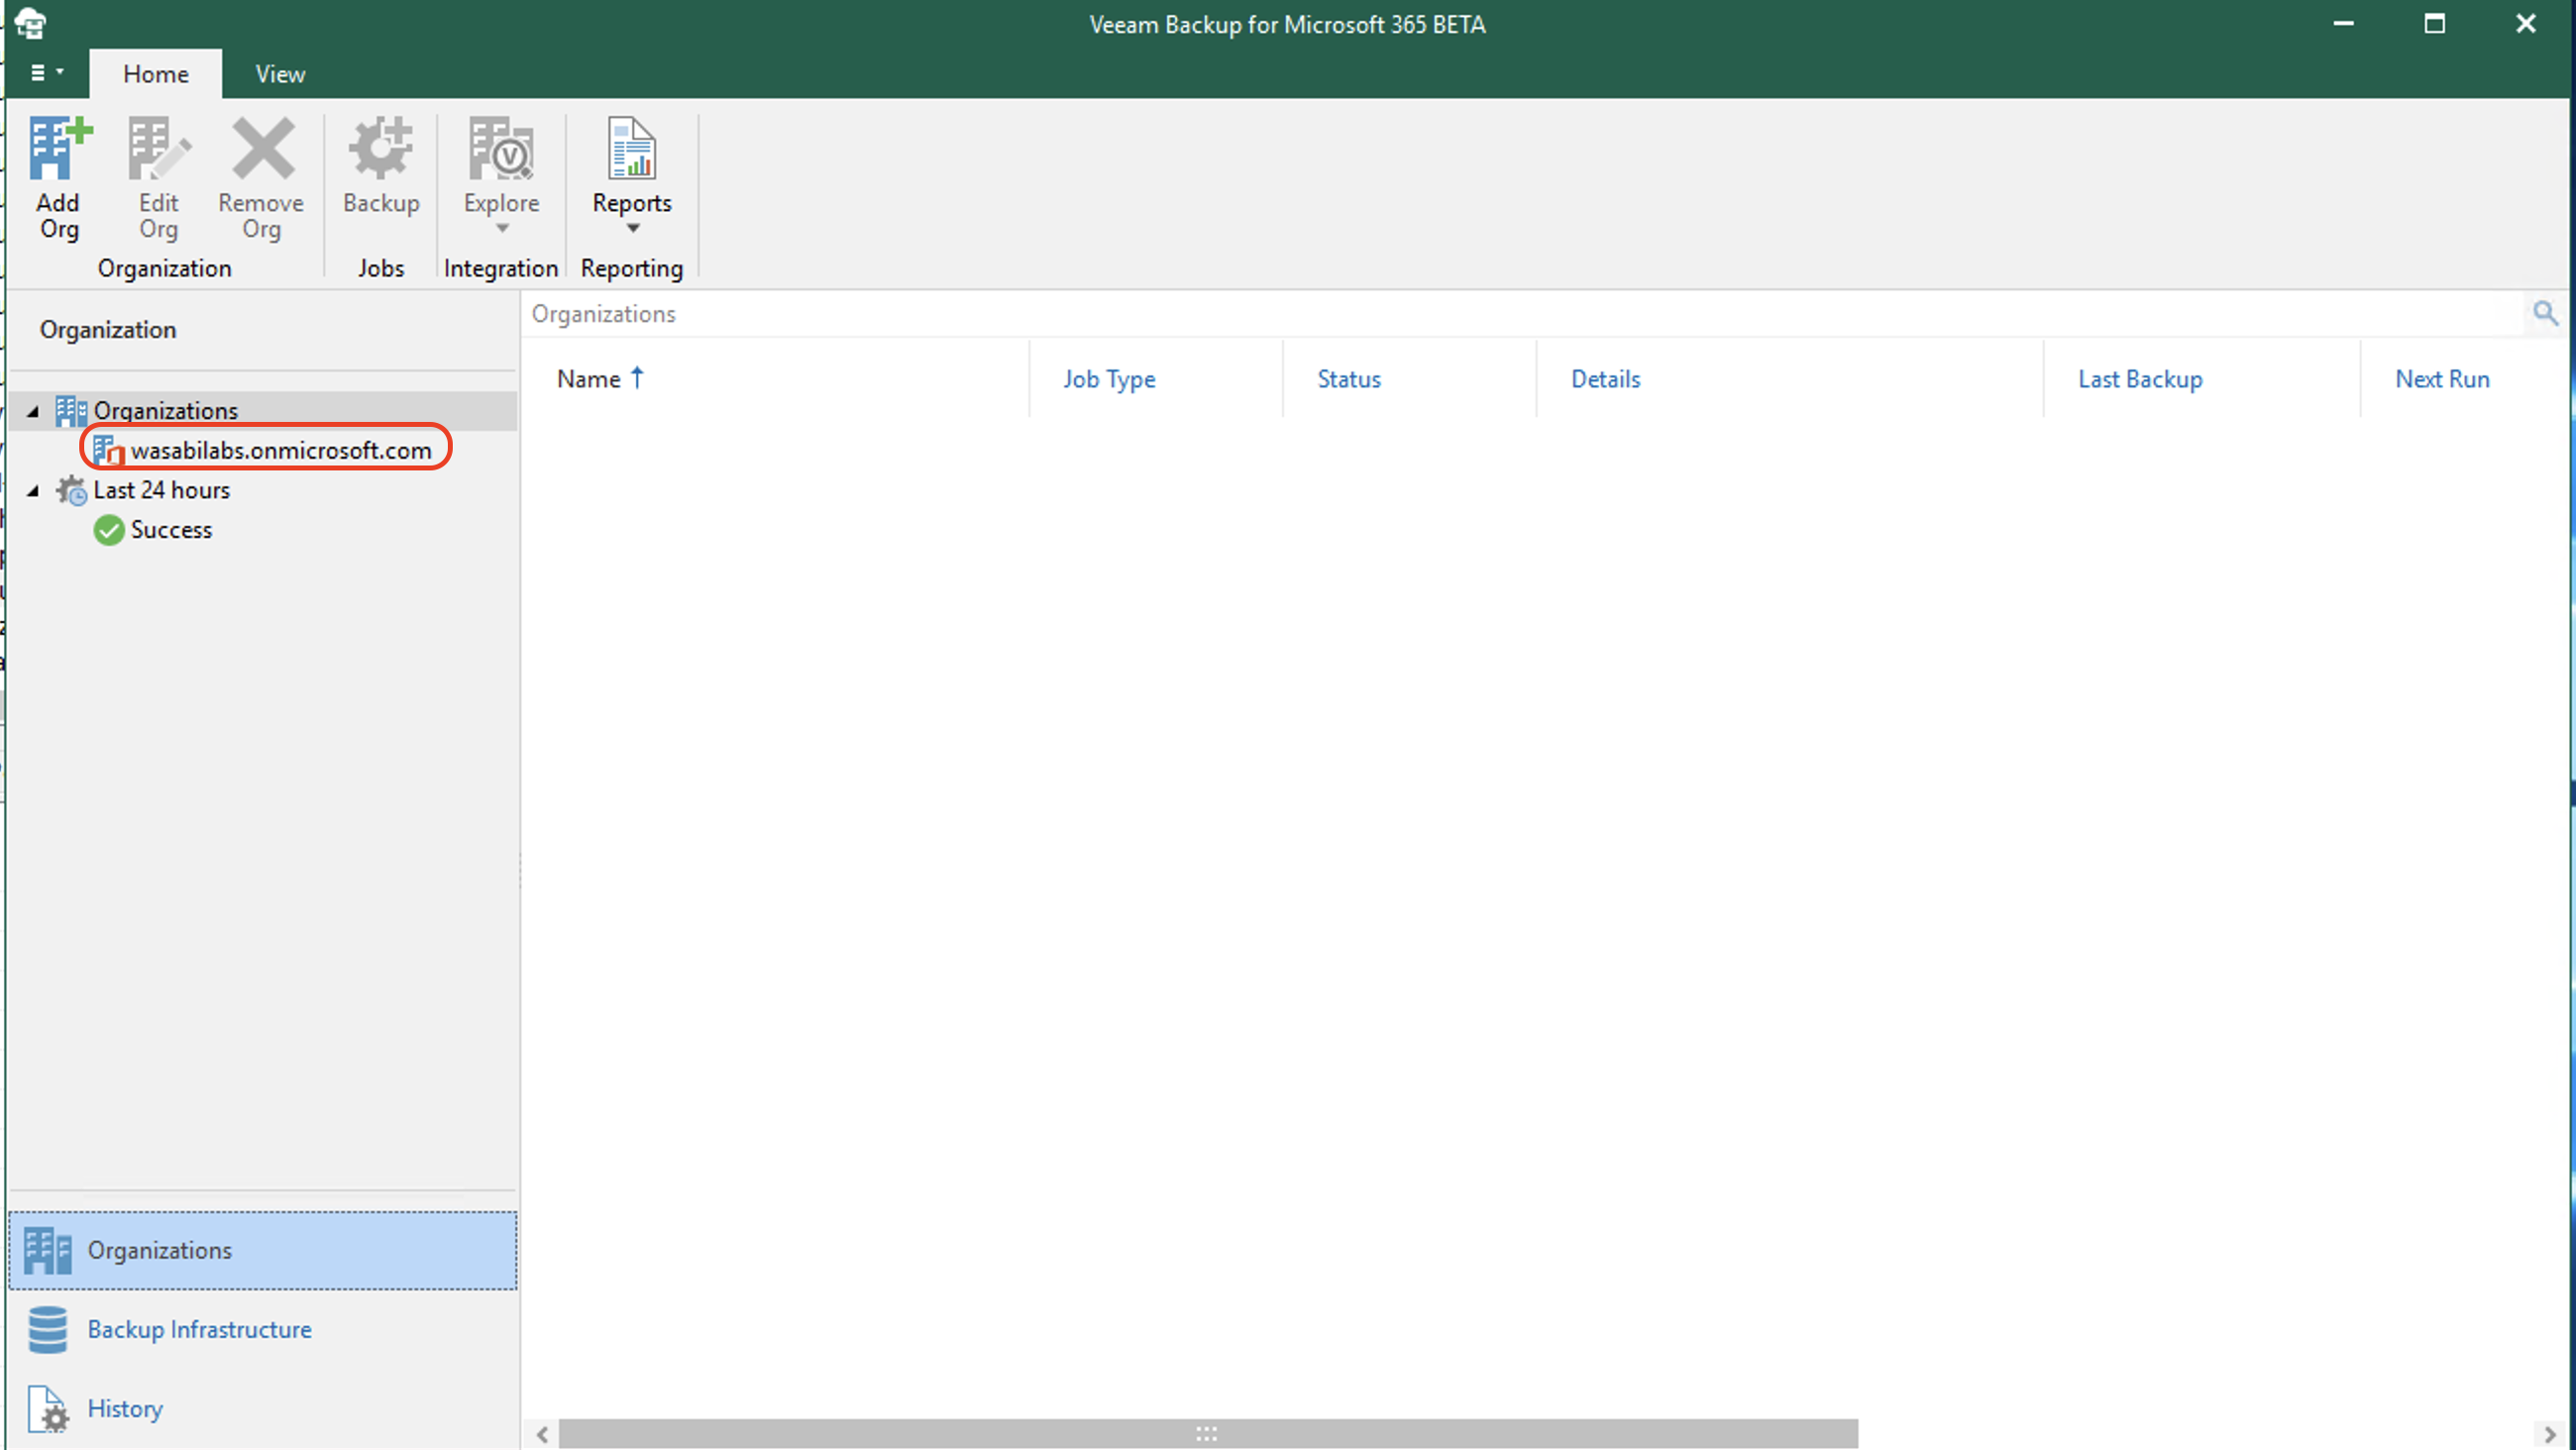
You will now see your newly created Organization in the list.
Adding Wasabi Hot Cloud Storage
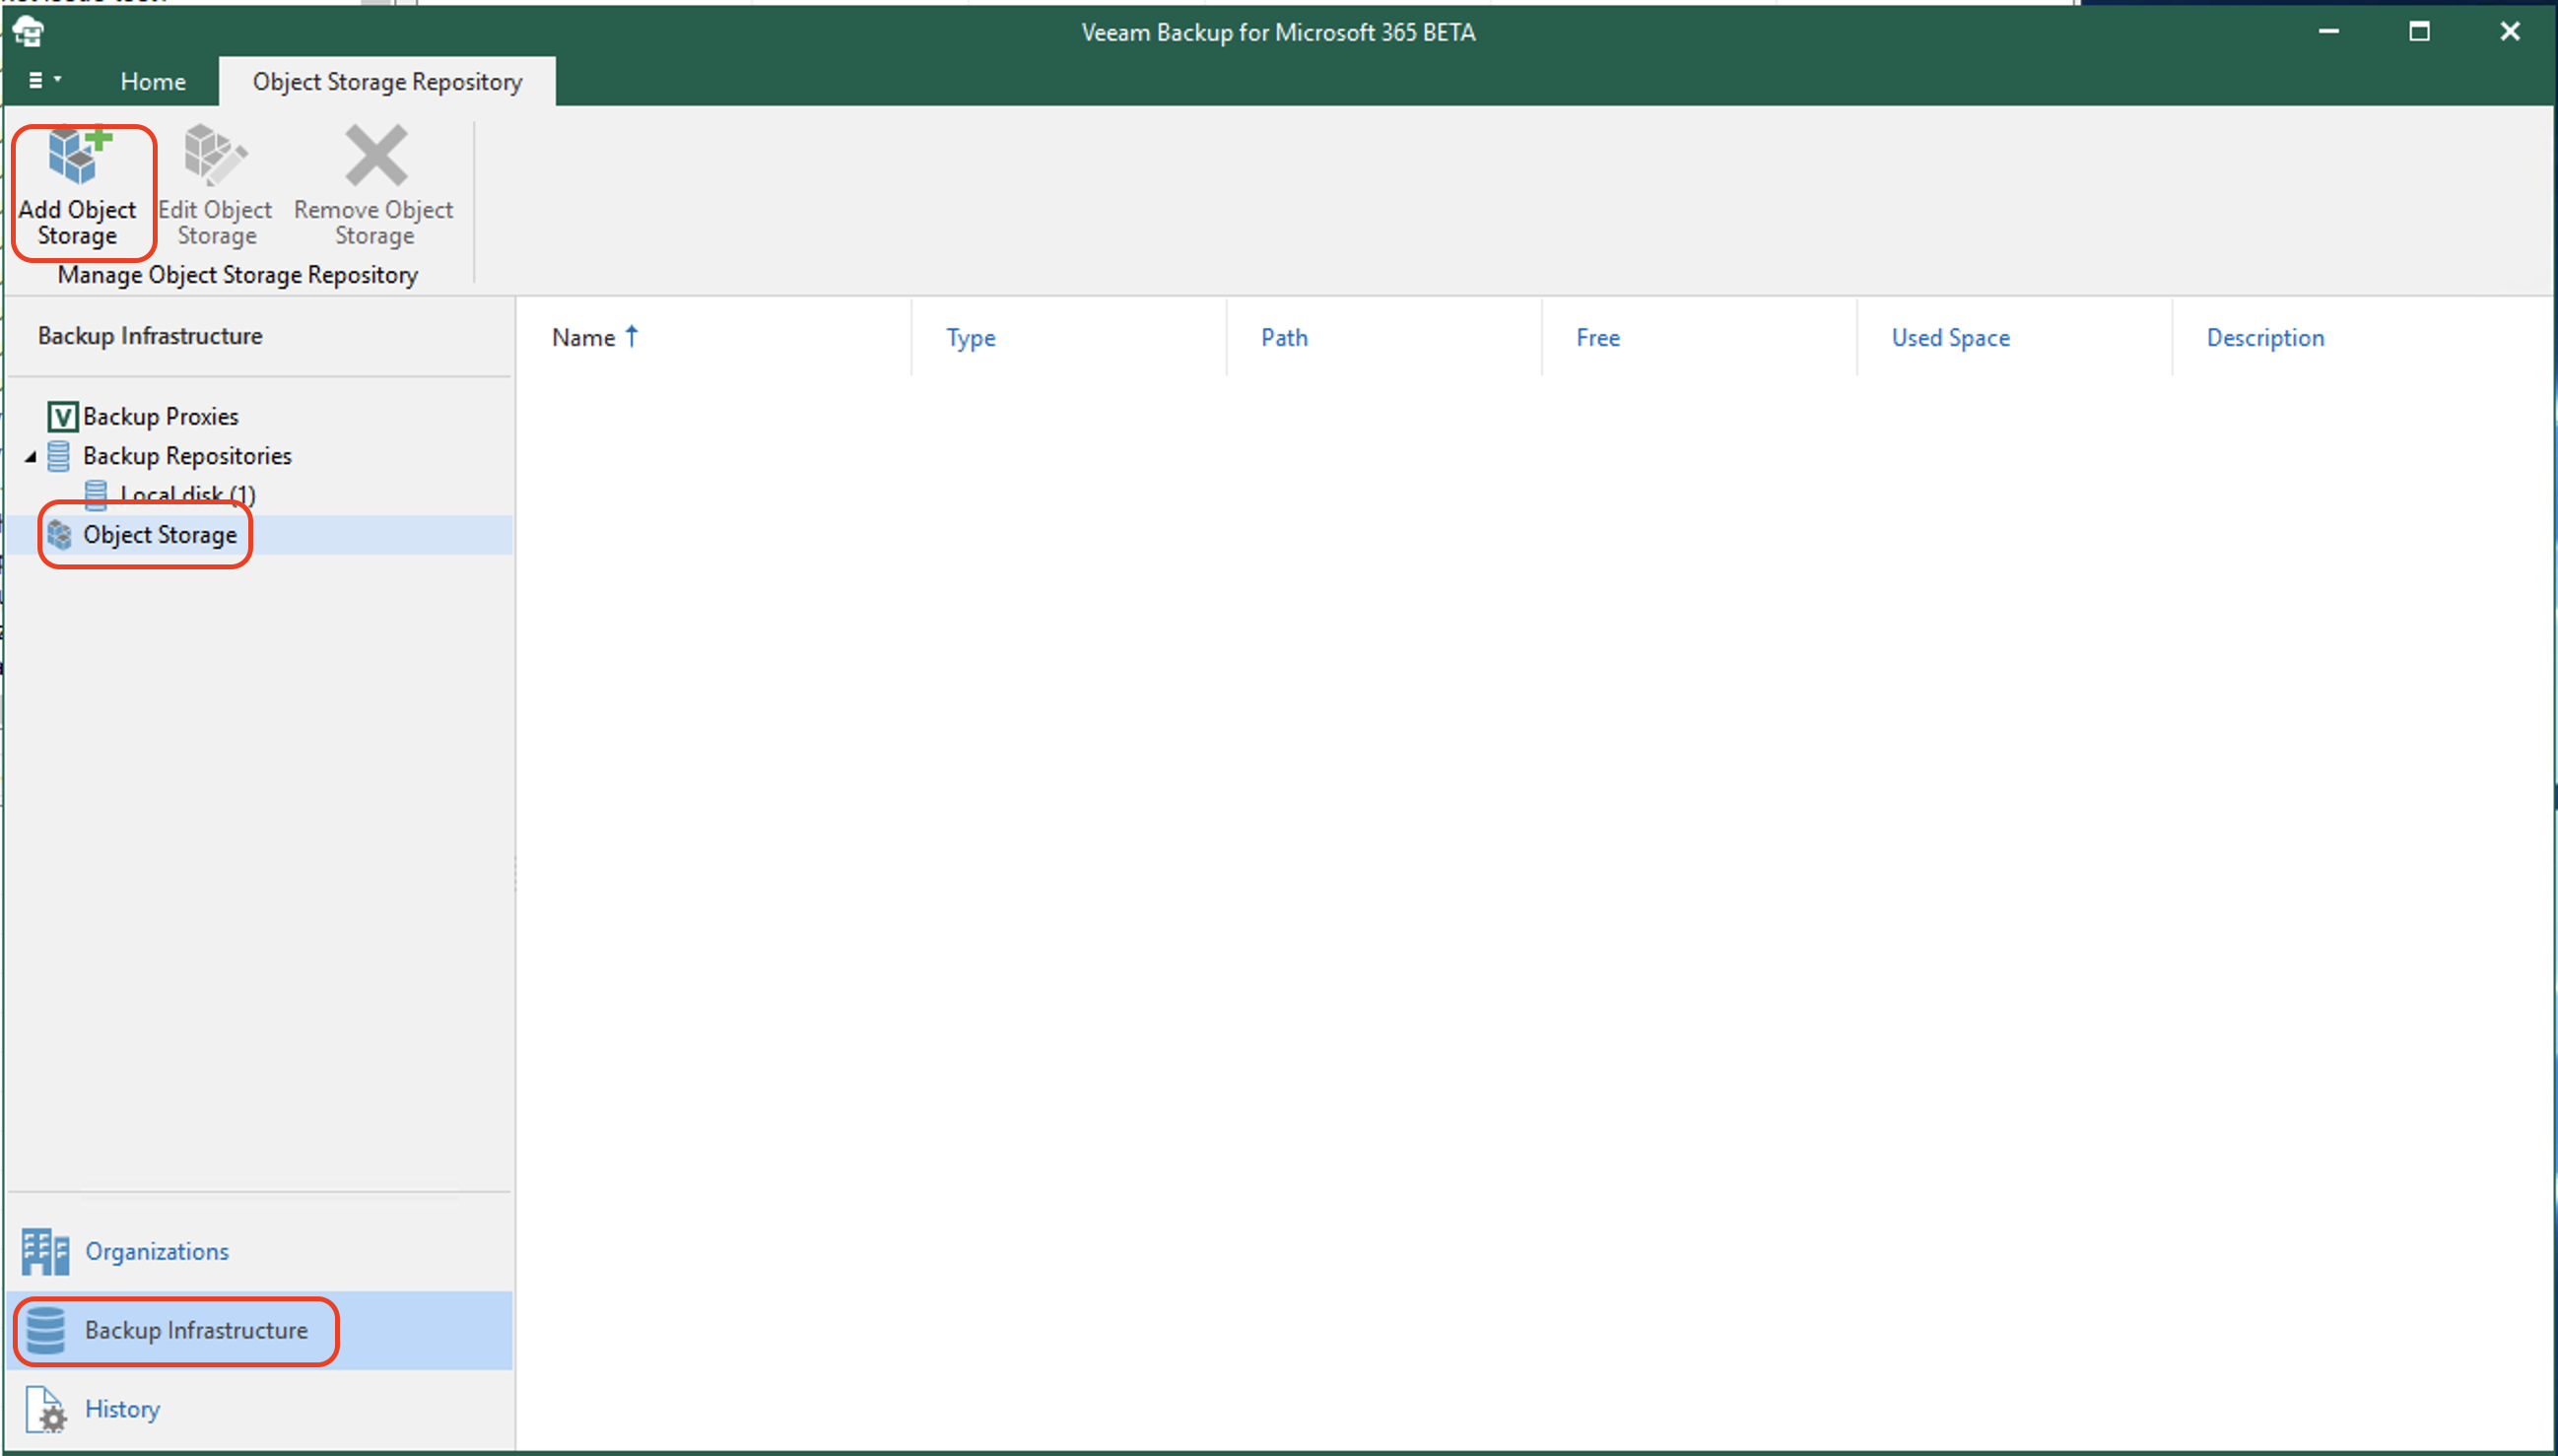
Navigate to the Backup Infrastructure tab. Click Object Storage, then click Add object storage.
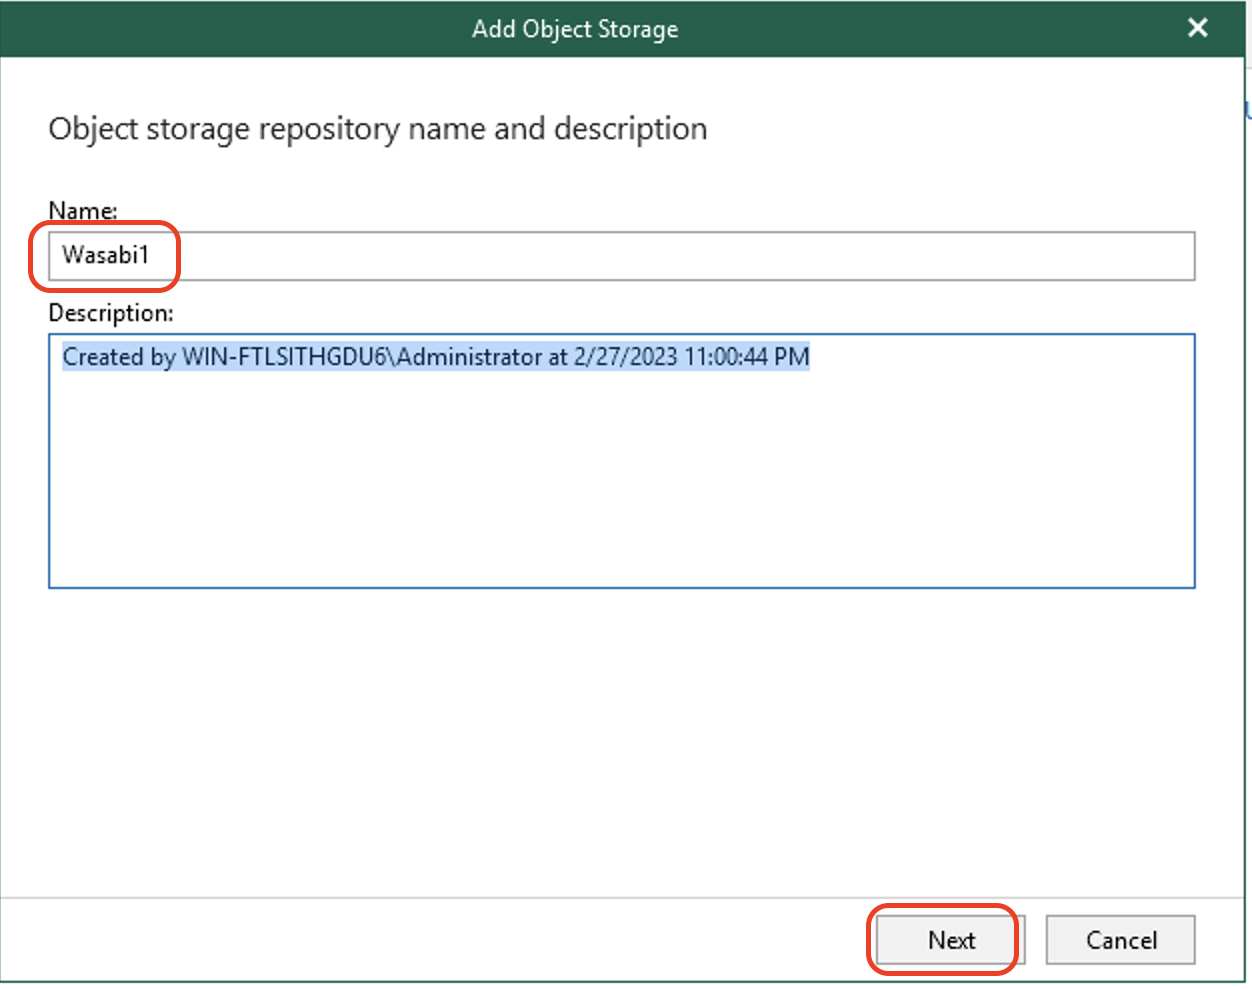
Input a Name and Description. Click Next.
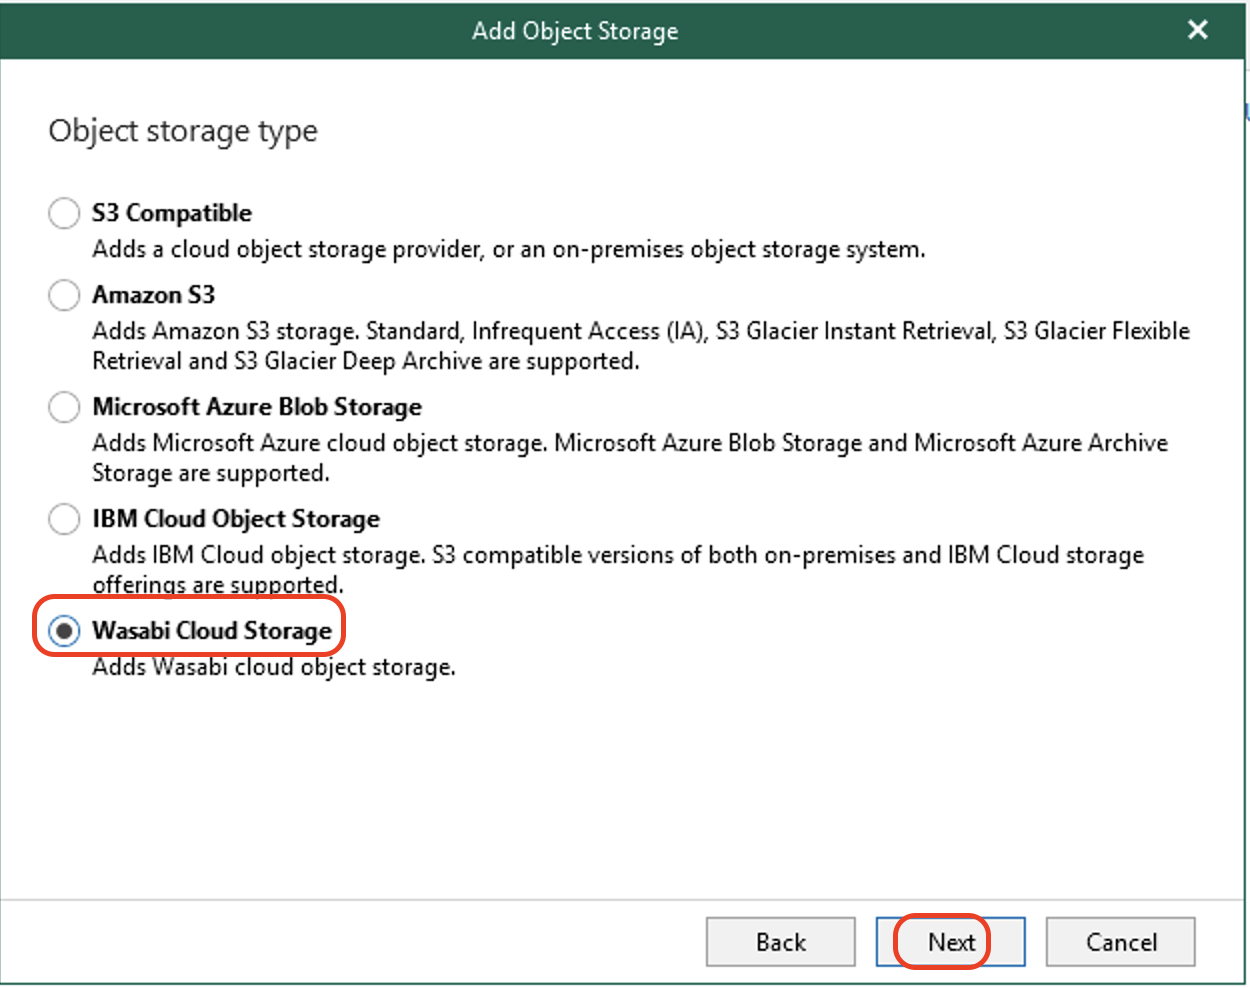
Select Wasabi Cloud Storage. Click Next.
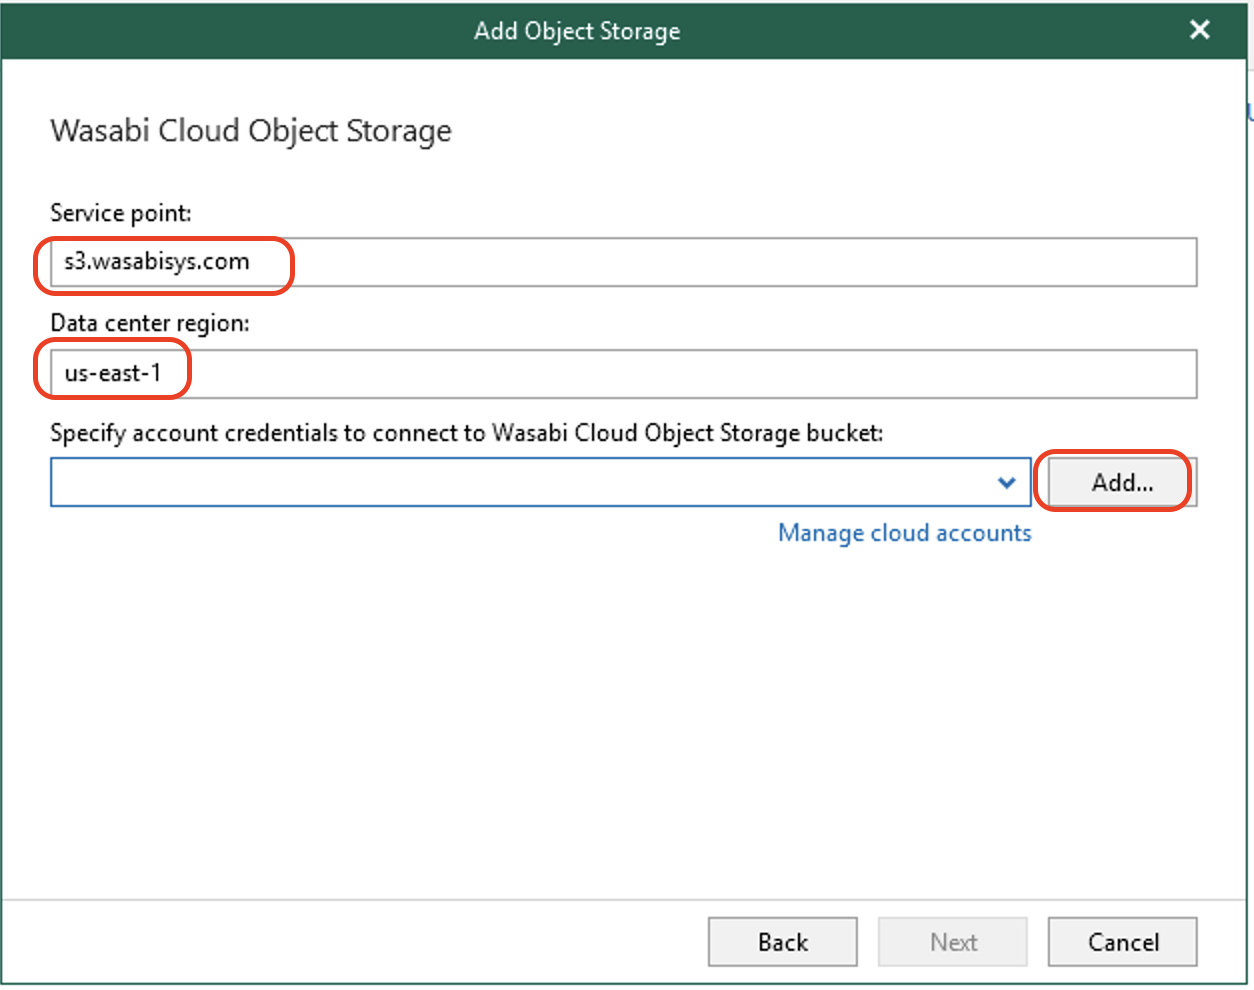
Enter your Service URL and the region to use. Click Add to add your Wasabi Access and Secret Keys. Click Next.
This configuration example uses Wasabi's us-east-1 storage region. To use other Wasabi storage regions, use the appropriate Wasabi service URL as described in Wasabi Service URLs.
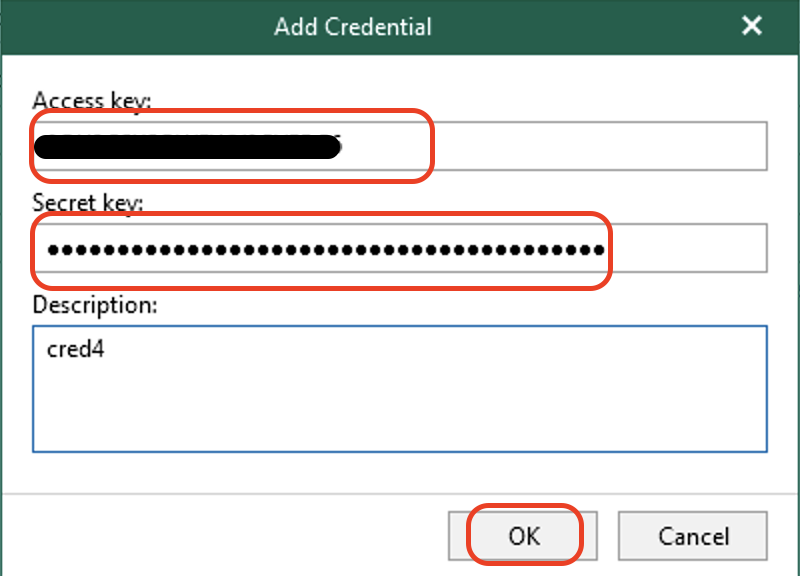
Input the Access key and Secret key for your Wasabi bucket. Click OK.
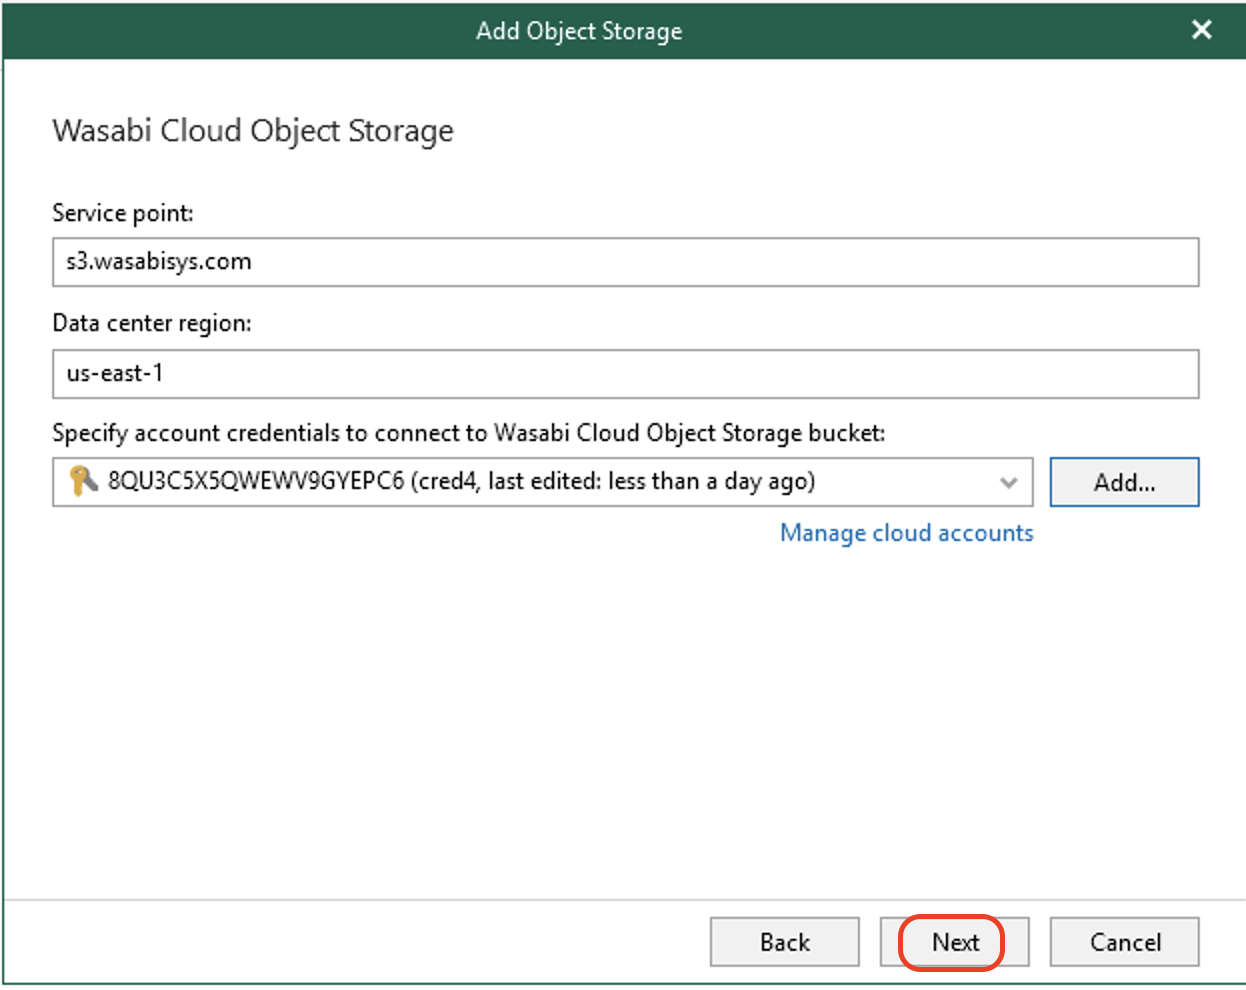
Once the credentials are added, click Next.
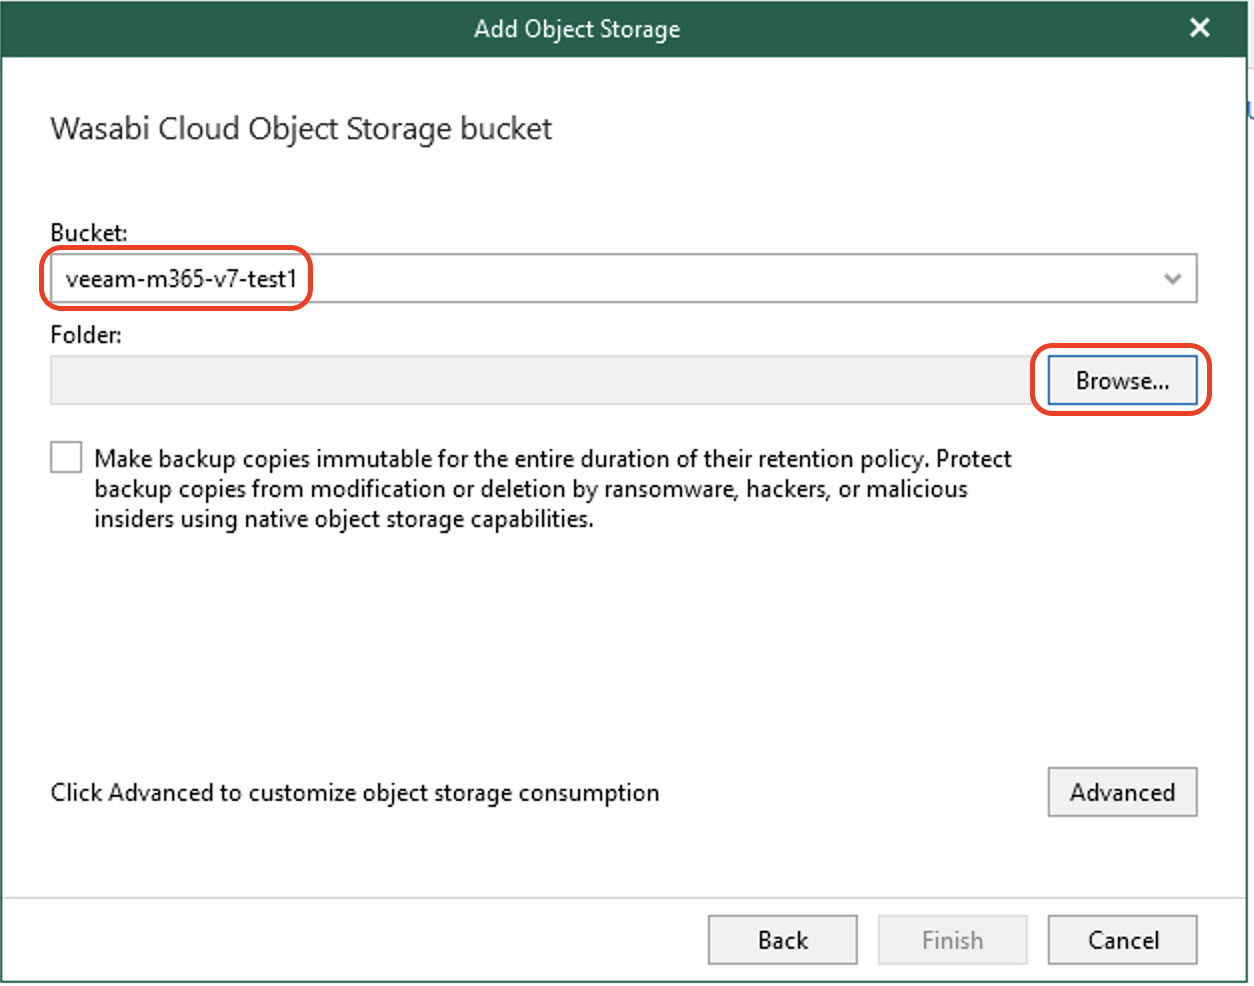
Select your bucket from the drop-down. Click Browse to select a folder.
Veeam Backup for Microsoft 365 introduces Object Lock functionality for backup copies only. If the "Make backup copies immutable" setting is checked to enable immutability for this object storage, the object storage cannot be used for a backup job. To make immutable backup copy job, refer to Backup Copy for Veeam Microsoft 365 v7.
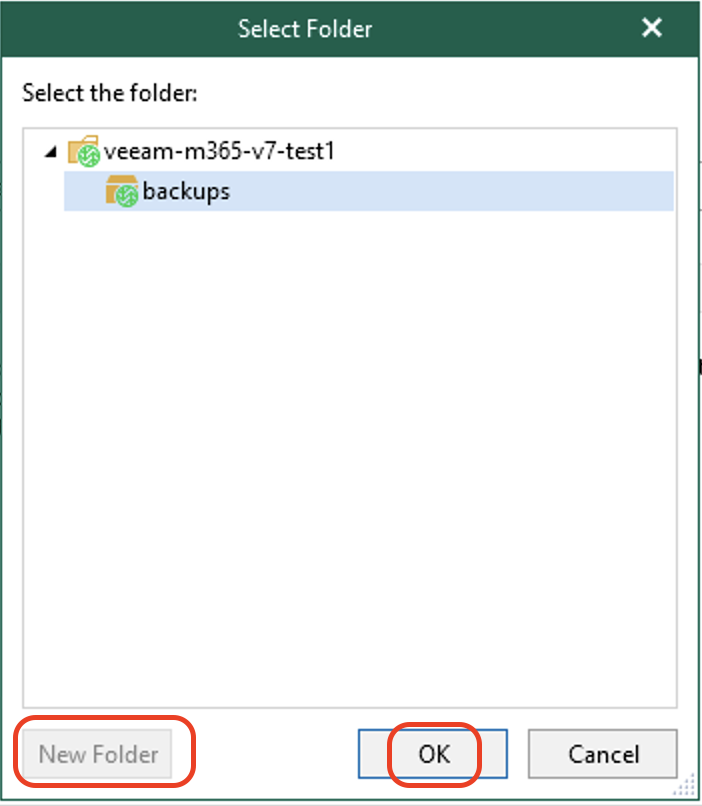
Select a folder from the list or create a new folder. Click OK.
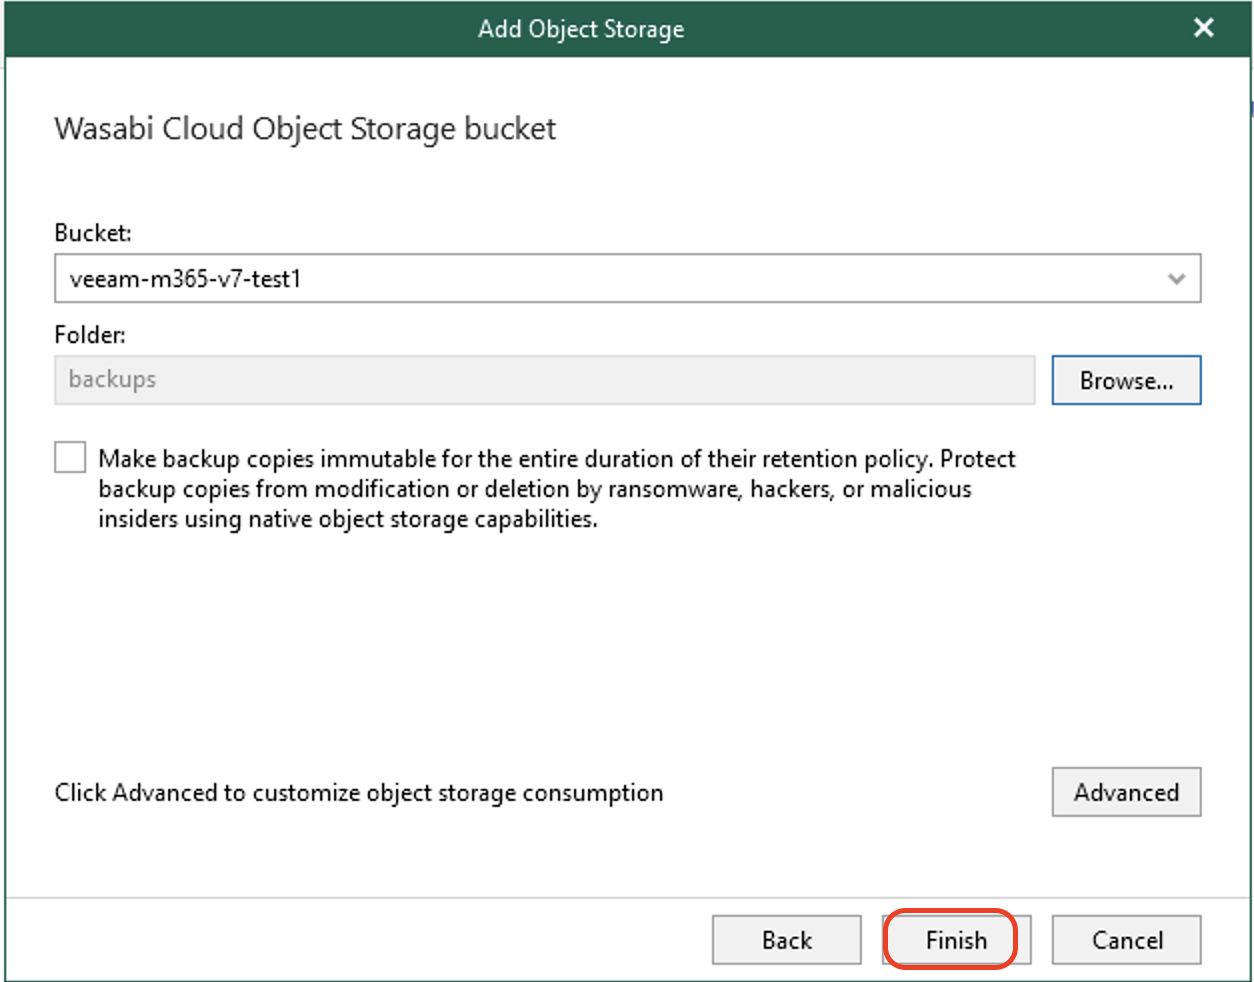
Click Finish to complete adding Wasabi Storage.
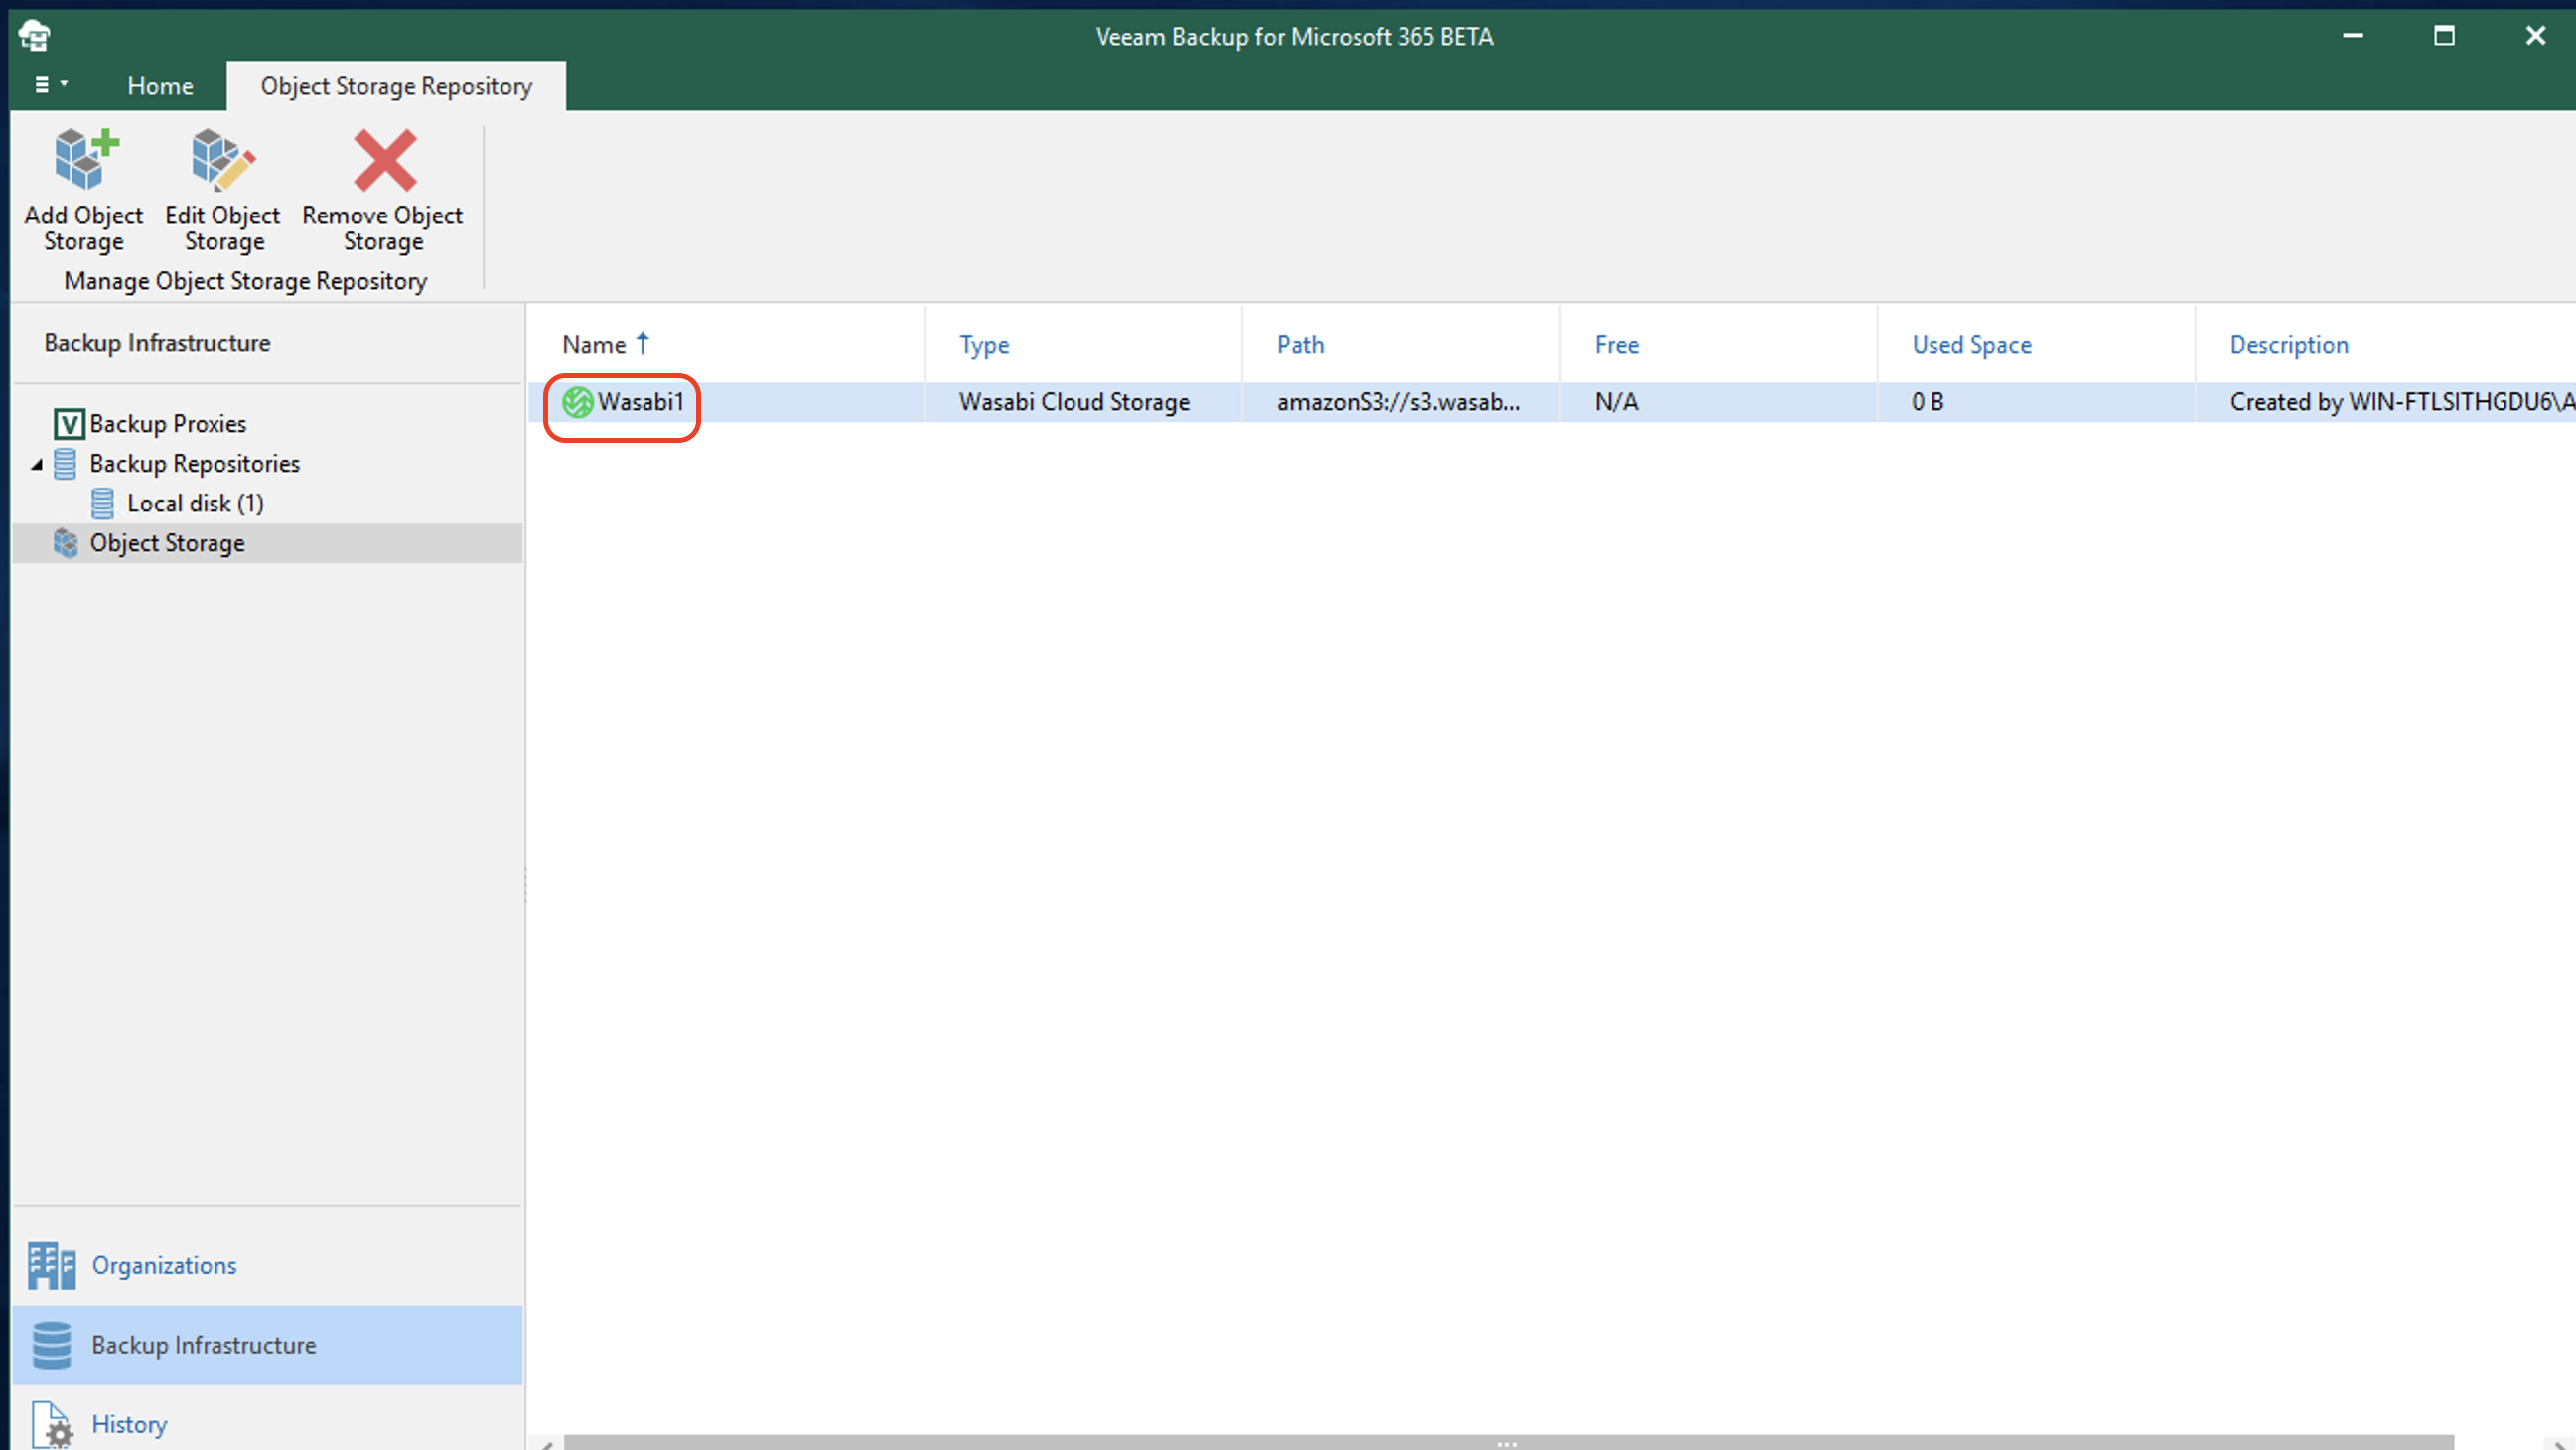
You should now see your newly created Wasabi Object Storage.
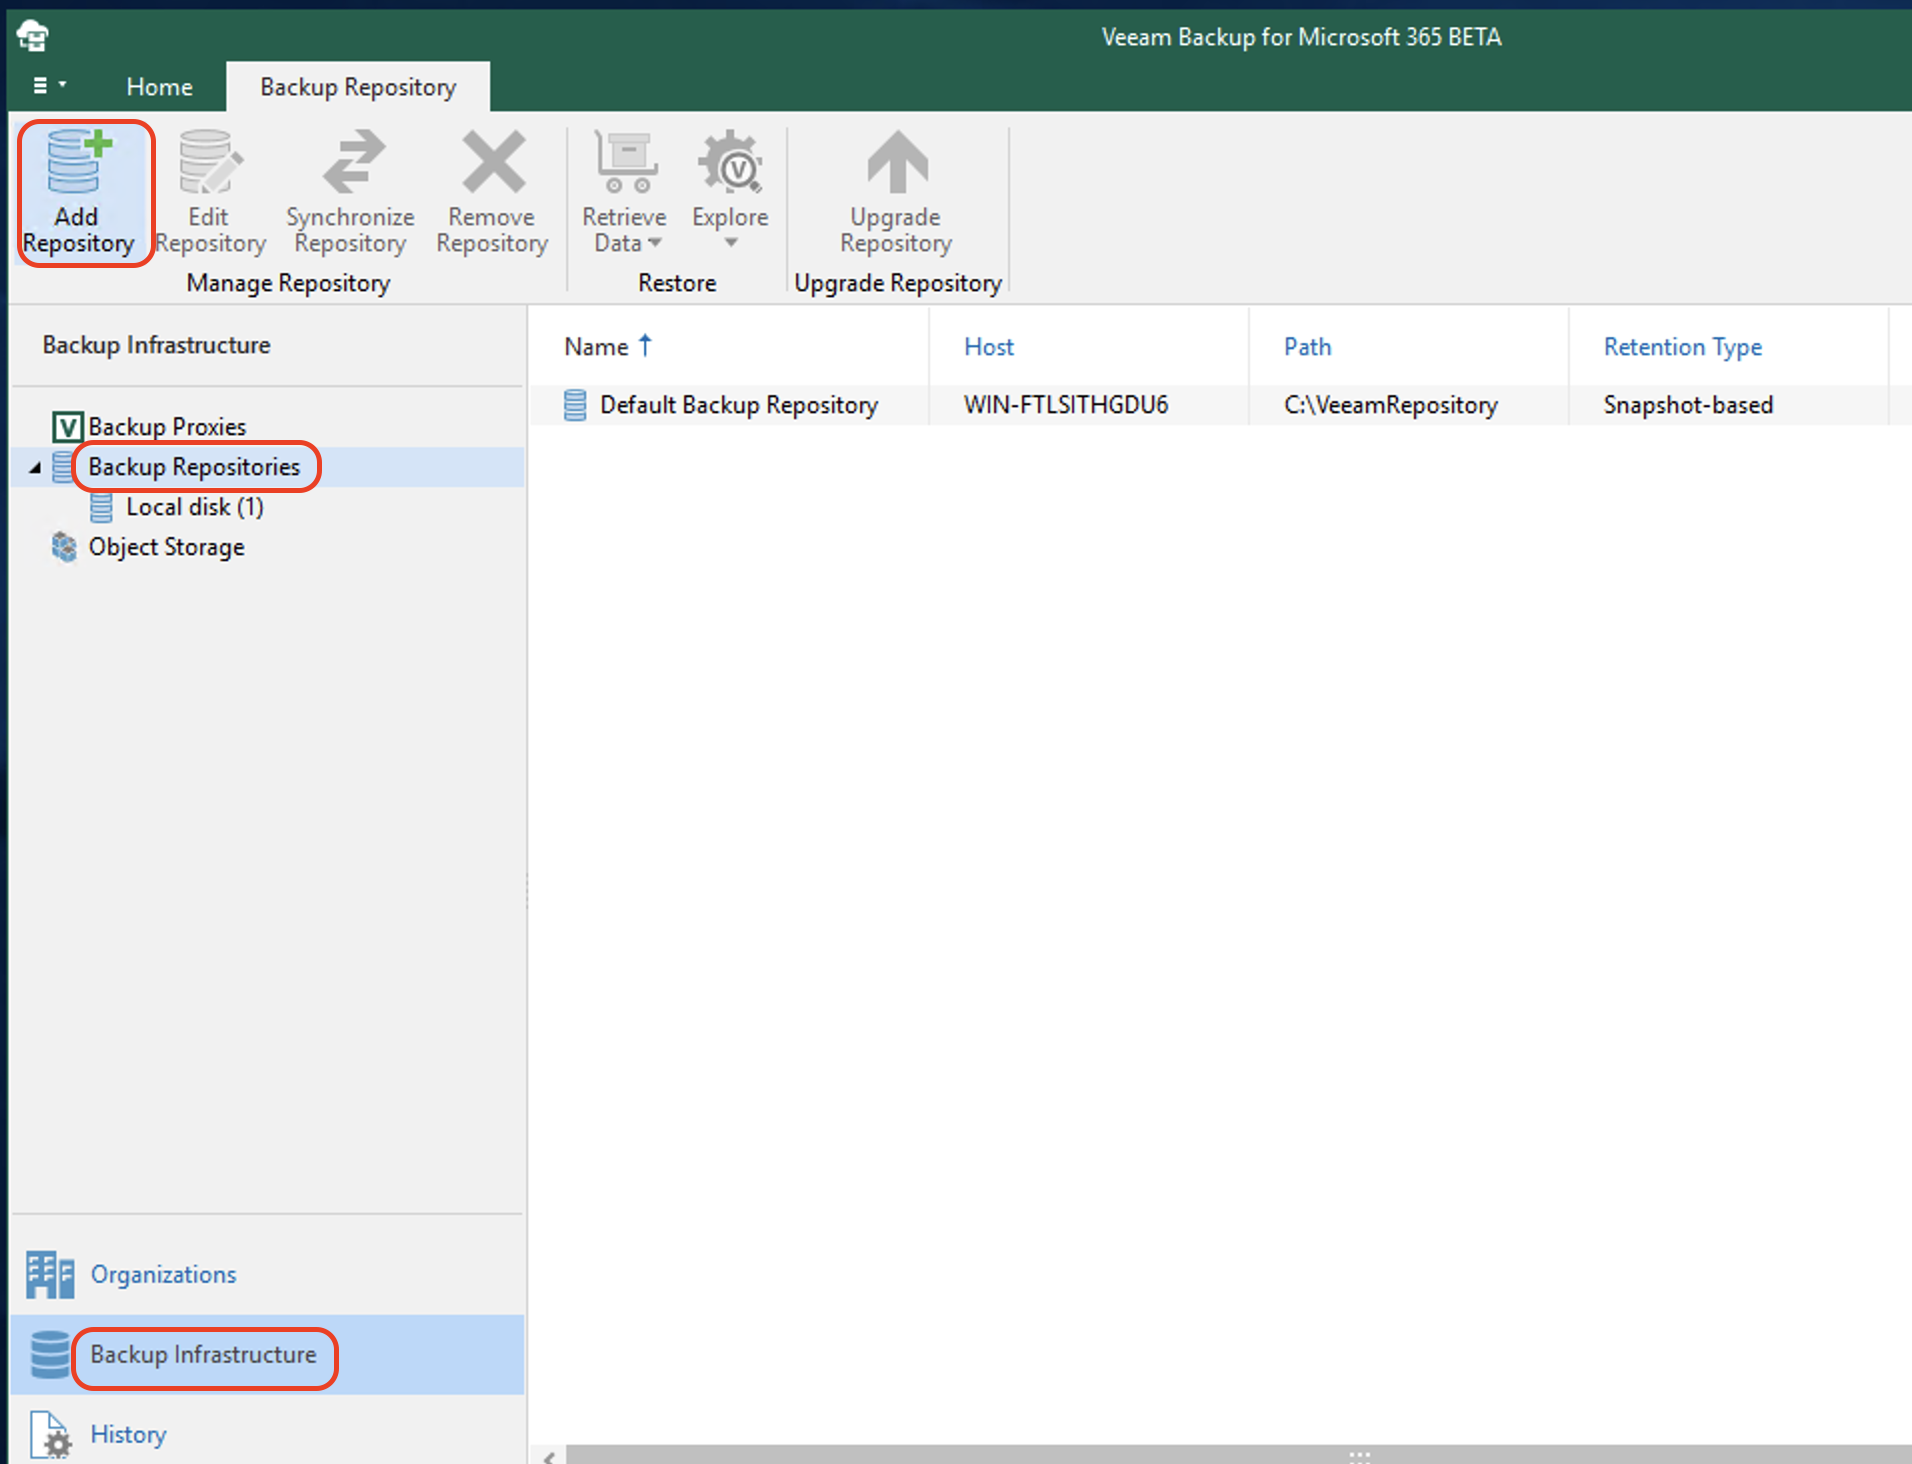
Adding an Object Storage Repository
Click Backup Repositories in the Backup Infrastructure tab. Click Add Repository.
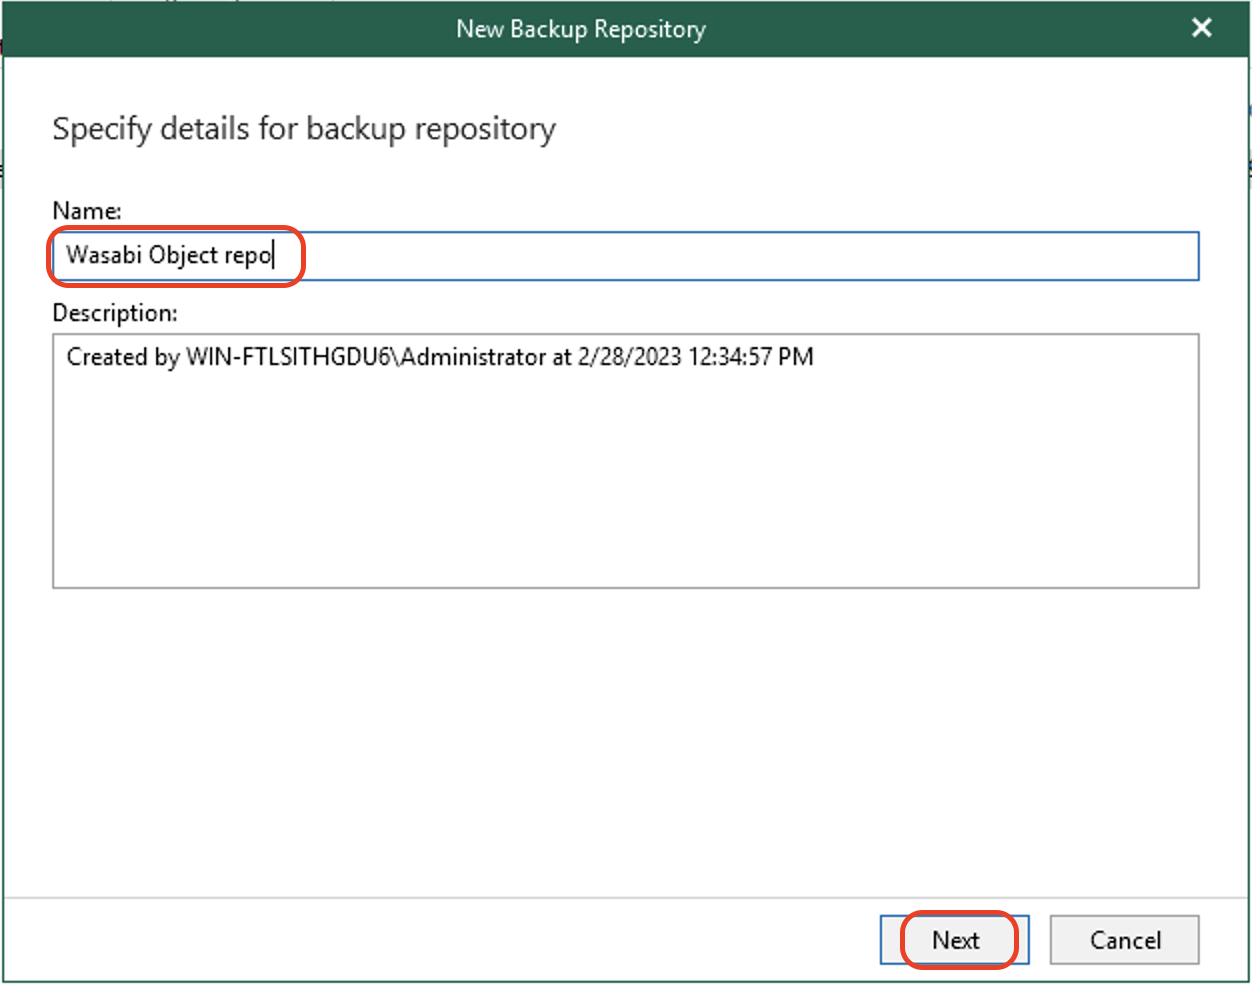
Input a Name and Description. Click Next.
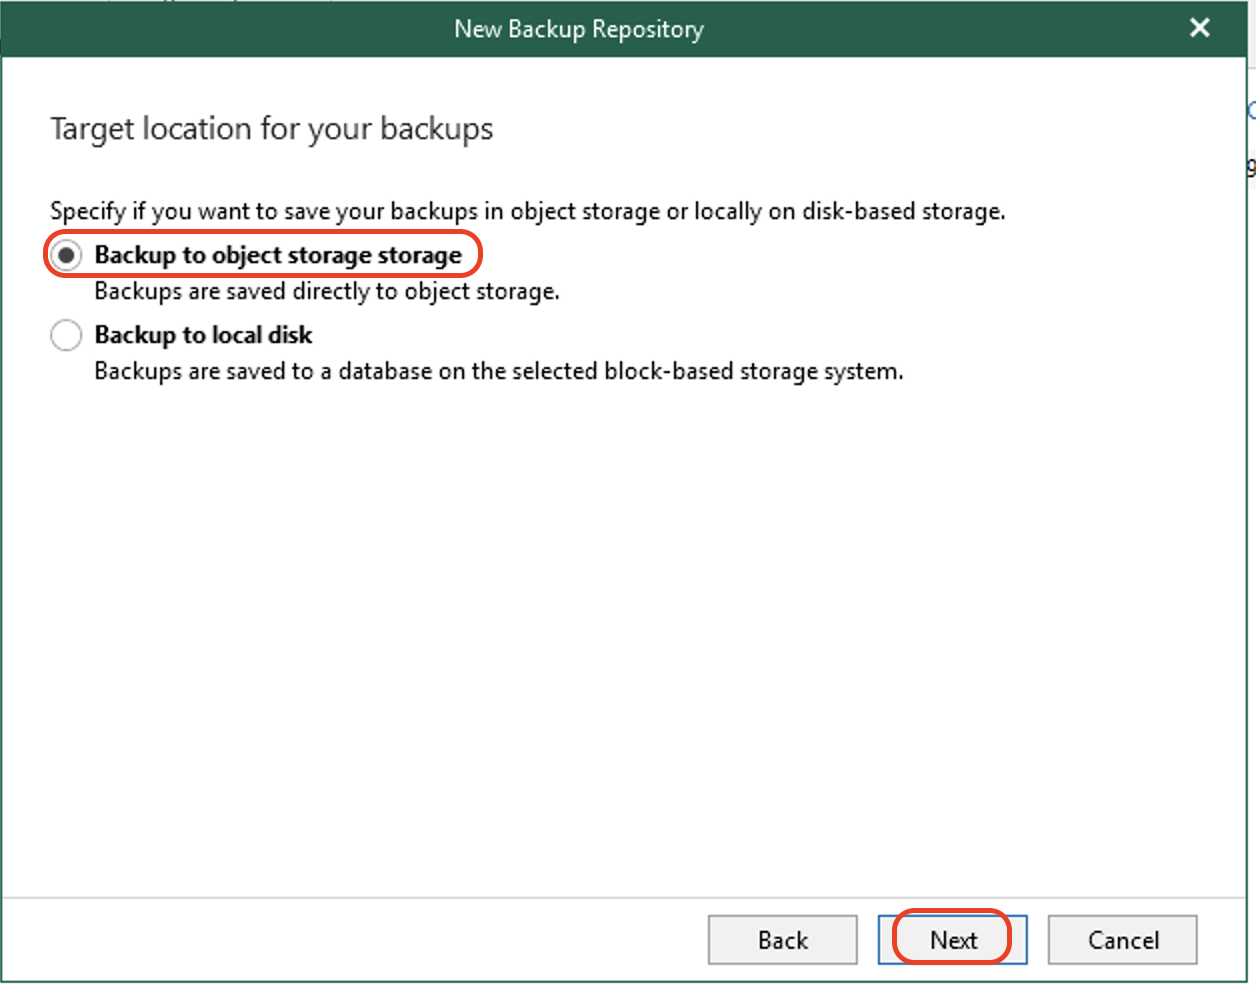
Select Backup to object storage. Click Next.
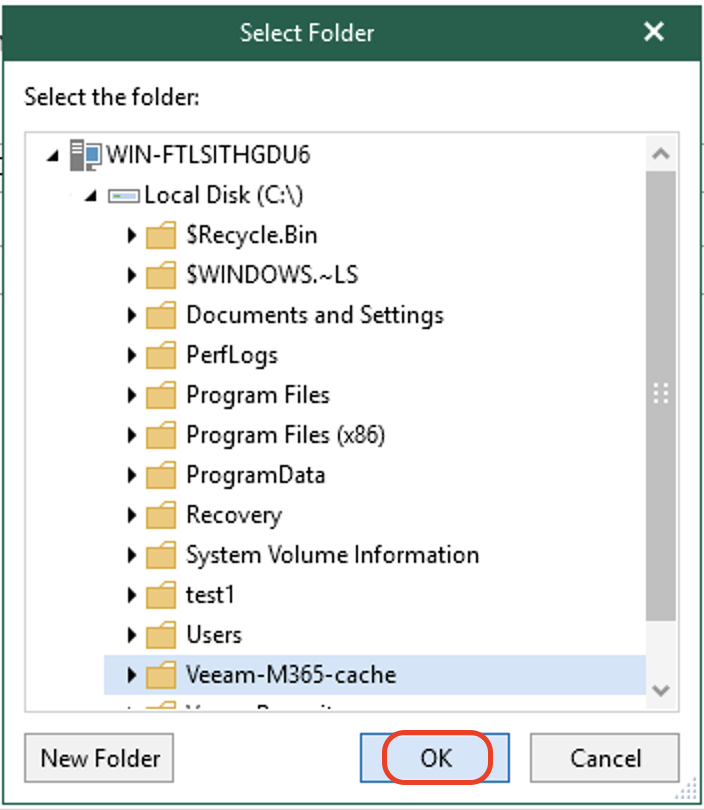
Leave the default backup proxy or select an alternative if you are using one. Click Browse to select the local cache path.
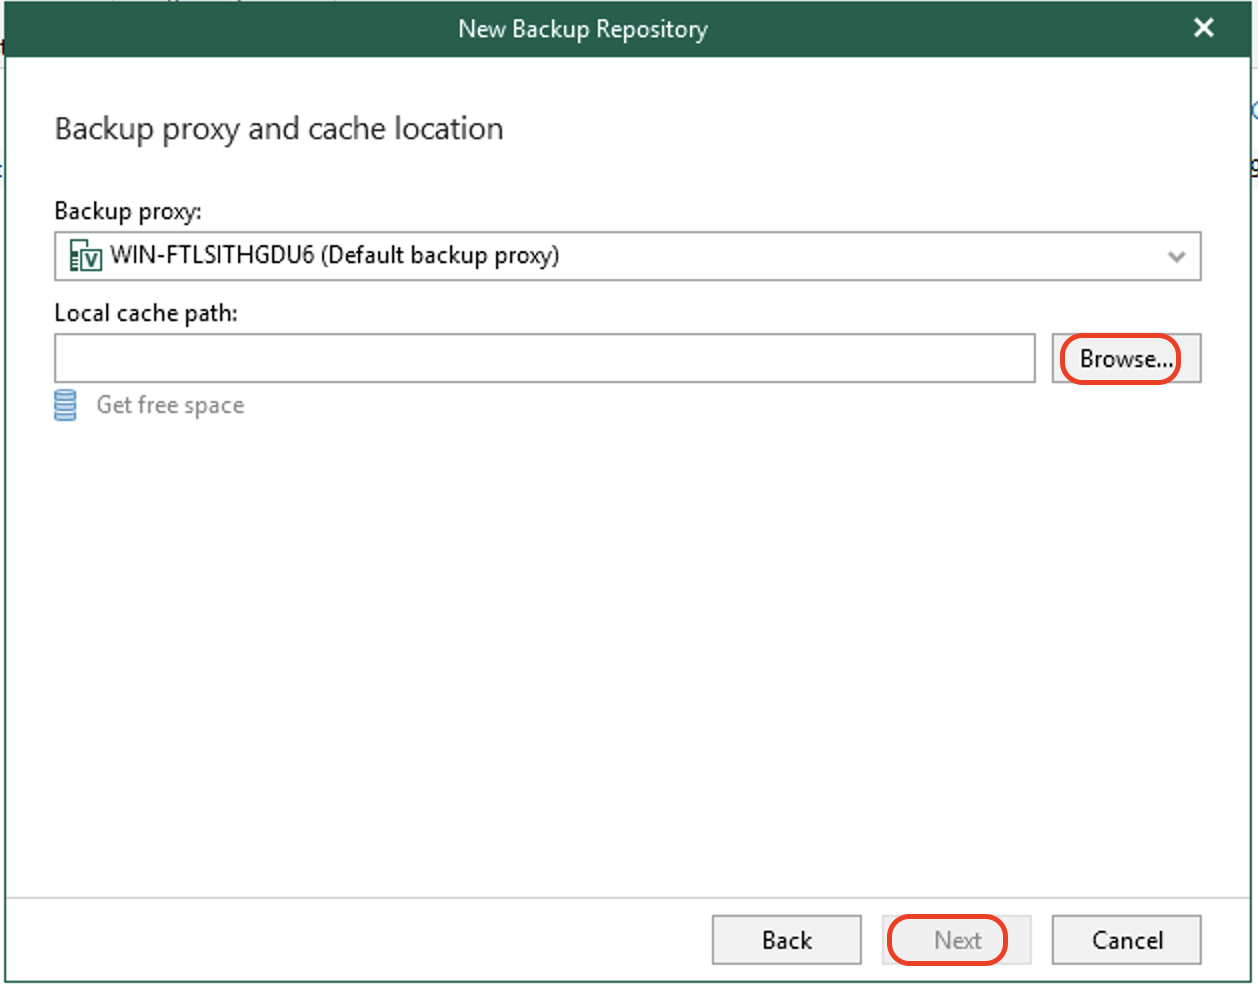
Create a new folder or select an existing one to be used as a local cache directory. Click OK, then Next.
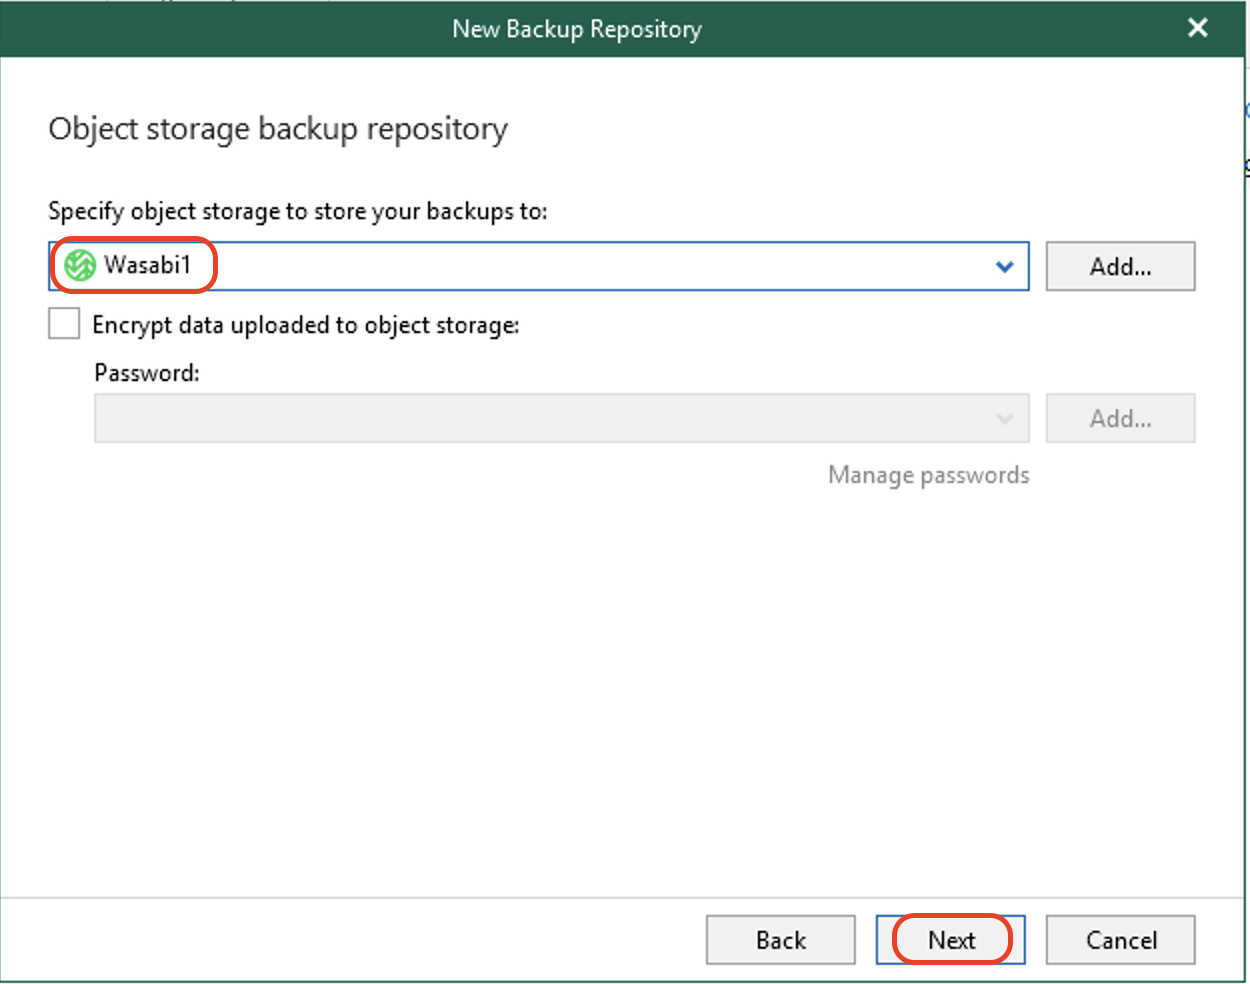
Select the previously created Wasabi Object Storage. Click Next.
Optionally, you can choose to encrypt the data which Veeam uploads to Wasabi. This will be third-party encryption provided by Veeam. For more information, refer to Veeam's documentation on Data encryption.
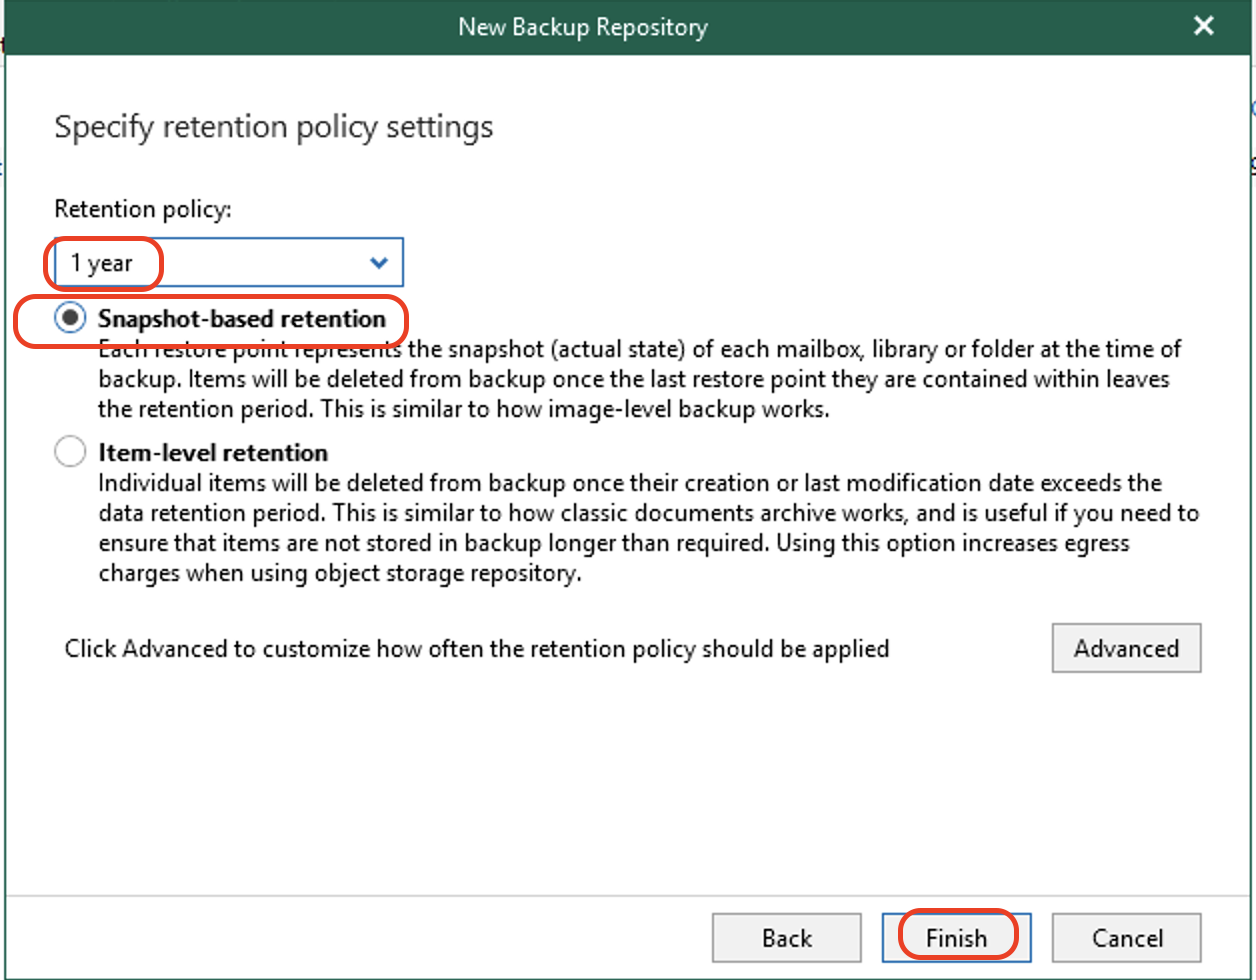
Select the retention period and retention type, as needed. Click Finish to create the repository.
Snapshot-based retention: Select this type if you want to keep an item until the restore point of an item's version is within the retention coverage.
Item-level retention: Select this type if you want to keep an item until its creation time or if the last modification time is within the retention coverage.
Advanced settings for the retention policy can be configured by clicking on Advanced. For more detail, refer to Veeam's documentation on Retention policy settings.
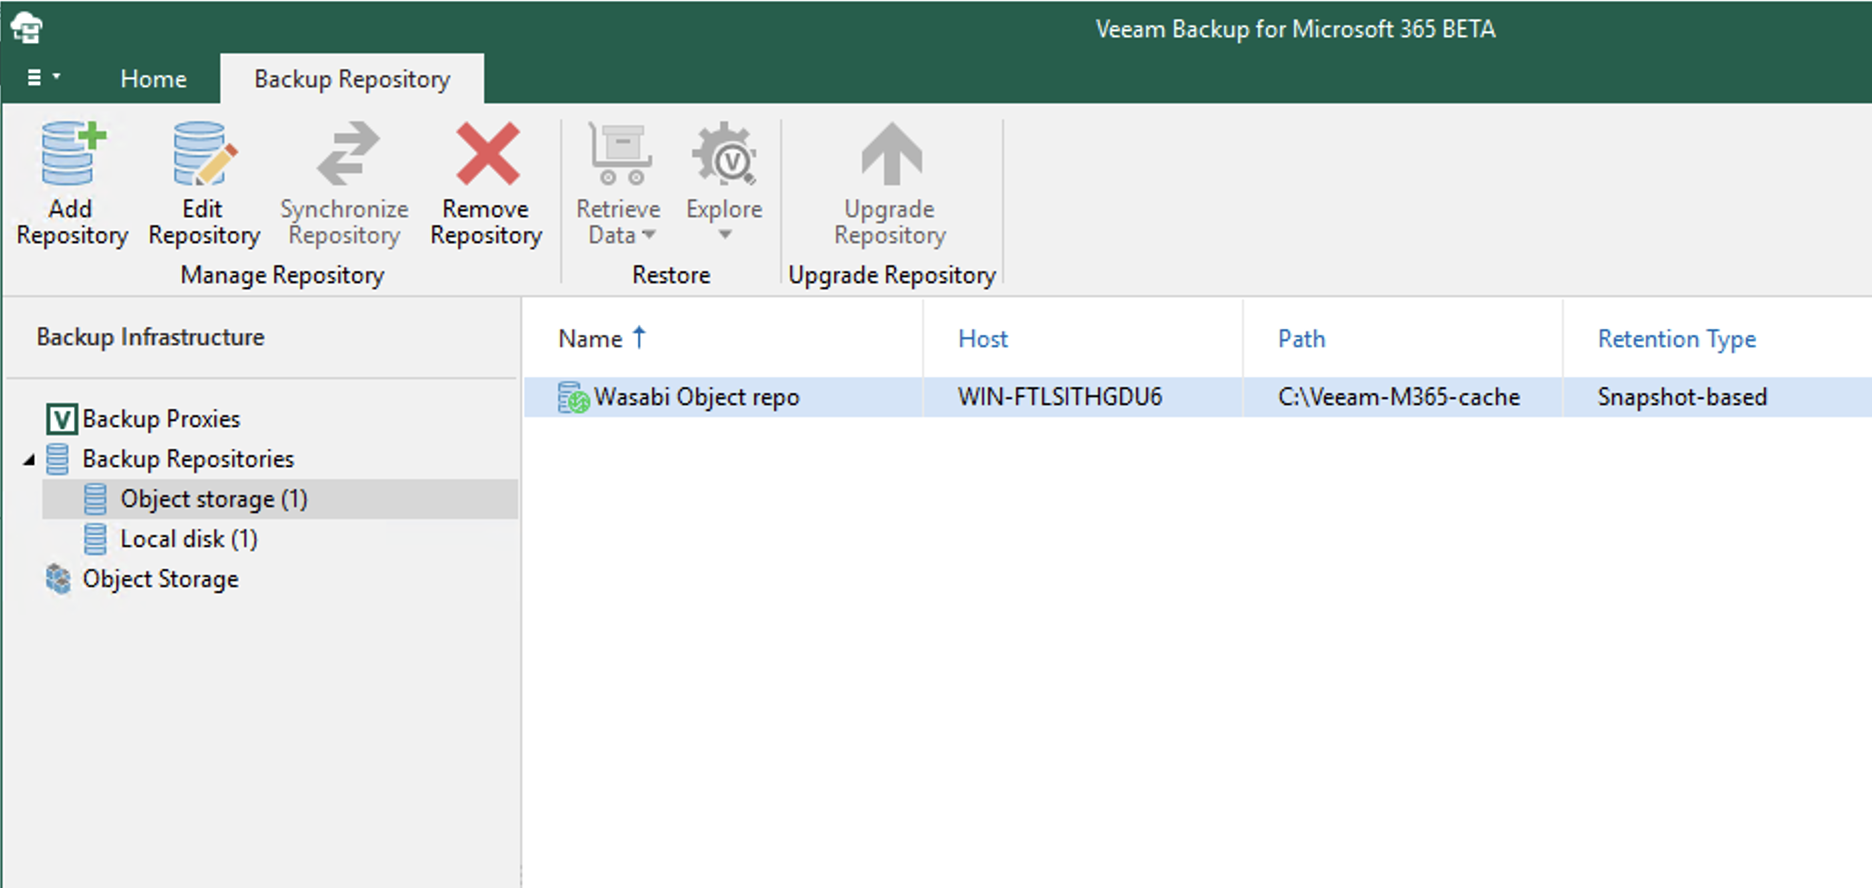
You will see your newly created Object Storage Repository.
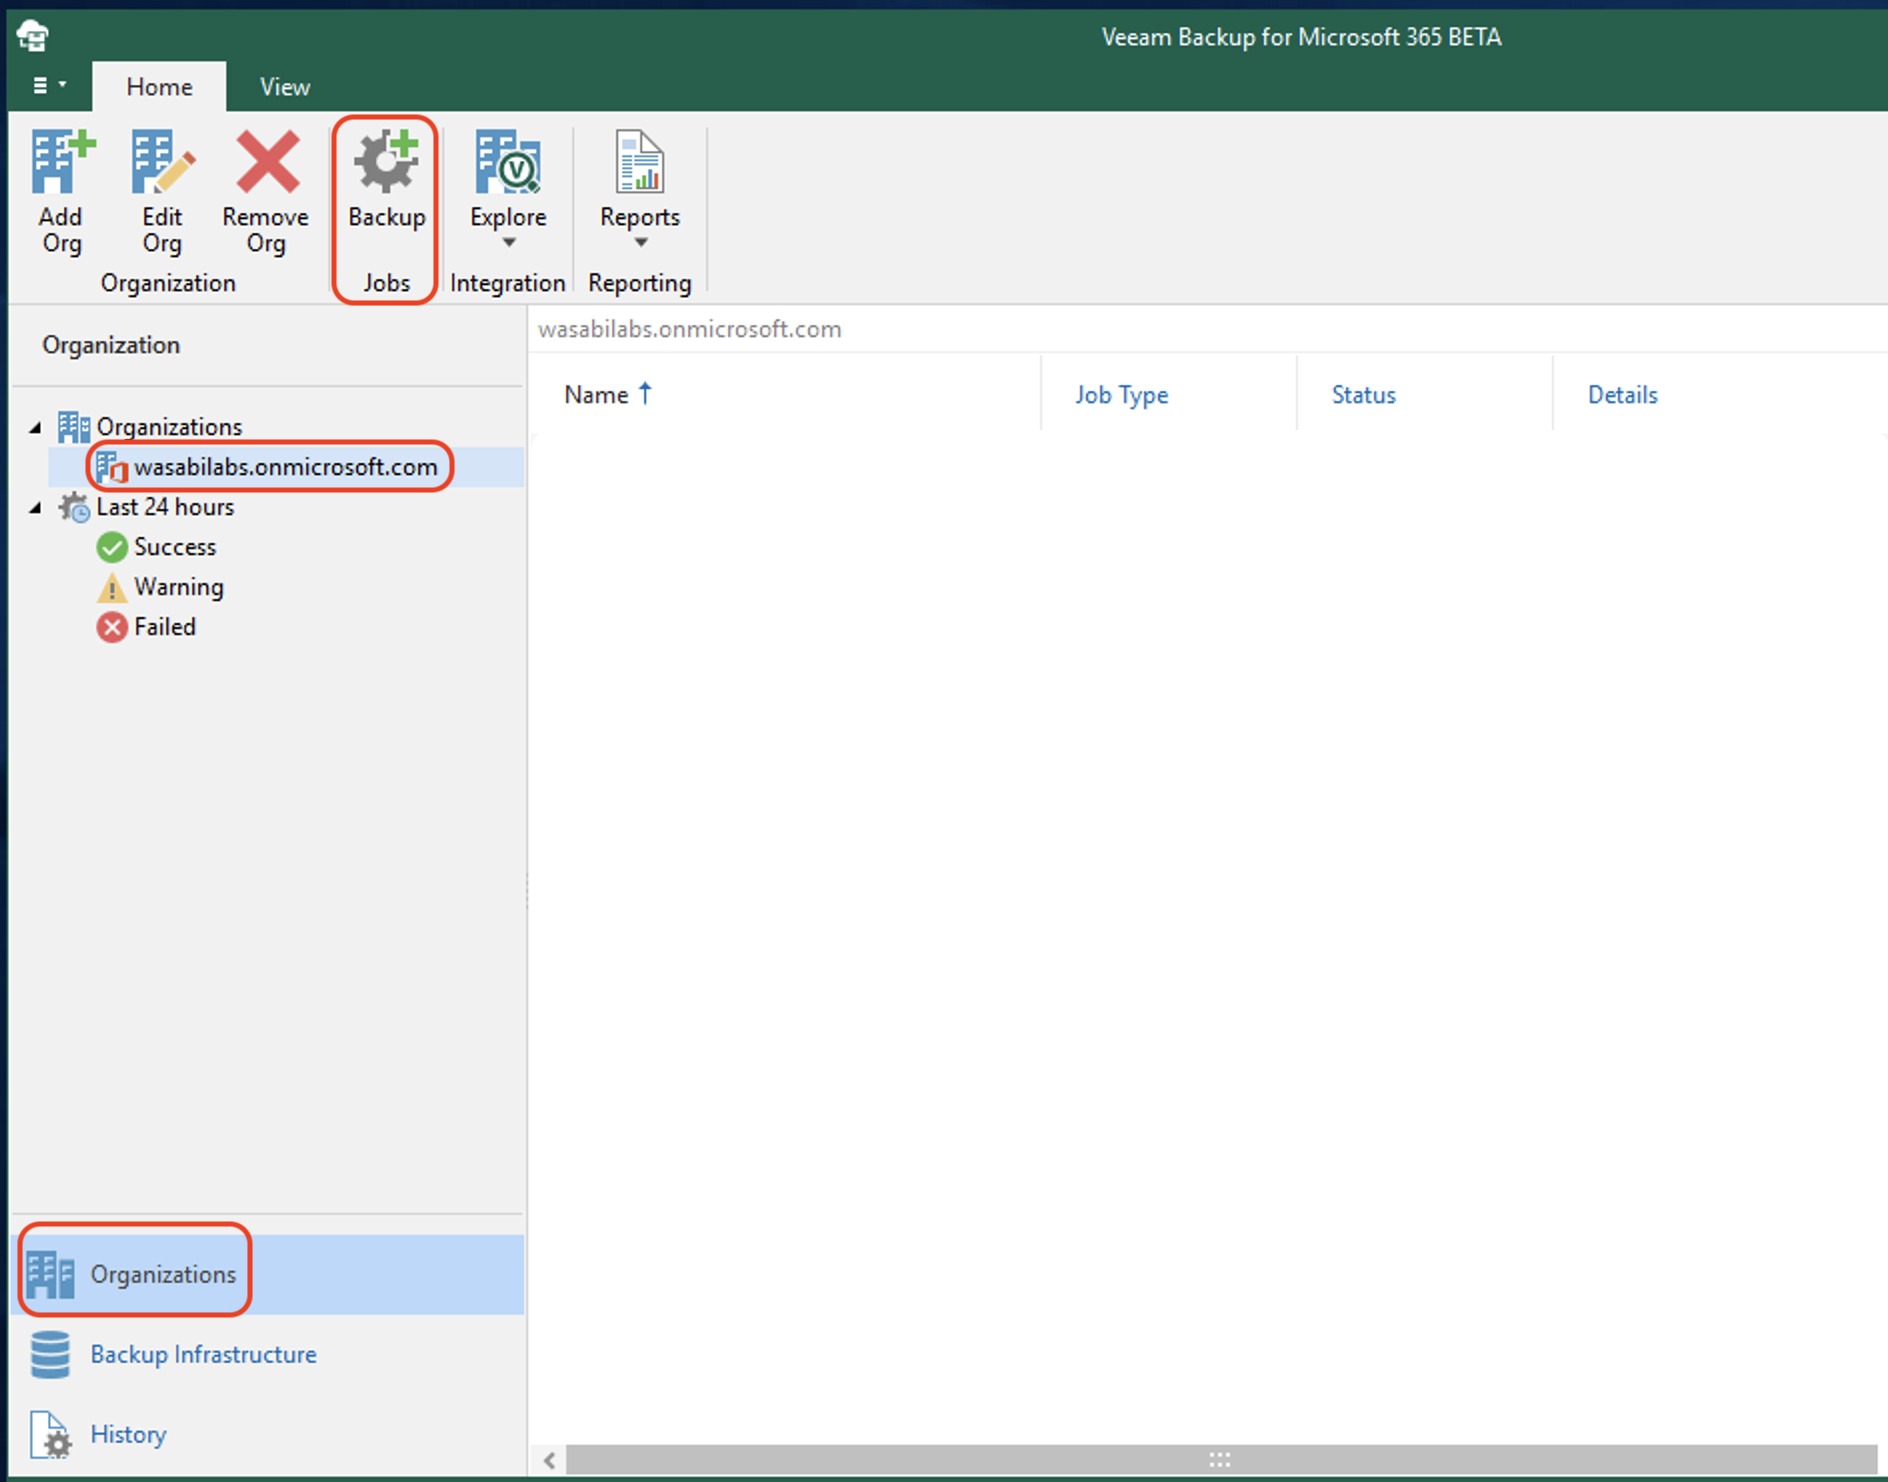
Creating a Backup Job
Click the Organizations tab. Select your organization and click Backup Jobs. This will open up the New Backup Job wizard.
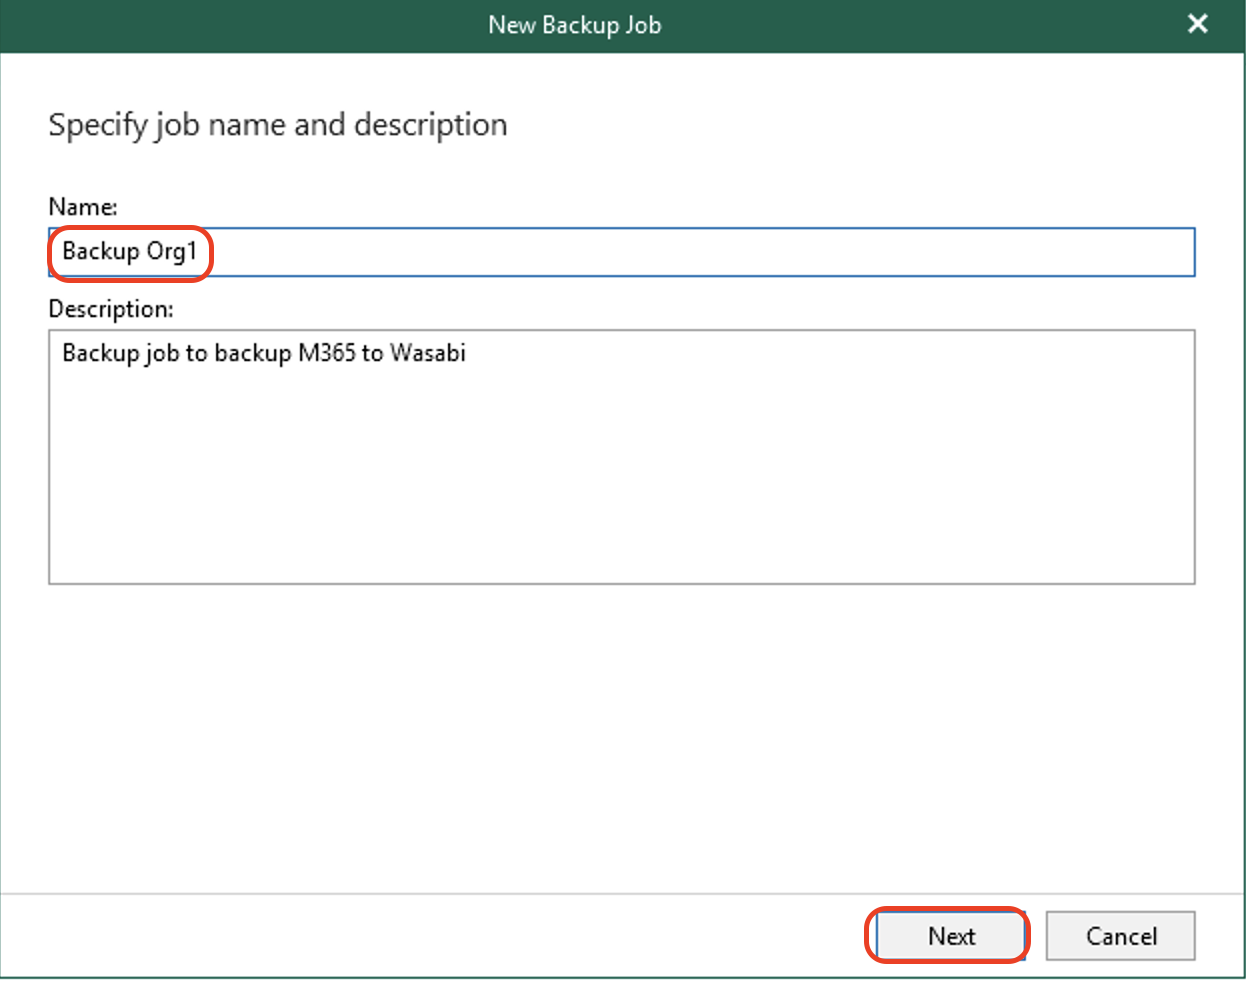
Input a Name and Description for your backup job. Click Next.
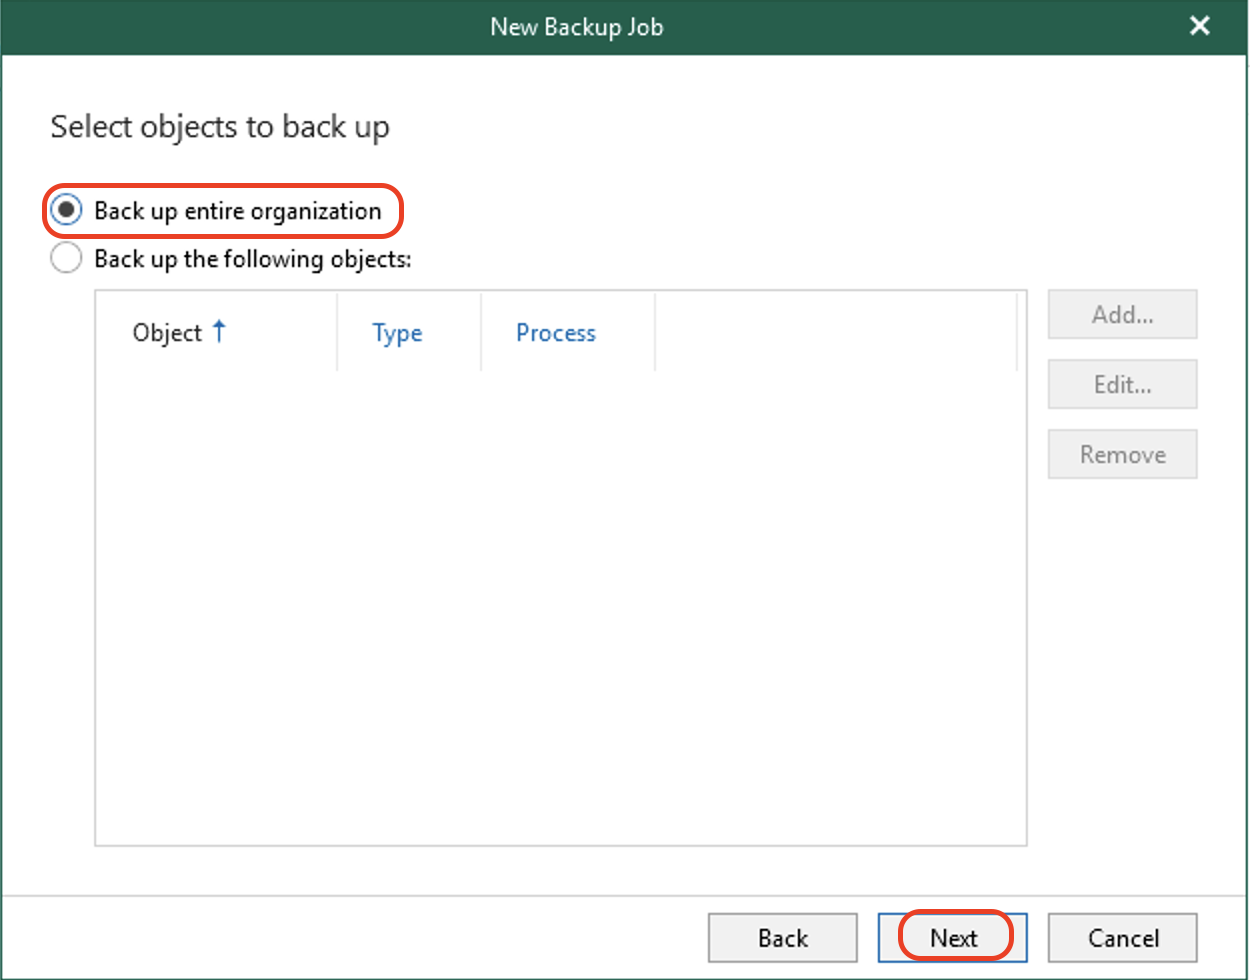
Select what you want to backup and click Next.
Veeam allows you to backup your entire organization or, alternatively, select specific objects in your organization. In this example, we are backing up the entire organization. You may want to only back up certain groups, depending on your needs. This is handy in specific use cases where different groups may have different retention periods. You can create multiple jobs, each backing up specific groups, and apply different retention policies to each.
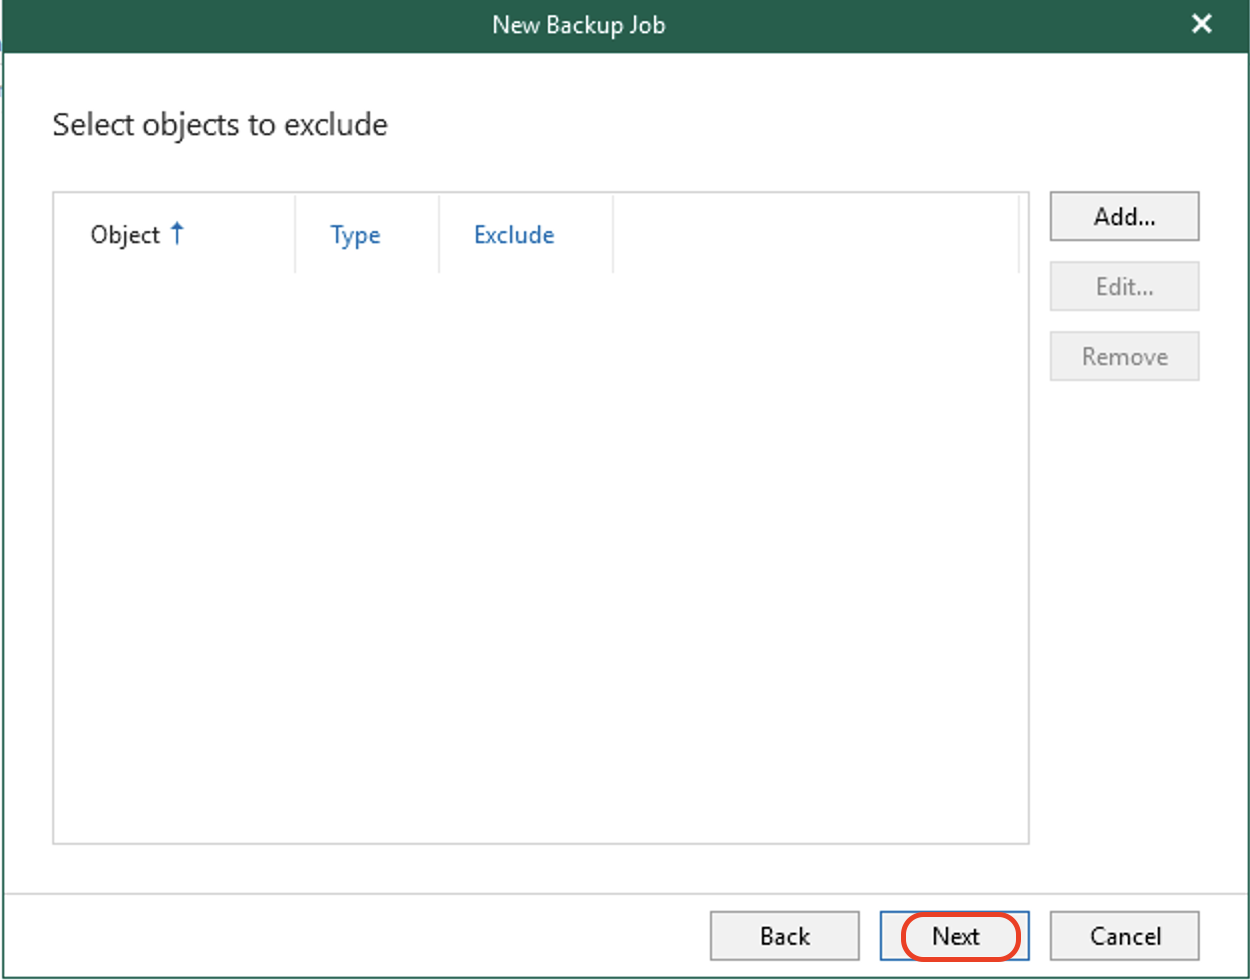
If any data needs to be excluded, select it here. Click Next.
Veeam allows you to exclude specific objects from a backup. For instance, you may want to exclude specific internal users or groups from being backed up.
Select the Wasabi Object Repository that was created previously. Click Next.
You can choose a different backup proxy if you are using this feature. Otherwise, leave the defaults.

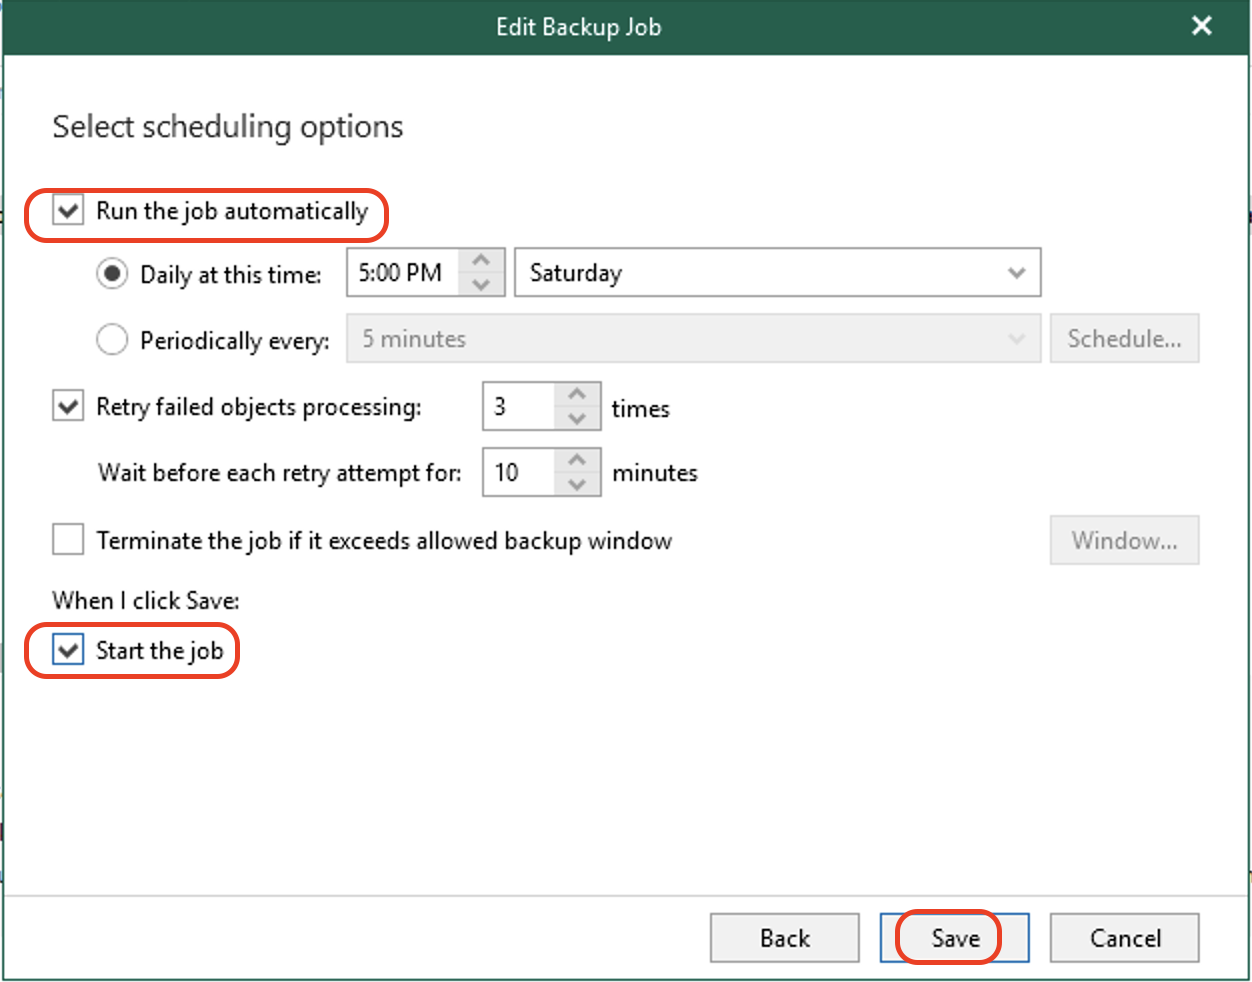
Select a scheduling option for the job. Click Create.
Optionally, select Terminate the job if it exceeds the allowed backup window. Specify the allowed and prohibited hours for the backup job by clicking Window. For more details, review the Veeam documentation.
In this example, we have also chosen to start the backup job when the "Create" button is clicked. This will kick off the new job immediately.
You will see the backup job created when you select your organization.

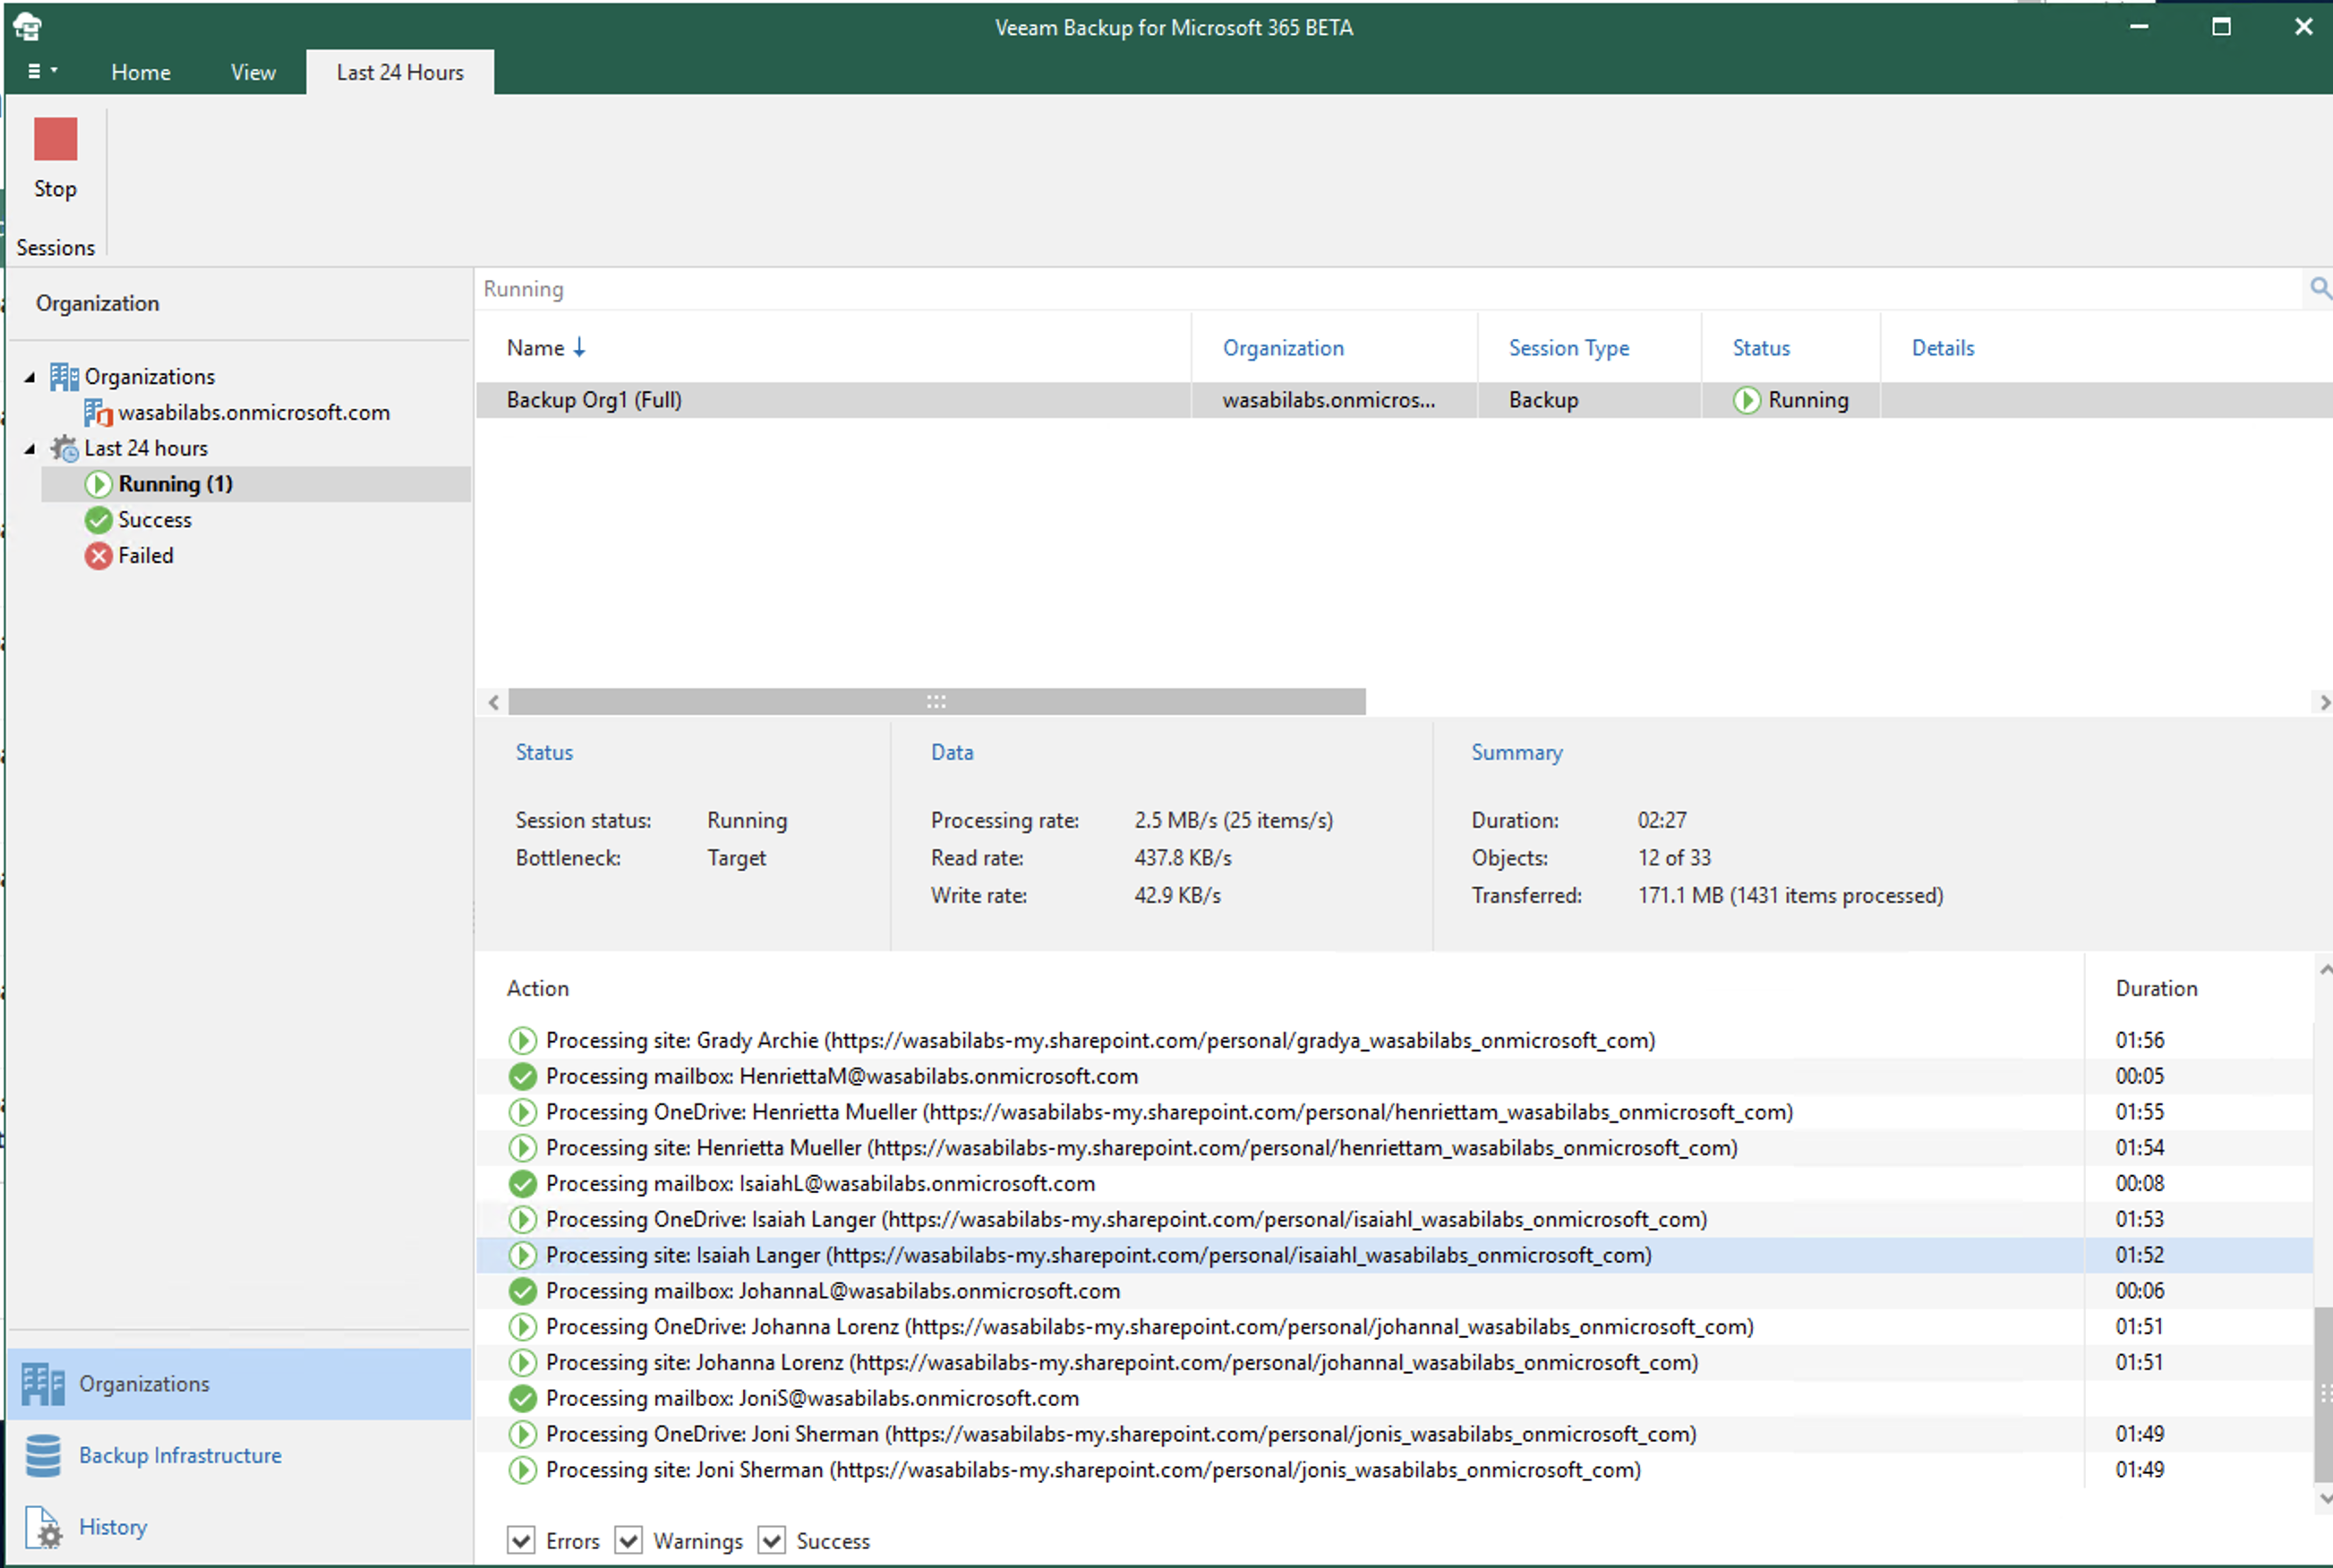
Click the Running tab. Click the Backup job to view the statistics of your newly created job.
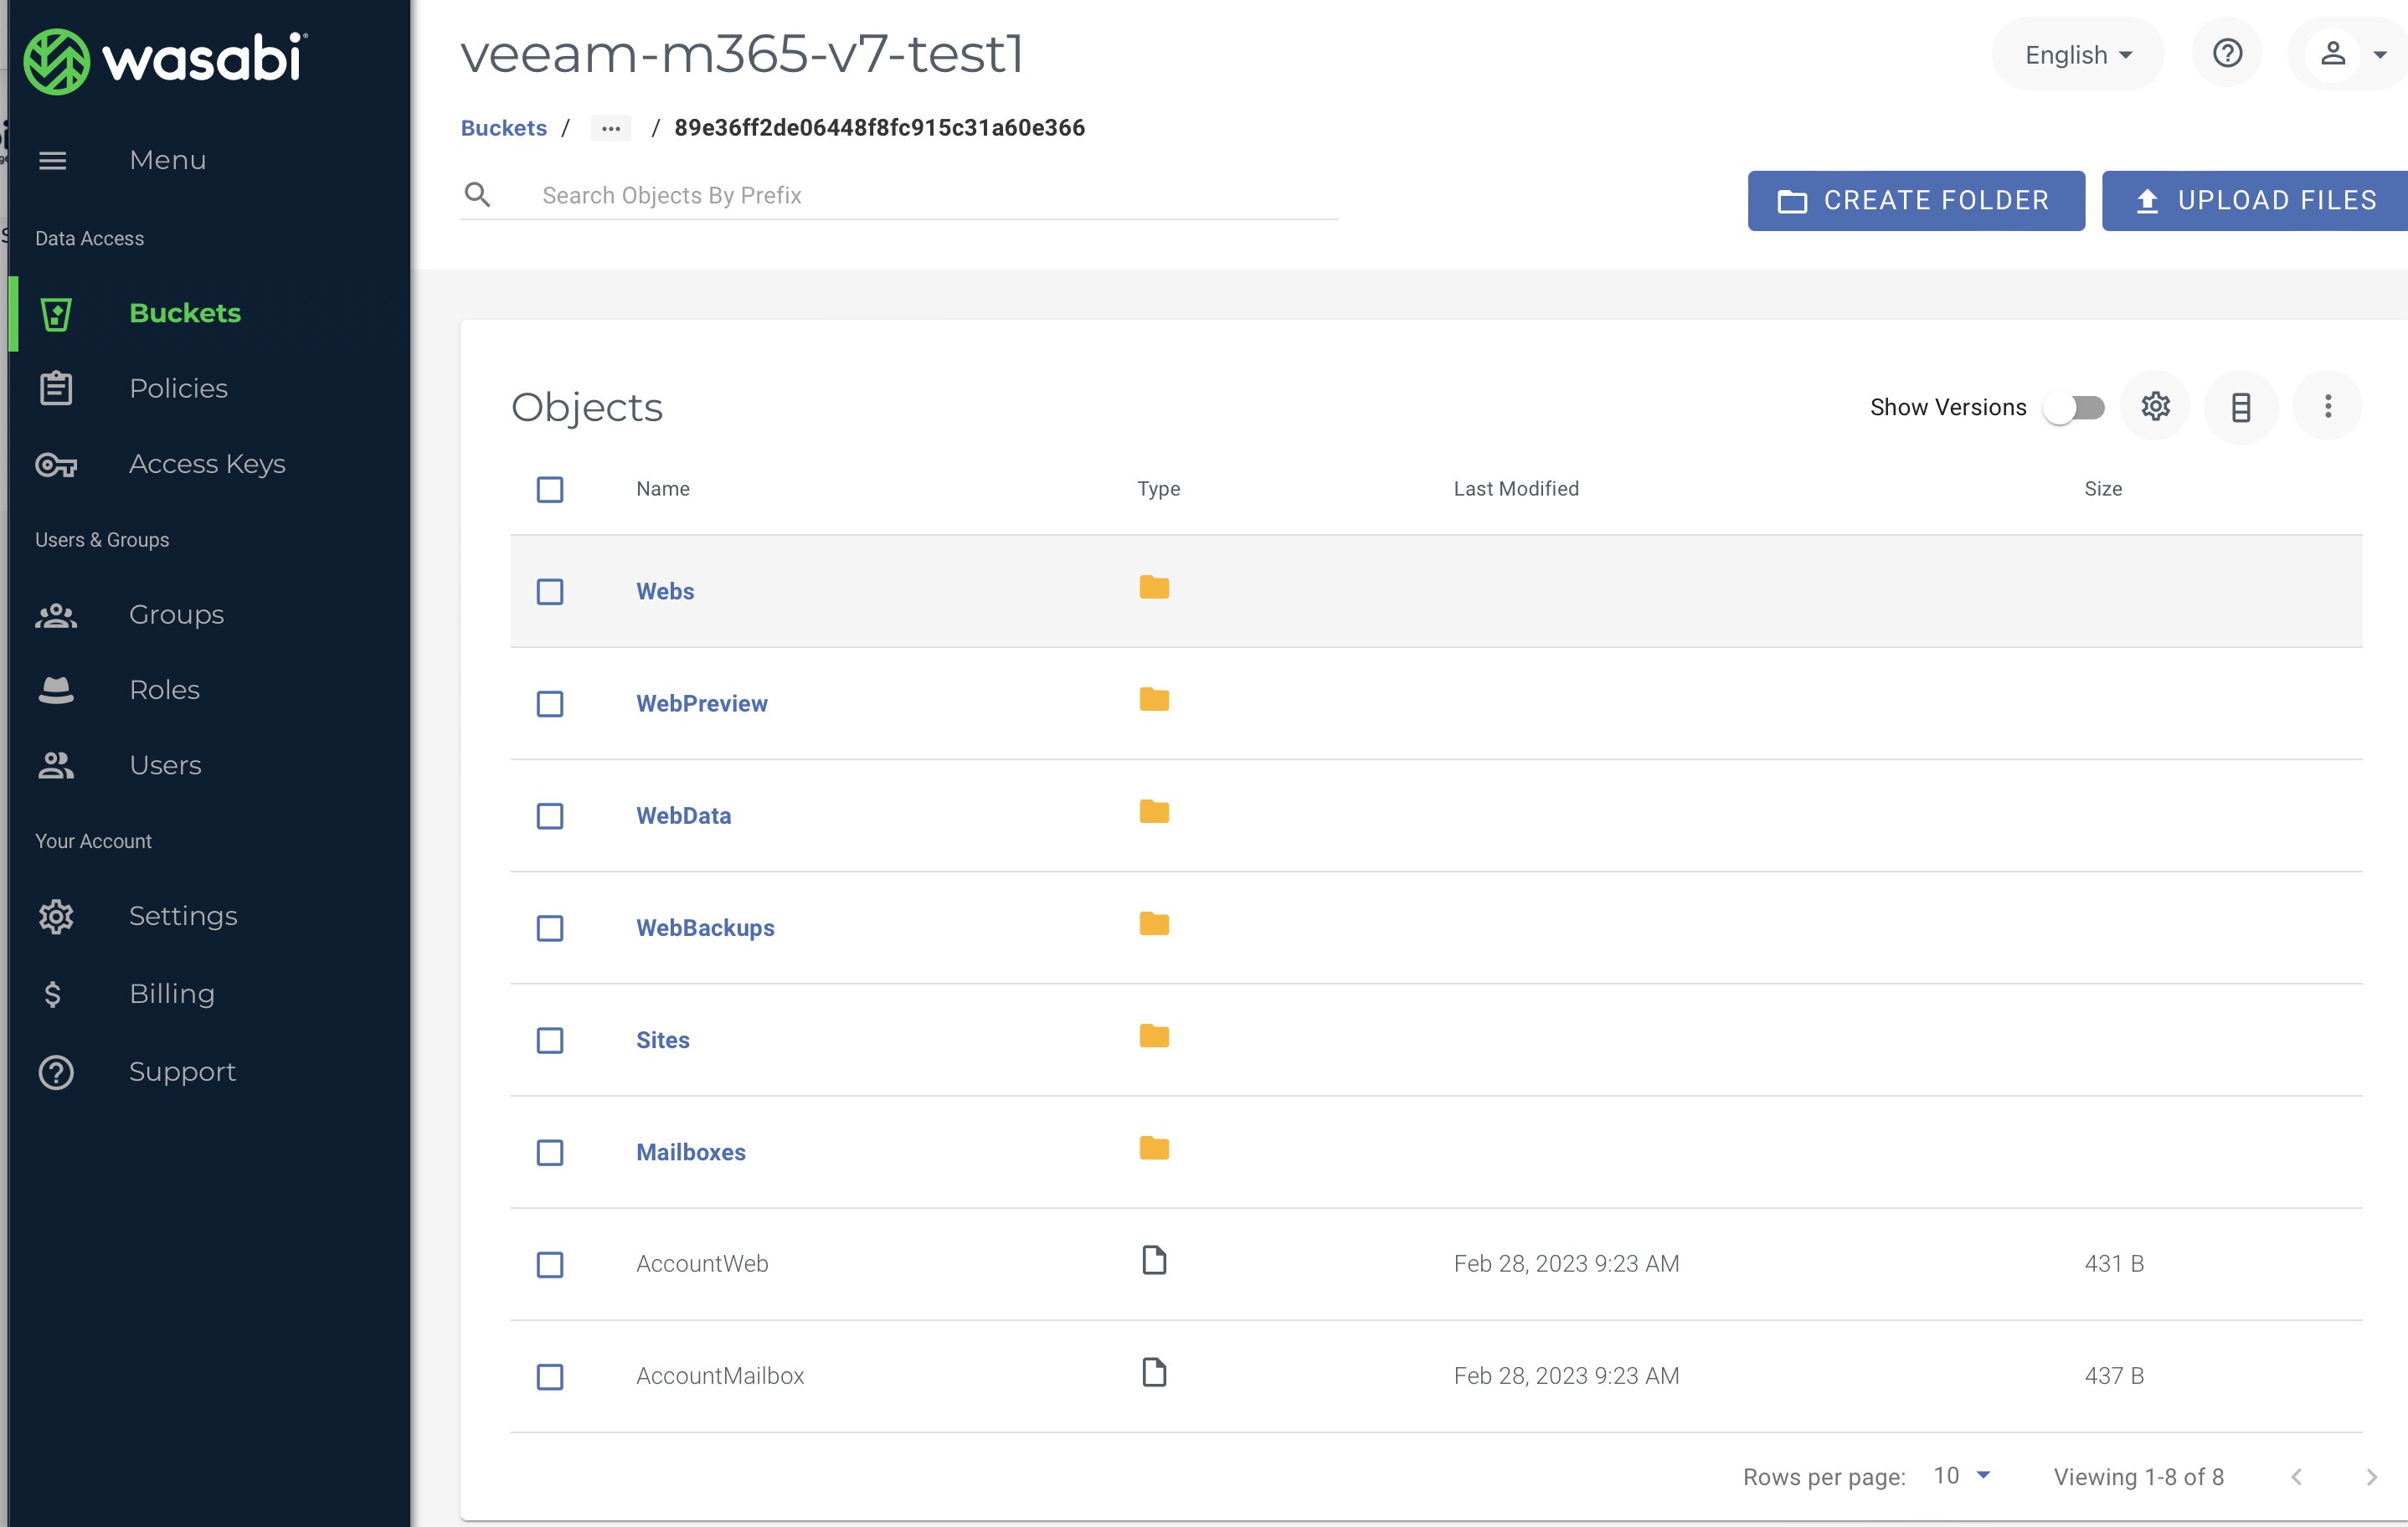
Verify that your data is being backed up to Wasabi by logging into the Console. Navigate to the bucket used for Veeam Backups for Microsoft 365 and look for the data.