GB Labs Unify Hub has been validated for use with Wasabi Hot Cloud Storage. Follow the steps outlined below to configure Wasabi as a cloud storage target.
Requirements
GB Labs Core OS v.4.3 and higher, as well as the Unify Hub Appliance
Active Wasabi storage account
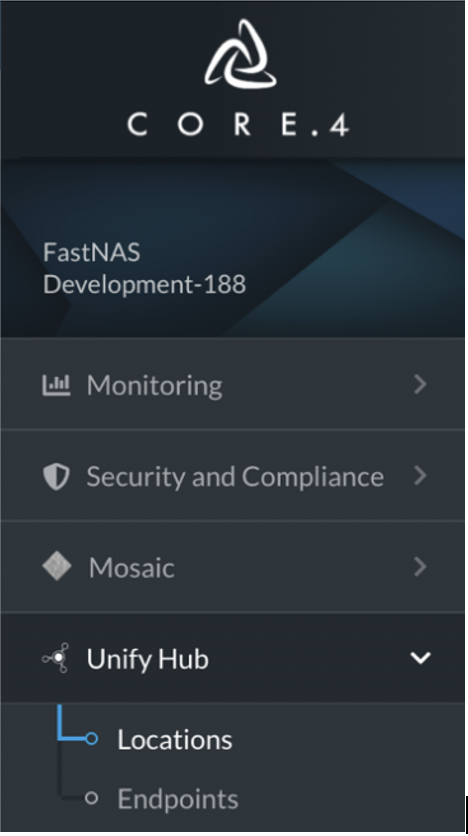
From the initial login screen of your GB Labs storage, navigate to Tools -> Cloud Services. This takes you to the Cloud Services overview page, where you can see the Unify Hub accounts that have been set up.
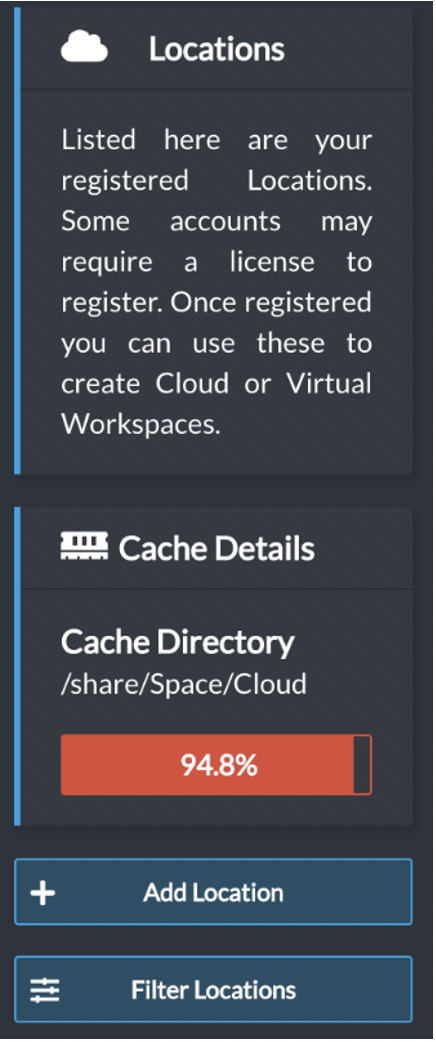
Click on Unify Hub to expand the options below, then select Locations. In the locations view, cloud accounts and storage locations that have previously been set up are displayed.
To add your Wasabi account to Unify Hub, first click the add location button to start the wizard that will walk you through the setup process.
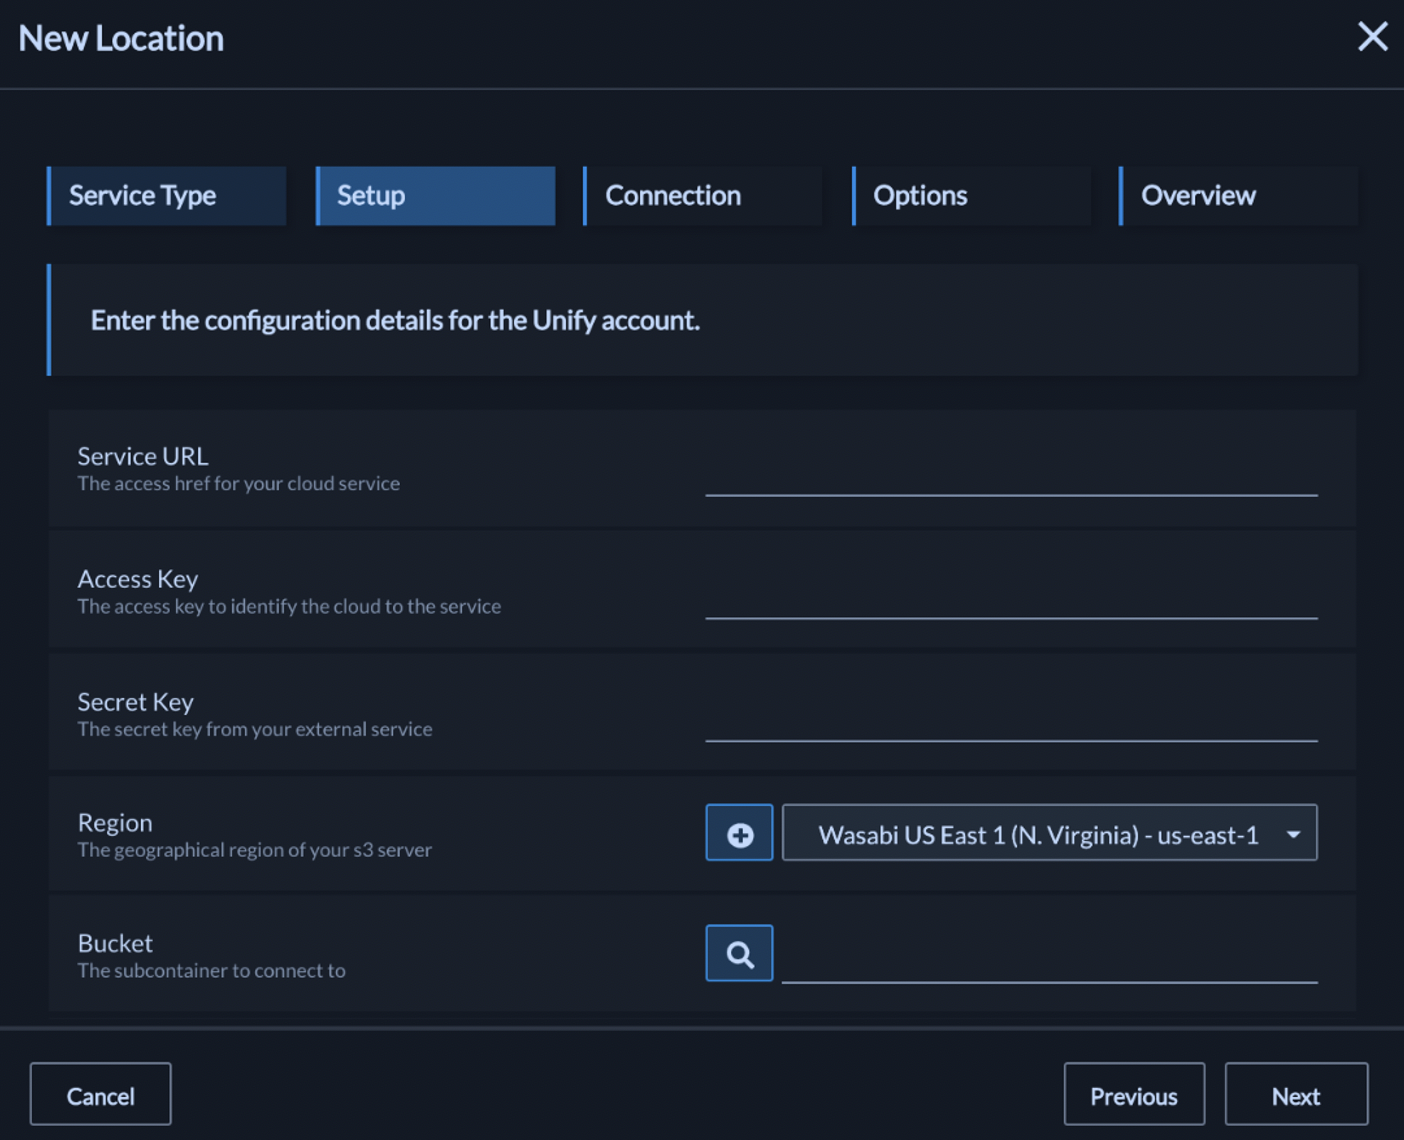
Enter a name for the service that you are adding. This will be used later to identify that service and link it to your storage workspace. Ensure that you have selected Wasabi as the service provider.

The next tab allows you to enter all the required credentials for your Wasabi Hot Storage account
Service URL - s3.us-east-1.wasabisys.com
Access Key
Secret Key
Region - us-east-1
Bucket
Note: This config example uses Wasabi’s us-east-1 storage region. To use other Wasabi storage regions, please use the appropriate Wasabi service URL as described in this article.
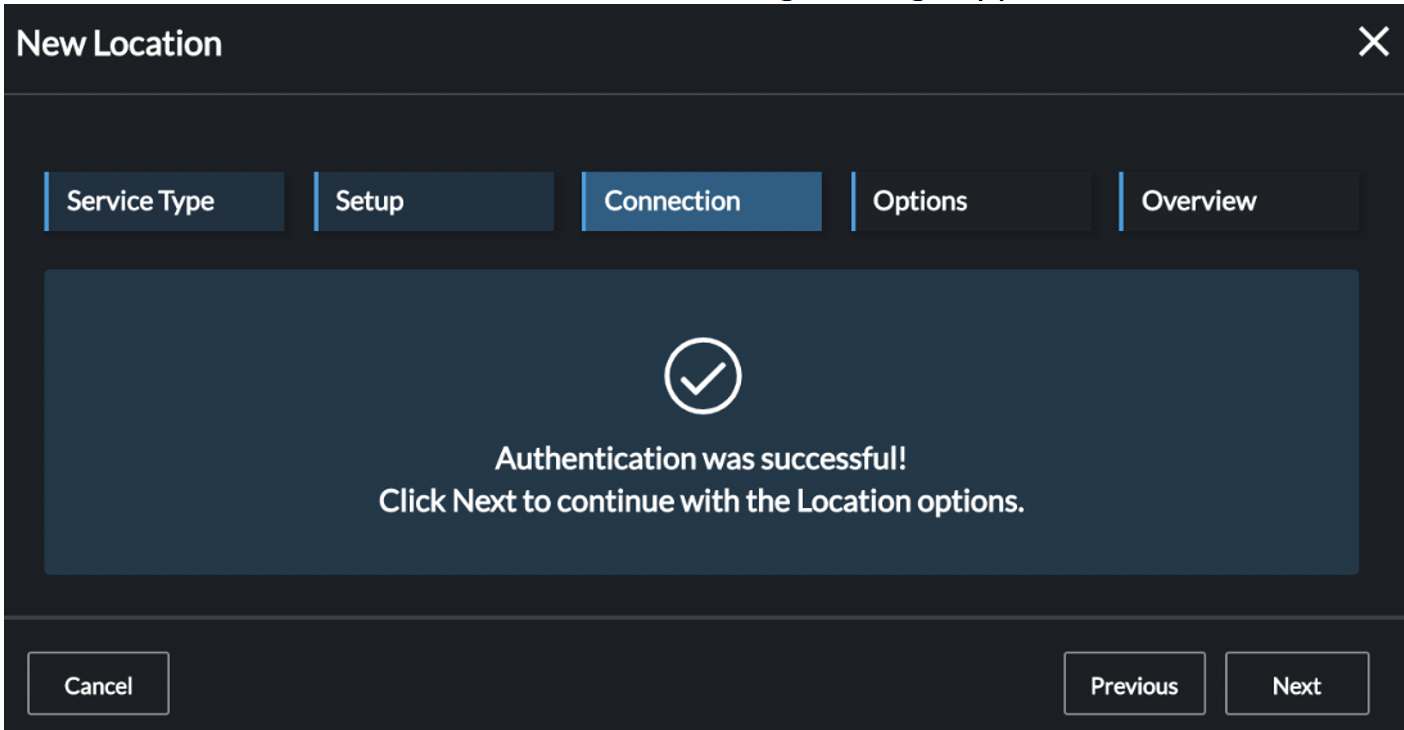
Click Next, the authentication process begins, and once complete, the following message will be displayed.
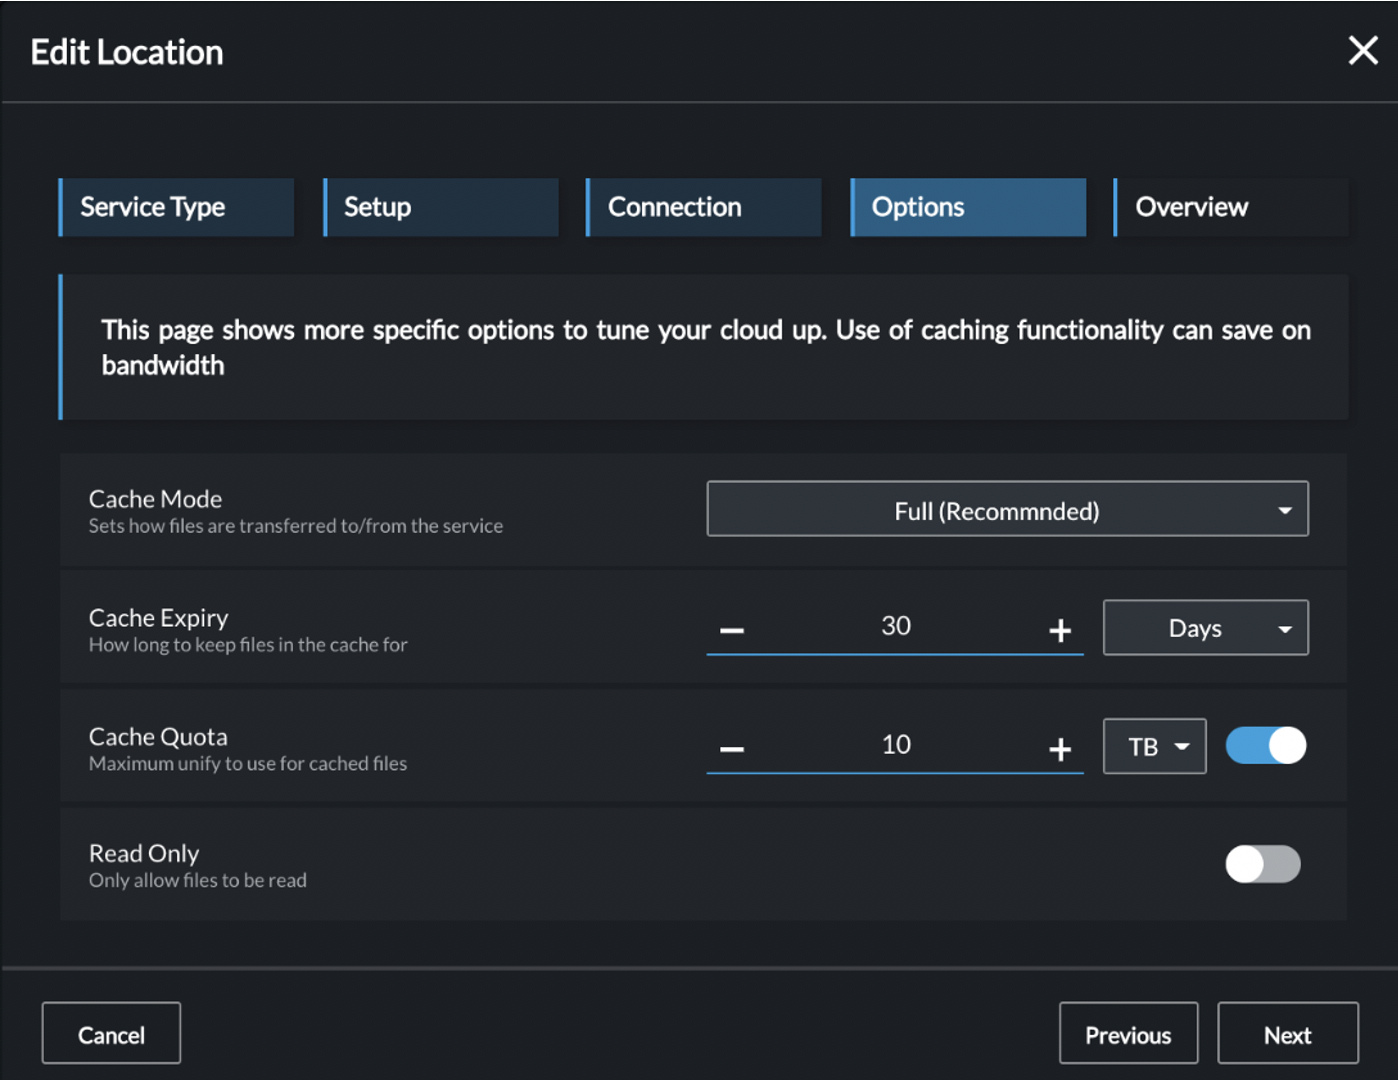
Next, you can set the configuration for your linked Cloud Workspace on your GB Labs system. Set cache mode to Full.
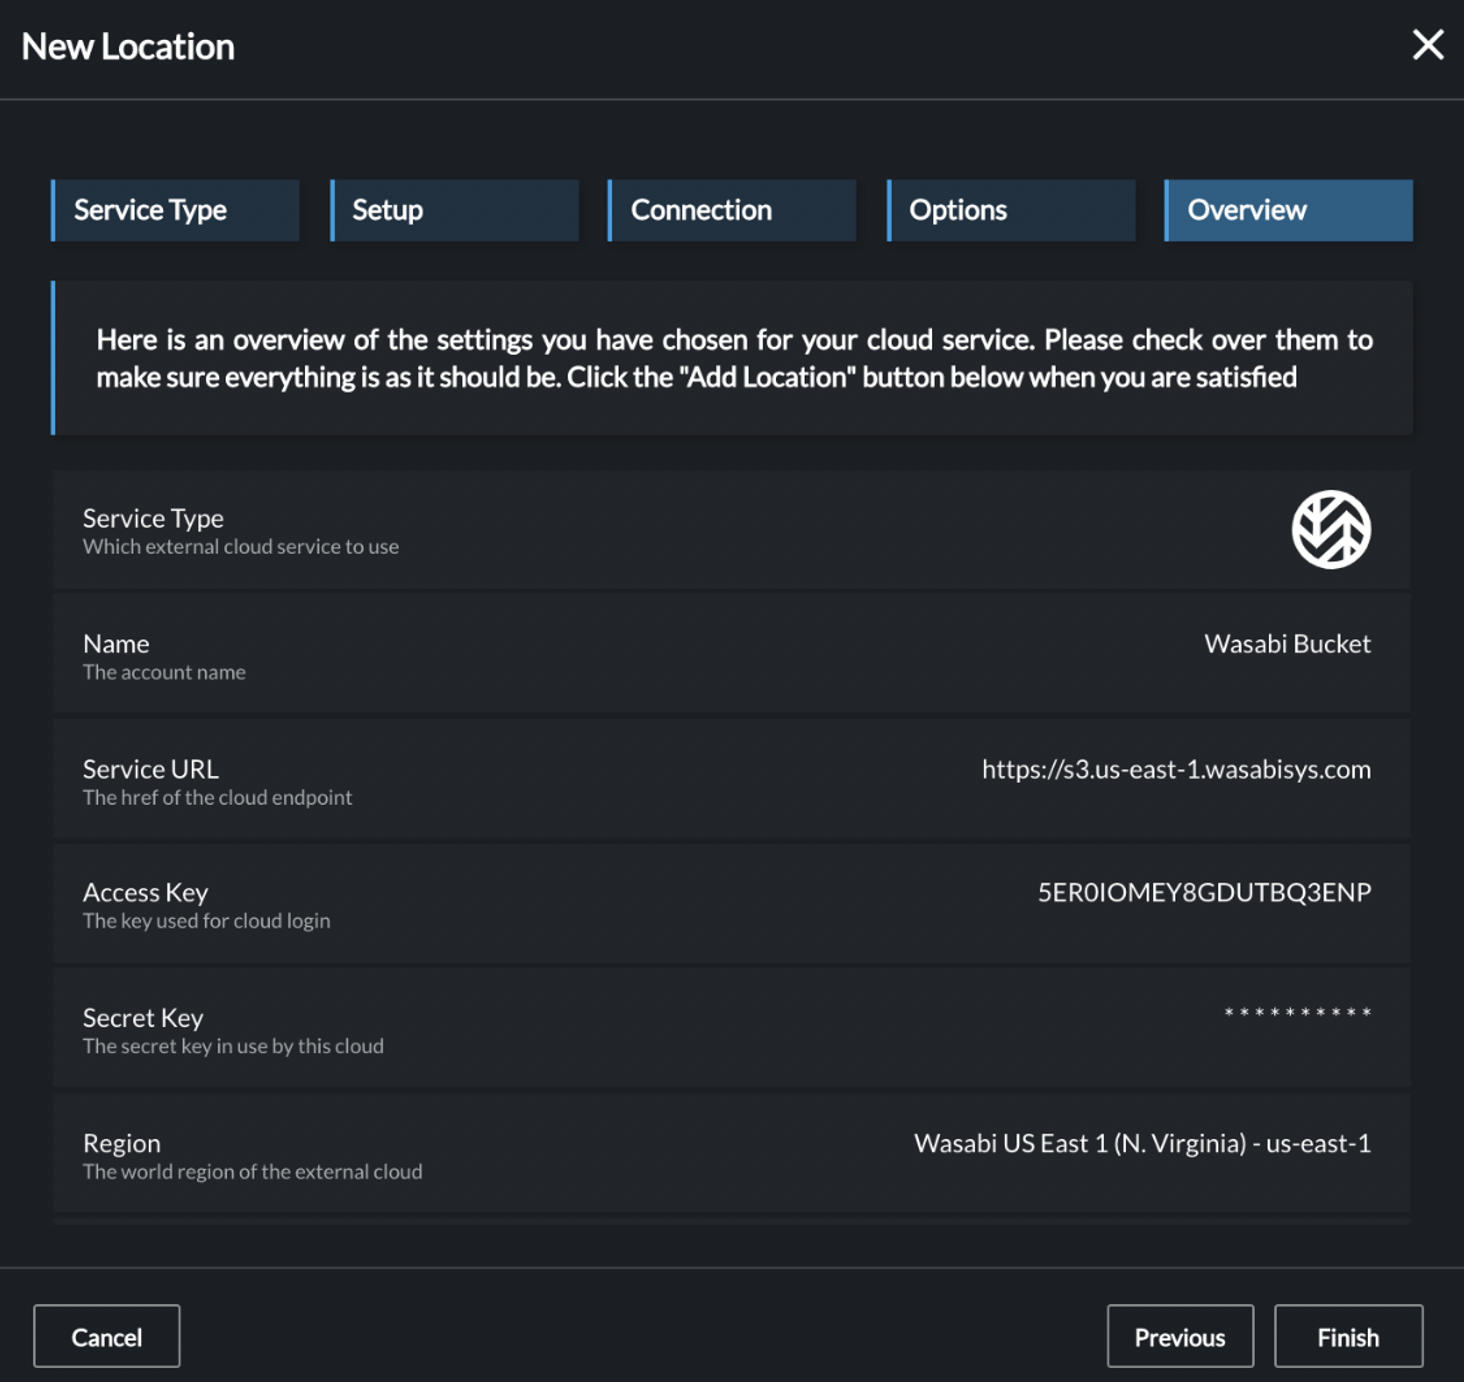
An overview of the configuration for your Wasabi Hot Storage linked Cloud Workspace is shown.
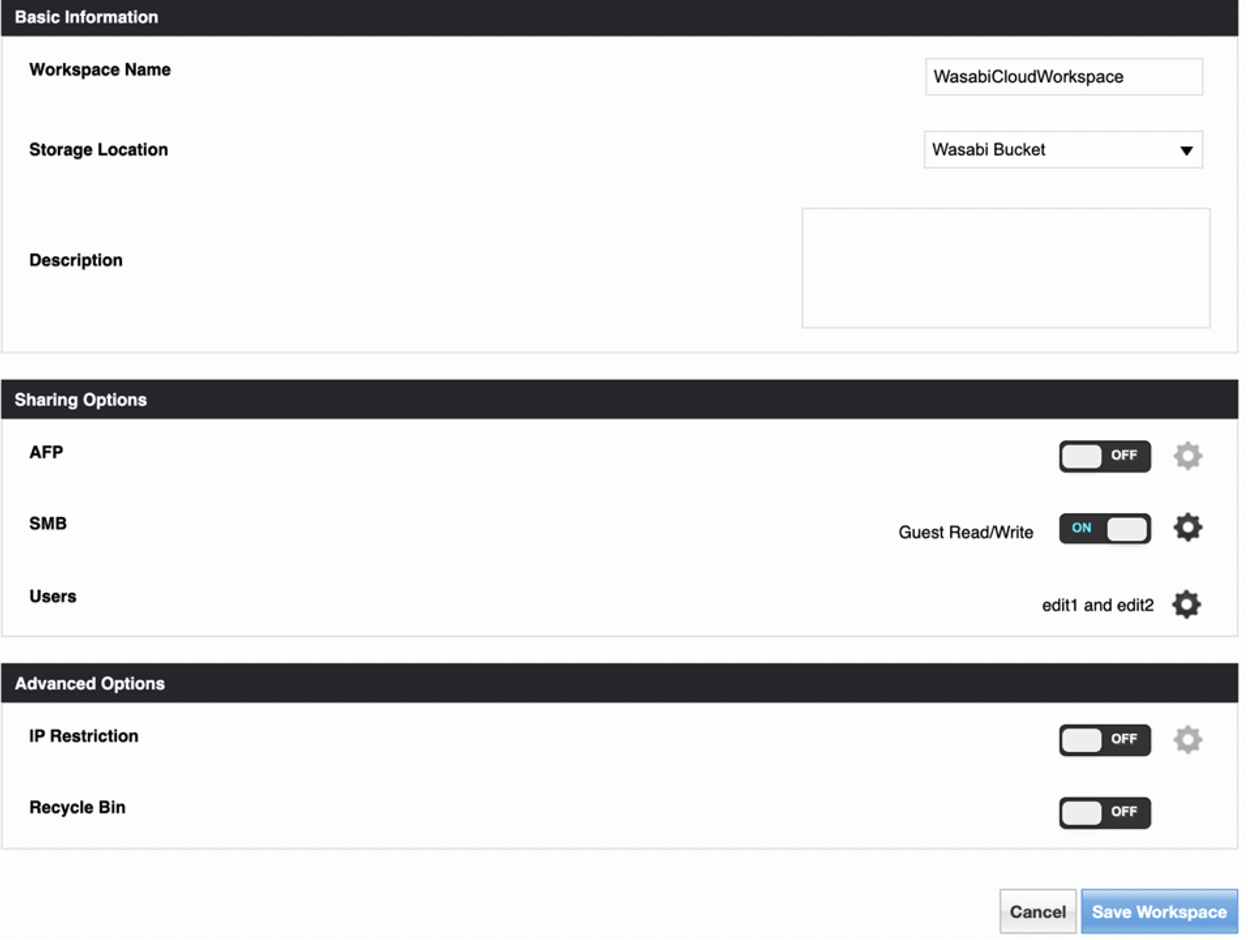
Click on the Workspaces link to take you back to the system workspace manager

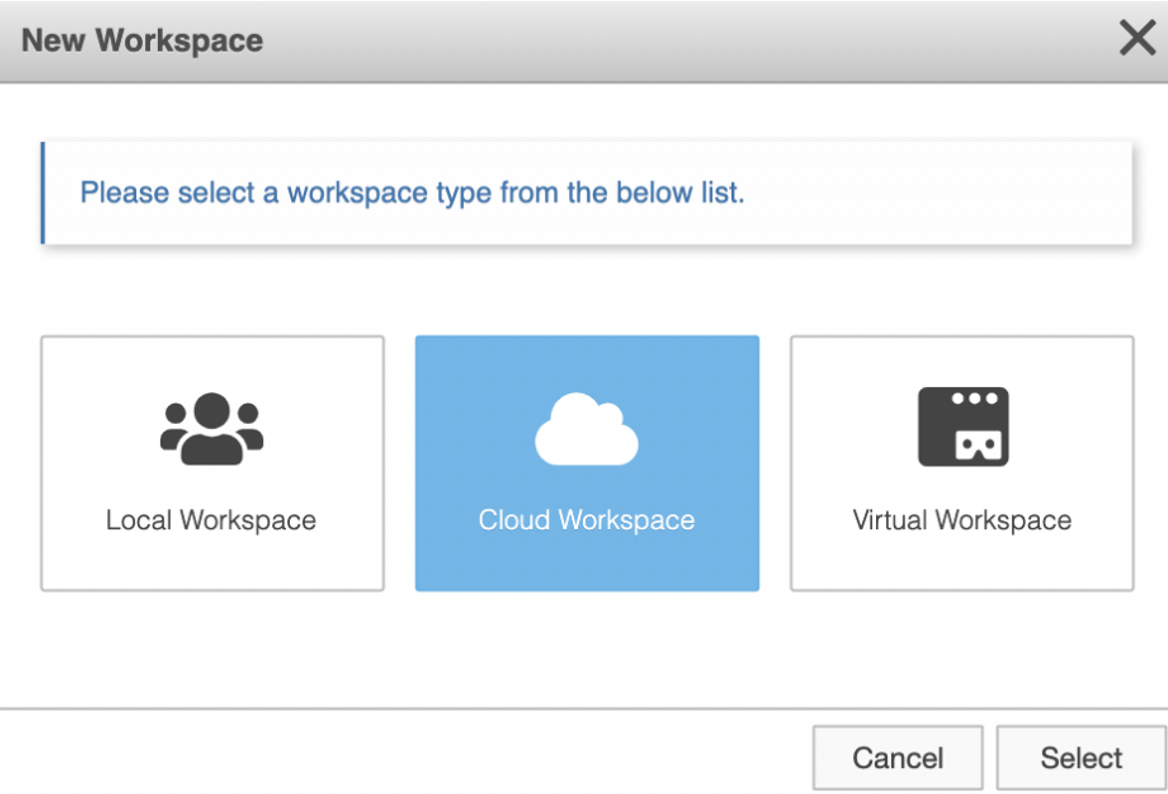
Click New Workspace . Select Cloud Workspace for the type.
Configure the workspace to suit your workflow. Give it a name and set the storage location to be the same as the Wasabi Unify Hub location previously created.