Hammerspace has been validated for use with Wasabi. To use this product with Wasabi, please follow the instructions below.
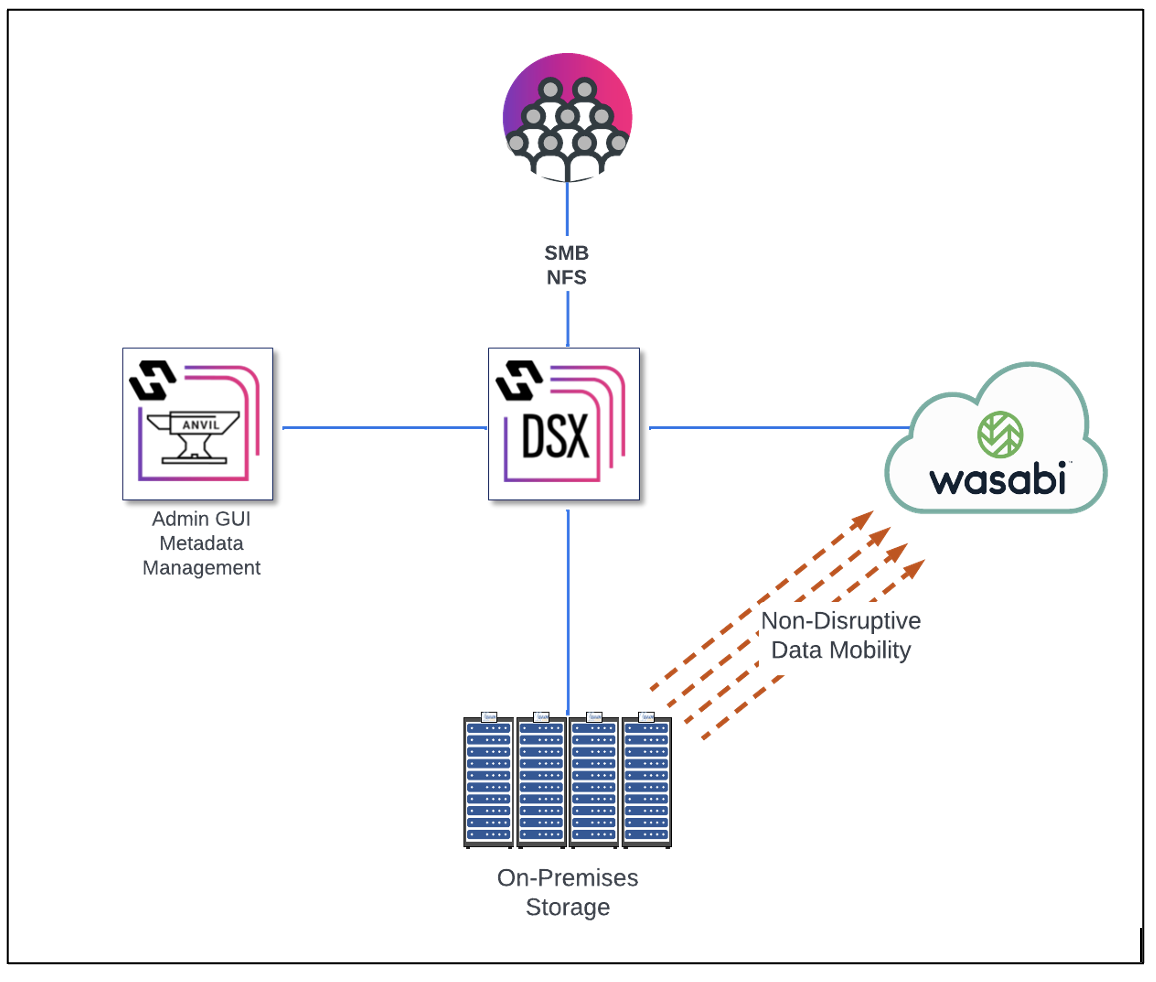
1. Reference Architecture
2. Prerequisites
Anvil metadata node installed
Hammerspace DSX data node installed
An active Wasabi account
Wasabi Bucket - See our Bucket Creation Guide
Access & Secret Key Pair - See our Access Keys Guide
3. Adding Wasabi as a Hammerspace Storage System
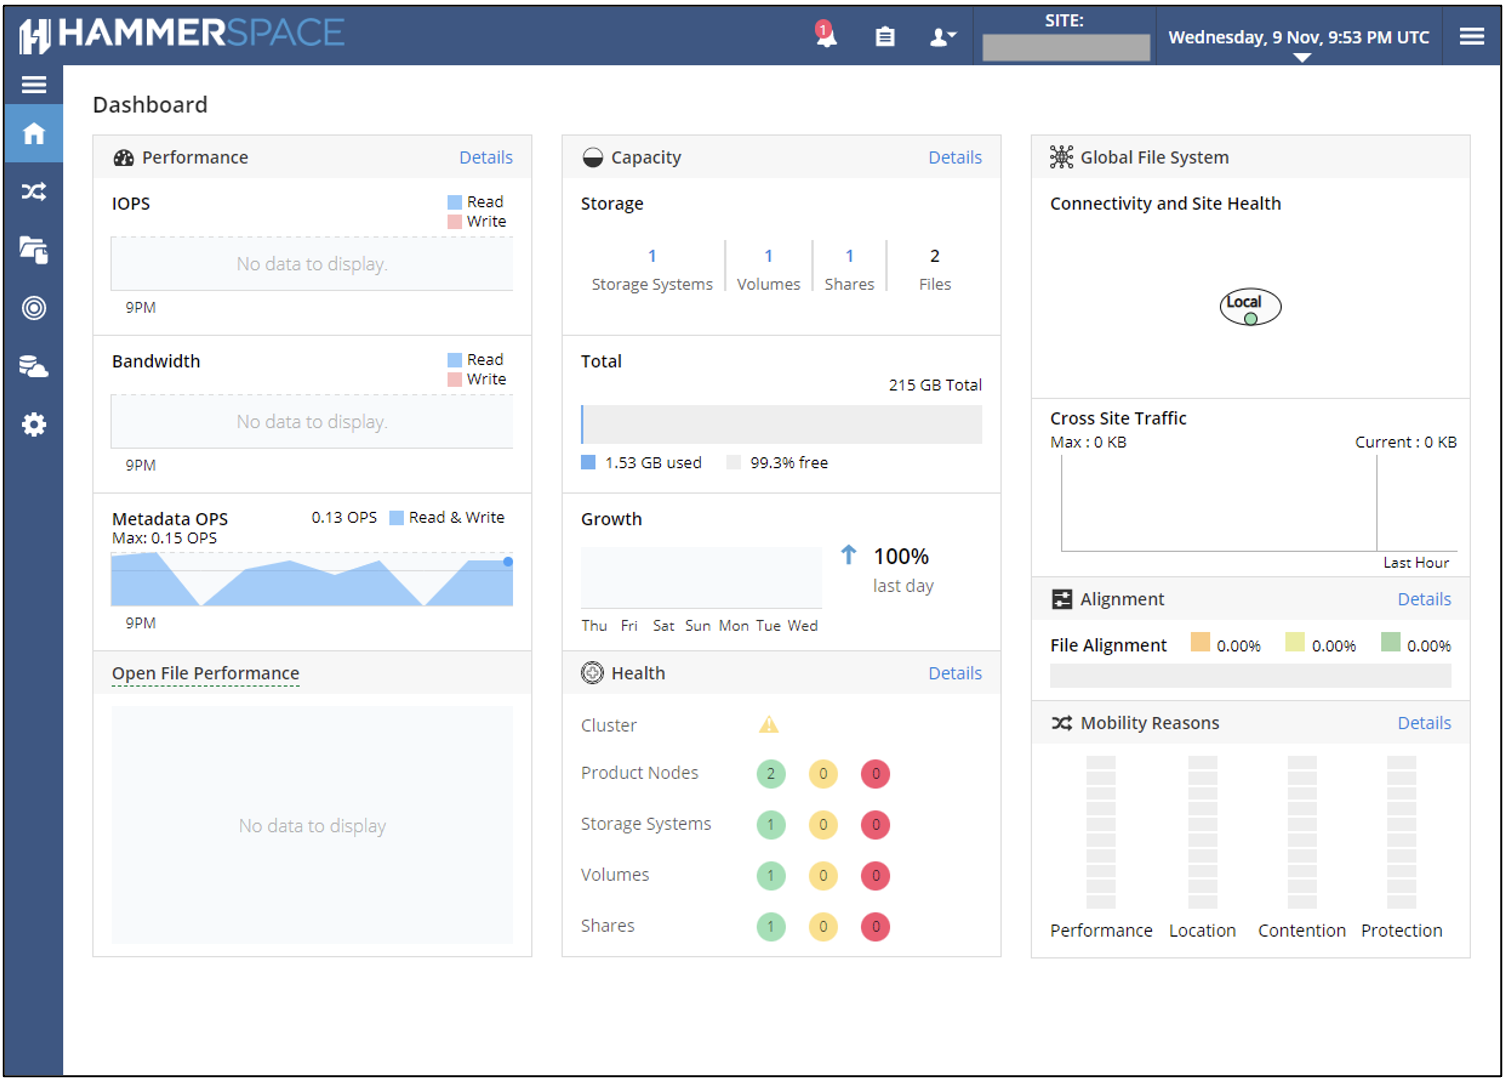
3.1. Login to Hammerspace admin portal via browser https://:8443
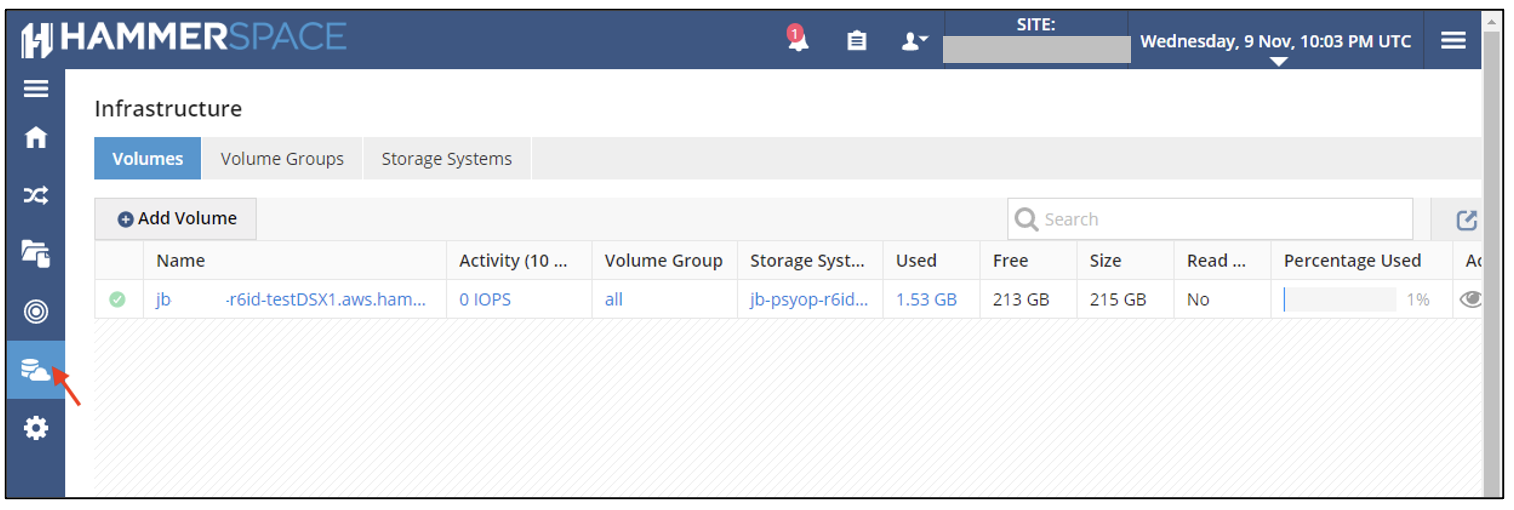
3.2. Click on Infrastructure icon in the left navigation pane.
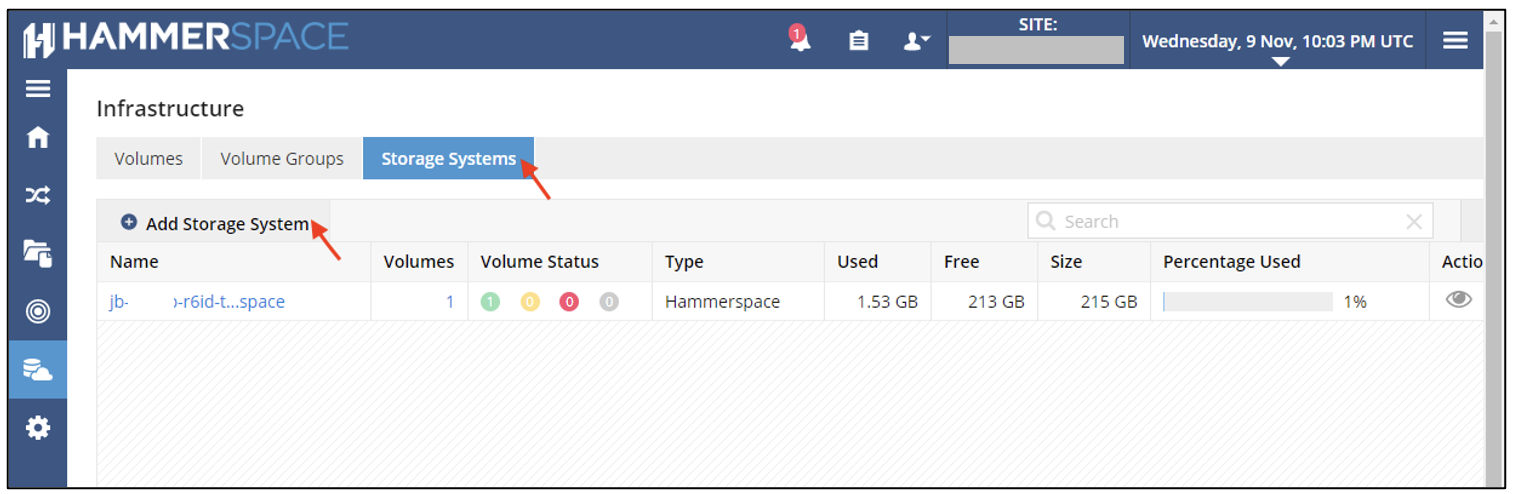
3.3. Navigate to Storage Systems. Click Add Storage System.
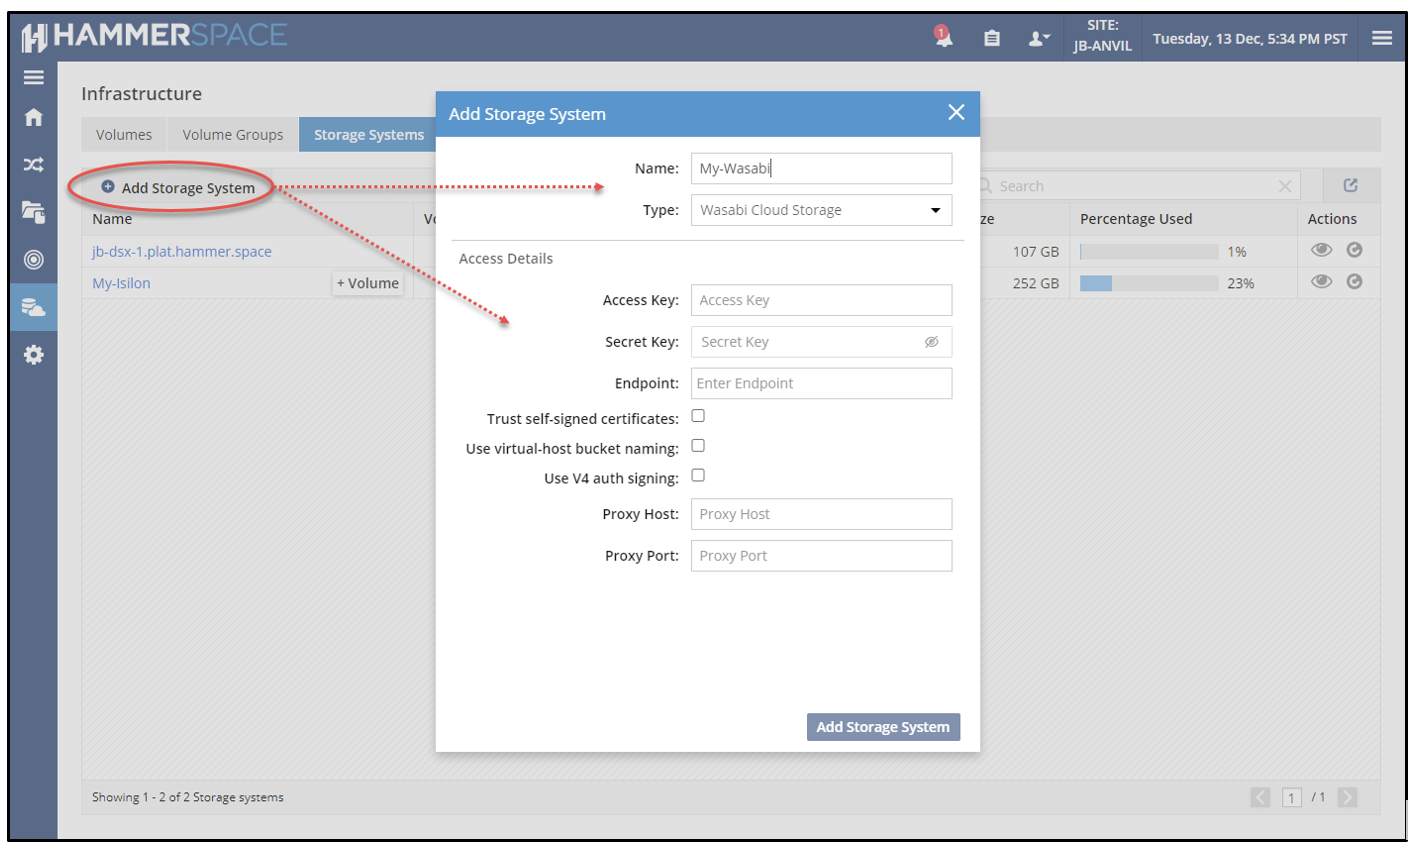
3.4. In the Add Storage System dialog box, provide the following details and click Add Storage System.
Name: provide a name for the Storage System
Type: select "Wasabi Cloud Storage" from the dropdown menu.
Access Key: Wasabi access key
Secret Key: Wasabi secret key
Endpoint: endpoint URL of the Wasabi region where the bucket is located
Trust self-signed certificates: optional
Use virtual host bucket signing: optional
Use V4 auth signing: Leave empty!
Proxy Host: optional
Proxy Host: optional
Note: For information on the Wasabi service URLs, refer to our Service URLs for Wasabi's Storage Regions.
4. Creating a Volume
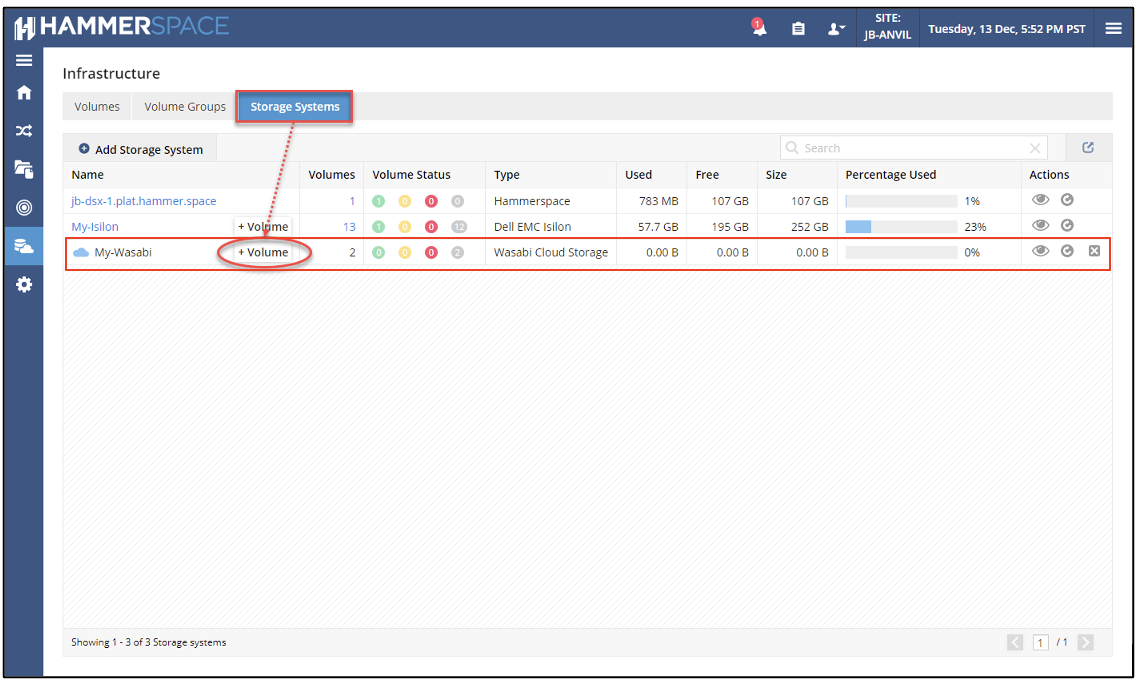
4.1. The Wasabi storage system created earlier will now be listed in the Storage Systems tab. Click + Volume b in the column listing Wasabi.
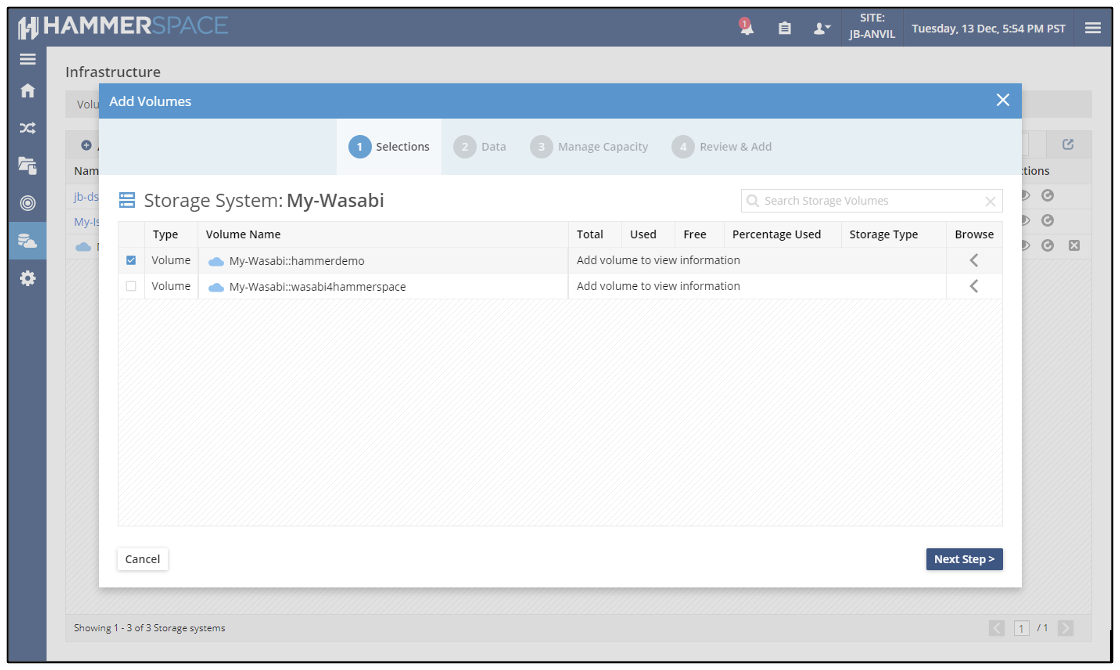
4.2. In the Add Volumes wizard, under Selections, select the checkbox(es) for the Wasabi bucket(s) to add to Hammerspace. In this example, we are adding a single bucket, but it is just as simple to add multiple buckets at once if desired. Click Next Step .
4.3. In the Data tab, do not check Shared Volume. This must be empty unless creating a Hammerspace Global File System. Click Next Step.
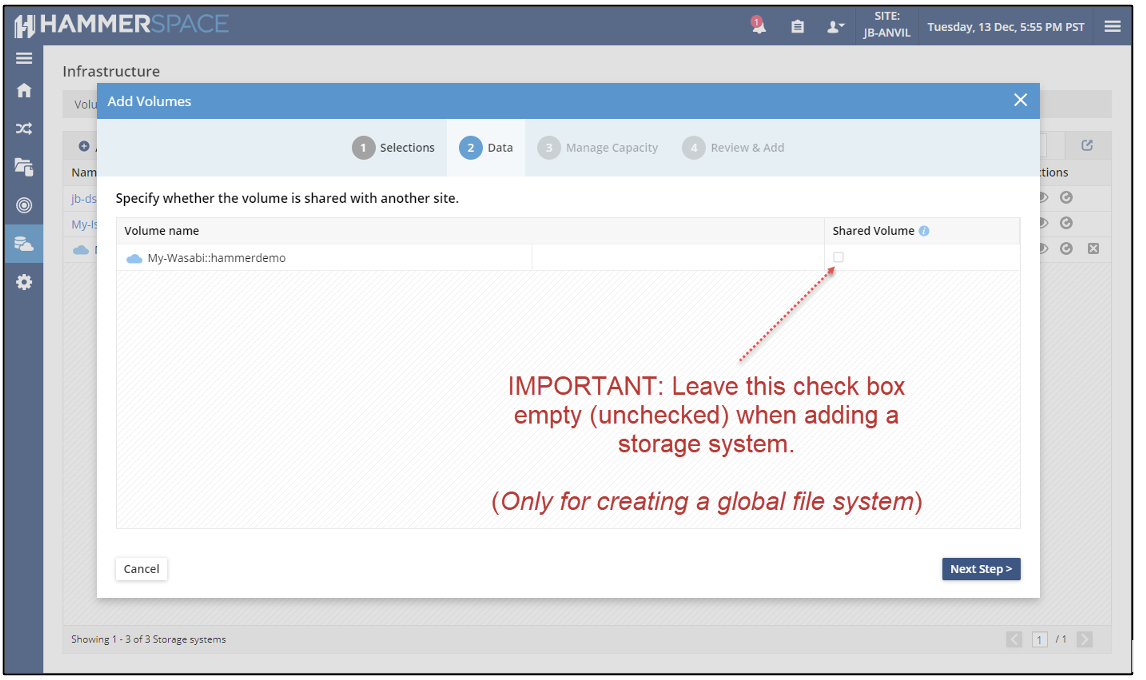
Note: Please contact Hammerspace if you are configuring a Global File System.
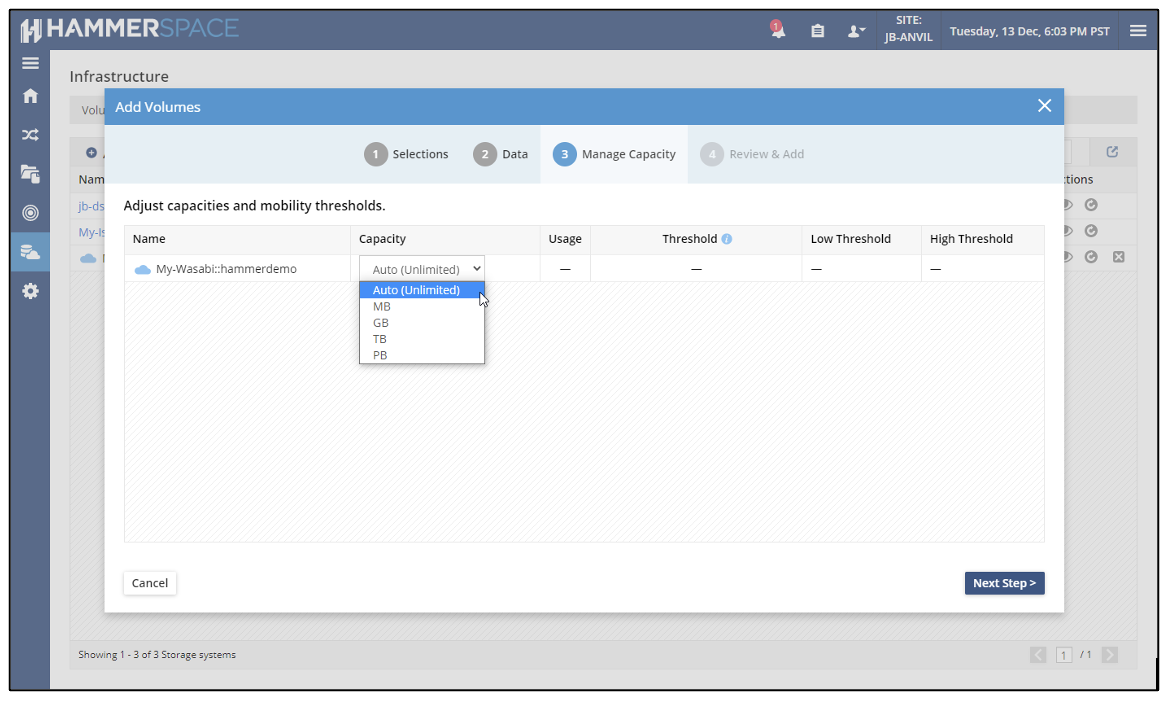
4.4. Under Manage Capacity tab, select the desired capacity to limit the capacity, or choose Auto for unlimited capacity. Click Next Step and the new volume will be created.
4.5. The new volume will be listed in the Volumes tab.
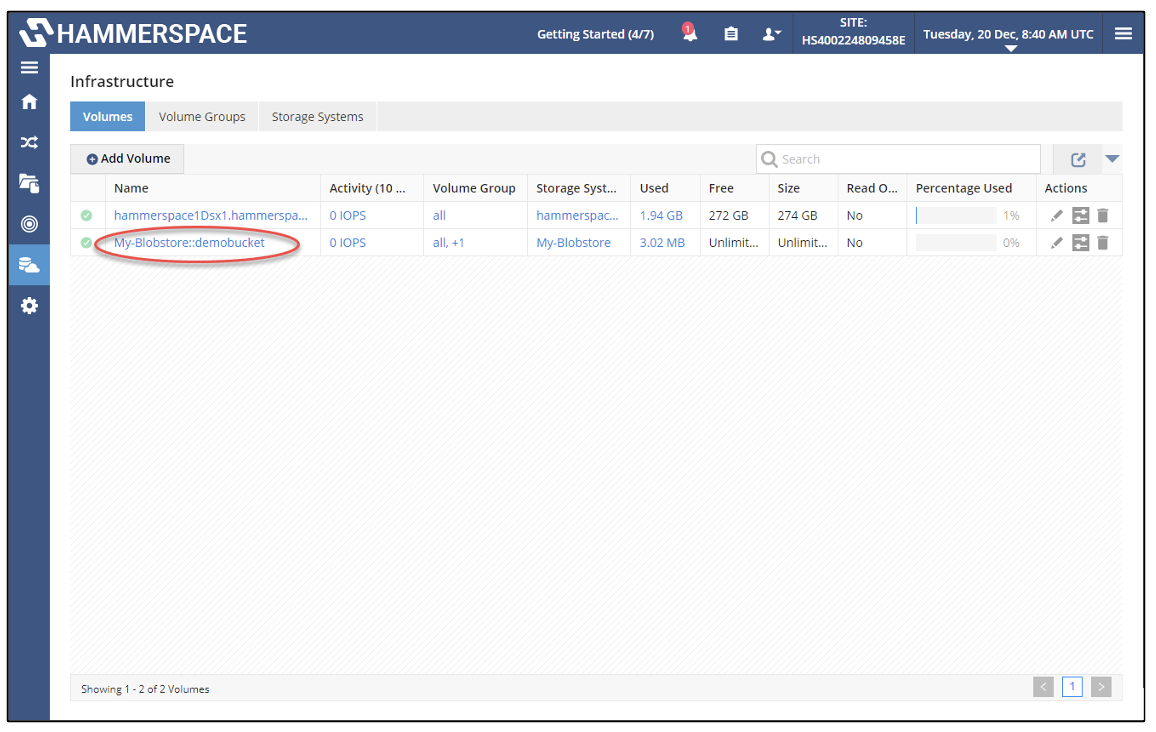
The next step is to create a share for SMB and NFS export.
5. Creating a Share
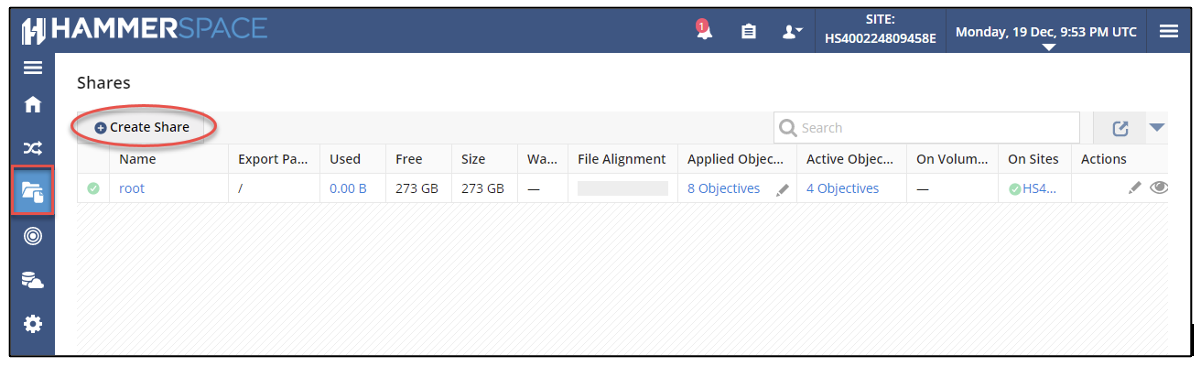
5.1. Click Share icon in the left navigation pane. Click Create Share.
5.2. The Create Share configuration window will open. From the Share Details tab fill out the following information:
Name: Provide a name for the SMB
NFS Export Path: automatically filled out (from the “Name” form field above).
Max Share Size: Set the desired maximum size for the share.
Alert Threshold: Set a percentage of capacity trigger for alerting (soft quota).

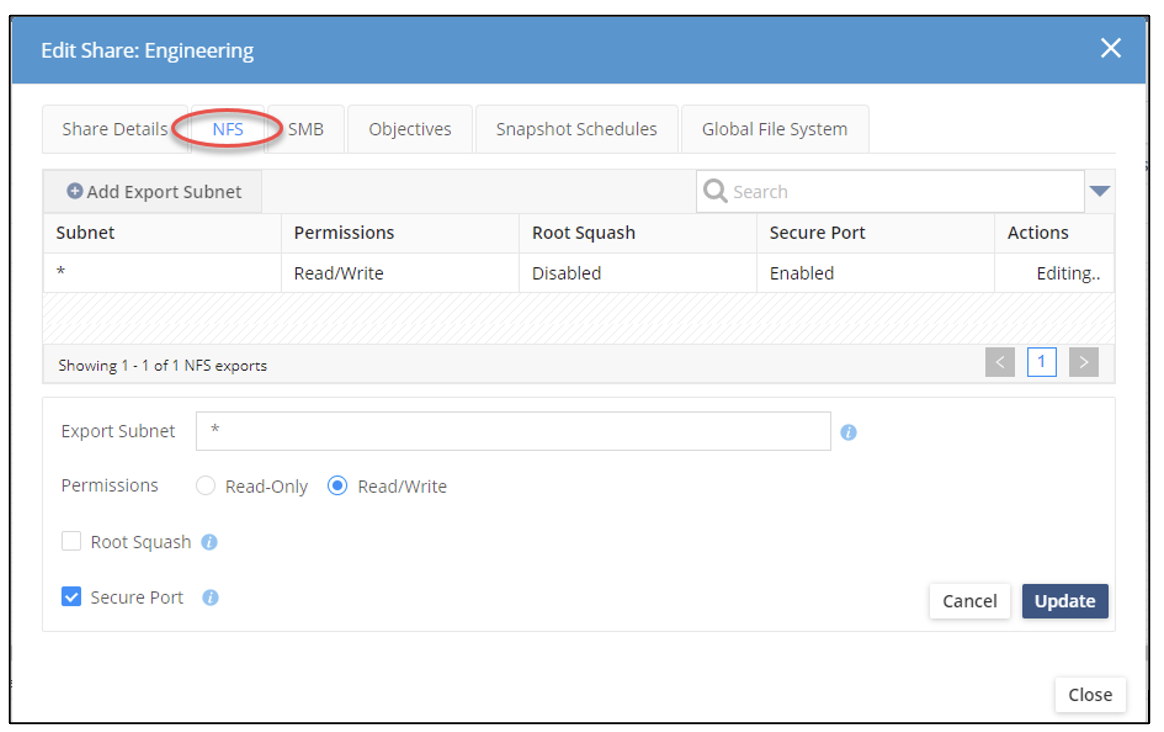
5.3. Select NFS tab to view or edit additional configuration options. These are standard NFS configuration options. Click Update if making changes.
Export Subnet
Permissions
Root Squash
Secure Port
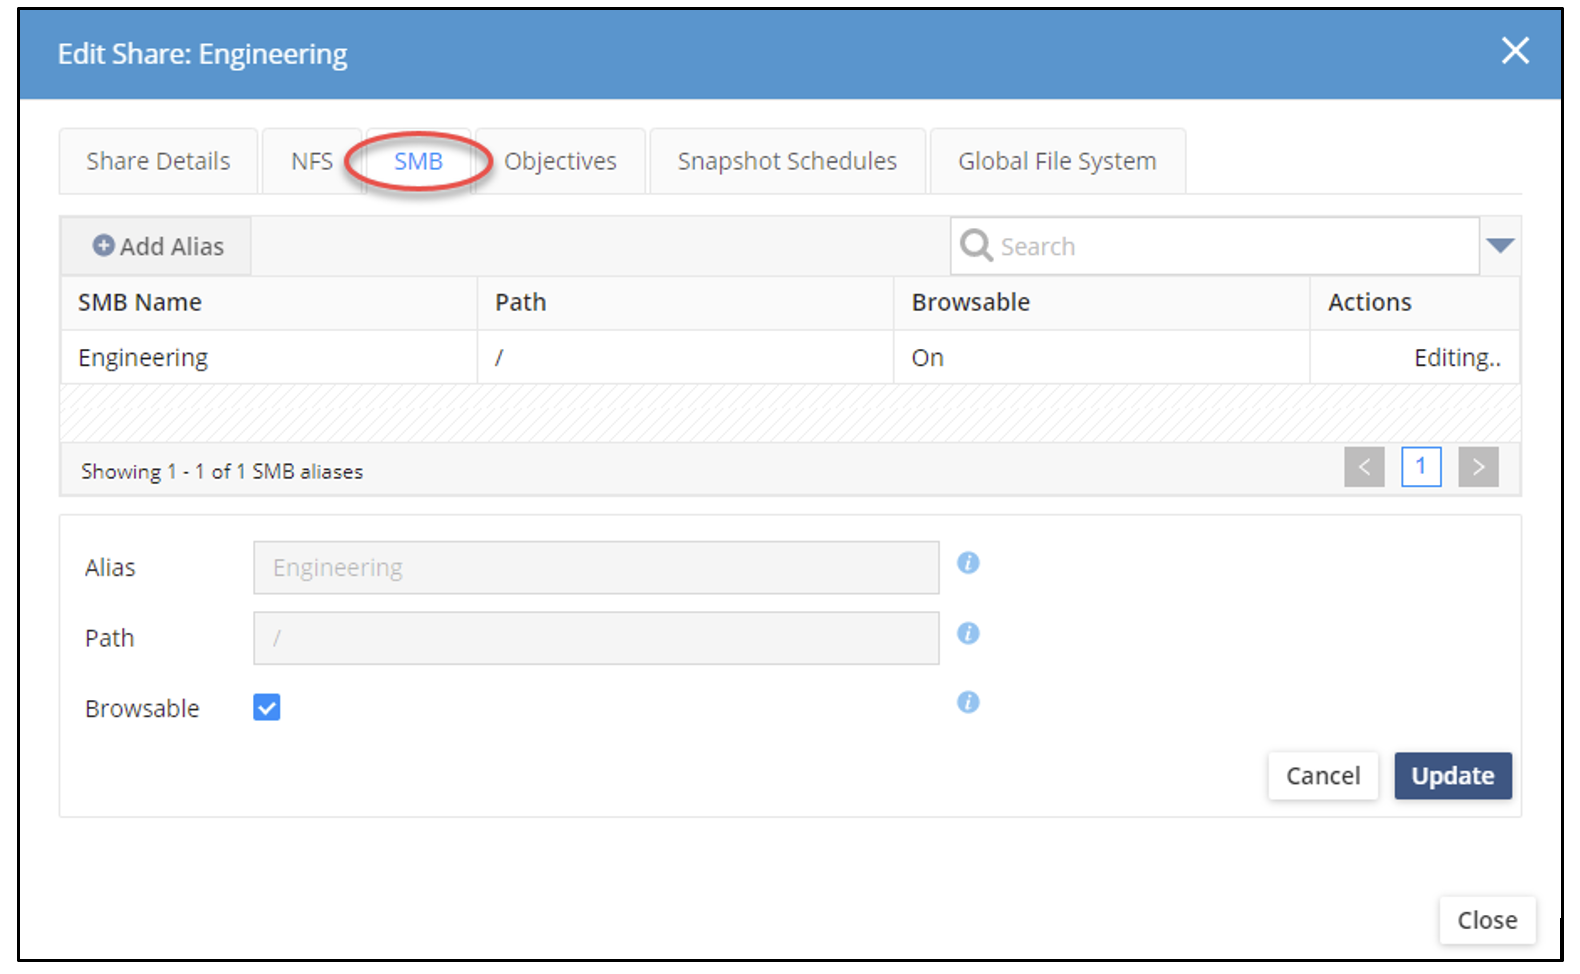
5.4. The SMB tab allows us to configure:
SMB Aliasing. NOTE: The name must be unique across all shares.
SMB Alias Path (relative to the root of the share). NOTE: Must begin with a forward slash (“/”).
Whether or not to make the Share browsable (checkbox).
Click Update if making changes.
5.5. Click Objectives. Click Add Objective. Select place-on-My-Wasabi from the Objective dropdown menu.
Click Add to apply the Objective. Click Close.
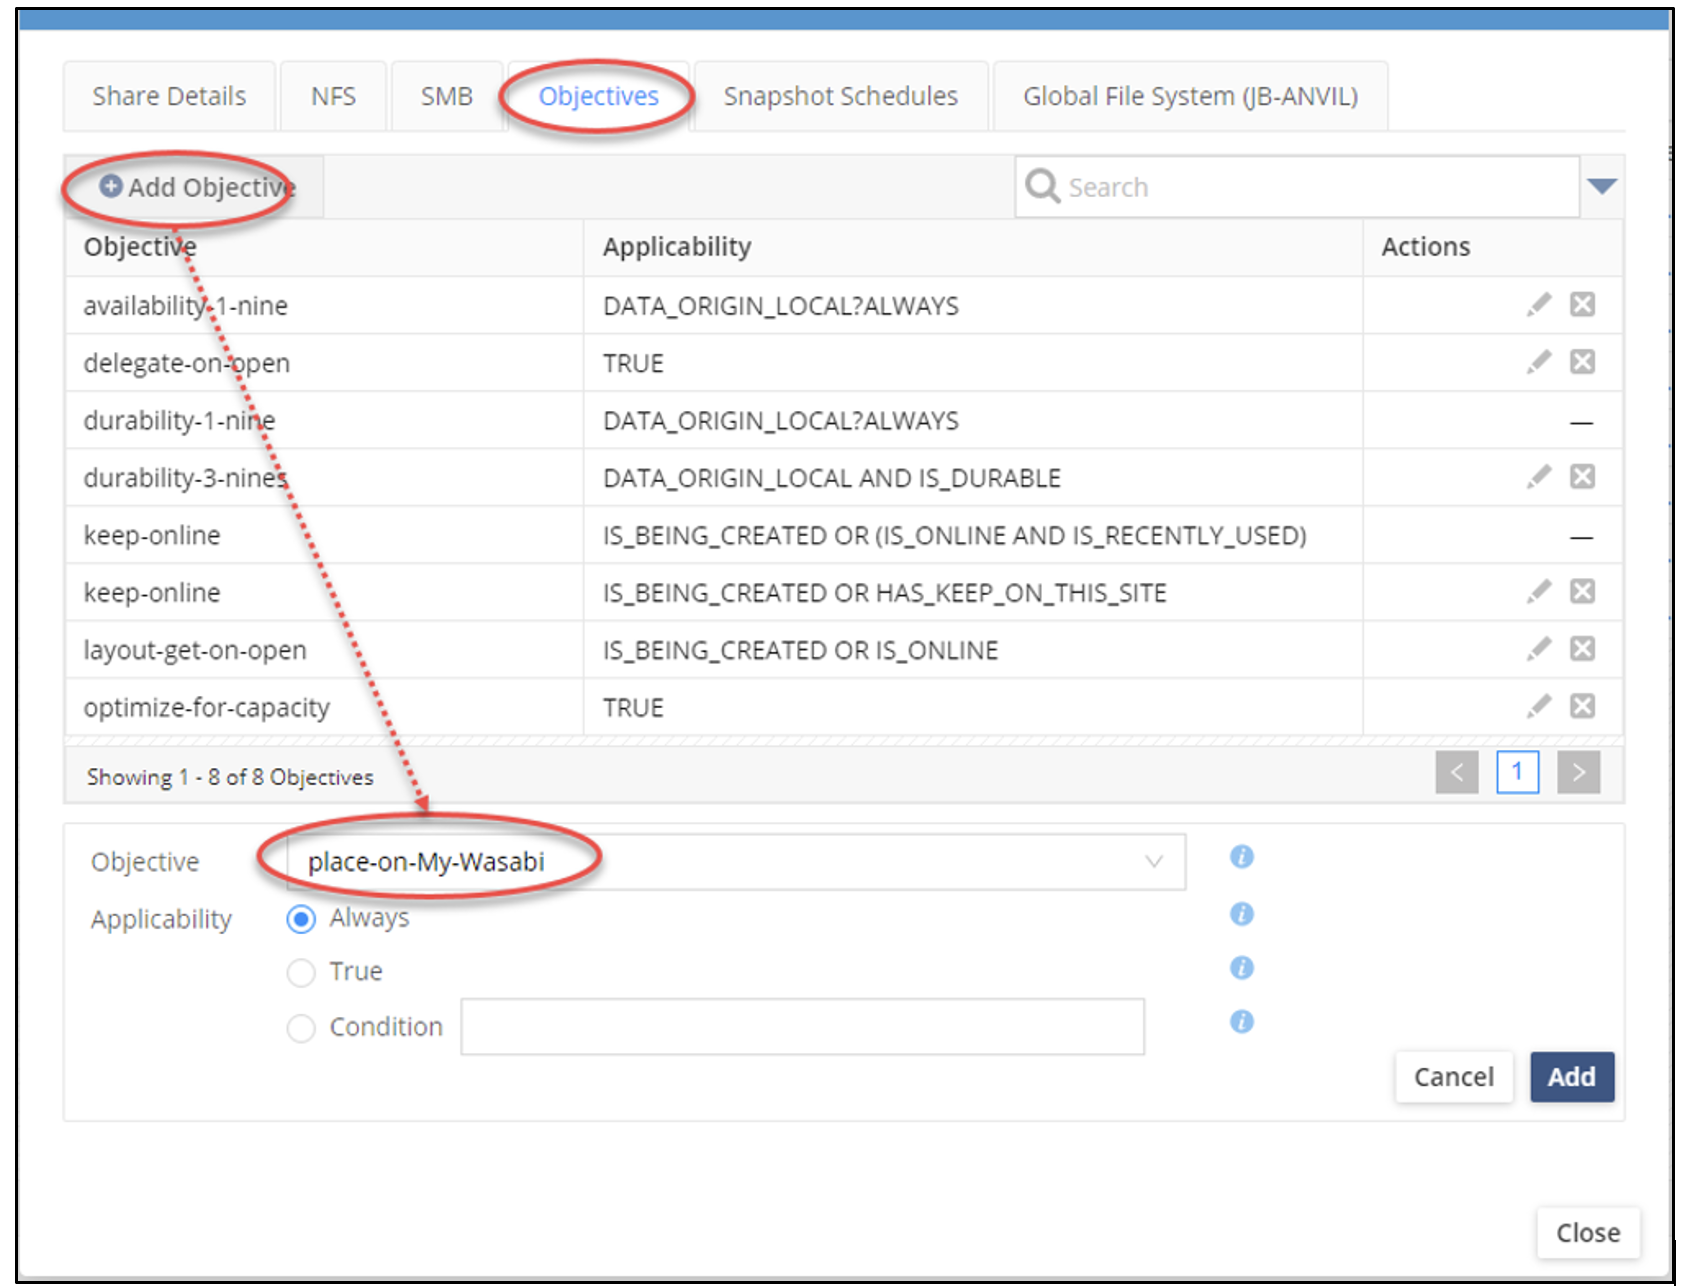
Note: The name “My-Wasabi” was chosen in the section “Adding Wasabi to Hammerspace”. This name will vary depending on your configuration.
This Objective will move data non-disruptively from another Storage System, Volume, Site, or Cloud to Wasabi.
5.6 To apply to existing shares, navigate to Shares from the left navigation pane. Click edit pencil to the far right in the appropriate row corresponding to the share containing data to migrate to Wasabi.
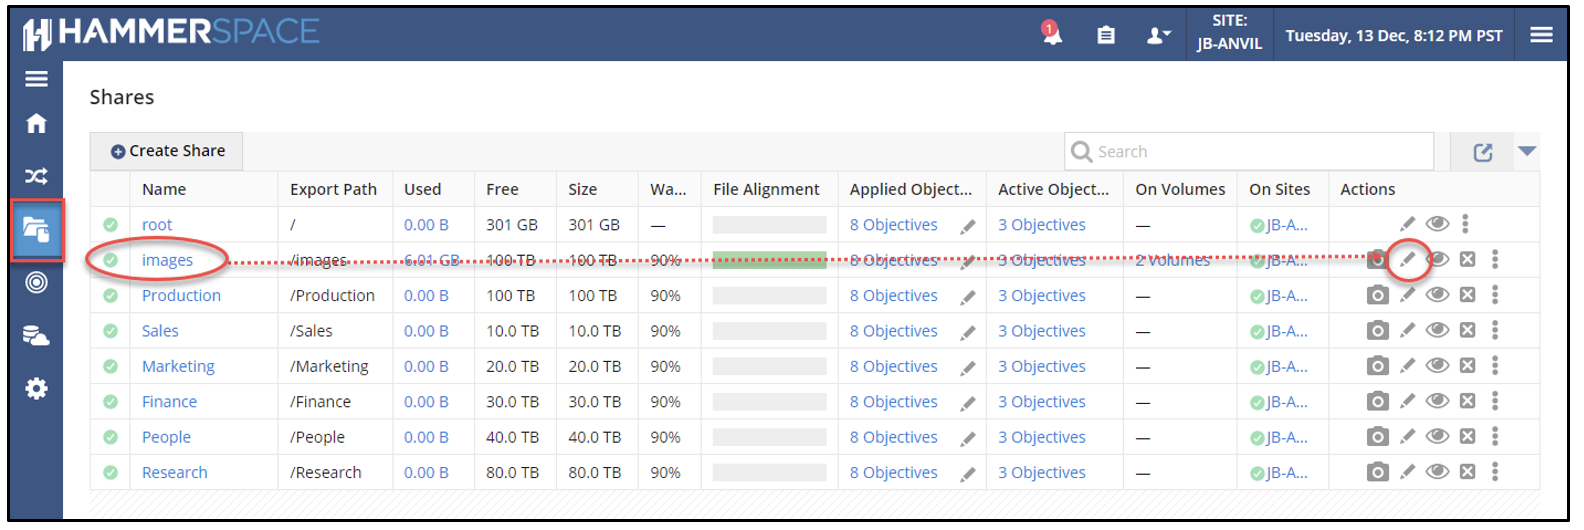
This will open up the share configuration window (seen in previous images). Add the objective as directed in Step 5.5.
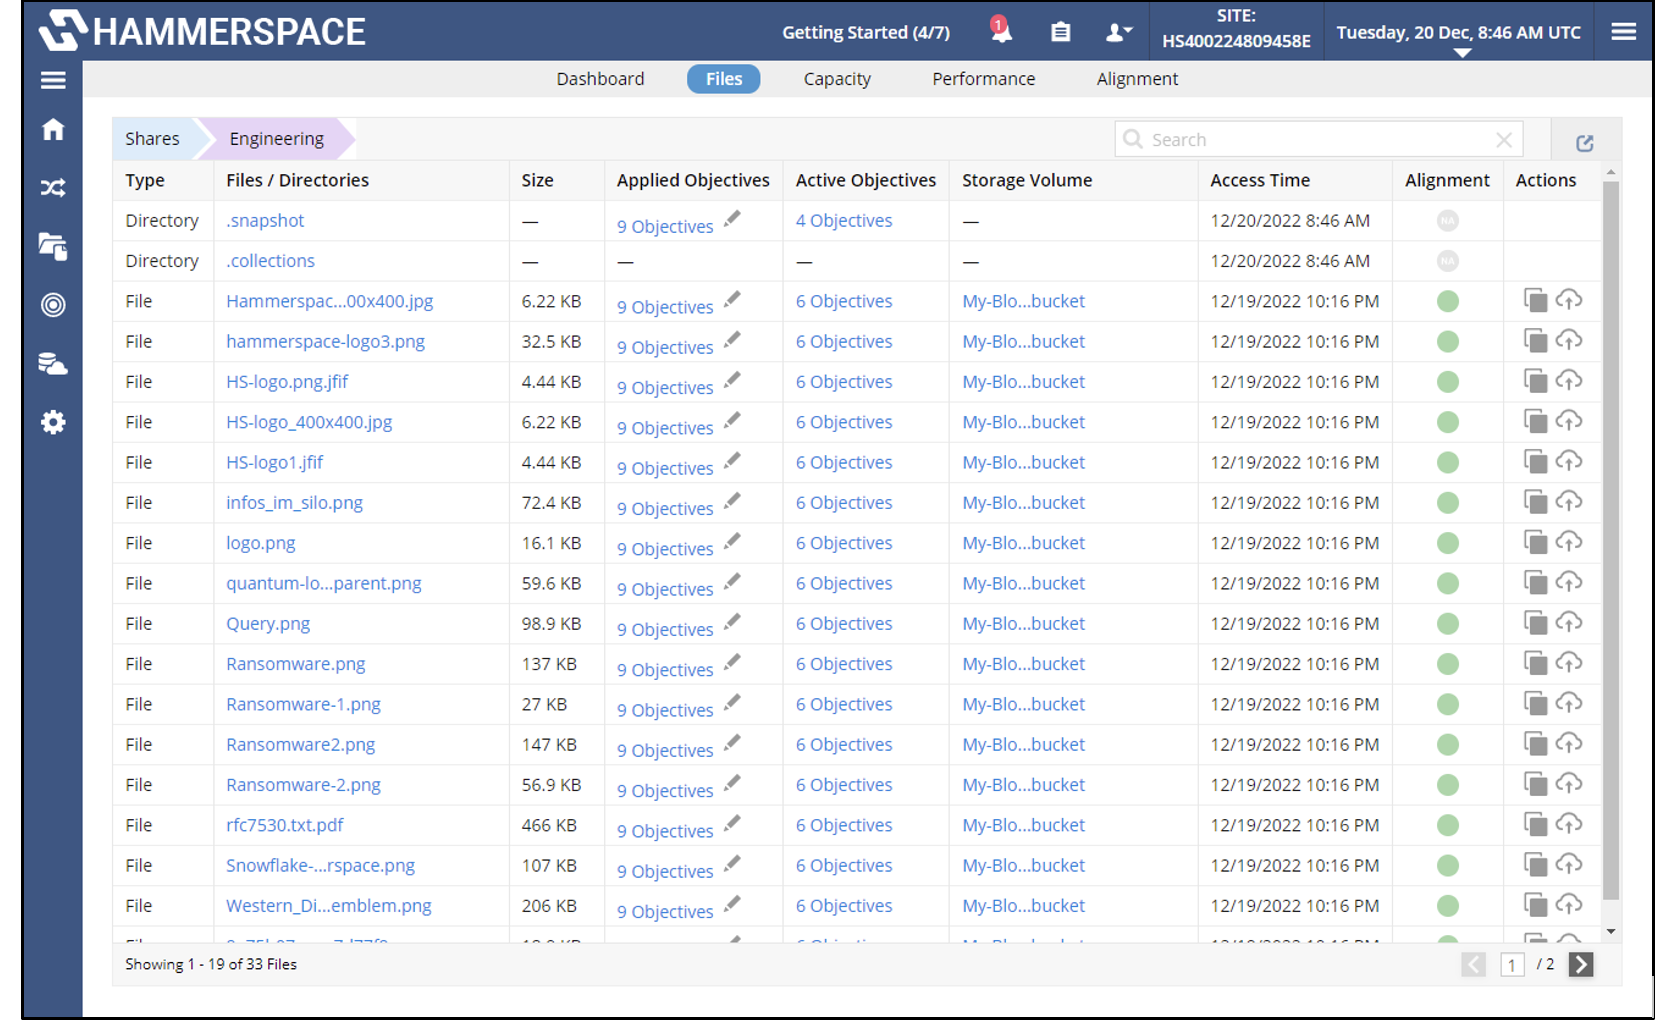
6. Alignment
Alignment is the term used to describe when data conforms with an Objective. While data is moving an orange bar will be displayed.
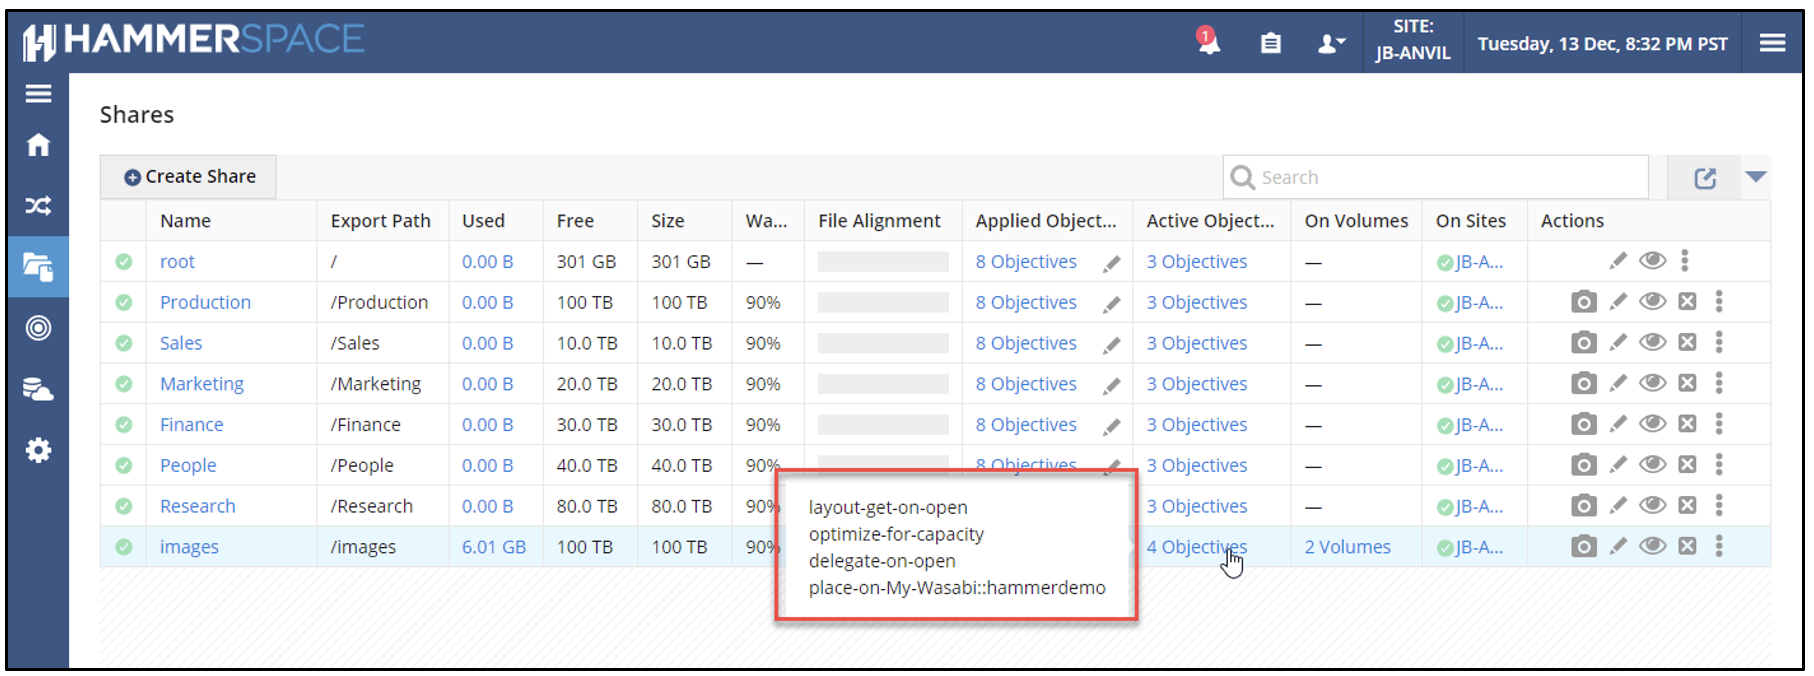
6.1. In the Shares tab, by hovering over the Active Objectives column and row with our target share, the highlighted information displays, showing that our newly applied Objective has taken effect.
6.2. We can also click on the Share itself and browse subfolders and files. The green color in the Alignment column tells us that the data has been aligned with its Objective. In other words, data has been moved to its declared destination (“place-on-My-Wasabi”).