Wasabi is a member of Veeam's cloud partner ecosystem and has worked with Veeam on several different methods for interfacing between your Veeam environment and Wasabi. For more information on how Veeam works with Wasabi, review Wasabi and Veeam for the Most Resilient Data Protection Solution.
If you have a large amount (generally 50 TB or more) of Veeam-associated data to transfer to Wasabi Hot Cloud Storage, one transfer option you have to use is the Wasabi Ball Transfer Appliance. The Wasabi Ball is a data transfer appliance used for transferring large data sets. For more information on Wasabi Ball, review Wasabi Ball Transfer Appliance.
The Wasabi Ball does not support the object lock/Veeam immutability feature.
Veeam immutability cannot be enabled after seeding with non-immutable Veeam data. The object lock chain must be started from scratch.
For questions about object lock, contact your sales representative or support@wasabi.com.
Follow the steps below to use Veeam with Wasabi Ball.
Modifying the Hosts File
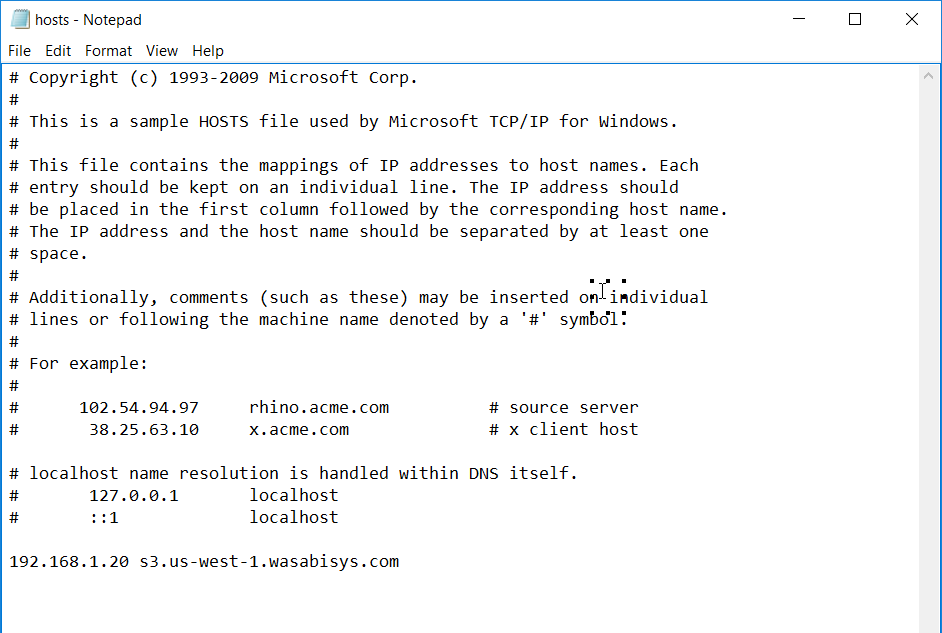
To use Veeam with Wasabi Ball, you must temporarily redirect Veeam to the Wasabi Ball IP address instead of the Wasabi service URL. To do so, edit the Windows hosts file.
Access the hosts file located at C:\Windows\System32\drivers\etc and modify it as Administrator. In the example below, the Wasabi Ball IP address is 192.168.1.20, and the destination bucket is located in the US-West-1 region.
For more information on Wasabi service URLs, review Service URLs for Wasabi's Storage Regions.
192.168.1.20 s3.us-west-1.wasabisys.comBy default, the Wasabi Ball S3 server listens to port 9000. For help changing this default setting to port 443, contact support@wasabi.com.
See screenshot below.
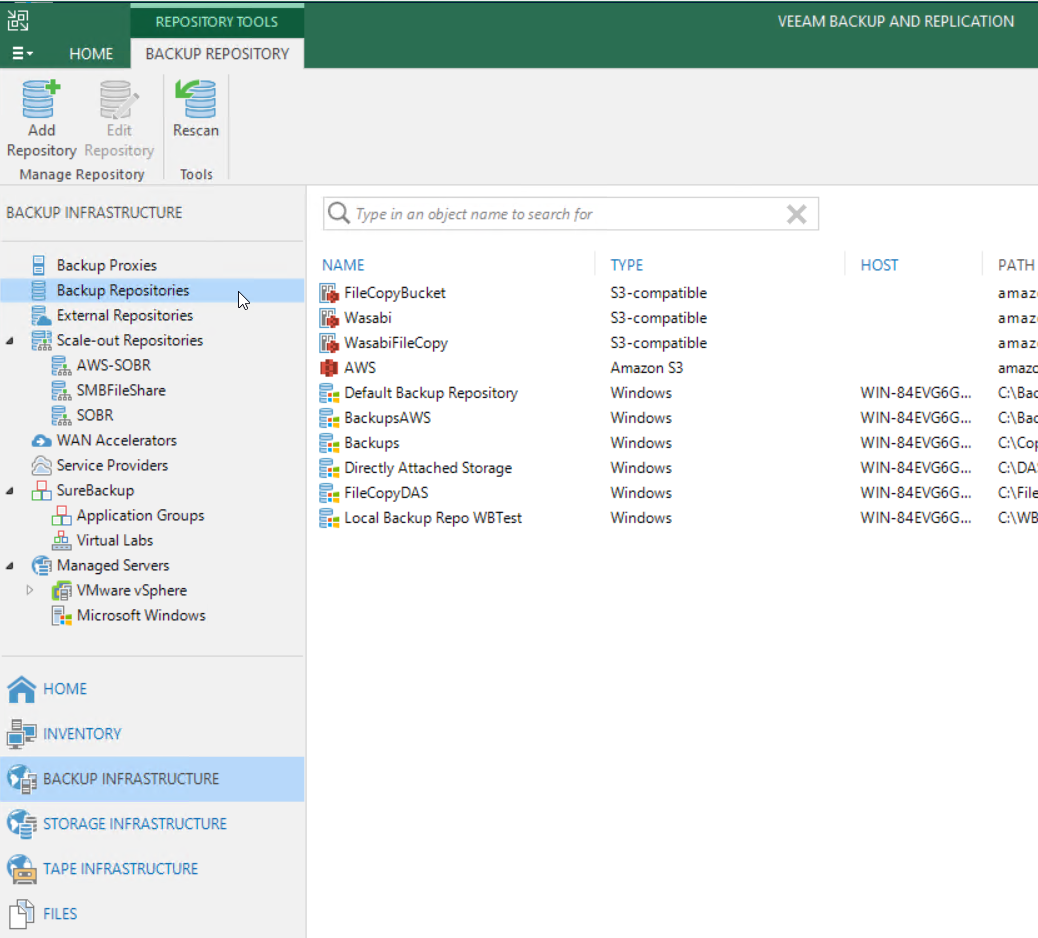
Adding a Backup Repository
Log in to the Veeam Backup and Replication console. Click Backup Repositories.
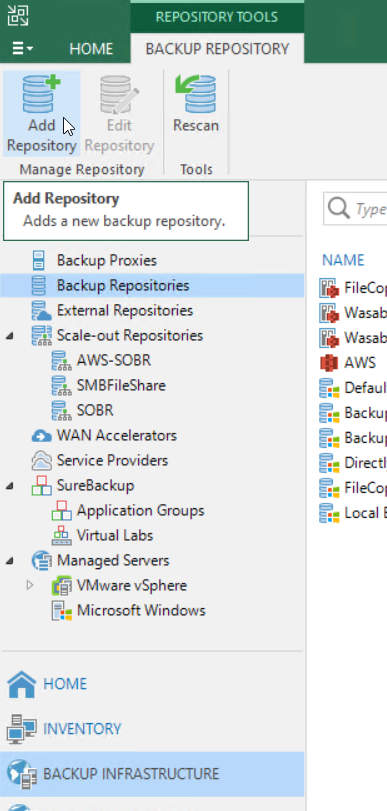
Click Add Repository.
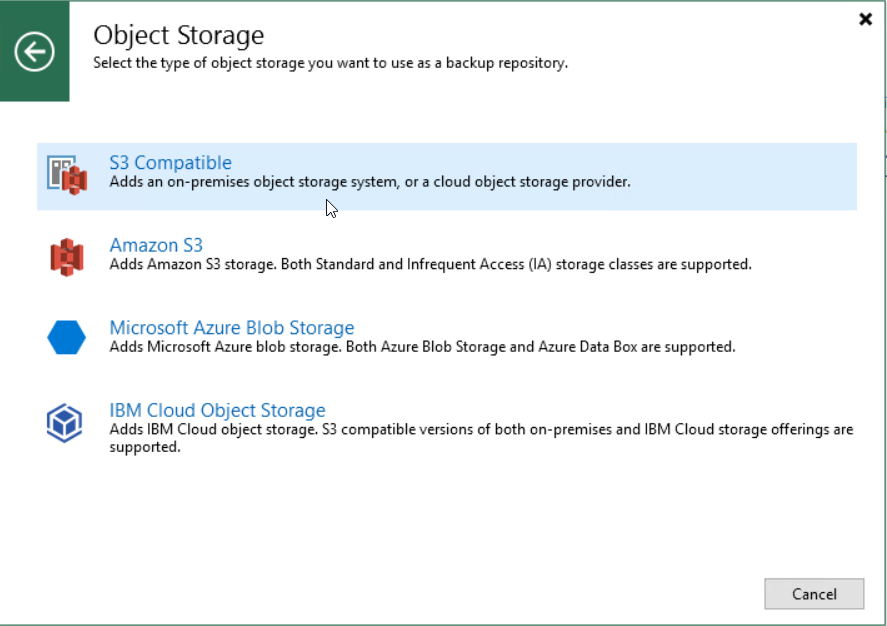
Select Object storage.
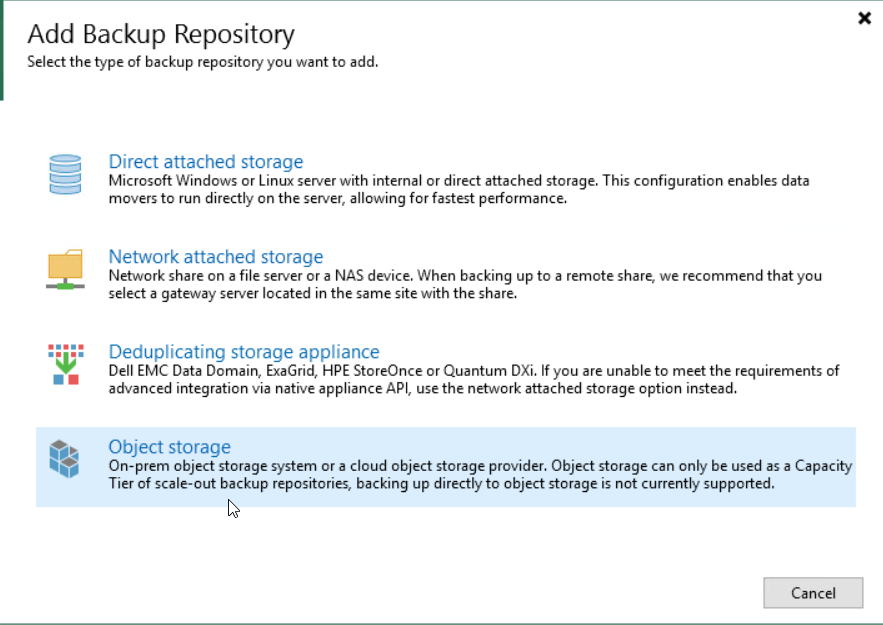
Select S3 Compatible.
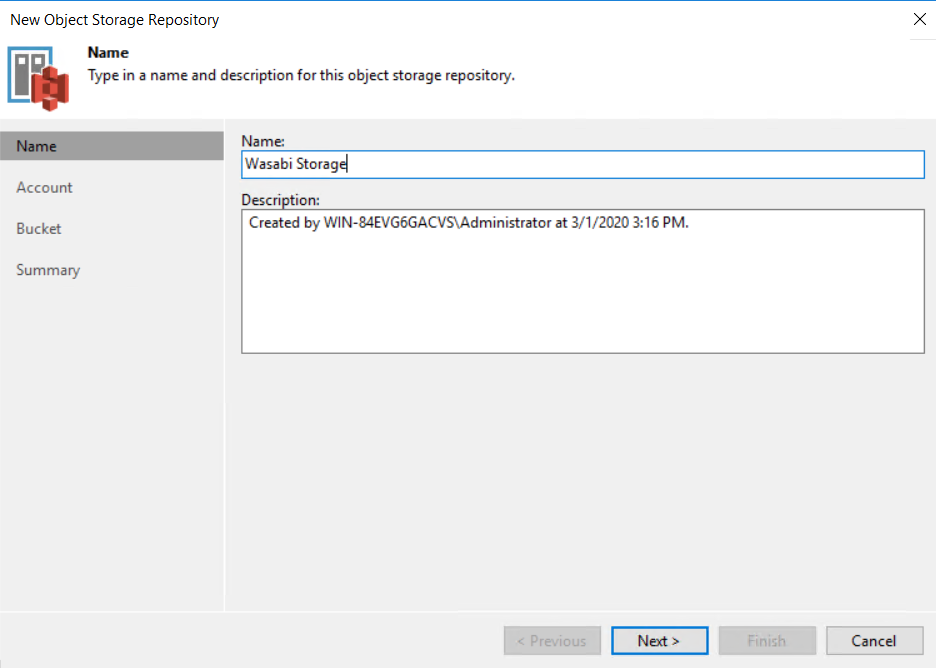
Enter a name, for example, Wasabi Storage. Click Next.
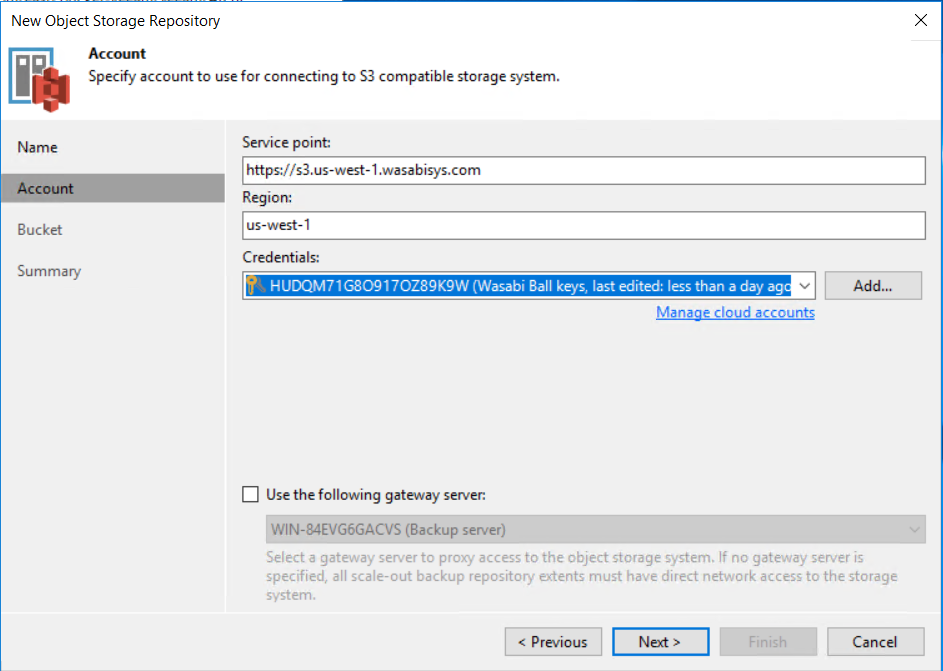
Add the appropriate Wasabi region URL. This needs to match your bucket region and the host’s entry above. Enter your Wasabi credentials. Click Next.
The Wasabi Ball will authenticate using your Wasabi cloud storage credentials.
You will see the alert box below confirming a connection to the Wasabi Ball. Click Continue.

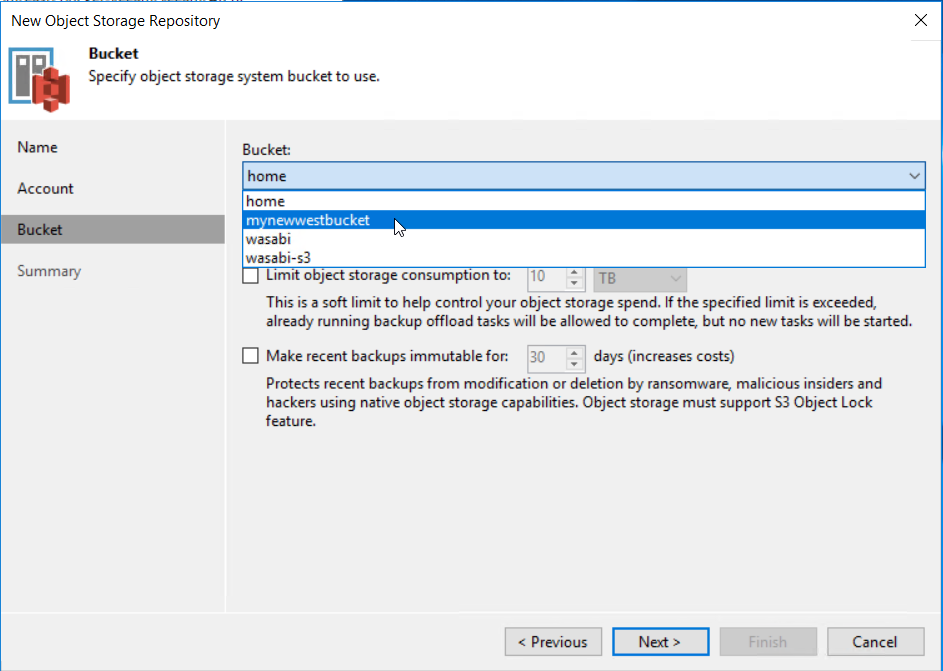
Veeam will list the different folders on the Wasabi Ball. Select the folder matching your Wasabi bucket name. Click Next.
CAUTION: Be sure that "Make recent backups immutable" is not checked for the Wasabi Ball.
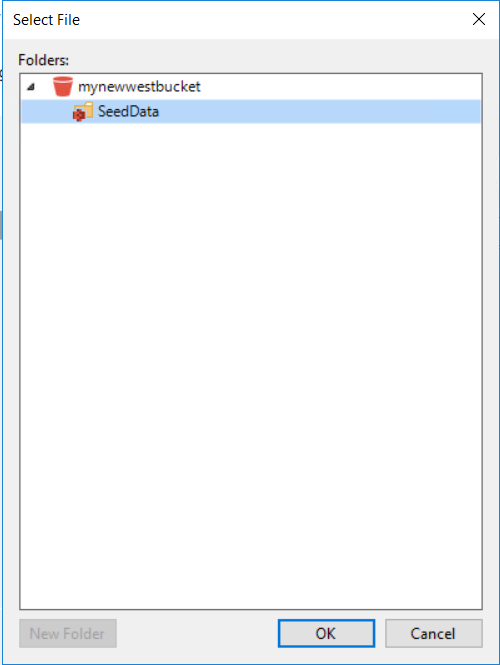
Click Browse. Click New Folder. Enter a folder name, for example, SeedData. Click OK. Click Next.
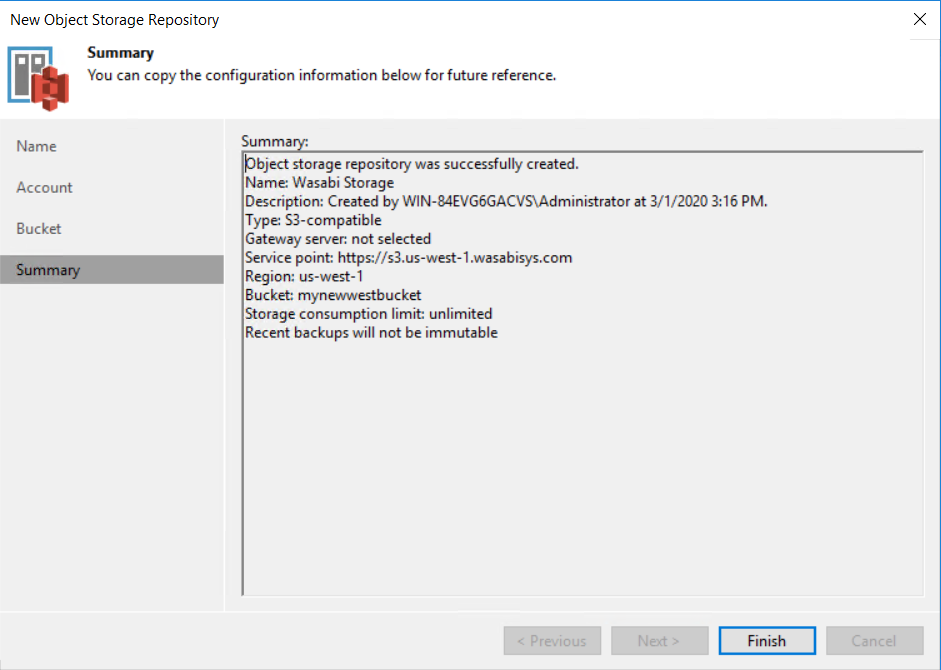
Click Finish on the Summary page. This confirms that the configuration has been entered successfully.
Adding a Scale Out Repository
Below are the steps to build the Scale Out Repository. This is used to tie with Primary/Local storage with the object storage.
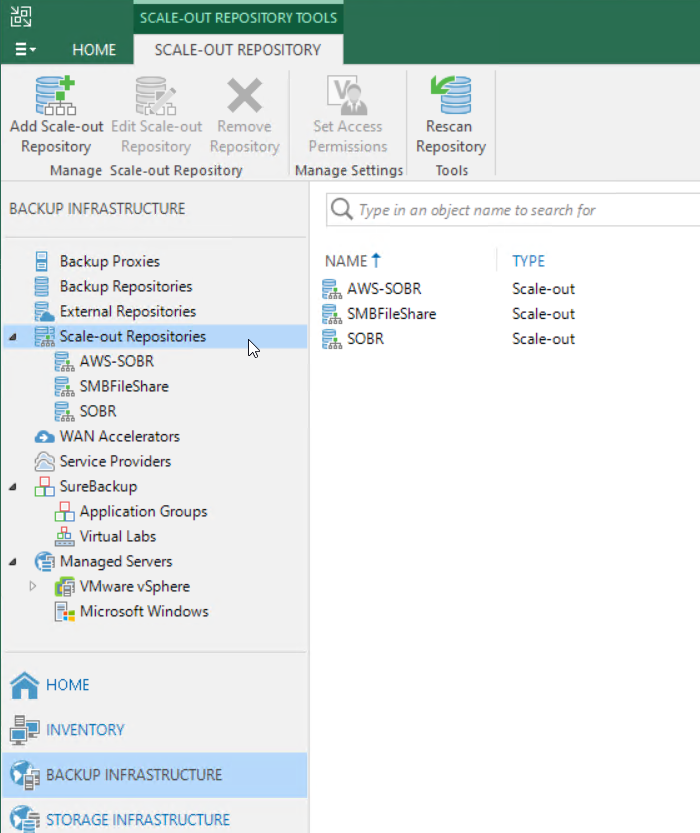
Click Scale-out Repositories. Click Add Scale-out Repository.
Enter a name, for example, Wasabi SOR. Click Next.

Click Add. Veeam will list the available local/primary repositories. Select the appropriate repository. Click OK.

Click Next to confirm.
Keep the default settings, as shown below. Click Next.

Click the checkbox to select the Wasabi Backup Repository that was created when adding a backup repository (above). Optionally, you can check the Copy backups to object storage option. Click Apply.

Click Finish.

At this point, we have successfully built the Wasabi Backup Repository and the Scale Out Repository to build the association between the local/primary storage repository and the Wasabi repository.
Creating a Backup Job
To start writing to the Wasabi Ball, configure a Backup Job. To begin, follow the steps below:
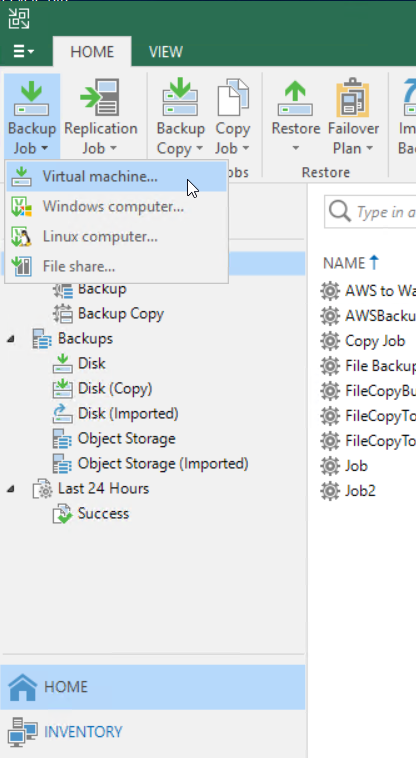
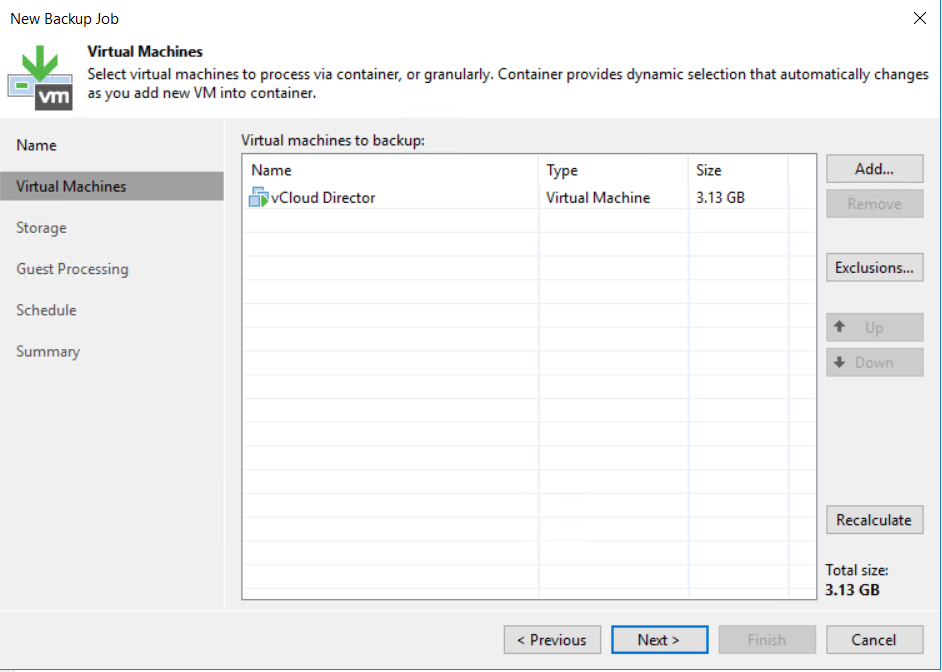
Click Home. Click Jobs, click Backup Job. Select Virtual Machine.
Enter a name for the Backup Job.
Click Add to add the Virtual Machines. Select the Virtual Machines into which the job will be backed up. Click Next.
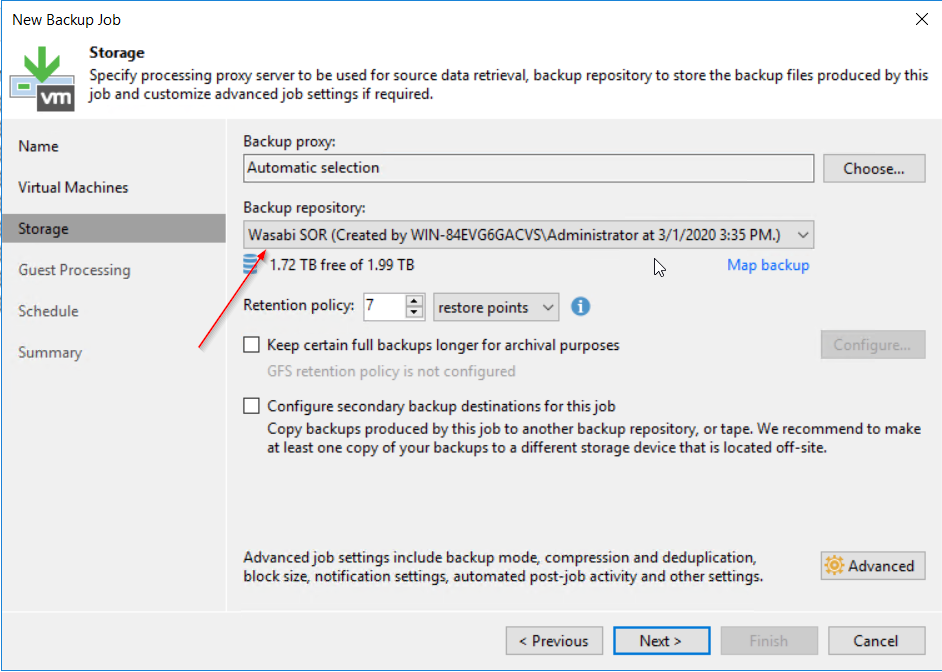
Select the Scale-out Repository created earlier as the backup. Click Next.
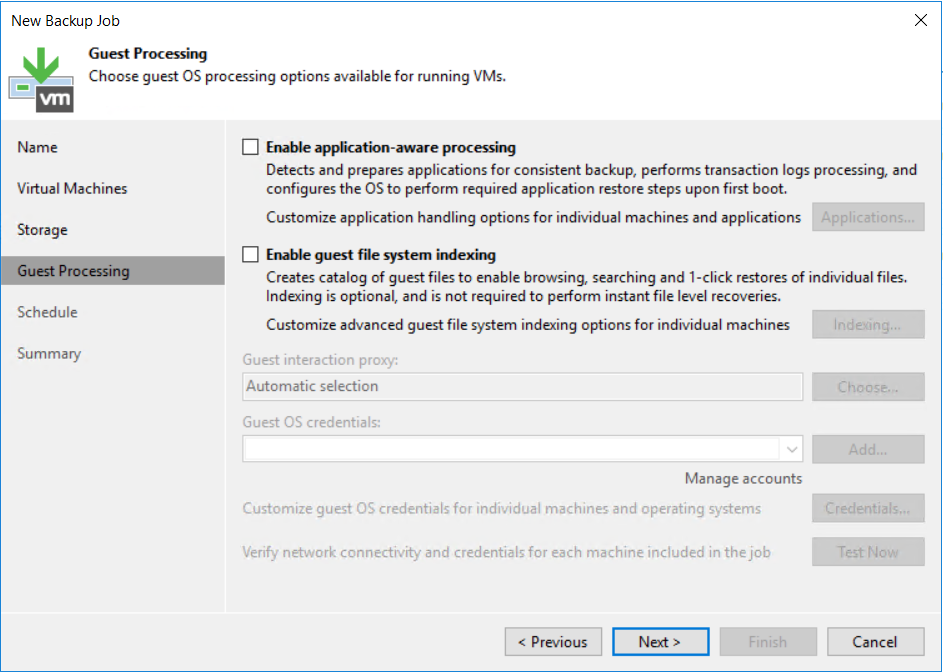
Keep the default settings on this screen. Click Next.
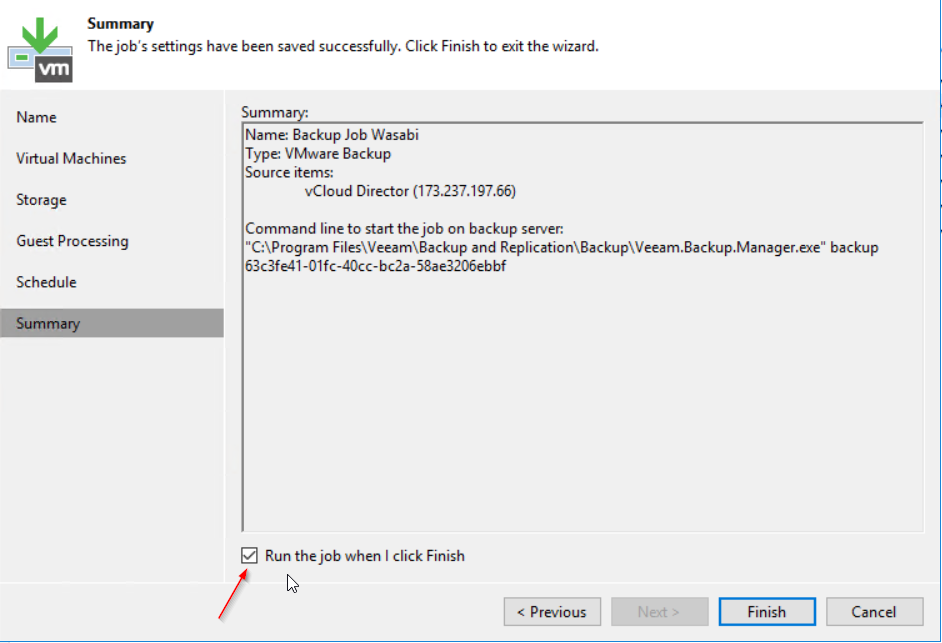
You may use the auto scheduler or keep it unchecked and opt to run the job immediately. Click Apply.
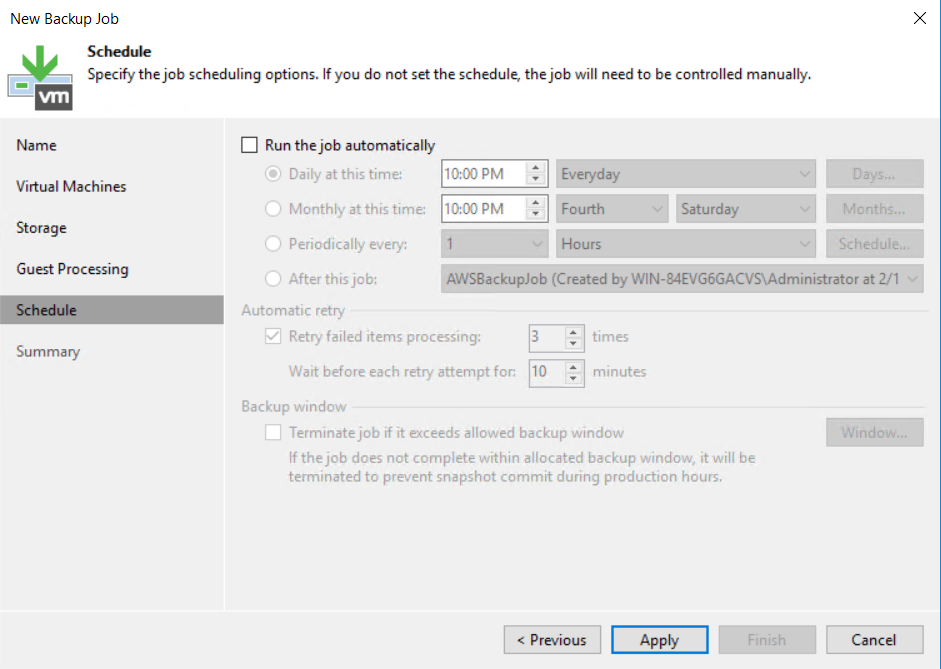
Select Run the job when I click Finish option to run the job immediately. Click Finish to initiate the job.
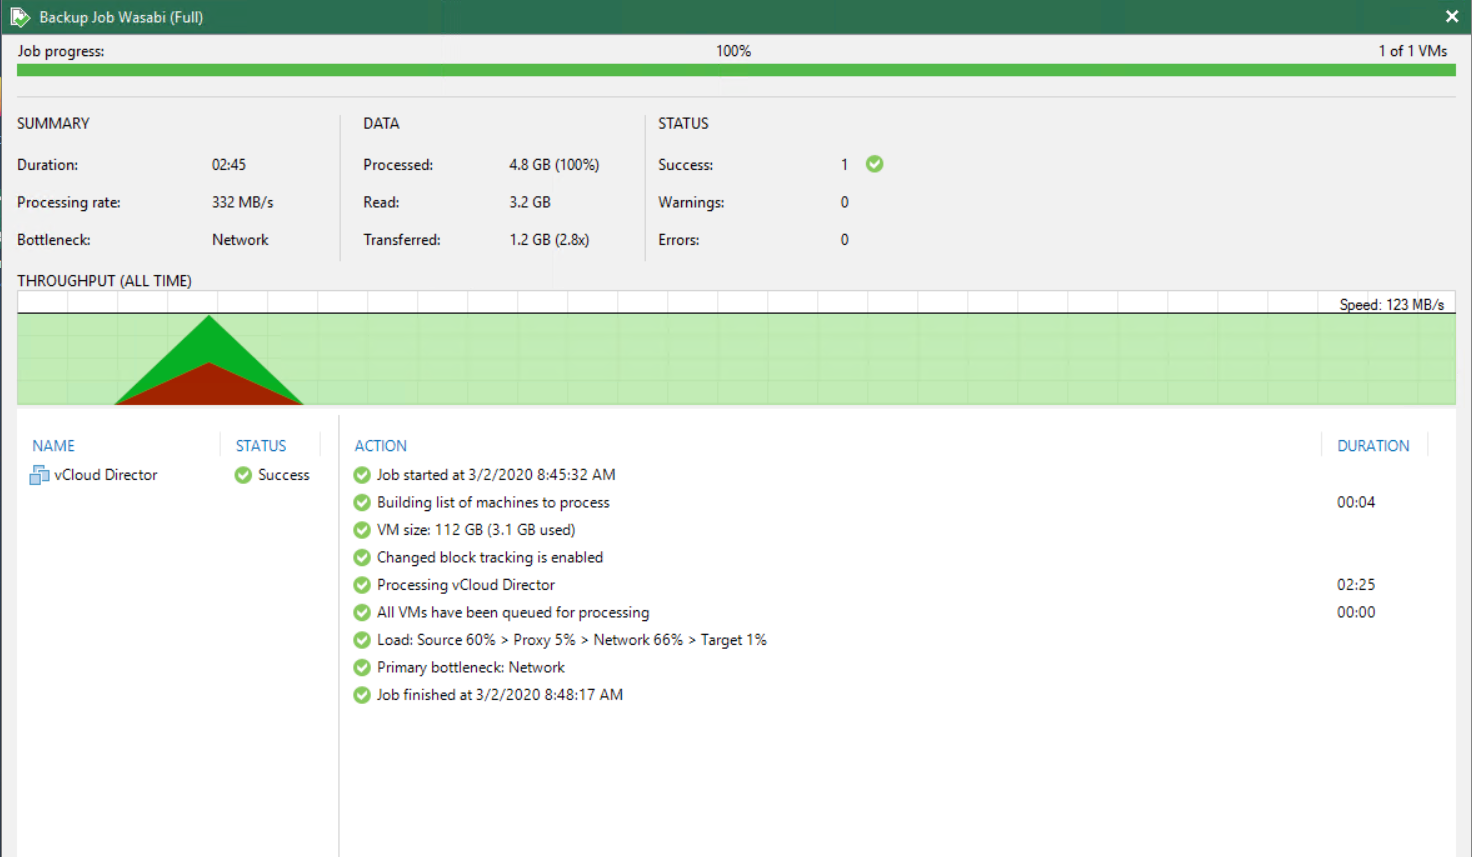
You should see the Backup Job progressing by first writing to the Primary storage.
When the above step completes, Veeam will then initiate offloading to the object storage (the Wasabi Ball), as shown below.
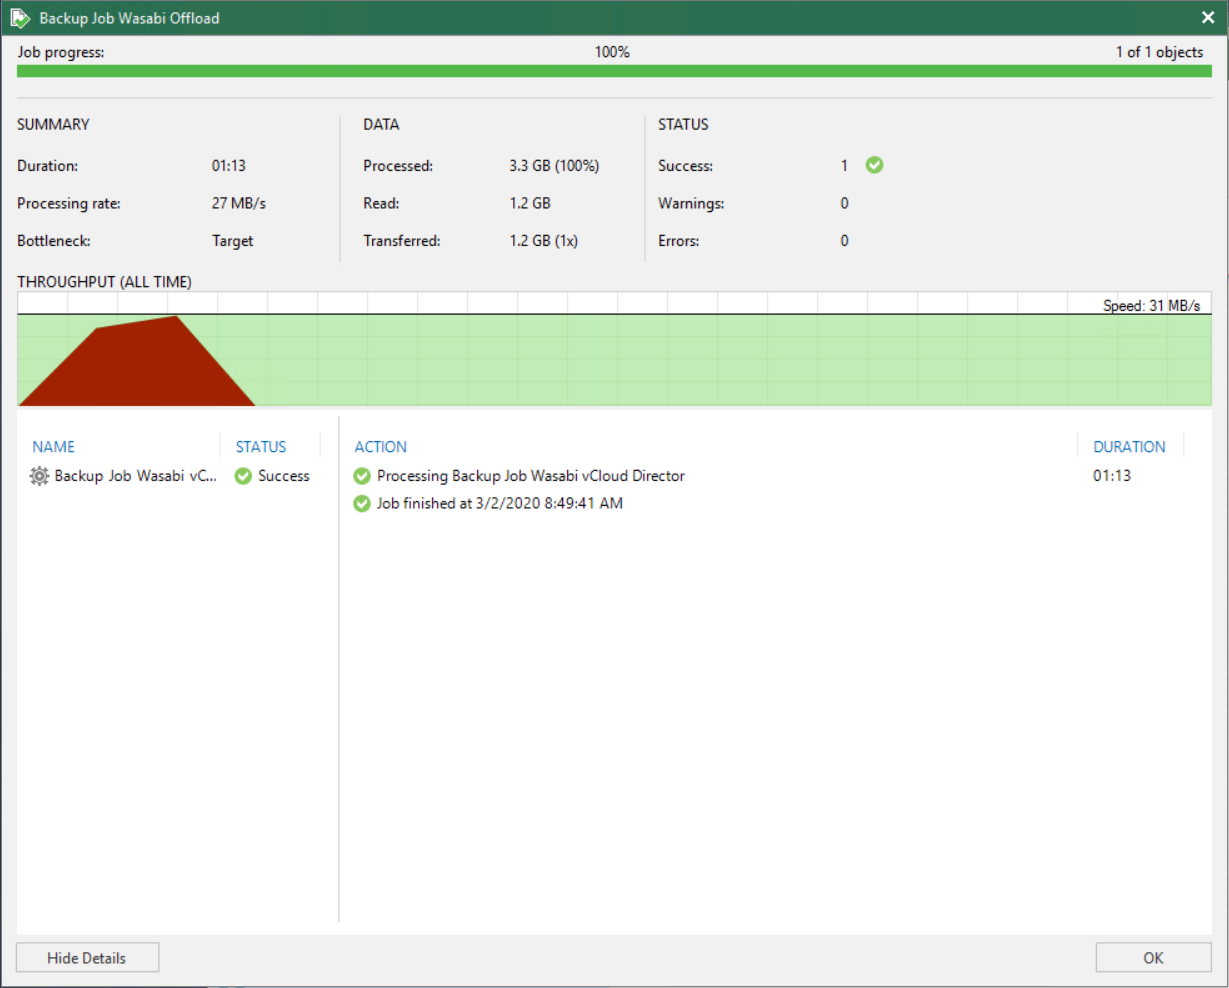
At this point, the backup has been written to the Wasabi Ball. Wasabi engineers will ingest this data from the Wasabi Ball to your bucket once they receive the Wasabi Ball back.
Reverting to Temporary Changes
To revert to the original Veeam configuration:
Delete the host’s entry. Save the file.
Edit the Wasabi Backup Repository to change the credentials from the Wasabi Ball credentials to your Wasabi storage access and secret keys.
For more details on importing backups into the new
Wasabi bucket, review Importing Object Storage Backups.