How to use Veeam to back up object storage to Wasabi
Wasabi is a member of Veeam's cloud partner ecosystem. Wasabi has worked with Veeam closely to offer both a seamless implementation and a smooth transition to cloud storage. Veeam with Wasabi Solution Overview provides more information on the Wasabi-Veeam partnership and solutions.
Veeam's Backup and Replication version 12.1 adds a new feature to protect production data residing in both on-premises and cloud object storage. This article provides the procedure to back up object storage directly to Wasabi.
The data restoration process is handled by your specific backup software application. As many, potential variables will affect your unique environment, Wasabi strongly recommends that you seek the guidance of your backup software's technical support team if you encounter difficulty or have application-specific inquiries.
If you are going to leverage immutable Veeam backups, follow the steps in Object Lock: Enabling.
Enabling bucket versioning only is not a proper configuration for immutable Veeam backups and can cause problems.
If you are simply going to use regular Veeam backups with Wasabi buckets, bucket versioning is not required.
Prerequisites
Active Wasabi Storage account.
A Wasabi bucket along with access and secret keys to access the bucket. Review S3 Object storage permissions to provide the correct permissions to the user who will access the Wasabi bucket.
Veeam Backup and Replication version 12.1 software installed and licensed. The object backup feature is available starting with version 12.1. For other release versions, refer to Veeam With Wasabi.
A valid Veeam license that supports capabilities for object storage.
Object storage to be backed.
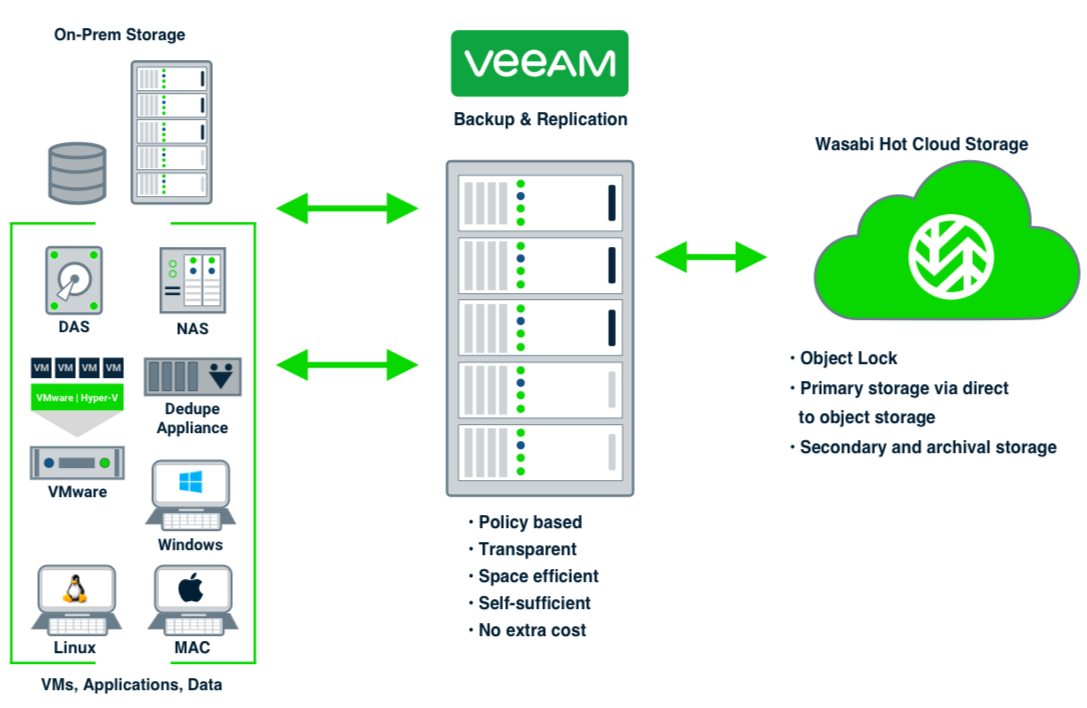
Architecture Diagram
Creating a Wasabi Object Repository
The following steps detail the procedure to add a Wasabi bucket as an object storage repository on Veeam.
On the Backup Infrastructure tab, click Backup Repositories. Click Add Repository to open the Add Backup Repository wizard.
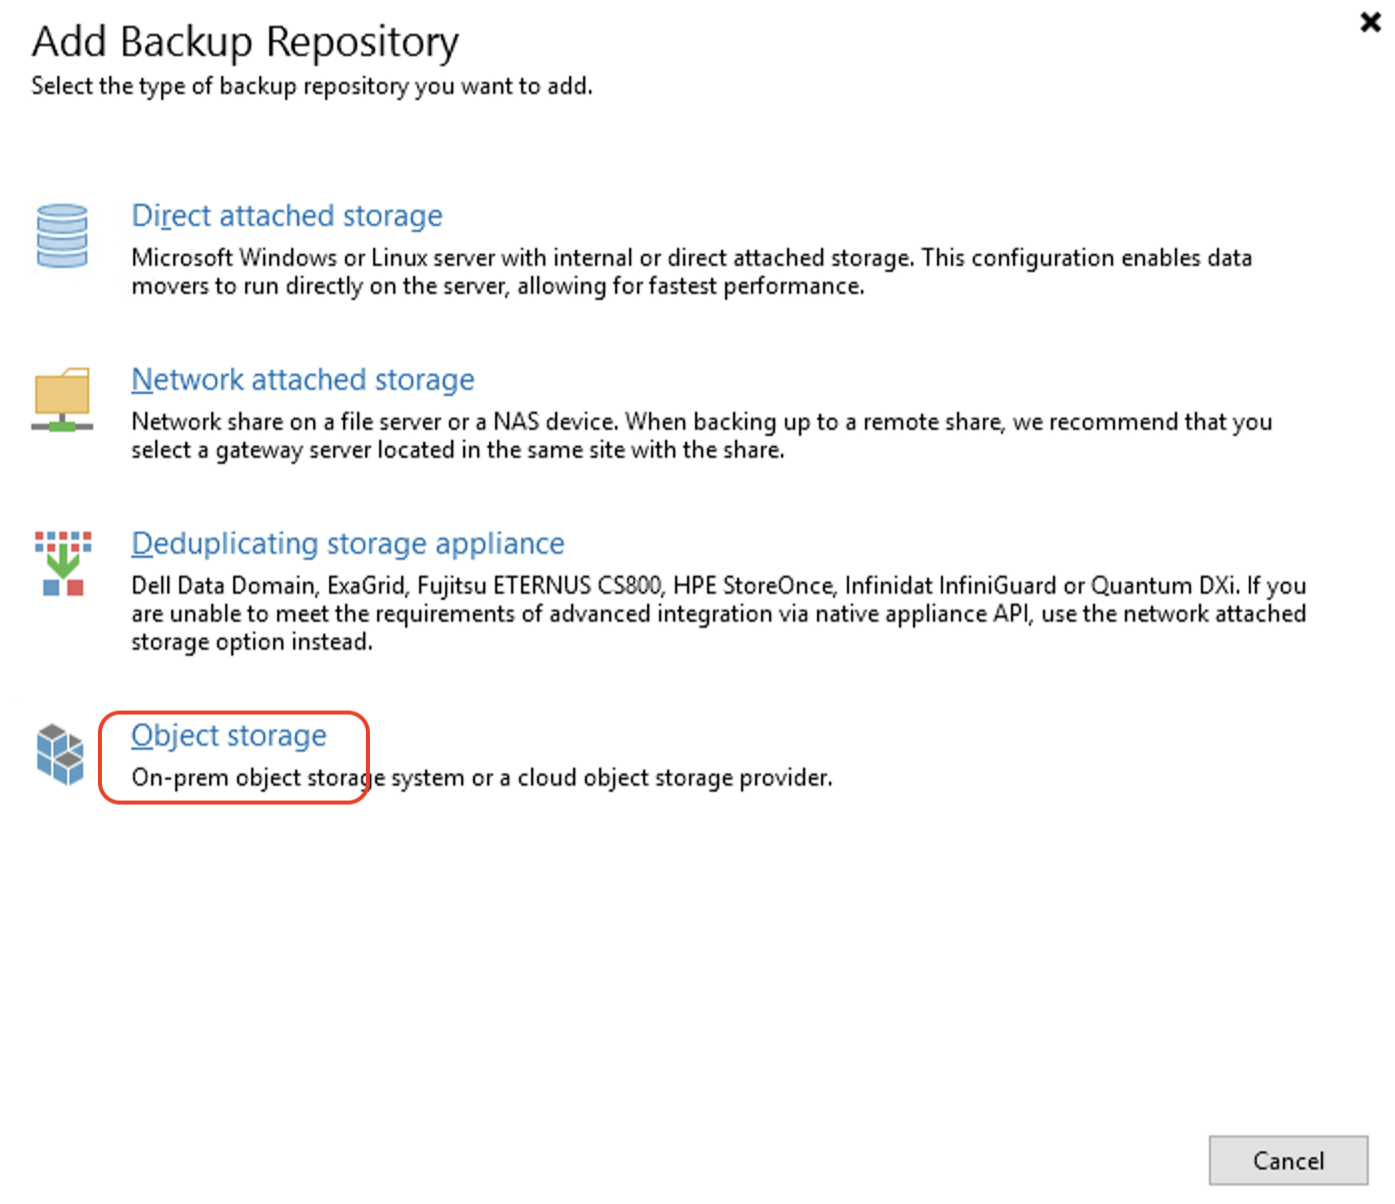
Click Object storage to select the type of backup repository.
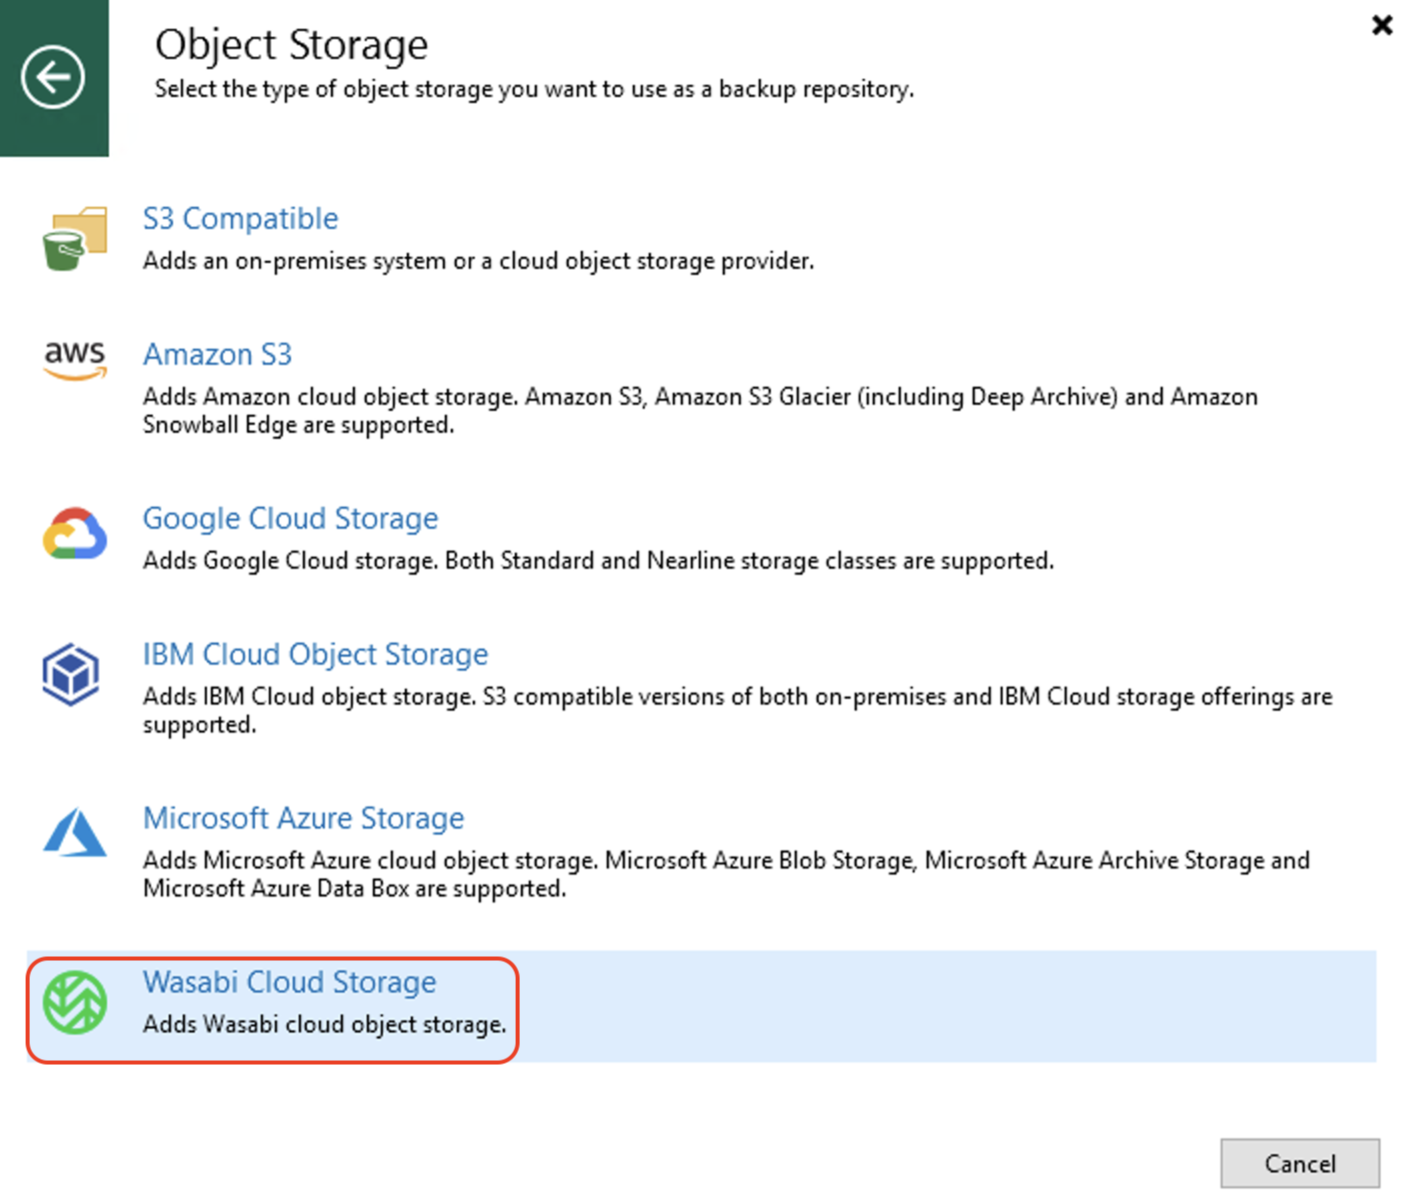
Click Wasabi Cloud Storage to select Wasabi as the object storage.
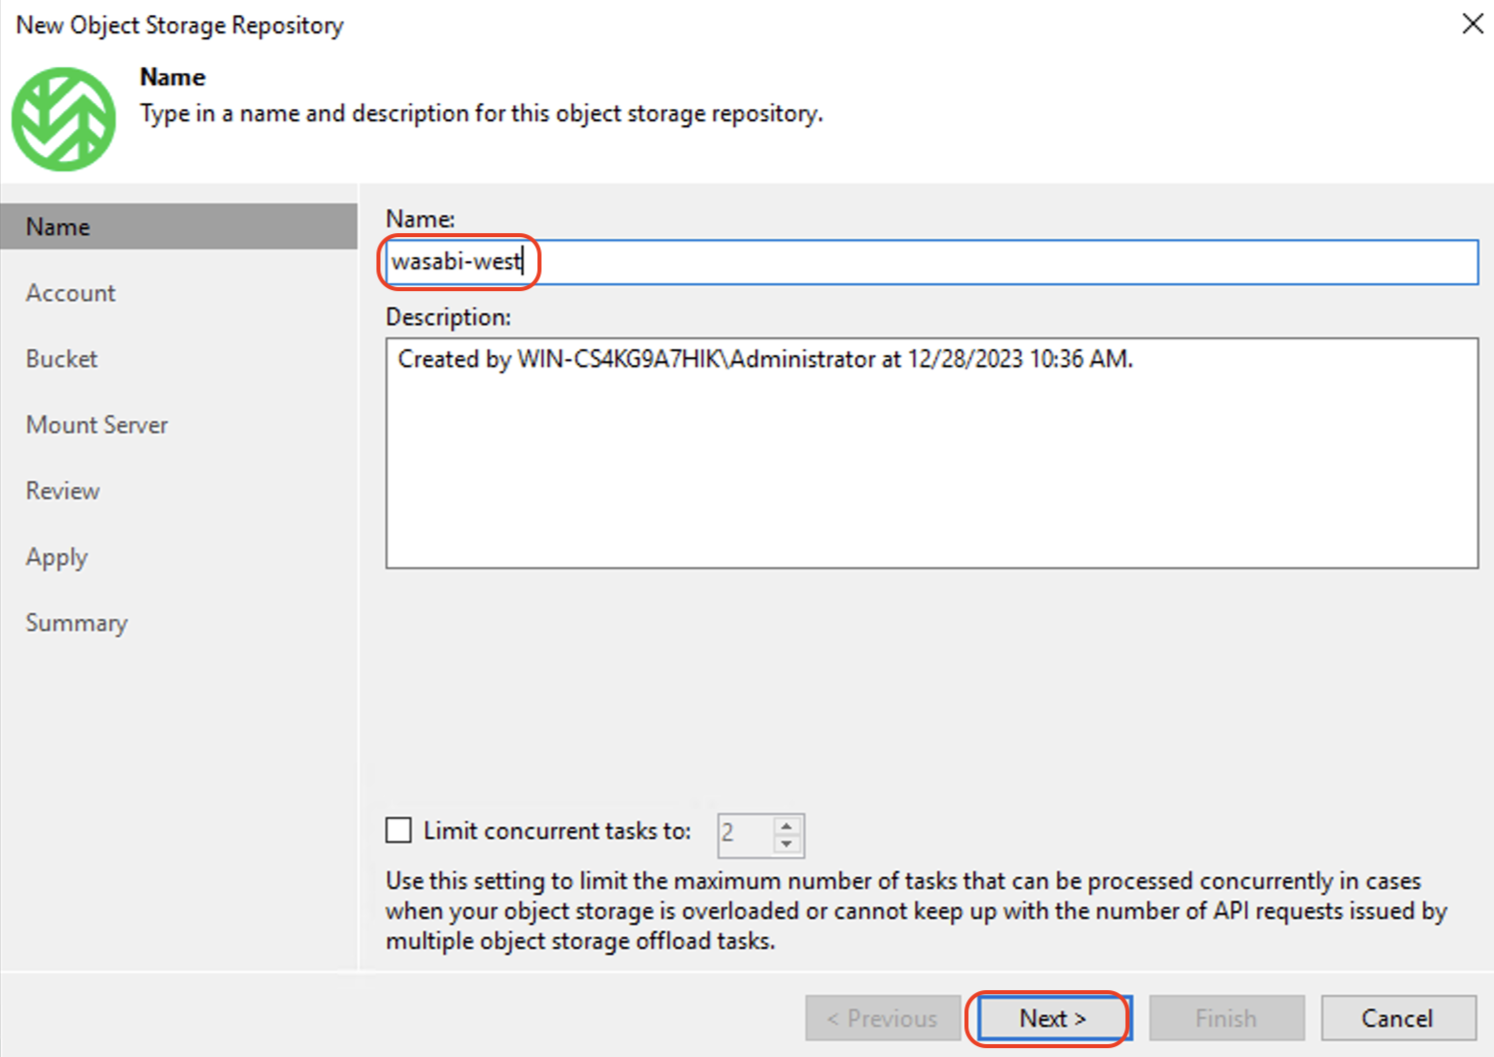
Enter a Name and an optional description for the object storage repository. Click Next.
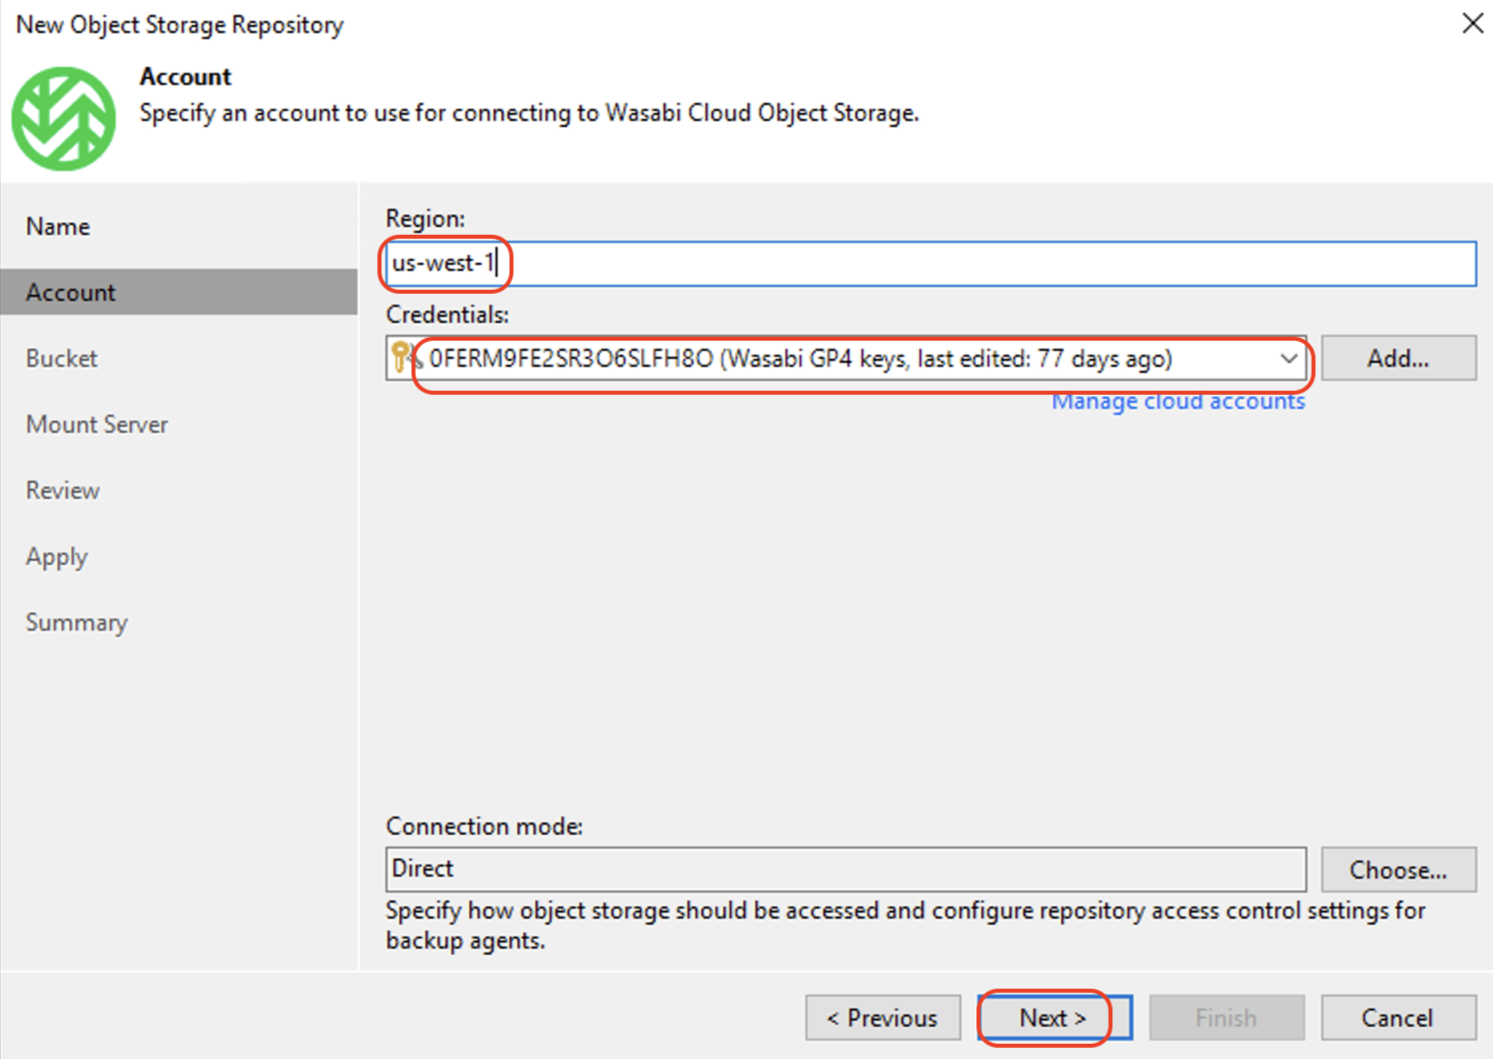
Input the Region and click Add to input the access and secret keys.
This configuration example discusses the use of Wasabi's us-west-1 storage region. To use other Wasabi storage regions, use the appropriate Wasabi service URL as described in Service URLs for Wasabi’s Storage Regions.
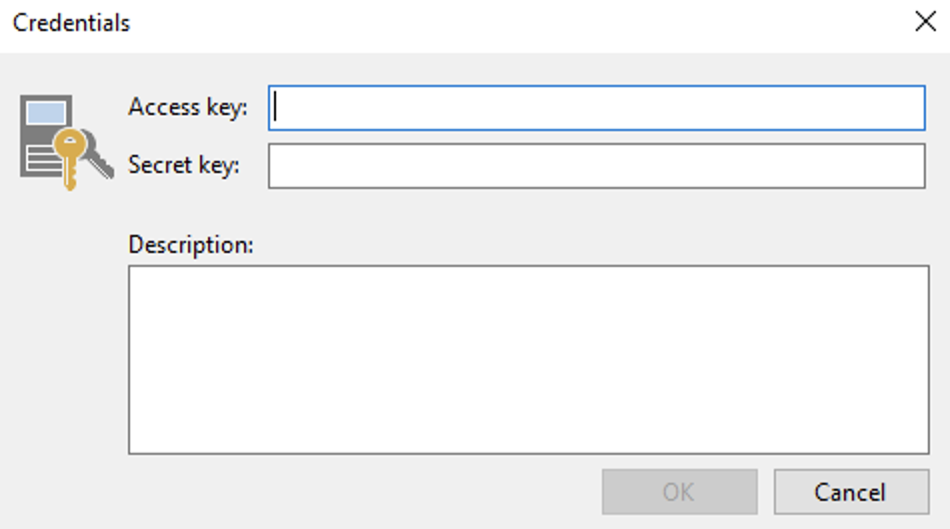
Input your Wasabi Access key and Secret key credentials. Click OK and Next to continue.
Click Browse beside the Bucket to choose an existing Wasabi bucket. Click Browse beside the folder and create a new folder by clicking New Folder in the folder window. Input a Name for the folder and click OK. Then click Next.
— Limit object storage consumption: This defines a soft limit that can be exceeded temporarily for your object storage consumption. Provide the value in TB or PB.
— Make recent backups immutable: To create immutable backups, click the radio button to check the "Make recent backups immutable for" and configure the number of days to make backups immutable. For more detail, refer to Wasabi Veeam Object Lock Integration.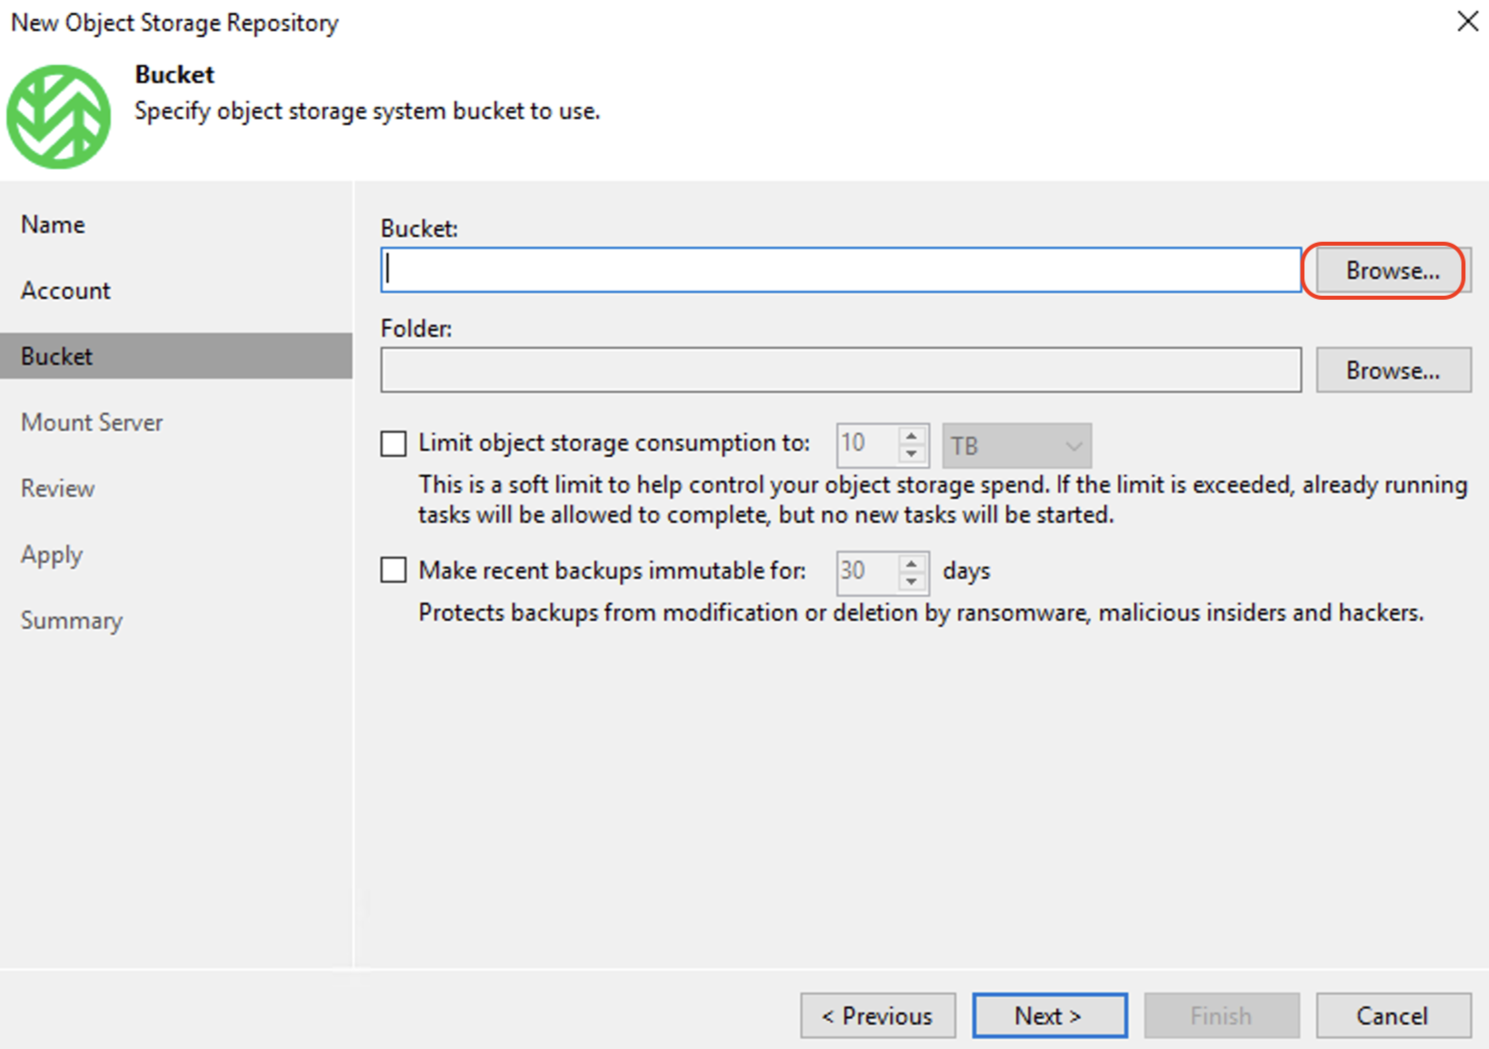
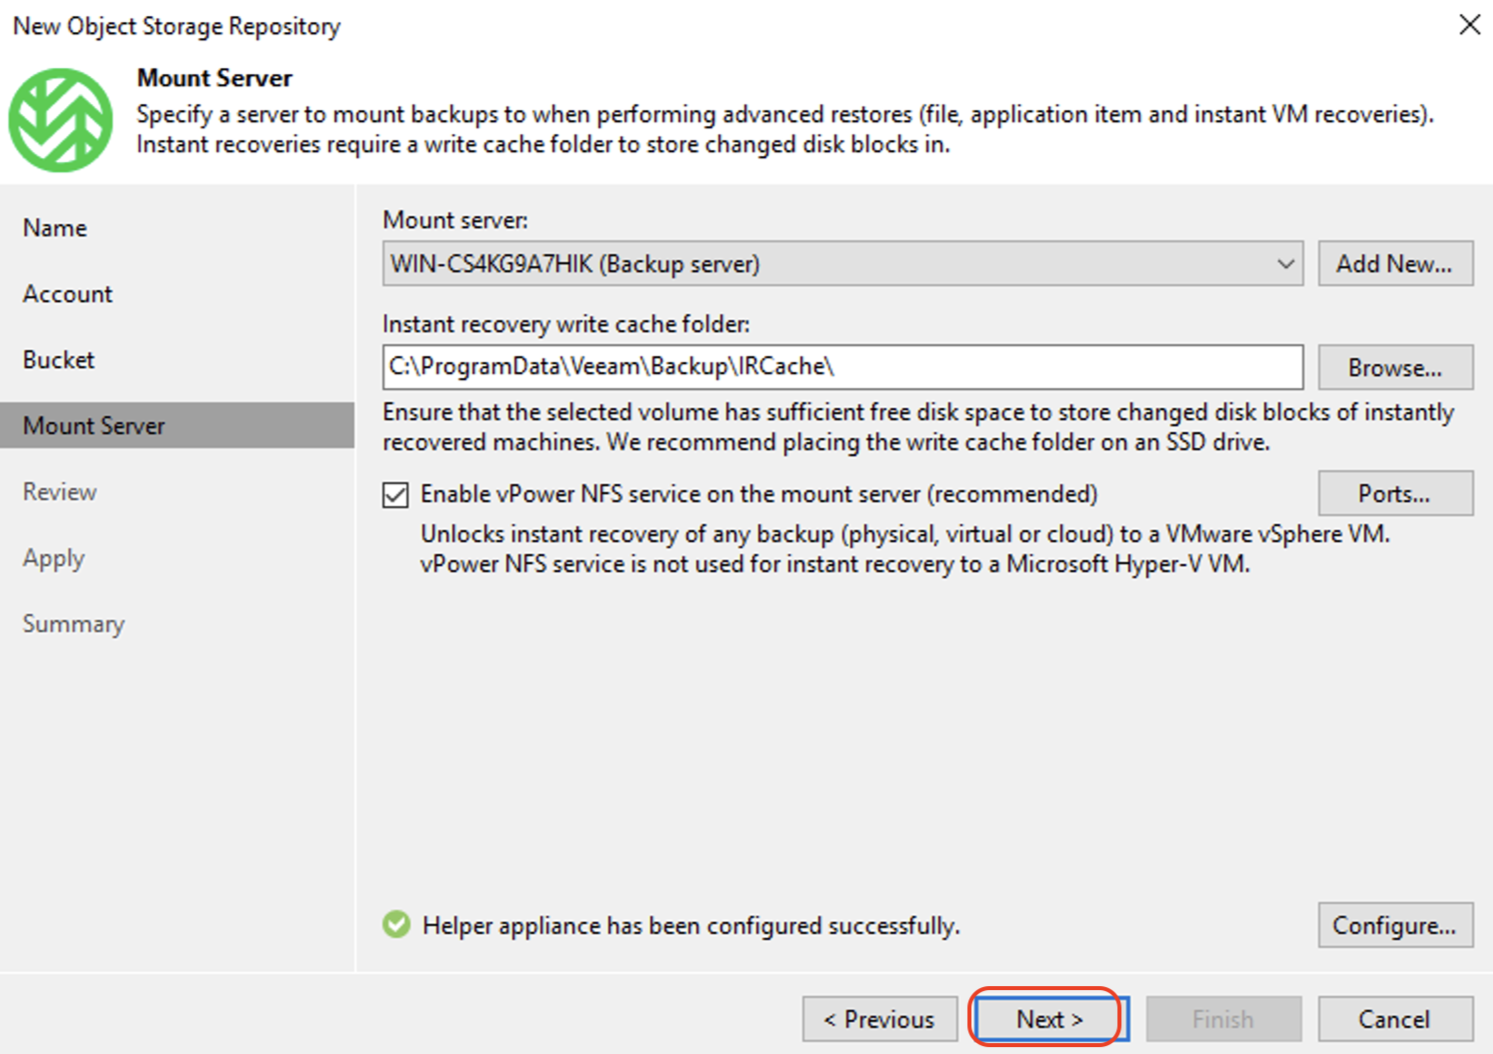
On the Mount Server tab, keep the default values and click Next.
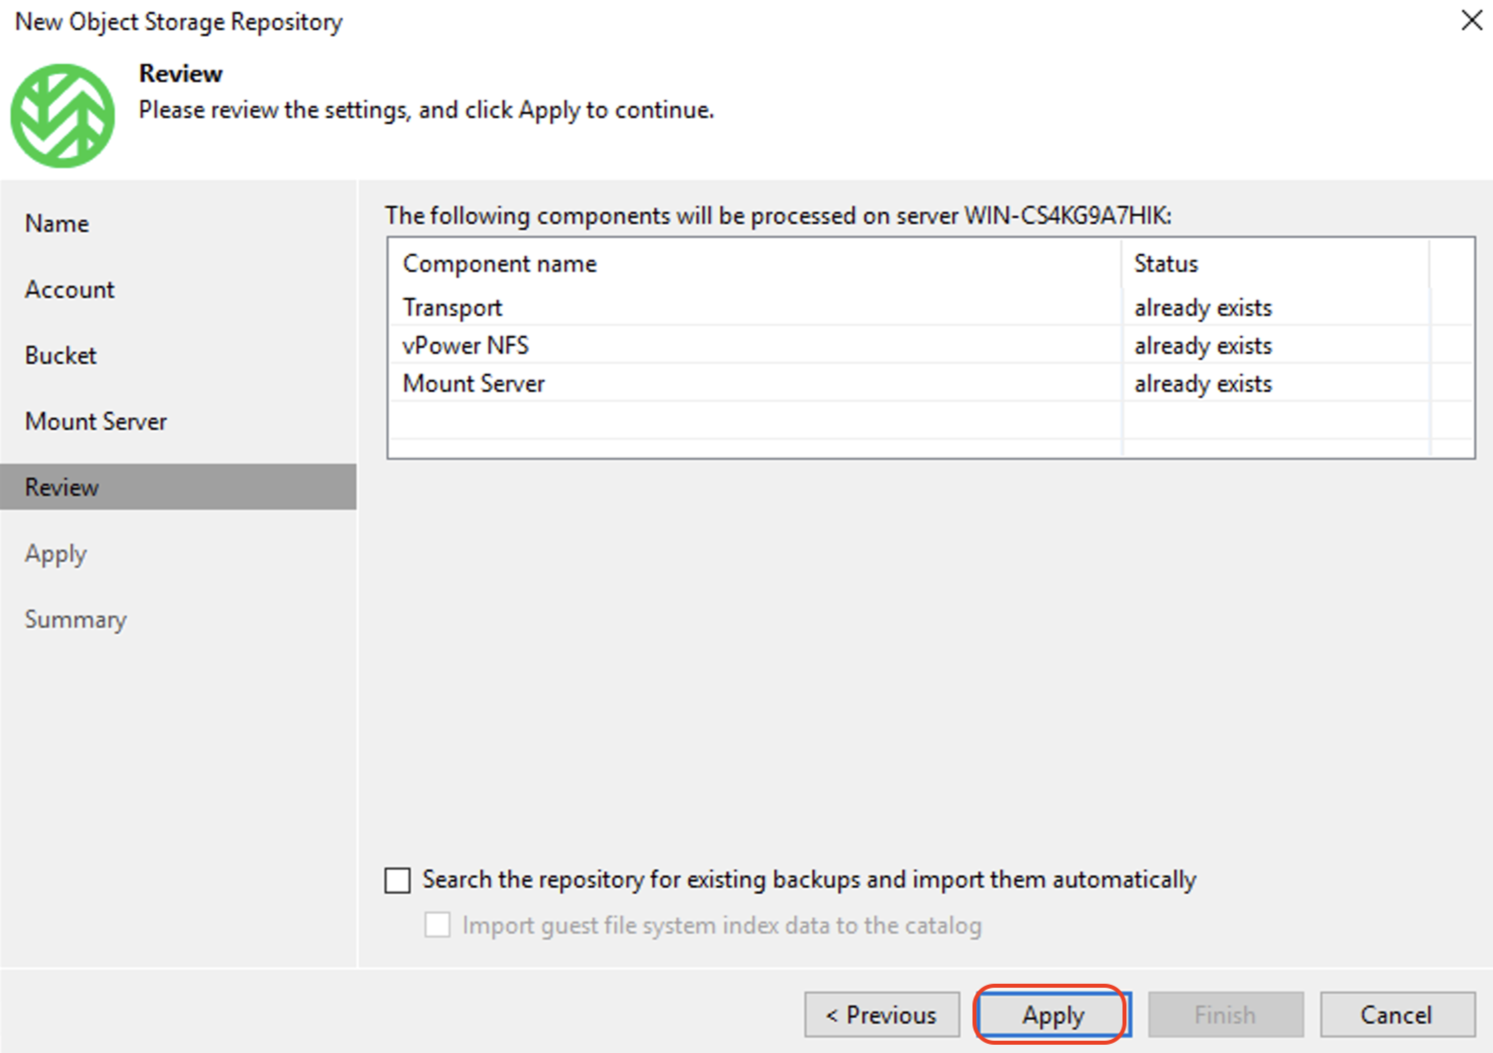
On the Review tab, click Apply.
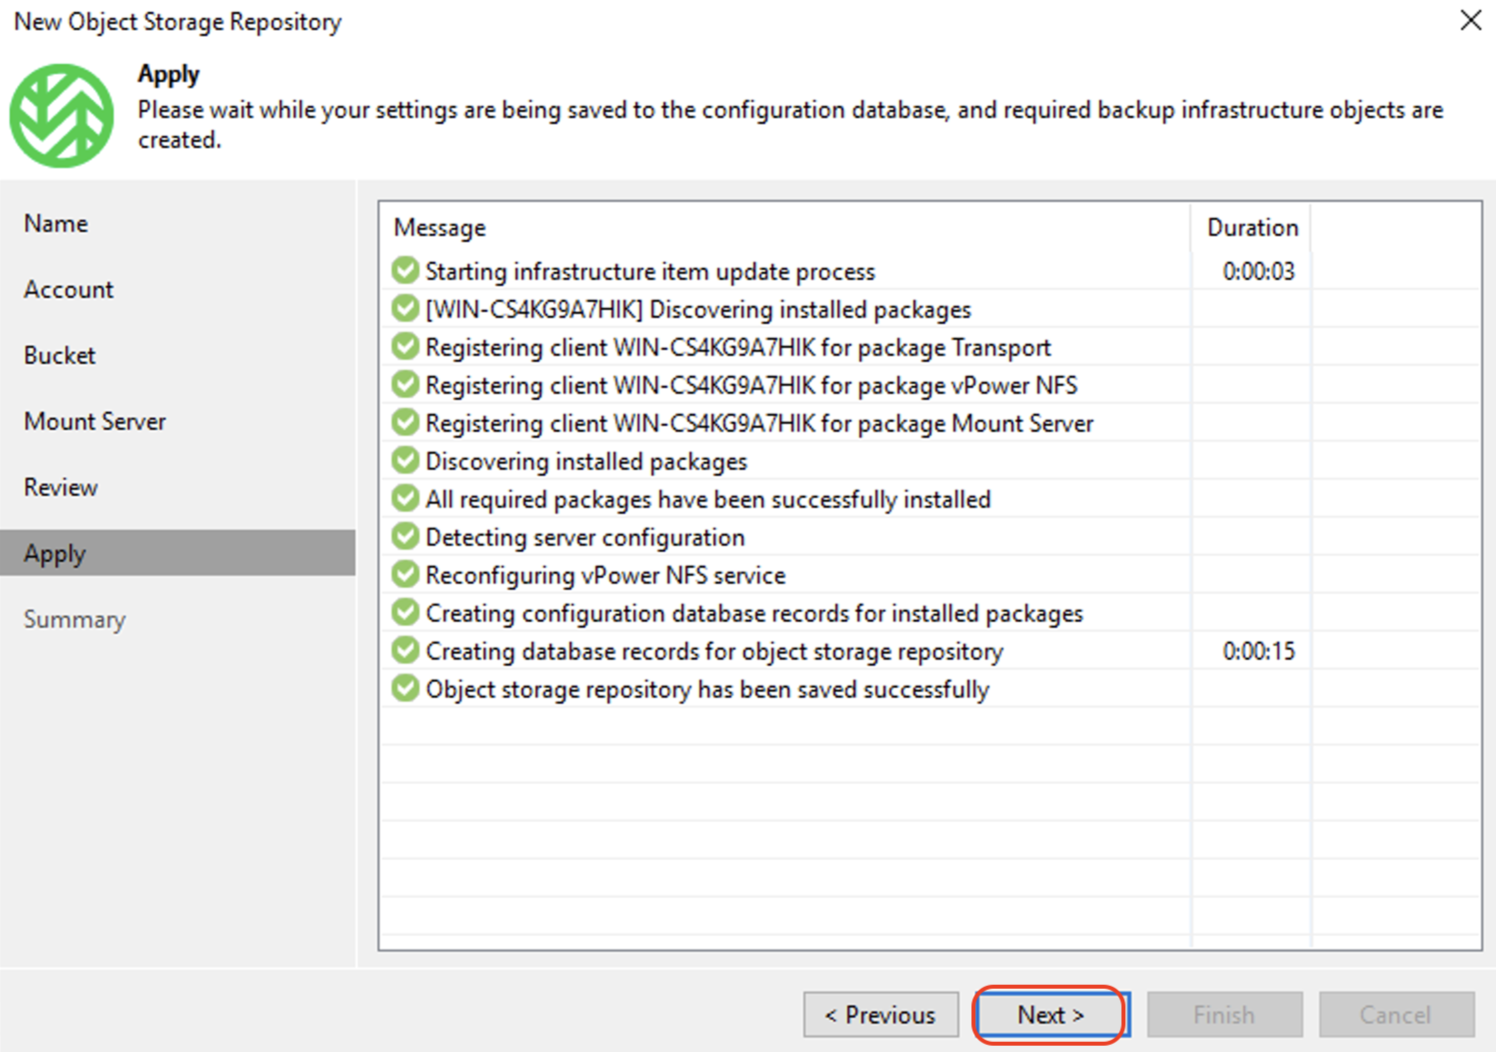
On the Apply tab, click Next to continue.
Review the Summary and click Finish to create the Wasabi repository.
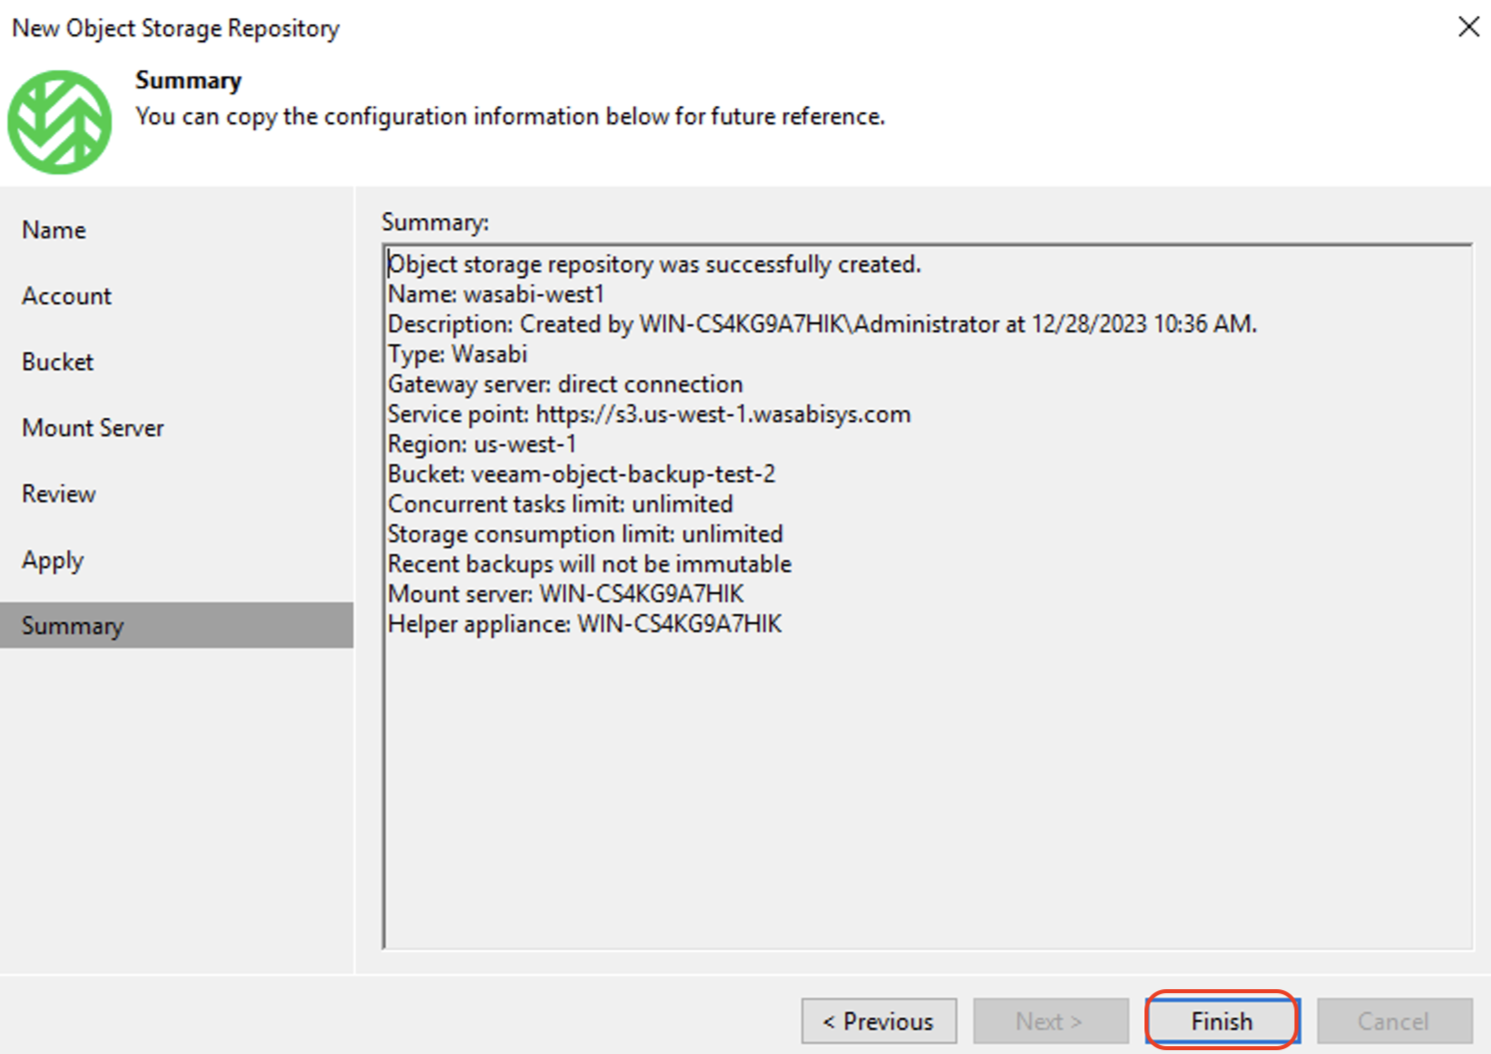
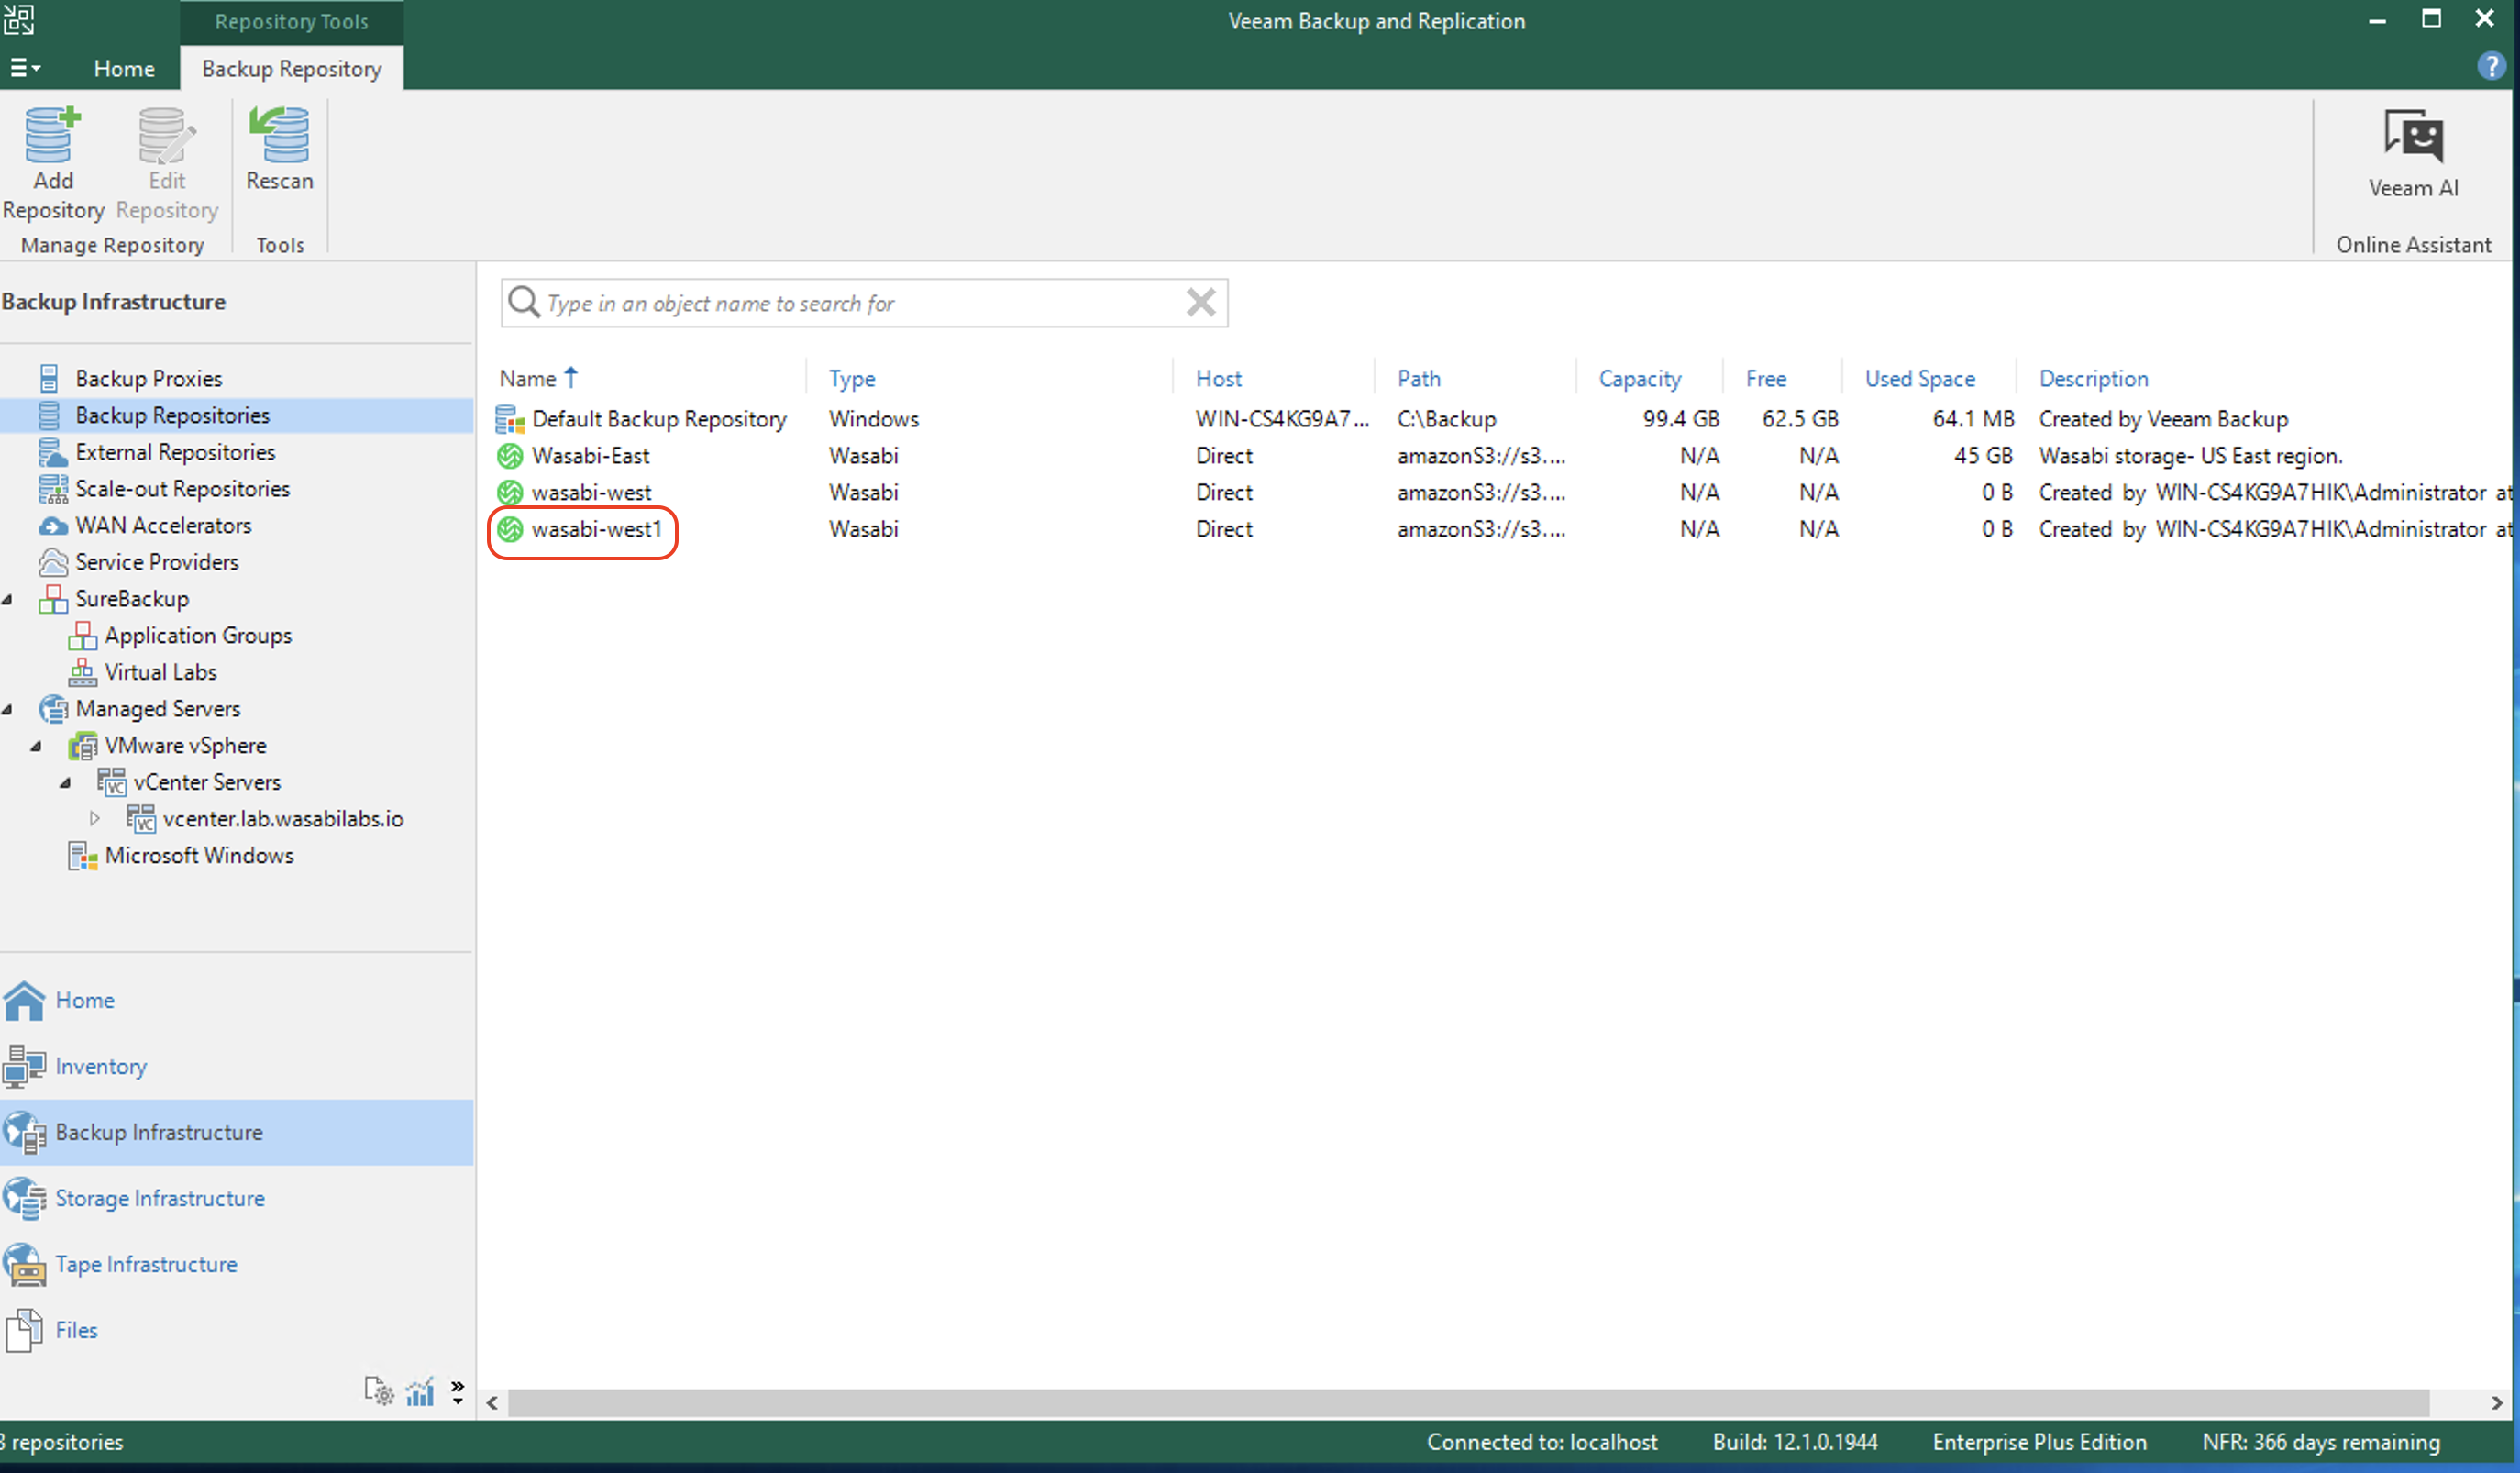
You can view the newly created object repository by clicking Backup Repositories on the Backup Infrastructure tab.
Creating an Object Store Data Source
This section details the procedure to create an Object Data Source to be protected. This can be an on-premise object storage appliance or a cloud storage target such as Wasabi.
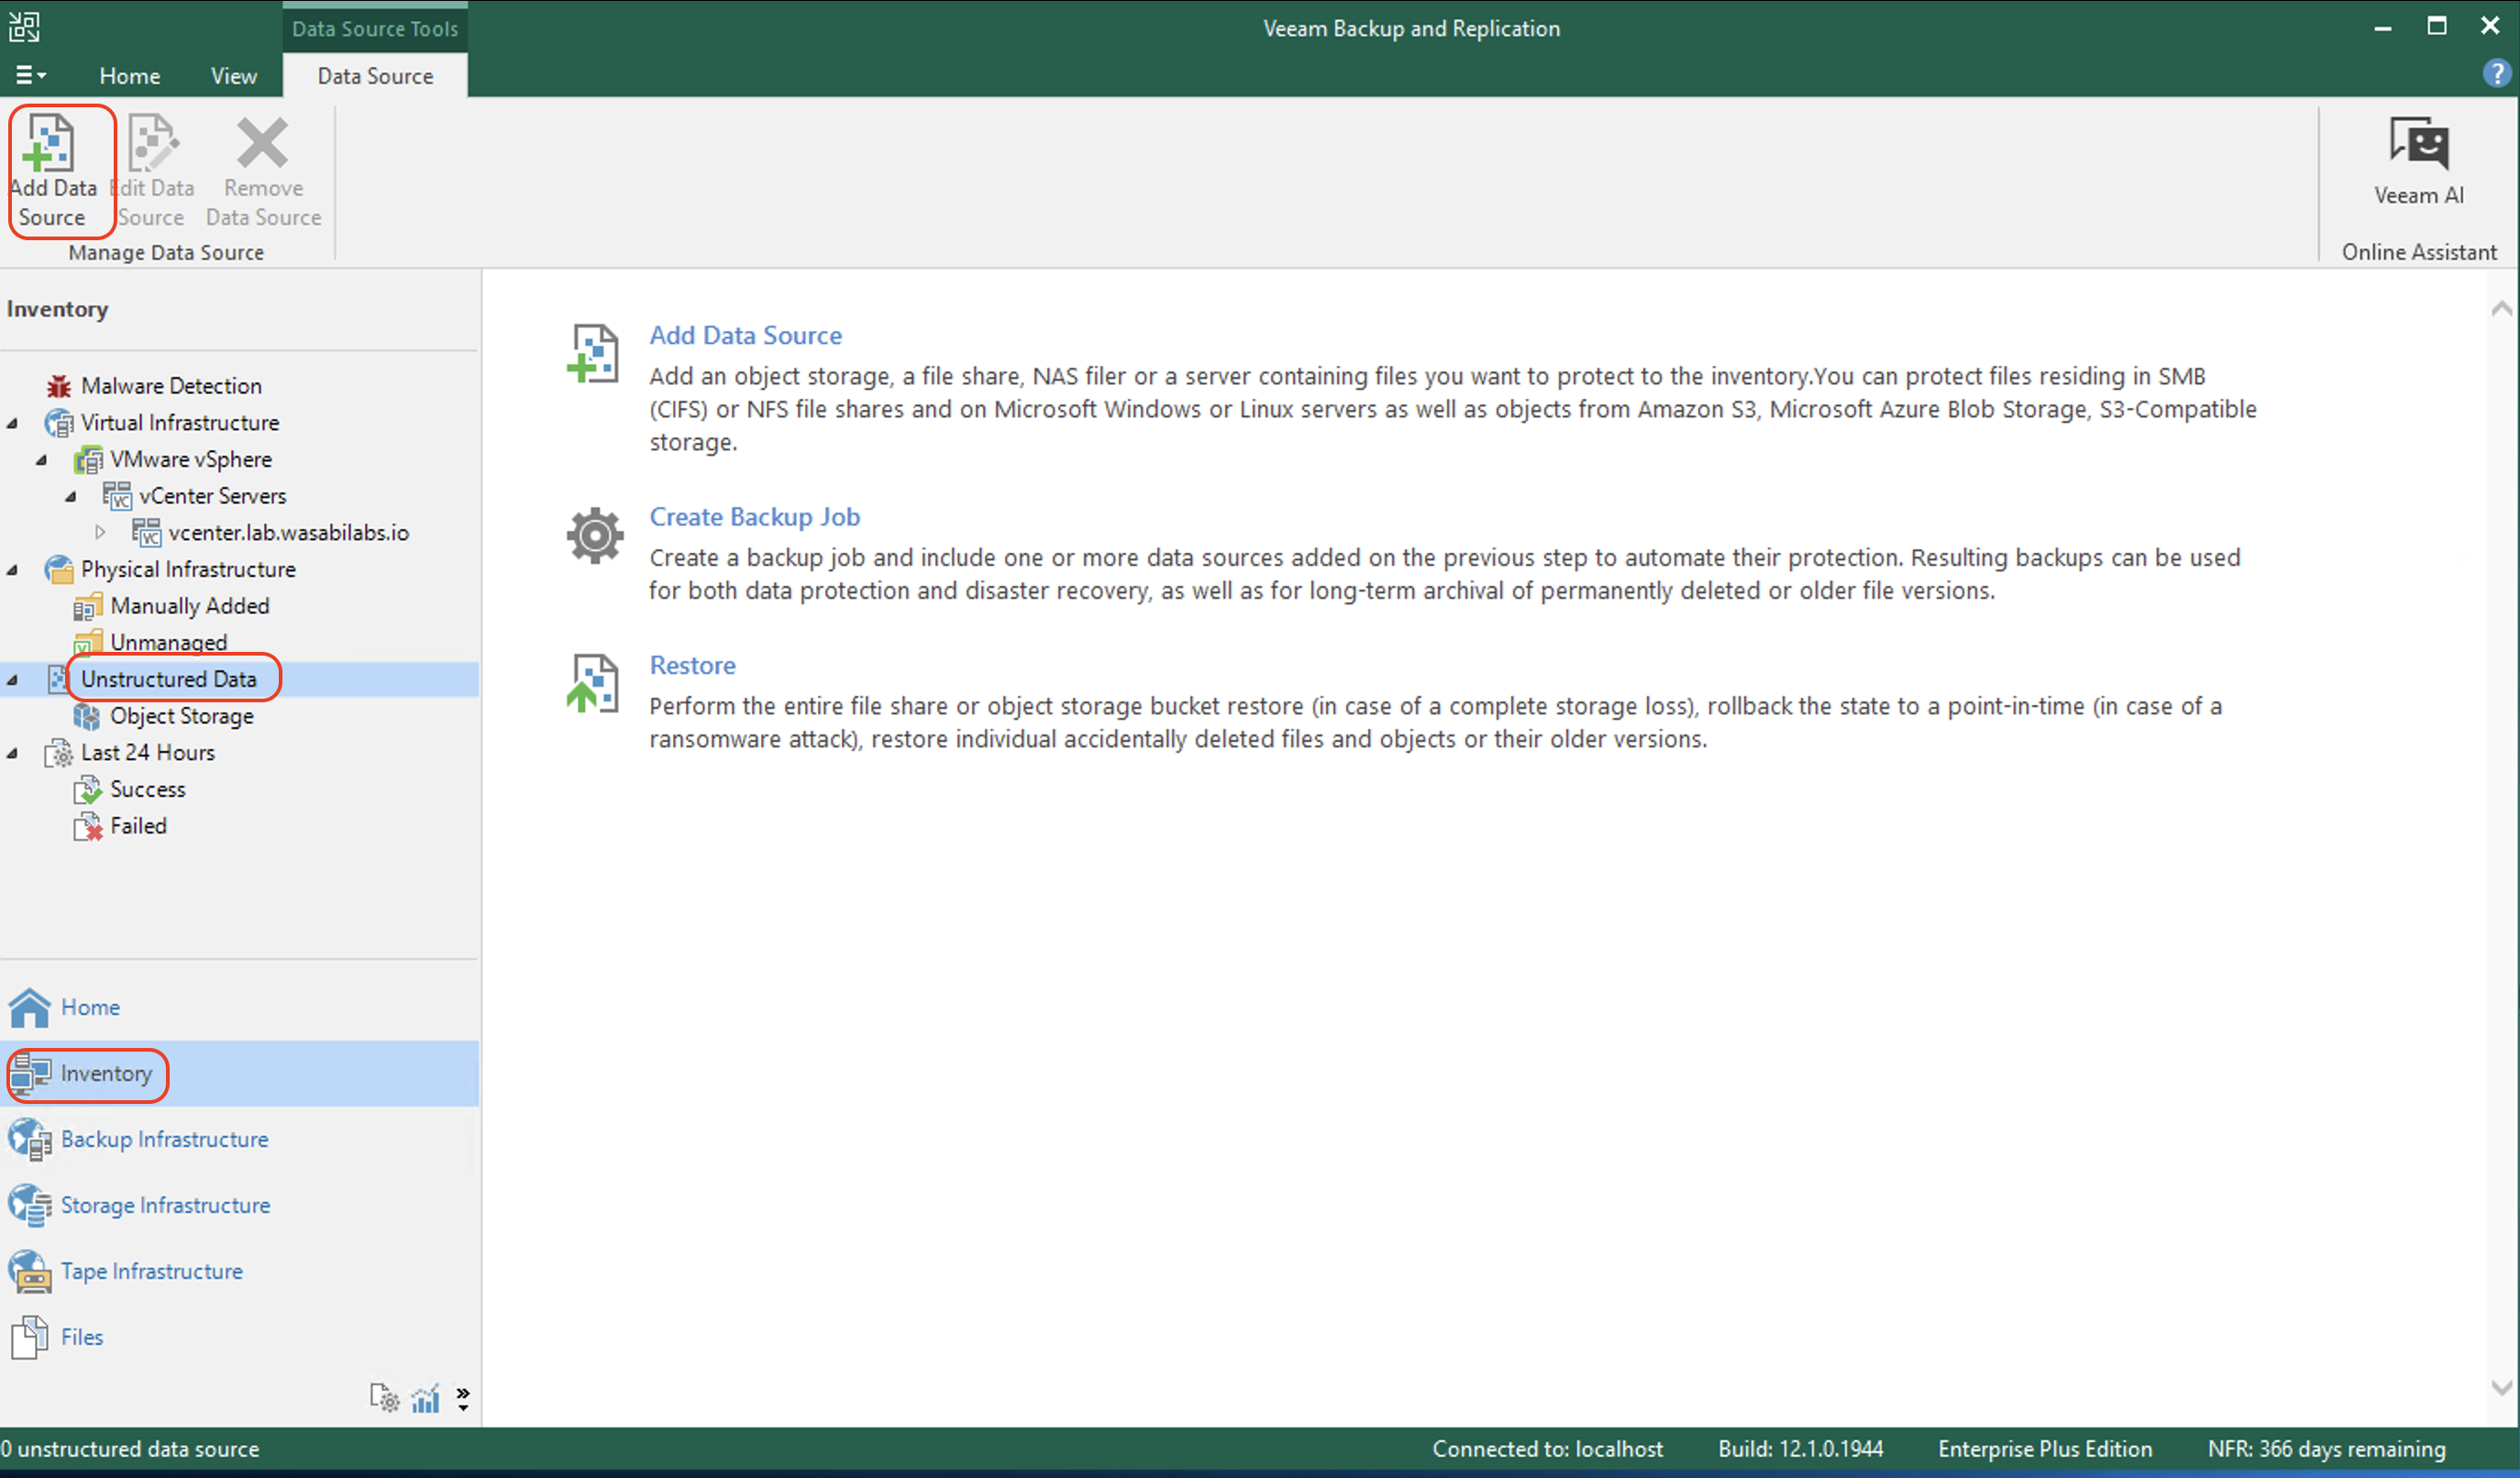
On the Inventory tab, click Unstructured Data. Click Add Data Source to add an object data source to Veeam.
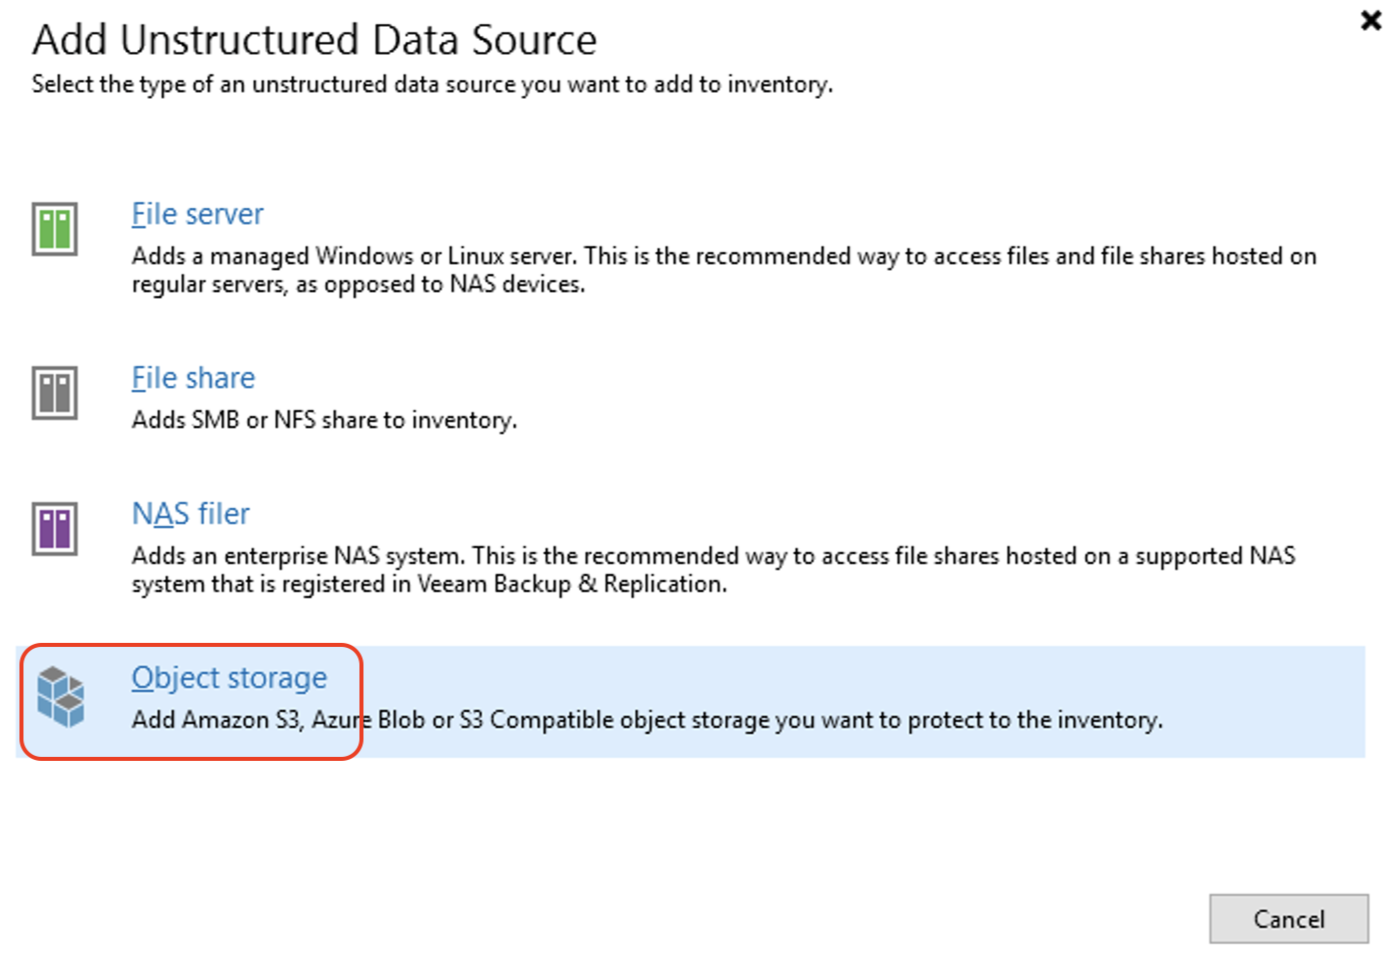
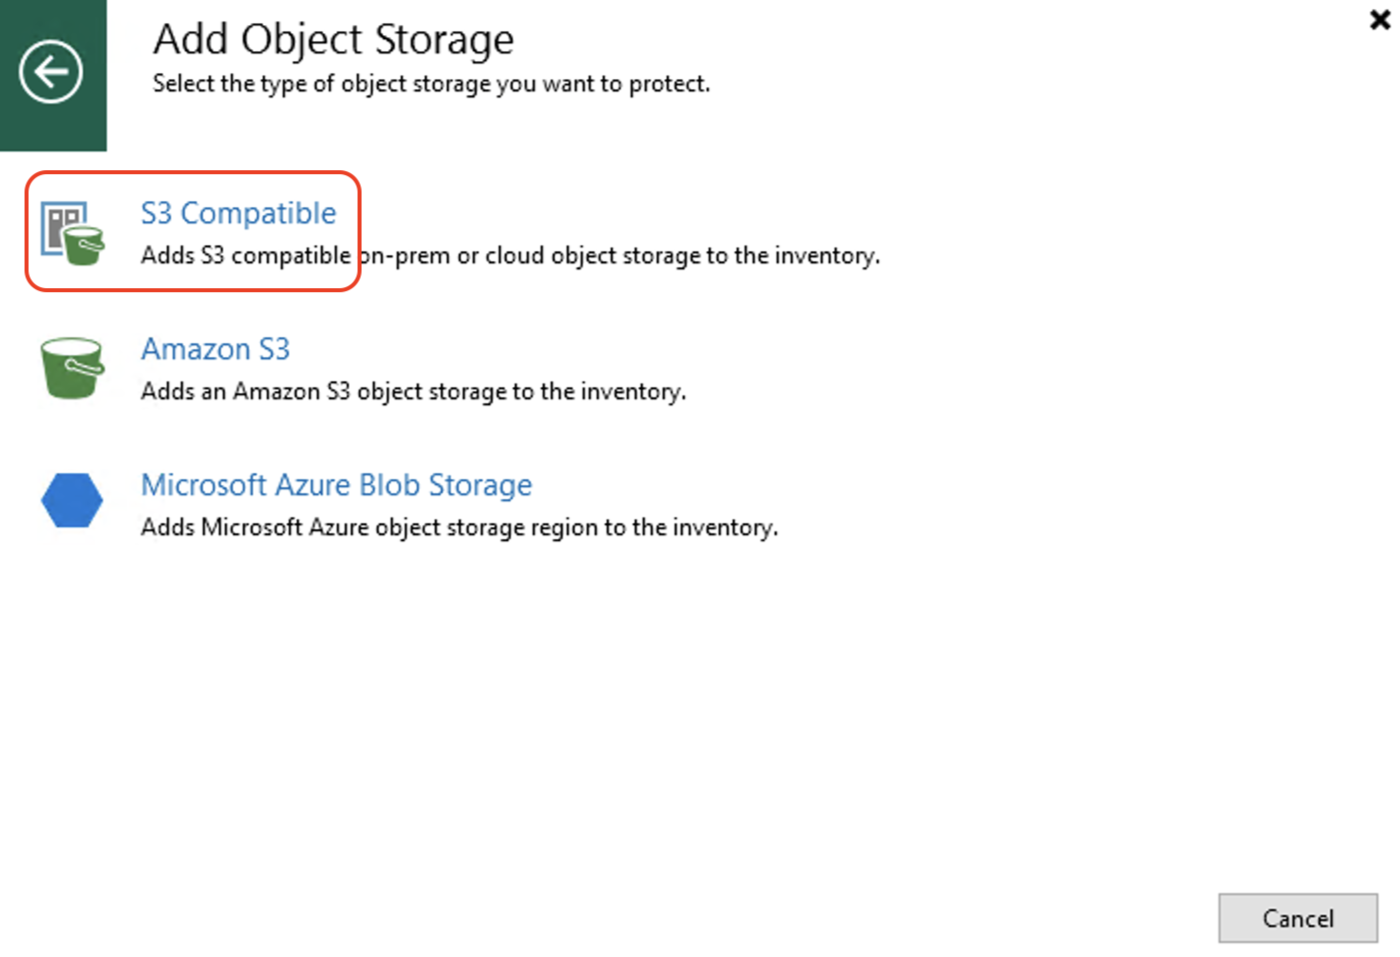
On the Add Unstructured Data Source panel, click Object Storage.
Click the appropriate object storage in which to protect.
In the following example, click S3 Compatible to protect a Wasabi bucket.
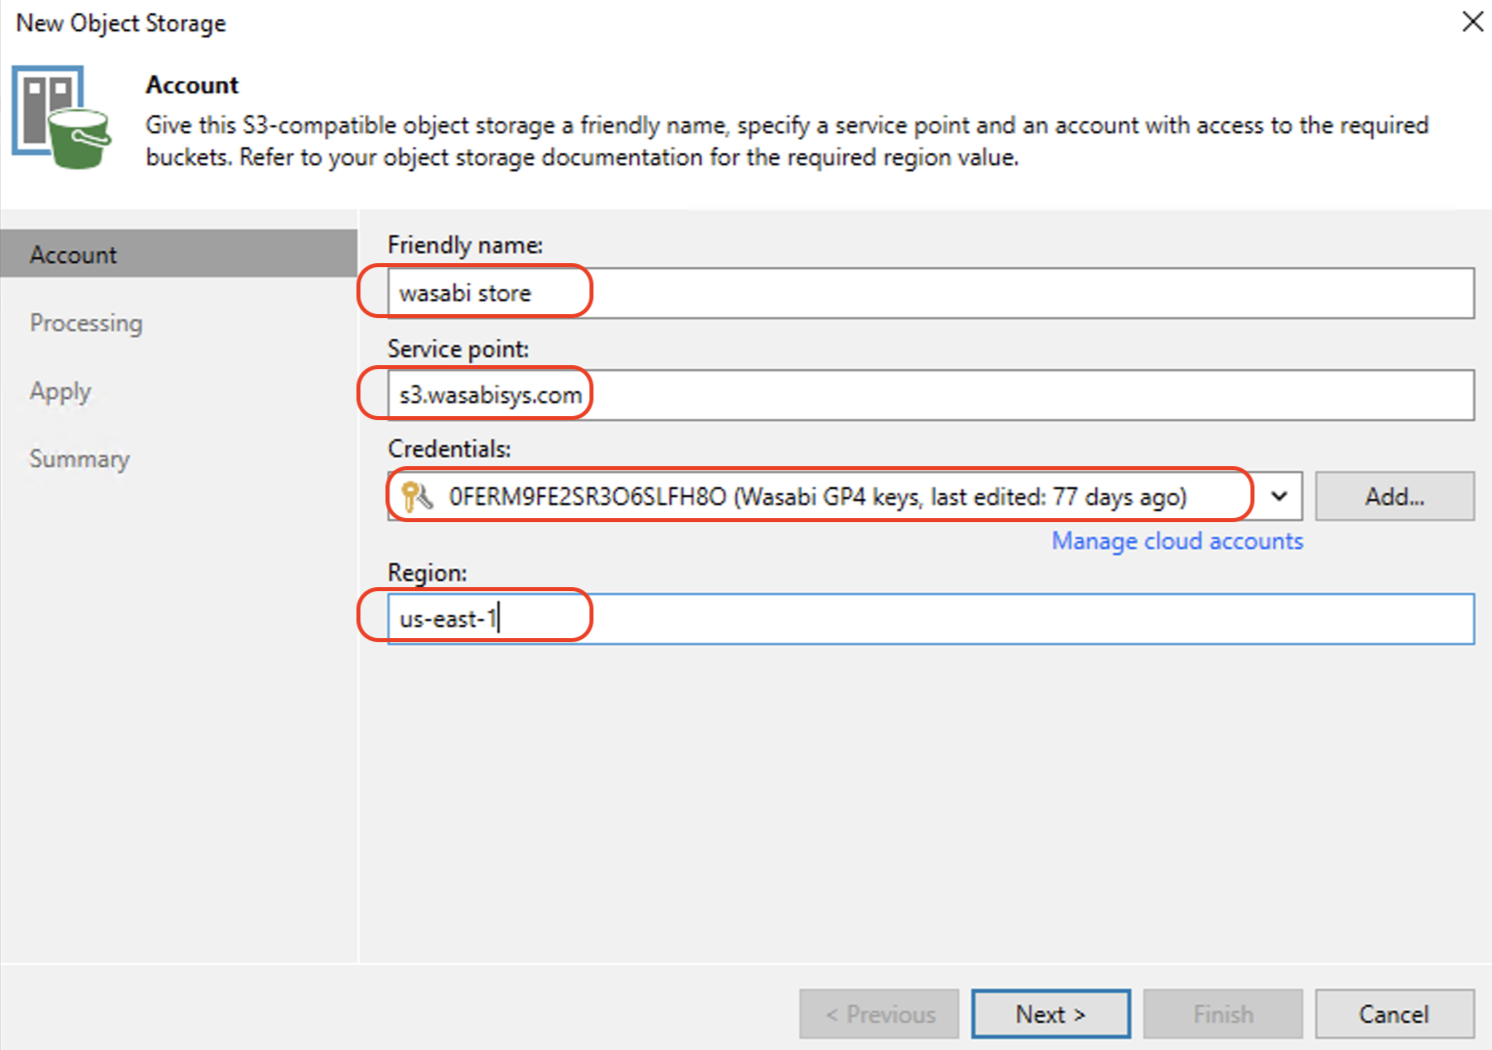
Input a Name for the Object storage and the service point URL. Select the S3 credentials for your object storage. New credentials can be added by clicking Add. Enter the Access key and the Secret Key for your object storage. Input the region and click Next to continue.
This configuration example discusses the use of Wasabi's us-east-1 storage region. Use the appropriate storage region for your object storage, as described in Service URLs for Wasabi’s Storage Regions.
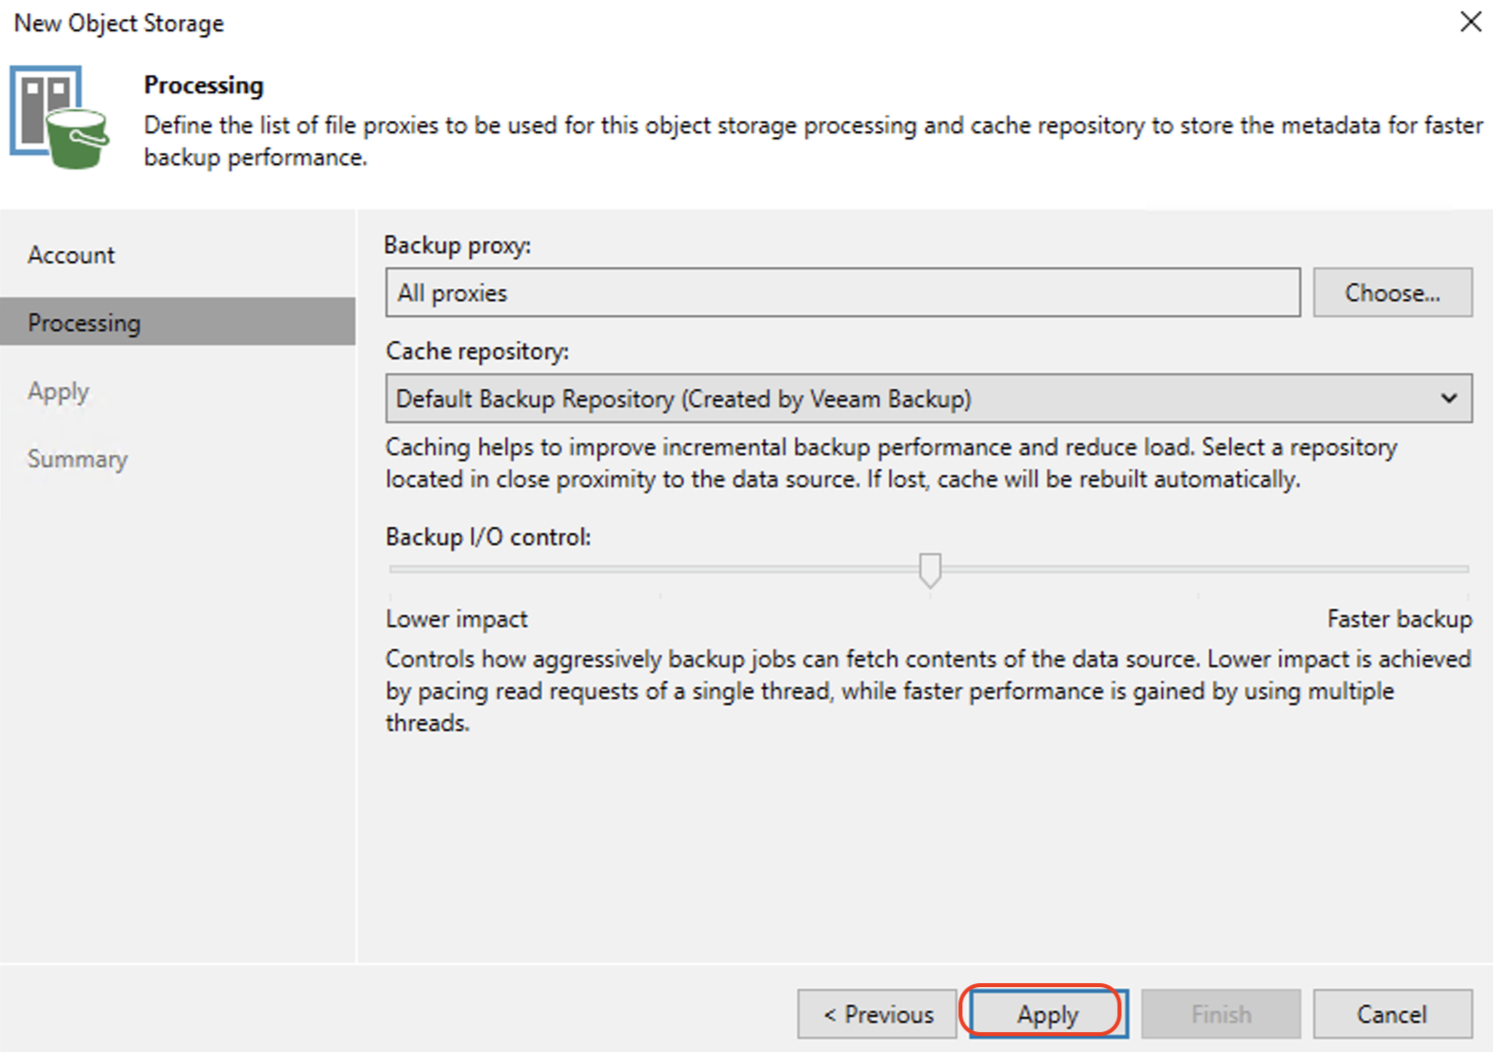
On the Processing tab, keep the defaults. Click Apply.
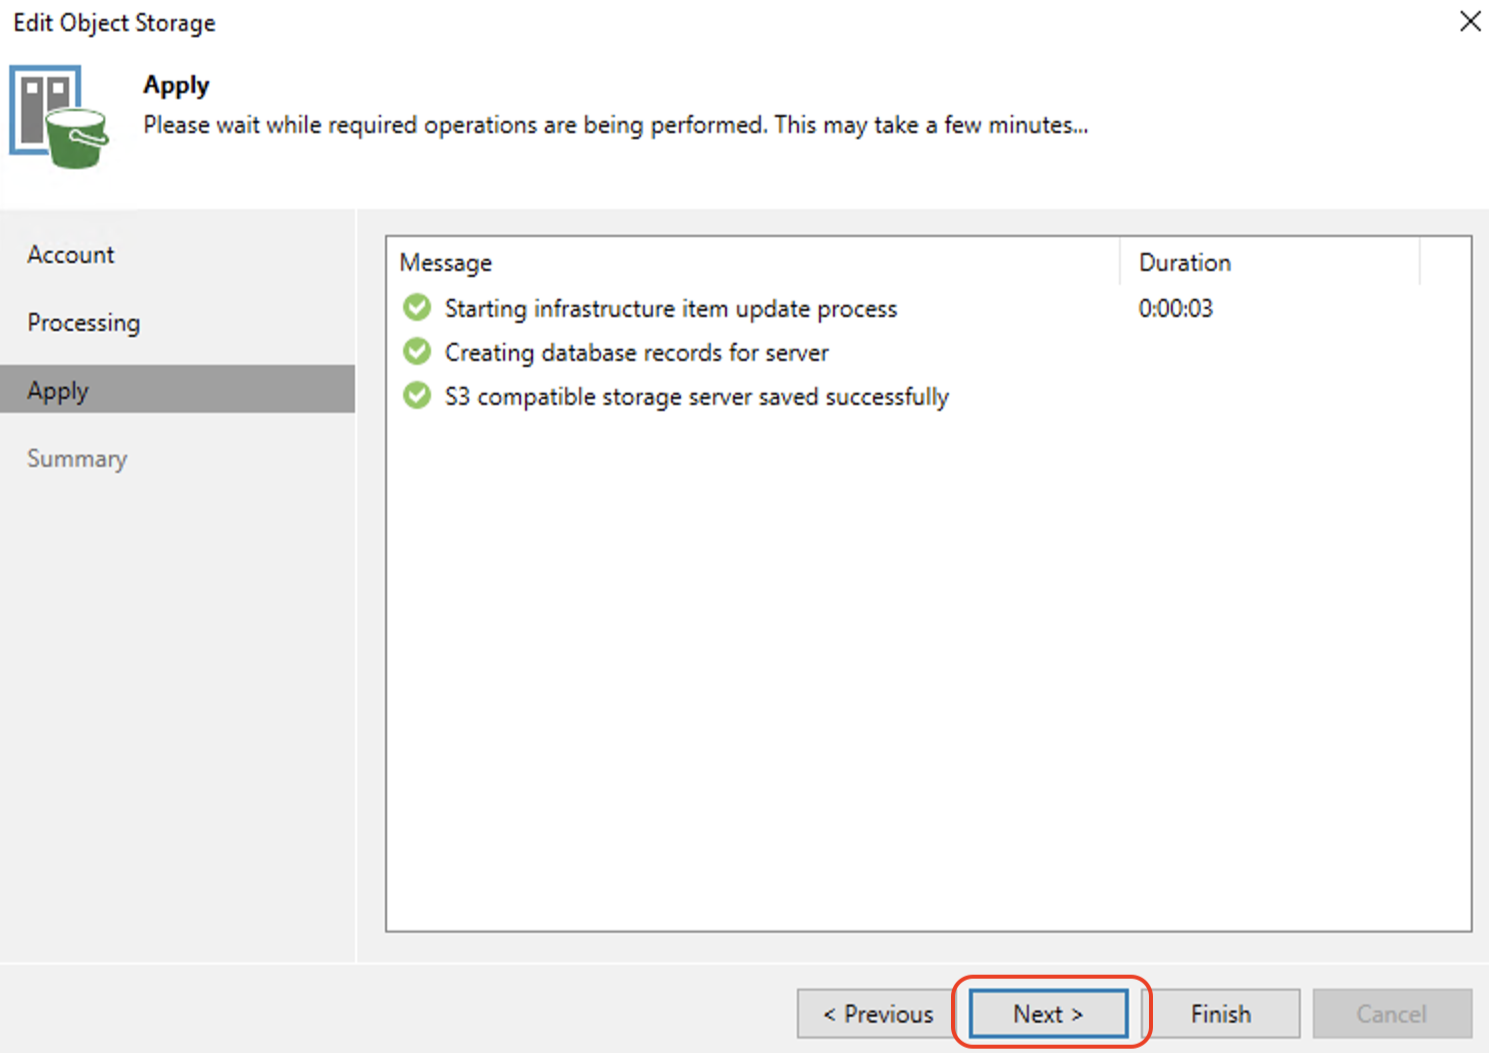
Click Next to continue.
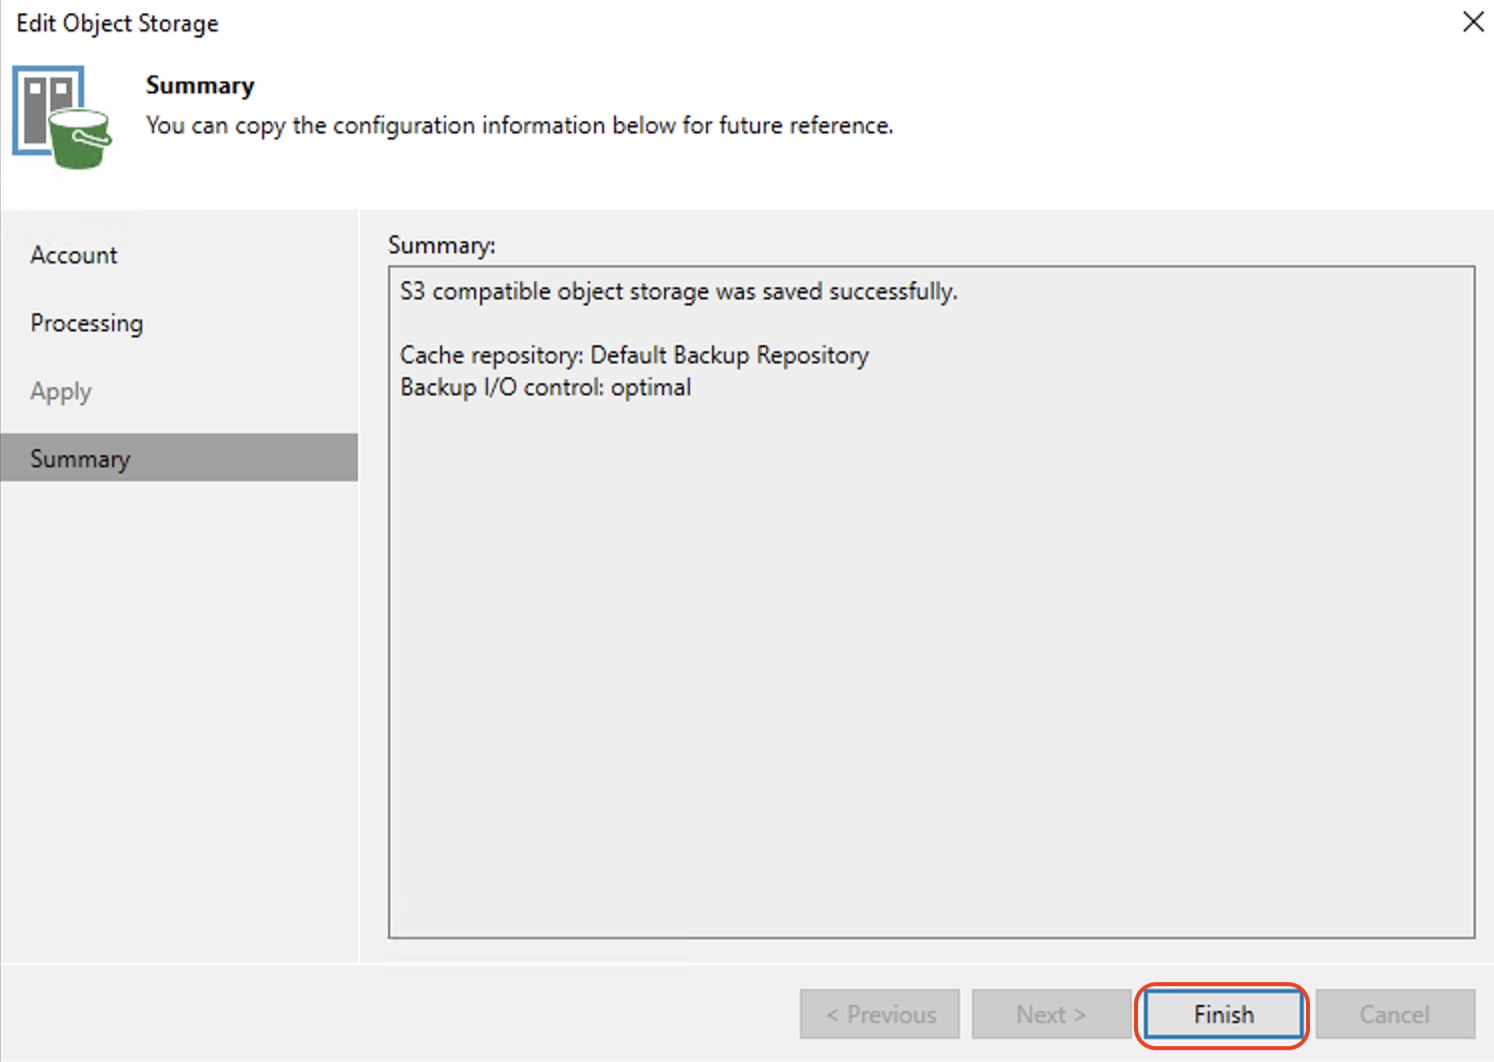
Review the Summary and click Finish to complete adding the object data source.
Creating an Object Backup Job
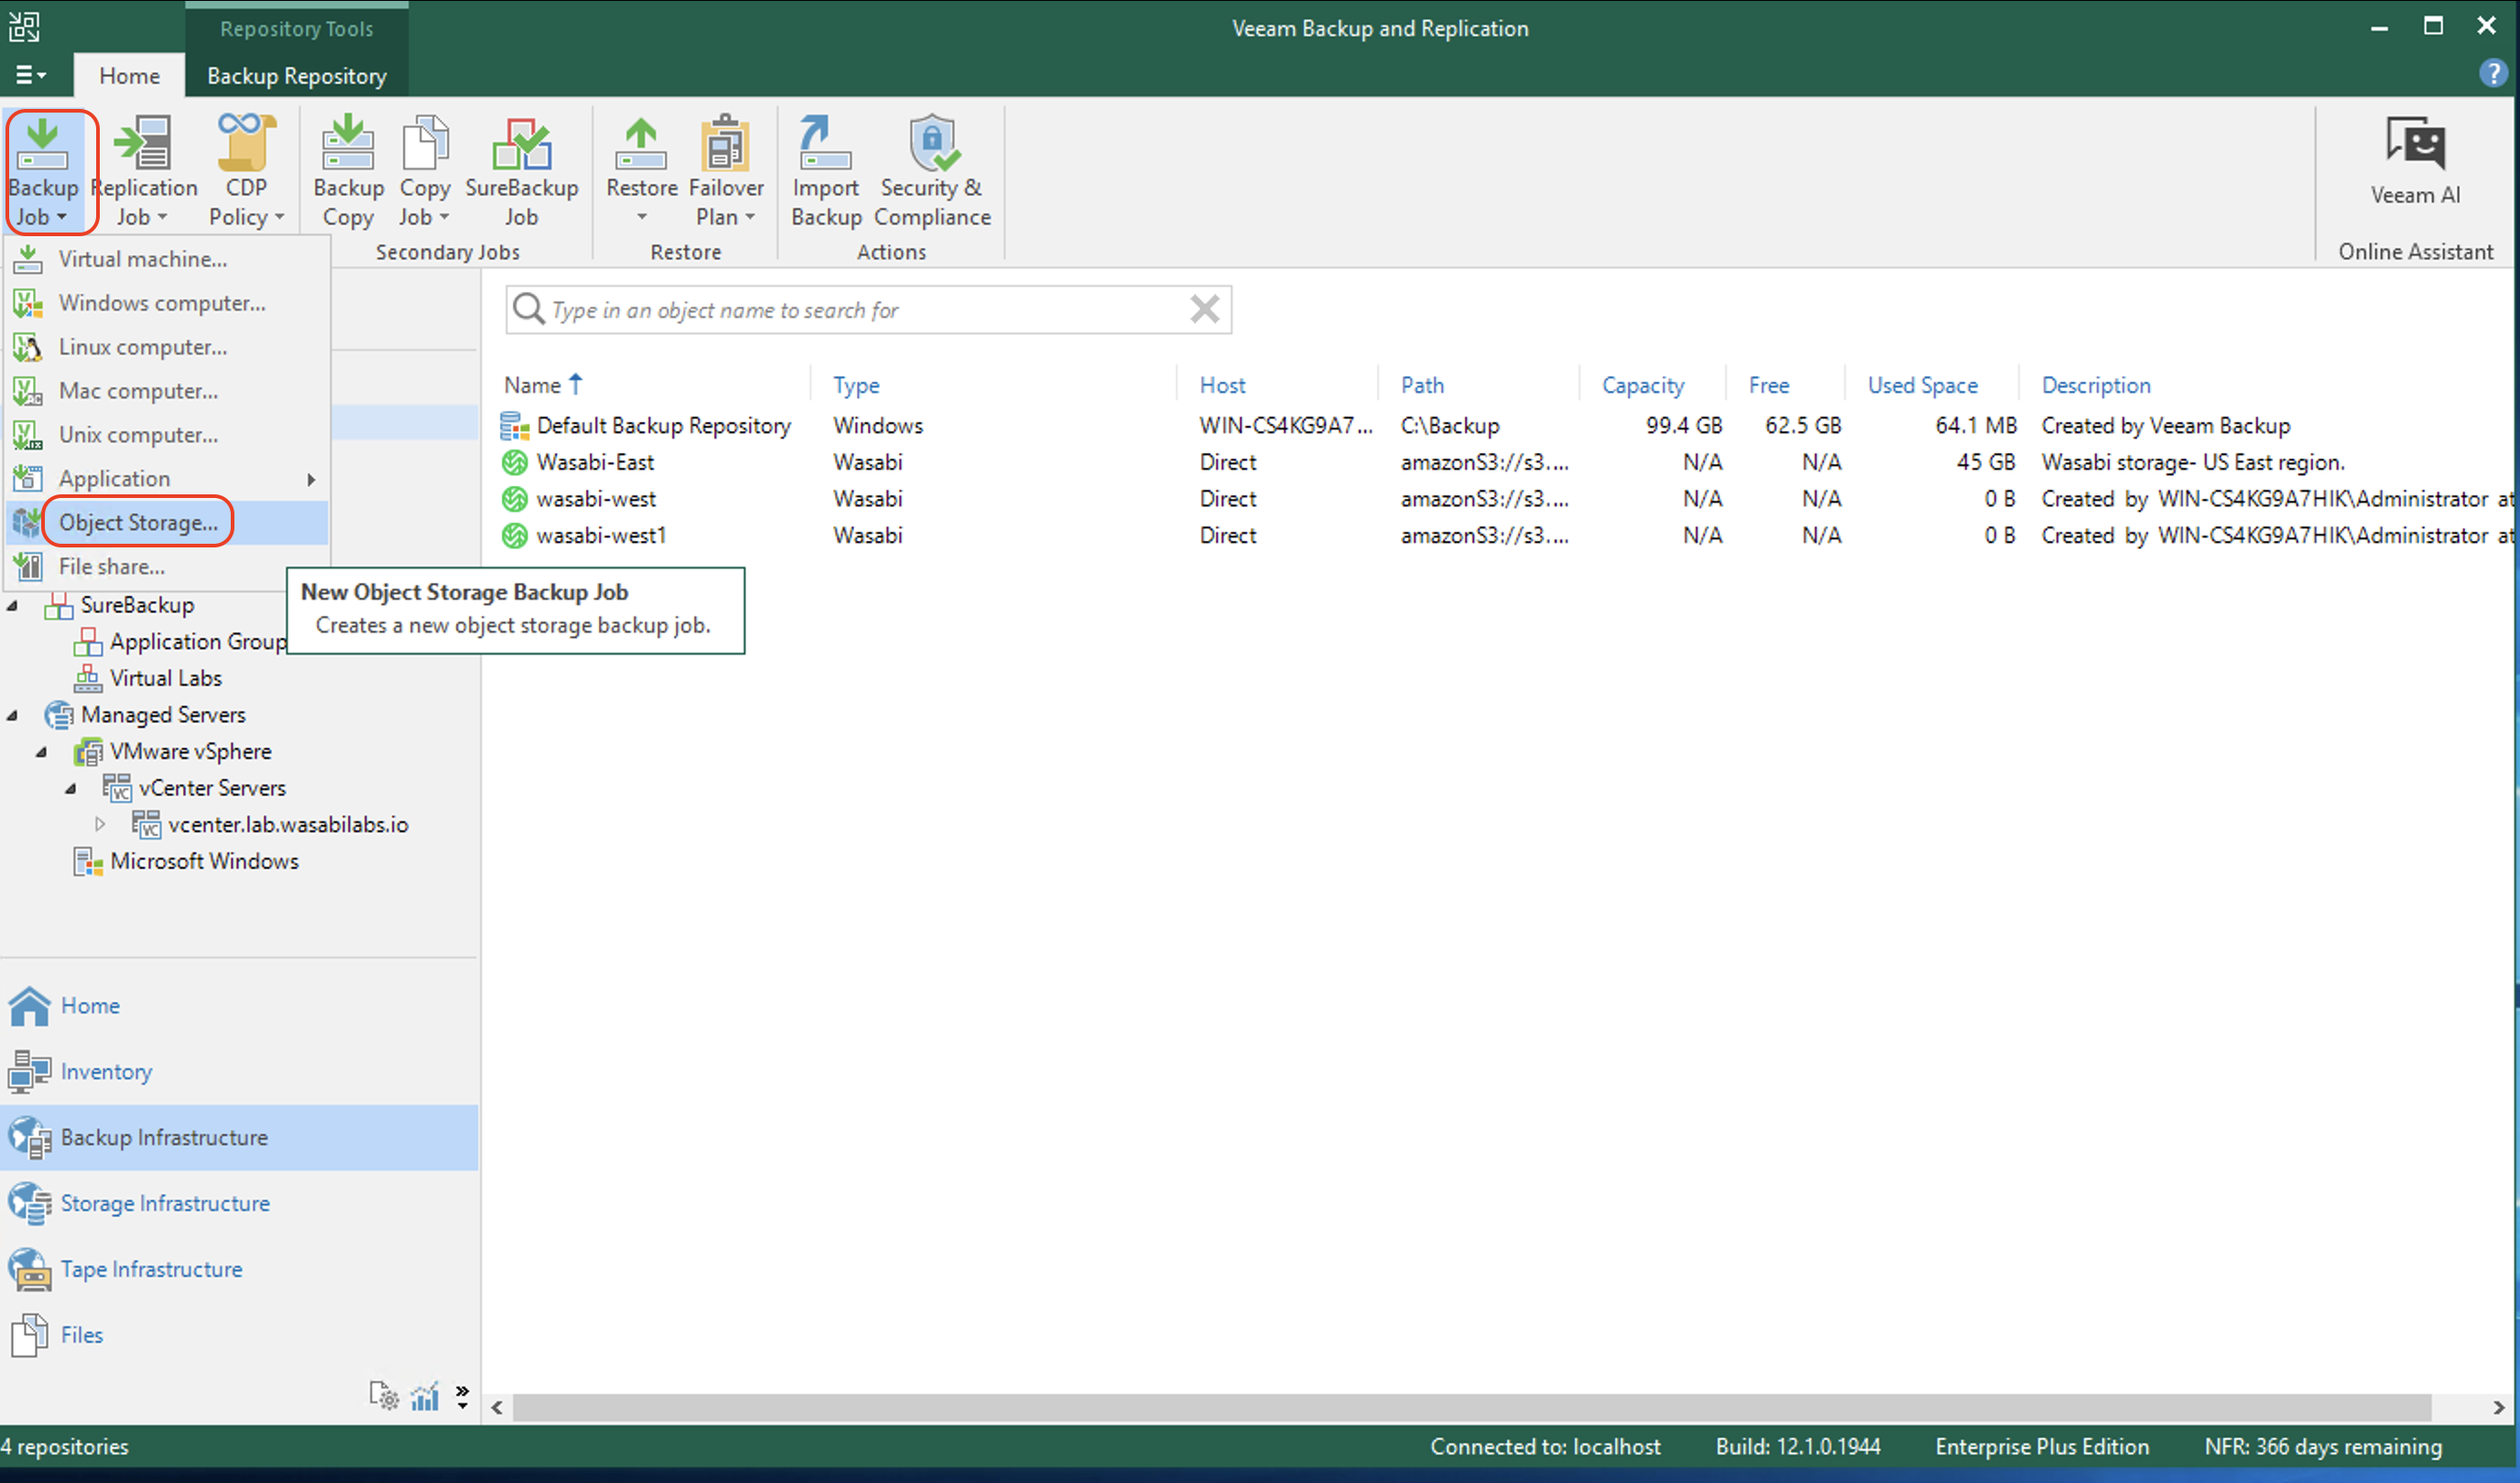
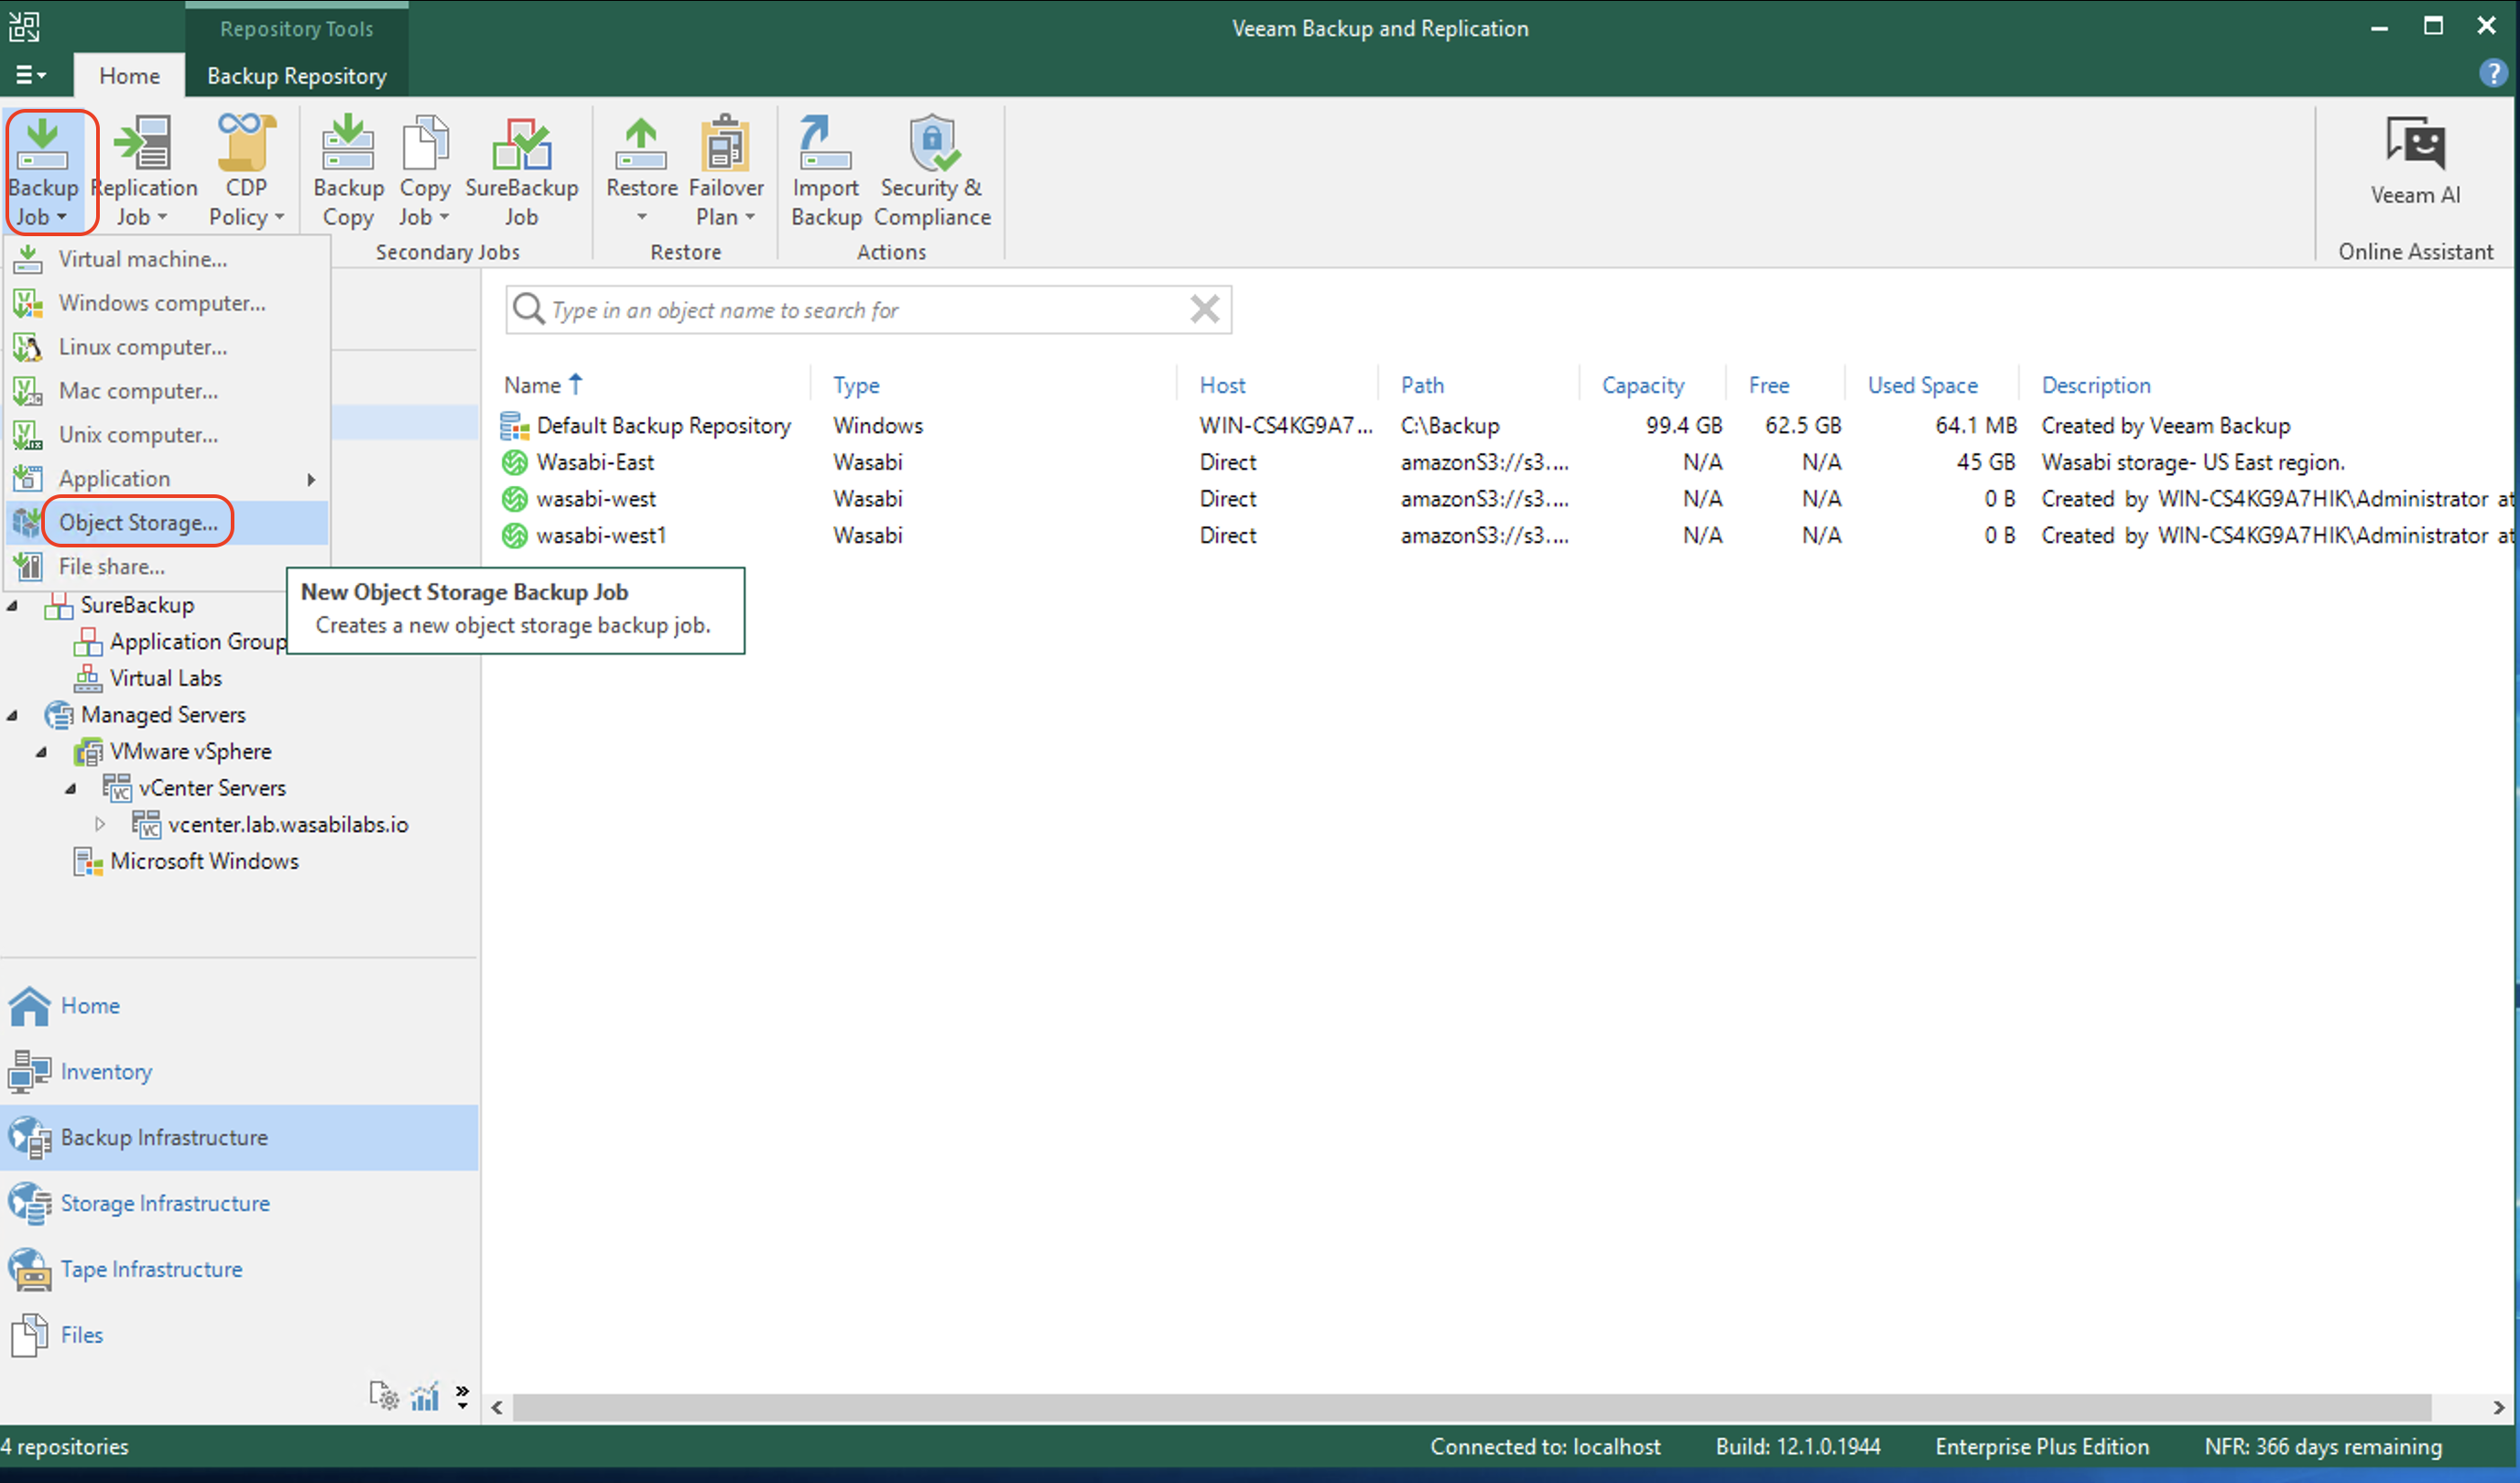
On the Backup Infrastructure tab, click Backup Job. Click Object Storage to open the New Object storage backup job wizard.
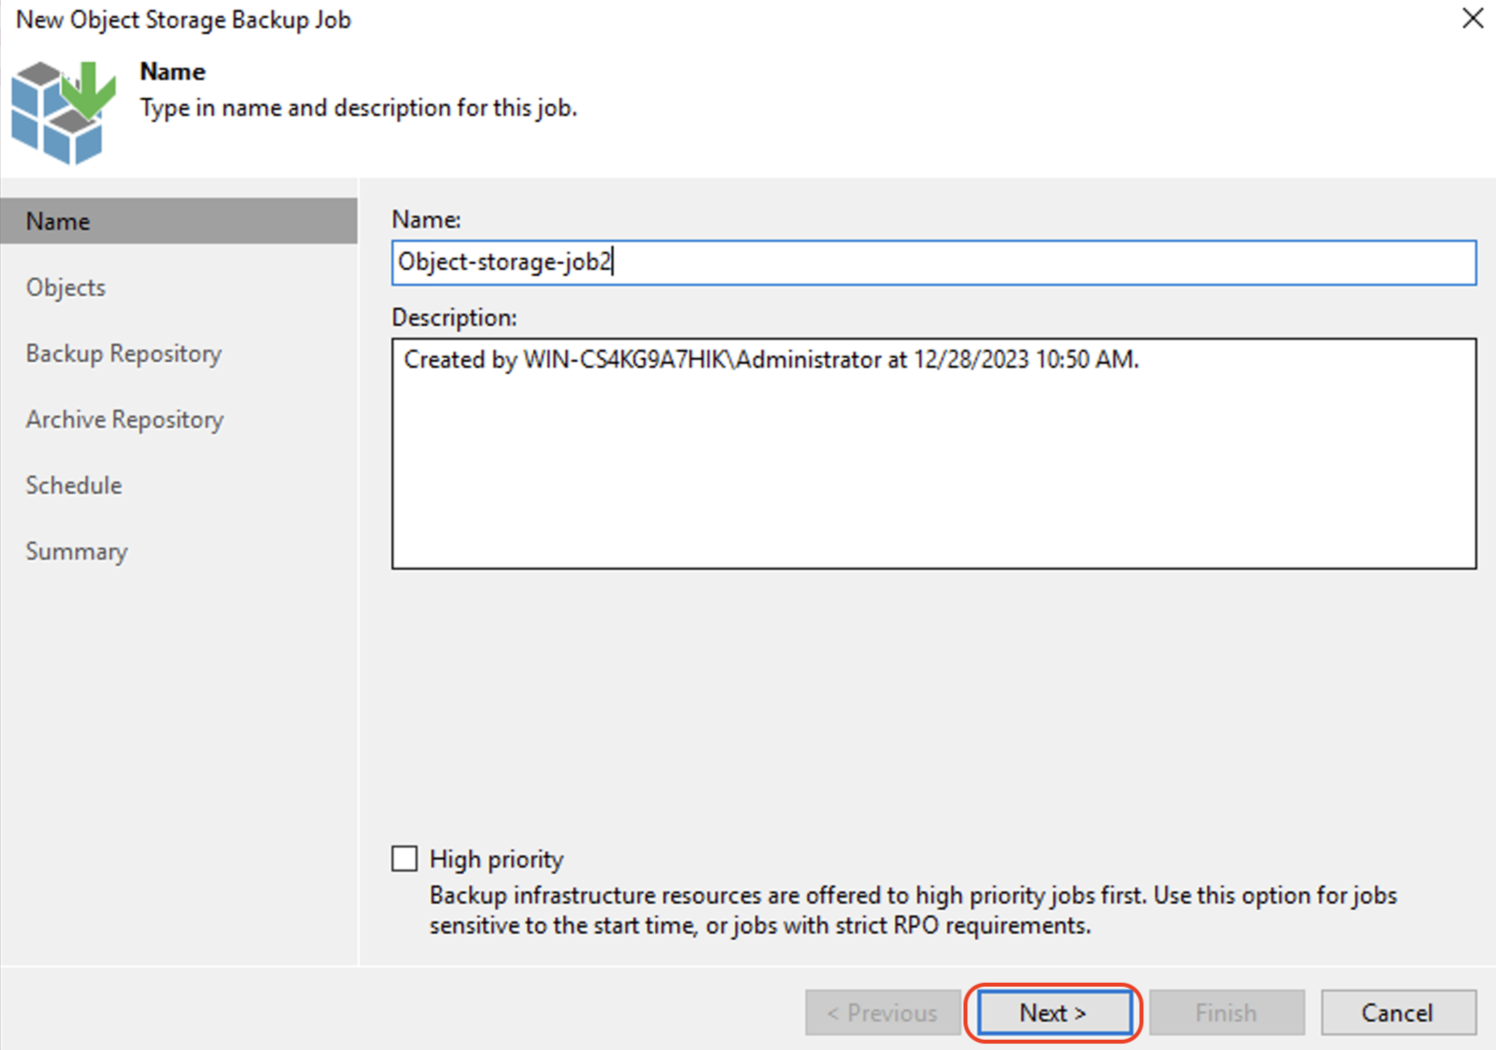
Input a Name for the backup job. Click Next.
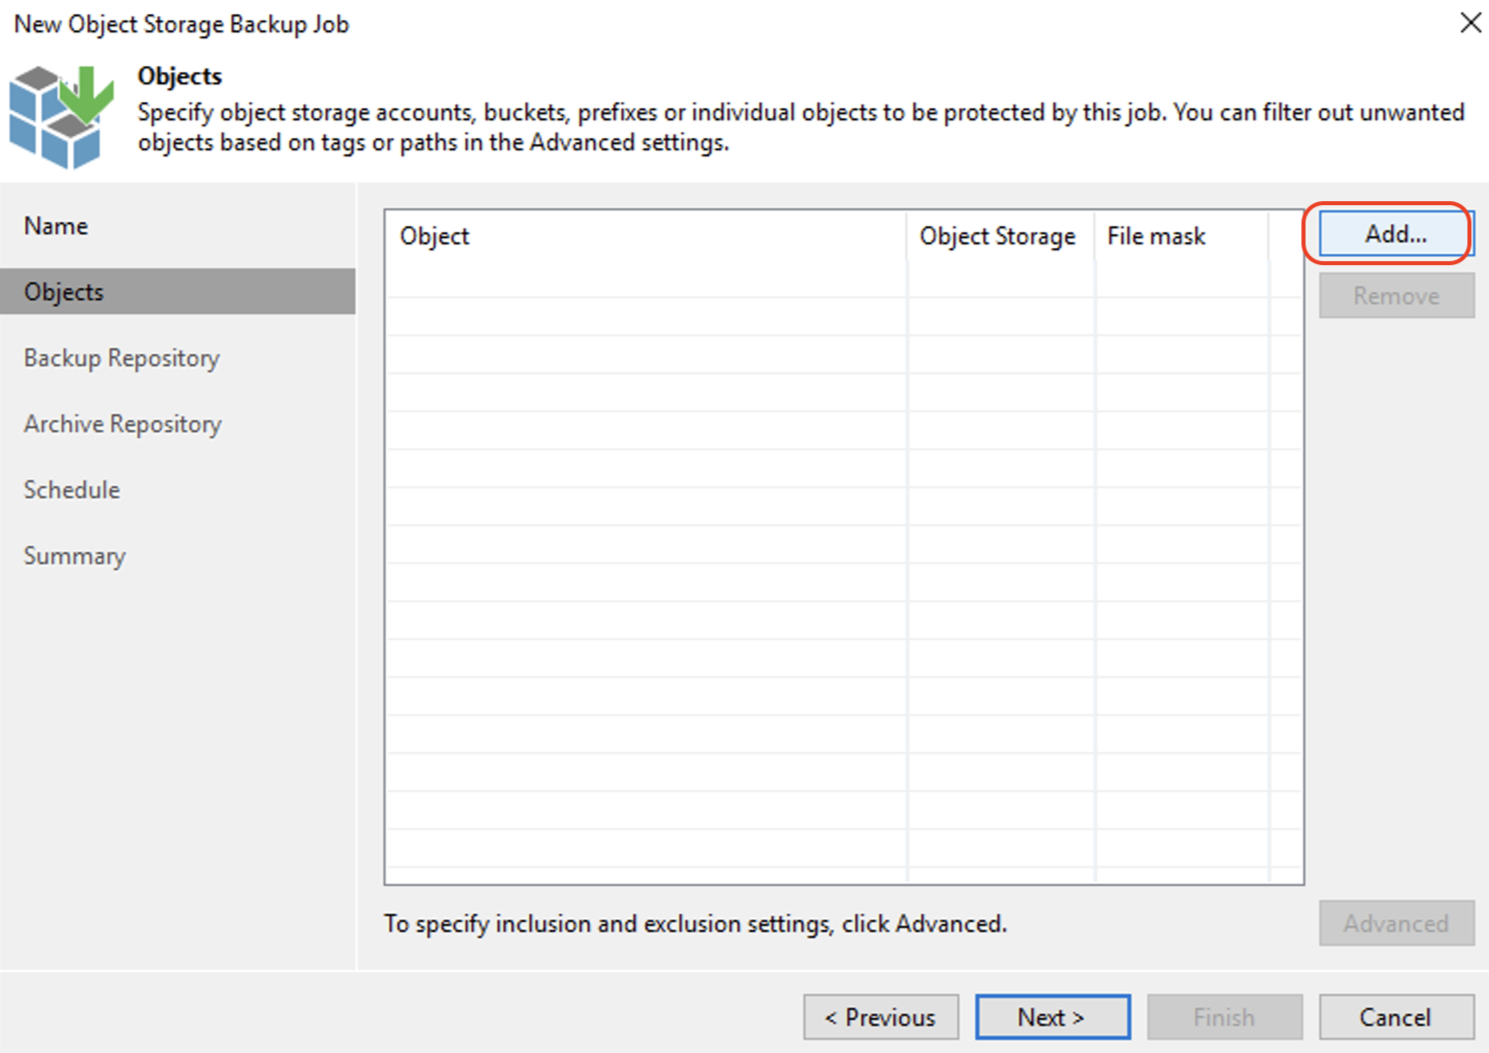
On the Objects tab, click Add to add objects to be backed up.
Select the object storage to be backed. Select the bucket or individual folders to be backed up. Click OK.
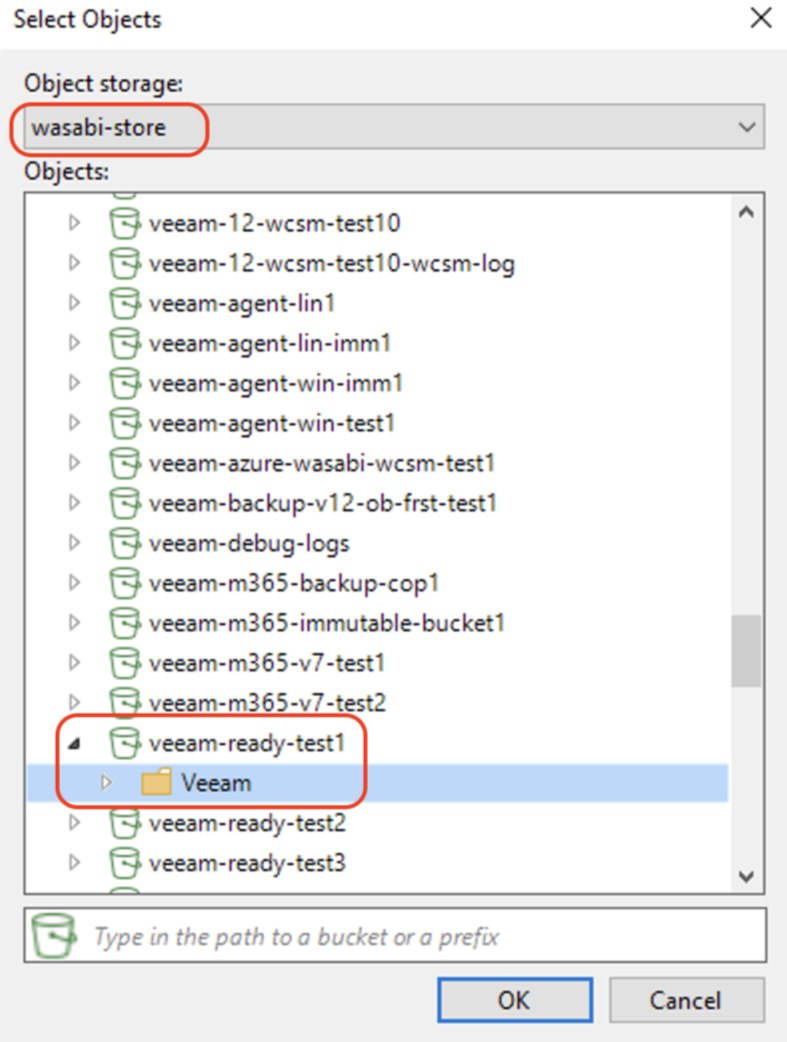
You can add more objects. Once all objects have been added, click Next to continue.
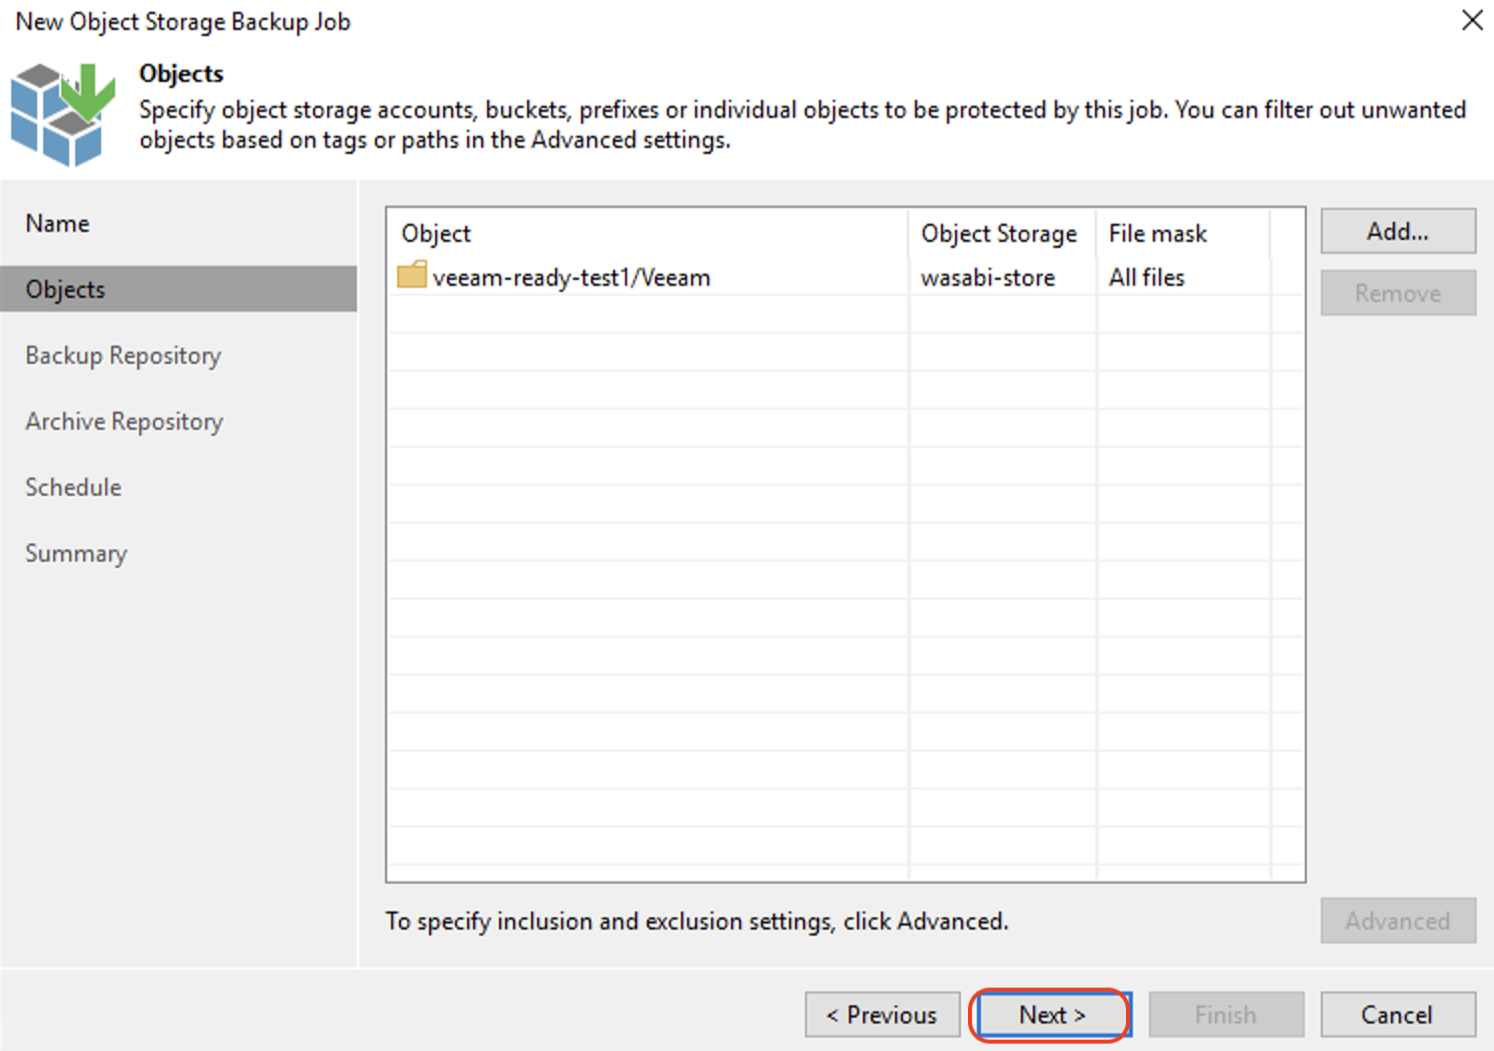
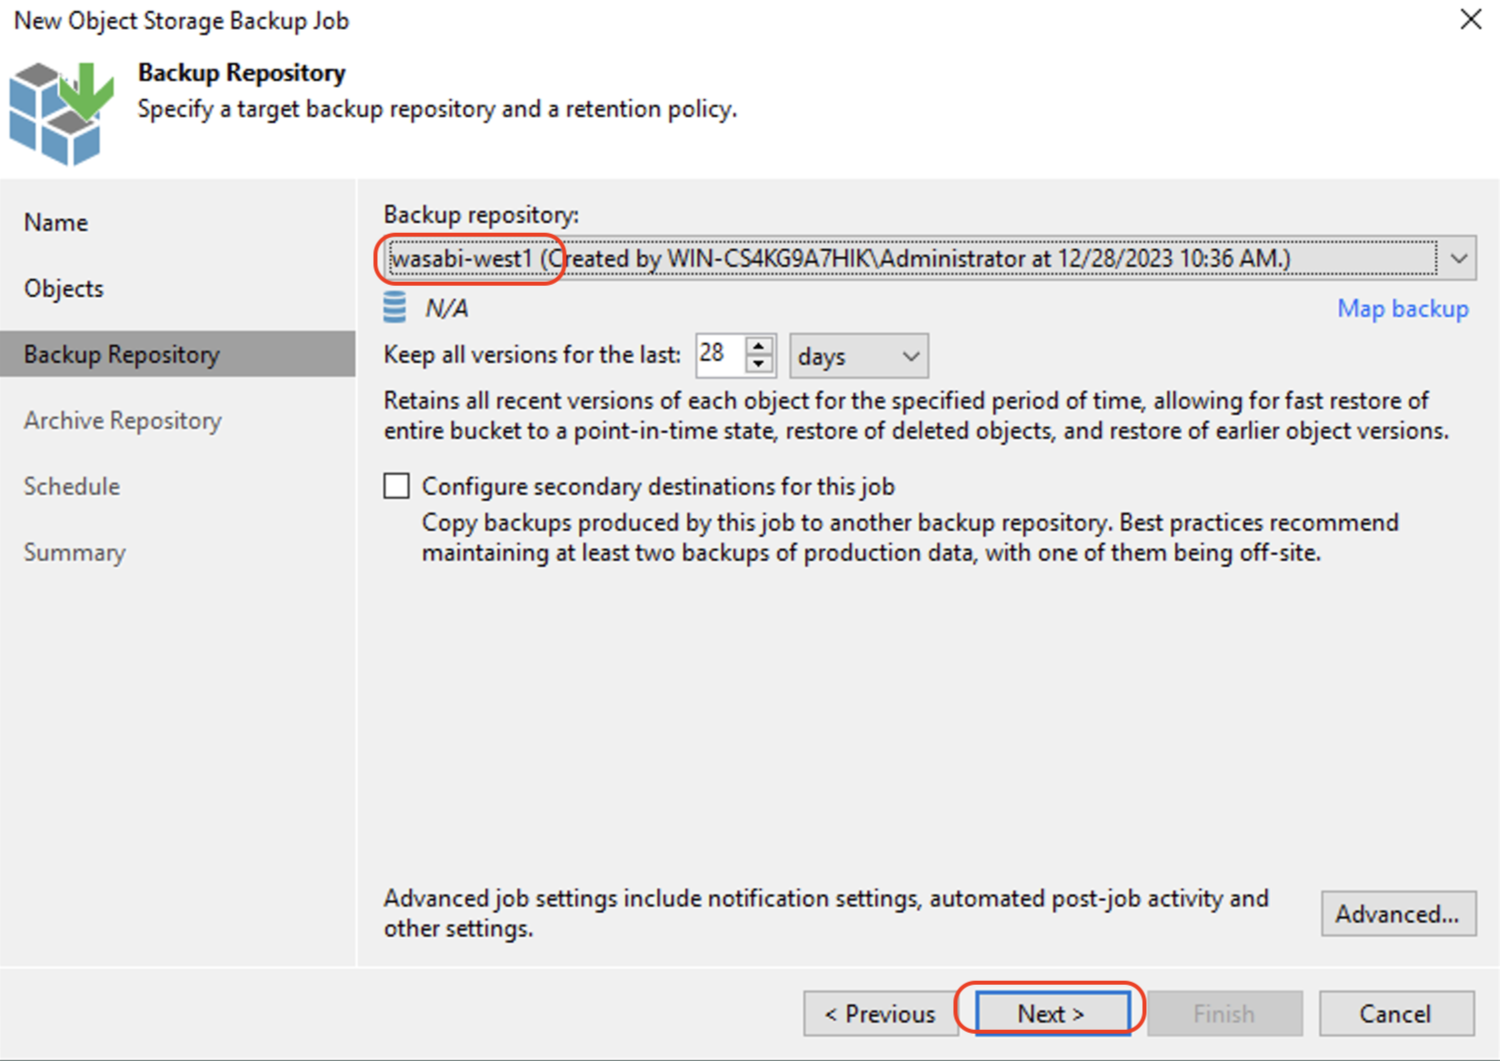
Select the target backup repository created in the procedure to Create a Wasabi Object Repository. This is where the backups will be stored.
Enable archive repository, if needed, by checking the checkbox for Archive object versions to the following repository and select the appropriate backup repository. Refer to Specify Archive Repository Setting for more details. Click Next to continue.
— Archive recent object versions: Keeps the copy of the data stored in the backup repository also in the archive repository
— Archive previous object versions for: Specifies the number of months or years during which backup files must be retained.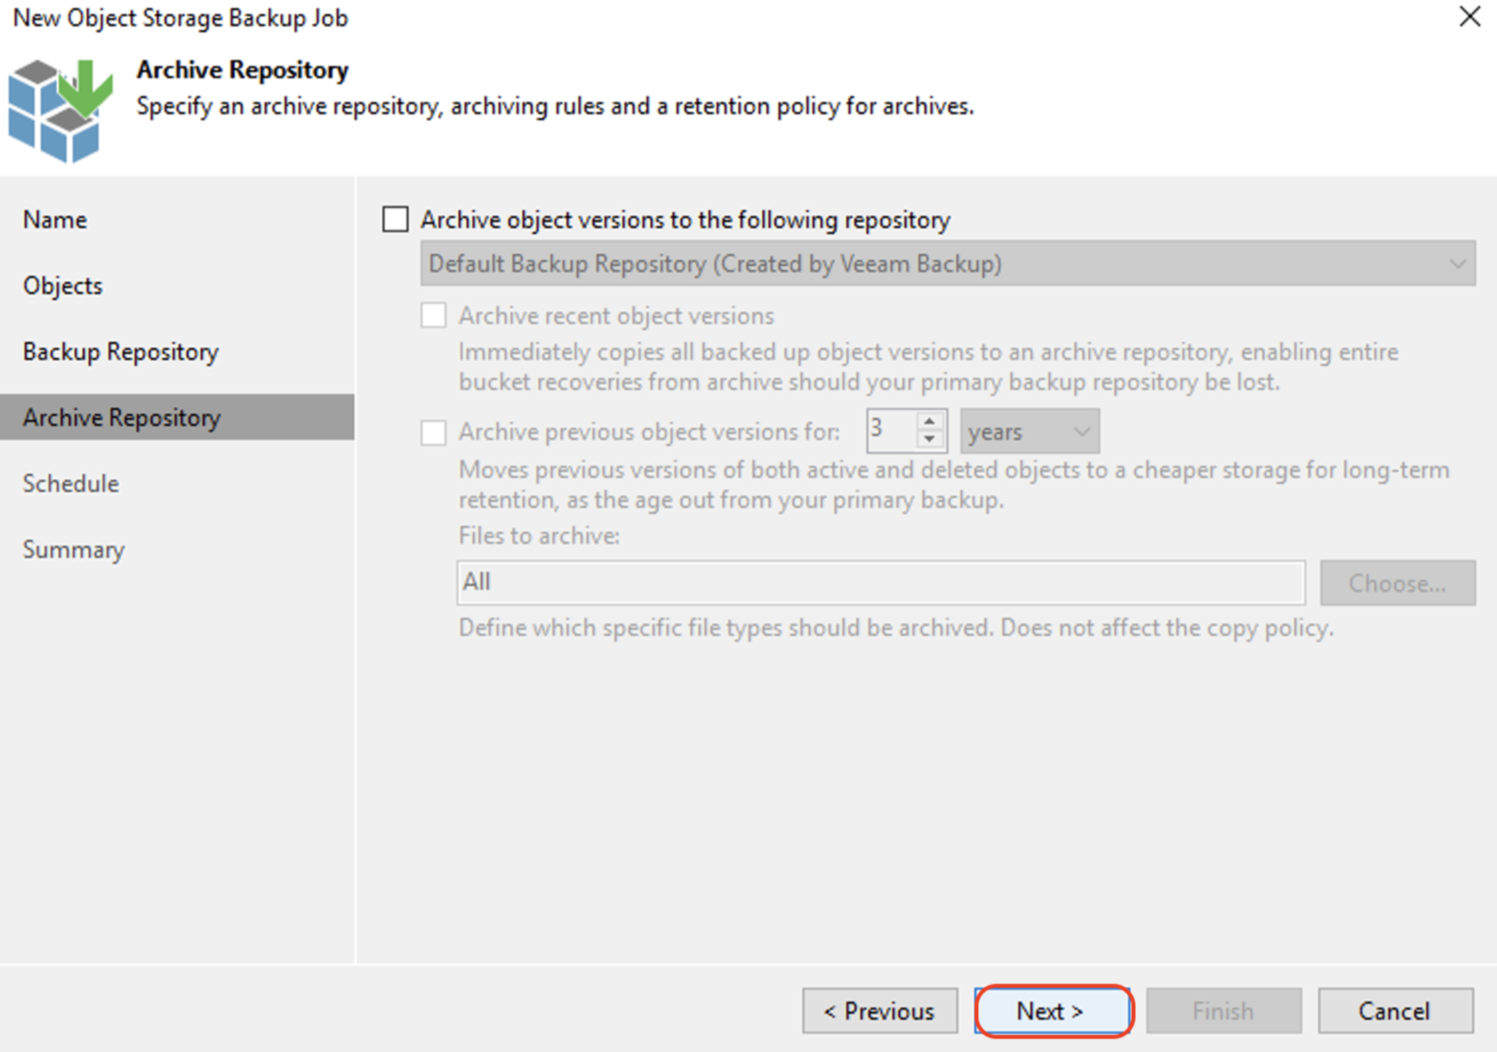
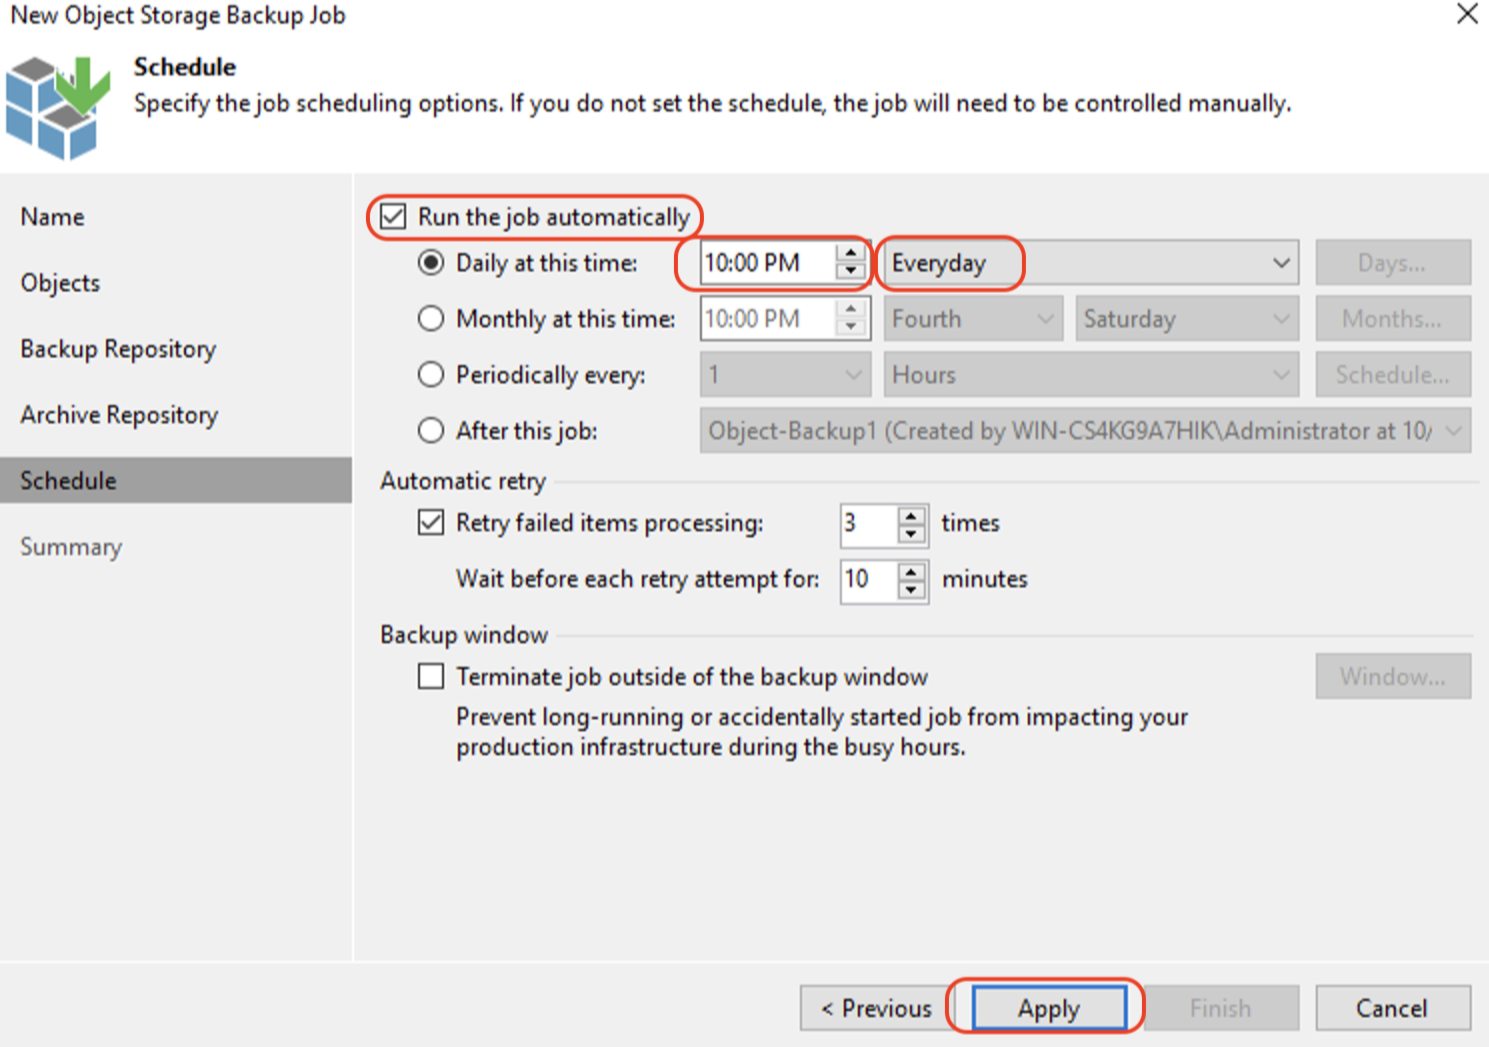
To enable scheduled runs of the object backup job, check the Run the job automatically checkbox. Specify the time and frequency for the schedule. Click Apply to apply the schedule.
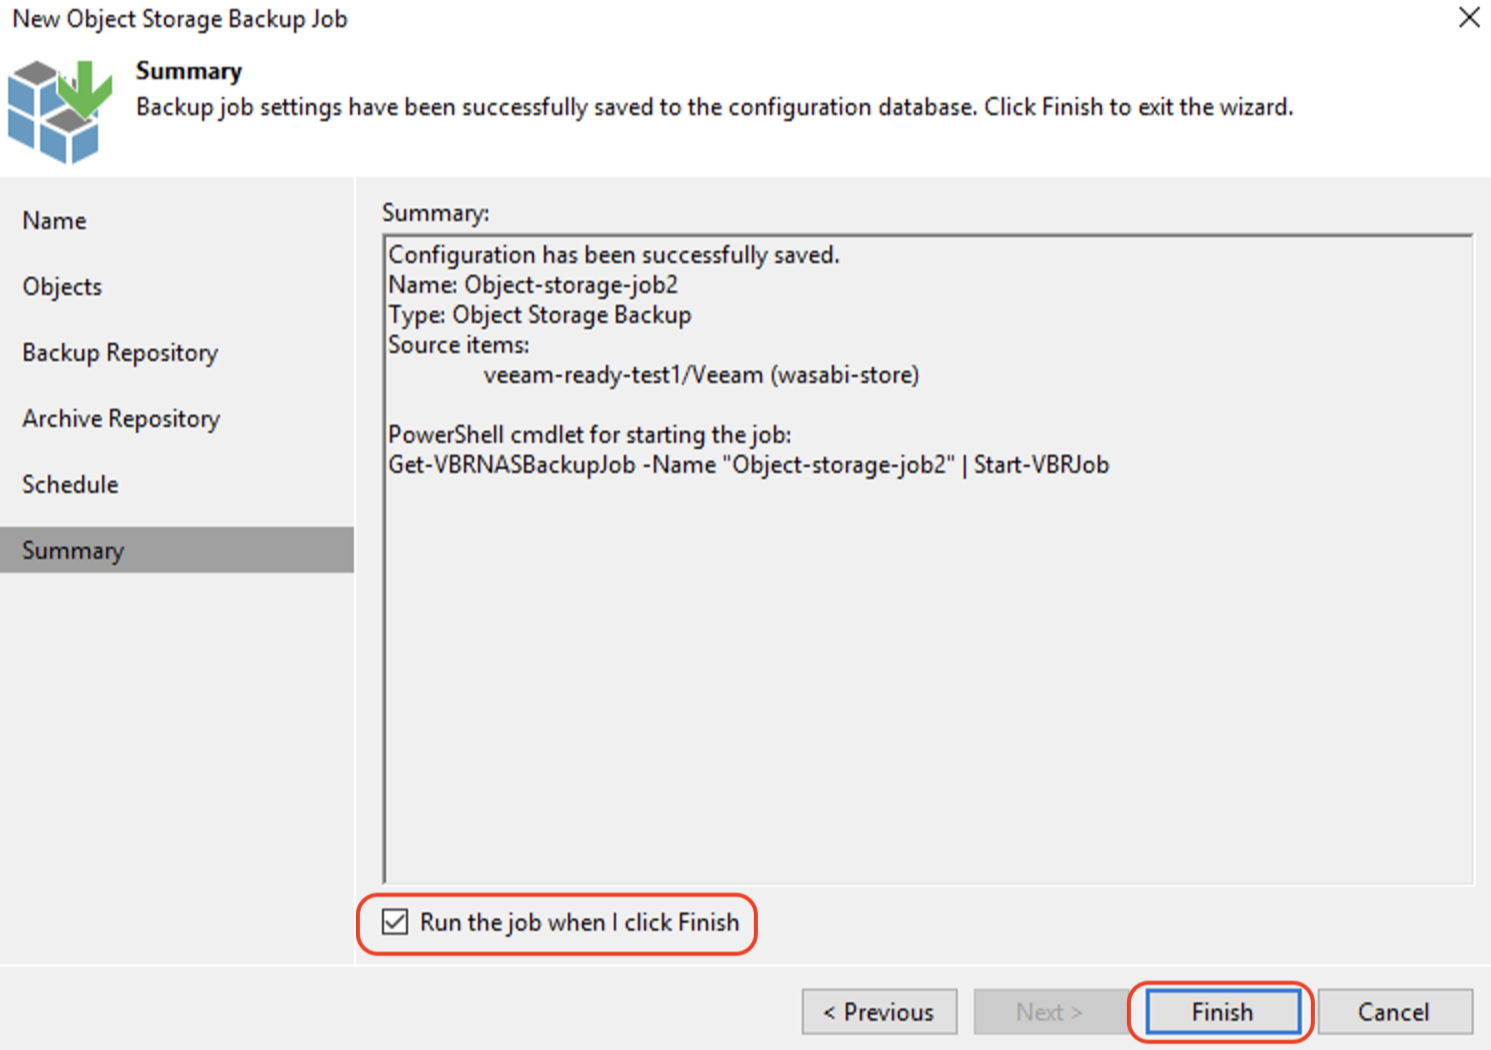
Check the Run the job when I click Finish checkbox to run the job immediately. Click Finish.
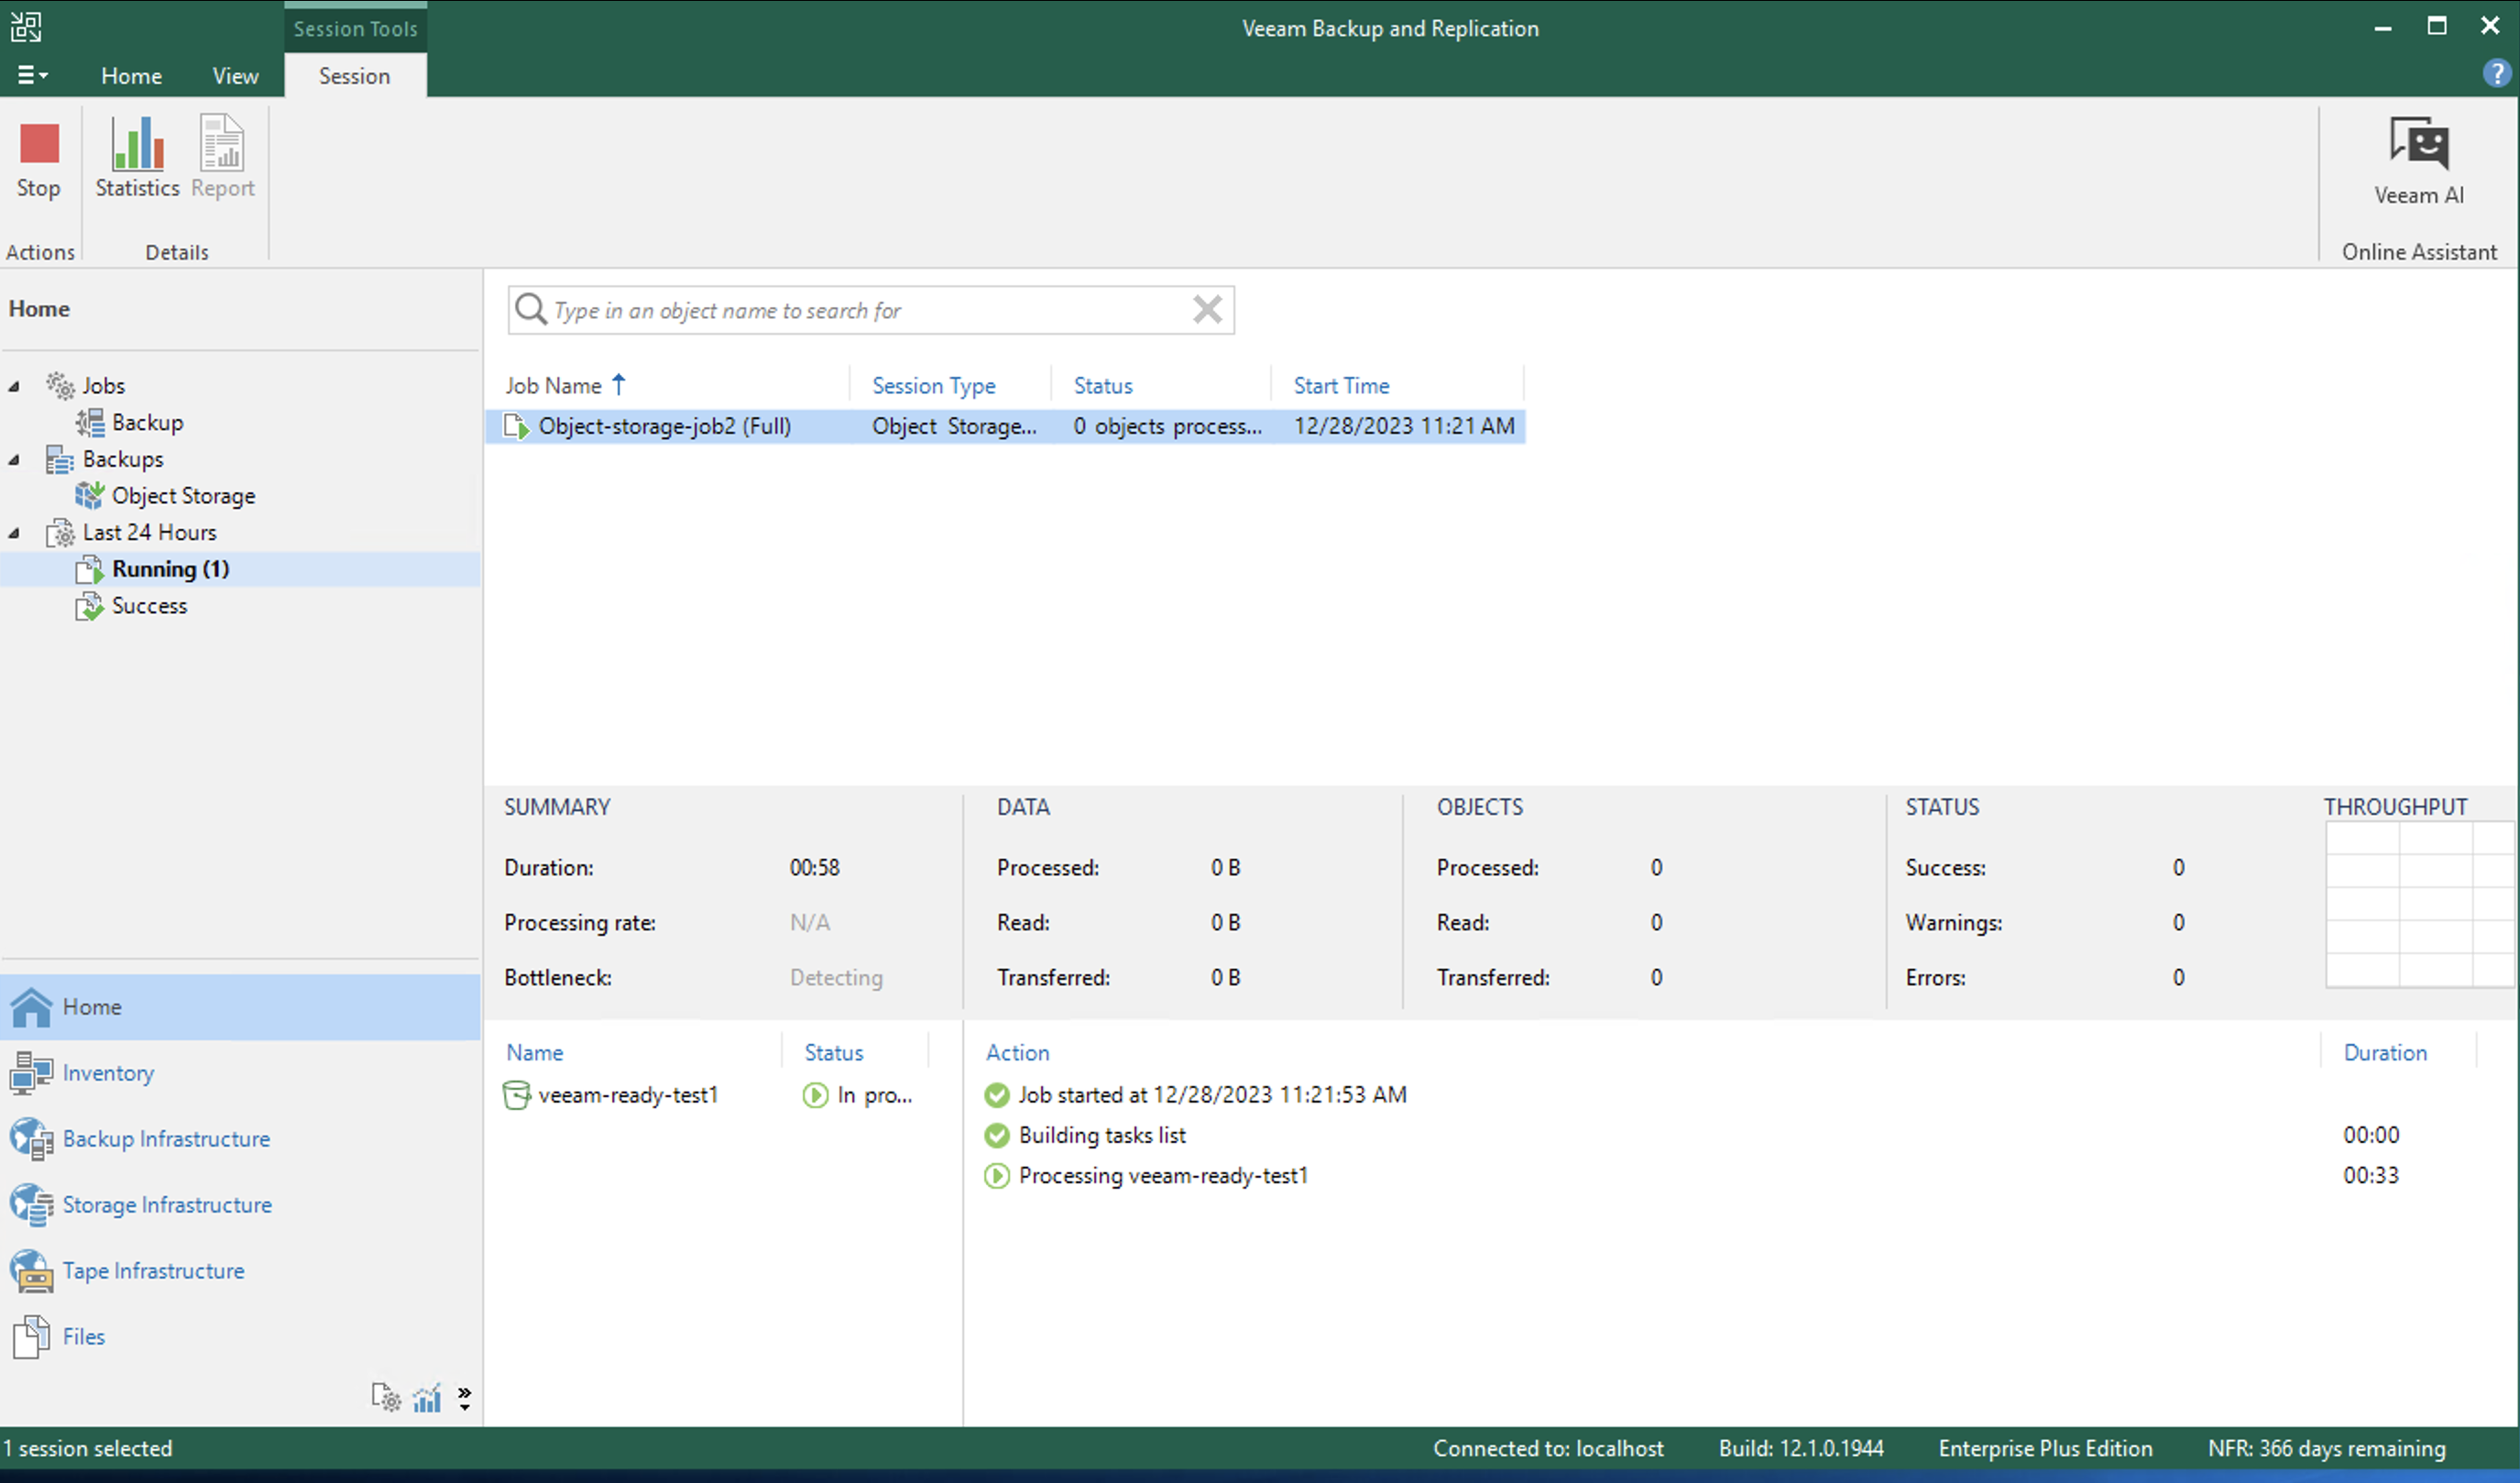
Once the backup job is created, view the status. To do so, click Running in the left pane of the Home tab and select the job.
Restoring Object Backups
Veeam provides multiple ways to restore object data from backups. The steps below describe the procedure to browse and restore individual objects from object storage backups on Veeam.
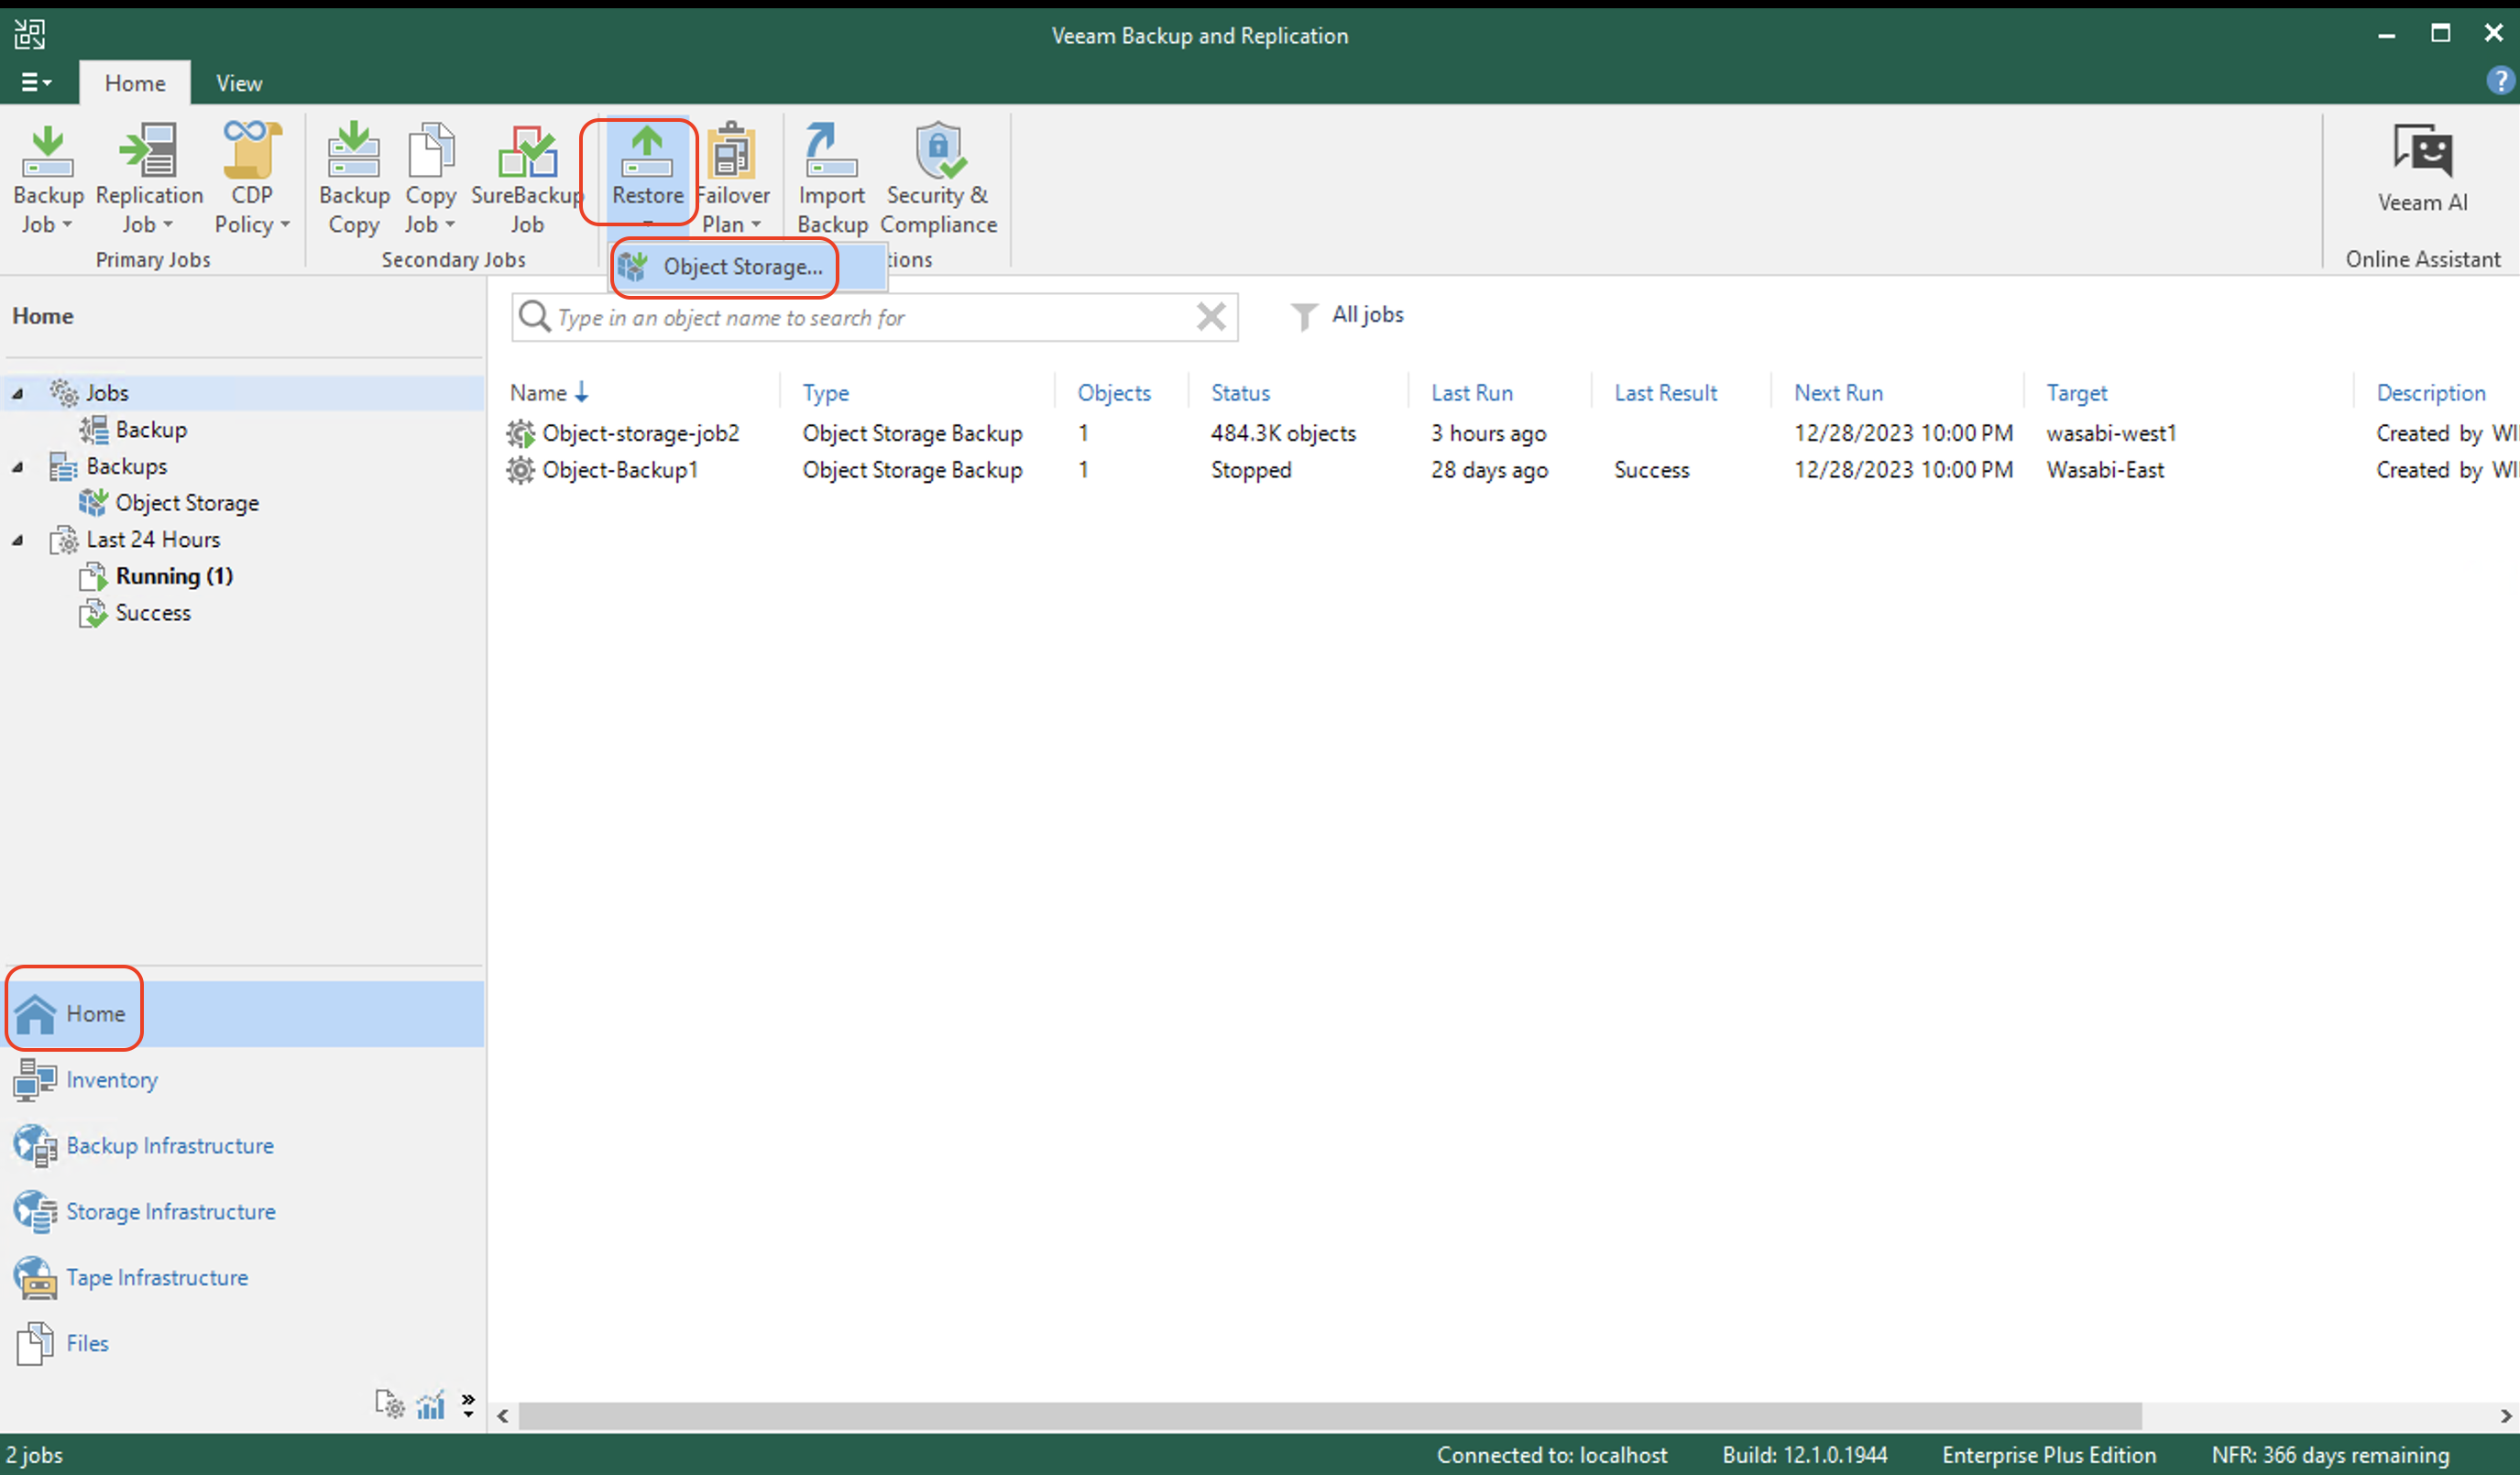
On the Home tab, click Jobs. Then click Restore and Object Storage.
Select the Restore individual objects or their specific versions option. In this article, steps are provided to restore individual objects. Review Object Storage Data Recovery at the Veeam Help Center for steps to restore entire buckets and rollback to a point in time.
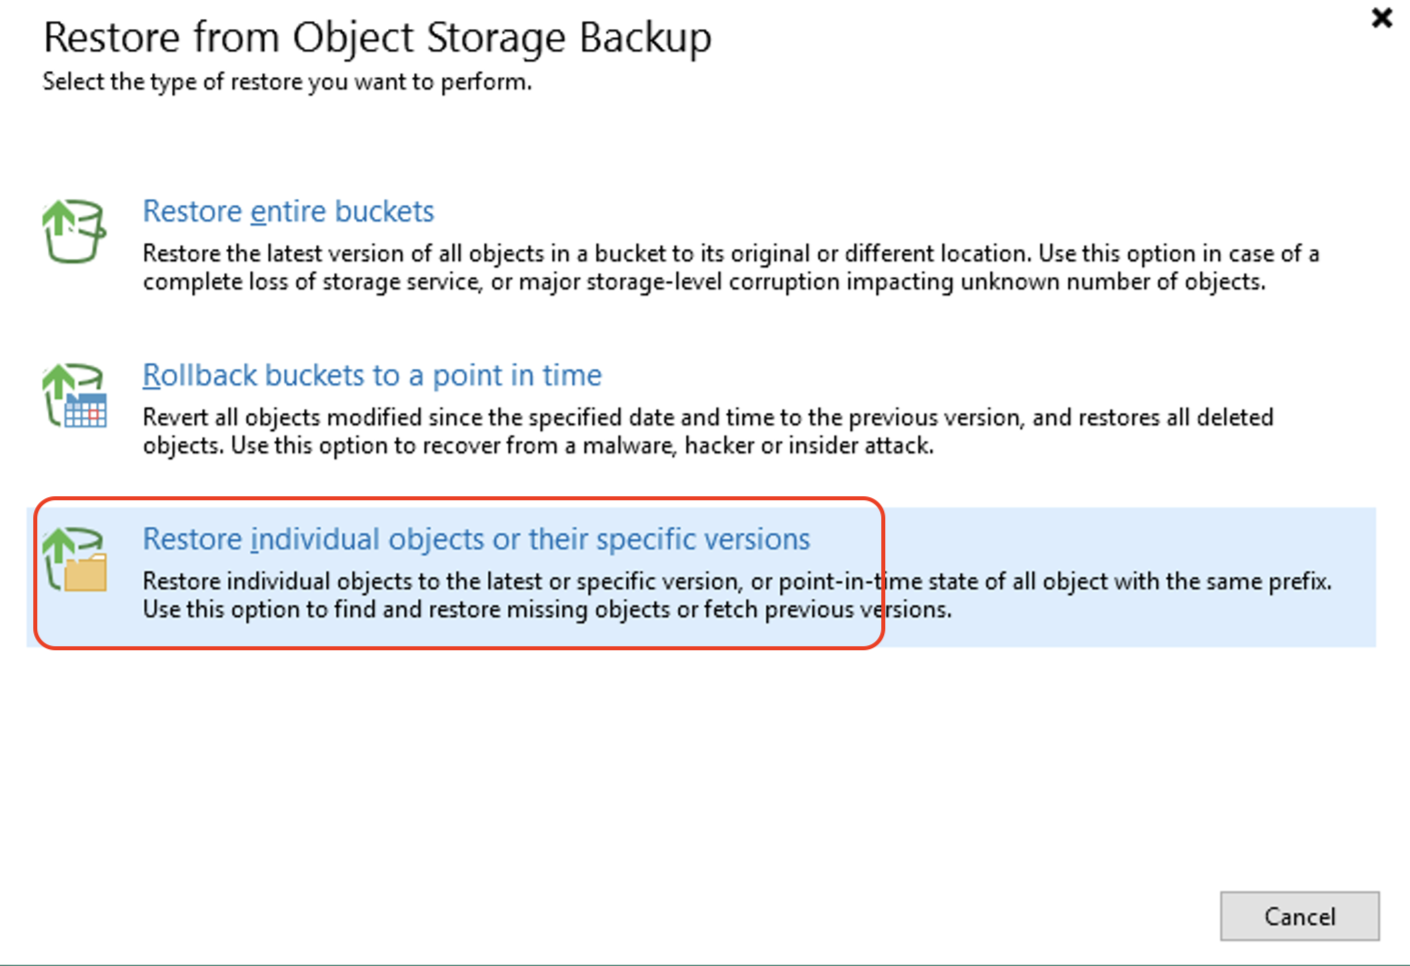
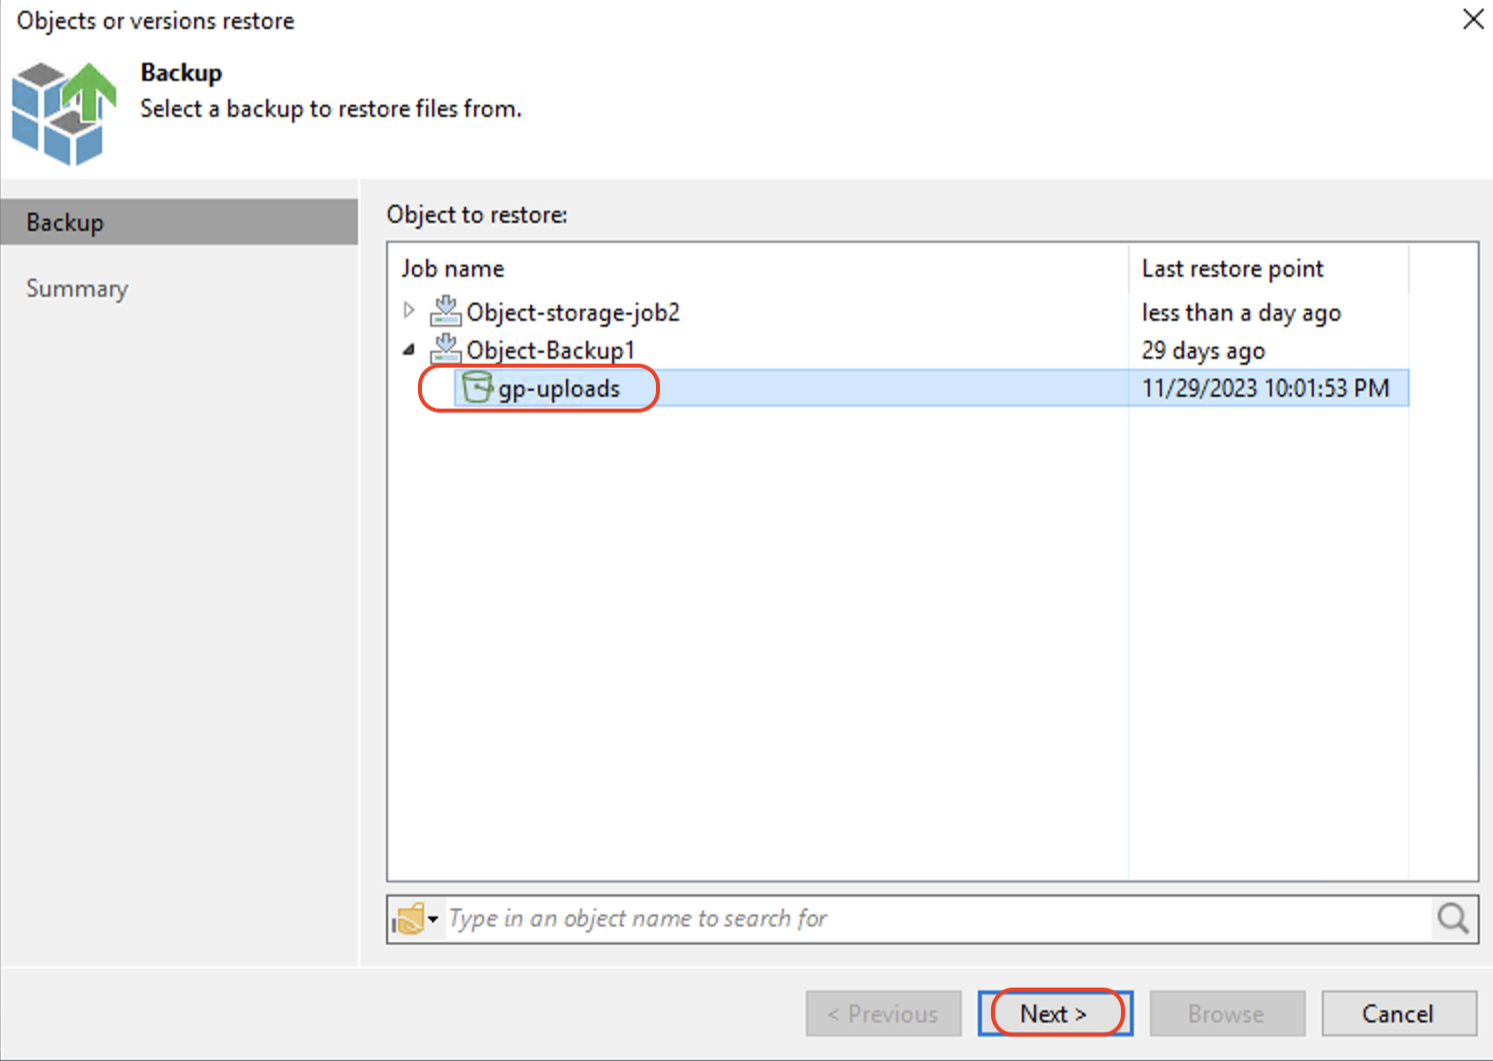
On the Backup tab, select the backup job and the source bucket from which to recover data. Click Next.
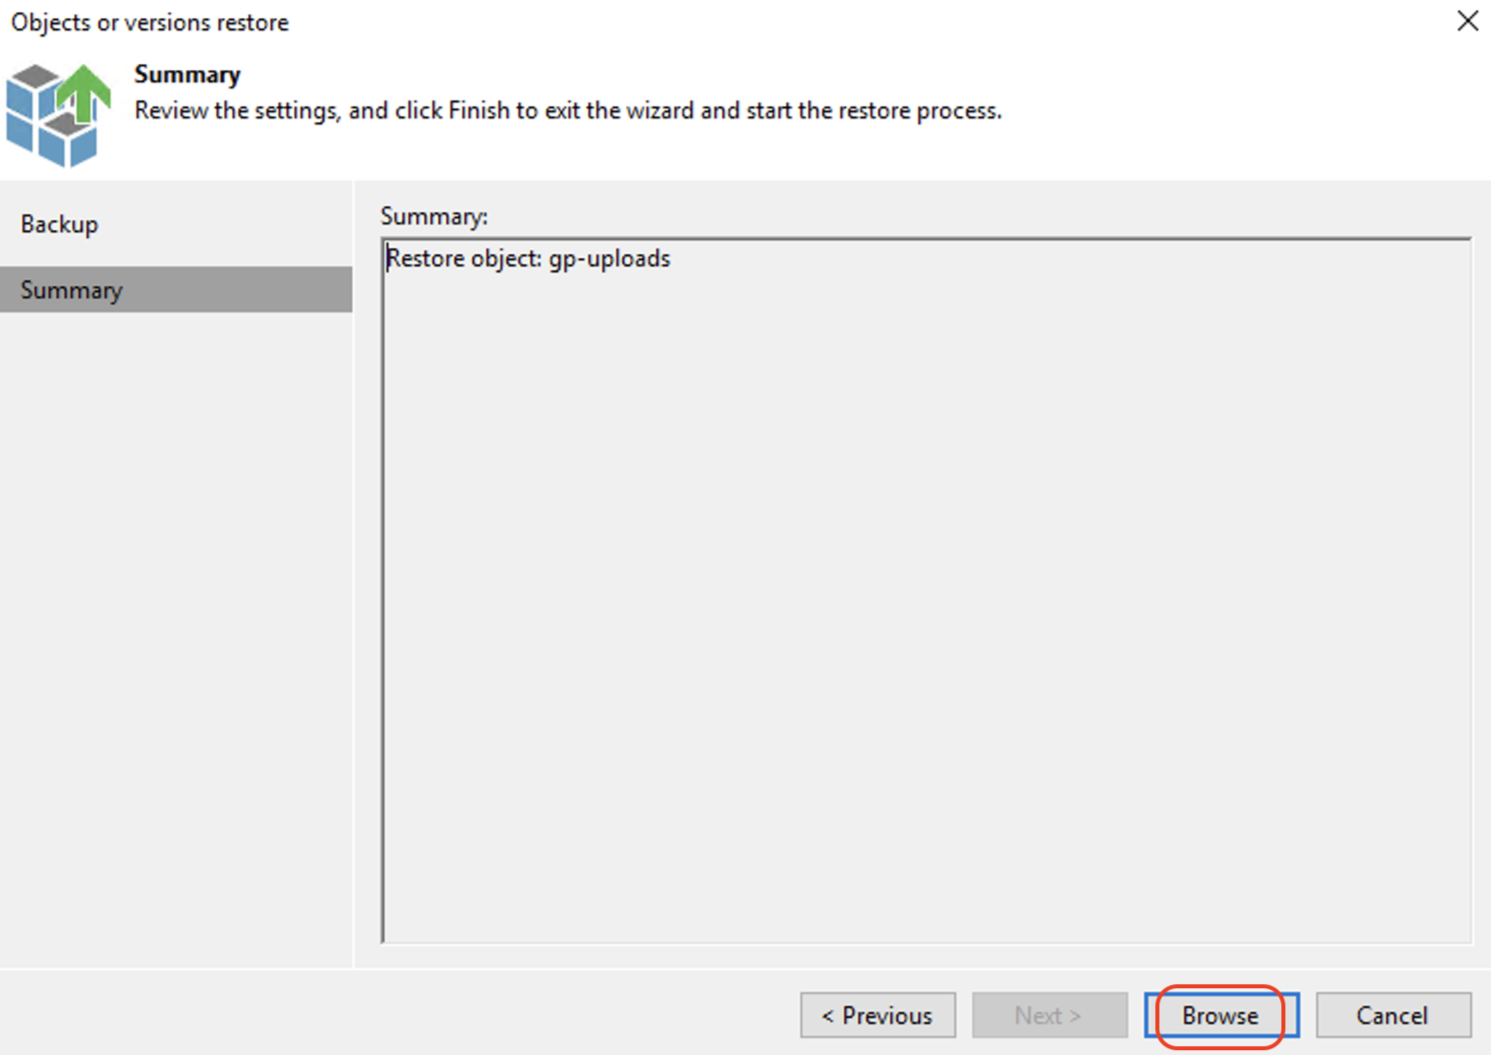
On the Summary tab, click Browse. Veeam will open the Backup Browser to browse the objects included in the backup. Note that the backup browser may take some time to open and show all the objects in the backup.
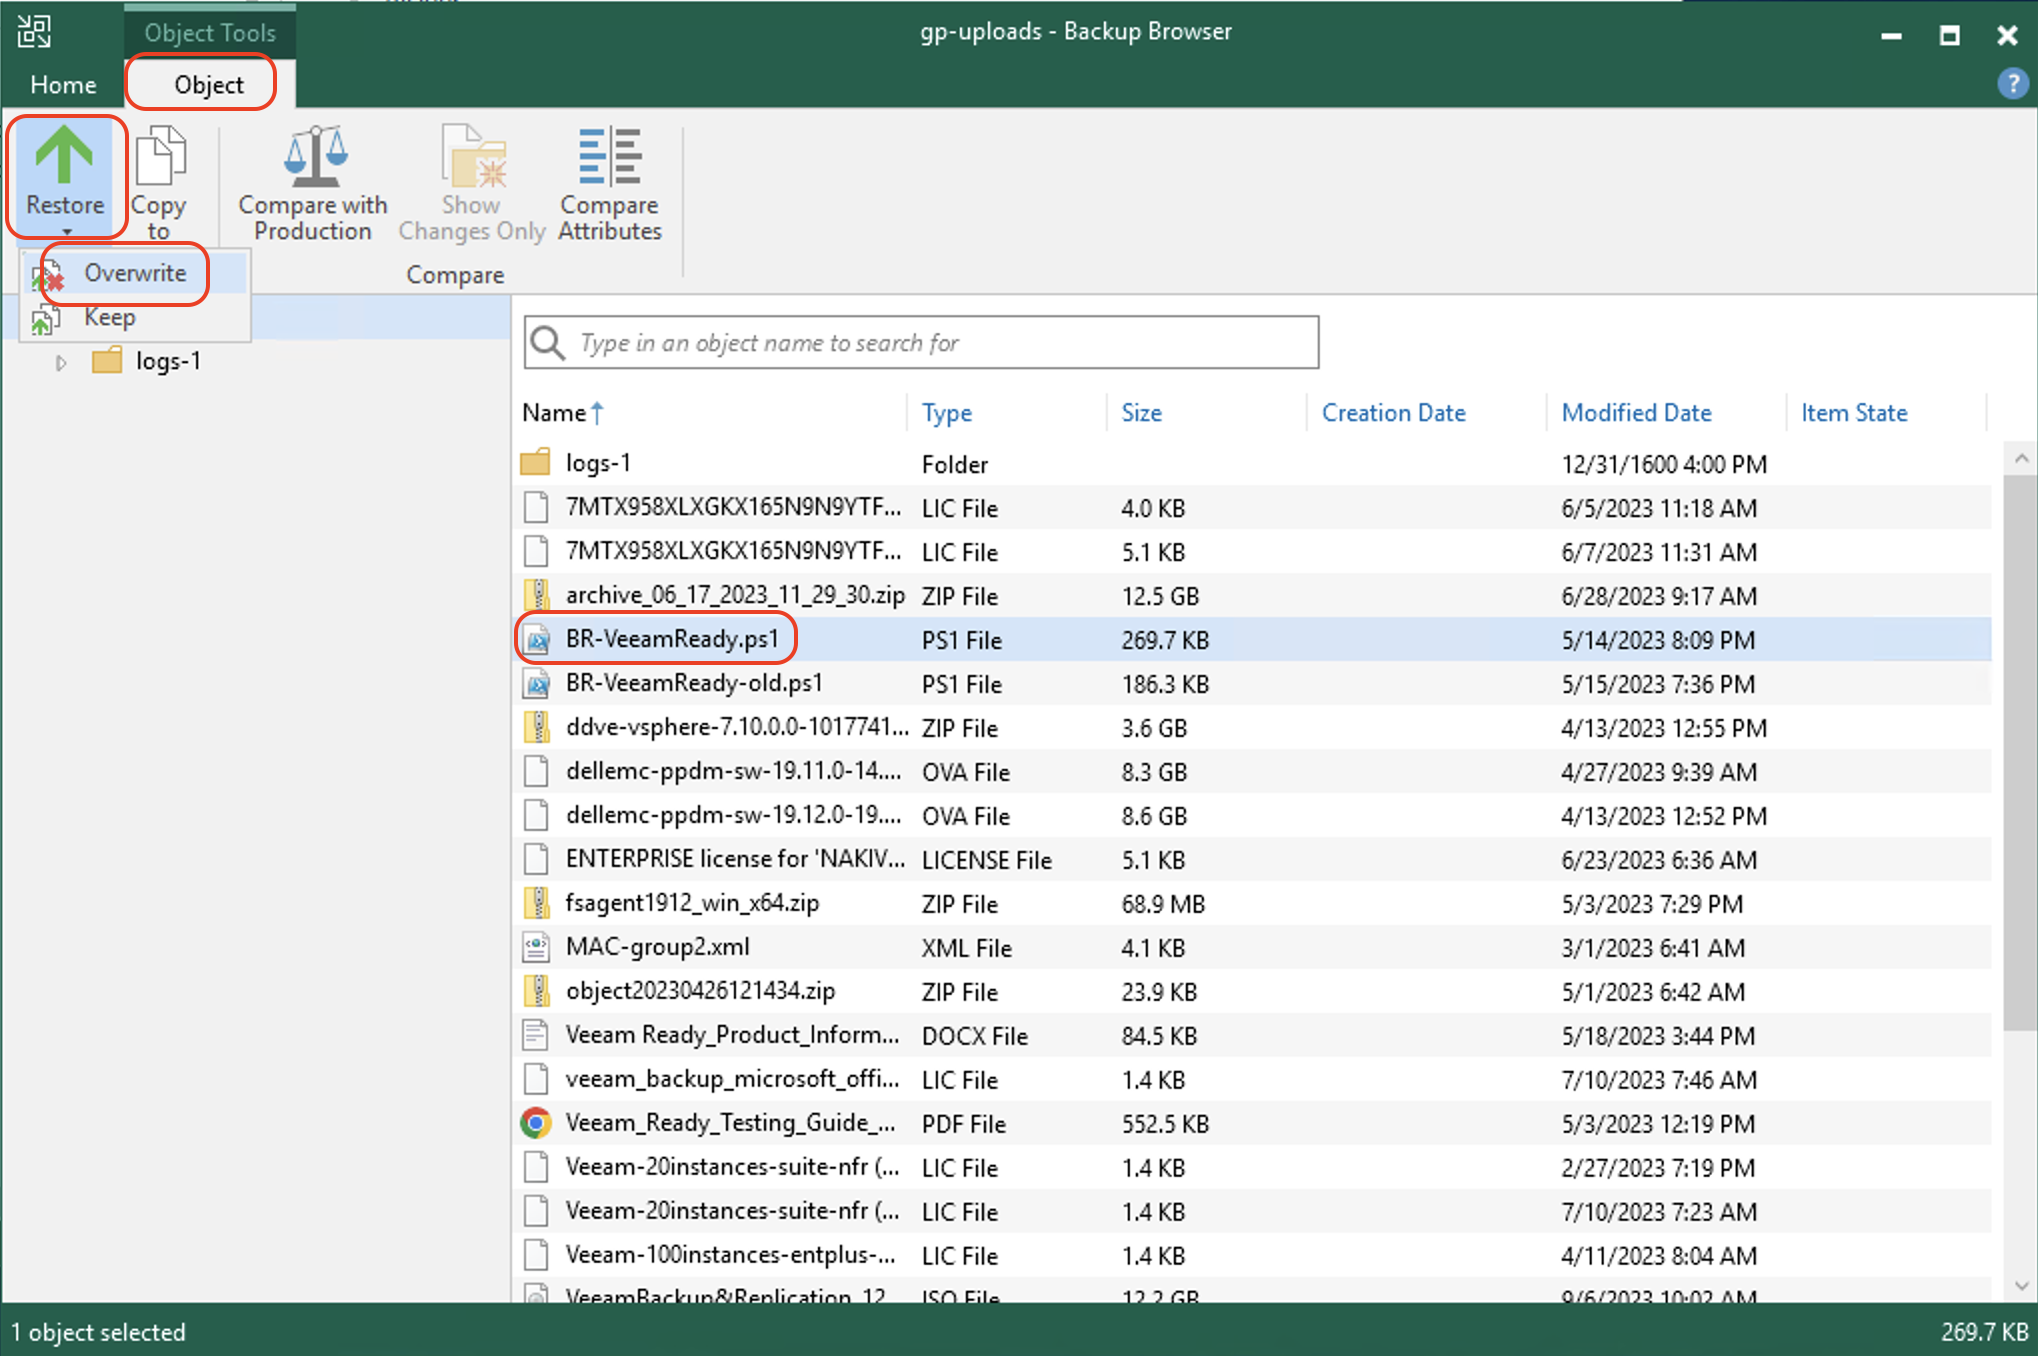
In the Backup browser, select the object to be restored and click Restore and Overwrite. If you want to keep a copy of the current object, click Restore and Keep.
The Backup browser has three representations of the restore points: Latest, All Time, and Selected. You can also search for objects or use prefixes to restore. For more detail on the Backup browser and different ways to restore, review Select Objects to Restore at the Veeam Help Center.
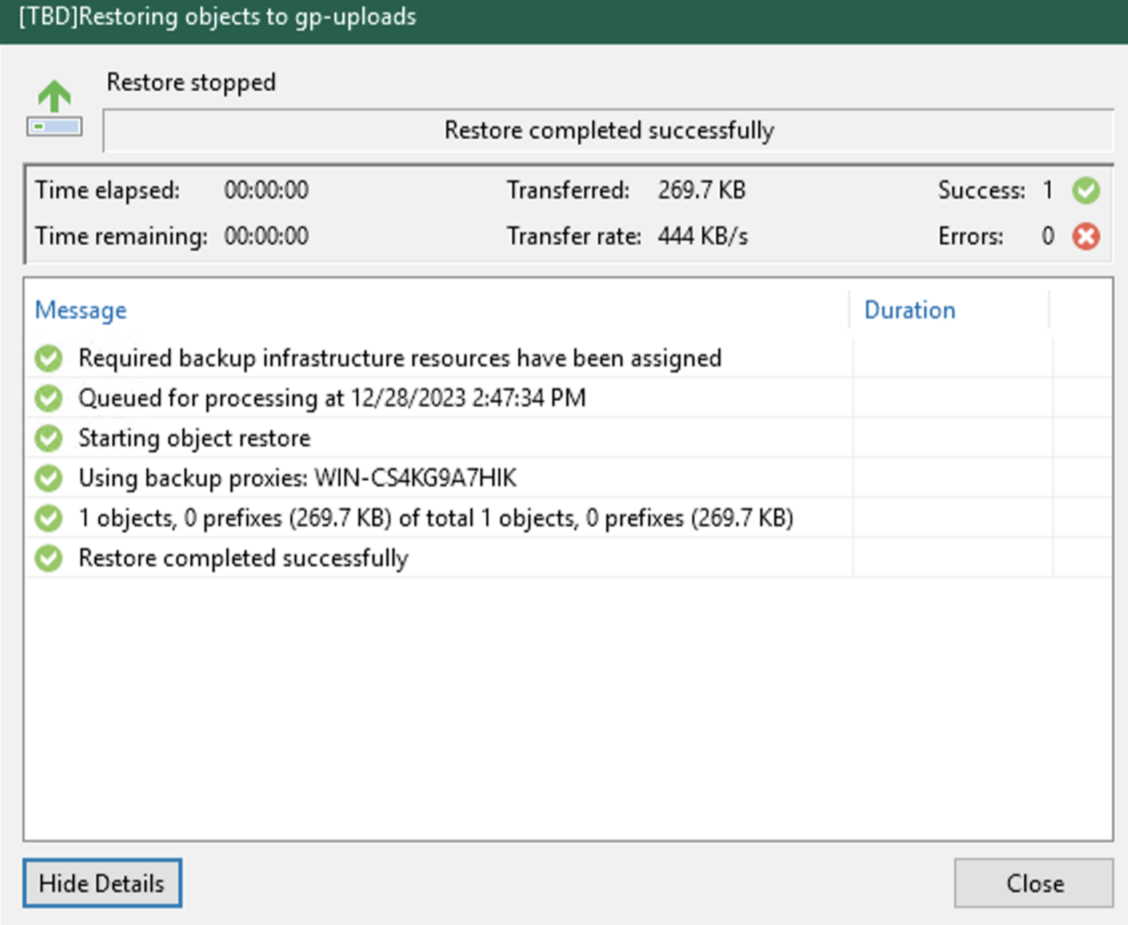
Once you click Restore, the restore status and details are displayed in the dialog box. Click Close to close the restore status window. Close the Backup browser if all restores are done.
