For IdP-initiated SAML SSO with Microsoft Entra ID (Azure AD), you configure Entra ID as the Identity Provider (IdP) and your application (Service Provider) to accept unsolicited SAML assertions.
Sign in to Wasabi Console (https://console.wasabisys.com/login).
Select Security in the navigation menu, then click SSO (Single Sign On). The SAML Connection pane is displayed.
Scroll down to the IdP-initiated login section, enable the login toggle, then click Save.
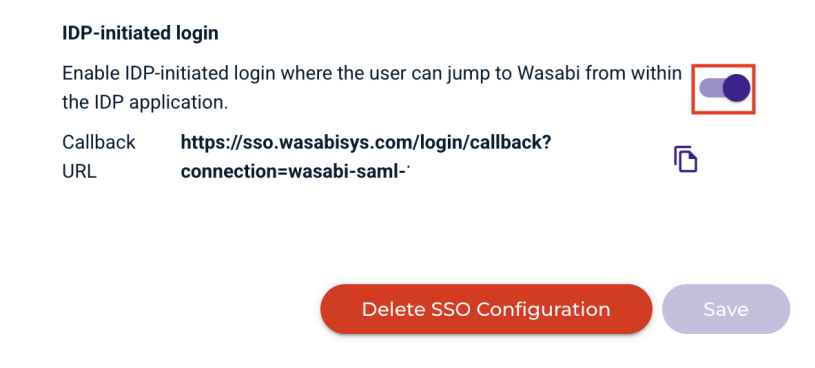
Verify that the Callback URL includes the Root ARN.
Copy the Callback URL.
In the Microsoft Entra ID (Azure AD) application, navigate to Enterprise Applications, then All Applications.
Select your application.
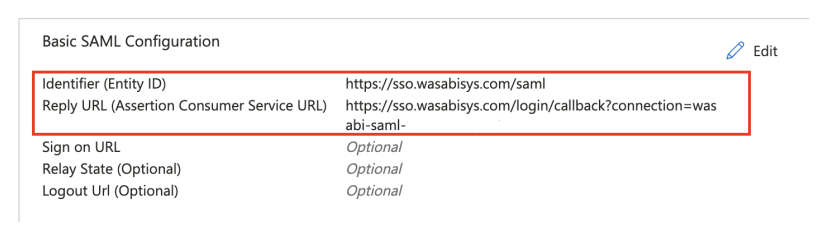
Go to Set Up Single Sign On, and click Edit in Basic SAML Configuration to enter the following information:
Identifier (Entity ID)—https://sso.wasabisys.com/saml
Reply URL (Assertion Consumer Service URL)—Paste the Callback URL previously copied from the SSO settings in the Wasabi Console.
To test the IdP-initiated login, go to the section Test single sign-on with SSO Wasabi and click Test. Or, go to your Apps Dashboard and select your Enterprise Applications tile to verify.
