When Bucket logging is enabled, a text log file will be maintained of all access to the bucket. This provides details about the types of access requests made, requested resources, and the date/time of processed requests. You can enable bucket logging:
While creating a bucket, as described below.
After a bucket has been created (that is, for an existing bucket displayed in the Buckets list), as described in Bucket Settings: Logging
Wasabi recommends using a separate bucket to store logging data. Keeping logs in a different bucket:
Avoids infinite looping that usually increases the bucket size.
Makes it easier to access, manage, and troubleshoot log files without mixing them with regular data stored in the source bucket.
Helps improve clarity, organization, and performance when reviewing access patterns.
Use logging cautiously because when logging is enabled, all log files are saved. This means the costs could be high, eventually, as log files are stored. For additional information, refer to Wasabi Pricing.
Wasabi does not have a Service Level Agreement (SLA) to deliver bucket logs. As such, logging occurs at maximum effort, but Wasabi does not guarantee a specific result.
Creating a Bucket With Logging
By default, the option to set the bucket logging feature is suspended (not enabled). To enable bucket logging:
Complete the Bucket Name section for creating a new bucket by entering a bucket name and selecting a region for storage. Click Next.
In the Set Properties section, set Bucket Versioning and Object Lock, if appropriate. Click Next.
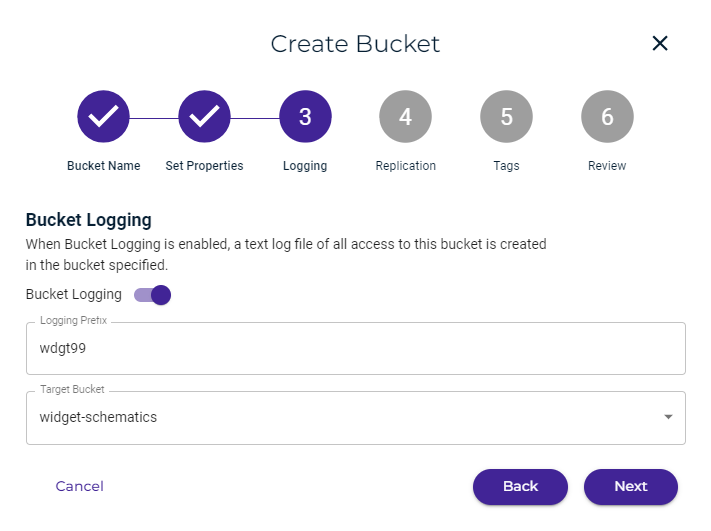
Slide to enable the Bucket Logging toggle:

Enter a logging prefix to include in the log file name (wdgt99 in the example below). Each log file will start with the characters you enter.
Select a target bucket in which to store log files. Click the down arrow to select from a list of target buckets.
In the following example, log file names will begin with "wdgt99” and the files will be stored in the widget-schematics target bucket.
Click Next.
Optionally, set Replication and Tags. Or, click Next until you reach the Review panel, as shown below.
Click Next.
The bucket properties are displayed for your review. You can click Back if you need to change any information. Otherwise, click Create Bucket to accept the information and create the bucket.
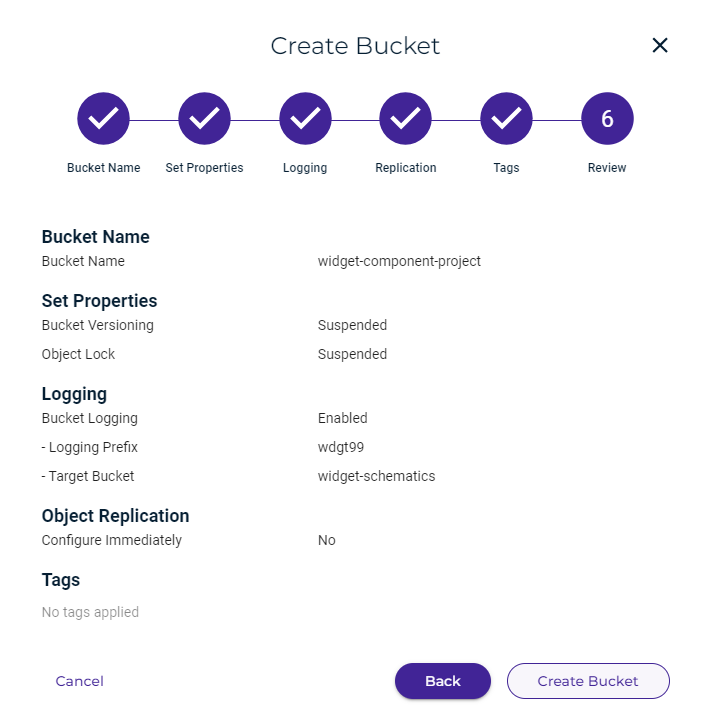
A message displayed at the top of your screen indicates that the bucket was created successfully.
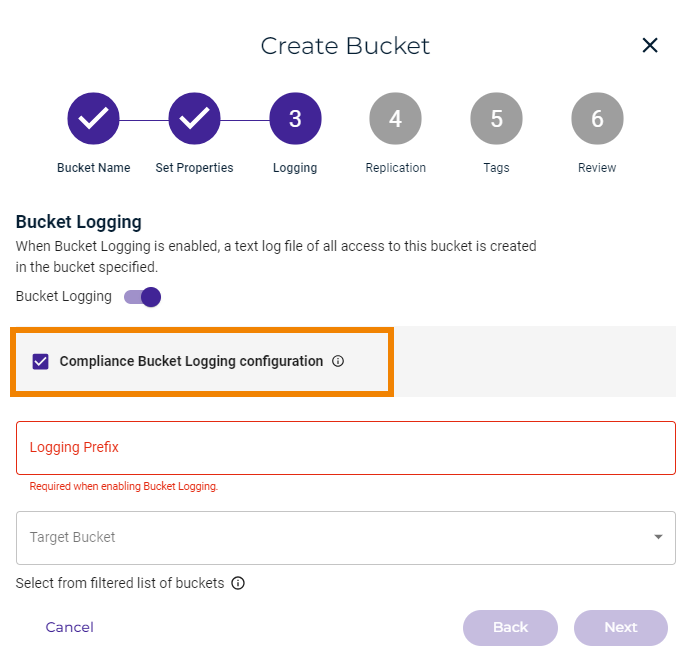
Enabling Compliance Bucket Logging
When compliance bucket logging is enabled, you can set it for a bucket. When creating a bucket, you will see an option to create a comprehensive text log in a format designed to meet compliance needs.
Enabling Logging for an Existing Bucket
You can enable logging after the bucket is created. To do so, refer to Bucket Settings: Logging for more information about bucket settings and logging.