Onsights Telemetry turns the cameras you already own into facility-wide movement intelligence, tracking how visitors move, dwell, and respond throughout their visit, whether that is a single storefront or the busiest venue. Integrated dashboards and analytics turn those journeys into answers to your key behavior questions. And privacy is the architecture, not an afterthought: the system is designed from the ground up to support our customers’ compliance with GDPR and CCPA.
Requirements
Wasabi Surveillance Cloud (WSC) account
WSC bucket (see Creating a Bucket)
Wasabi Access & Secret Key with read-only permissions (see Creating a User Account and Access Key)
Video Management System (Milestone, Genetec)
Onsights Version 1.0
Onsights Telemetry License (contact Onsights.io for a demo/quote)
Reference Architecture Diagram
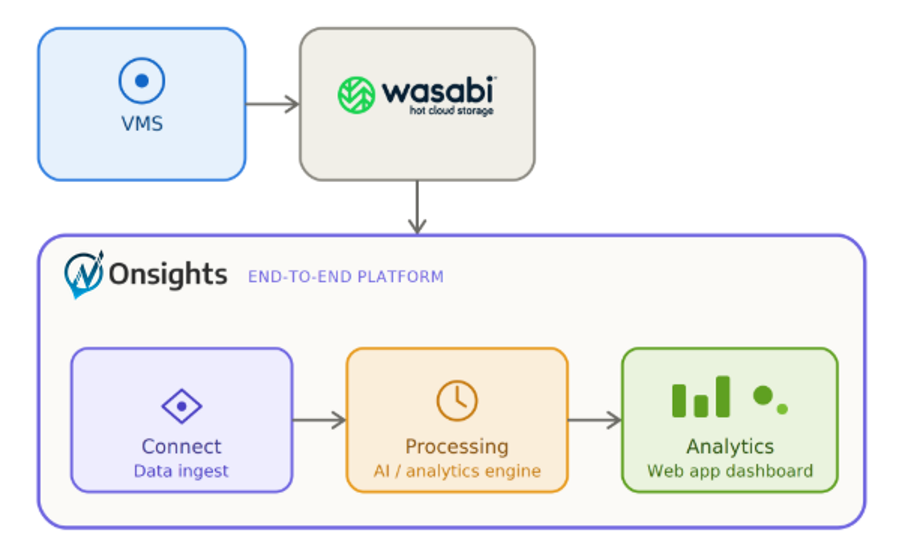
Configuring the Onboarding Video Source
Log in to your Onsights Dashboard.
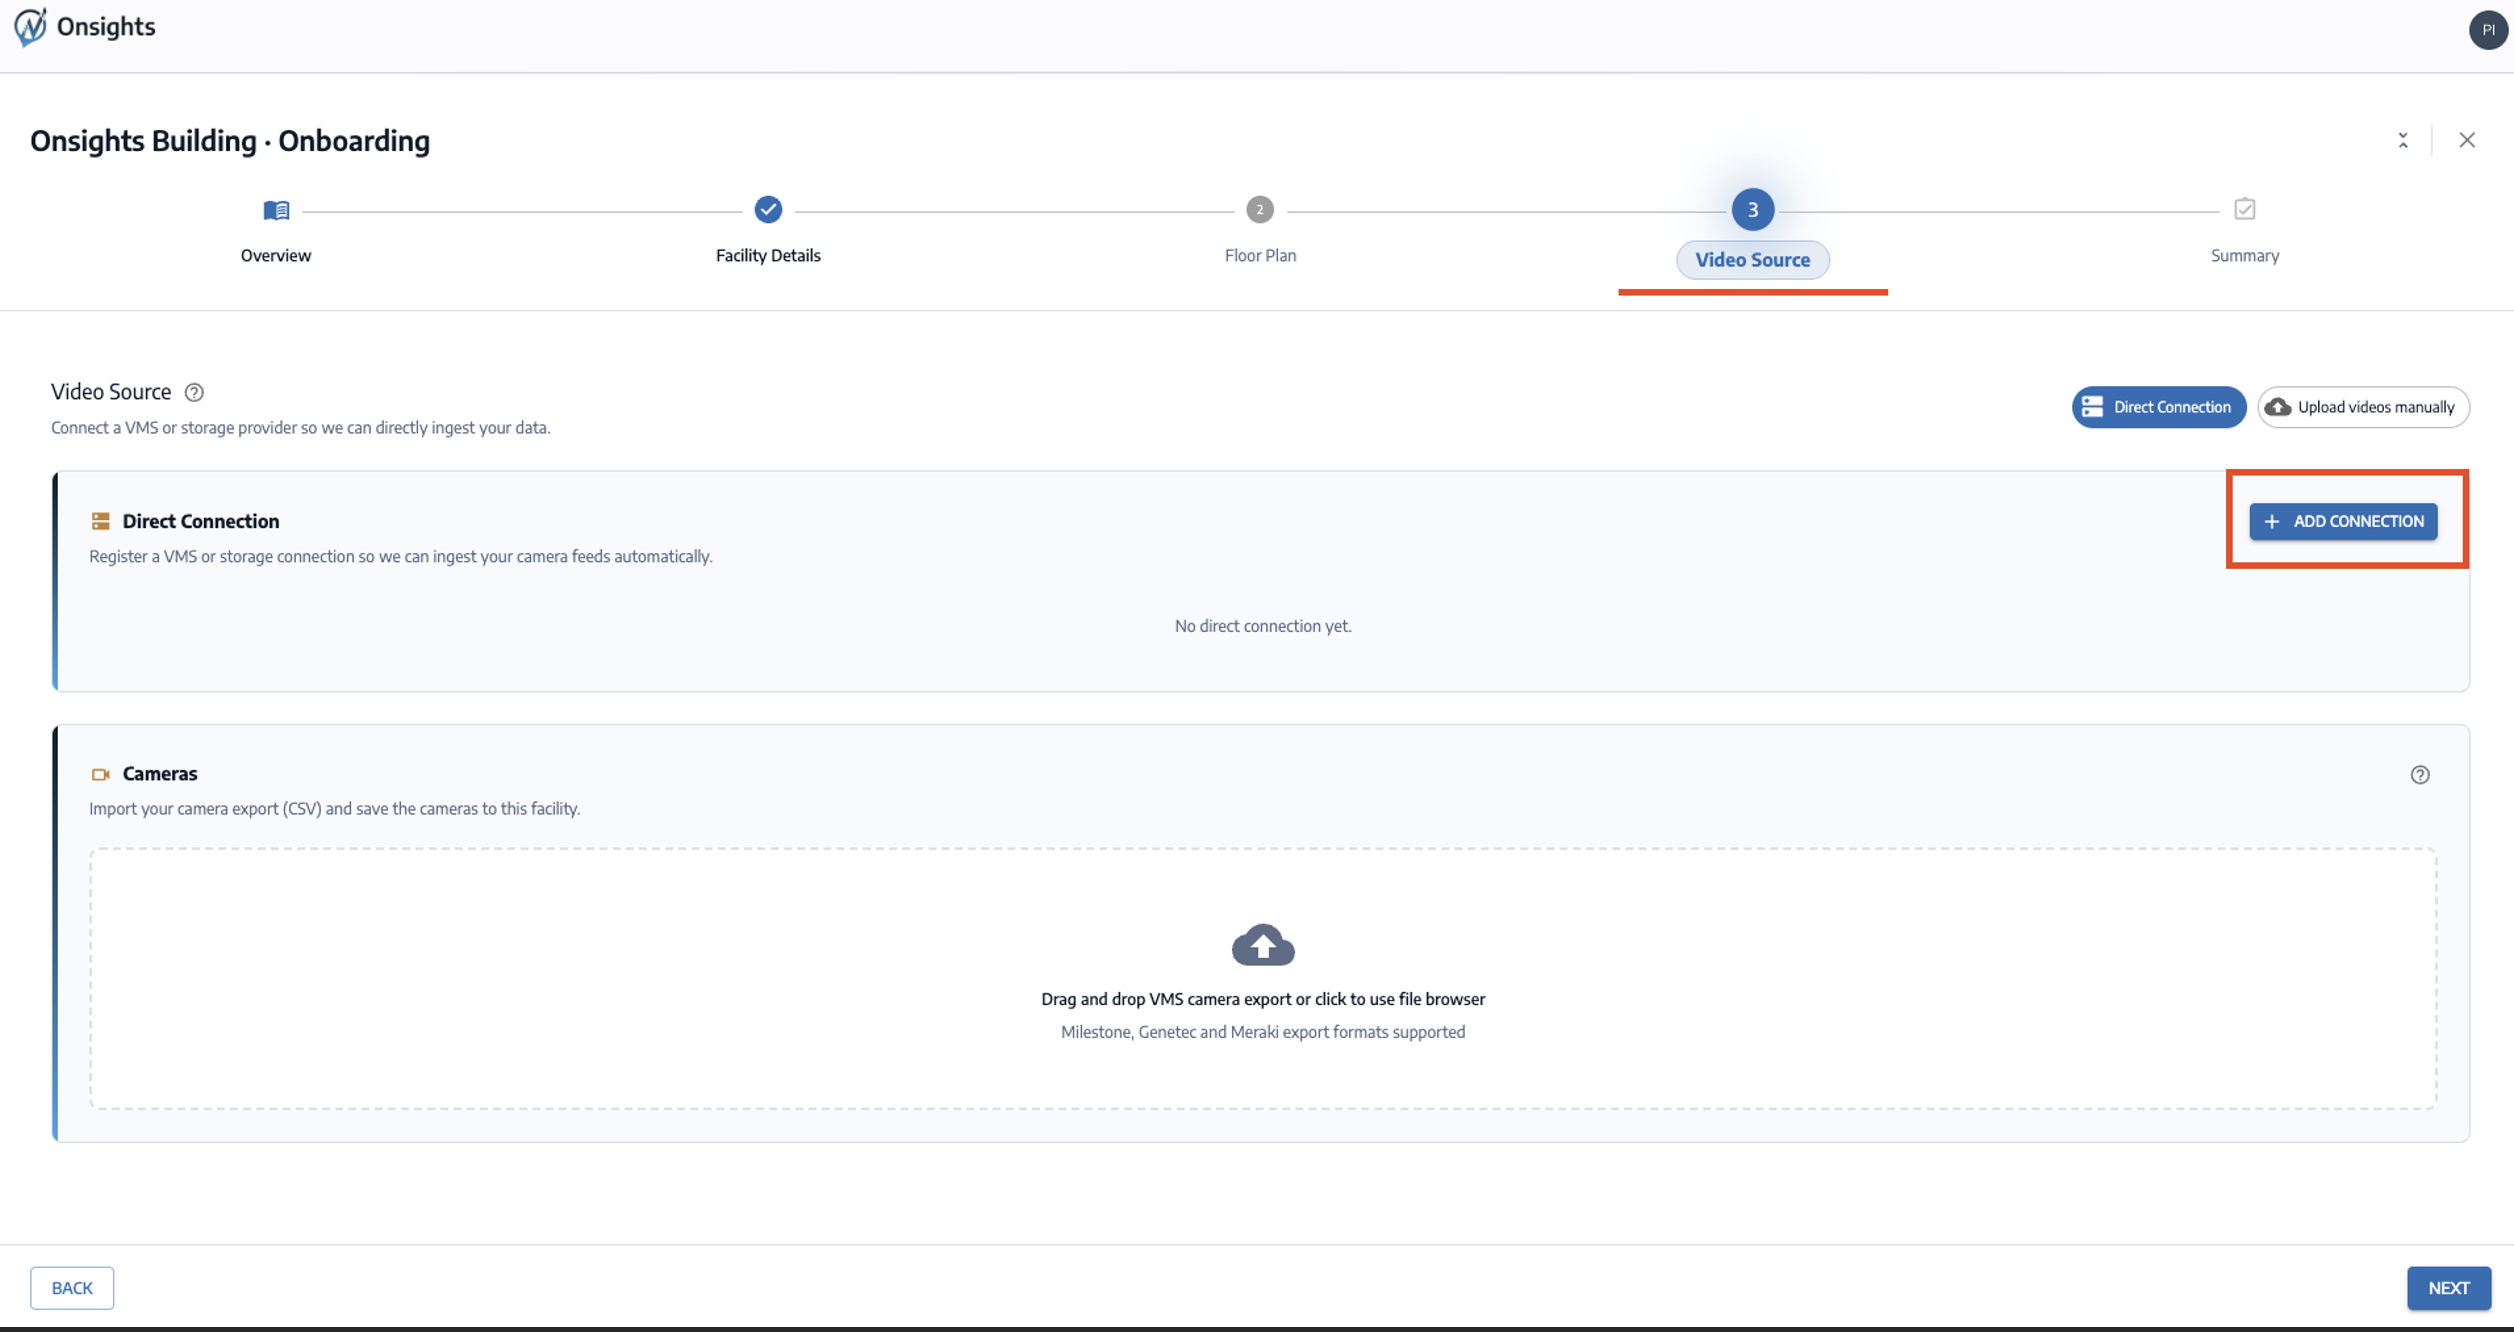
Start the onboarding process with the Facility Wizard.
Complete the Facility Details and Floor Plan steps of the wizard.
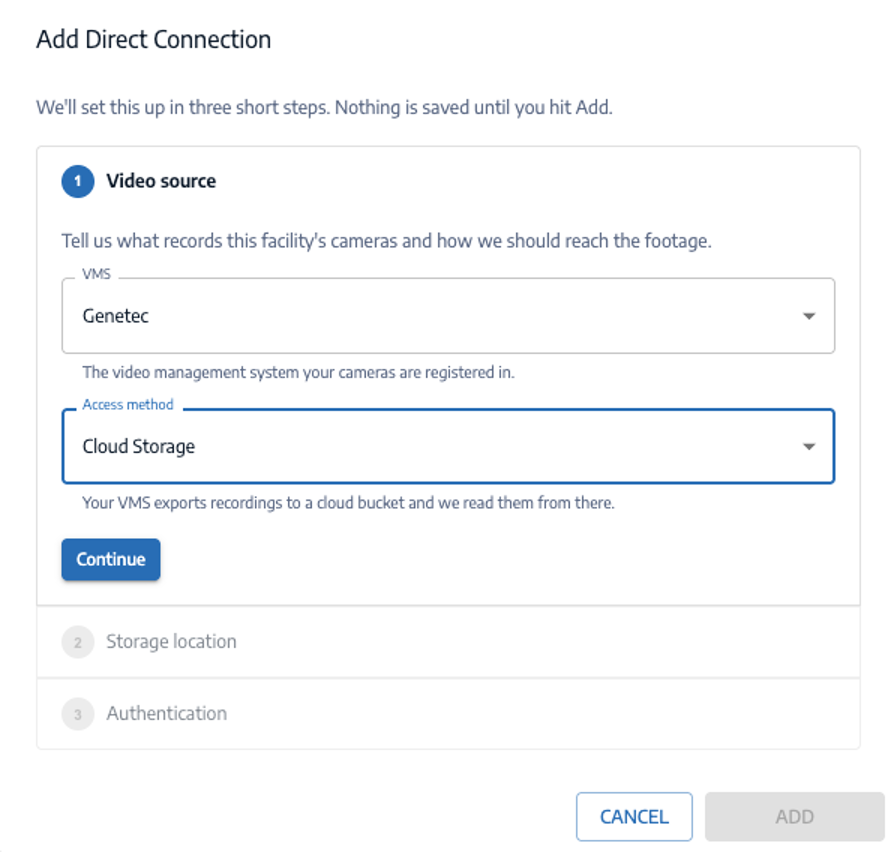
In a later step, you will be asked for the Video Source. Click ADD CONNECTION.
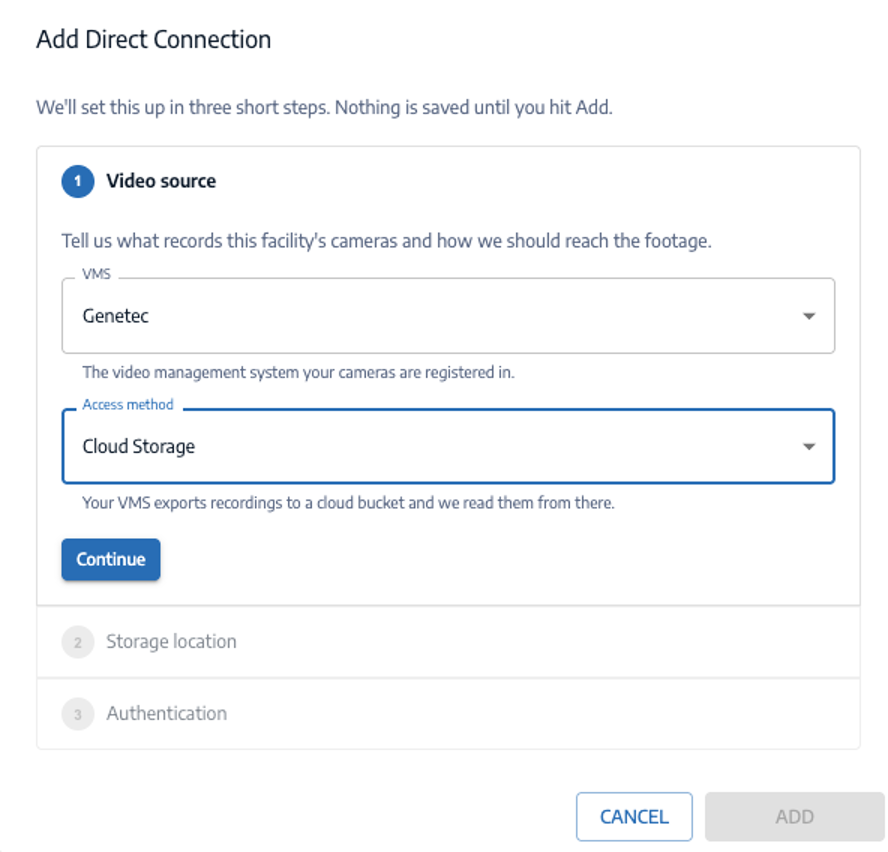
Fill the modal configuration form.
VMS—Select the video management system you use.
Transport—Select Cloud Storage.
Click Continue.
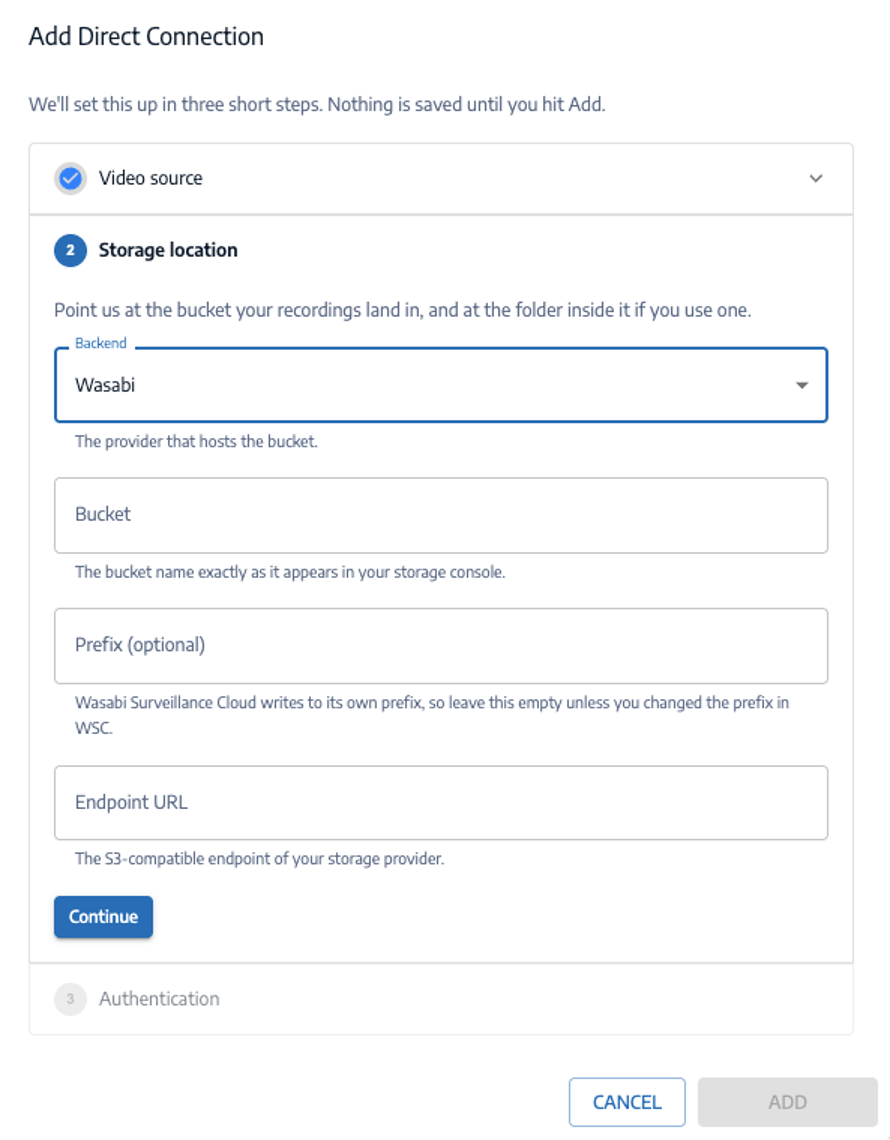
Input the following information.
Backend—Select Wasabi.
Bucket—Input the name of the bucket with your archived videos.
Prefix—(optional) The folder path inside your Wasabi bucket where WSC uploads your VMS recordings. This is the same value you configured as the destination/target folder in WSC. Enter only the prefix itself. Do not include the bucket name or any folders created automatically by your VMS. These are detected automatically.
Endpoint URL—Your bucket endpoint URL. For more information, see Service URLs for Wasabi's Storage Regions.
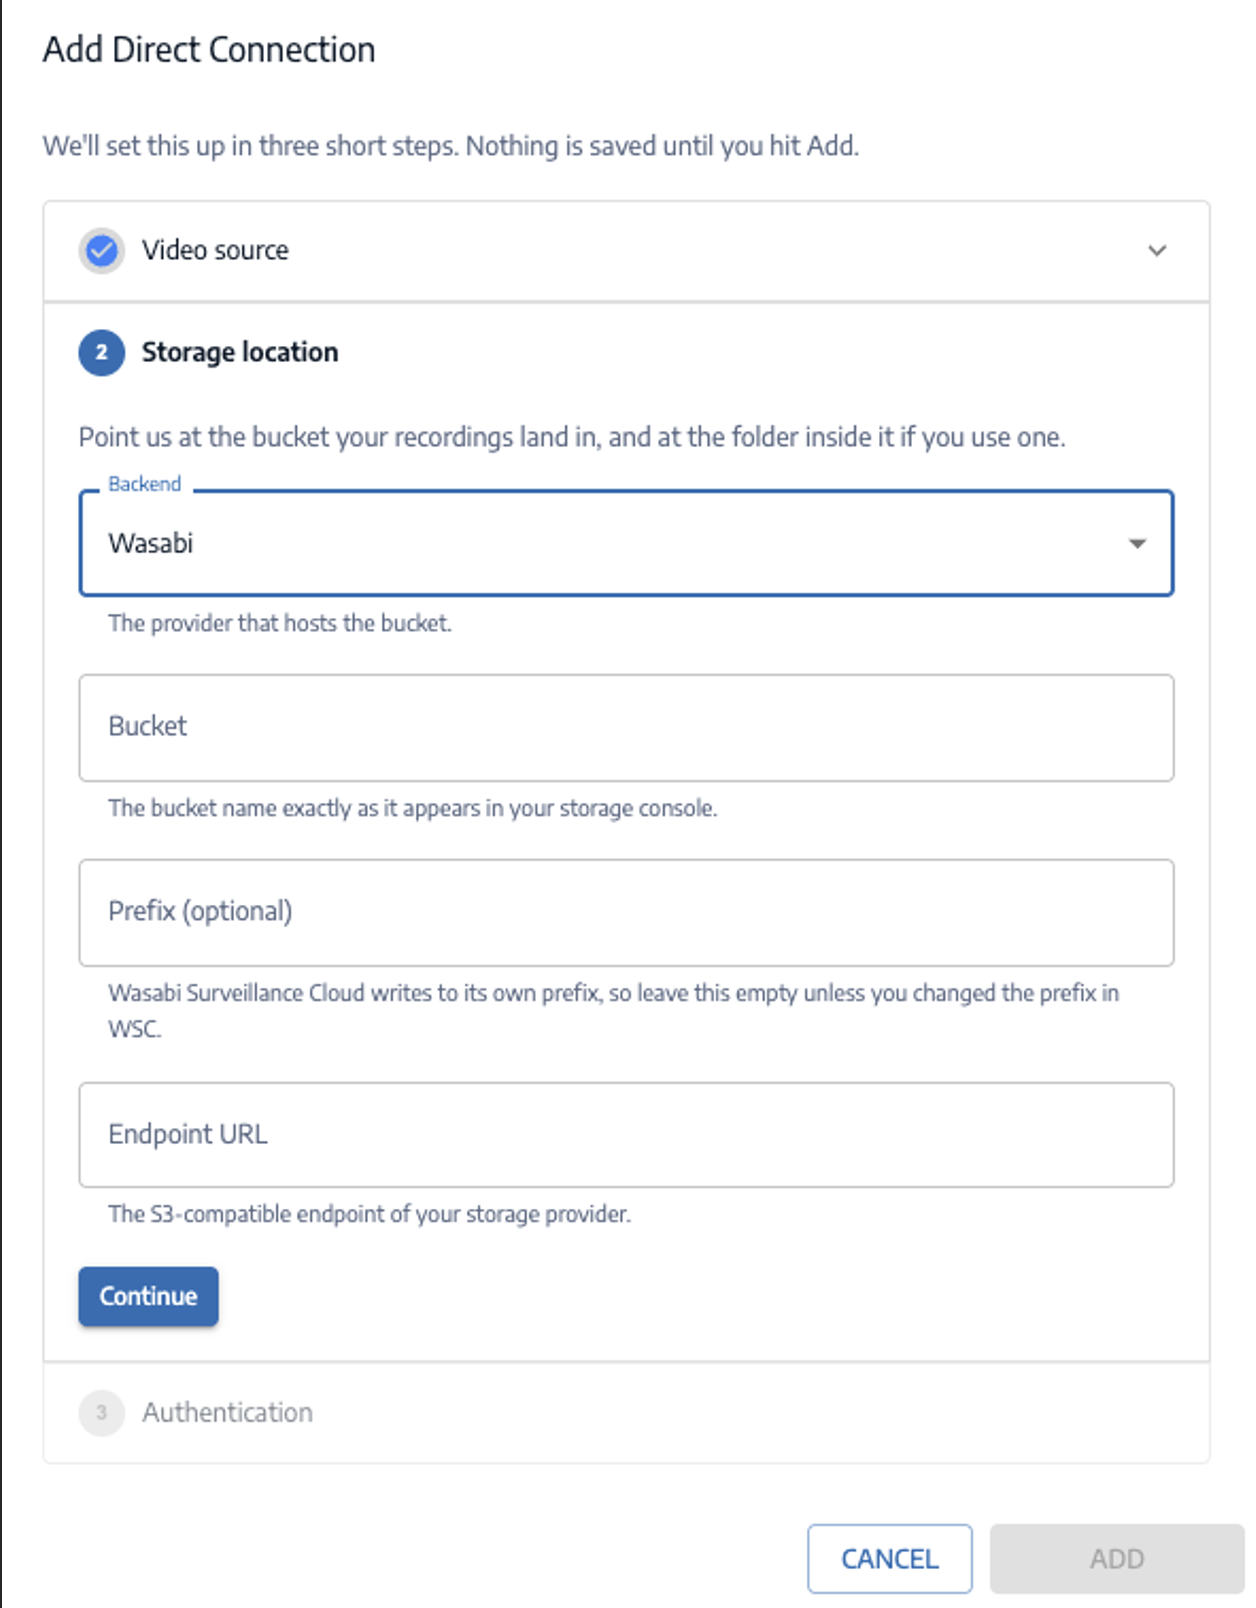
Click Continue.
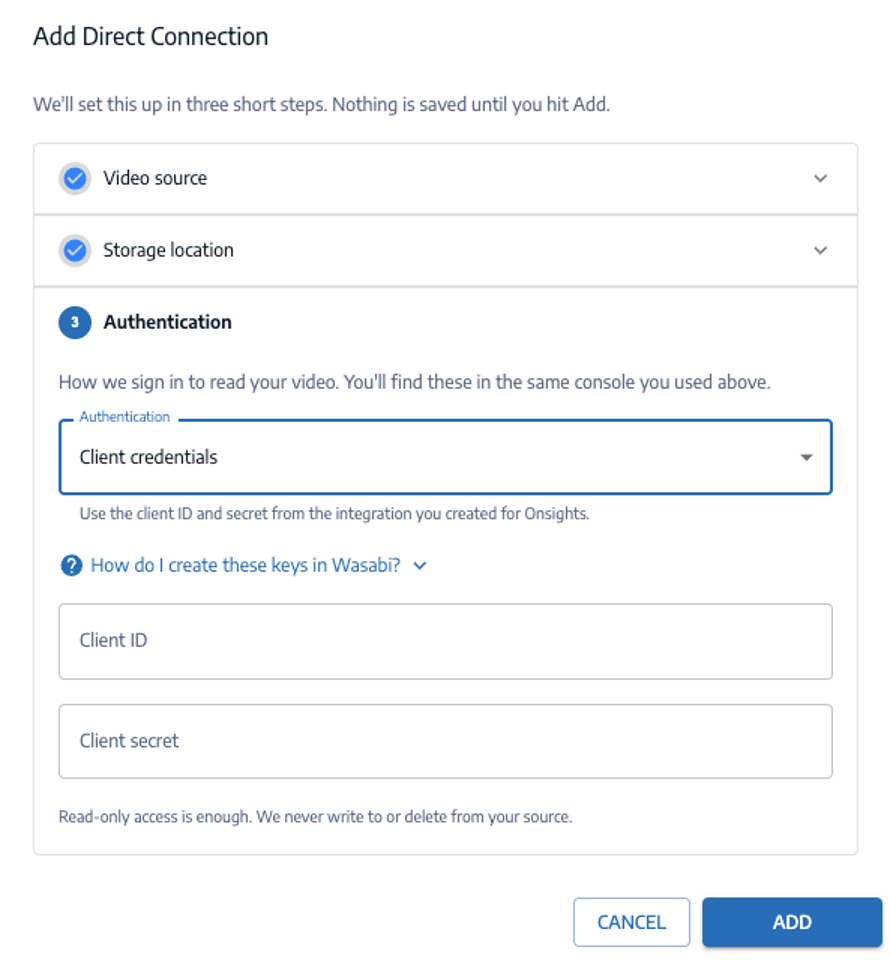
Input the following information.
Authentication—Select Client Credentials.
Client ID—The preconfigured Wasabi Access Key.
Client Secret—The preconfigured Wasabi Secret Key.
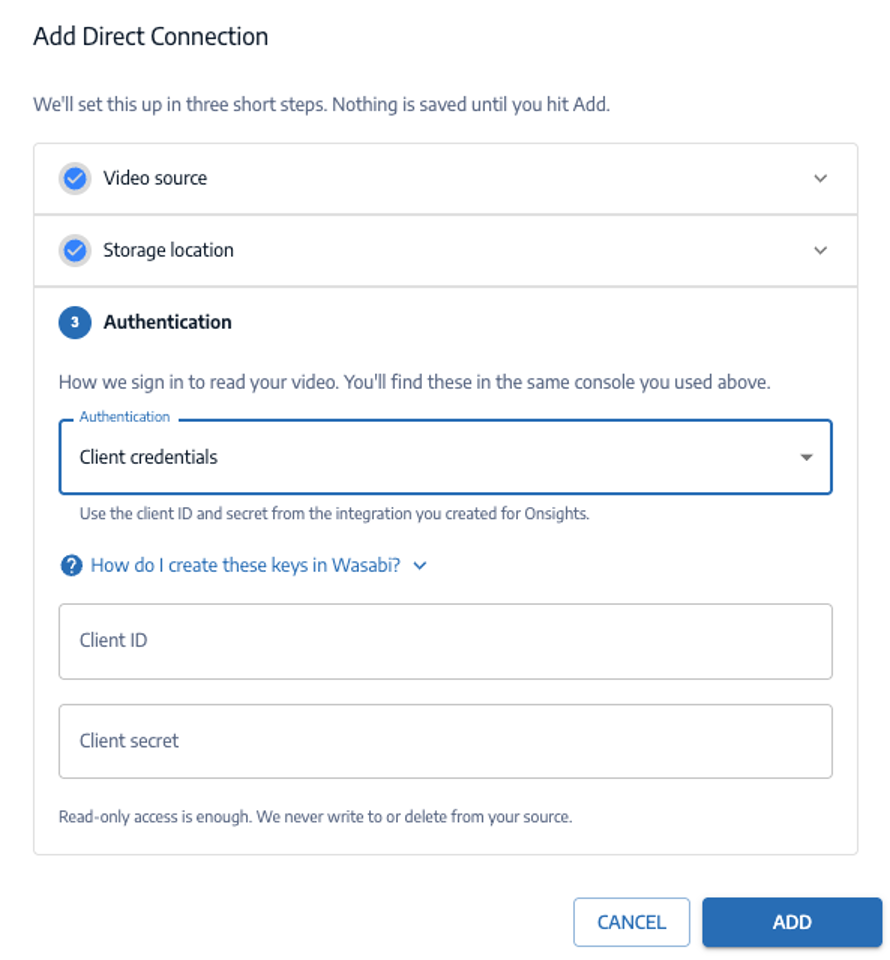
Log in to your Onsights dashboard with a Facility Manager account.
Navigate to the Administration Panel.
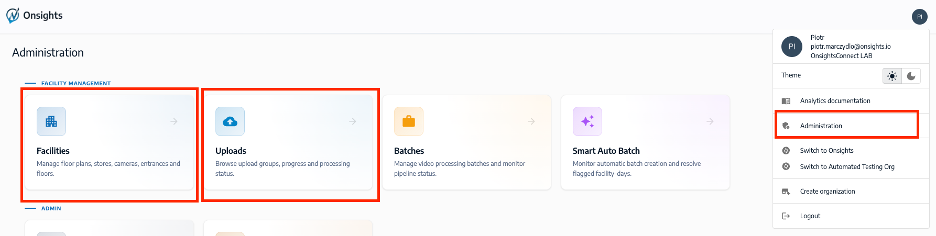
Configuring the VMS Connection Update
In Facility Settings, navigate to VMS Connection.
Click Add Connection.
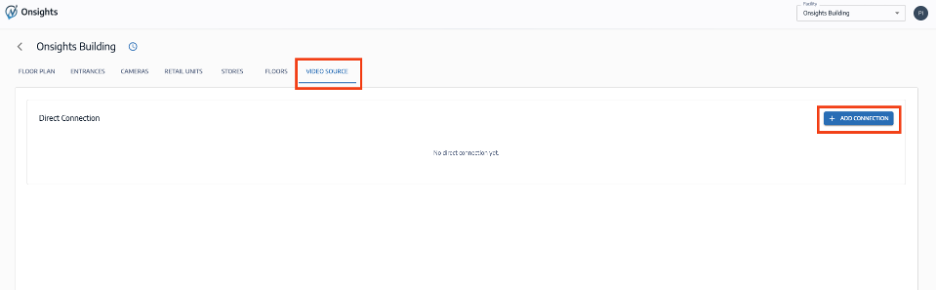
You will see a modal pop-up to update connection details.
This configuration example uses Wasabi’s us-east-2 storage region. To use other Wasabi storage regions, use the appropriate Wasabi service URL as described in Service URLs for Wasabi's Storage Regions.
Configuring Video Ingest
Navigate to Video Files.
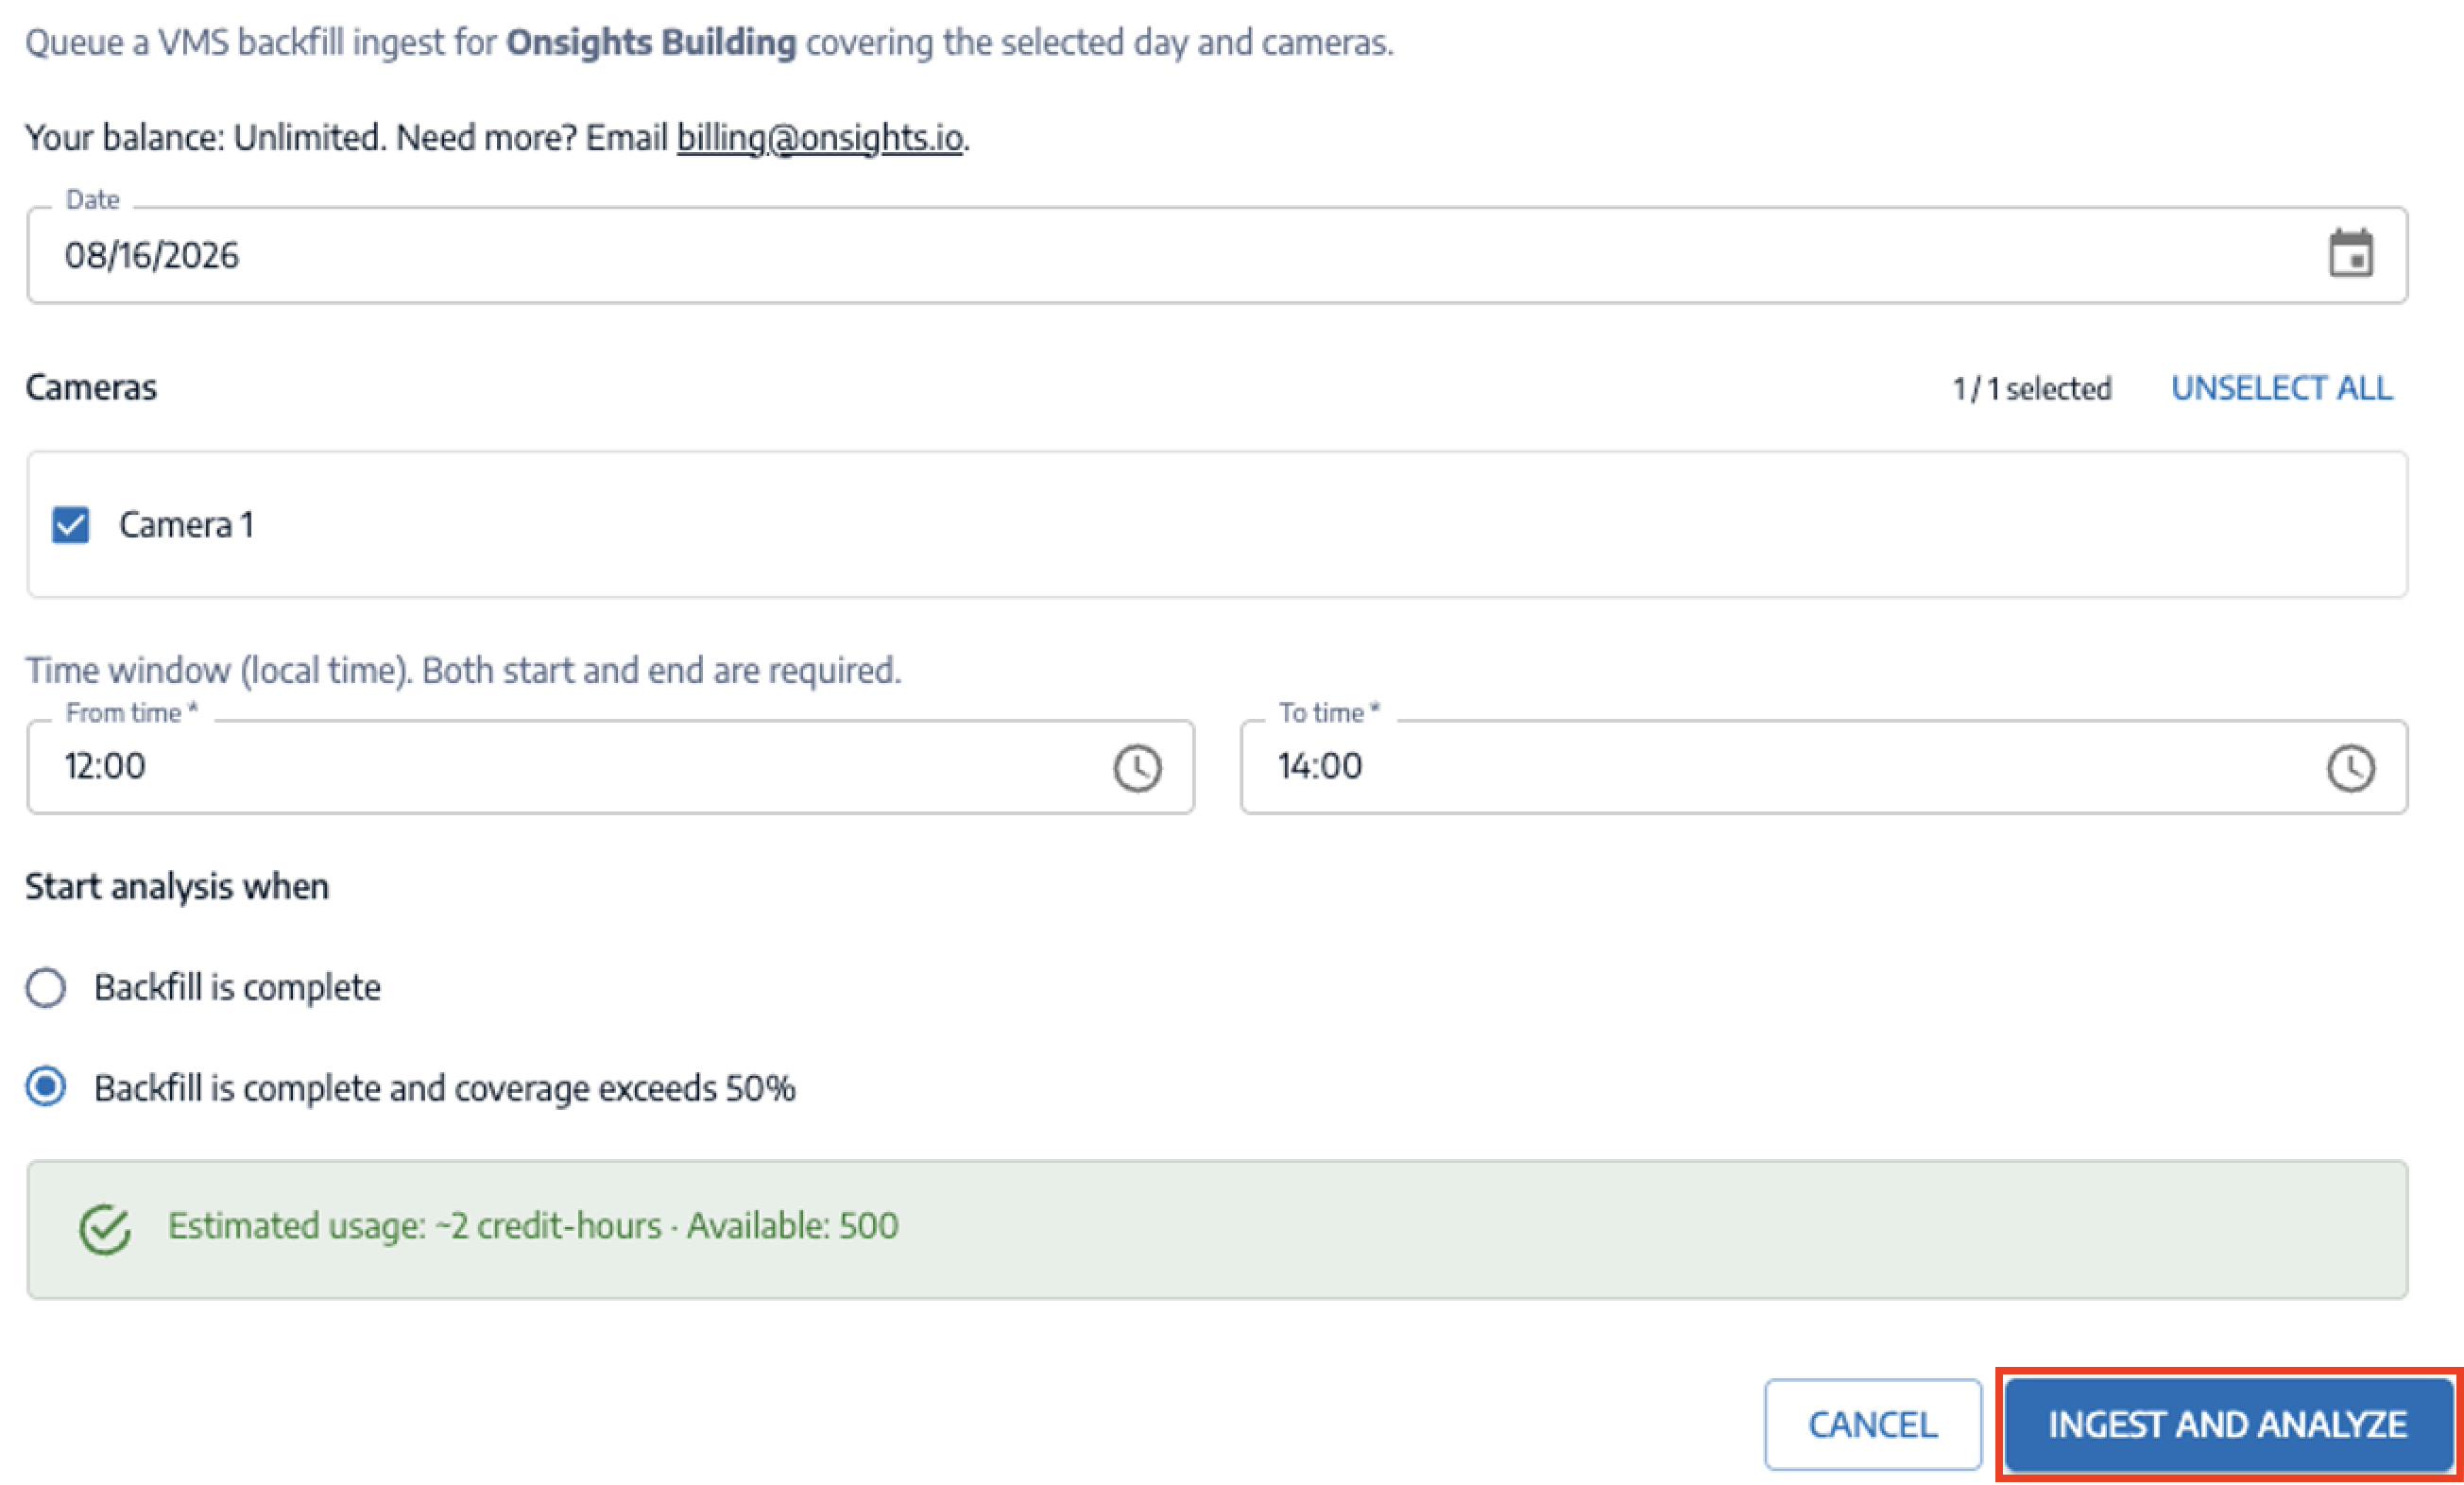
Click Ingest Videos.

Input the following information.
Date—The day of the recorded video to process.
Cameras—You can select from the onboarded and active cameras.
Time Window—By default, the facility’s opening hours are populated.
Analysis should be triggered when:
Backfill is complete—All videos are ingested
Backfill is complete, and coverage exceeded 50%—All videos are ingested, and the coverage over 50% of opening hours
Click Ingest and Analyze