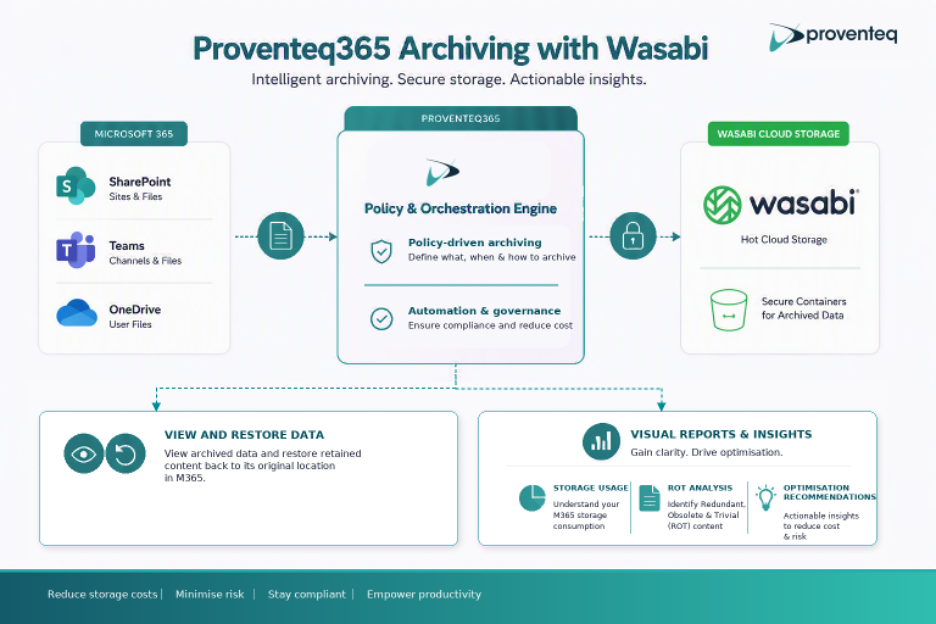
Proventeq365 helps organizations get the most out of their Microsoft 365 storage by automatically moving content that is no longer actively used to Wasabi Hot Cloud Storage. This lowers costs and strengthens data governance along the way.
Reference Architecture
Requirements
Wasabi Hot Cloud Storage account
Wasabi bucket (see Creating a Bucket)
Access & Secret Keys (see Creating a New Access Key)
Proventeq365 Software
Proventeq365 storage optimization license. For more information, refer to Storage Optimization & Archiving for Microsoft 365.
Proventeq365 workspace created. For more information, refer to Proventeq365 Workspaces documentation.
High-Level Overview of Proventeq365 Archiving
Proventeq365 flags content for archiving using governance rules set up in advance via the Obsolete Content Policy.
Once content meets the criteria for obsolescence, it is moved to the Wasabi source system, either via a manual trigger or an automated process.
After the transfer completes successfully, the original file is replaced with a stub link. Depending on how the archiving action is configured, the stub can inherit the original file’s permissions, and rather than dumping everything into a flat structure, the source folder hierarchy: site, library, and folder path, can be recreated in the archive destination.
Once archiving is confirmed successful, the original file is removed from its source location.
Adding Wasabi as a Connection in Proventeq365
Log In to Proventeq365.
Your Custom Console URL will have been set during the initial Proventeq365 configuration.
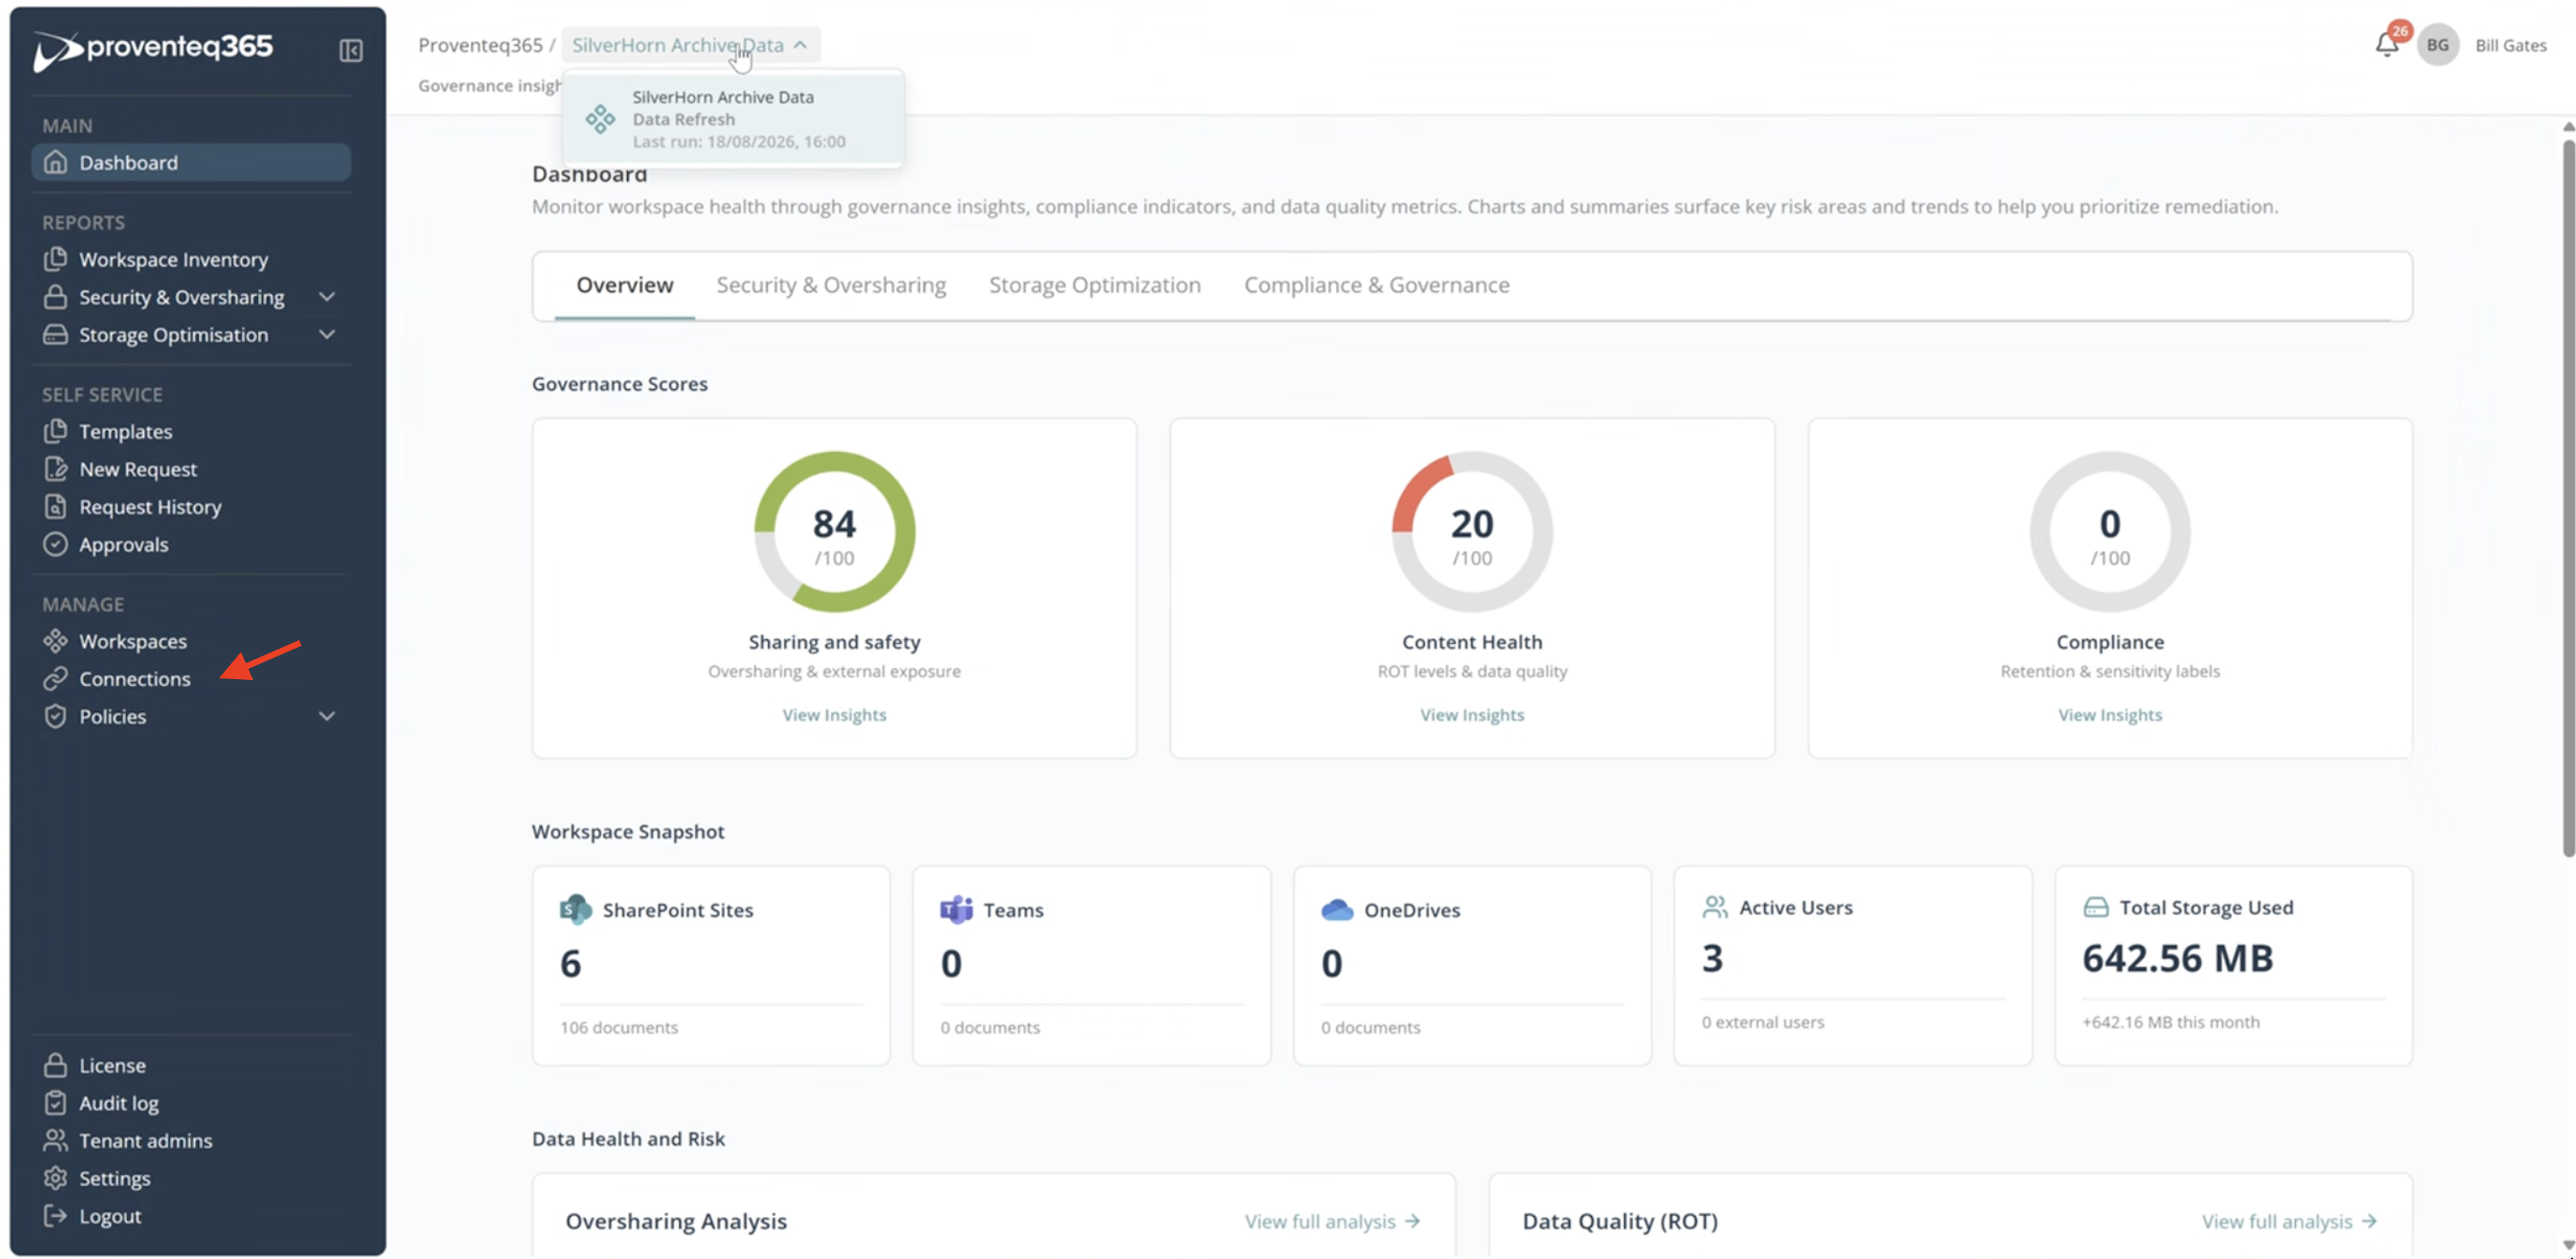
Click Connections.
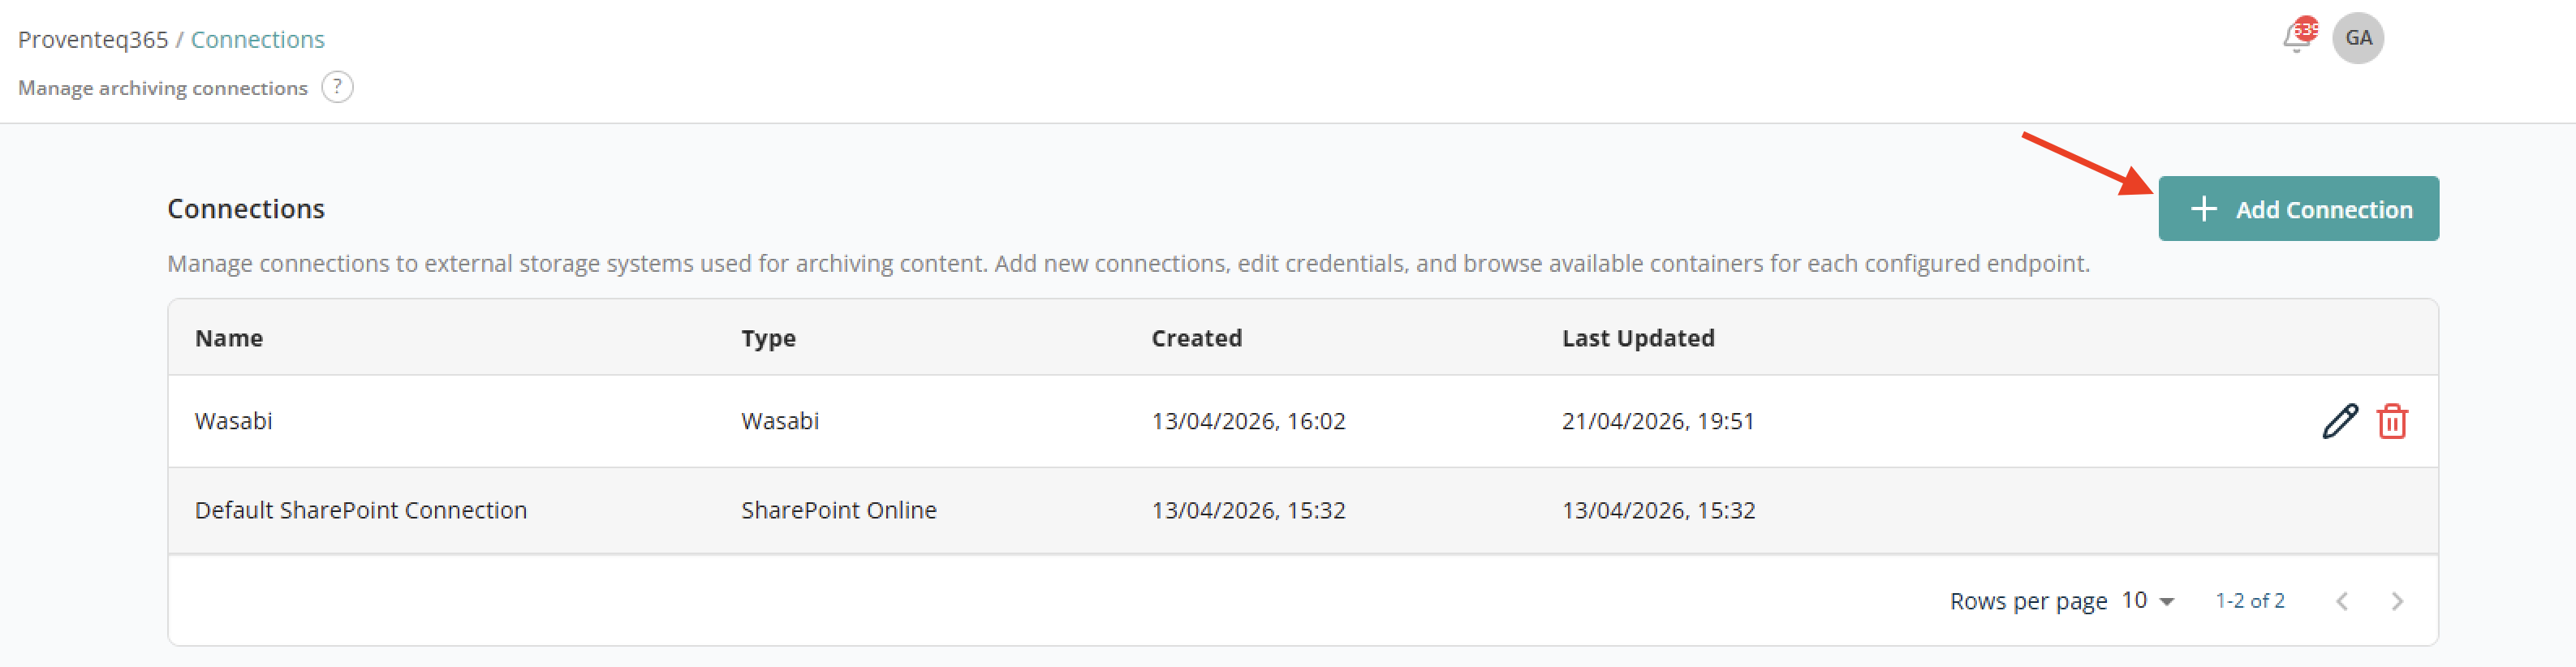
Click Add Connection.
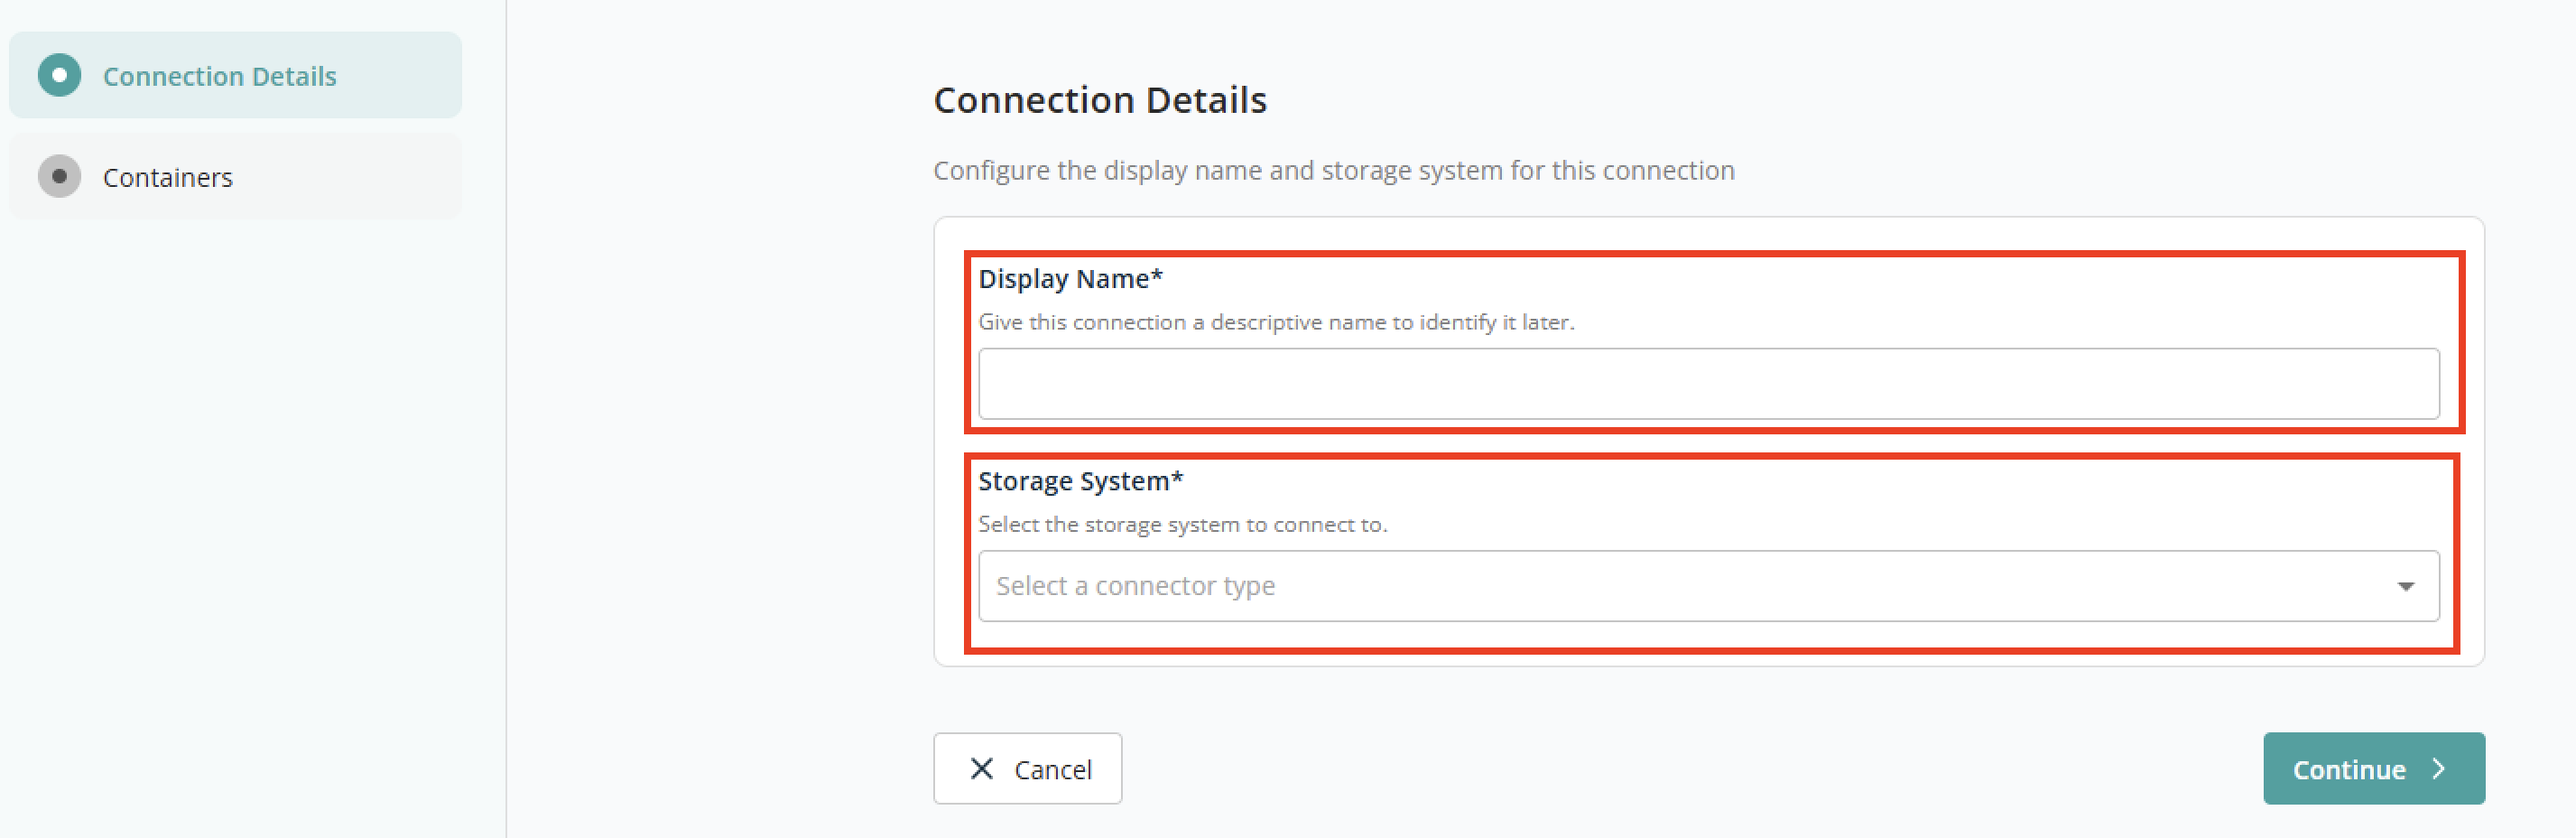
Input the following information.
Display Name—A descriptive name for the connection.
Storage System—Choose Wasabi from the drop-down menu.
Once Wasabi is selected, the Connection Configuration section appears. Input the following information.
Access Key—Your Wasabi Access Key
Secret Key—Your Wasabi Secret Key
Region—The Region Code of your Wasabi Bucket (for example, us-east-1).
This configuration example uses Wasabi’s us-east-1 storage region. To use other Wasabi storage regions, use the appropriate Wasabi service URL as described in Service URLs for Wasabi’s Storage Regions.
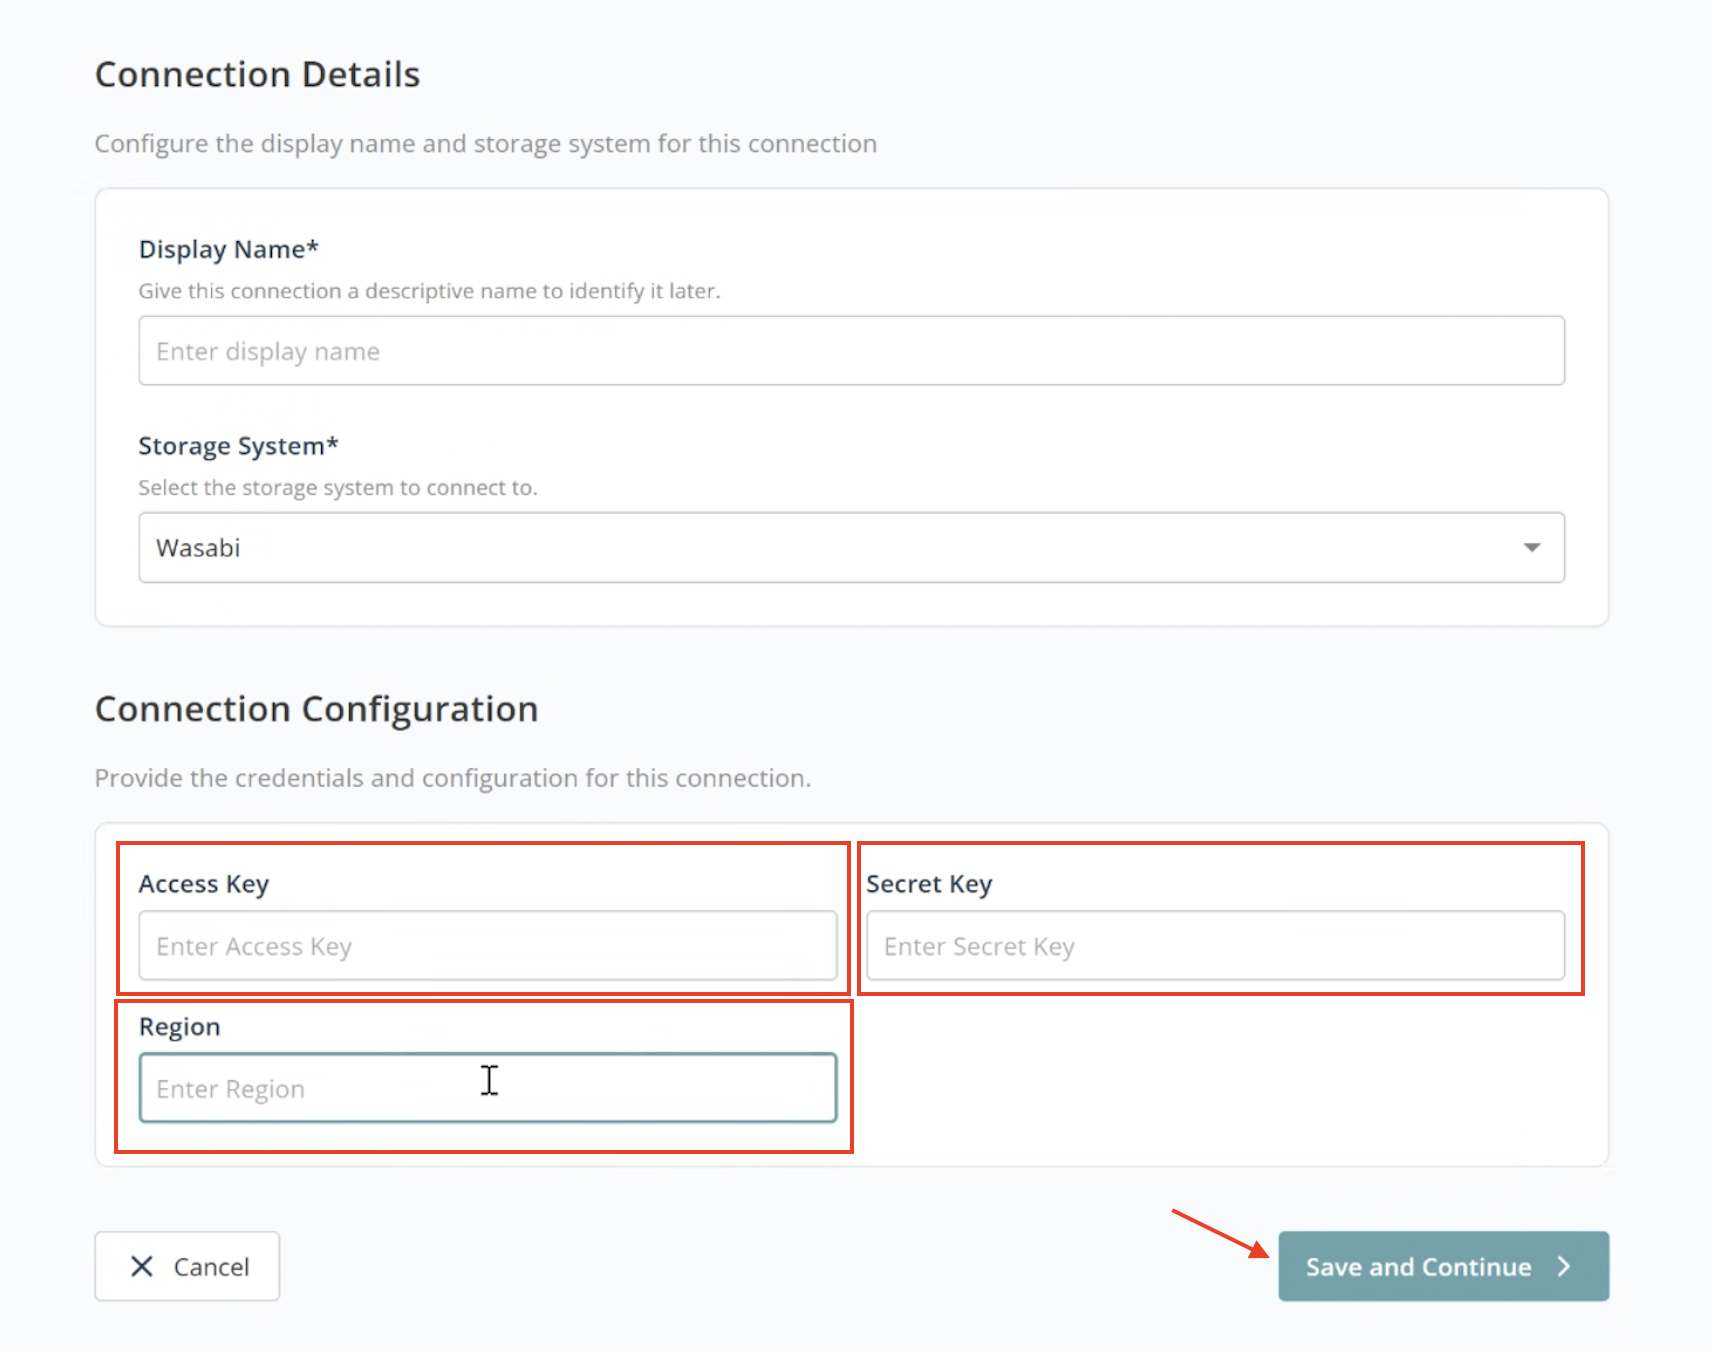
Click Save and Continue.
After saving the connection, the Containers section becomes active. Containers (such as buckets or folders) define where archived content will be stored. Before the connection is saved, this section displays the message. Save the connection first. You need to save the connection details before you can select containers. After saving, you can browse and select available containers from the configured storage system.
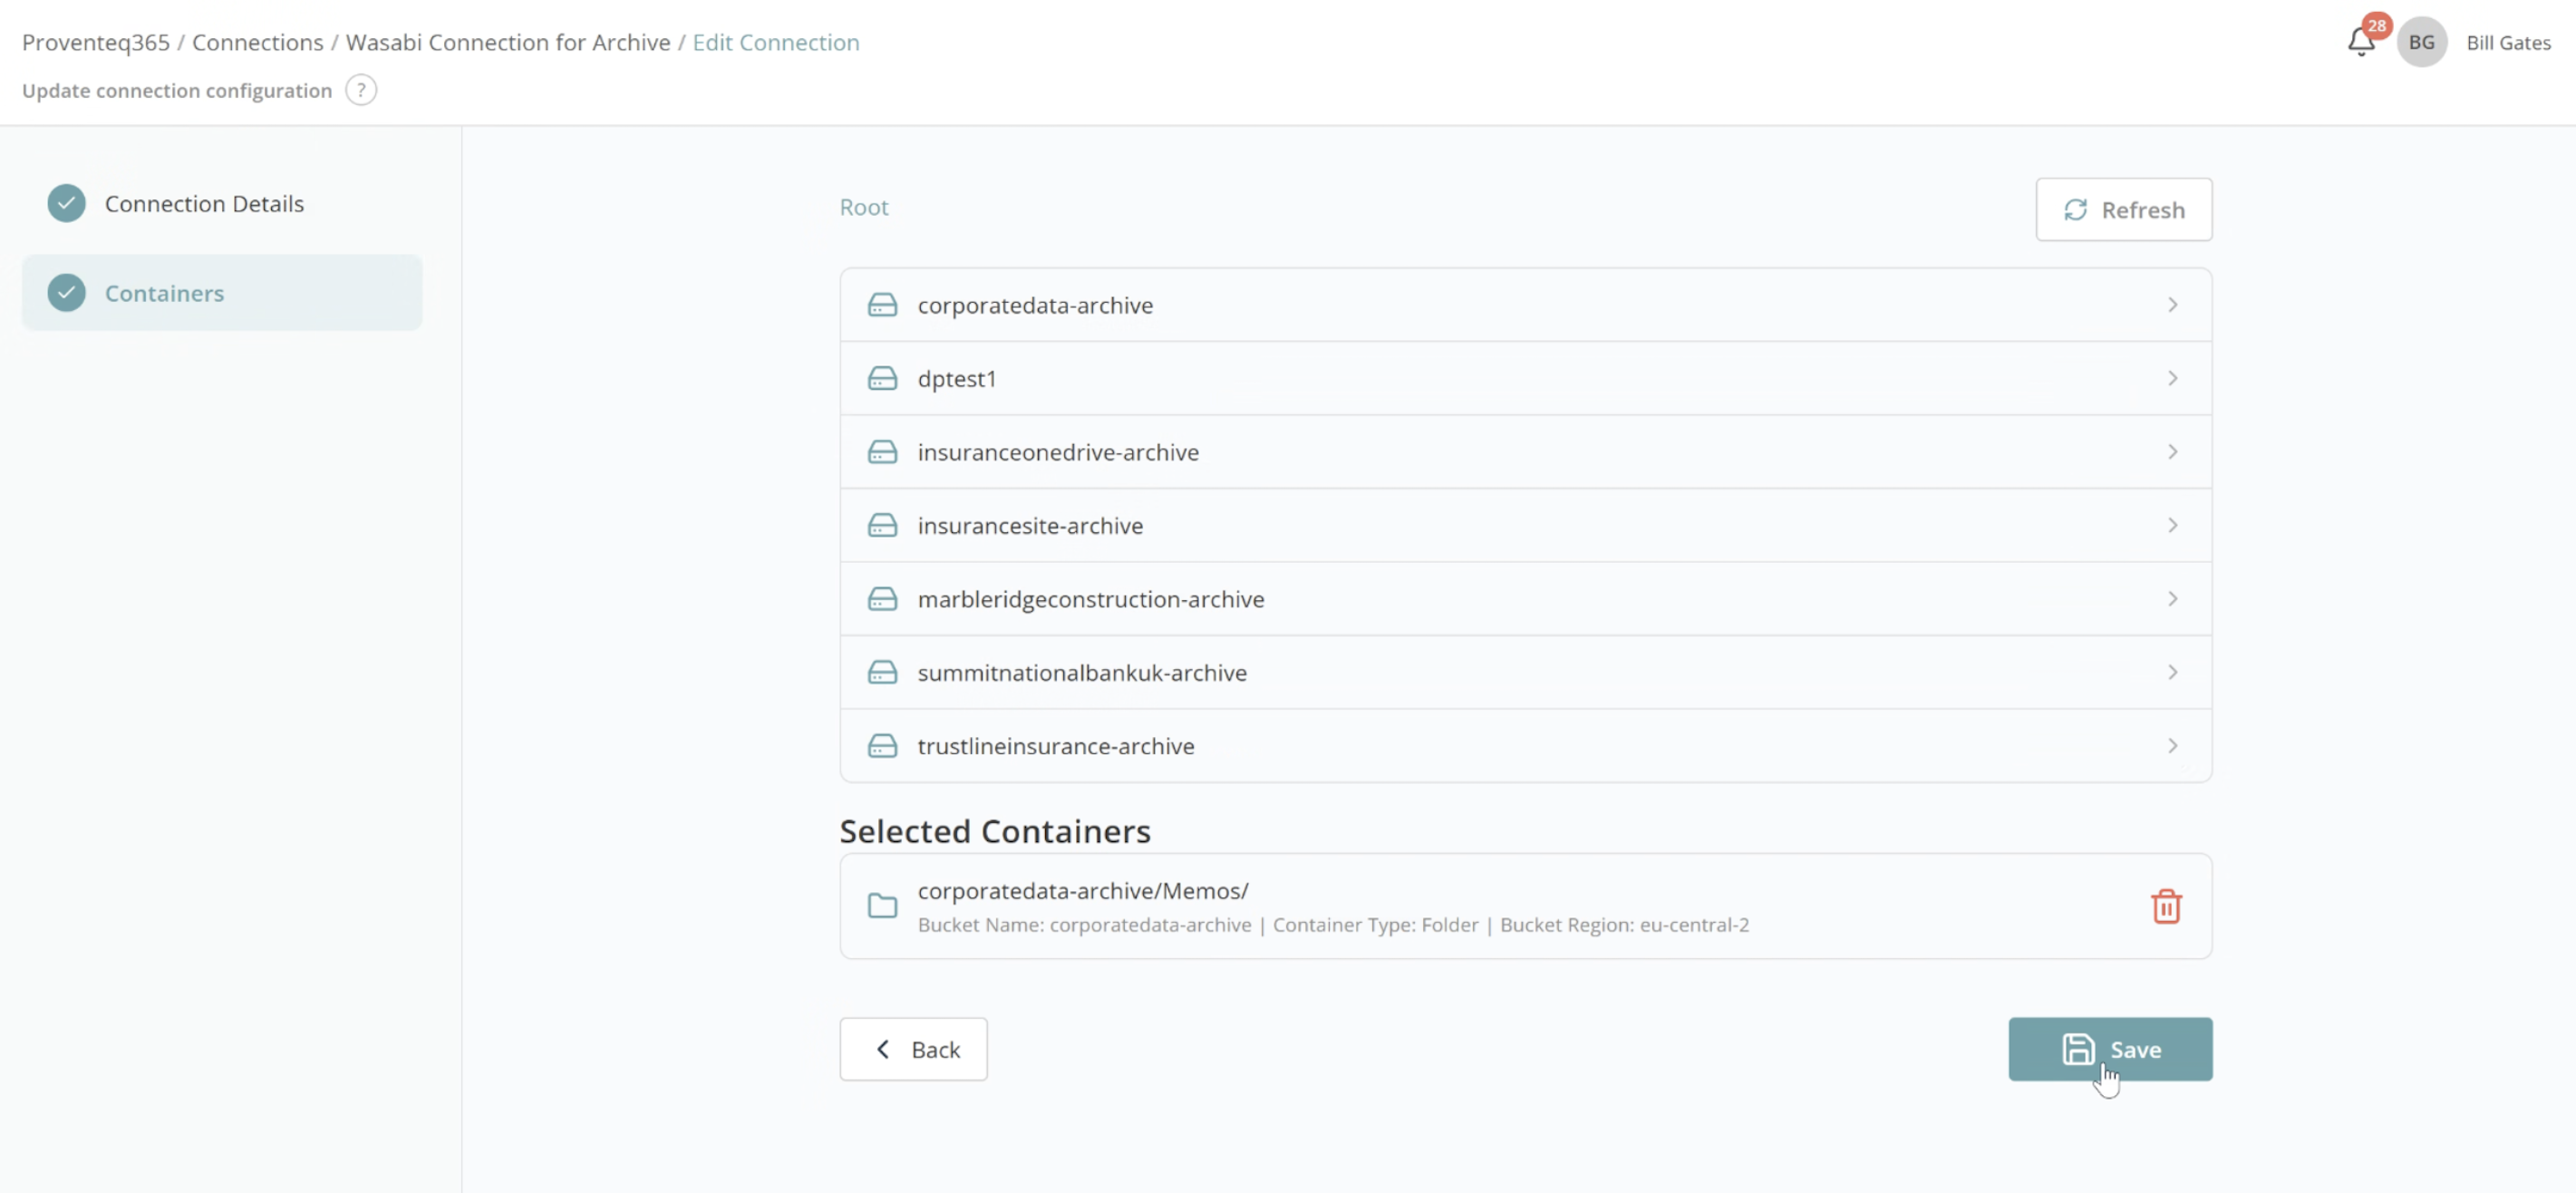
Click Refresh to reload the list of available containers. This is useful if:
New containers were added externally.
Access permissions were recently updated.
Selected Containers
This section displays the containers selected for archiving. Each entry shows:
The container name.
Additional metadata, such as bucket name, container type, and region.
Click the Delete icon to remove a selected container. Once removed, the container will no longer be used for archiving. You can select a different container if required.
Adding a Policy
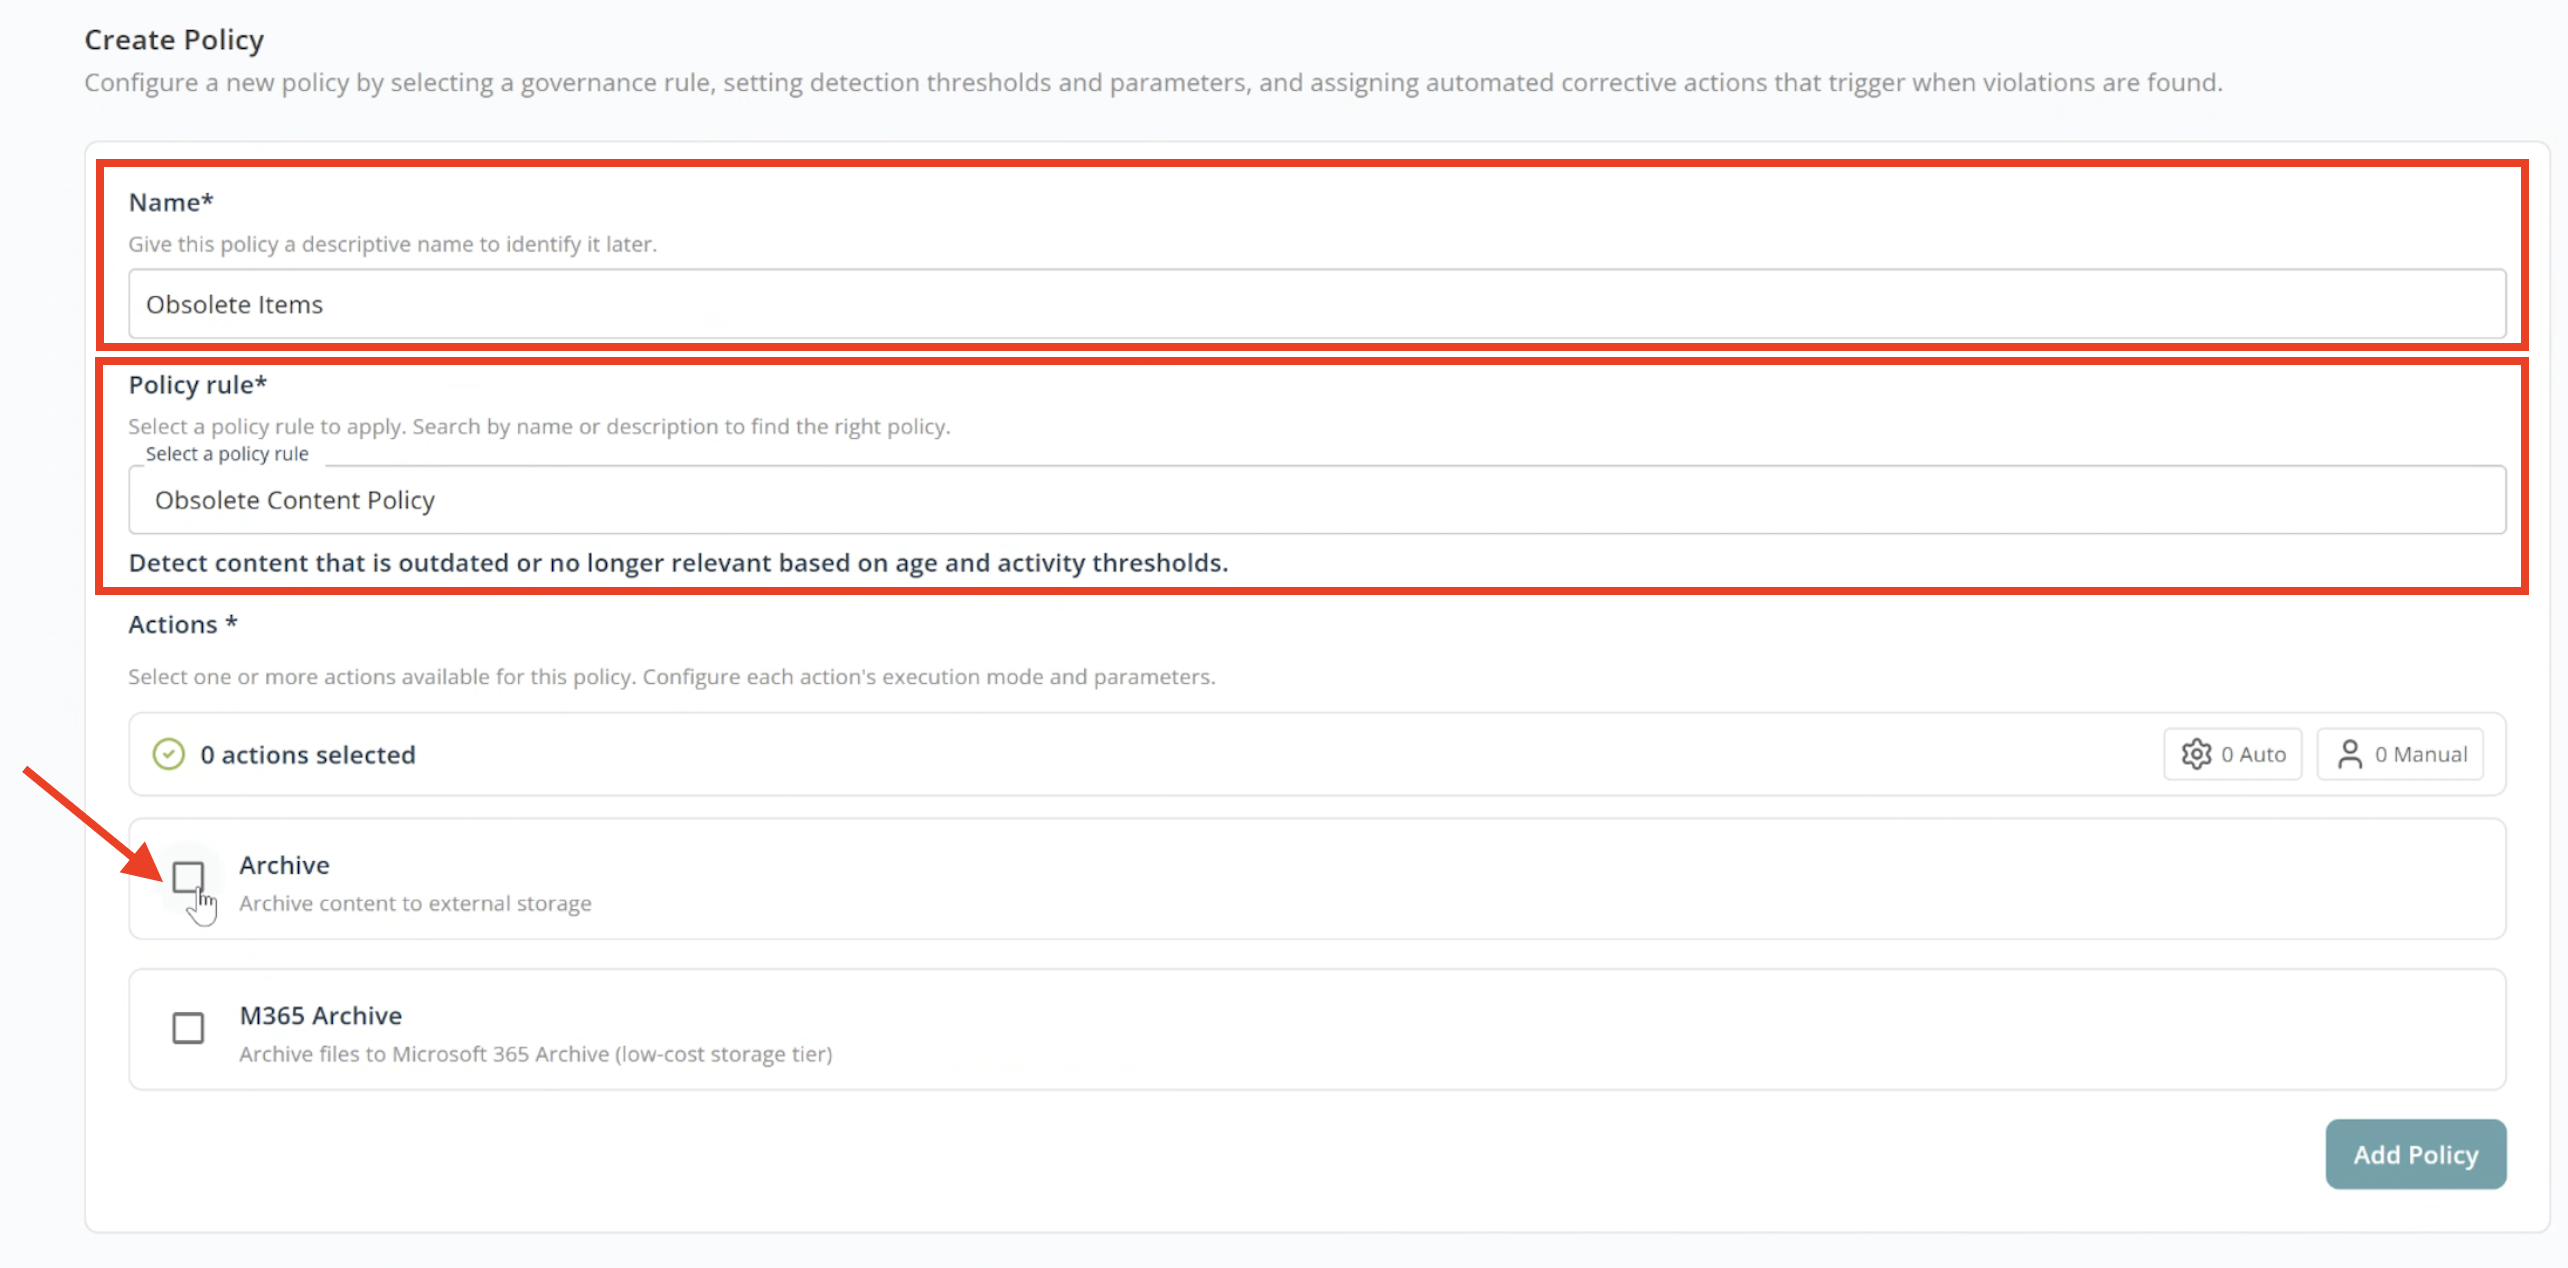
To identify content, configure an Obsolete Content Policy either when adding a workspace or in an existing workspace. Select Obsolete Content Policy in the Policy rule drop-down, give the policy a meaningful name, and configure its action using the action configuration section (described below).
Navigate to the Policies page.
Click Create New Policy.
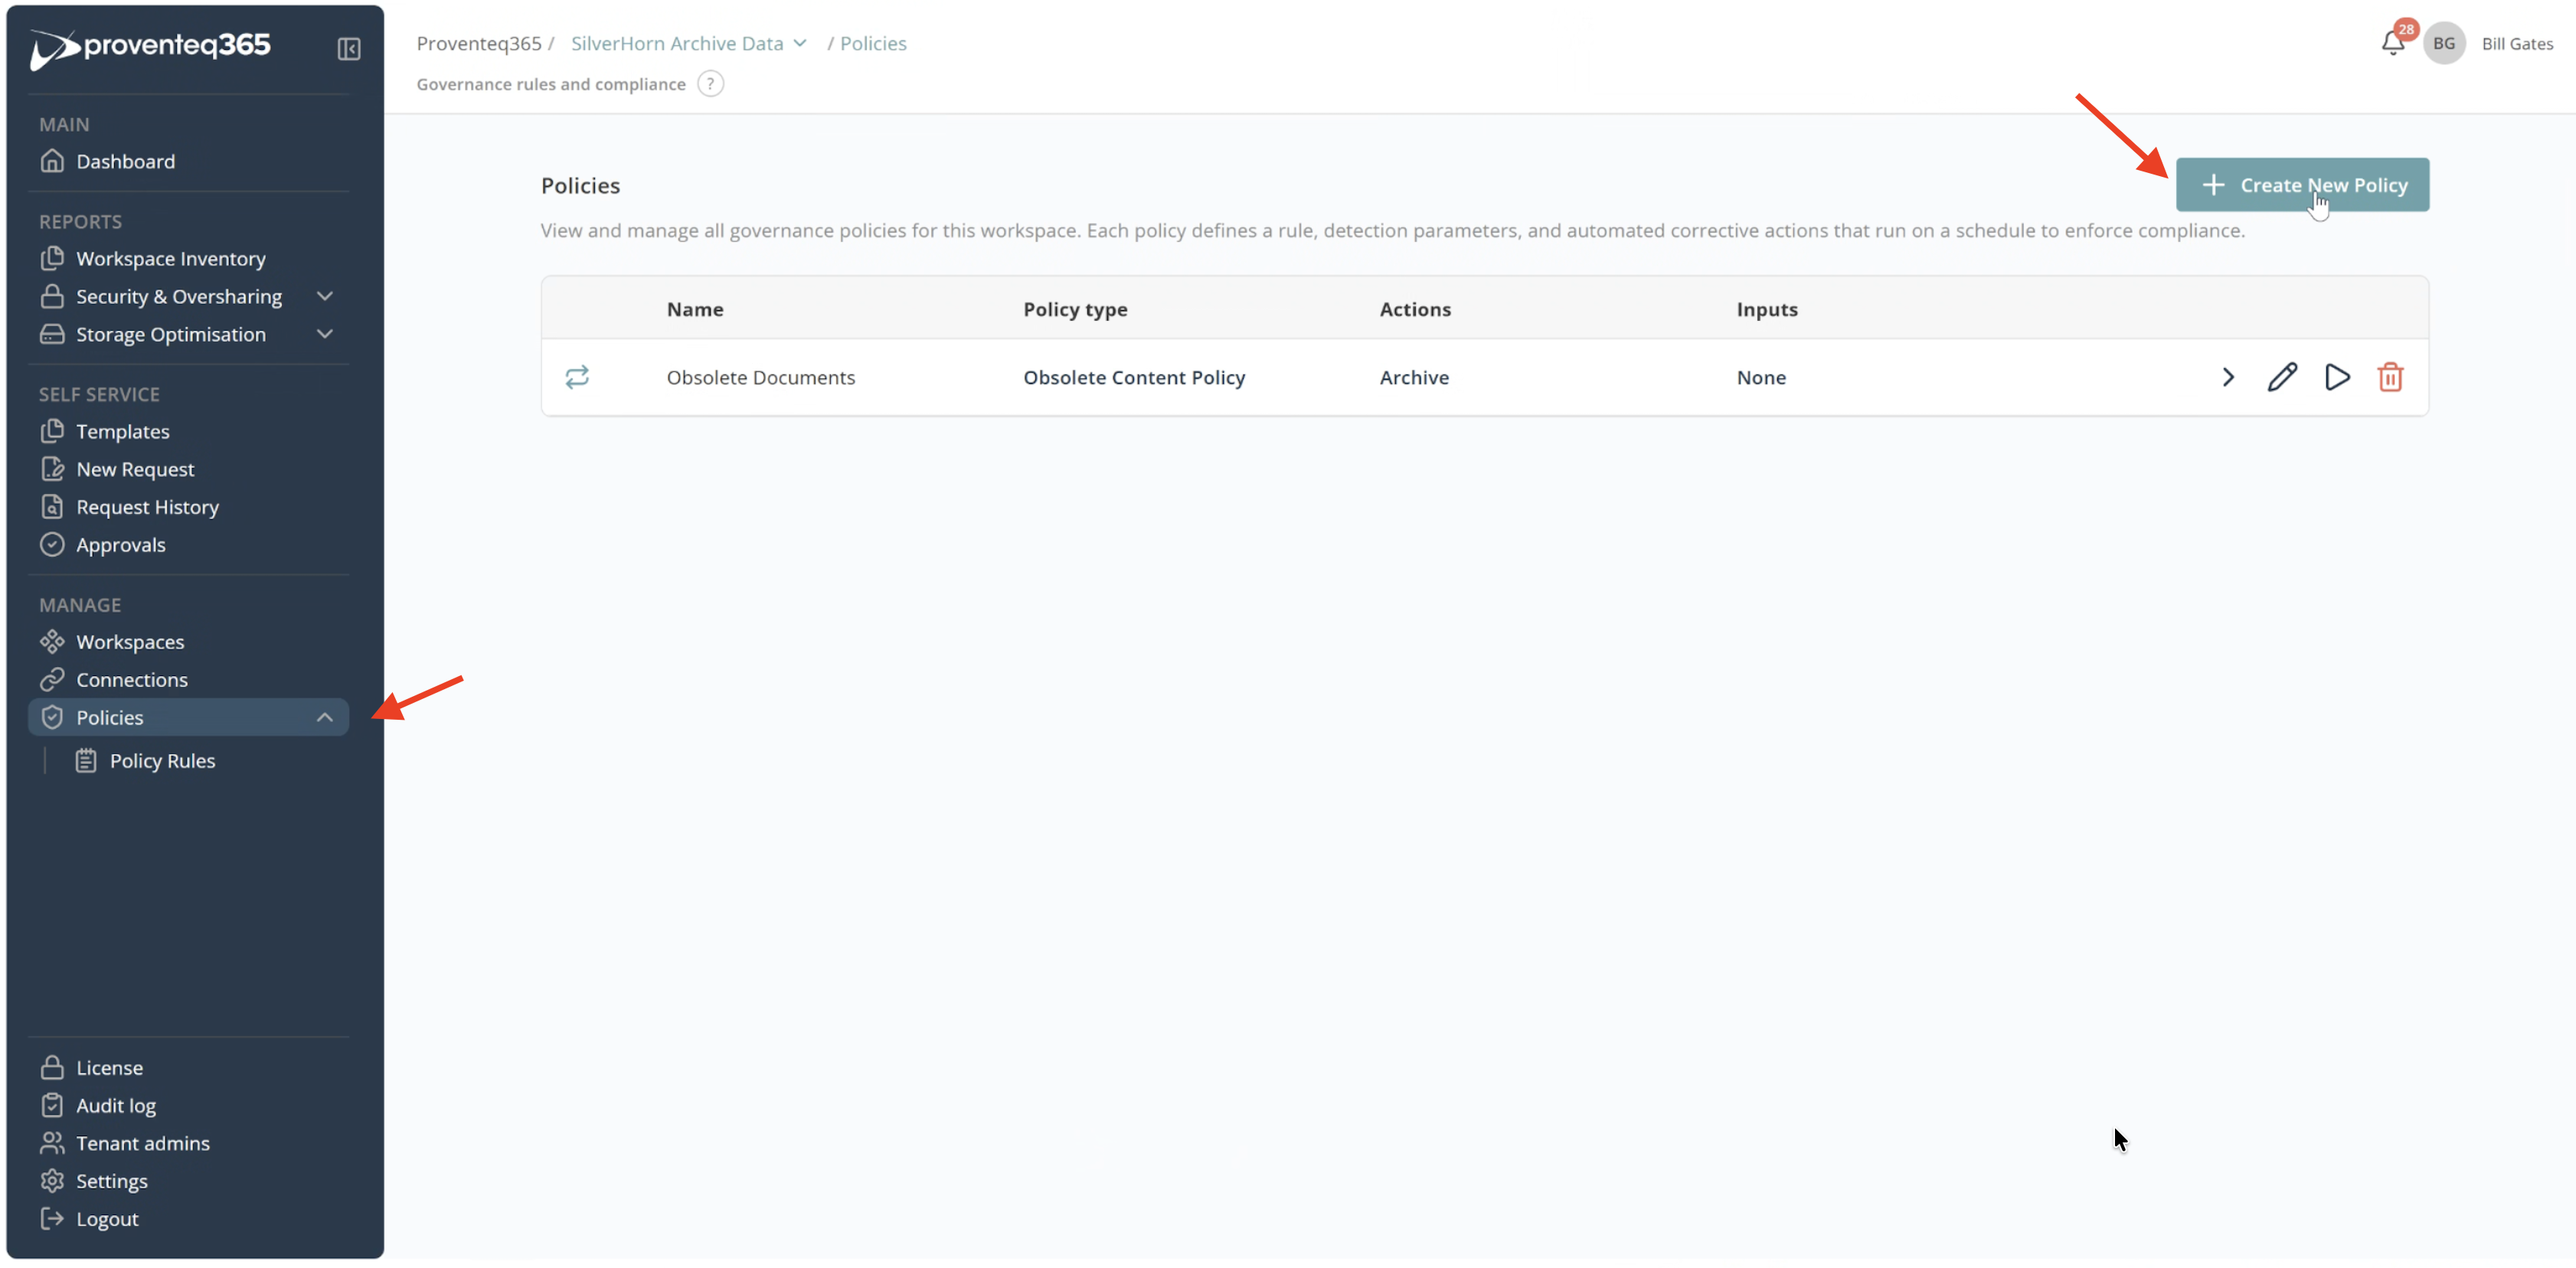
Input the following information.
Name—A descriptive name for your policy.
Policy Rule—Choose the relevant policy rule from the drop-down for your use case (in this example, Obsolete Content Policy).
Click the checkbox to Archive.
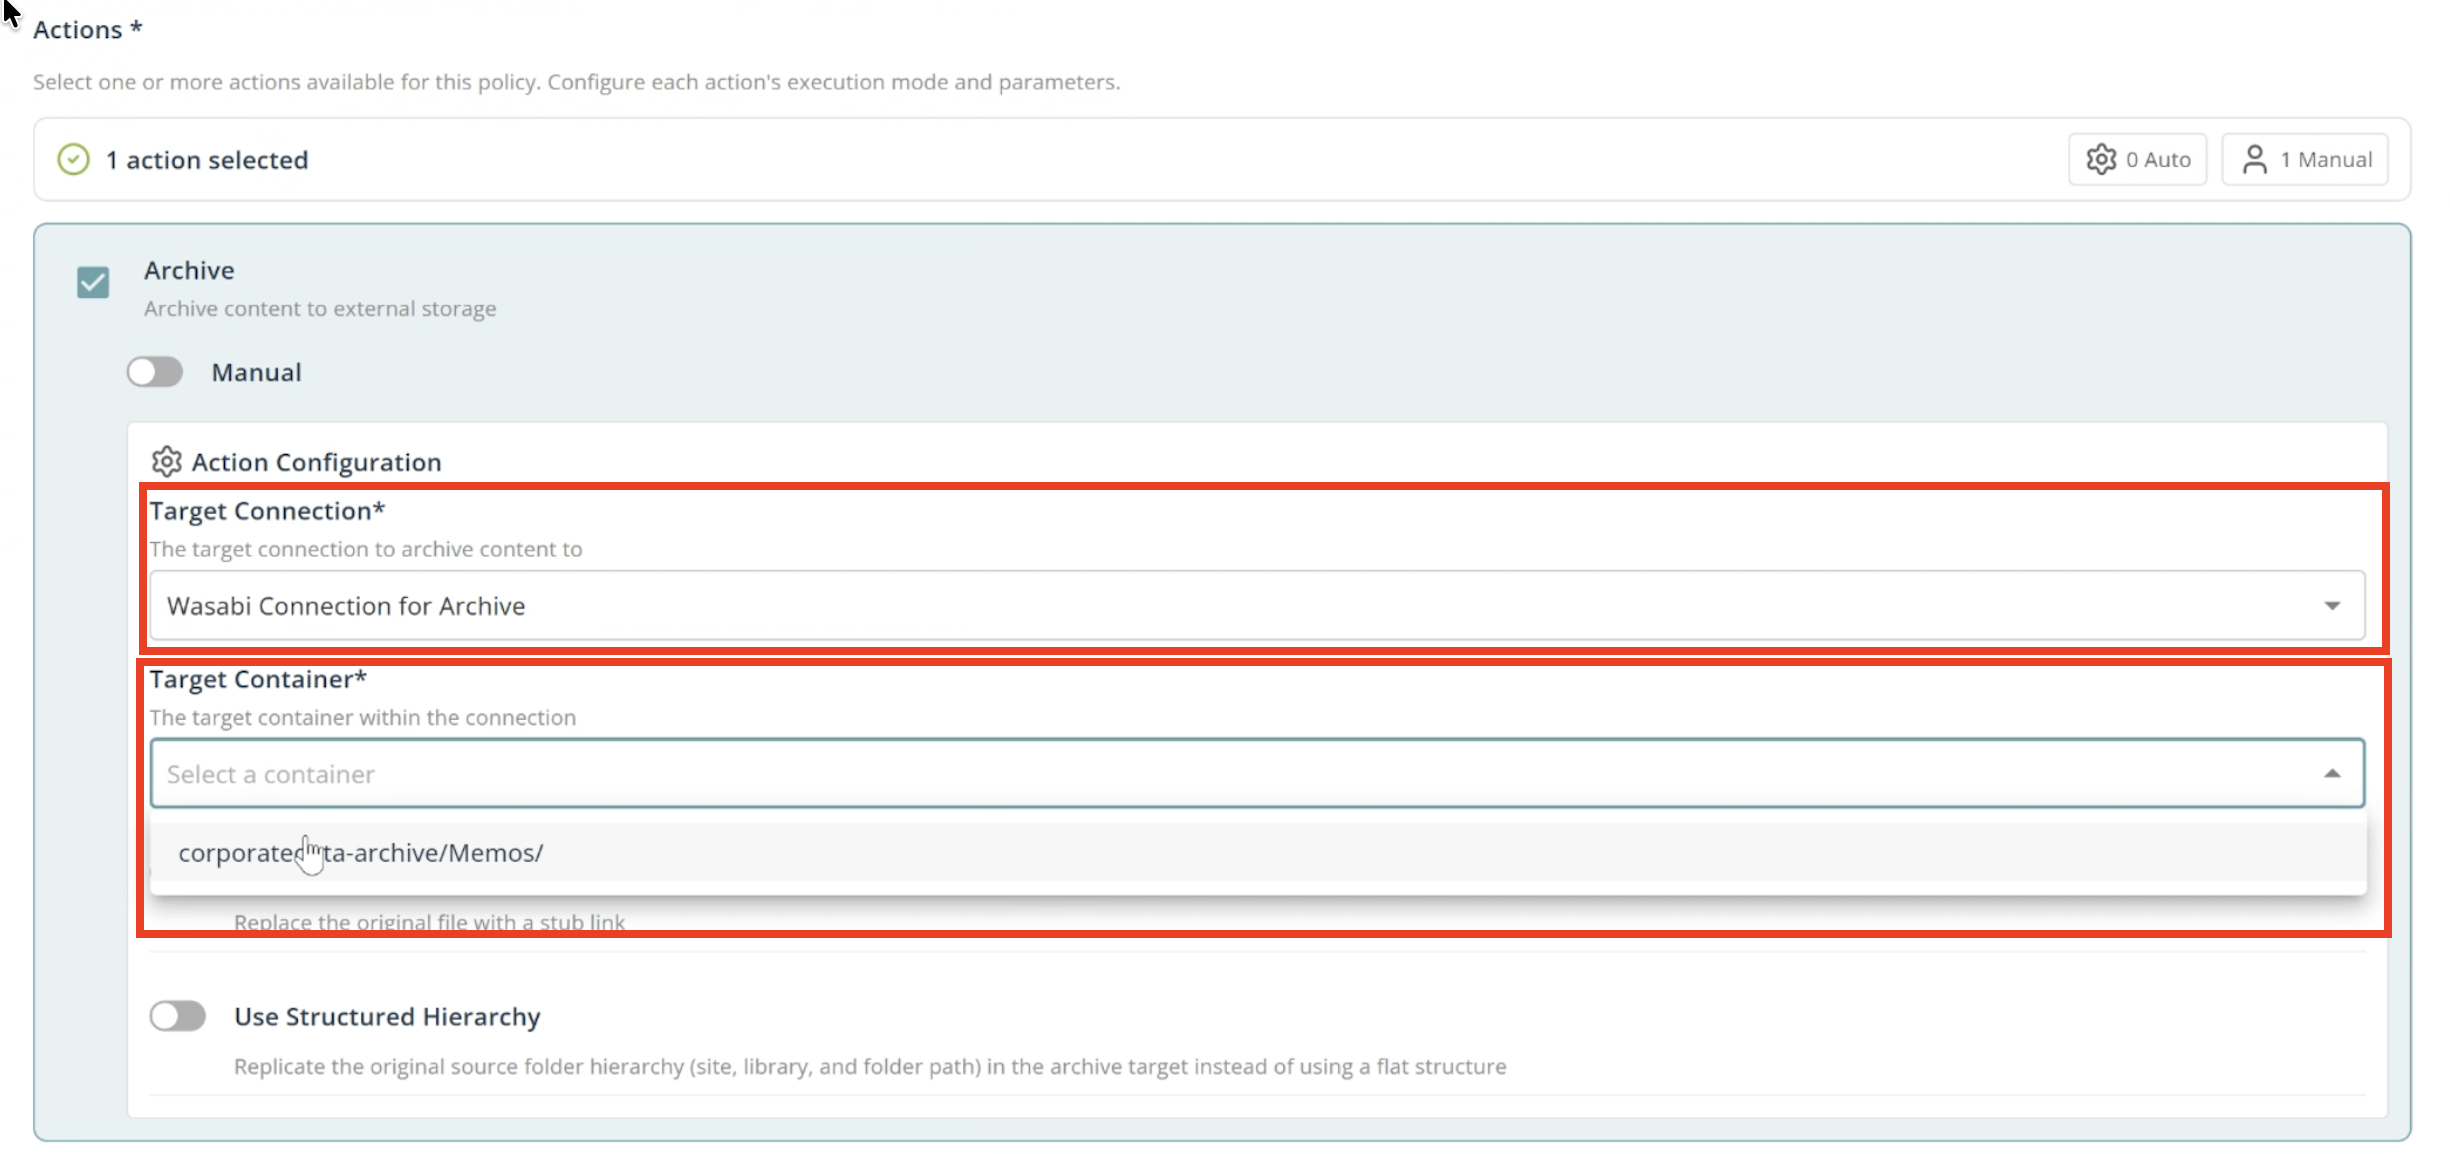
In the Target Connection drop-down menu, select the Wasabi Connection you created in prior steps.
Select the Target Container (a bucket or subdirectory of a bucket).
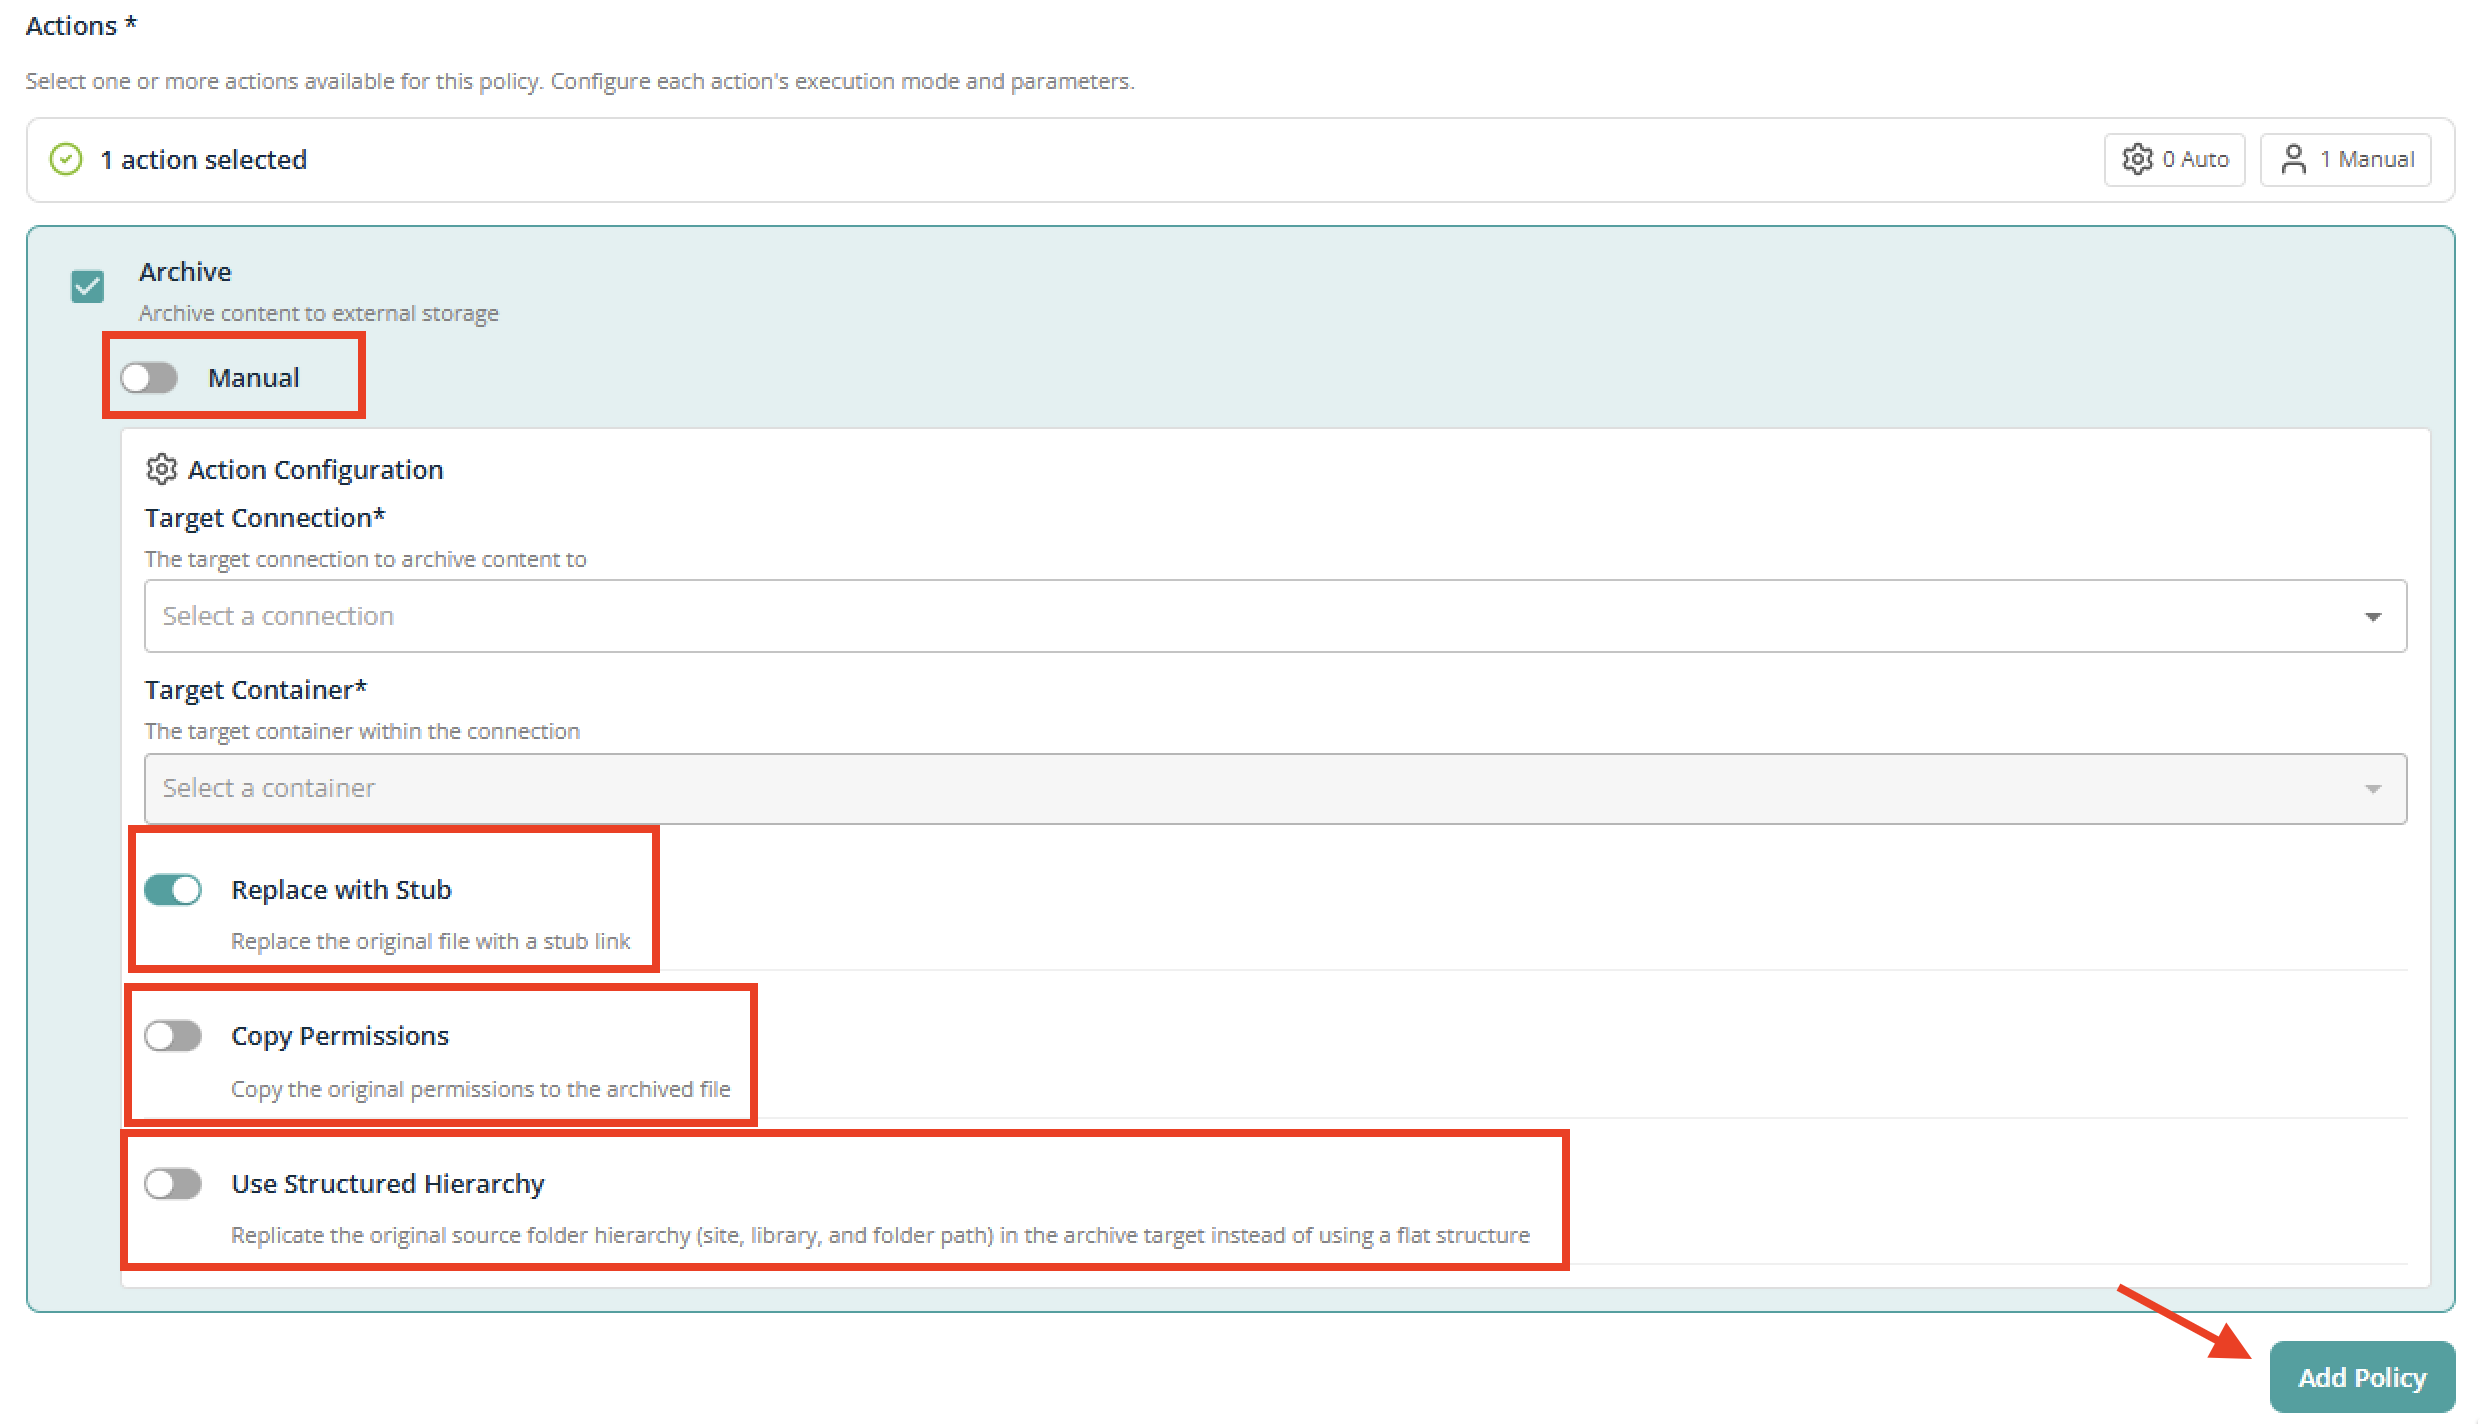
Optionally, choose configurations for archiving. After choosing the relevant settings, click Add Policy. The policy can run alongside workspace execution or separately.
Execution Mode—Controlled by a toggle displayed below the Archive checkbox. OFF by default.
Toggle OFF — Manual—The action requires user initiation before execution.
Toggle ON — Automatic—The action runs automatically when the policy is executed.
Action Configuration—Set the target connection and container, along with archive settings:
Target Connection—The connection representing the external storage system where content will be archived. Example: Wasabi, Azure Blob, or other configured archive sources.
Target Container—The container or bucket within the selected connection where archived content will be stored.
Replace with Stub—When enabled, the original file in the source system is replaced with a stub link pointing to the archived content.
Copy Permissions—When enabled, the original file permissions are copied to the archived content to maintain access controls.
Use Structured Hierarchy—When enabled, archived content retains its original folder structure (site, library, and folder hierarchy) within the target container instead of using a flat structure.
Archiving Content
Once the policy scan runs, click View to see the policy report and archive the relevant content.
At the top of the screen, the policy details are displayed.
Policy Name—The governance policy that was executed.
Policy Description—Explains what the policy detects. (For example, Detects content that is outdated or no longer relevant based on age and activity thresholds.)
This section provides context for why the listed items were identified.
Under the Available Actions section, Archive information is available if the policy is configured with Manual execution.
Execute on all items—Applies the action to all identified items.
Execute on selection—Applies the action only to selected items.
If the archive action is set to execute automatically, the Execute on All Items and Execute on Selection options are not available.
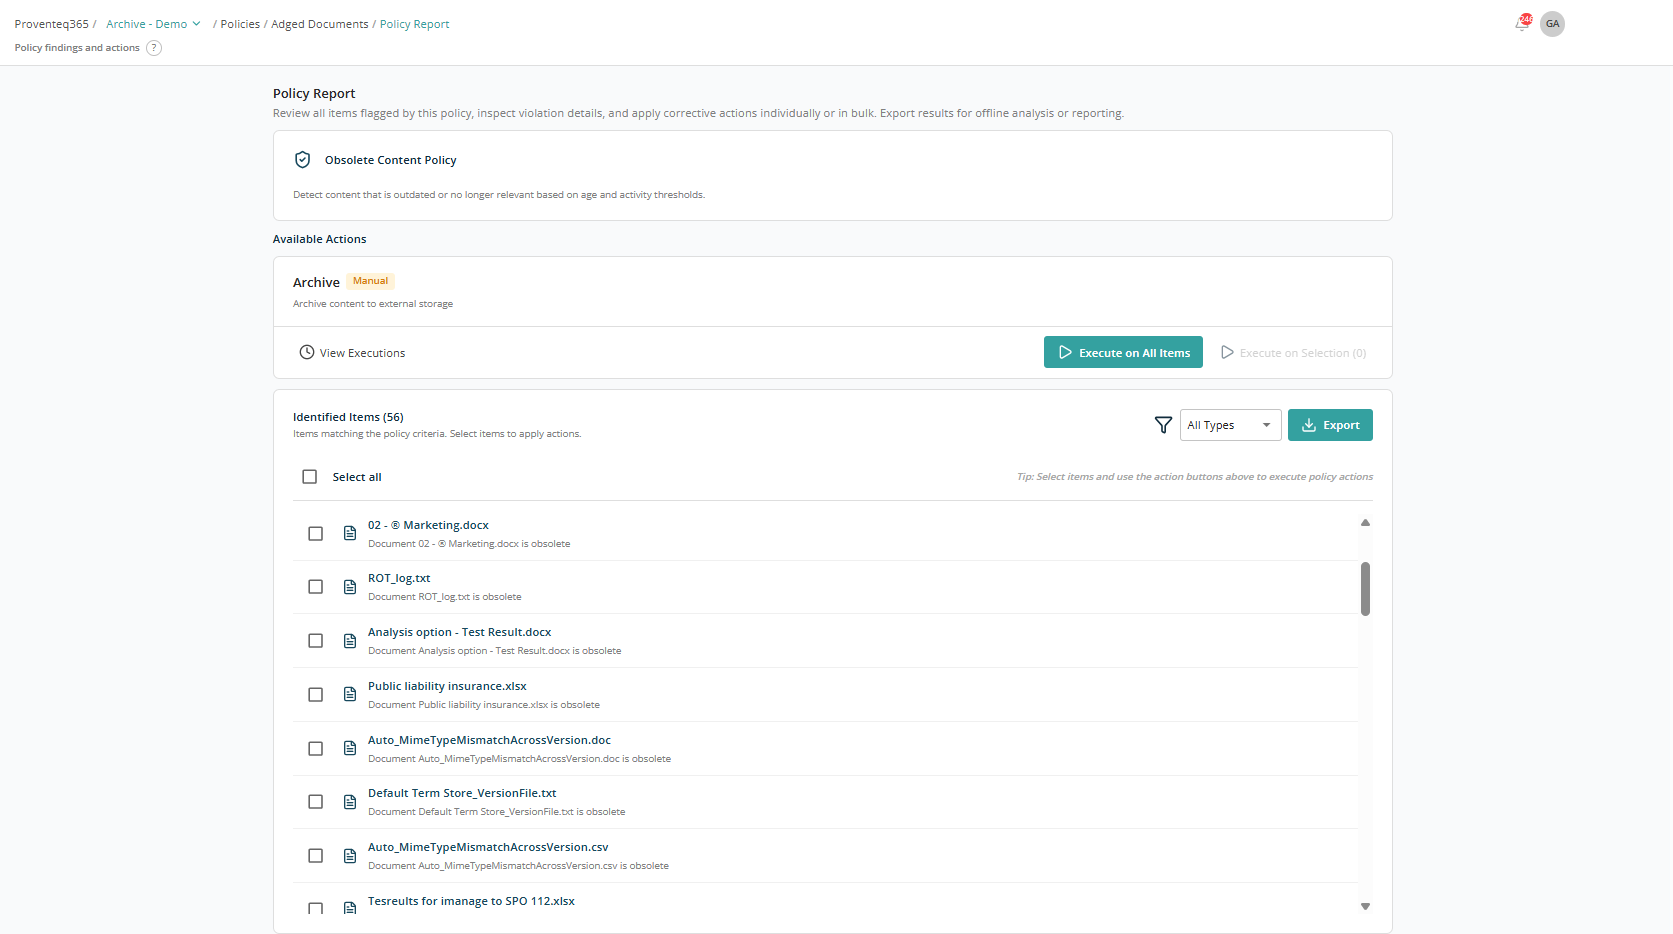
Click View Executions to view the history of policy runs and previously executed actions.
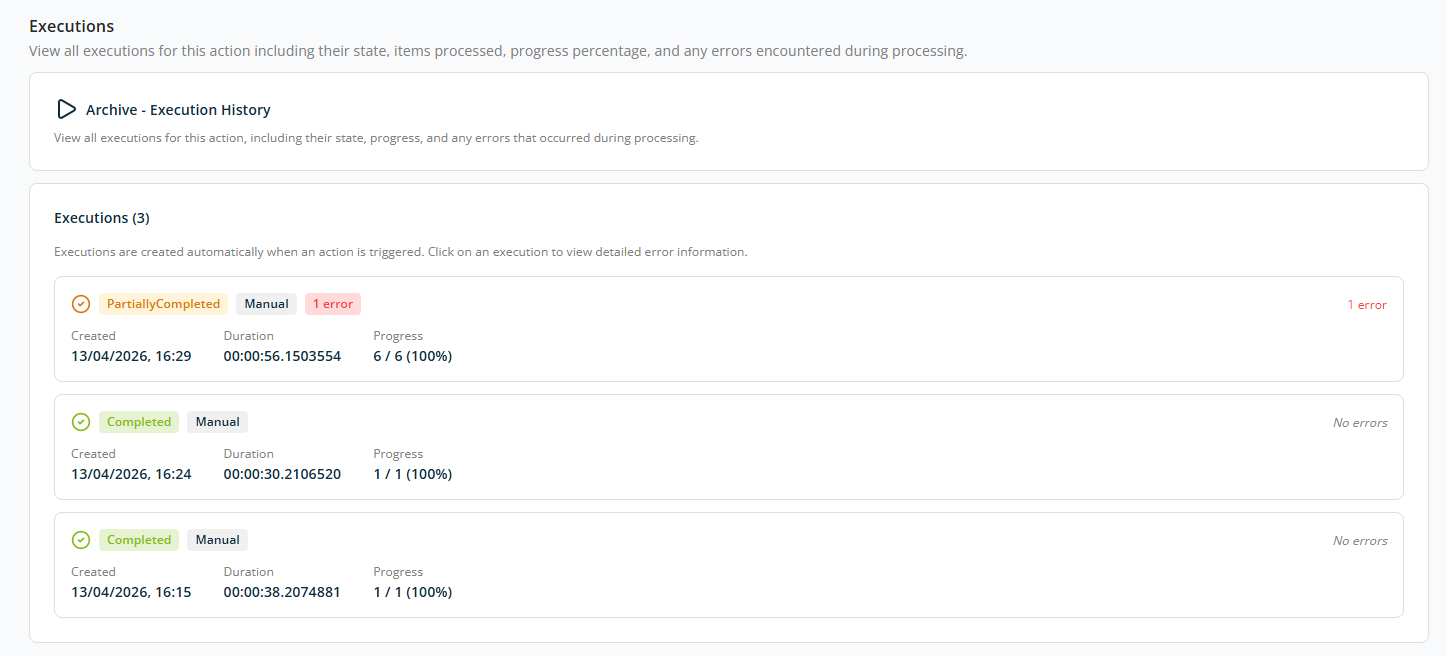
The Executions screen provides a complete history of all executions for a configured action, such as Archive. It enables you to monitor execution status, track progress, and review any errors encountered during processing. The executions list displays all recorded runs with the following details.
Execution Status—Possible values:
Completed—The action ran successfully with no errors.
Partially Completed—The action was completed, but one or more items failed.
Execution Mode—How the action was initiated (for example, Manual).
Created—The date and time when the execution started.
Duration—Total time taken to process all items in the execution.
Progress—Number of items processed out of the total items. Displayed as a count and percentage (for example, 6 / 6, 100%).
Errors—The number of errors, if any occurred. No errors indicate a successful execution. Selecting an execution with errors lets you view error details.
Viewing Archived Content
After archiving, open the source location to see the stub link. This link is accessible to all users who can access the original file.

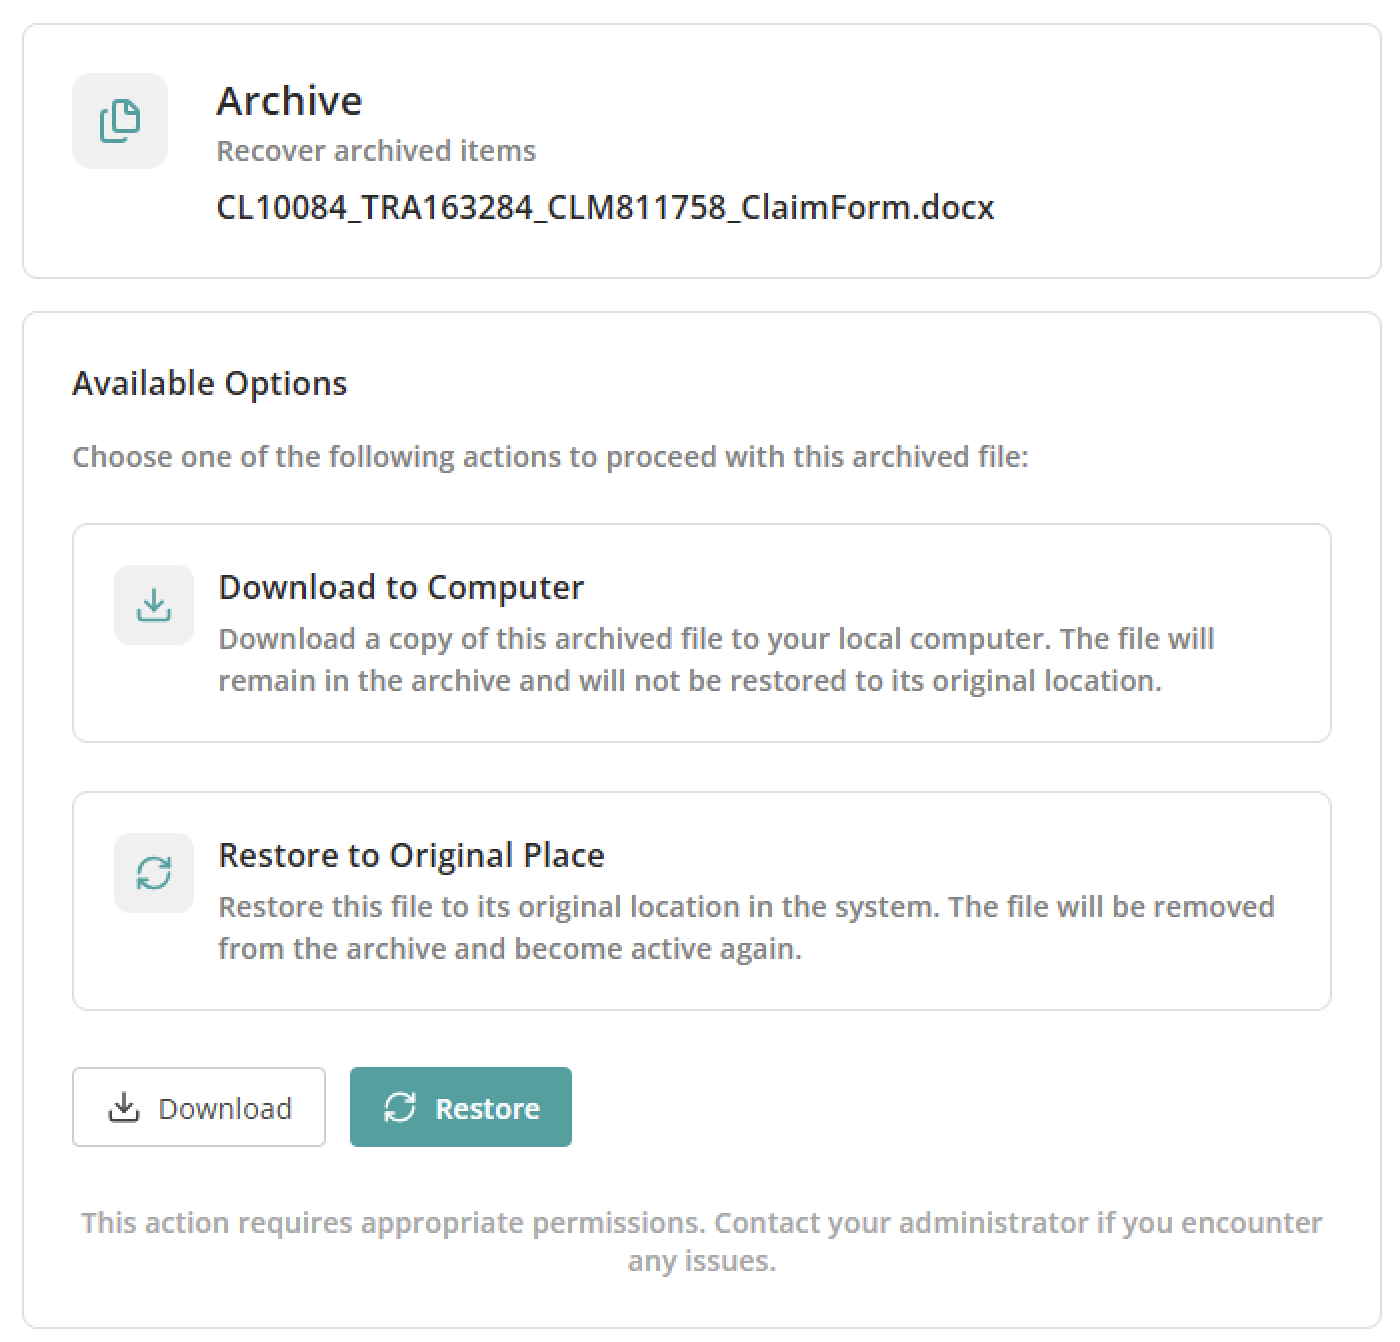
When you click the stub URL, you are redirected to a page from where you can either download the archived file directly to your PC or restore it to the MS365 workspace if needed.
You can also view your archived content directly via your Wasabi Console.