Wasabi offers Single Sign-On (SSO) for Wasabi accounts using the Pocket ID (Identity Provider) system, based on OpenID Connect integration.
This article provides configuration instructions for both the IdP administrator and the SSO user to properly configure and complete a Wasabi Console login using your Pocket ID SSO service.
Prerequisites
PocketID Admin account
Wasabi Console account
Group/Role name (both IdP side and SP/Client side must match).
Configuring the OIDC App in Pocket ID (IdP Side)
Log in to your Pocket ID account as Administrator. The Settings page is displayed.
Navigate to Administration in the navigation menu and select OIDC Clients.
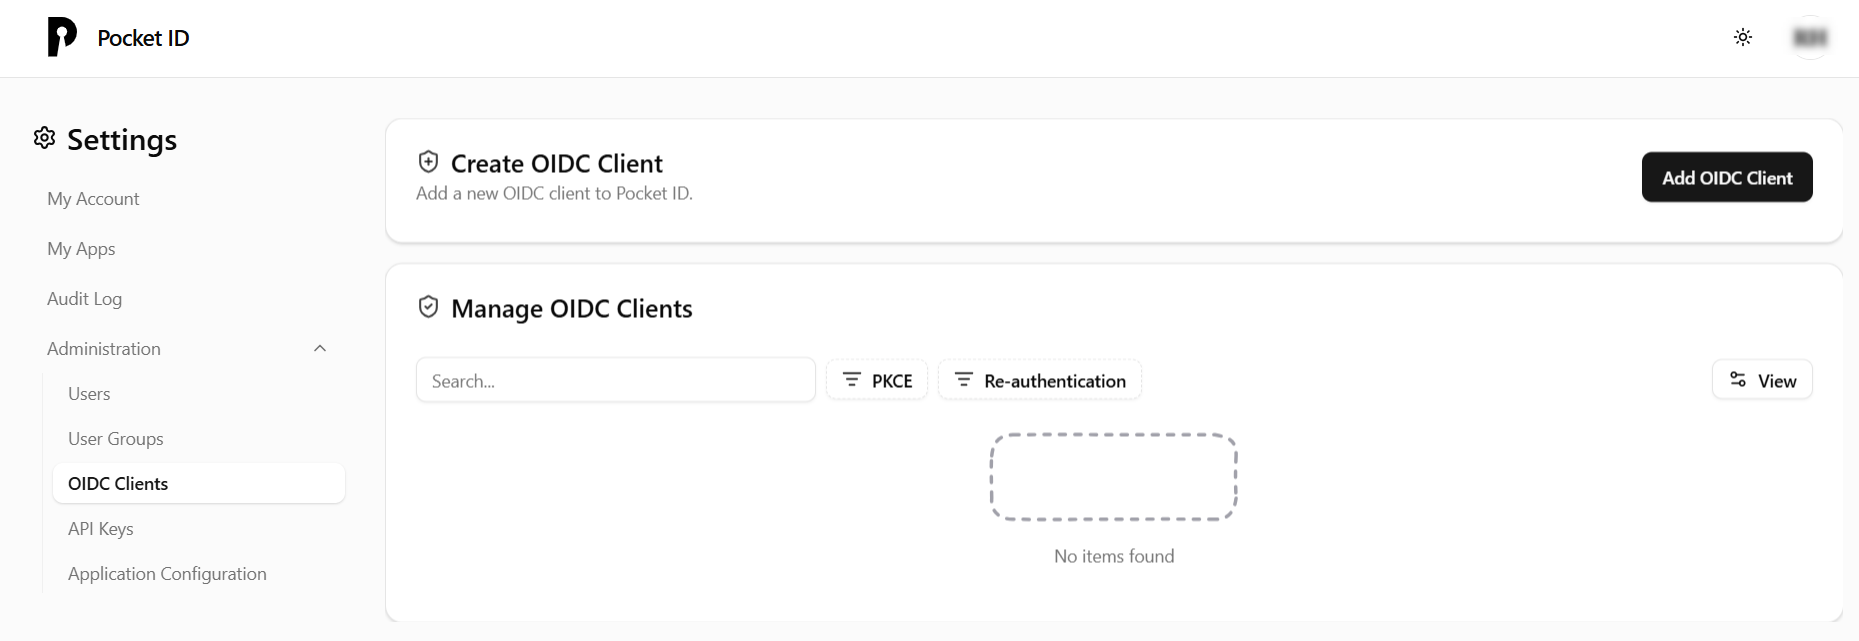
Click Add OIDC Client. The Create OIDC Client page is displayed.
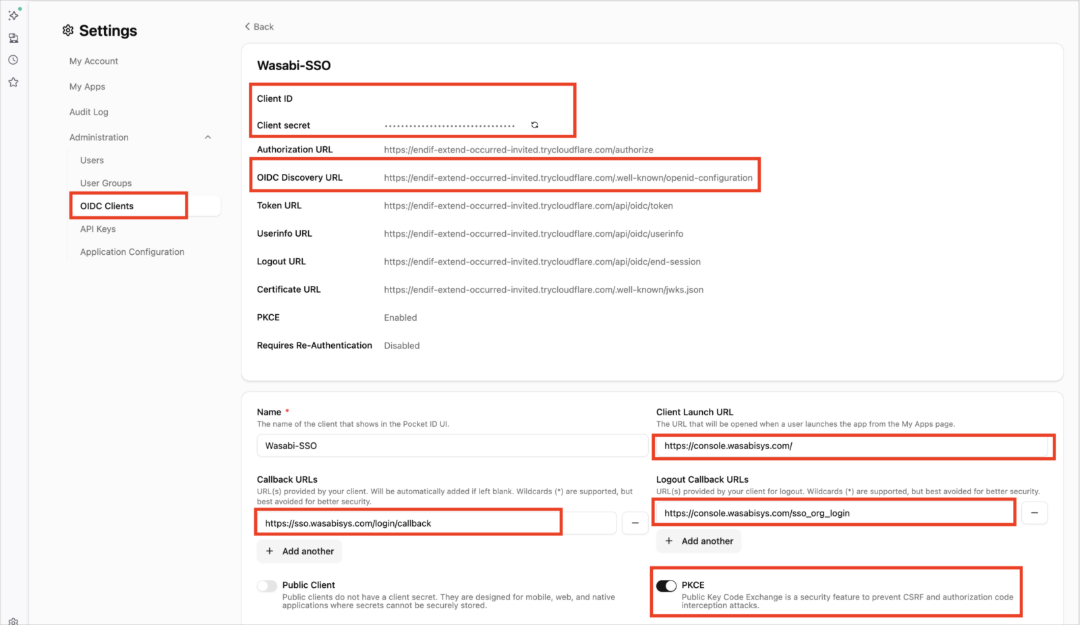
Create a client, such as “Wasabi-SSO” and provide the following information as required:
Client ID /Client Secret—Autogenerated identifiers used in the Wasabi Console to authenticate to.
Authorization URL / Token URL / Userinfo URL / Logout URL / OIDC Discovery URL / Certificate (JWKS) URL—Pocket ID endpoints. If you have the Discovery URL, most apps (including Wasabi) can learn the rest automatically.
Client Launch URL—Where Pocket ID should send users if they “Launch” the app from My Apps. Use https://console.wasabisys.com.
Callback URLs—The redirect URIs. Exact URLs Pocket ID redirects back to the login. Include the Wasabi SSO callback https://sso.wasabisys.com/login/callback. Both the IdP side and the SP/Client side must match.
Logout Callback URL—An optional endpoint used after logout, for example, the Wasabi SSO page.
Public Client—Disable. Wasabi Console uses a confidential client.
PKCE—Disable. For this integration, Wasabi will not send “code_challenge.” If PKCE is enabled, the login will fail without the “code_challenge.”
Requires Re-Authentication (optional)—Disable. When set, users must reauthorize each time.
Federated Client Credentials (optional)—Not required.
Allowed User Group (optional)—Restrict who can use this Wasabi Console client, based on Pocket ID groups.
OIDC Data Preview—Click Show to preview the exact OIDC claims and confirm that “group domain” is available for users.
Click Save.
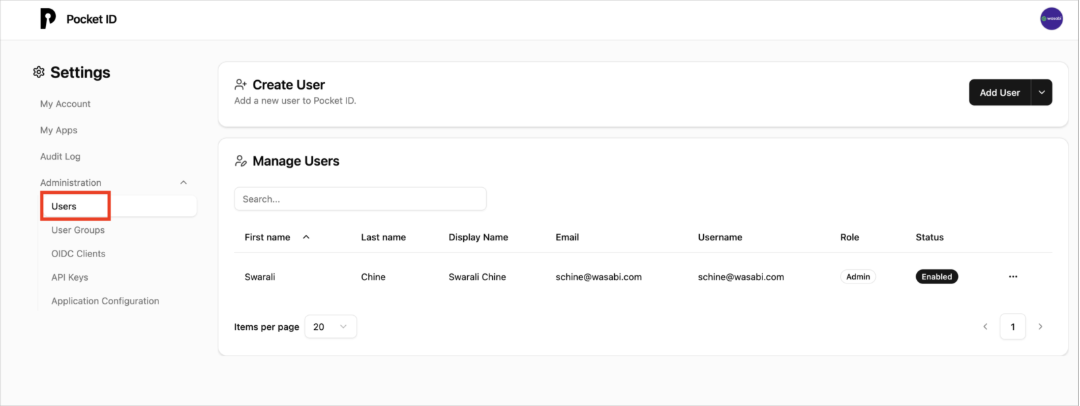
In Administration, select Users.
Verify that your Wasabi Console users are enabled.
In Administration, select User Groups to configure your group claim.
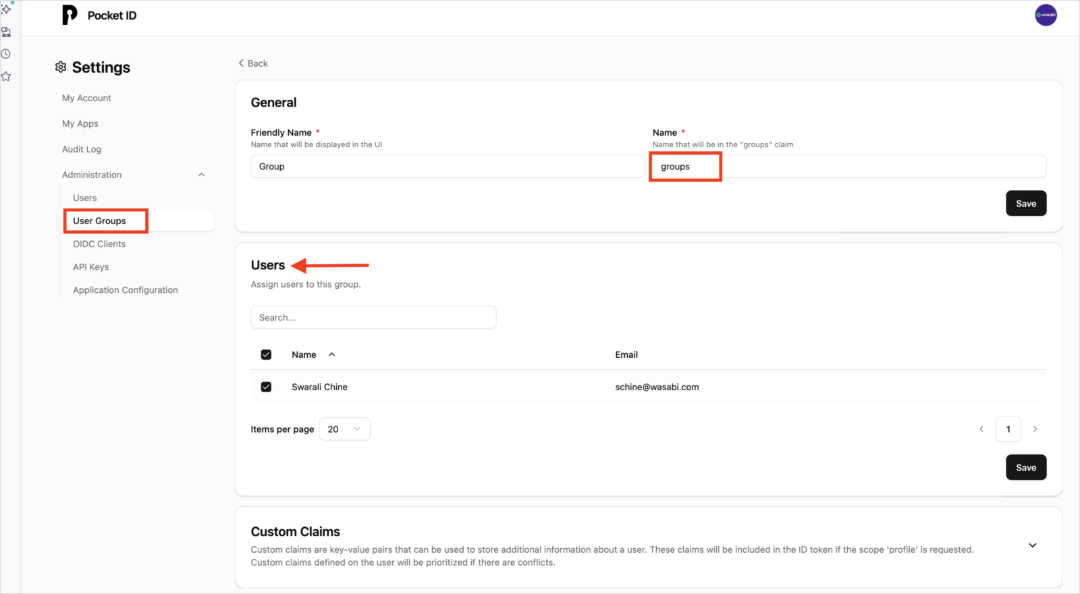
Enter the following information about the group claim:
Name—Enter the claim key group, for example, which is expected on the Wasabi Console side.
Users—Assign users to this group.
The group value must match the role value at the Wasabi Console. The group name for Pocket ID must match the role name used for the Wasabi Console.
Click Save.
Configuring OIDC Settings in Wasabi Console (SP / Client Side)
Sign in to the Wasabi Console (https://console.wasabisys.com/login) using a Root account email.
Select Security in the navigation menu. Then select SSO (Single Sign-On).
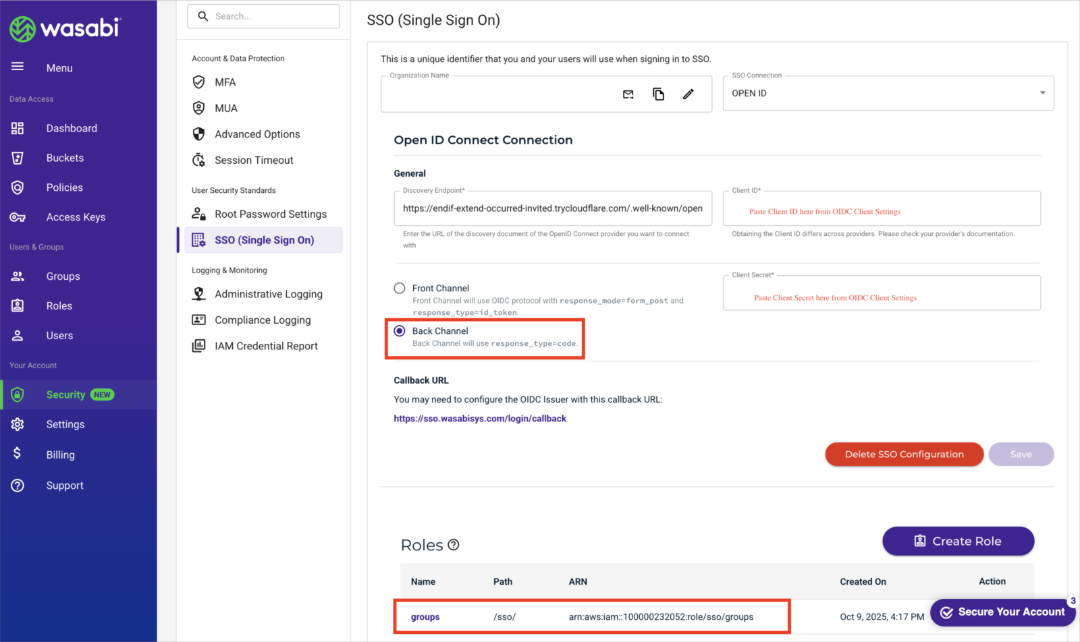
Enter the following information:
SSO Connection—Select the provider type Open ID.
Discovery Endpoint—Paste the OIDC URL for Pocket ID …/.well-known/openid-configuration
Client ID and Client Secret—Paste the values from your Pocket ID OIDC client.
Channel (flow type)—Enable Back Channel (server-side authorization code).
Callback URL—must show https://sso.wasabisys.com/login/callback. This must be the same URL listed in the Pocket ID callback URLs.
Click Save.
Click Create Role and add a role that matches your Pocket ID group name, such as “groups.”
Click Save.
Testing the Integration
Sign in to the Wasabi Console (https://console.wasabisys.com) to test the SSO configuration.
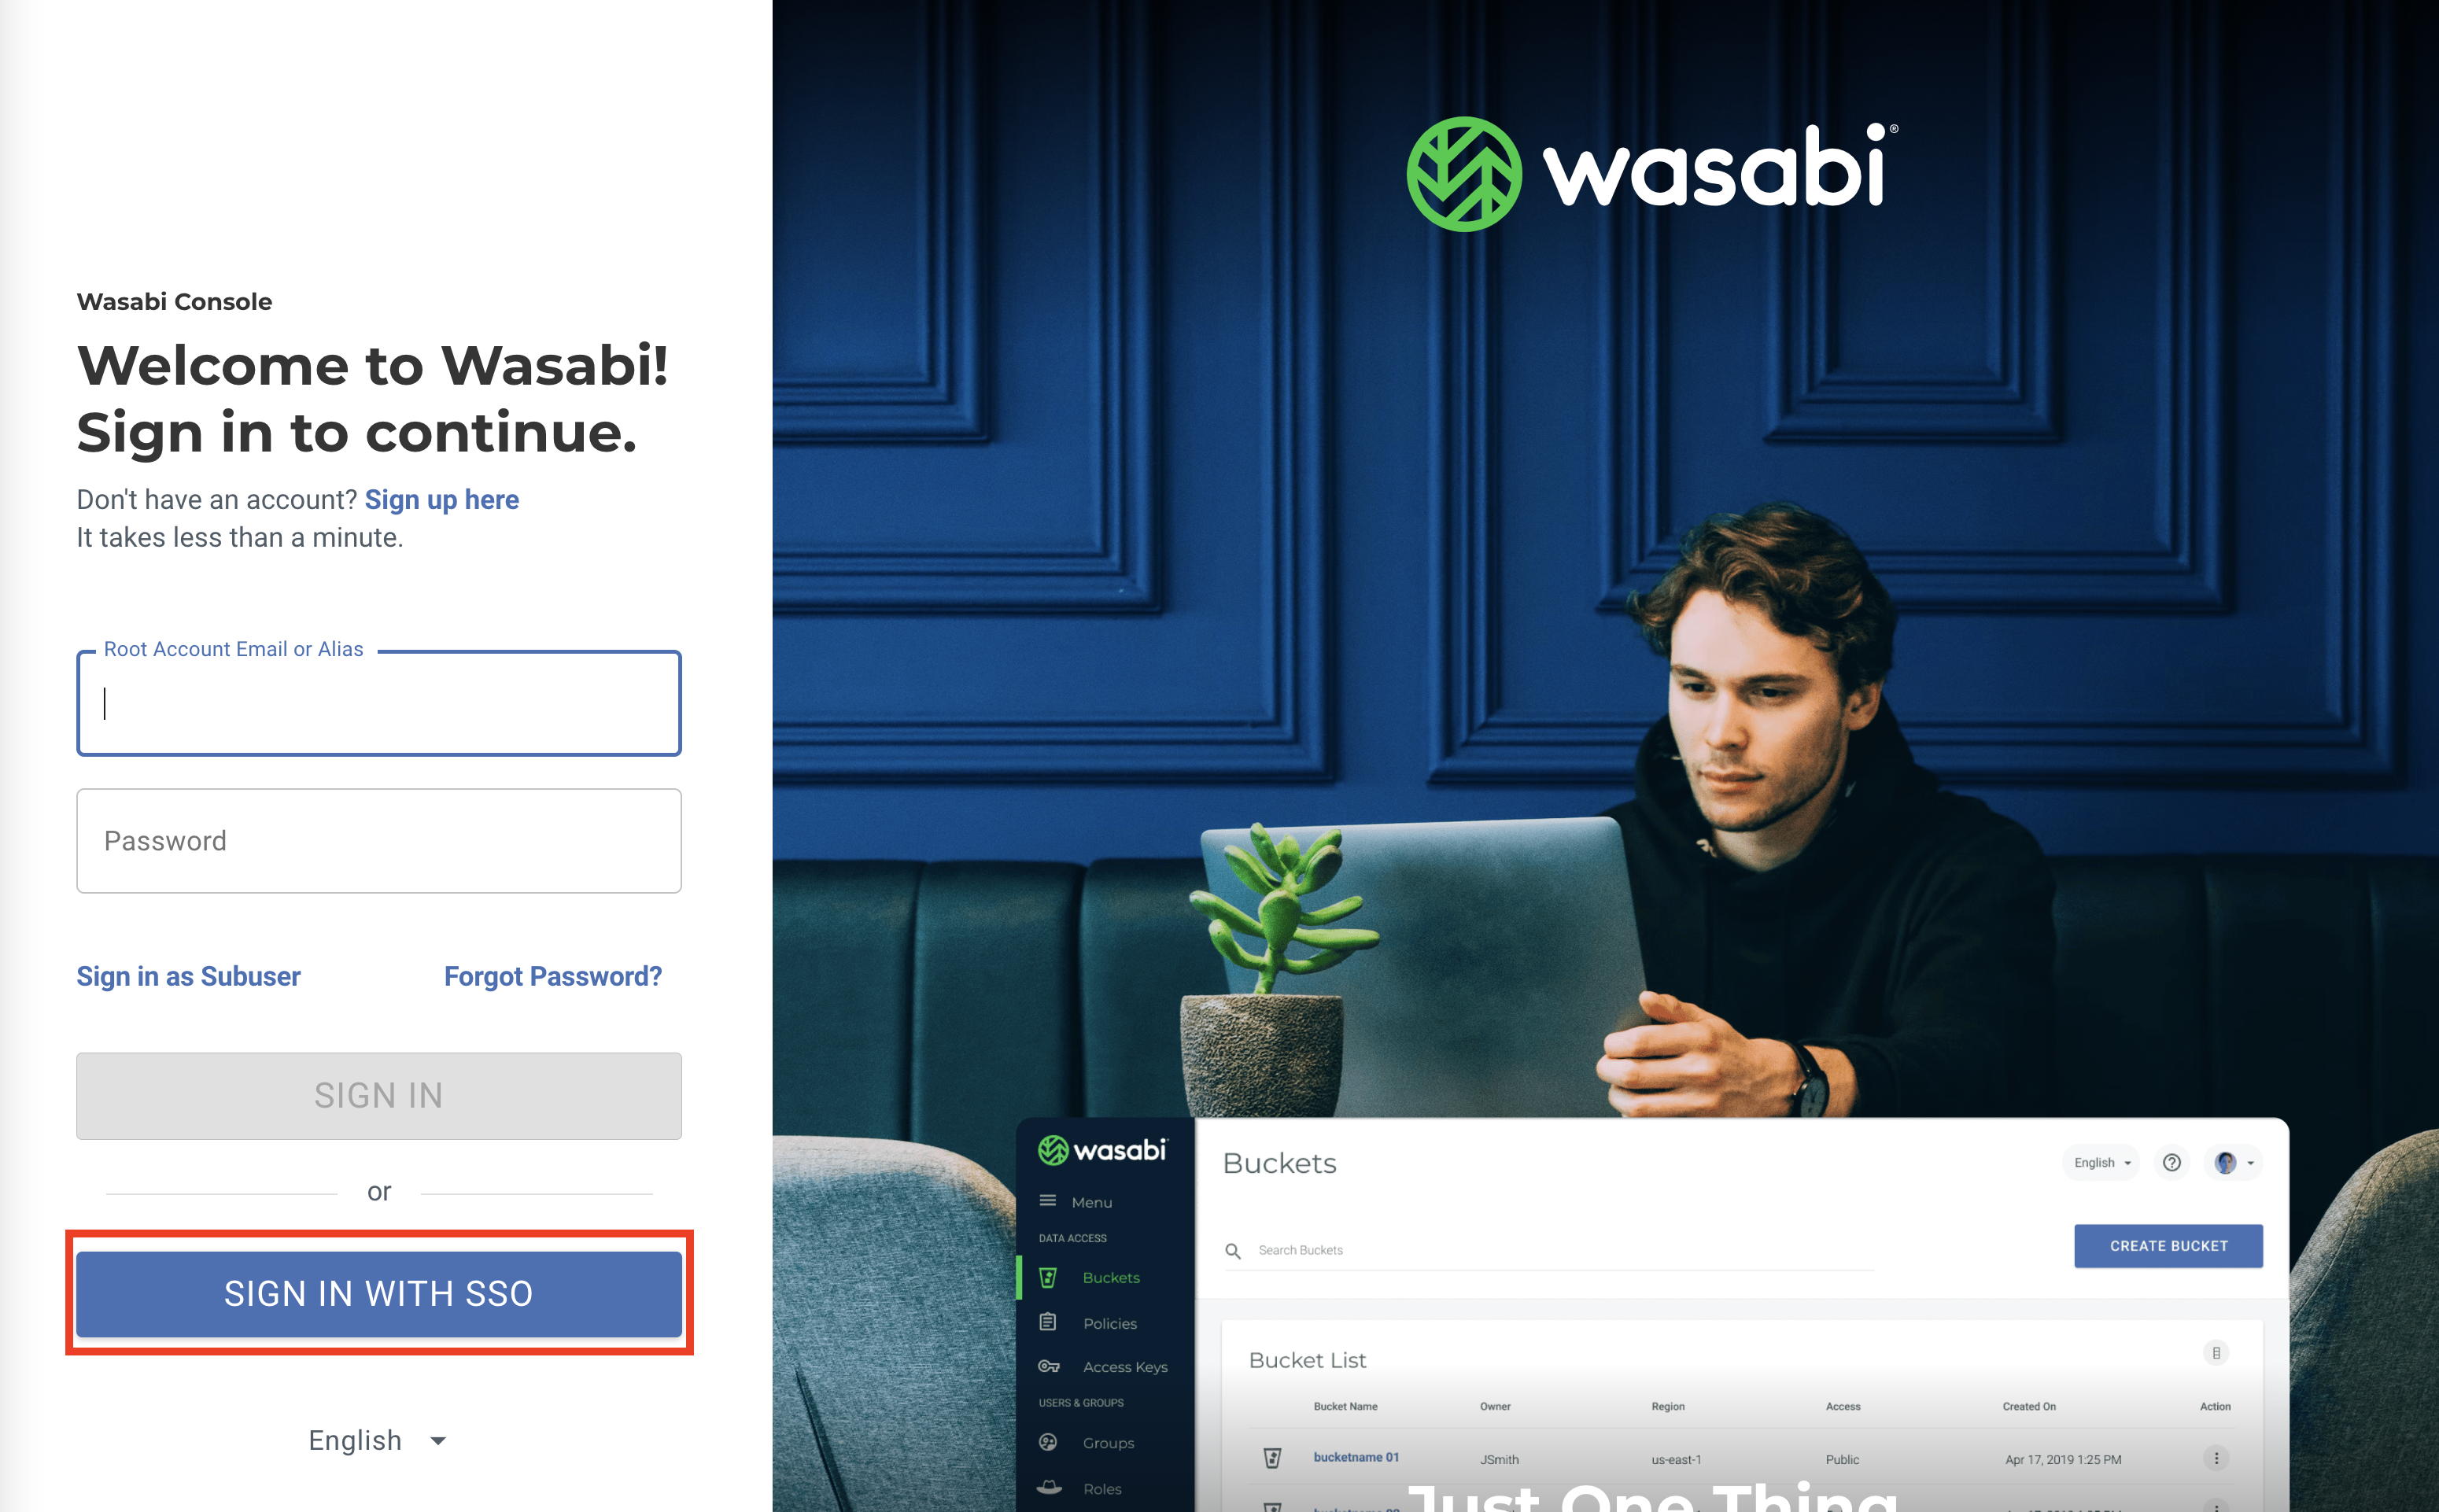
Click SIGN IN WITH SSO.
Click Sign In With an Organization Name.

Enter the name previously created. You will be redirected to the Pocket ID login page, where you will enter your login information.
In Pocket ID, navigate to My Apps, select the Wasabi-SSO tile, and then click Launch.
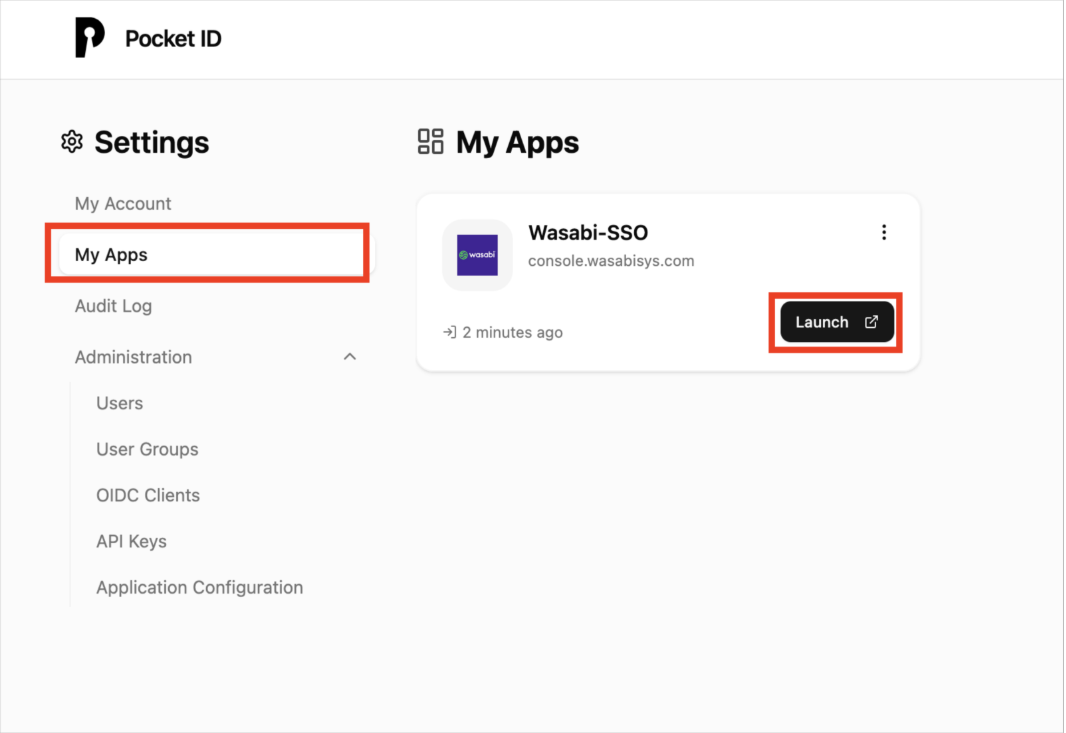
You will be redirected back to the Wasabi Console, where you can perform functions based on the user’s assigned role.