Wasabi offers Single Sign-On (SSO) for Wasabi enterprise and educational accounts using the Cisco Duo (Identity Provider) system, based on SAML 2.0 (Security Assertion Markup Language) standard.
This article provides configuration instructions for both the IdP administrator and the SSO user to properly configure and complete a Wasabi Console login using your Cisco Duo SSO service.
Configuring the SAML App in Cisco Duo (IdP Side)
Log in to your Cisco Duo portal (https://admin.duosecurity.com/login?) account with Admin credentials.
Select Users in the navigation menu and click Add User.
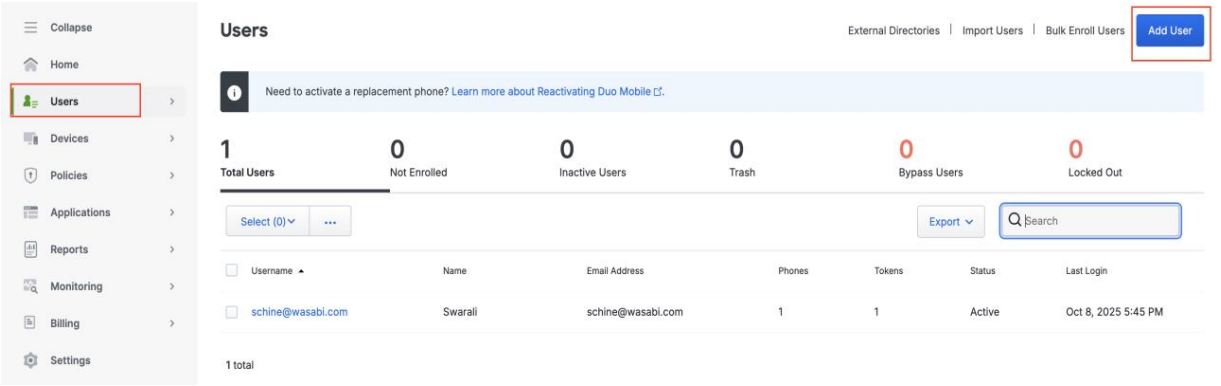
Assign the user in the Group name box, for example, Administrators.

Click Add users to group. The Groups pane is displayed.

In the Groups pane, click Add Group.

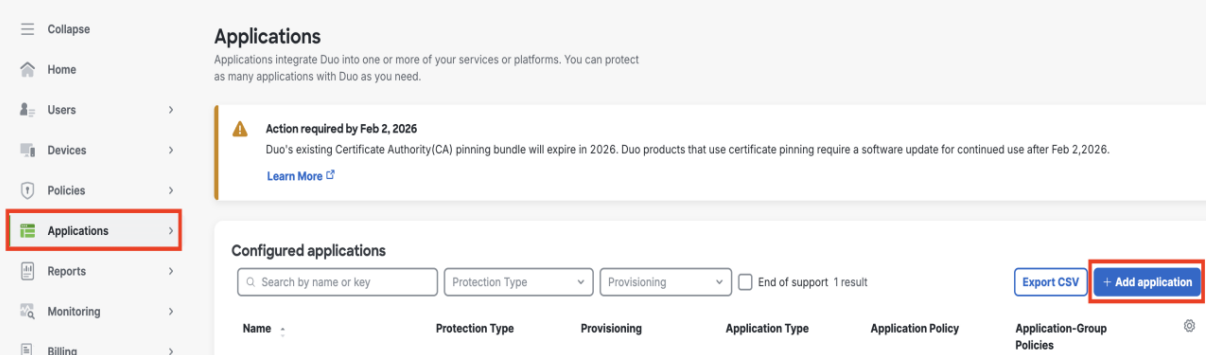
Navigate to Applications in the left menu. Click Add Application.
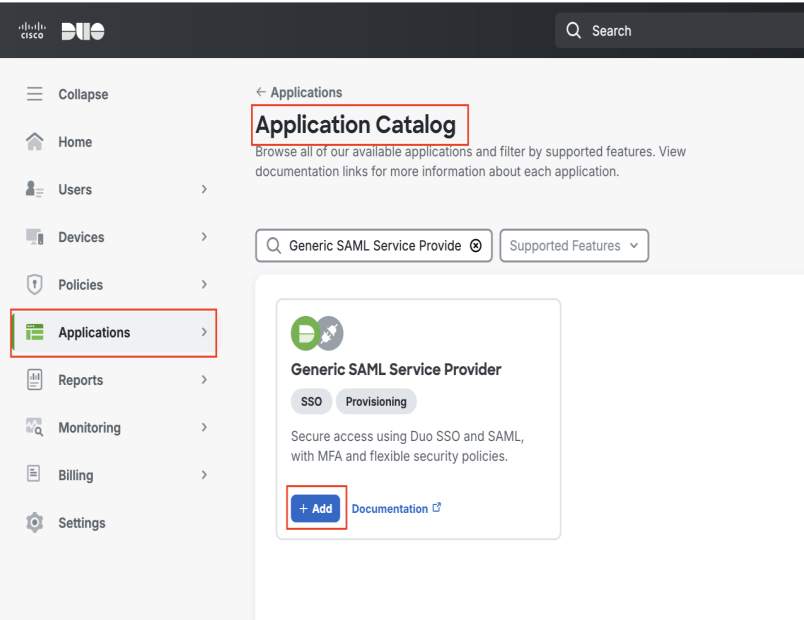
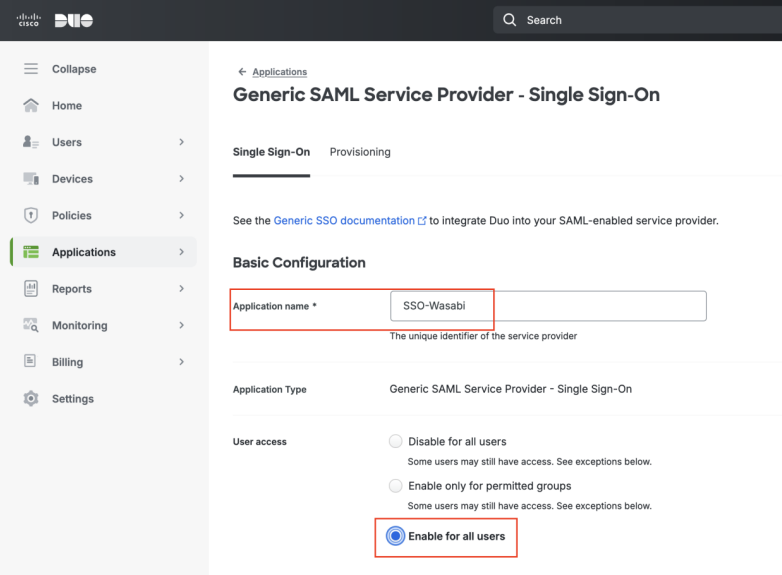
In the Application Catalog pane, search for “Generic SAML Service Provider,” then click Add.
Enter a name in the Application name box, for example, SSO-Wasabi.
Select the User access option, as required.
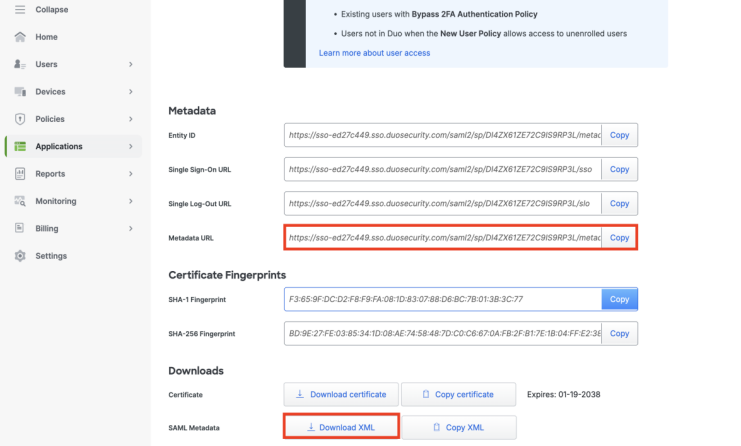
Scroll down to the Metadata section and select SAML Metadata URL and click Download XML. Also, copy the URL for later use in the Wasabi Console.
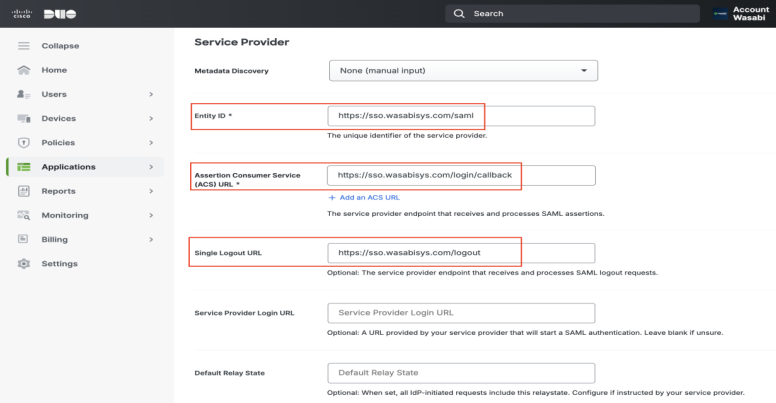
Scroll down to the Service Provider section and copy the following URLs into the appropriate box:
Entity ID—https://sso.wasabisys.com/saml
Assertion Consumer Service (ACS) URL—https://sso.wasabisys.com/login/callback
Single Logout URL—https://sso.wasabisys.com/logout
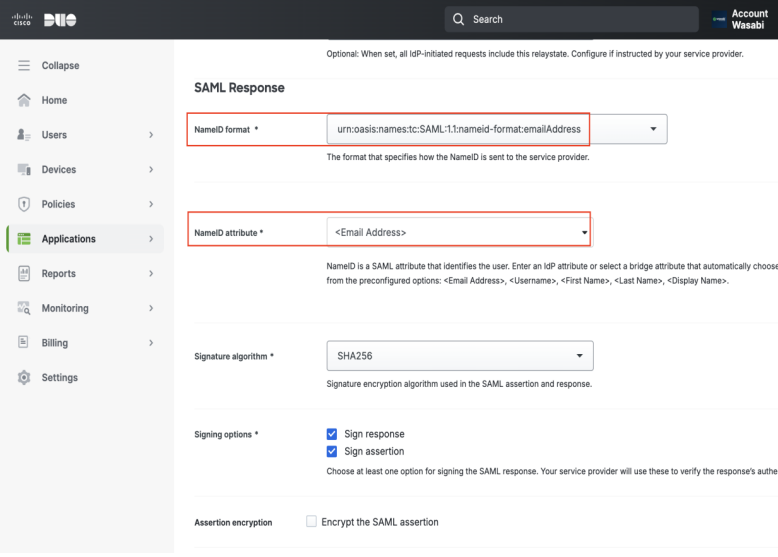
Scroll down to the SAML Response section and select the following drop-down options:
NameID format—urn:oasis:names:tc:SAML:1.1:nameid-format:emailAddress
NameID attribute—<Email Address>
Scroll down to the attributes sections and add the following:
IdP Attribute—<User Attribute>
SAML Response Attribute—groups
Attribute name—groups (must match the SAML Response Attribute). The user you select to access the Wasabi Console must be part of this group.
Service Provider Role—Administrators
Make note of the Service Provider role name you created. Do not use spaces in the role name as you will use this name for authentication in the Wasabi Console.
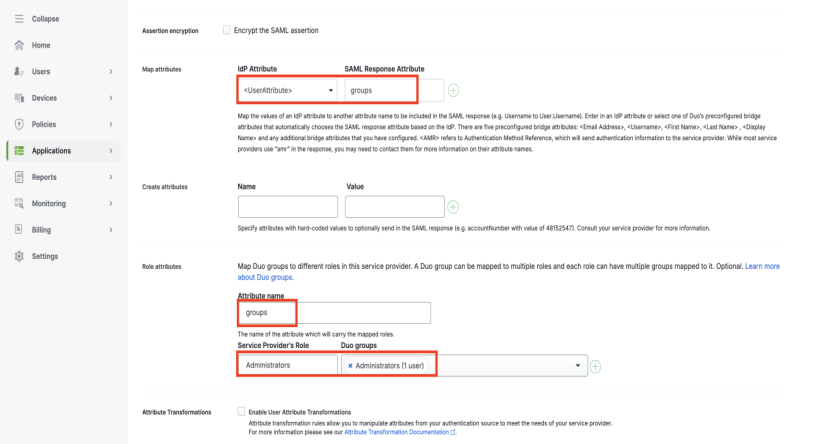
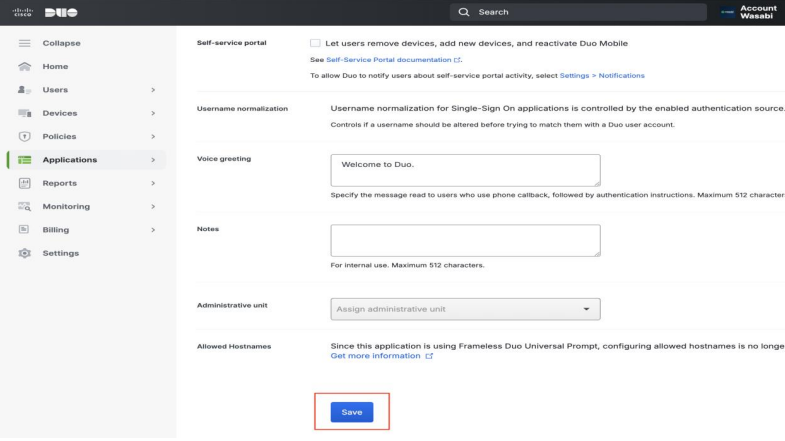
Leave the remaining settings at their defaults. Click Save.
Configuring SAML Settings in Wasabi Console (SP / Client Side)
Sign in to the Wasabi Console (https://console.wasabisys.com/login) using a root account email.
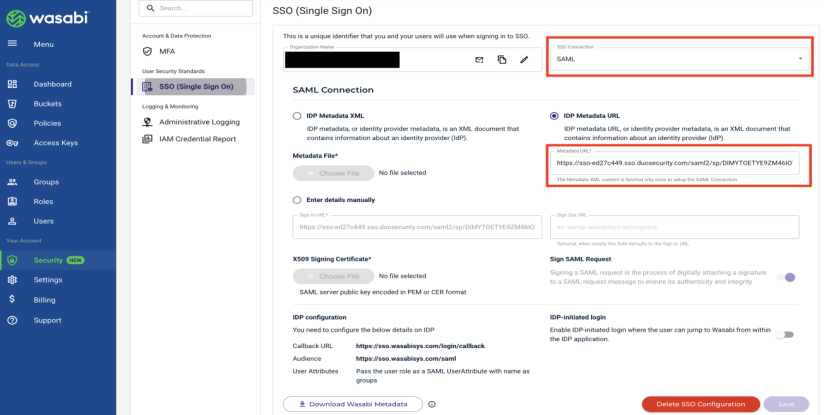
Select Security in the left menu, then select SSO (Single Sign-On).
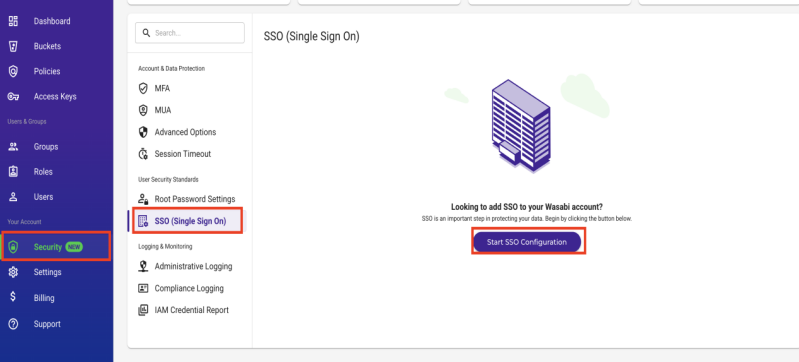
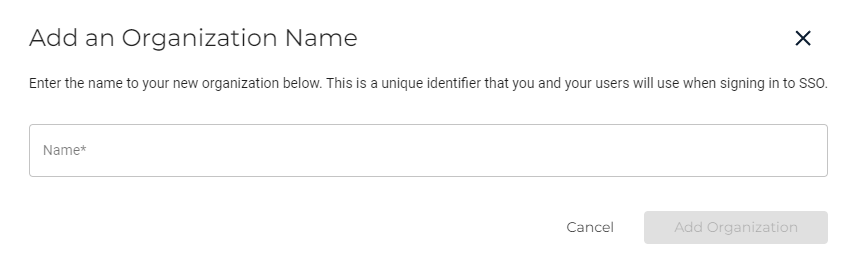
Click Start SSO Configuration. The Add an Organization Name dialog is displayed. Enter your organization’s unique name and click Add Organization.
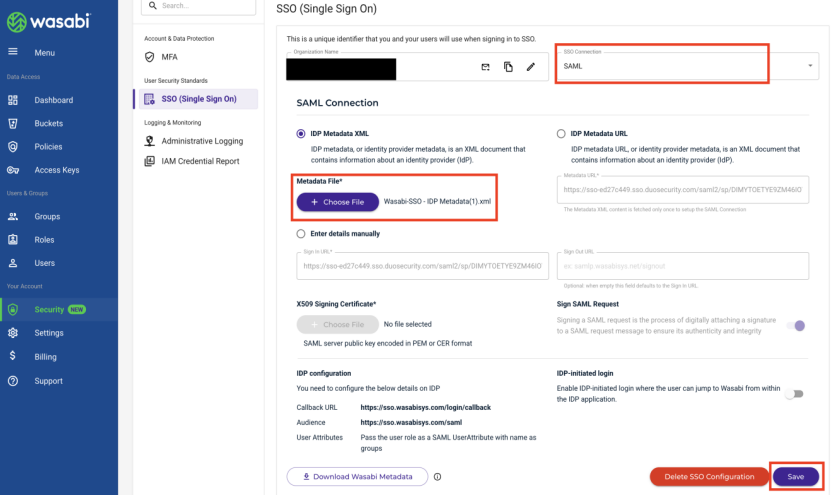
In the SSO (Single Sign On) pane, select SAML from the SSO Connection drop-down, then paste the previously copied SAML Metadata URL into the IDP Metadata URL box. Click Save.
If you previously chose to download the SAML Metadata XML file, select Choose File and select the XML file. Click Save.
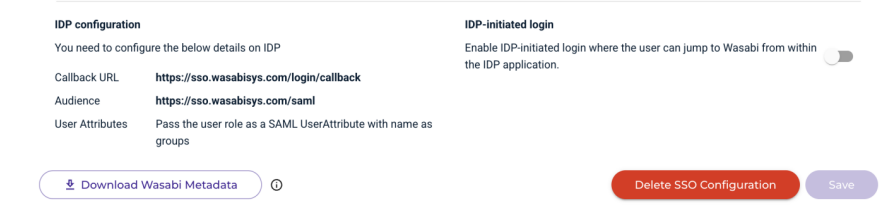
In the SSO Single Sign-On tab, select Settings to create an SSO role. This SSO role will be used in the Wasabi Console and assigned to users within your organization’s identity provider, and will be returned to Wasabi in SSO claims. It is used to match a user with a role.
Do not create the role through the Role tab on the left. SSO roles must be created using the SSO tab in the Settings section.
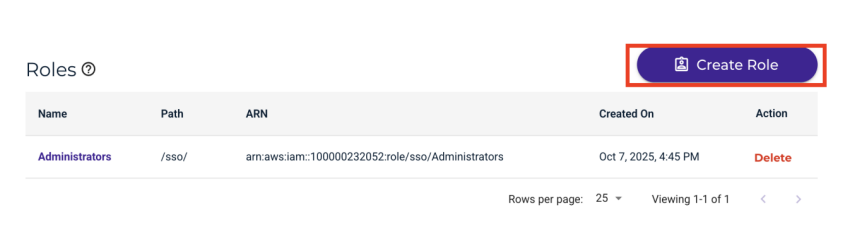
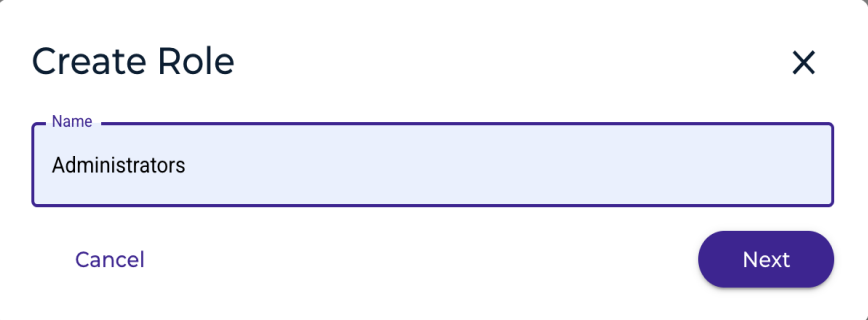
Click Create Role. The Create Role pane is displayed.
Enter the Cisco role name previously created in “Service Provider’s Role” in the Role Attributes section. Click Next.
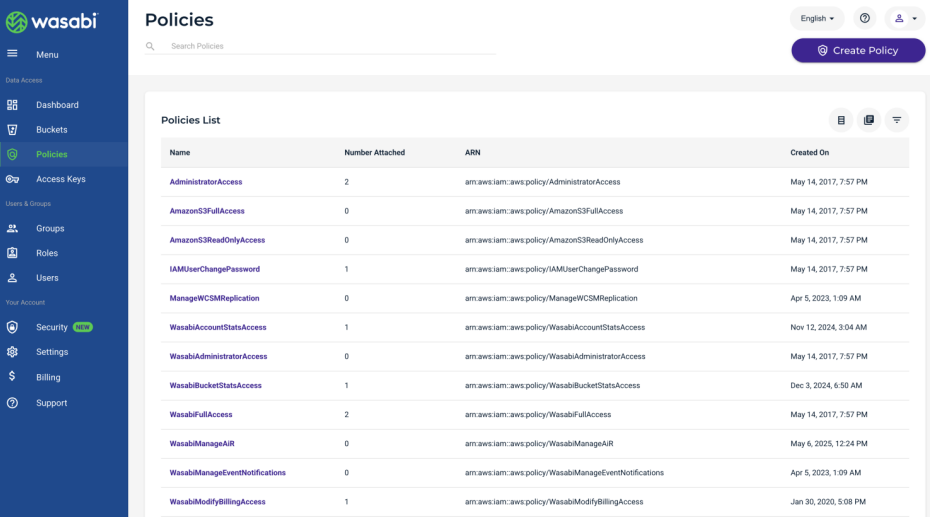
Assign a Policy to this role to give the user specific access. You can assign multiple policies to the user role. Review Policies in Wasabi Hot Cloud Storage for a description of the default policies available in the Wasabi Console. Refer to Creating and Deleting a Policy to create your own IAM policies. Click Create Role when finished.
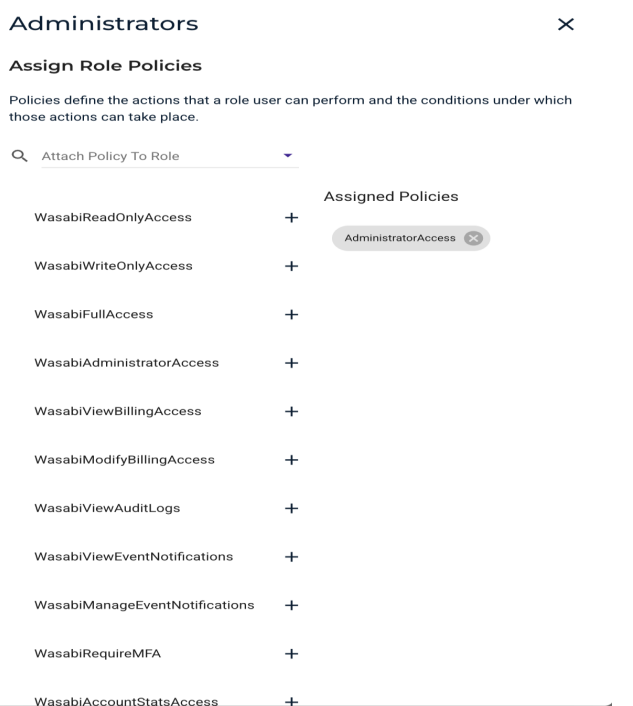
You can attach any Wasabi-managed or user-managed policy based on your requirements. This example uses the AdministratorAccess policy.
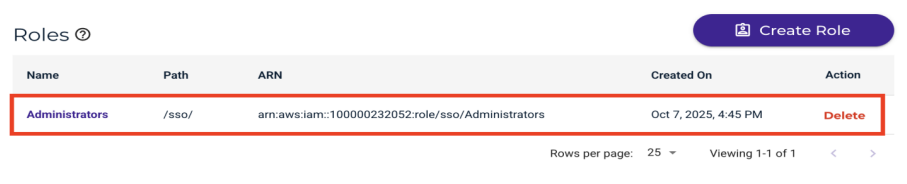
You can view the Wasabi role you have created in the SSO tab. For example:
Testing the Integration
Sign in to the Wasabi Console (https://console.wasabisys.com) to test the SSO configuration.

Click SIGN IN WITH SSO.
Click Sign In With an Organization Name.

Enter the name previously created. You will be redirected to the Cisco Duo login page, where you will enter your login information. You will be redirected back to the Wasabi Console, where you can perform functions based on the user’s assigned role.
In the Wasabi Console, you will see the AdministratorAccess policy created, for example.