Xen Orchestra has been validated for use with Wasabi. Xen Orchestra is a management tool dashboard for the XCP-ng hypervisor which allows you to manage your virtual machine deployments, lifecycle, and backups. For more information, refer to Xen Orchestra in a nutshell.
Prerequisites
Wasabi Hot Cloud Storage Account
Wasabi Bucket - See Creating a Bucket
Be sure to note your bucket name, storage region URL, and Access & Secret Key, as you will need these for later steps.
XCP-ng Installed (8.3 LTS as of this documentation) - See Installing XCP-ng
Xen Orchestra Installed (Version 6.0.3 as of this documentation). See Installing Xen Orchestra
Xen Orchestra Essential Edition License or better - See Vates Pricing Page
Configuring Wasabi Remote in Xen Orchestra
To configure your Wasabi bucket as a Remote in Xen Orchestra, follow the steps below.
Log in to your Xen Orchestra dashboard.
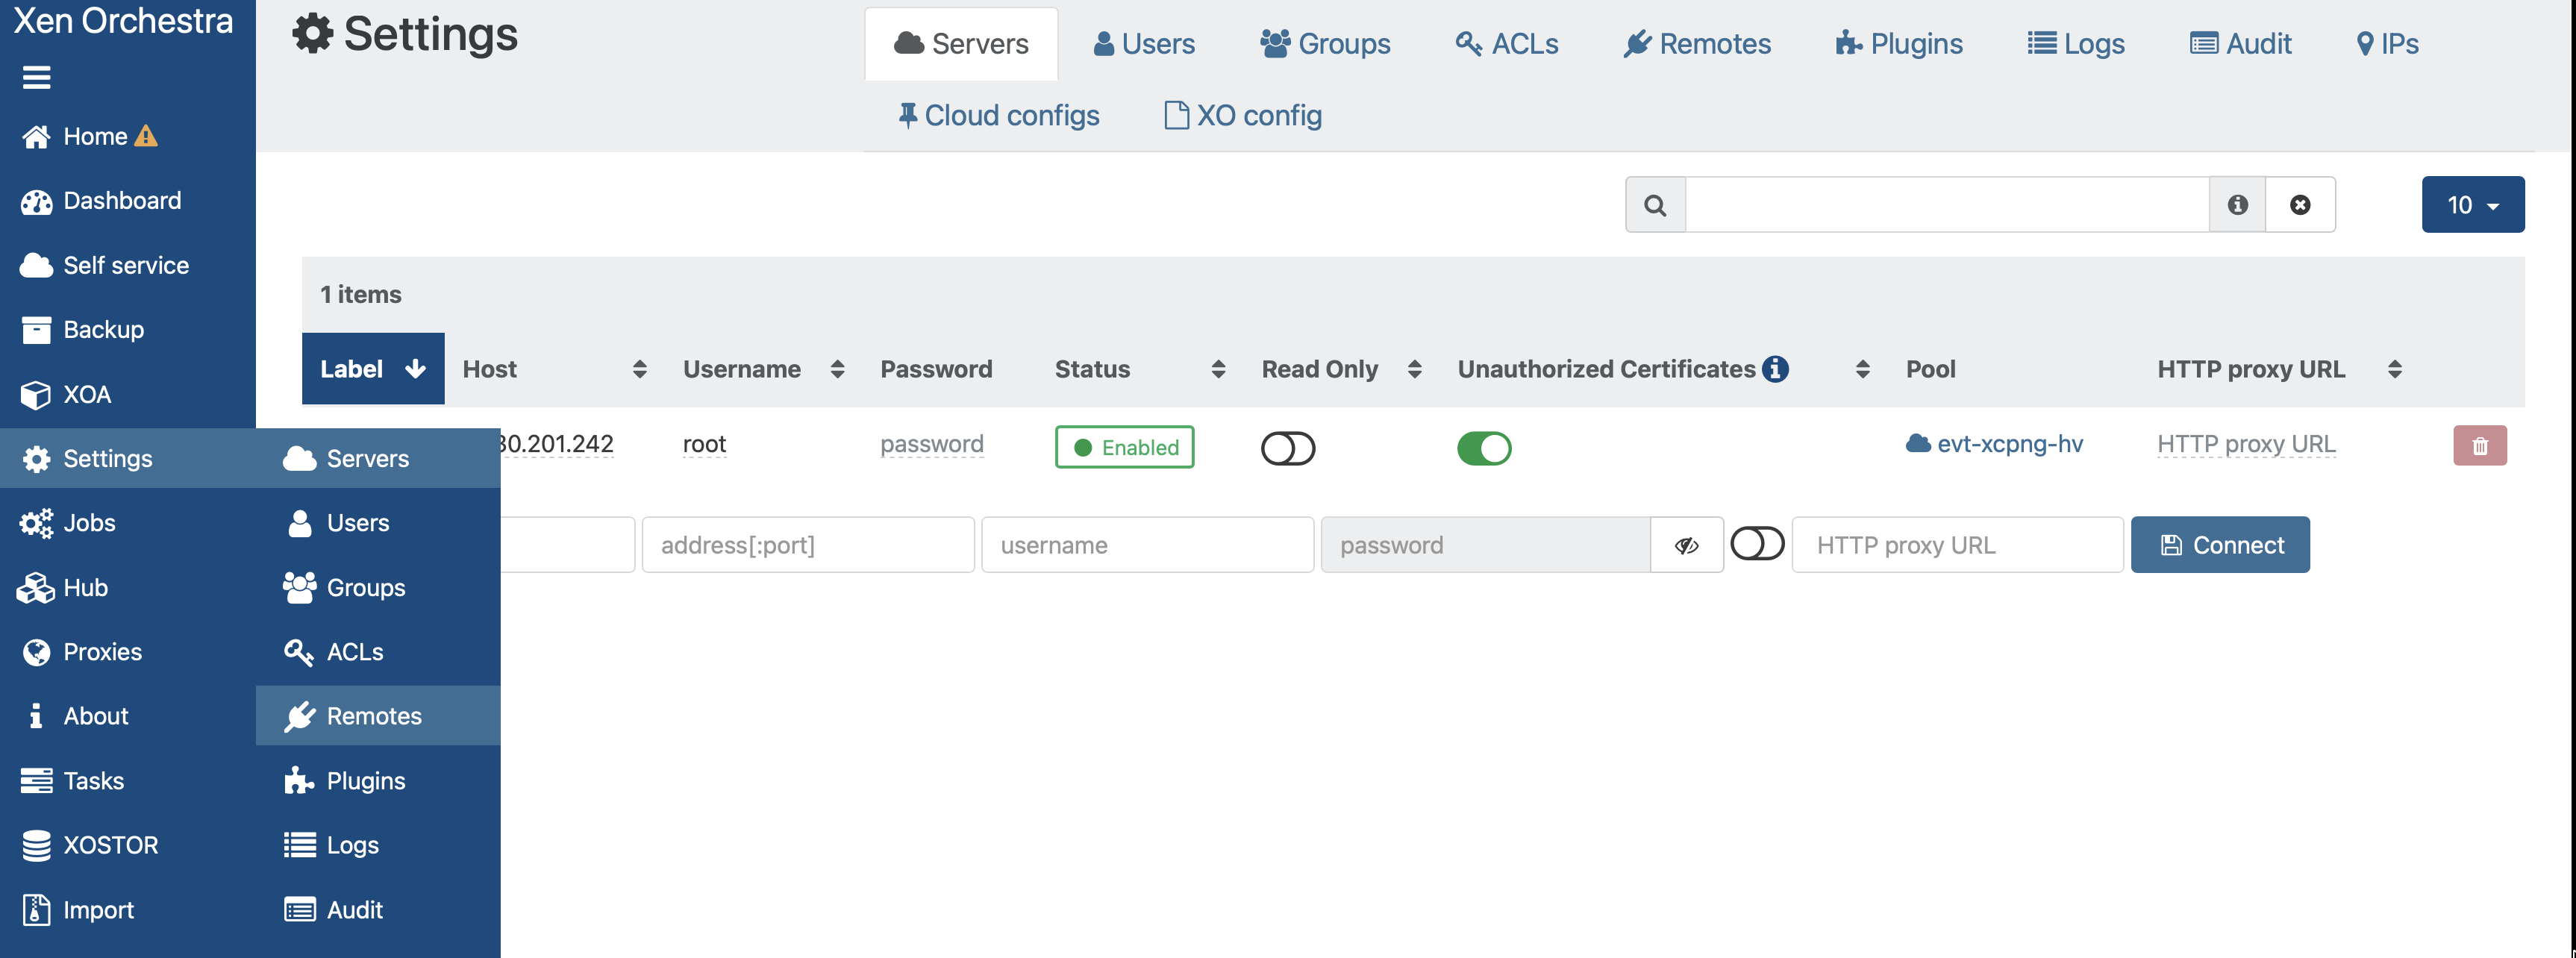
Select the Settings tab on the left-hand panel of the Xen Orchestra Dashboard, then click Remotes from the pop-out menu.
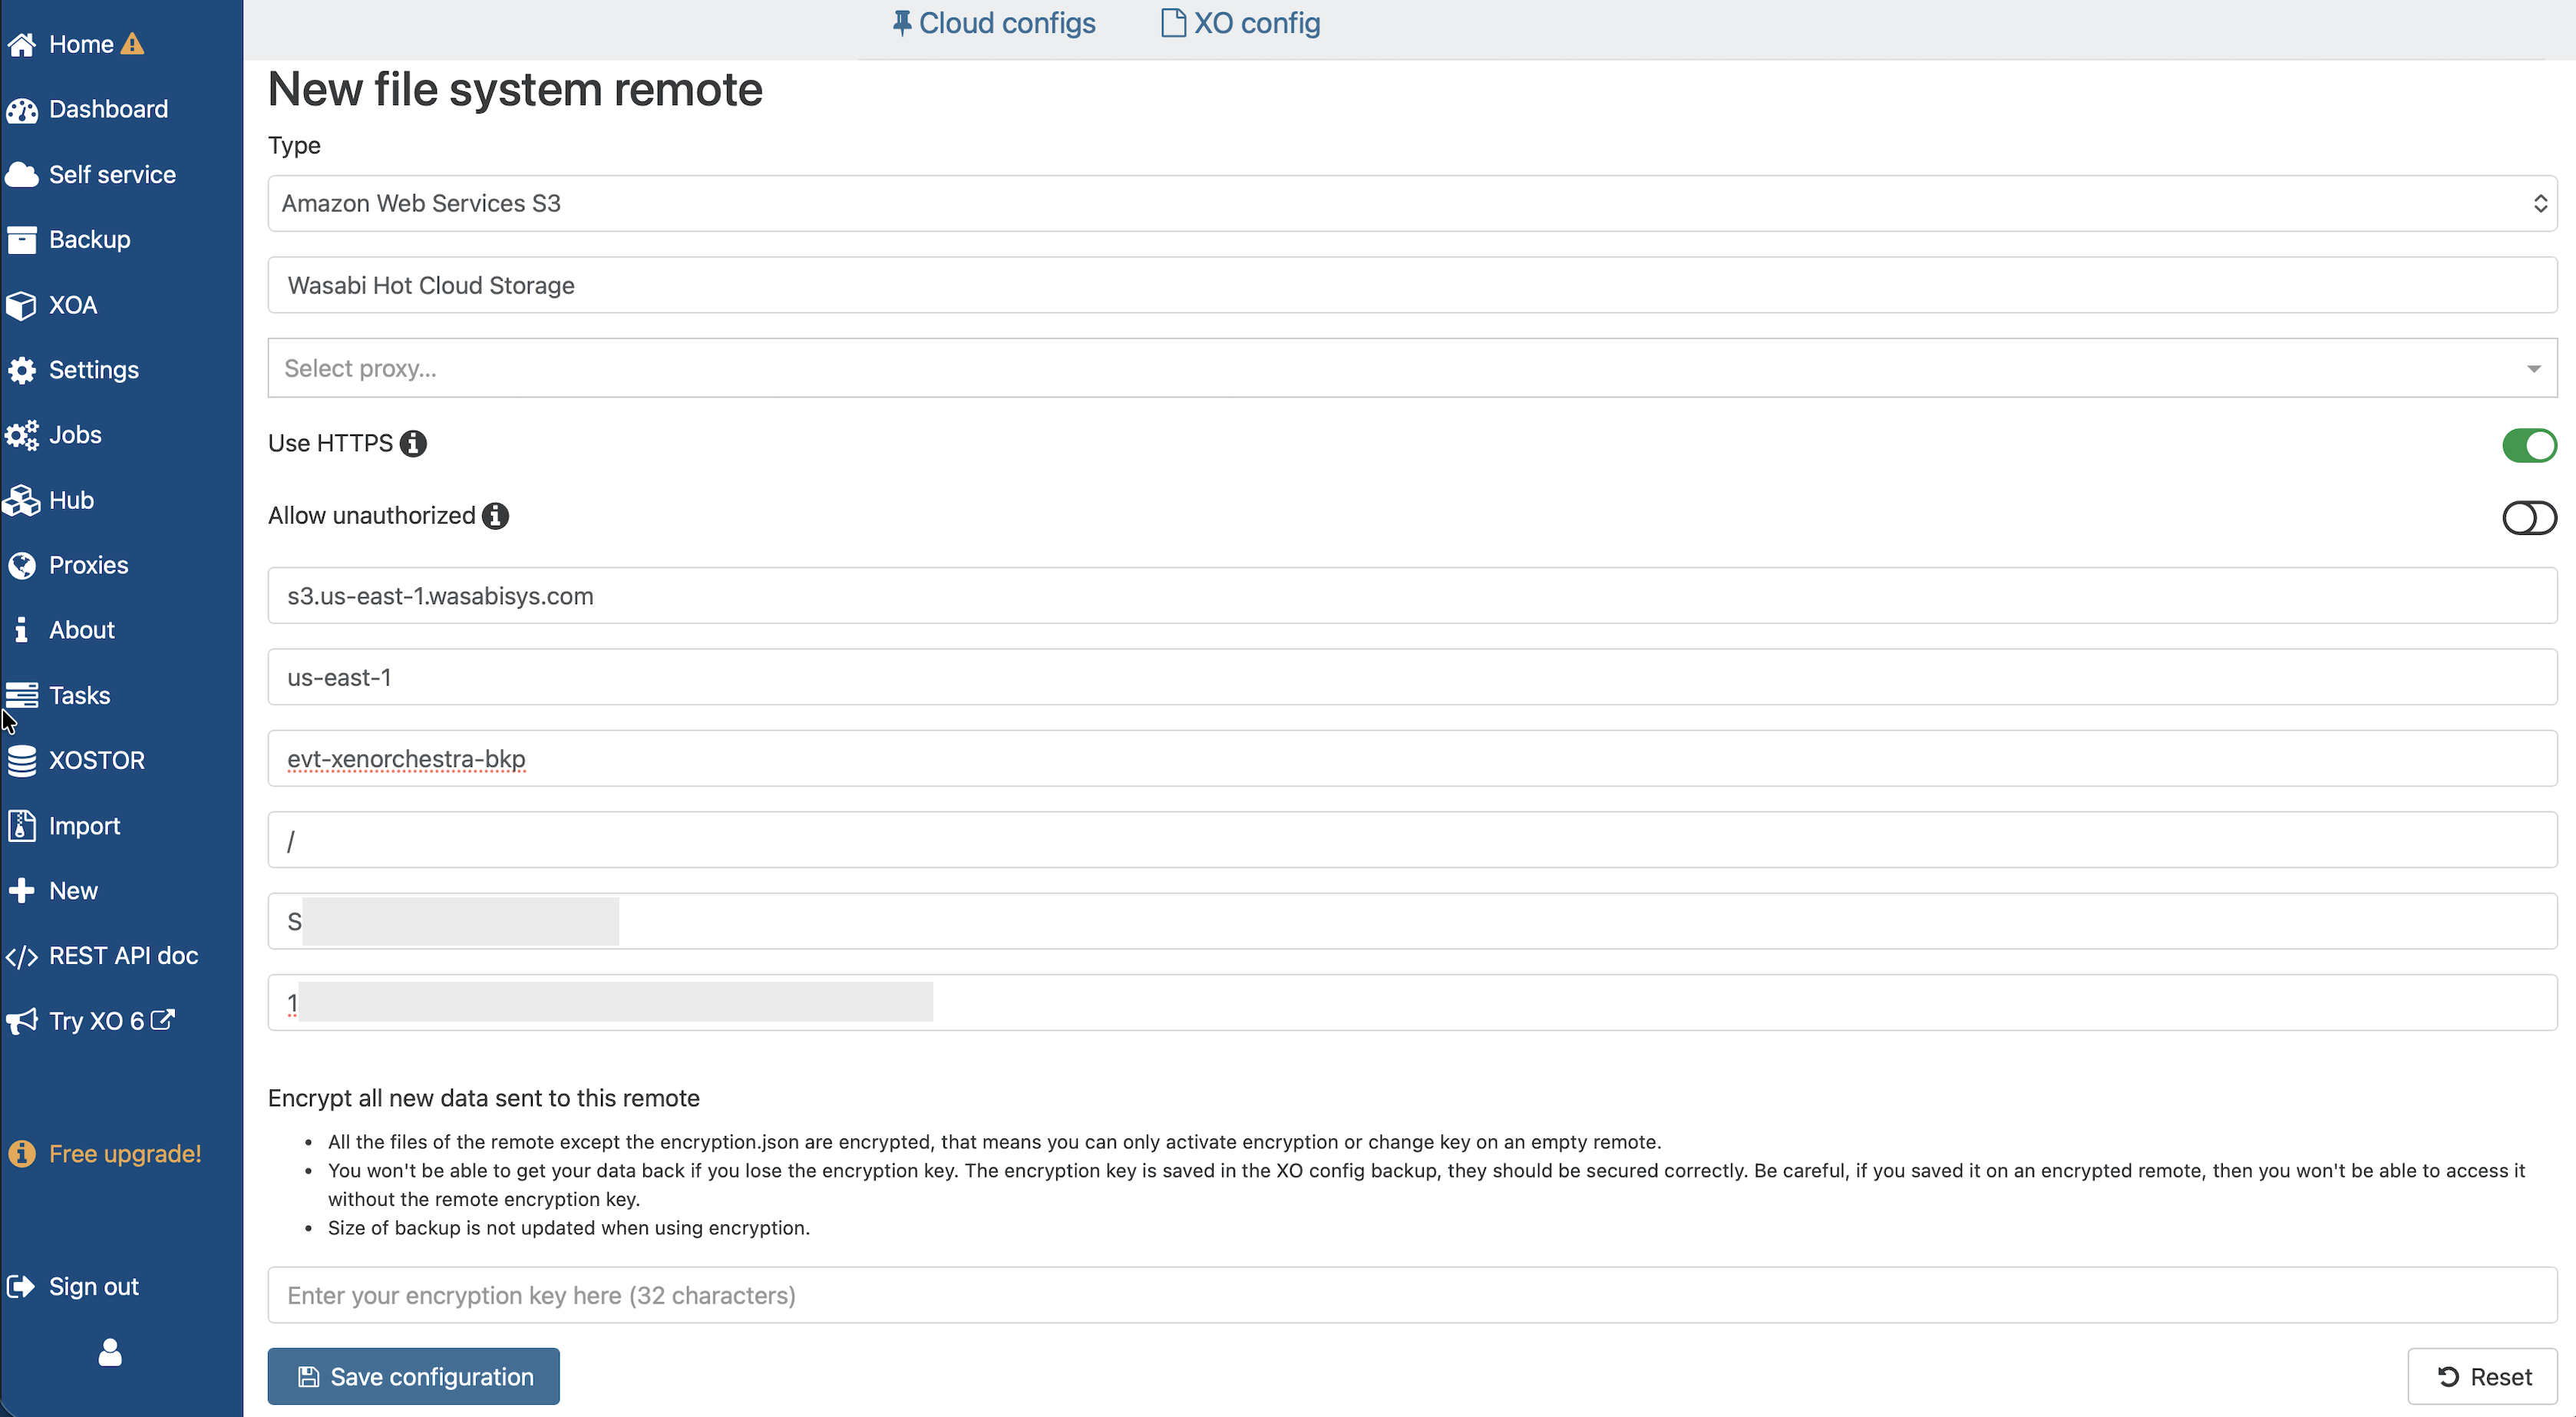
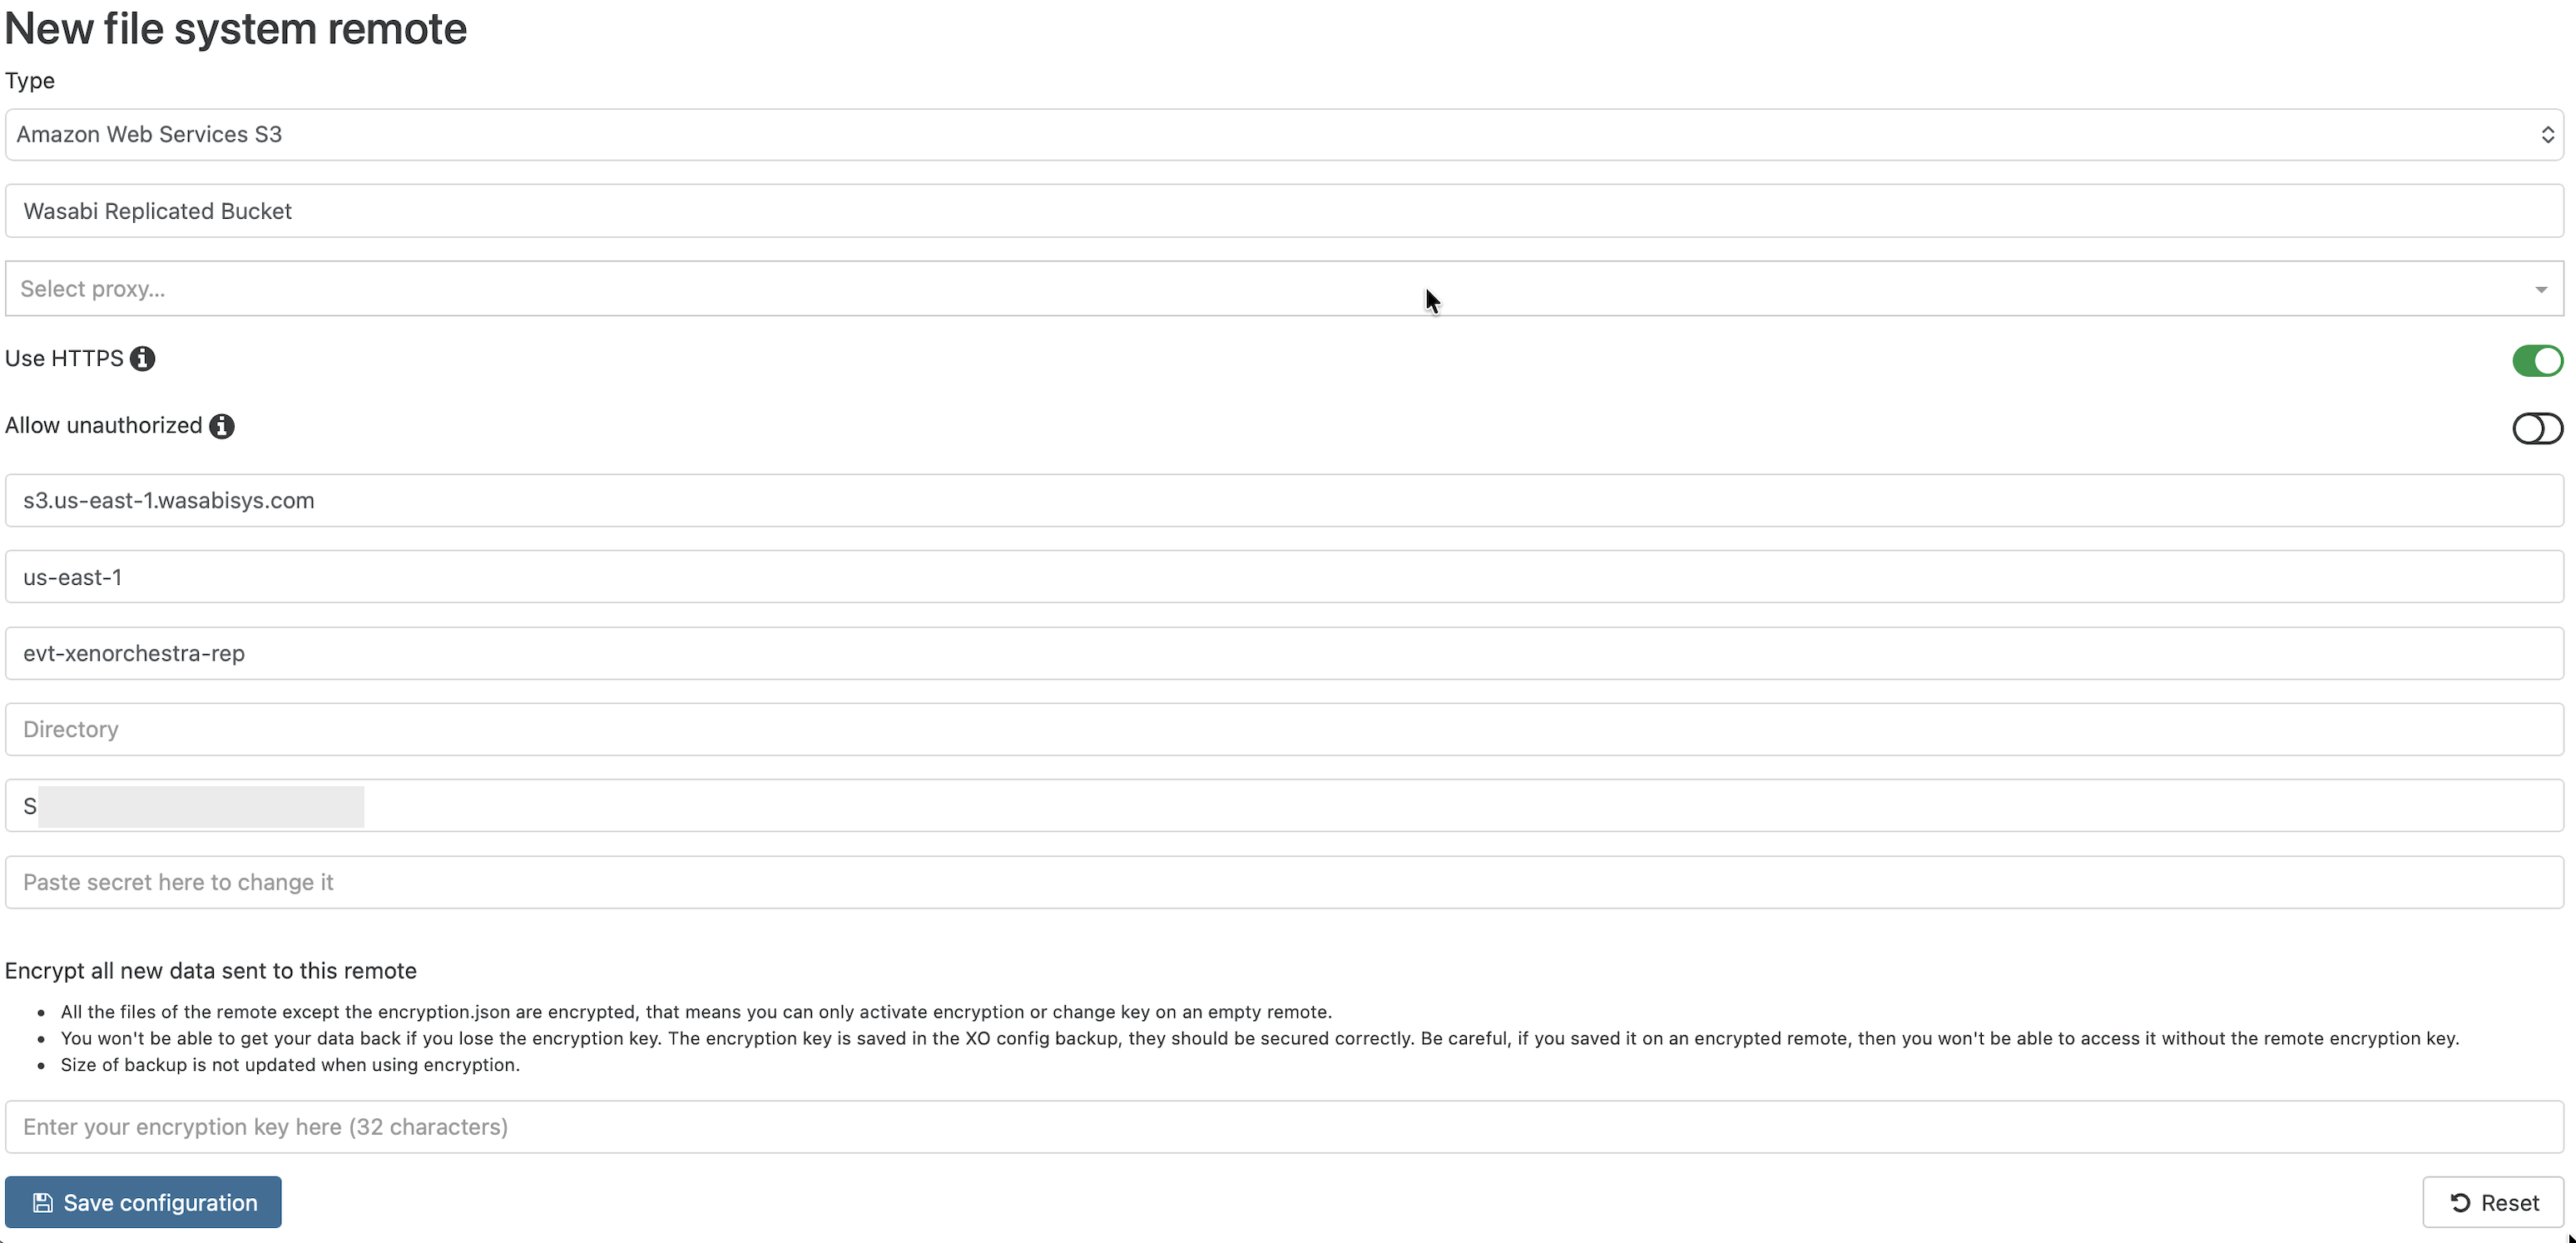
3. Input the following information to configure your Remote Storage in Xen Orchestra.
Select Amazon Web Services S3 from the Type drop-down.
Input a name to identify your Remote.
Optionally, configure a Proxy Server.
Enable Use HTTPS.
Be sure to disable Allow Unauthorized.
Input the Service URL for your Wasabi Bucket Storage Region (in this example: s3.us-east-1.wasabisys.com).
Input the Storage Region code for your Wasabi Bucket (in this example: us-east-1).
Optionally, specify a directory in the bucket (in this example, we use the bucket root, “/”).
Input your Wasabi Access & Secret Keys.
Optionally, input an encryption key.
Finally, click Save Configuration.
This configuration example discusses the use of Wasabi's us-east-1 storage region. Use the region your bucket is located in. For a list of regions, see Service URLs for Wasabi's Storage Regions.
Your new Remote will appear on the Remotes page.

Configuring a Backup Job
Click the Backup tab on the left-hand panel of the Xen Orchestra Dashboard, then click + New from the pop-out menu.
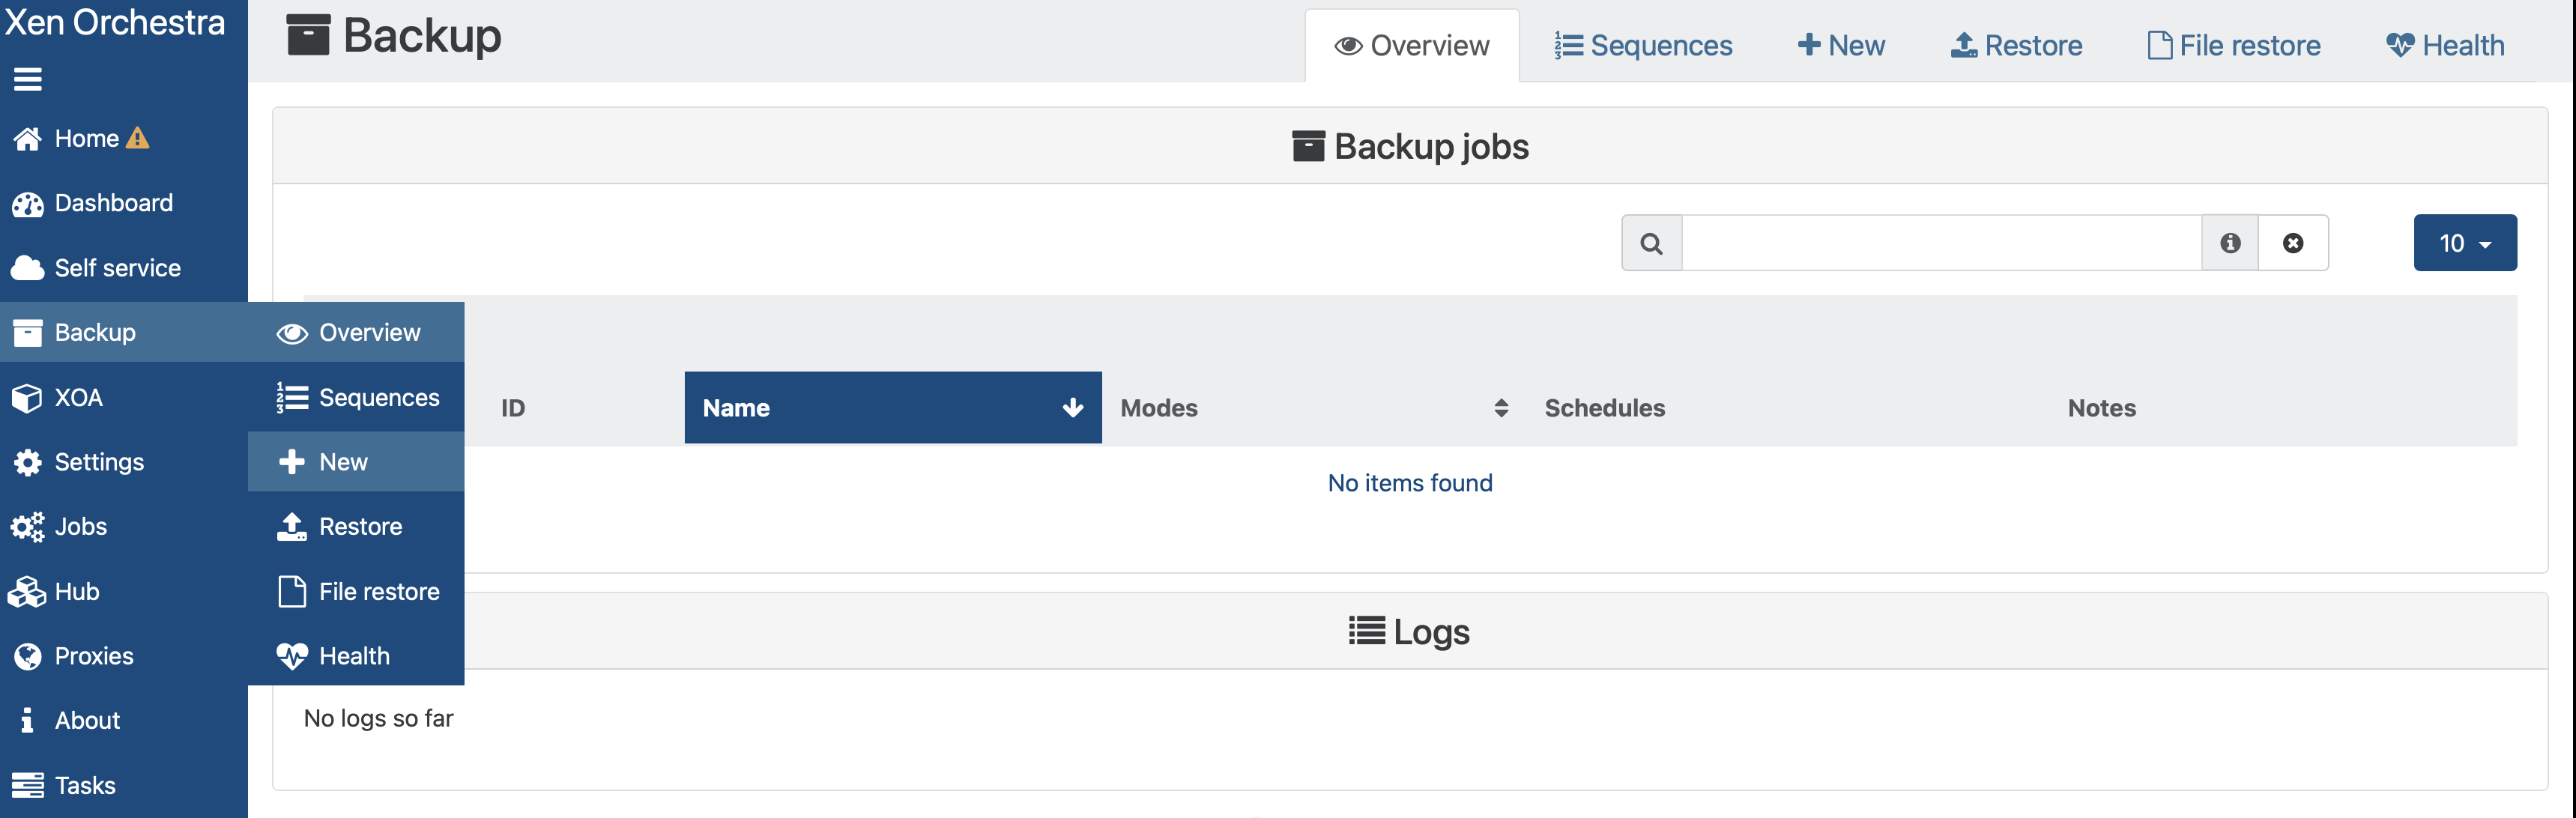
Click VM Backup & Replication.

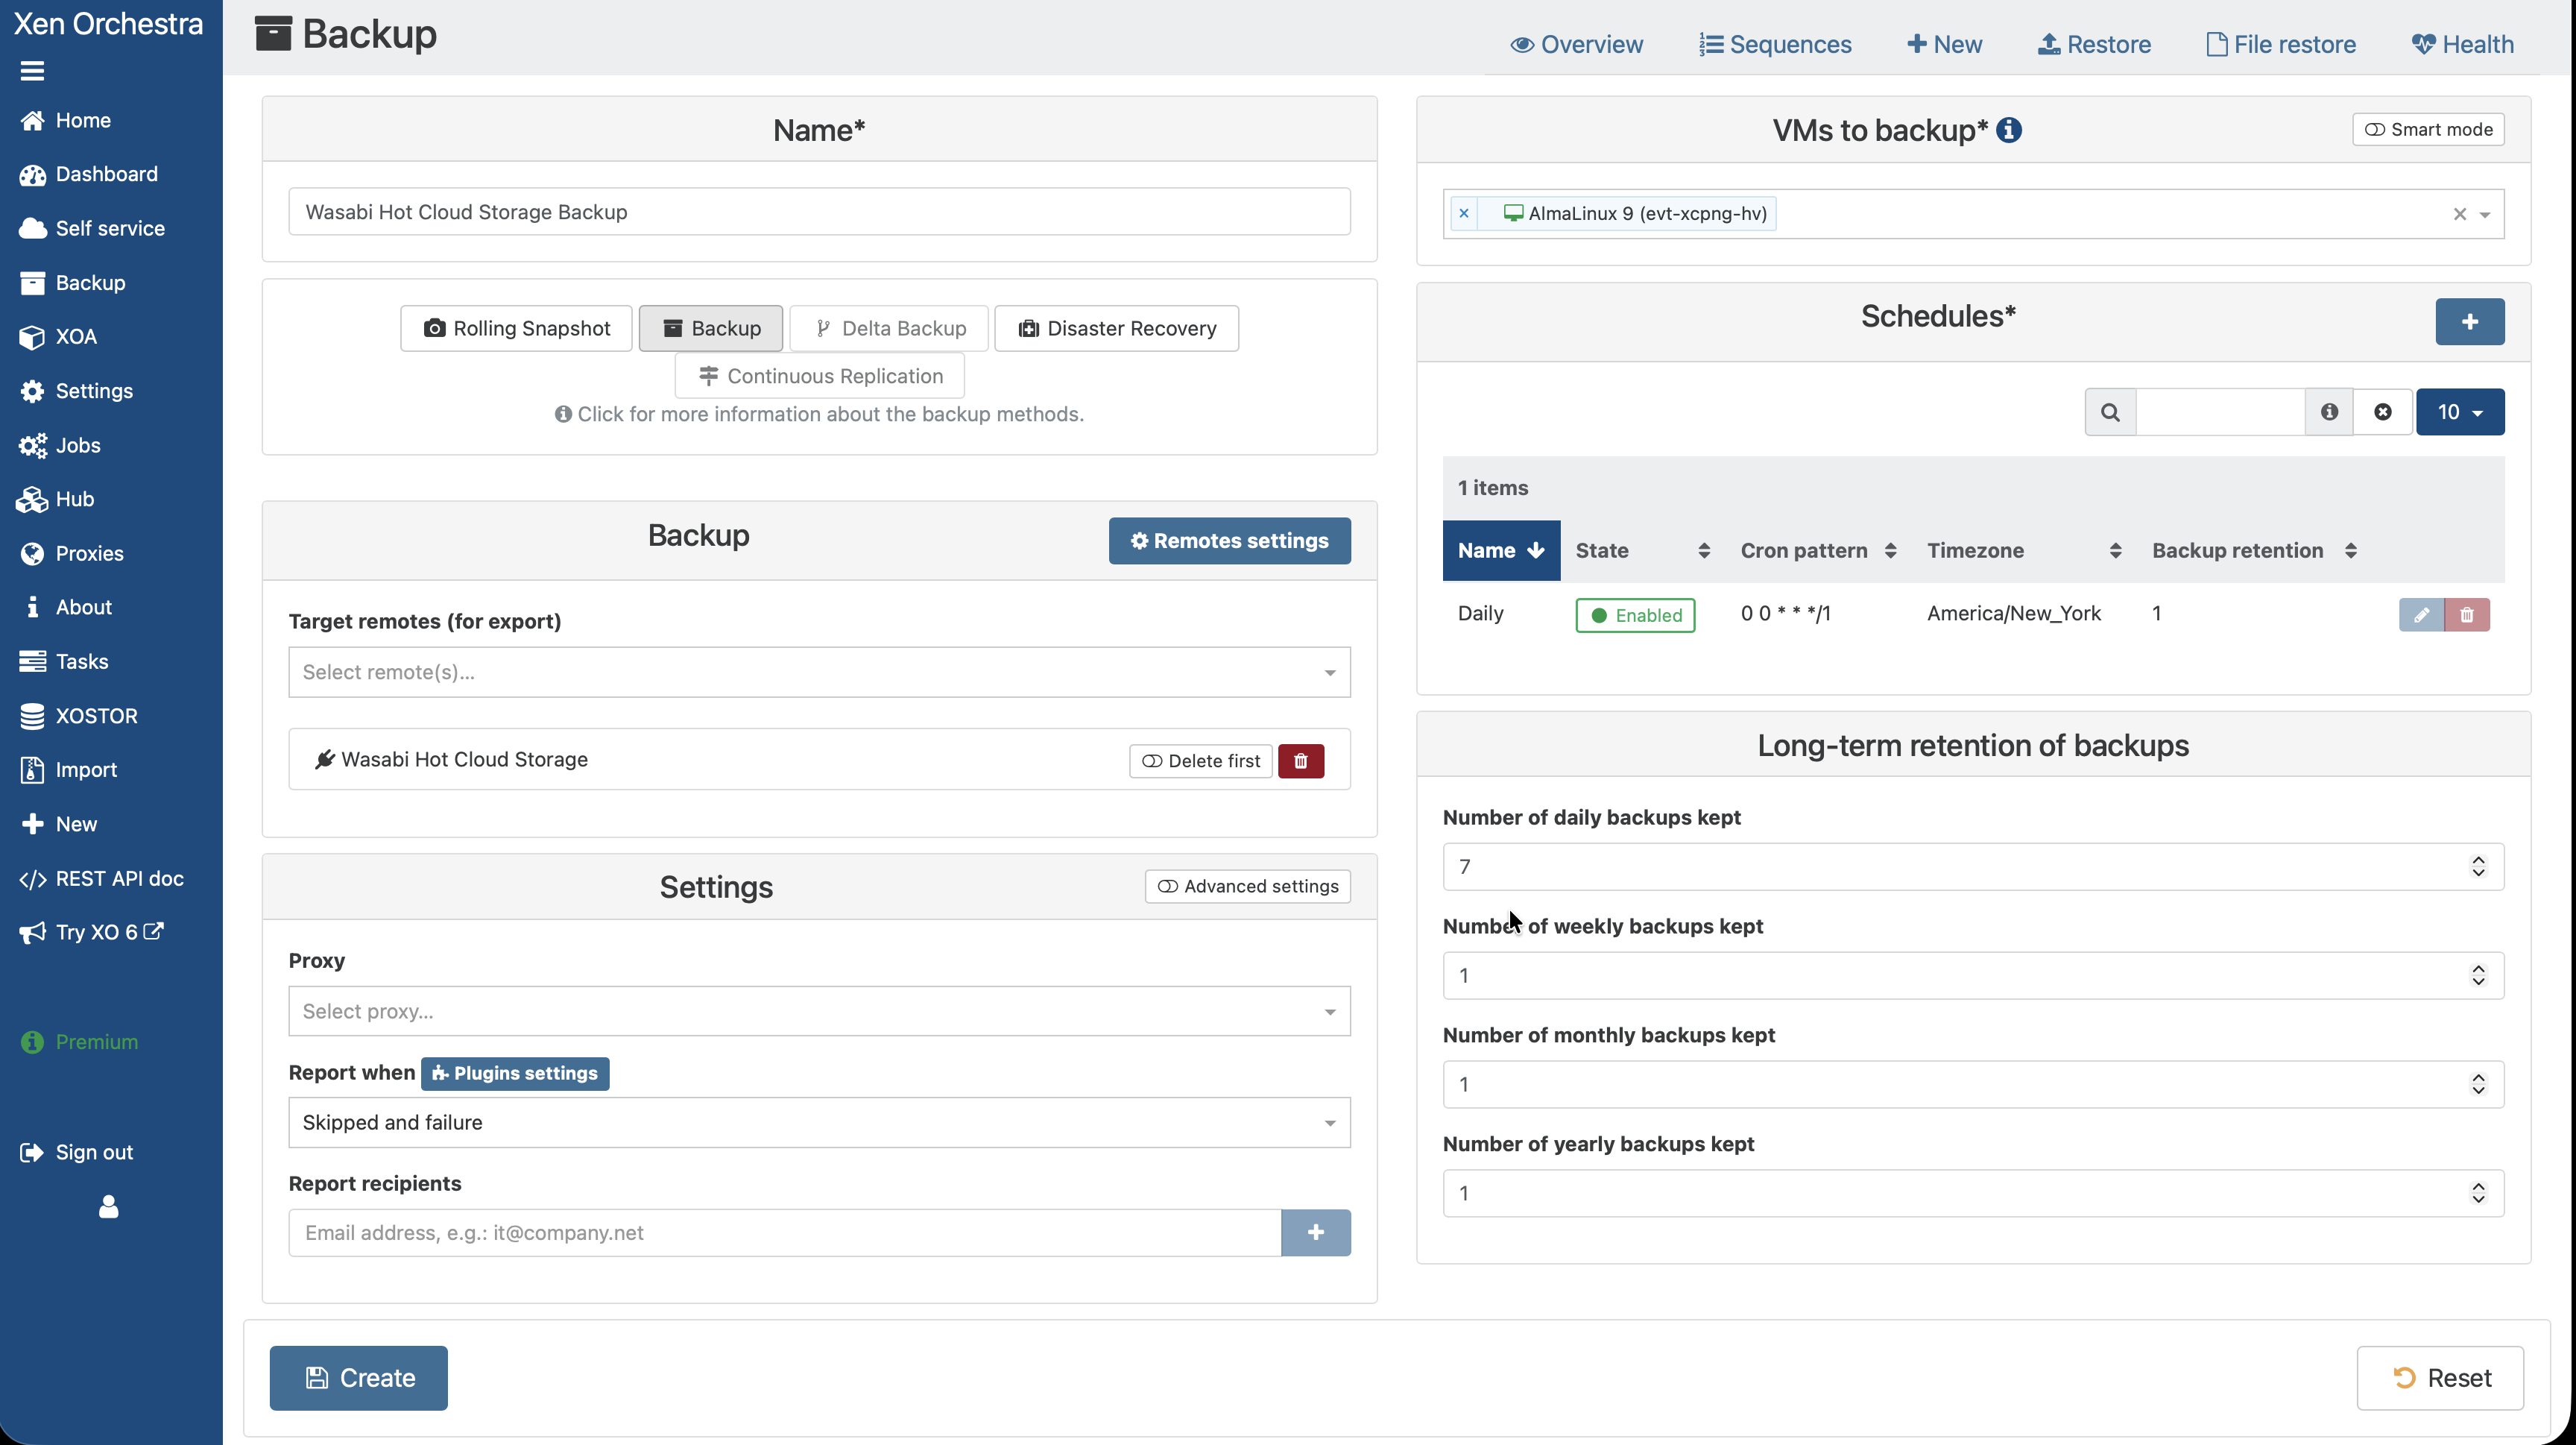
On the Backup page, configure the following.
Input a friendly name for your backup job.
Choose your prior configured Wasabi Remote as the target.
Choose your VM to back up.
Set a Schedule for your backup job.
Optionally, set up reporting for backup skips/failures.
Optionally, configure long-term retention policies in line with your organizational backup strategy.
Finally, click Create.
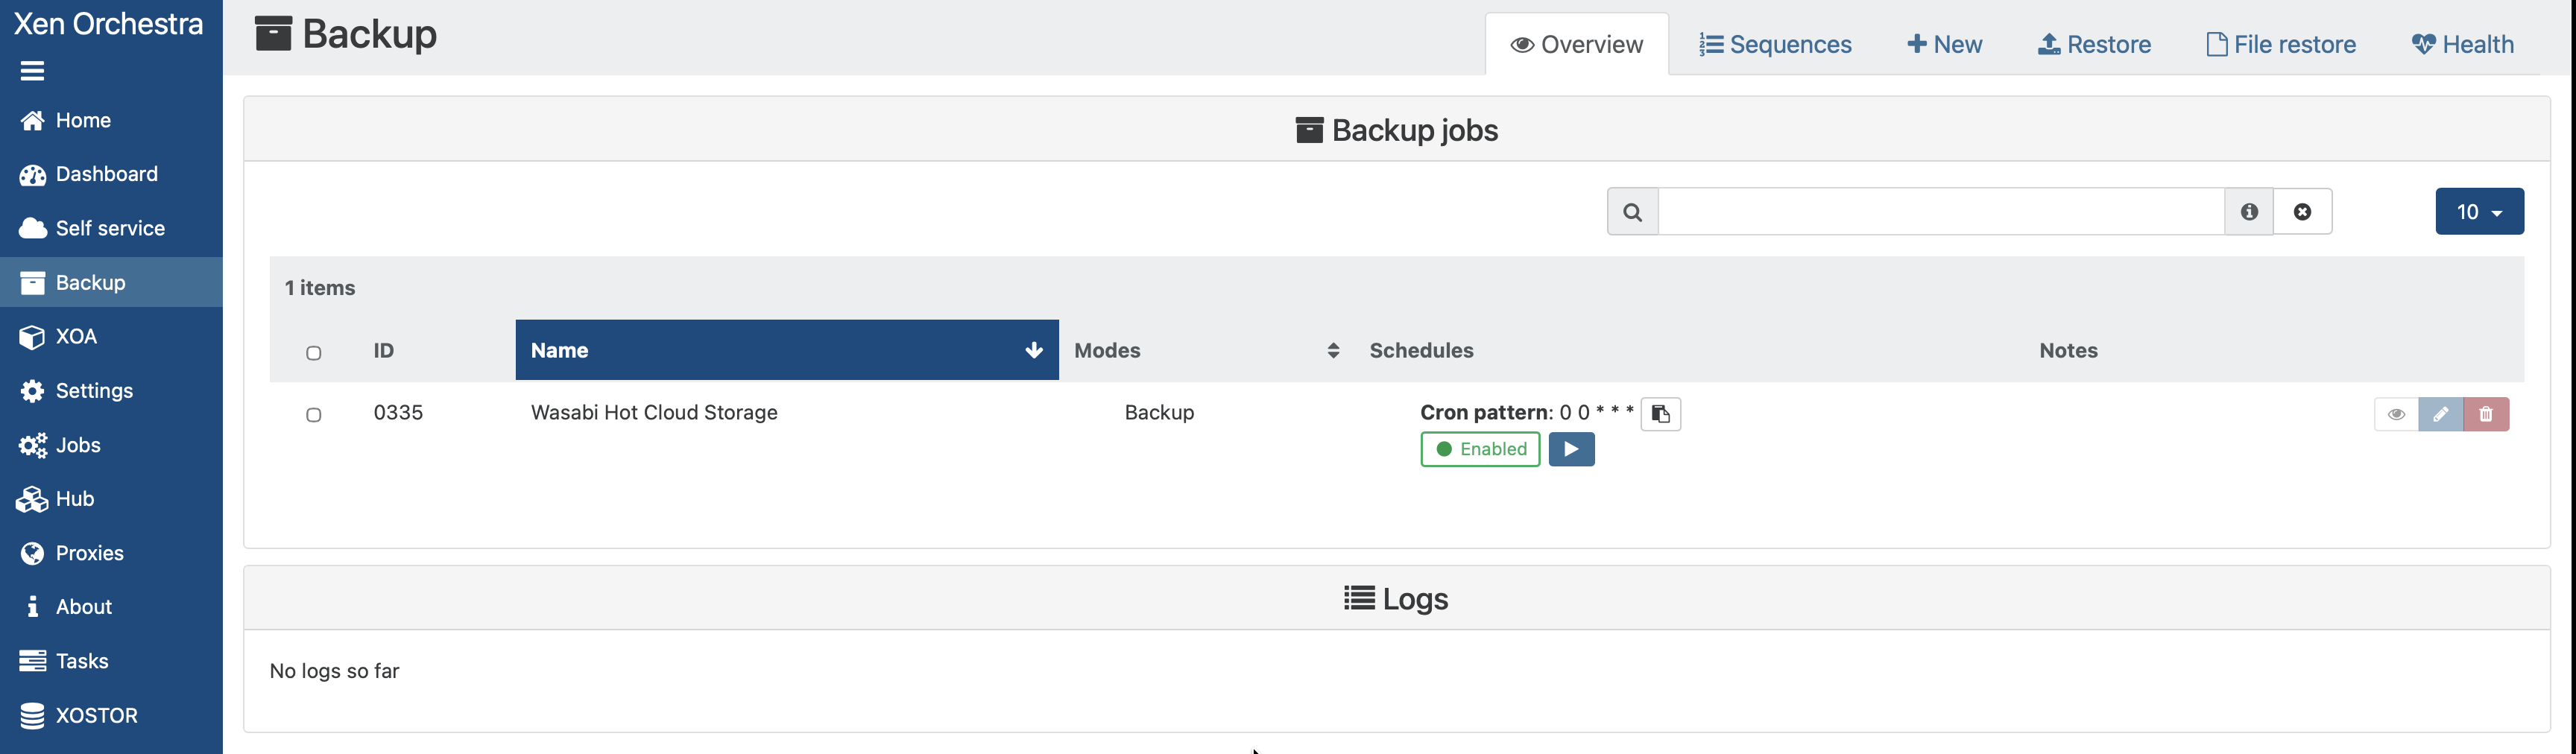
Your new backup job will now appear on the Backups page.
For more information on backup strategies and scheduling, refer to the Xen Orchestra documentation.
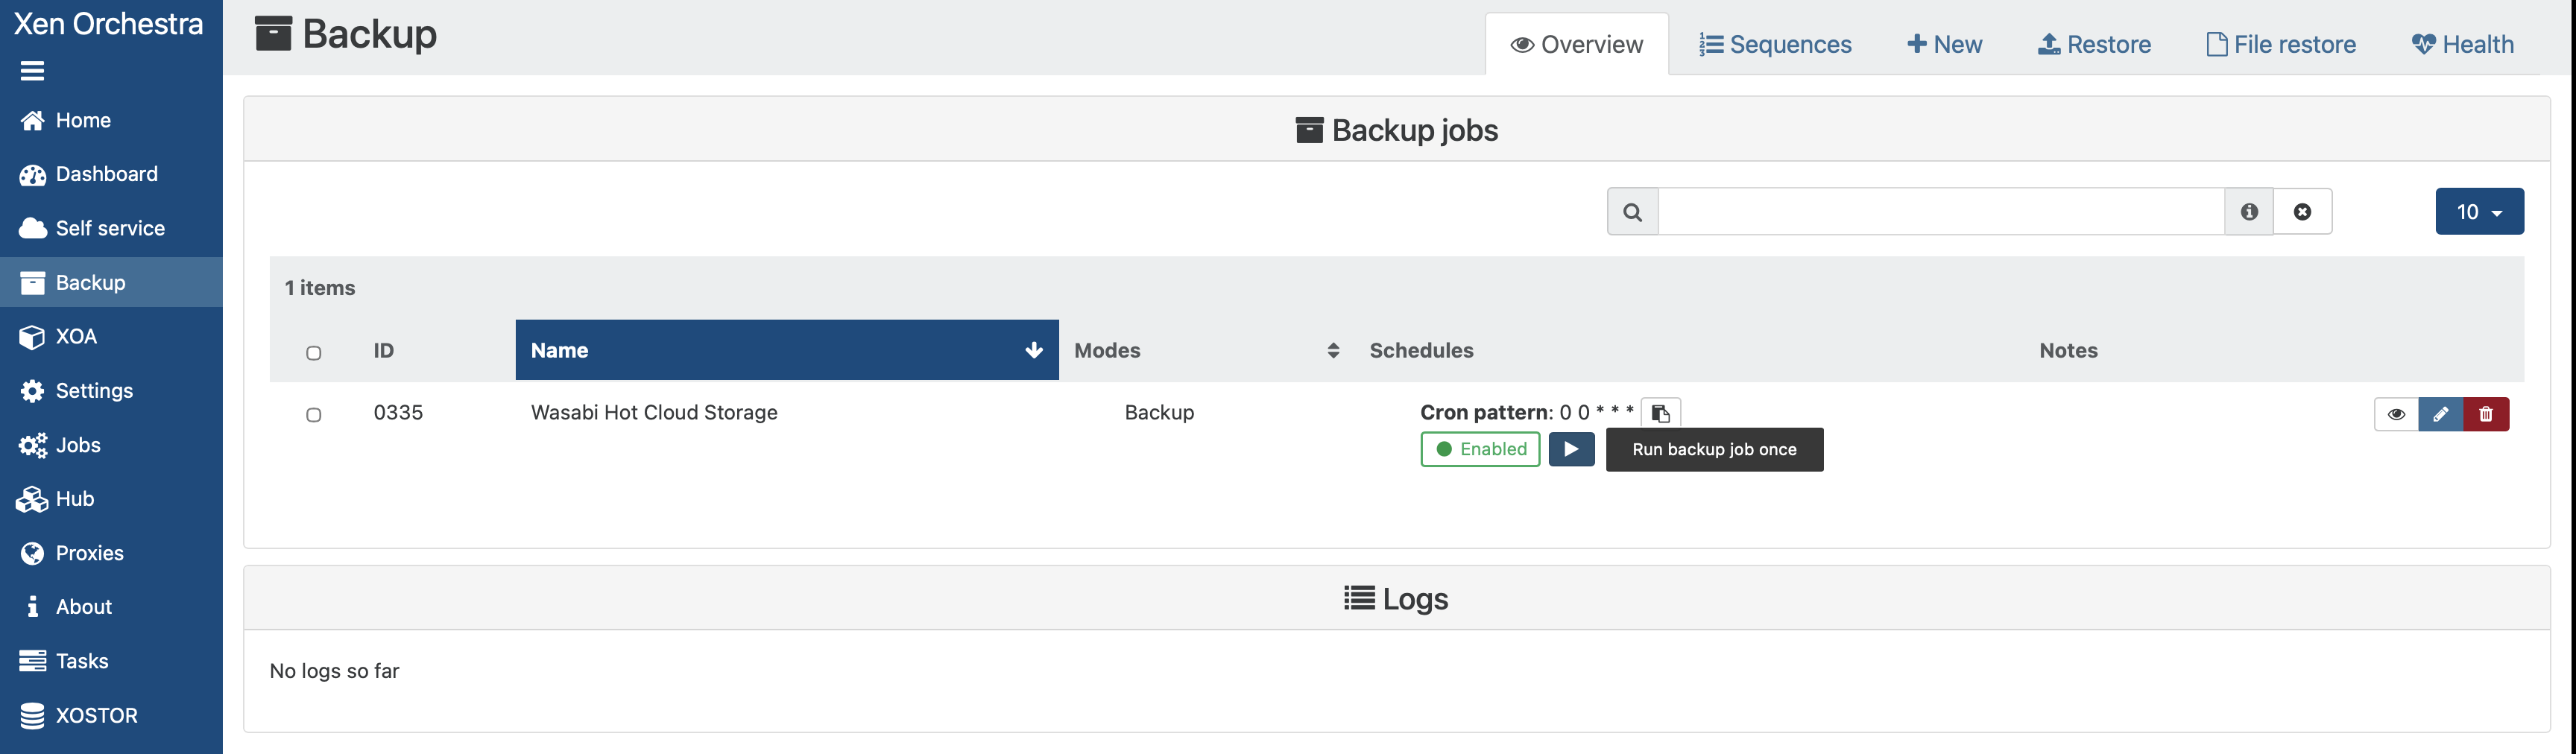
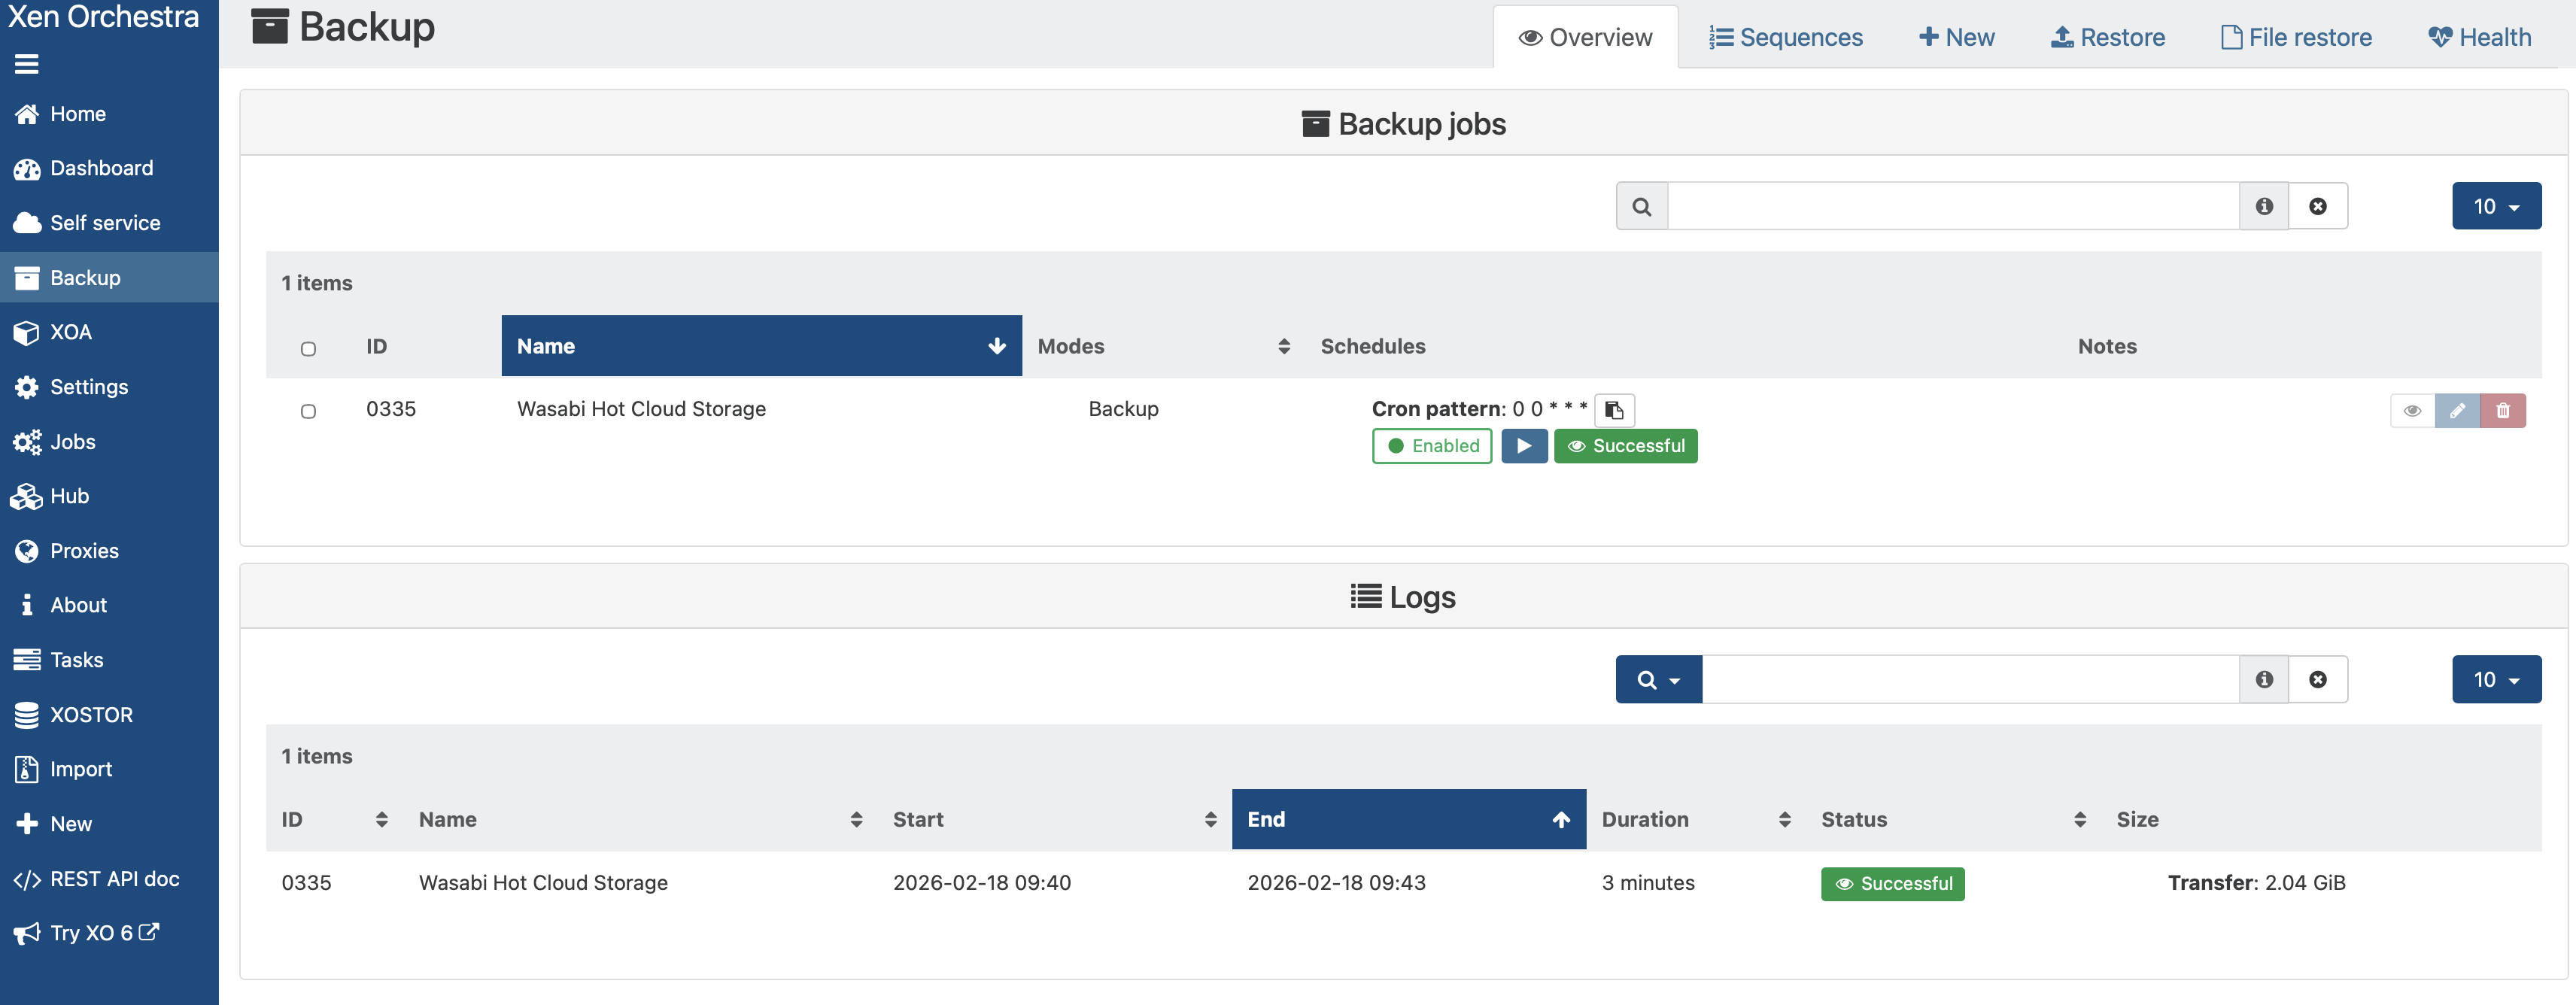
Running Your First Backup Job
Select the Backup tab on your Xen Orchestra dashboard, and click the Run Backup Job Once.
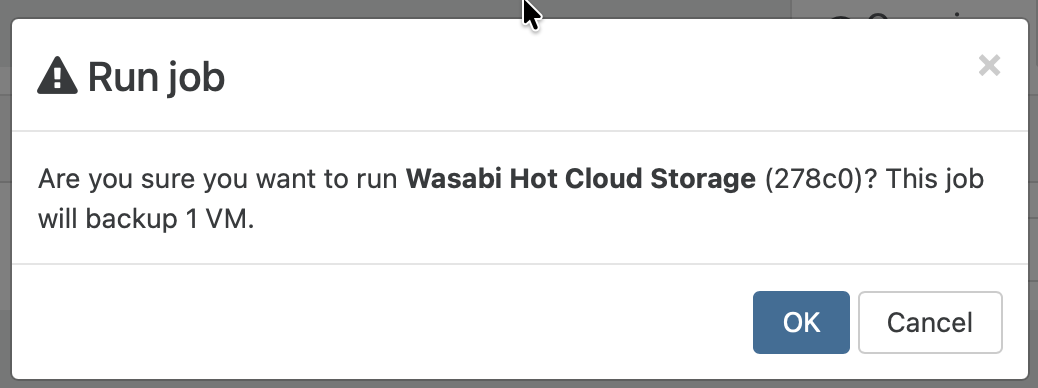
Click OK on the pop-up window that appears to confirm.
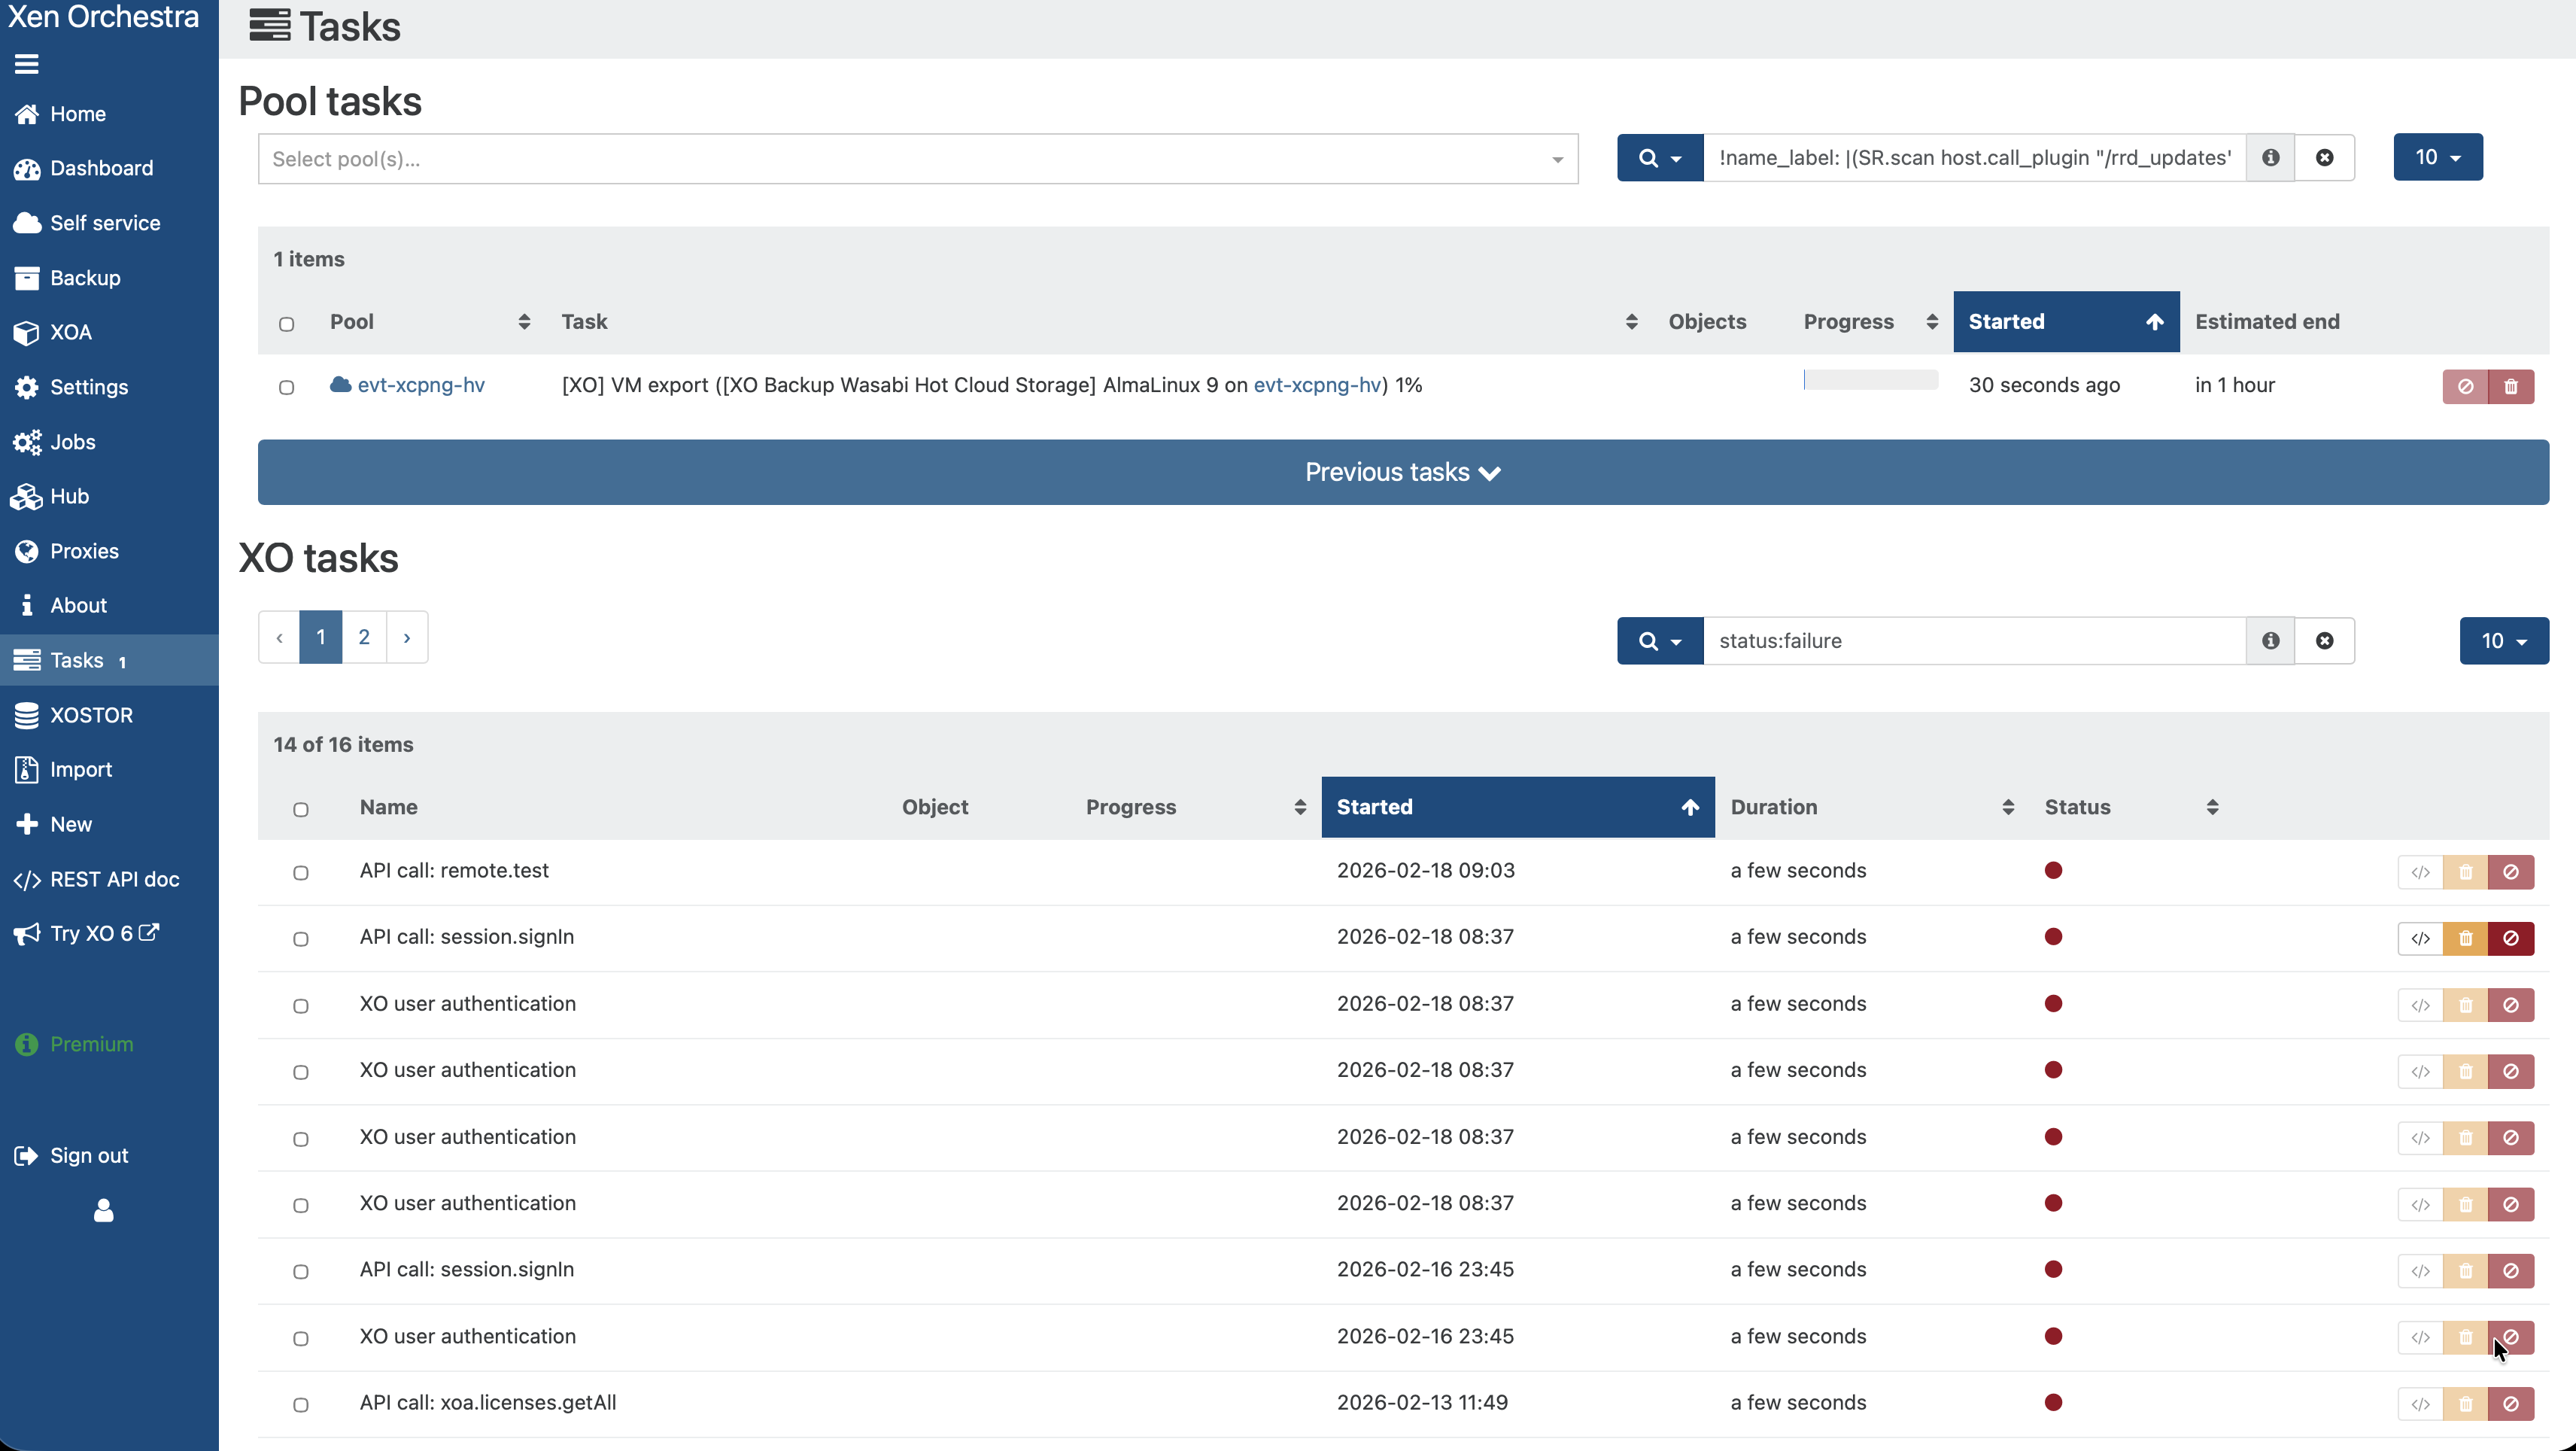
Your backup Job will start. Progress can be viewed via the Tasks tab in your Xen Orchestra Dashboard.
Once the backup job completes, you will see the backup on the Backup tab of your Xen Orchestra Dashboard.
Verifying Your Data
On your Wasabi Storage Console, you will see that data has been written to your bucket. Xen Orchestra stores some metadata as well as an XVA file representing your Full VM backup.
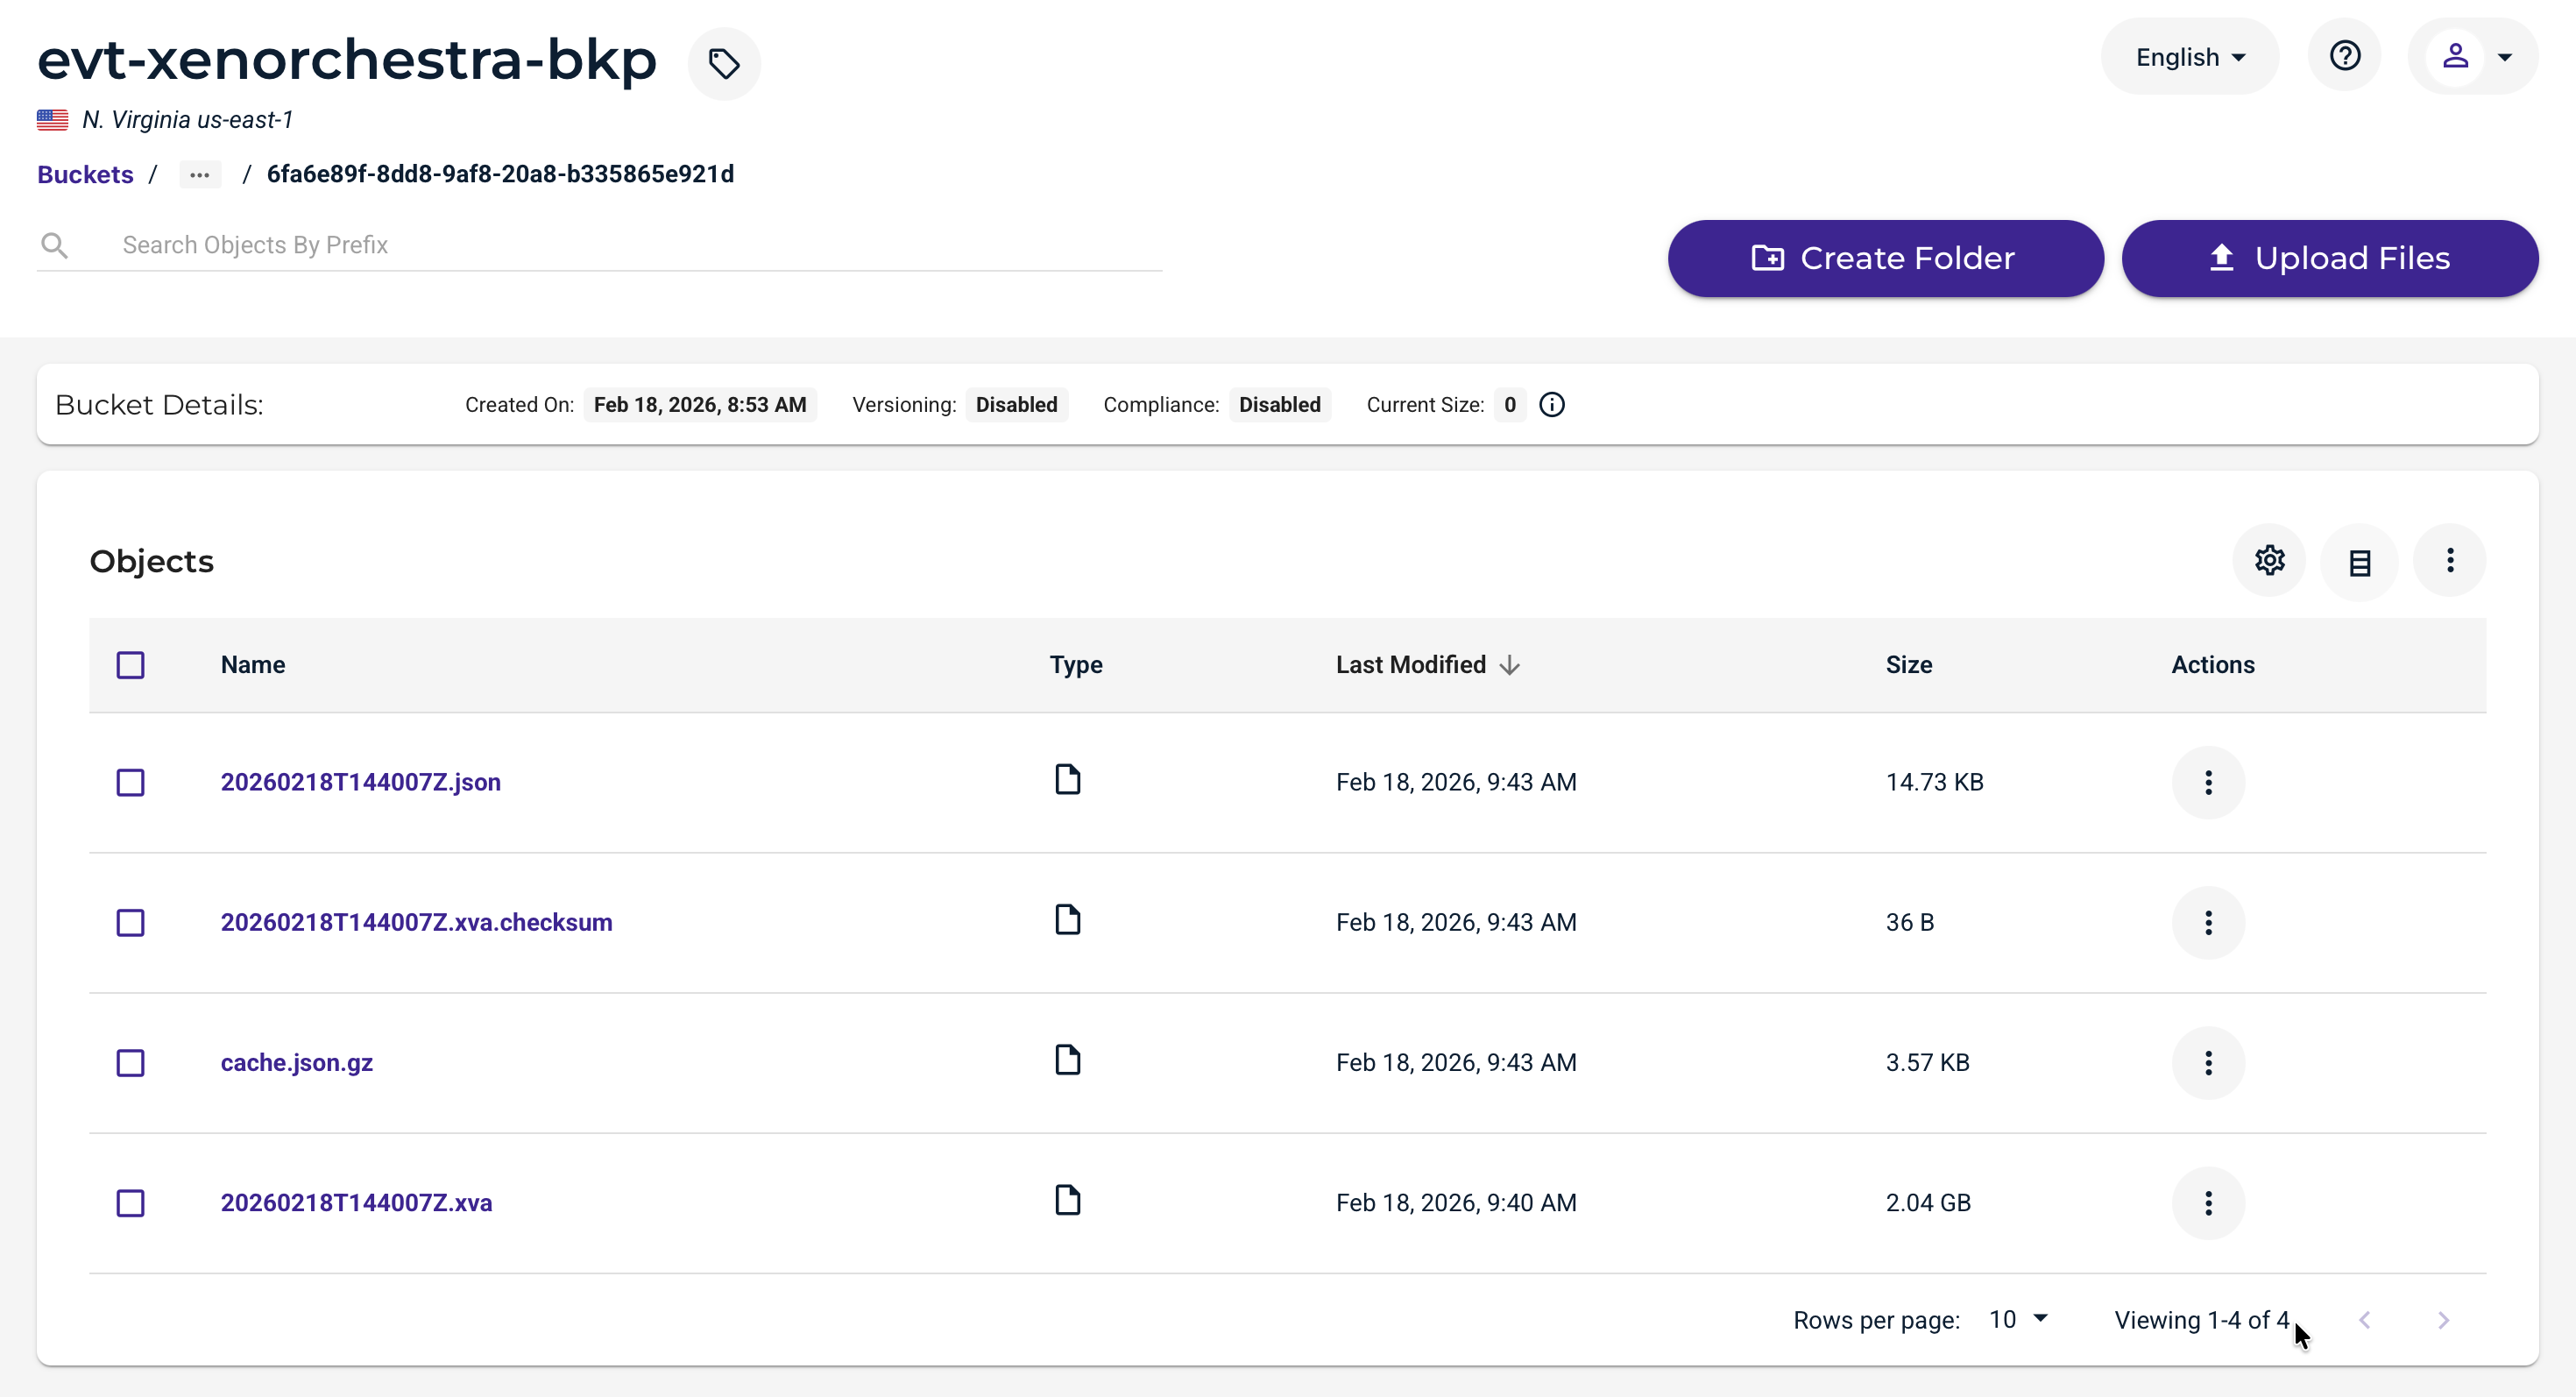
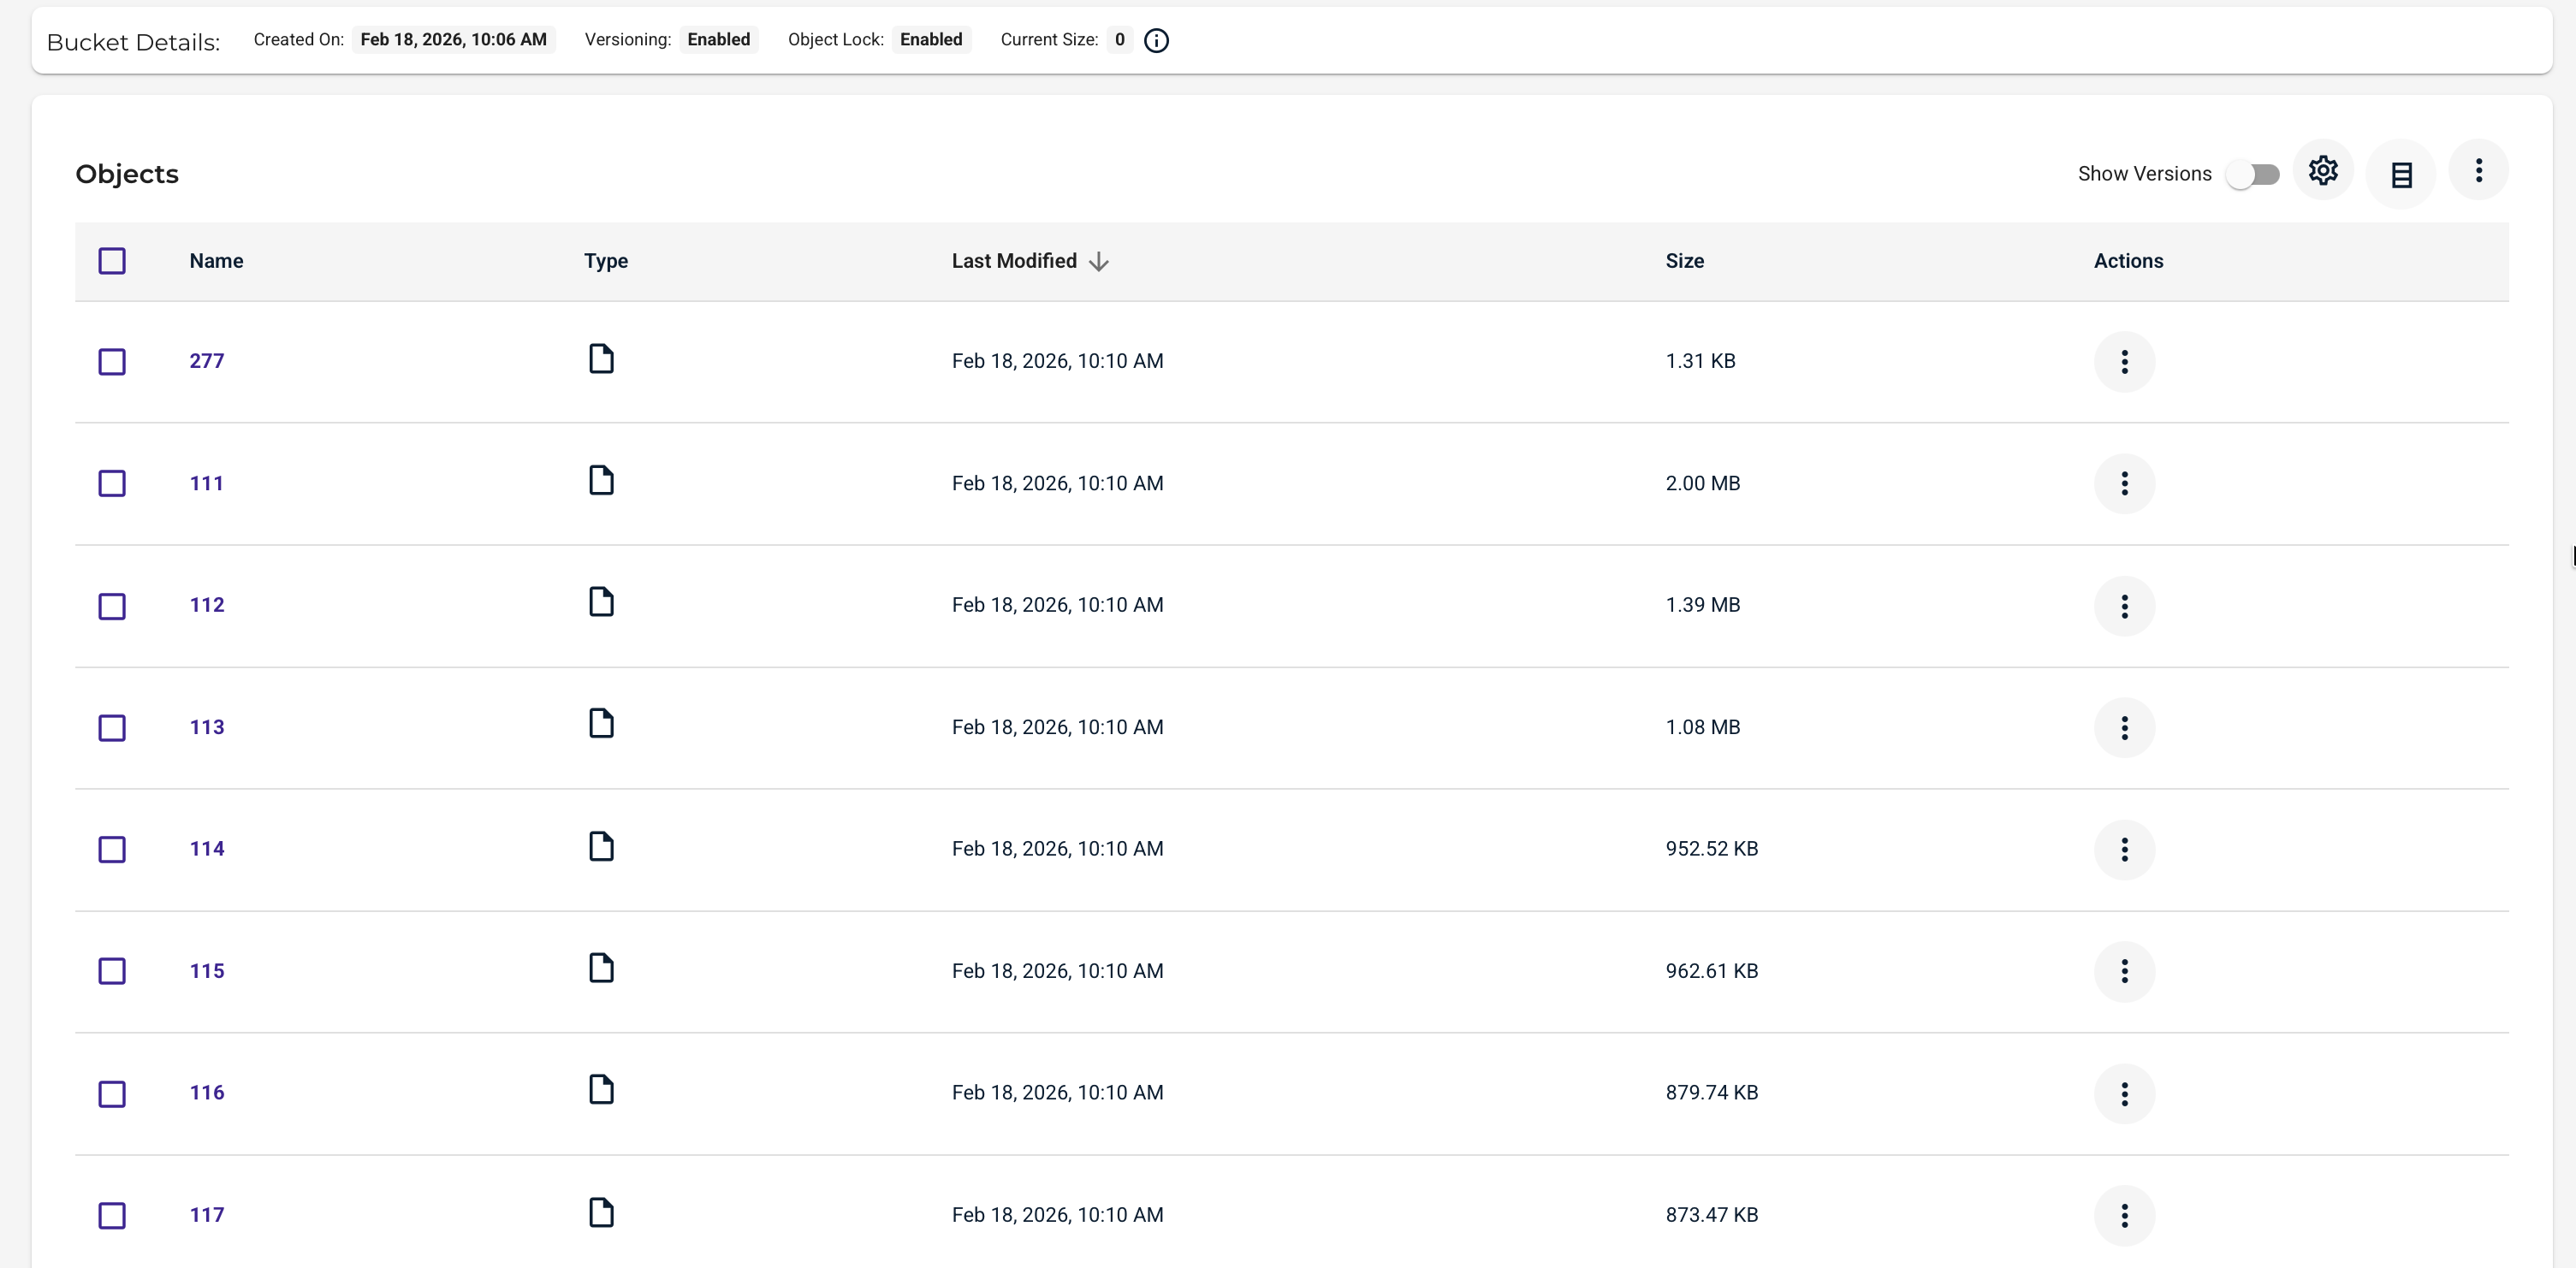
Note that, depending on the backup type you choose, some data will be written in a proprietary format (example below is from a Delta Backup, which writes blocks instead of a full XVA disk image).
Restoring Your VM Backup
The data restoration process is handled by your specific backup software application. As there are many, potential variables that will affect your unique environment, Wasabi strongly recommends that you seek the guidance of your backup software's technical support team in the event that you encounter difficulty or have application-specific inquiries.
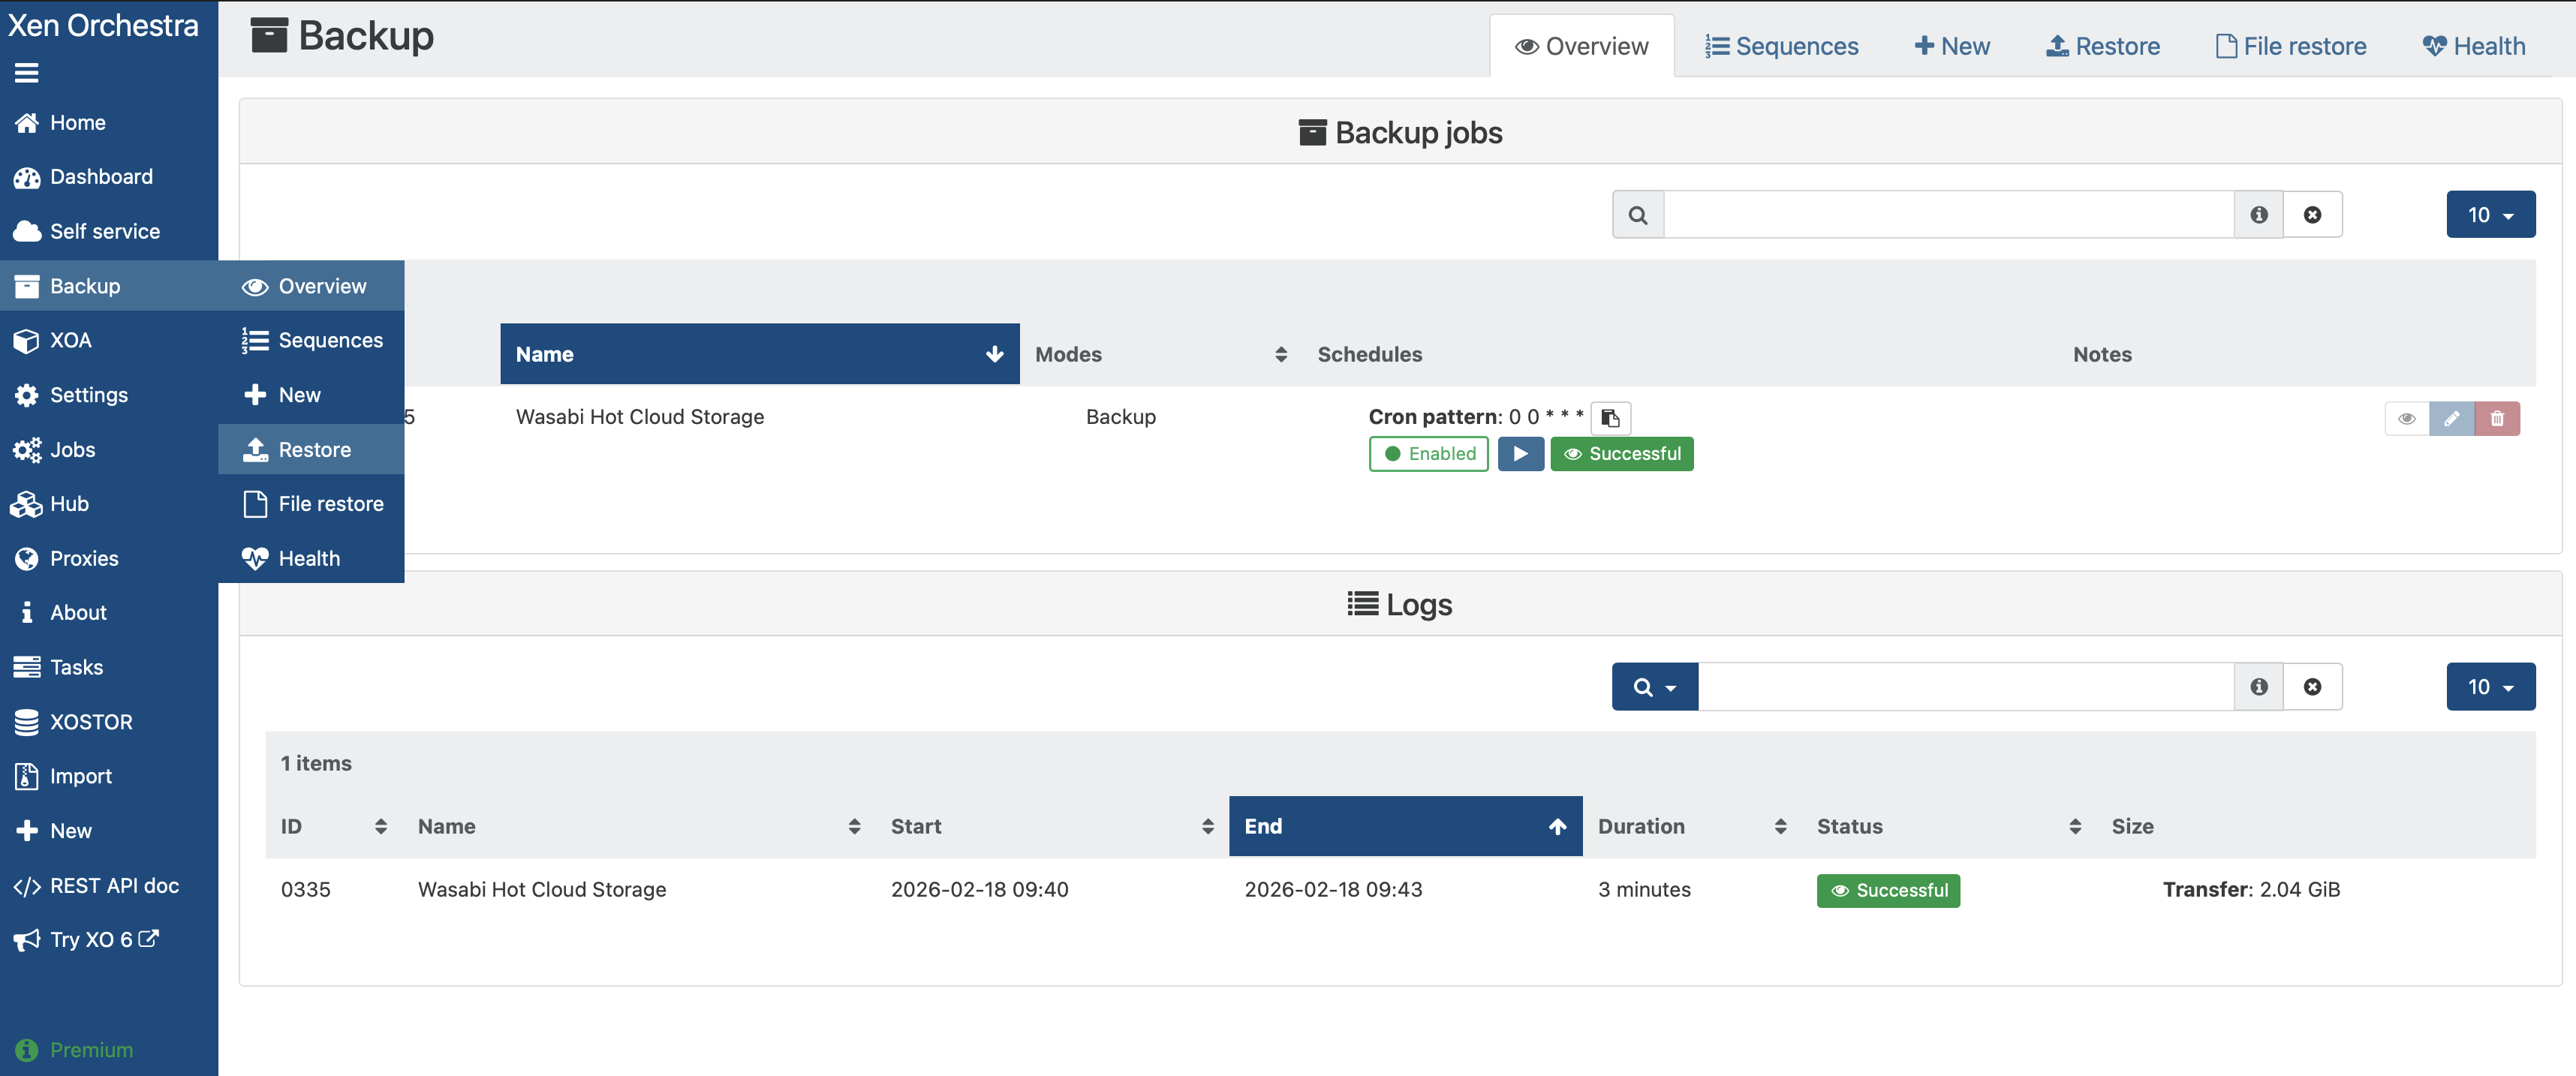
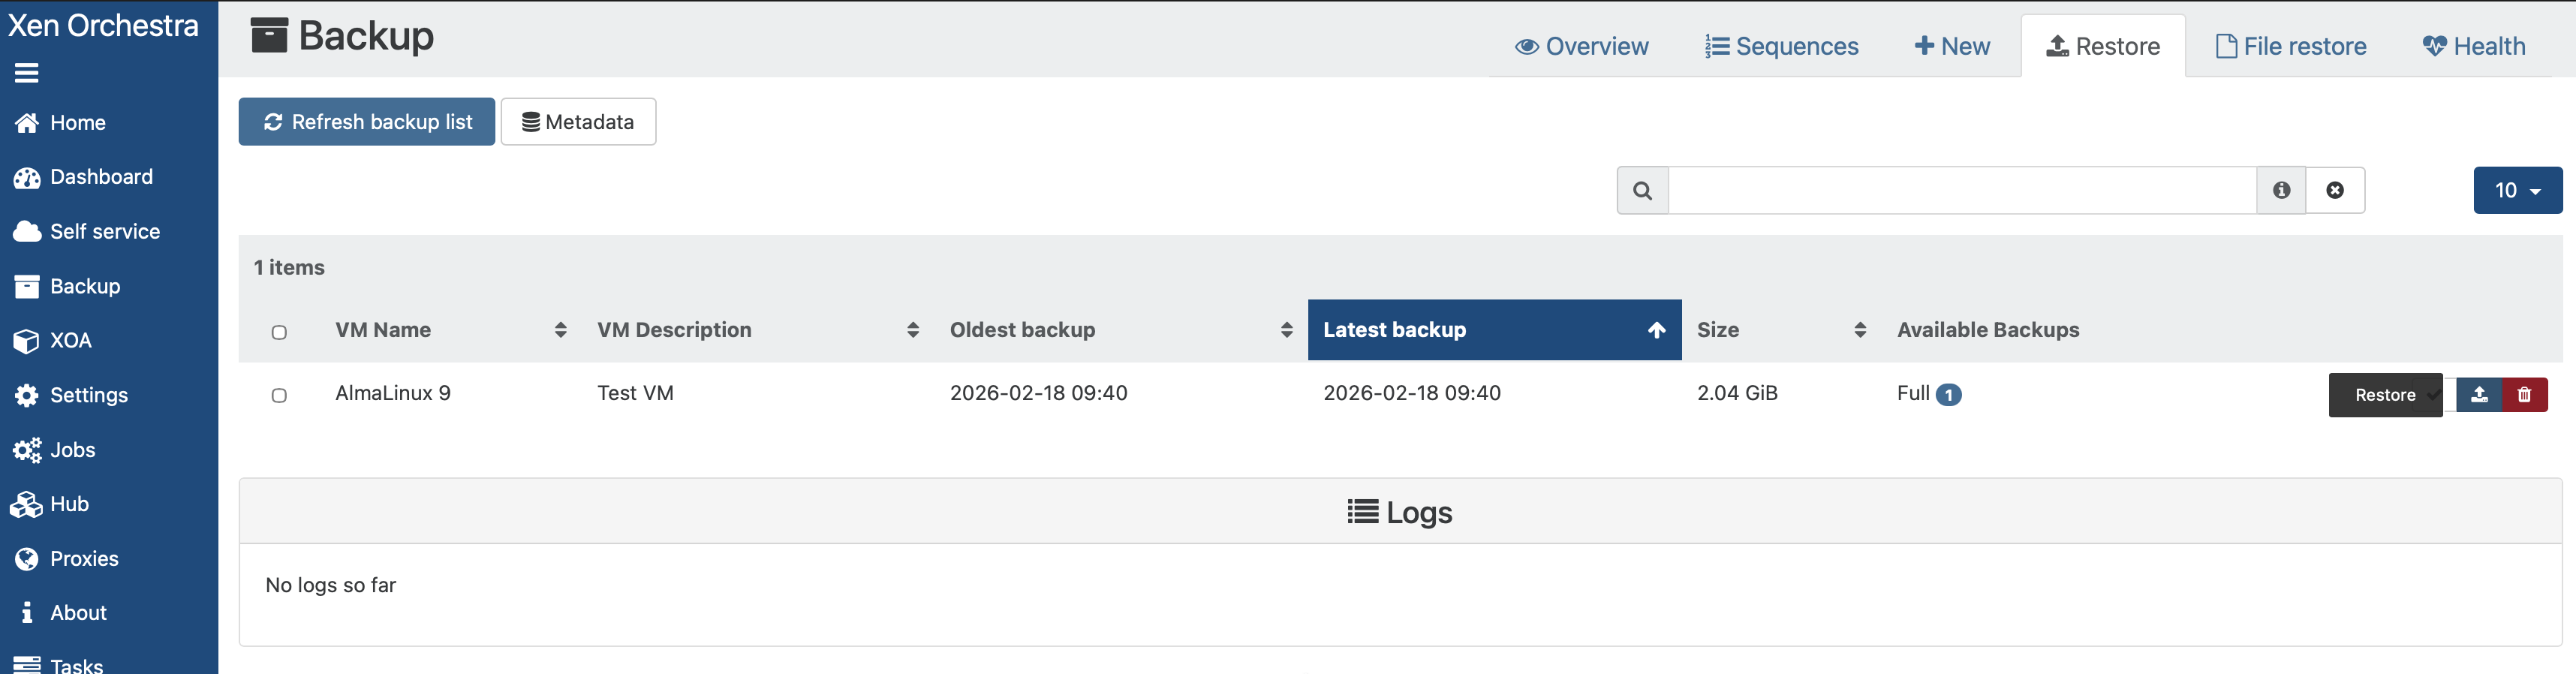
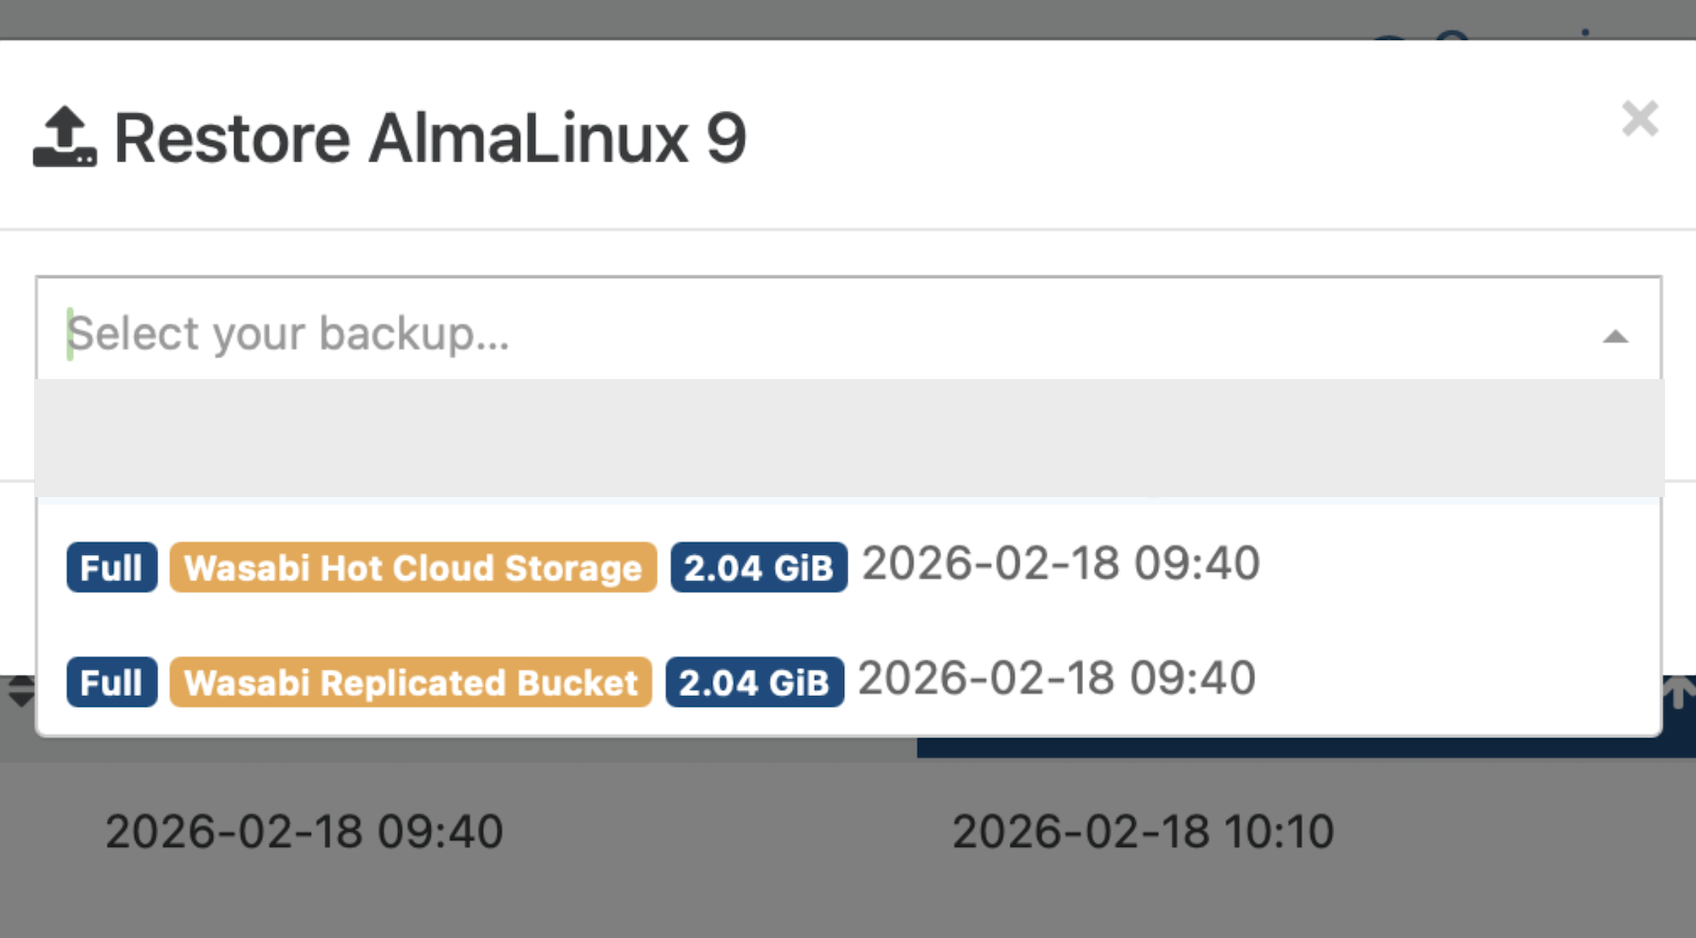
Select the Backup tab on the left-hand panel of your Xen Orchestra Dashboard, then click Restore from the pop-out menu.
On the Restore tab, click Restore at the right side of the row for your relevant protected VM.
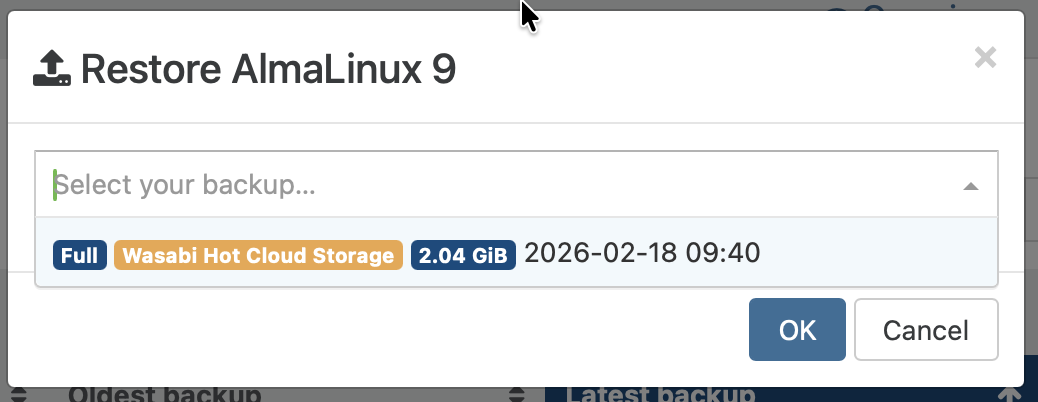
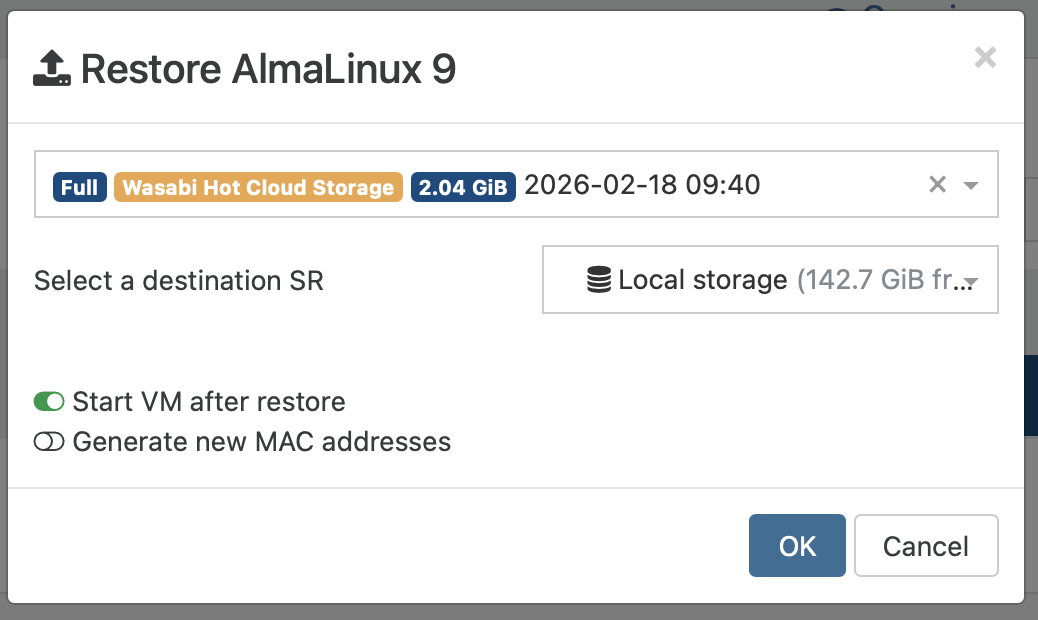
Select your desired backup from the dropdown on the pop-up that appears, then click OK. Optionally, choose to start the VM after the restore has completed.
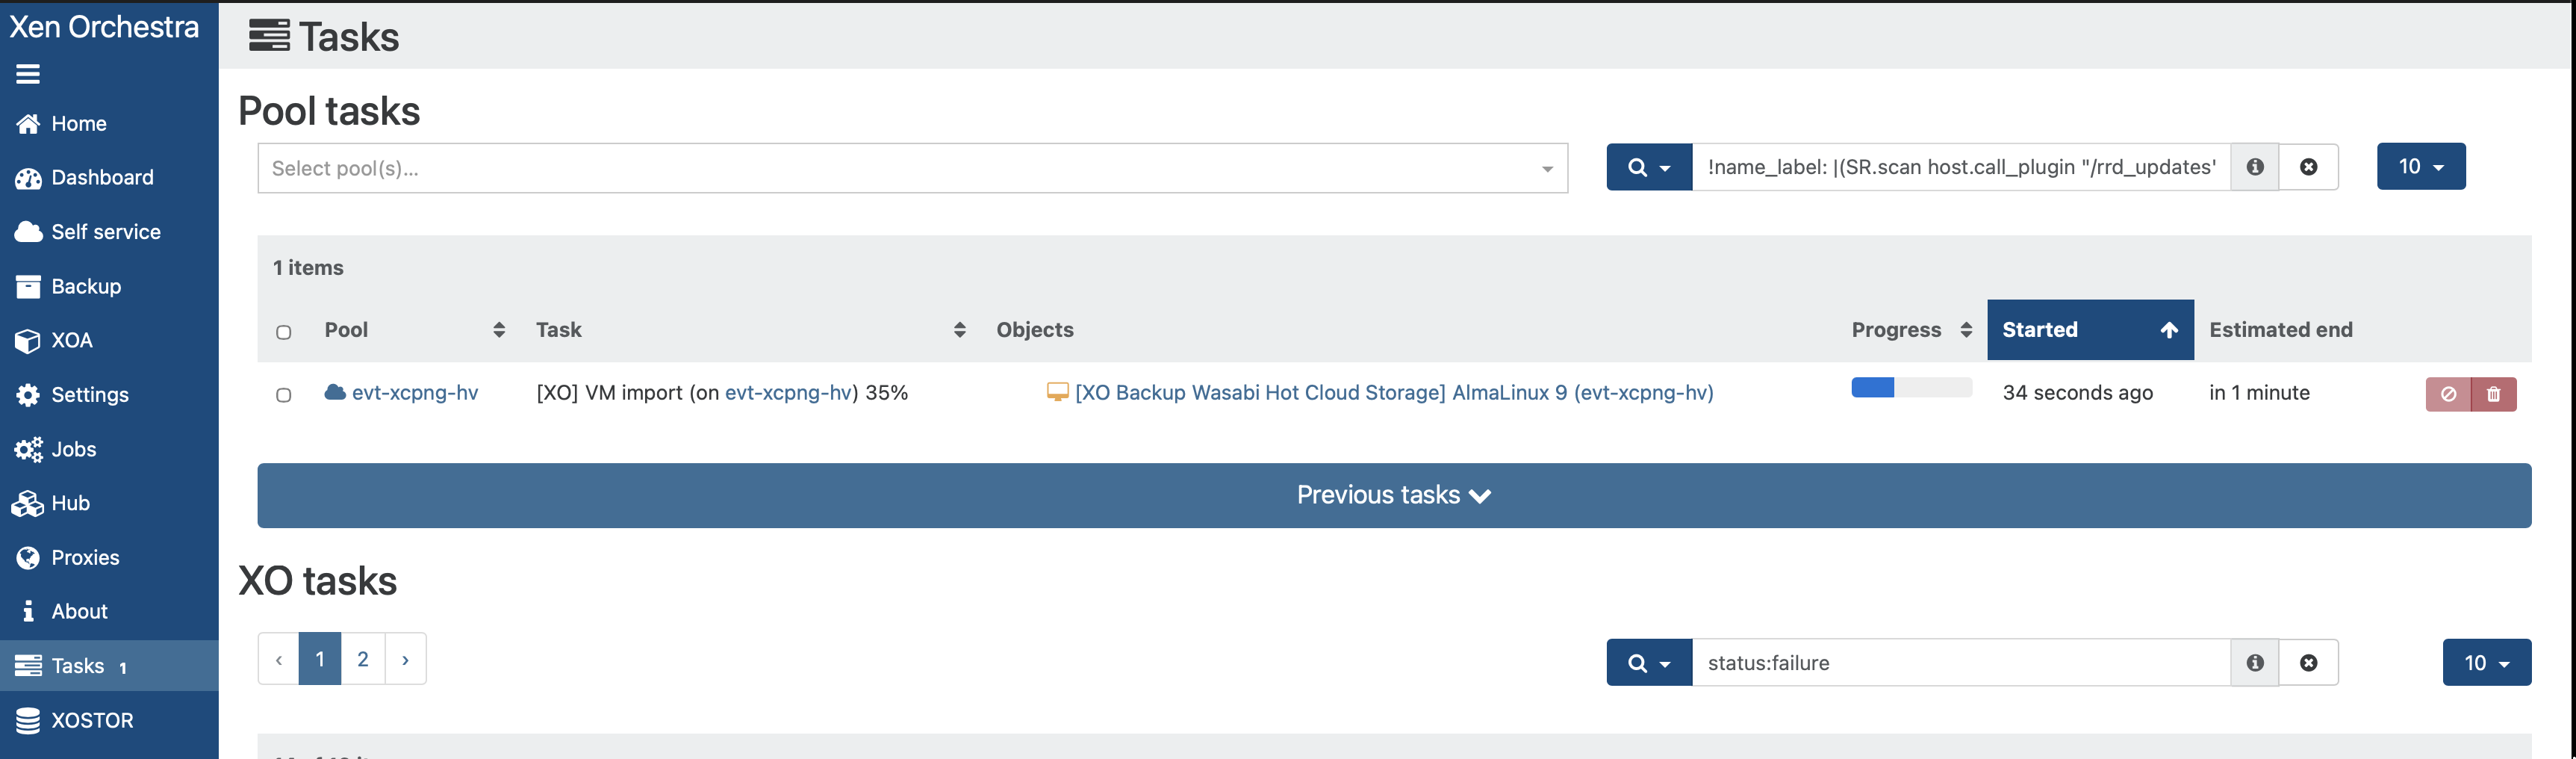
Your restore progress will show on the Tasks tab of your Xen Orchestra Dashboard.
Xen Orchestra will deploy a new VM from your backup, which can be seen on the VM page of your Xen Orchestra Dashboard. If you have confirmed that the original VM is no longer needed, you can delete it.

Replicating Backups With Wasabi Object Replication
Wasabi’s Object Replication feature enables you to replicate or copy your data between Wasabi regions to protect against ransomware attacks, malicious data manipulation, natural disasters, or even accidental deletion. Object replication enables you to replicate/copy objects from an active storage bucket (source) to one or more different buckets (destination).
Follow the steps above to deploy a primary Wasabi Bucket, then configure your primary Remote and Backup Job.
Take at least one backup of your protected VM.
Deploy a new, secondary Wasabi Bucket - See Creating a Bucket
Set up Object Replication from the primary bucket to the new secondary bucket - See Object Replication in the Same Account.
Wait for the Object Replication process to complete.
Add your new secondary bucket as another Remote in the Xen Orchestra dashboard (Settings > Remotes).
Xen Orchestra will automatically index the backups in your secondary bucket, and you will be able to choose the replicated Remote in the Restore options.
Proceed with the restore steps listed above under Restoring your VM Backup to complete the VM restore.