Use of SSO Legacy is discouraged. Wasabi is no longer provisioning new customers on SSO Legacy.
As part of the SSO Legacy configuration instructions, you will:
- Install and configure an Identity Provider (IDP) of a third-party application (such as configure Okta, Auth0, or Shibboleth).
- Configure SSO Legacy by continuing with the instructions below.
Configuring SSO Legacy
- Click Security on the Wasabi menu.
- Select SSO (Single Sign On) Legacy.This option is available only if you have SSO Legacy enabled through Wasabi Customer Support, as noted above.
- Click Configure SSO.
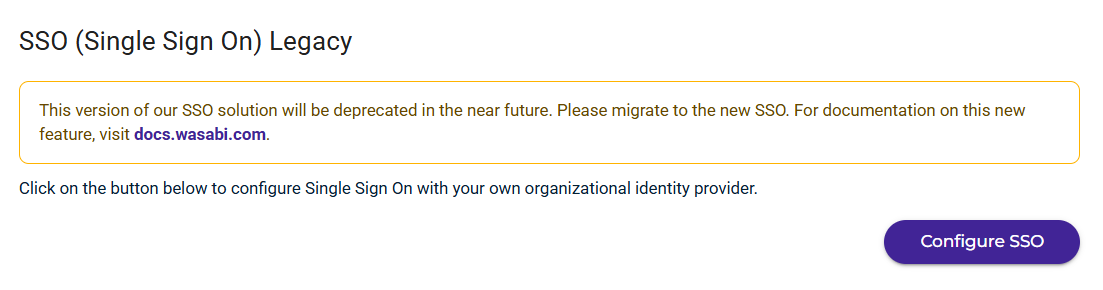
By default, SSO is disabled for existing and newly created Wasabi accounts. You will see this option only if it is available for your account.
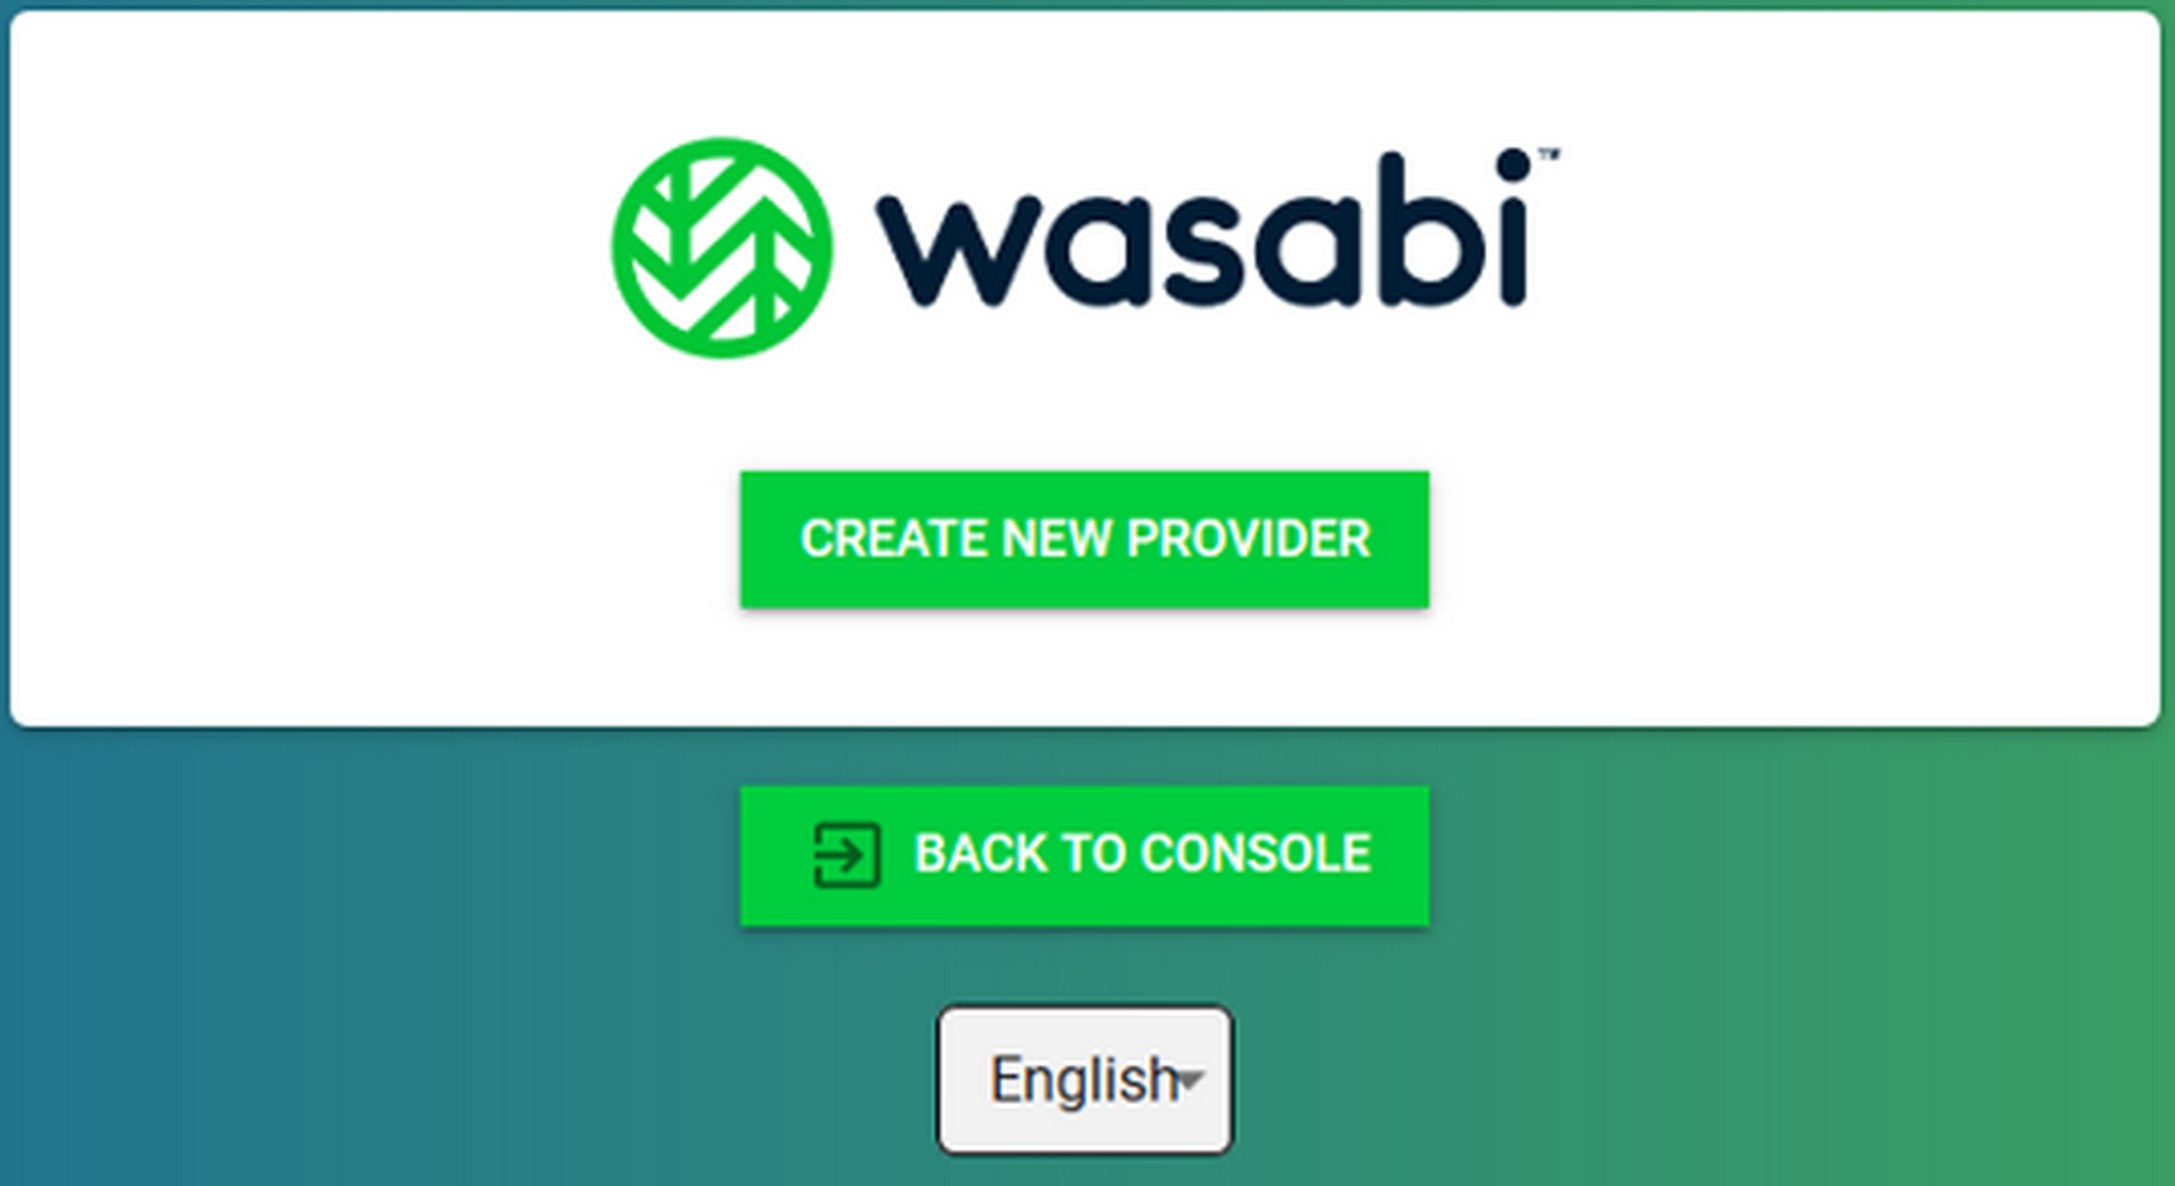
If you have already configured SSO, refer to Modifying the SSO Configuration to configure a new provider or modify an existing provider.
- Click CREATE NEW PROVIDER. (Or, click BACK TO CONSOLE to return to the ACCOUNT SETTINGS panel.)
- A panel is displayed on which you can add an authorized provider. Enter a name for the provider. It is best to use a name that will be easily recognized by the users.
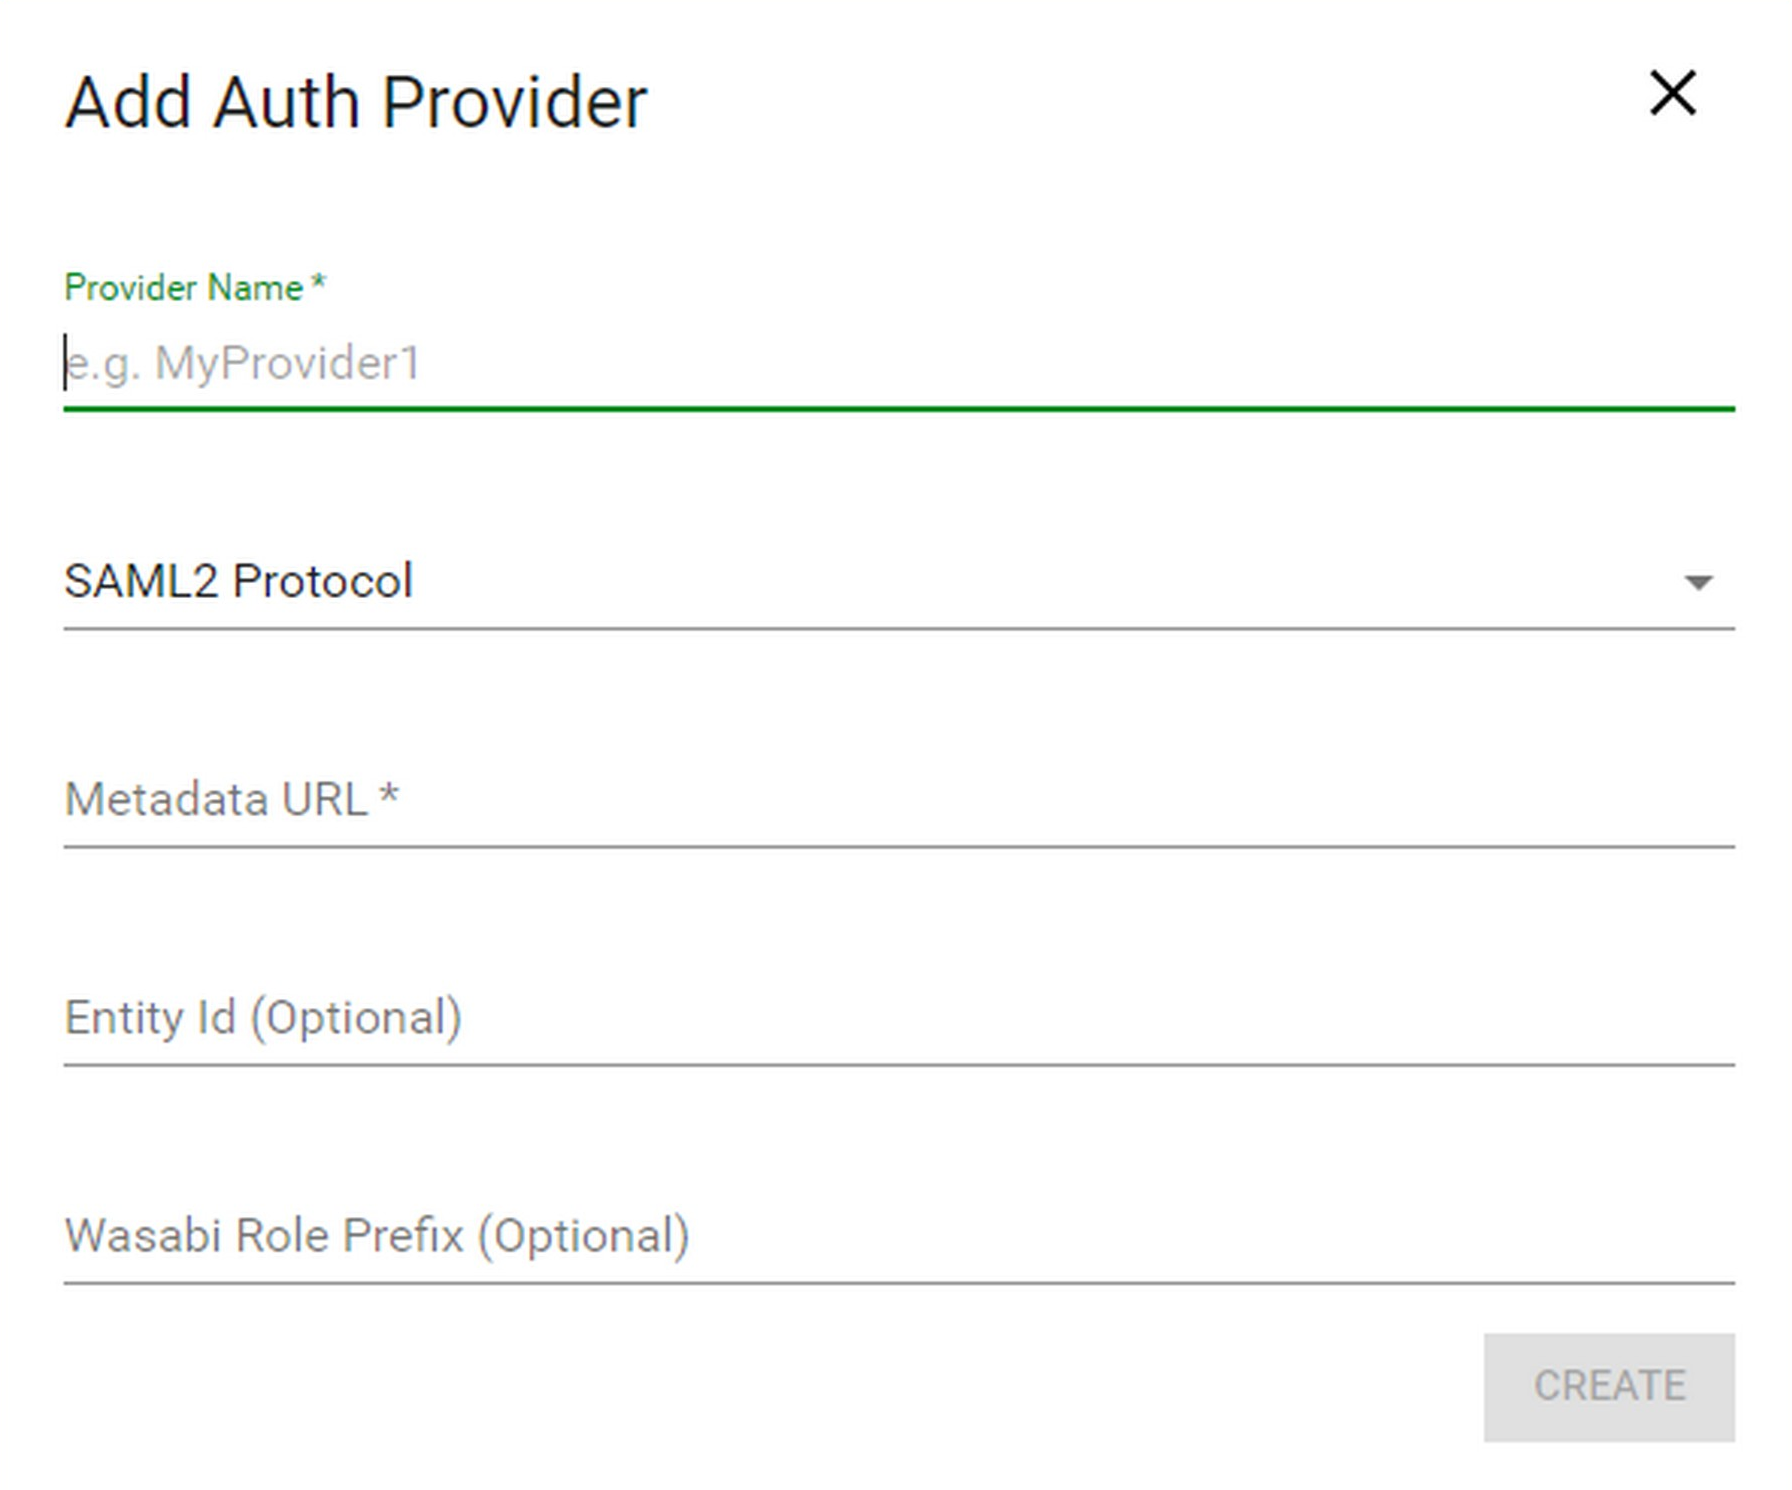
- Select one of these protocols:
- SAML2
- OpenID Connect (OIDC)
- Enter the metadata URL that was provided during IDP configuration. For example, enter the URL indicated when configuring SAML2 with Okta.
- Optionally, enter an entity ID. For example, a SML2-based IDP can declare more than one “entity” in the meta-data XML (multiple IDP providers each with separate public keys, etc.).
- Optionally, enter a Wasabi role prefix. The SSO feature uses this prefix to map to Wasabi roles. By default, the prefix is assumed to be “wasabi-” if you do not enter a different prefix. When Wasabi receives a group/role name from the IDP that starts with this prefix, Wasabi looks for a role with the same name in the Wasabi account. For more information about Wasabi roles, refer to Roles.
- Click CREATE. The SSO Provider List is displayed.

This list shows the serial number, name, ID (which will be used on the enterprise login), and protocol type for each provider.
If you want to add a provider, click
 and return to the instructions above.
You can click the toggle to enable or disable the provider status.
When the provider is enabled, the slide option is green
When the provider is disabled, the option is gray:
In addition, you can click
 to the right of a provider and select:
- Configure to edit the provider.
- Support to access Wasabi Technical Support.
- Delete to delete the provider.
- Click BACK TO CONSOLE to return to the ACCOUNT SETTINGS panel.
- Set up roles and a policy for the sign in. Refer to Policies and Roles. Begin by reviewing the information in Creating a Role for SSO Legacy.
Modifying the SSO Configuration
- Click CONFIGURE SSO on the ACCOUNT SETTINGS panel.
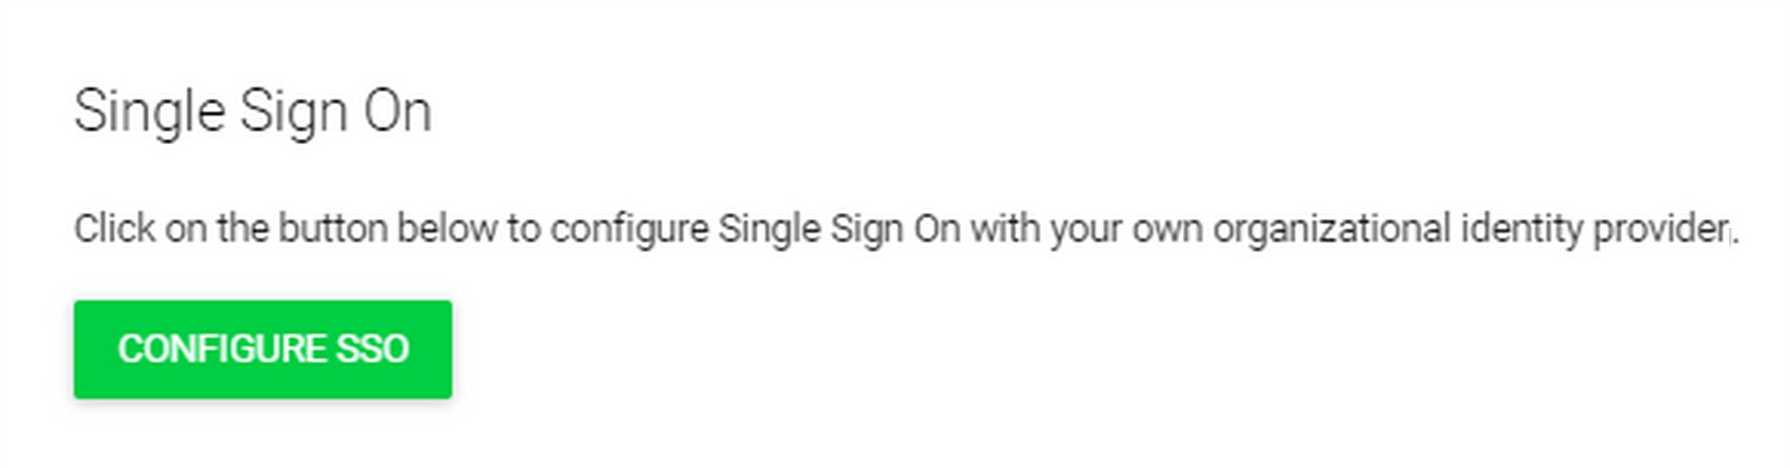
- The SSO Provider List is displayed. Configure a new provider or modify an existing provider, as described above.