You cannot rename a bucket if it or any object in it has object lock or compliance enabled.
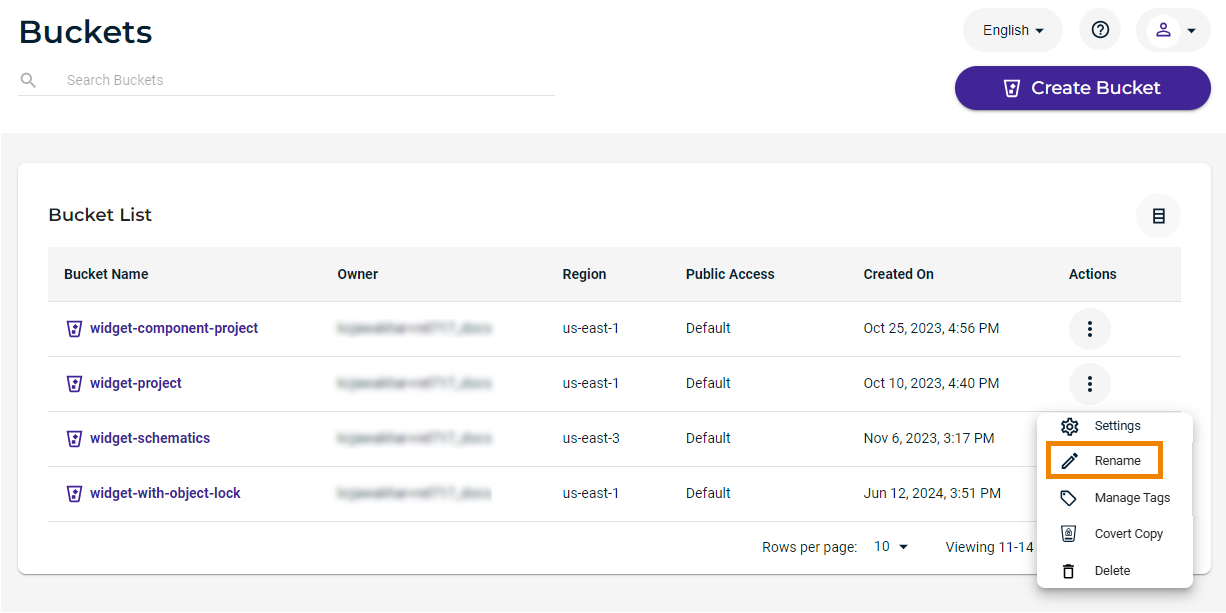
Click
 to access options for the bucket you want to rename.
Click Rename. In this example, we will rename widget-schematics.
Enter a new bucket name.
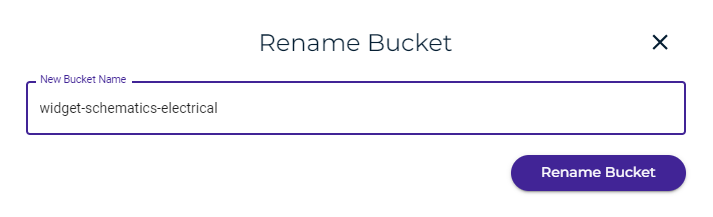
Click Rename Bucket.
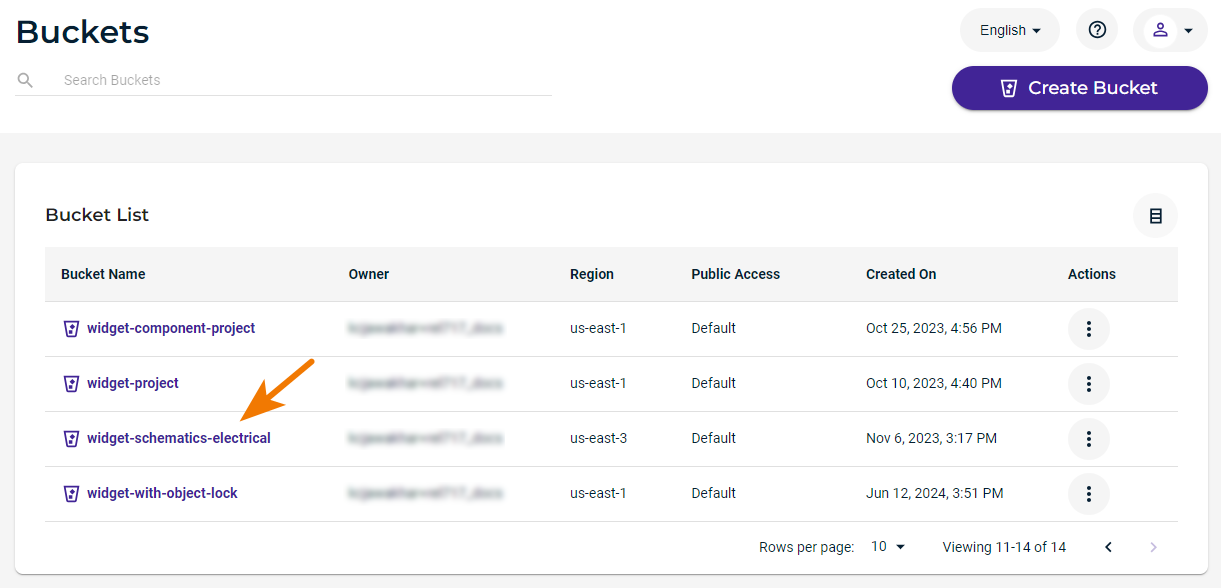
The bucket name is changed and displayed in the Bucket list. For example:
If you attempt to rename an object that has object lock enabled or if any object in the bucket has object lock enabled, this alert is displayed:
