Commvault has been validated for use with Wasabi. Follow the steps below to configure Wasabi as a cloud storage target.
The data restoration process is handled by your specific backup software application. As many variables can affect your unique environment, Wasabi strongly recommends that you seek guidance from your backup software’s technical support team if you encounter difficulties or have application-specific inquiries.
Requirements
Commvault v11sp19 (or later) has been installed and configured. This article details the configuration of v11.44.
Commvault media agent has been installed and associated with Comcell server.
An active Wasabi Cloud Storage account.
Commvault recommends using the Commvault Command Center web console for net-new installs, while earlier versions will need to use a Java-based Command Center. For details on the configuration using the Commcell Console, refer to Configuring Commvault With Wasabi Using the Commcell Console. Note that Commcell console cannot be used for versions FR30 and later.
Configuring Wasabi as a Cloud Storage Target
Log in to the Commvault Command Center.
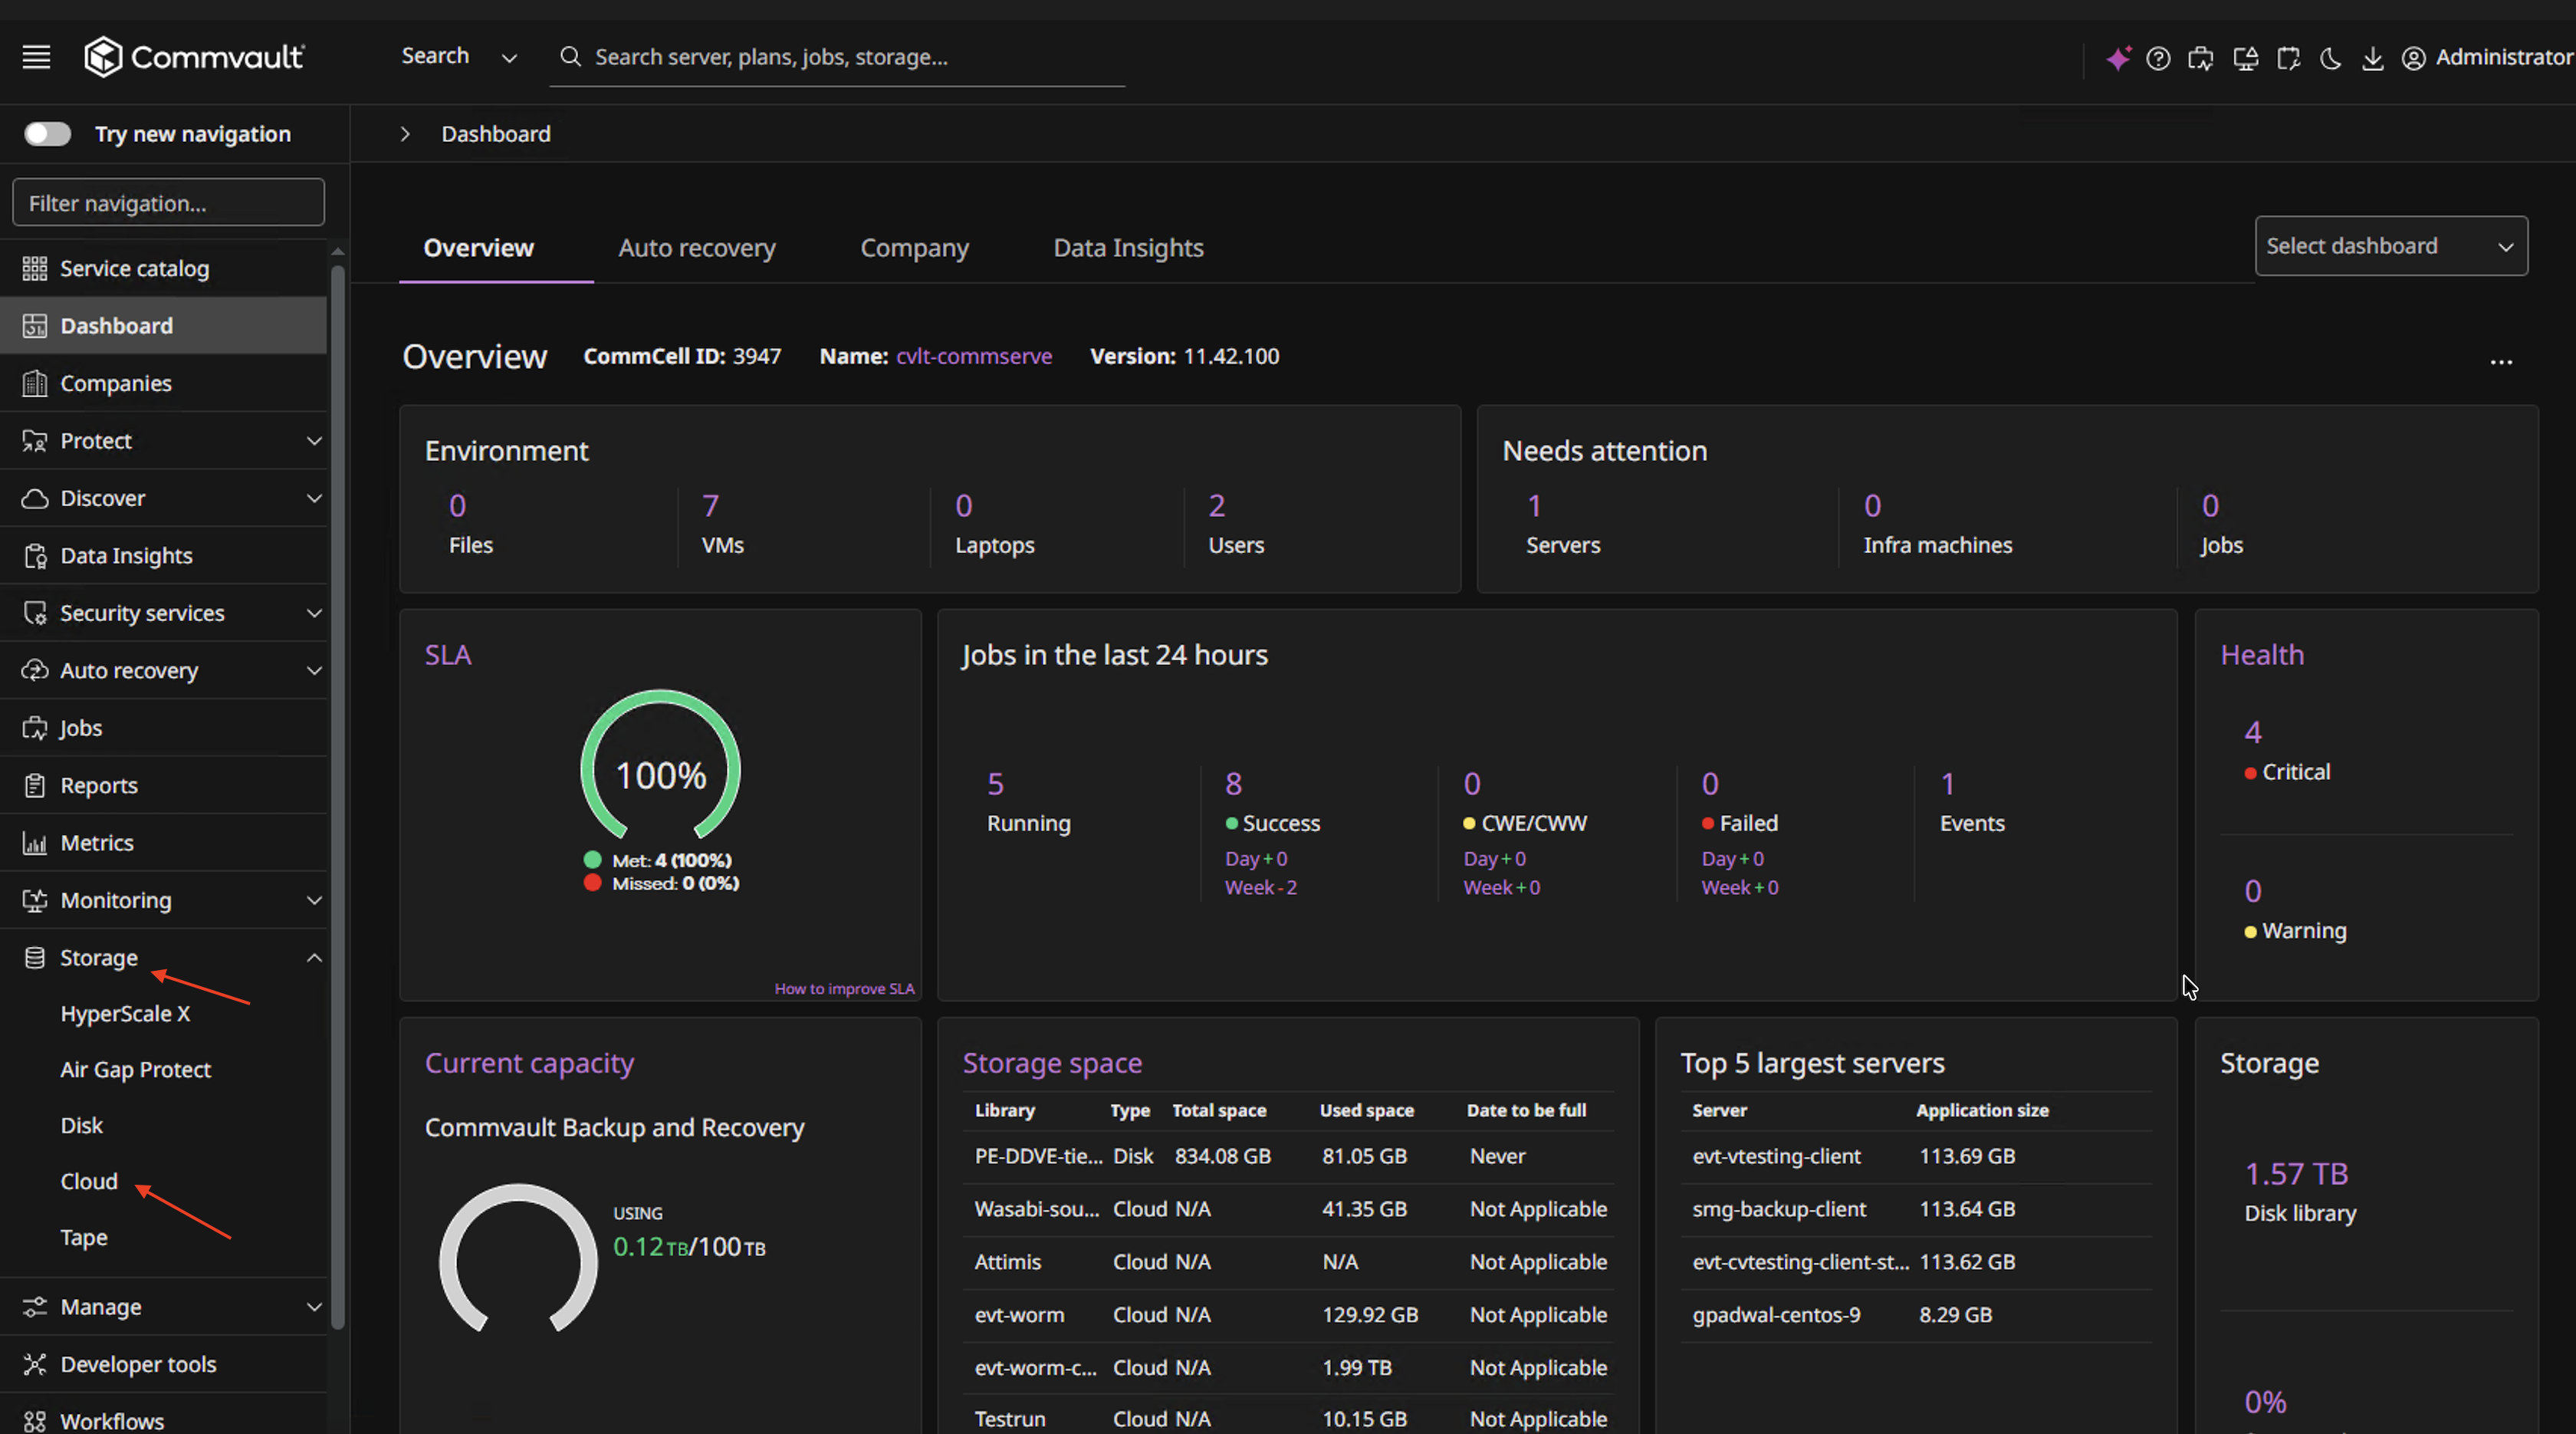
Navigate to the Storage tab.
Click Cloud.
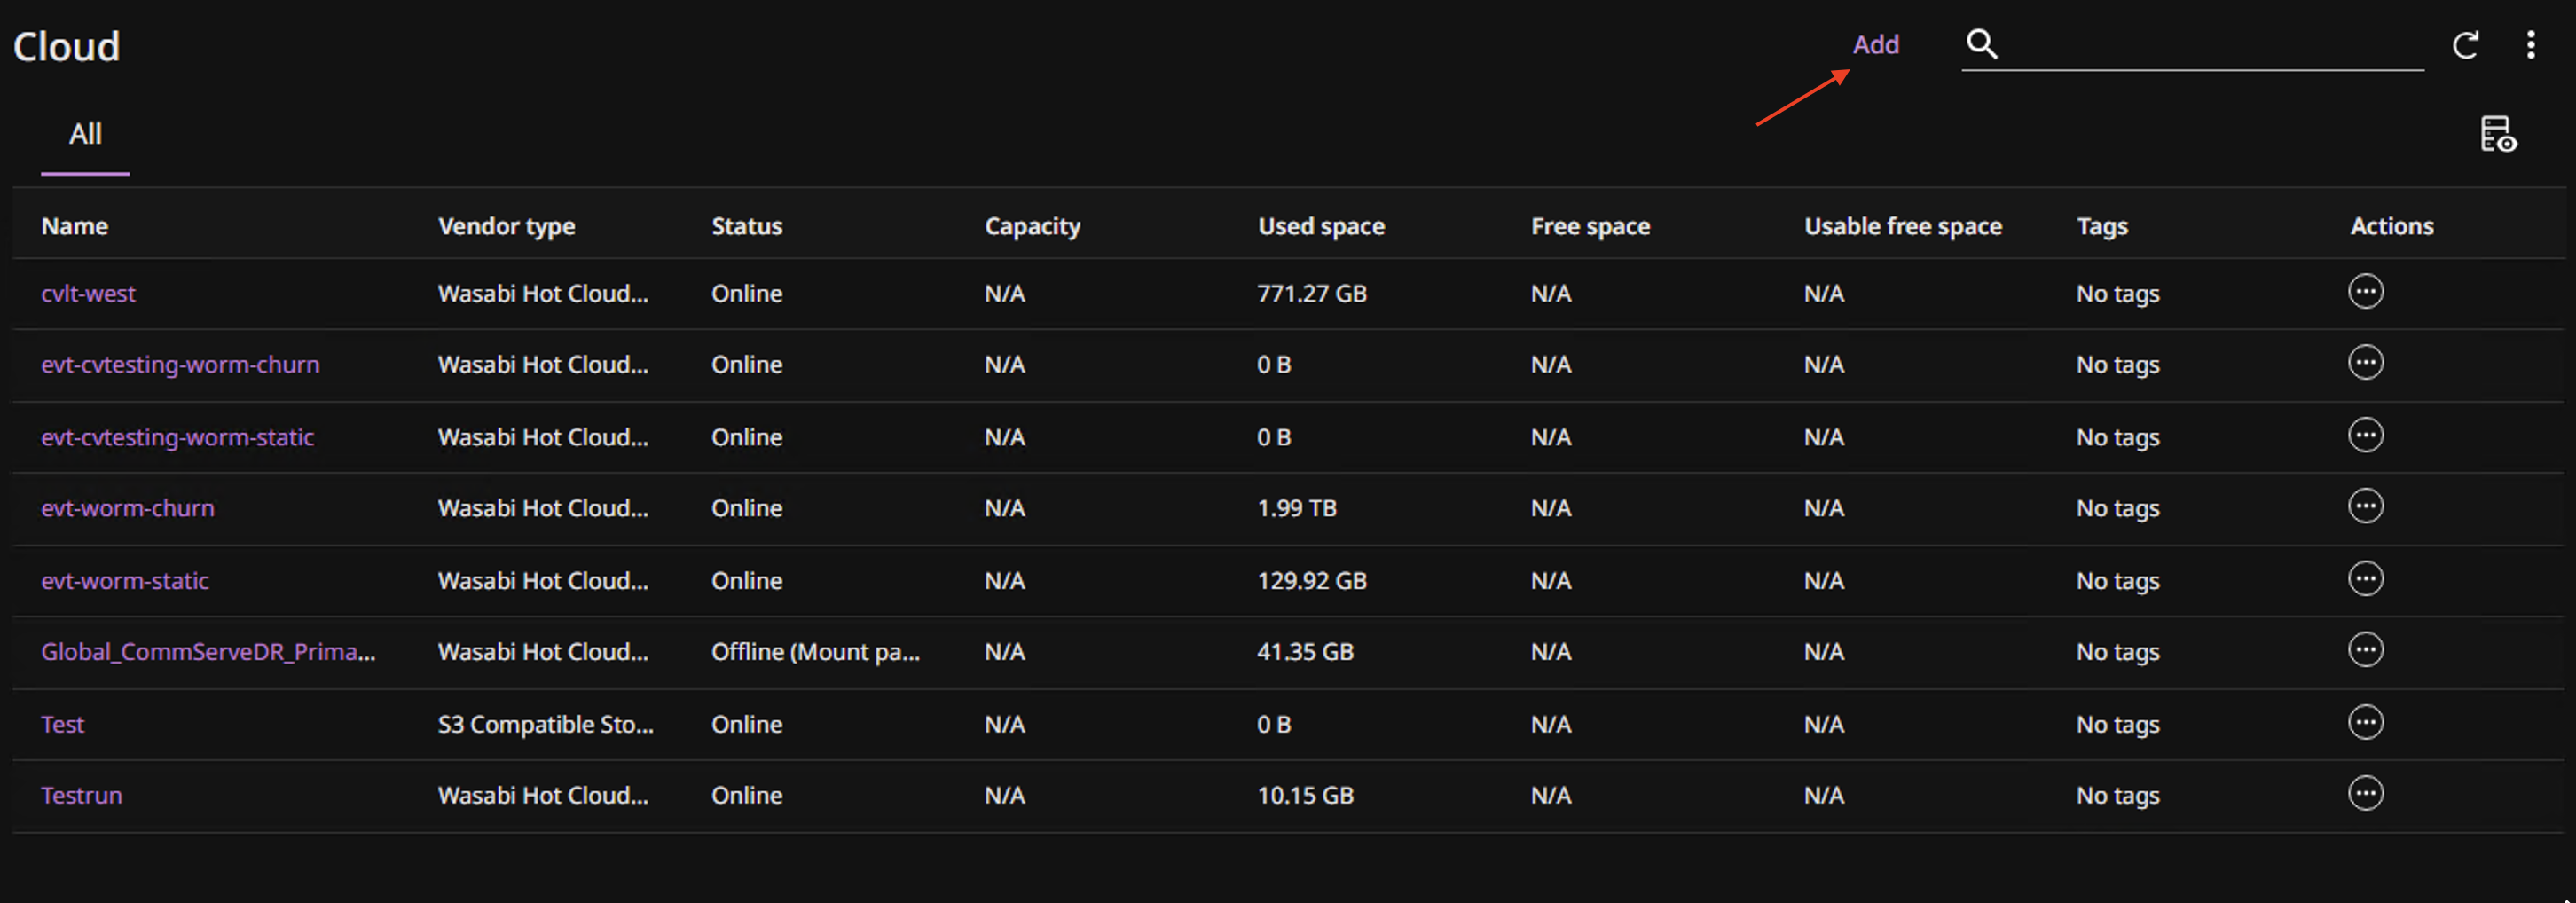
Click Add.
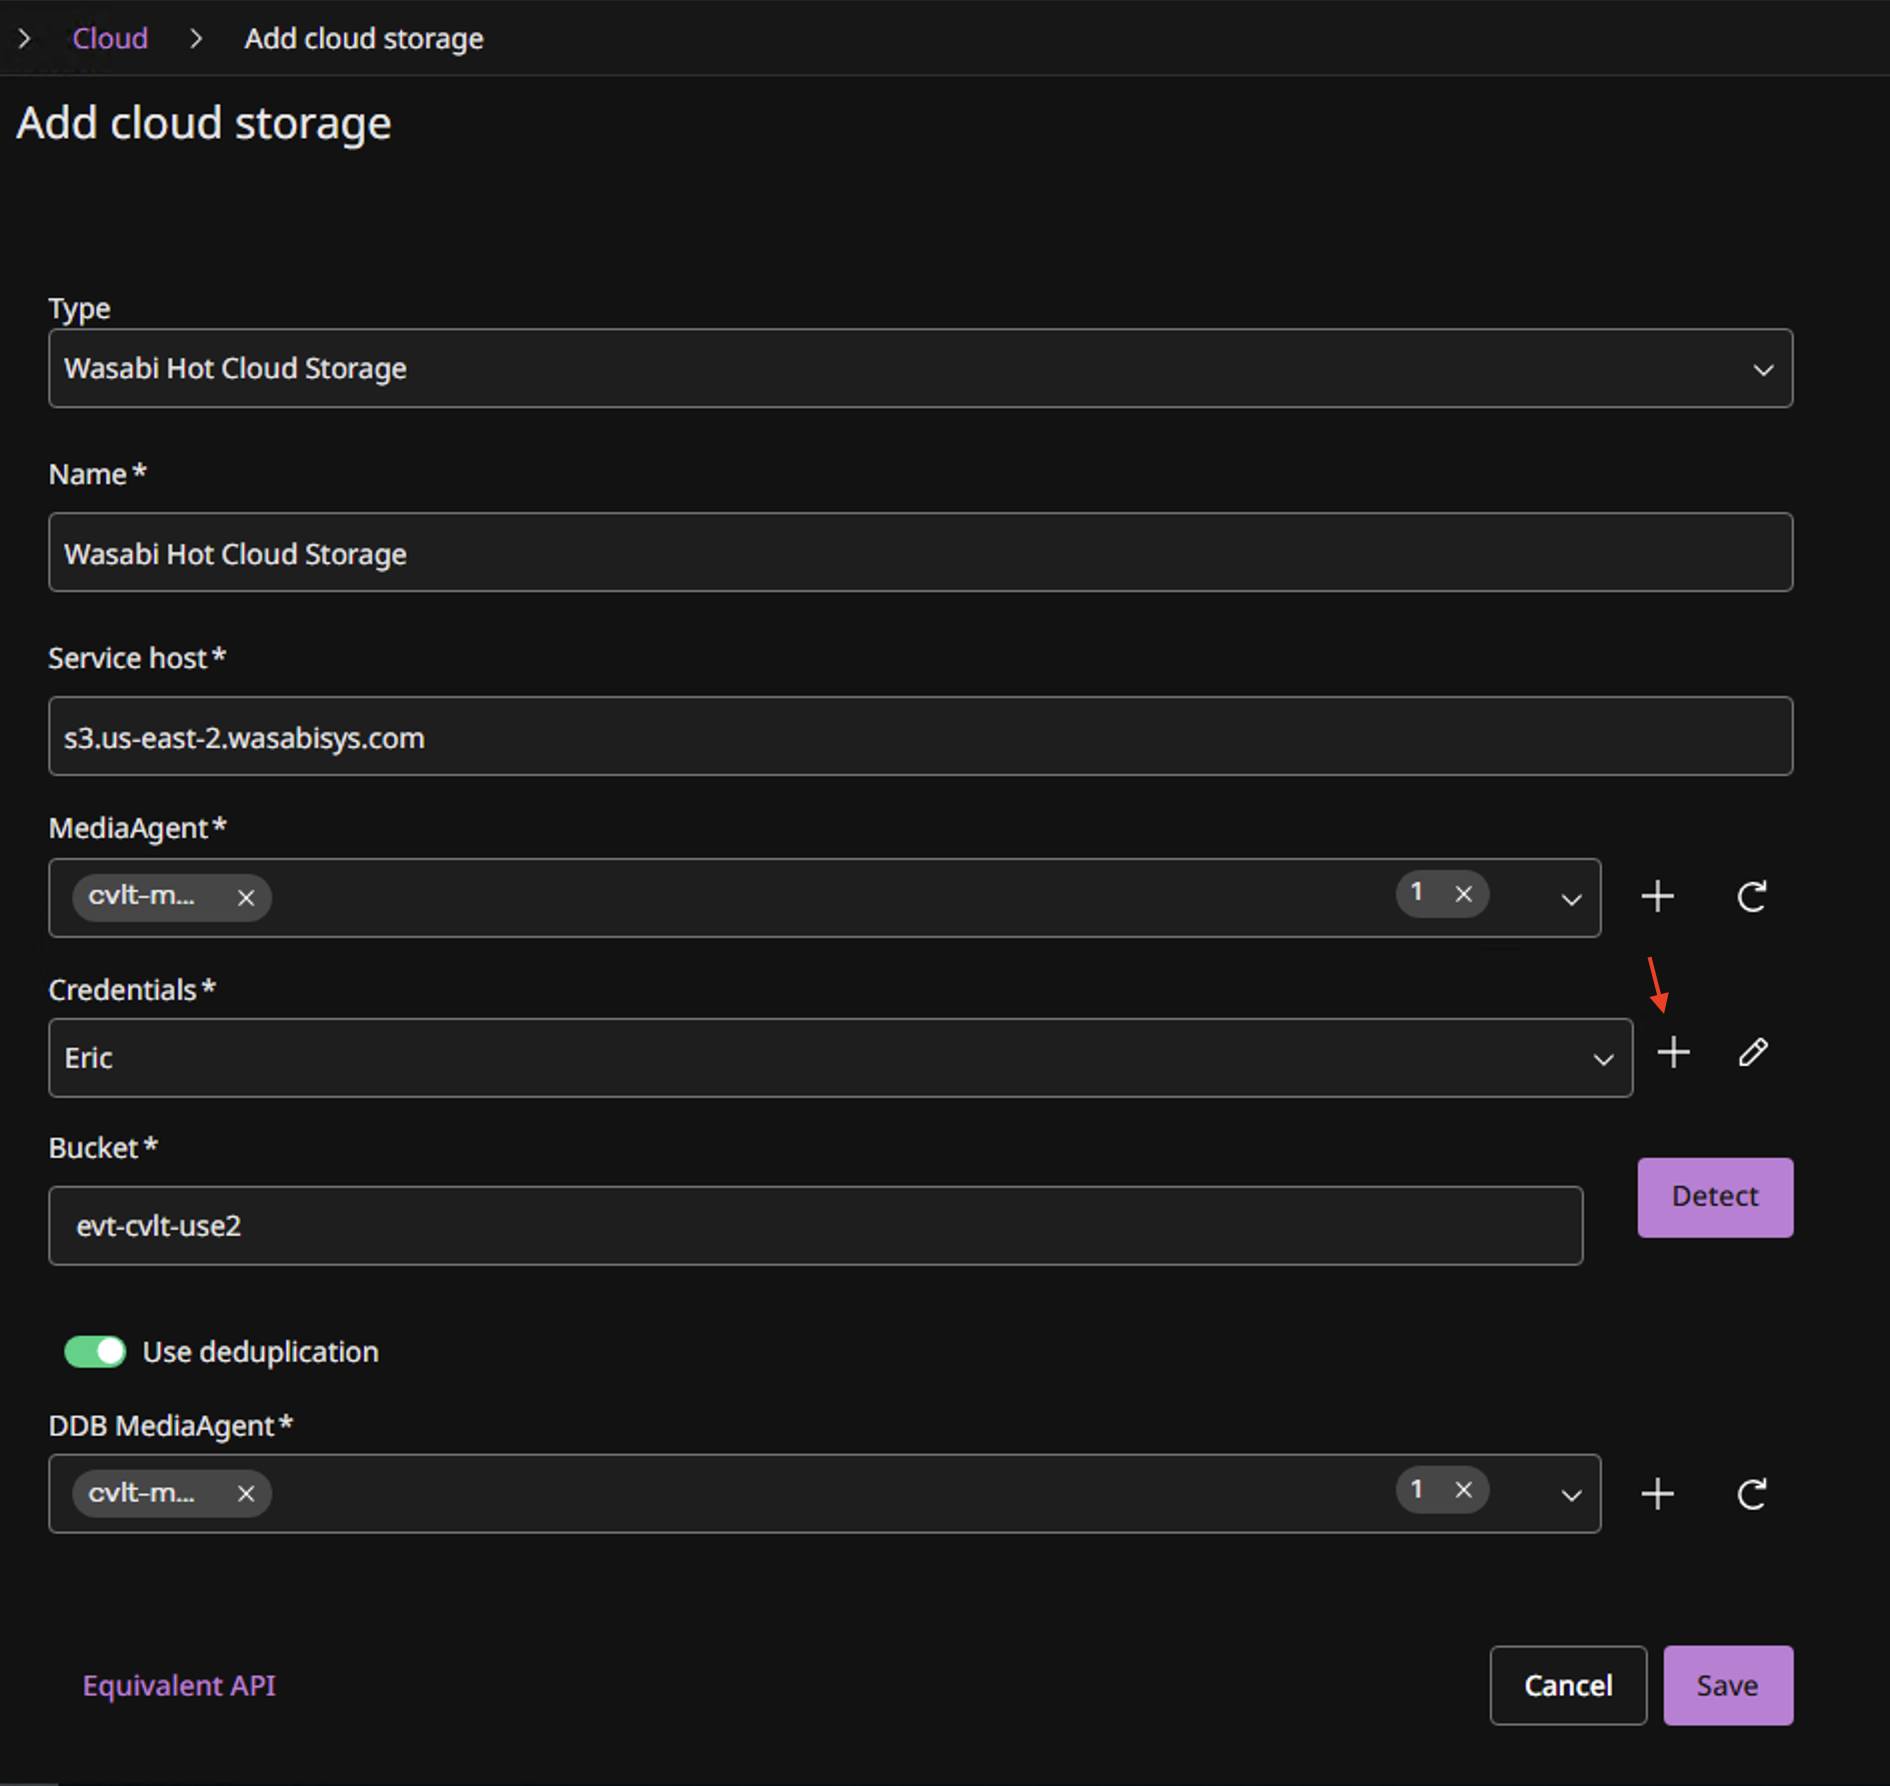
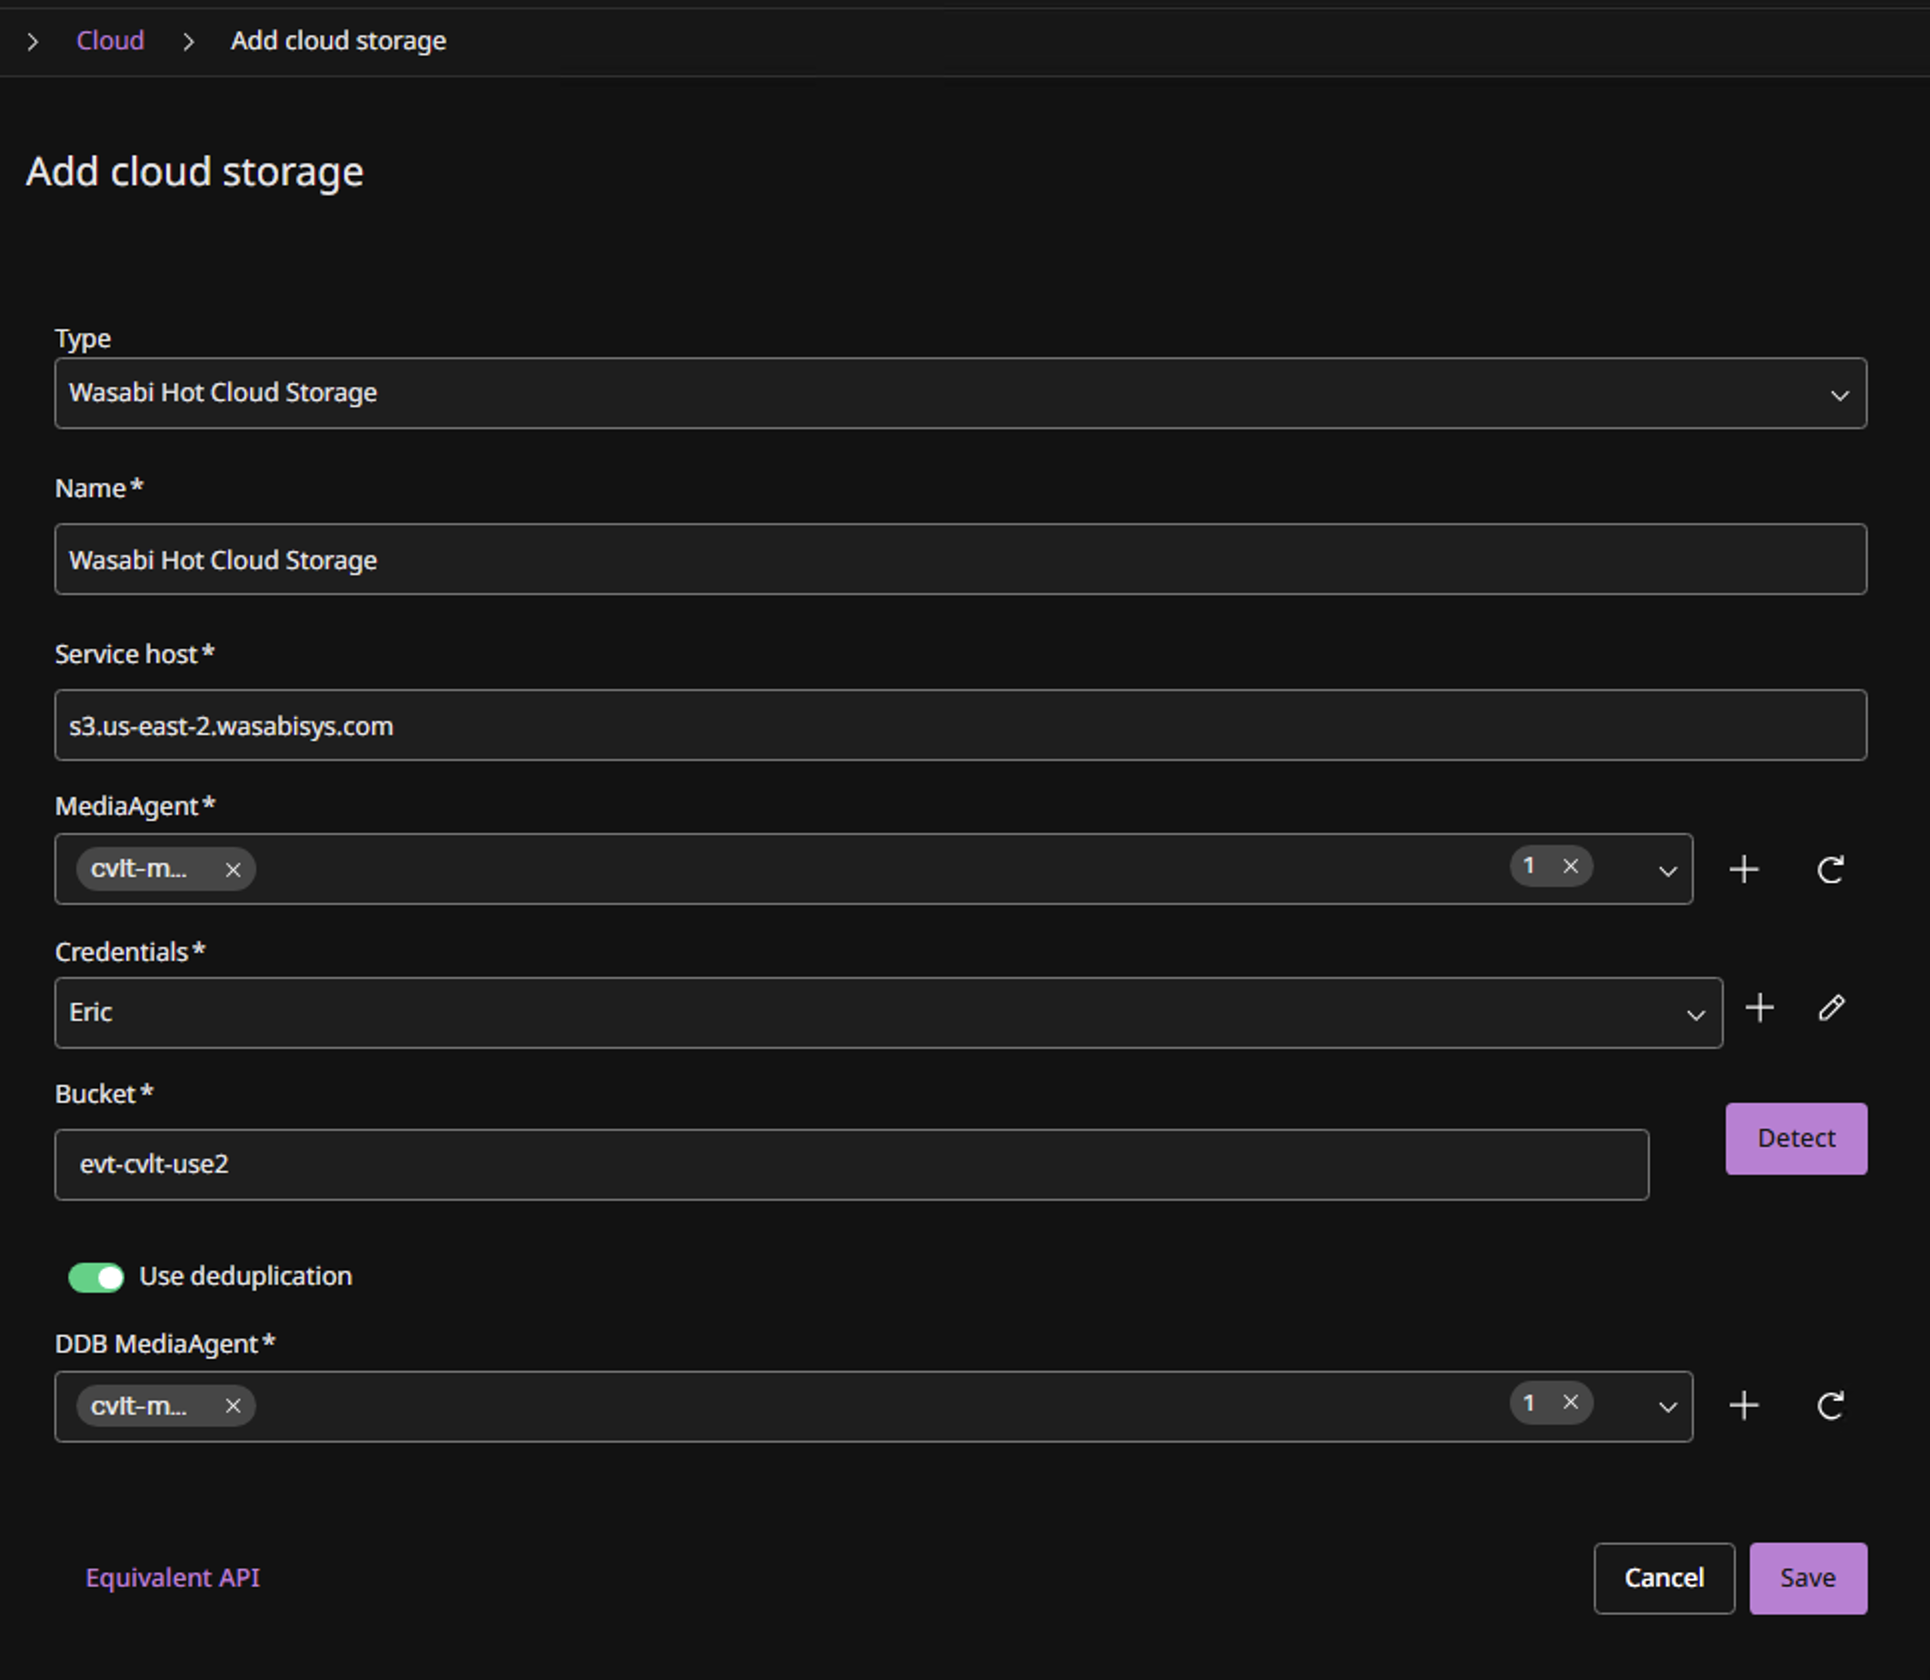
Configure the following.
Type—Select Wasabi Hot Cloud Storage from the drop-down menu.
Name—Provide a name for the cloud storage.
MediaAgent—Select a Media-agent associated with Commcell.
Server host—Provide the endpoint URL for the Wasabi region where the bucket is located.
Bucket—commserve-demo.
Credentials—Click + to add your Wasabi credentials.
This configuration example discusses the use of Wasabi's us-east-2 storage region. To use other Wasabi storage regions, use the appropriate Wasabi service URL as described in Service URLs for Wasabi's Storage Regions.
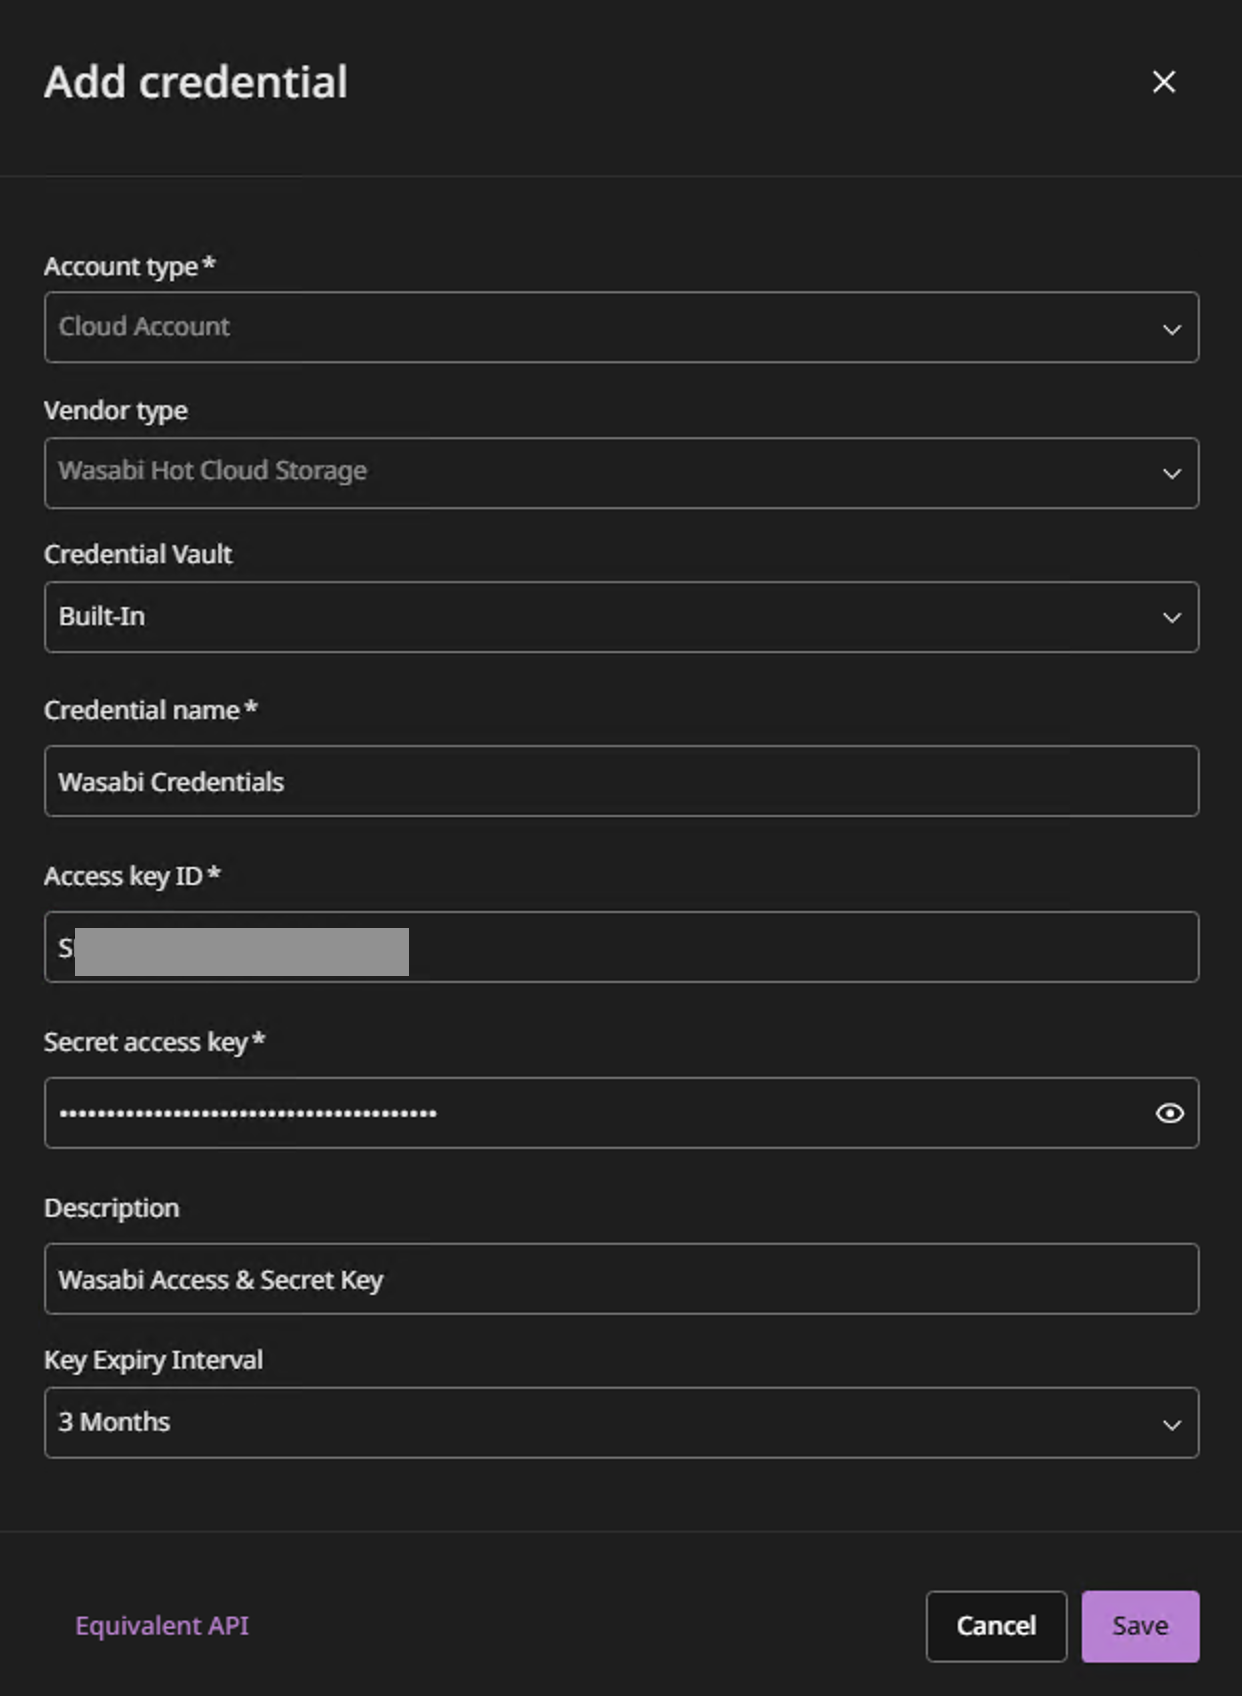
In the Add Credential window, provide the following details. Click Save.
Credential name—Provide a name for the credentials.
Access key ID—Provide the Wasabi access key.
Secret access key—Provide the Wasabi secret access key.
Select the added Wasabi credential and provide a bucket name.
Enable deduplication and add a location for the Deduplication DB location.
Click Save.
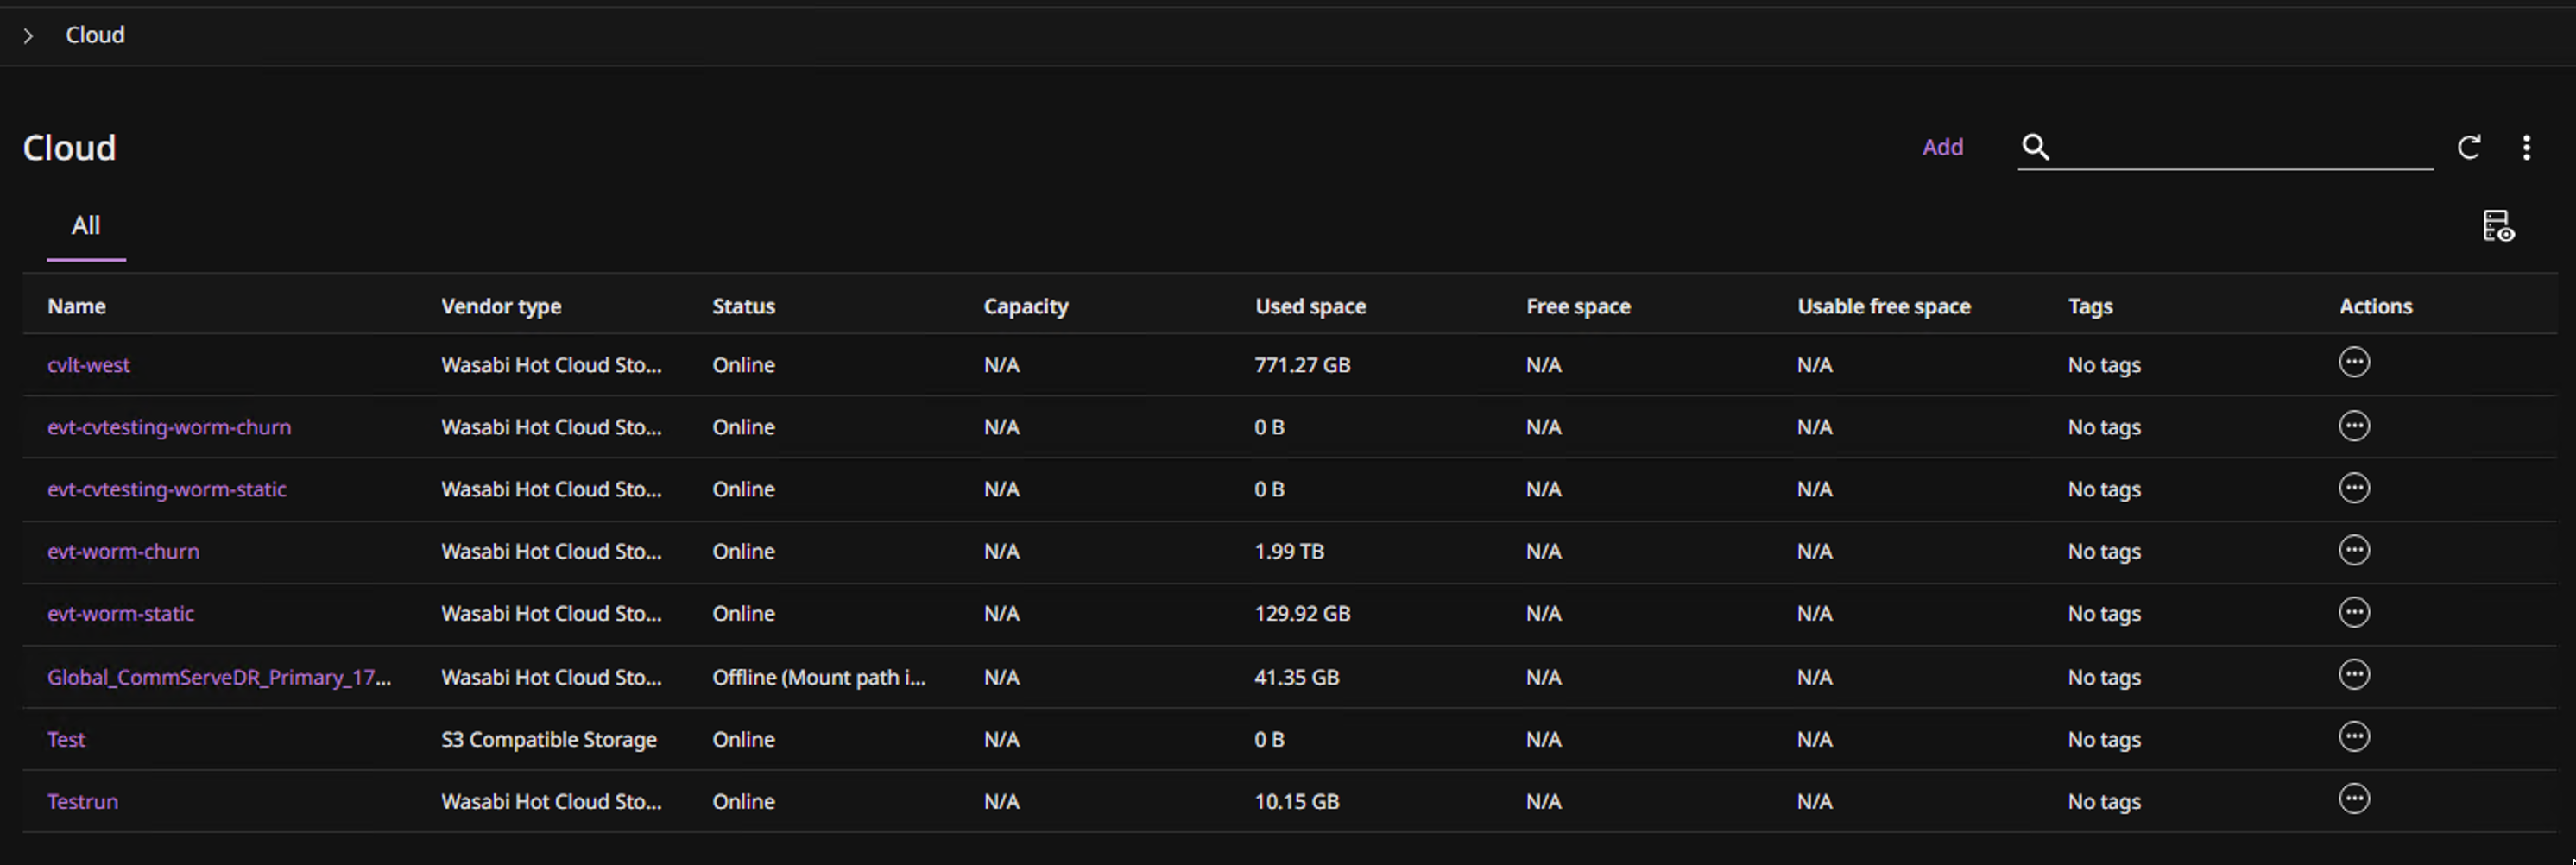
The Cloud tab displays the newly added Wasabi storage location.
Backing Up a Virtual Machine
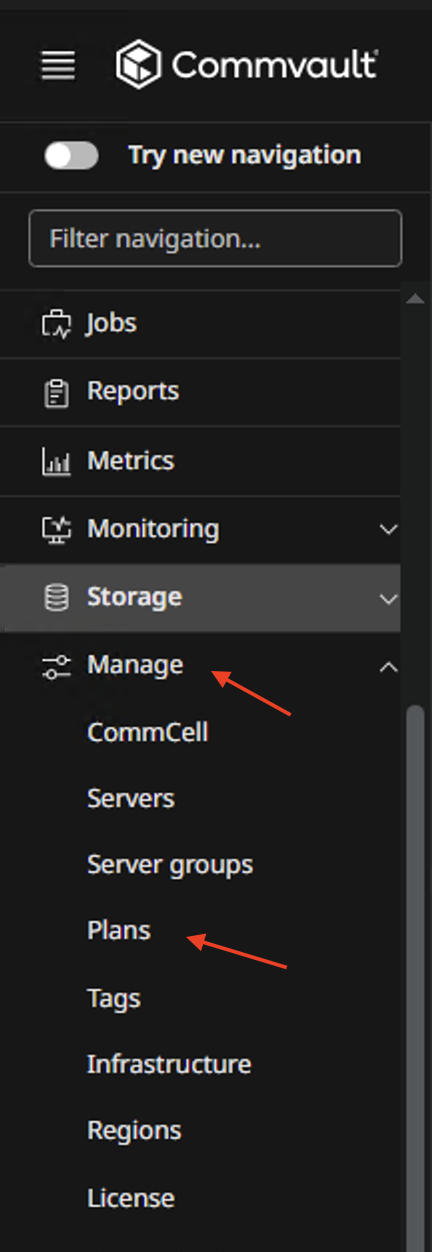
Navigate to Manage.
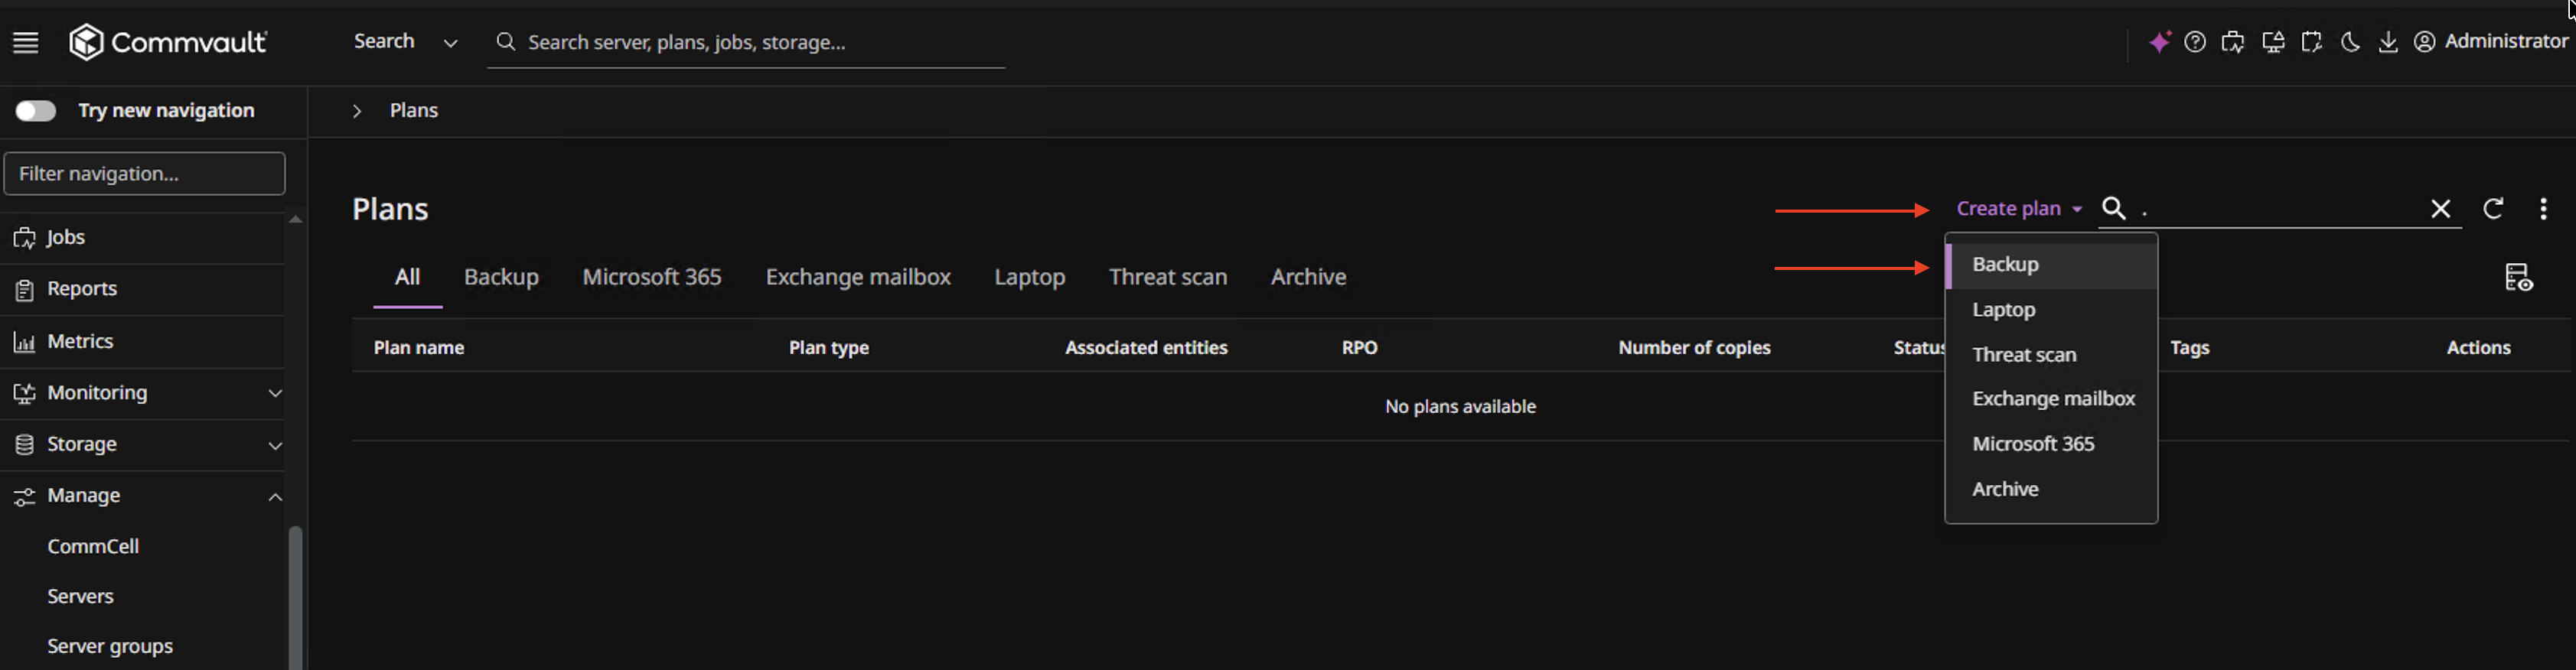
Select Plans.
Click Create Plan and select the desired plan type. In this example, we will be configuring a Backup.
In the Create Server Backup Plan wizard, input the following.
Plan Name—Provide a name for the plan
Configure backups—Click the checkbox to enable Configure backups.
Storage—Select the Wasabi cloud storage location created in the previous section.
Frequency—Choose how often the backup should occur.
Retention rules—Select the retention period.
Click Save.
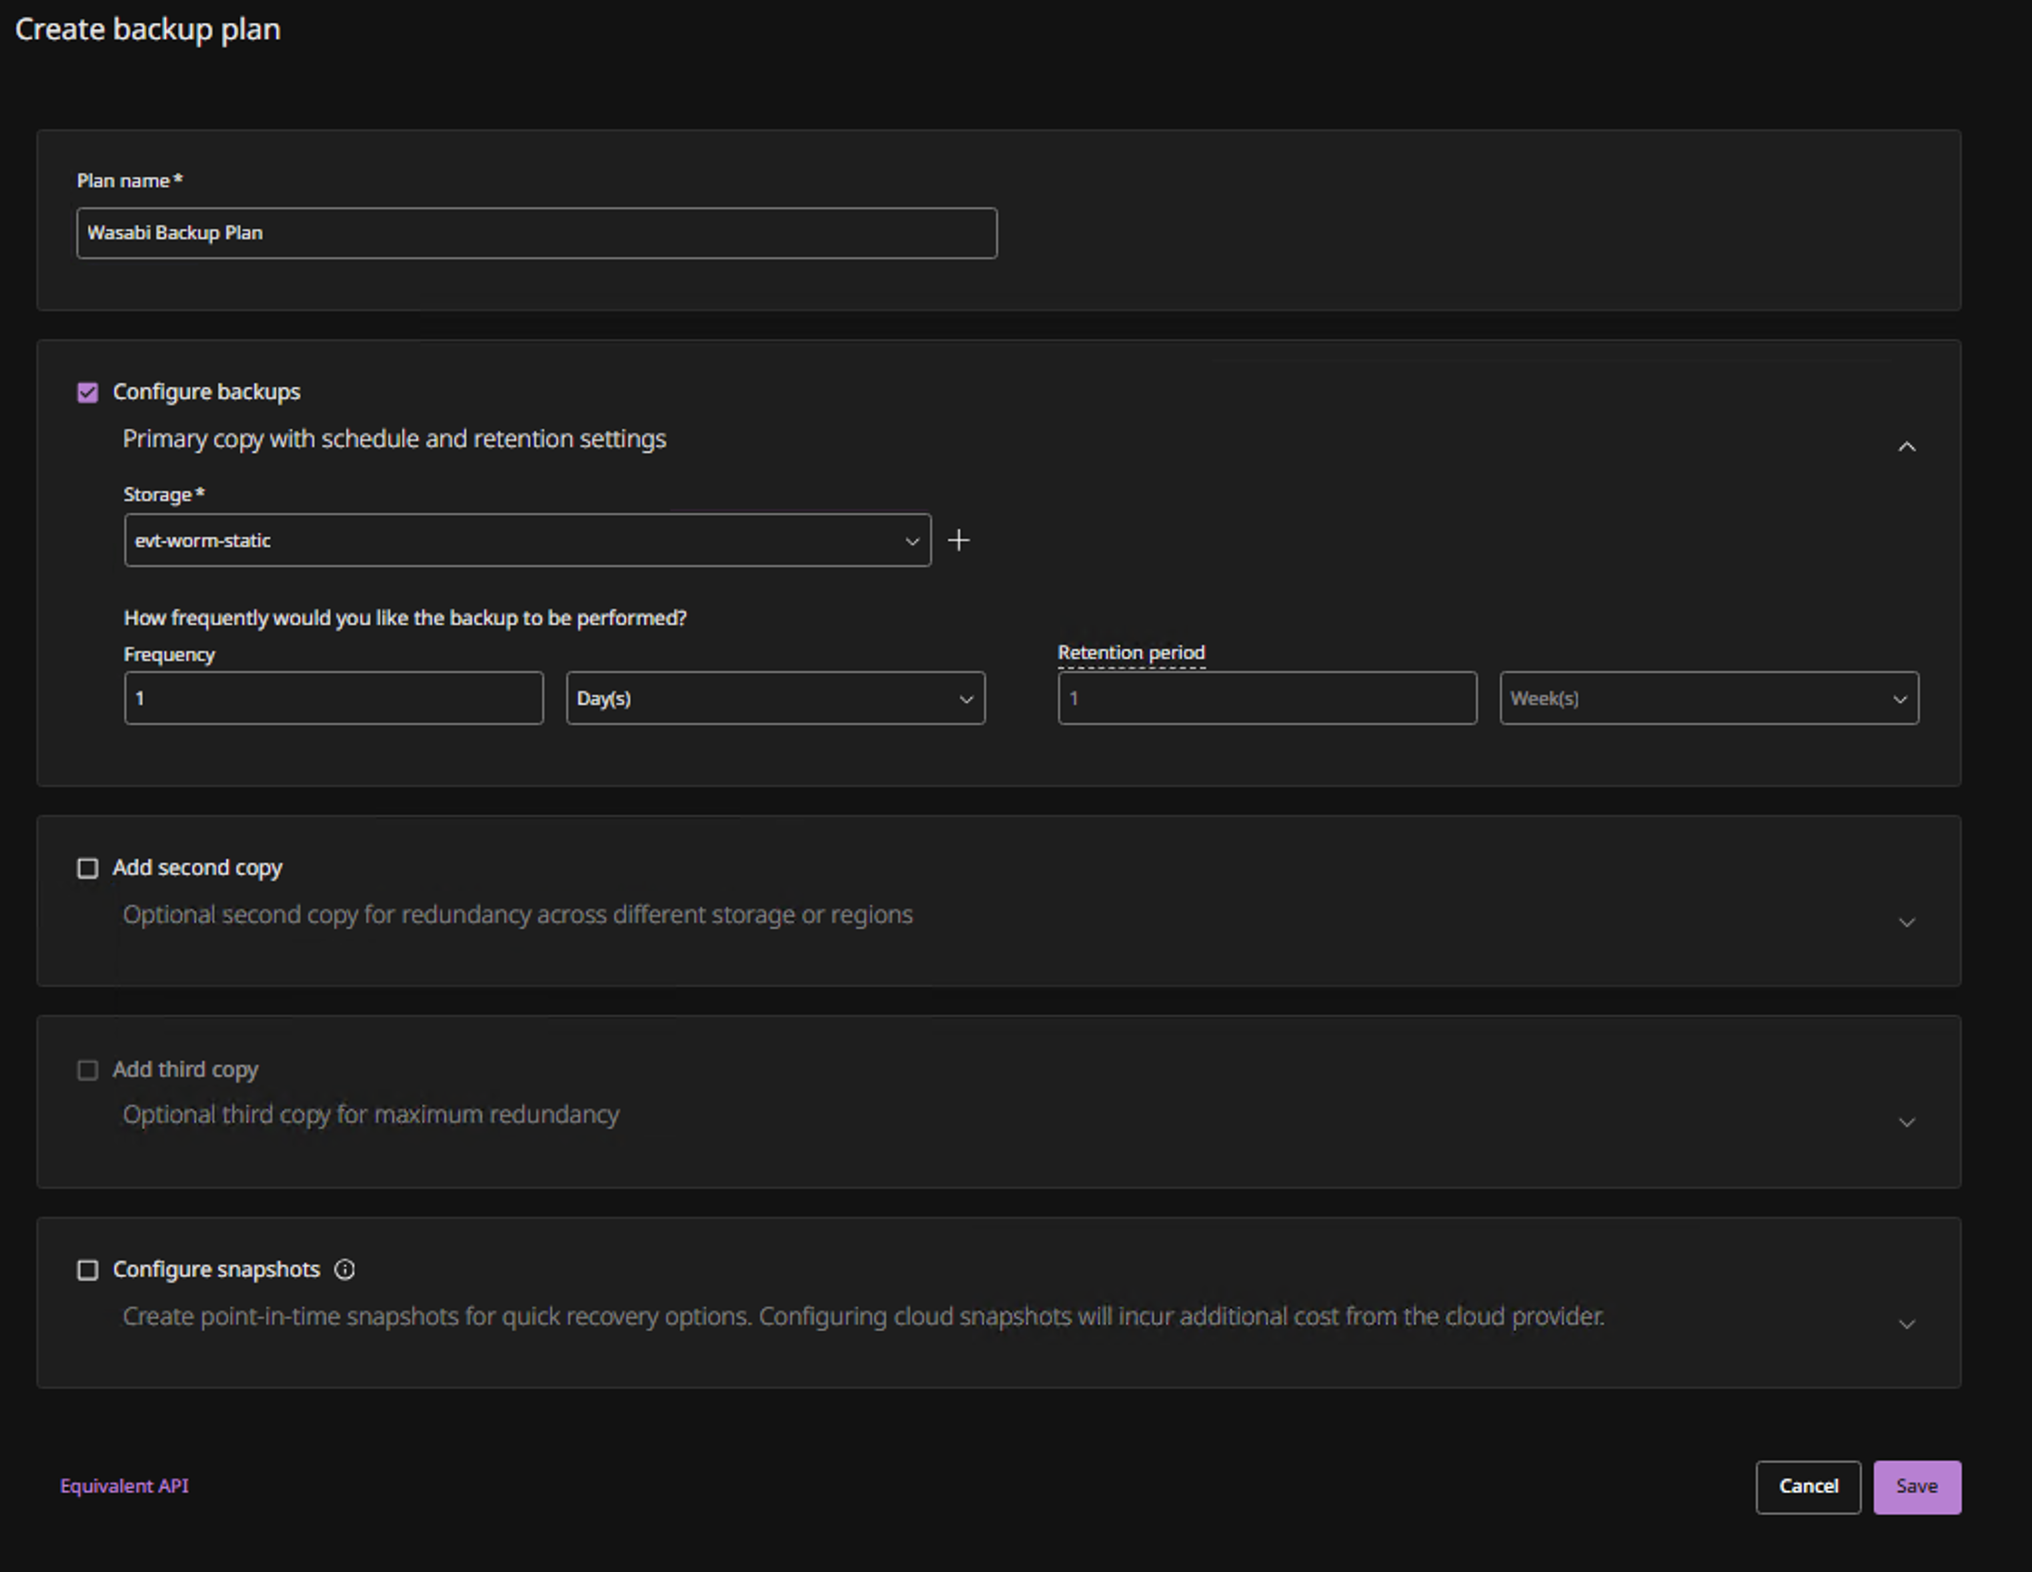
The virtual machines associated with this plan will be backed up to the Wasabi storage location.
Configuring Immutable Backups Using Object Lock
You can configure immutable backups by enabling WORM functionality on the cloud storage server. Commvault supports object lock in Compliance mode.
When WORM is enabled, the cloud storage utilization will be increased due to the deduplication databases used by Commvault as a part of its backup process. This applies to all cloud storage providers. For more information, refer Commvault’s documentation on Configuring Storage Lock.

As of version 11.44 of Commvault, a new feature has been added to improve storage reclamation efficiency, you can enable WORM Storage Optimization, which uses micro-pruning to reclaim eligible data at the job level while maintaining WORM immutability protections. For more information, review the Commvault’s documentation on Configuring Immutability on Cloud Storage.
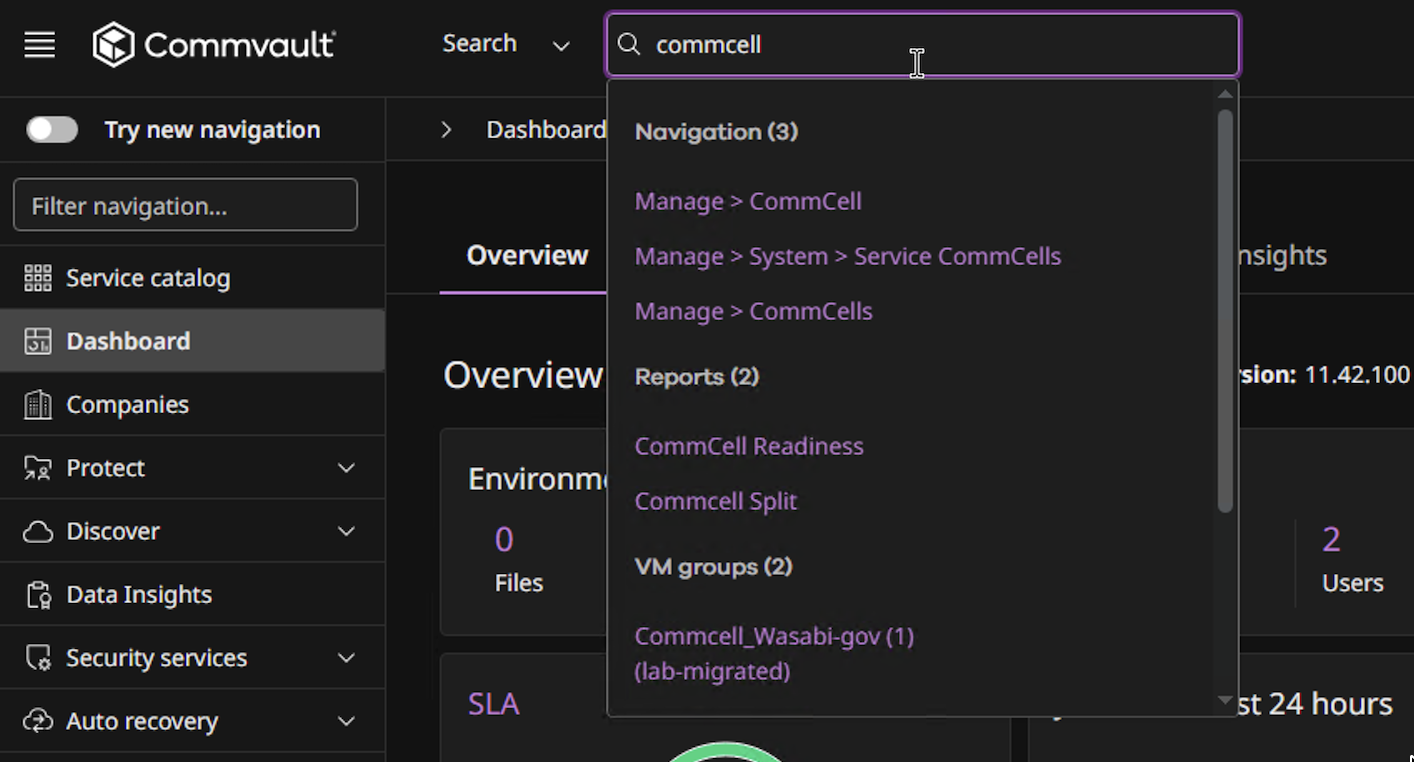
Log in to your Commvault Console Dashboard.
Search Commcell in the search bar at the top of the dashboard.
Click Manage.
Click Commcell.
In the Settings panel, click Add.
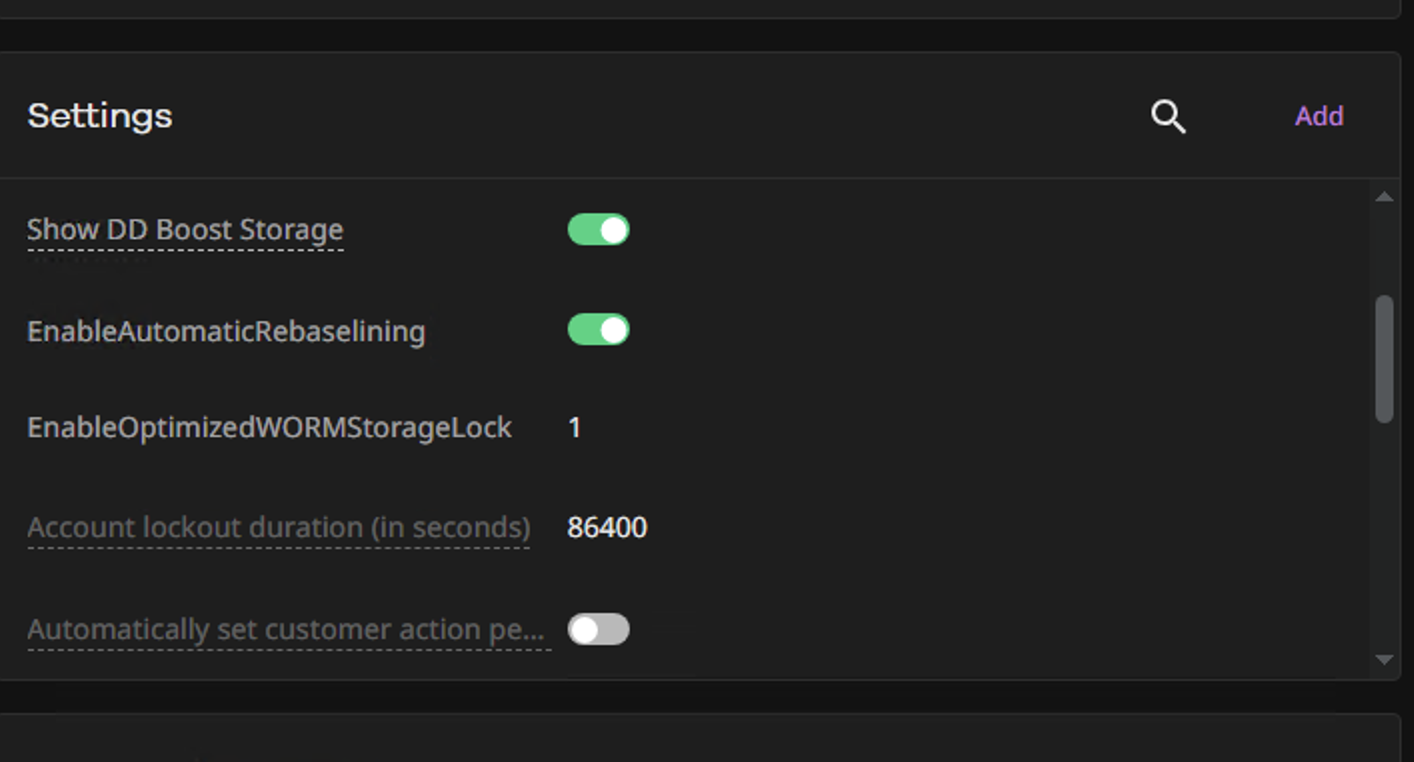
Input the following values.
Name—EnableOptimizedWORMStorageLock
Type—Integer
Path—CommServDB.GxGlobalParam
Value -1 (or 0 to disable)
Click Save.
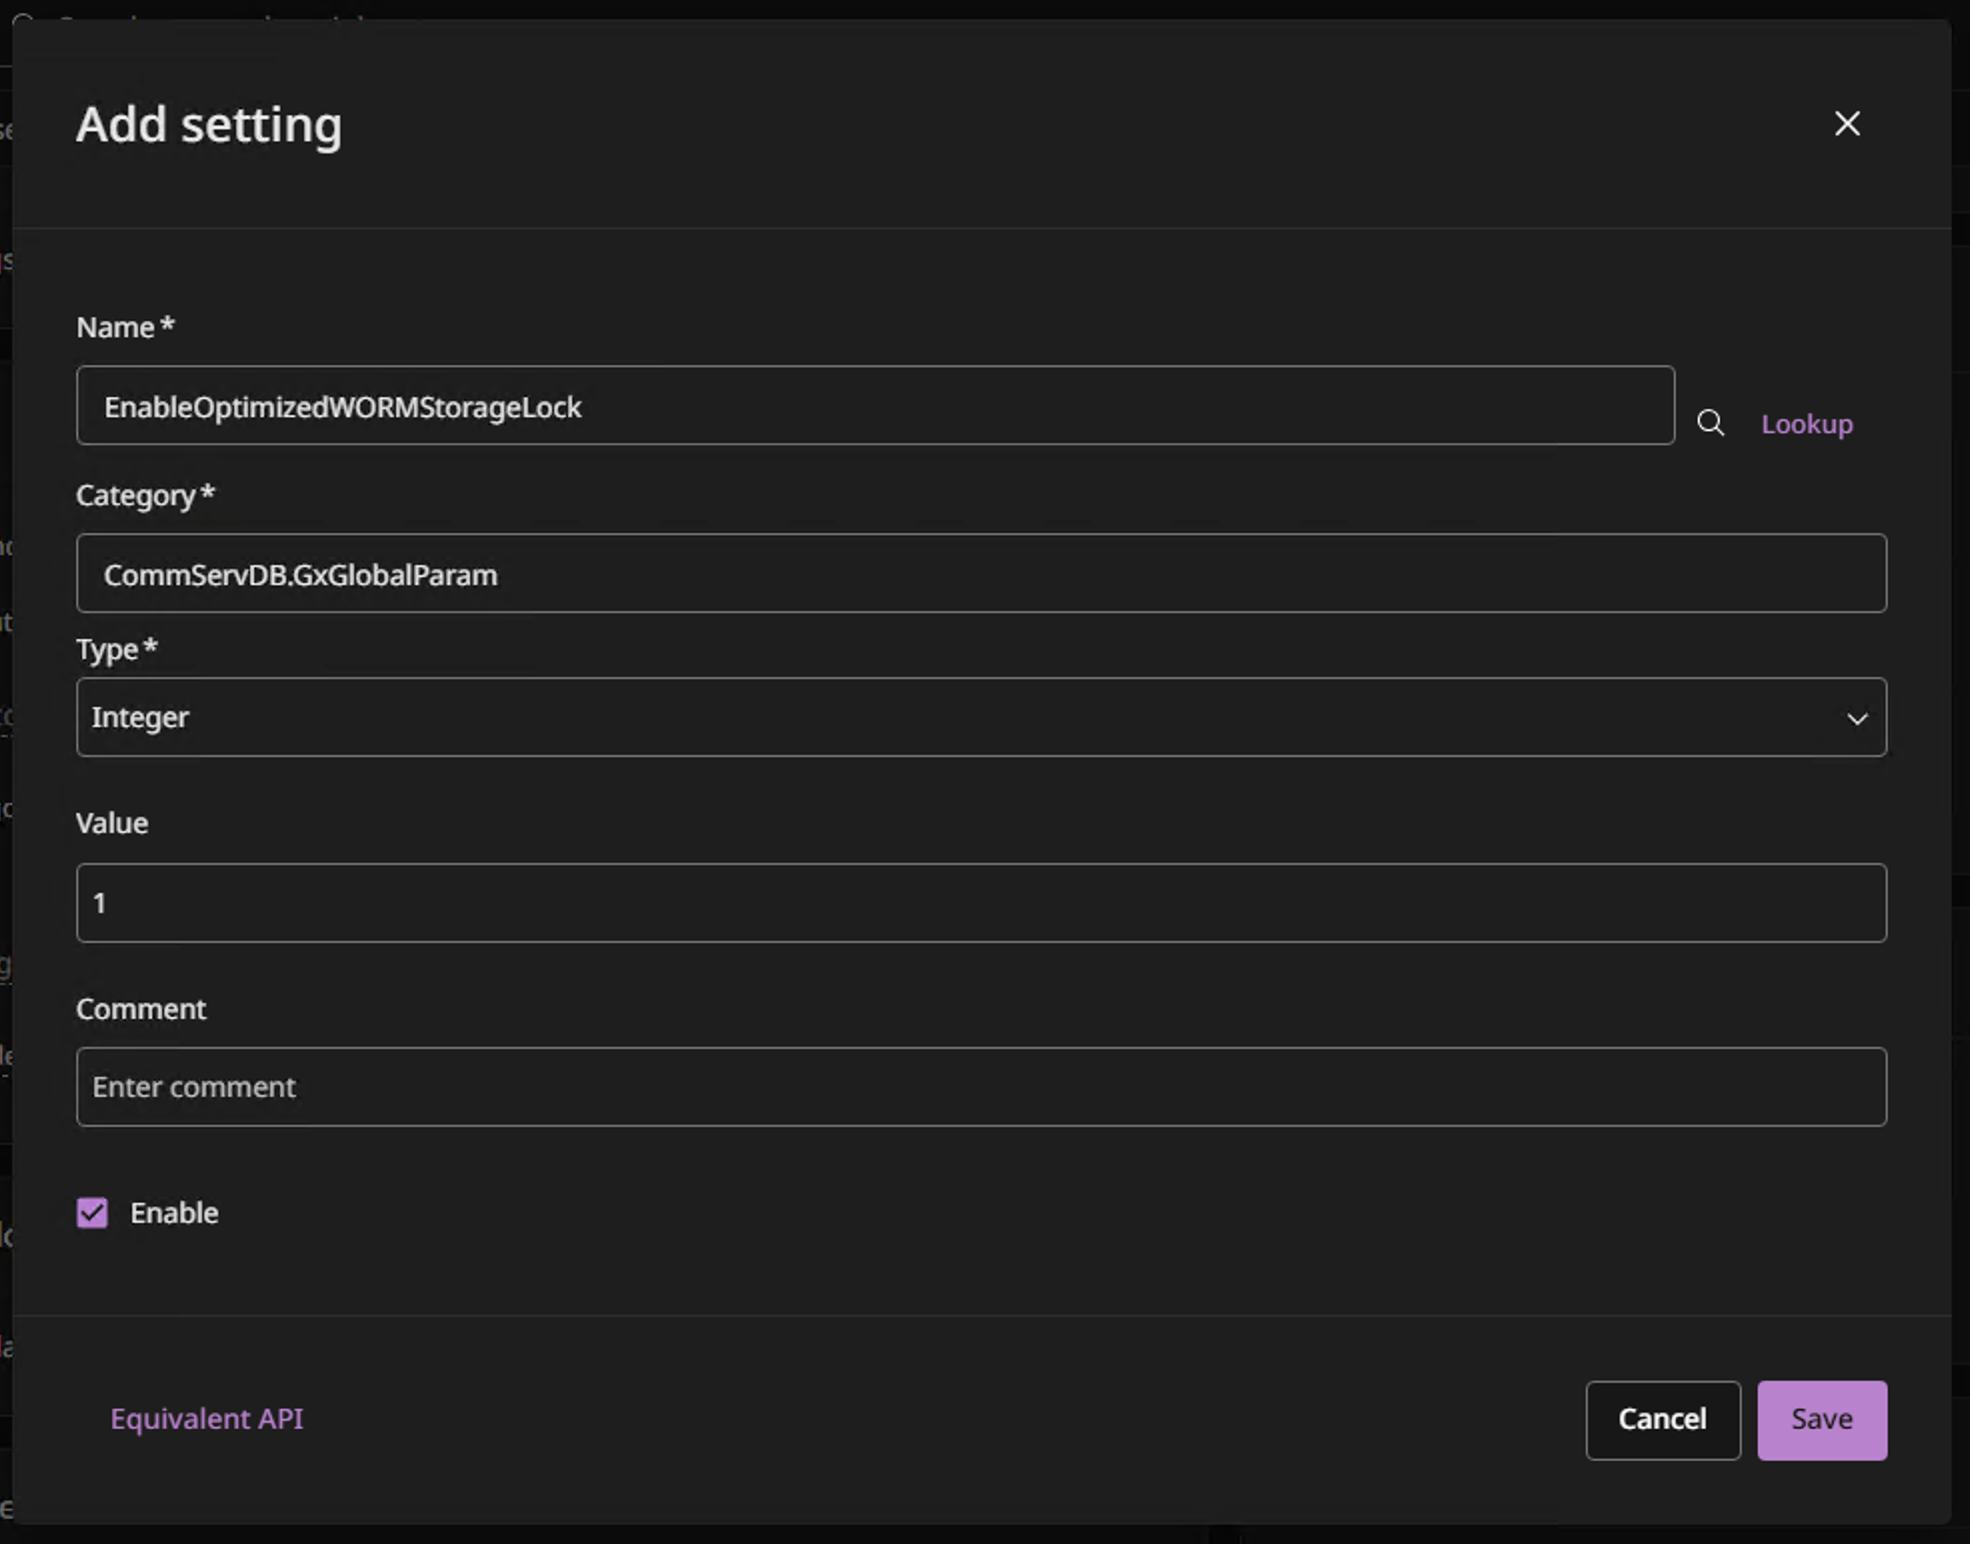
Commvault Optimized WORM Storage Lock will be enabled for newly created storage locations.
Create an Object Lock enabled Wasabi bucket. For more information, refer to Object Lock: Enabling.
Configure the Object Lock enabled bucket as a cloud storage server location by following the steps in Configuring Wasabi as a Cloud Storage Target.
Select the cloud storage location and navigate to Configuration.
Under the Immutability section, enable Storage Lock and configure the retention period.
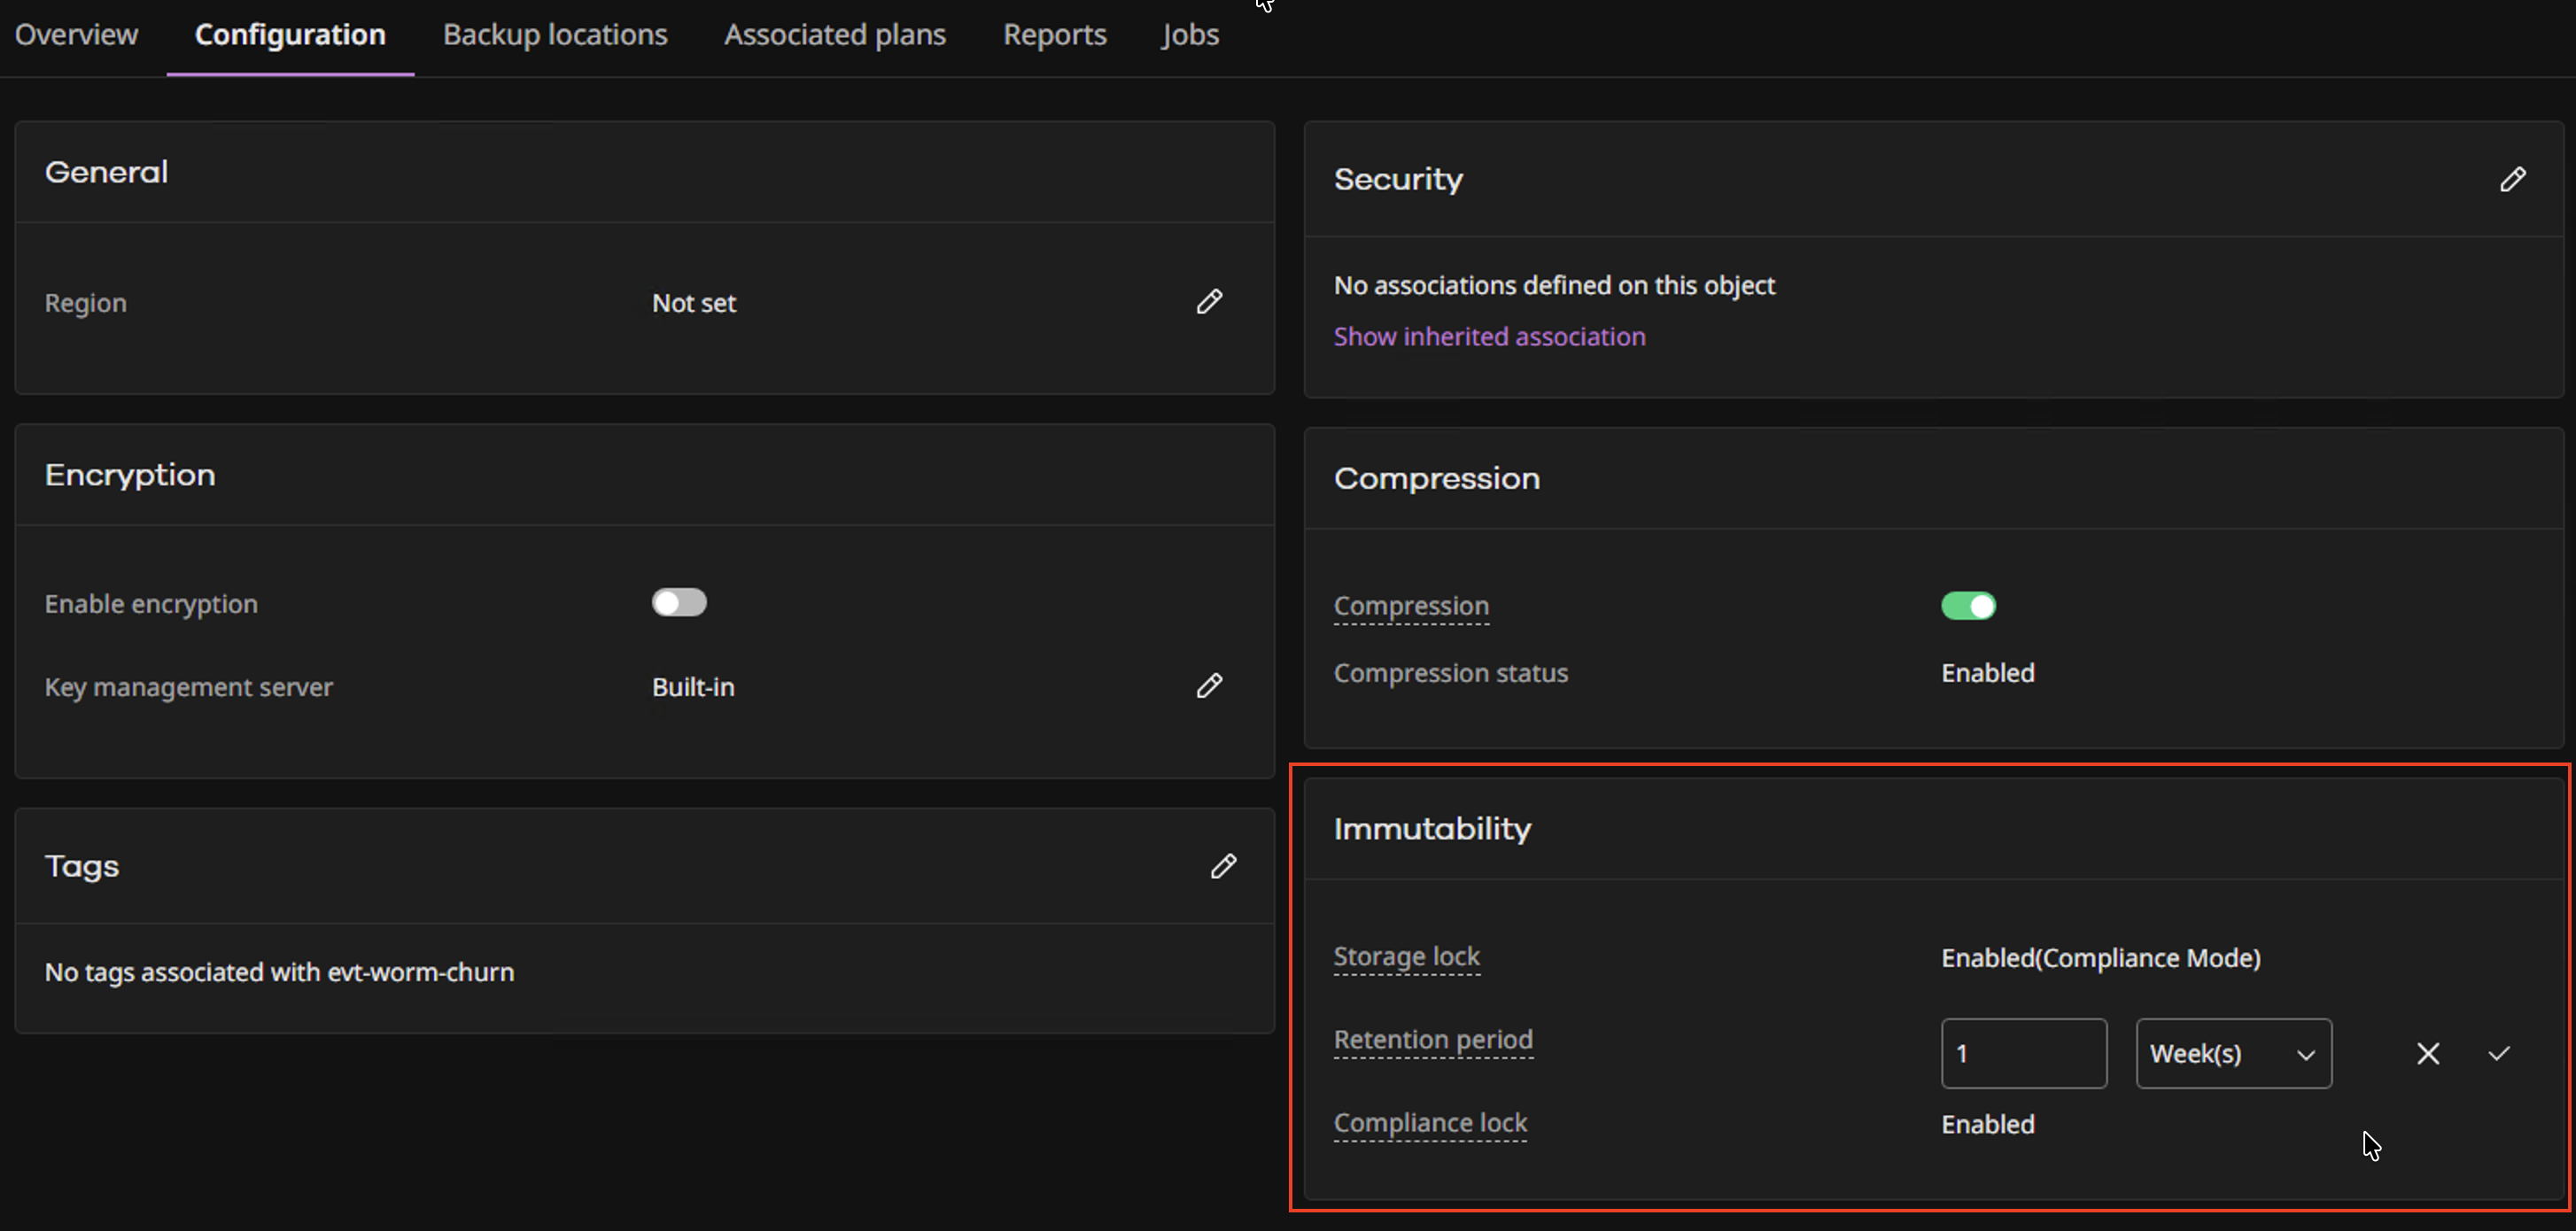
Assign this storage server as the destination in the appropriate backup plan. All backups will be written to Wasabi in WORM mode after the retention period specified in the backup plan.
Restoring a Backup
The data restoration process is handled by your specific backup software application. As there are many, potential variables that will affect your unique environment, Wasabi strongly recommends that you seek the guidance of your backup software's technical support team in the event that you encounter difficulty or have application-specific inquiries.
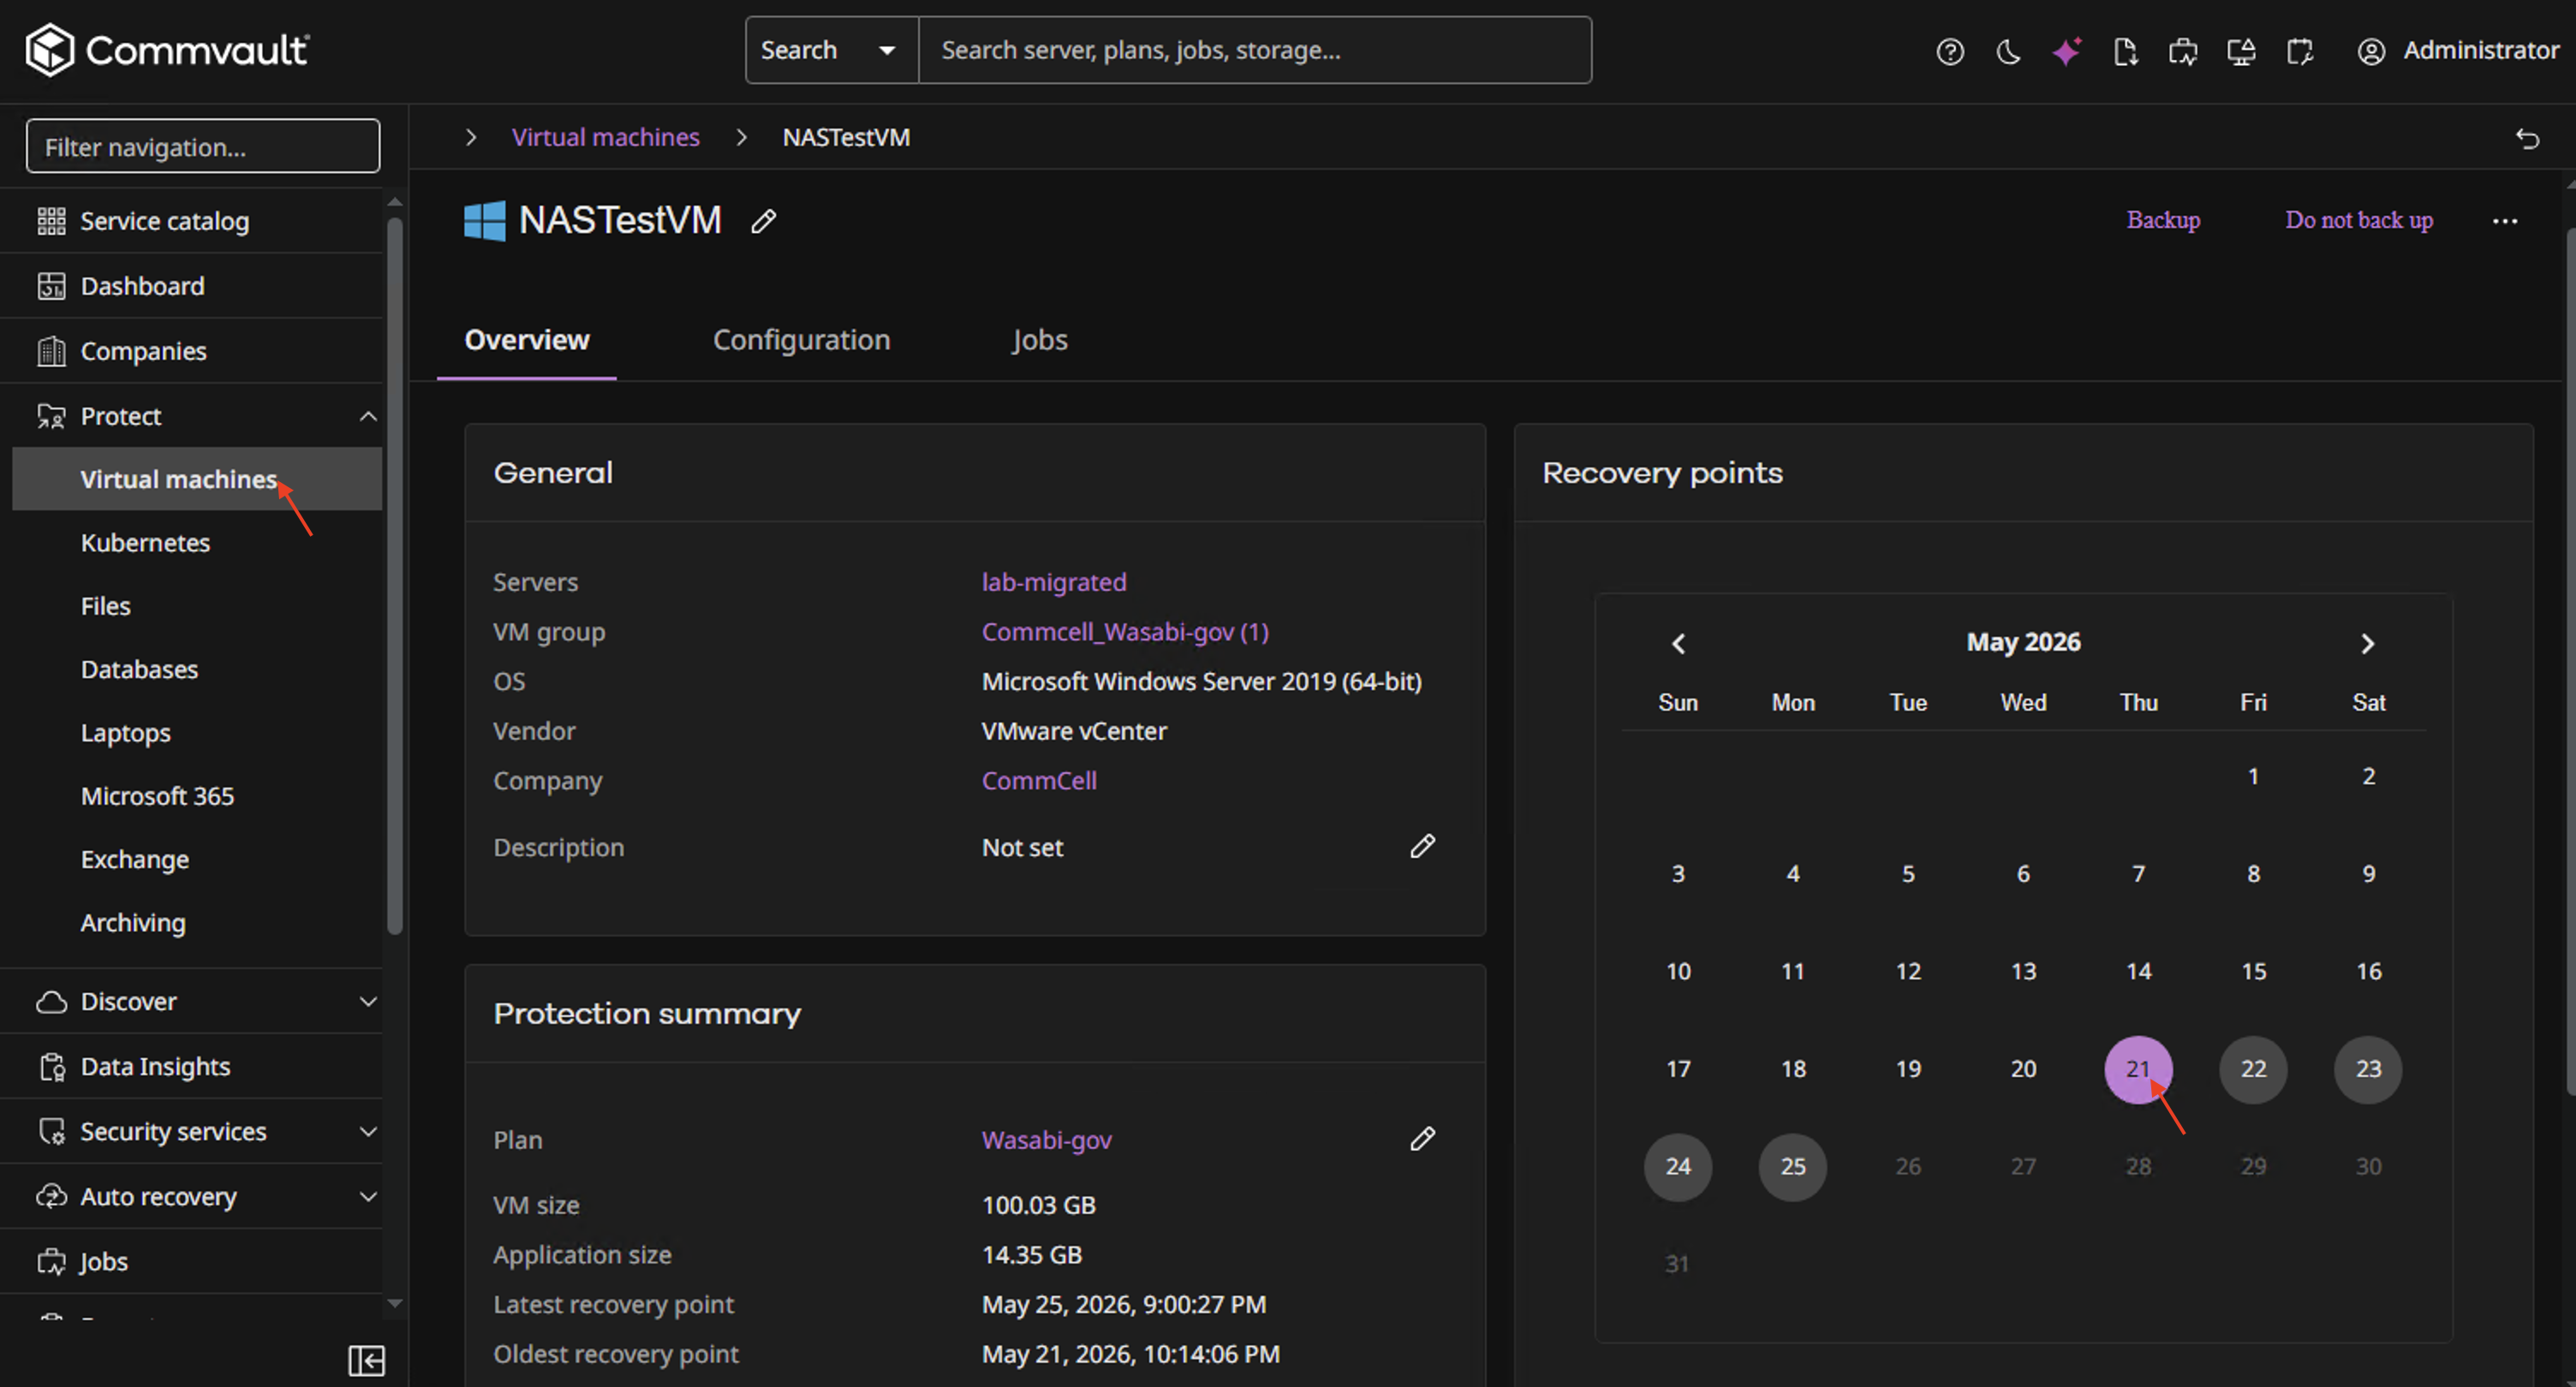
Navigate to the VM and select the desired date from the calendar in the Recovery points section.
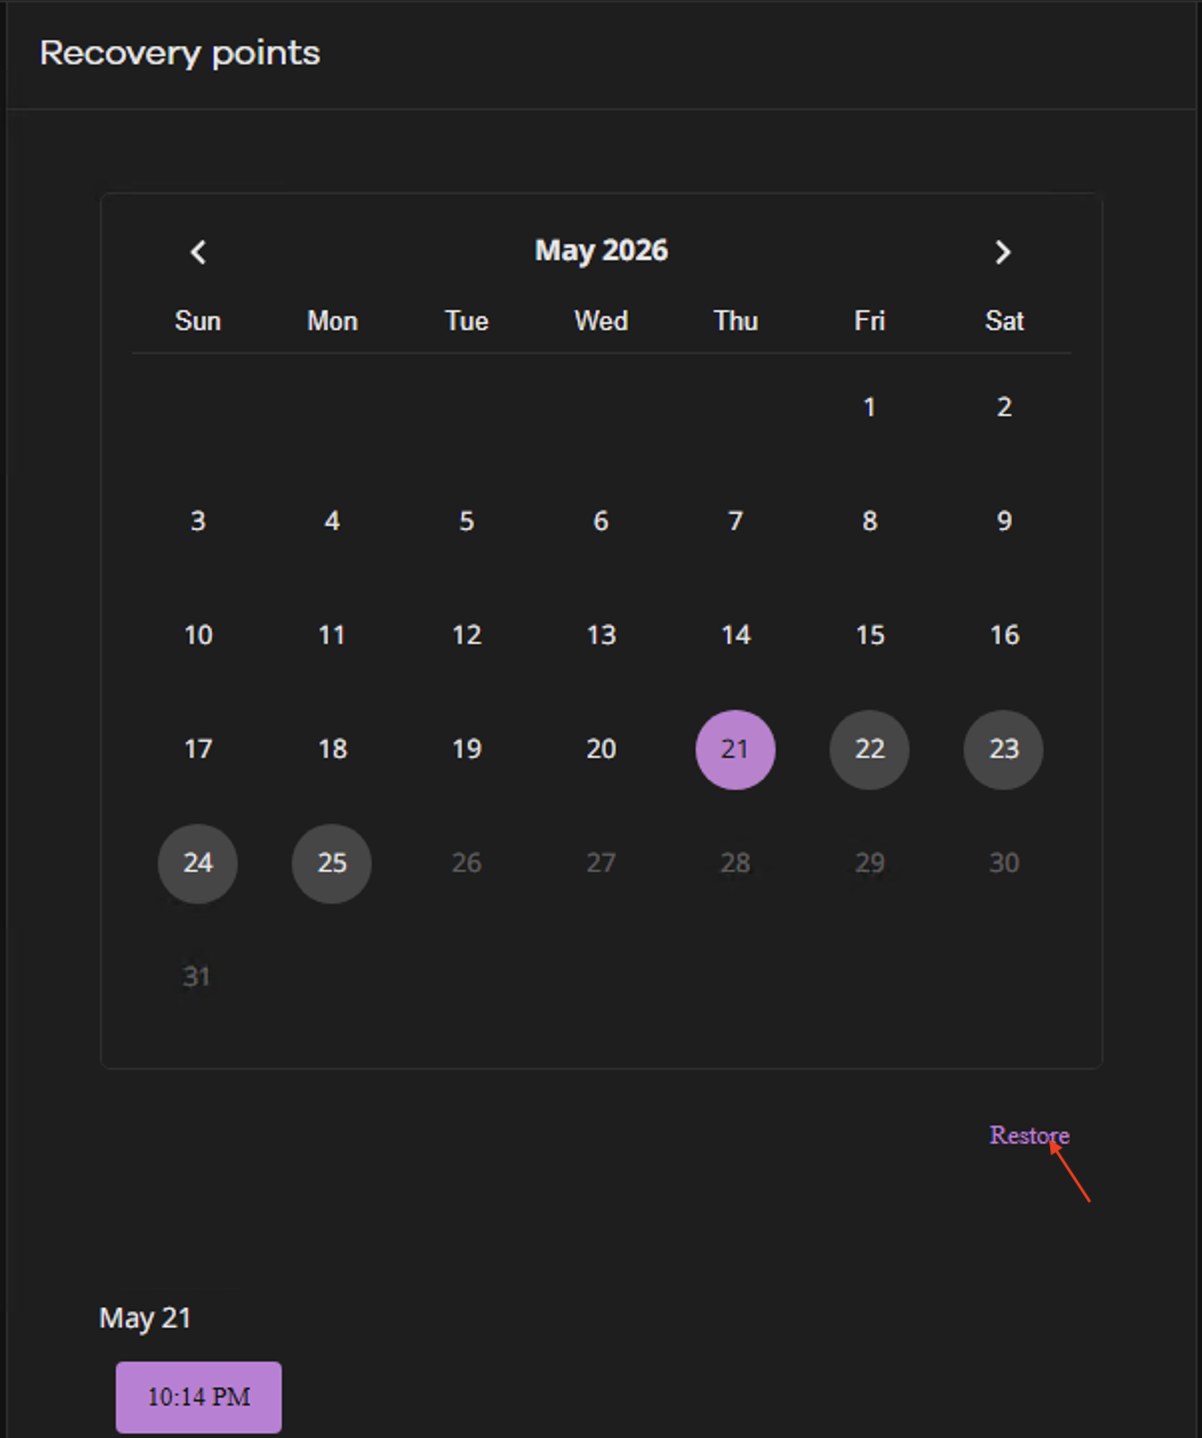
Click Restore.
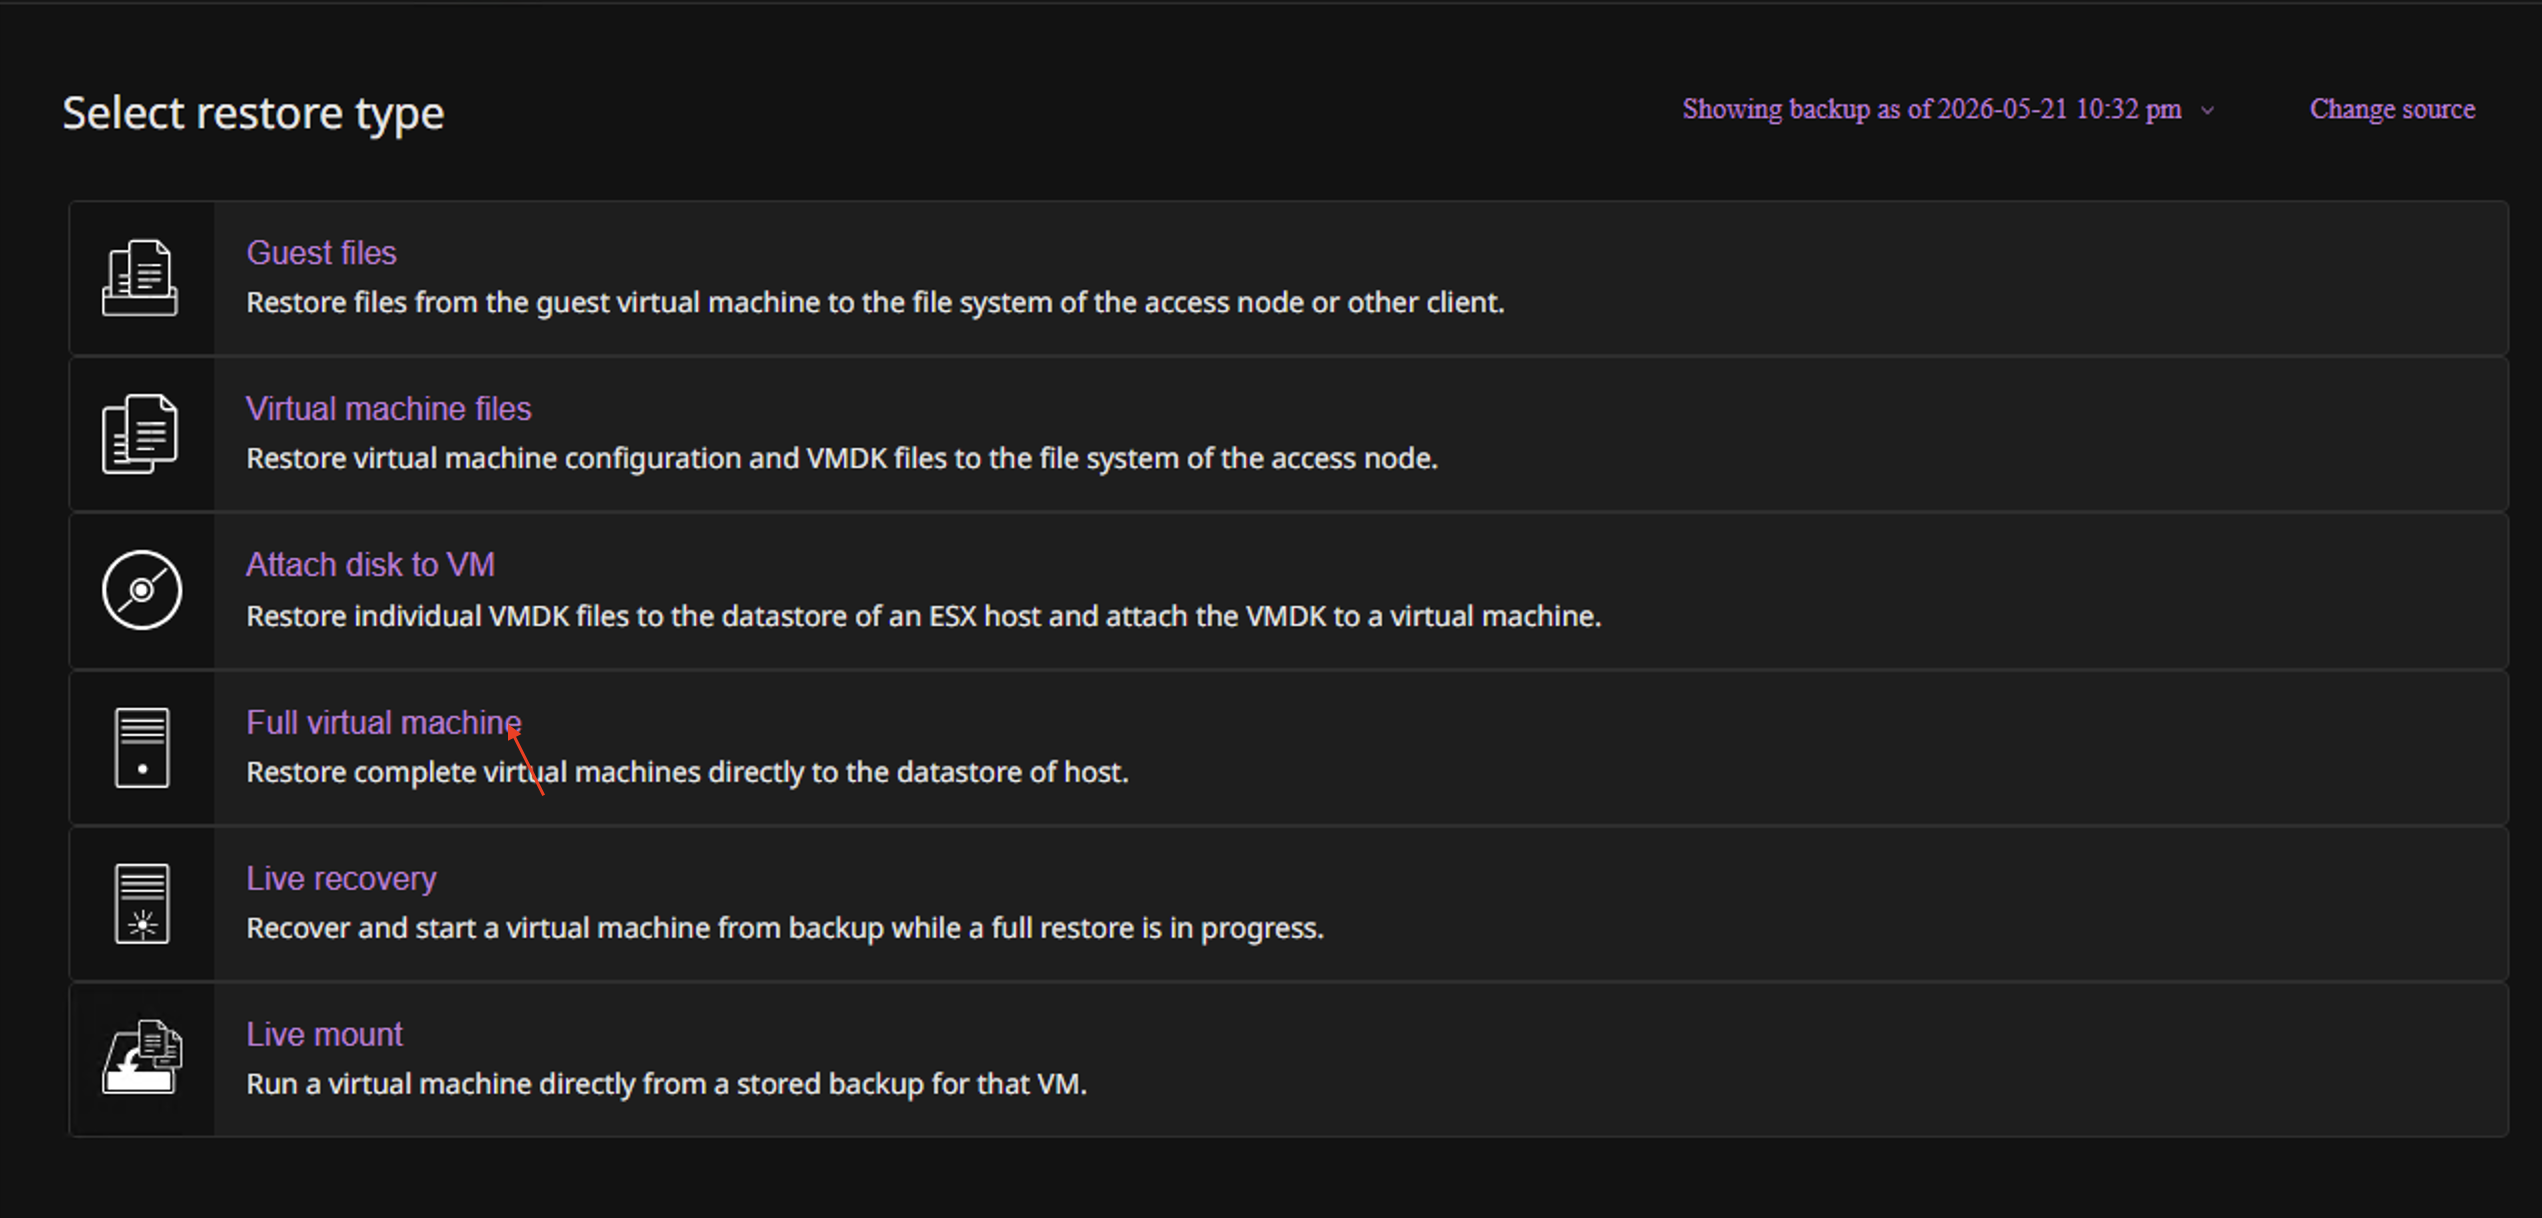
Select the Restore type. In this example, we selected Full virtual machine.
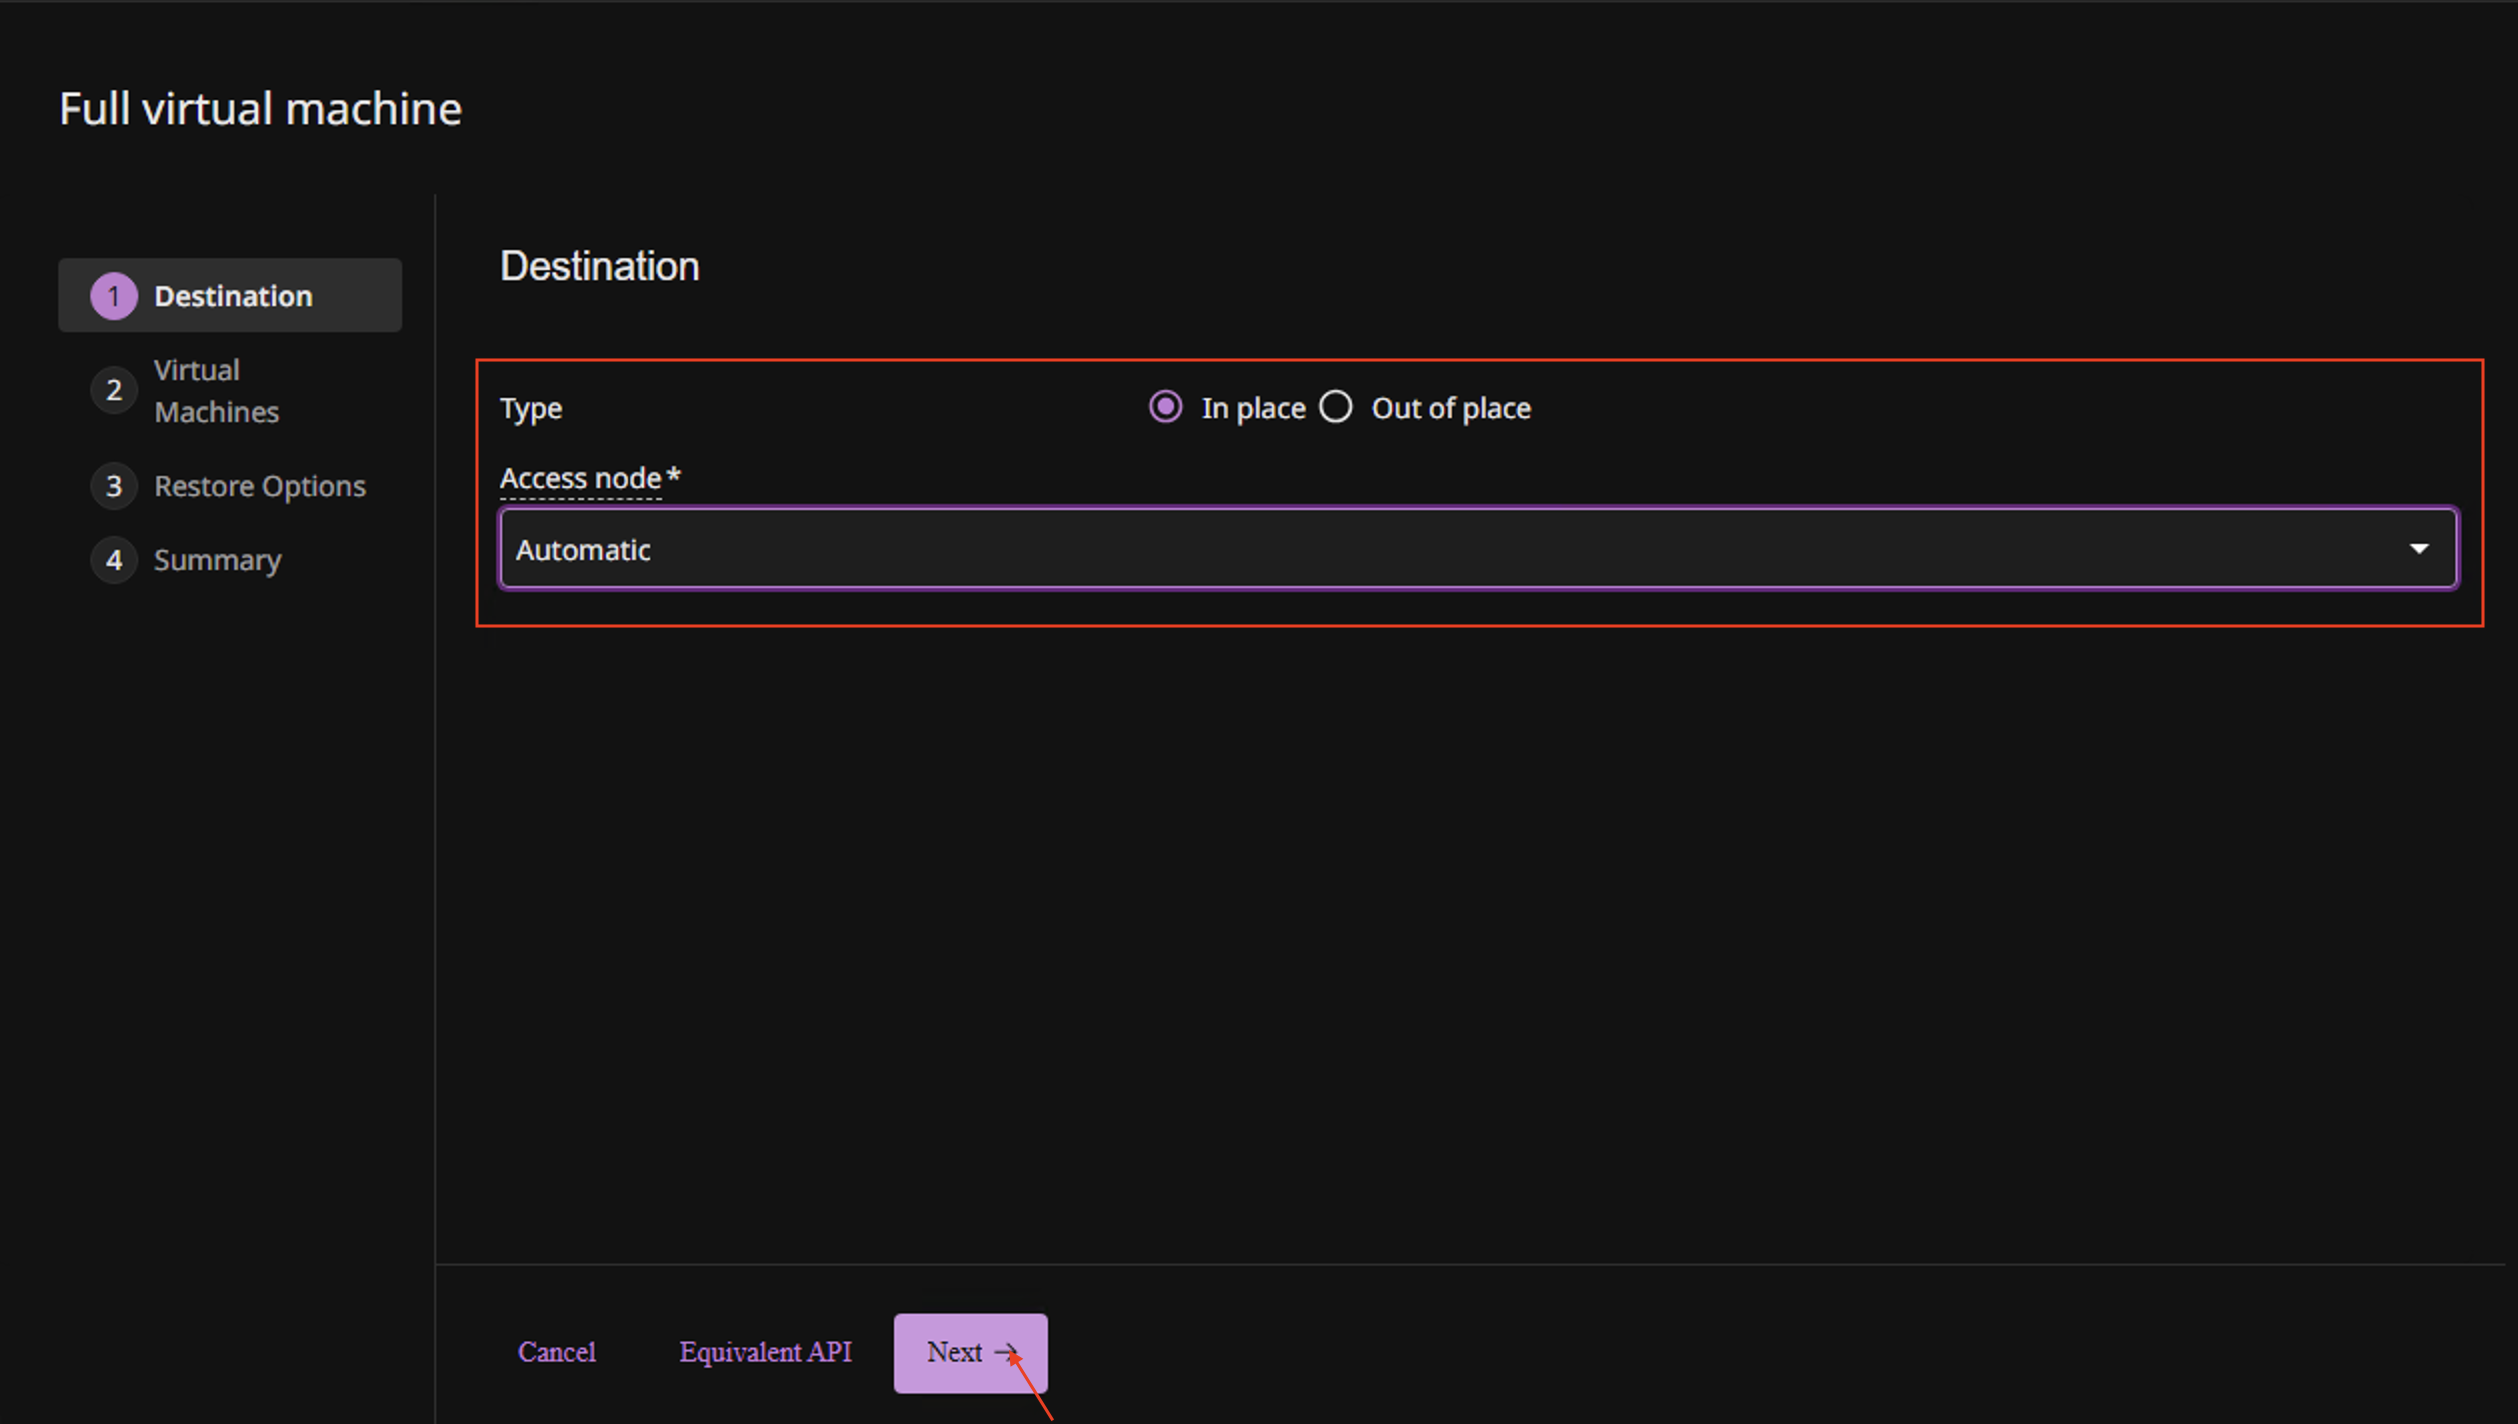
On the Destination tab, select the Type.
Select Access node.
Click Next.
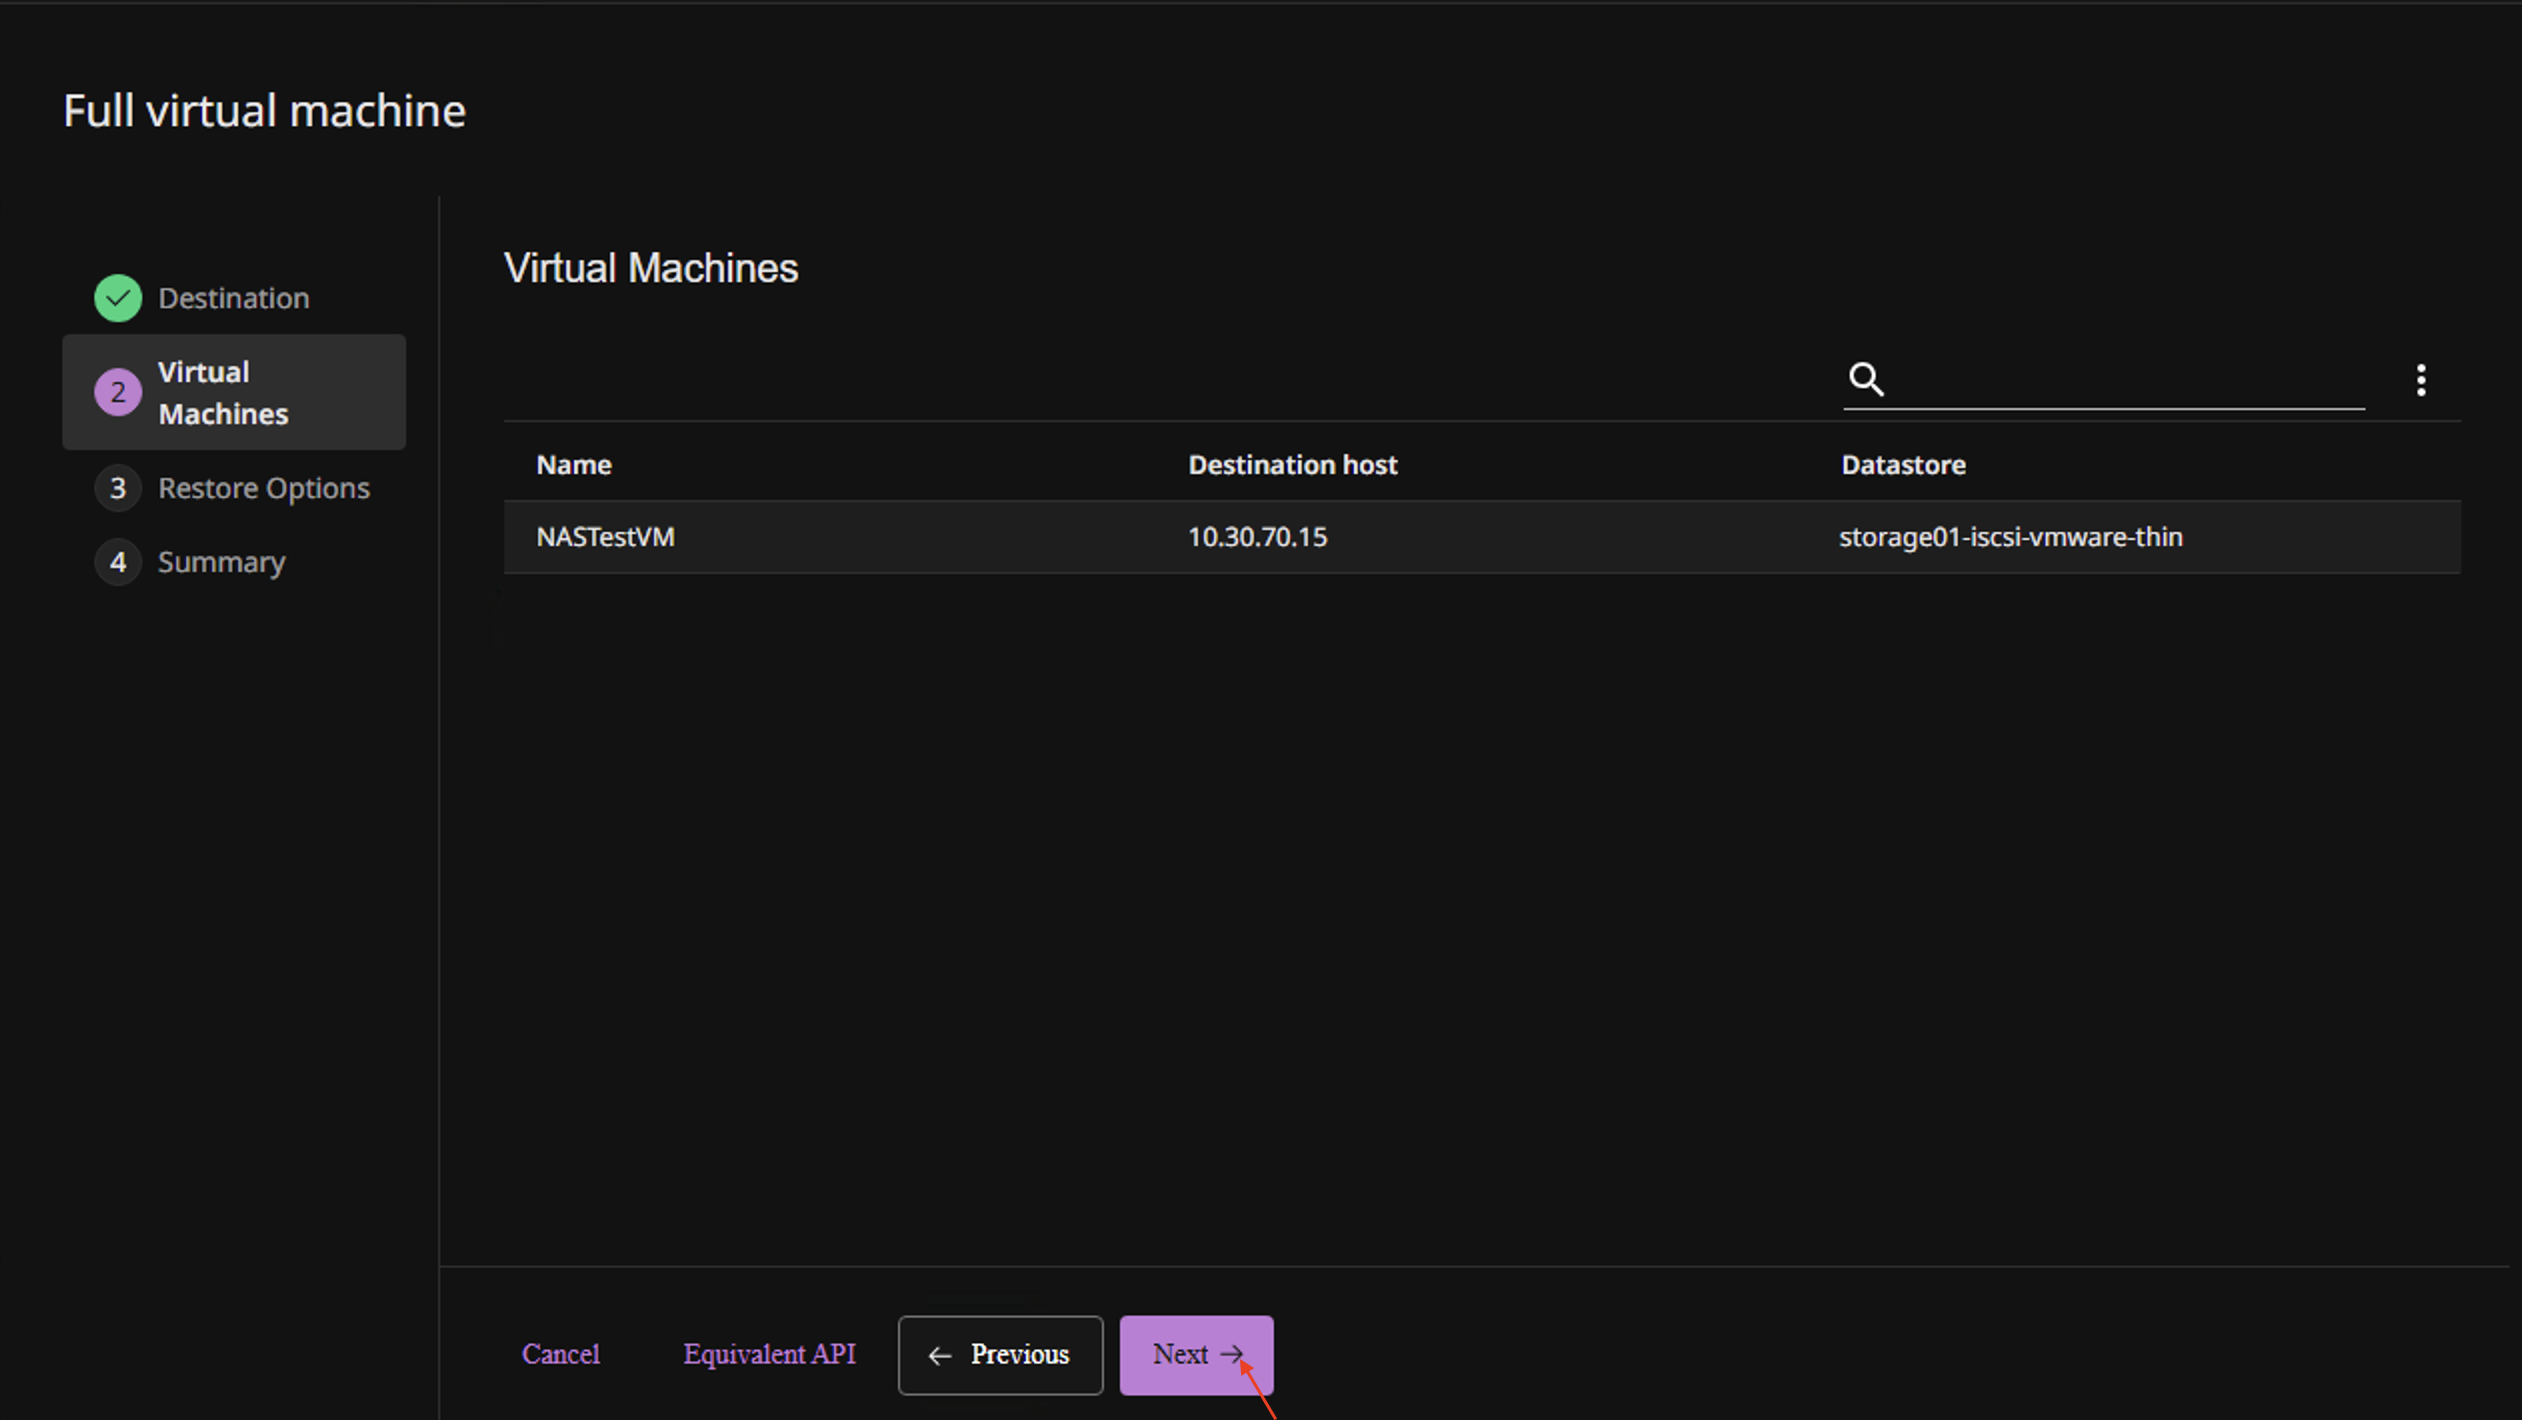
On the Virtual Machines tab, click Next.
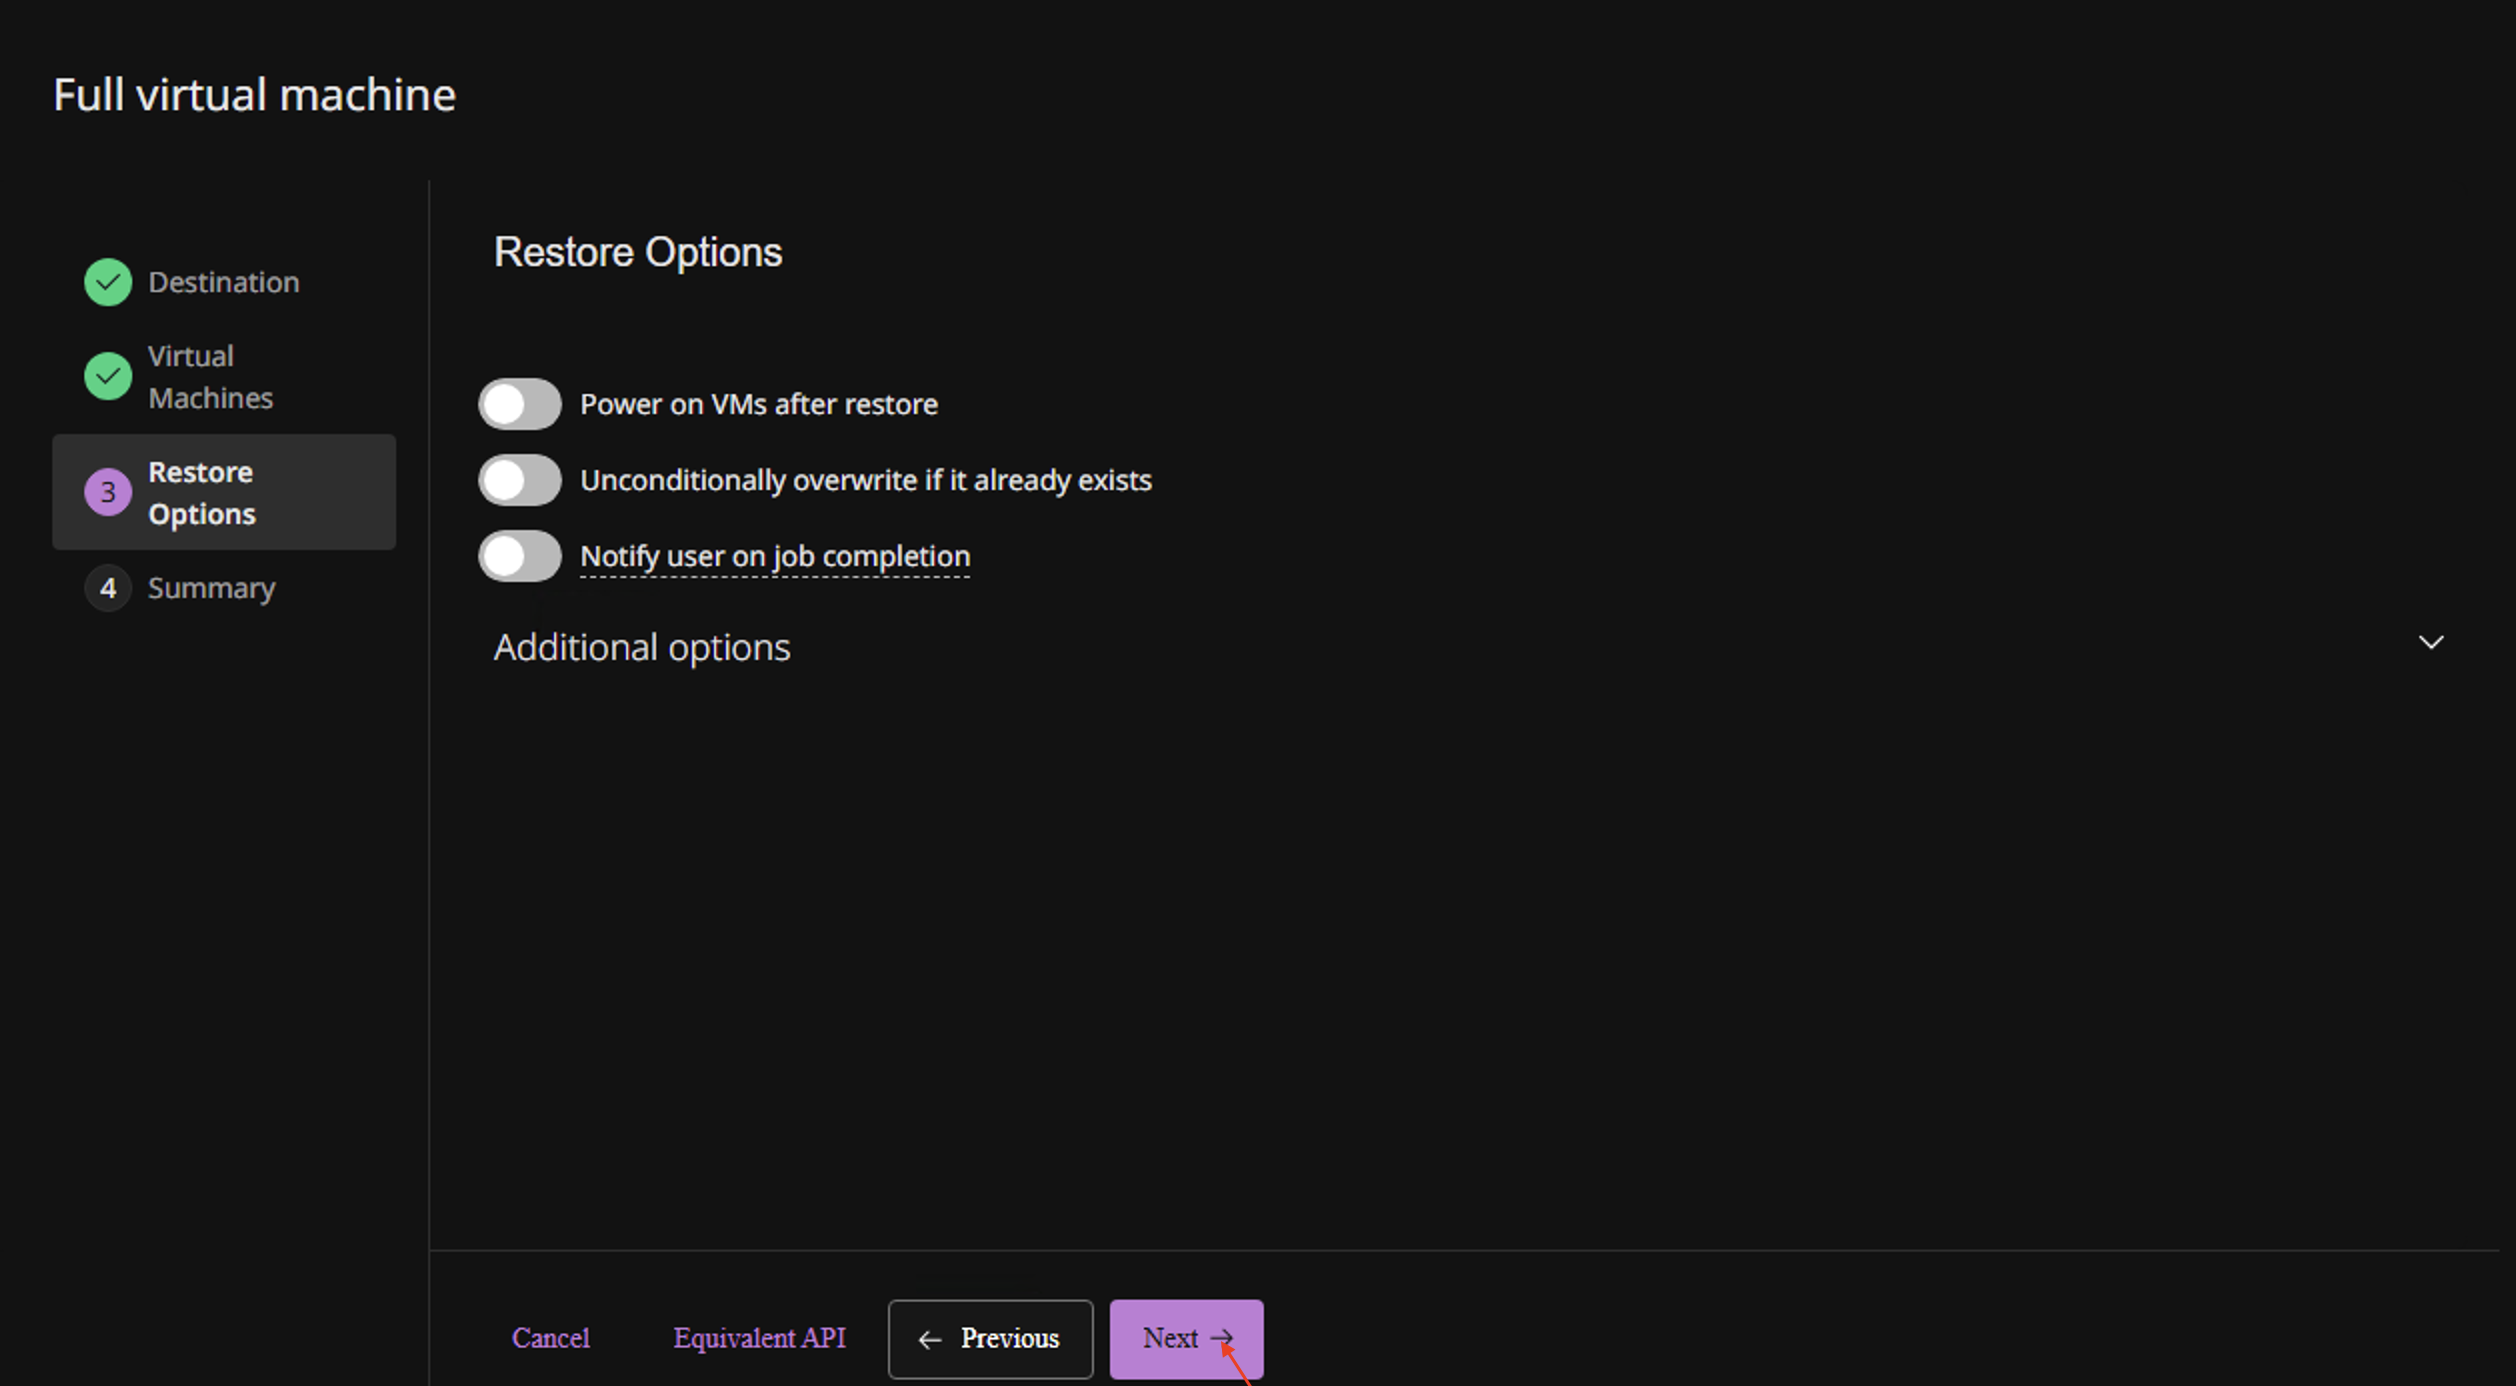
In the Restore Options tab, configure the desired options.
Click Next.
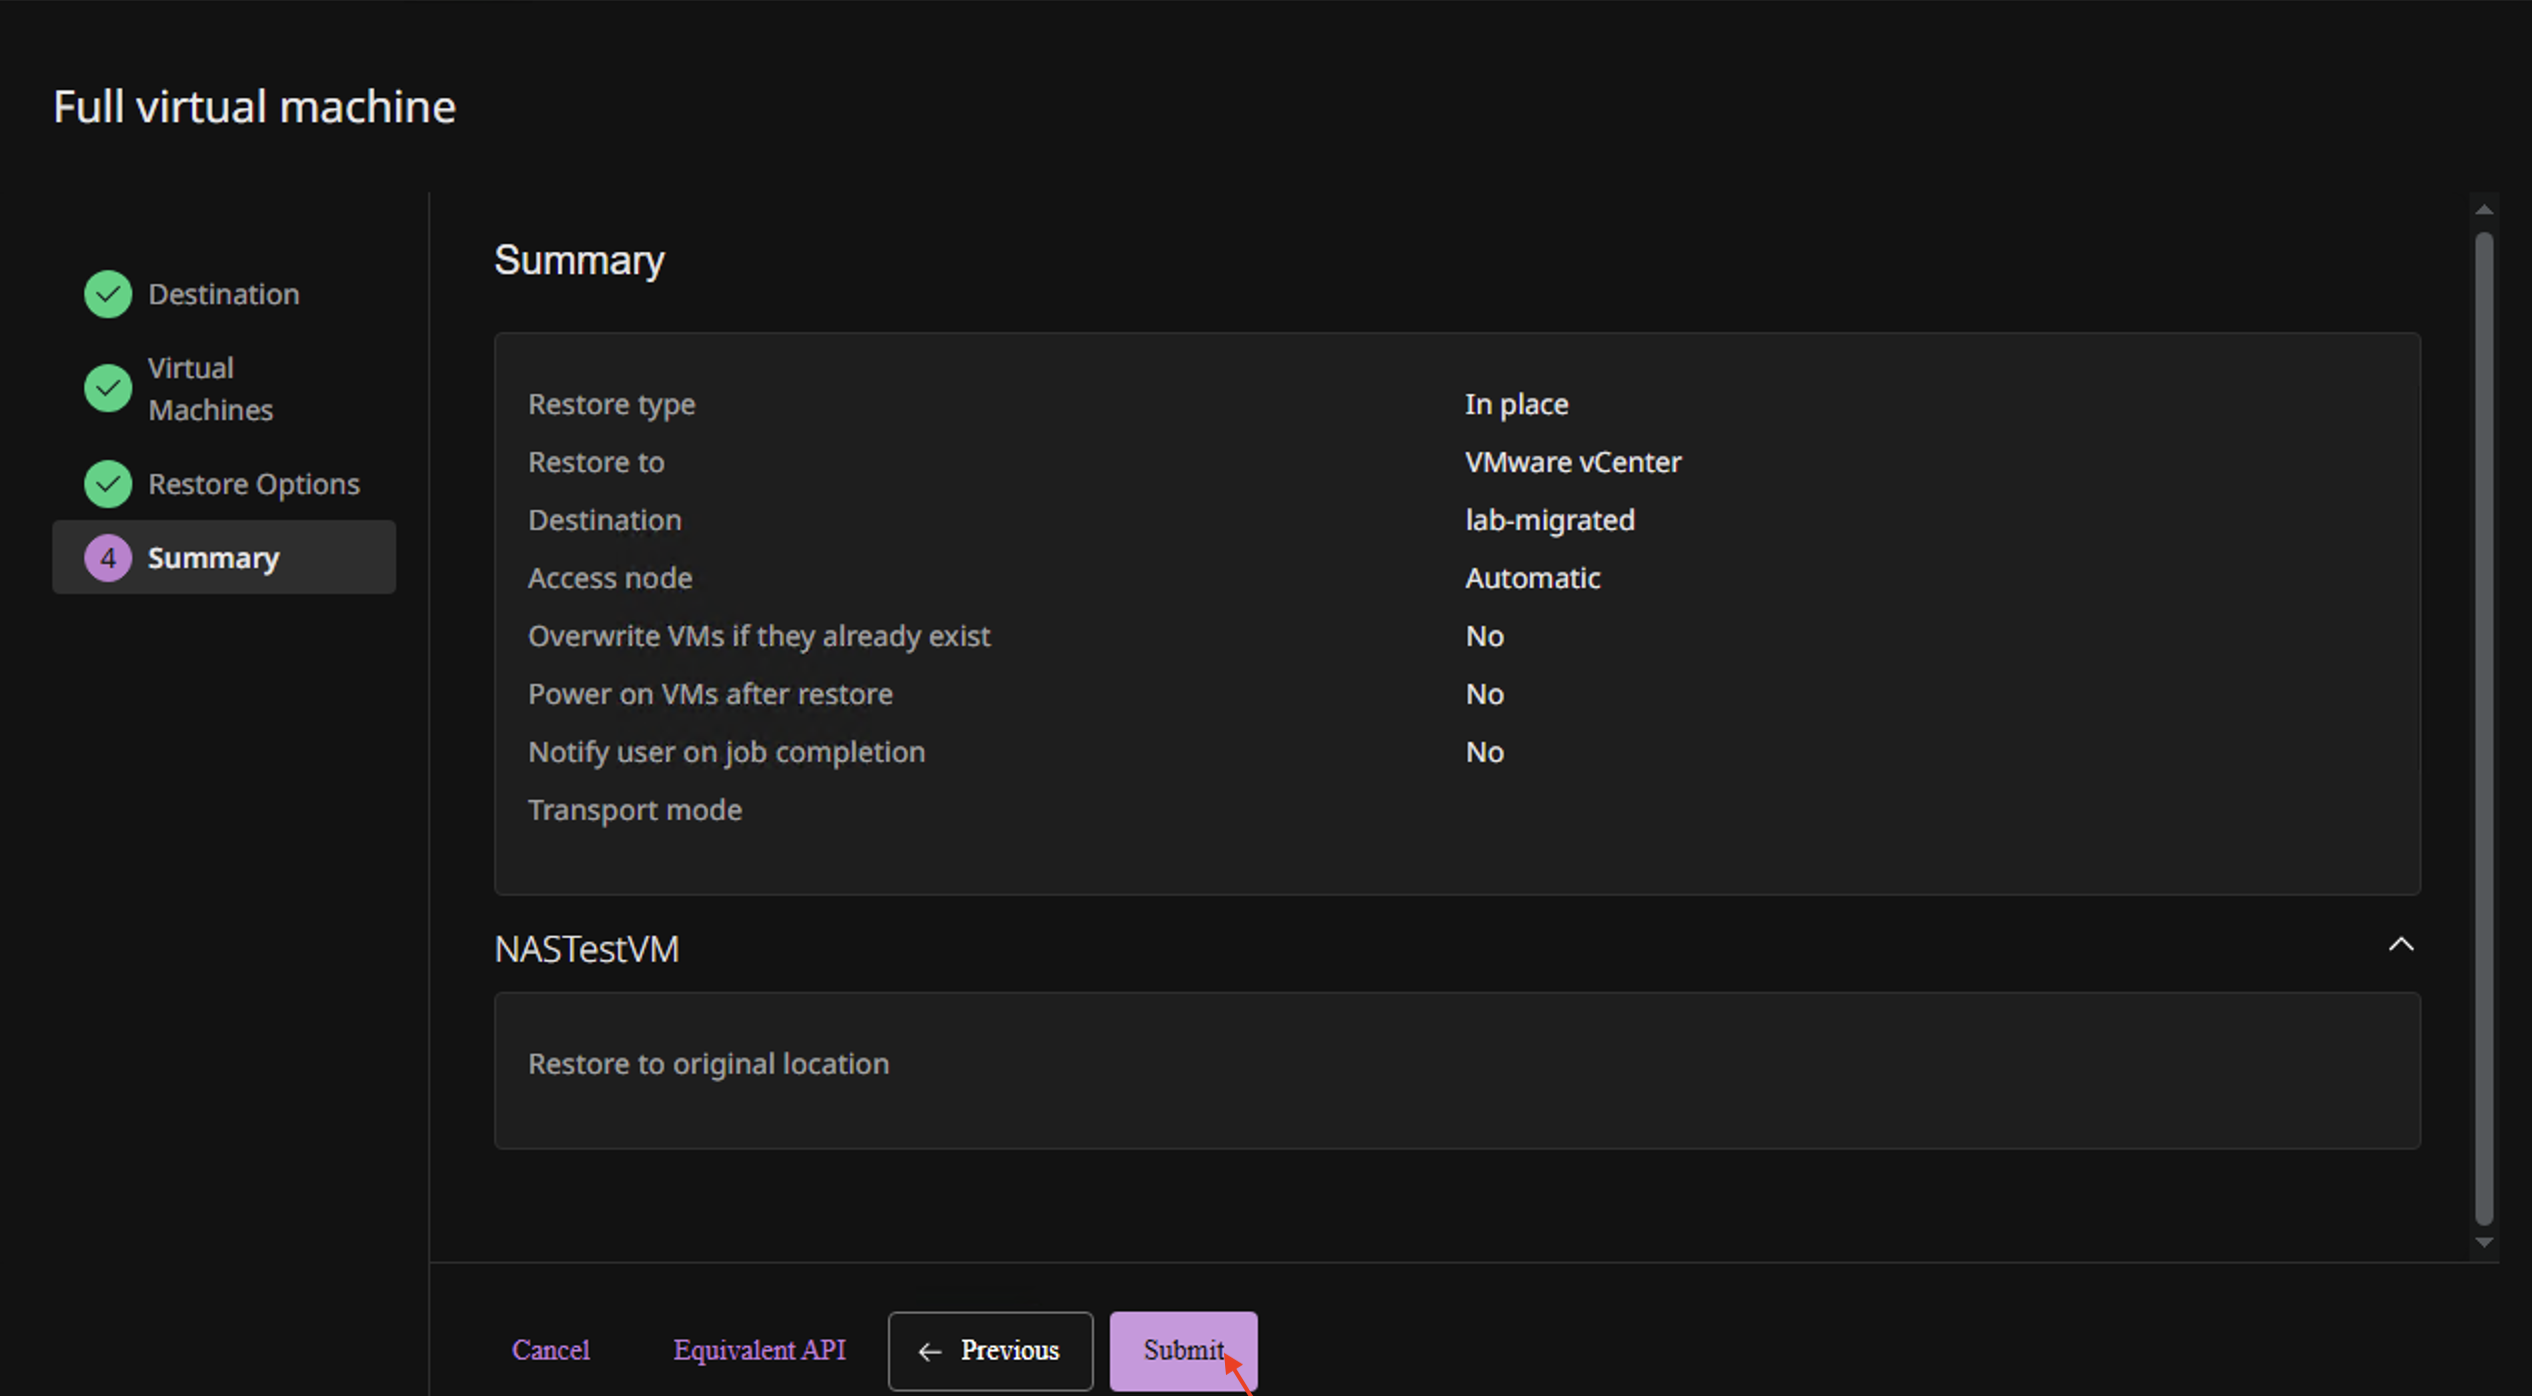
On the Summary tab, review the settings. Click Submit to start the restore job.