The Hard Quota feature enables hard quotas to be set during or after sub-account creation. Only specific accounts have the option to enable hard quotas. Wasabi recommends using soft quotas to minimize the risk of service interruption. If you require hard quotas to be enabled, contact your account representative at Wasabi Sales to discuss your options.
In the Sub-Accounts page, click Create Sub-Account. The Create Sub-Account form is displayed.
Enter the name and email for the sub-account and create a password.
Optionally, select the following:
Send Password Reset to Sub-Account Email
Password Reset Required
On Trial
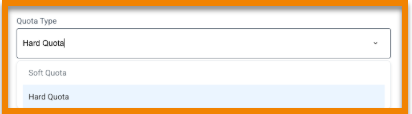
Enter the Quota Type. This is the amount of storage purchased for this sub-account. The purchased storage is used to calculate the storage utilization value. This amount can be modified at any time in the Sub-Account profile.
The Quota Type available depends on whether a hard quota or soft quota type is enabled. If you do not see the Quota Type drop-down, the quota type will be a soft quota used for altering only. The Quota Type drop-down will appear if your account has hard quotas enabled. Most users will have the Soft Quota type enabled. The Quota Type is available from the drop-down.
Currently, a hard quota limit cannot be set for Channel Accounts. However, Channel Accounts can set the hard quota on their Sub-Accounts if the Control Account is enabled.
Hard Quota—enforces storage quota limits and prevents continued use after the storage quota limit is reached or exceeded. A block will be placed on all future uploads to that account, causing any uploads in progress or any future uploads to fail. The storage quota must be increased, or the set limit must be removed to lift the block.
Because storage quota usage is assessed every 24 hours, an account can technically exceed the quota limit during that time before it is blocked.
Soft Quota—does not enforce storage quota limits. It triggers a notification when the storage quota limit is reached or exceeded.
Click Create.