Wasabi is a member of Veeam's cloud partner ecosystem. We have worked with Veeam closely to offer both a seamless implementation and a smooth transition to cloud storage. Veeam with Wasabi Solution Overview provides more information on the Wasabi-Veeam partnership and solutions.
Wasabi has been validated to work with Veeam Agent for Windows (6) in standalone mode to protect data on Windows computers and backup directly to Wasabi's Object storage. Veeam Agent for Windows version 6 introduces support for Backup directly to cloud object storage, as well as support for immutable backups.
Note: The data restoration process is handled by your specific backup software application. As there are many, potential variables that will affect your unique environment, Wasabi strongly recommends that you seek the guidance of your backup software's technical support team in the event that you encounter difficulty or have application-specific inquiries.
If you are going to leverage immutable Veeam backups, follow the steps in Object Lock: Enabling.
Enabling bucket versioning only is not a proper configuration for immutable Veeam backups and can cause problems.
If you are simply going to use regular Veeam backups with Wasabi buckets, bucket versioning is not required.
Requirements
Active Wasabi Storage account.
Veeam Agent for Windows version 6 installed and licensed.
A valid Veeam license that supports capabilities for object storage.
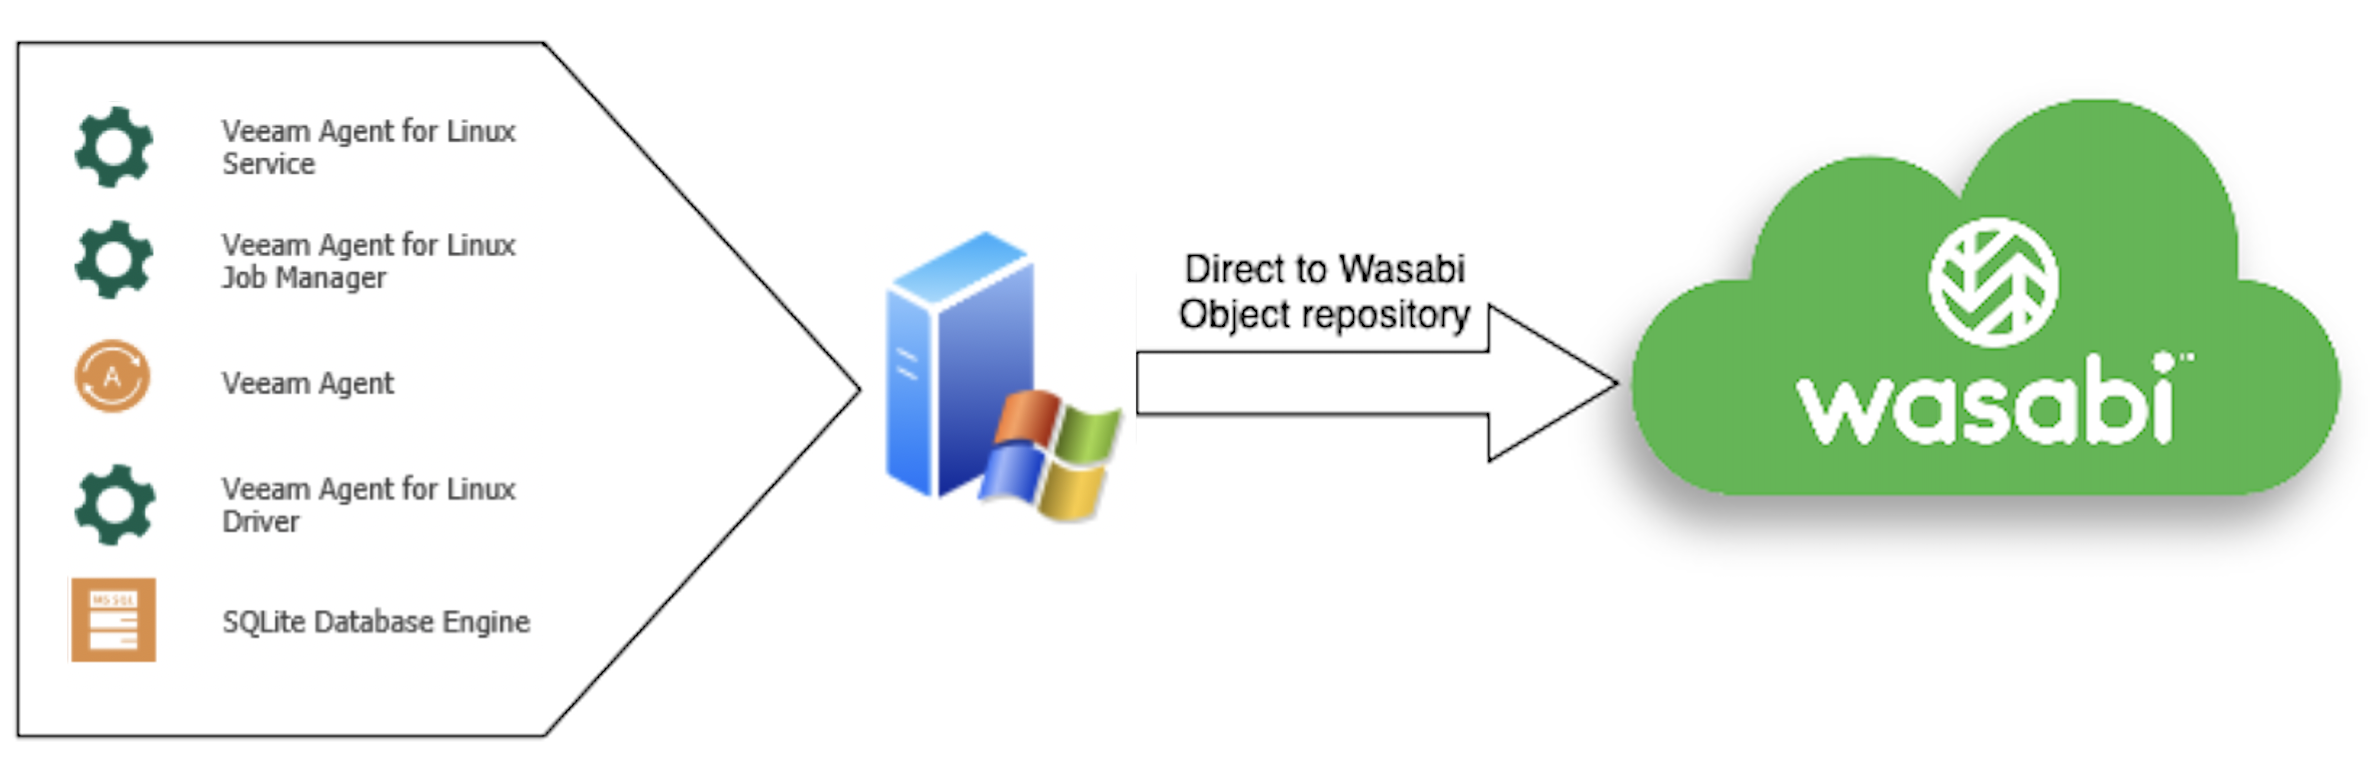
Architecture Diagram
Creating a Backup Job
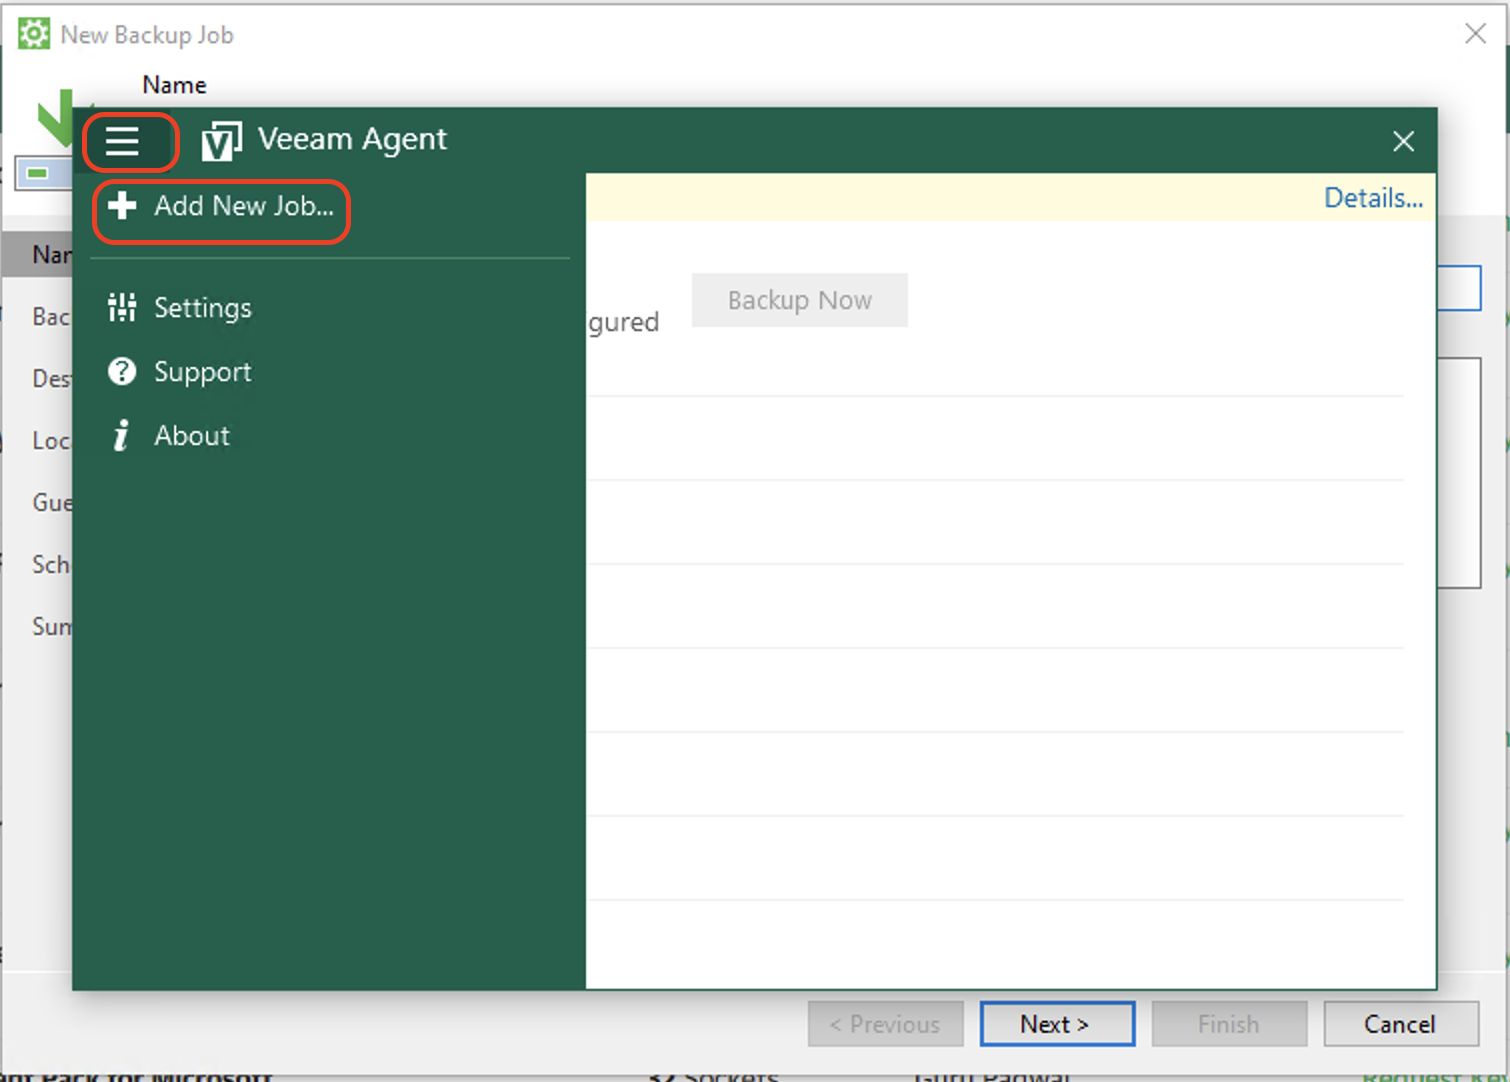
Open Veeam Agent for Windows and click Menu. Click +Add New Job.
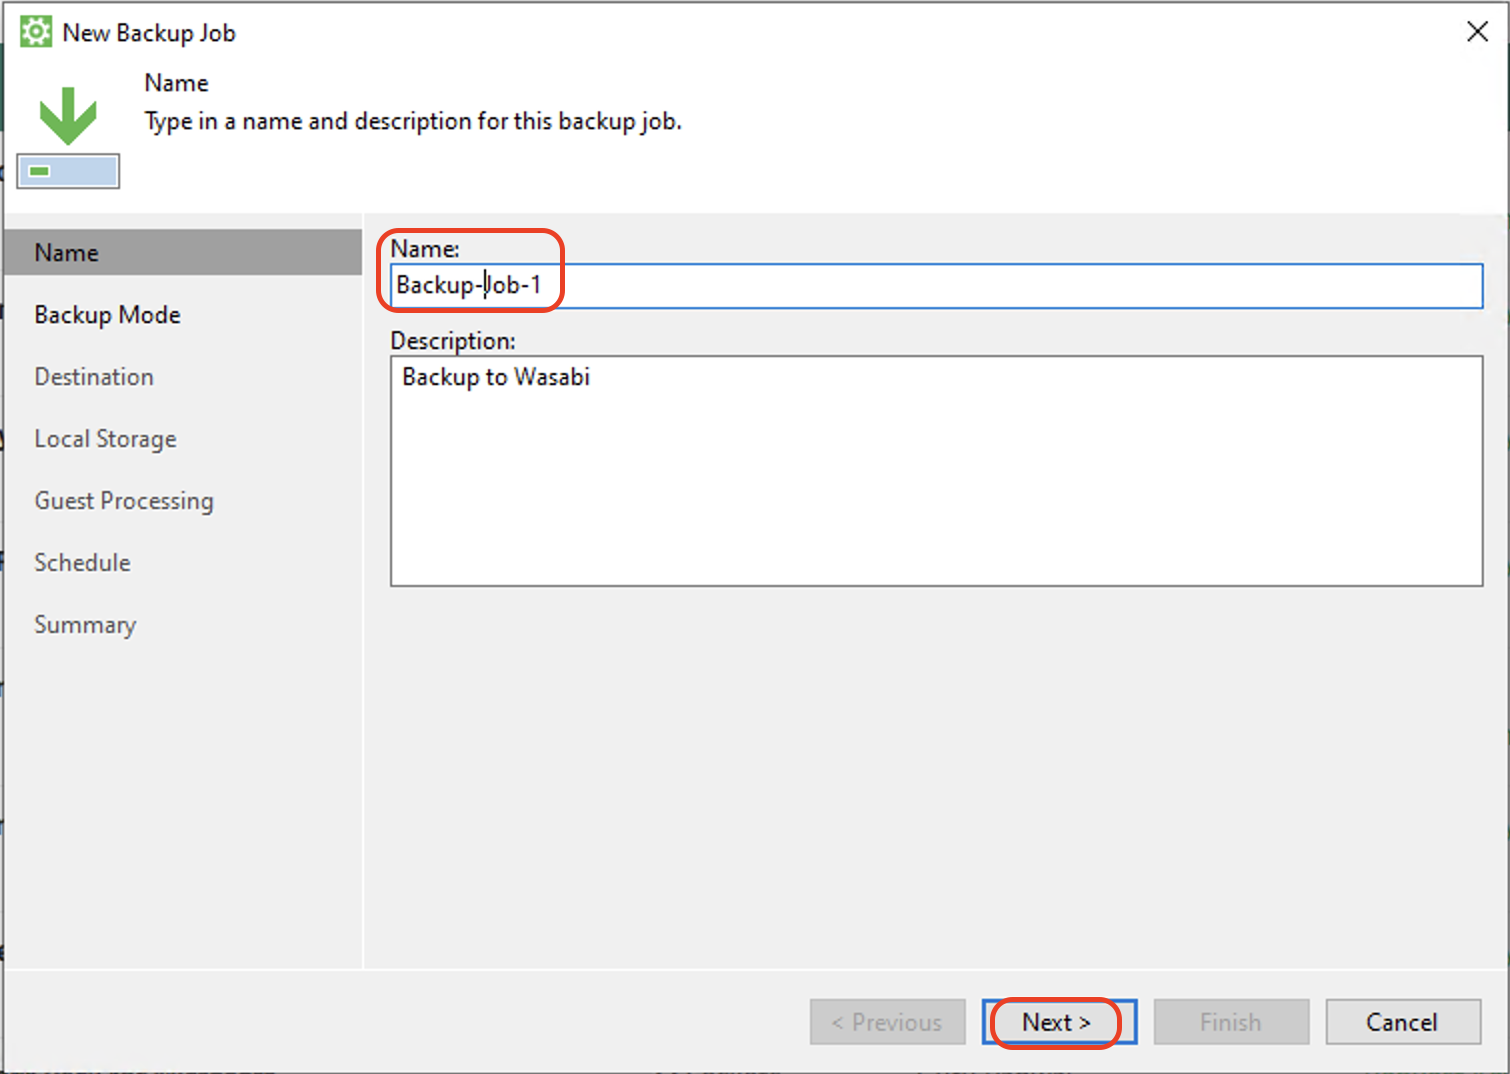
Input the Name for the backup job. Click Next.
Select the backup mode. Click Next.
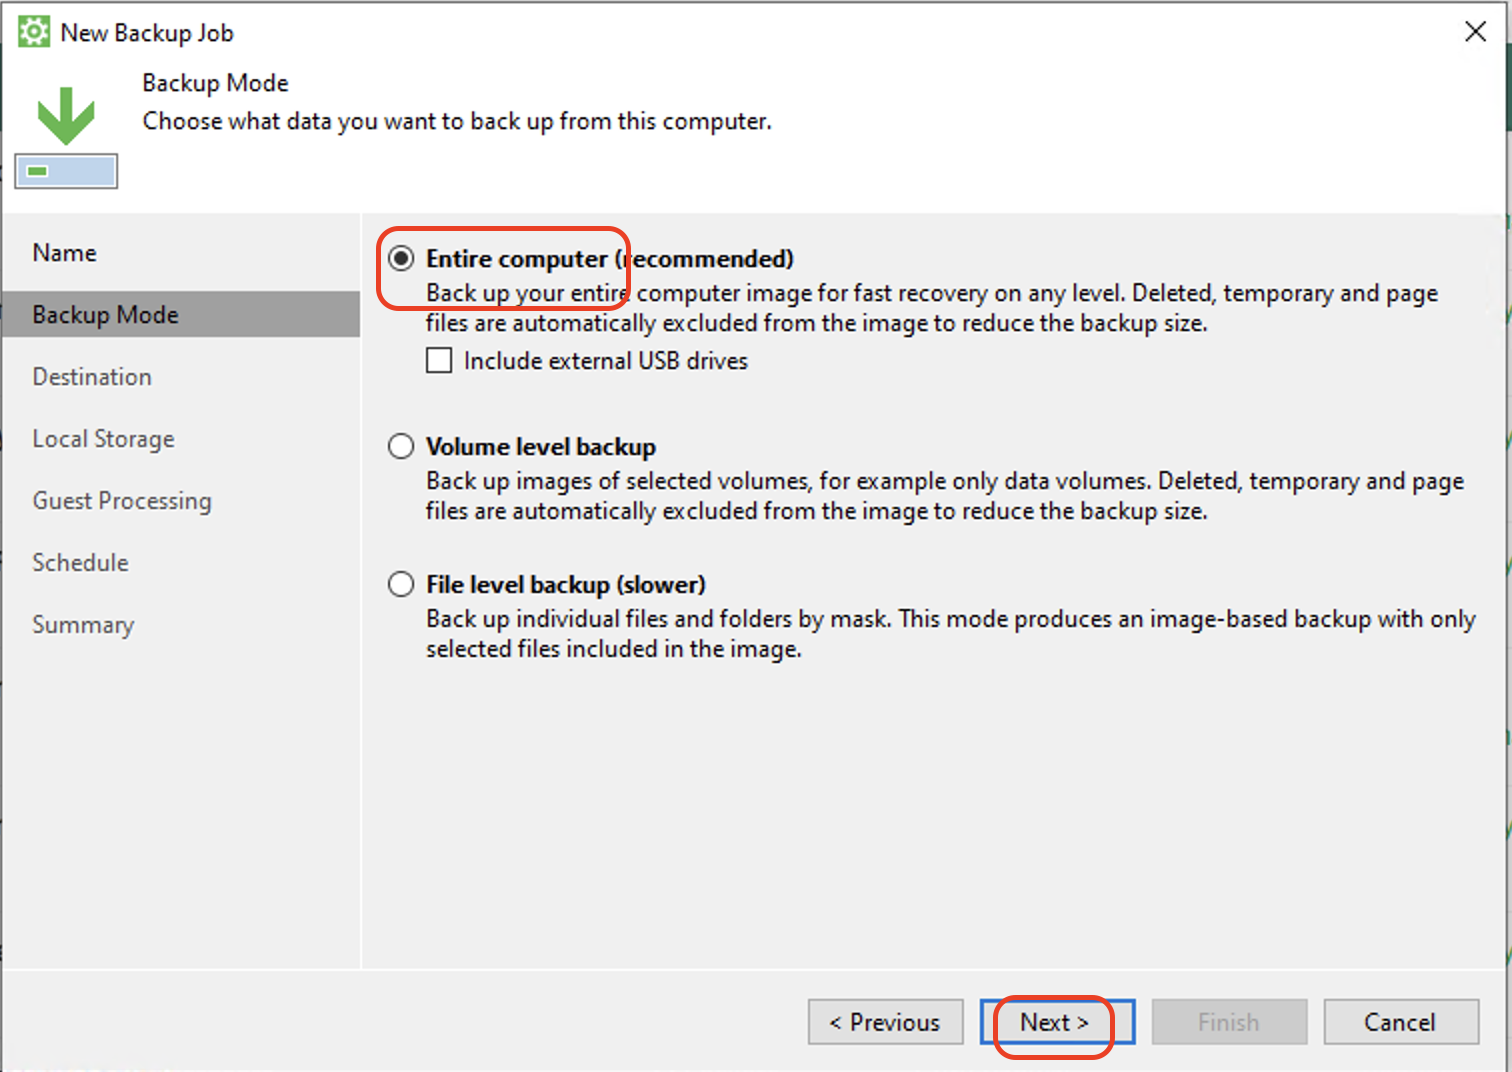
Entire computer (recommended): Select this option to create a backup of the entire computer image. With this option selected, you will continue to the Destination step of the Wizard.
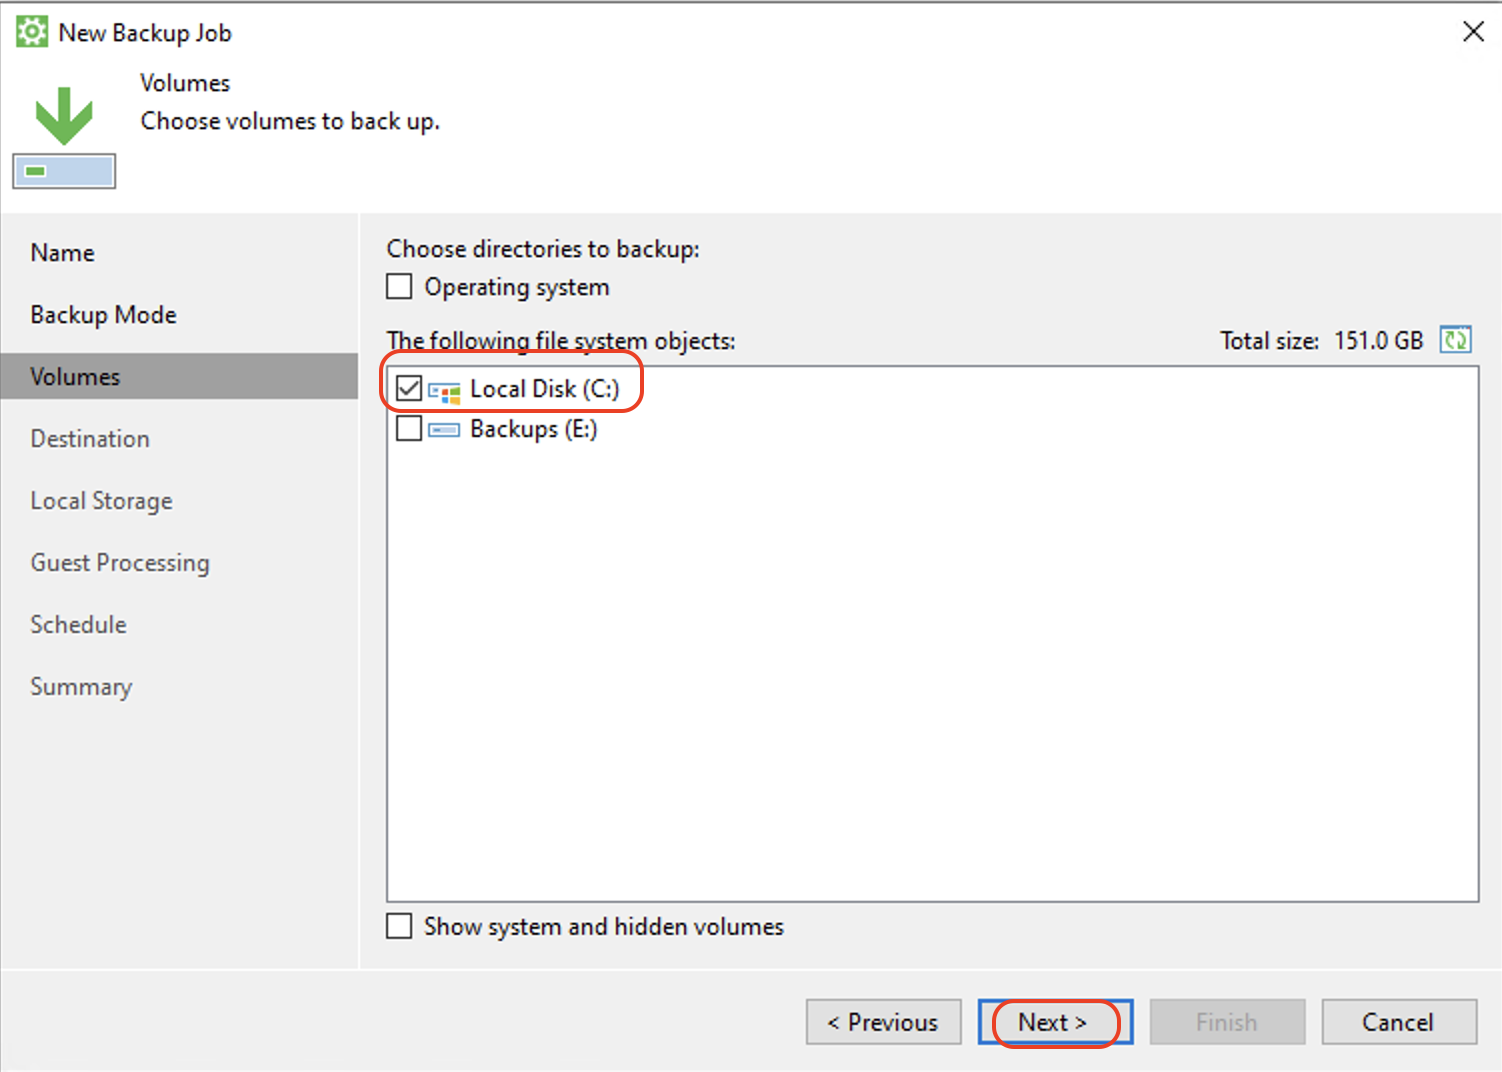
Volume level backup: Select this option to create a backup of specific computer volumes. With this option selected, you will continue to the Volumes step of the Wizard to select specific volumes to backup.
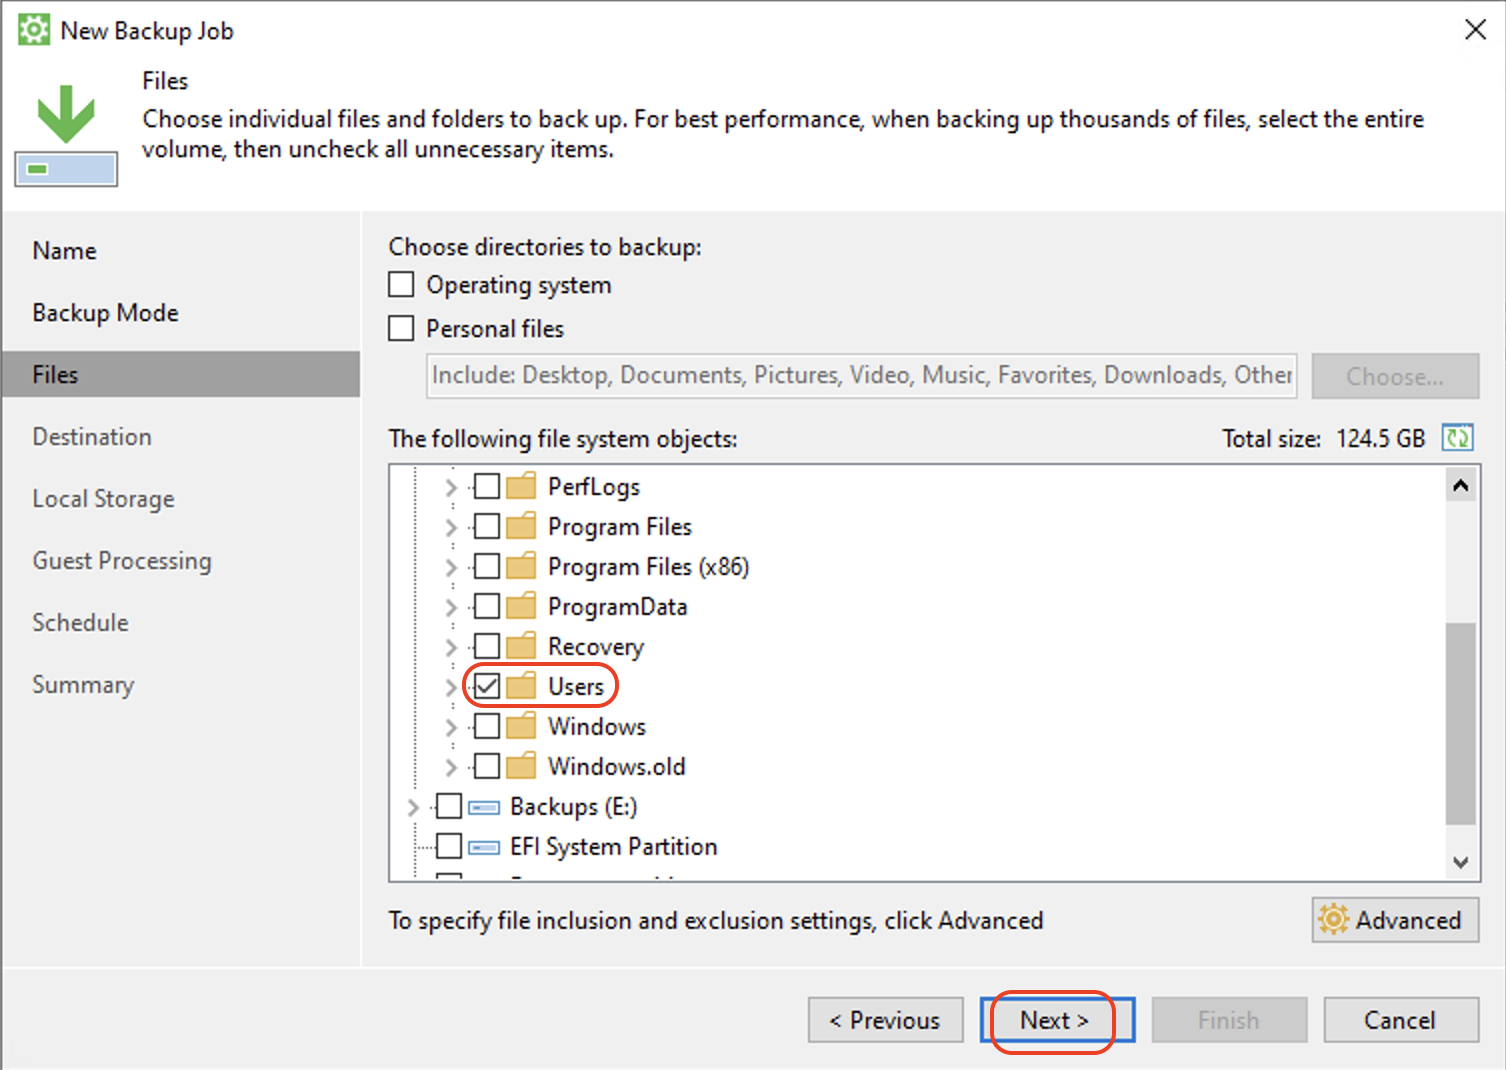
File level backup (slower): Select this option to create a backup of individual folders. With this option selected, you will continue to the Folders step of the Wizard.
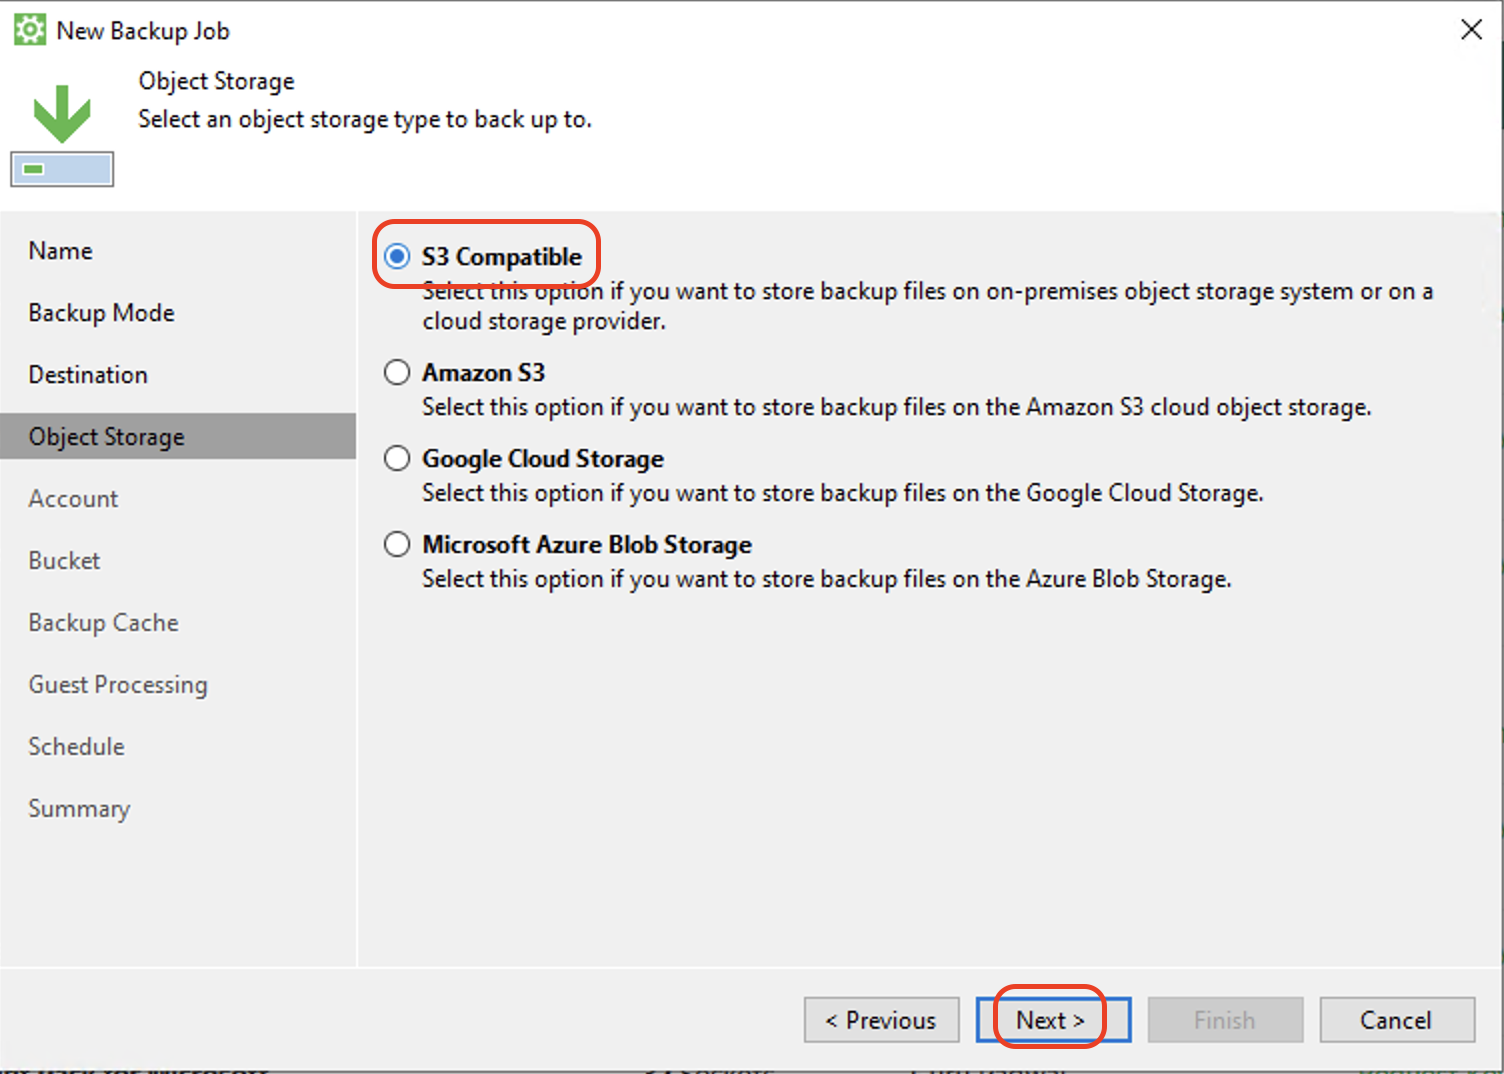
On the Destination page, select Object storage. Click Next.

On the Object Storage page, select S3 Compatible. Click Next.
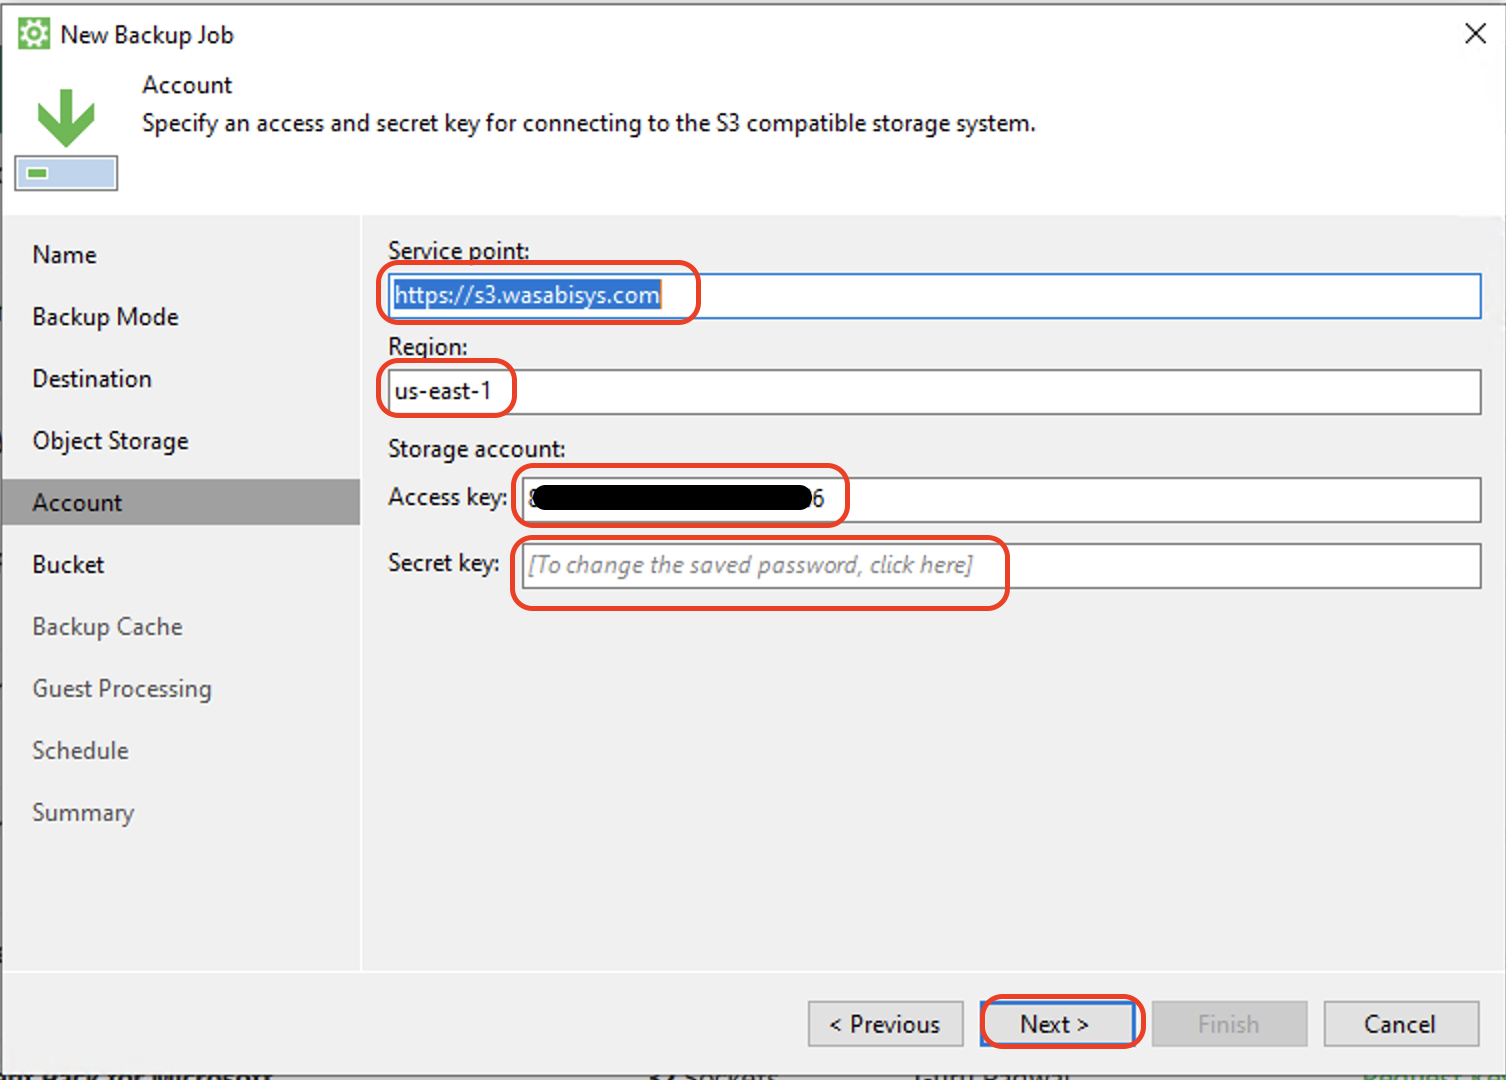
Input the following Wasabi account details and click Next.
Service point: Service url for Wasabi.
Region: Wasabi region name.
Access key: Access key for the Wasabi bucket. For more detail, refer to creating a sub-user and access and secret keys.
Secret key: Secret key for the Wasabi bucket. For more detail, refer to creating a sub-user and access and secret keys.
In this example, we are using the us-east-1 region. To get a list of Wasabi regions, refer to Service URLs for Wasabi's Storage Regions.
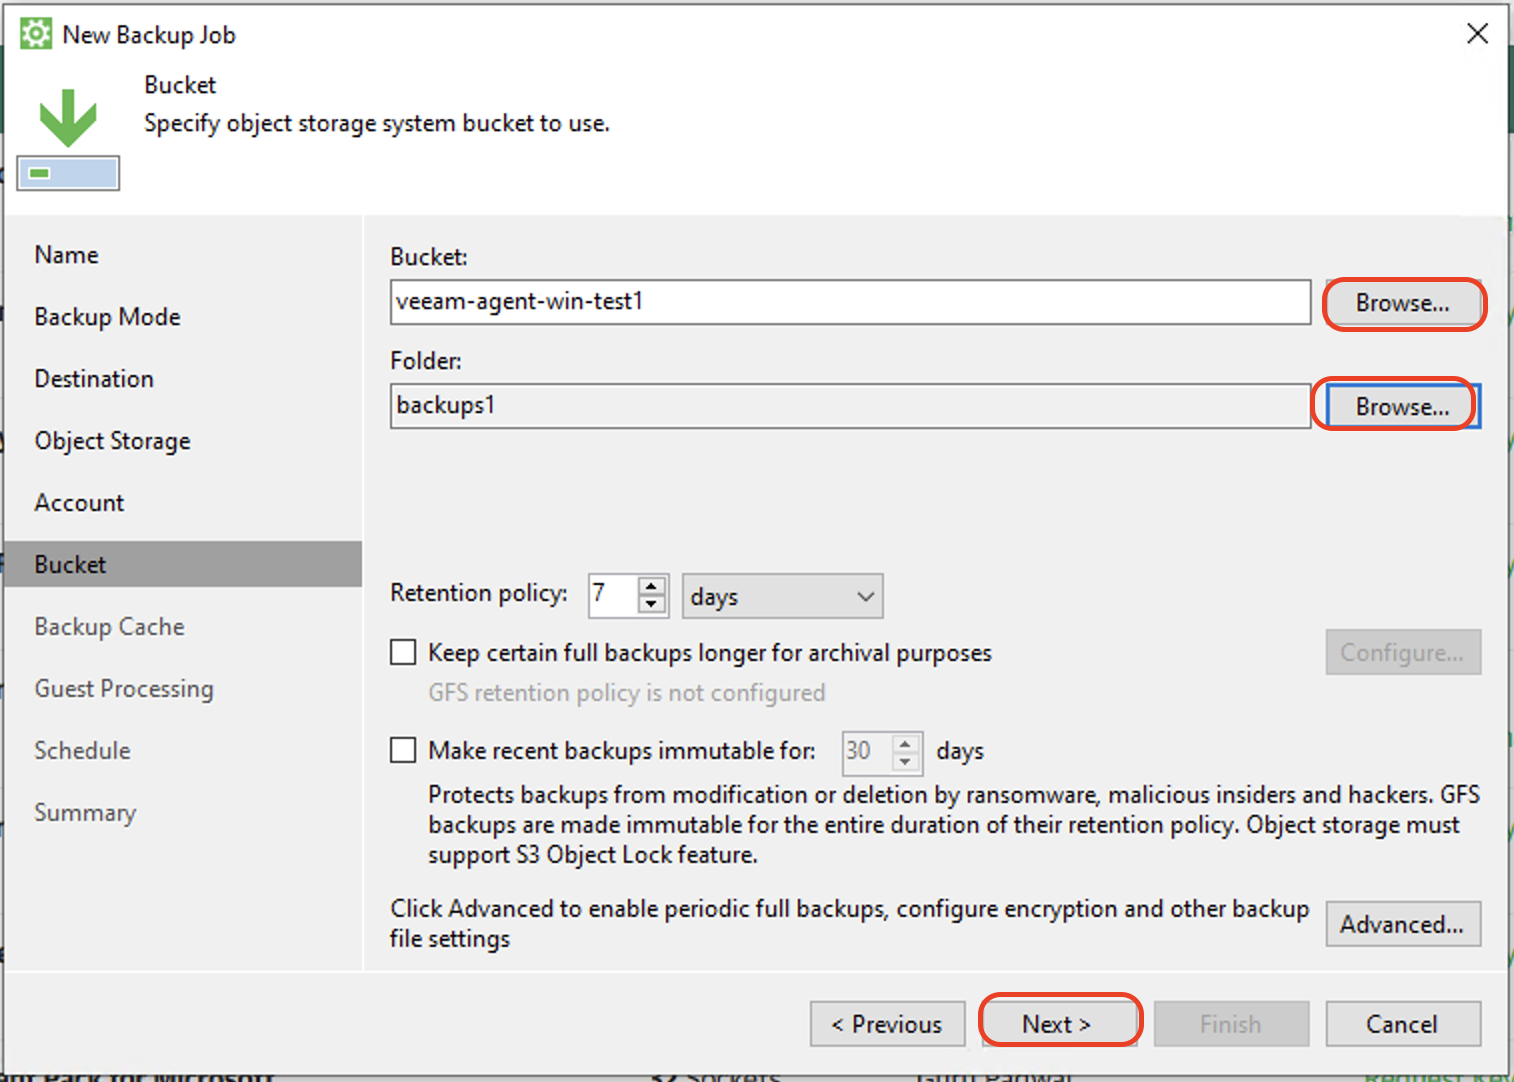
Click Browse next to the Bucket field to select the Wasabi bucket to be used. Click Browse next to the Folder field to either select an existing folder in the bucket or create a new folder. Click Next to continue.
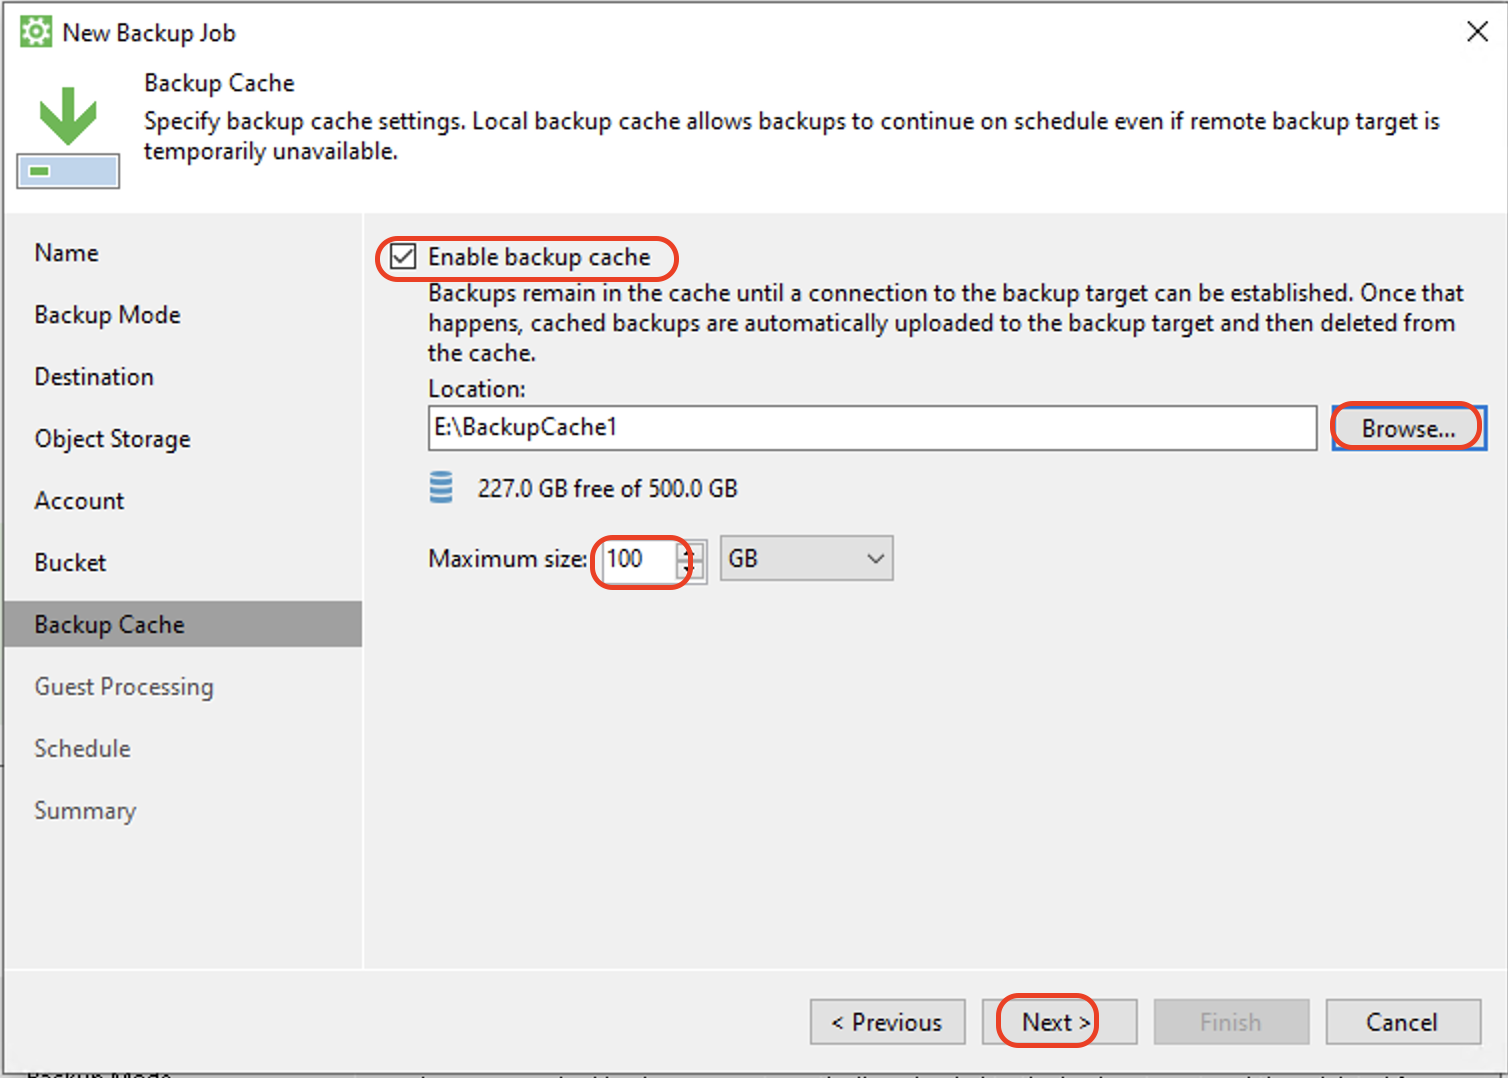
Select the Enable backup cache check box. Click Browse to browse to the folder to store the backup files locally. Specify the maximum size for the Backup cache.
For the backup cache, you can use a dedicated removable storage device to avoid using disk space on the local drive of the Veeam Agent computer.
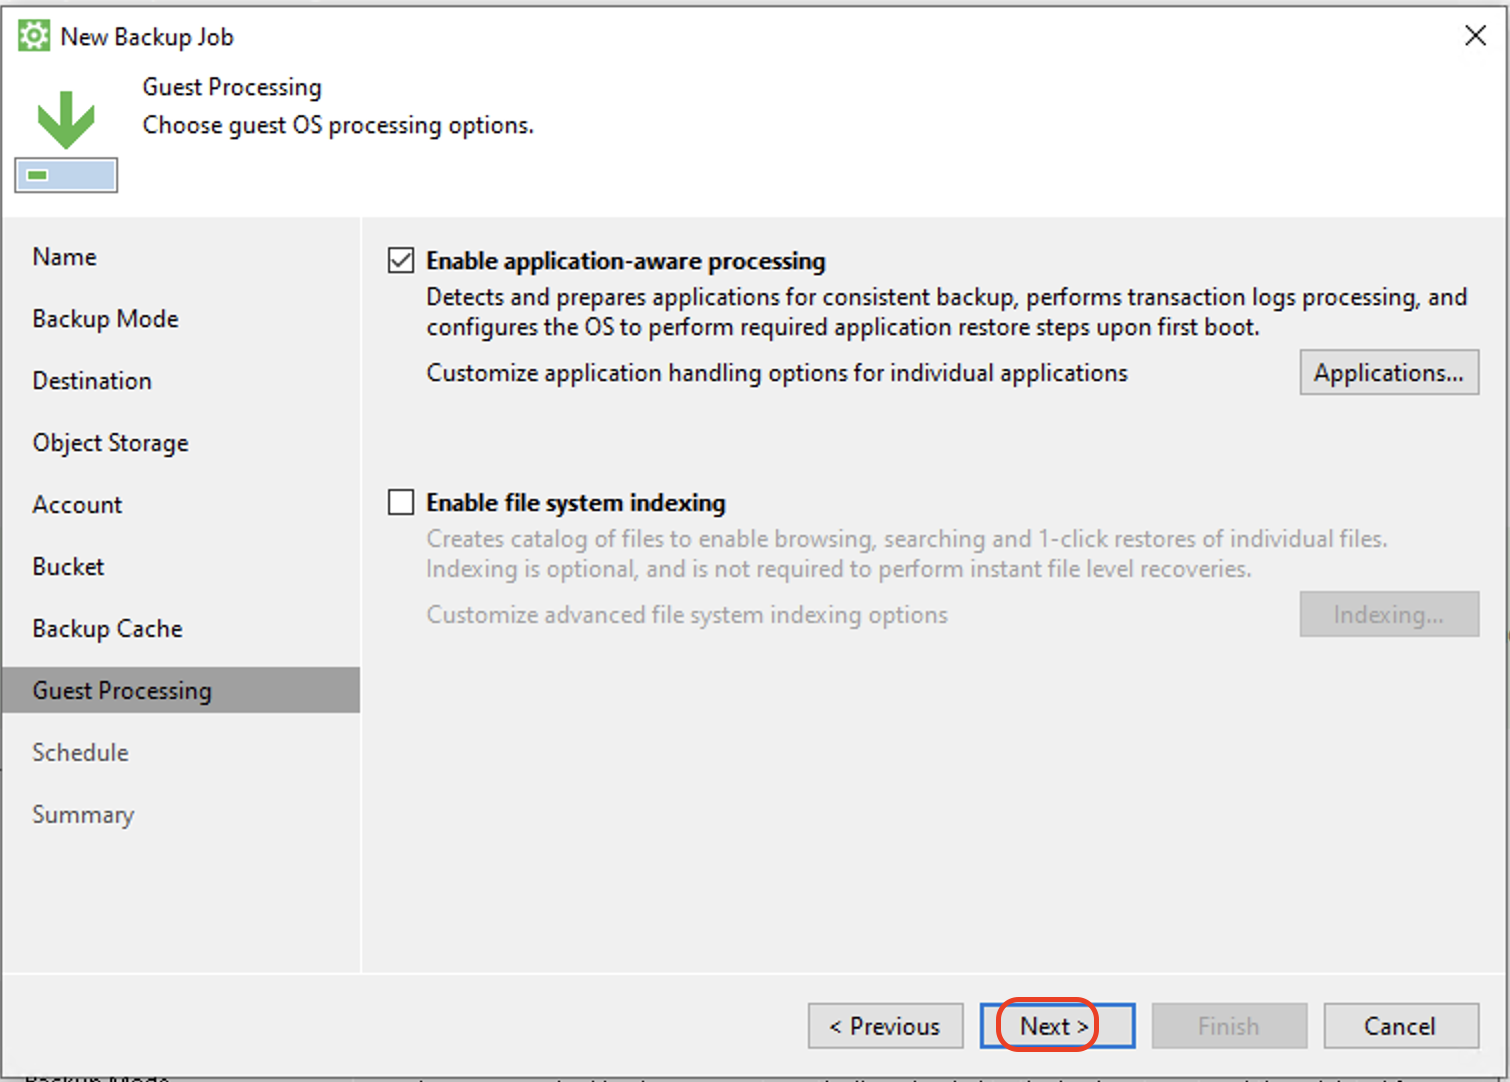
Configure the Guest OS Processing options if your application needs custom handling options. Click Next to continue. For more detail on these settings, refer to the Veeam Help Center.
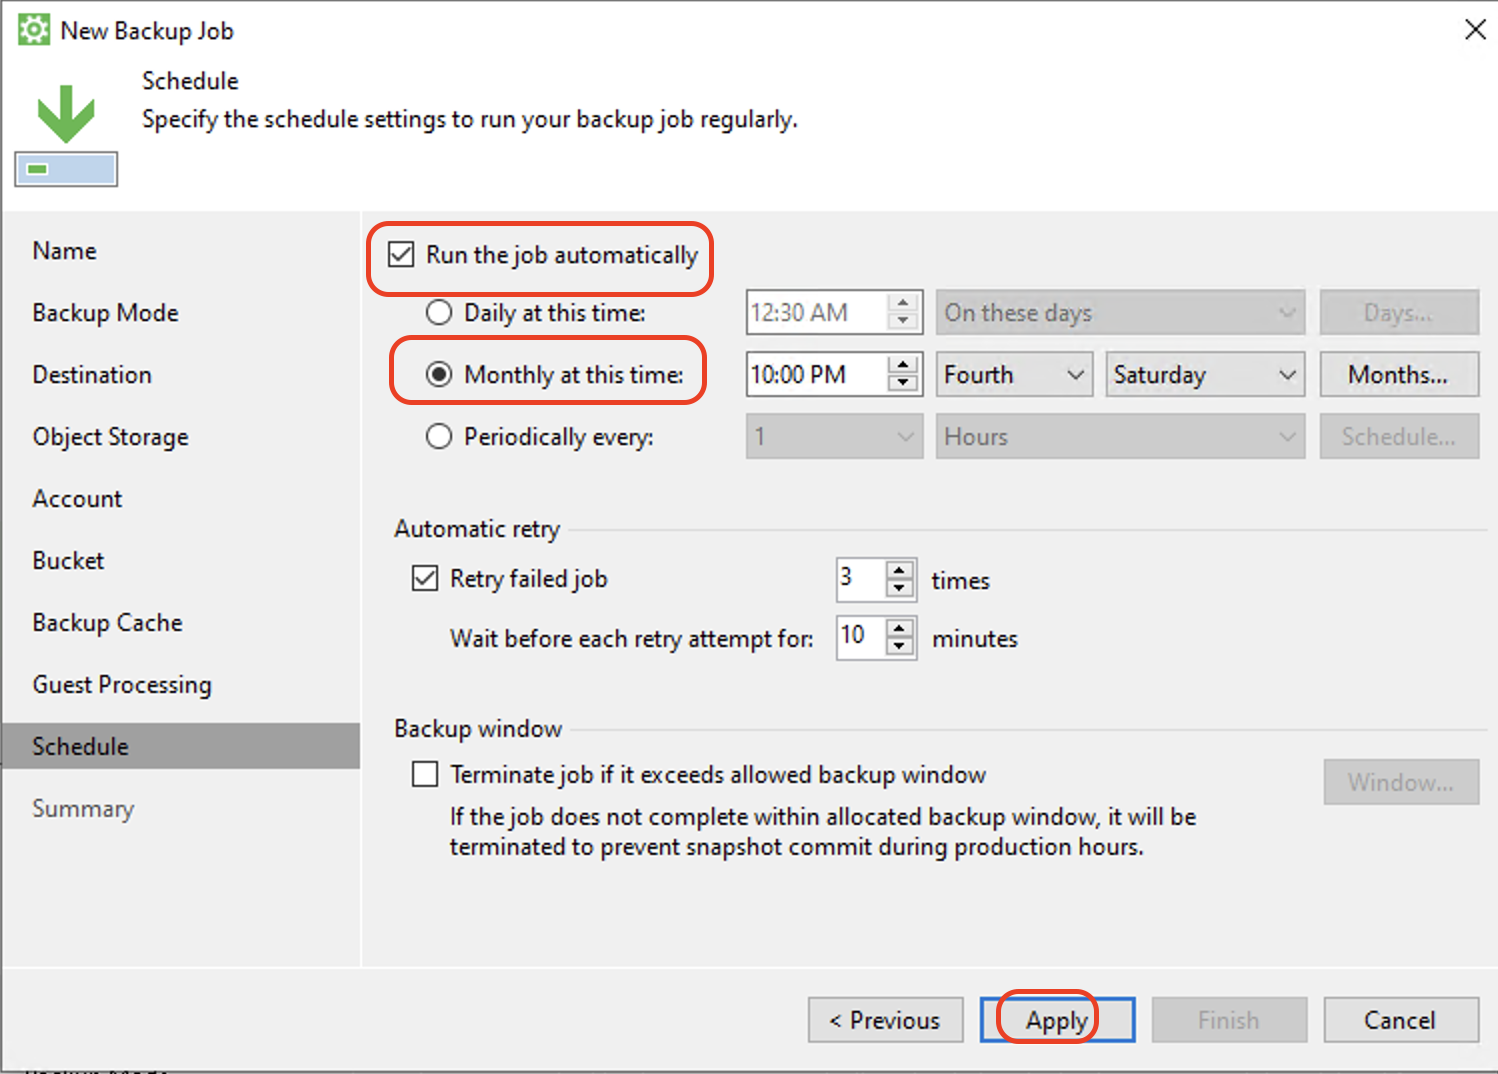
Optionally, on the Schedule page, check Run the job automatically and configure the schedule settings. Click Apply.
Review the Summary and check Run the job when I click Finish to run the backup job immediately. Click Finish.
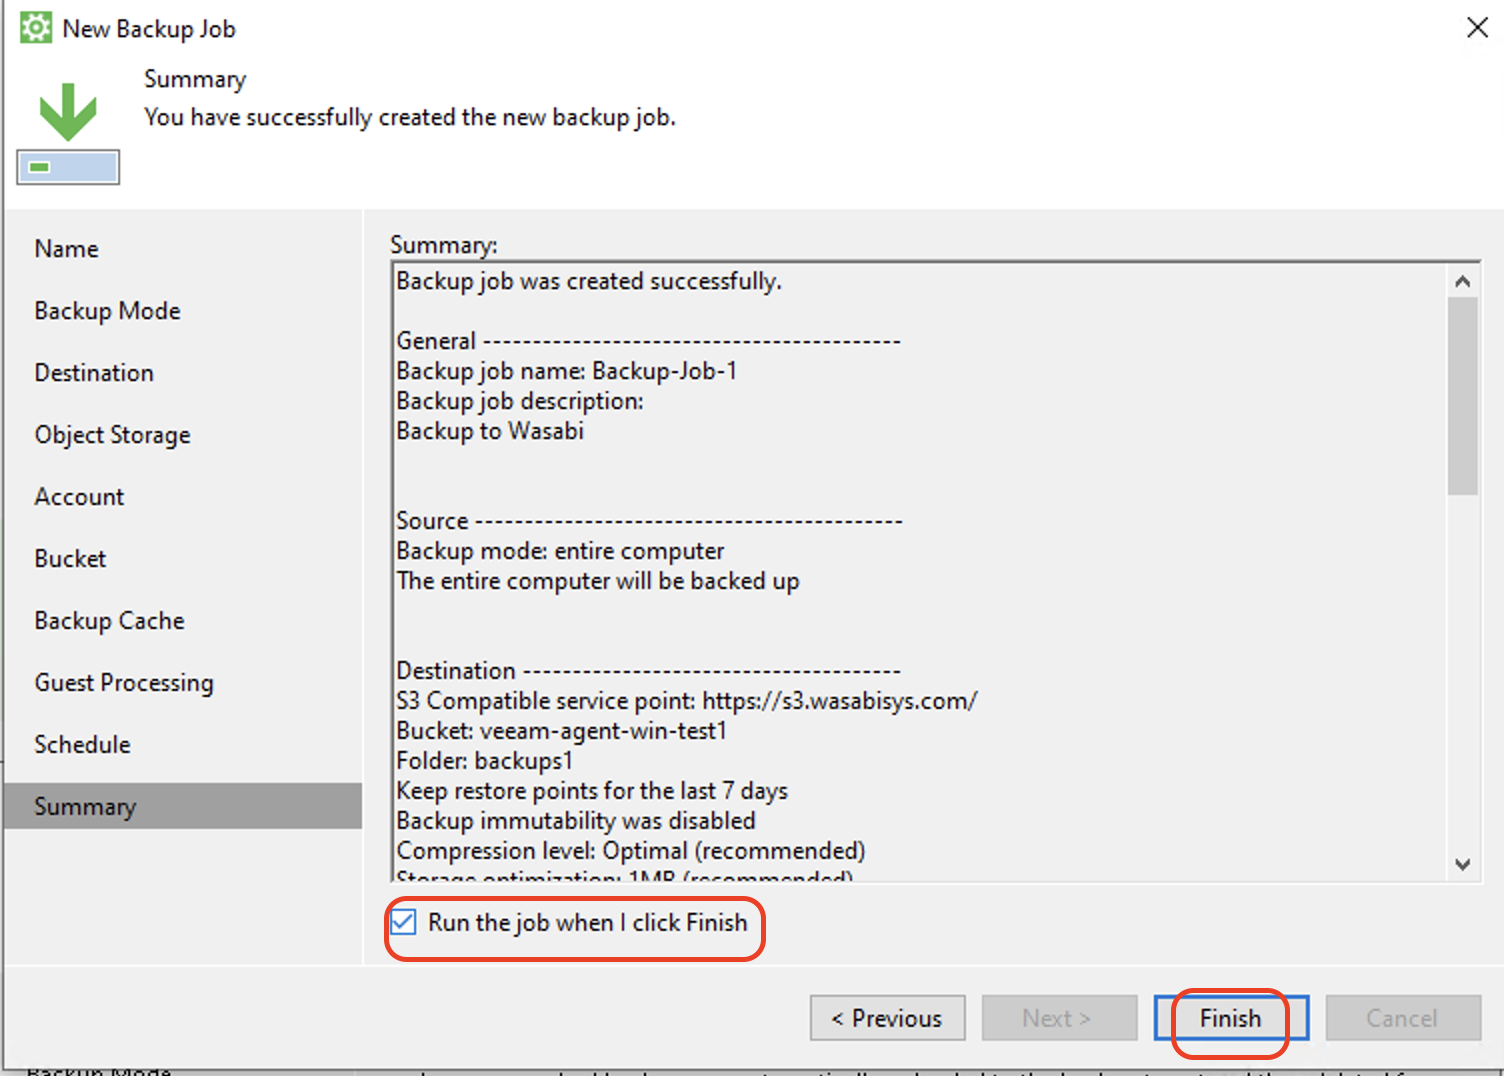
The Backup job is created and will begin running.
Manually Run the Backup Job
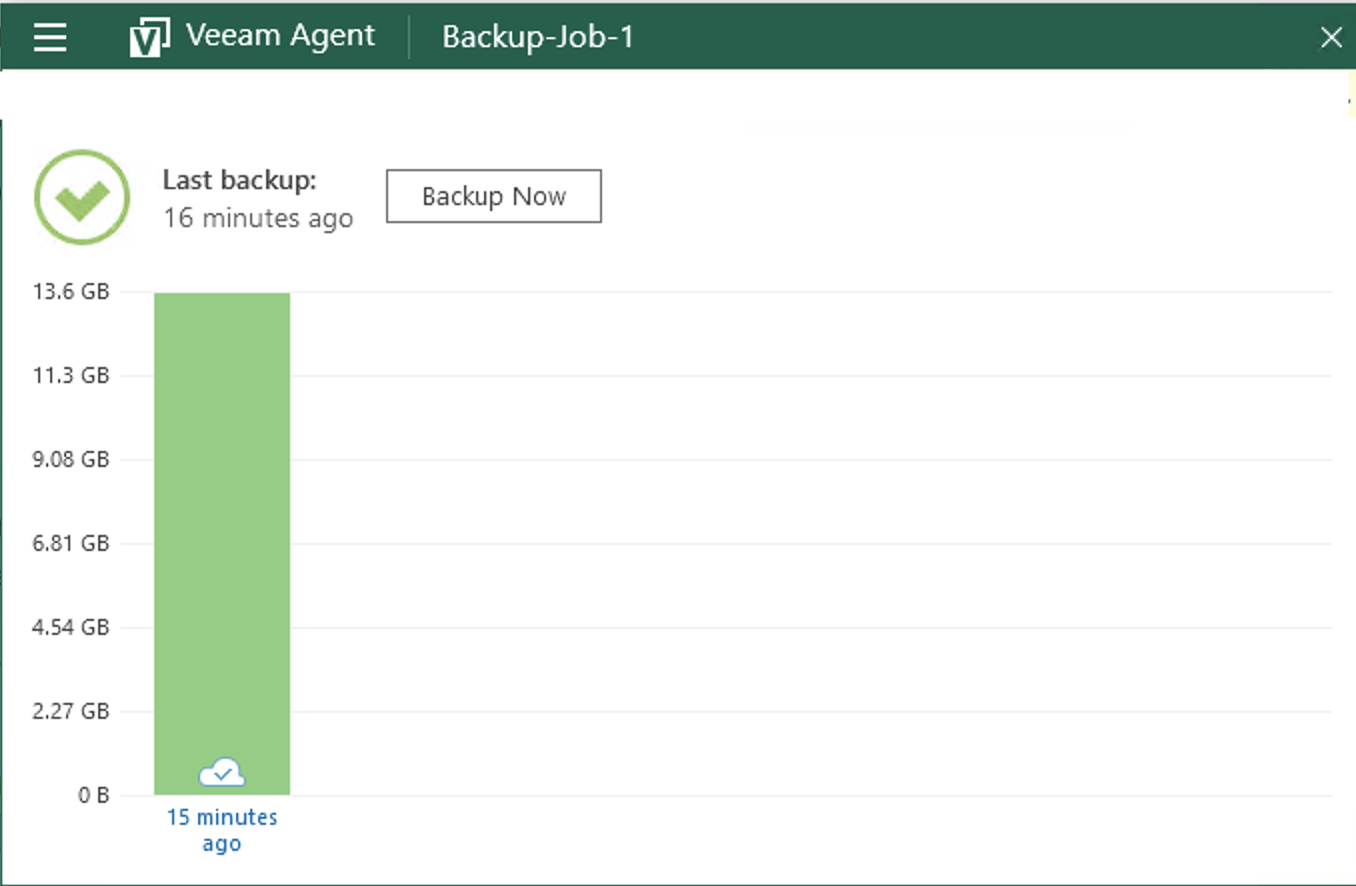
Open Veeam Agent for Windows. Click Menu and hover over the backup job in which to run. Click Backup Now.

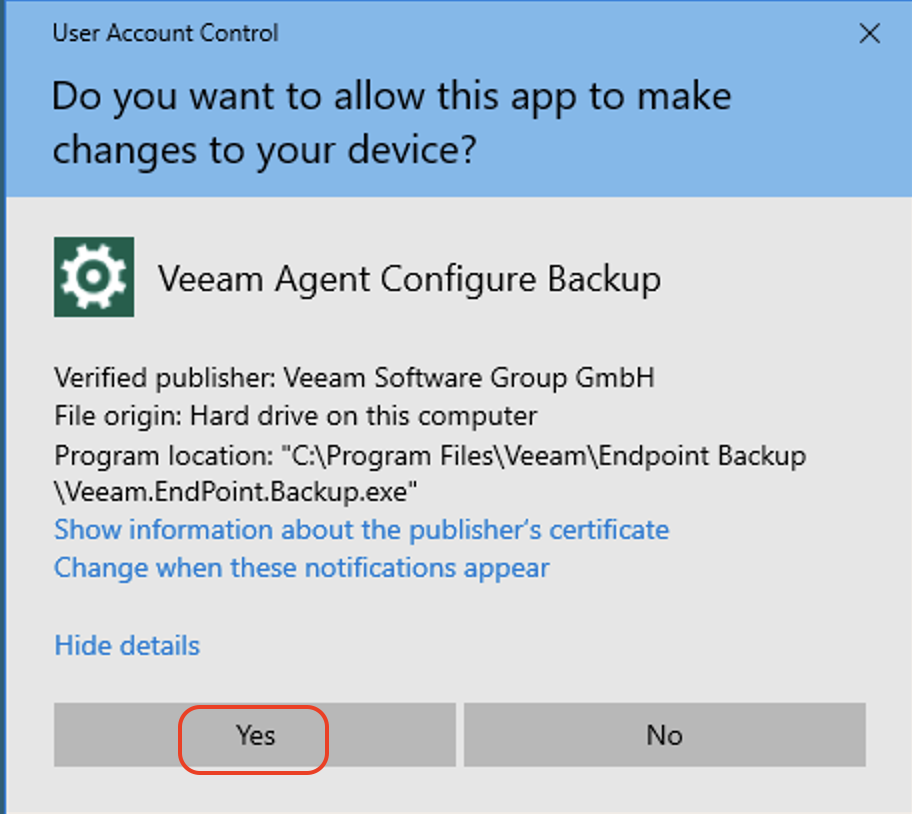
Click Yes if Windows asks for permission to make changes to the device.
Restoring a Backup
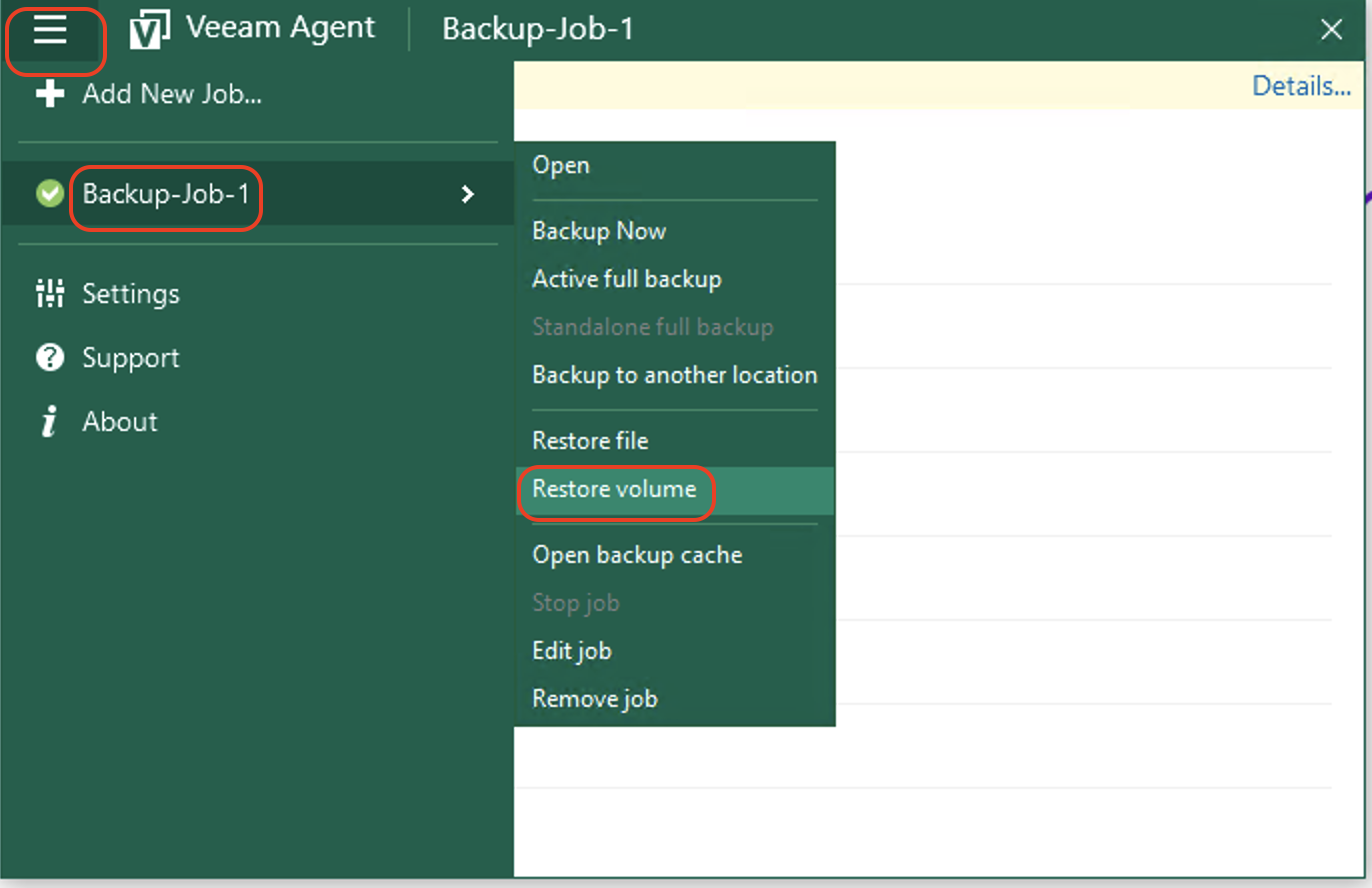
Open Veeam Agent for Windows. Click Menu and hover over the backup job from which to restore. Click Restore Volume.
Click Yes if Windows asks for permission to make changes to the device.
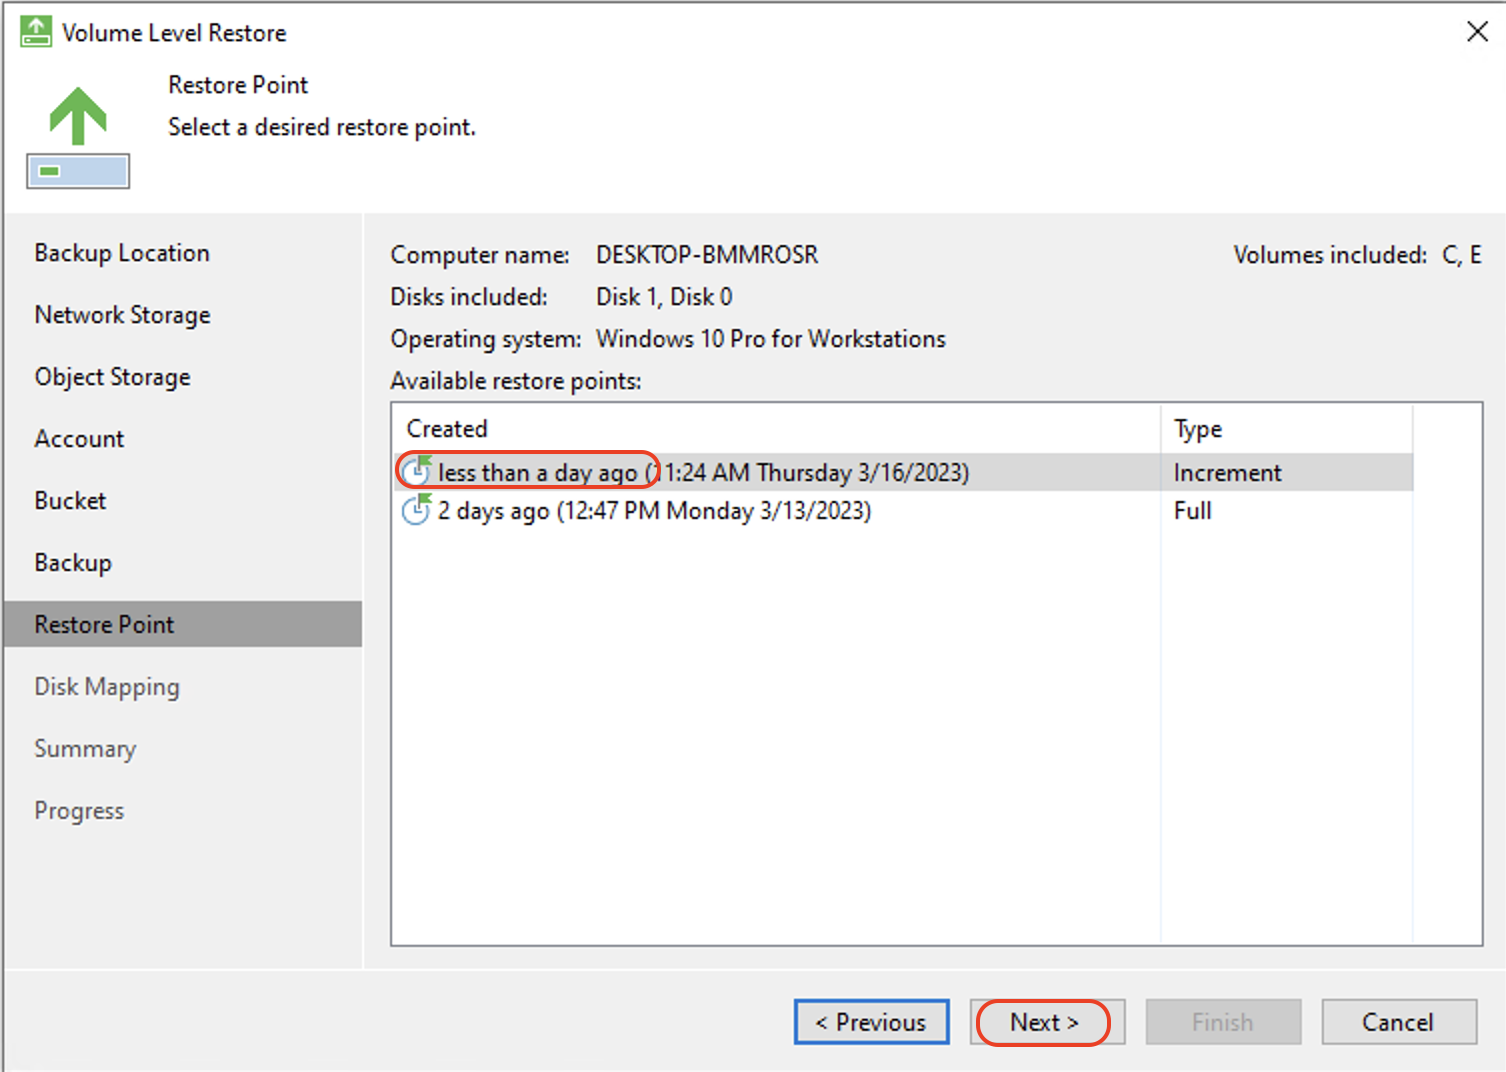
Select a restore point. Click Next.
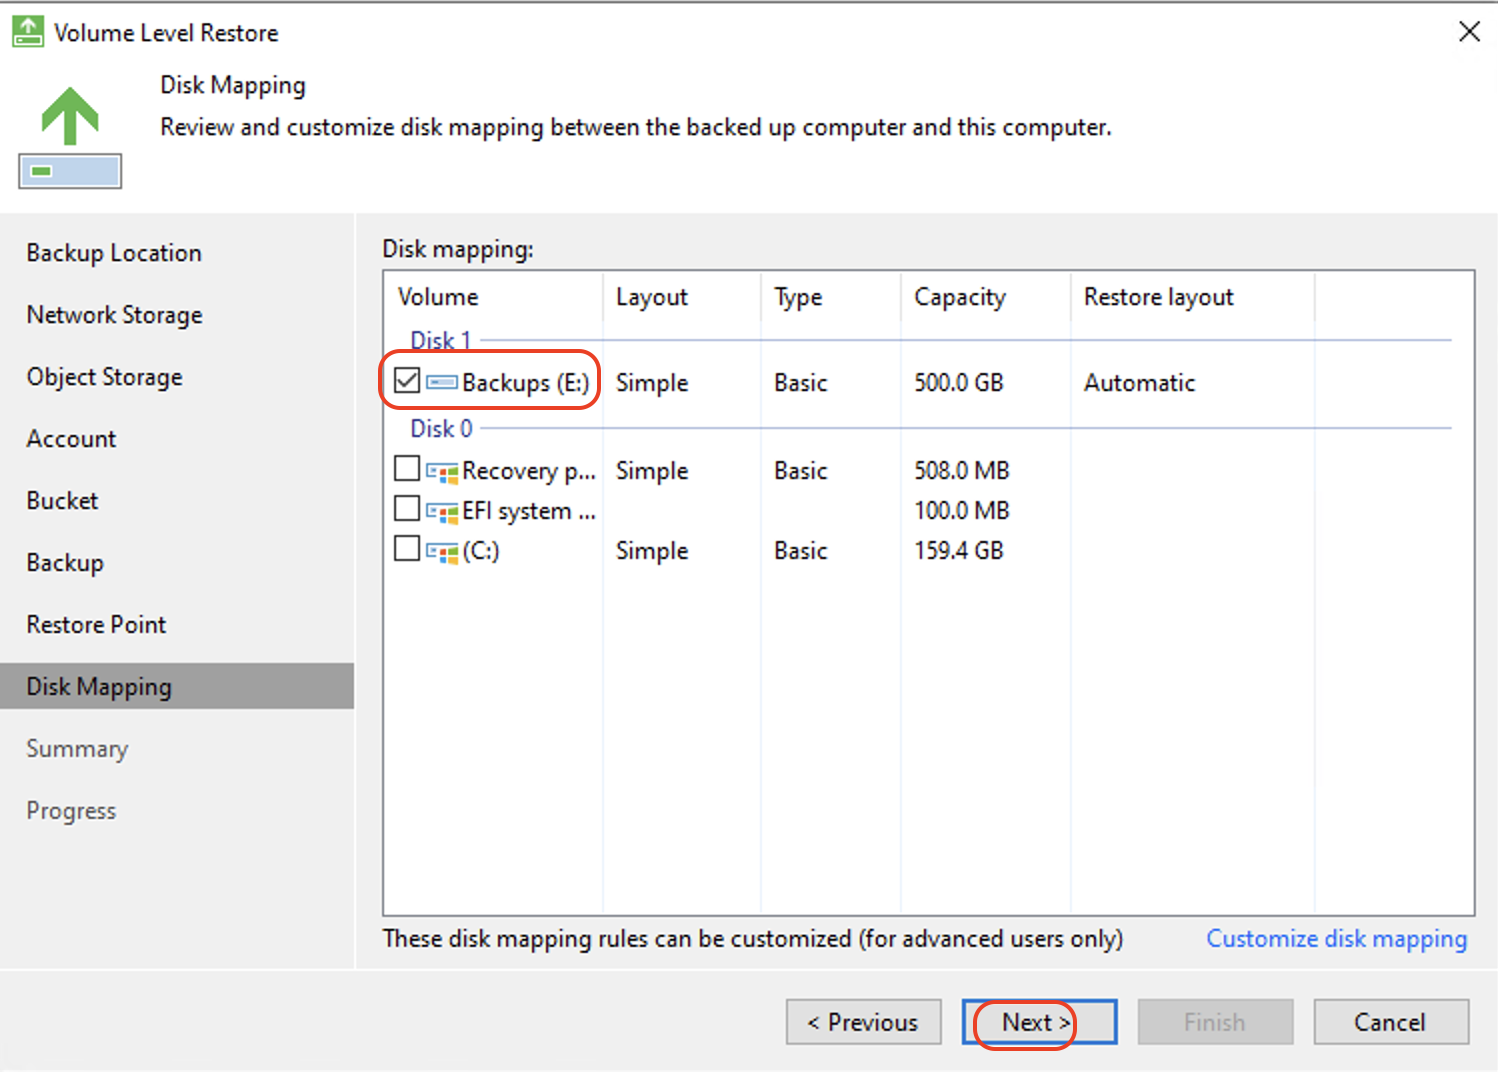
Select the Volume Disk to restore. Click Next.
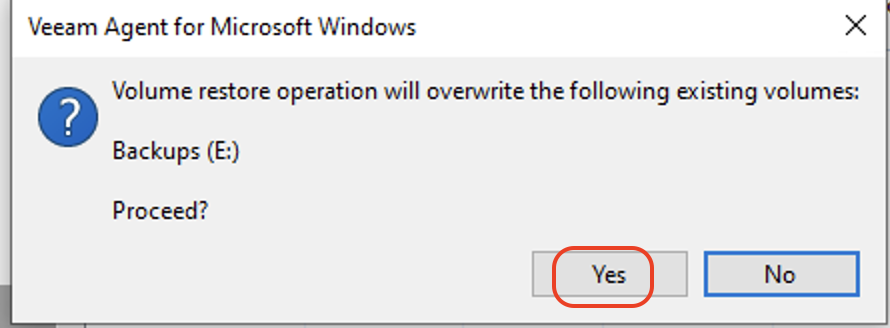
In the confirmation box, click Yes.
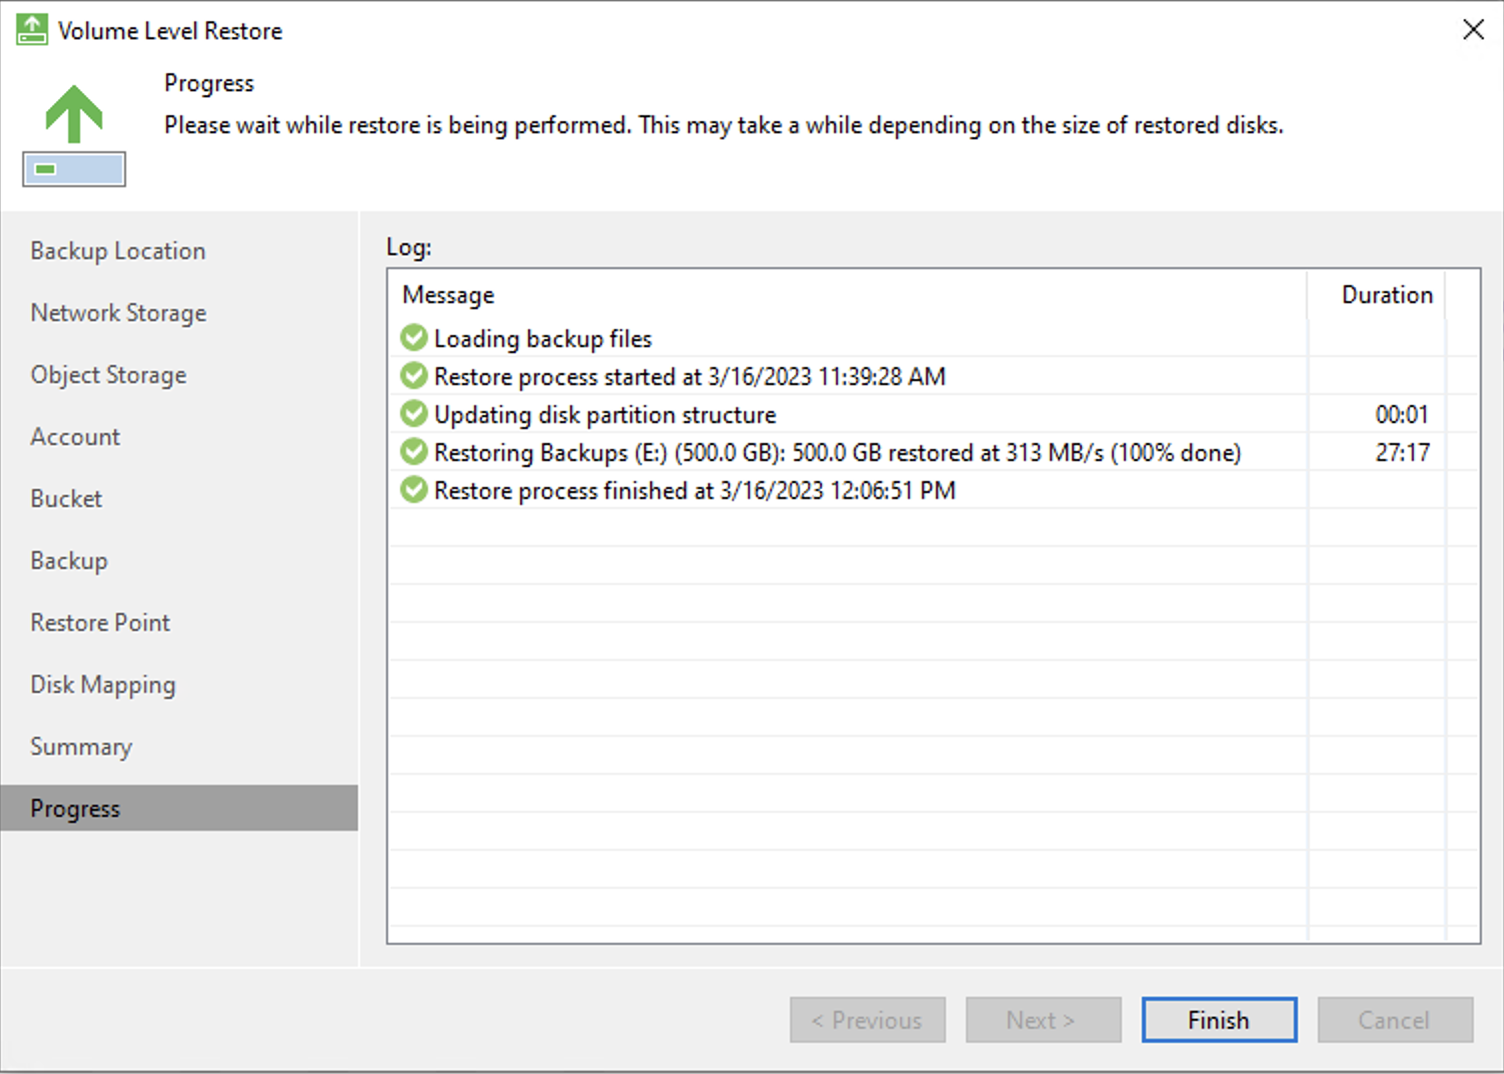
Review the Summary. Click Restore to start the restore process.
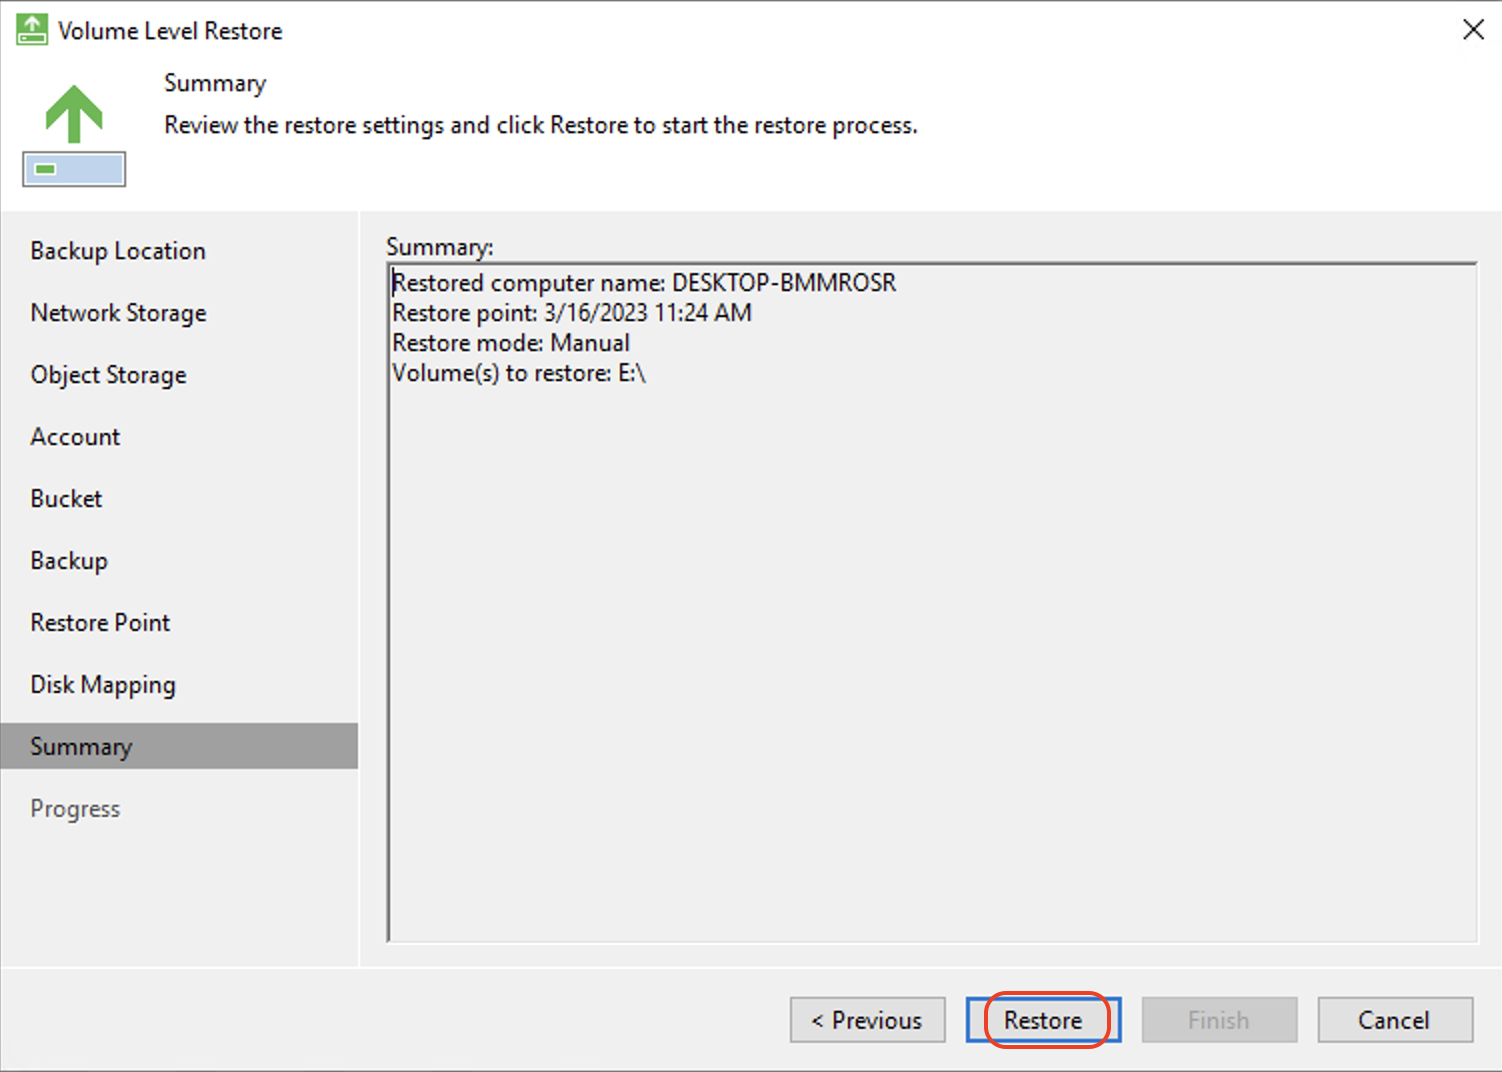
While the restore is running, review the log. Click Finish after the restore is complete.
Enabling Immutability
In version 6 of Veeam Agent for Windows, Veeam introduced immutability support for backup jobs. When you store your backup data in Wasabi, Veeam Agent enables you to protect backup data from deletion or modification by making that data temporarily immutable using the Object lock feature on Wasabi bucket.
This section details the procedure to create immutable backups using a backup job for your Windows computer.
Create an Object Lock enabled bucket. For more detail, refer to Object Lock: Enabling.
CAUTION: Do not enable Bucket-Level Object Retention settings on the Object Lock tab for your bucket. The screenshot below illustrates the correct way to configure Object Lock.
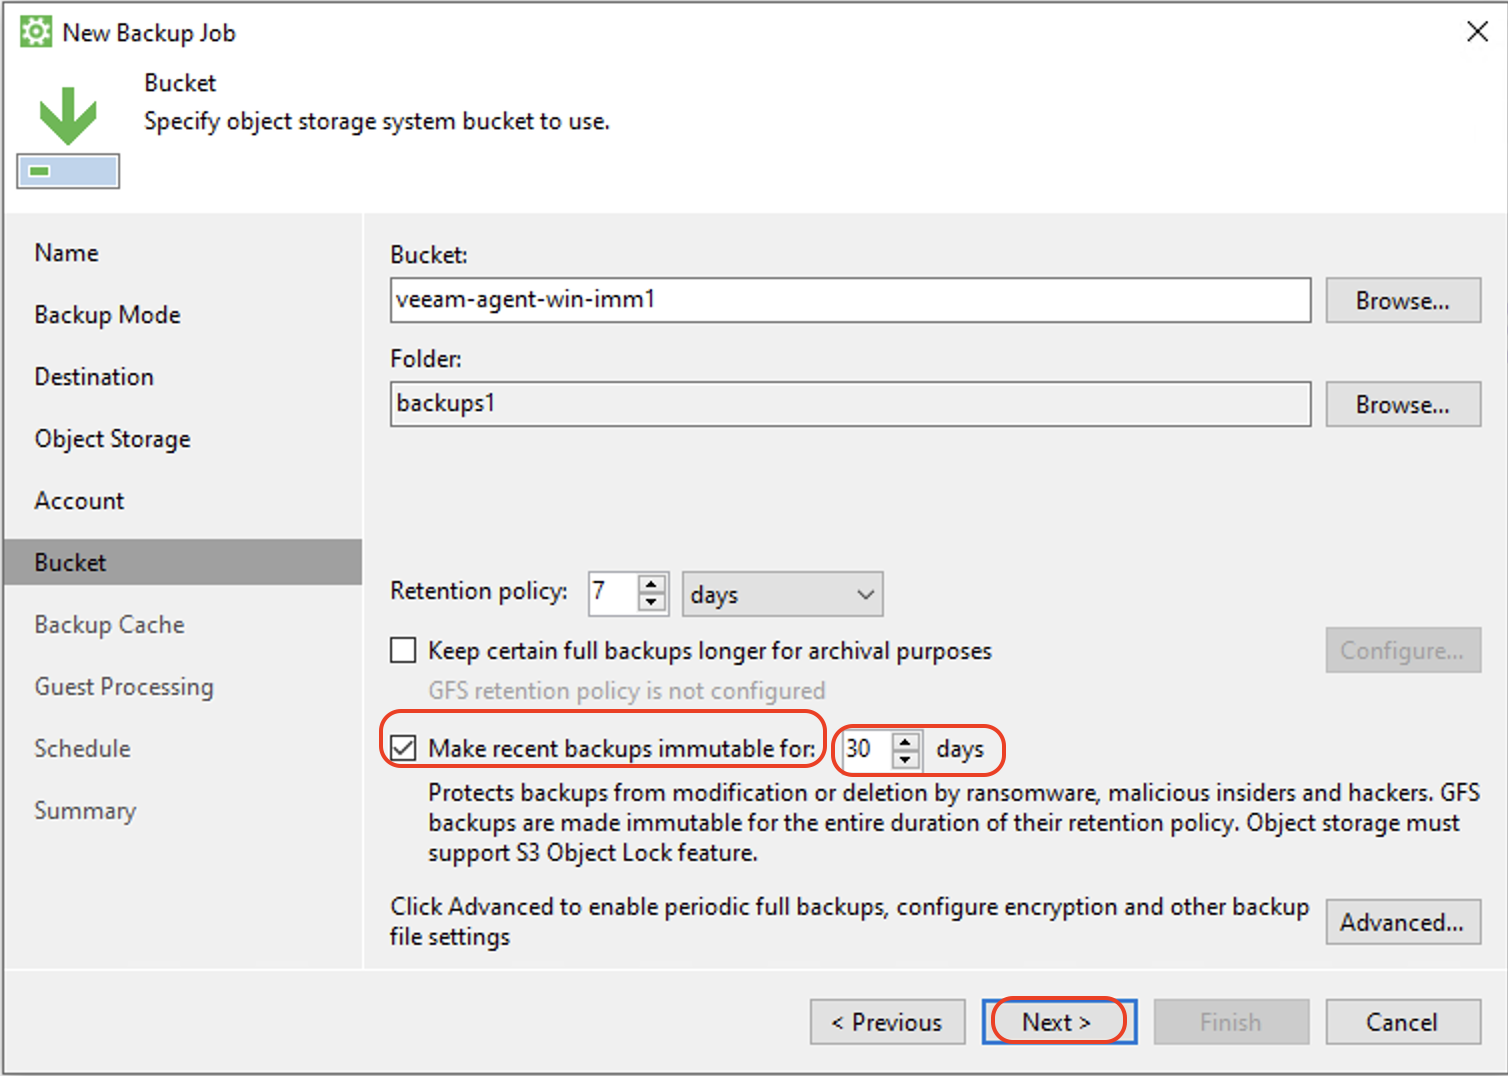
Enable immutability while creating the backup job. Follow the steps in Section 3 of this article to create a backup job. In Step 7, once you browse the bucket and create a new folder, enable immutability by checking the Make recent backups immutable box and specify the number of days to keep the backup immutable. Click Next. You will get a confirmation box regarding increase in costs due to immutability. Click OK to continue.
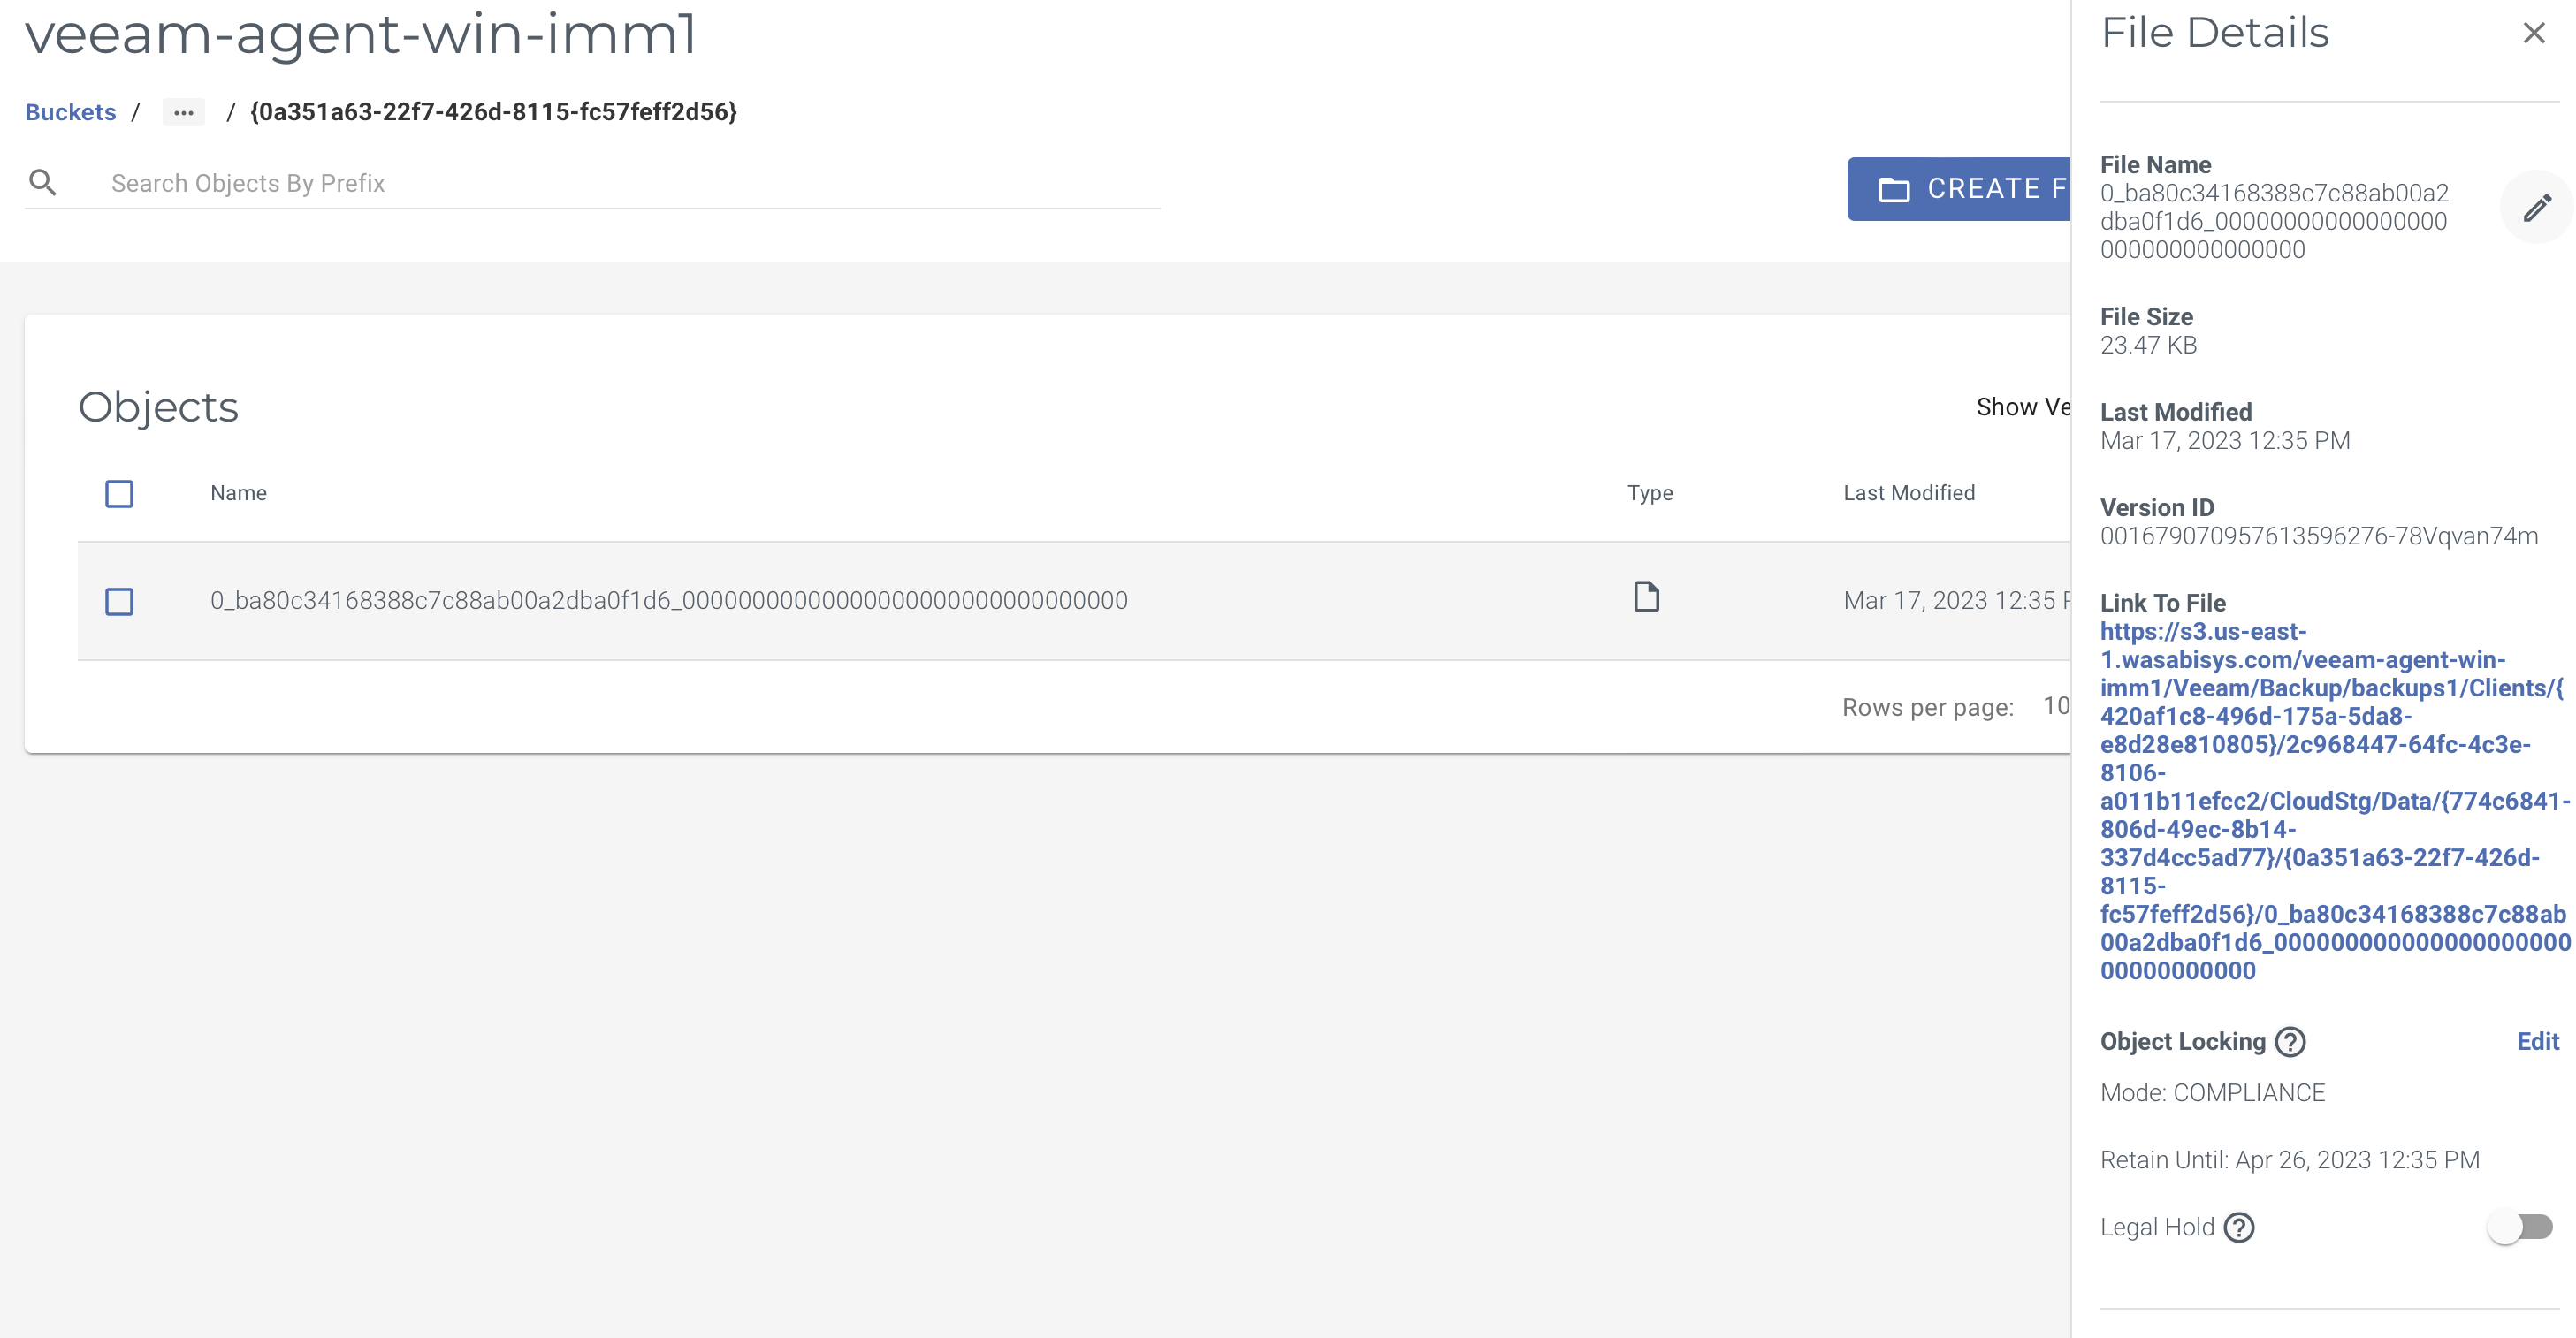
Complete the remaining steps to create the backup job. Once a successful backup is written to Wasabi, confirm that immutability is enabled by viewing file properties on Wasabi Console.
To view object lock properties of files on Wasabi Console, check the checkbox beside Show versions on the Wasabi console.