When configuring the WSC software, you established an initial source-target pair between your source (VMS) and target (Wasabi bucket). You can establish additional source-target pairs, as needed.
Before pairing a source with a target, it is best practice to create a separate bucket for each source that you intend to pair. You can either create a new bucket in your WSC storage account or directly from the WSC software, as described below.
If you have a recording server with only a recording volume (no archive volume), the same bucket is used for storing a single copy of all data and for Disaster Recovery (DR) and Extension. DR contains all camera data, XML files, and index files necessary to recreate the VMS database. Extension only requires a subset (camera data). If you have more than one volume configured on your recording server, each volume requires its own bucket.
Adding a Source
On the WSC Configuration tab, click Add source.
Navigate to the folder location. This should be the folder that contains the video recordings to replicate to Wasabi.
If the parent folder of the selected folder is already paired with a target, the selected folder cannot be used as a new source.
Optionally, create a new folder.
Click Select Folder.
.PNG)
Continue to Pairing a Target, below.
Pairing a Target
Once you have added a VMS source, continue to pair a Wasabi bucket with the source, as described below.
While adding a source and target pair, all replication jobs and operations will be paused.
Select the newly added source.
.png)
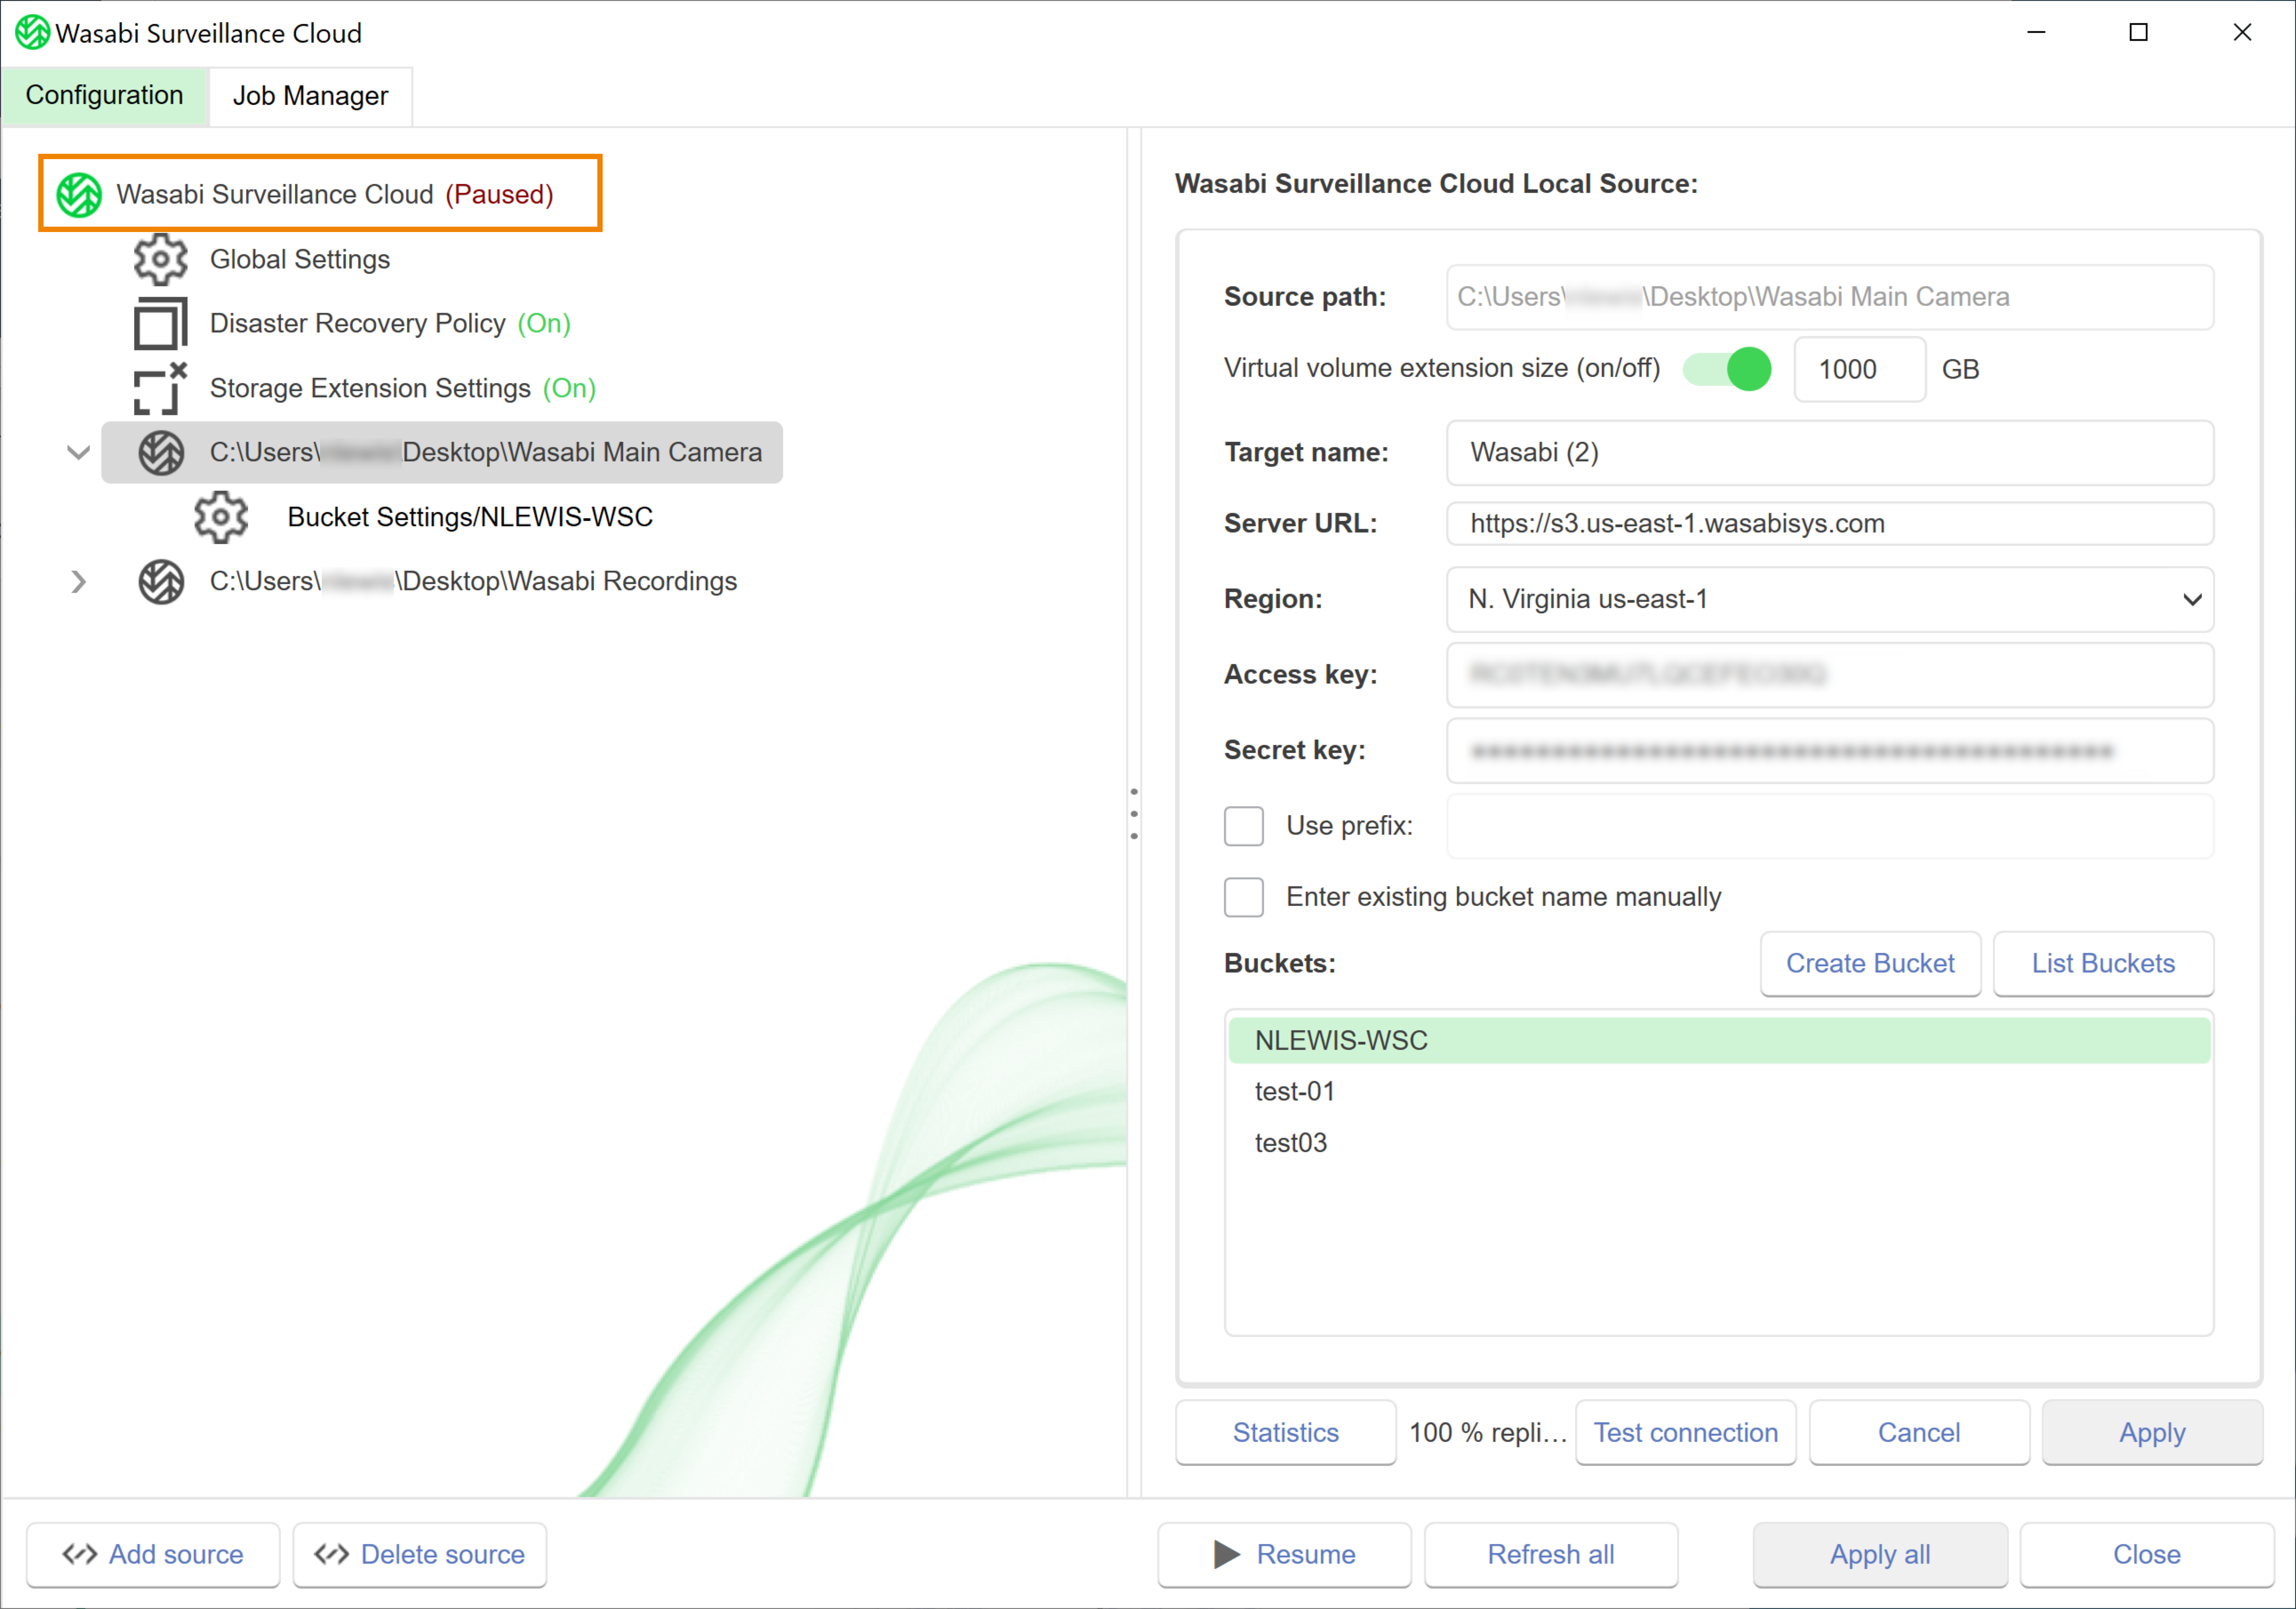
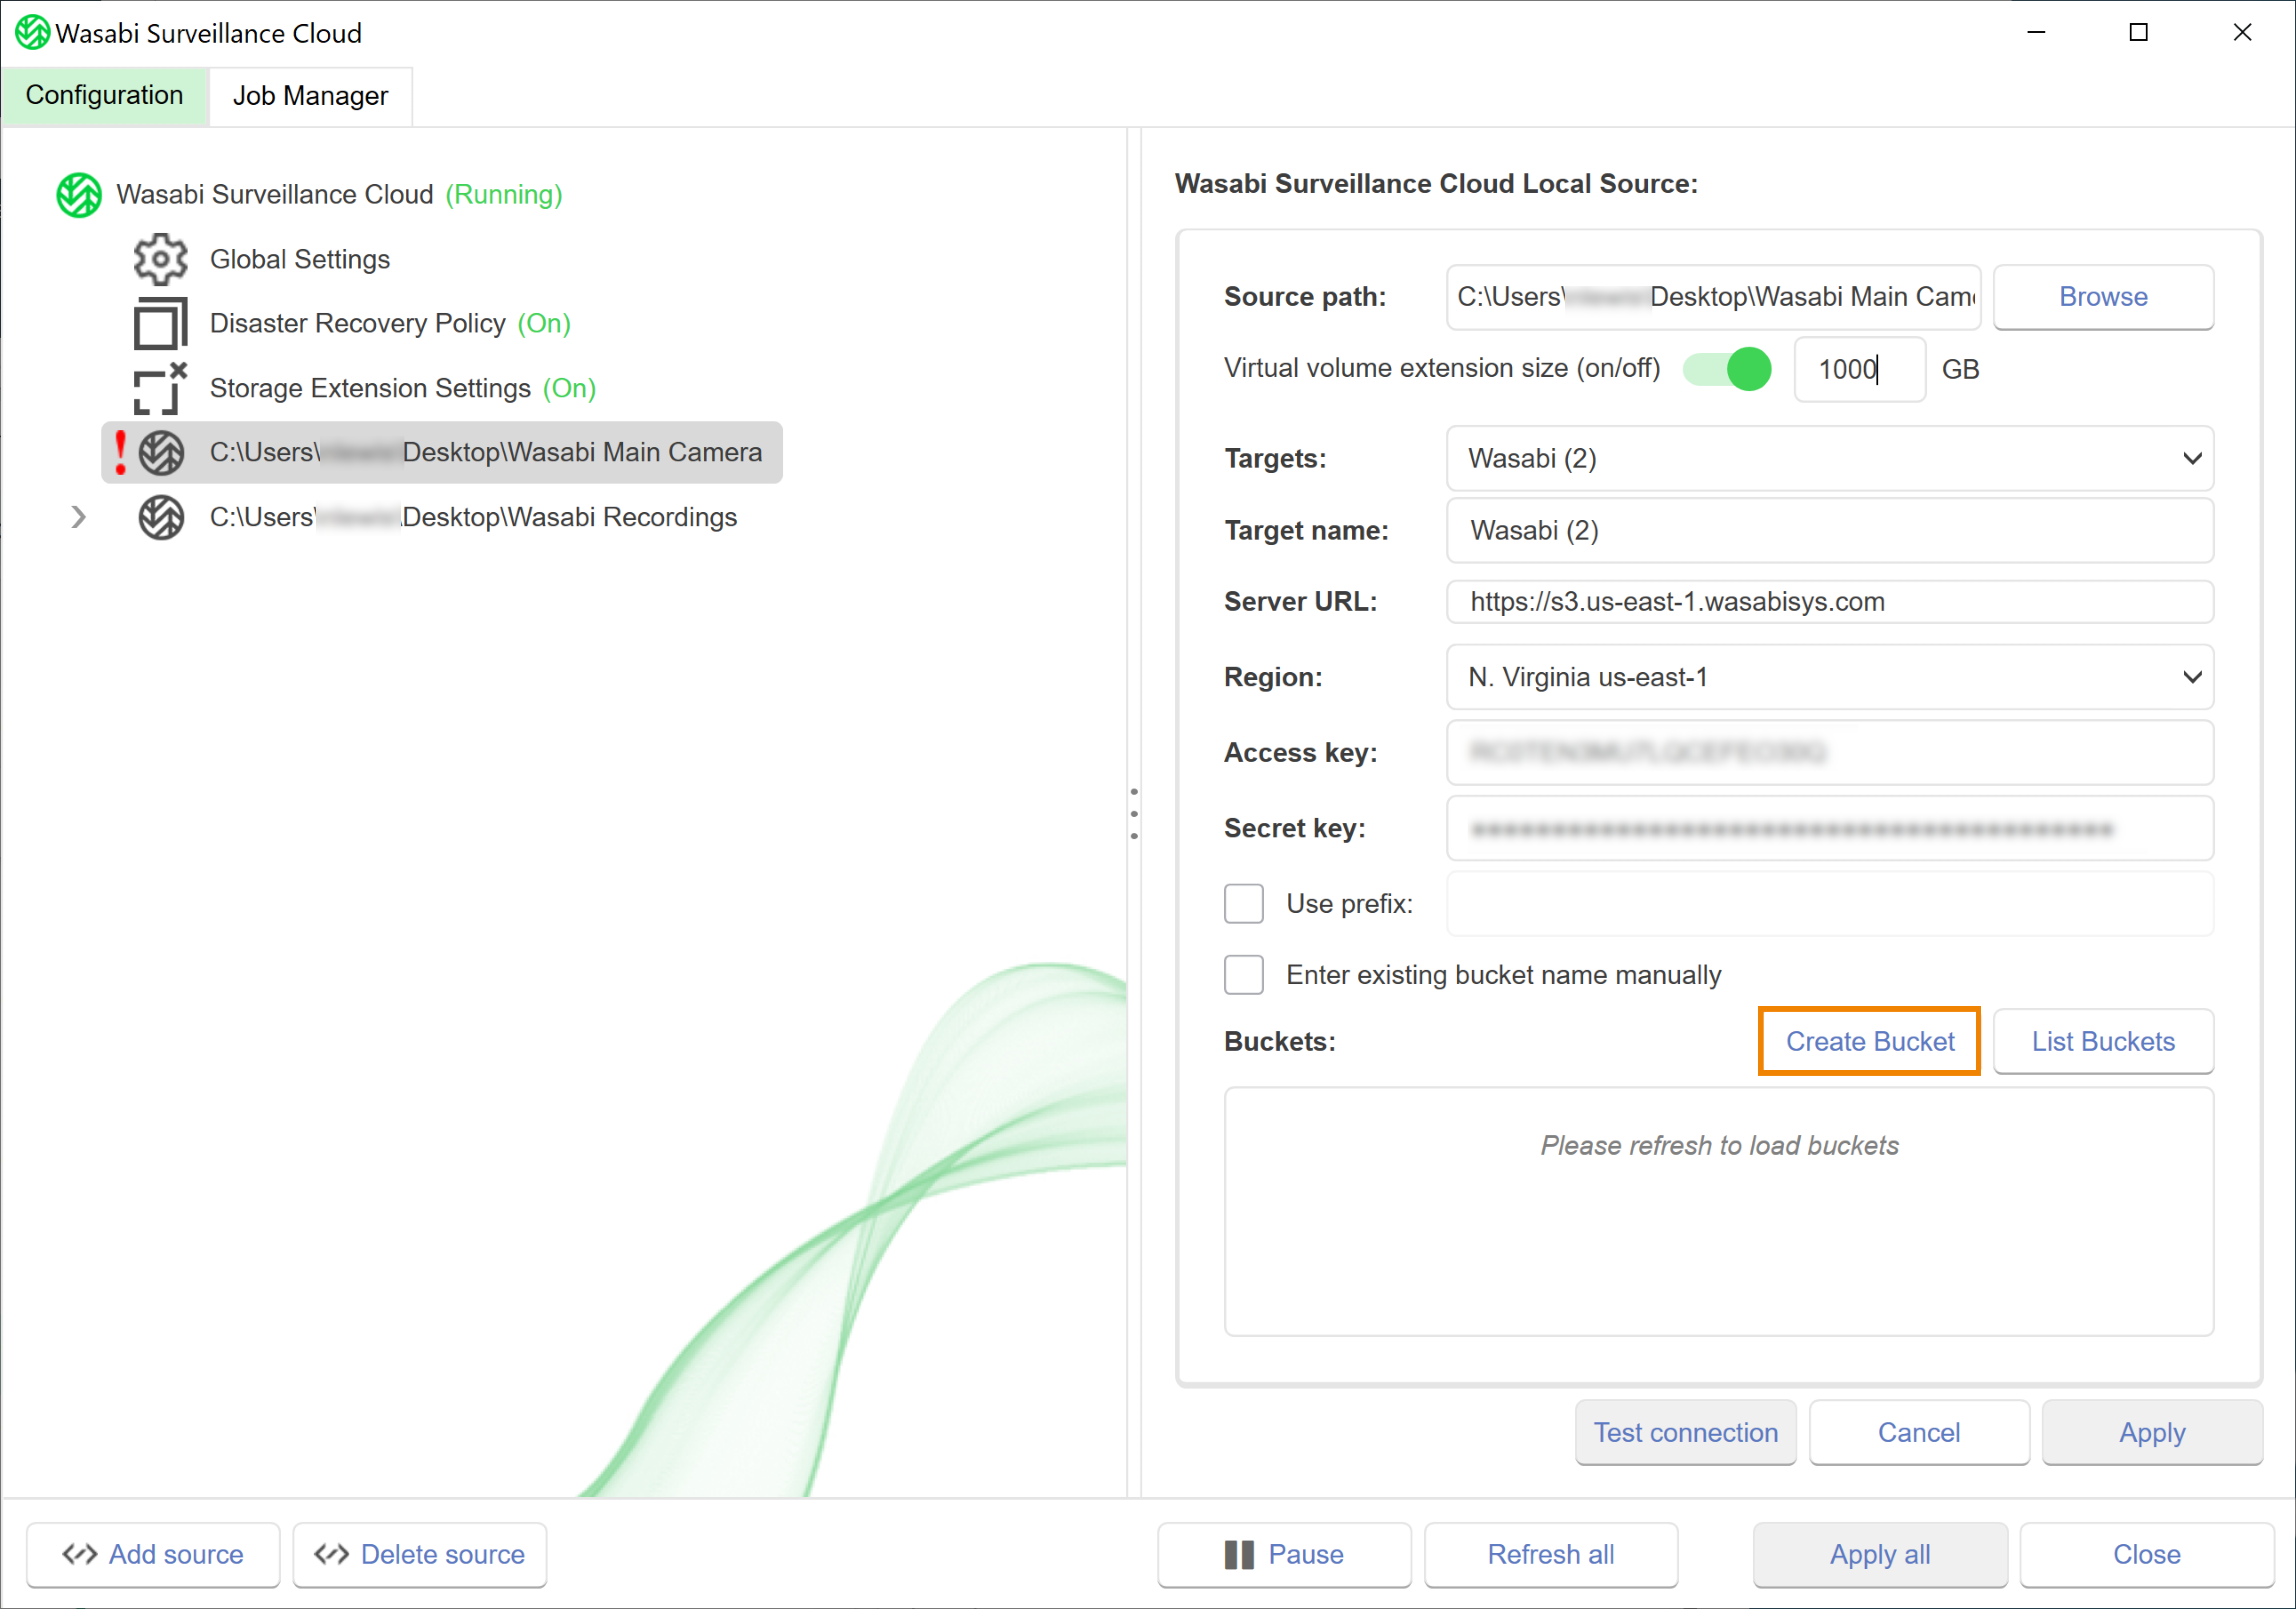
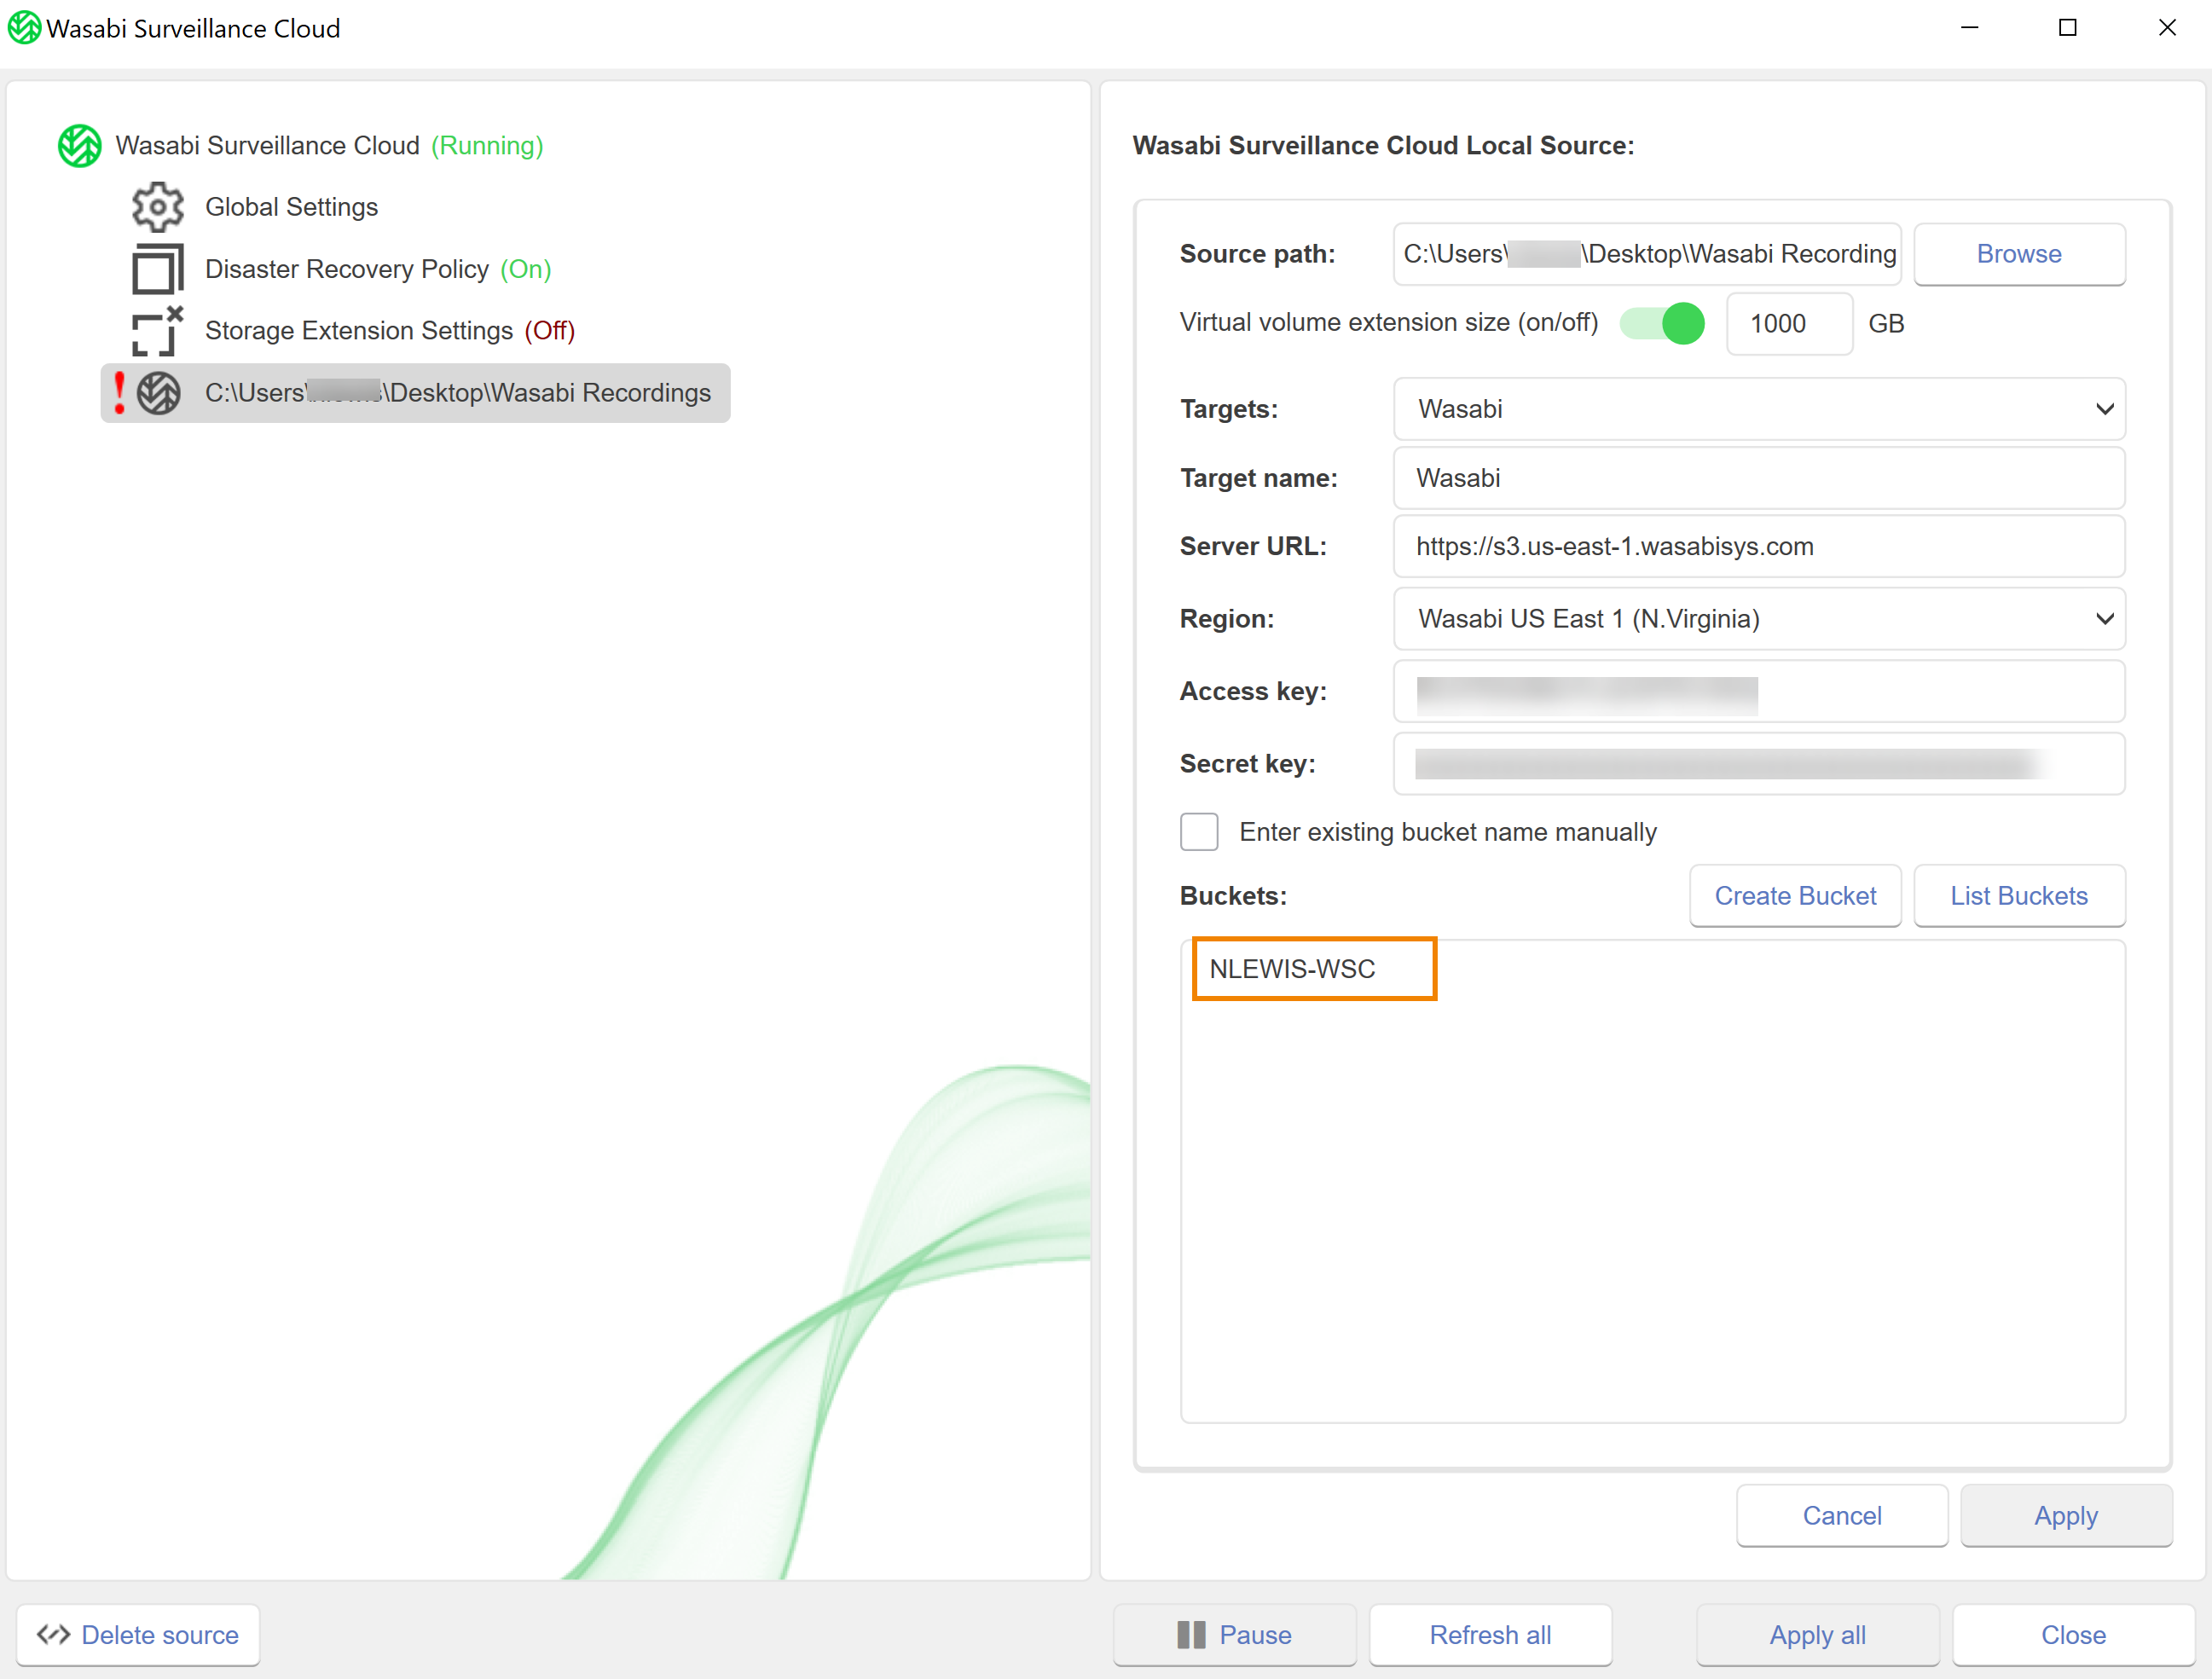
On the right pane, the Source path will be auto-populated according to the location of your source. To modify the source location, click Browse.
Virtual volume extension size enables the cloud to act as a virtual extension of your local storage (source volume) and preserves recordings even if local disk capacity is exceeded. This setting is required when you are using WSC to extend the local storage using the Storage Extension feature. For example, if your local storage has a capacity of 100 GB but you intend to store 1 TB of recordings, you must enable Storage Extension so that WSC will keep 100 GB of the newest data locally and the remaining 900 GB of older data in Wasabi. Depending on the VMS application, the VMS will issue deletions of the older data when it detects that the size of the recordings is getting close to the size of the local drive (even though the majority of the data is only stored in Wasabi). To protect the recordings from incorrect deletion by the VMS, you can "virtually expand" the local drive to a size that matches your total retention size (local and cloud). In the example below, we would set this to 1000 GB. Once you set this and complete the remaining configuration steps, the local drive will reflect this new size on Windows Explorer.

Click the toggle to enable Virtual volume extension size:

Enter a size.

Enter the following information for the target.
Targets—Click the drop-down to select a target.
Target Name—Enter a name for the target.
Be sure to use a unique target name. A unique target name enables you to reuse the parameters if you pair another source with the same target. When you reuse the target name, the name (and its parameters) will appear as an option to select in the Targets drop-down list.
Server URL—Keep the default. The Server URL field will auto-populate once you select a region.
Region—Click the drop-down to select the appropriate region.
Access Key—For your WSC storage account bucket.
Secret Key—For your WSC storage account bucket.
To assign a prefix to data uploaded through the WSC client, click the checkbox to Use prefix. Enter a prefix in the type field.
When pairing a bucket, you have the following options. Once complete, return to this step.
Manually enter an existing bucket—Manually enter the name of an existing Wasabi bucket
Create a new bucket—Create a new Wasabi bucket
Listing buckets—Automatically list all existing Wasabi buckets
Optionally, use the Test Connection feature to test the connection of the selected bucket. To do so, click Test Connection.
Hover over each list item to view more details about each test. Click the checkbox(es) to select the test to run.
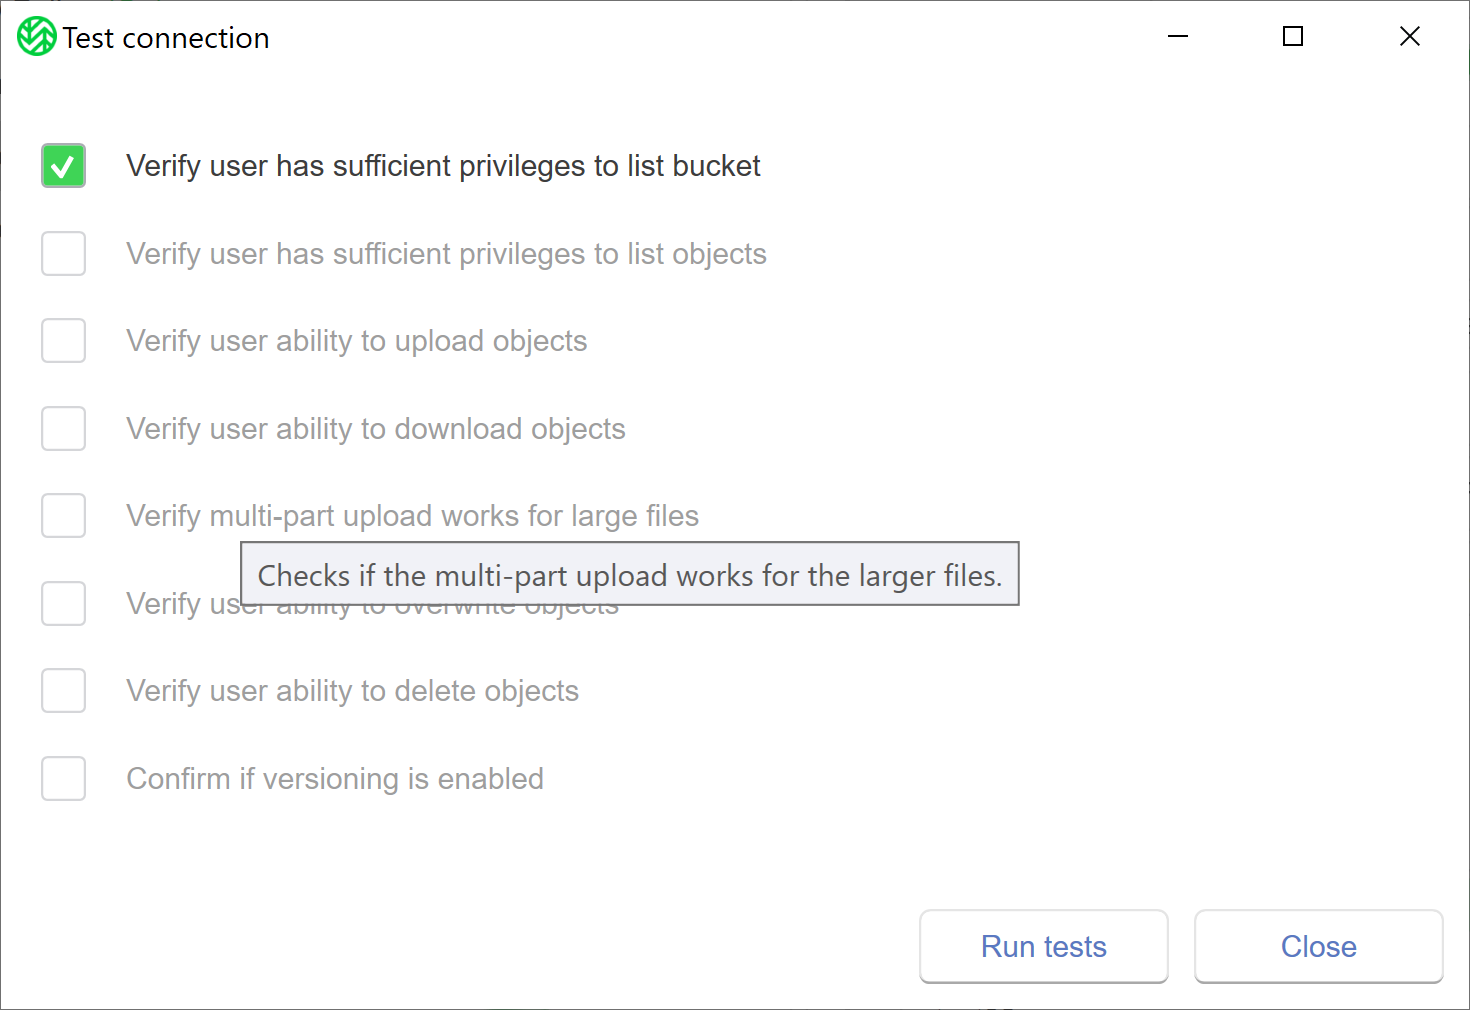
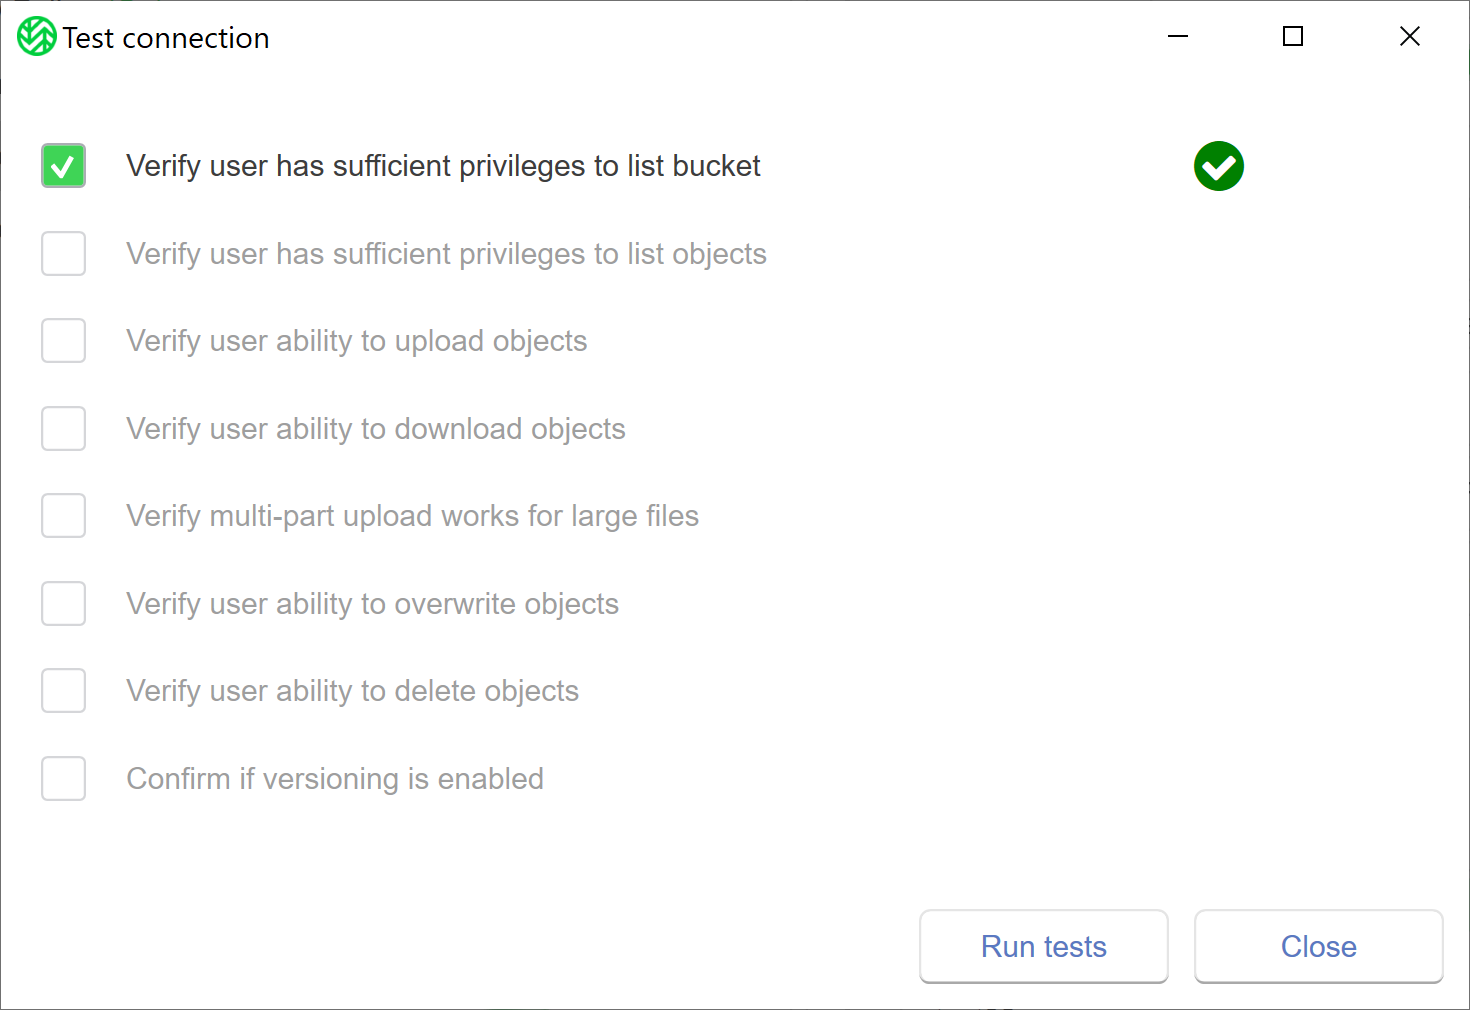
Click Run tests. A green checkmark will report a successful test, as shown below.
Once complete, click Close.
Click Apply all.
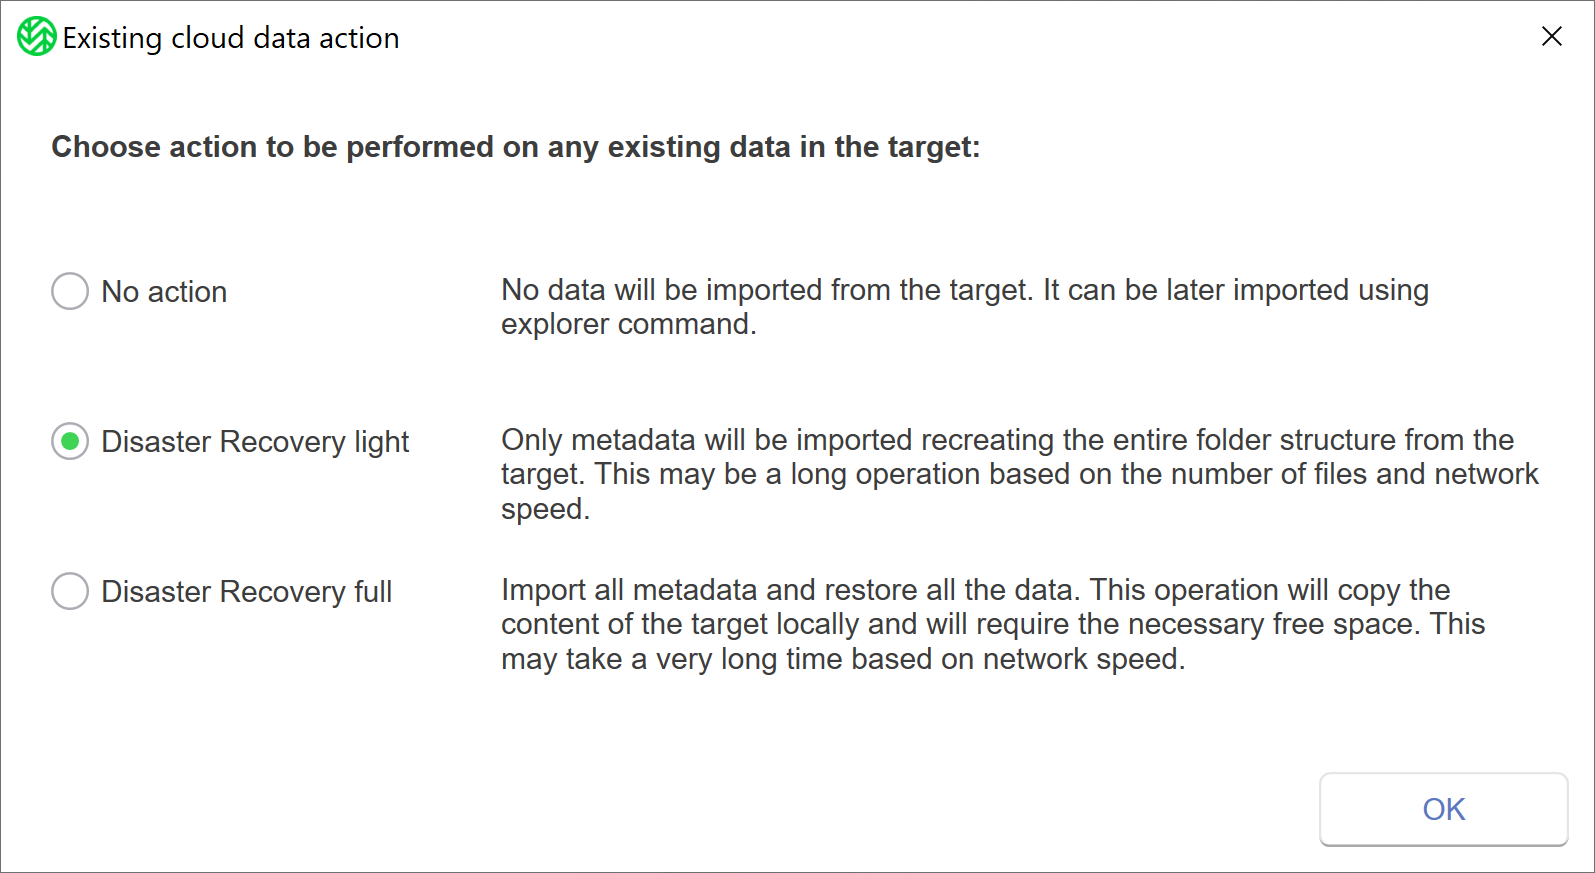
If you paired an existing bucket, WSC provides optional actions to perform on preexisting data in the bucket.
A message will confirm that the changes have been applied and WSC is paused. Click OK.
To resume operations, click Wasabi Surveillance Cloud.
Click Resume.
.png)
WSC is now successfully configured and camera data from your source folder will automatically begin replicating to the cloud.
Manually Entering Existing Bucket
Click the checkbox to Enter existing bucket name manually.
Enter the bucket name.
Creating a New Bucket
Click Create Bucket.
If you create a new bucket, be sure to follow the bucket naming conventions defined in Bucket Naming Rules.
Choose a different bucket for each repository for each recording server.
Click the drop-down to select a region.
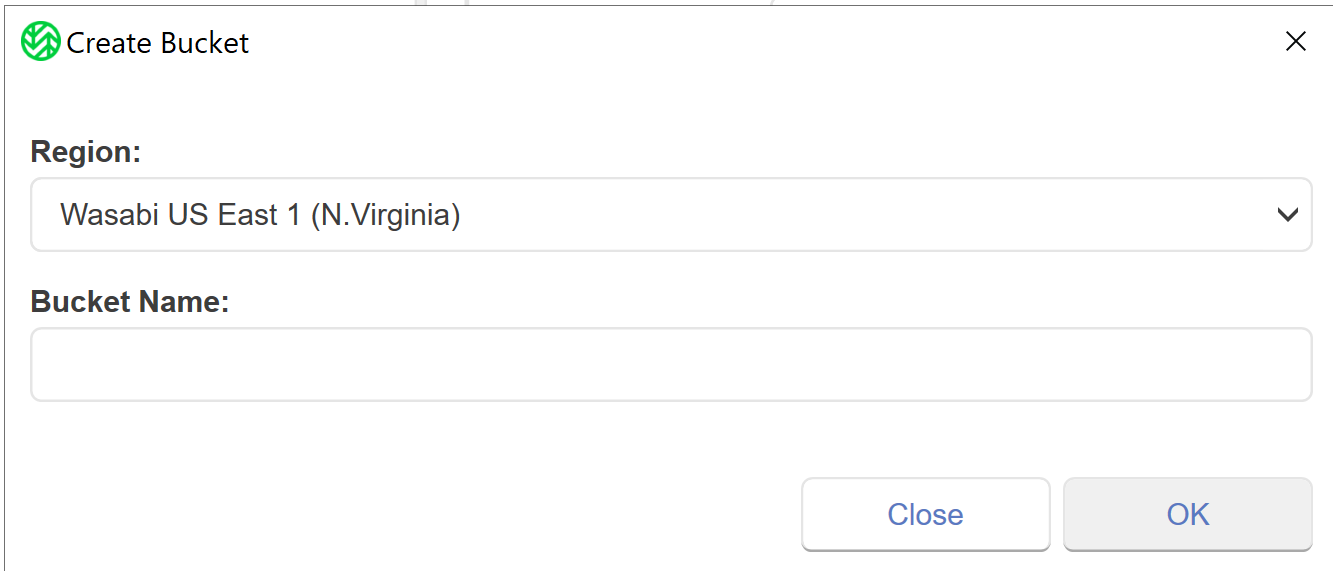
Enter a bucket name.
Click OK.
Listing Buckets
Click List Buckets.
.png)
WSC will display all buckets that are available in your account. Select a bucket from the list.
Objectives Met!
1—Download and install Wasabi Surveillance Cloud.
2—Activate the Wasabi Surveillance Cloud software.
3—Configure Wasabi Surveillance Cloud.
You are ready to explore features in the Product Guide for Wasabi Surveillance Cloud (WSC).
Optionally, learn more about getting started with specific VMS profiles in Wasabi Surveillance Cloud and VMS Integrations.