Rubrik NAS Cloud Direct is a data protection application validated for use with Wasabi Hot Cloud Storage. This application protects various sources of unstructured data such as SMB shares, NFS shares, Dell Powerscale (Isilon), NetApp, Pure Storage and many more.
Pre-Requisites
Wasabi Hot Cloud Storage Account
Wasabi Bucket - See Creating a Wasabi Bucket
Be sure to note your Bucket Name & Storage Region, as you’ll need these later.
Wasabi Access & Secret Key - See Access Keys
Rubrik NAS Cloud Direct
System to protect - See Instructions Below
Target Location - See Instructions Below
Protection Policy - See Instructions Below
Adding A System
Please note, this application can back up many sources of data. In our example, we are backing up an SMB share. Please be sure to reach out to your Rubrik representative to ensure that your unstructured data storage solution is supported.
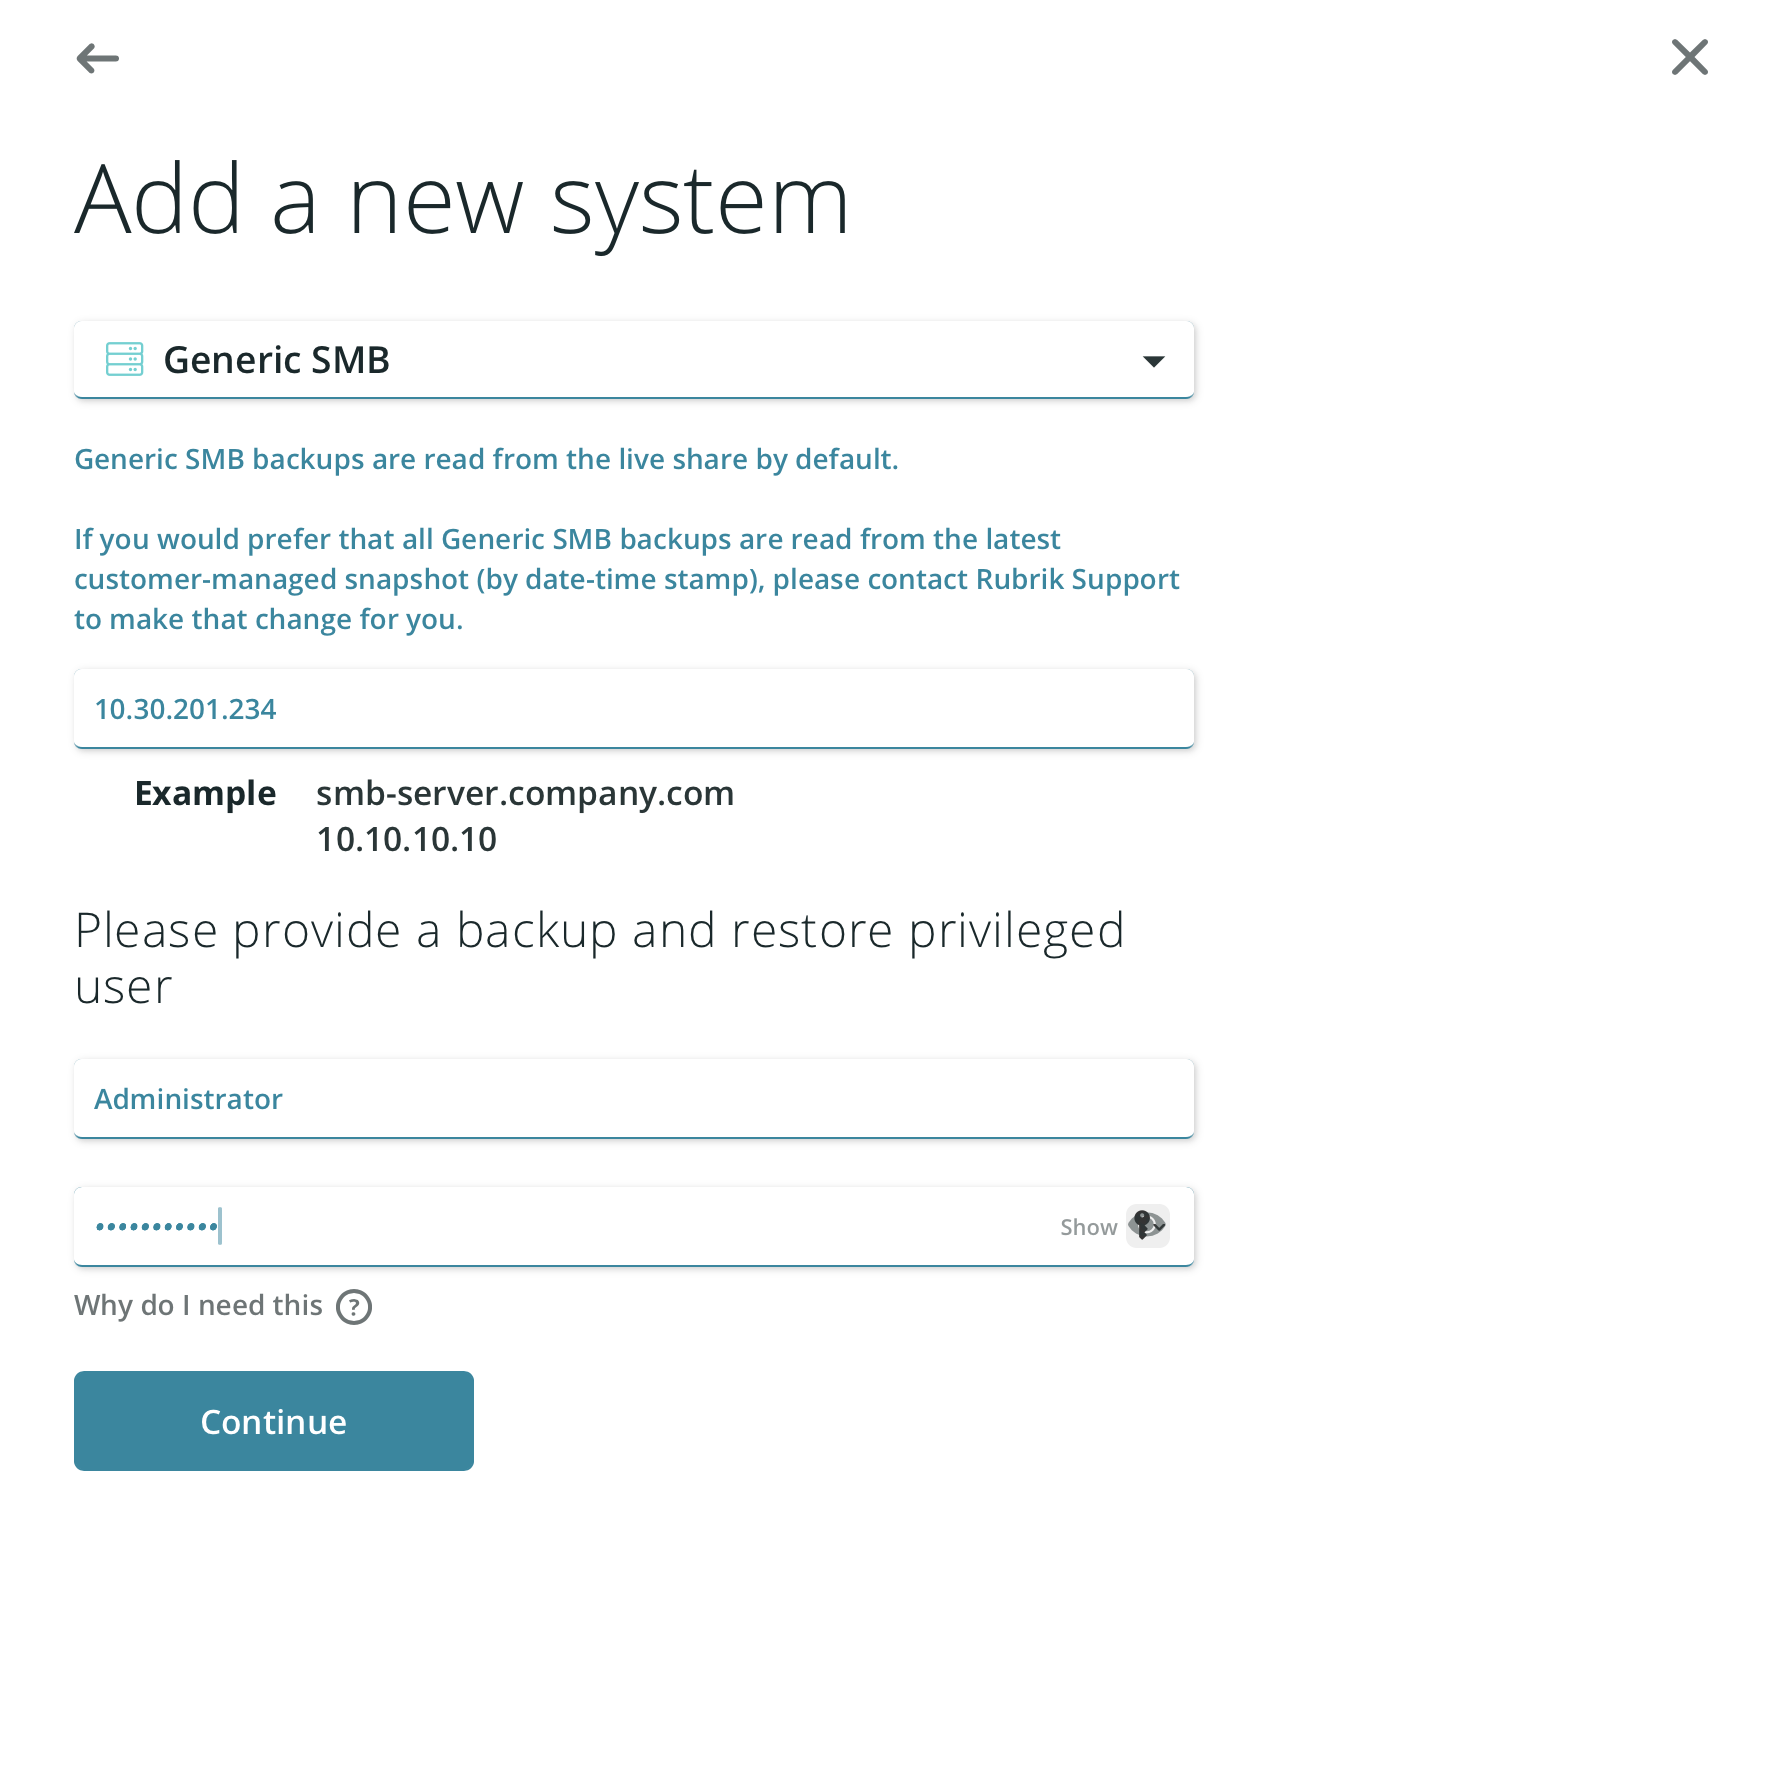
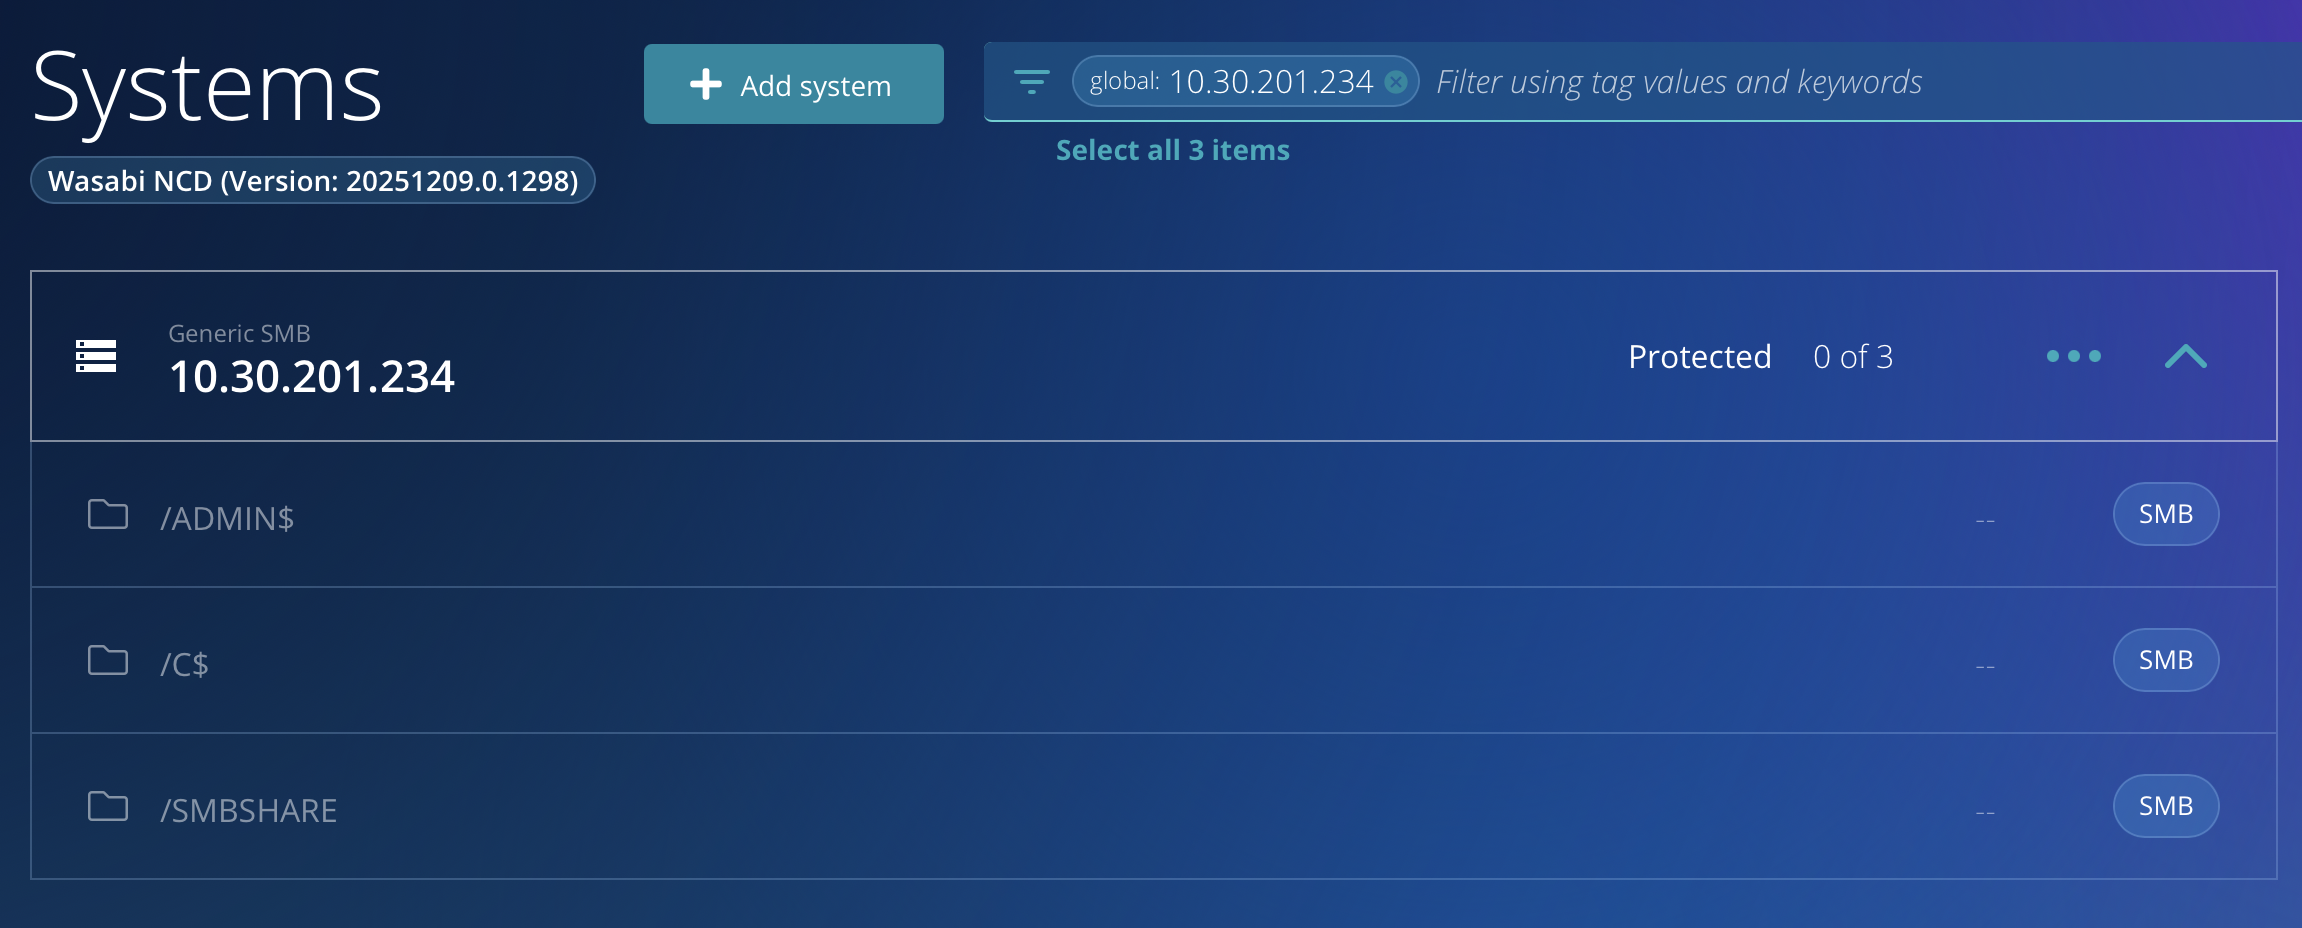
Click + Add System on the Systems page of your NAS Cloud Direct Dashboard
Choose the appropriate System Type (In this case we chose “Generic SMB”) from the dropdown menu.
Provide the IP or Host Address of the system.
Enter credentials for the System (In this case, a user with read/write access for the SMB Share).
Click Continue.
2. Optionally, add Share Names, then click Complete adding system.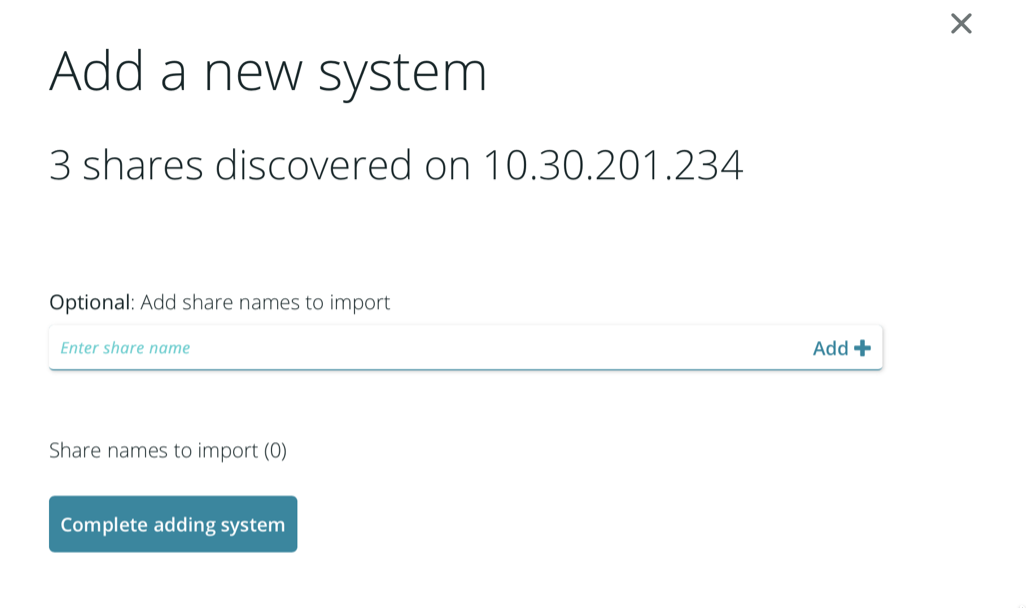
3. Your system will now be shown on the Systems page.
Adding a Target
On the left-hand menu click Targets then, click Target Locations from the popup menu.
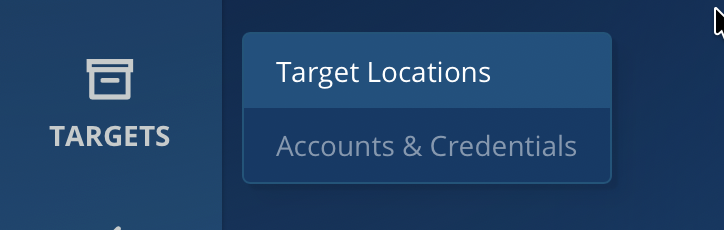
Click the Add Target button on the Targets page.

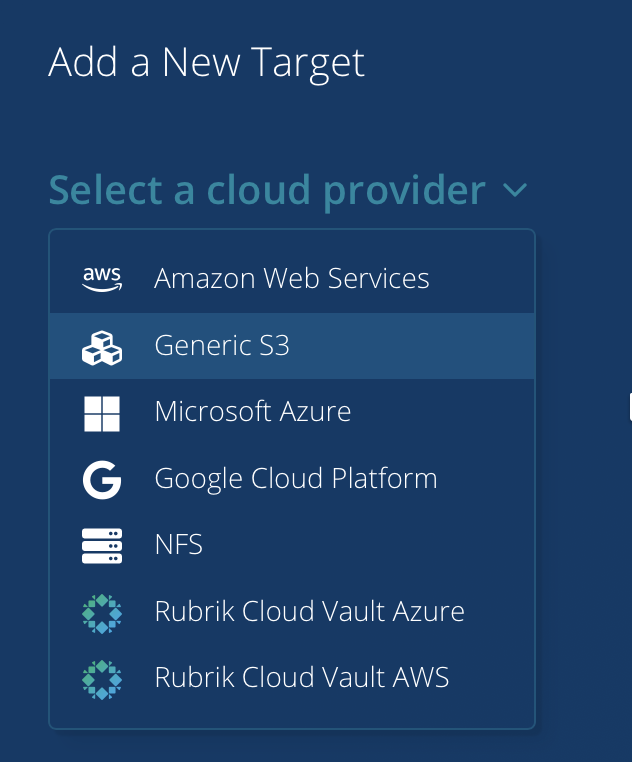
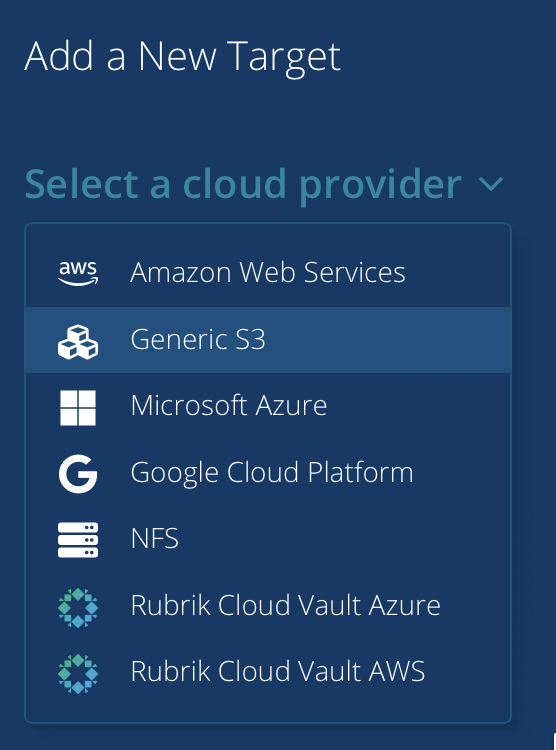
Choose Generic S3 from the Select a cloud provider dropdown menu.
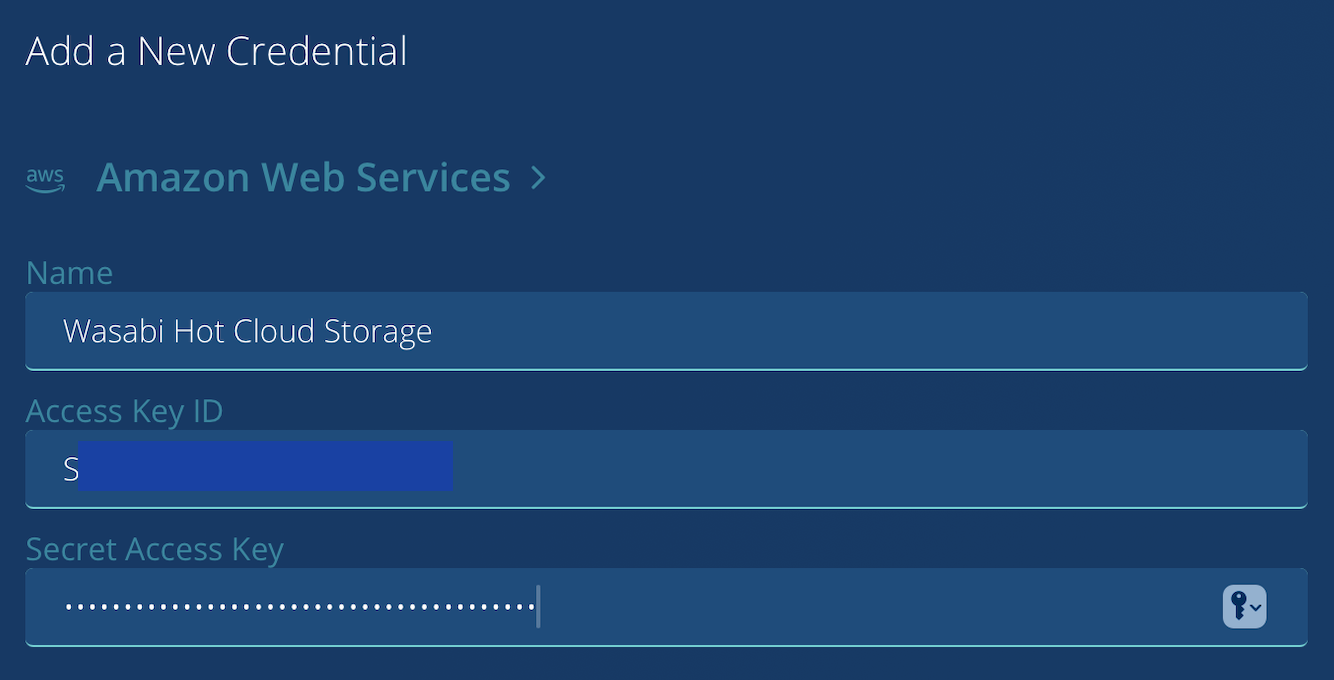
Click the + sign next to the Credential input box, to add your Wasabi Account Credentials.
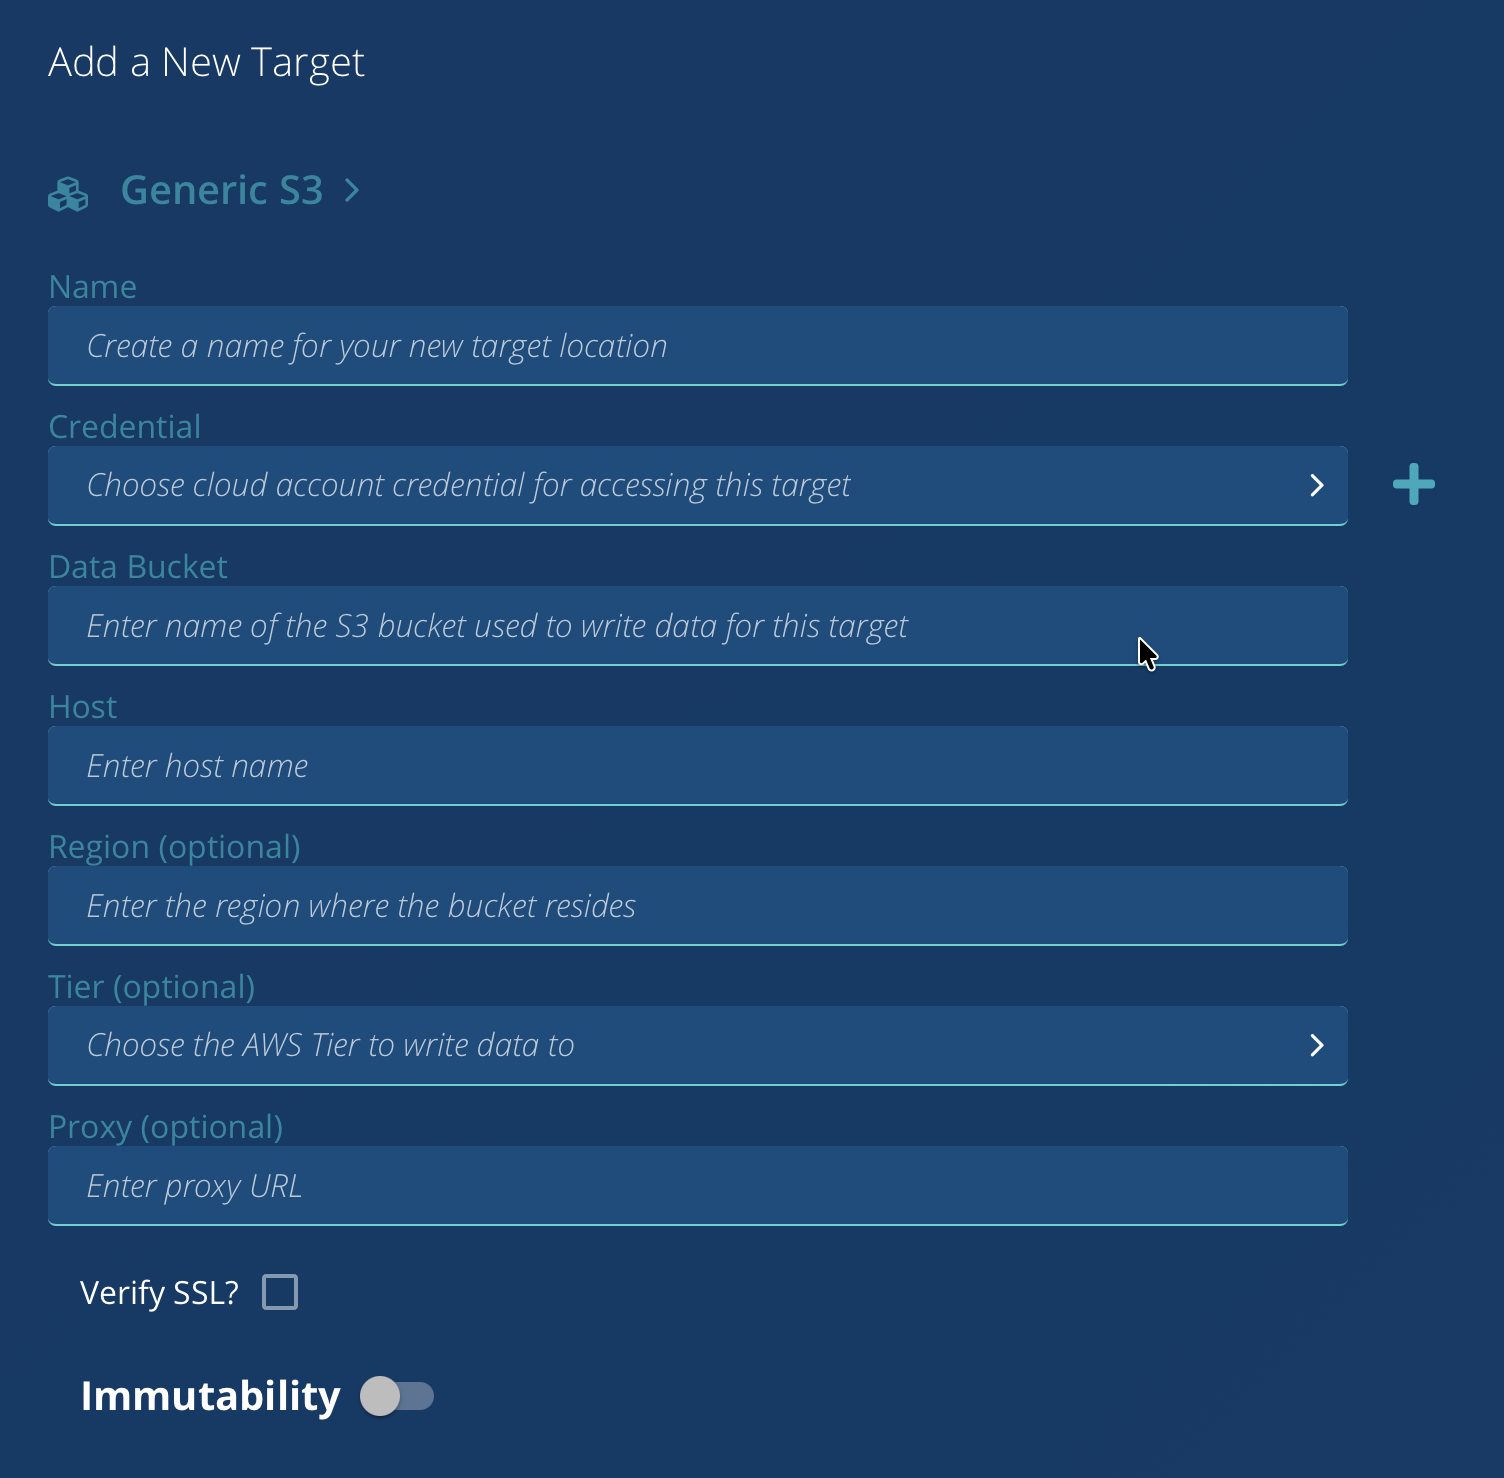
5. Add a friendly name, and input your Wasabi Access & Secret Key, then click Save.
6. Fill in your integration info:Input a friendly name,
Choose credentials created in Step 5
Input the name of your Wasabi Bucket
Enter the Service URL (in this example “s3.us-east-2.wasabisys.com”).
Enter the Service Region (in this example “us-east-2”).
Leave Tier and Proxy Blank
Optionally enable SSL Verification
Optionally enable Immutability.
Finally, Click Save.
This configuration example discusses the use of Wasabi's us-east-2 storage region. Use the region your bucket is located in. For a list of regions, see Available Storage Regions.

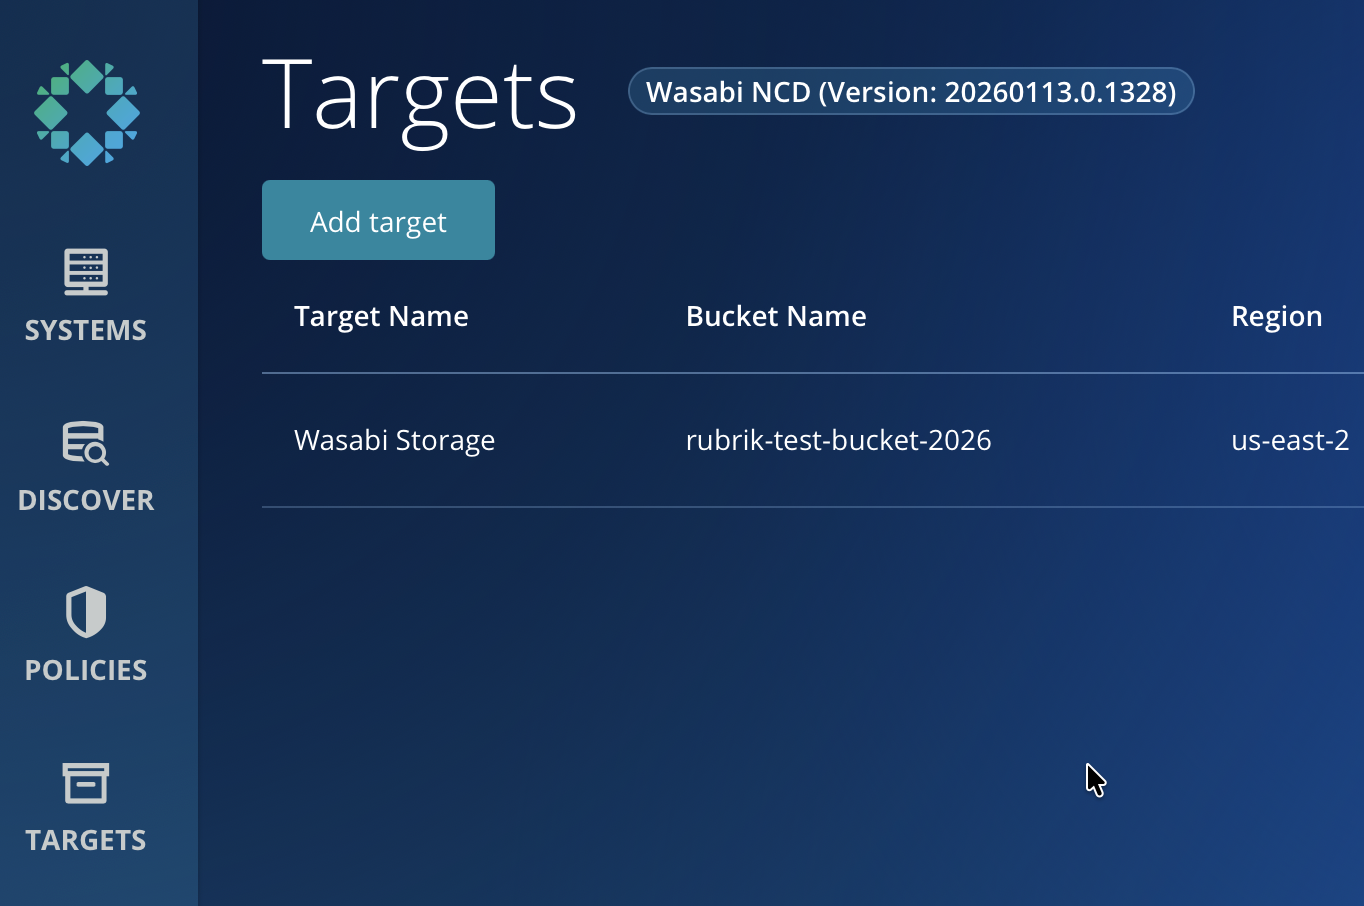
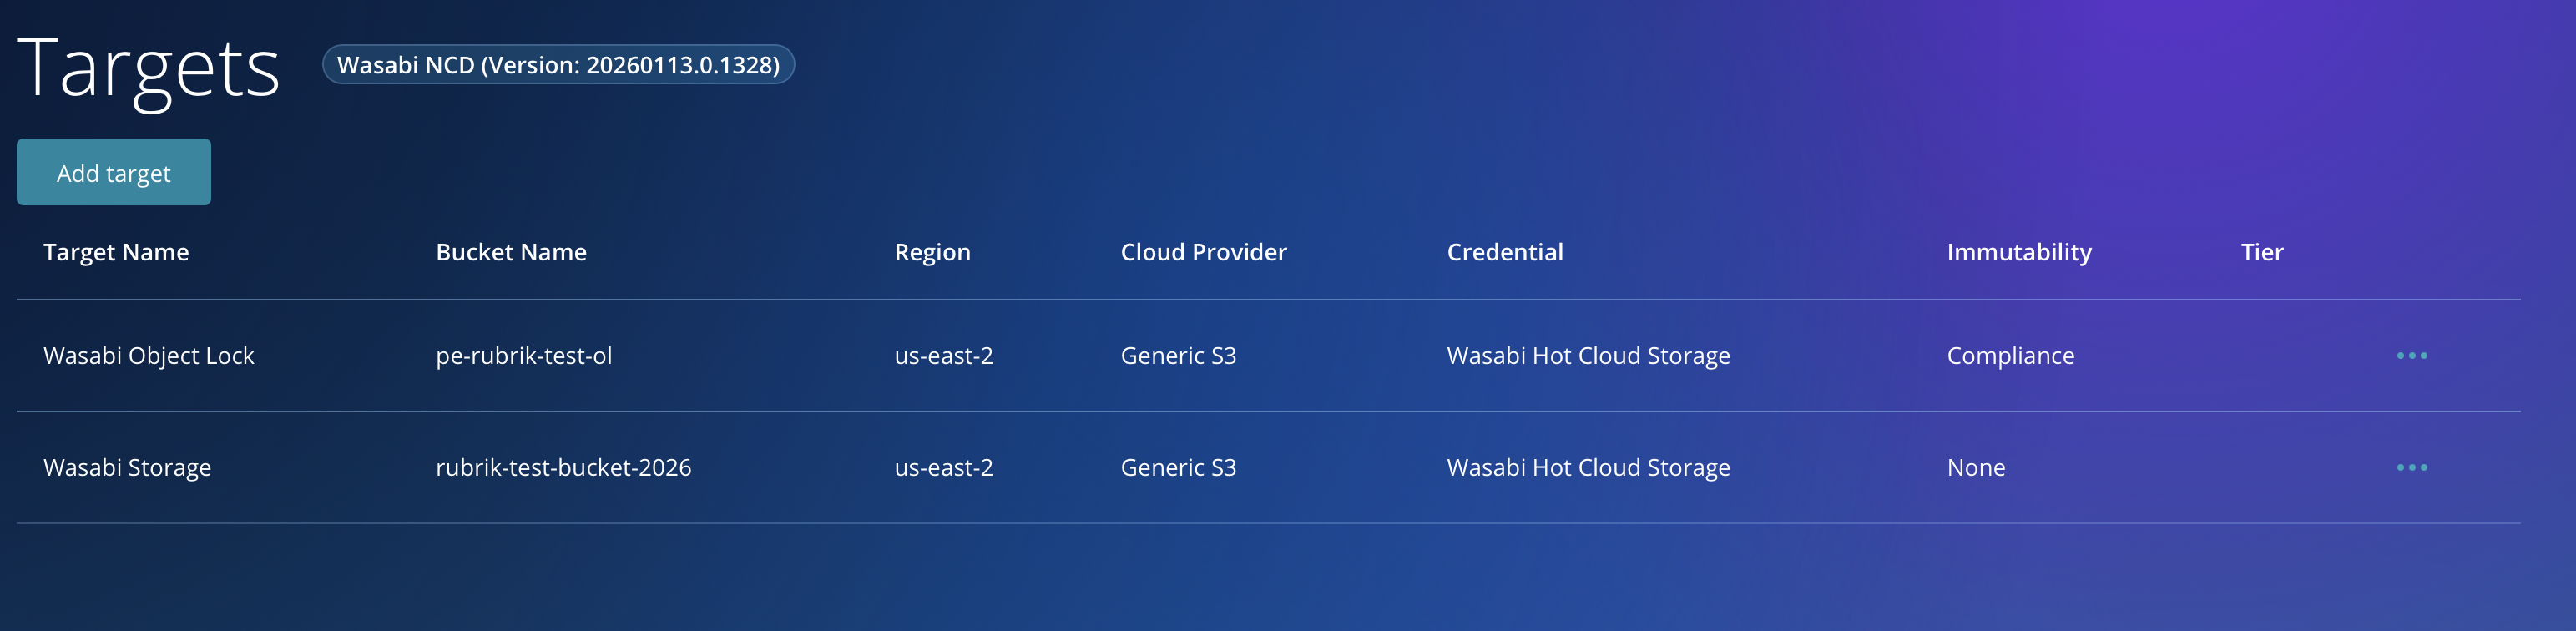
You will now see your Target on the Targets Page.

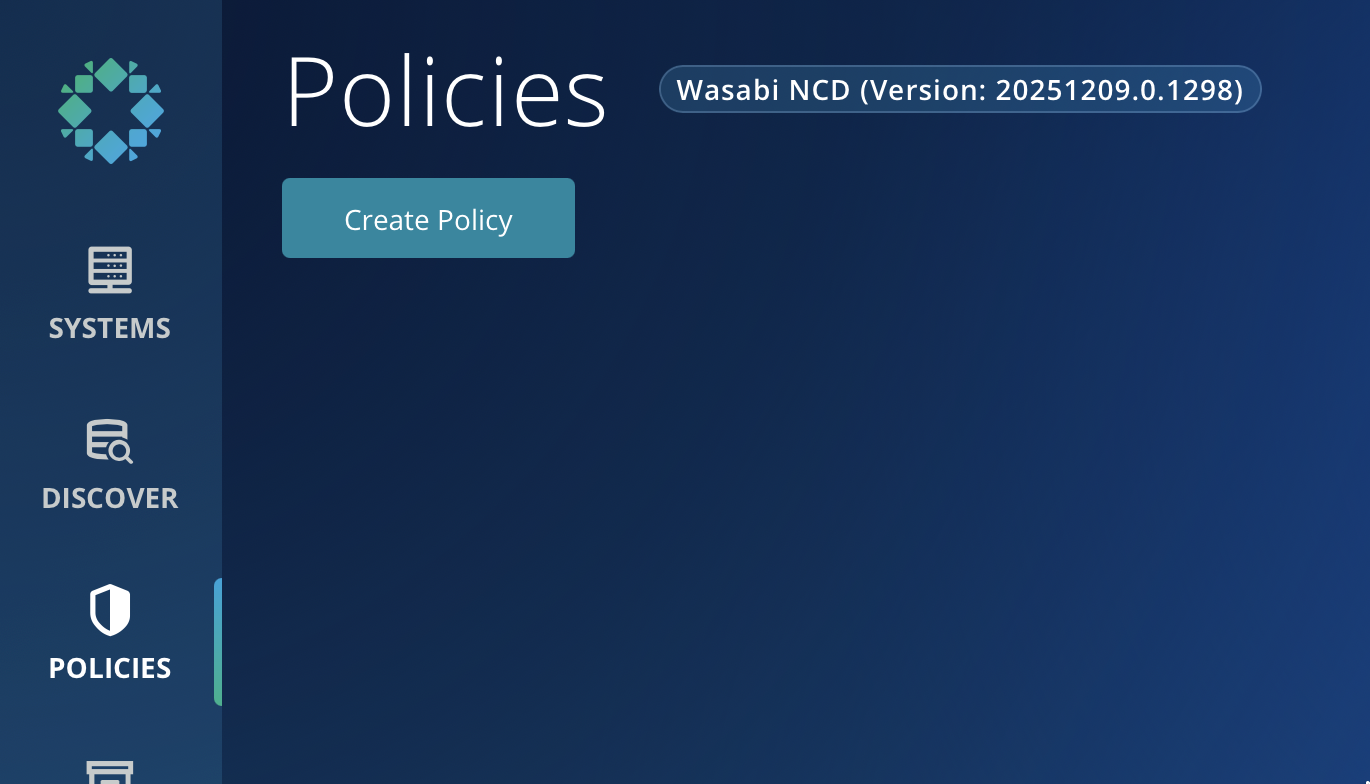
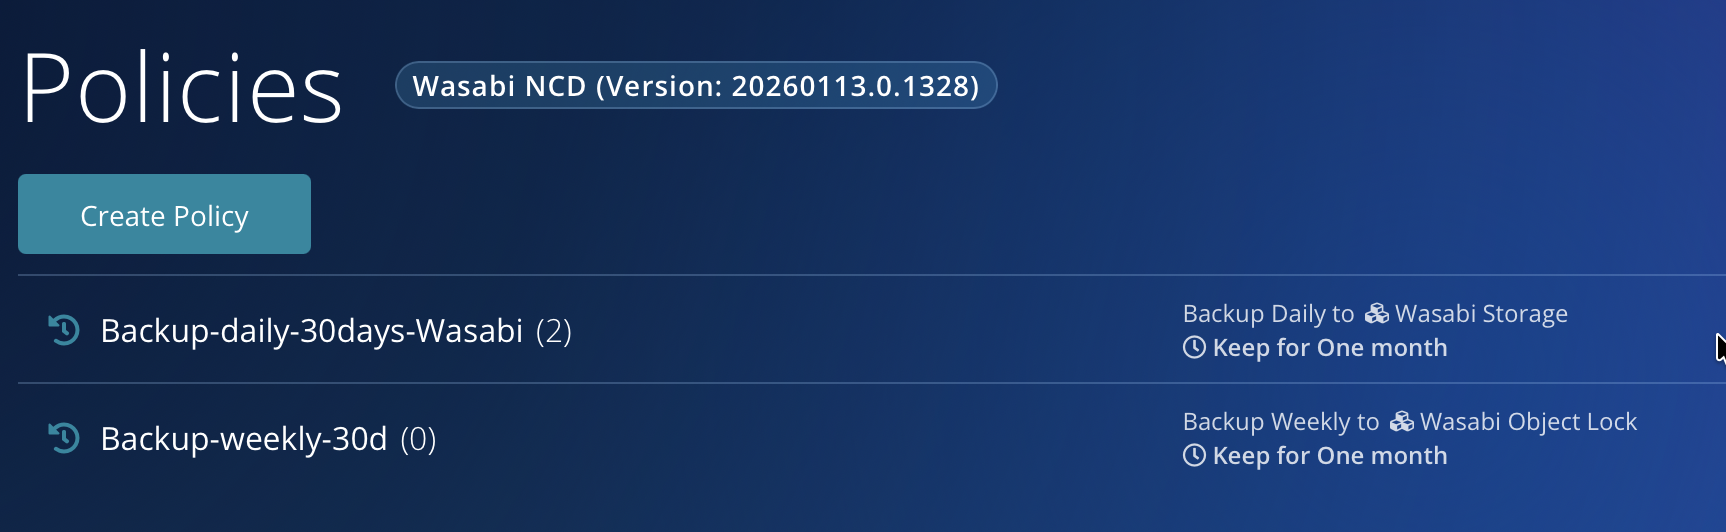
Adding a Policy
On the Polices page, click Create Policy.
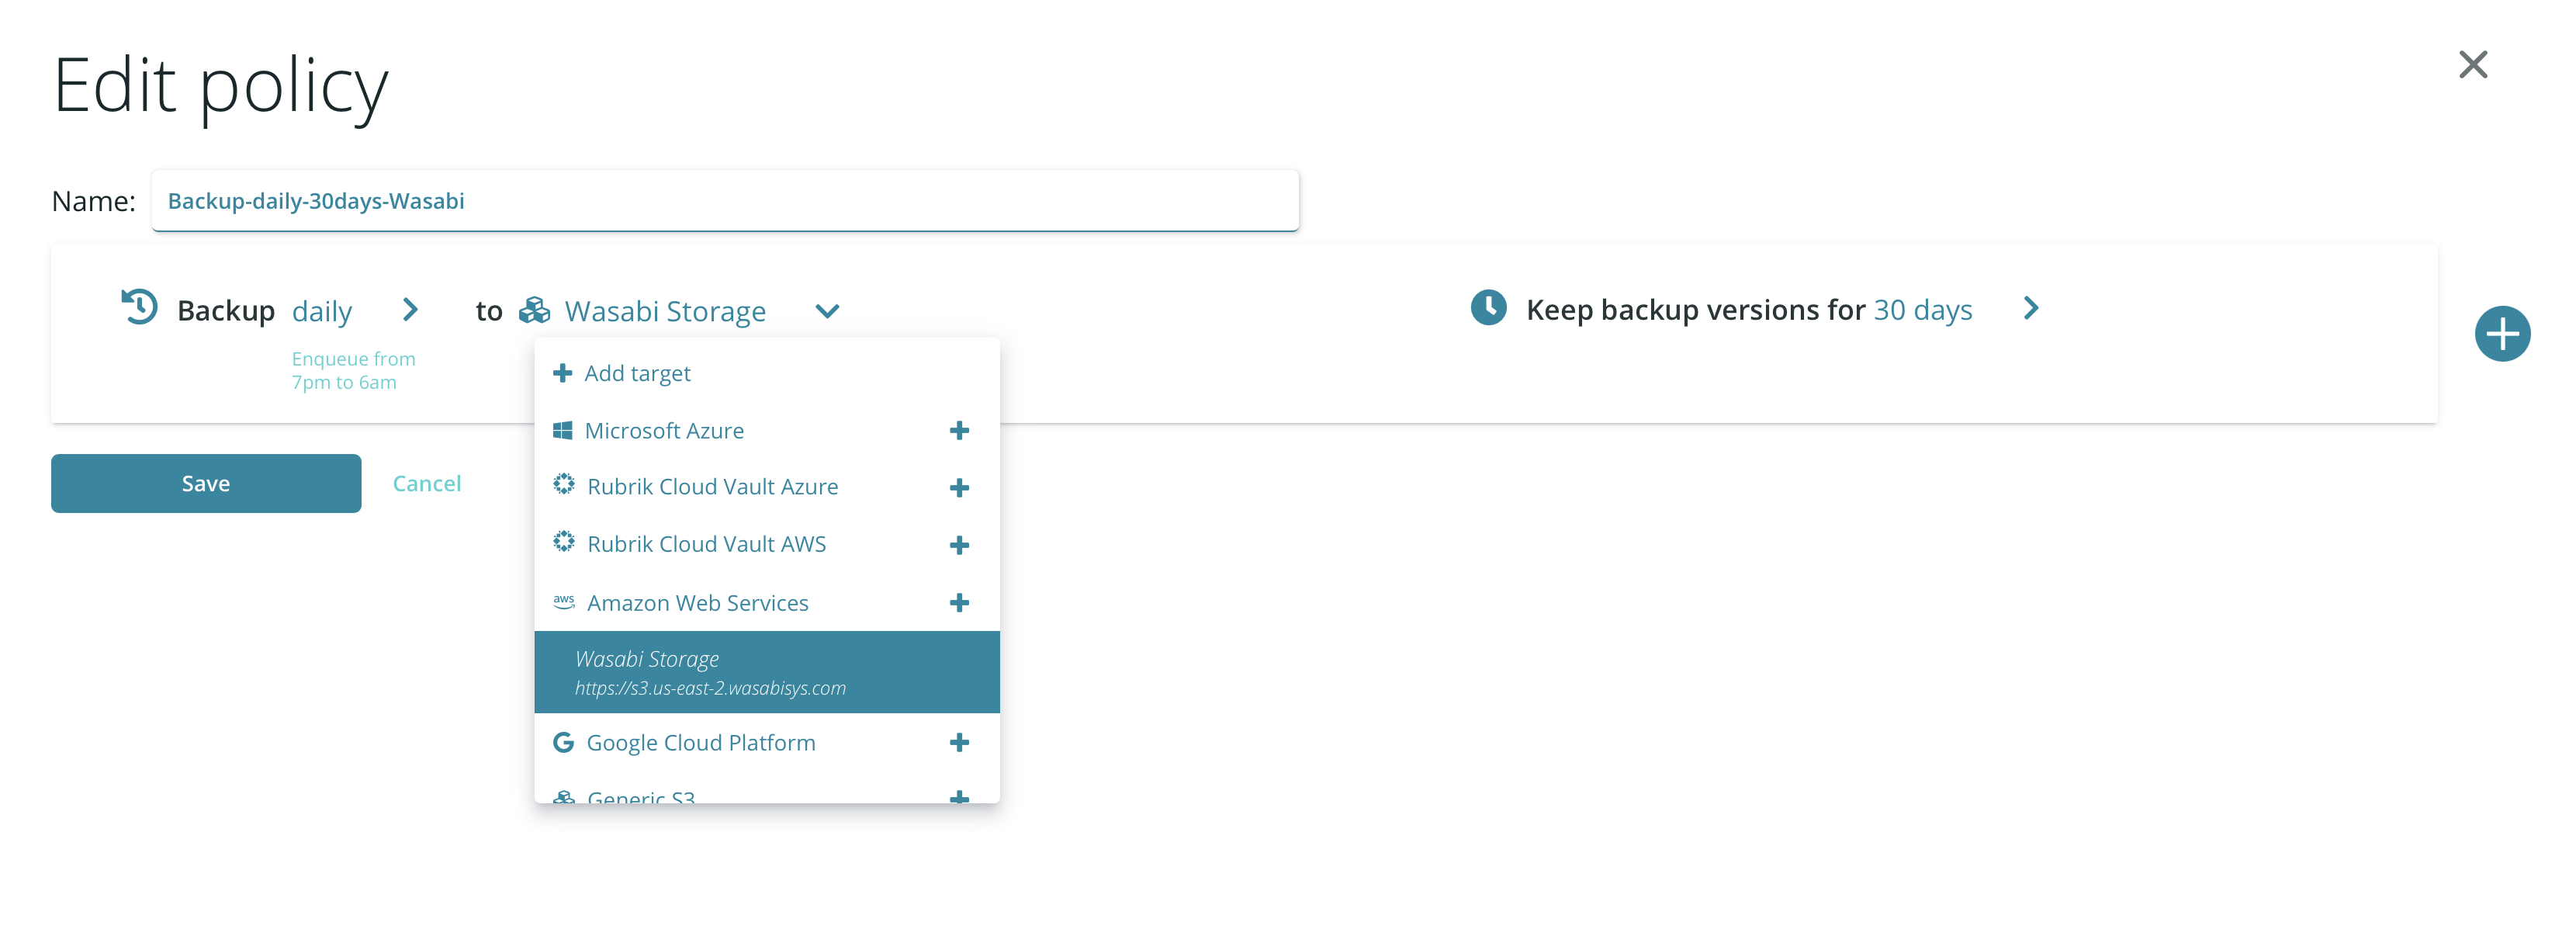
Set your Policy parameters
Name the Policy
Set the Backup Frequency
Choose the Target created in the prior steps (In this example: “Wasabi Storage”)
Set a Retention Period.
Finally, click Save.
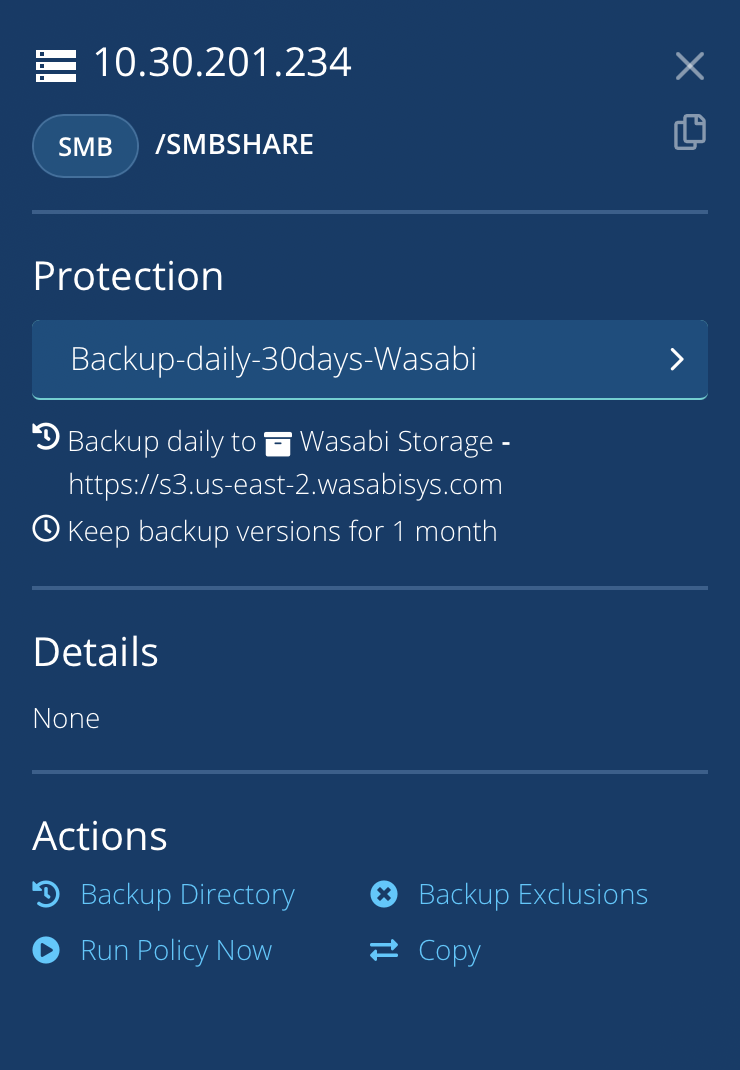
Adding your System to a Protection Policy & Running the First Backup
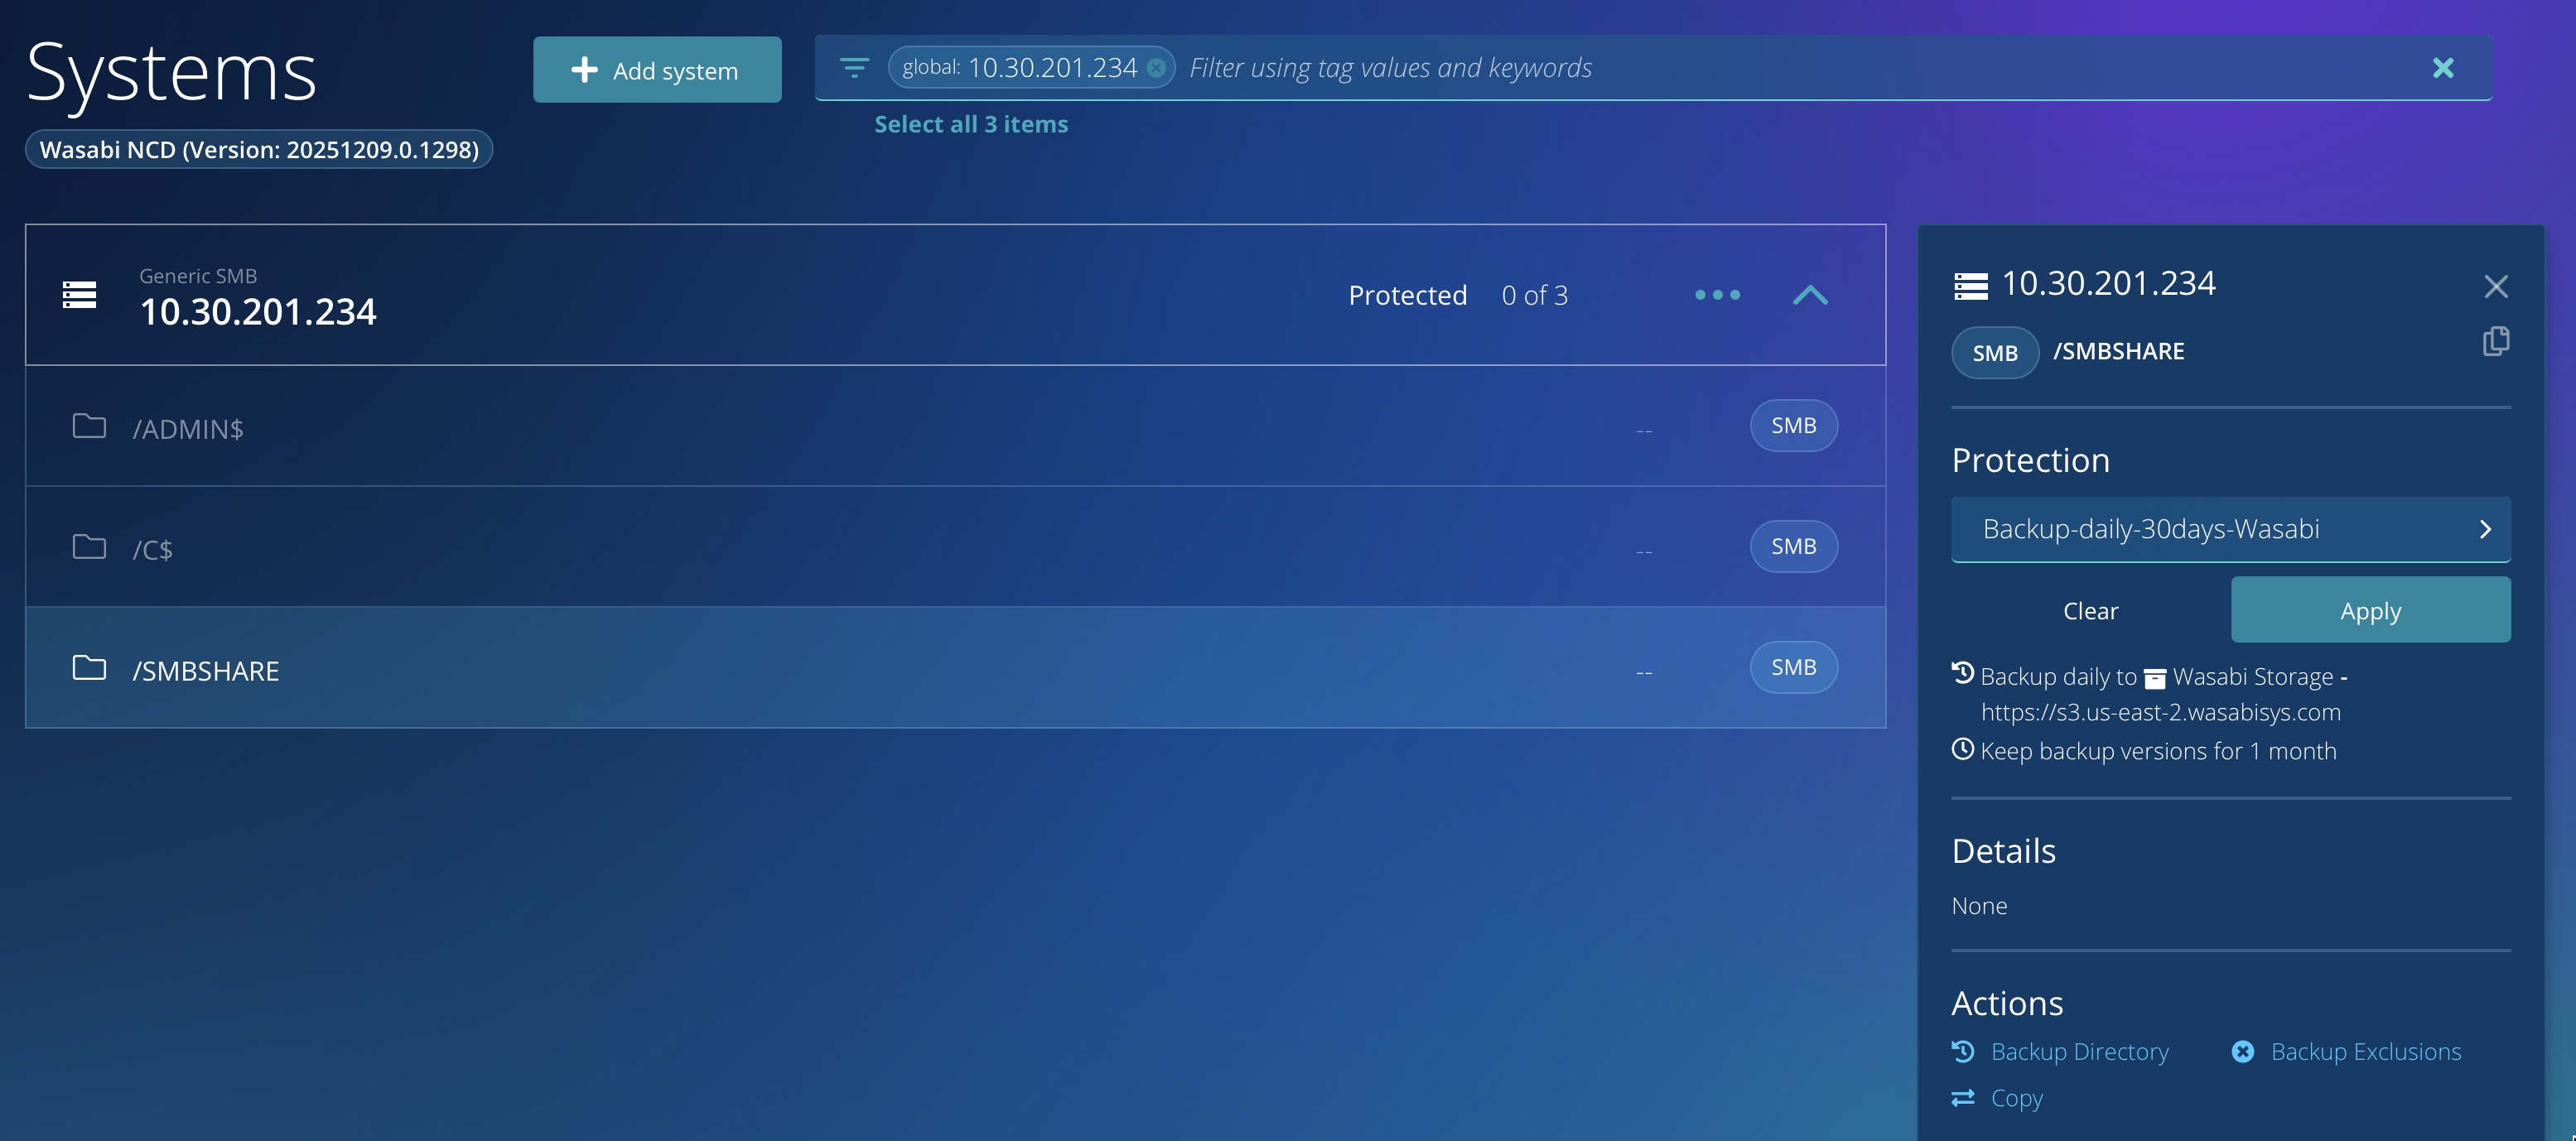
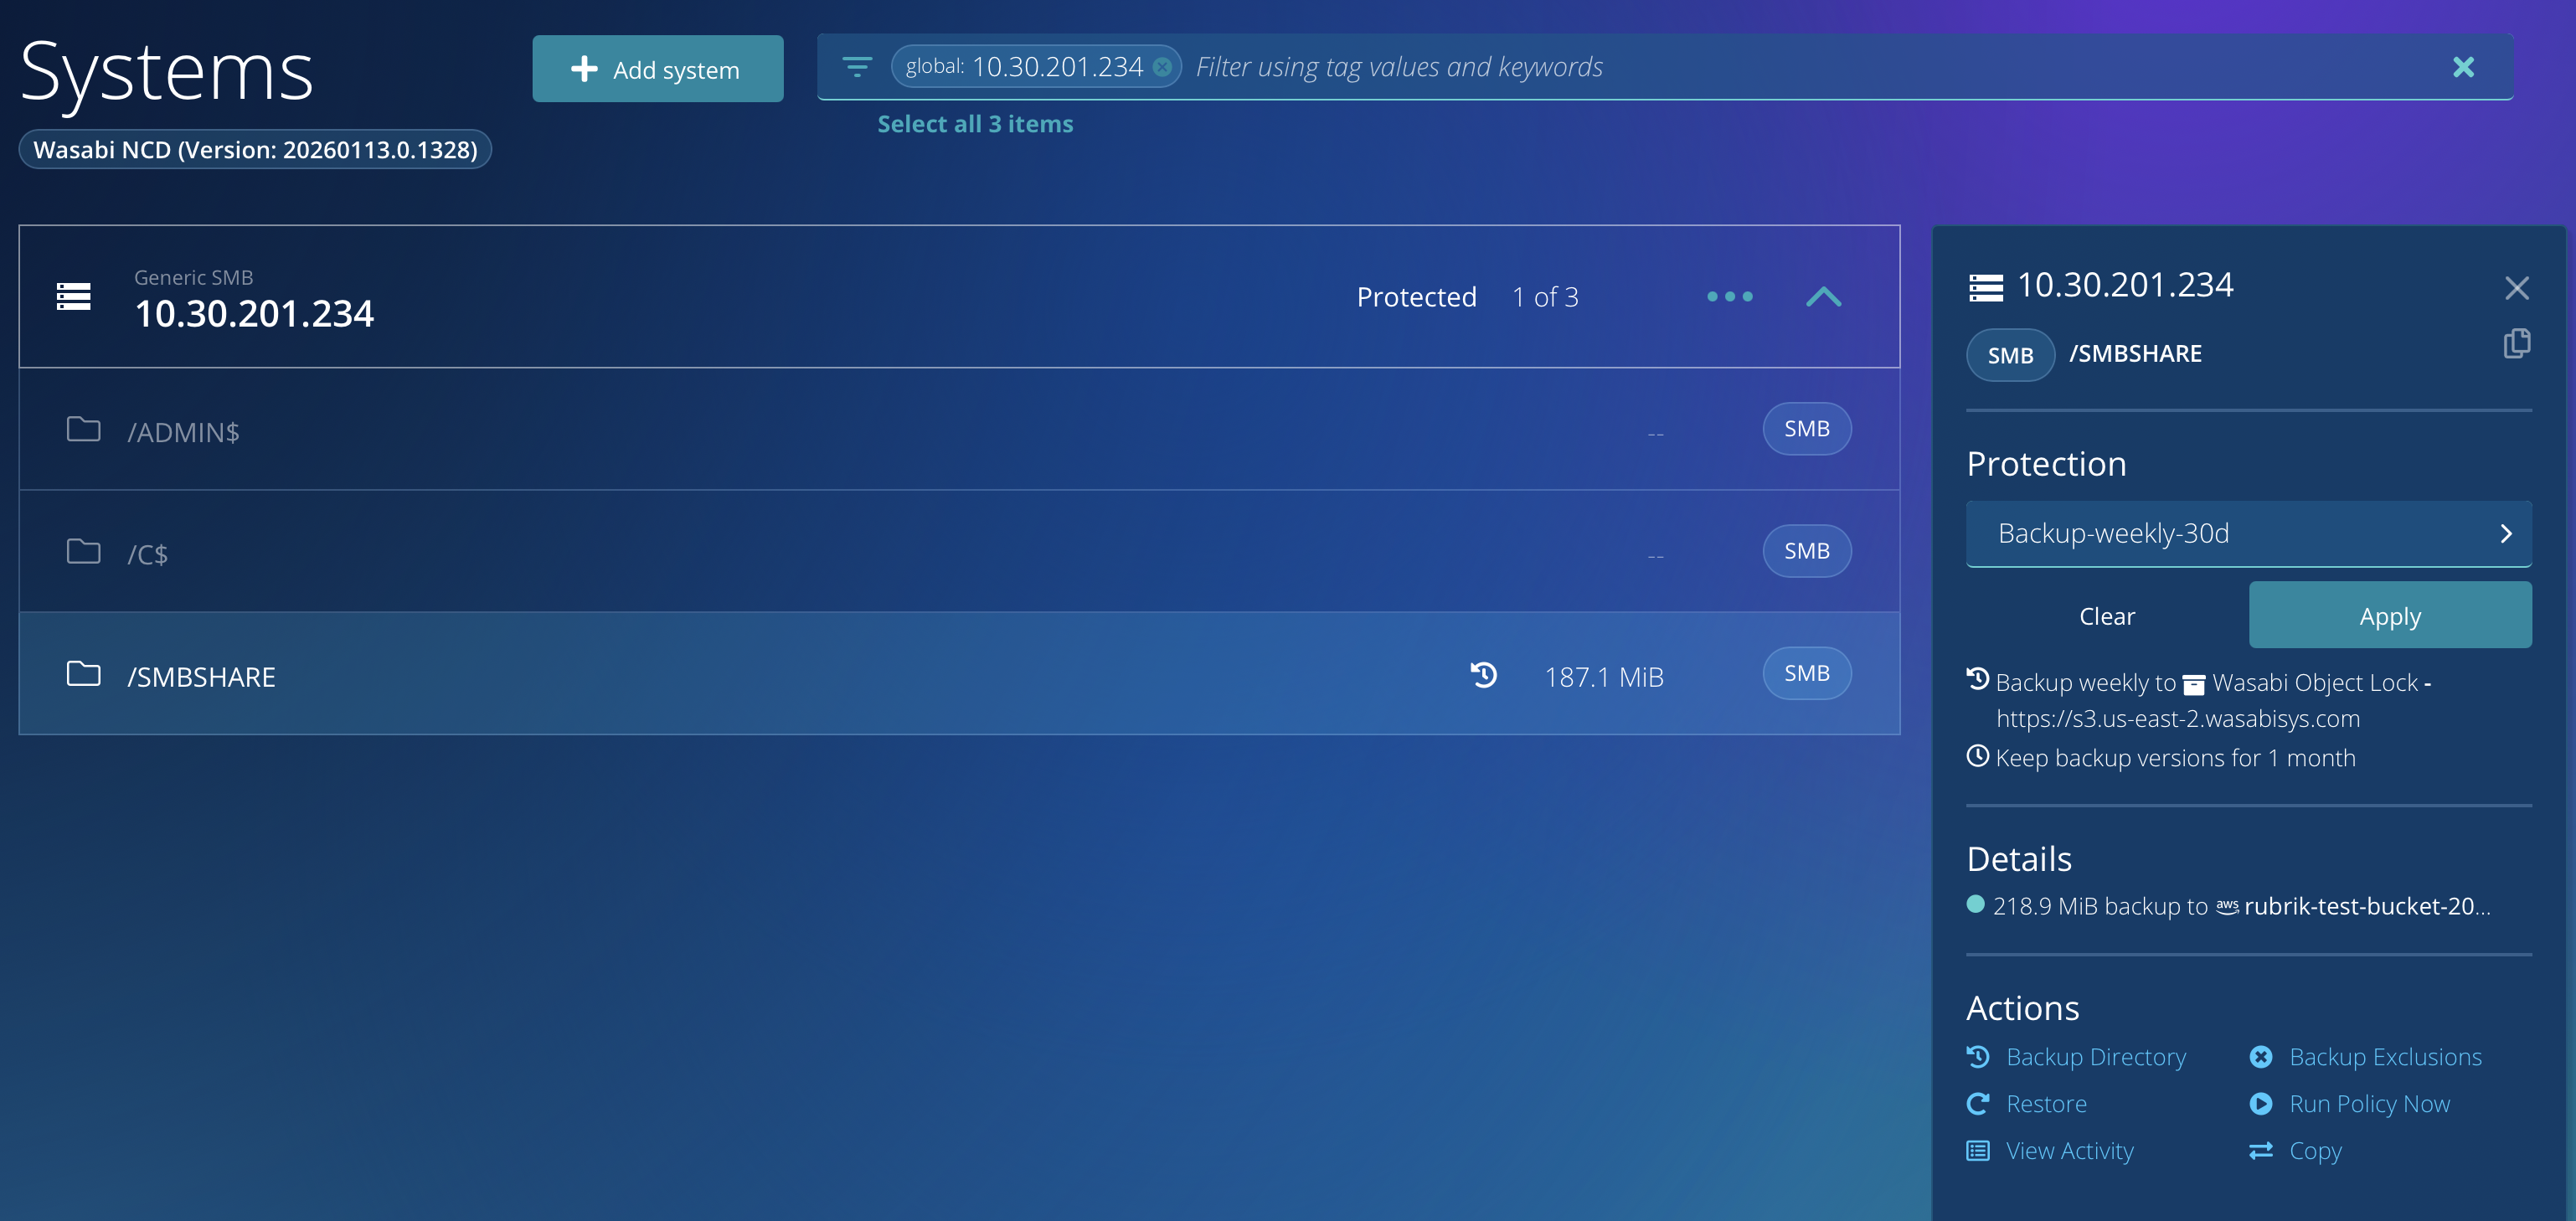
Visit the Systems page of the Rubrik NAS Cloud Direct Dashboard
Select the relevant System and Share
In the Protection dropdown, choose the previously created Policy
Finally, click Apply.
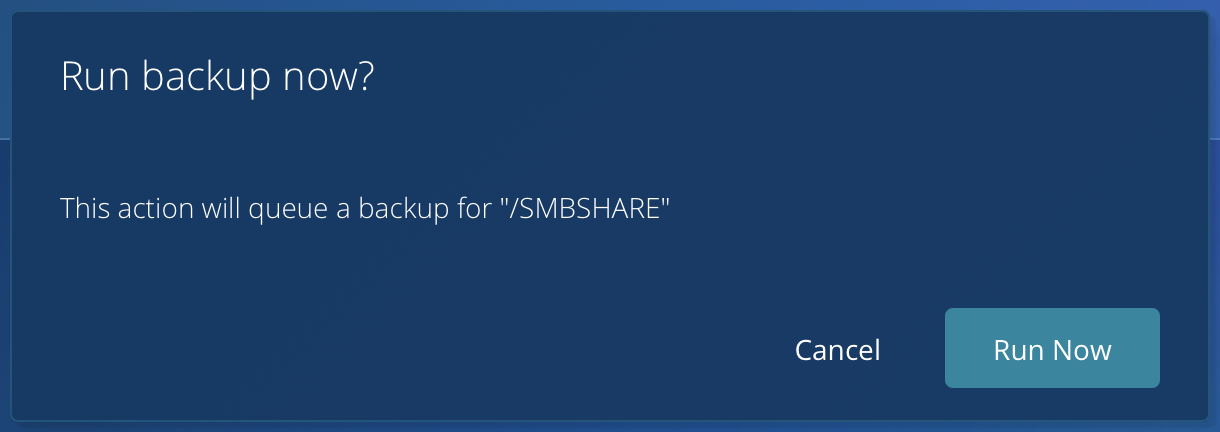
To run the Protection Policy immediately, click Run Policy Now, then click Run Now when prompted for confirmation.
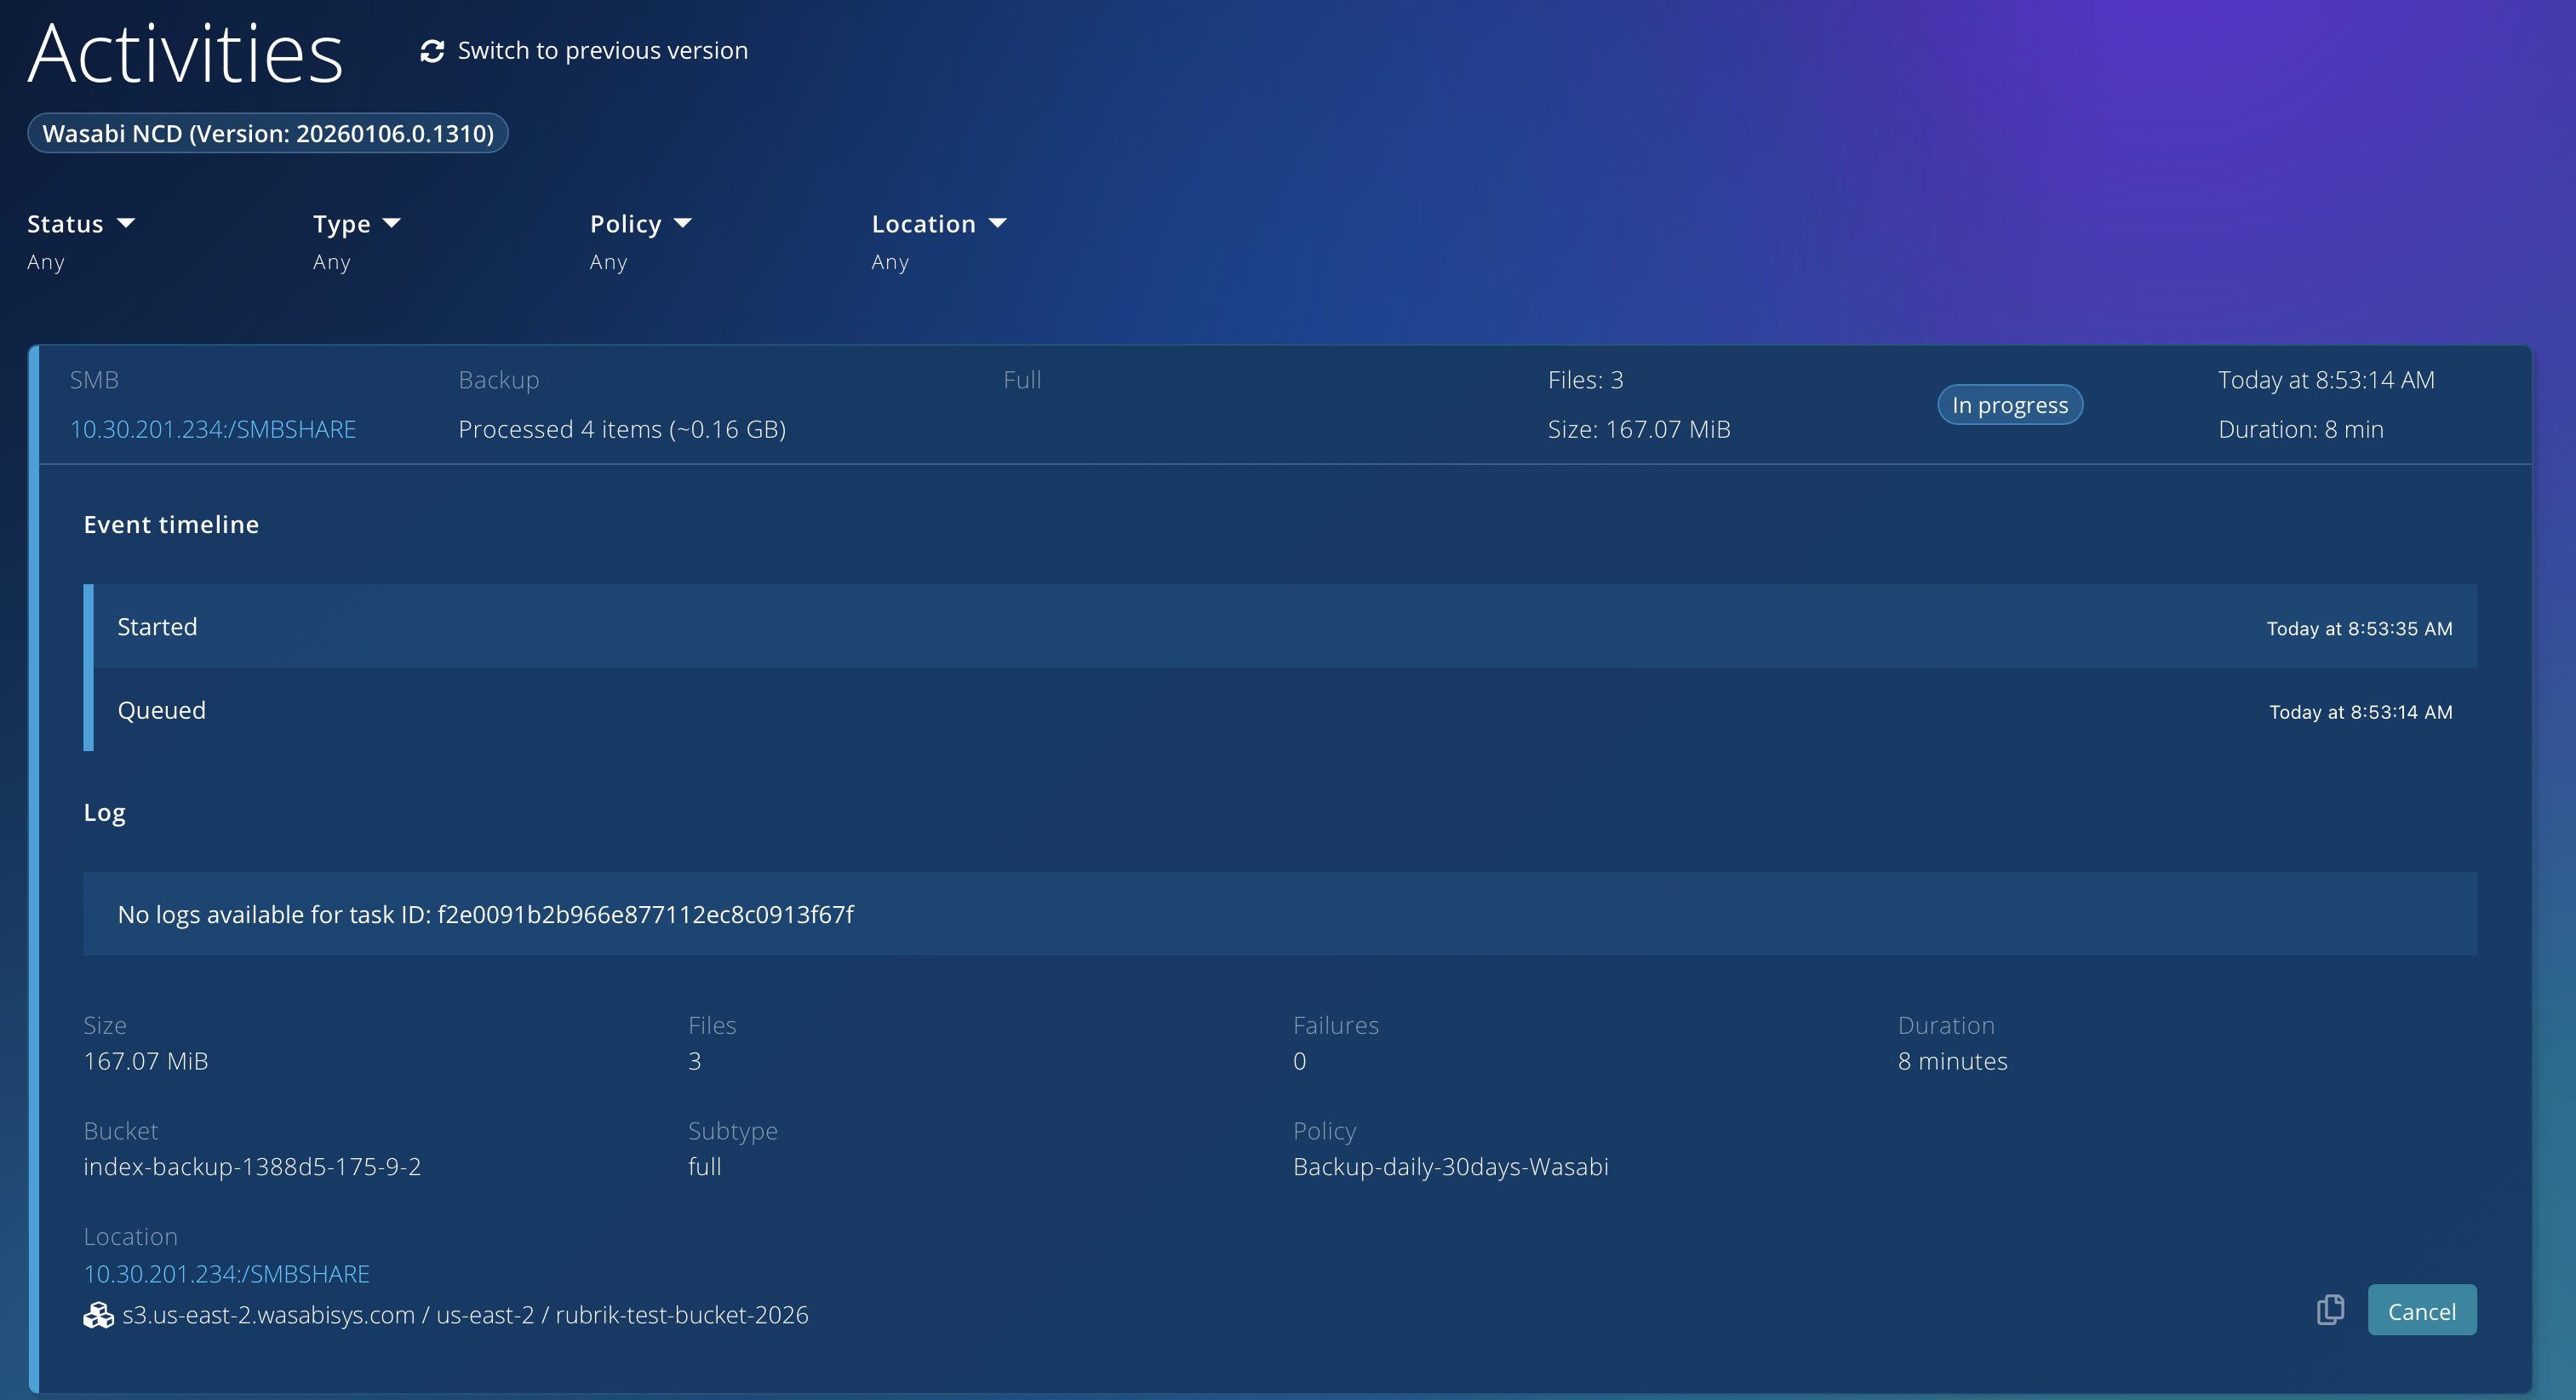
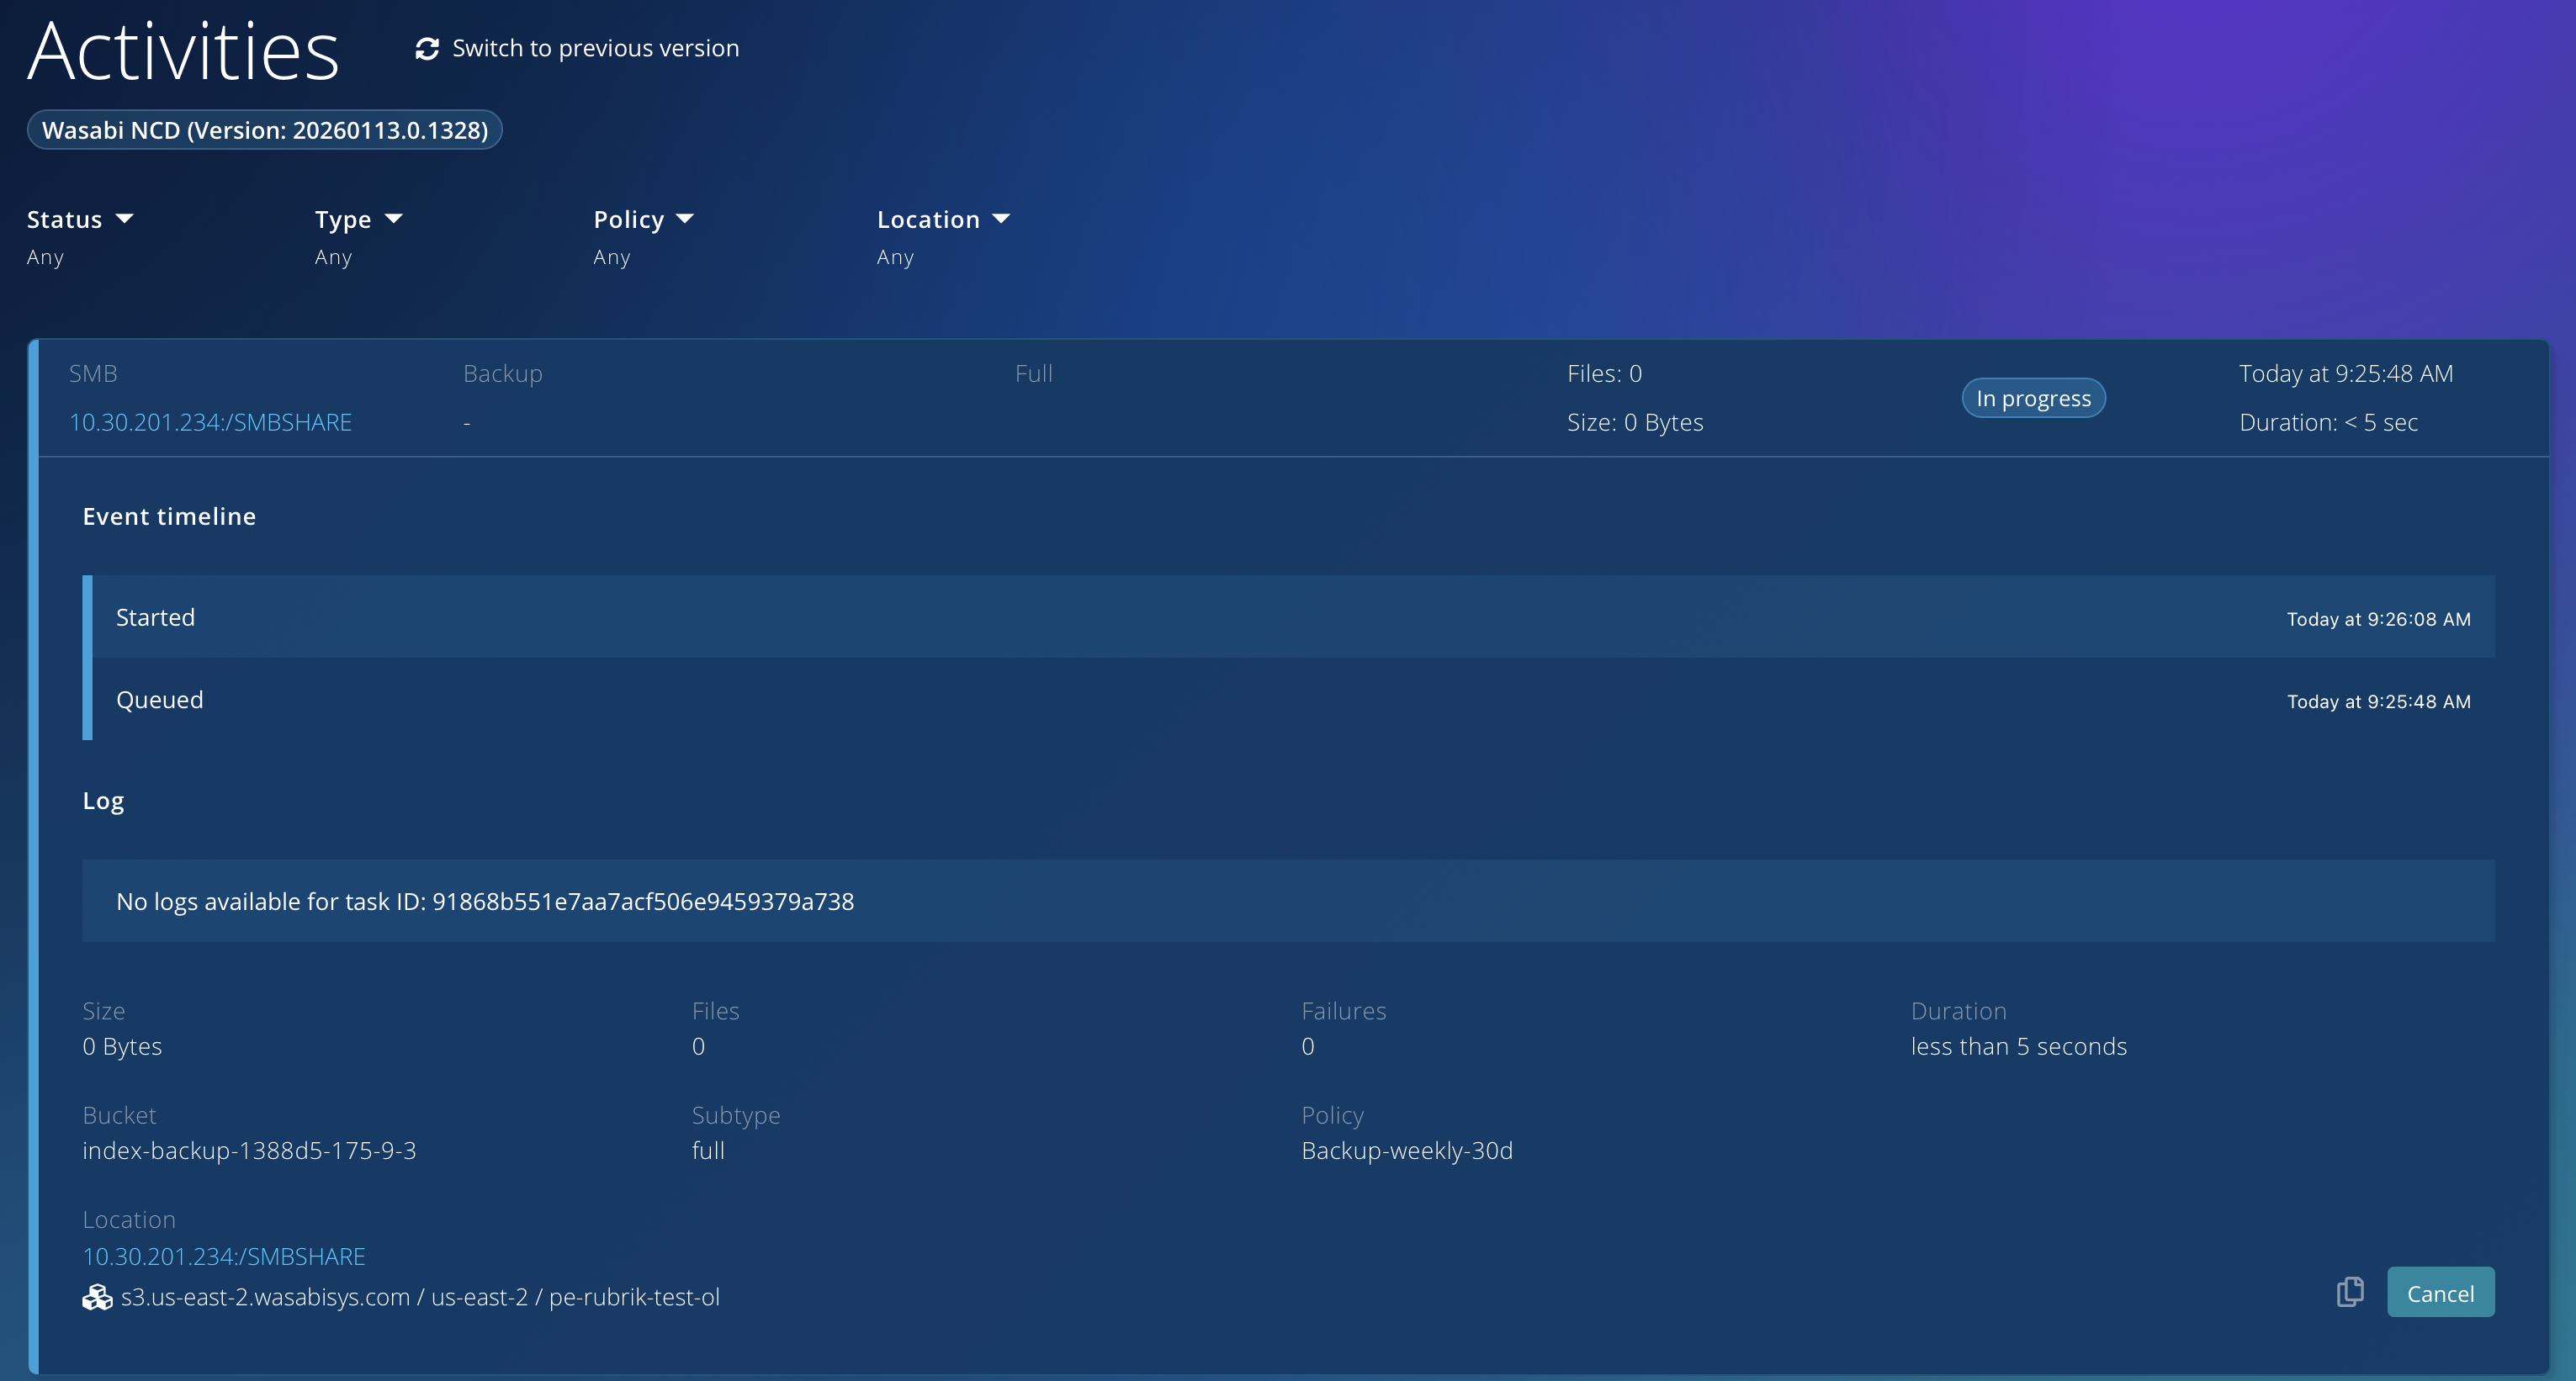
You can visit the Activities tab of your Rubrik NAS Cloud Direct Dashboard to check the status of the Backup Job.
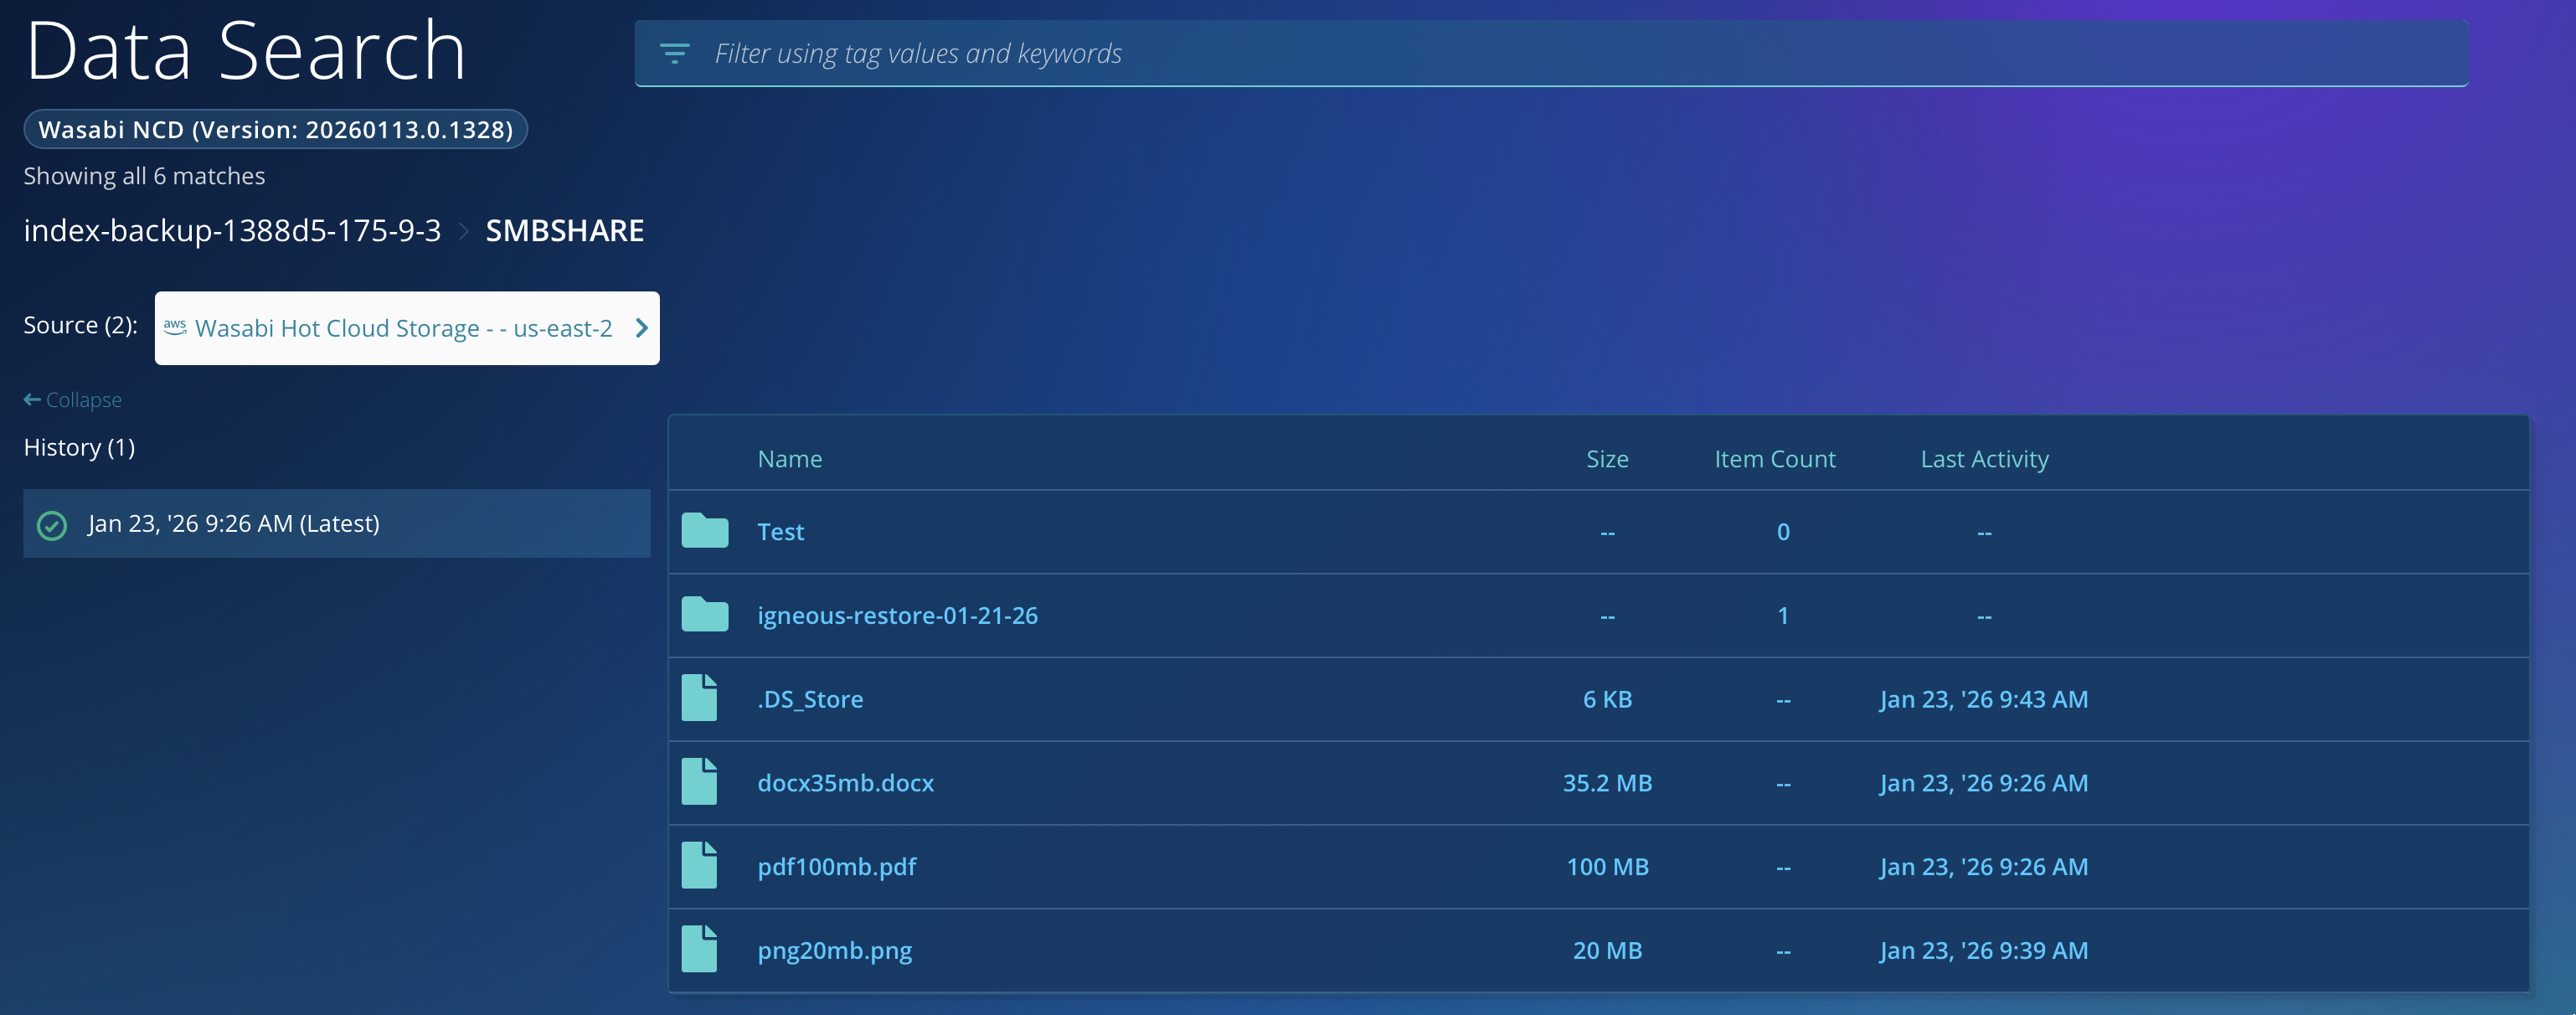
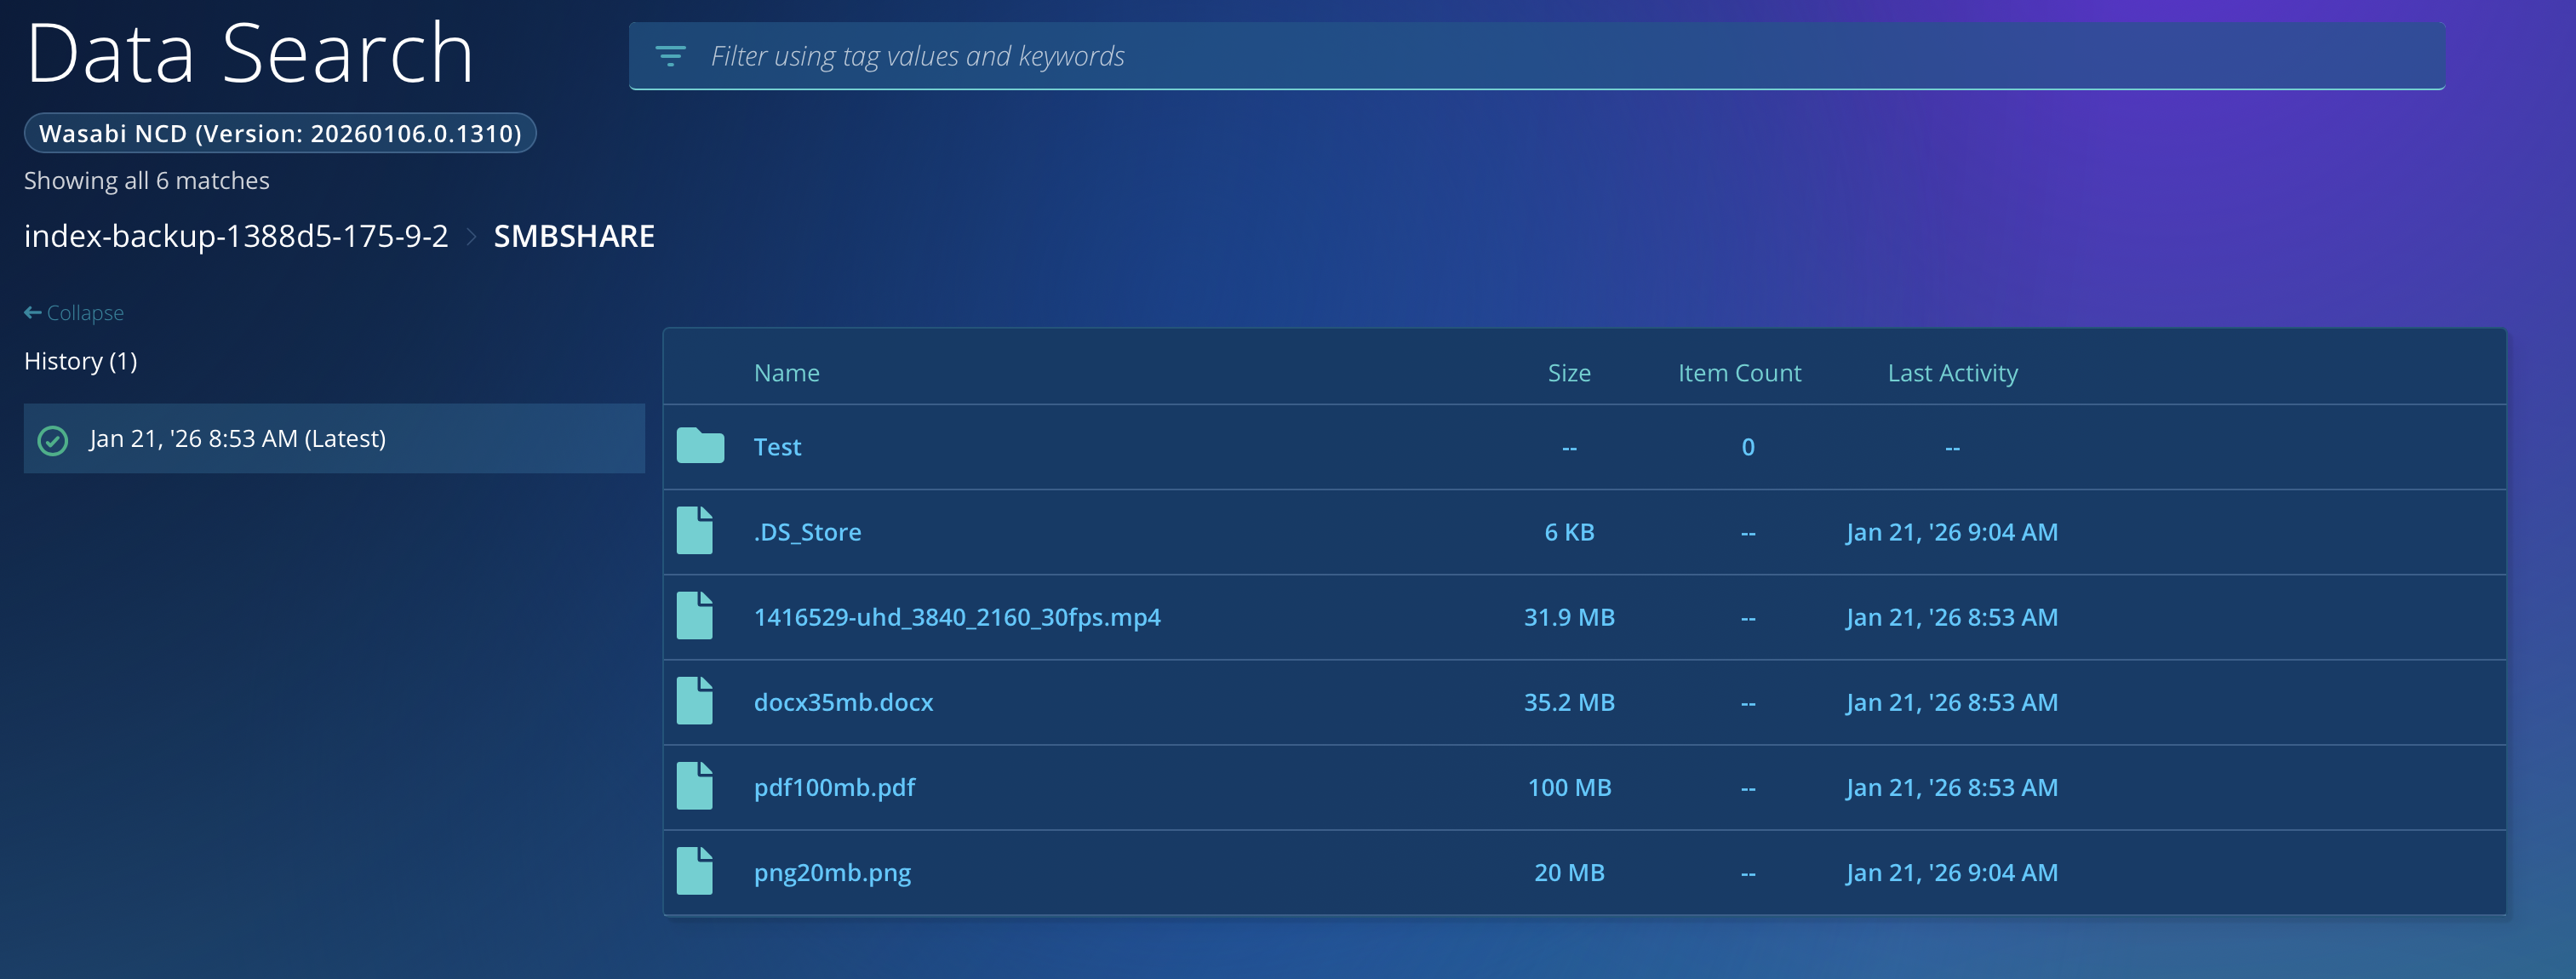
Verifying Data
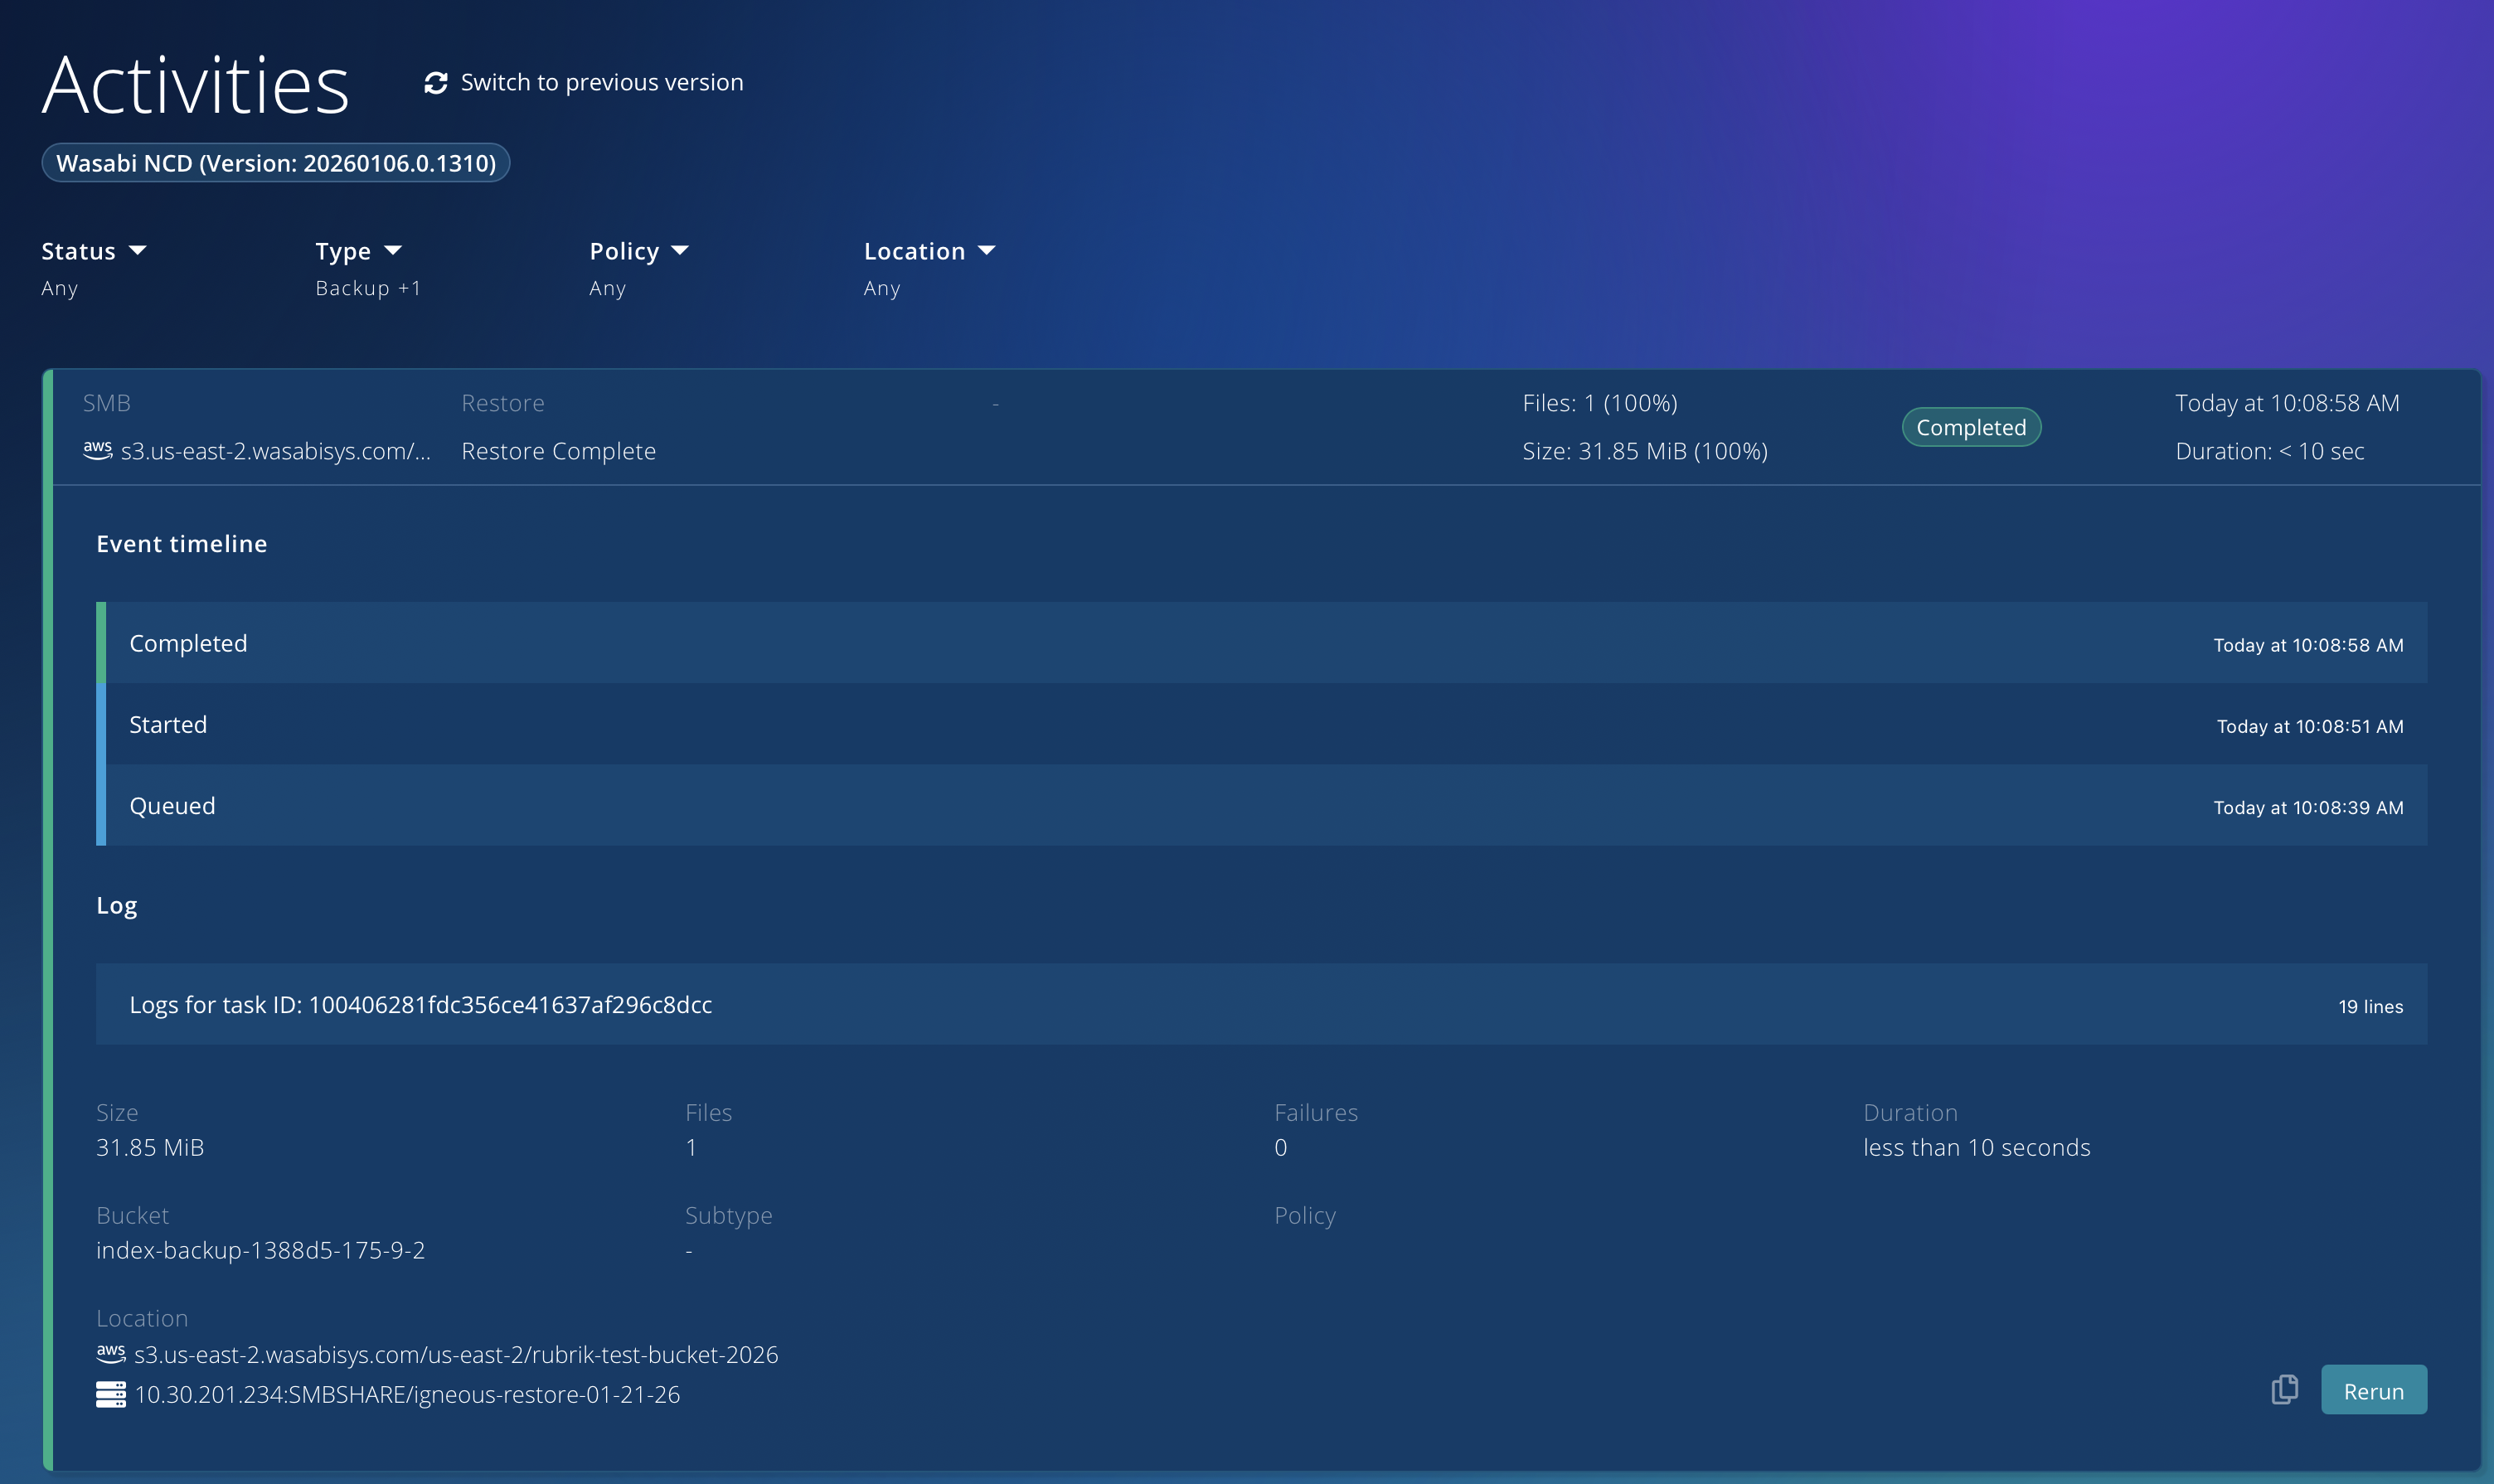
1. Once the backup job completes, you will see an activity entry like the following.
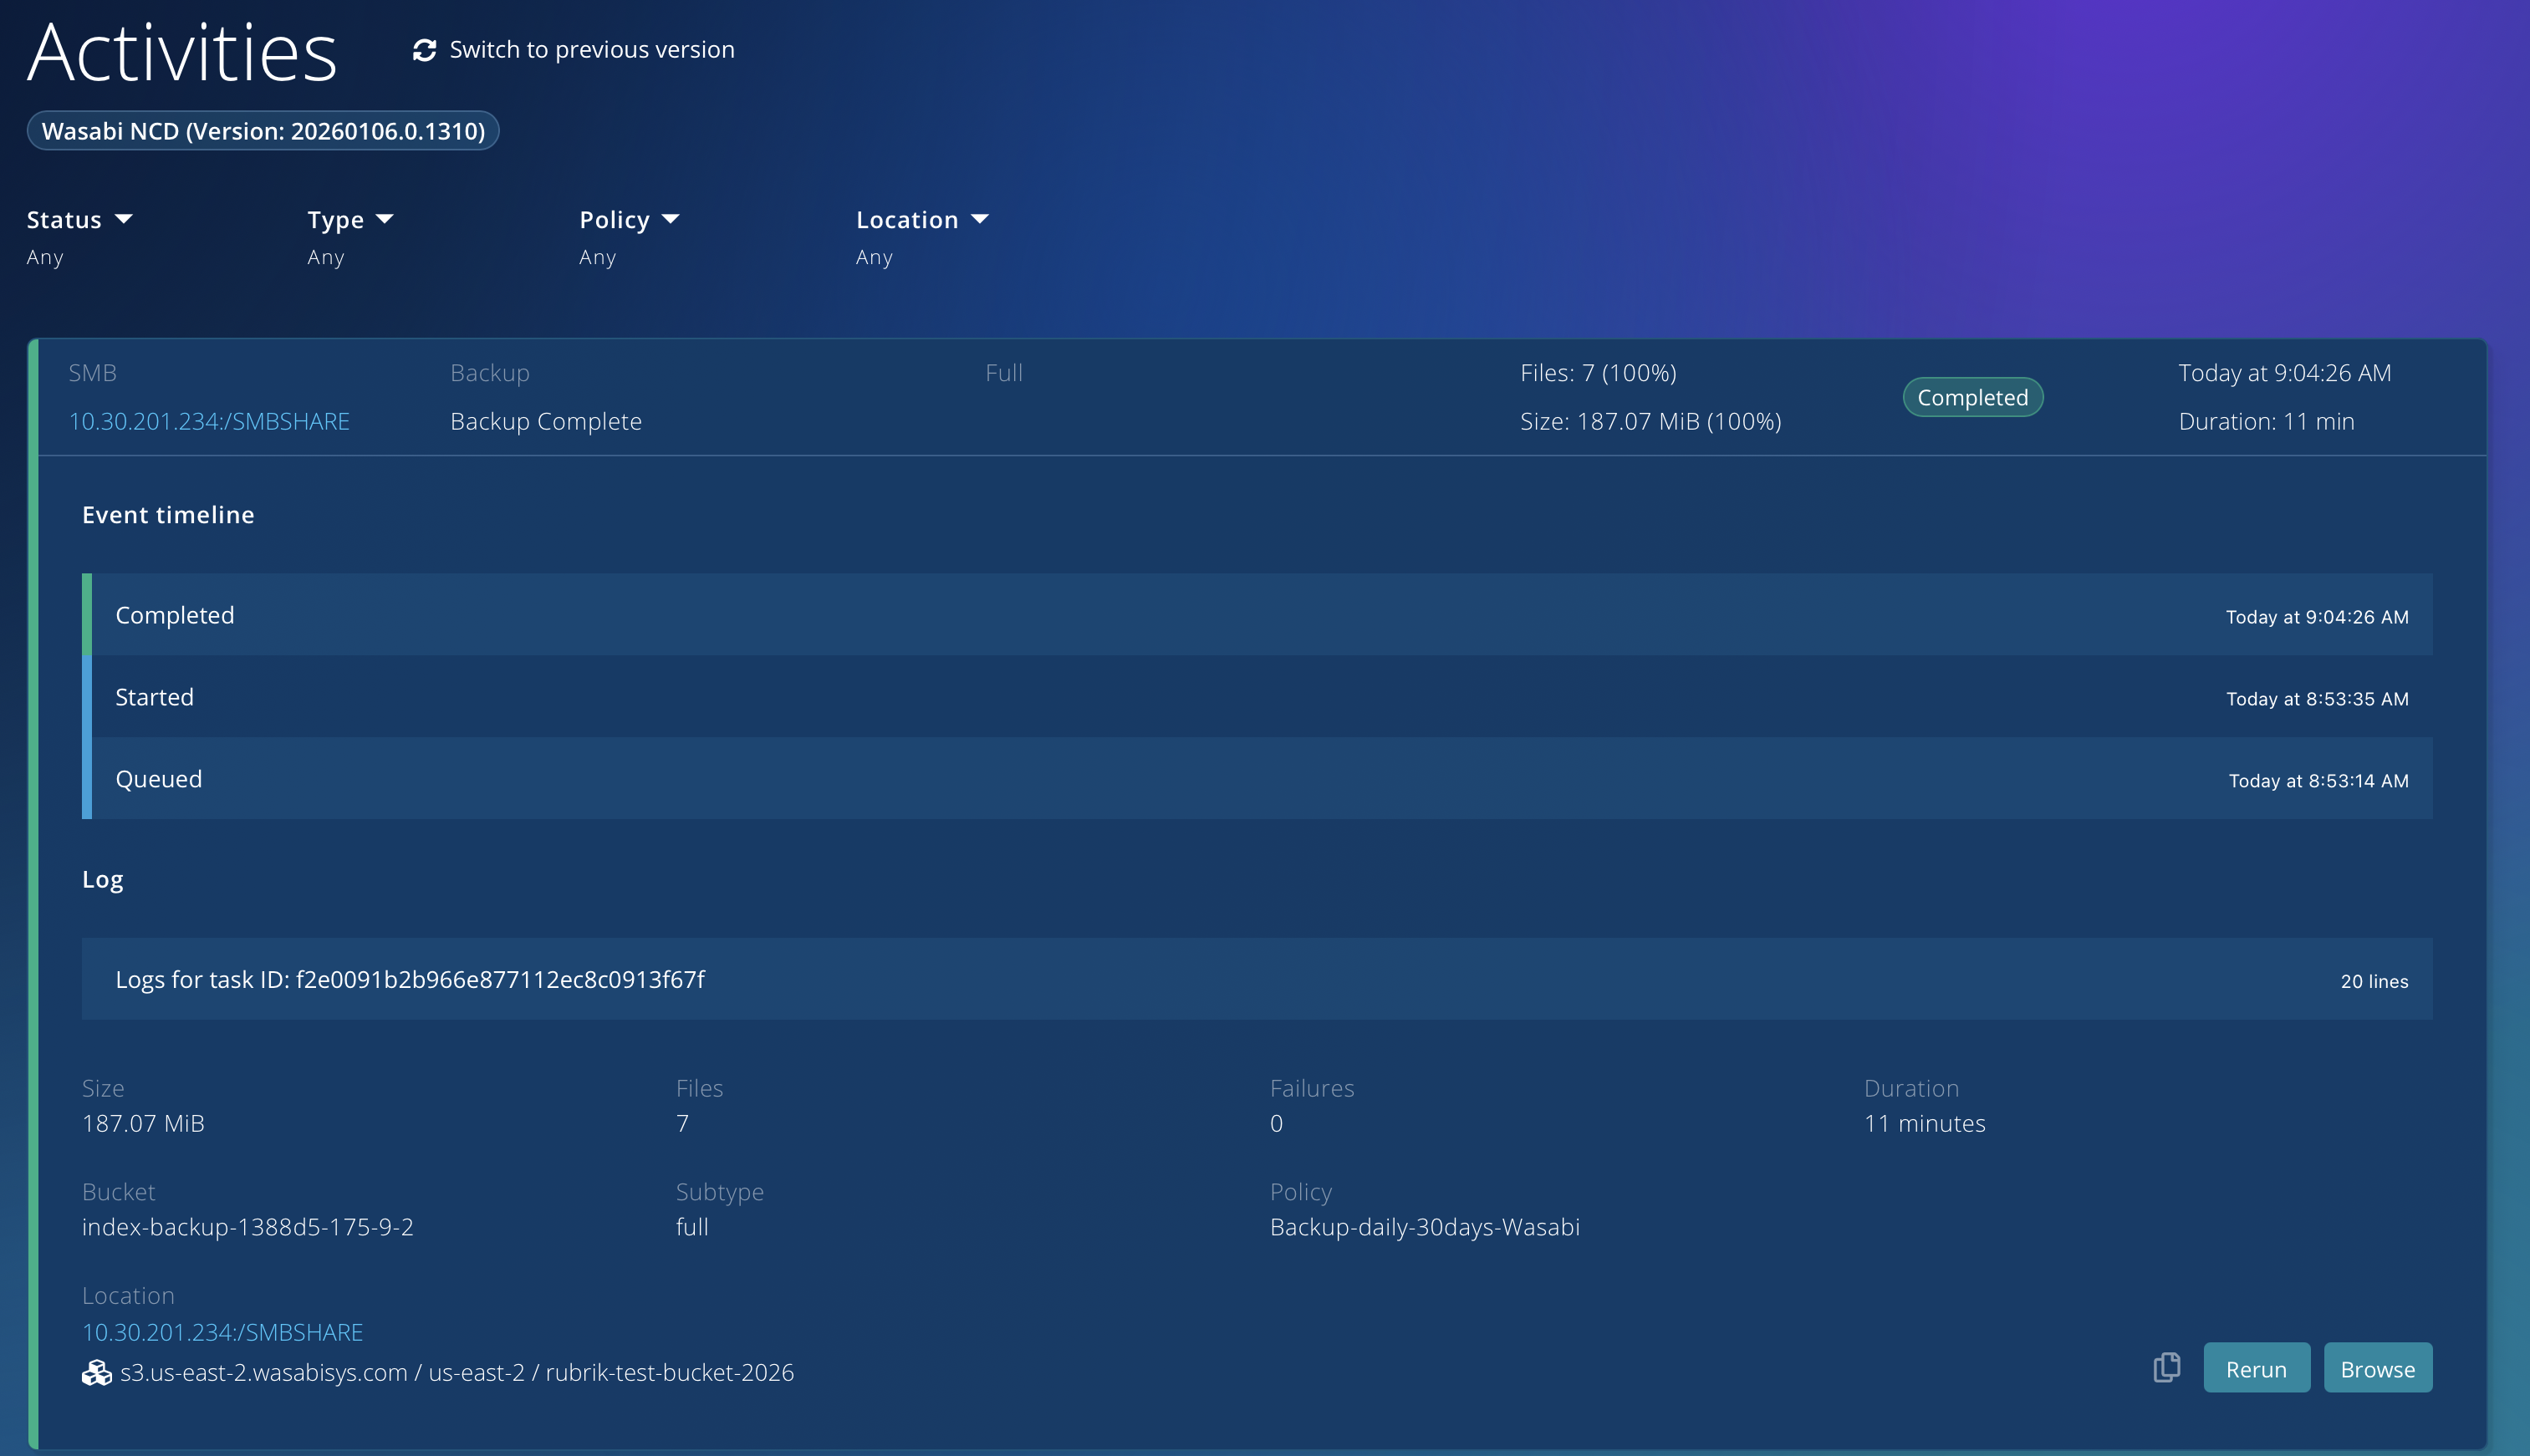
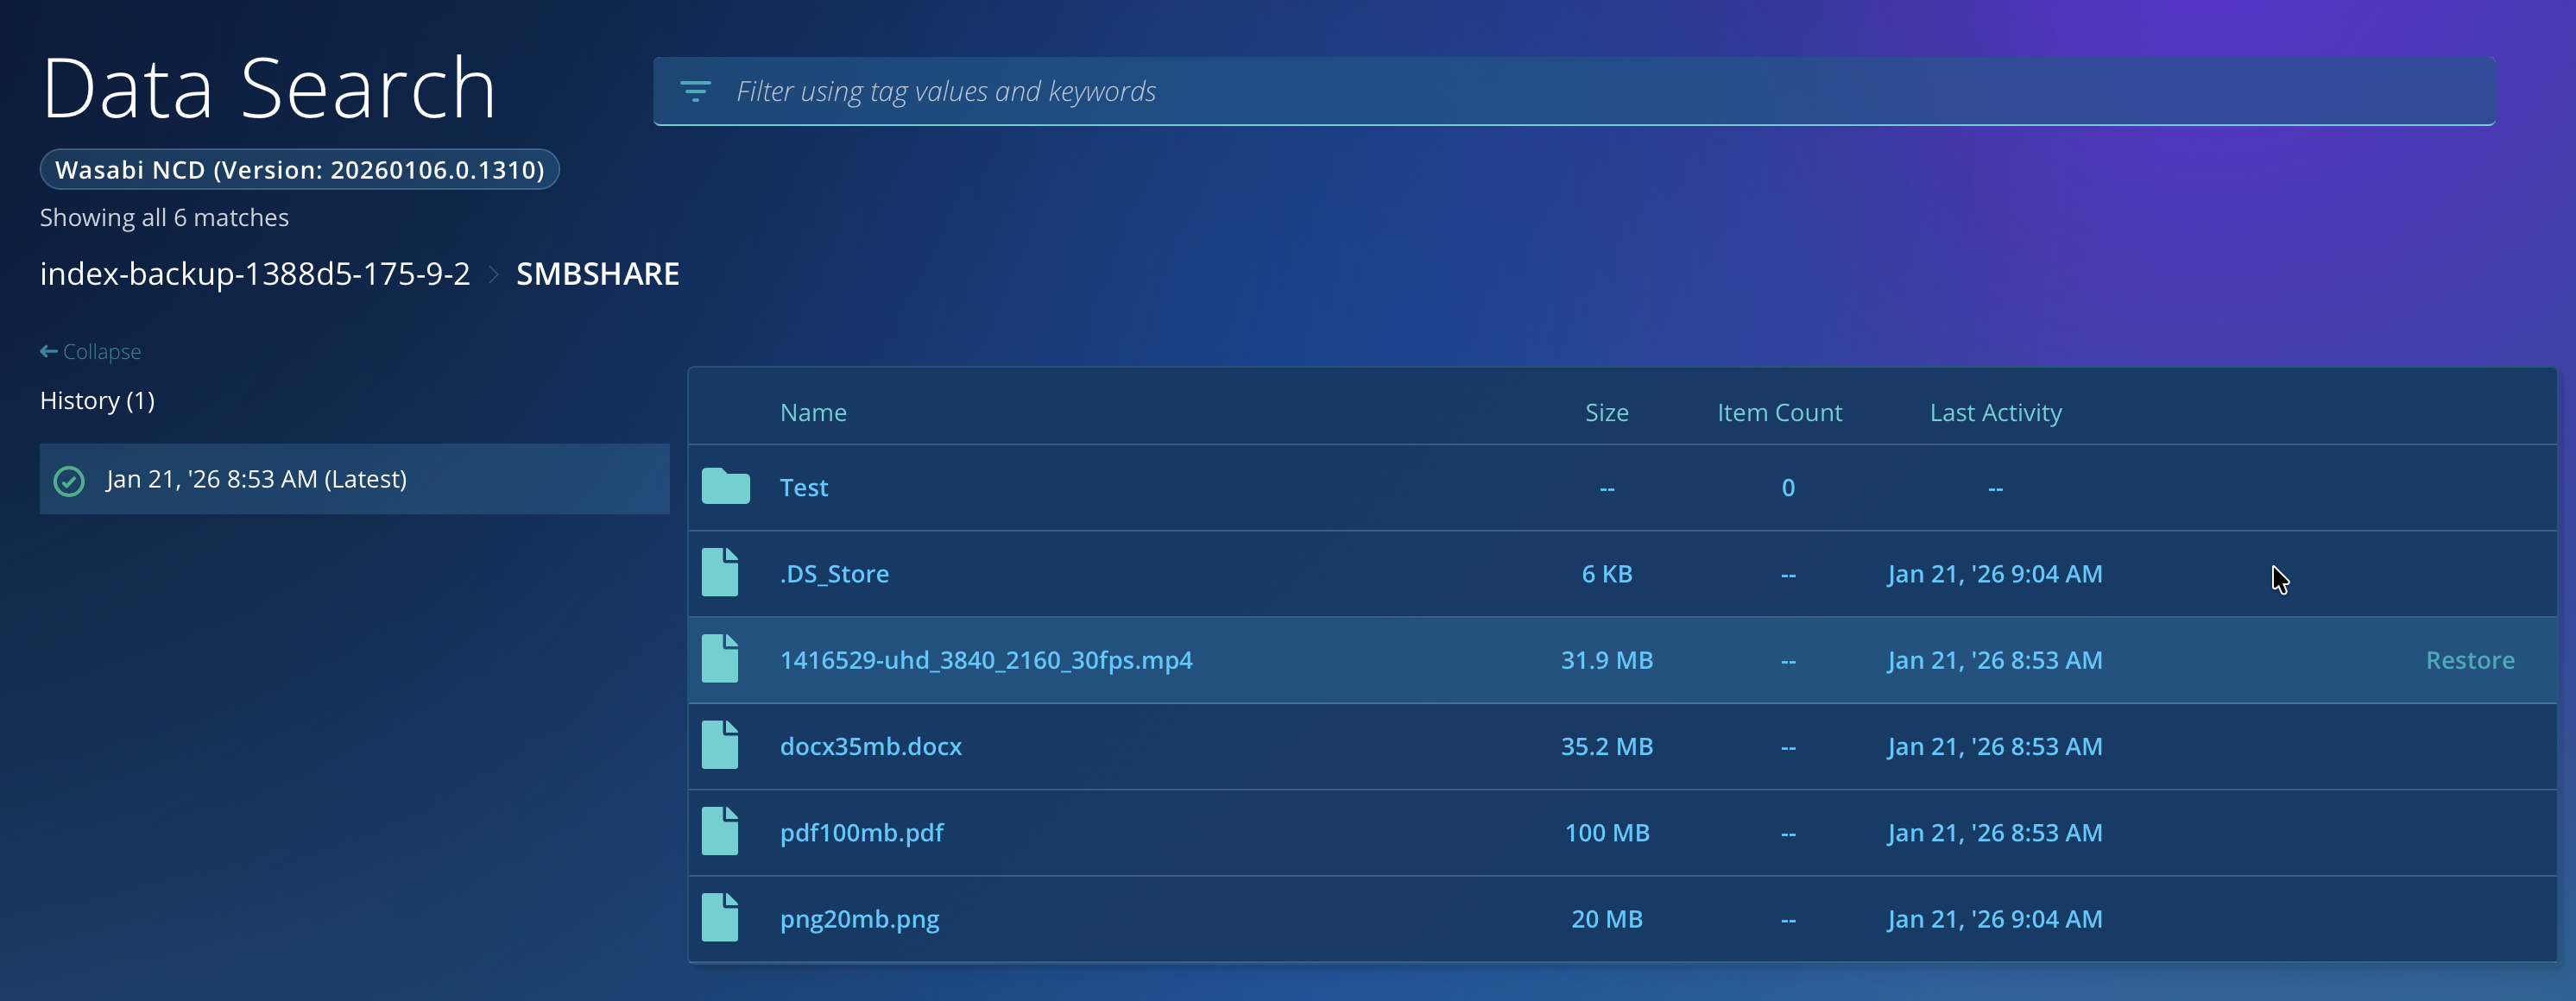
Clicking Browse will allow you to see the files from your share.
The way Rubrik NAS Cloud Direct stores data in your Wasabi bucket is in a proprietary format. This means that the data is only accessible via the Rubrik NAS Cloud Direct application, or via the original data source.
Restoring a File
The data restoration process is handled by your specific backup software application. As there are many, potential variables that will affect your unique environment, Wasabi strongly recommends that you seek the guidance of your backup software's technical support team in the event that you encounter difficulty or have application-specific inquiries.
From the Browse page, or from Data Search you can restore a file by hovering the relevant entry and clicking Restore.
You’ll then be prompted to choose a restore location. By default it will choose the system from which you had backed up the file. Verify choices, and then click Start Restore.
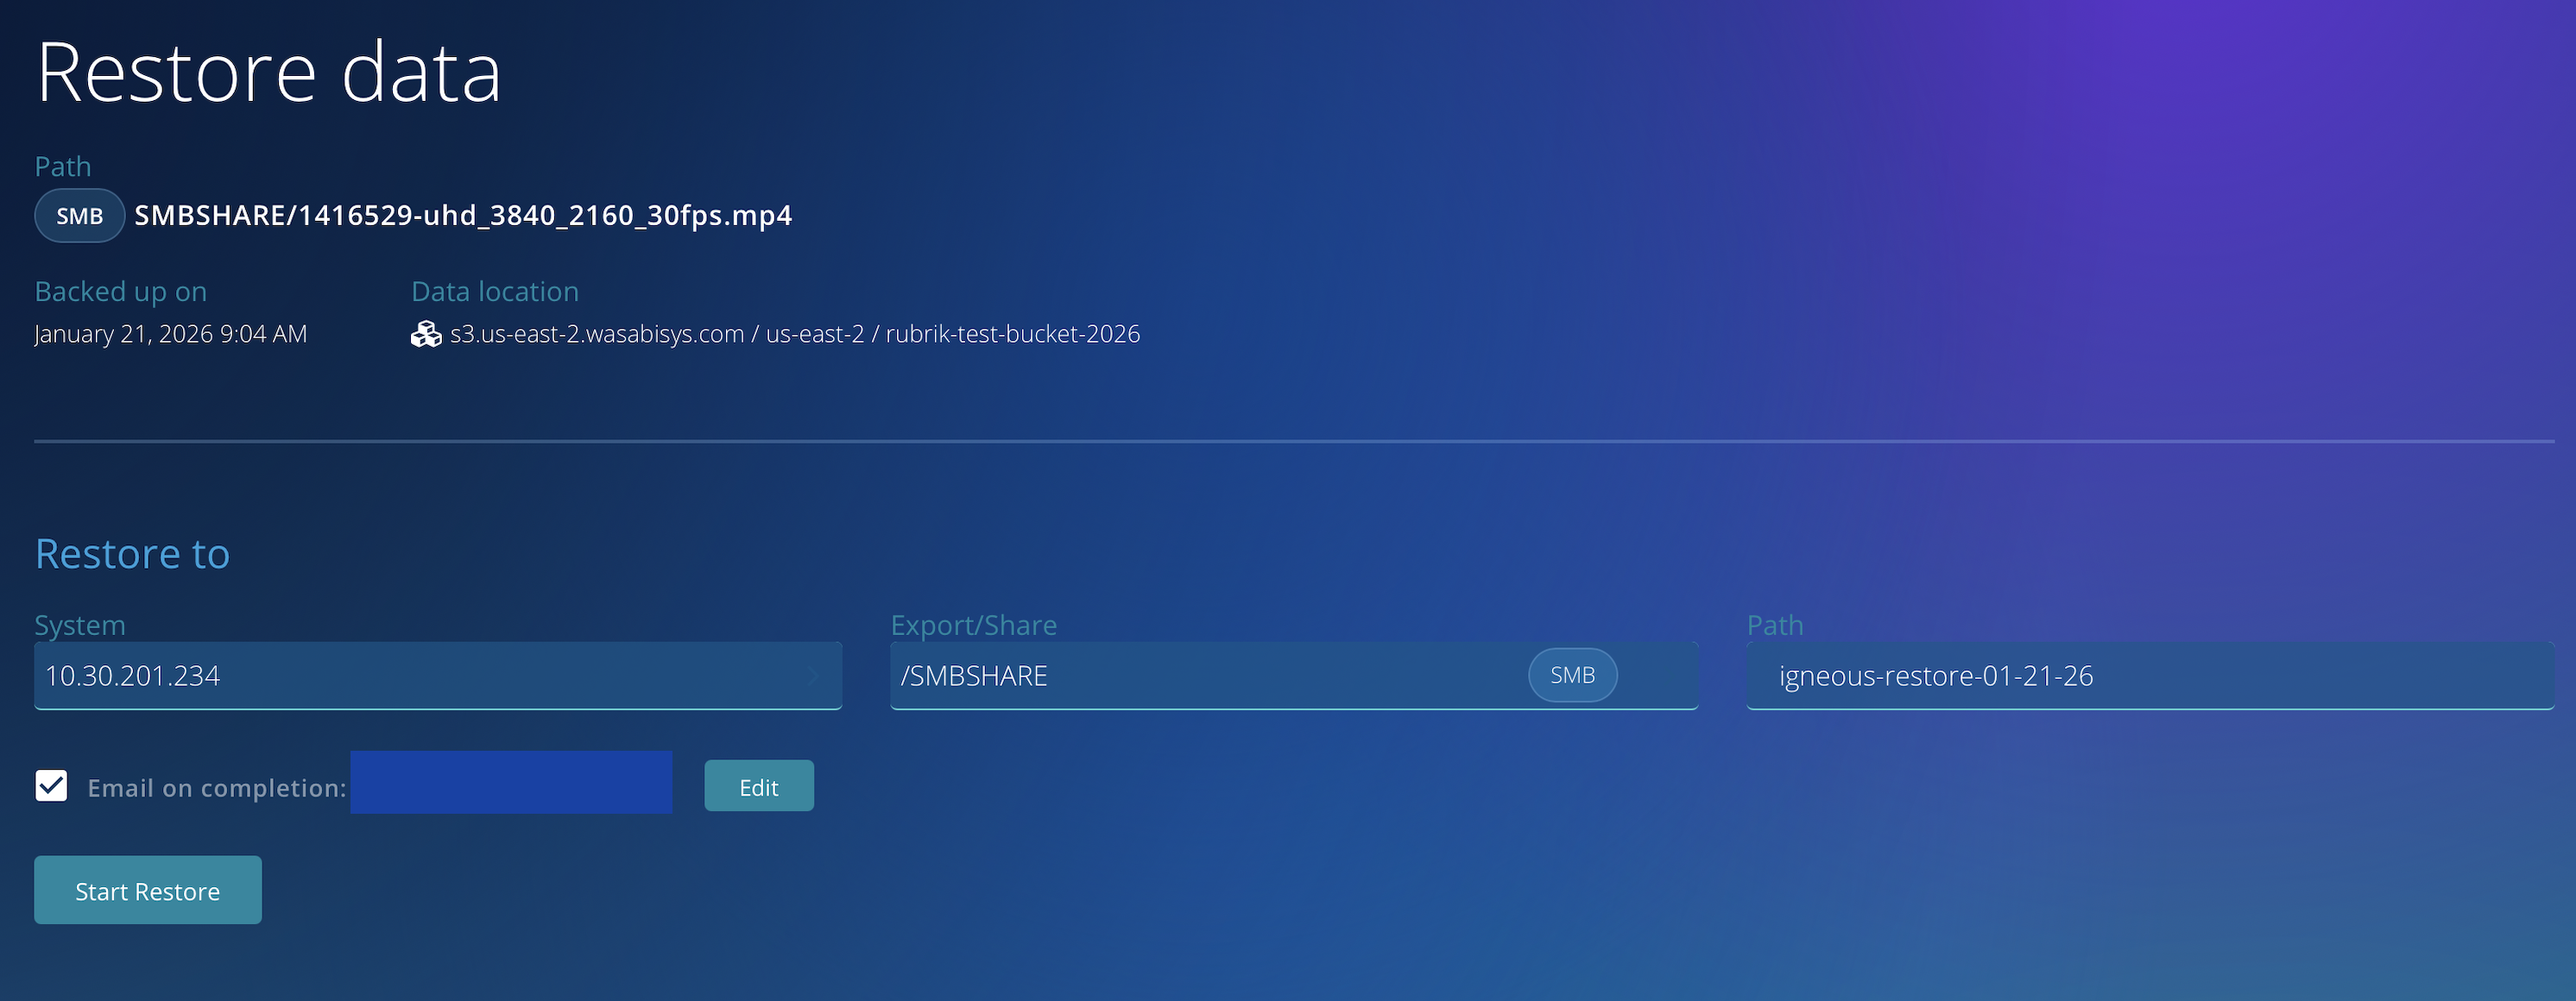
Depending on the size of the file, this step may take some time to complete. You should then be able to find the file under the default restore path on your system.
Protecting Your Data With Object Lock (Immutability)
Create an Object Locked bucket - See Wasabi Object Locking KB
Visit the “Targets” page of your Rubrik NAS Cloud Direct Dashboard, and click Add Target.
Click Select a cloud provider, then click Generic S3.
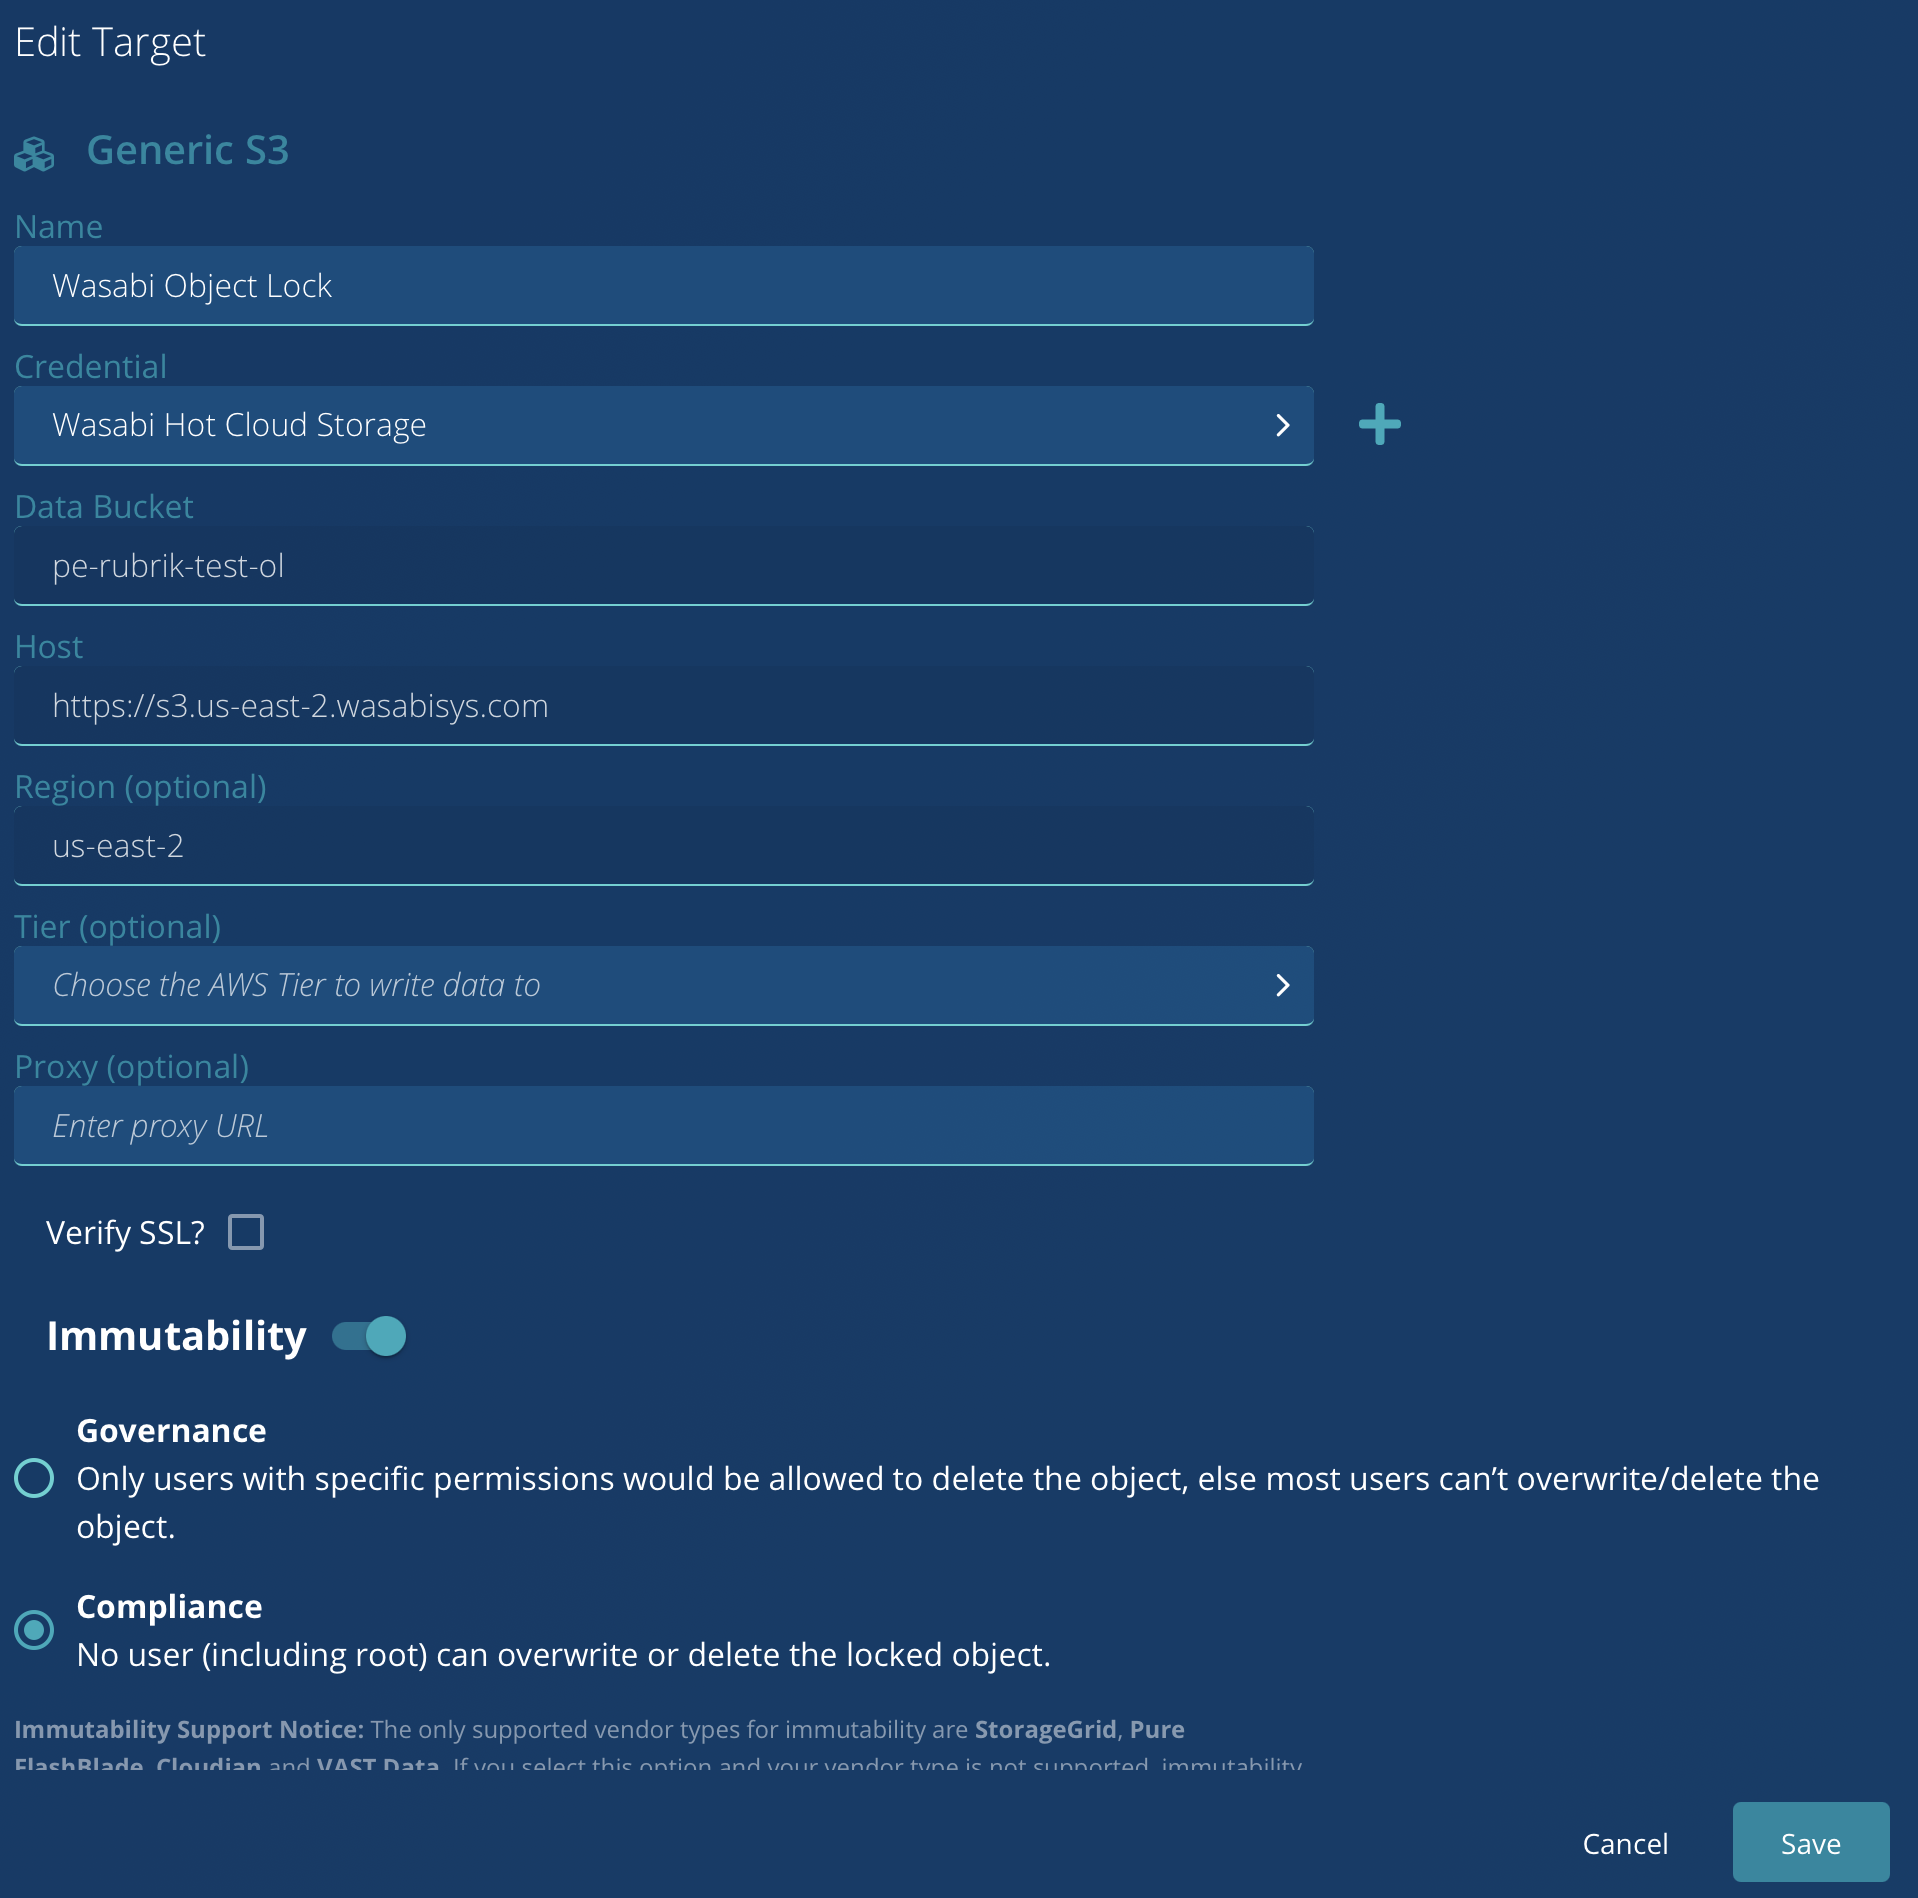
Enter the relevant information for your new target:
Friendly Name
Credentials for your Wasabi Account (Access & Secret Key)
The Name of the Object Locked bucket
Regional Service URL
Region Code
Set the toggle for Immutability to On
Choose Compliance mode
Finally, click Save
5. Your Target will appear on the Targets page.
Visit the Policies page and click Create Policy.

Choose appropriate settings for frequency and retention (minimum 28 days) in accordance with your organization’s guidelines, and choose the Object Locked target made in the prior steps. Click Save.
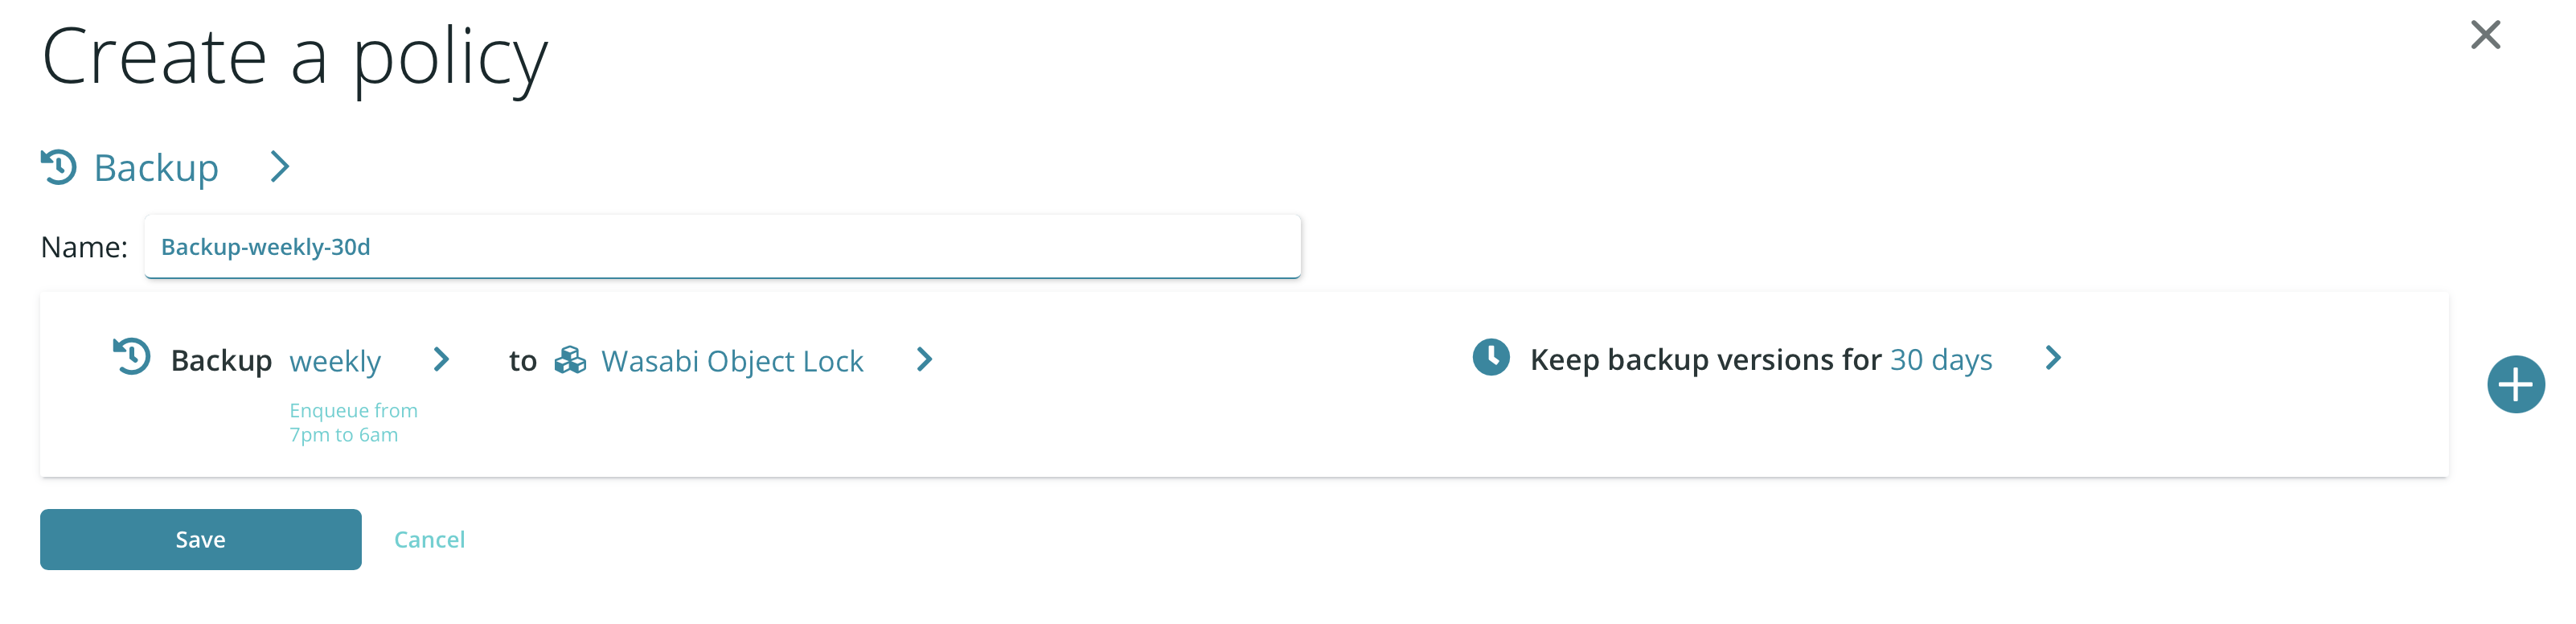
Your Policy will now appear on the Policies page.
Visit the Systems page and choose the share you’d like to protect.
Click Apply, then click Run Policy Now.
Click Run Now when prompted.
Your backup will start, you can visit the Activities page to view its progress.
Once the backup has completed, you will be able to browse the contents of your protected share.
Please note that any data backed up this way will be immutable, and thus unable to be deleted for 30 days.