AXIS Camera Station Pro is validated for use with WSC. AXIS Camera Station is a video and access management software developed to address surveillance use cases.
Requirements
AXIS Camera Station 5 and Pro
WSC storage account (see Create a Wasabi Account)
Wasabi bucket (see Creating a Bucket)
Access key and secret key (see Creating a User Account and Access Key)
Configuring AXIS Camera Station
Install, configure, and activate your AXIS Camera product.
After creating a bucket in Wasabi, navigate to your AXIS Camera Station client.
Search for the main recording drives. To do so, click Configuration.
Click Management.
Specify the Allocated capacity.
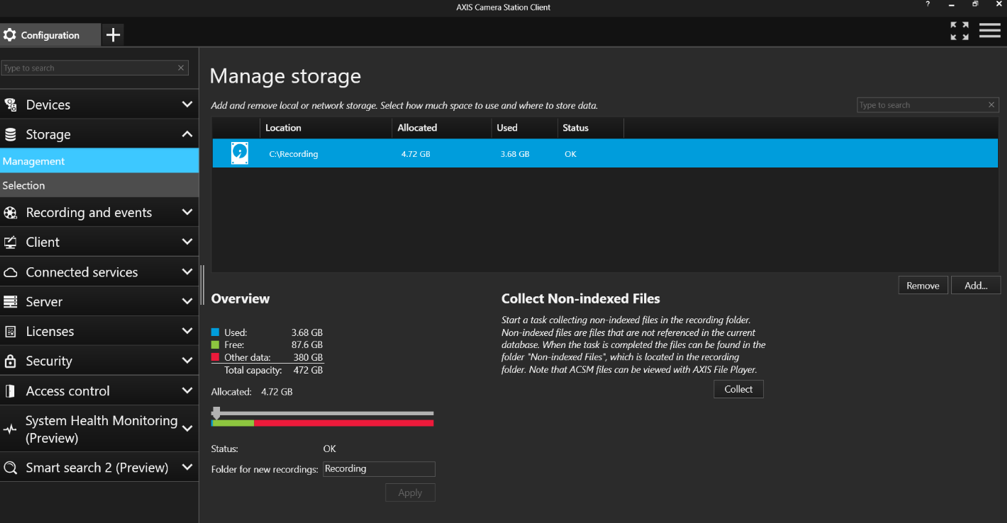
Under configuration selection, ensure that the cameras you store in the cloud are configured to store the drive on which to replicate.
Configuring WSC for Use With AXIS Camera Station
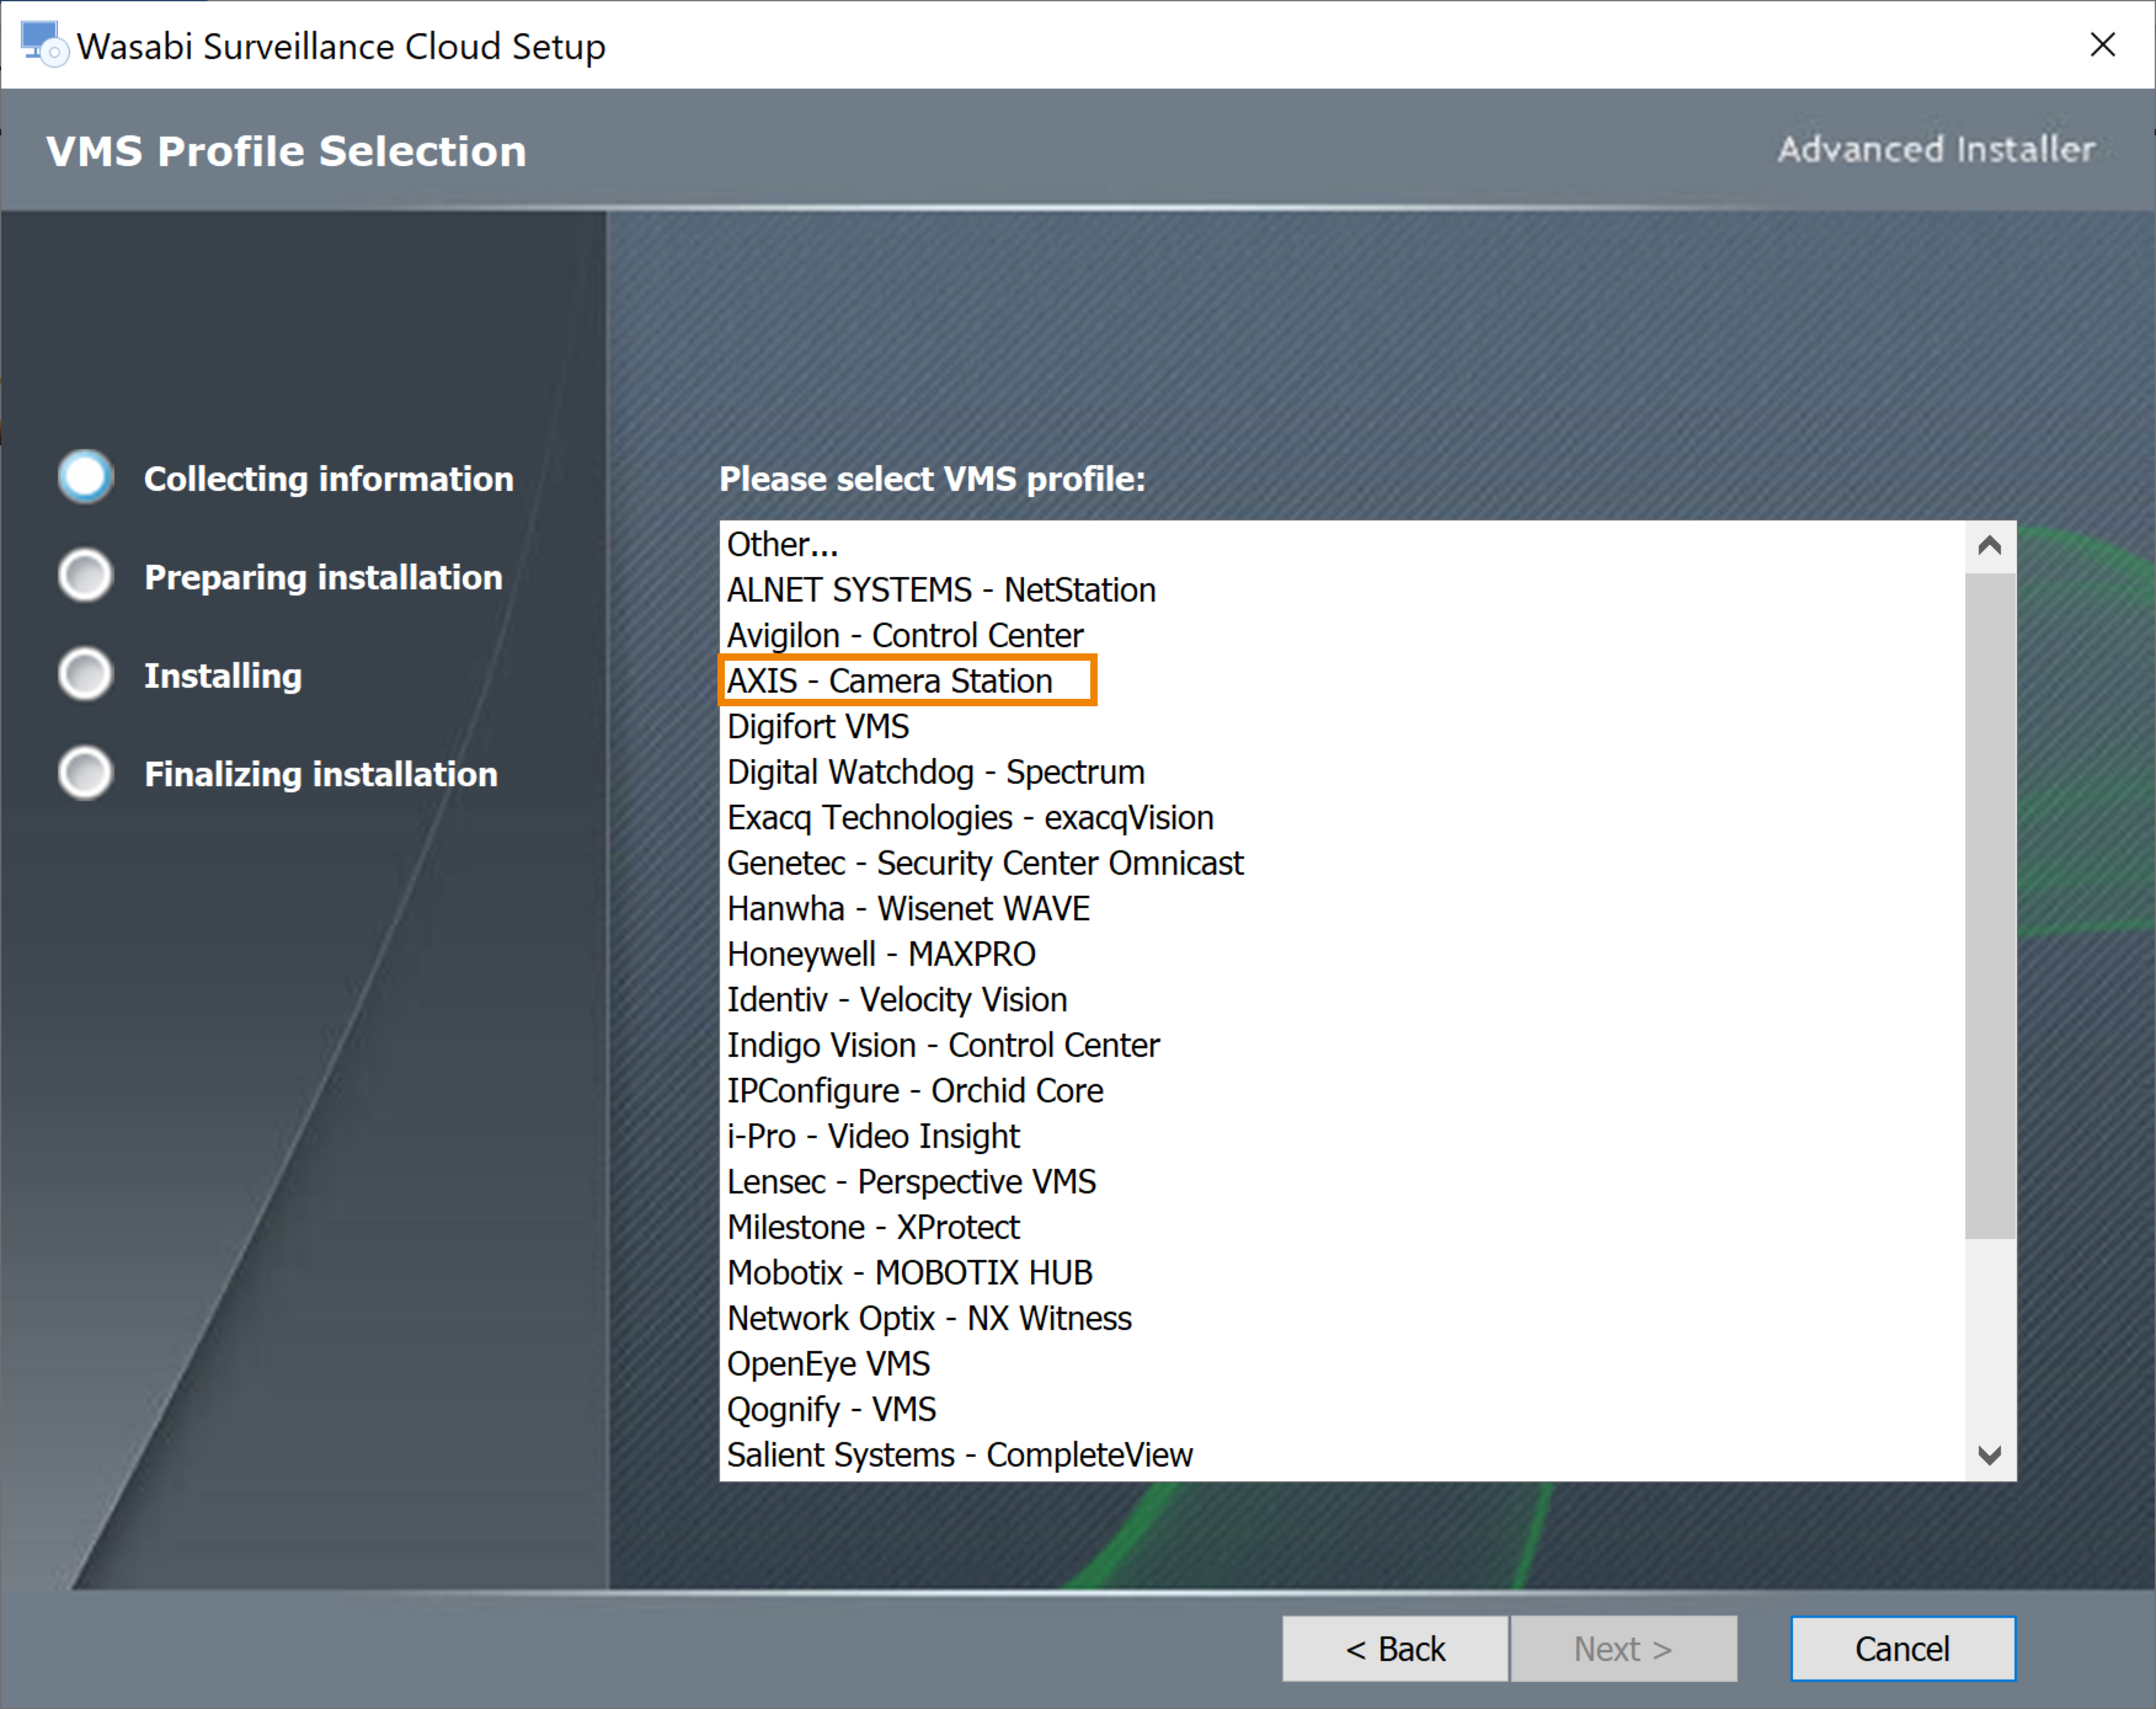
Follow the instructions in 1—Installing Wasabi Surveillance Cloud to install WSC on the local server. Be sure to select AXIS Camera Station. Once the Camera Station profile is selected, it cannot be changed.
Install the WSC software on each server in case multiple recording servers are deployed. The same WSC credentials can be used across all servers.
Open the WSC software.
Follow the steps in Pairing a VMS with a Target to add a source and target. Be sure to set:
Source path—Select the same drive/folder shown in Camera Station. If more than one volume has been configured in Camera Station, add each folder (source) separately. Do not add subfolders whose parent folder has been added as a source.
Targets—Select Wasabi to autofill the Access and Secret keys. Optionally, enter the keys manually.
Enable Virtual volume extension size.
To confirm that data is being written to the bucket with the same directory structure as the source folder, log in to the Wasabi Console to verify.