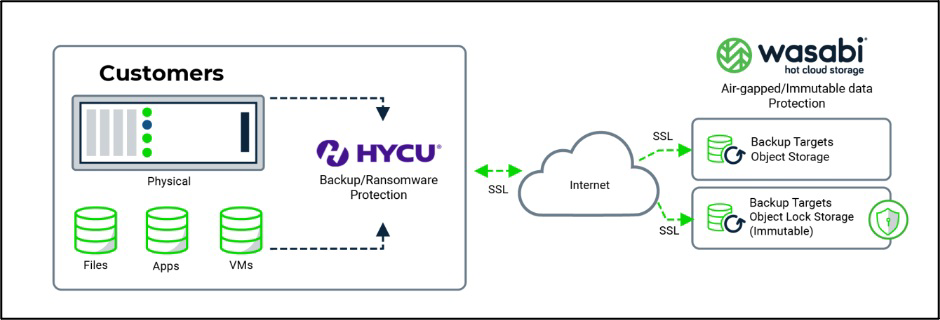
Wasabi has been validated for use with HYCU, a leading multi-cloud backup as a service provider, and Nutanix AHV, a modern and secure virtualization platform. To set up Wasabi with your HYCU application and Nutanix AHV, follow the instructions below.
The data restoration process is handled by your specific backup software application. As there are many potential variables that will affect your unique environment, Wasabi recommends that you seek the guidance of your backup software's technical support team in the event that you encounter difficulty or have application-specific inquiries.
Requirements
Active Wasabi Cloud Storage Account.
Wasabi Bucket—For more information, review 2—Working With Buckets and Objects. This may be either a regular bucket or one with Object Lock enabled. Object Lock is highly recommended from a security perspective.
Access & Secret Key pair—For more information, review 3—Creating a User Account and Access Key.
HYCU licensed and deployed. This solution was tested with version v5.2.1. Wasabi recommends using the latest version.
Nutanix AHV hypervisor.
Reference Architecture
Adding Nutanix AHV as a Source
Launch the HYCU Backup Controller application.

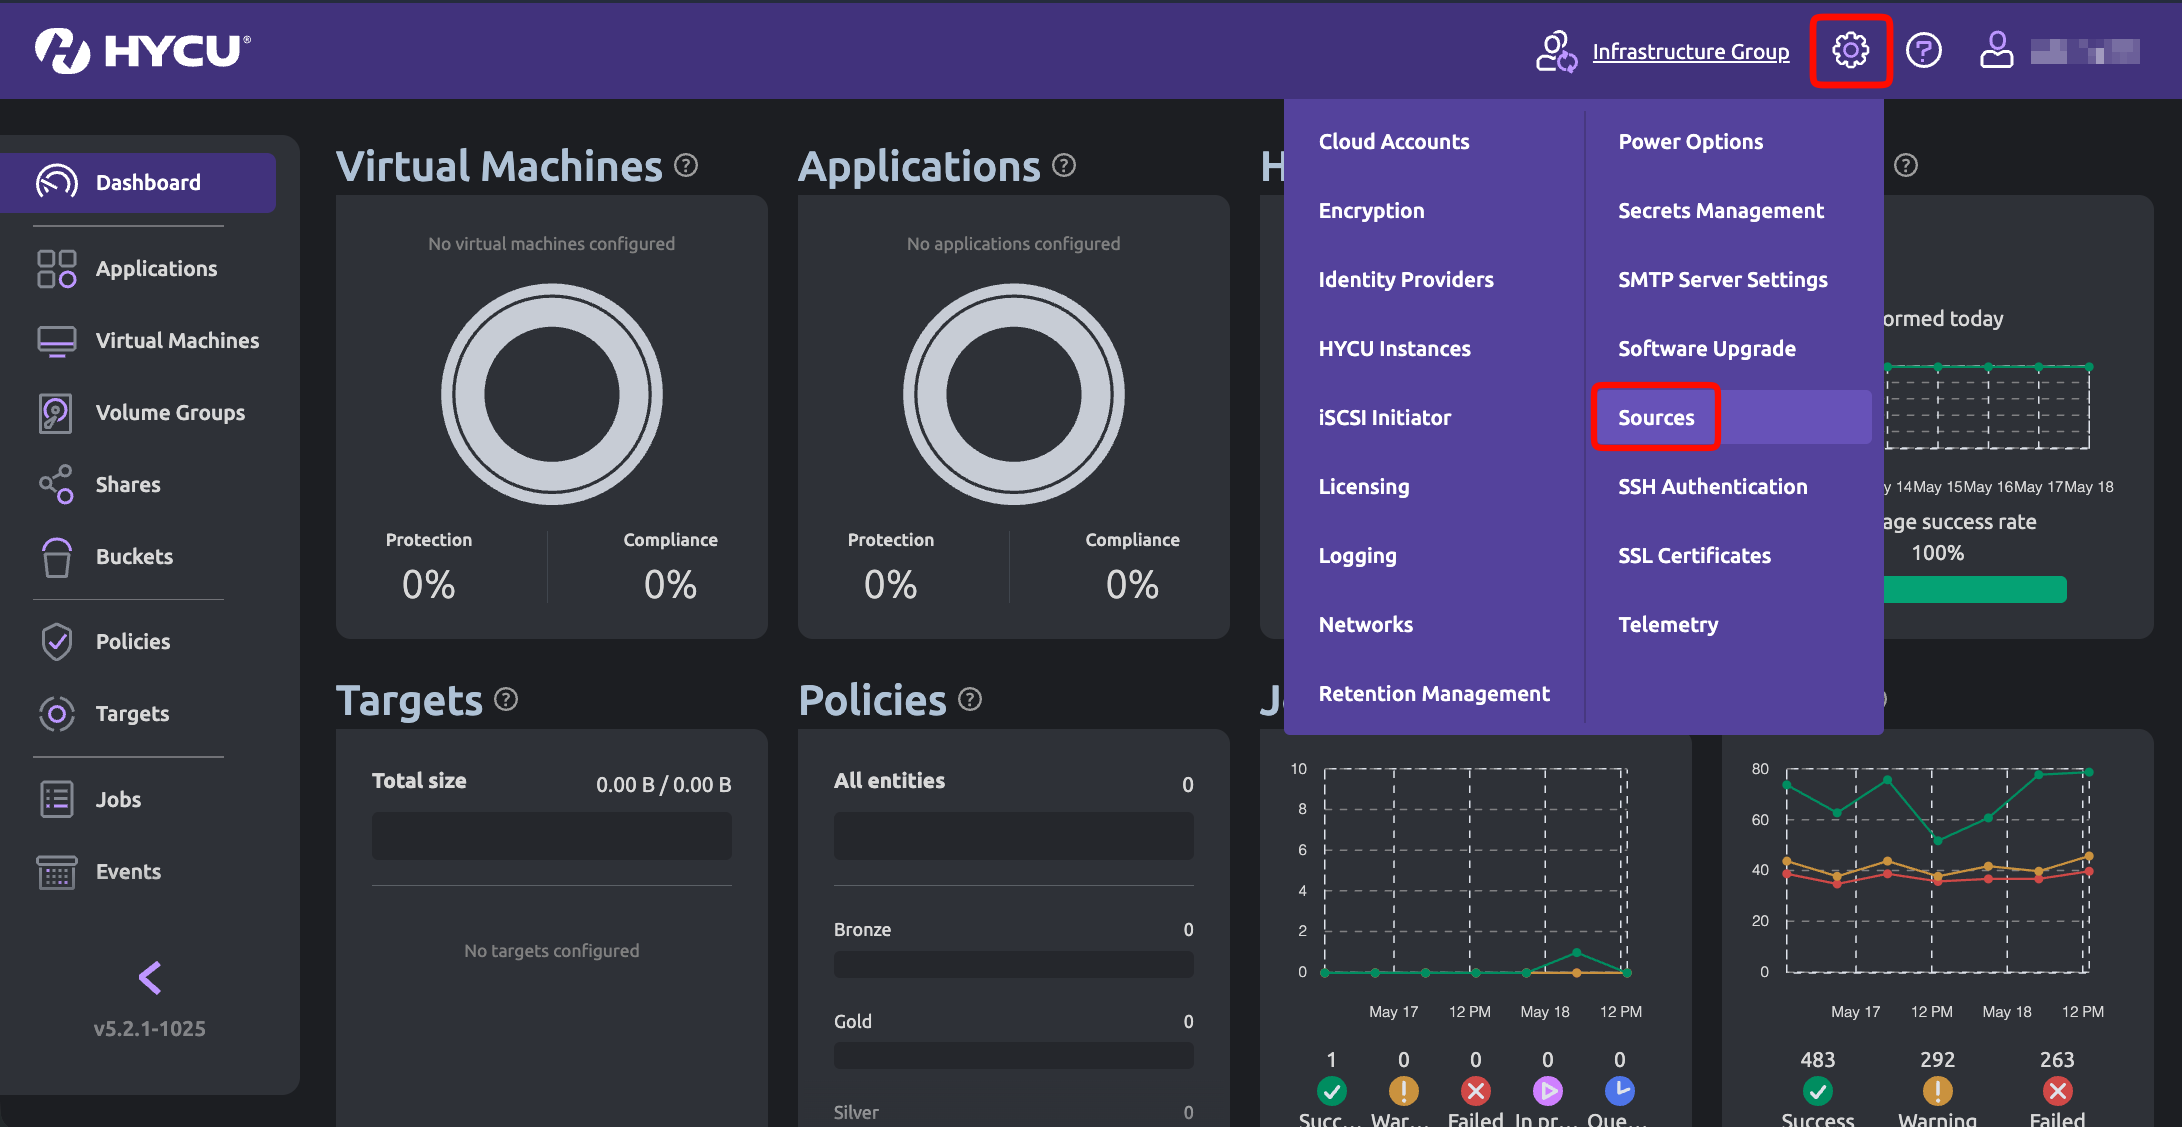
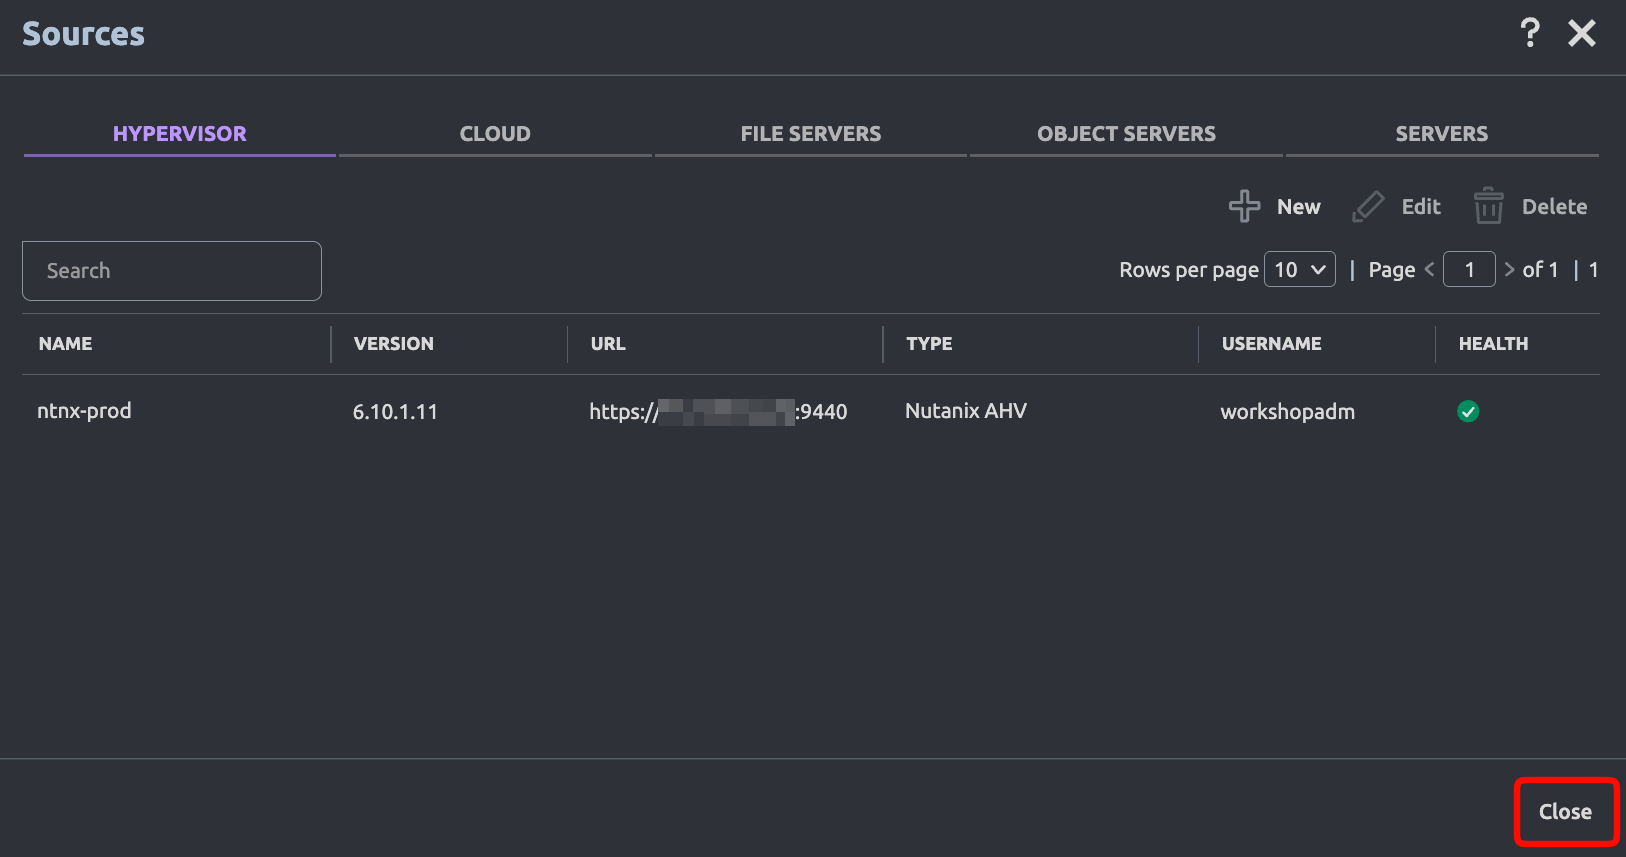
To add Nutanix AHV as a source for the protection environment, click Settings (gear icon) and select Sources.
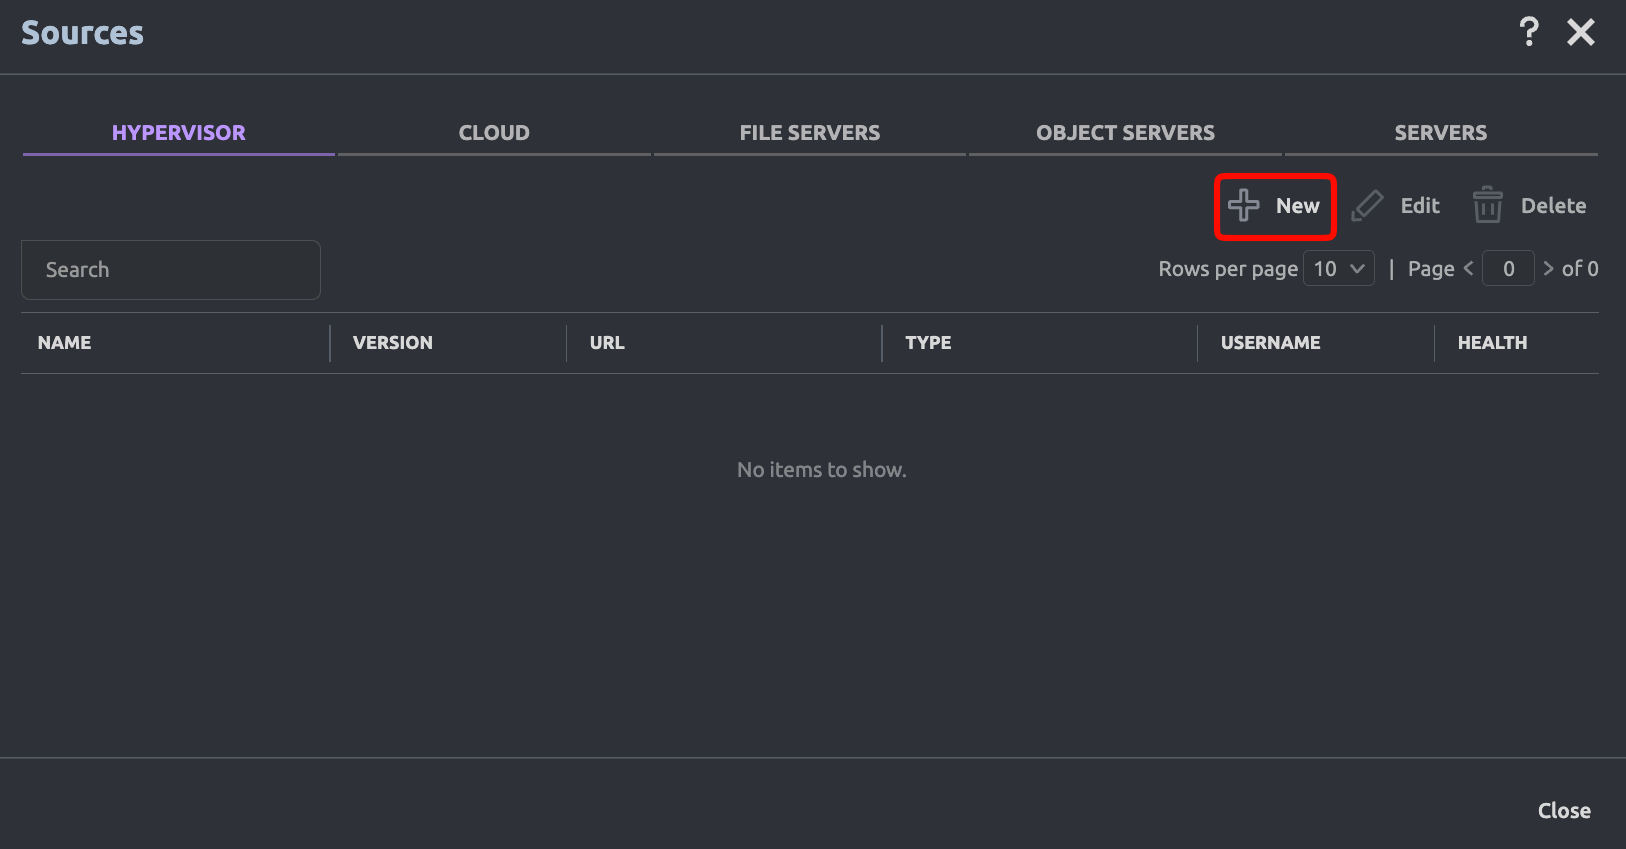
In the Sources window, click + New in the Hypervisor tab.
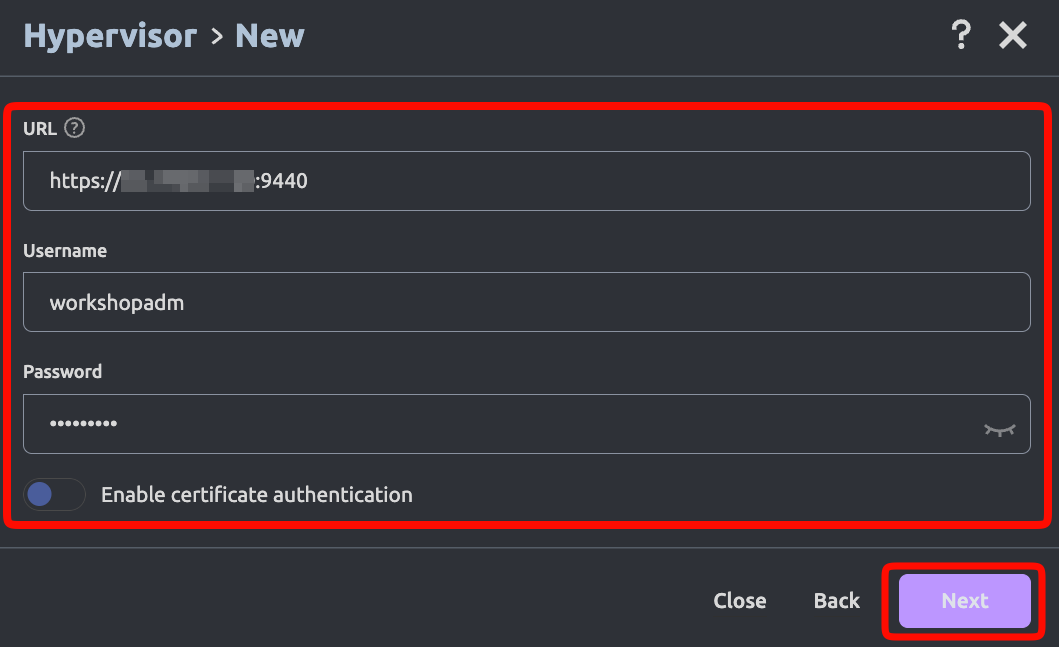
In the New Hypervisor window, provide the required details. Click Next.
Click Save on the Summary page.
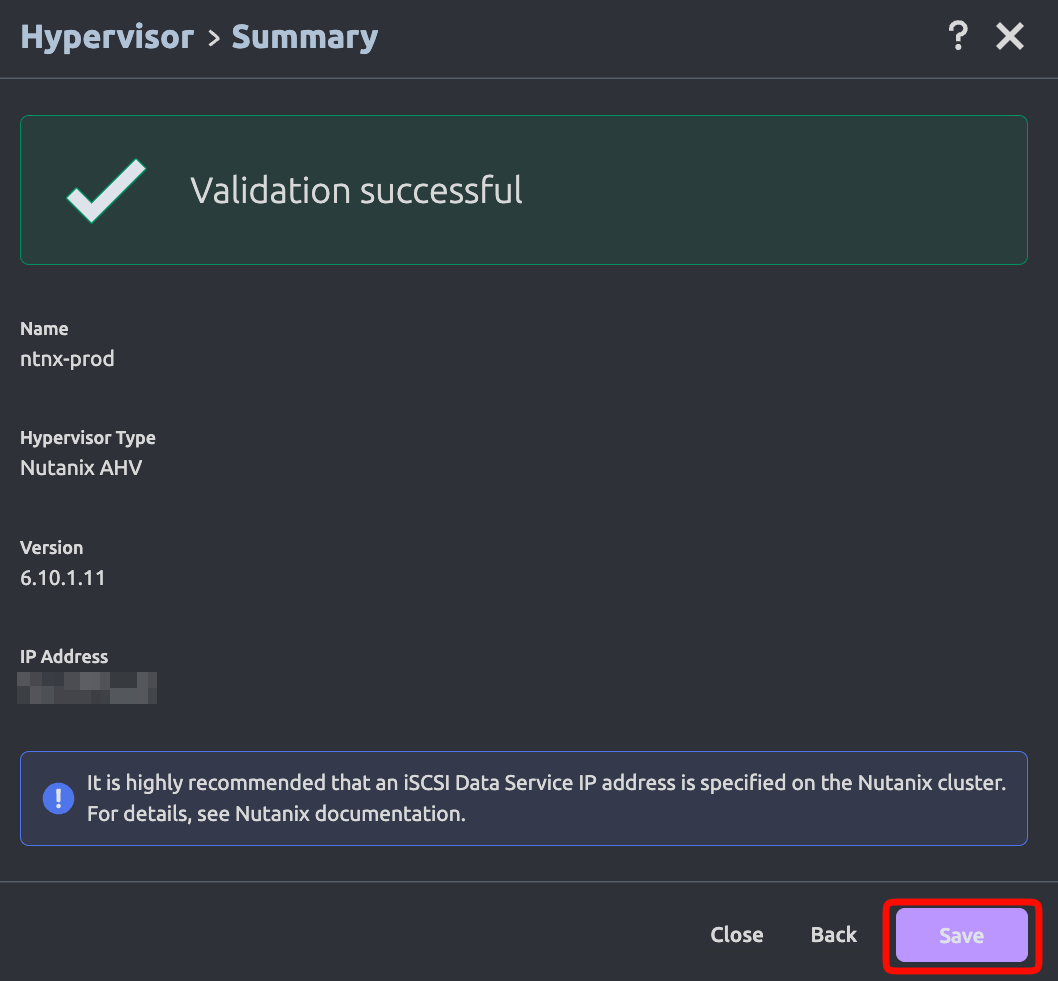
Click Close.
Adding Wasabi as a Target
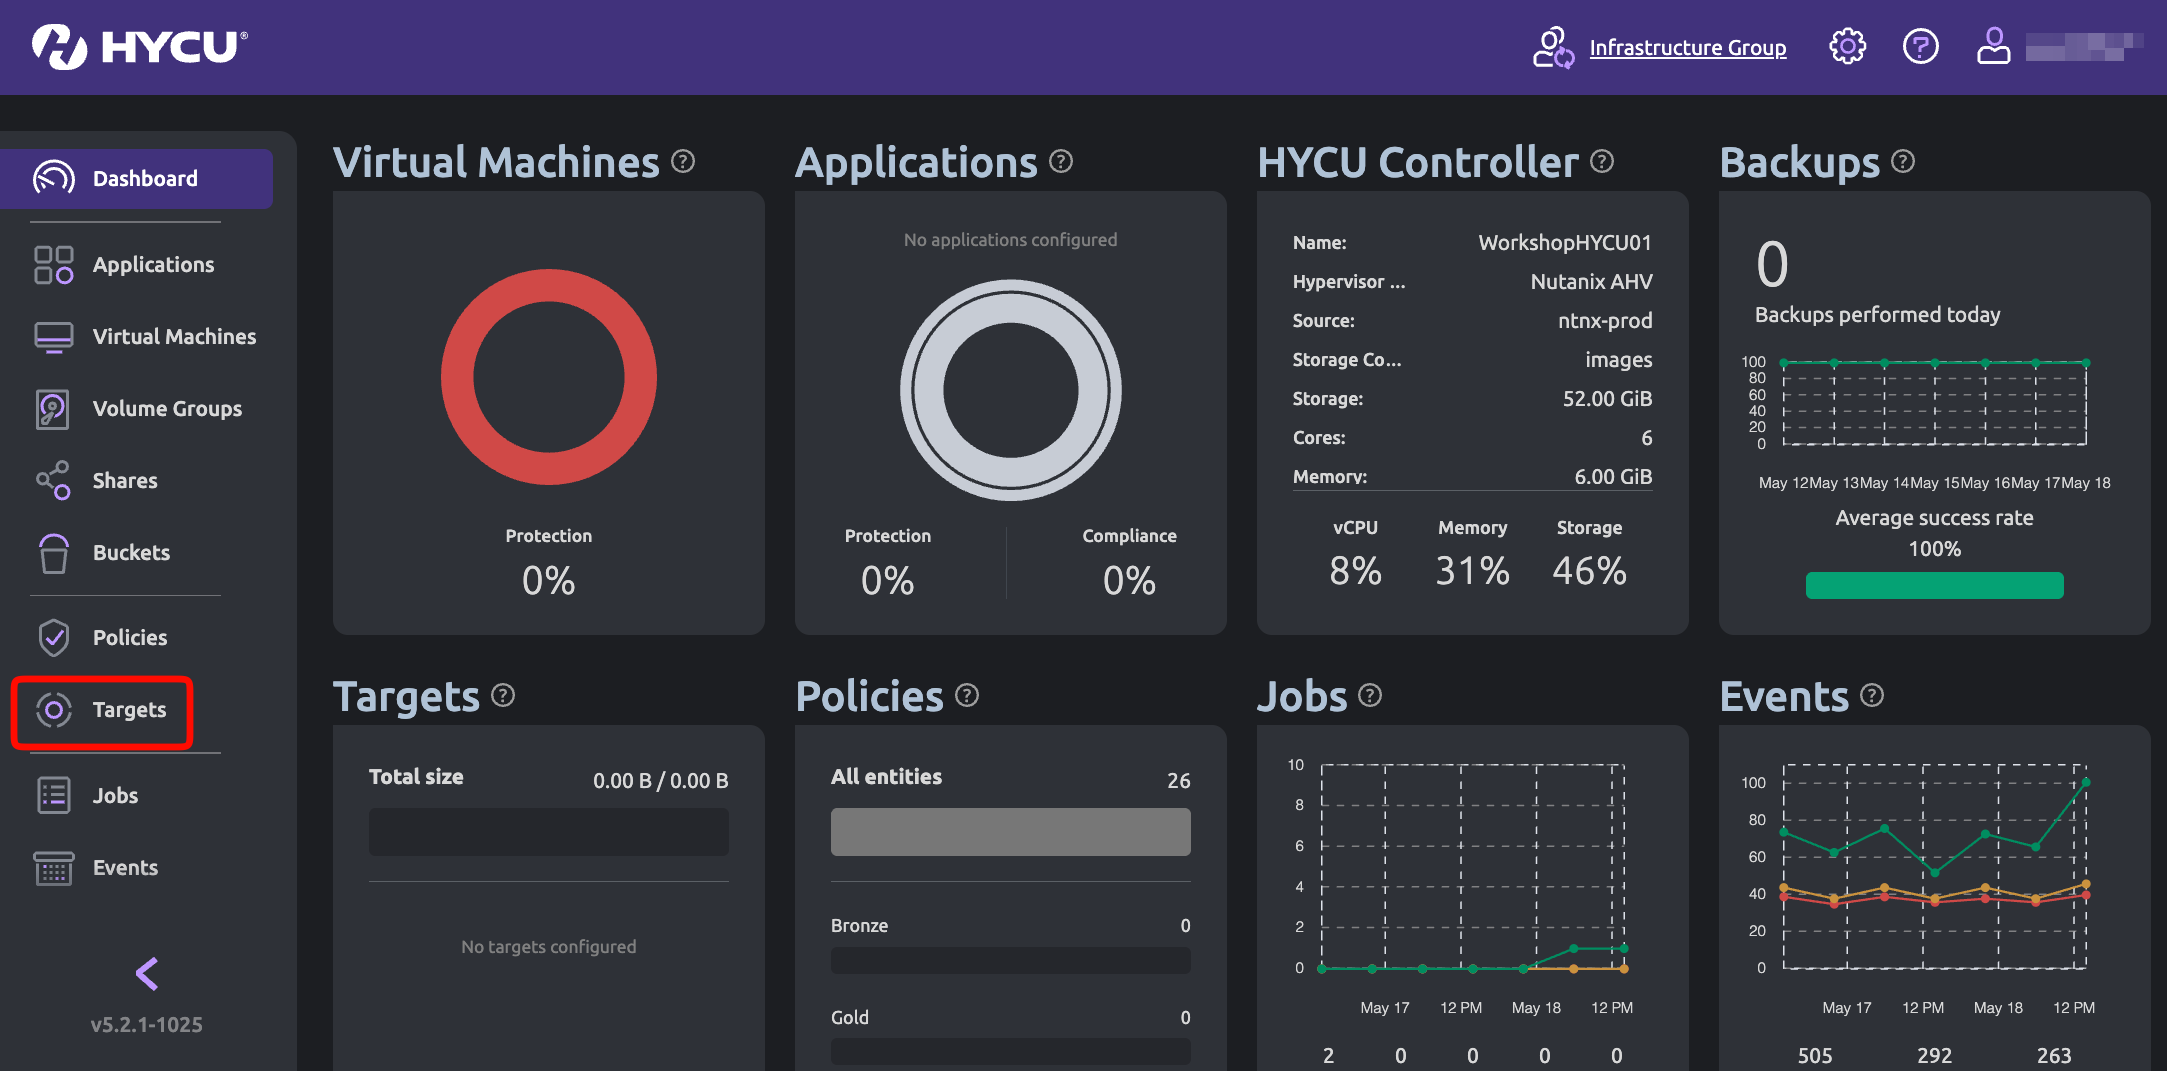
Click Targets.
Click + Add.

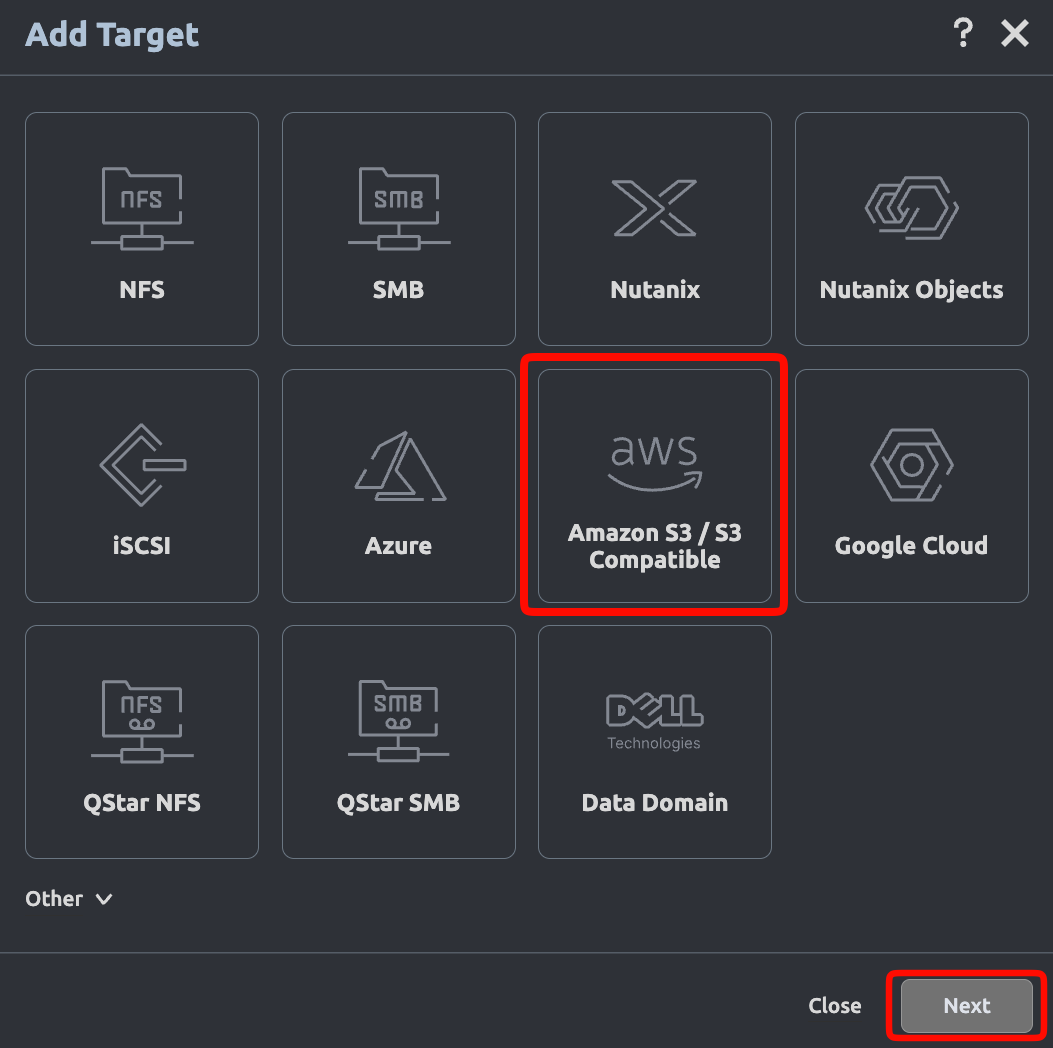
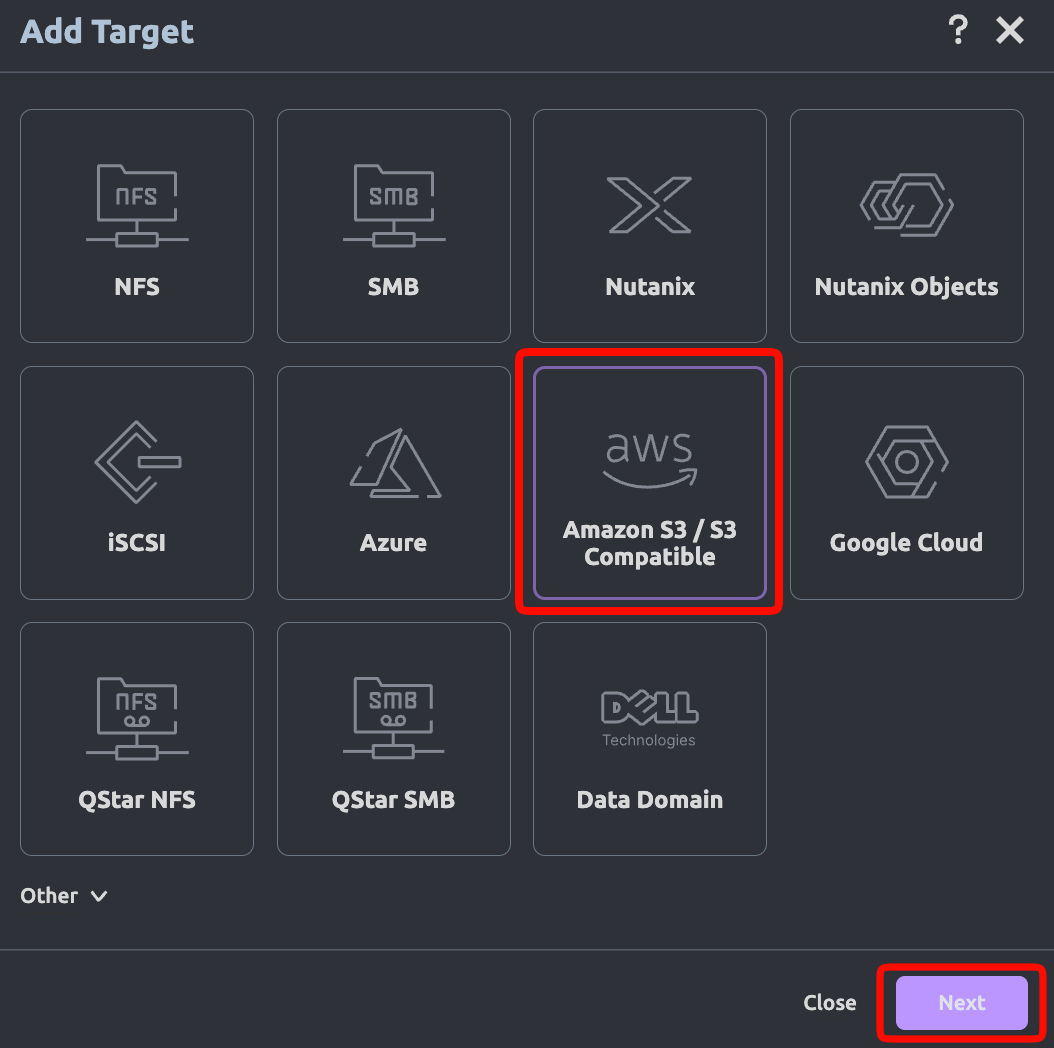
Select Amazon S3 / S3 Compatible. Click Next.
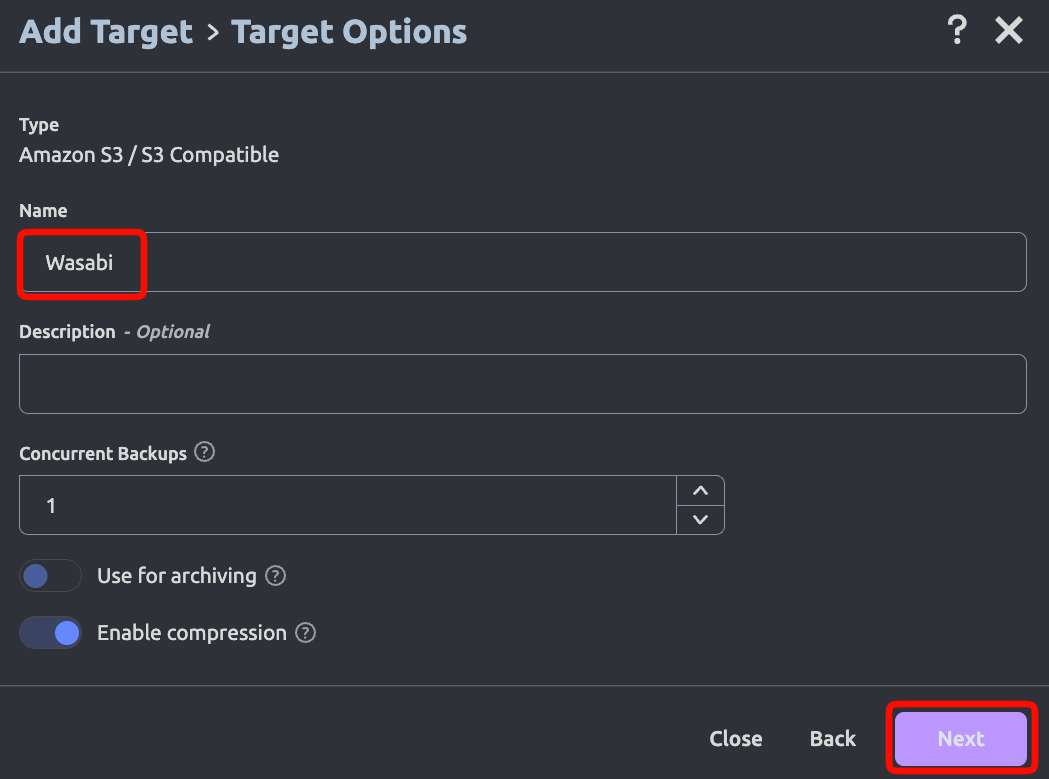
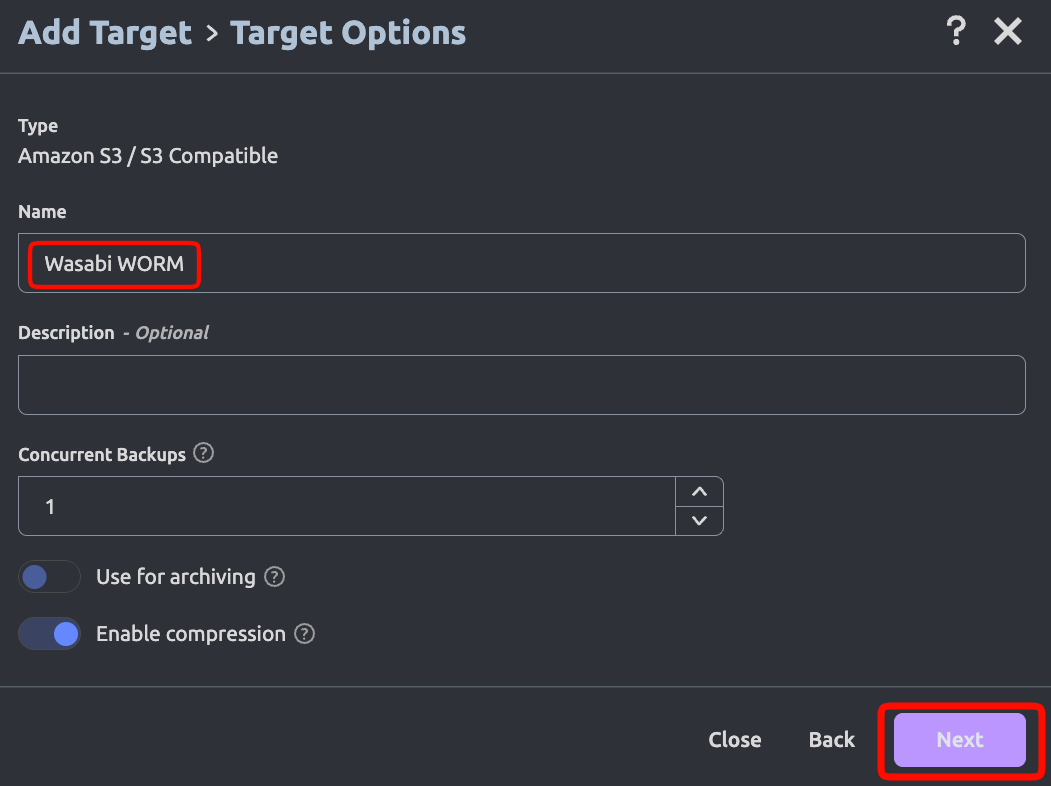
Provide a name for the target. Click Next.
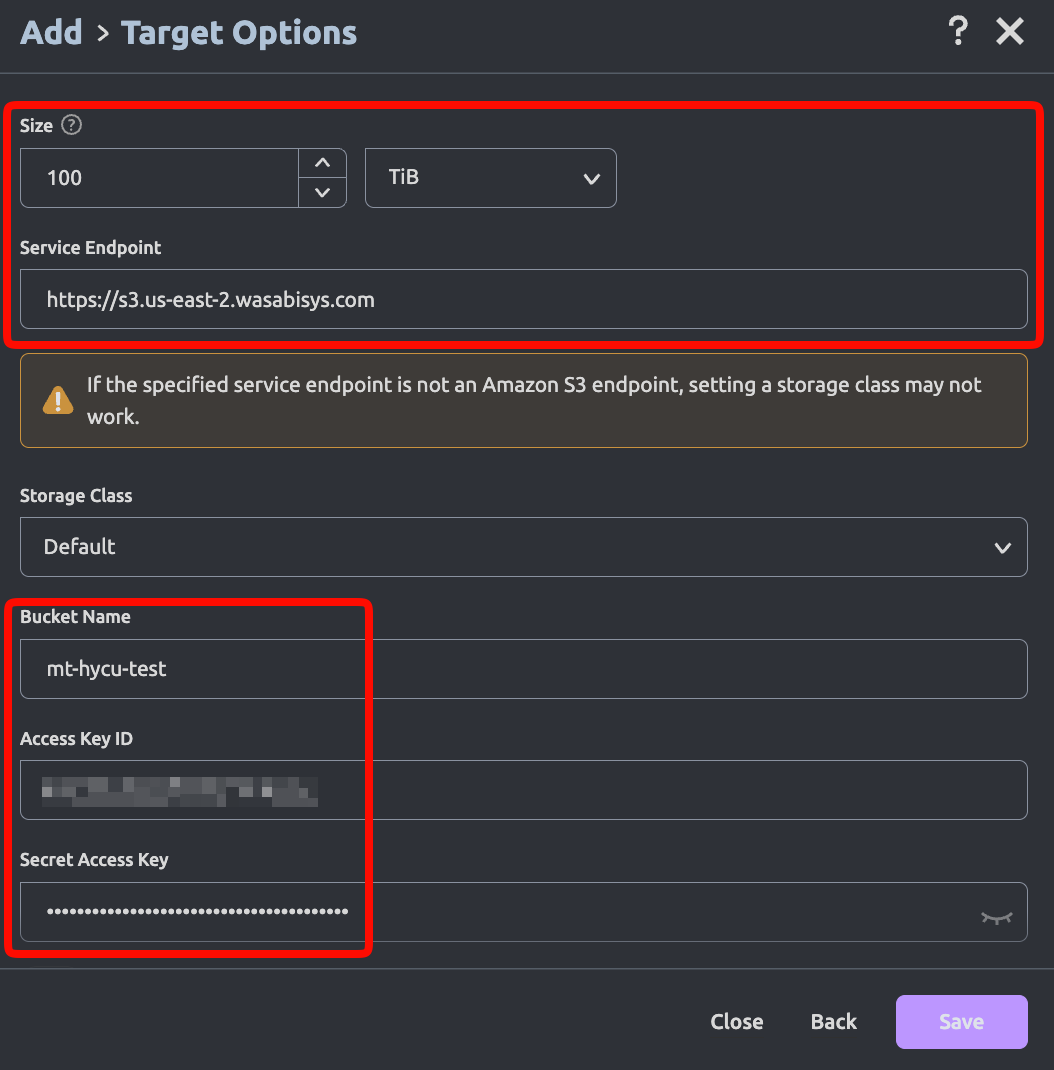
Provide the following and scroll down.
Size—The size of your Wasabi storage you want to allocate to HYCU backups.
Service Endpoint—For example, https://s3.us-east-2.wasabisys.com (Enter the service URL for the region your bucket is in. For more information, review the notes below.)
Bucket Name—The name of your bucket.
Access Key ID—Wasabi Access Key.
Secret Access Key—Wasabi Secret Key.
This configuration example discusses the use of Wasabi's us-east-2 storage region. To use another Wasabi storage region, use the appropriate Service URLs for Wasabi's Storage Regions.
The HYCU application REQUIRES the service endpoint to be prepended with transport definition (https).
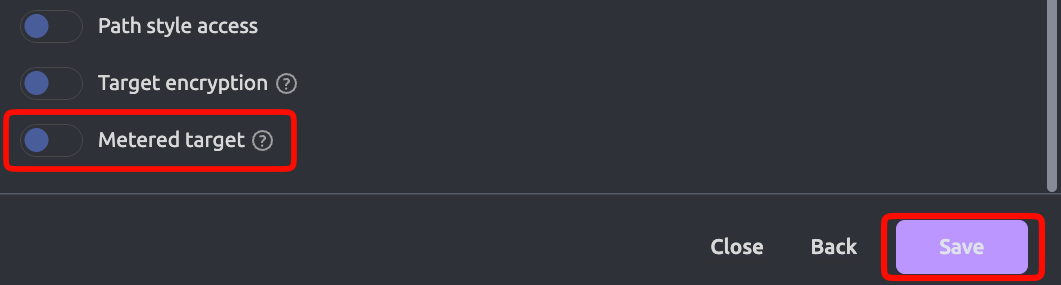
Disable Metered Target. Click Save.
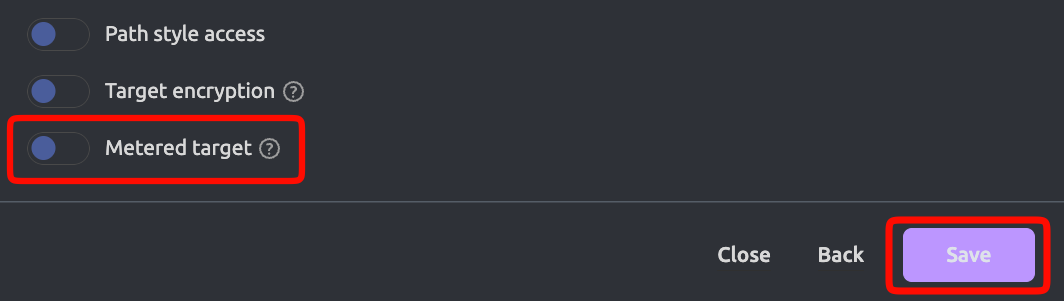
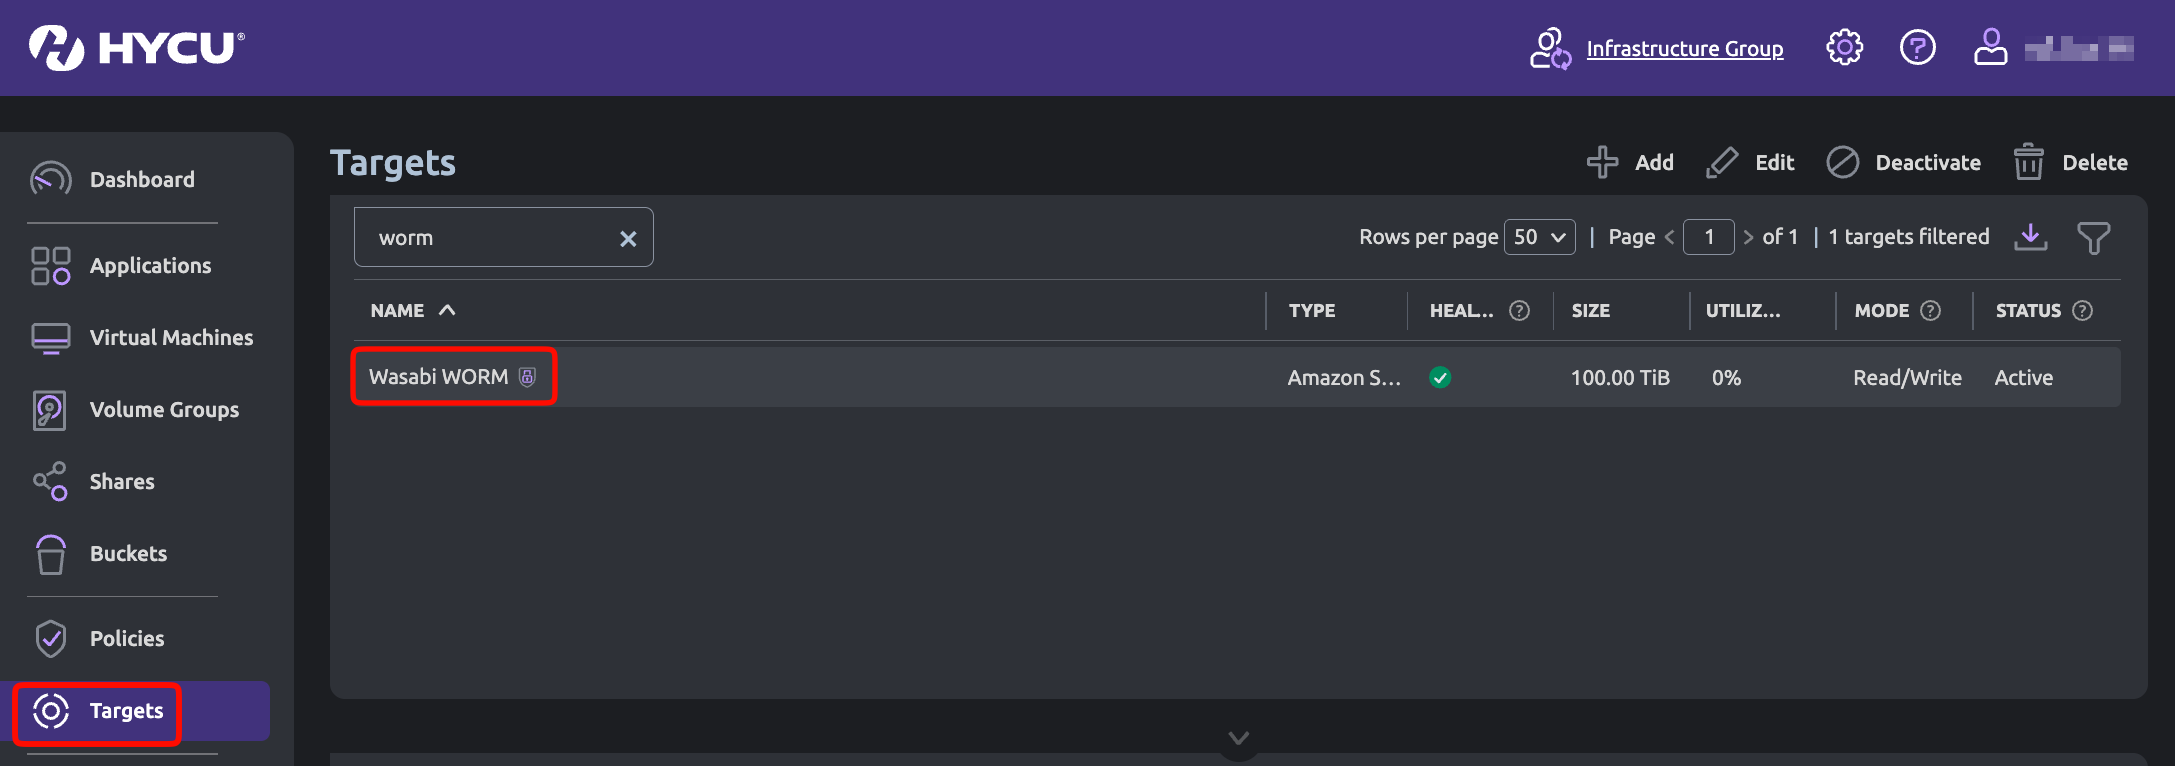
The Targets tab will now display the newly added Wasabi cloud storage.

Creating a Policy
To assign the Wasabi target to a policy, navigate to Policies on the left side pane. Select the desired pre-existing policy. Click Edit. Optionally, to create a custom policy, click New.
.png)
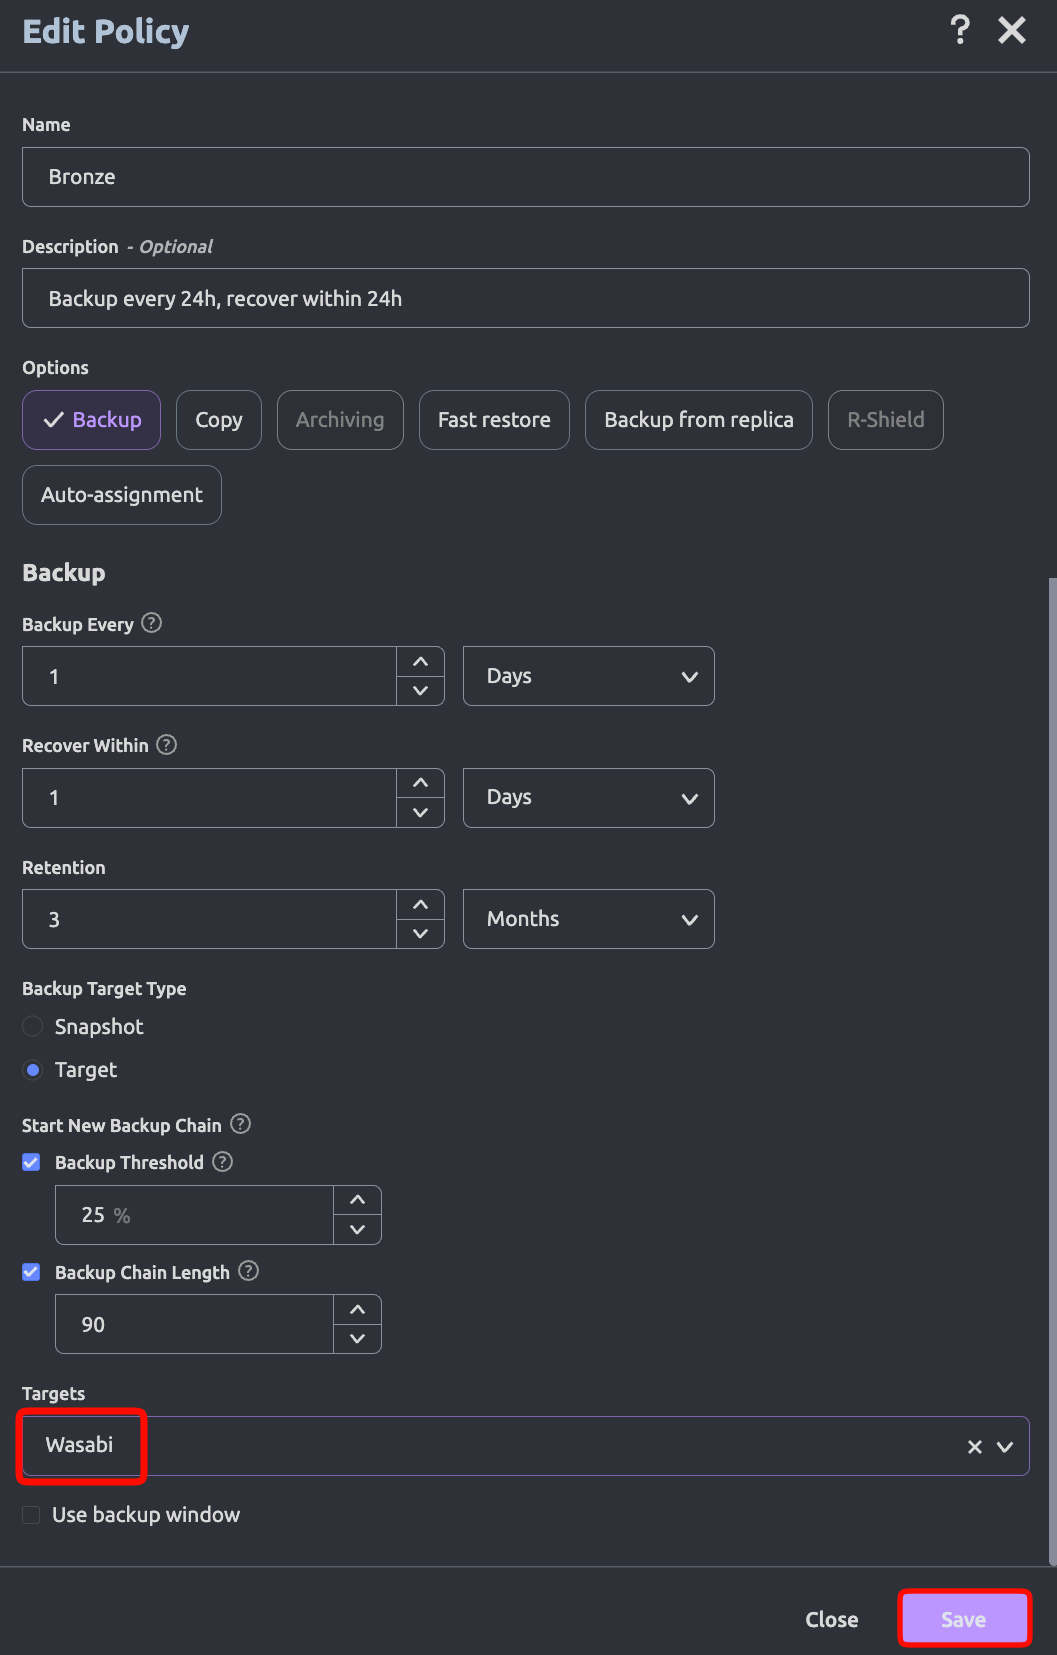
Once in the Edit Policy Window, update or provide a description for the policy.
Set the Backup options, as needed (such as how often, recovery window, and retention period).
Set Backup Target Type as Target.
Start New Backup Chain Setting
Select when you want a new Backup Chain to be started by selecting Threshold % or Chain Length. You can also select both and whenever the first value is exceeded a new chain will be started.
This setting can affect the size of your buckets and your storage usage.
The following HYCU article discusses Backup Expirations.
Backup Threshold—A new backup chain is started when the percentage of the data changes since the last full exceeds the specified value. The default value is 25%. This can lead to more Full backups during your specified retention period and increased storage.
Backup Chain Length—A new backup chain is started when the number of the full and subsequent incremental backups in a chain exceed the specified value. The default value is 7. To keep the backup storage size to a minimum, be sure to set the Backup Chain length to the same value as the Retention.
The ideal Backup Chain Threshold or Chain Length setting can depend on multiple factors, such as Retention Policy, RTO, Storage Capacity, and Data Change Rate. Consult with HYCU Support to optimize these settings based on your environment variables. You can refer to HYCU's Policy Explanation for further insight and for details on the configuration elements, you can reference "Setting up an AWS S3/Compatible target" in the HYCU user guide, HYCU R-Cloud Hybrid Cloud Edition v5.2.1.
Assign Wasabi as the Target and click Save.
Assign the Policy to VMs
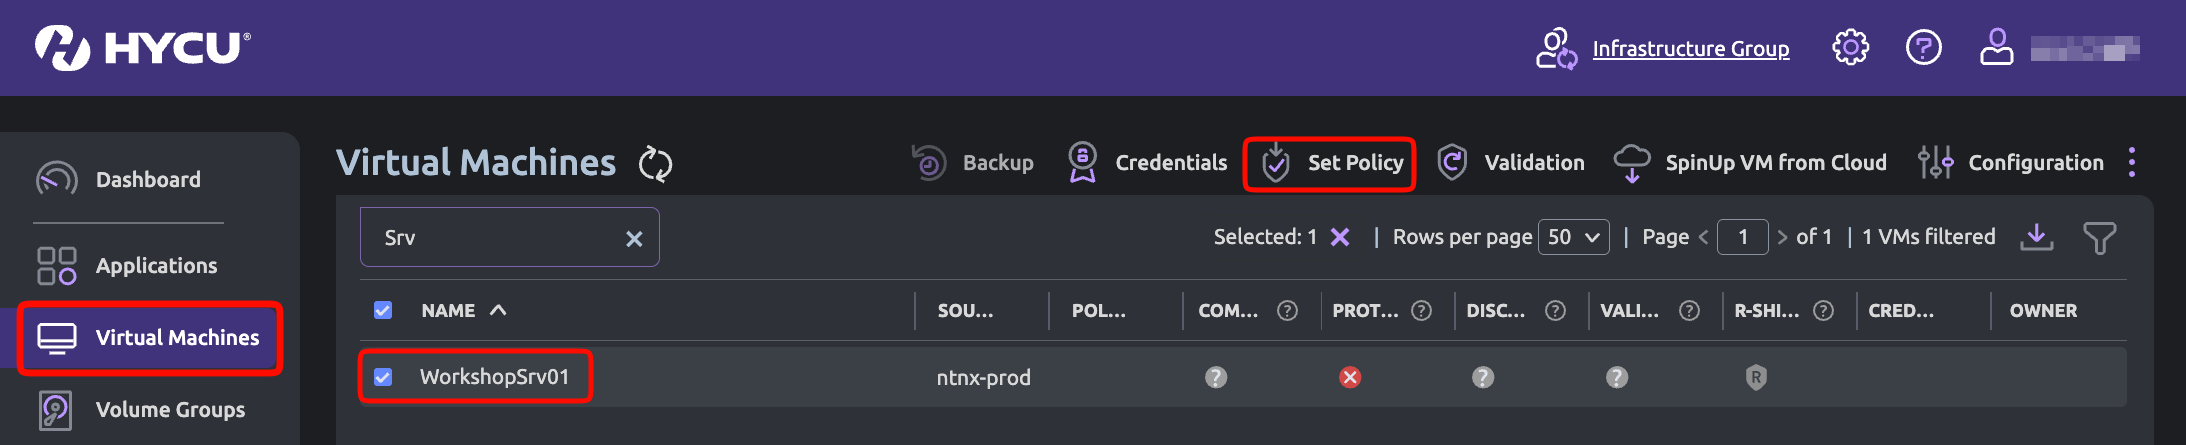
Assign the policy to the virtual machines that must be protected. To do so, navigate to Virtual Machines on the left pane. Select the required Virtual Machines. Click Set Policy.
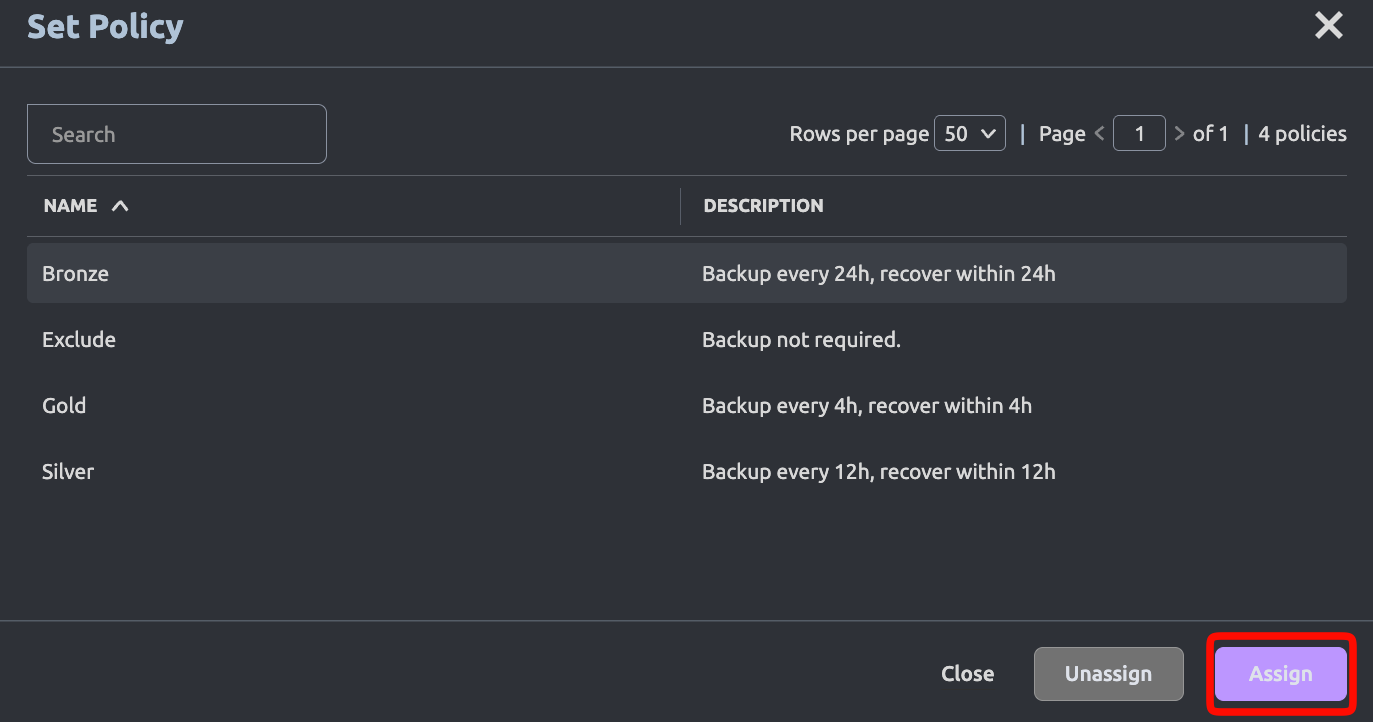
In the Set Policy window, select the desired policy (for example, Bronze). Click Assign.
The protected virtual machines will now be backed up to Wasabi per the configured settings in the policy.
Performing a Backup
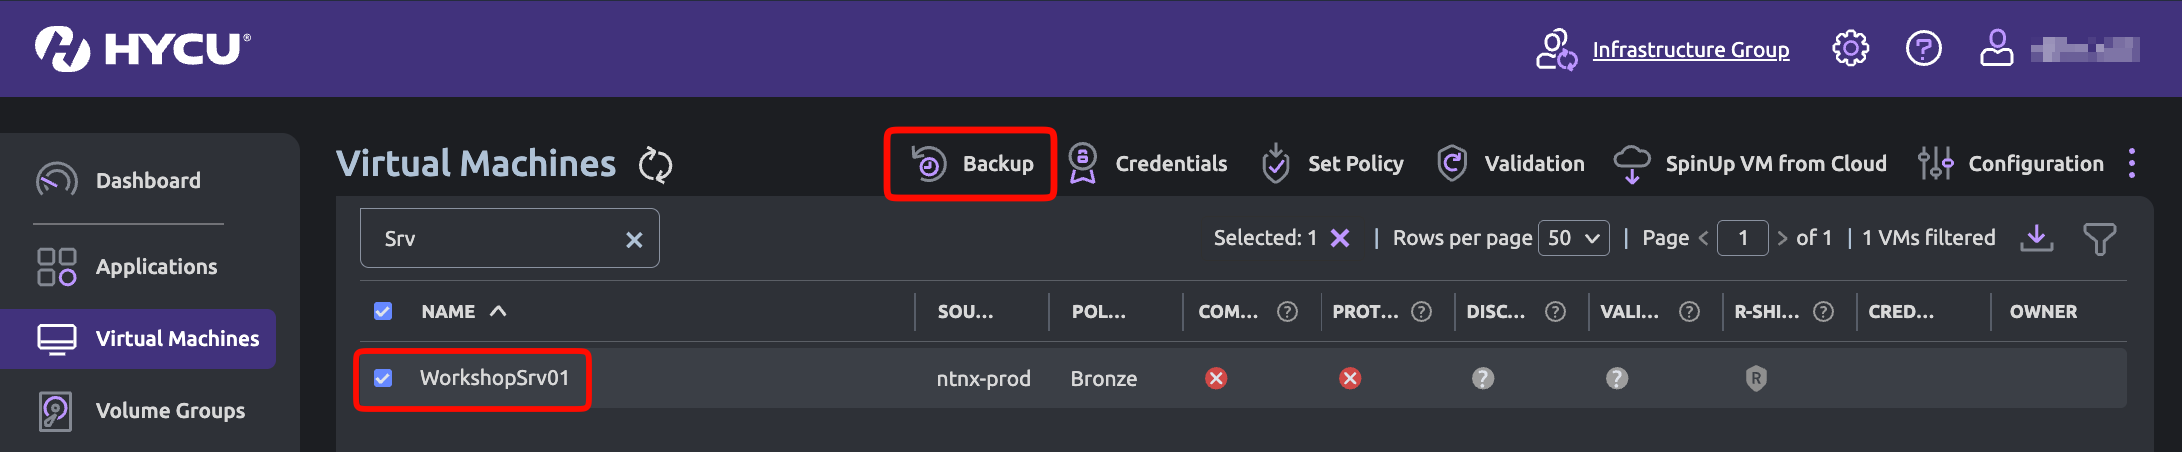
To perform an on-demand backup, select the Virtual Machine. Click Backup.
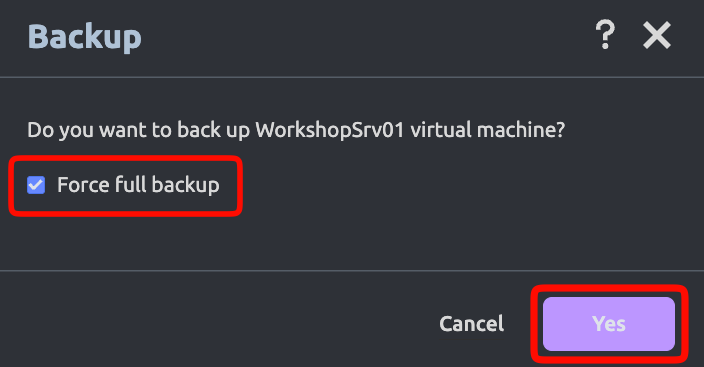
Select the checkbox next to Force full backup. Click Yes.
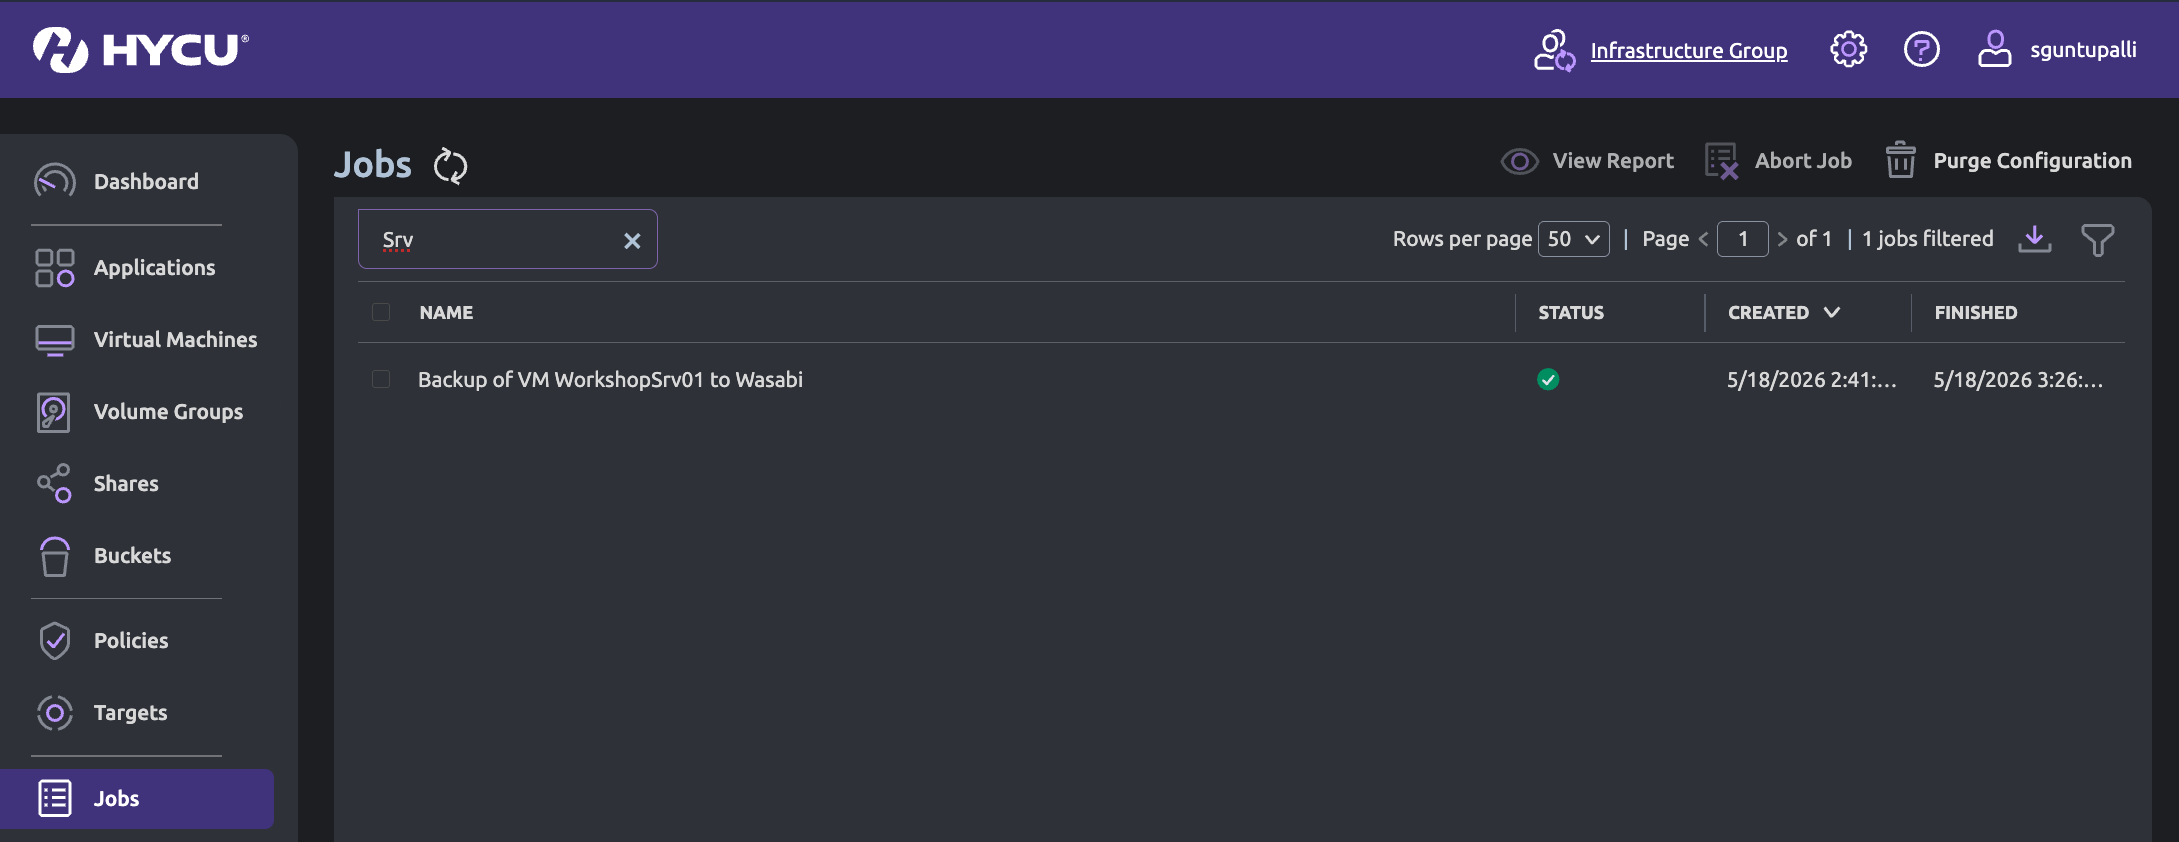
Navigate to the Jobs tab to see the status of the backup job.
Performing a Restore
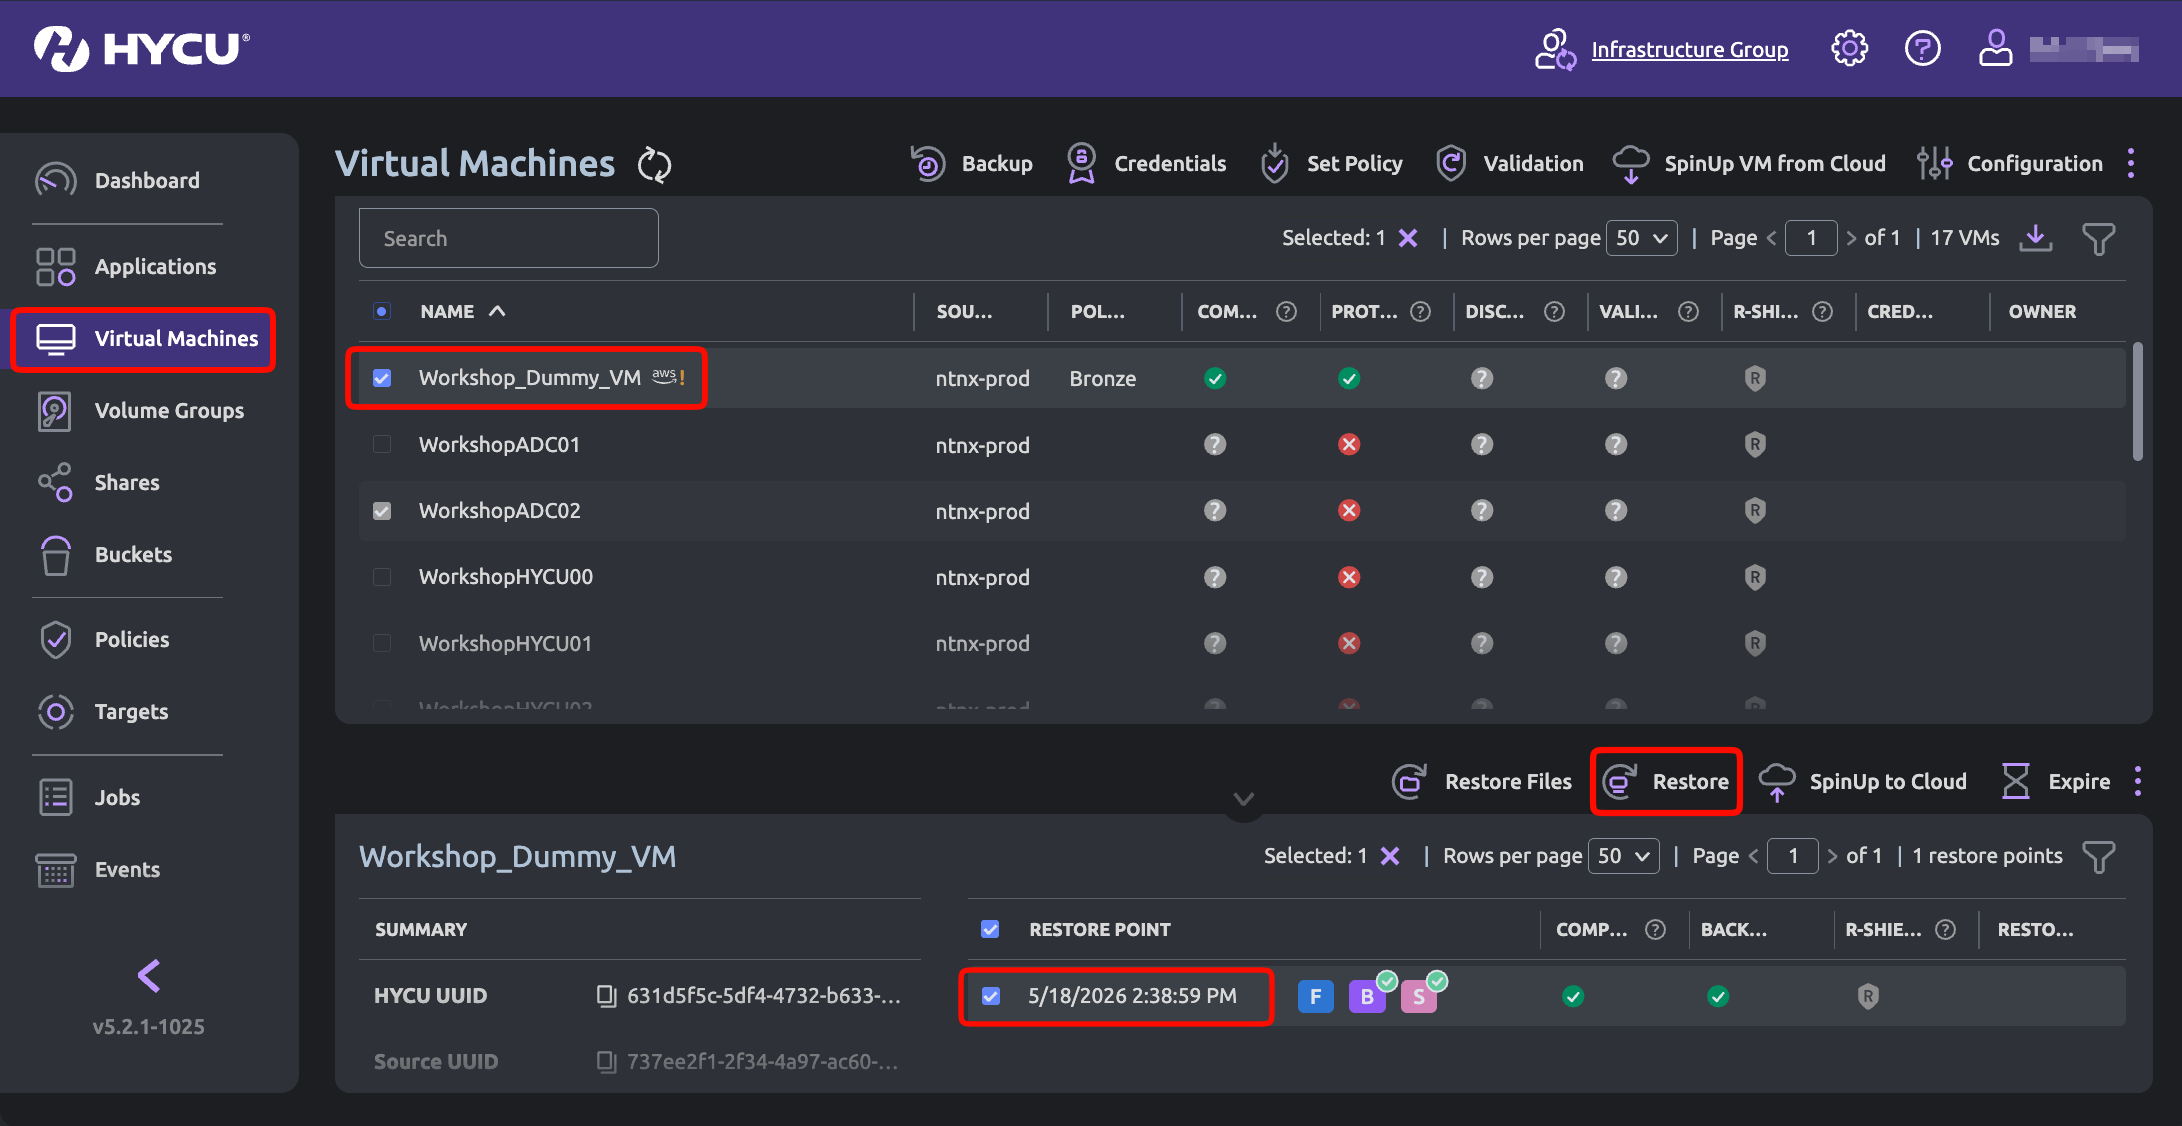
Click Virtual Machines and select a Virtual Machine to restore from Wasabi. Select a restore point. Click Restore.
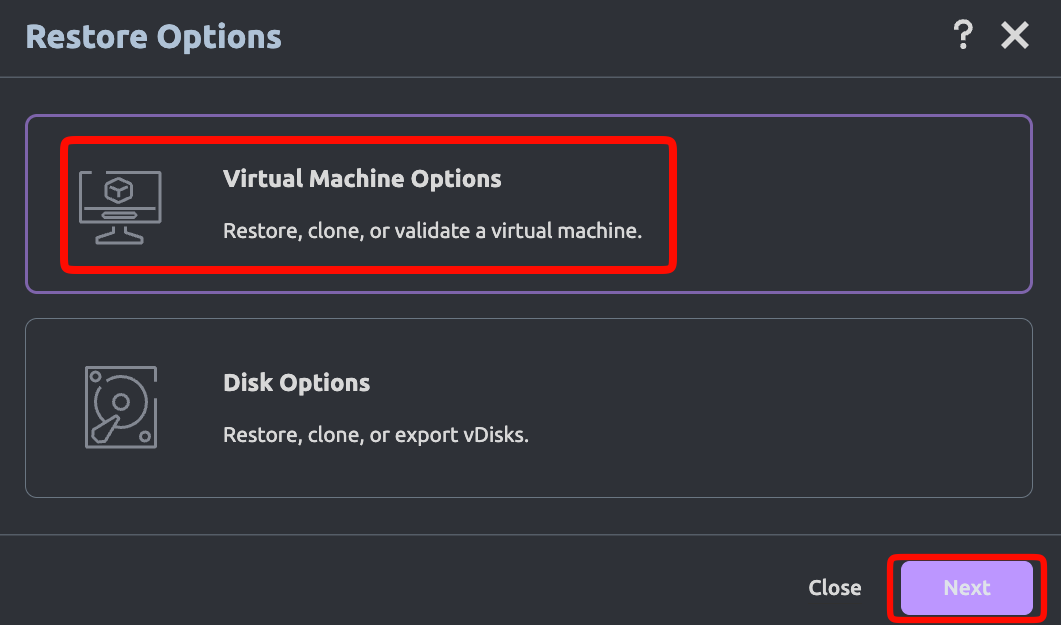
Click Virtual Machine Options. Click Next.
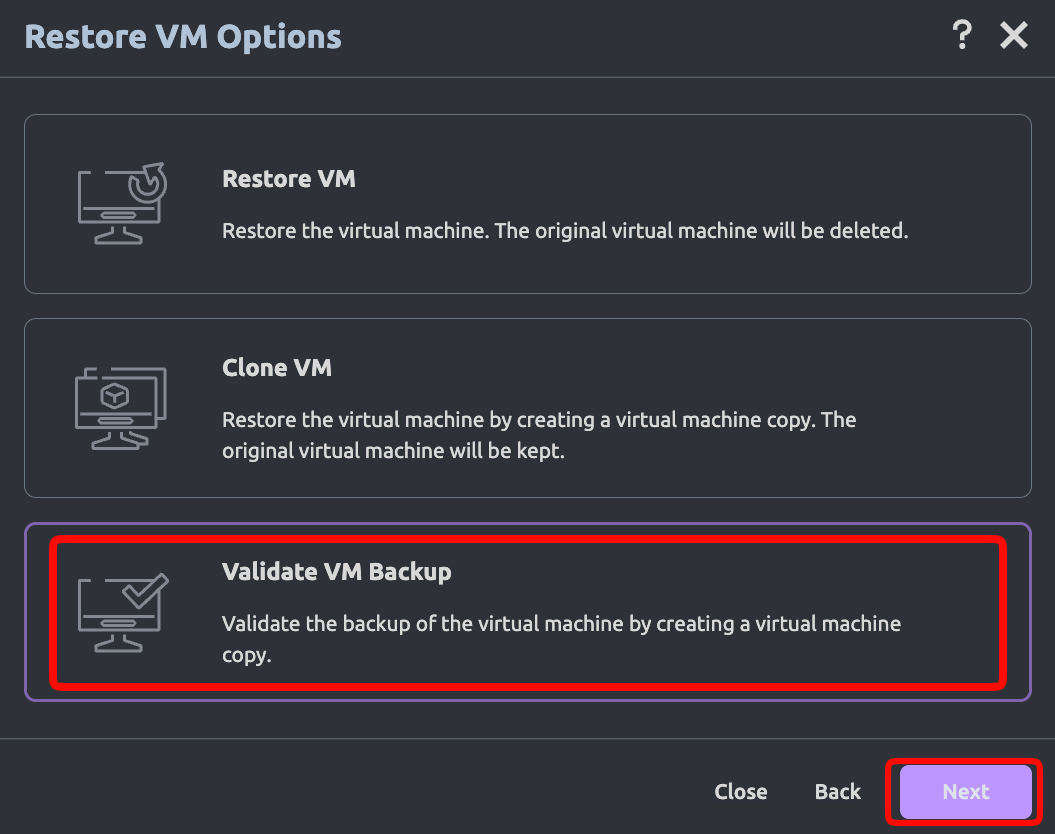
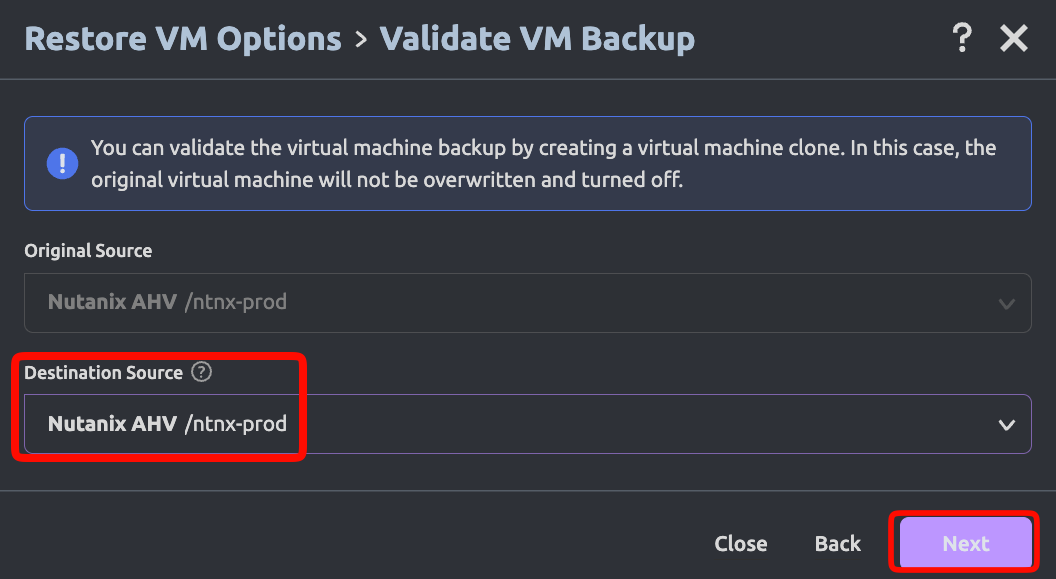
In our example we are going to click Validate VM Backup. Click Next.
Select your Nutanix AHV hypervisor as the Destination Source. Click Next.
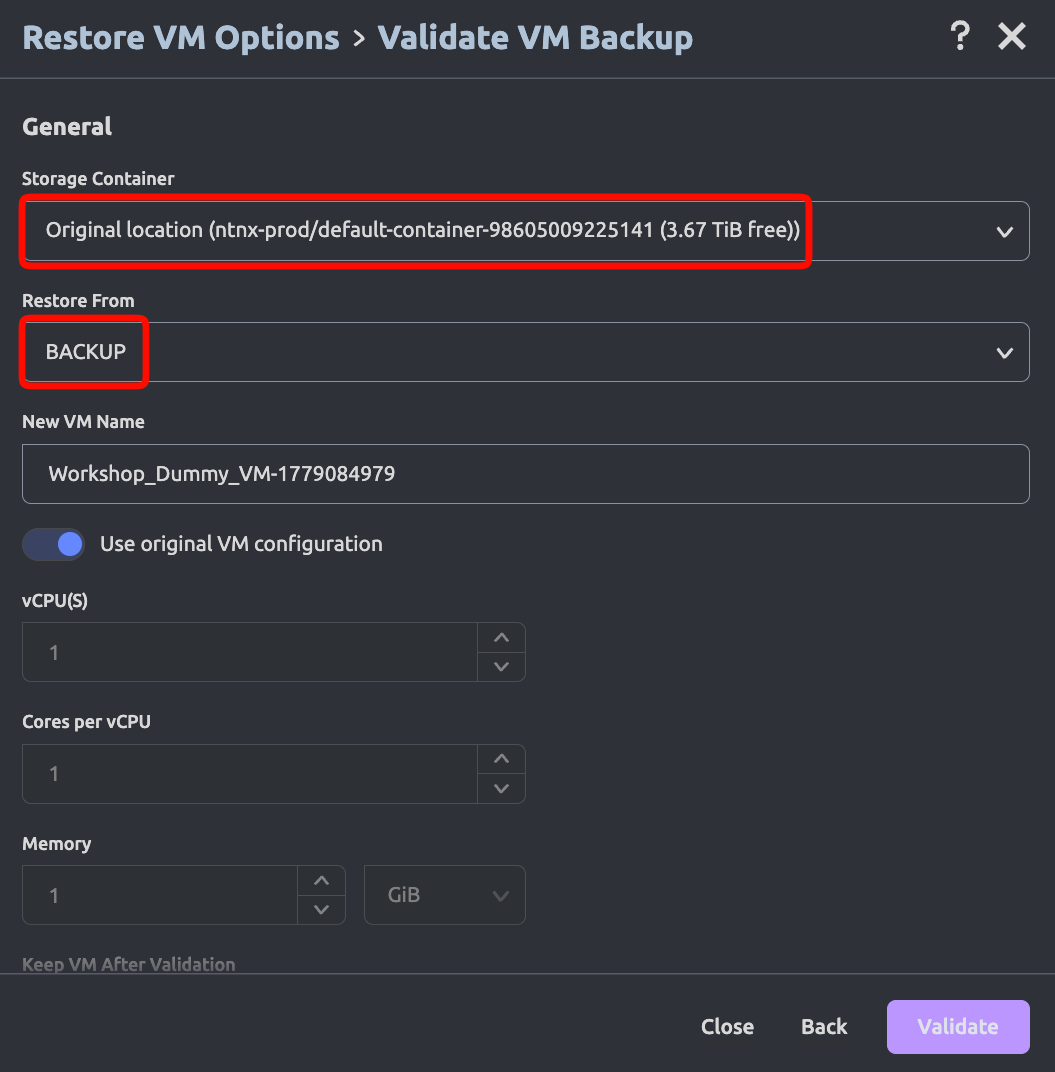
Select the appropriate Storage Container for your environment and select BACKUP in the Restore From field. Scroll down.
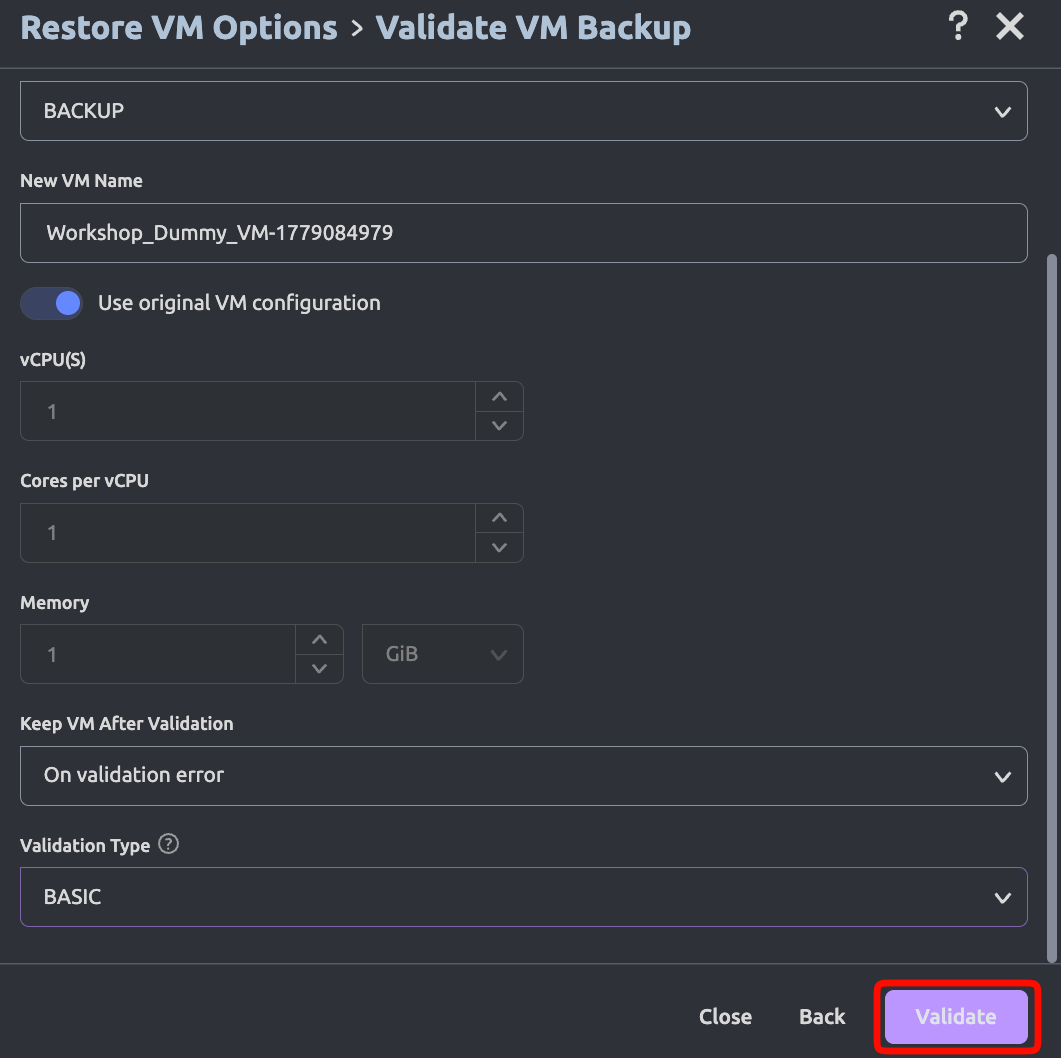
Select the appropriate Validation Type. Click Validate.
Enabling Immutable Backups
You can use Wasabi’s Object Lock feature to make your backups immutable. To protect the backups from ransomware events, this implementation uses Wasabi's Object Lock, which means the retention mode setting and the required retention period are set on Wasabi and extended by HYCU to match the retention period set in HYCU. For example, if you set bucket-level object retention in Wasabi to 30 days and the retention period in HYCU to 2 months, HYCU will extend the Wasabi retention period to 2 months.
HYCU manages object-level retention through a scheduled WORM (Write Once, Read Many) maintenance job that runs every 24 hours. Instead of waiting for a WORM lock to expire, this job proactively checks each locked object and extends the lock if expiration falls within a configurable threshold. Each maintenance cycle extends the WORM lock by 30 days or until the restore point’s expiration date, whichever is sooner. This ensures the lock is never extended further than necessary and remains aligned with your HYCU retention policy.
For additional information, see HYCU WORM-Enabled Buckets Consideration.
HYCU supports Compliance and Governance retention modes of Object Lock. For more information, refer to Object Lock: Setting for a Bucket or Object.
Wasabi recommends using Compliance mode to ensure that data cannot be modified or deleted by any user (including the root user) until the retention policy has elapsed.
To make your HYCU backups immutable with Wasabi, follow the instructions below.
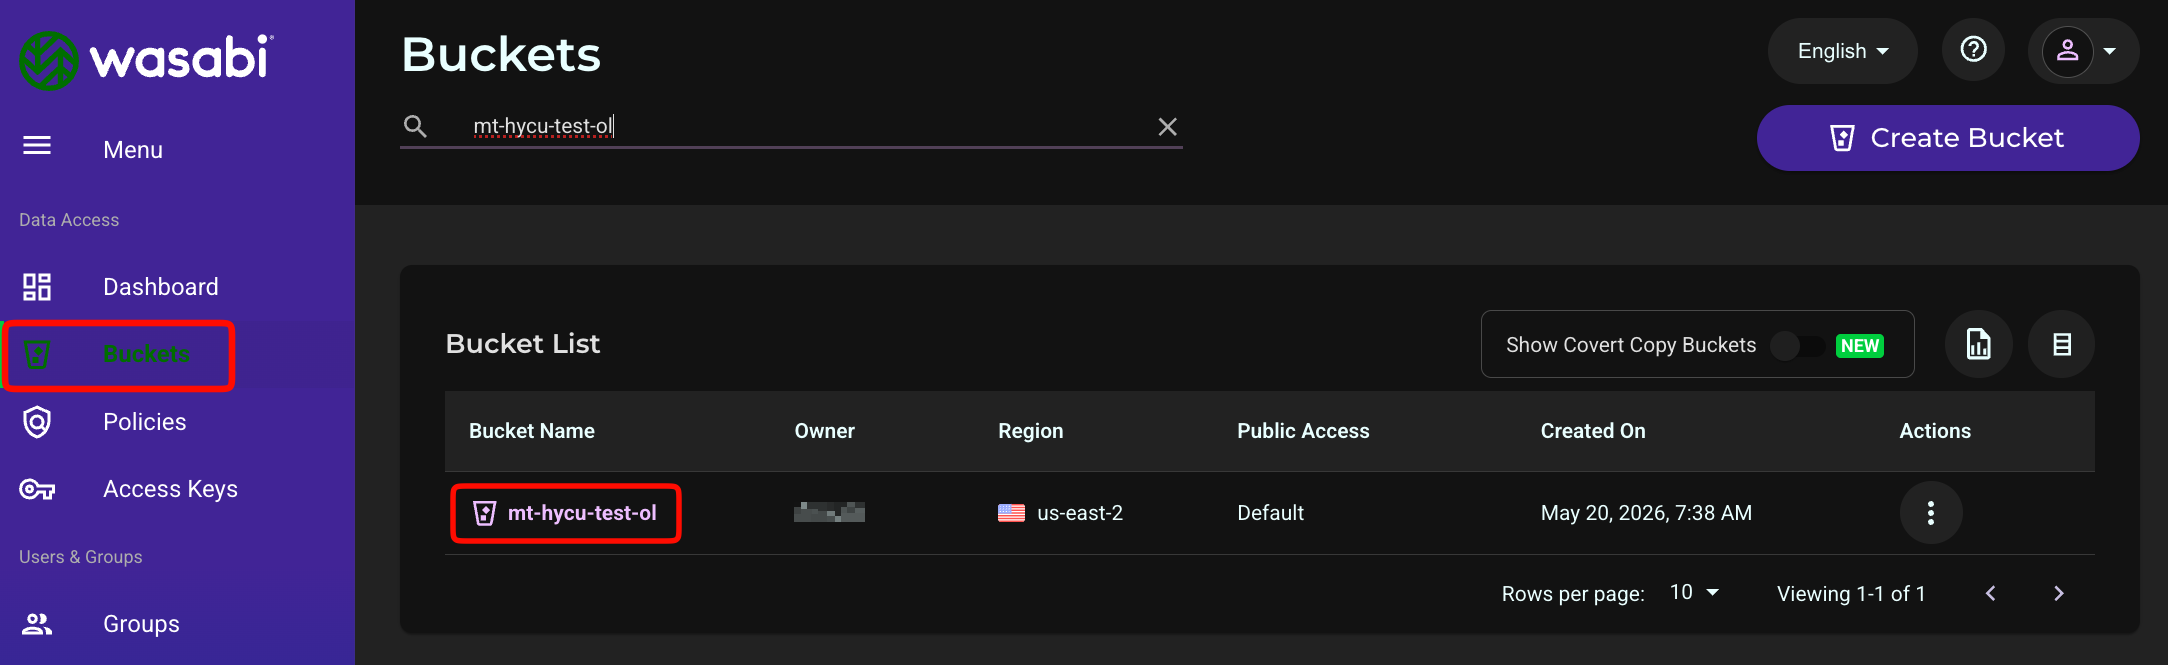
Log in to the Wasabi Console (console.wasabisys.com) and create an Object Lock-enabled bucket. Enabling Object Lock on the bucket must be performed at the time of bucket creation.
Click Buckets and click the name of your bucket.
Click the gear icon.
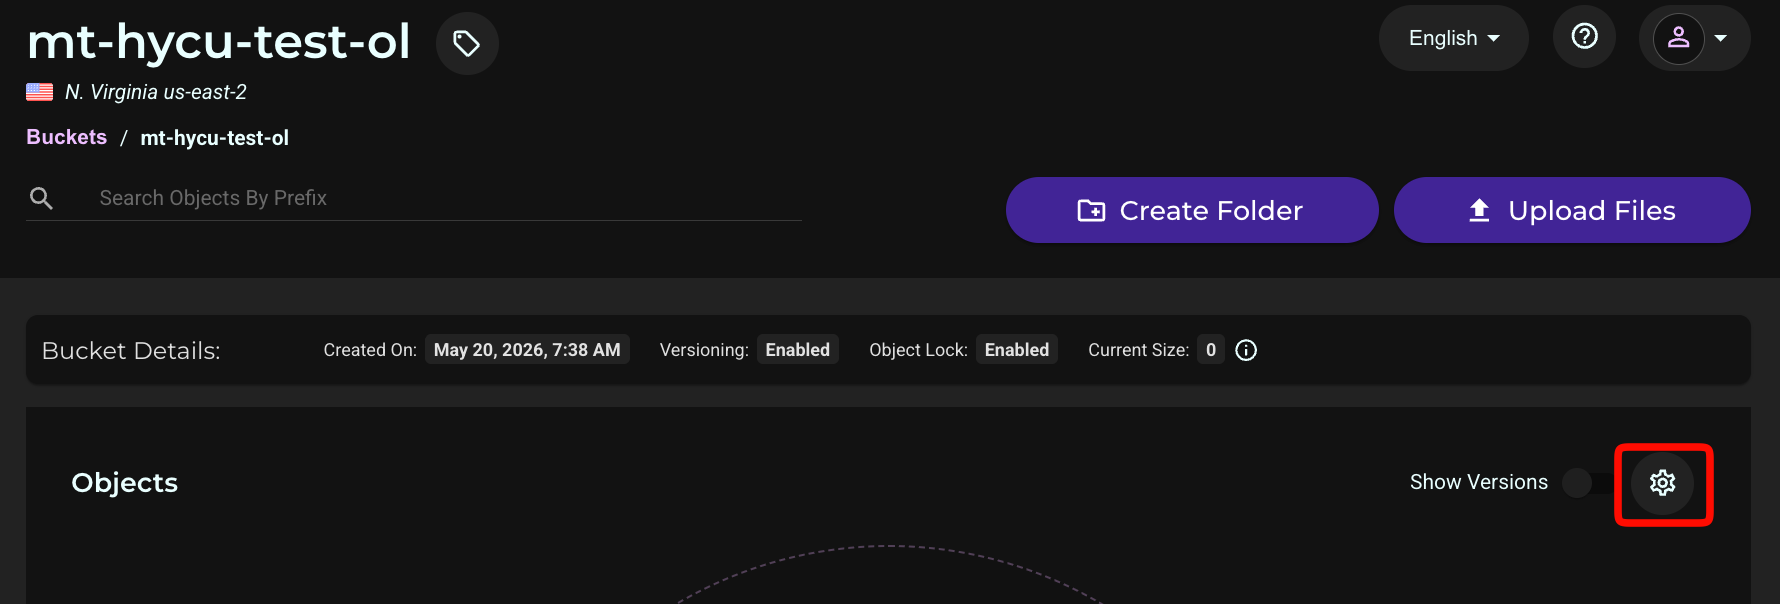
Select the Object Lock tab.
.png)
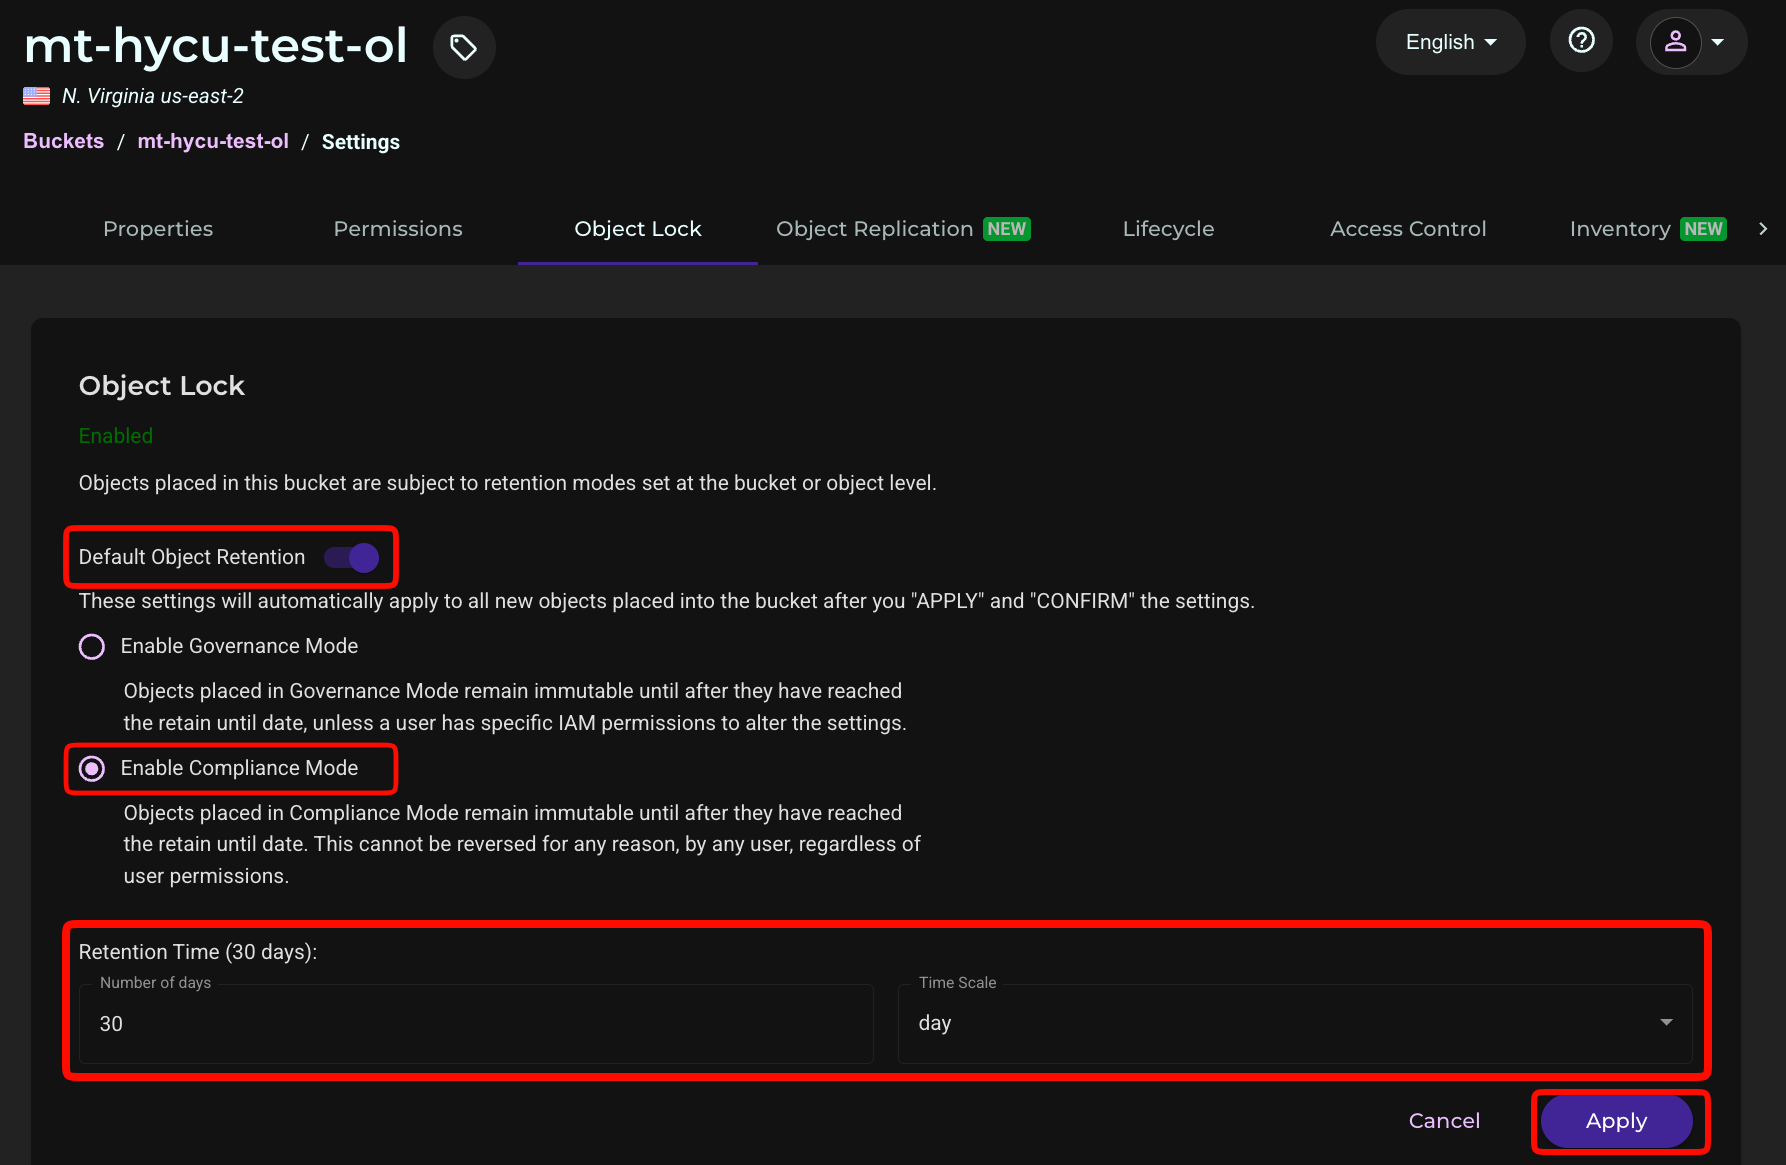
Enable Bucket-level Object Retention. Select Enable Compliance Mode. Set the retention period (in our example, the retention period is 30 days). Click Apply.
The bucket Retention Time configured in this step must be less than the HYCU retention period that is configured below.
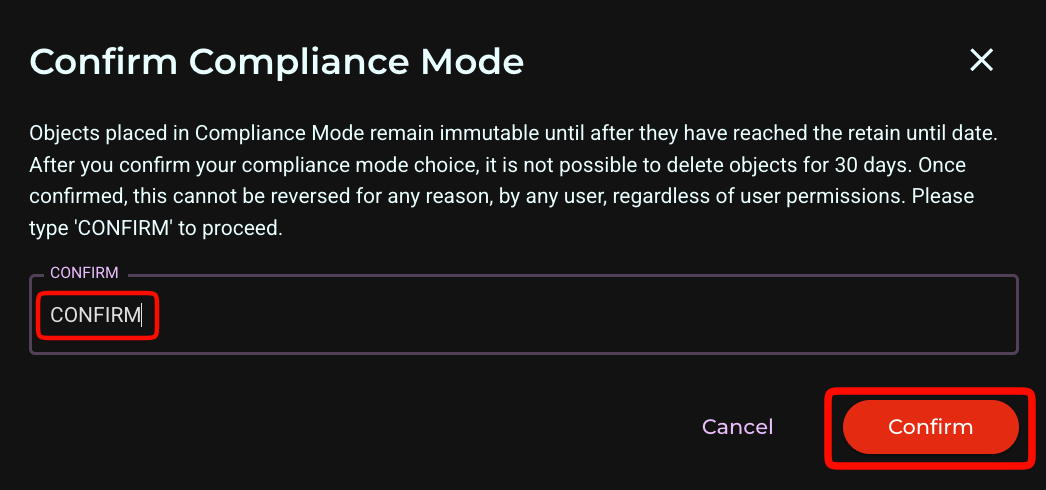
Once you apply the settings, you will be presented with a confirmation box, type CONFIRM. Click Confirm to apply the settings.
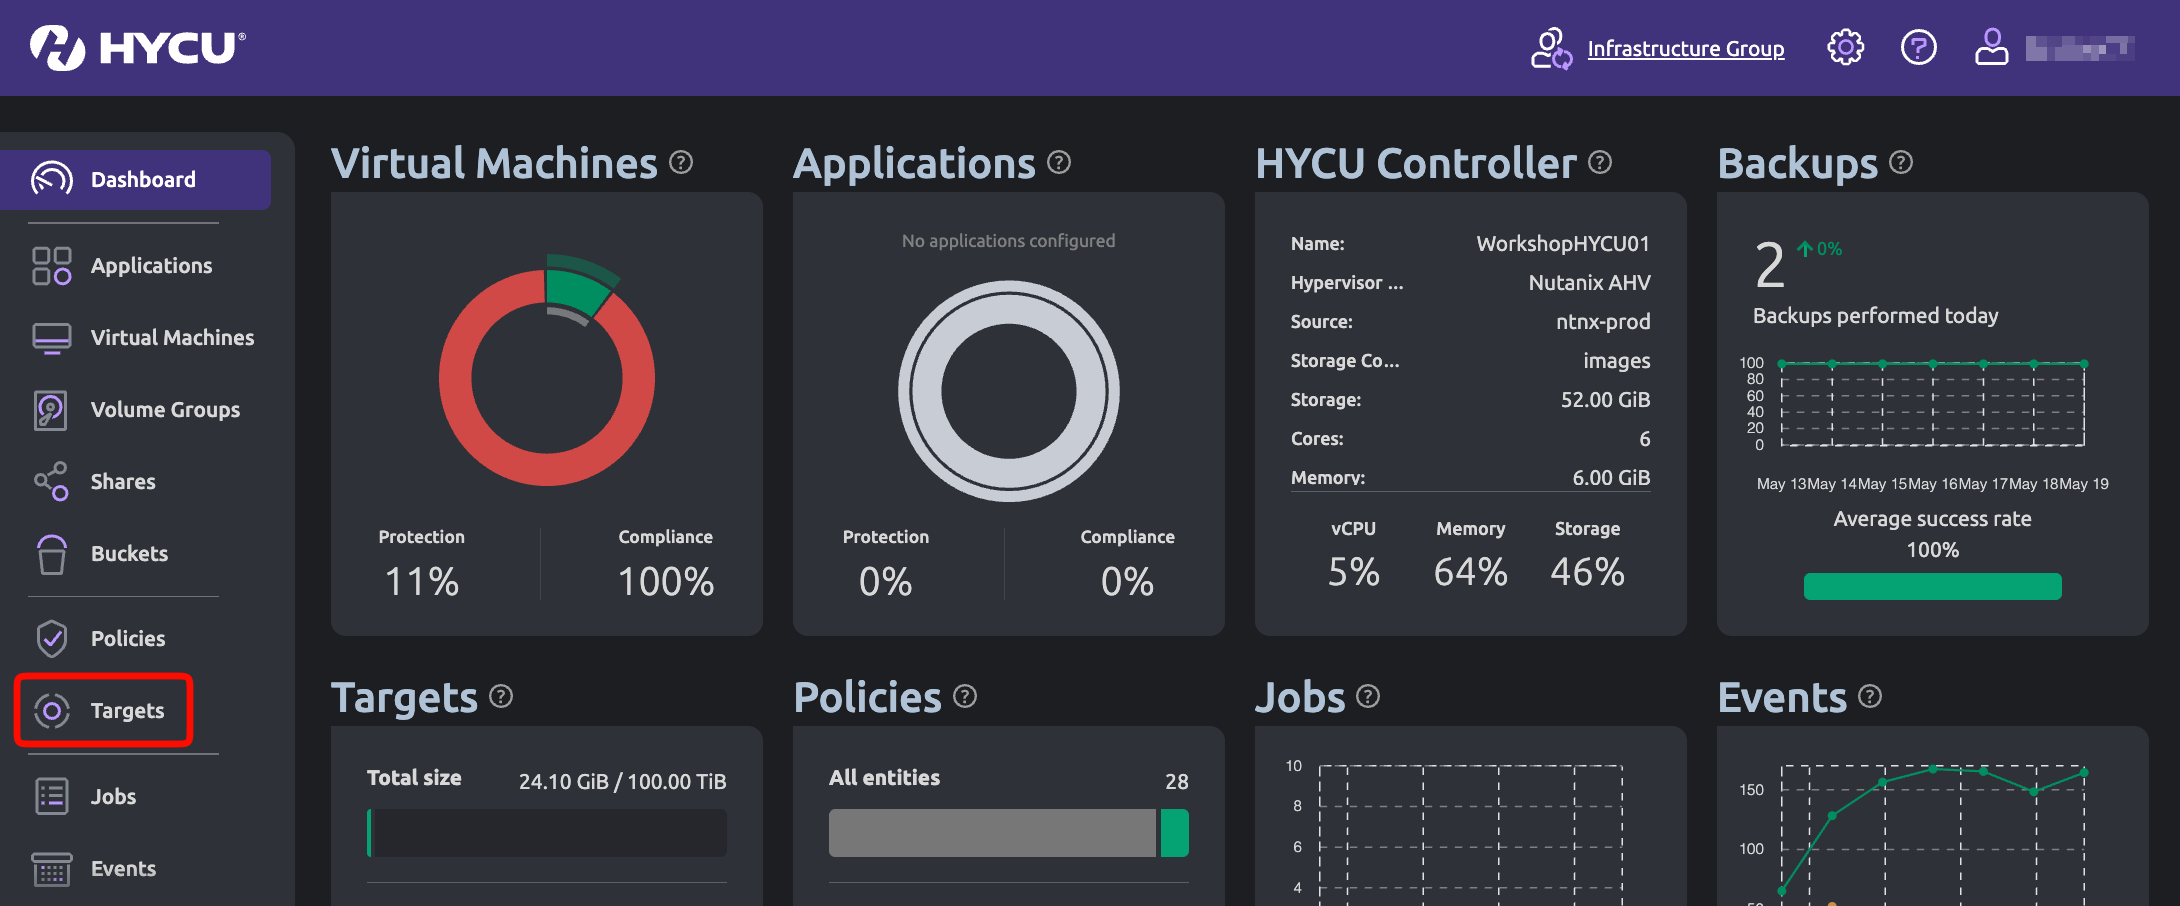
Log in to the HYCU console. Click Targets.
Click + Add.

Select AWS S3 / S3 Compatible. Click Next.
Provide a name for the target. Click Next. We used Wasabi WORM to match HYCU’s immutability nomenclature of Write Once, Read Many (WORM).
Provide the following and scroll down.
Size—The size of your Wasabi storage you want to allocate to HYCU backups.
Service Endpoint—For example, https://s3.us-east-2.wasabisys.com. Enter the service URL for the region your bucket is in. For more information, review the notes below.
Bucket Name—The name of the bucket you created.
Access Key ID—Wasabi Access Key.
Secret Access Key—Wasabi Secret Key.
This configuration example discusses the use of Wasabi's us-east-2 storage region. To use another Wasabi storage region, refer to Service URLs for Wasabi's Storage Regions.
The HYCU application REQUIRES the service endpoint to be prepended with the transport definition (https).

Disable the Metered target. Click Save.
The Targets tab will now display the newly added Wasabi cloud storage with a lock icon, as Object Lock & Bucket-Level Object Retention Time are configured for the bucket.
To assign the Wasabi target to a policy, navigate to Policies on the left side pane. Select the desired policy. Click Edit.
.png)
Scroll down and expand the Targets drop-down. Select the Wasabi WORM target configured above as the Target and configure the Retention period.
The HYCU Retention period must be greater than the Wasabi bucket Retention Time set above.
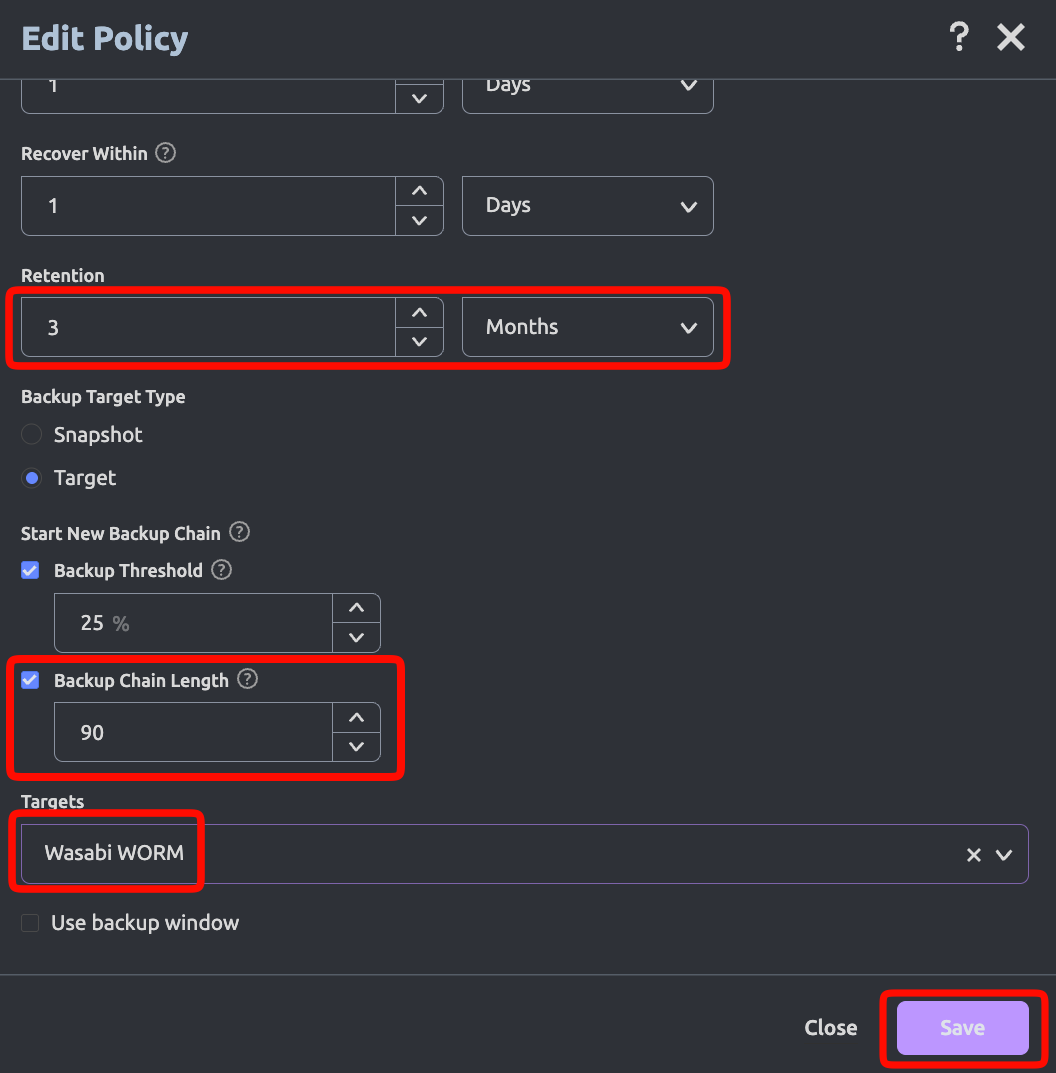
Starting a New Backup Chain Setting
Select when you want a new Backup Chain to be started by selecting Threshold % or Chain Length. You can also select both and whenever the first value is exceeded a new chain will be started.
This setting can affect the size of your buckets and your storage usage.
Backup Threshold—A new backup chain is started when the percentage of the data changes since the last full exceeds the specified value. The default value is 25% This can lead to more Full backups during your specified retention period and increased storage.
Backup Chain Length—A new backup chain is started when the number of full and subsequent incremental backups in a chain exceeds the specified value. The default value is 7.
The ideal Backup Chain Threshold or Chain Length setting can depend on multiple factors, such as Retention Policy, RTO, Storage Capacity, and Data Change Rate. Please consult with HYCU Support to further optimize these settings based on your environment variables.
Click Save.
Next, assign the policy to the virtual machines that need protection. Navigate to Virtual Machines on the left side pane. Select the required Virtual Machines. Click Set Policy and select the policy configured in this section above.
.png)
In the Set Policy window, select the desired policy (Bronze in our example). Click Assign.
All the backups written to the backup target will now be immutable.