QNAP Hybrid Backup Sync 3 (HBS 3) has been validated for use with Wasabi. For information on how HBS 3 works with Wasabi, refer to QNAP. Follow the steps below to configure Wasabi as a backup destination and to restore data from Wasabi.
The data restoration process is handled by your specific backup software application. As there are many potential variables that will affect your unique environment, it is strongly recommended that you seek the guidance of your backup software's technical support team in the event that you encounter difficulty or have application-specific inquiries.
Requirements
Active Wasabi Cloud Storage account (see Create a Wasabi Account).
Wasabi bucket. Using Object Lock on your bucket is highly recommended from a security perspective so your data will be immutable. For more information, review Working With Buckets and Objects. This guide covers creating the bucket directly from within HBS 3.
Access Key and Secret Key. For more information, review Creating a User Account and Access Key.
QNAP NAS with HBS 3 Hybrid Backup Sync installed and licensed. This solution was tested with HBS 3 version 26.3.0.226 and QuTScloud version c5.2.4.3041.
Configuring a Wasabi Storage Space
Before creating a backup job, connect your Wasabi account to HBS 3 by adding it as a Storage Space. A Storage Space stores your Wasabi credentials and can be reused across multiple backup jobs.
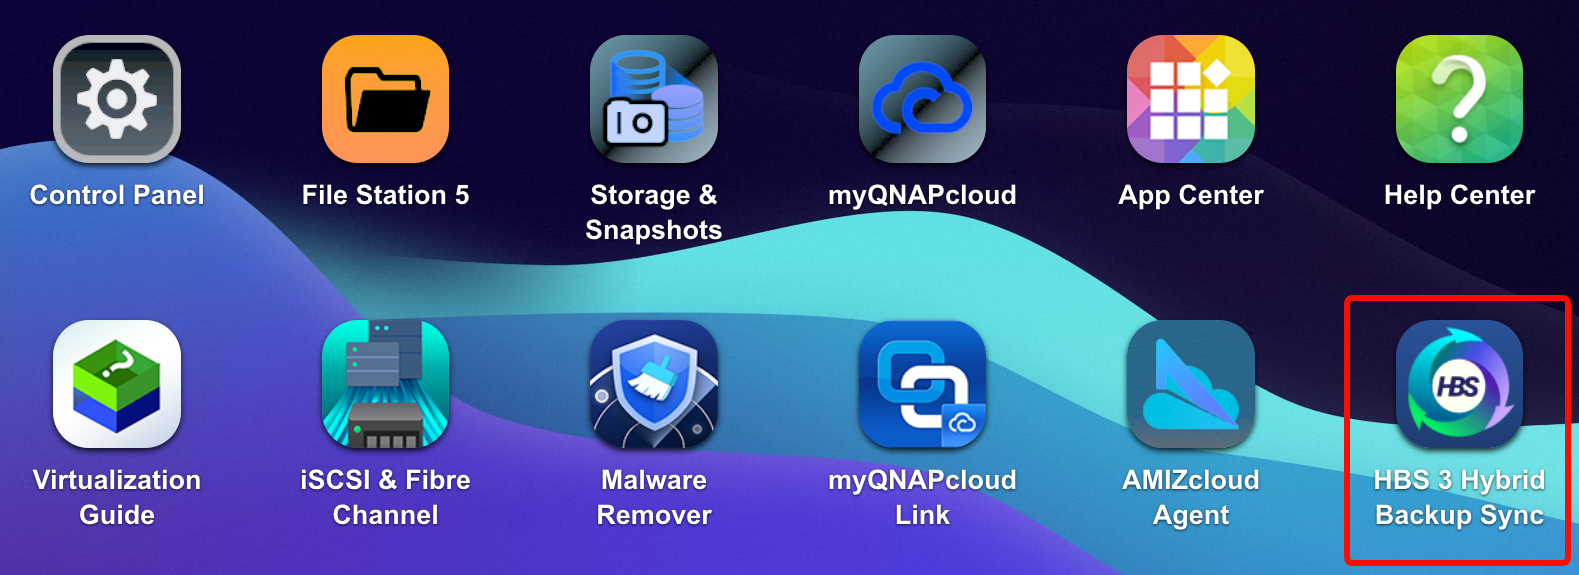
Open HBS 3 Hybrid Backup Sync from the QNAP NAS console.
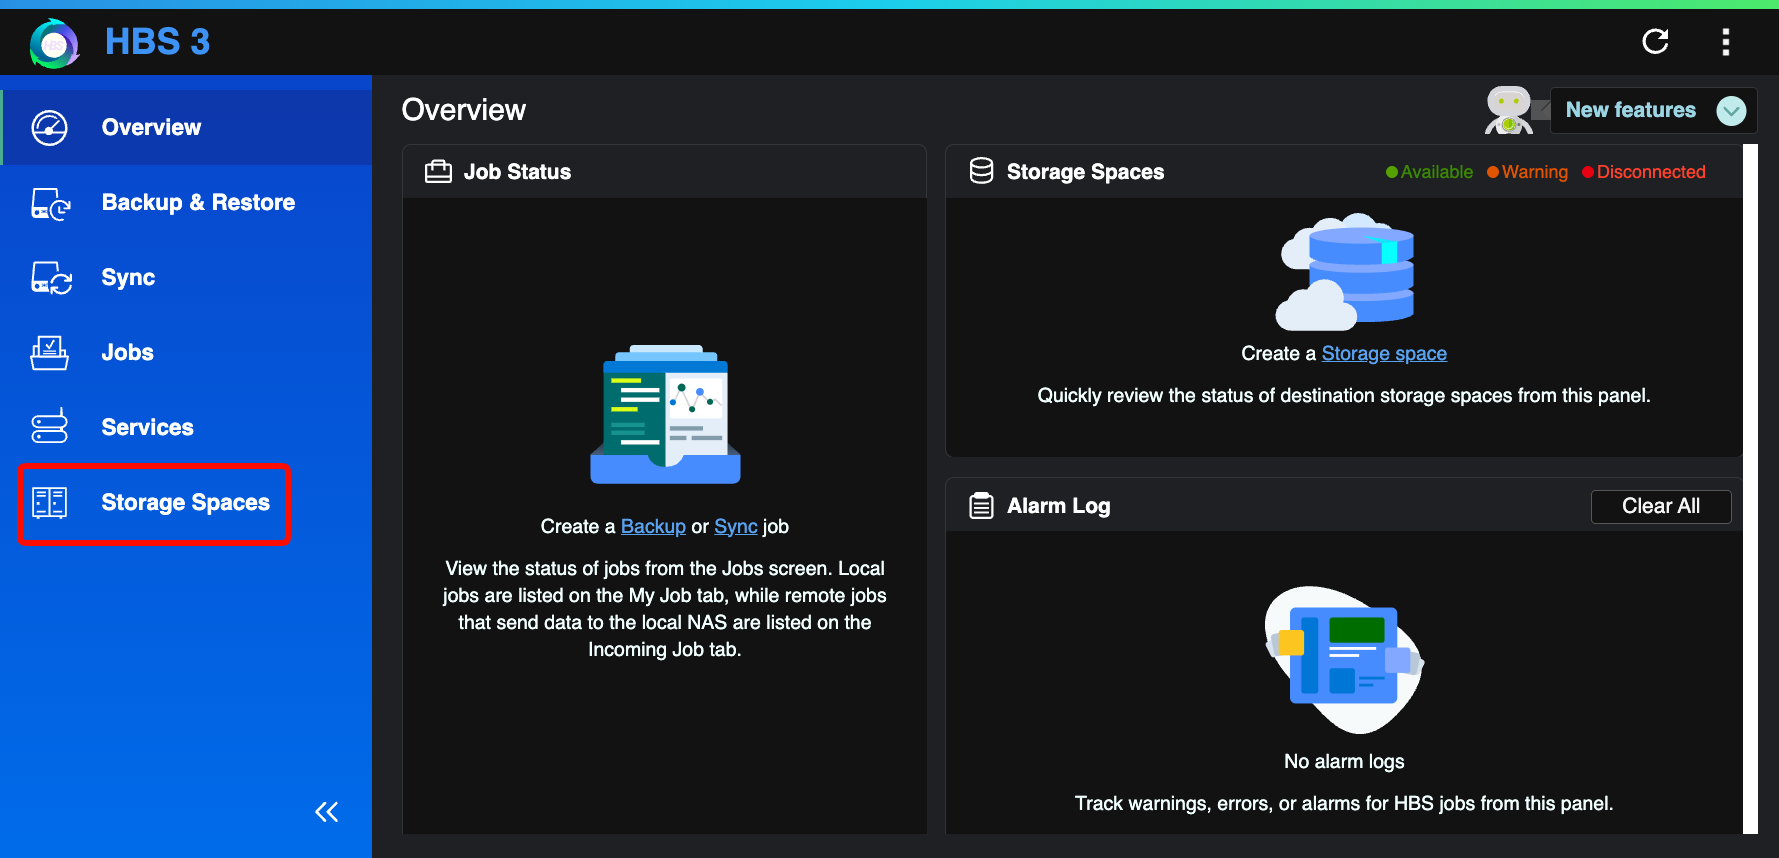
In the left navigation panel, click Storage Spaces.
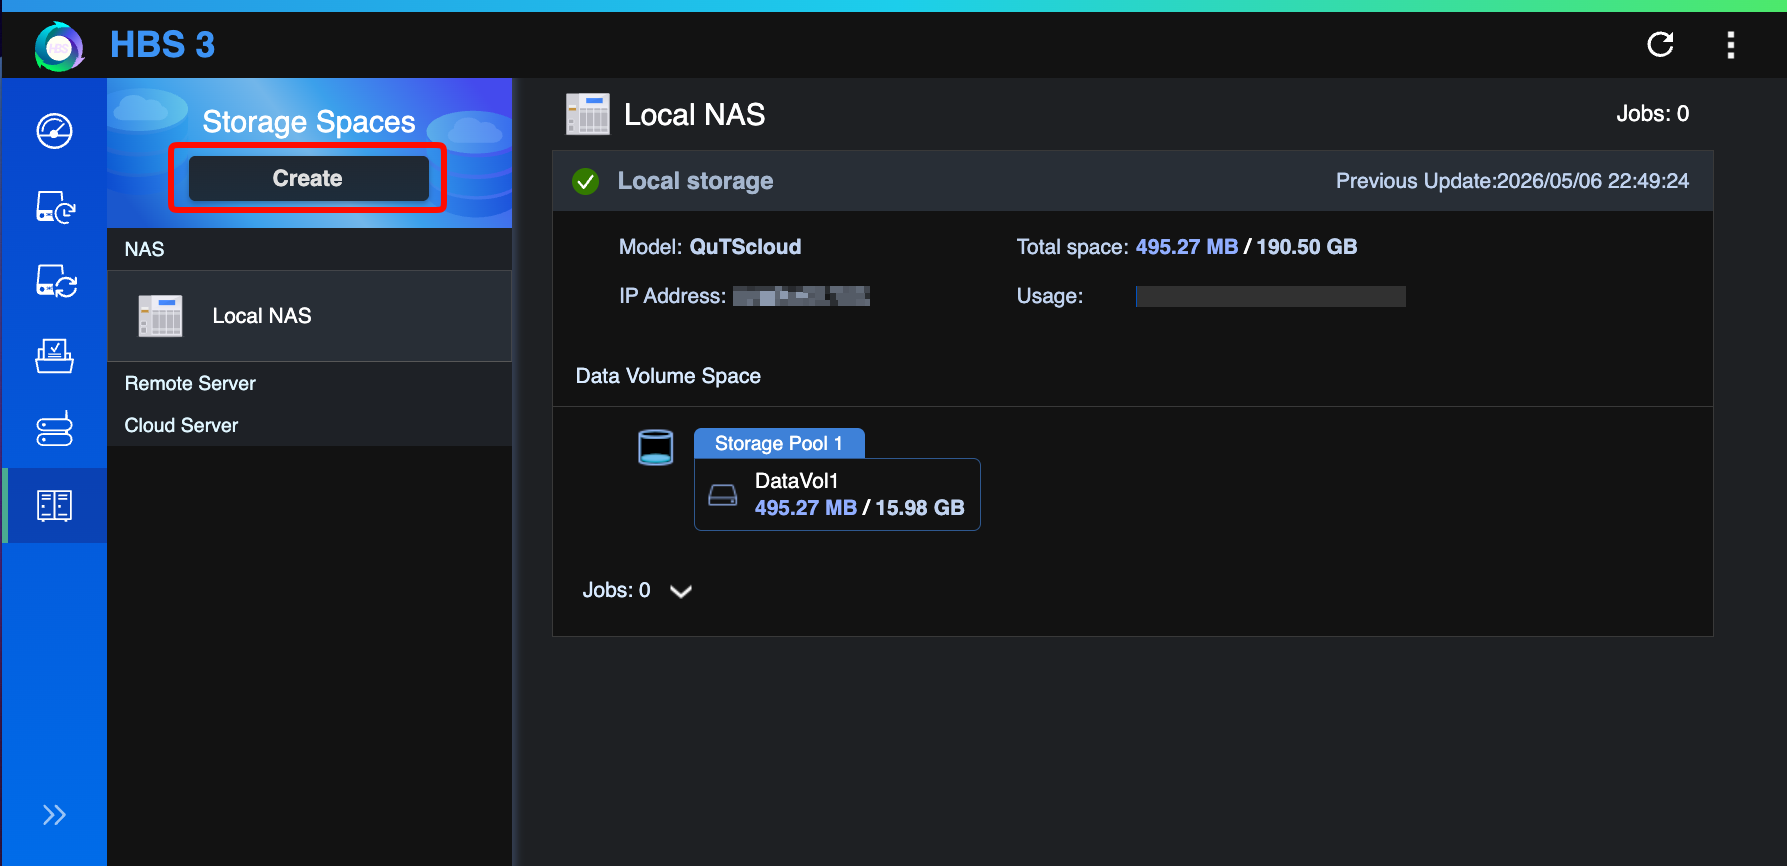
Click Create.
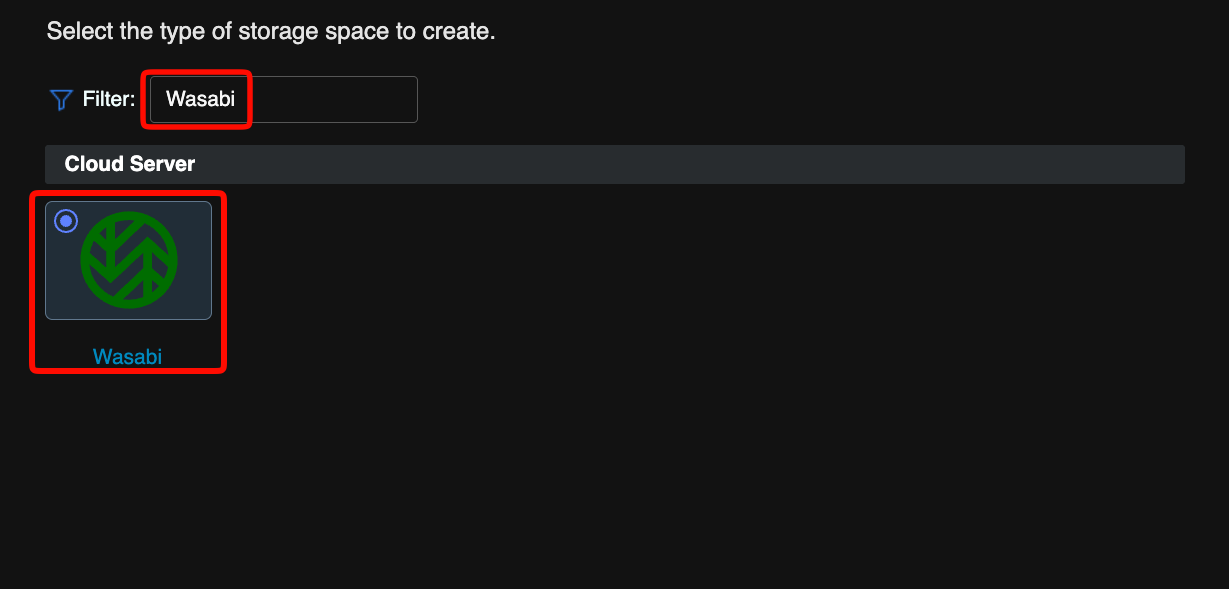
In the Filter field, type Wasabi. Select the Wasabi tile.
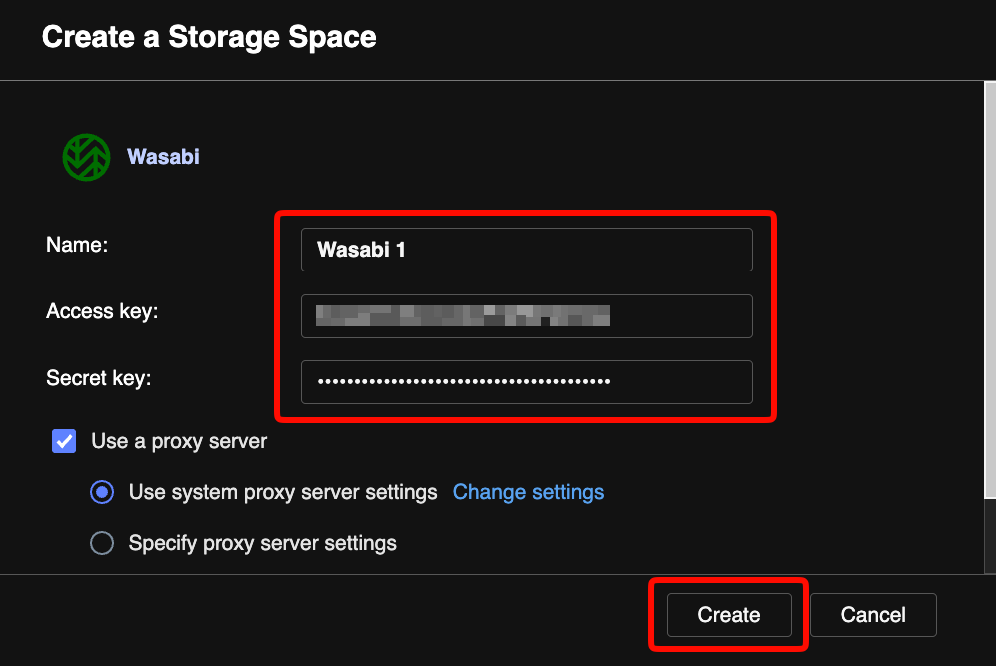
In the Create a Storage Space dialog, enter the following information. Click Create.
Name—A friendly name for this storage space (for example, Wasabi 1).
Access key—Your Wasabi Access Key.
Secret key—Your Wasabi Secret Key.
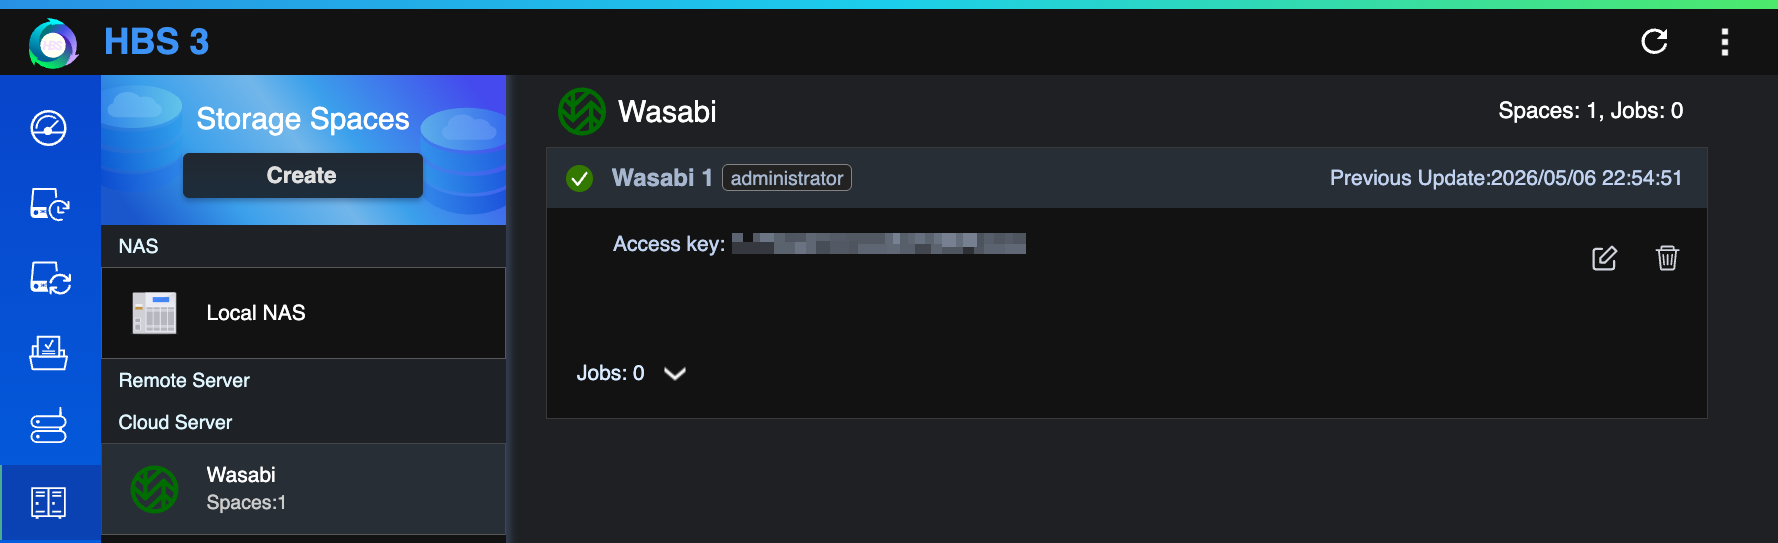
The new storage space appears in the Storage Spaces list with a green checkmark, confirming a successful connection to Wasabi.
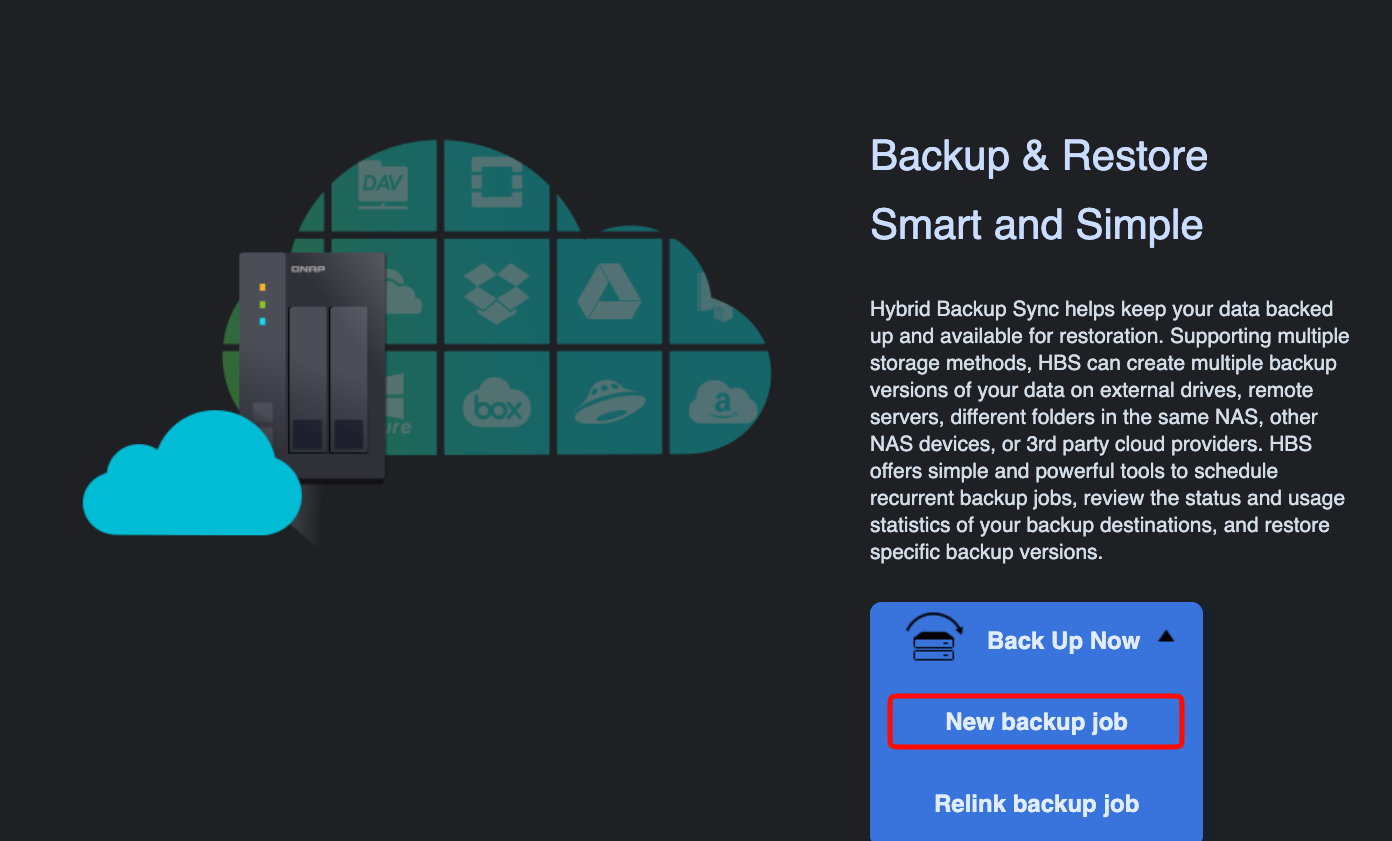
Backing Up to Wasabi
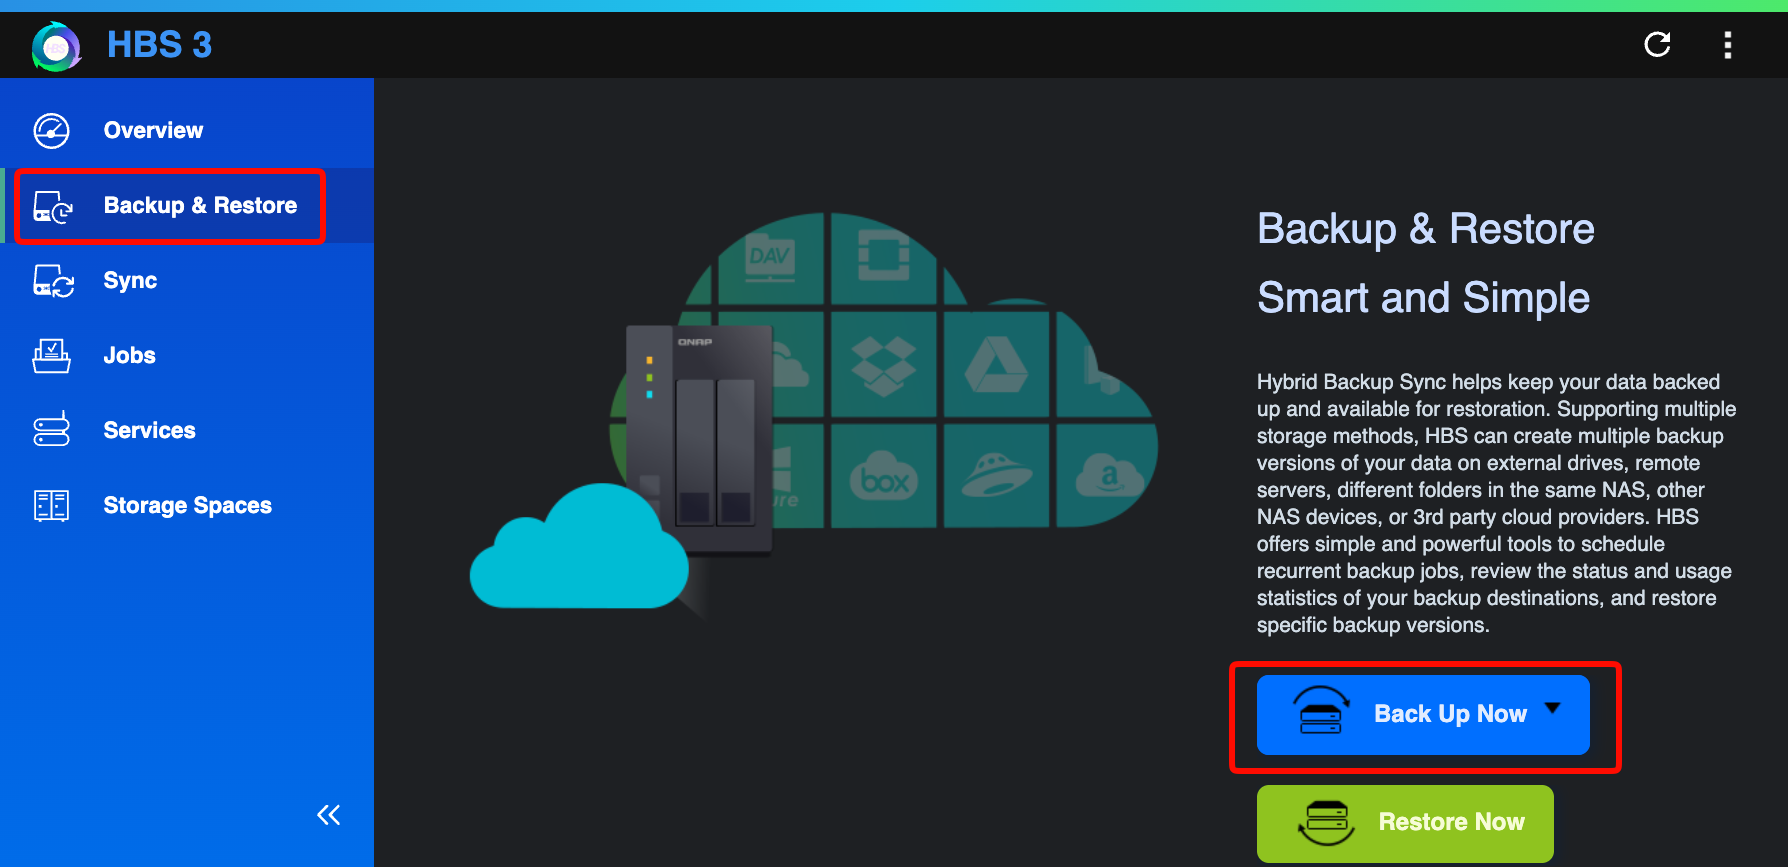
In the navigation panel, click Backup & Restore. Click Back Up Now drop-down arrow.
Select New backup job.
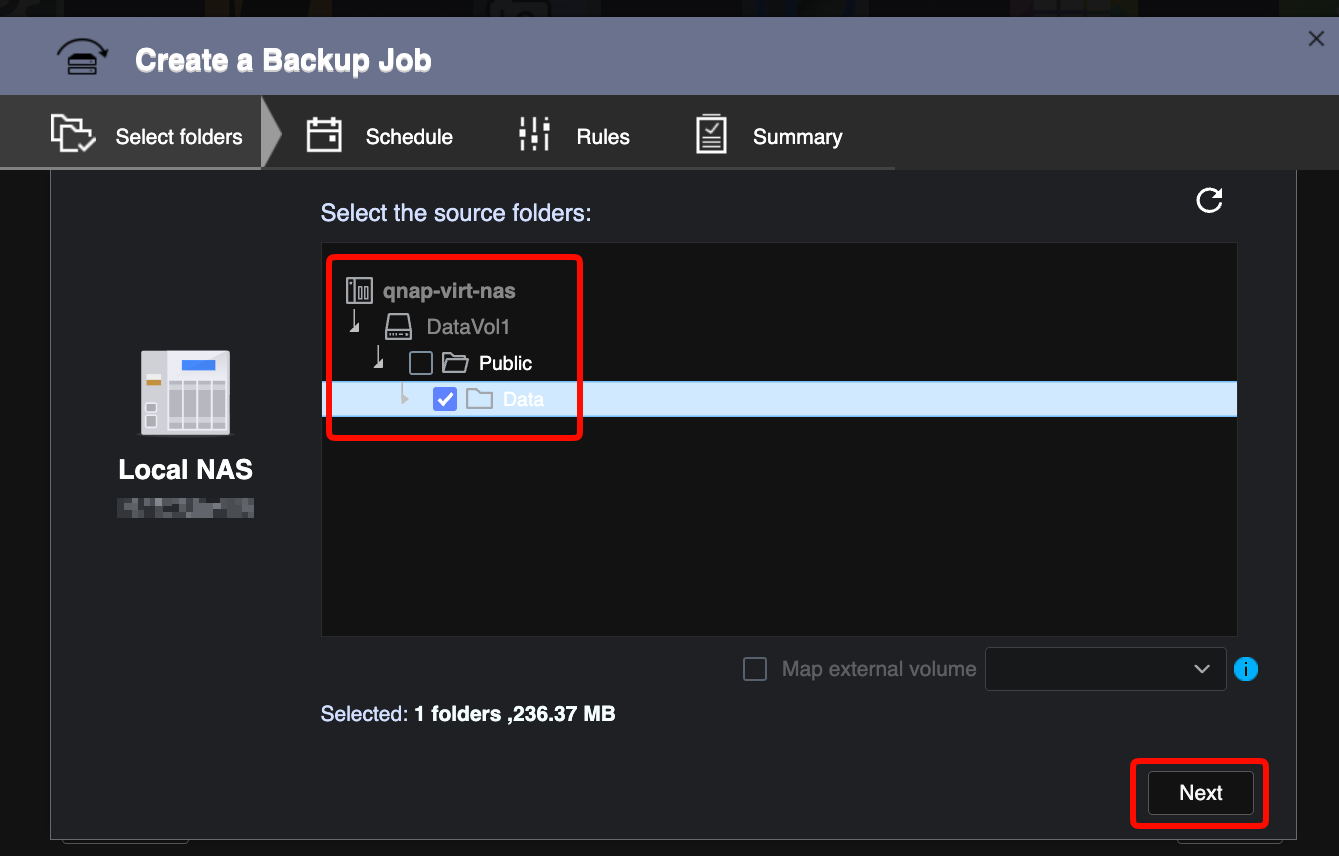
In the Create a Backup Job wizard, under Select the source folders, expand your NAS in the folder tree and check the folders you want to back up. Click Next.
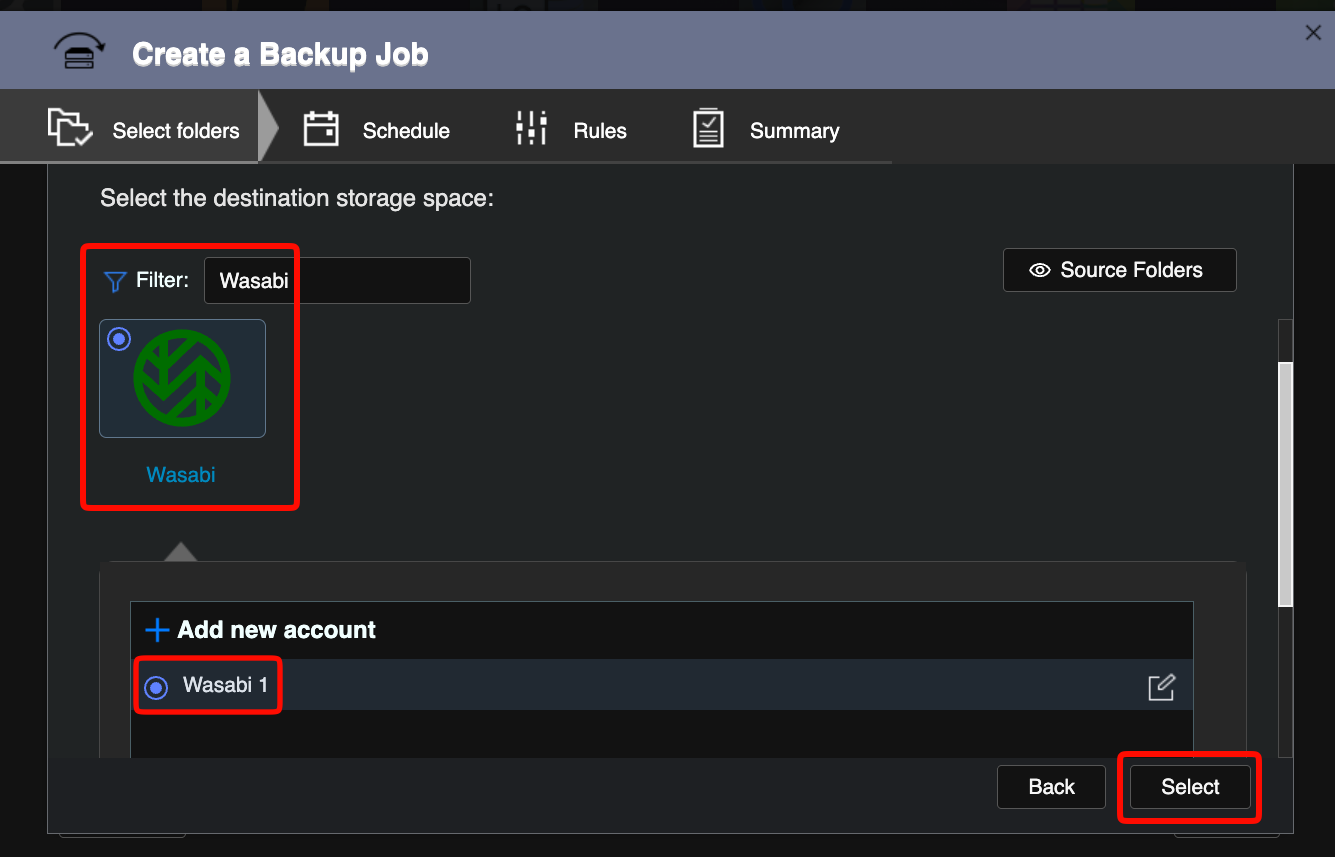
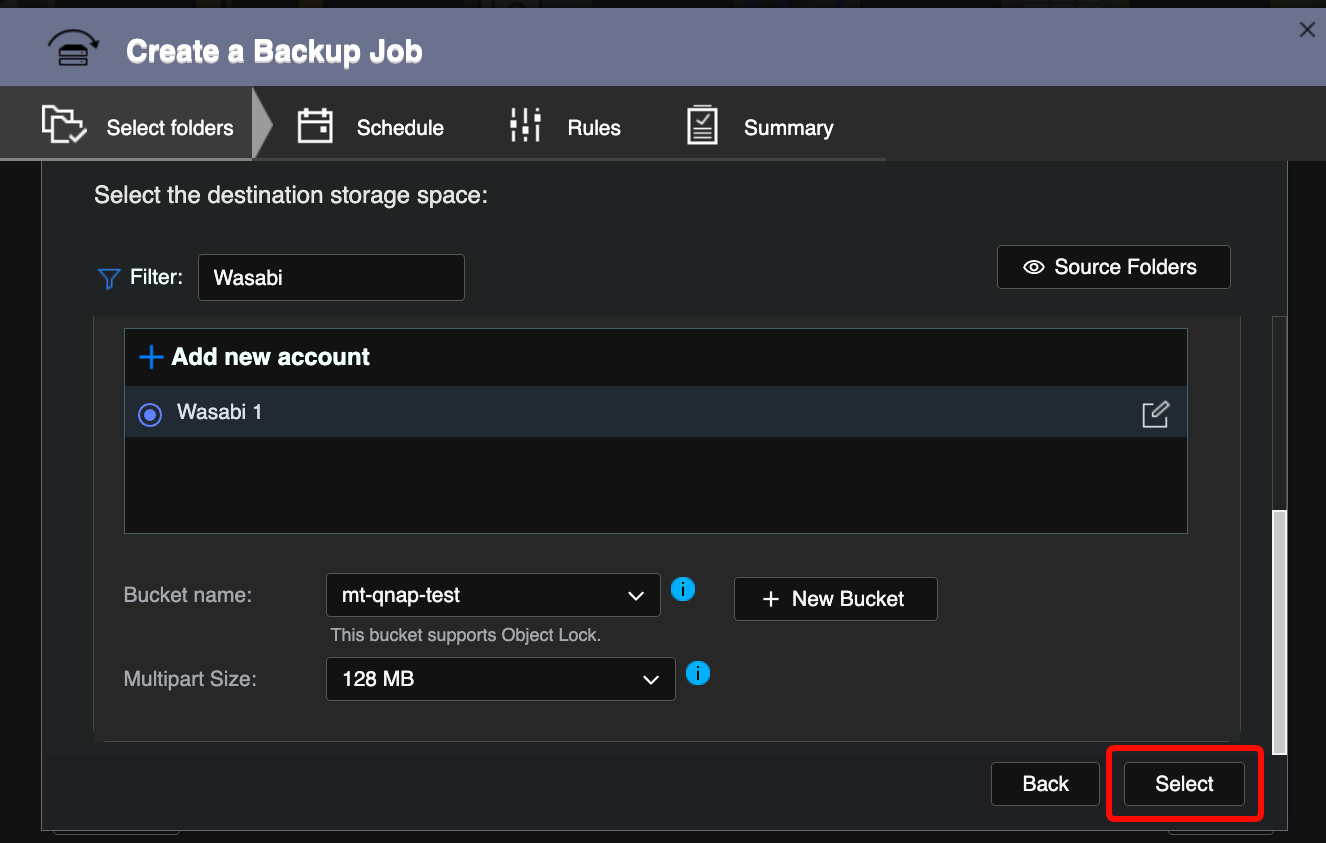
Under Select the destination storage space, type Wasabi in the Filter field. Select the Wasabi tile. Select your Wasabi storage space from the list. Click Select.
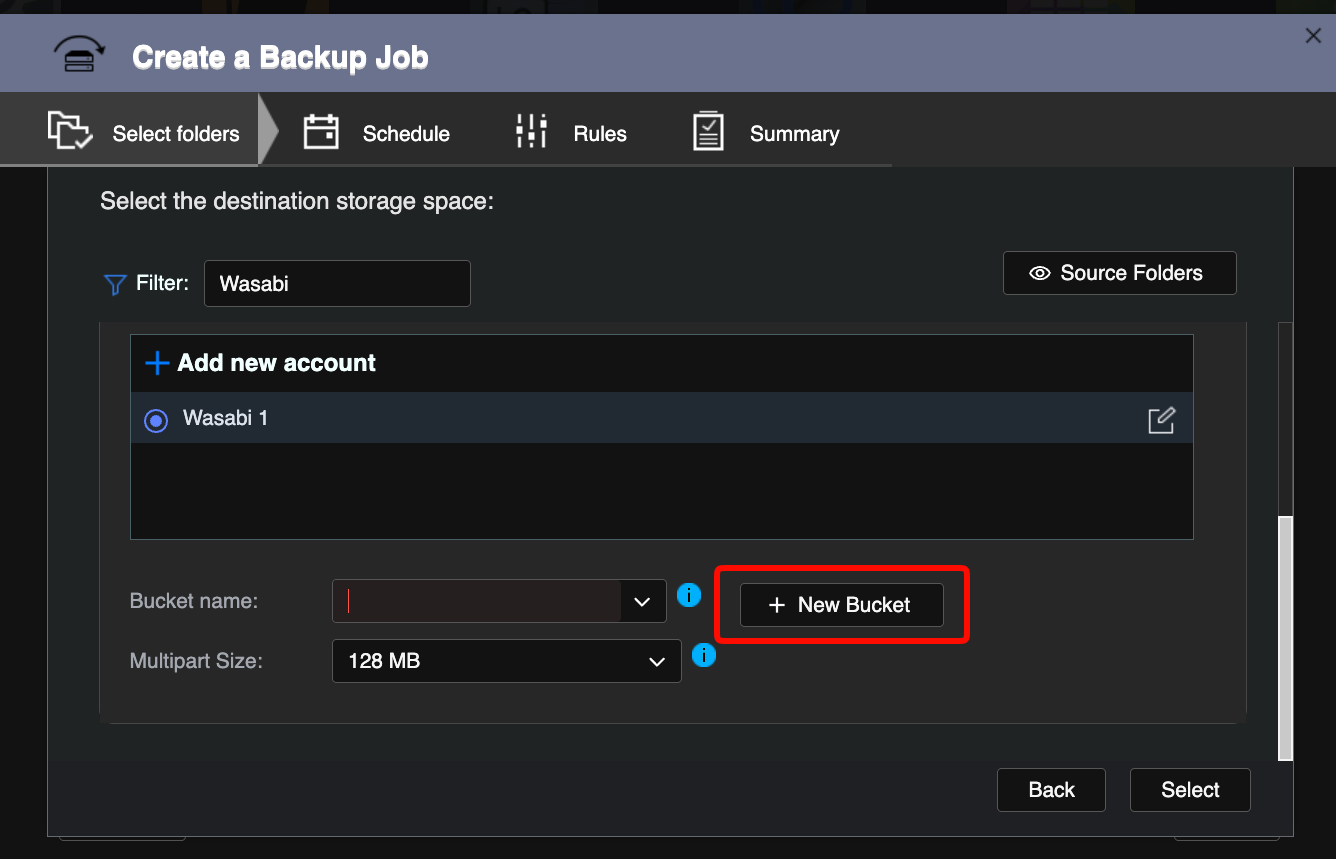
Click + New Bucket to create a new Wasabi bucket.
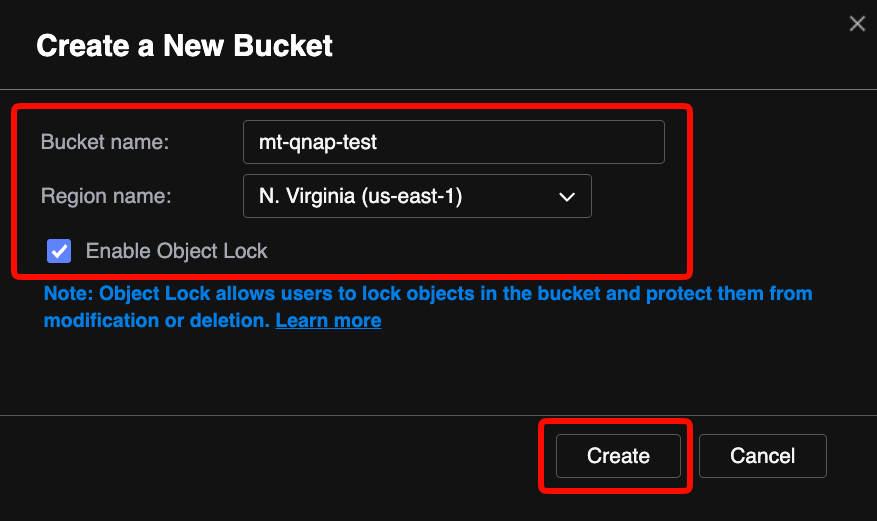
In the Create a New Bucket dialog, enter a Bucket name, and select the Region name. Check Enable Object Lock (this is highly recommended to help prevent accidental or malicious data deletion). Click Create.
This configuration example discusses the use of Wasabi’s us-east-1 storage region. Use the region your bucket is located in or that you wish your bucket to be created in. For a list of regions, see Available Storage Regions.
The new bucket is selected automatically. The message This bucket supports Object Lock is shown below the bucket name. Click Select.
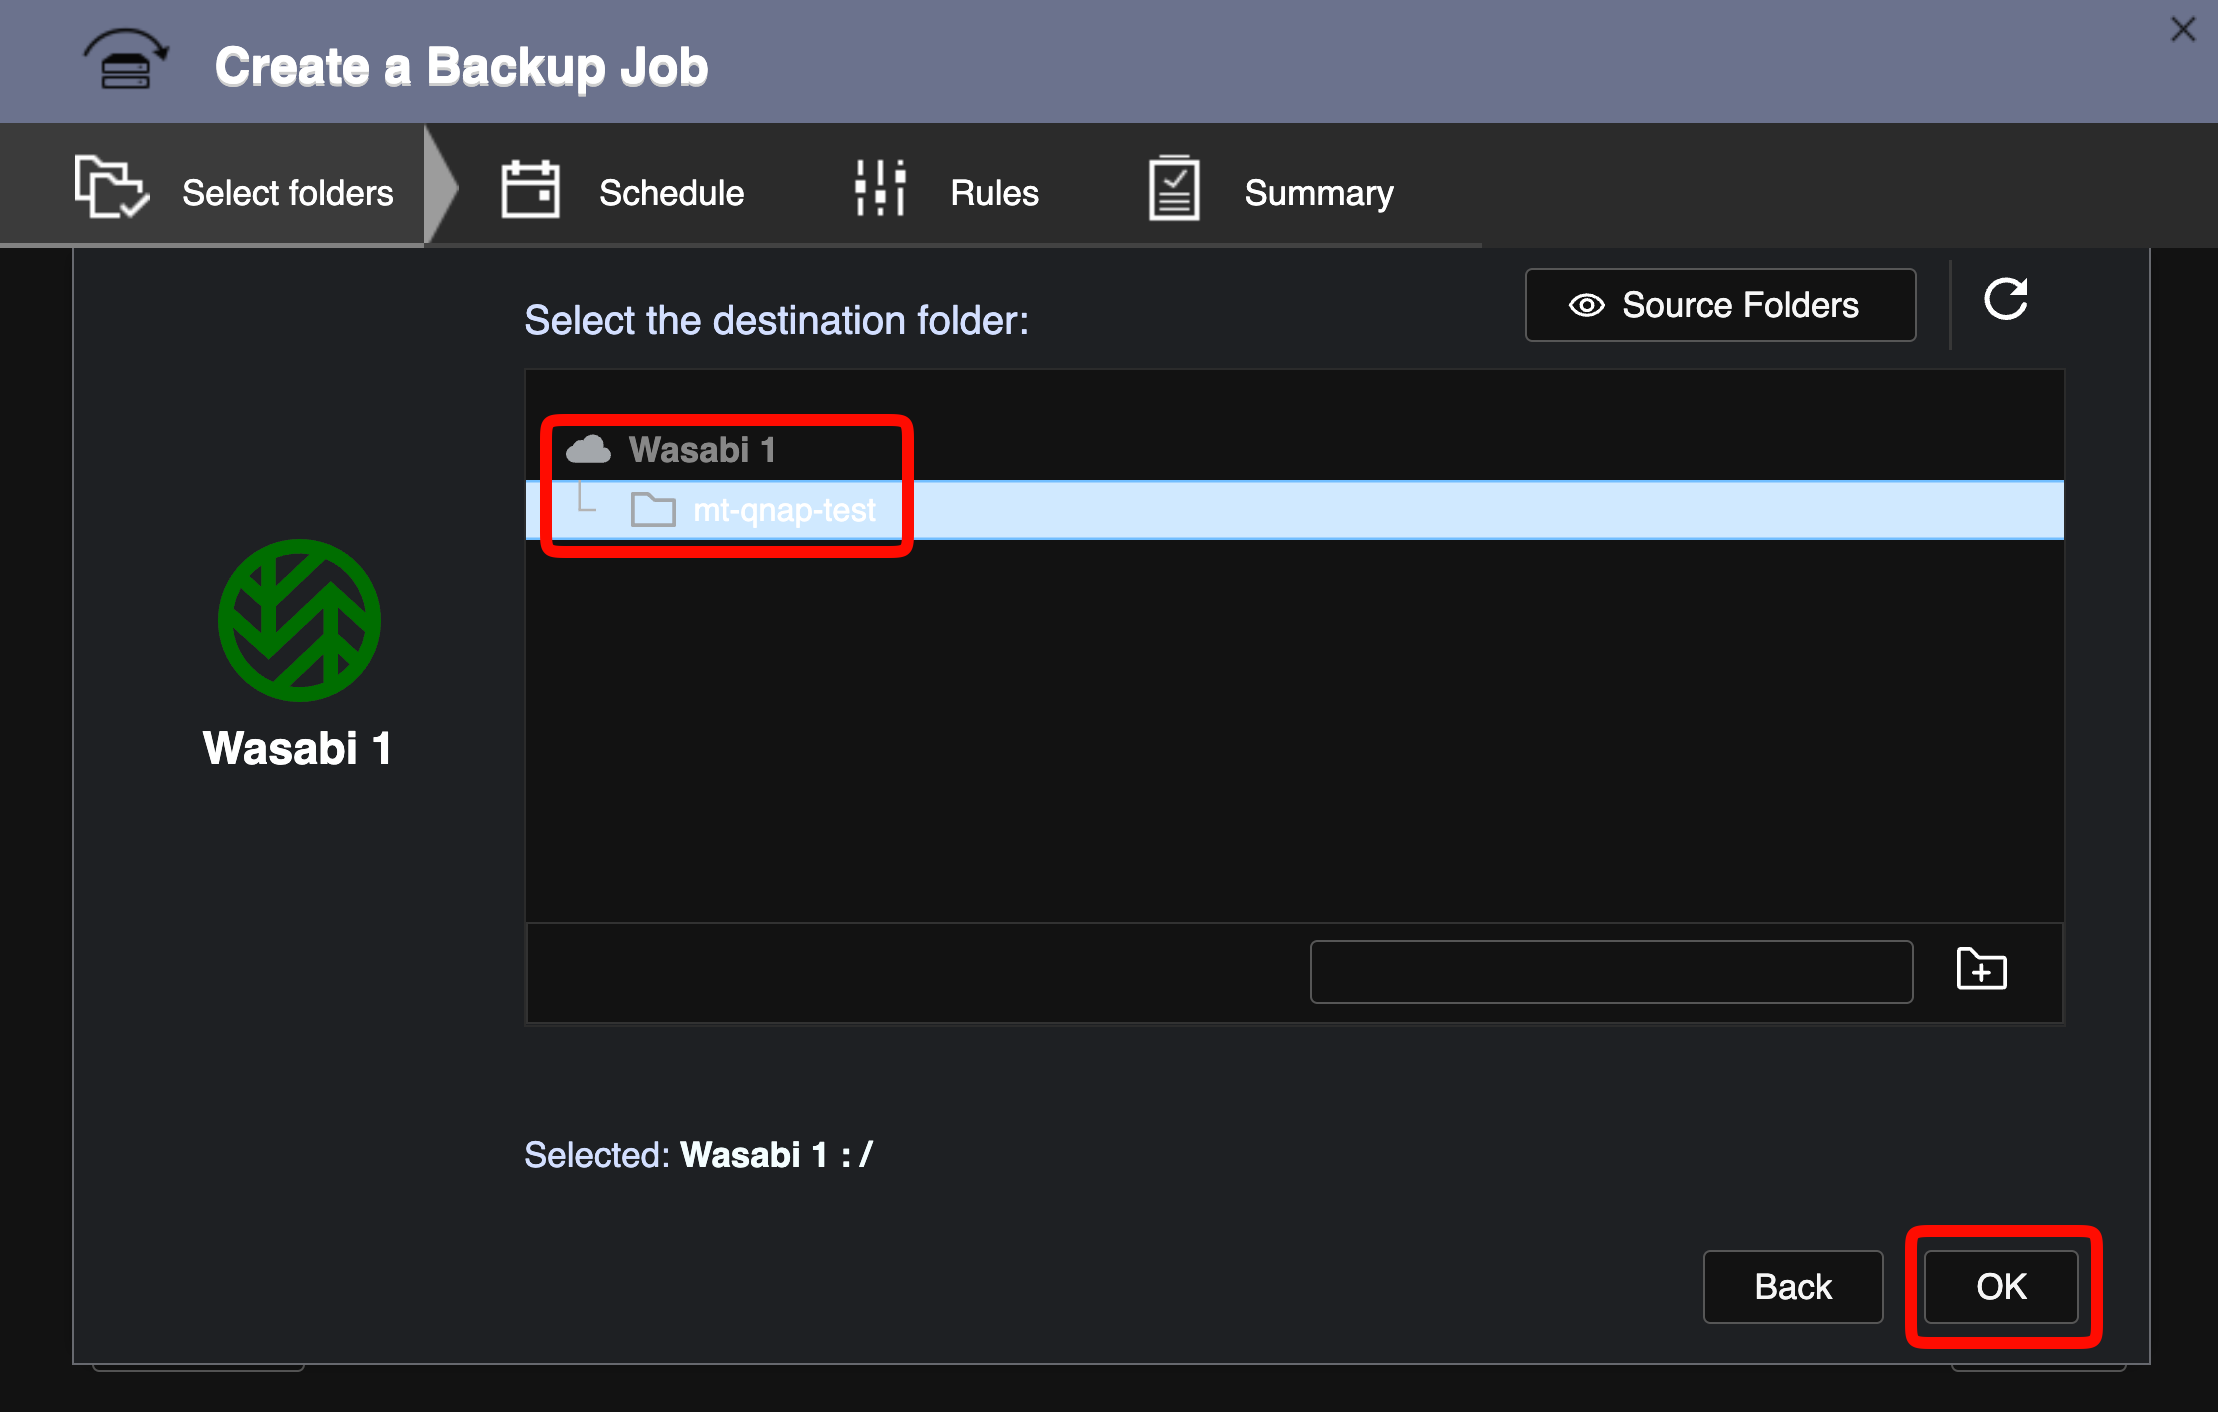
Under Select the destination folder, select the bucket (or a subfolder within it) as the destination. Click OK.
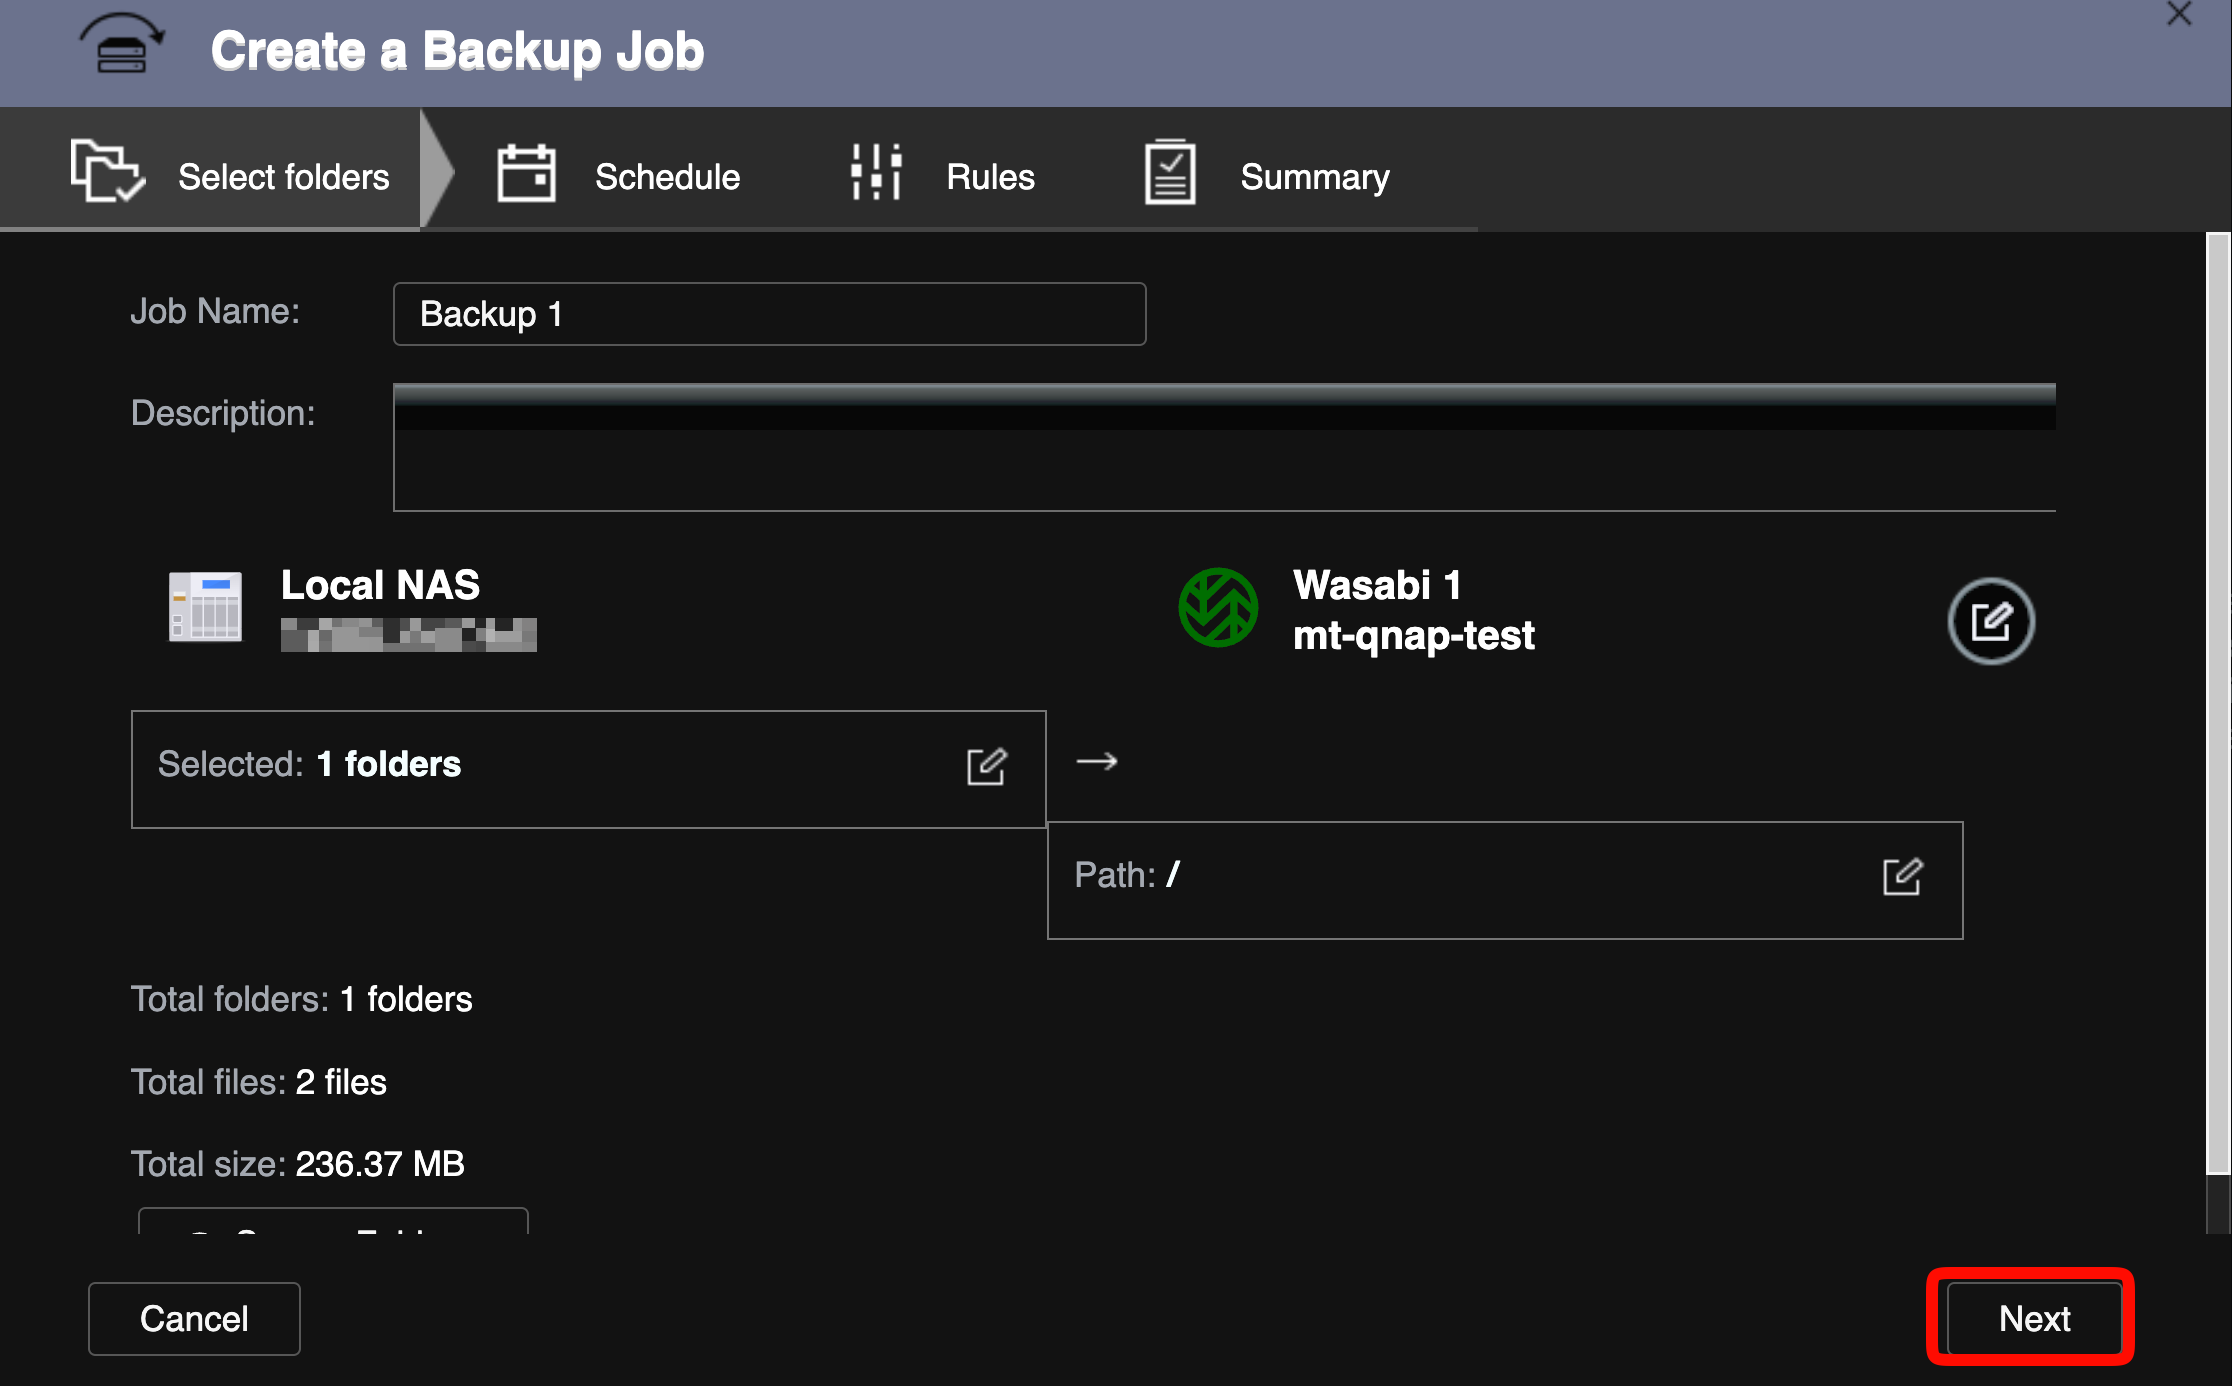
Review the job name and source/destination summary. Click Next.
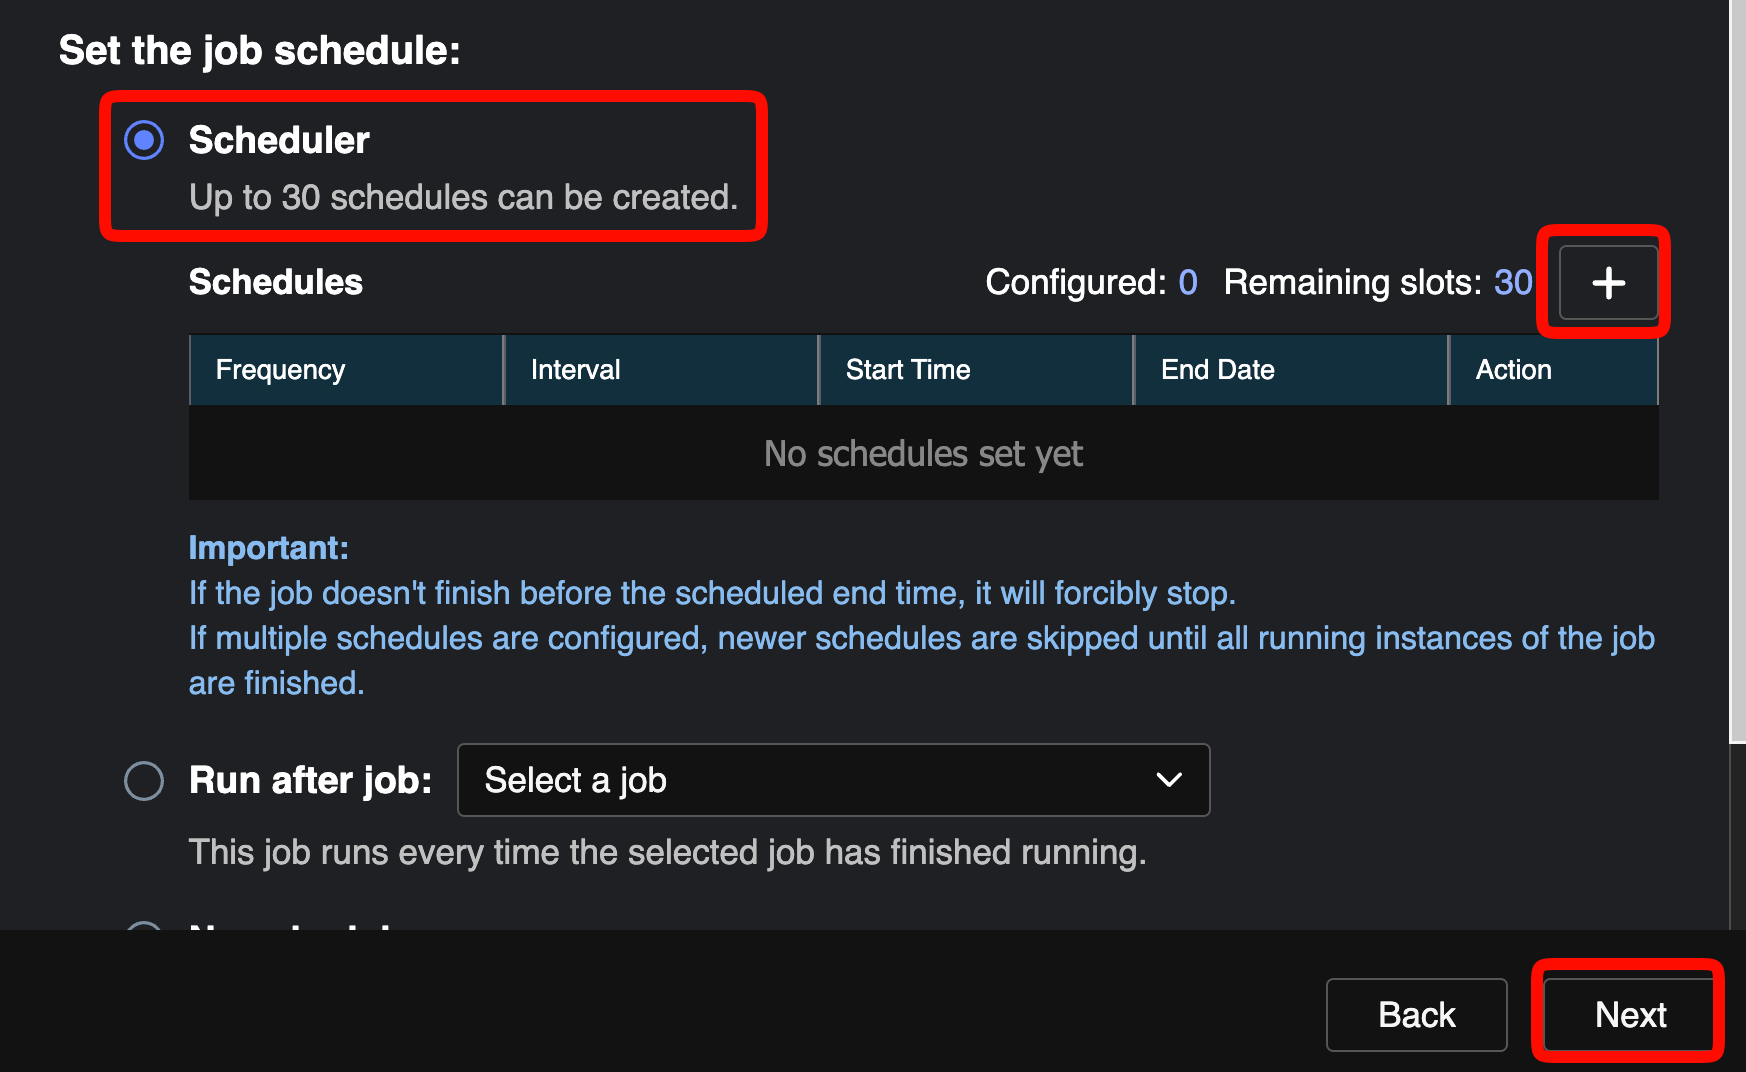
Select Scheduler and click + to add a schedule. Click Next.
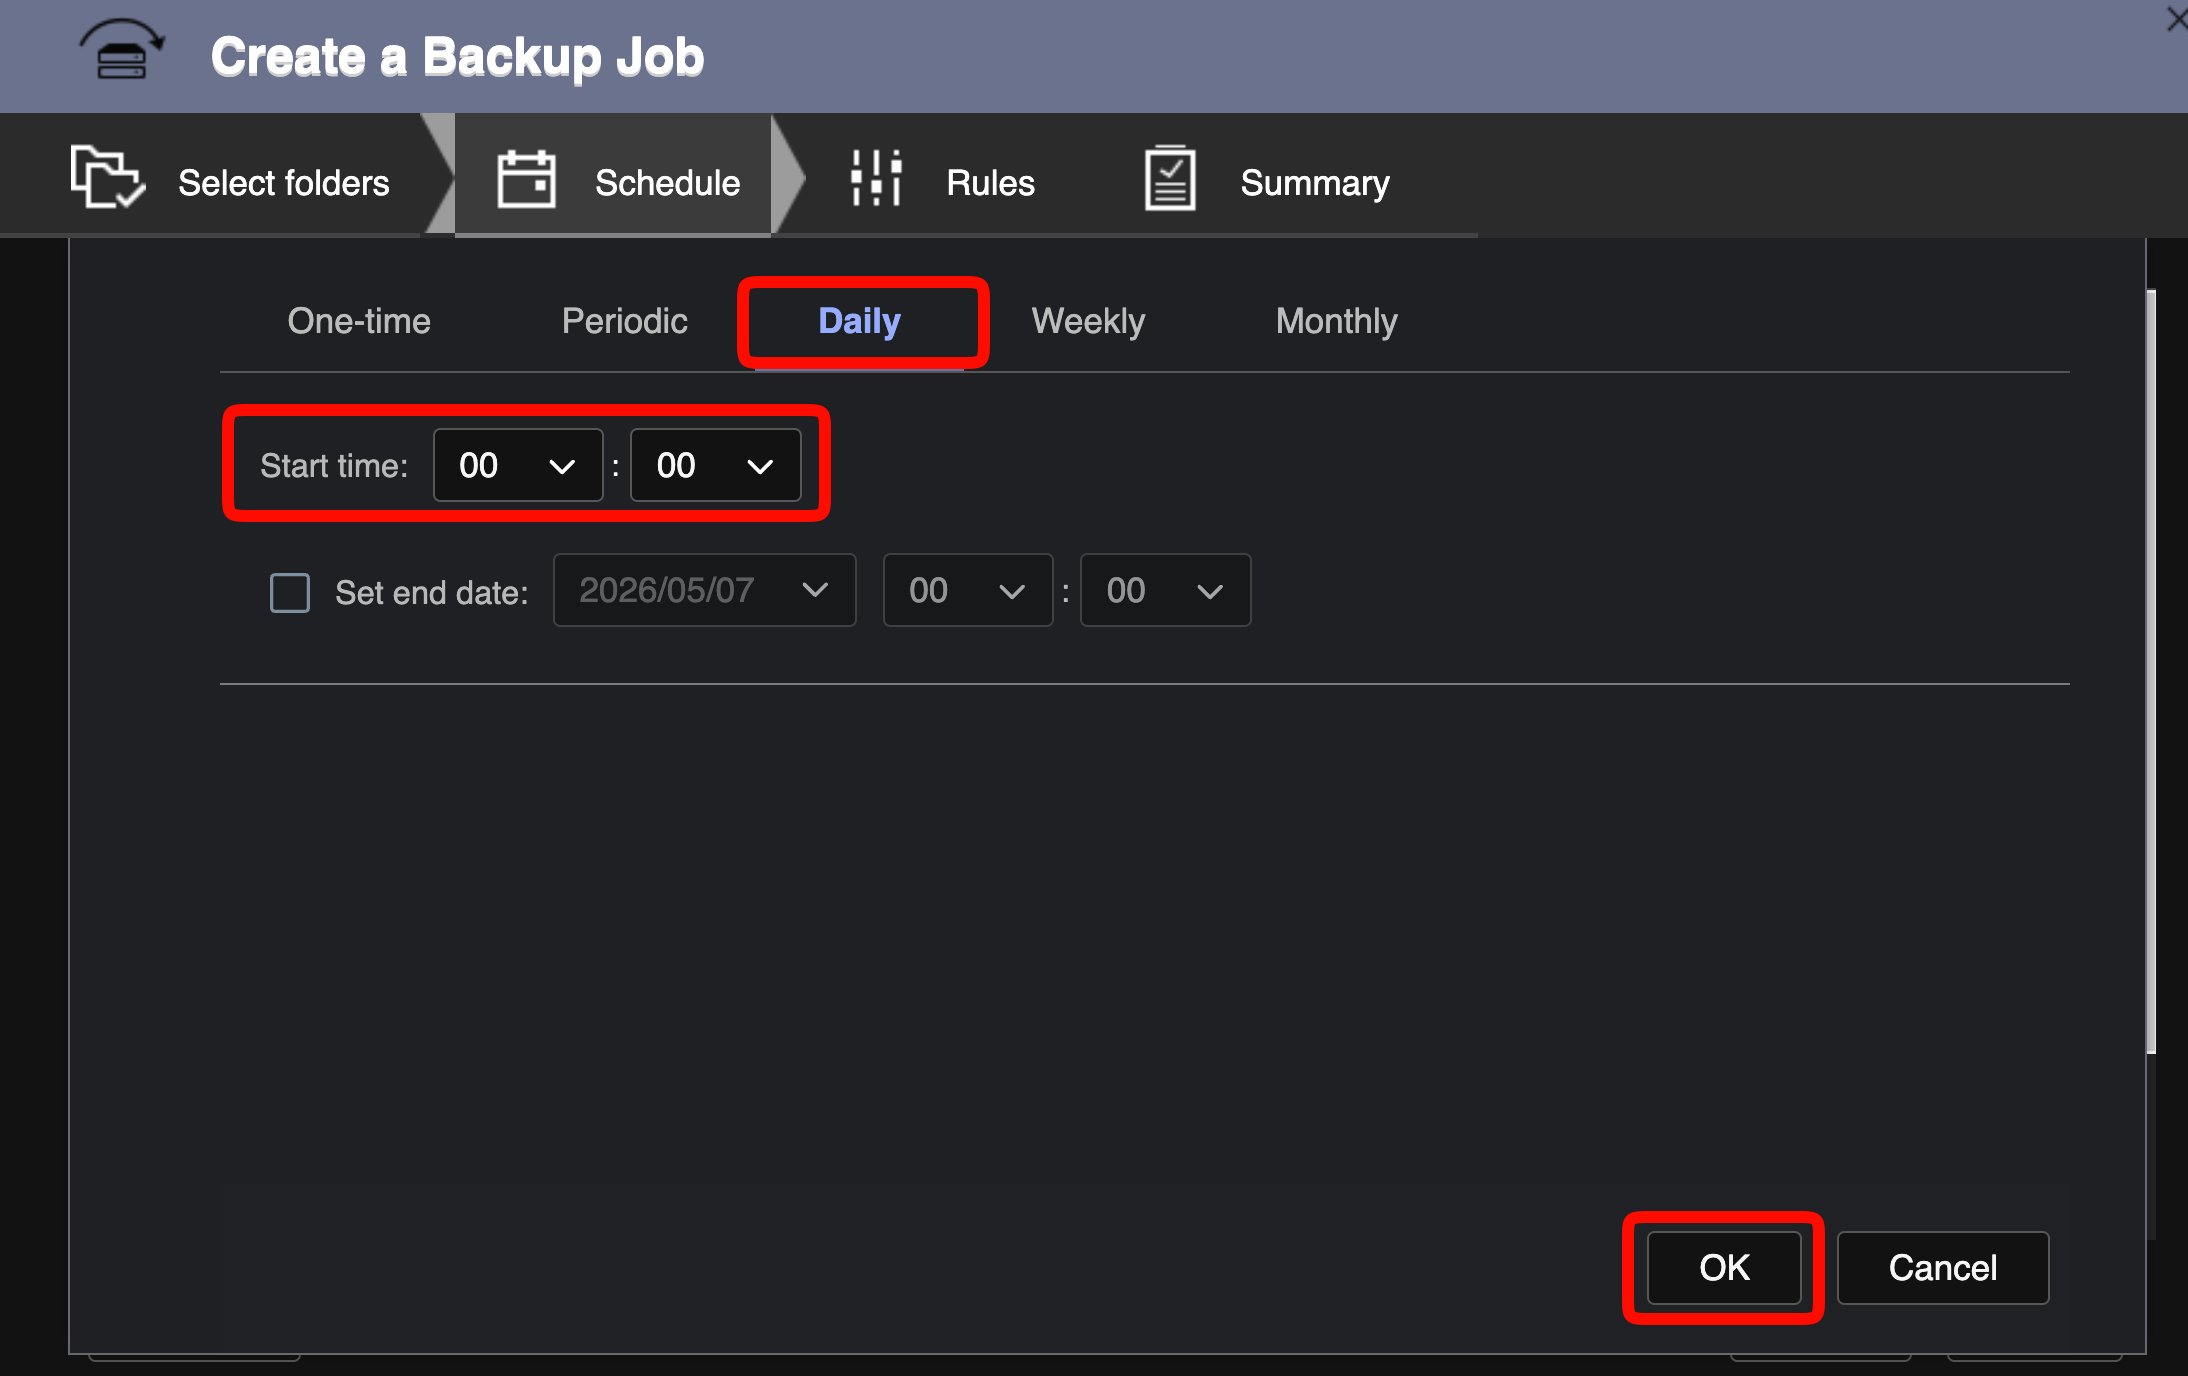
Select the appropriate backup frequency, set your preferred Start time. Click OK. In our example we selected Daily at midnight (00:00).
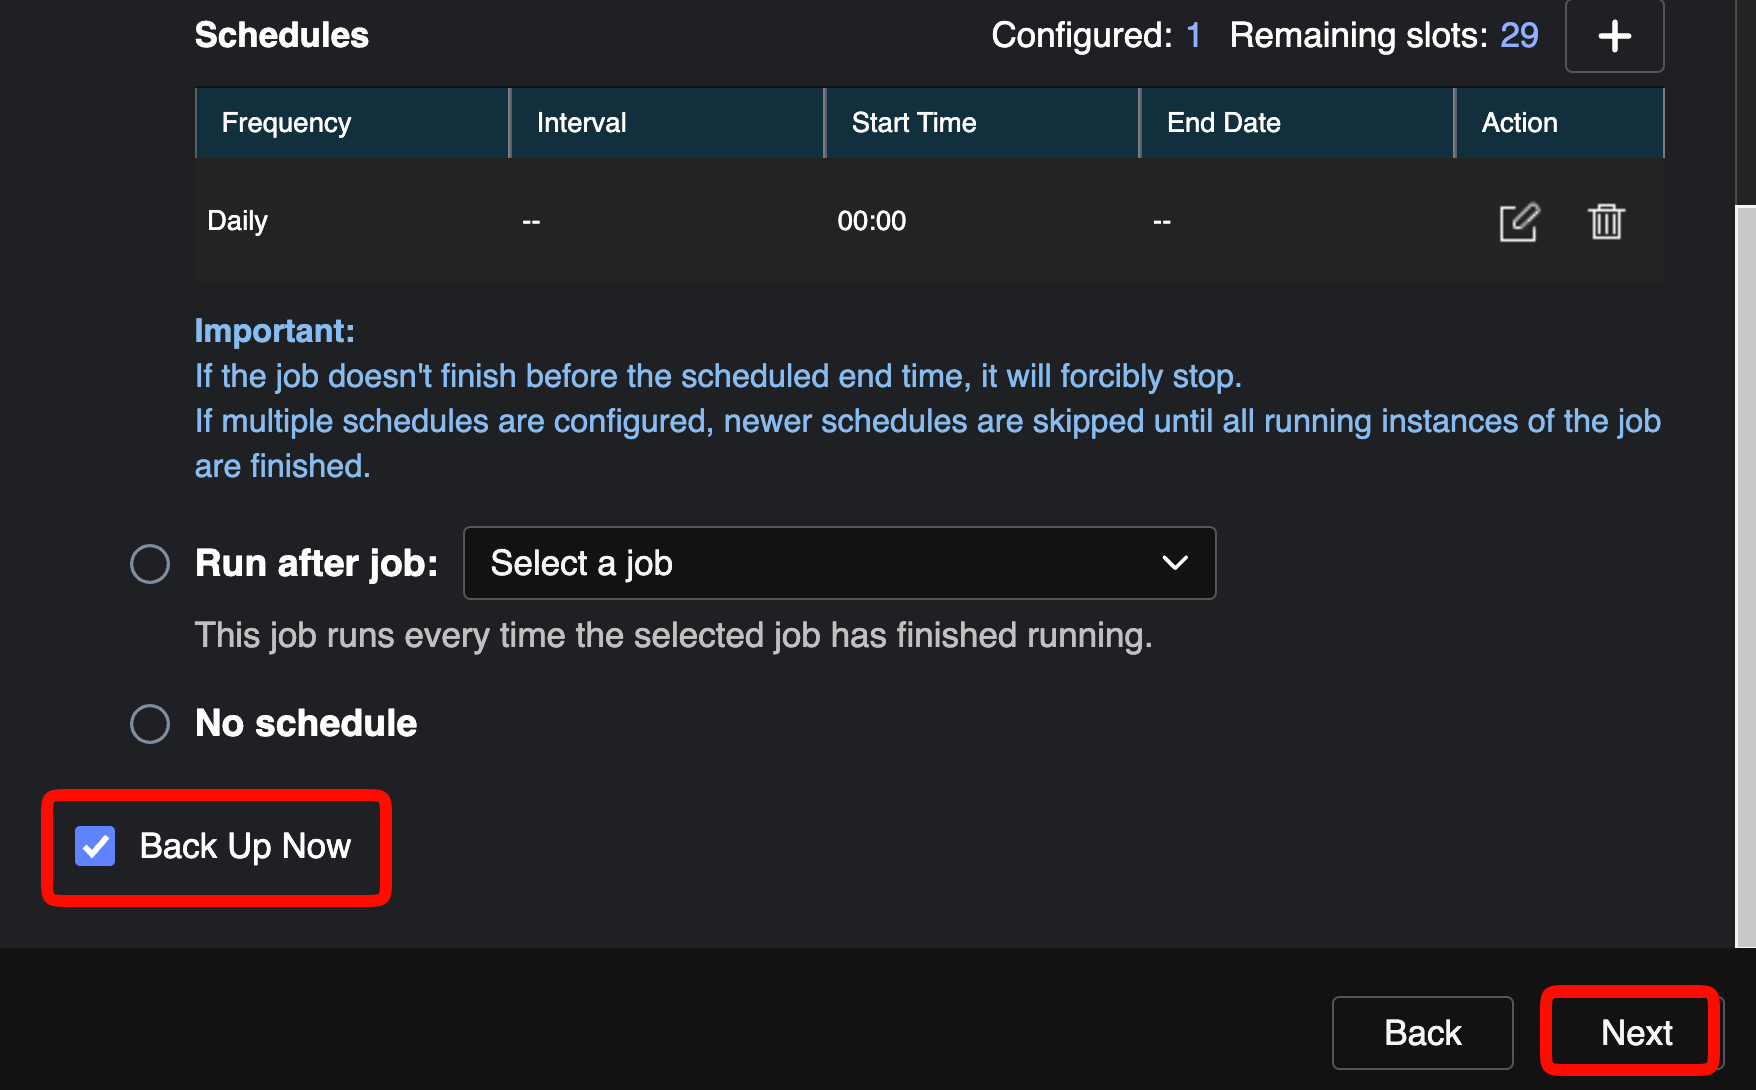
The configured schedule appears in the Schedules list. Check Back Up Now to run the first backup immediately when the job is created. Click Next.
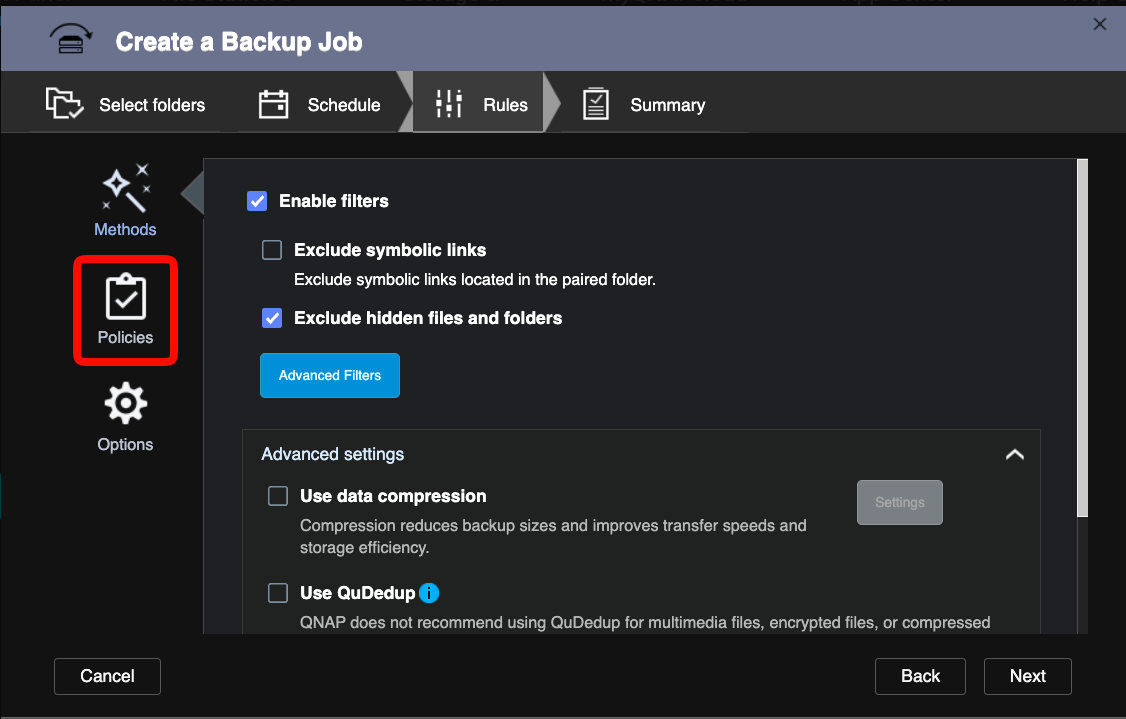
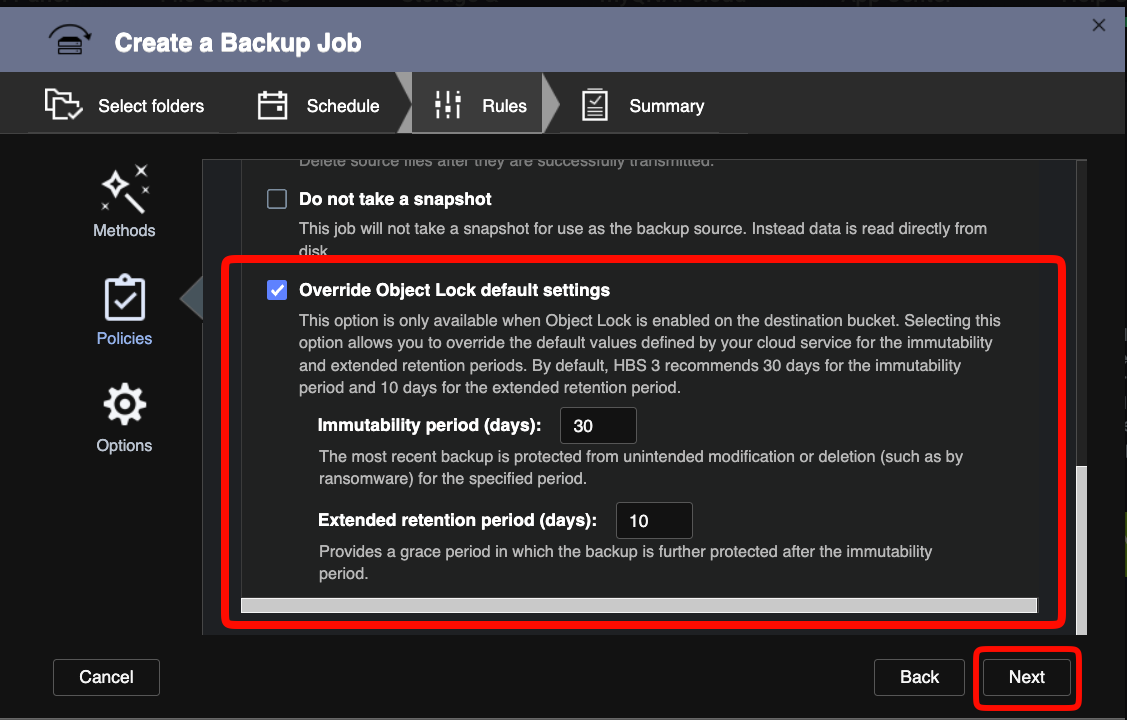
On the Rules tab, review the filter and advanced settings. Click Policies.
Select the checkbox to Override Object Lock default settings (if using Object Lock). Adjust the settings to match your requirements. Click Next.
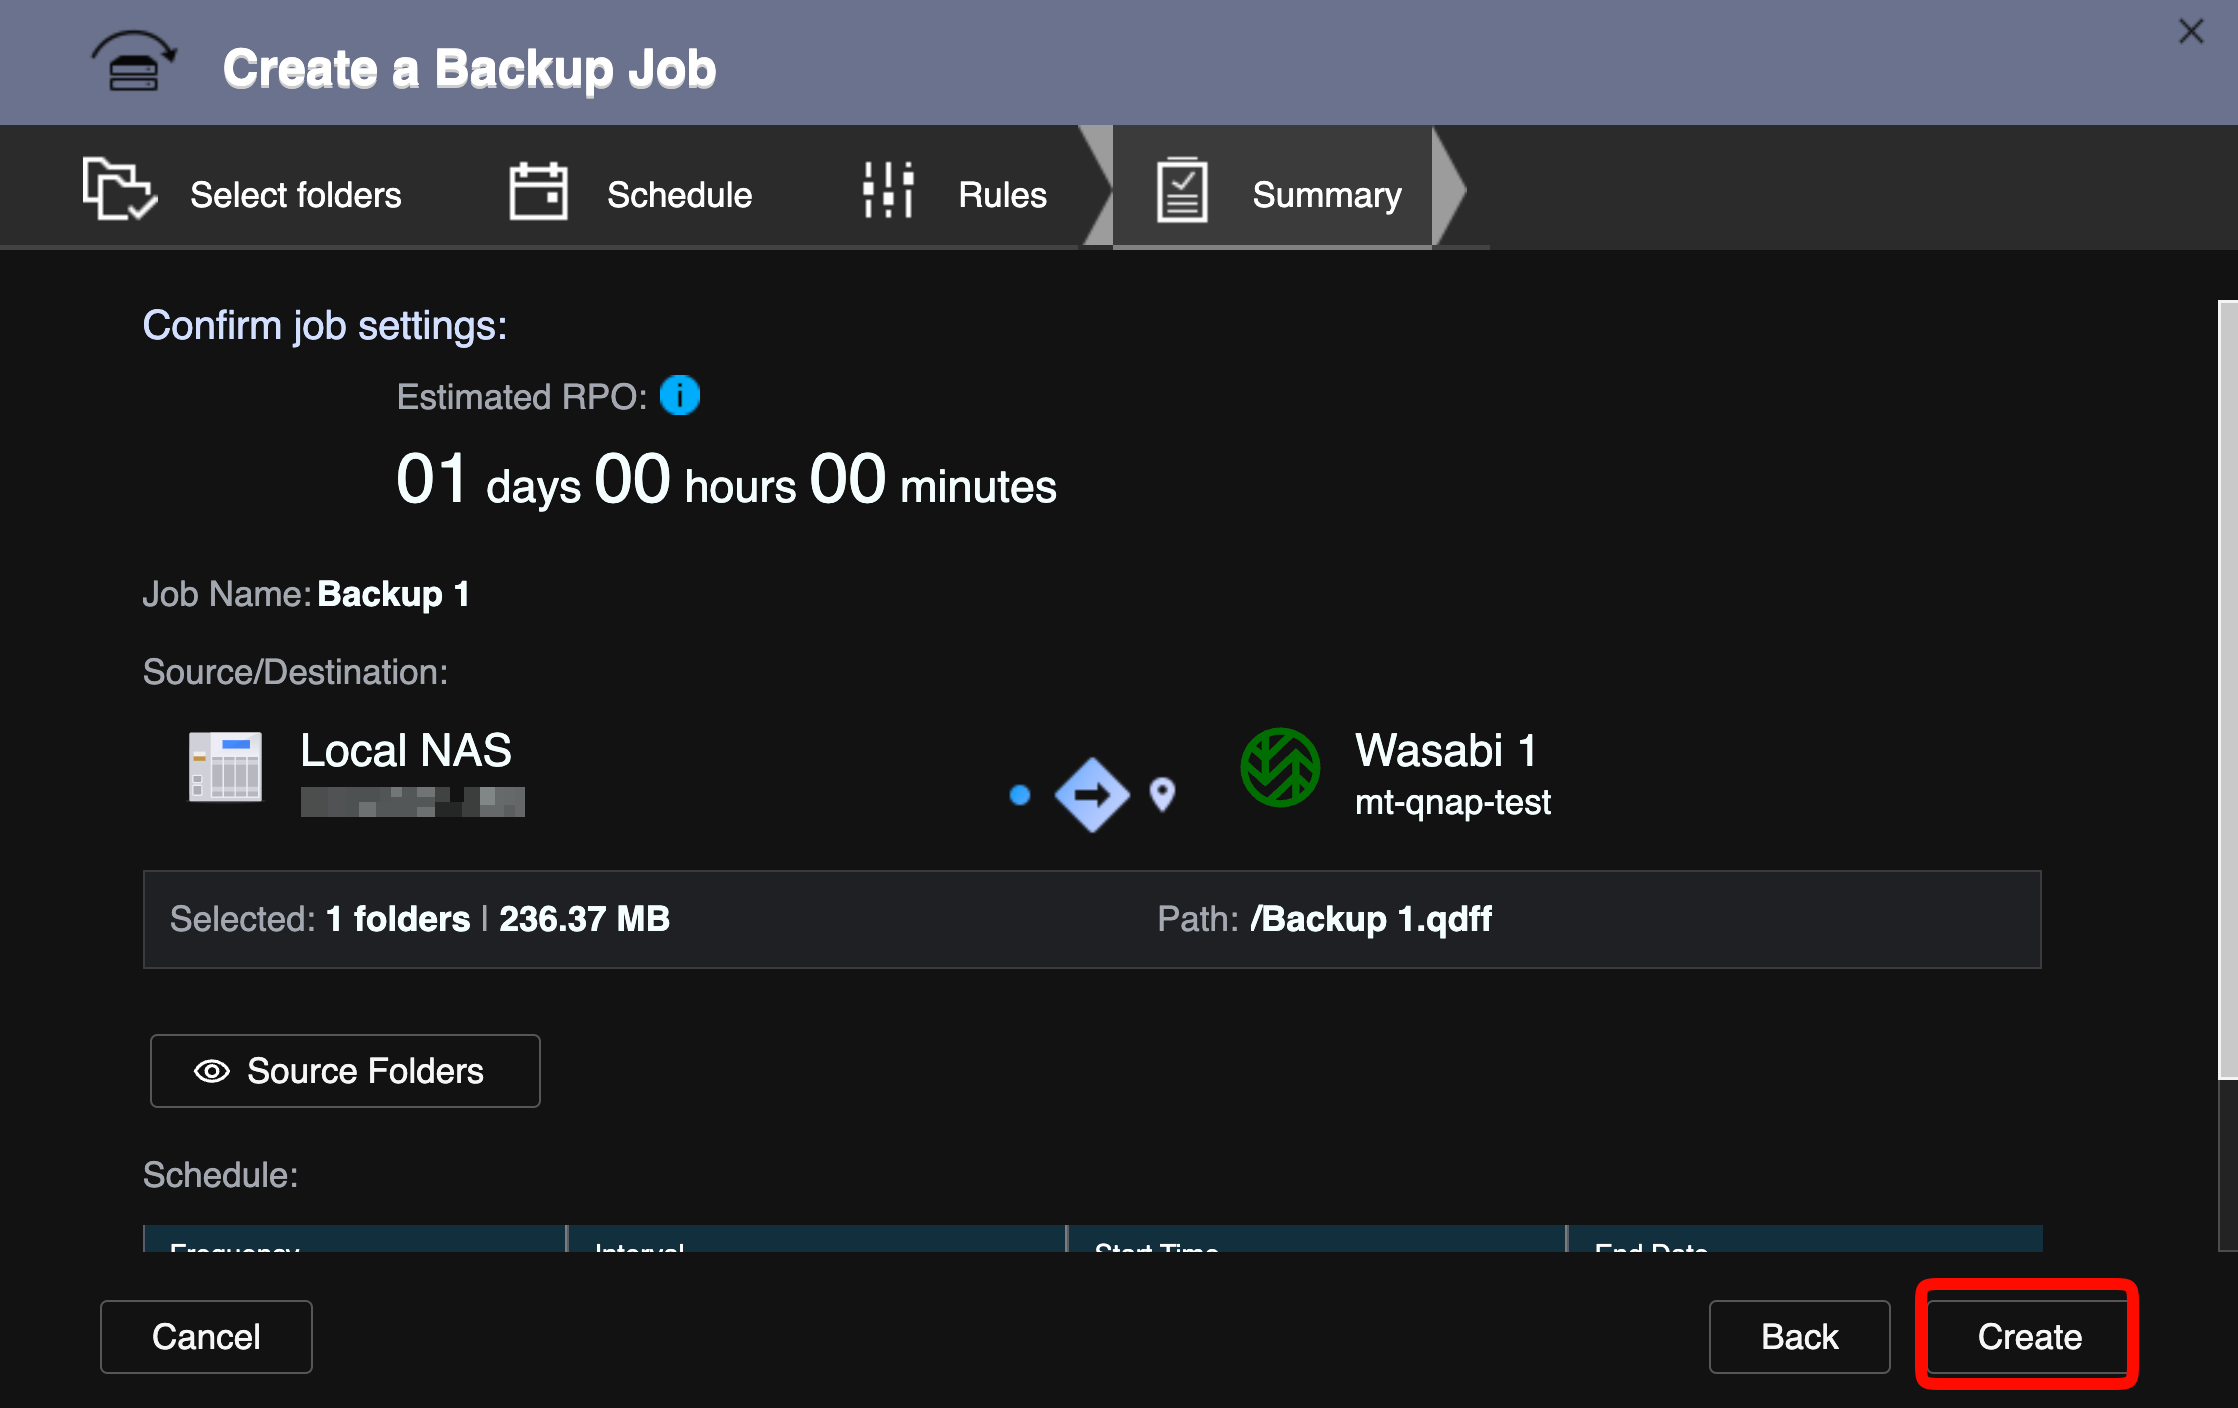
Choose the Summary tab, confirm all job settings. Click Create.
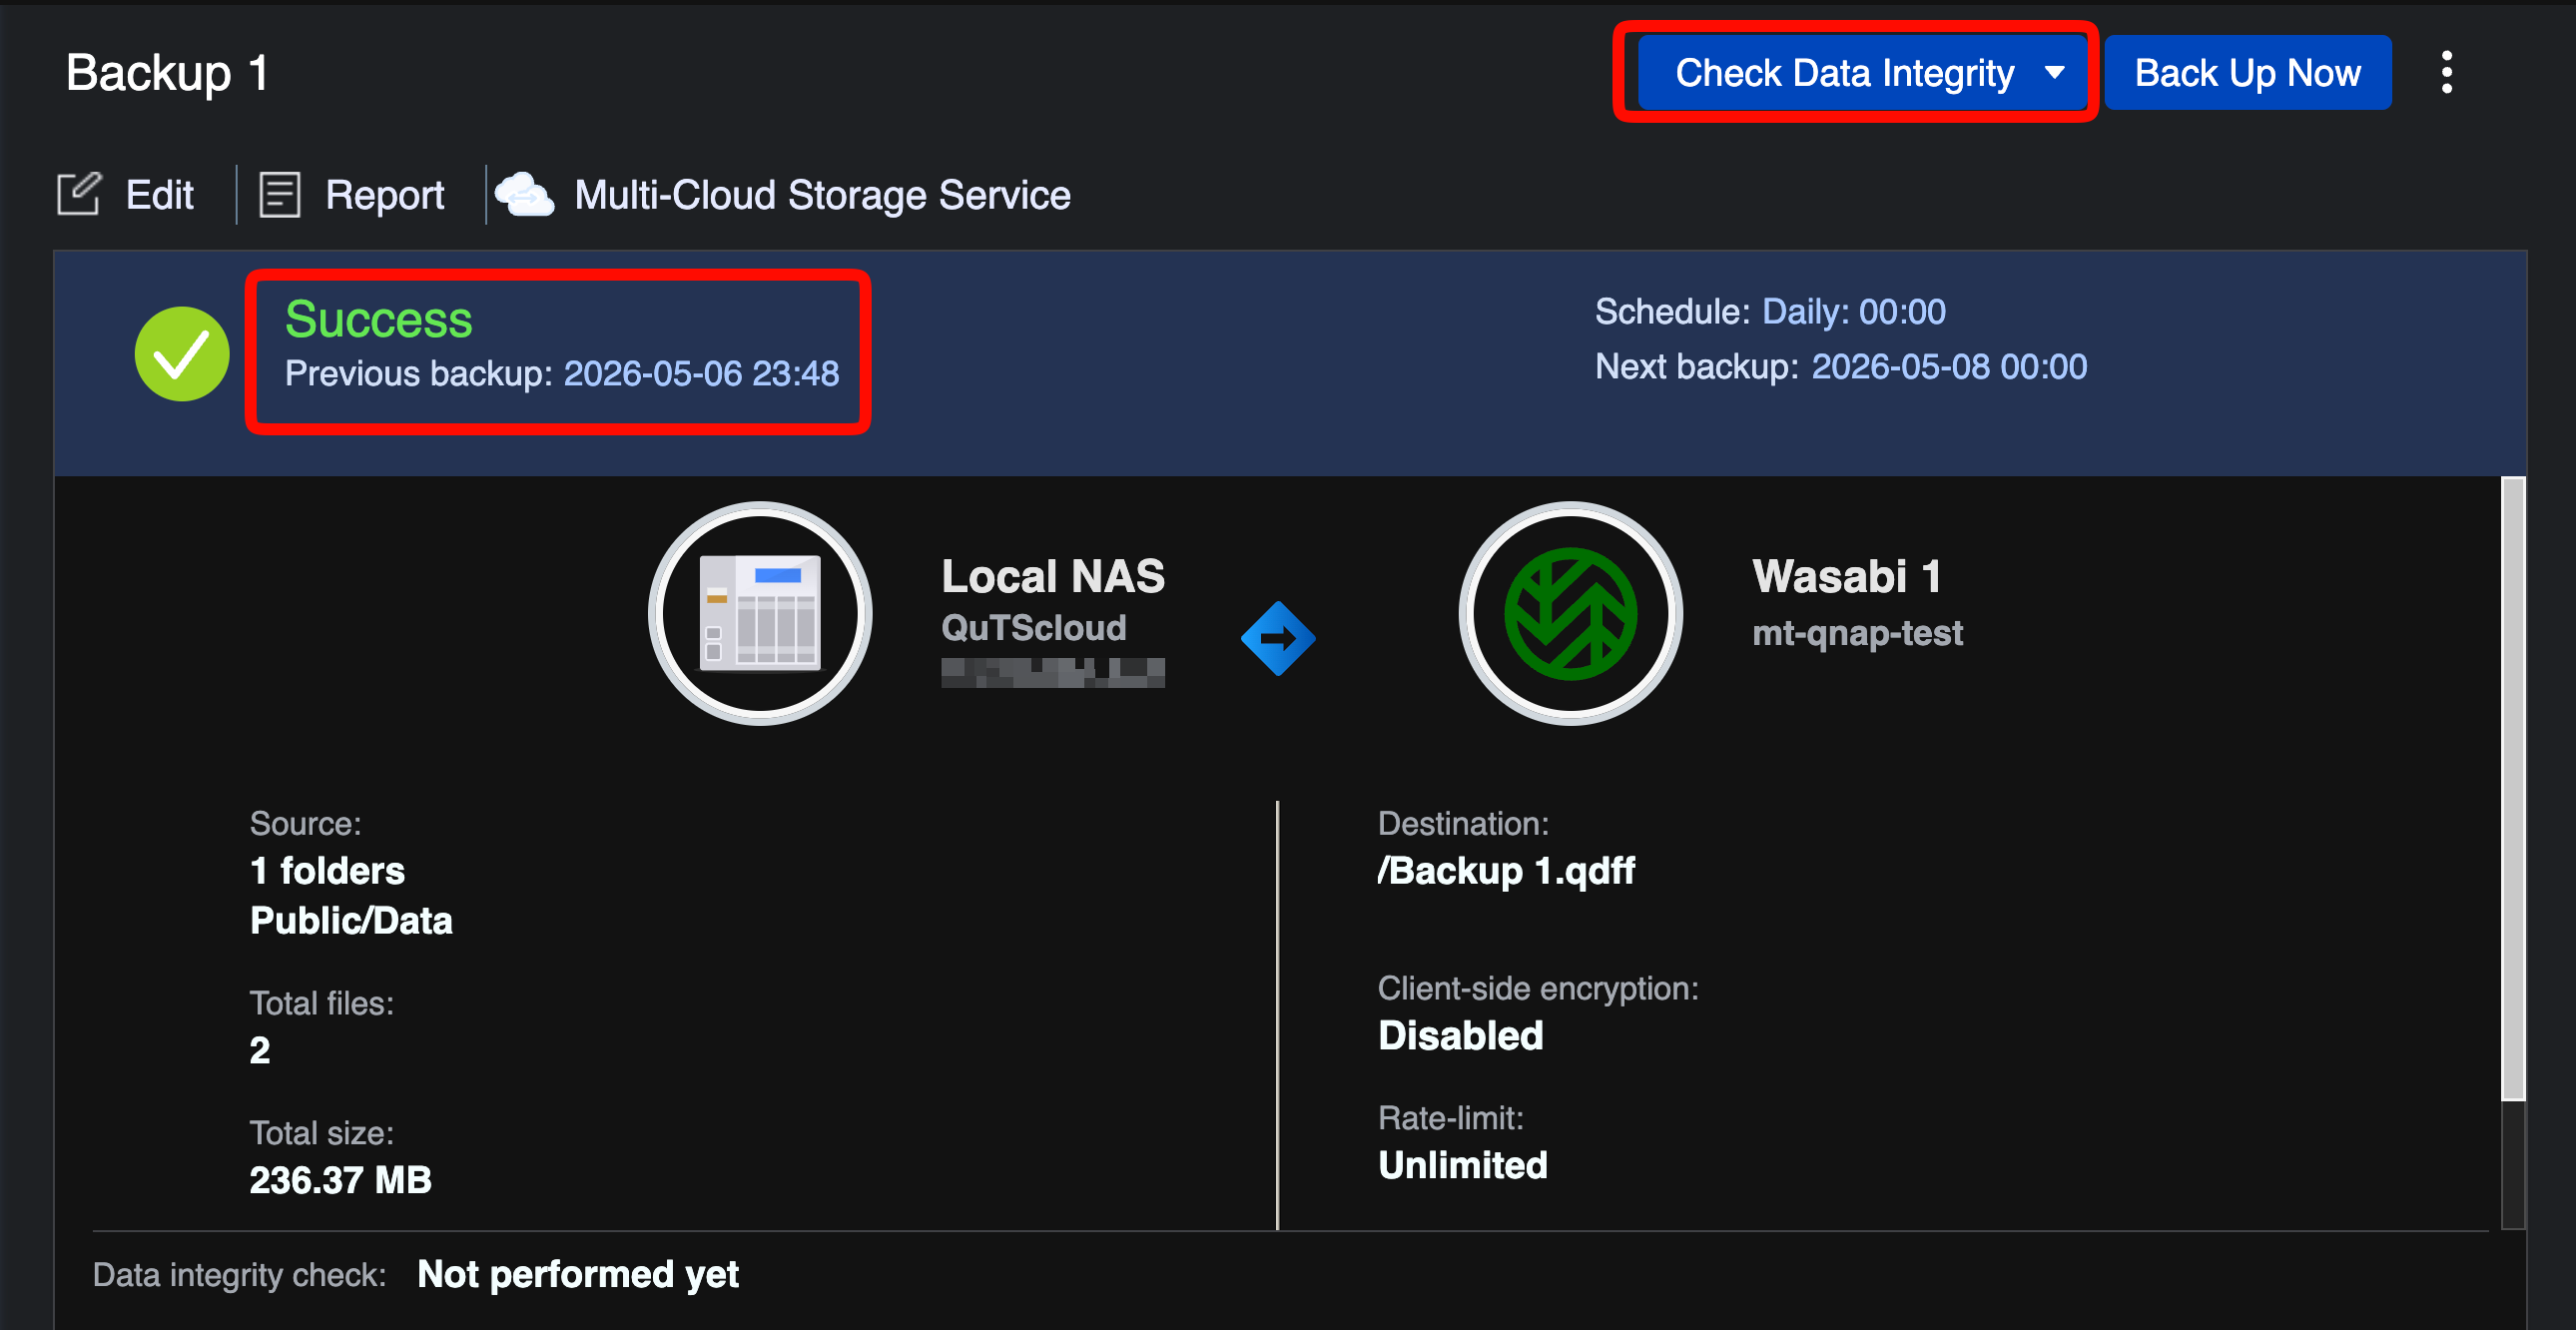
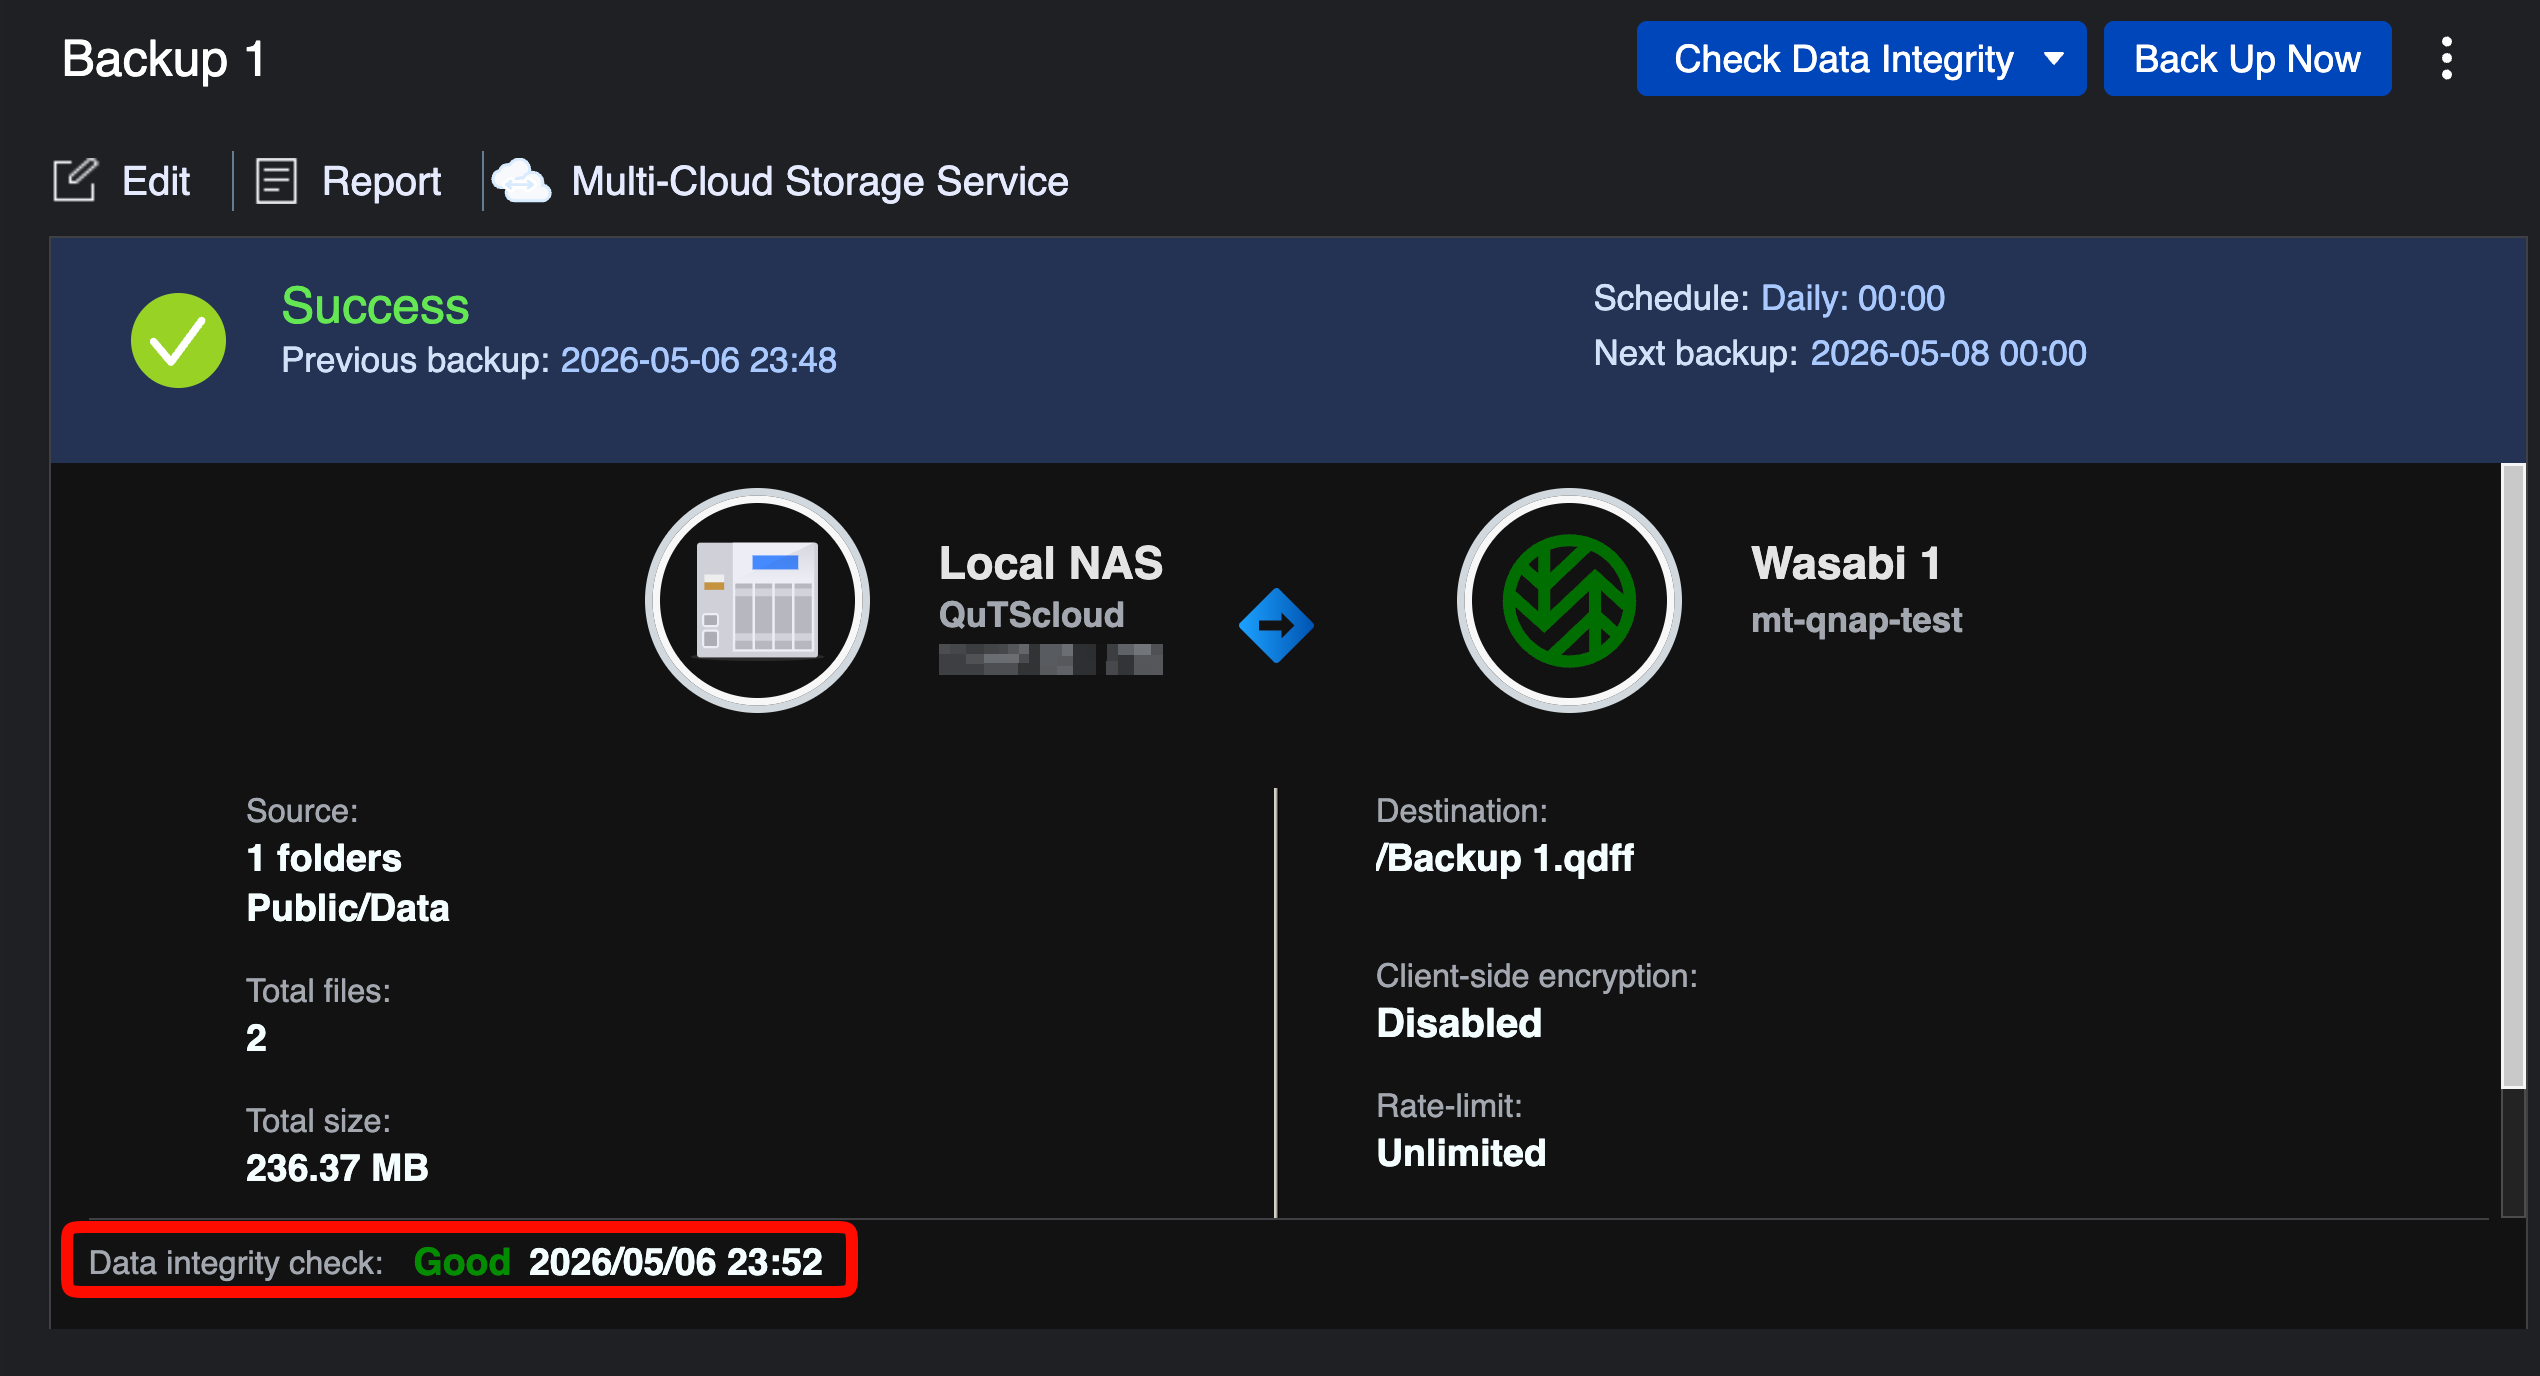
The backup job runs immediately. When complete, the job status shows Success along with the date and time of the backup and the next scheduled run. Click Check Data Integrity.
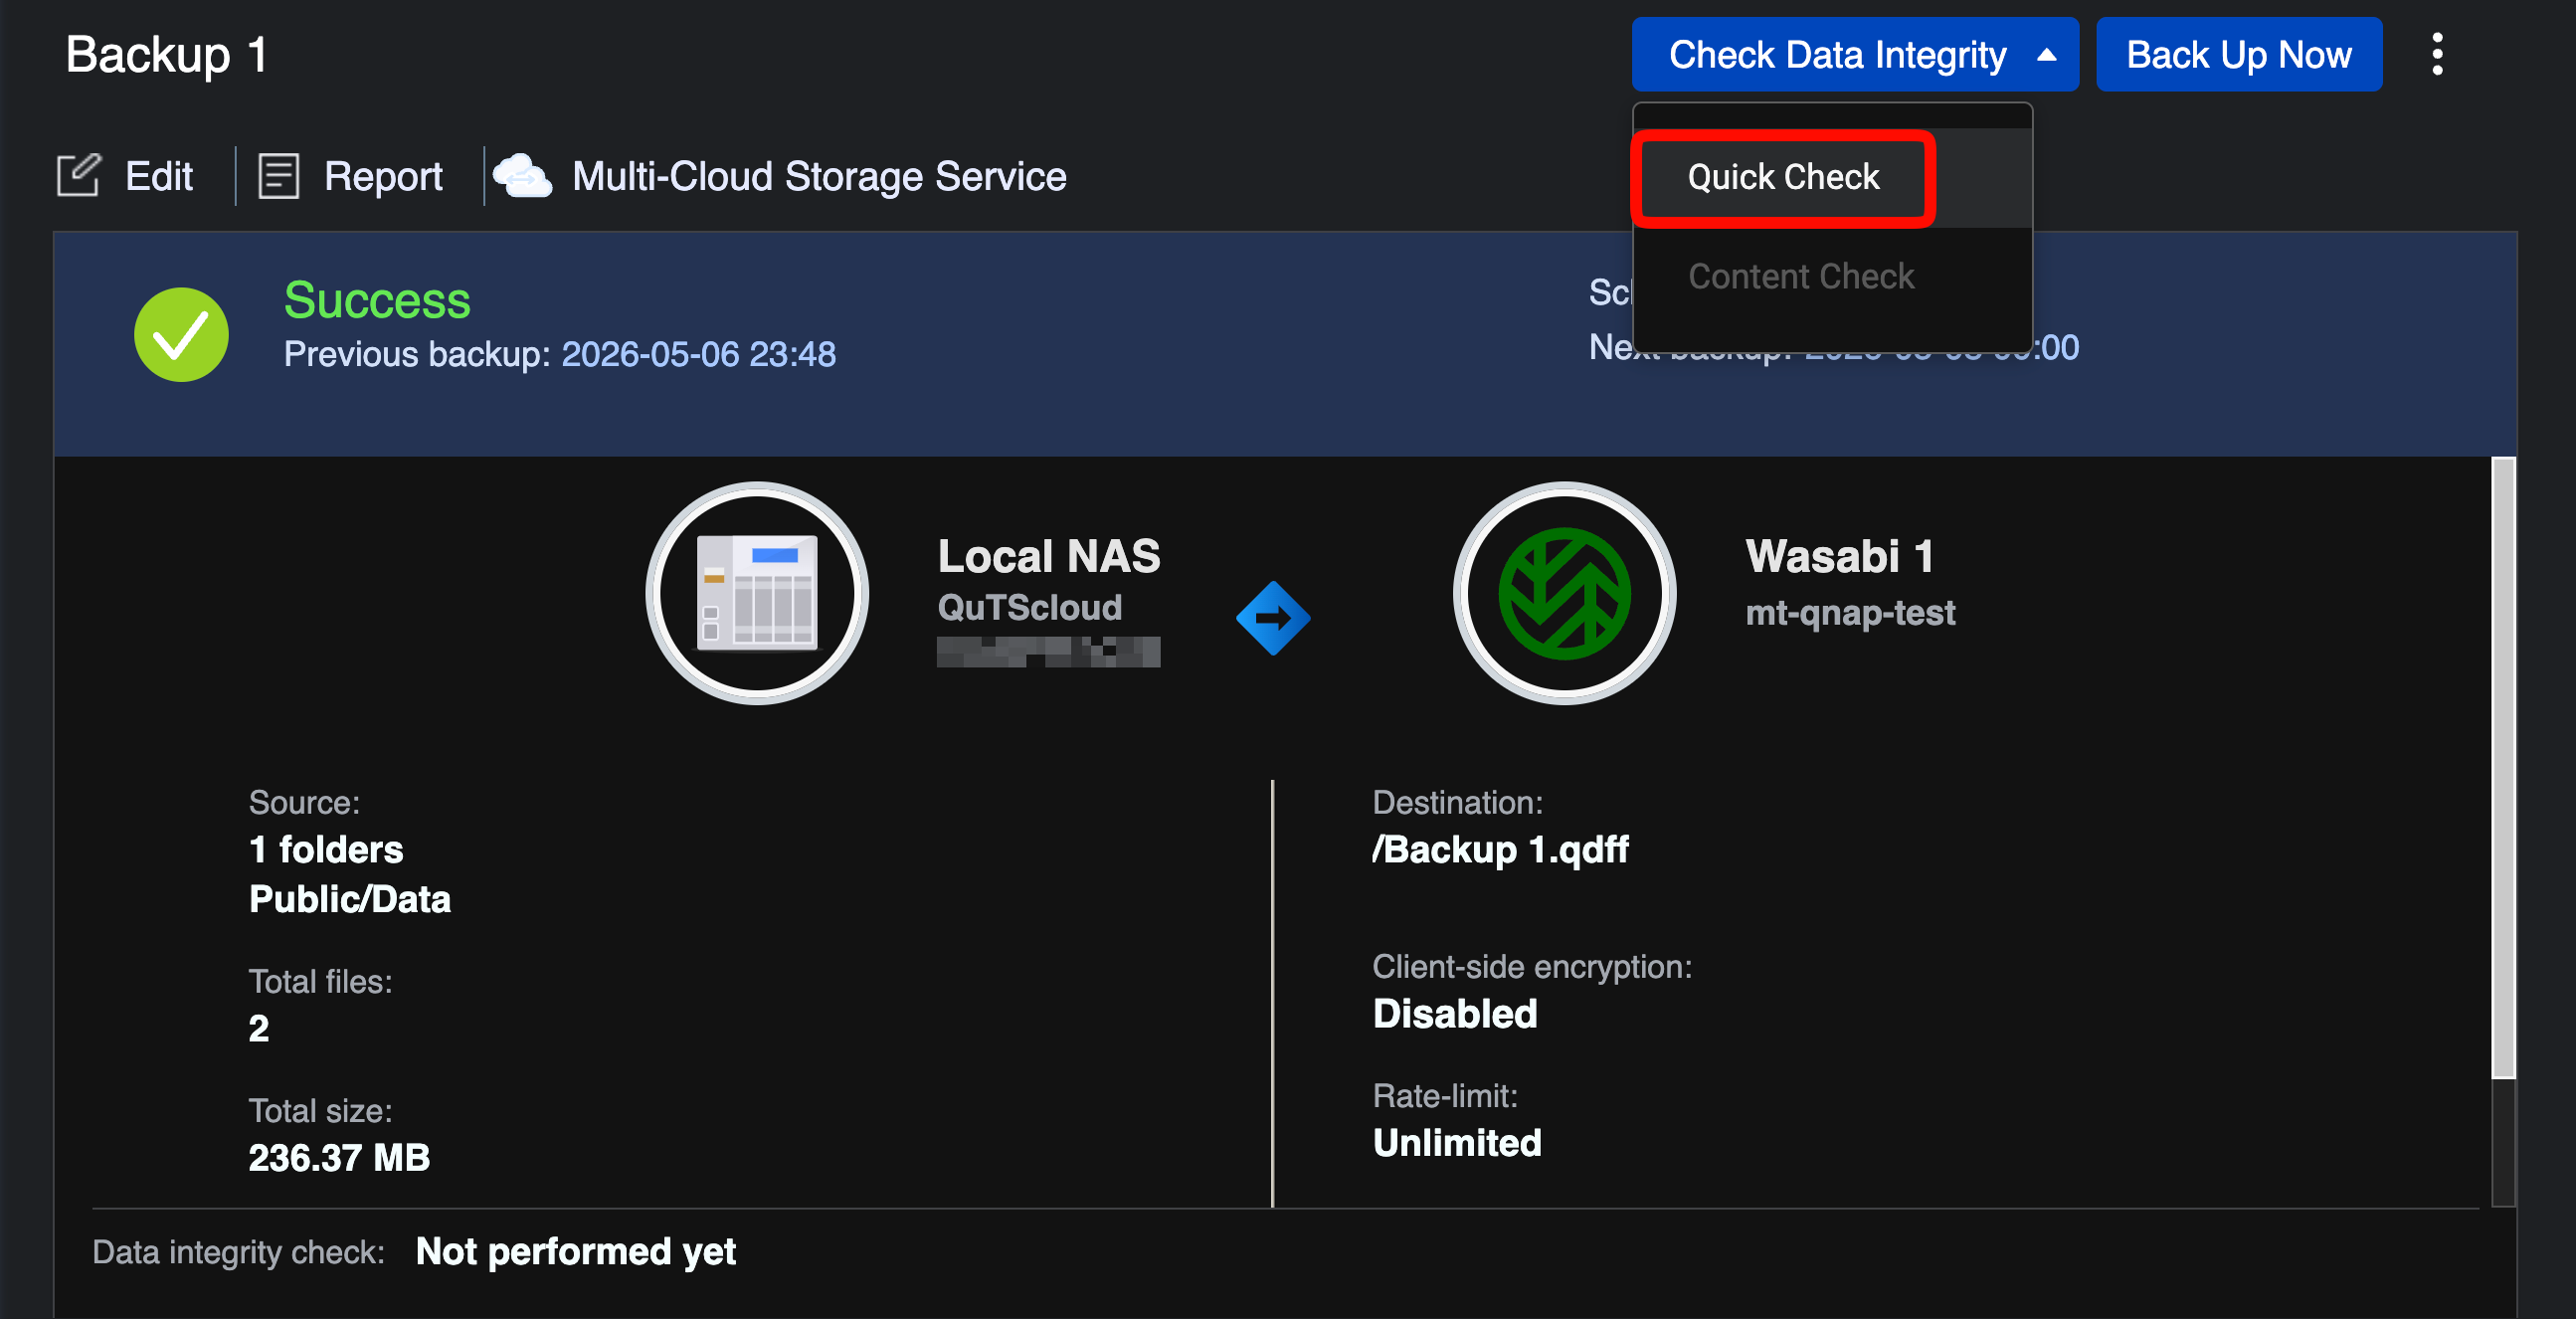
Select Quick Check. HBS 3 will verify the backup files in Wasabi and report the result.
Restoring From Wasabi Backups
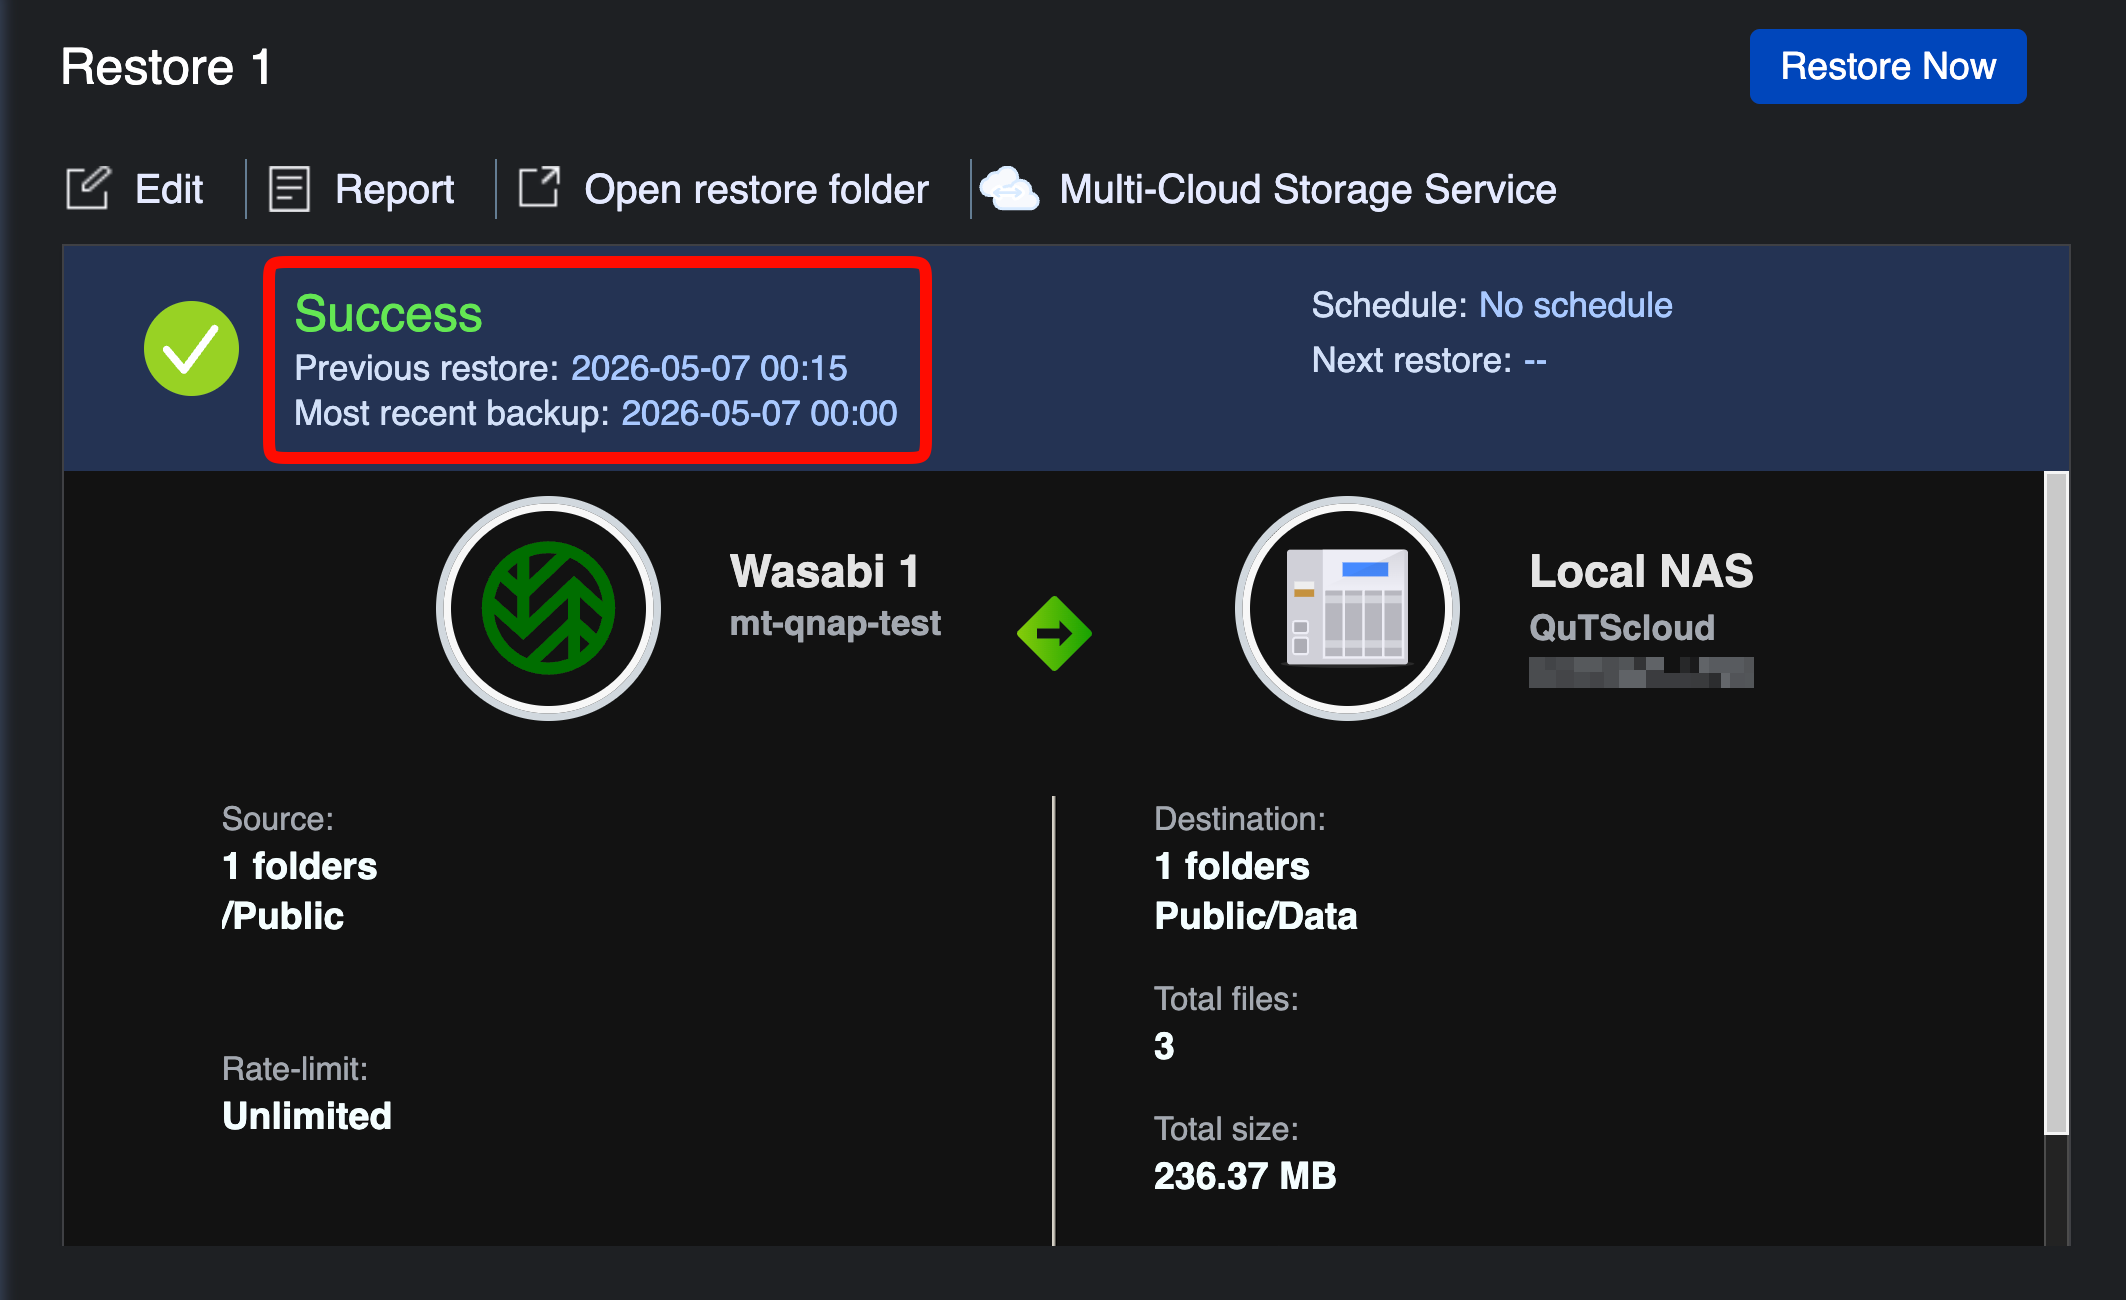
In the event that you need to restore data from a Wasabi backup, follow the steps below.
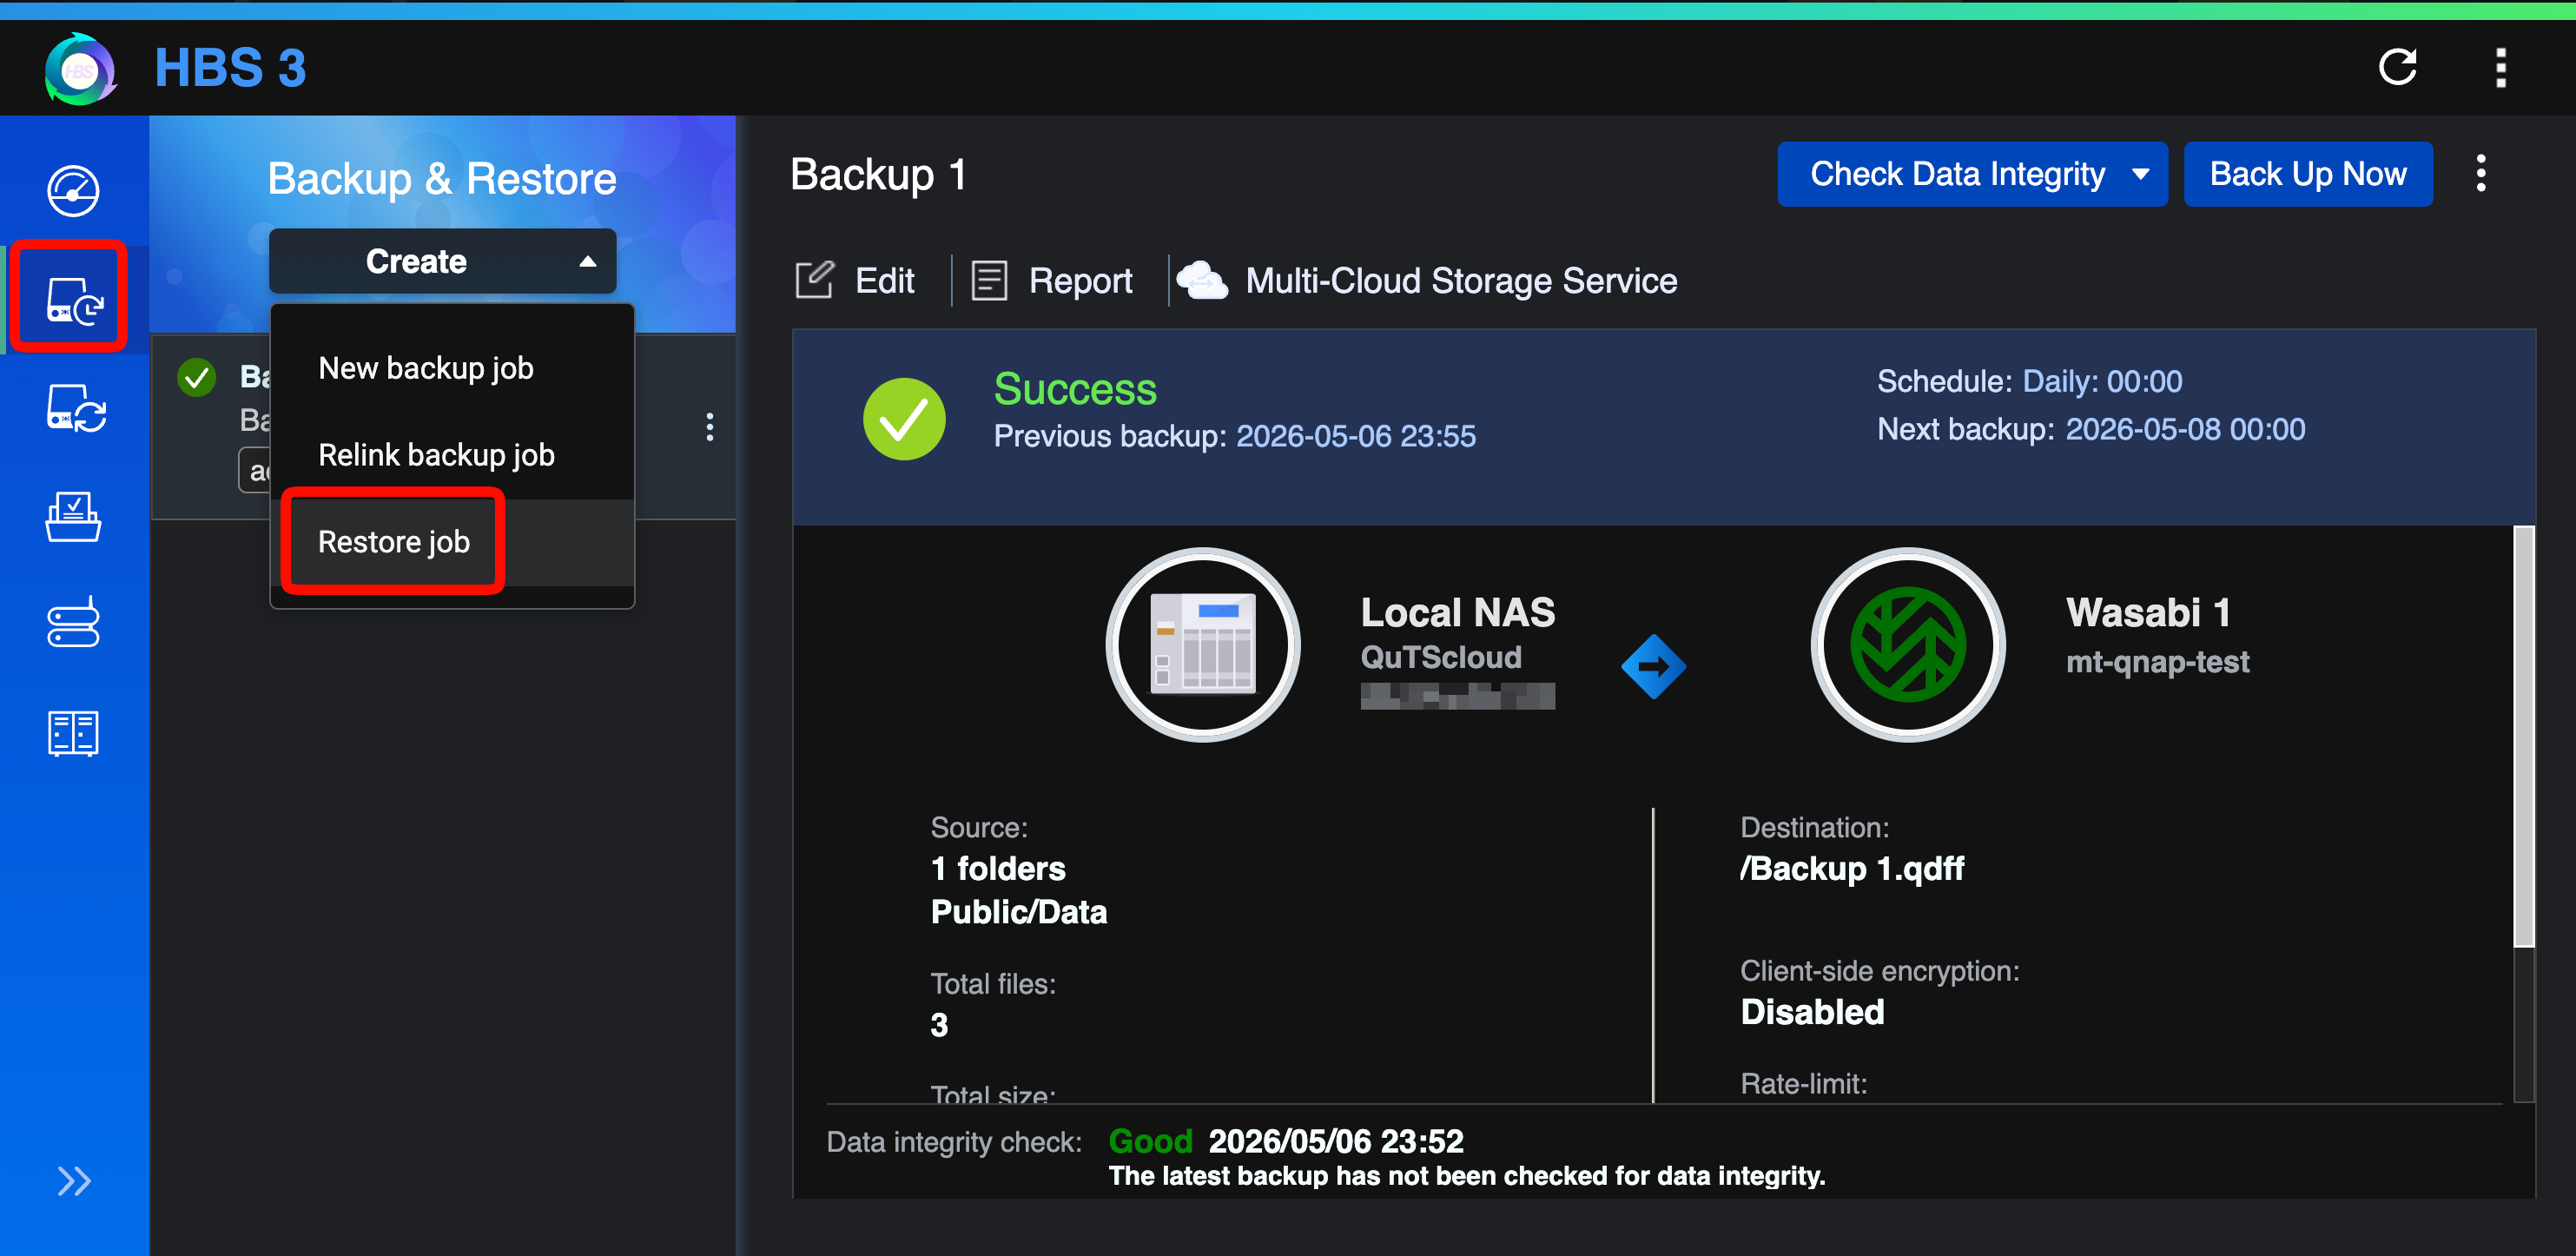
In HBS 3, click Backup & Restore in the left navigation panel. Click Create drop-down arrow and select Restore job.
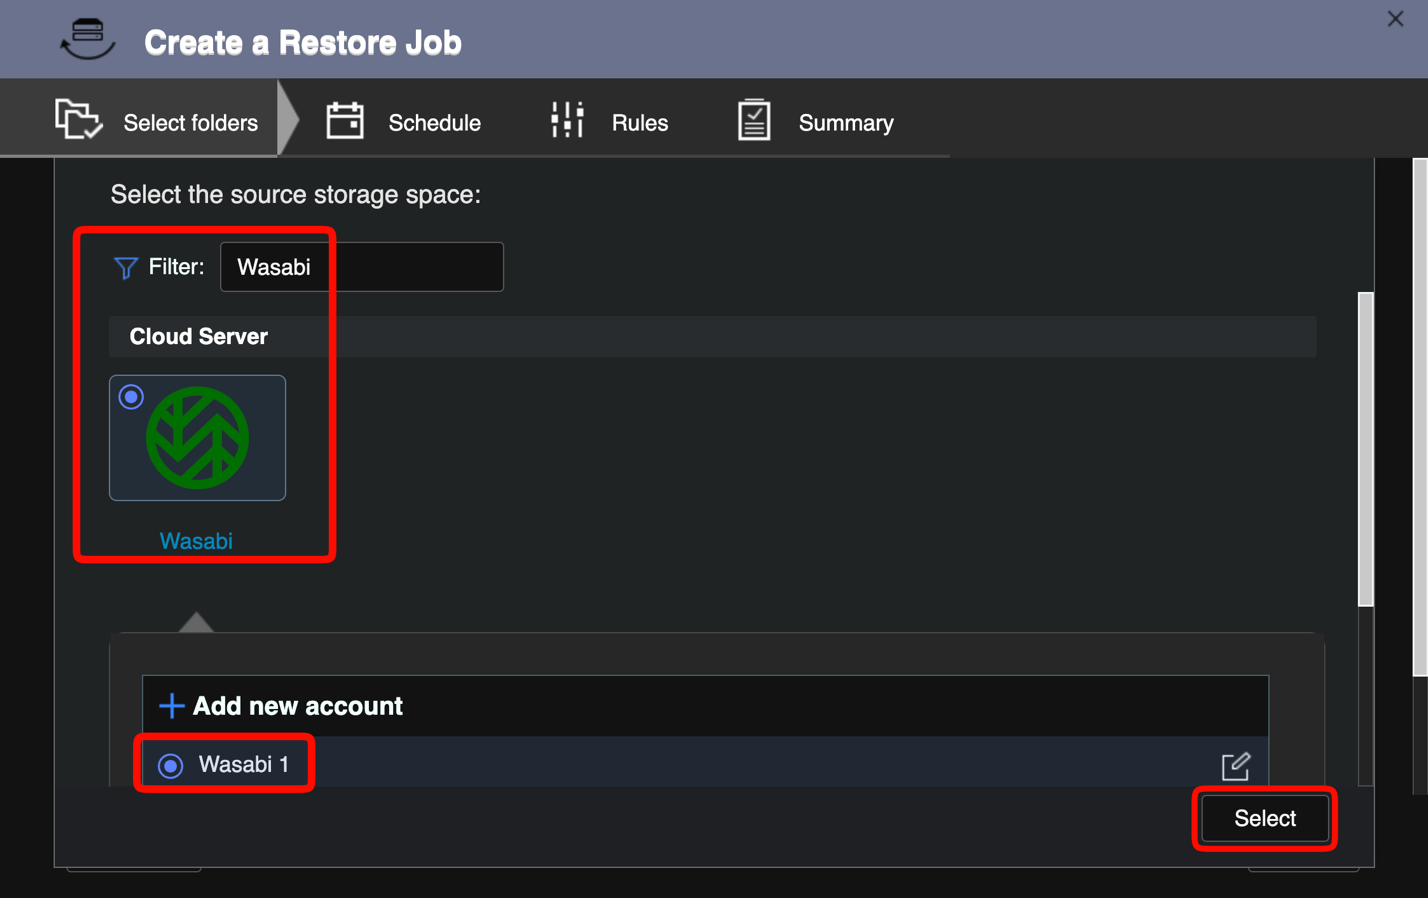
In the Create a Restore Job wizard, type Wasabi in the Filter field. Select the Wasabi tile, then select your Wasabi storage space. Click Select.
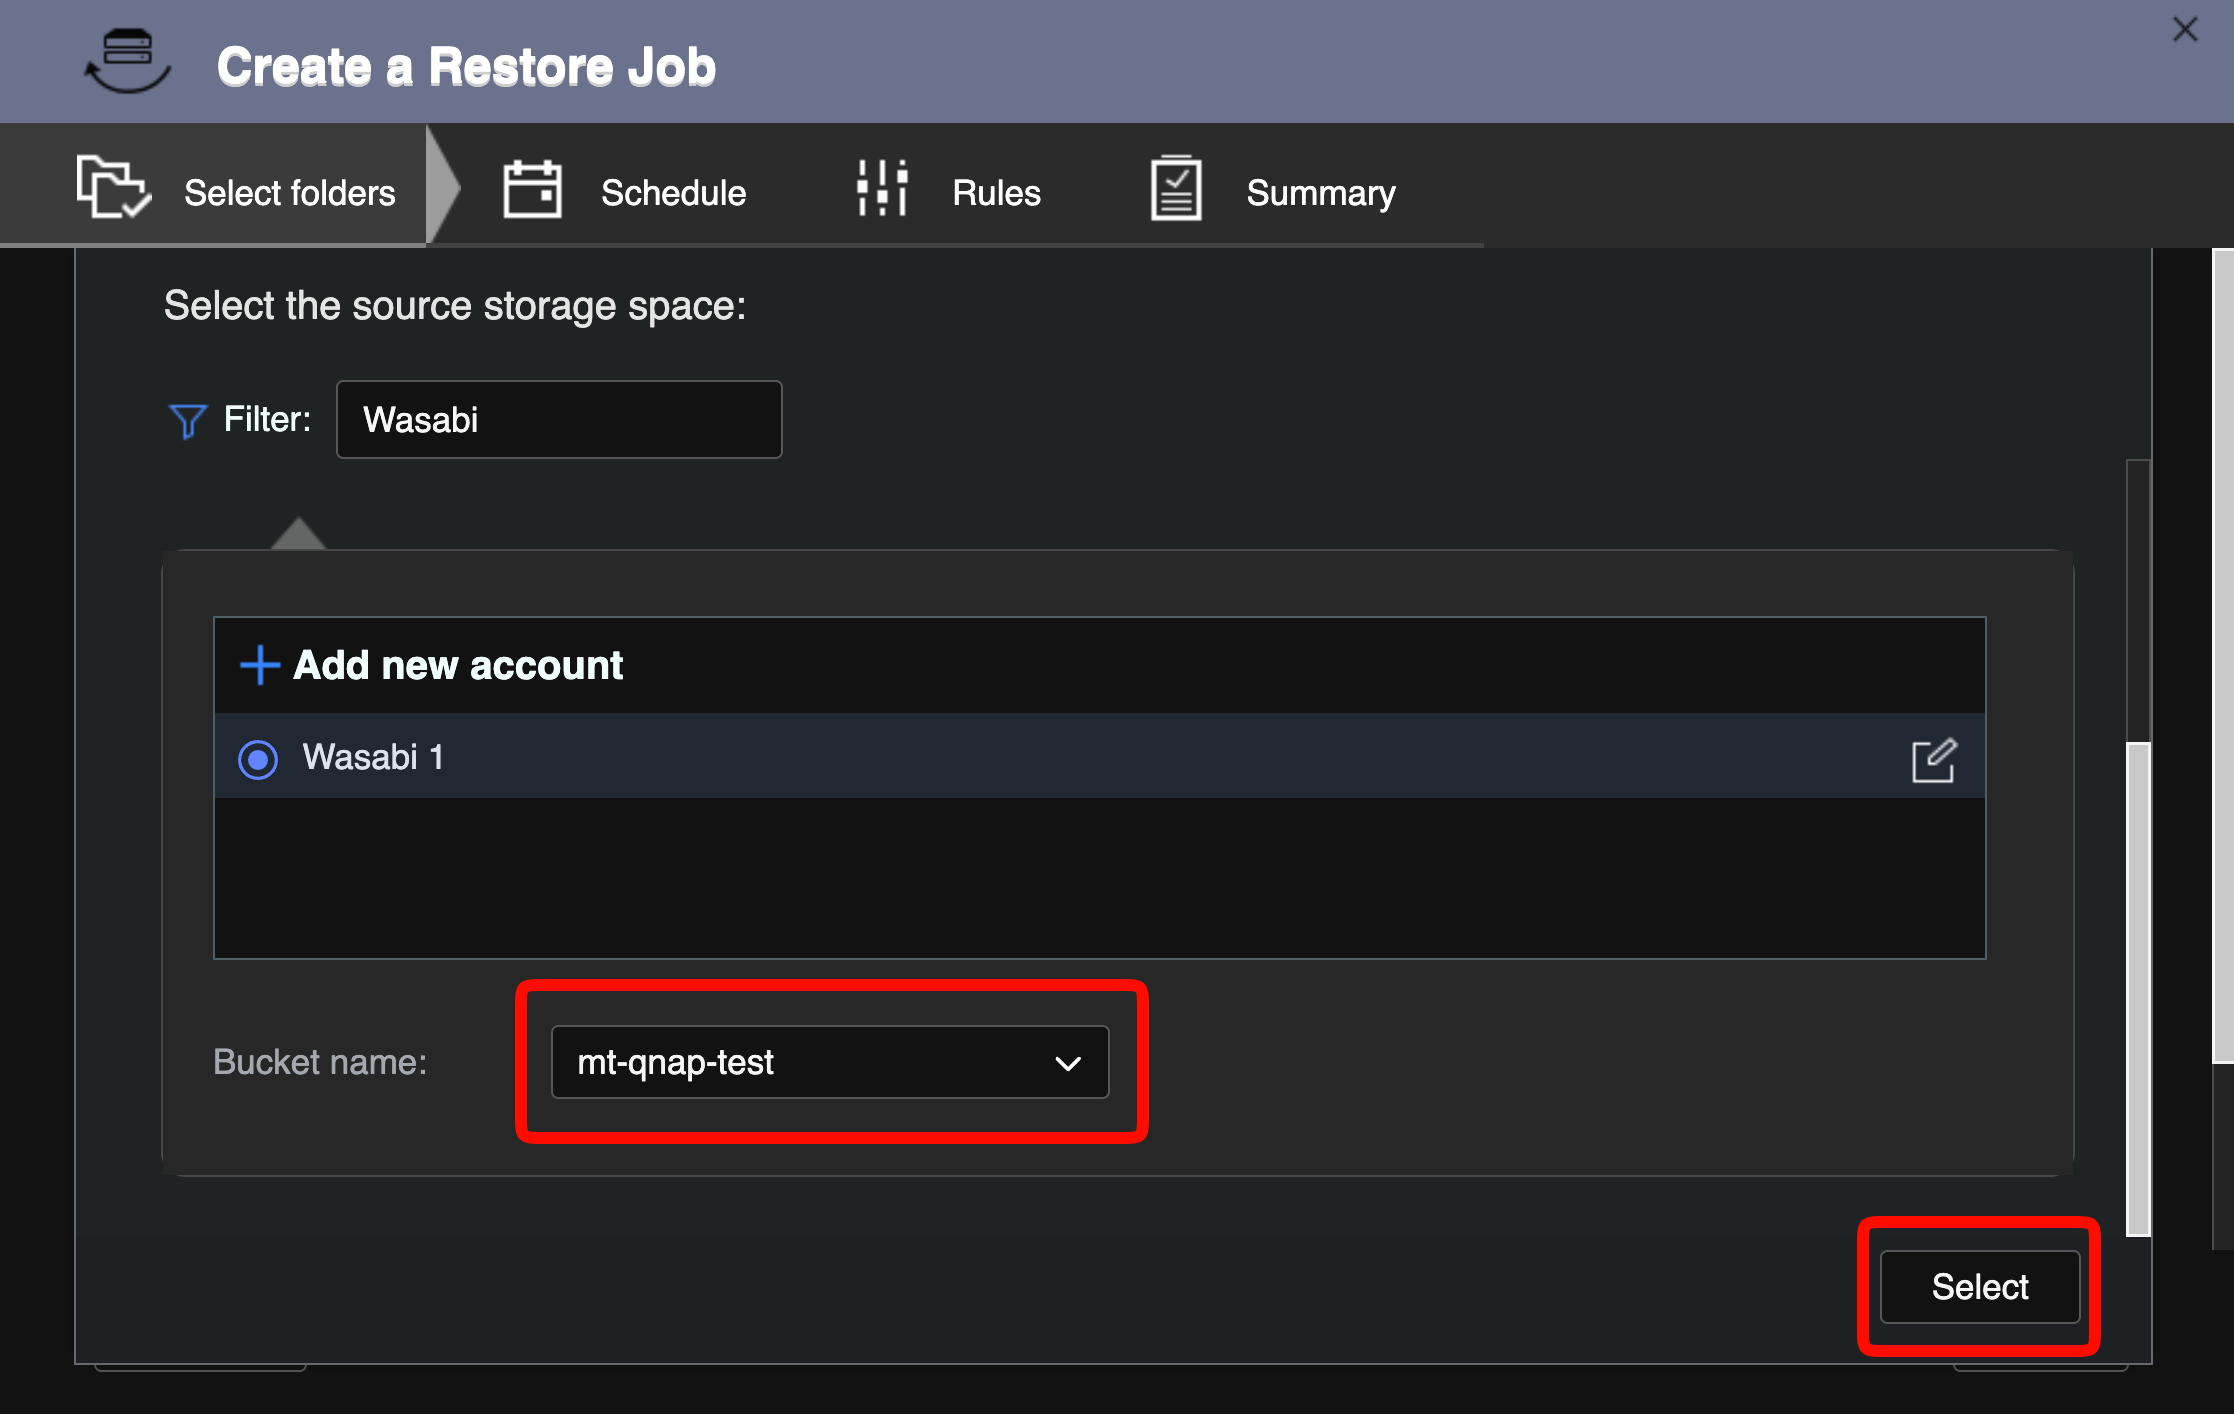
Select your backup bucket from the Bucket name drop-down. Click Select.
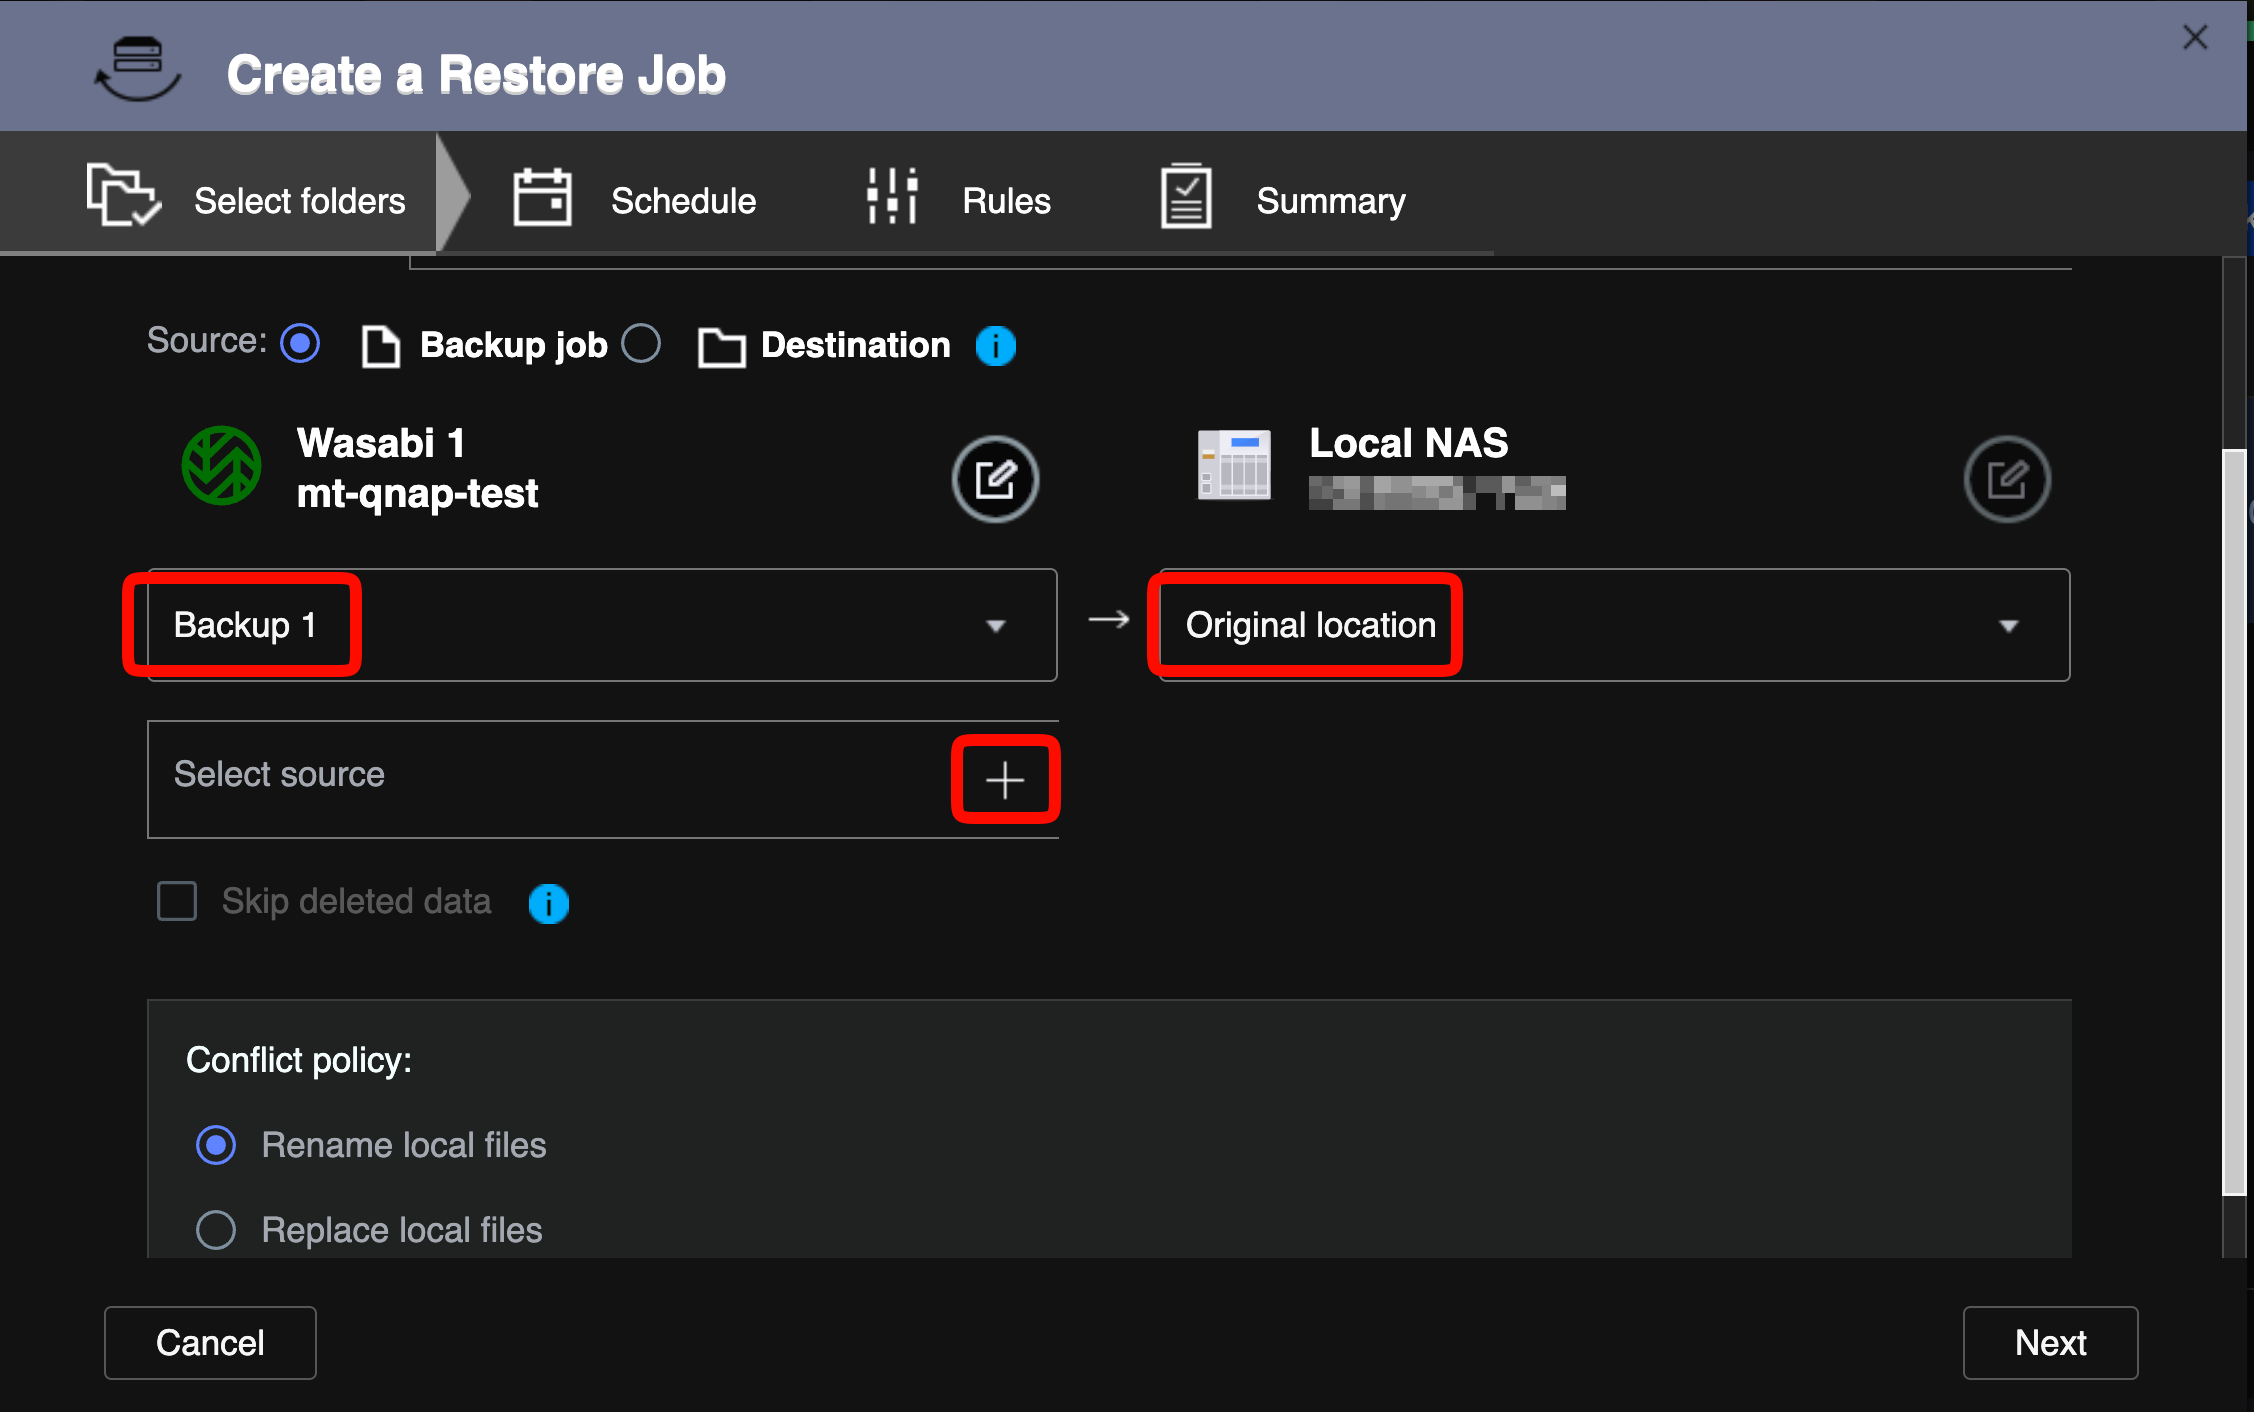
Select the backup job from the source drop-down and set the destination to Original location (or choose an alternative). Click + next to Select source to choose the backup version and folders to restore.
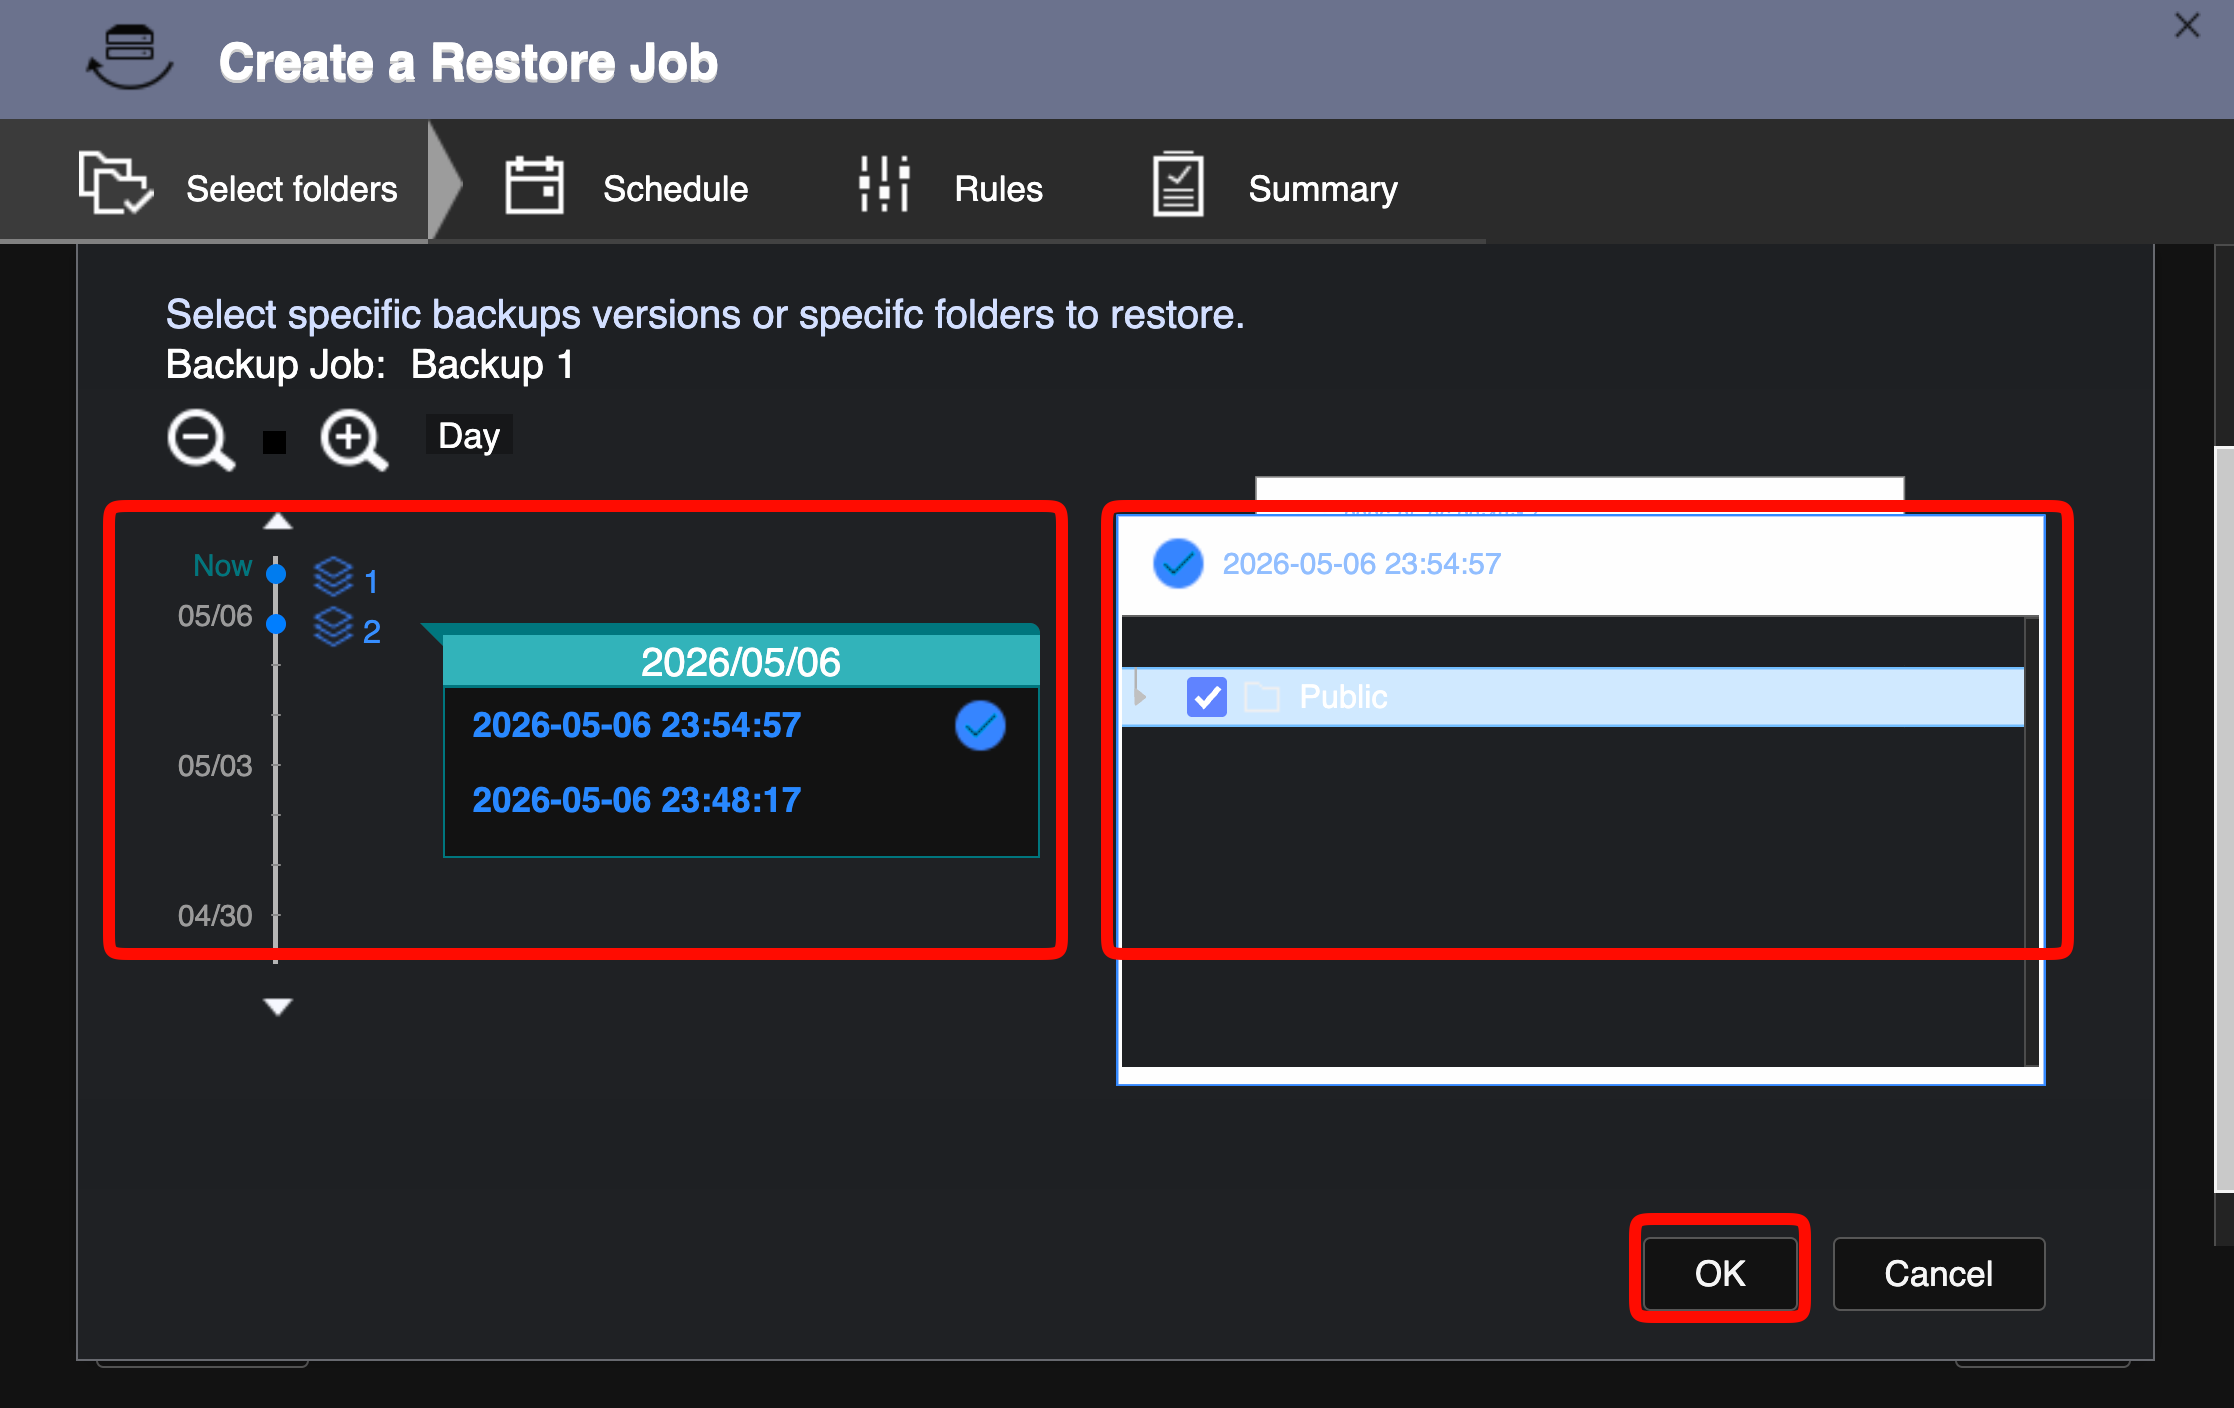
A timeline shows all available backup versions. Select the version you want to restore. On the right, check the folders or files to restore. Click OK.
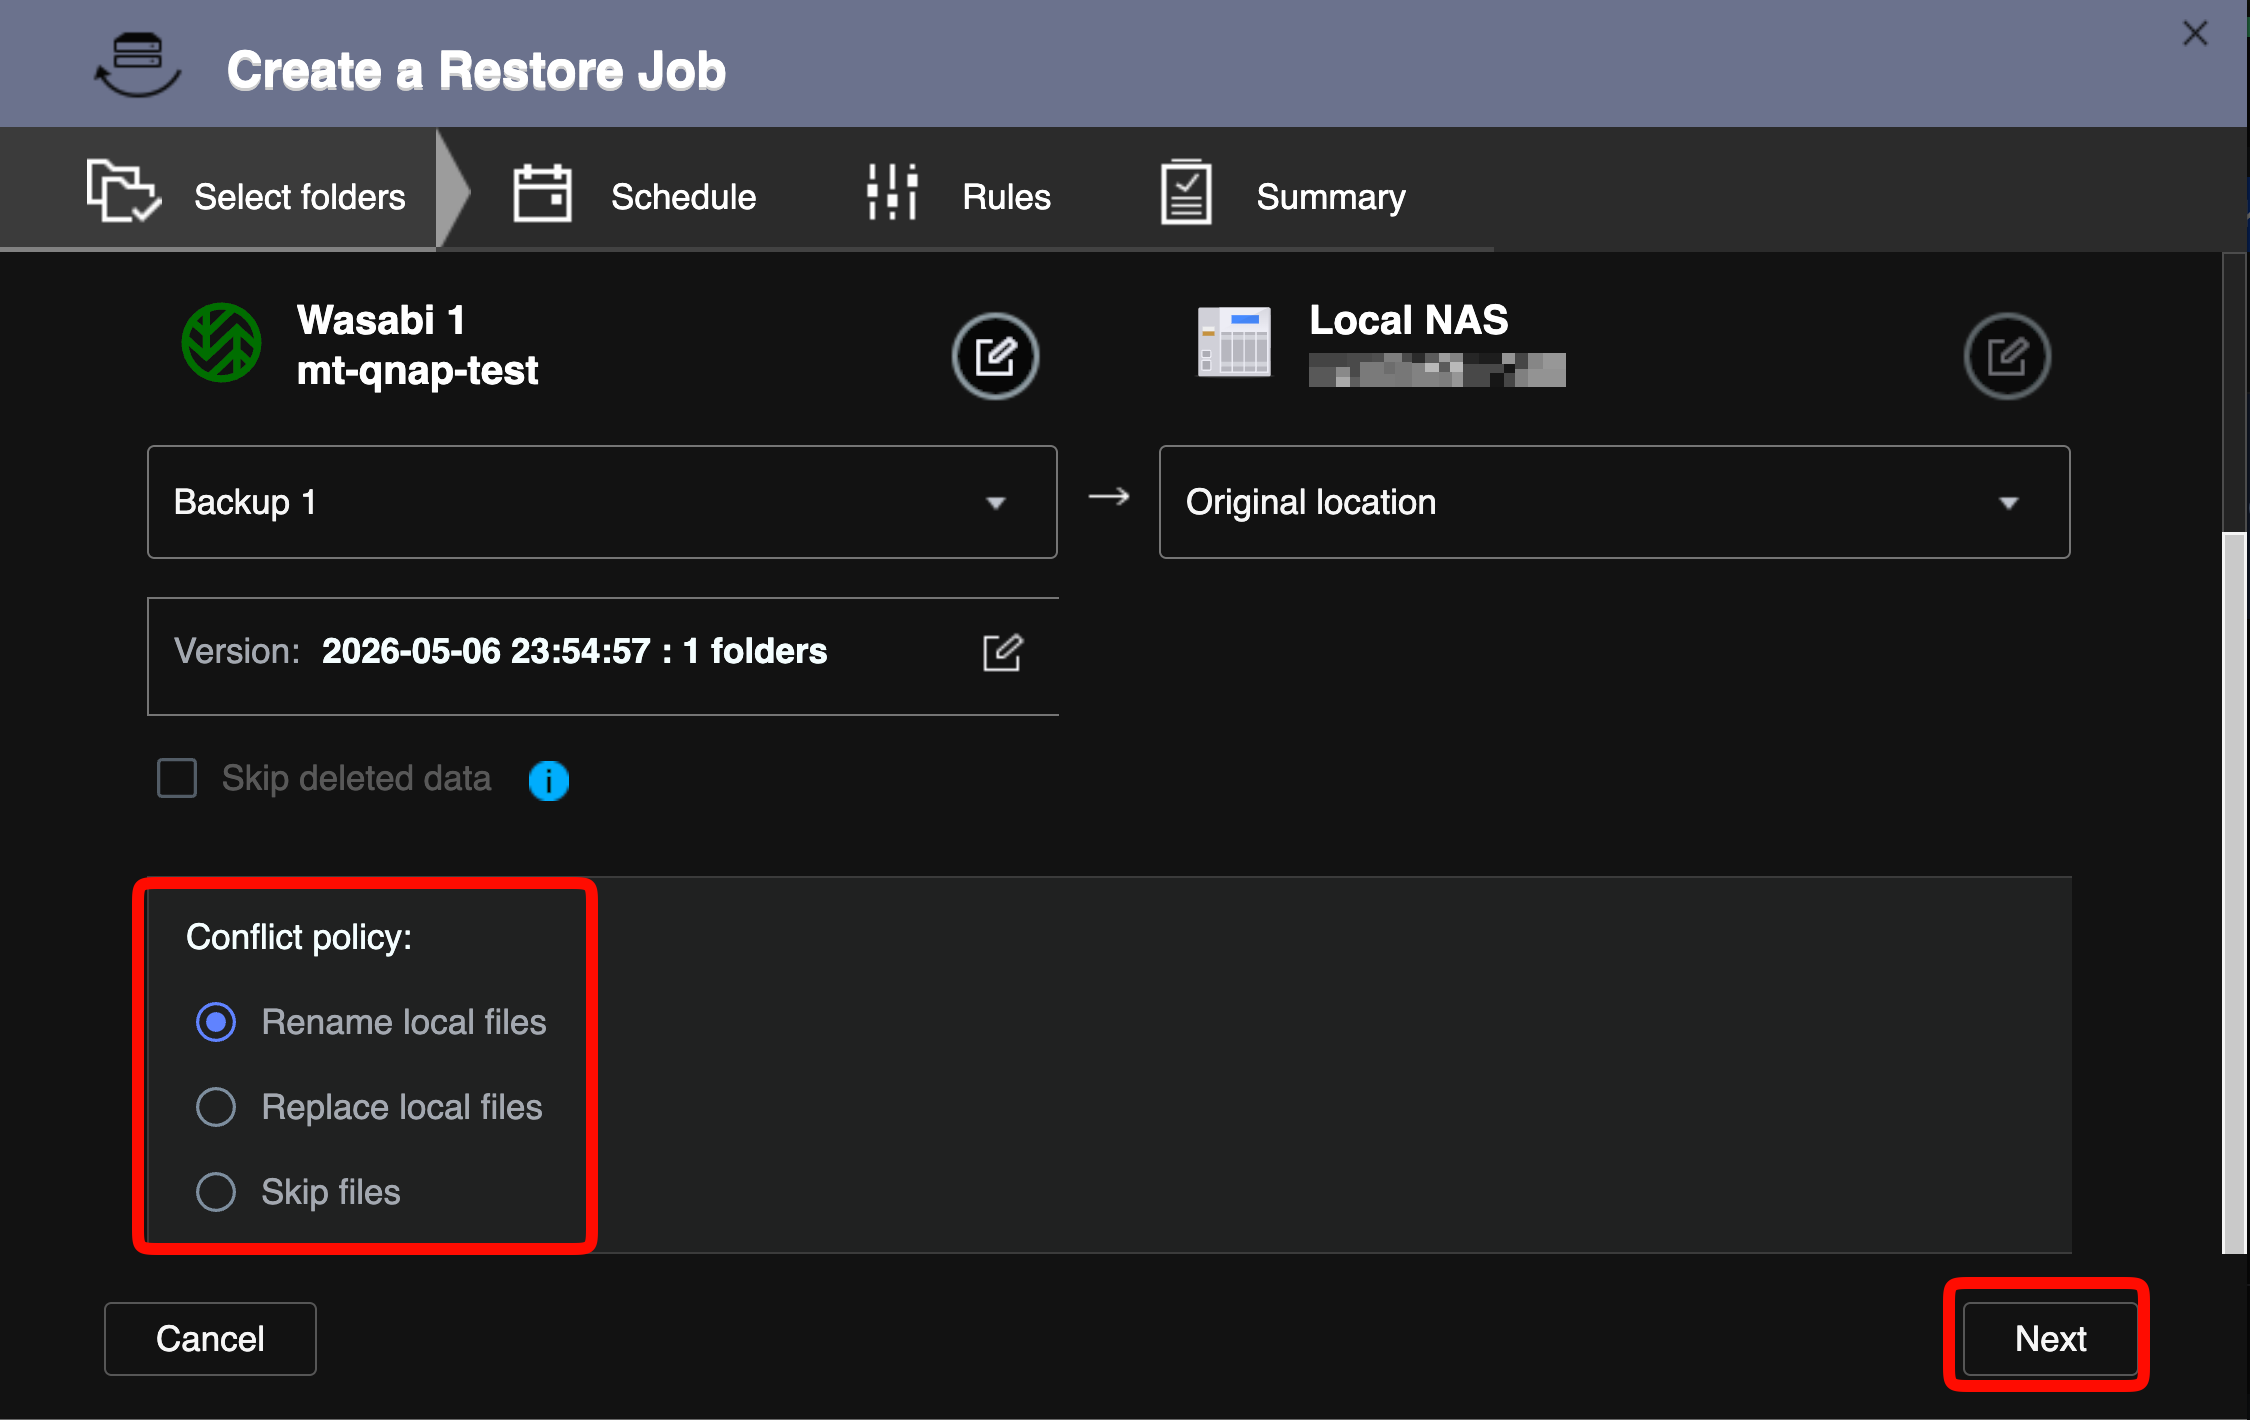
Review the Conflict policy. Click Next.
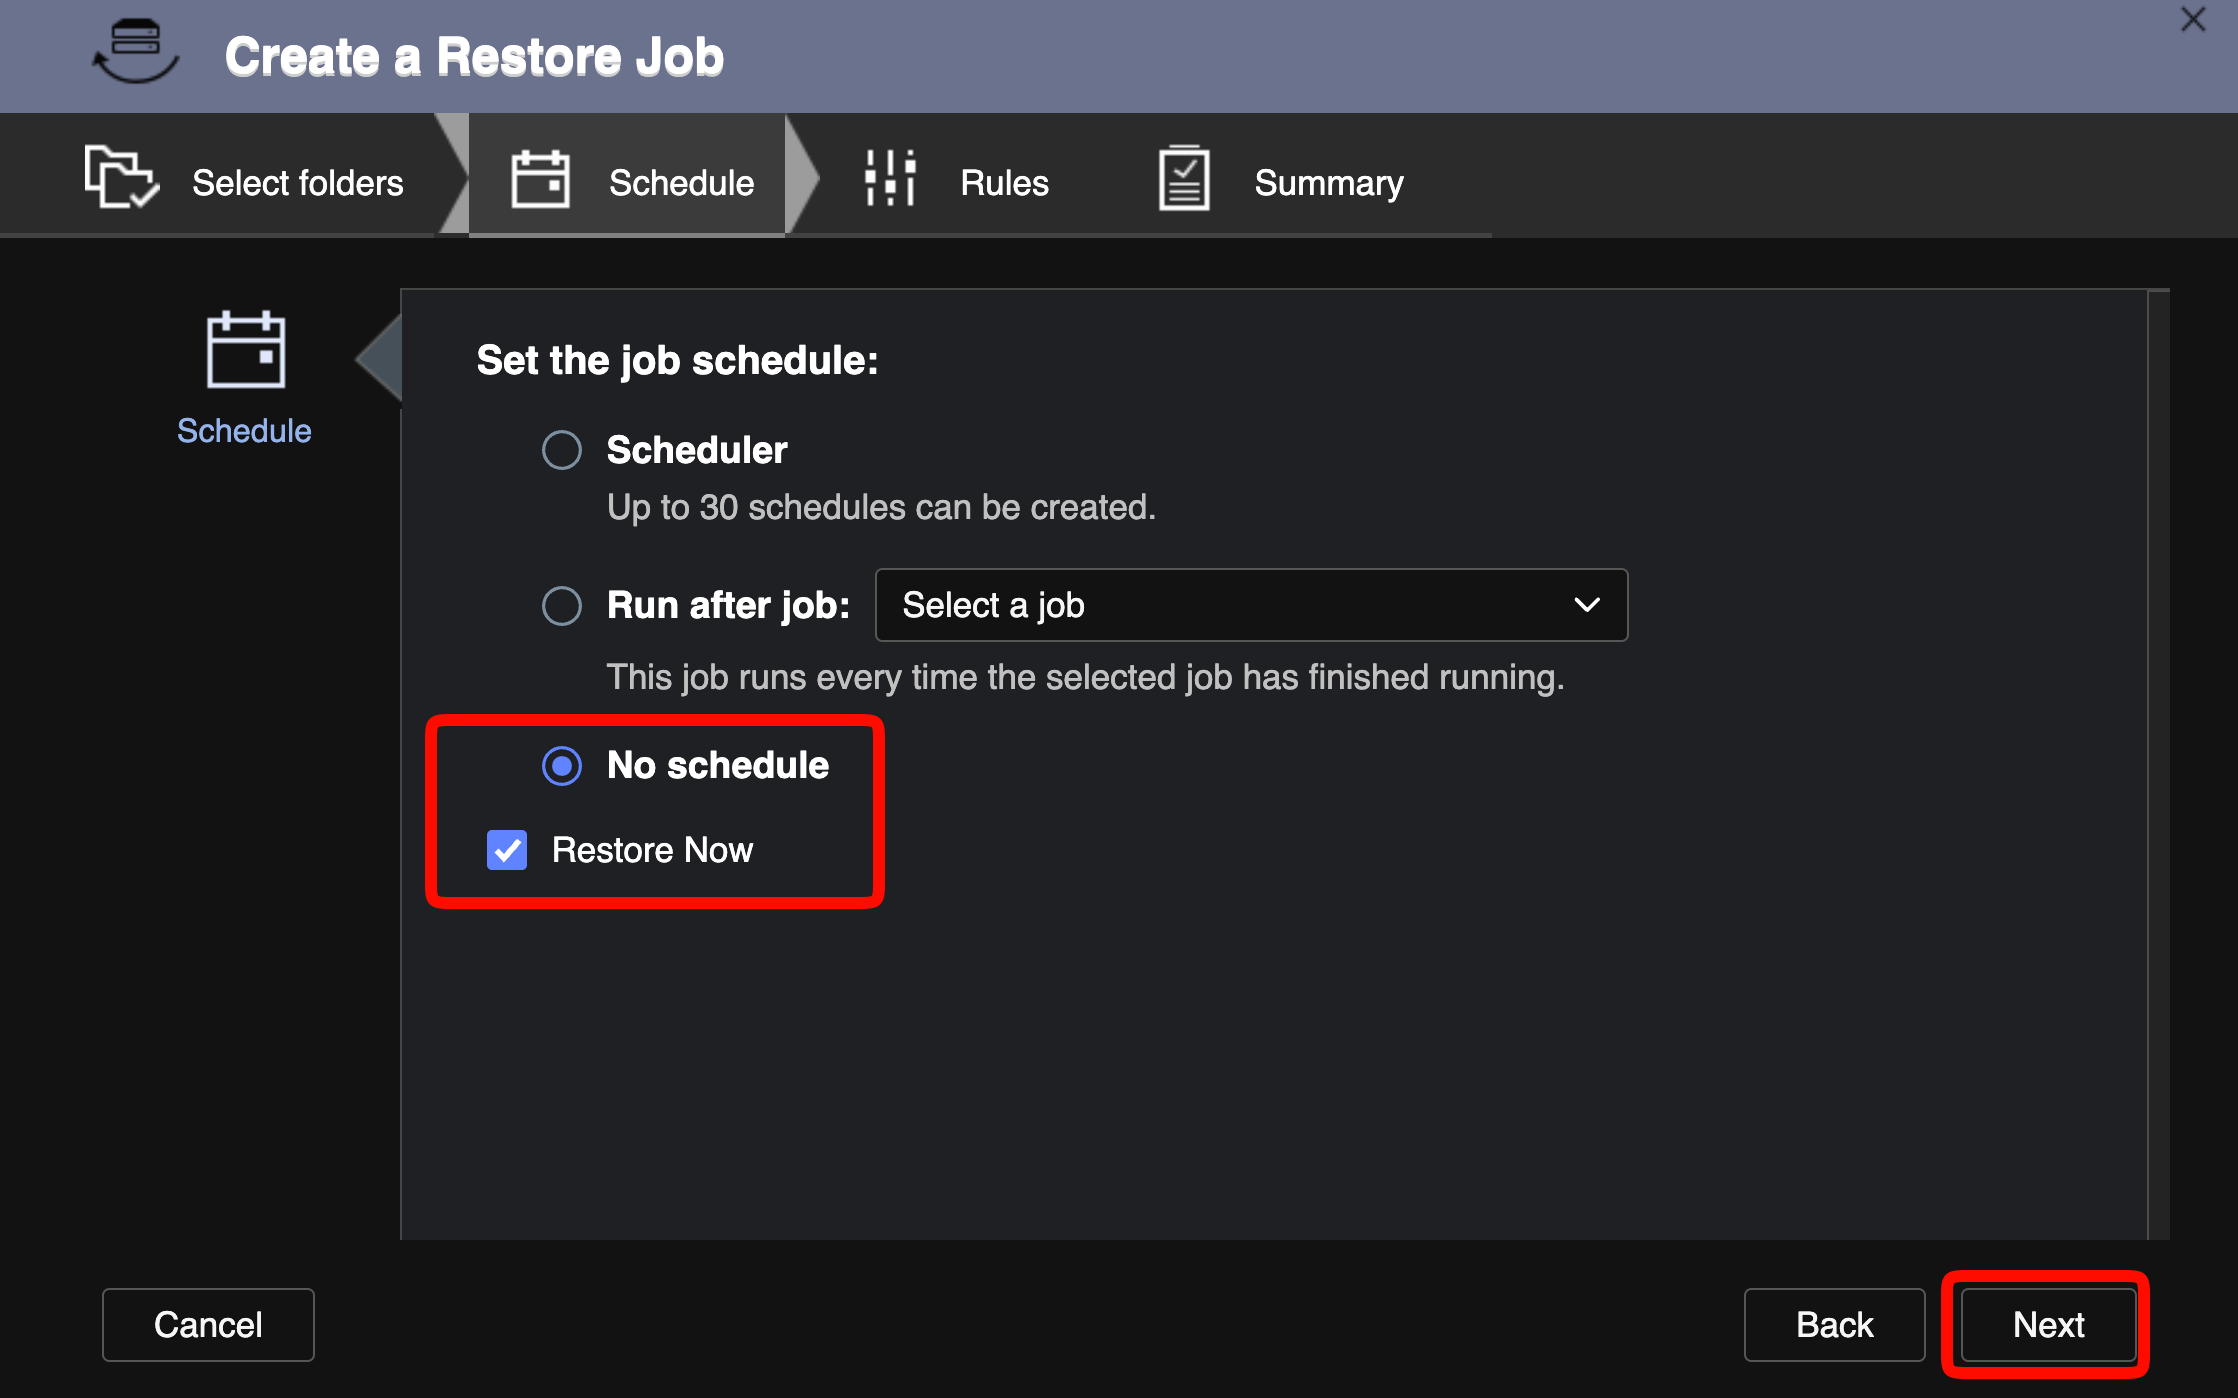
Choose the Schedule tab, select No schedule and check Restore Now to begin the restore. Click Next.
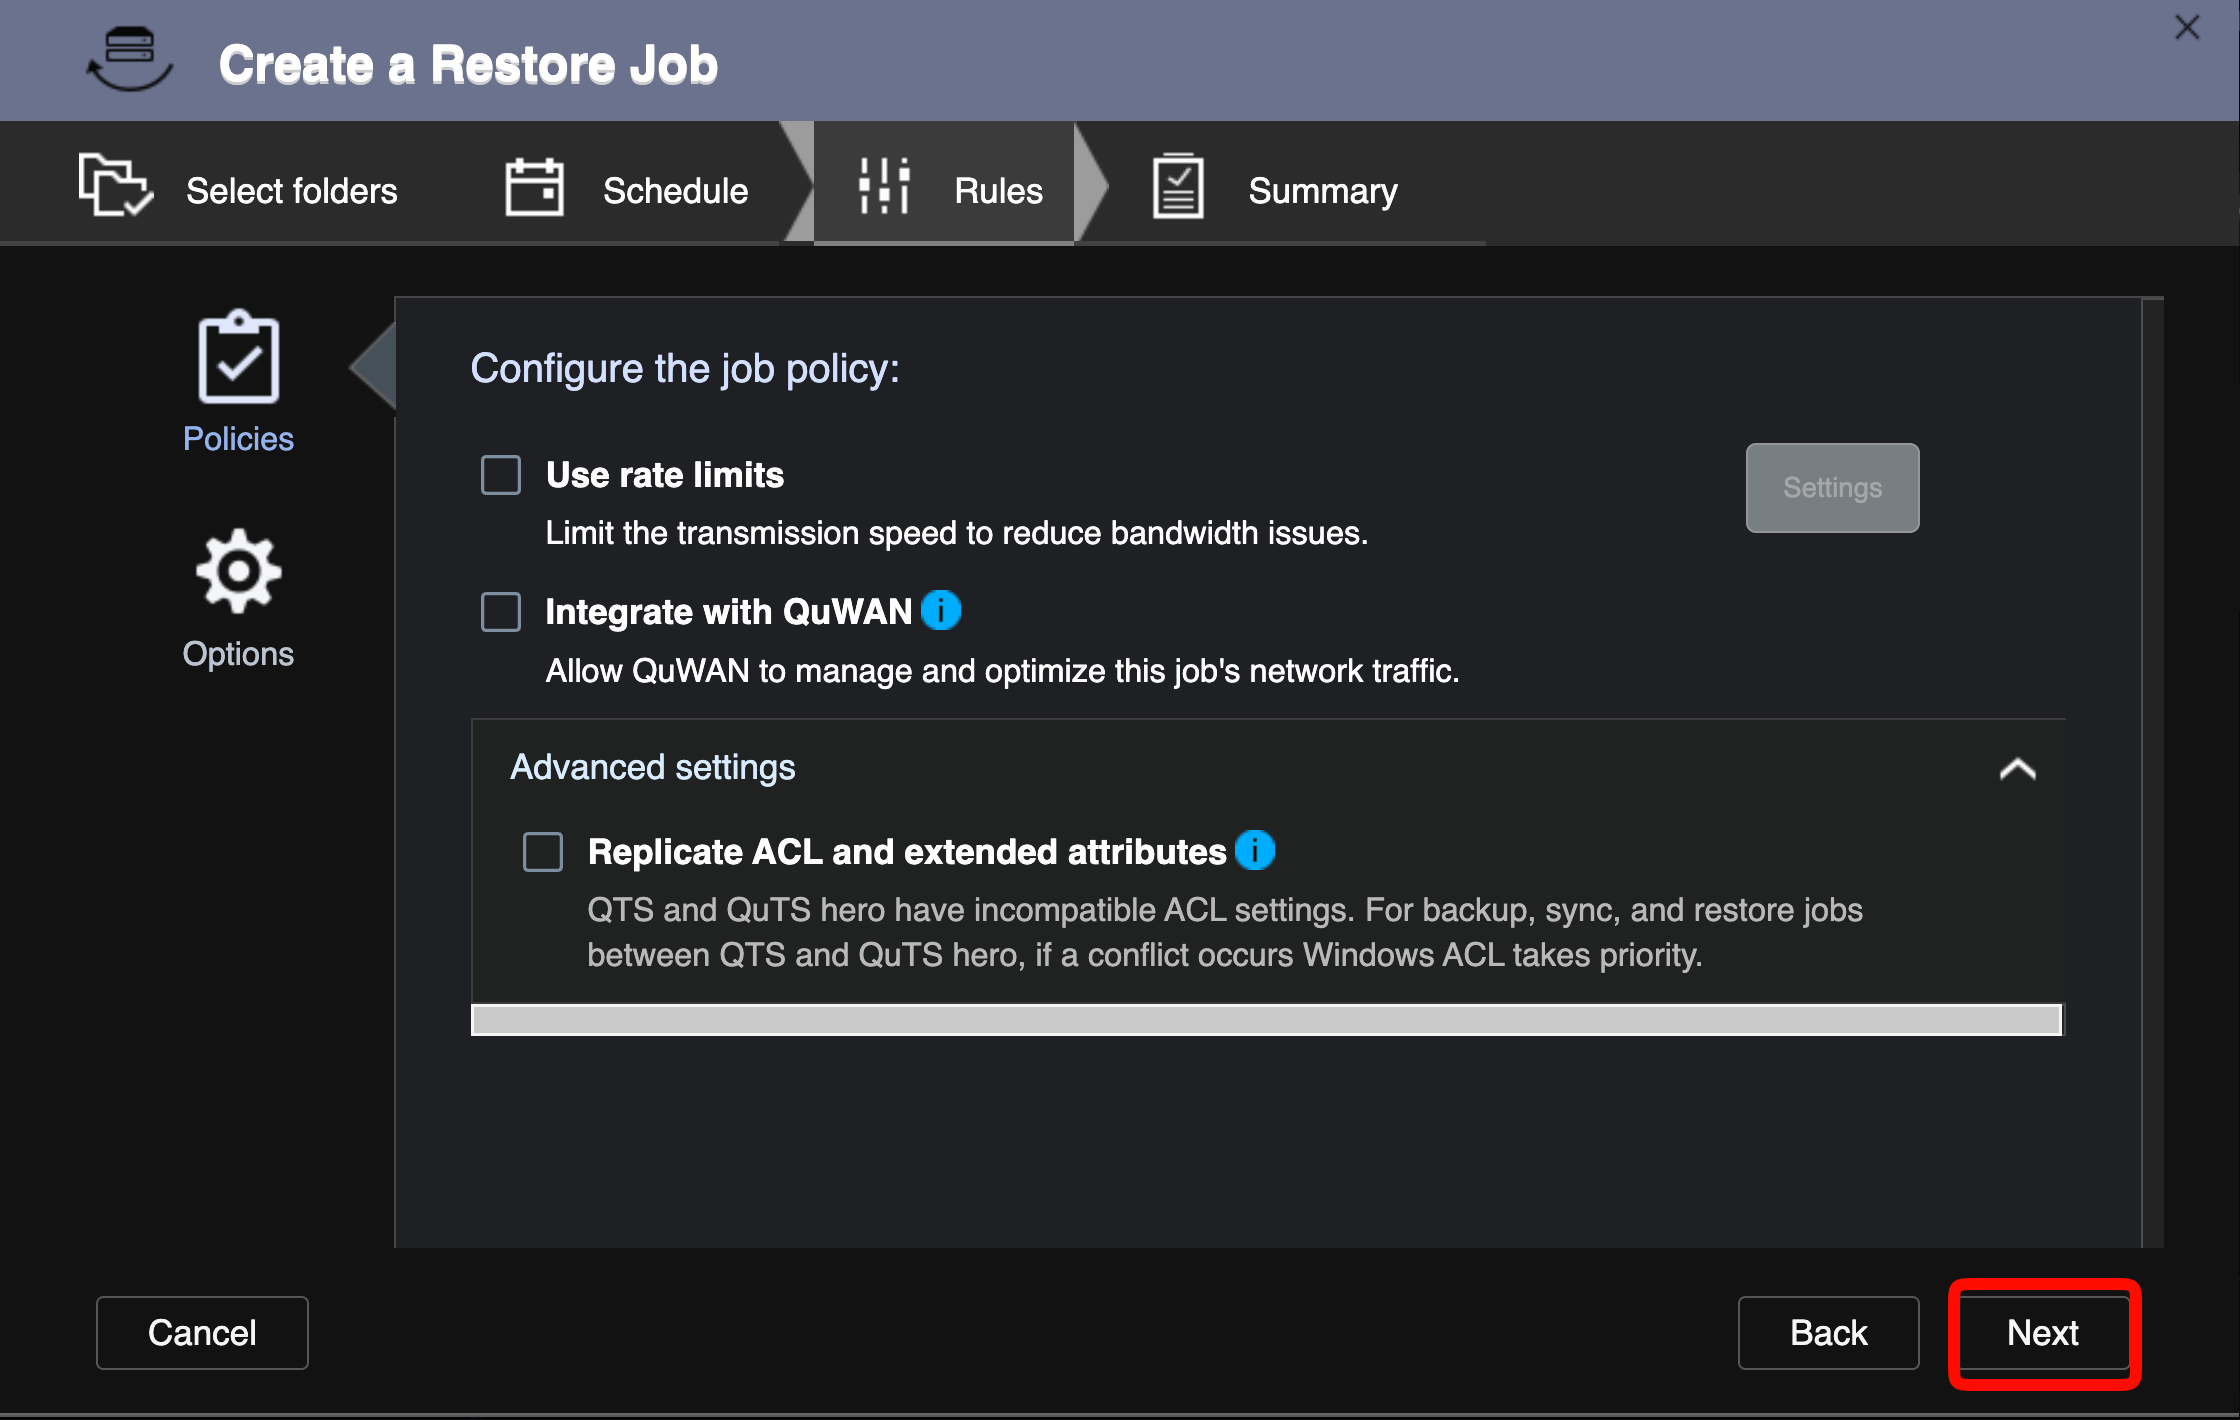
On the Rules tab, review policy settings. Click Next.
Choose the Summary tab, confirm all restore job settings. Click Restore.
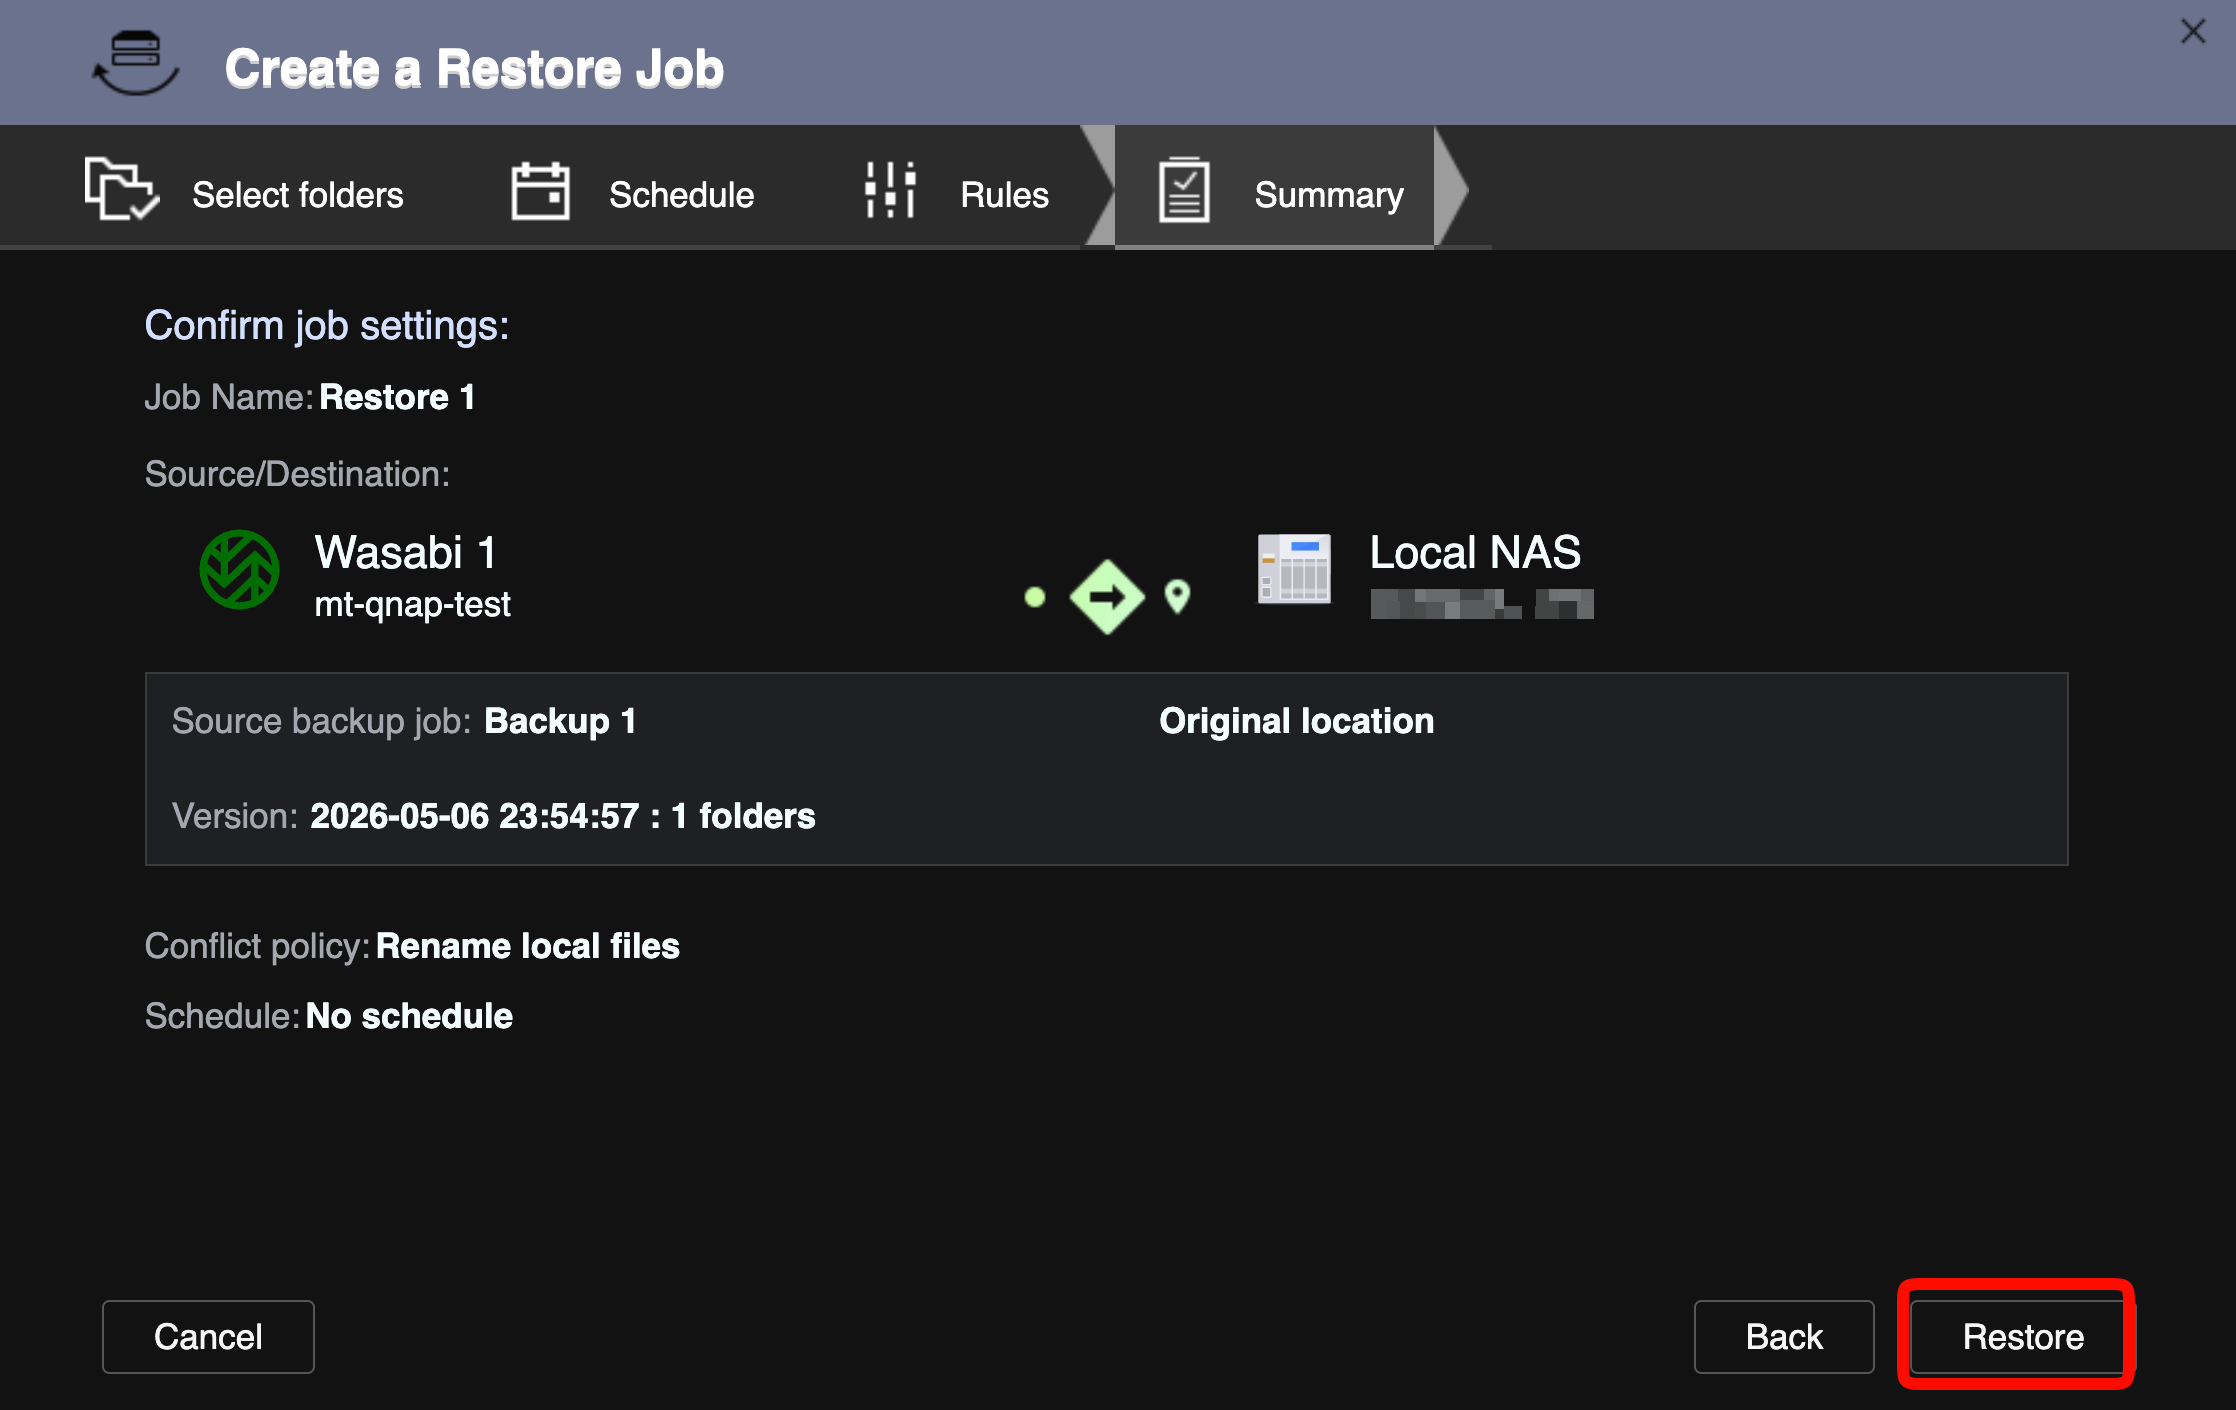
The restore job will run. When complete, the status shows Success.