Wasabi offers the Single Sign-On (SSO) functionality for Wasabi accounts using the CyberArk identity provider system, based on SAML2 (Security Assertion Markup Language) integration.
This article provides configuration instructions for both the IdP administrator and the SSO user to properly configure and complete a Wasabi Console login using your organization's CyberArk SSO service. It also includes additional details beyond what is provided in the Wasabi Management Console Guide for this feature.
Configuring the SAML App in CyberArk (IdP Side)
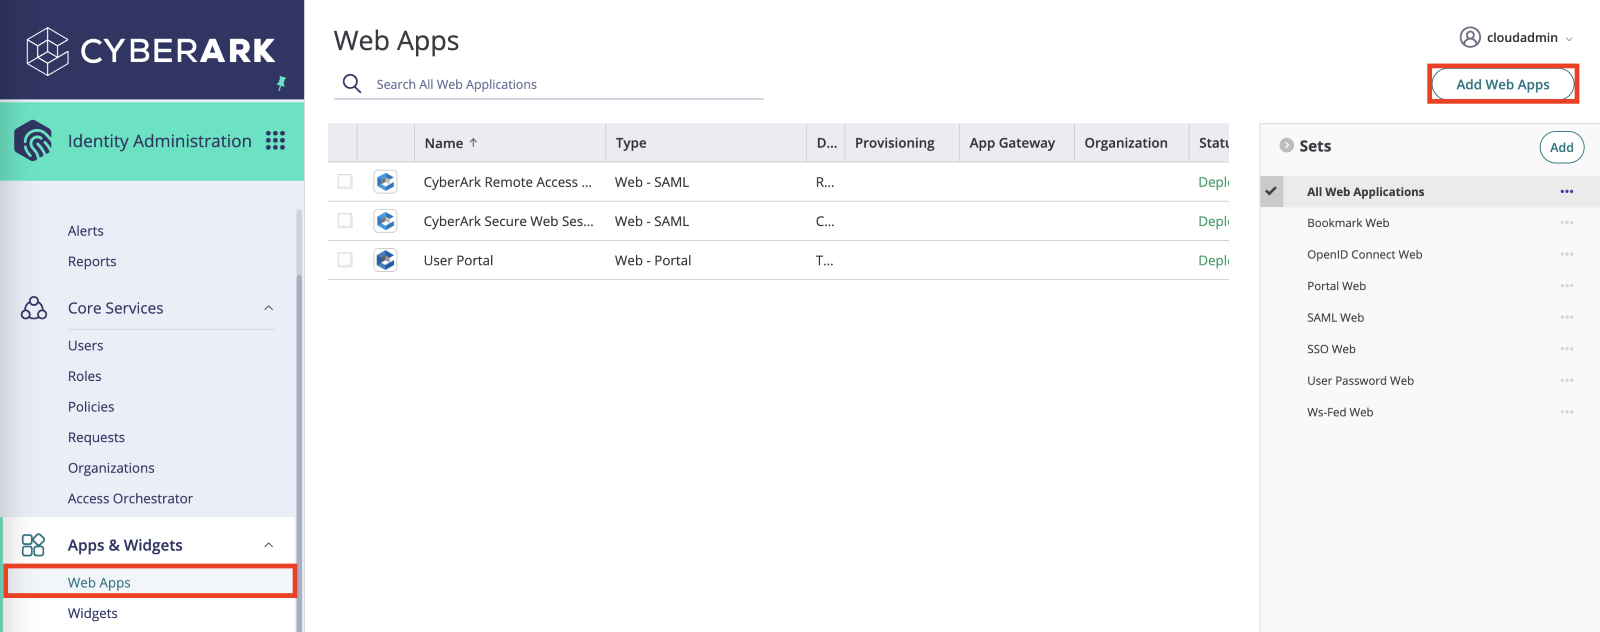
- Log in to your CyberArk Admin Portal.
- On the CyberArk menu, select Web Apps under Apps & Widgets. Click Add Web Apps to create a new web application.
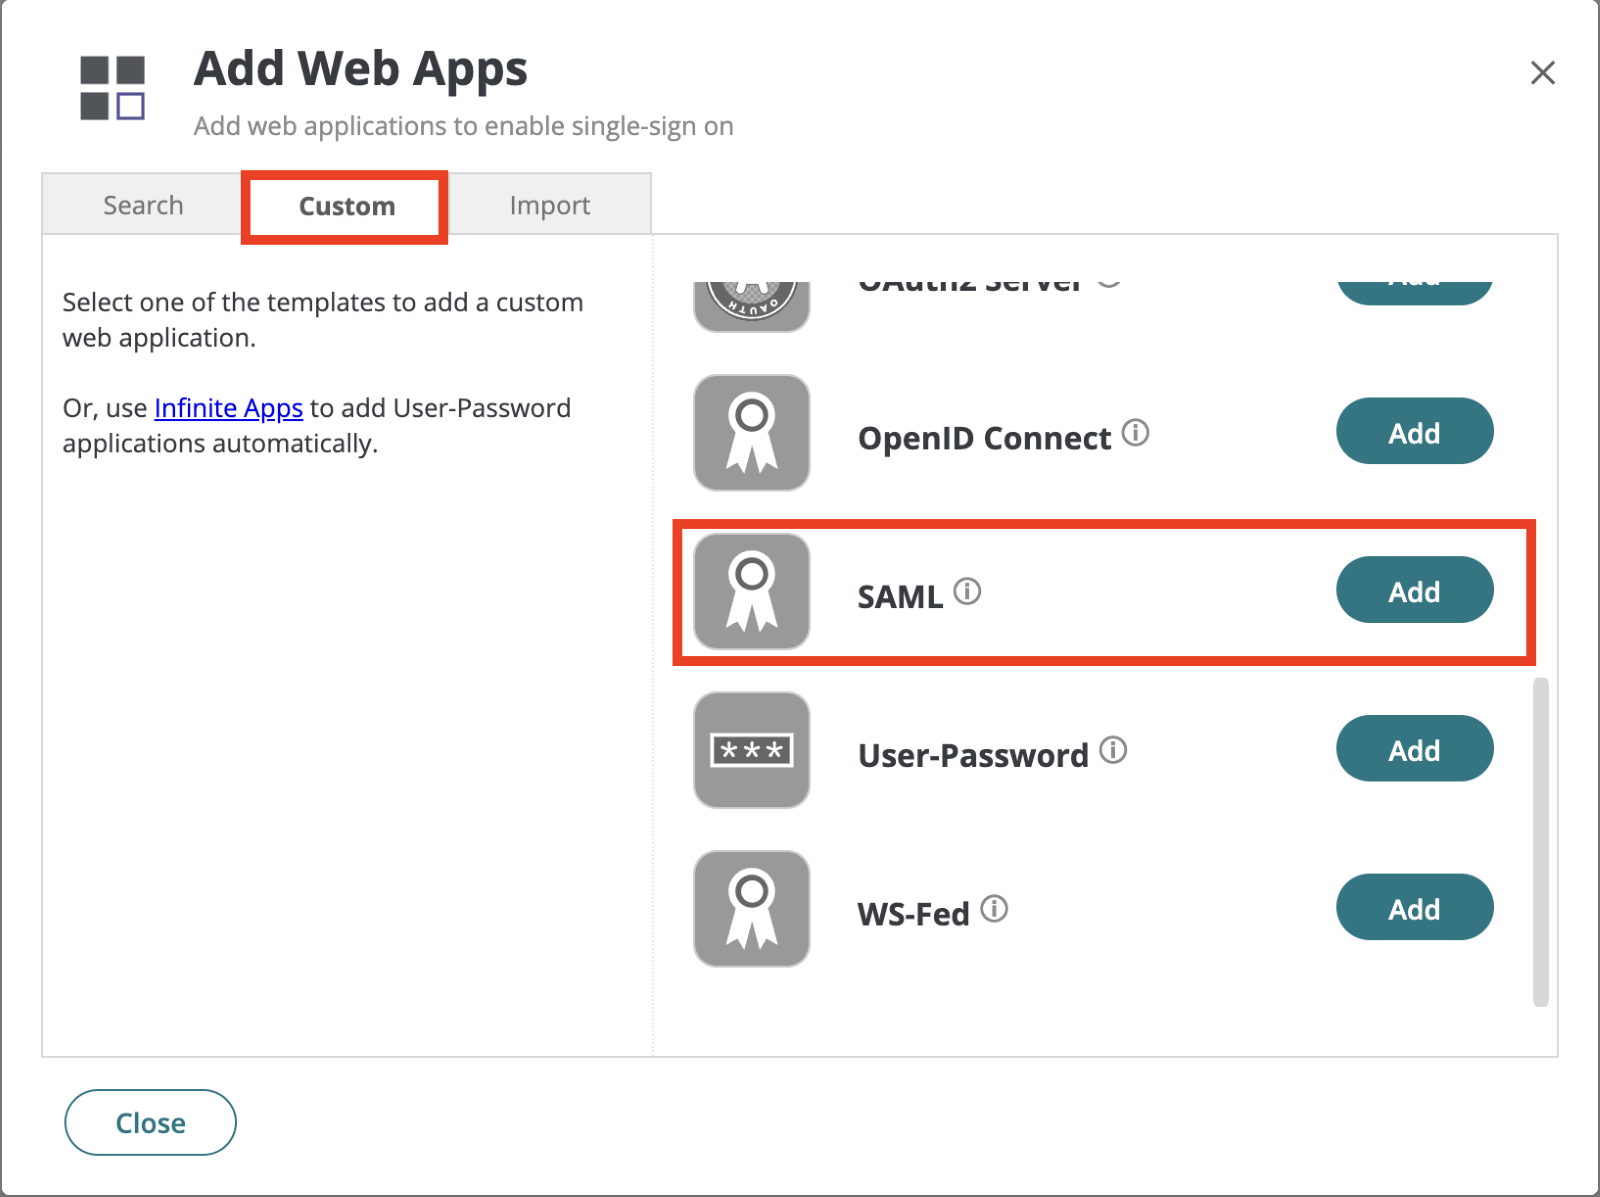
- Select the Custom tab and then click Add to select the SAML web application.
- Optionally, in the Organization box, select the SAML web application from the drop-down. You will use this target organization to log in to the Wasabi Console through SSO, depending on your CyberArk configuration.
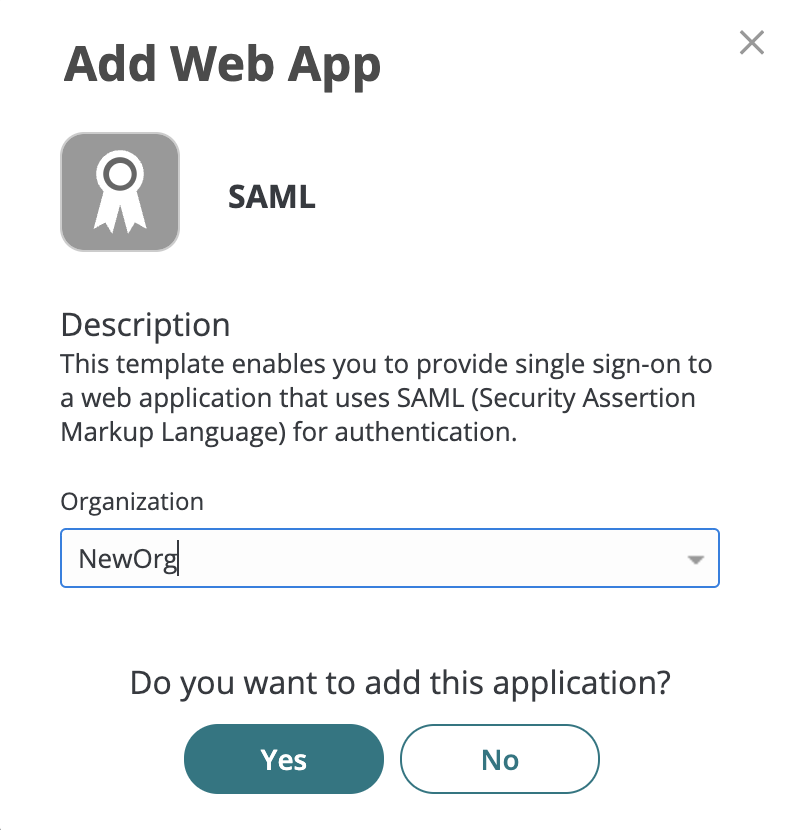
- Click Yes. The SAML page is displayed.
NOTE: If you do not add a target organization, you must manually add the users and groups to the web applications under the Permissions tab in the CyberArk web application.
- In the Settings tab Name box, provide a name for the SAML application, such as "Wasabi Single Sign On."
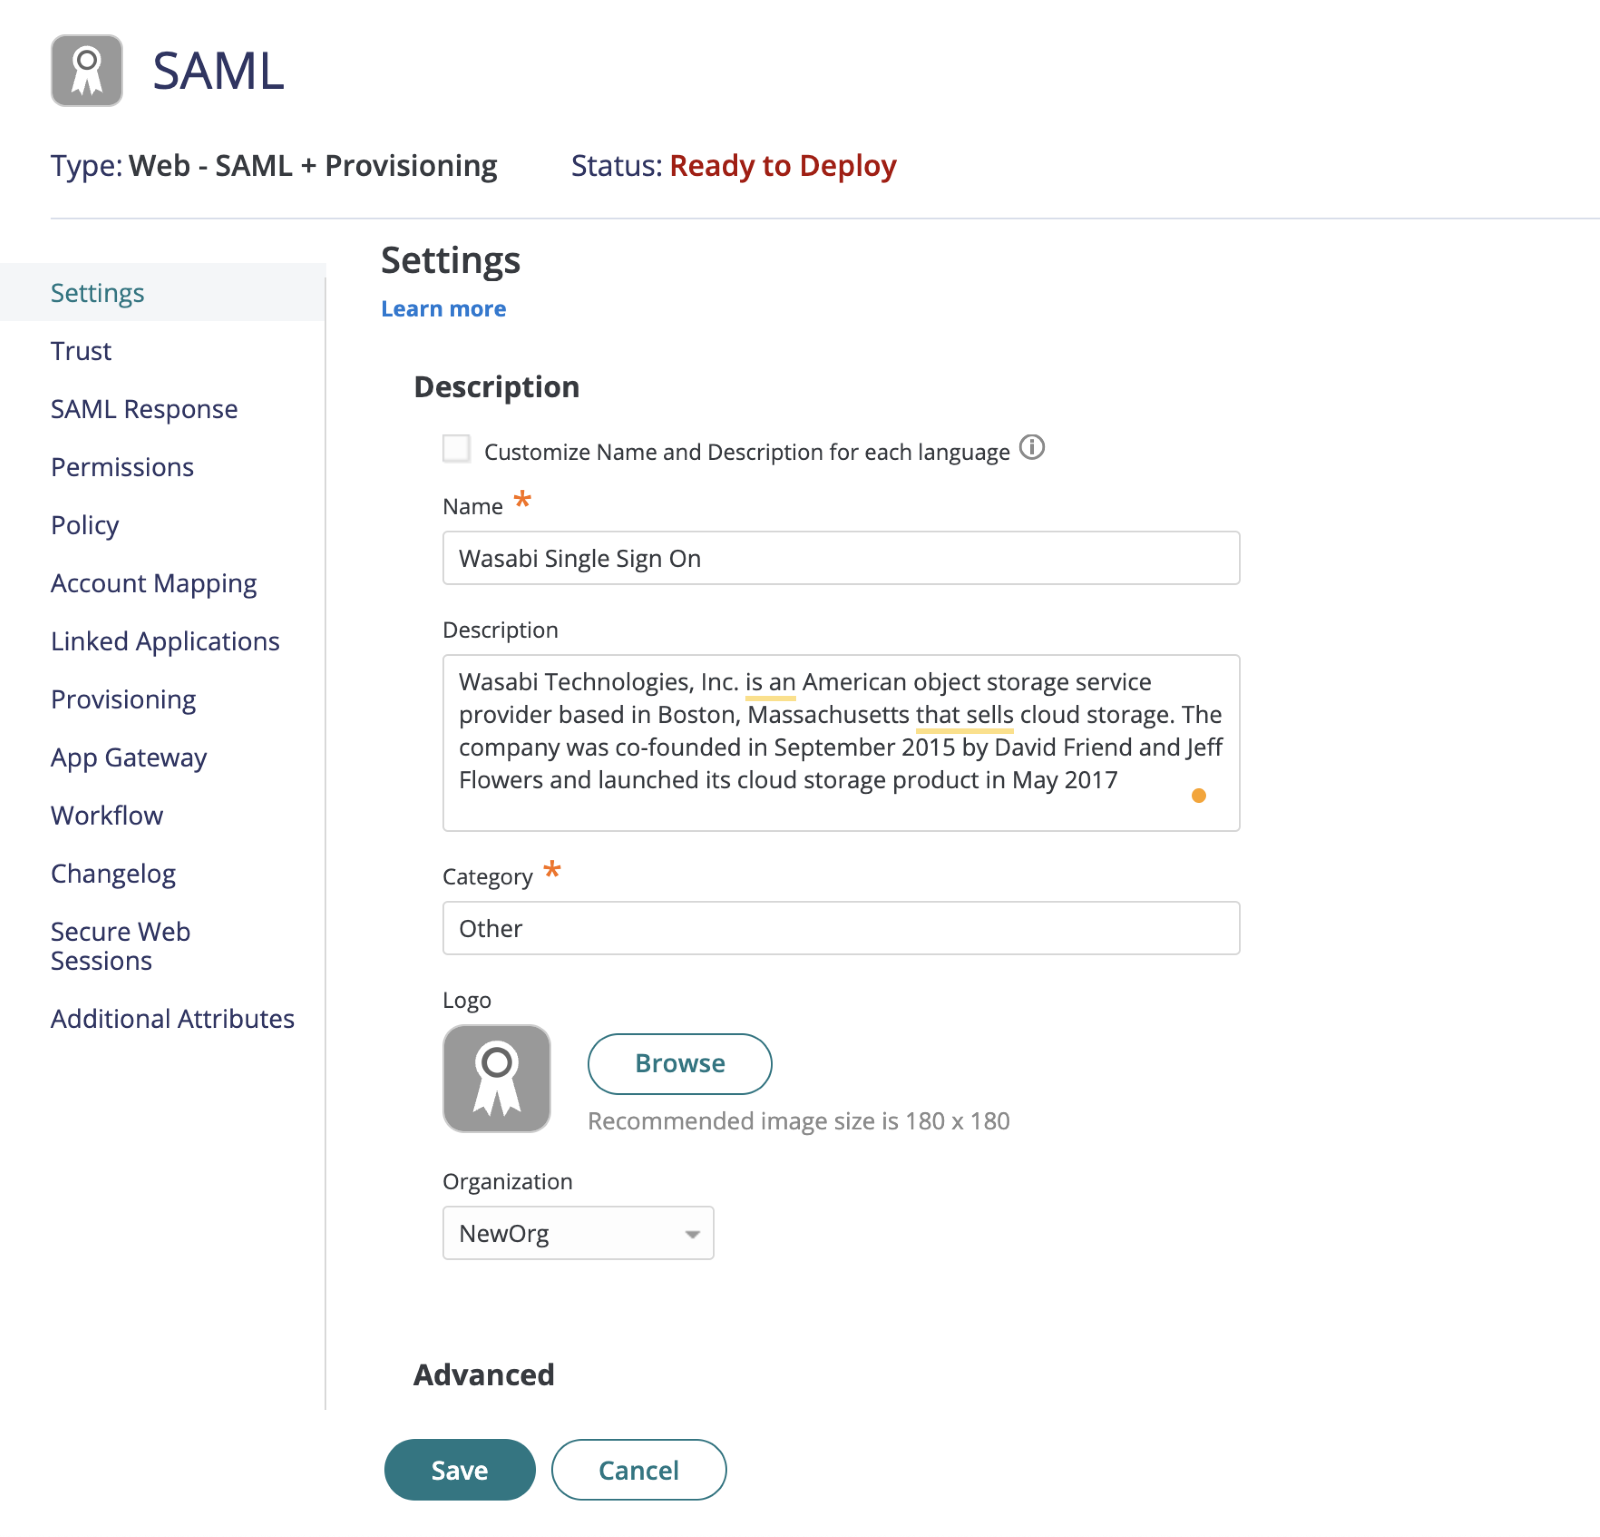
- In the Logo section, browse to and select the Wasabi logo to download.

- Click Save.
- In the Trust tab Identity Provider Configuration section, click Download Metadata File, then click Save.
You can copy the IdP Entity ID/Issuer URL, Single Sign On URL, and download the Signing Certificate to paste into the Wasabi Console manually. The Metadata File will contain all the necessary URLs.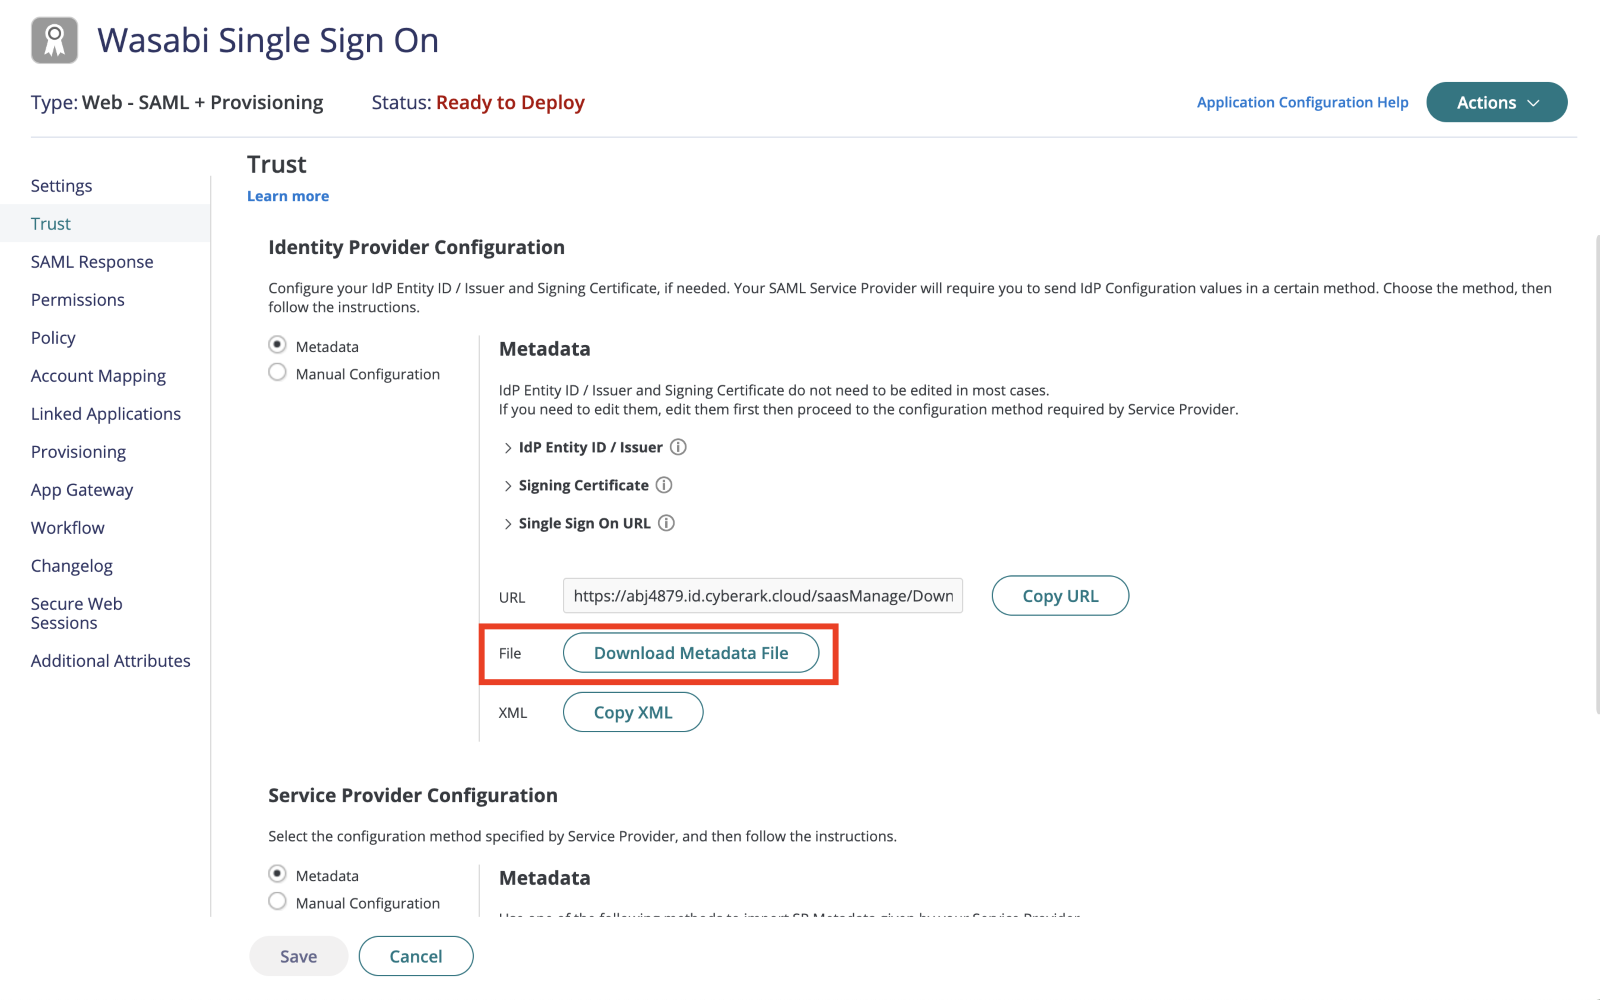
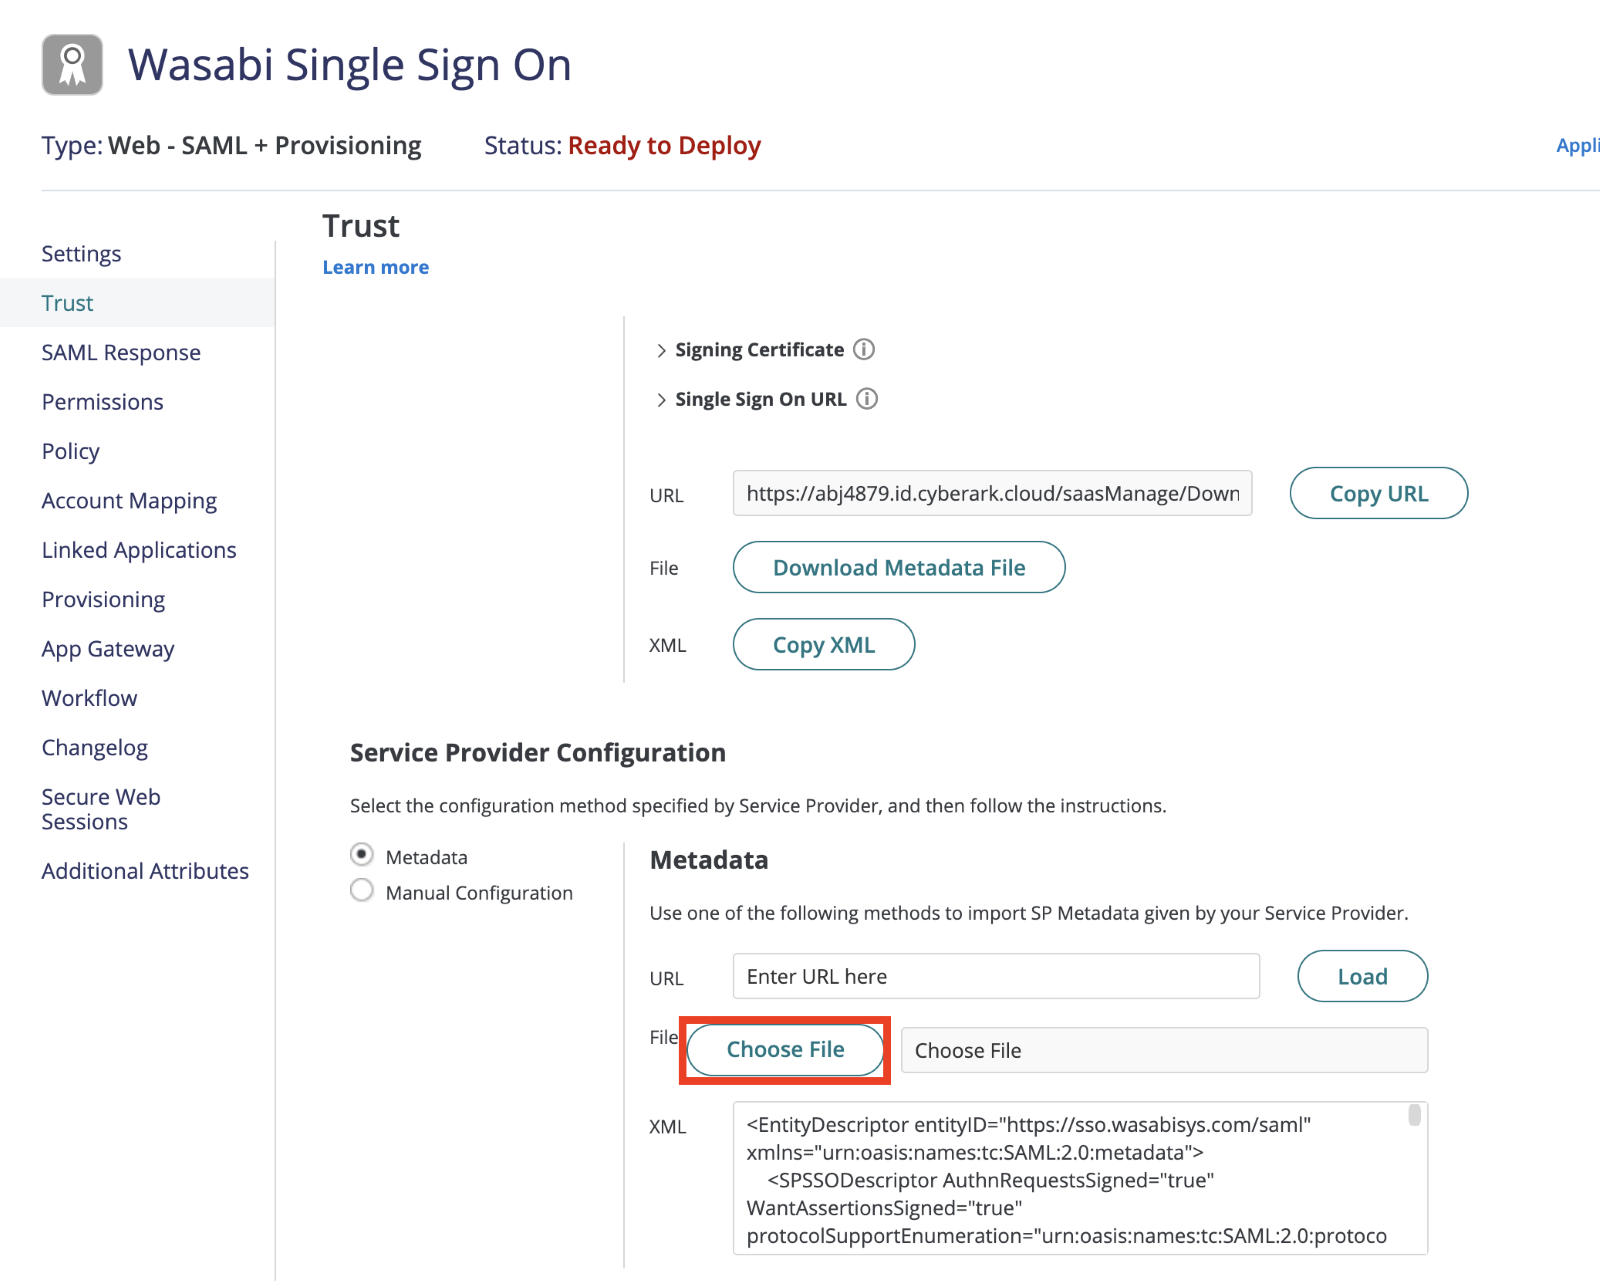
- In the Service Provider Configuration section, click Choose File to upload the Wasabi metadata file “WasabiServiceProviderMetadata.xml." to the CyberArk Web App.
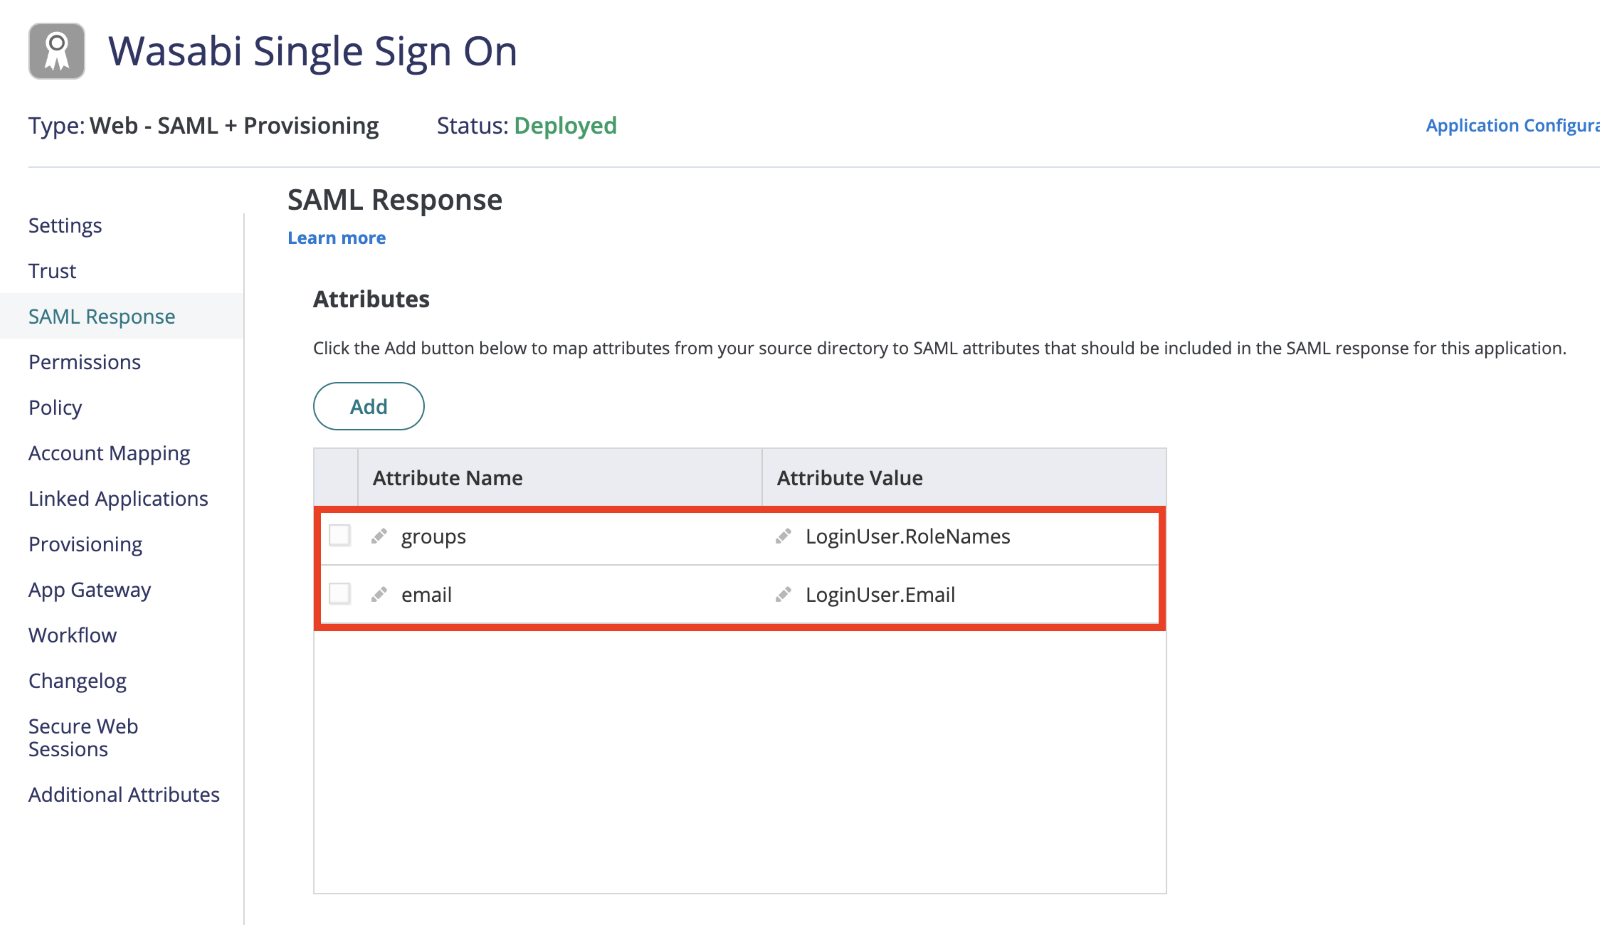
- In the SAML Response tab Attributes section, click Add to map the following attributes.
- Attribute Name: “groups” with the attribute value as “LoginUser.RoleNames”
- Attribute Name: “email” with the attribute value as “LoginUser.Email”
- Click Save.
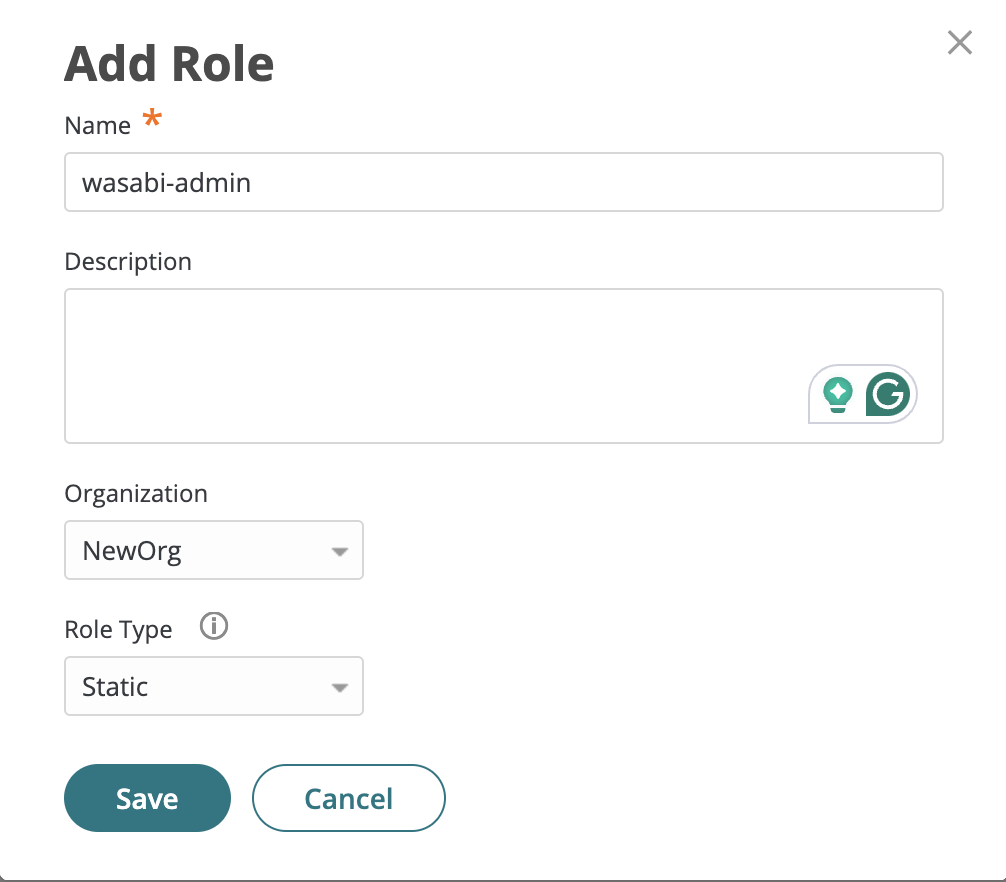
- On the CyberArk menu, select the Roles tab under Core Services. Click Add Role.
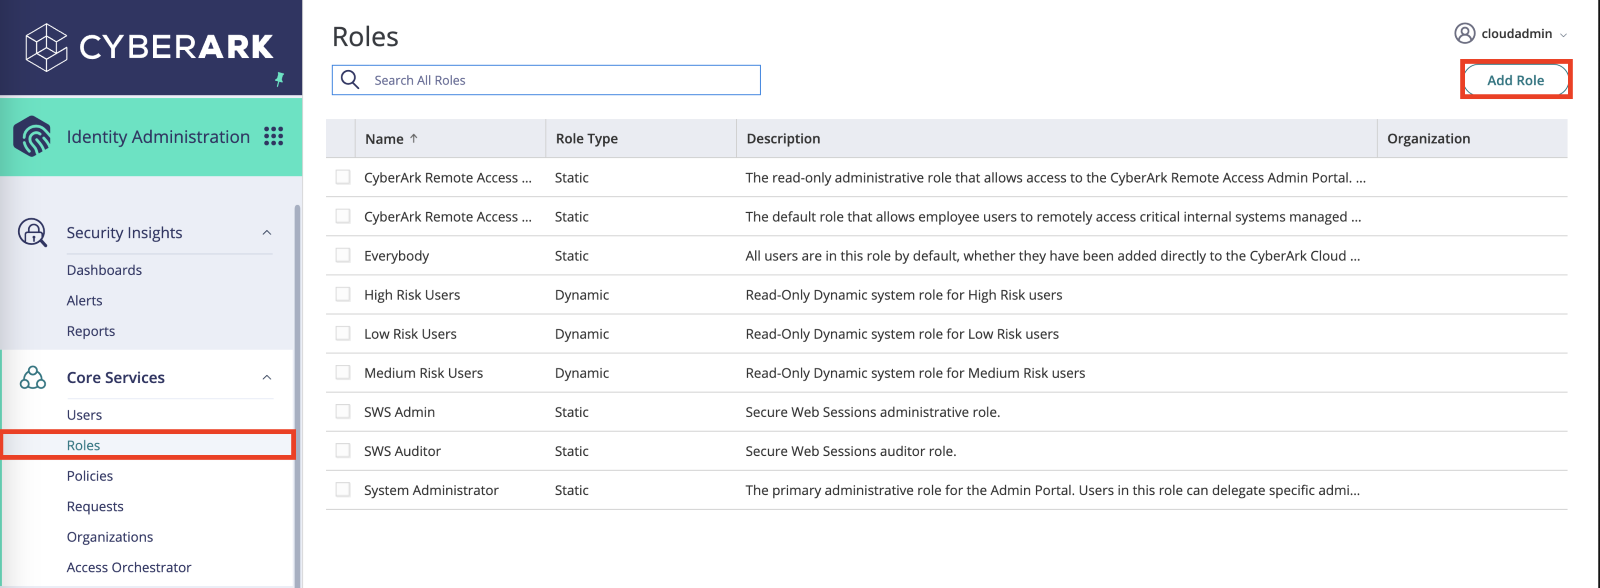
- In the Add Role dialog Name box, enter wasabi-admin, then select NewOrg from the Organization drop-down (if necessary) and select Static from the Role Type drop-down. Click Save.Do not put any spaces in the role name because you will create the same role name in the Wasabi Console for authentication.
- In the Add Members dialog add users and groups to the newly created role that will have access to the Wasabi Console through SSO.
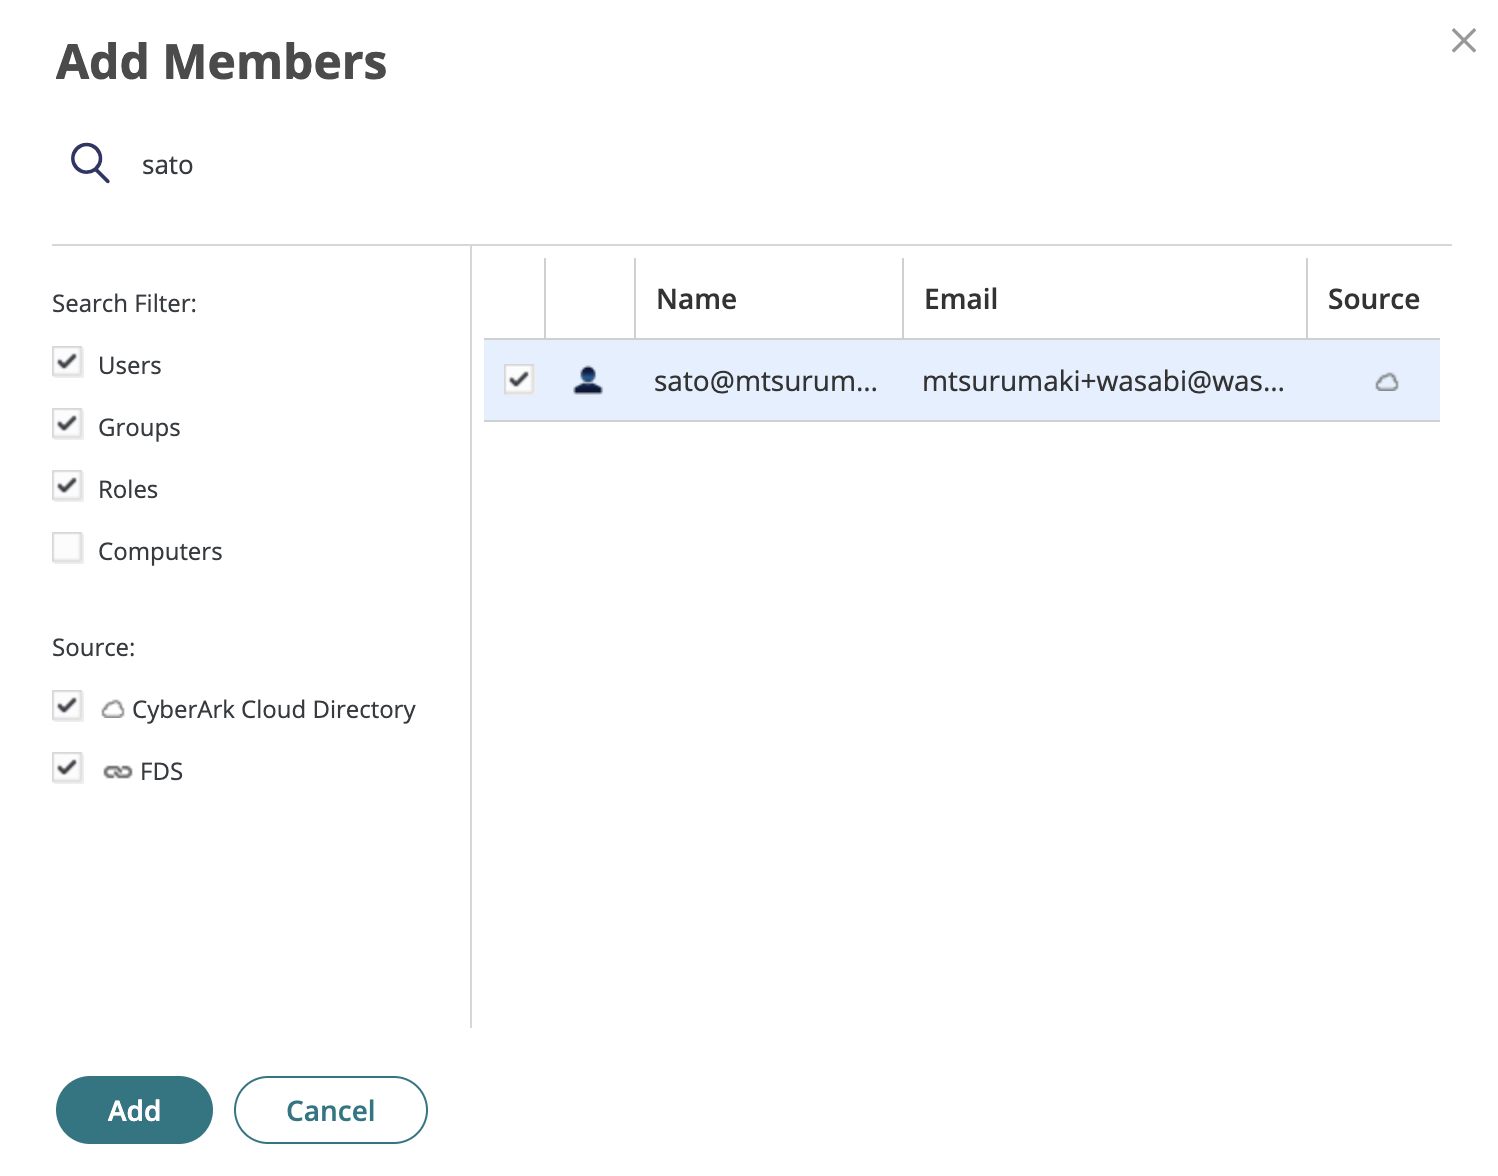
- Click Add.
NOTE: A Wasabi role must be created to match the attached role from CyberArk. The Wasabi role will have an IAM policy for the necessary permissions within the Wasabi Console. They must be assigned to users within your organization's Identity Provider and be returned to Wasabi. Without this, we will be unable to match a user with a role.
Configuring SAML Settings in Wasabi Console (SP / Client Side)
- Sign in to the Wasabi Console at https://console.wasabisys.com/login using a Root account email.
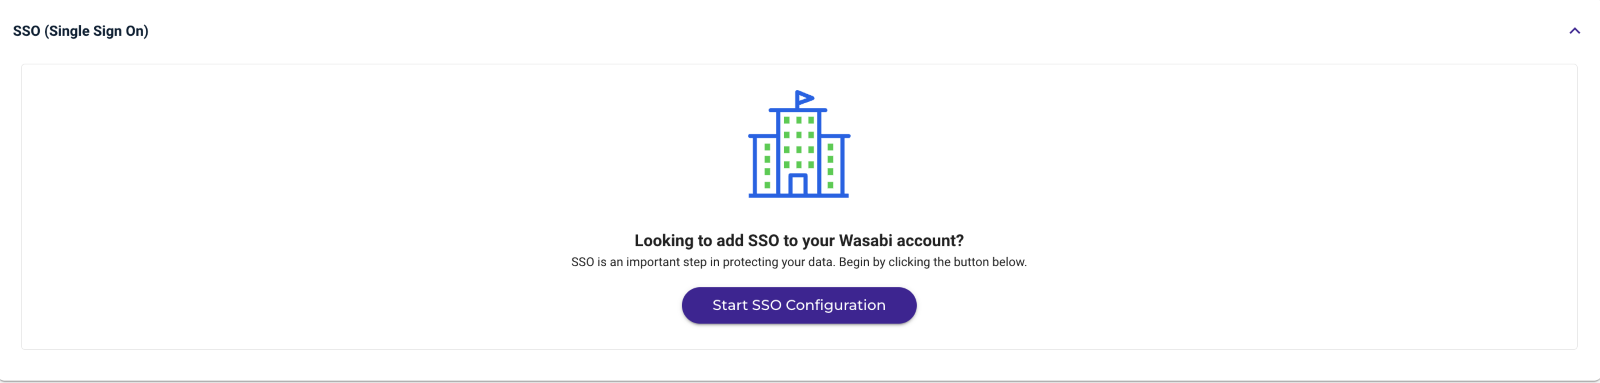
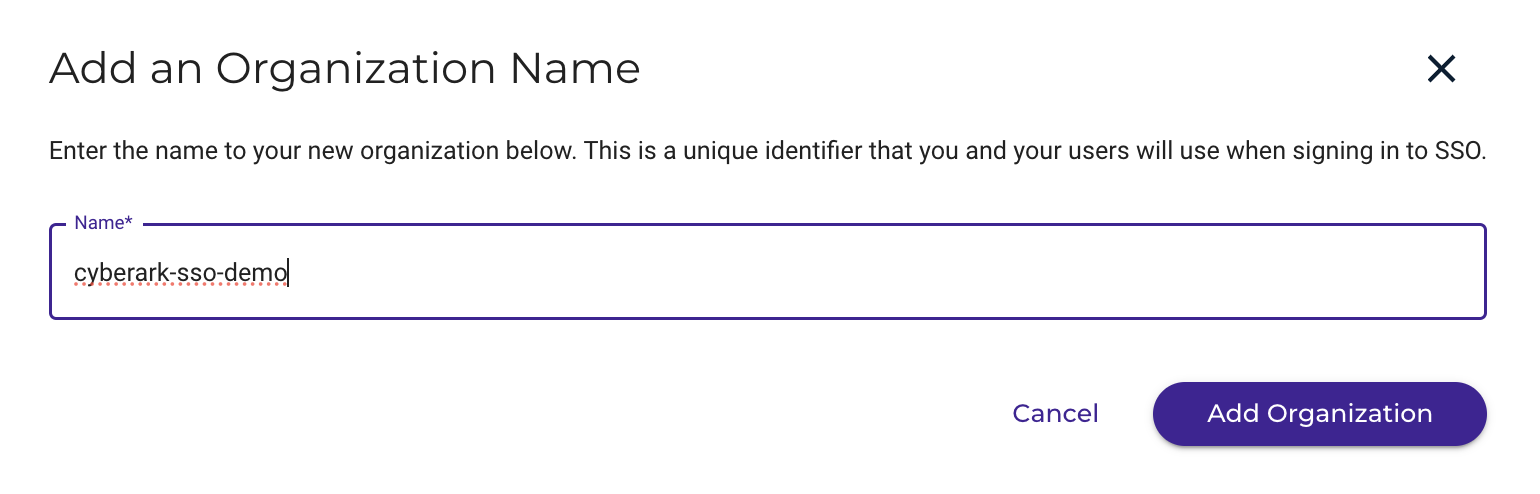
- On the Wasabi menu, click Settings and scroll down to the SSO (Single Sign On) tab. Once expanded, click Start SSO Configuration. The Add an Organization Name dialog is displayed.
- In the Name box, enter a unique name and then click Add Organization.
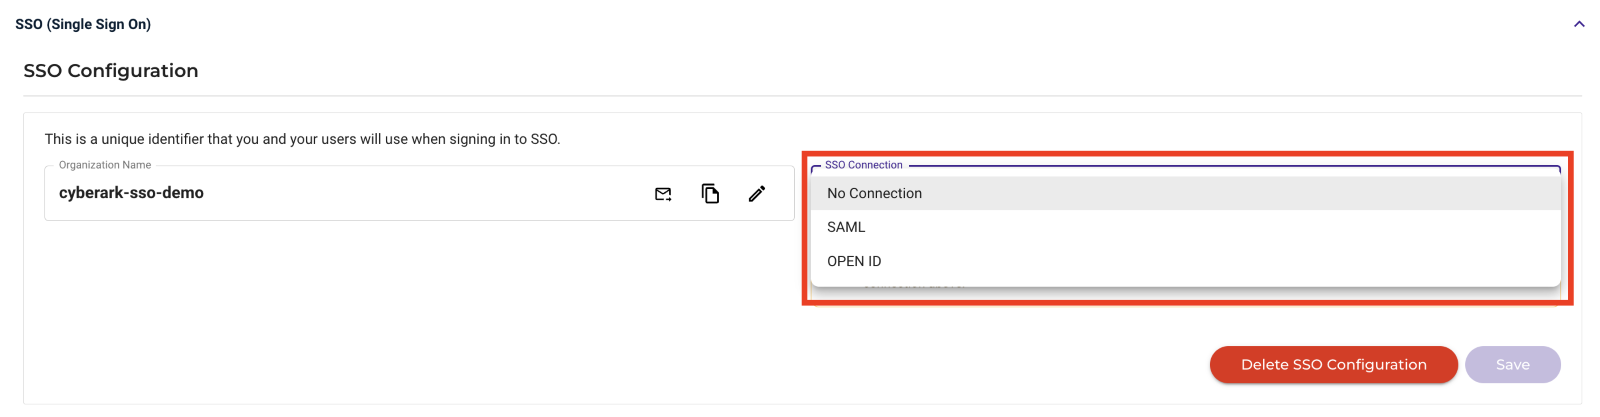
- In the SSO Connection box, select SAML, then click Save.
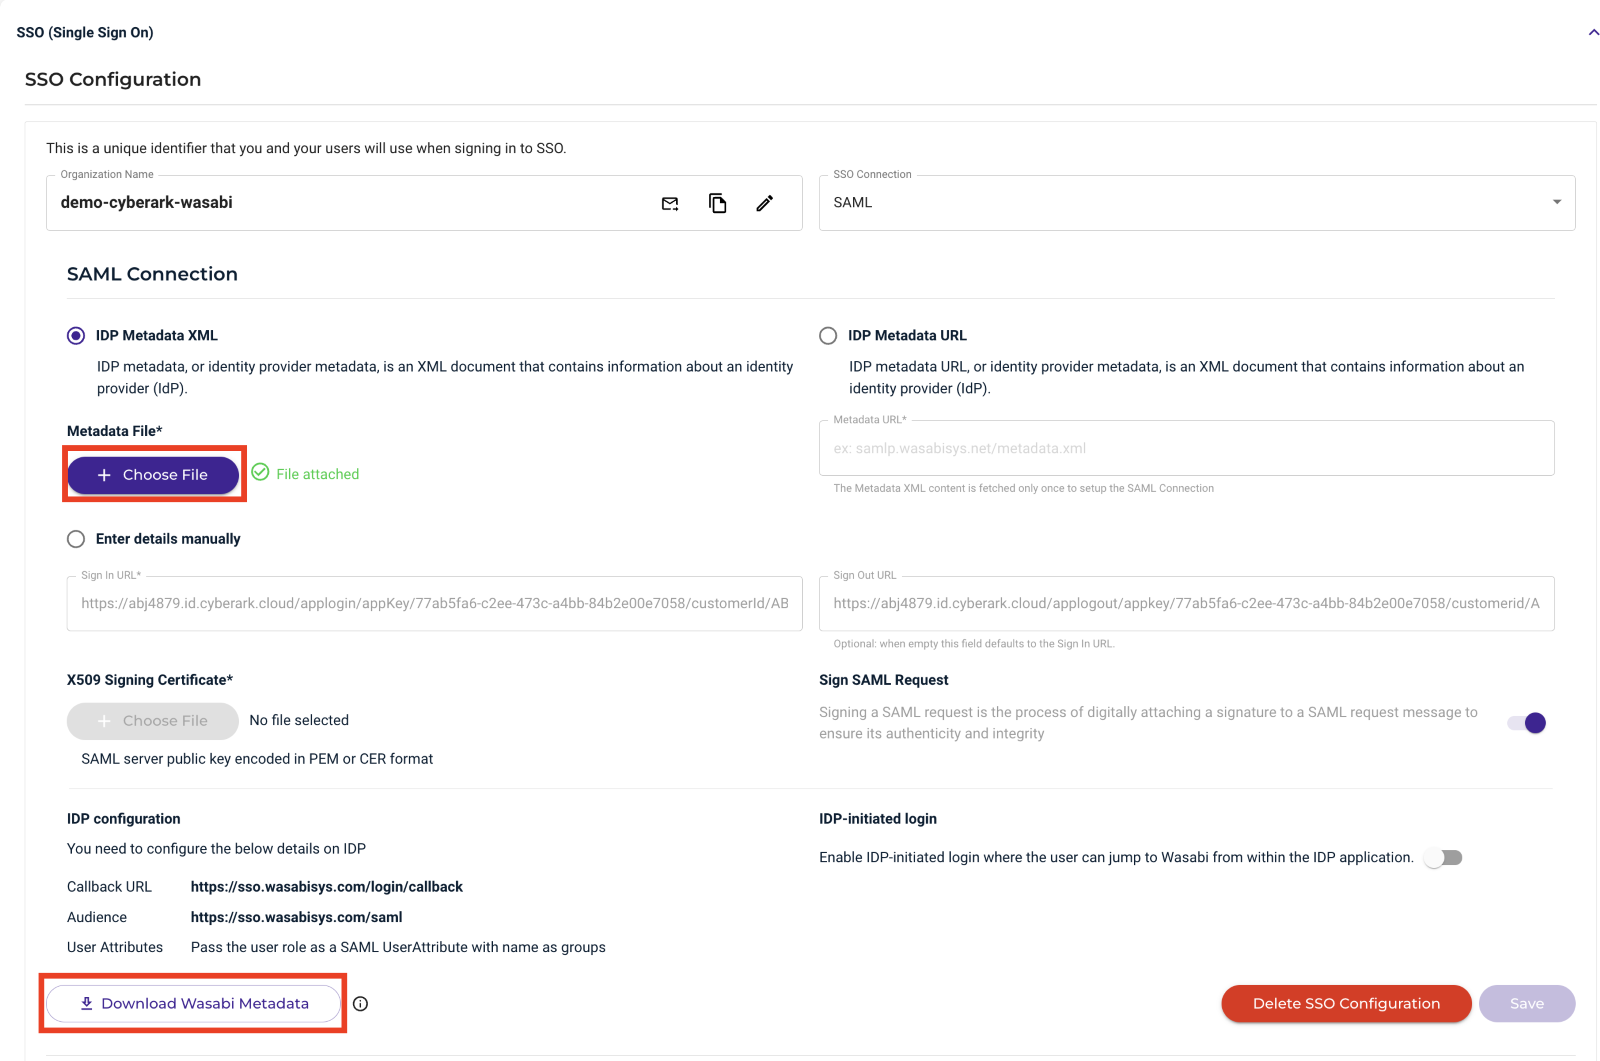
- In the SAML Configuration section under Metadata File, click Choose File and select the metadata file downloaded in the previous section, Step 9.
- In the IDP Configuration section, click Download Wasabi Metadata. This will include all the necessary URLs and the certificate needed for CyberArk to use the Wasabi SSO URLs. Click Save.
- To create roles, select Security in the left menu, then select the SSO (Single Sign-On) tab.
- Click Start SSO Configuration. The SSO Single Sign On page is displayed.
- In the SSO Connection box, choose SAML from the drop-down. Click Create Role.
NOTE: Do not create the role through the Role tab in the left menu. SSO roles must be created through the SSO tab under Settings.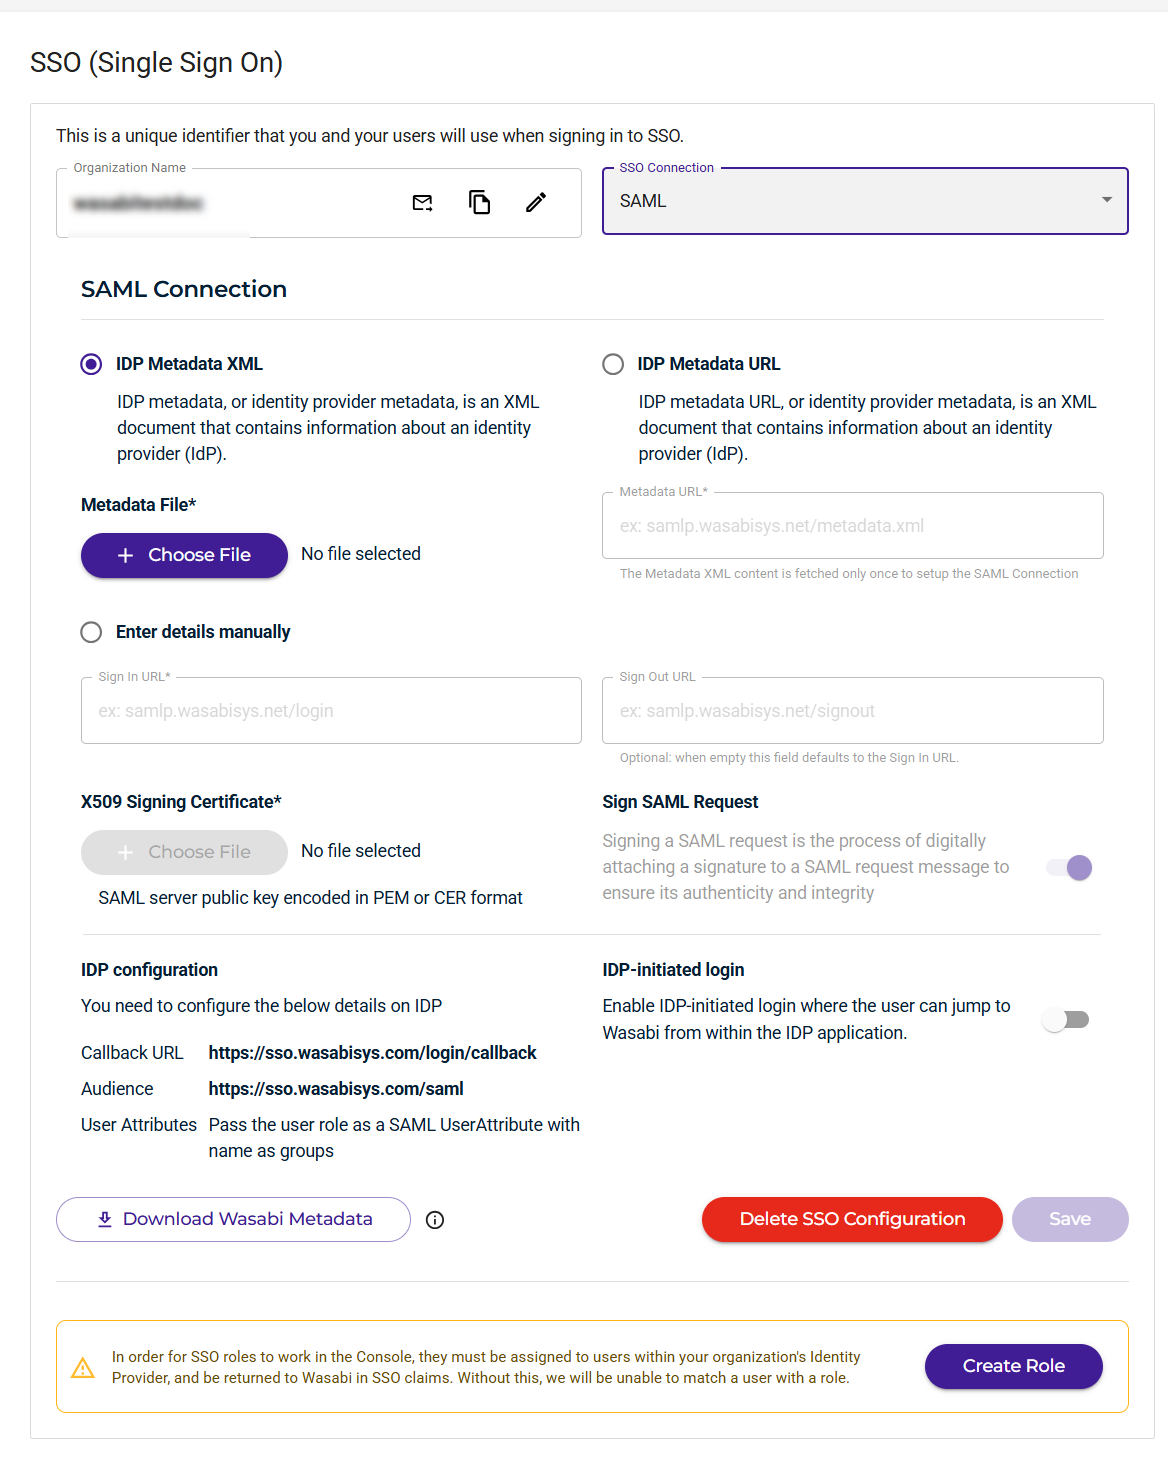
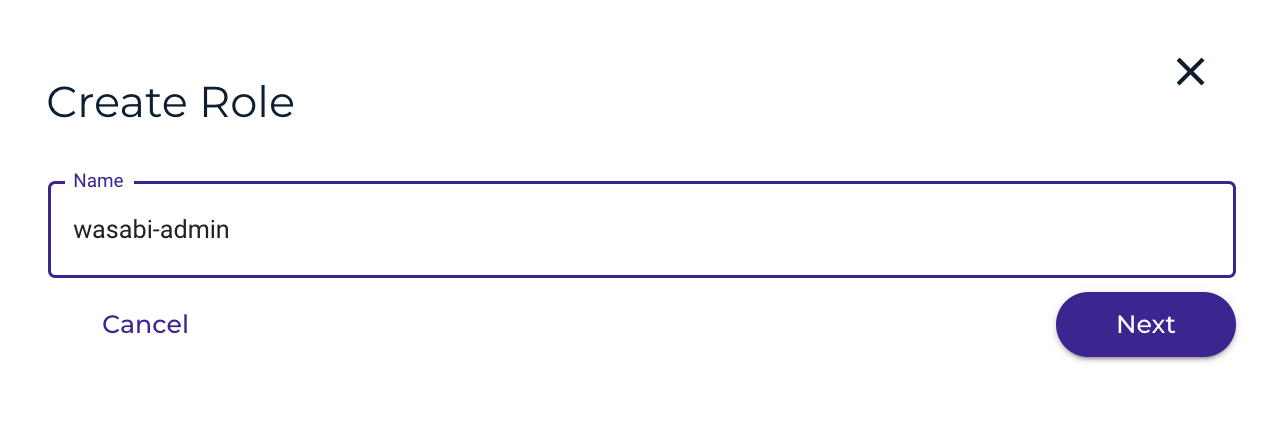
- In the Create Role dialog, enter the same role name created previously.
- In the Assign Role Policies dialog, assign a policy to this role to give the user specific permissions. Once finished, click Create Role.
For more information on the default policies available in the Wasabi Console, review Policies in Wasabi Hot Cloud Storage. Optionally, create your own IAM policies from the Policy tab on the Console.
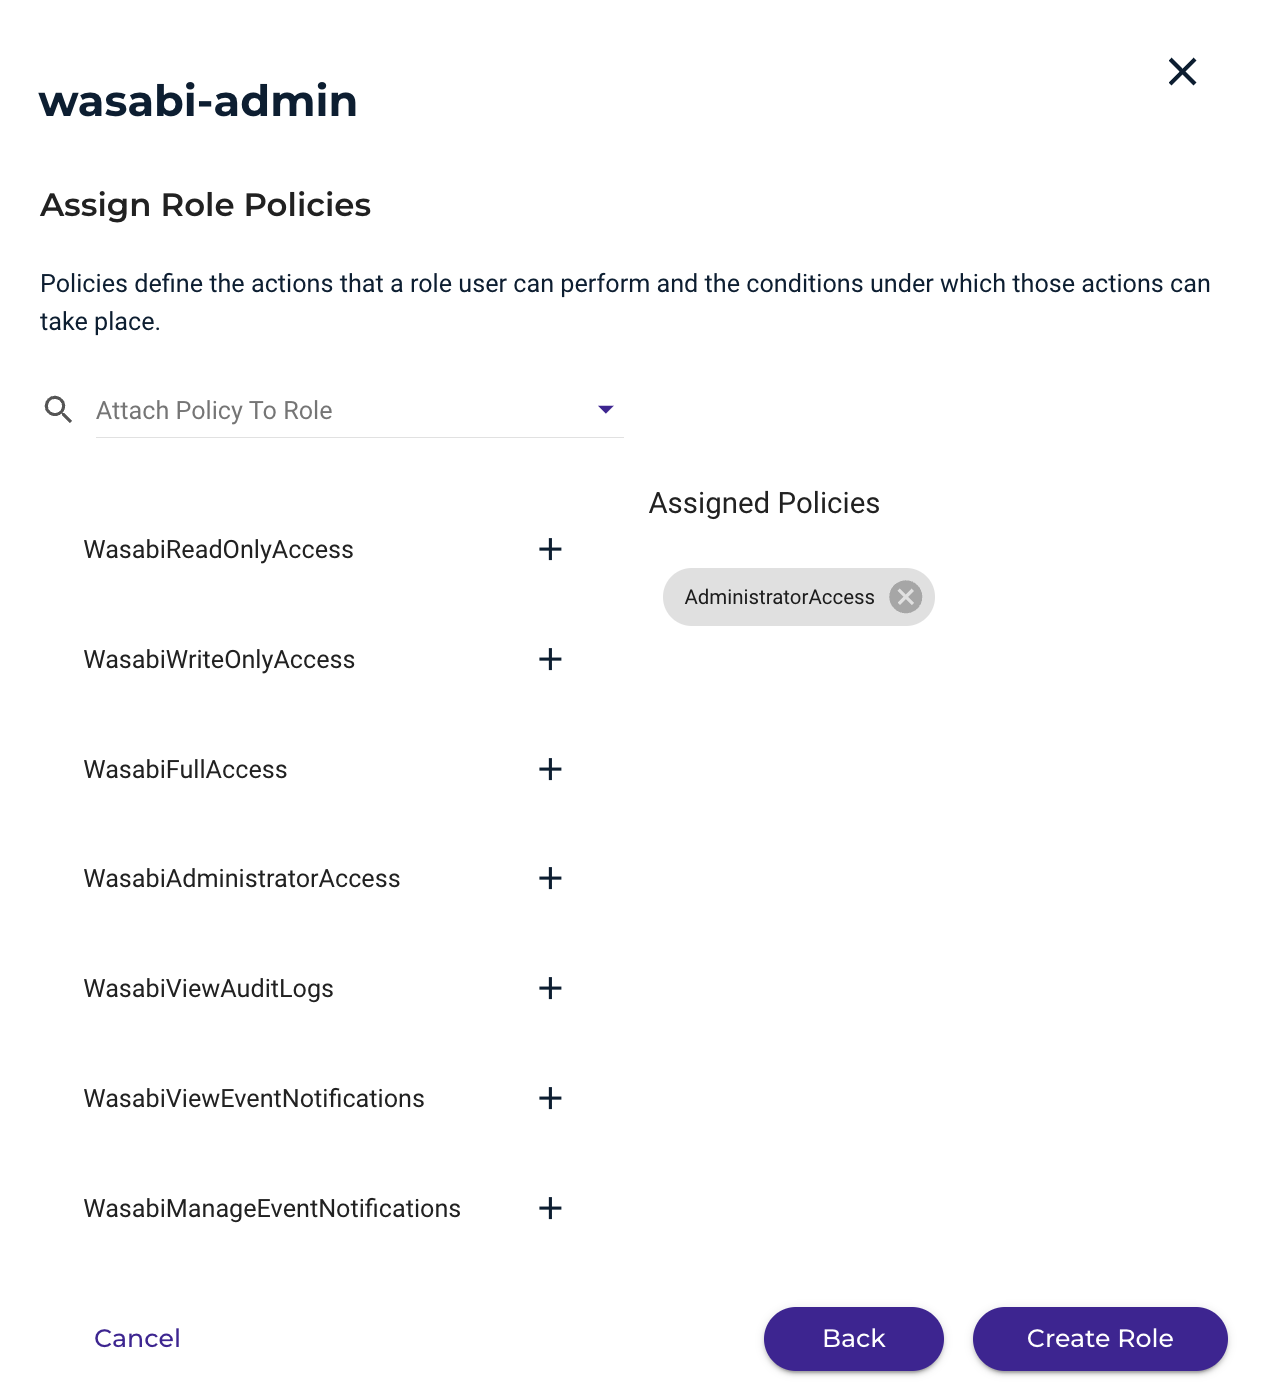 This example uses the “AdministratorAccess” policy. You may attach any Wasabi-managed policy or user-managed policy based on your requirements.
You should now see the Wasabi role you have created in the SSO tab under Roles. You can create multiple roles with different IAM policies, if needed. Be sure to also create those additional roles in CyberArk.

Testing the Integration
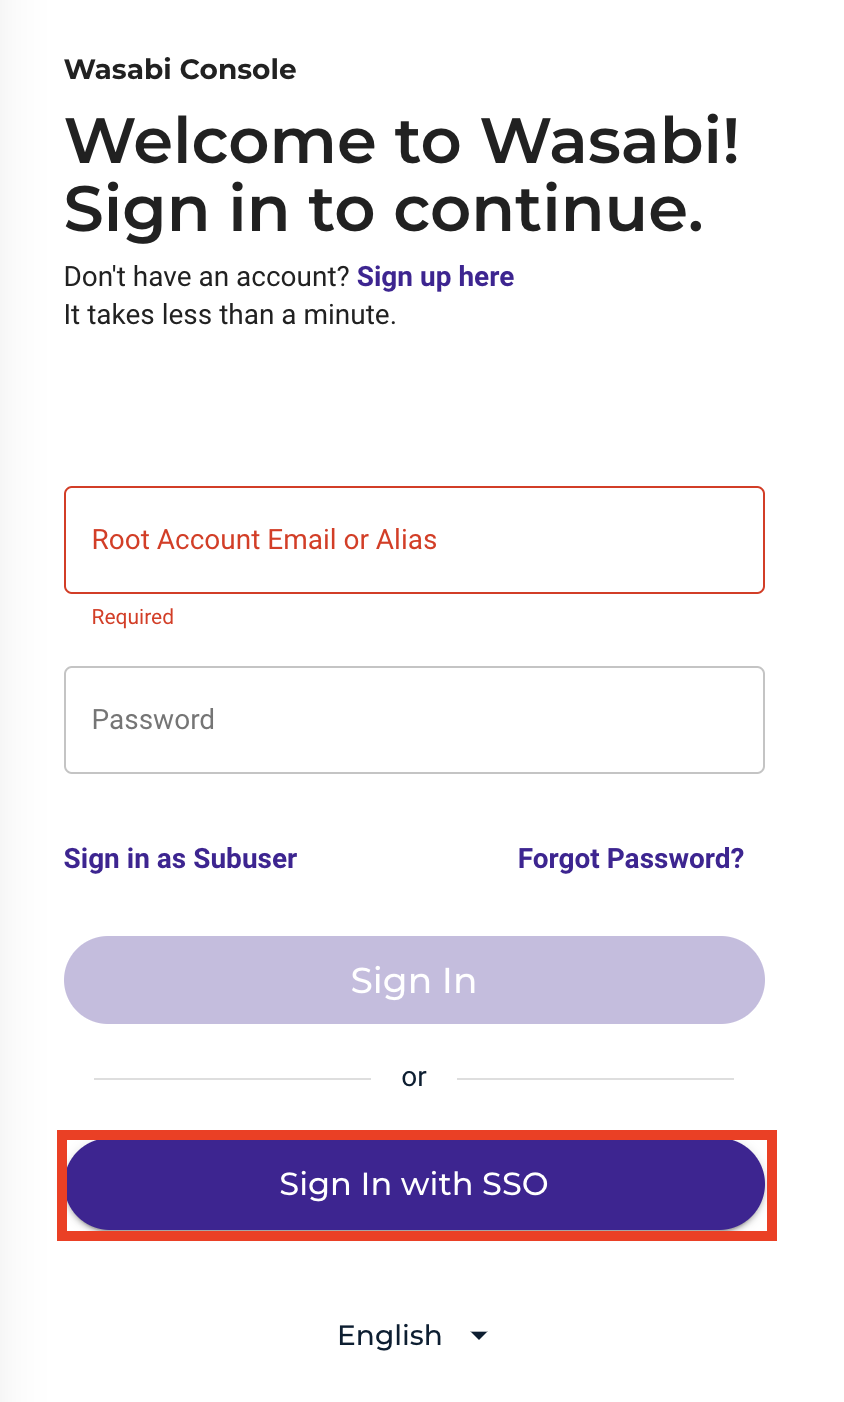
- Sign in to the Wasabi Console at https://console.wasabisys.com to test the SSO integration.
- Click Sign in with SSO.
- Select either Sign In With an Organization Name or Sign In With a Root Account Email.
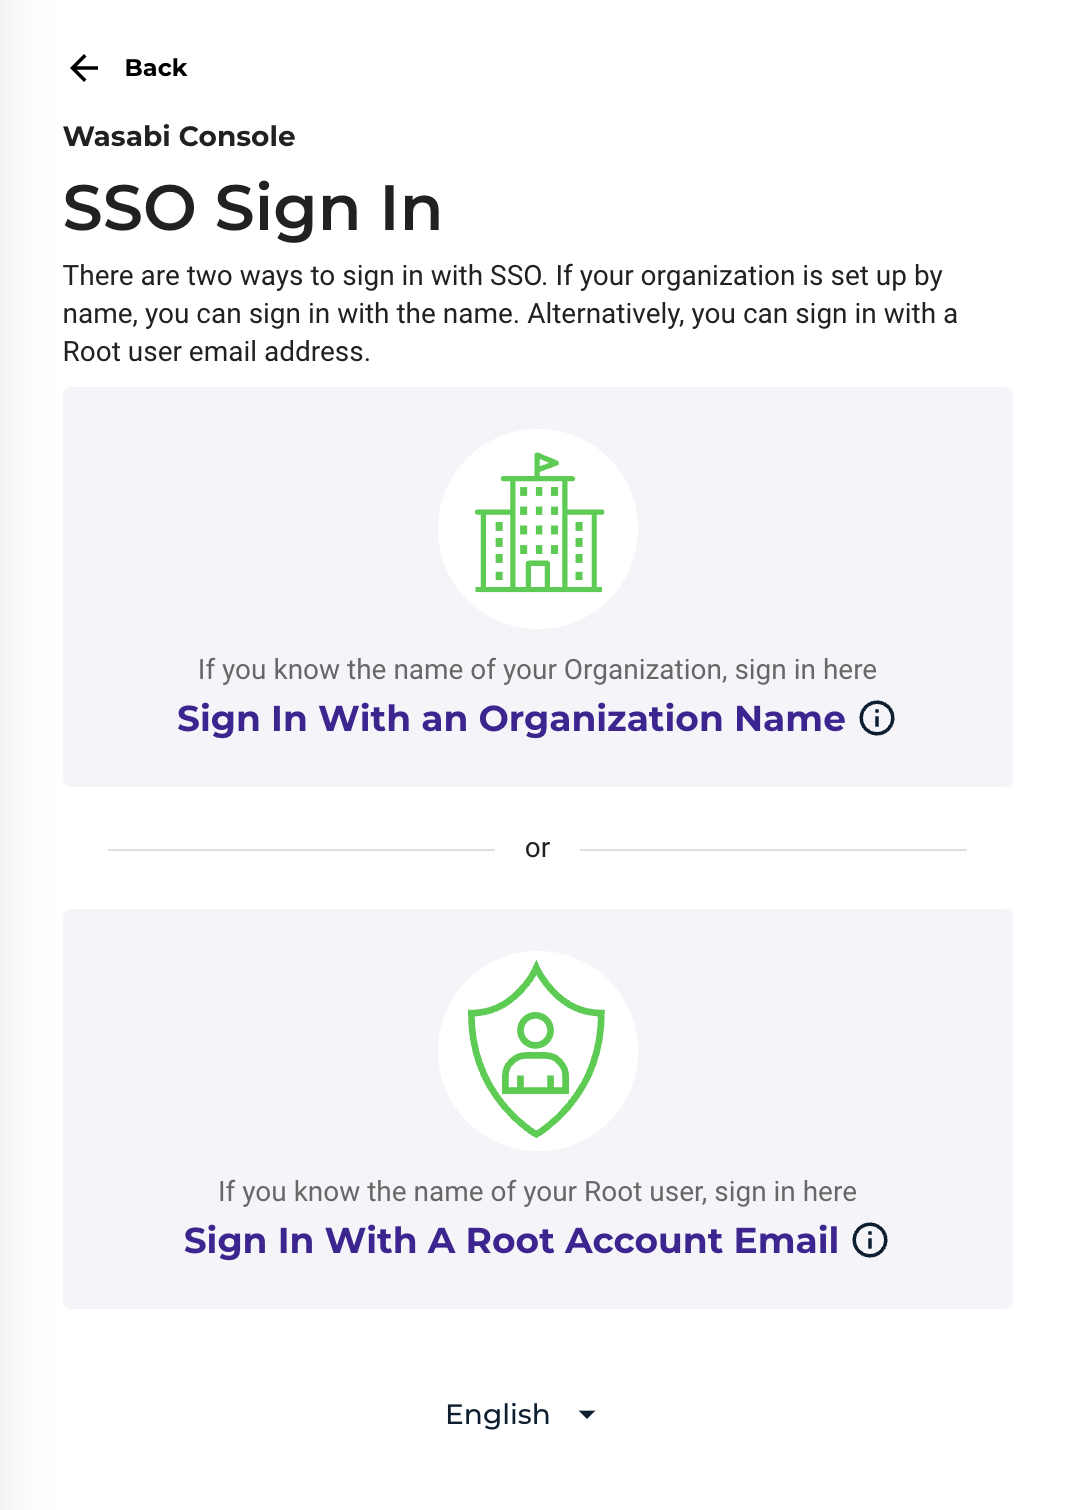
- Enter either the Organization Name (created in Step 11) or the Root account email address.
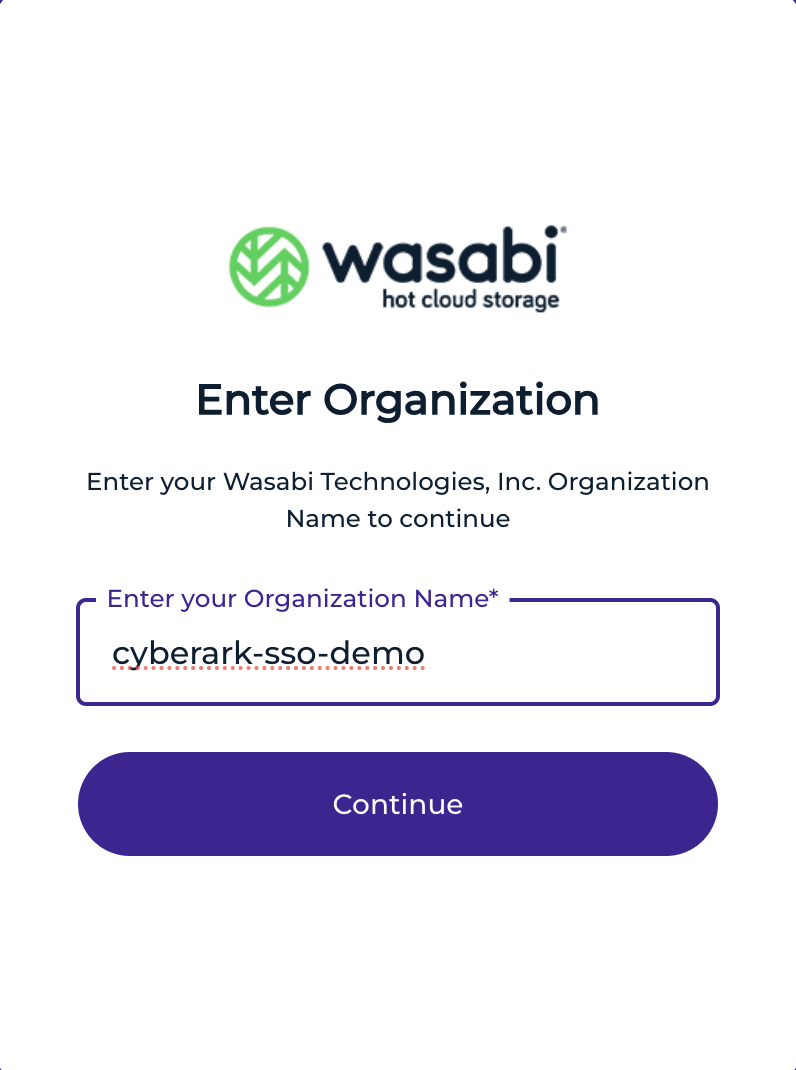
You will be redirected to the CyberArk sign-in page.
Sign in to the Cyberark portal at CyberArk Admin Portal.
 Once authenticated, you will be redirected to the Wasabi Console, where you can perform the functions appropriate to your role.
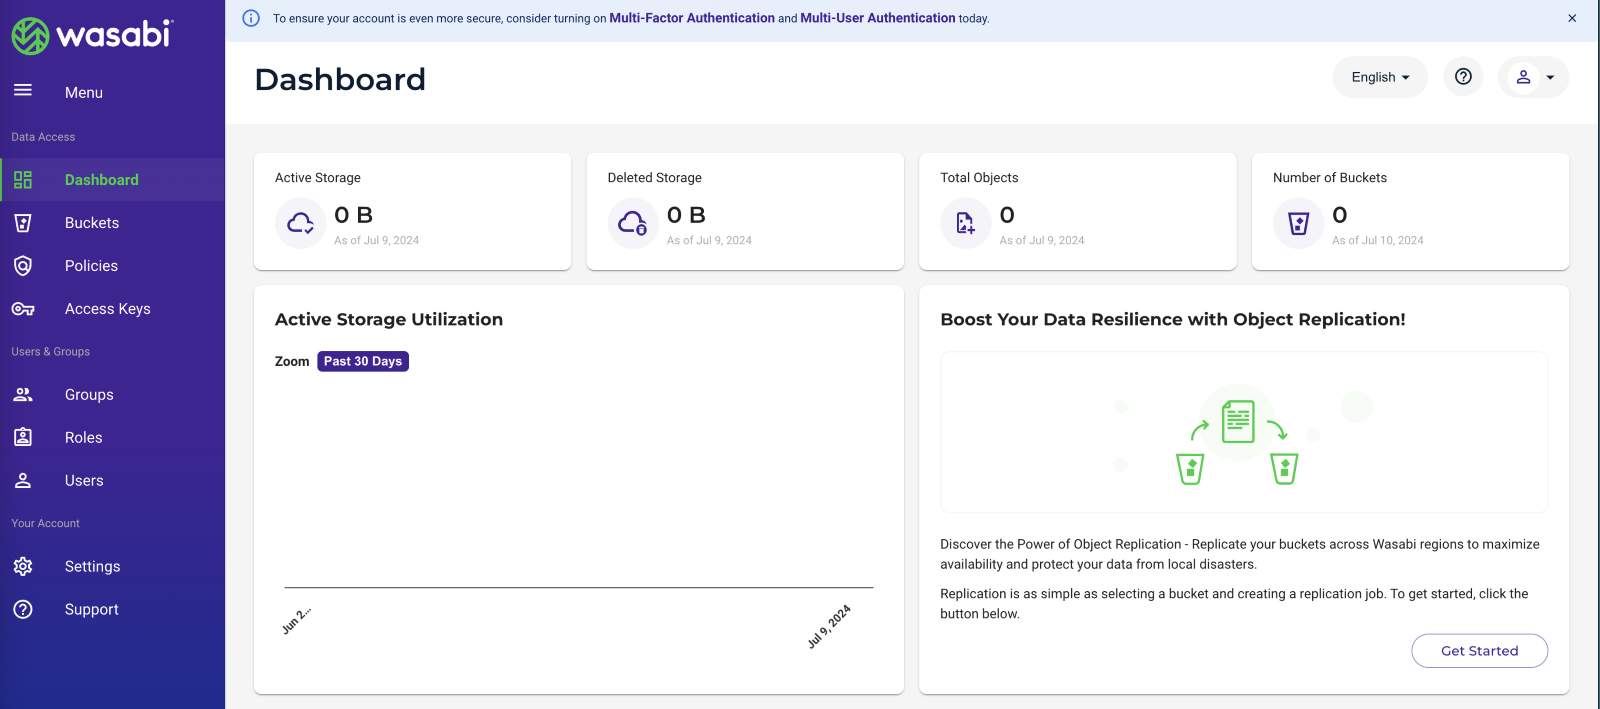 For any issues or questions, contact support@wasabi.com.