How to use Catalogic DPX vPlus with Wasabi?
Catalogic DPX vPlus has been validated for use with Wasabi. DPX vPlus is an enterprise-ready, agentless backup and snapshot management solution for Microsoft 365 and virtual environments. It allows you to reliably improve and automate backup performance, automate recovery tests, and significantly save resources, time, and money. Microsoft 365 backups and virtual machines backups can be stored on-premises, on a local file system or share, or can be stored in the cloud using cloud storage.
Prerequisites
Active Wasabi Cloud Storage Account
Wasabi Bucket - See our Bucket Creation Guide
Access & Secret Key Pair - See our Access Keys Guide
Catalogic DPX vPlus version 5.0 or higher
Reference Architecture
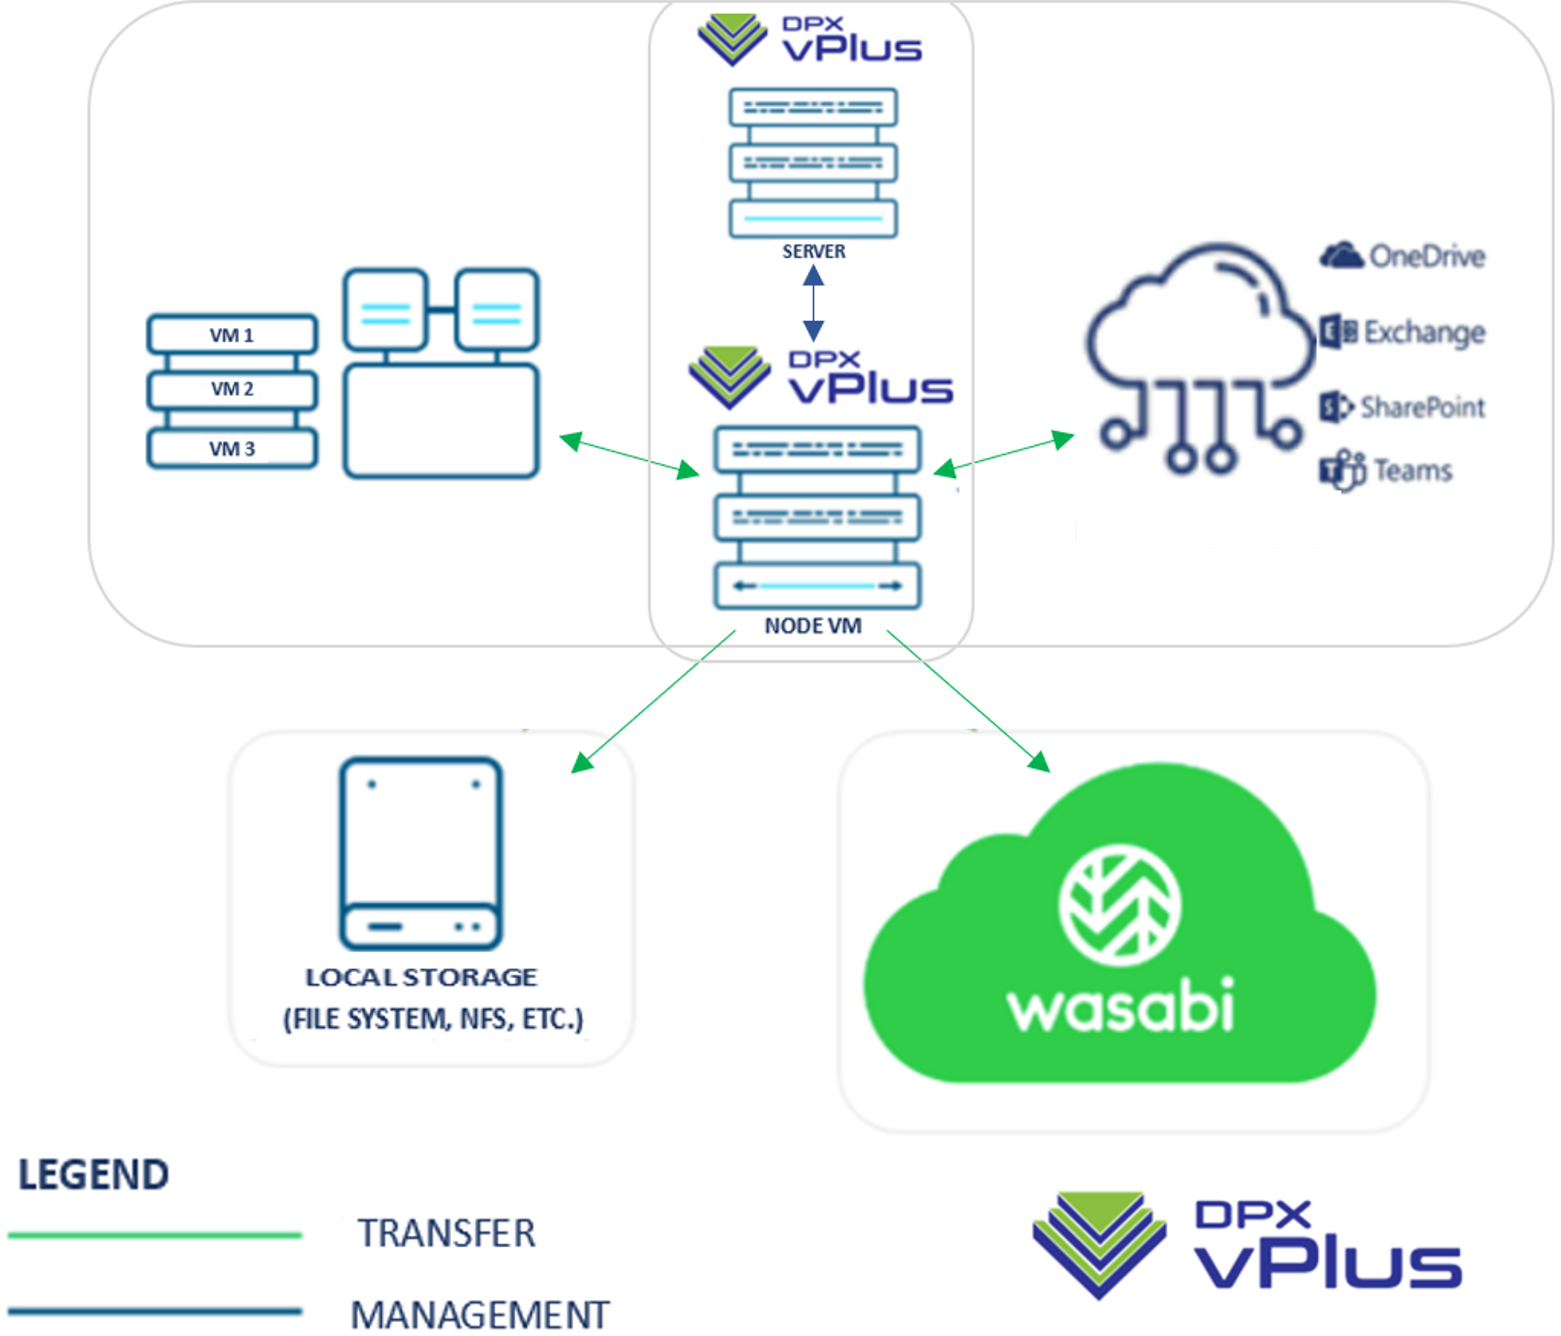
DPX vPlus Configuration
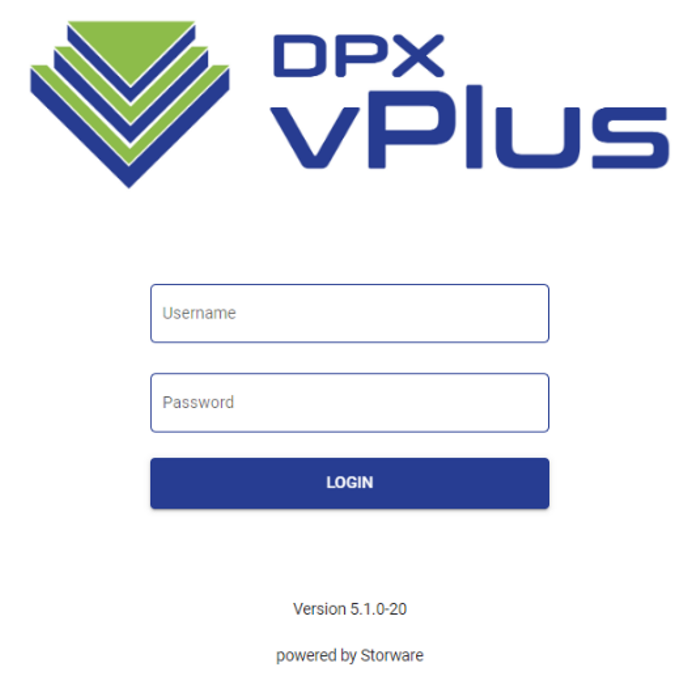
Log in to the DPX vPlus Web UI.
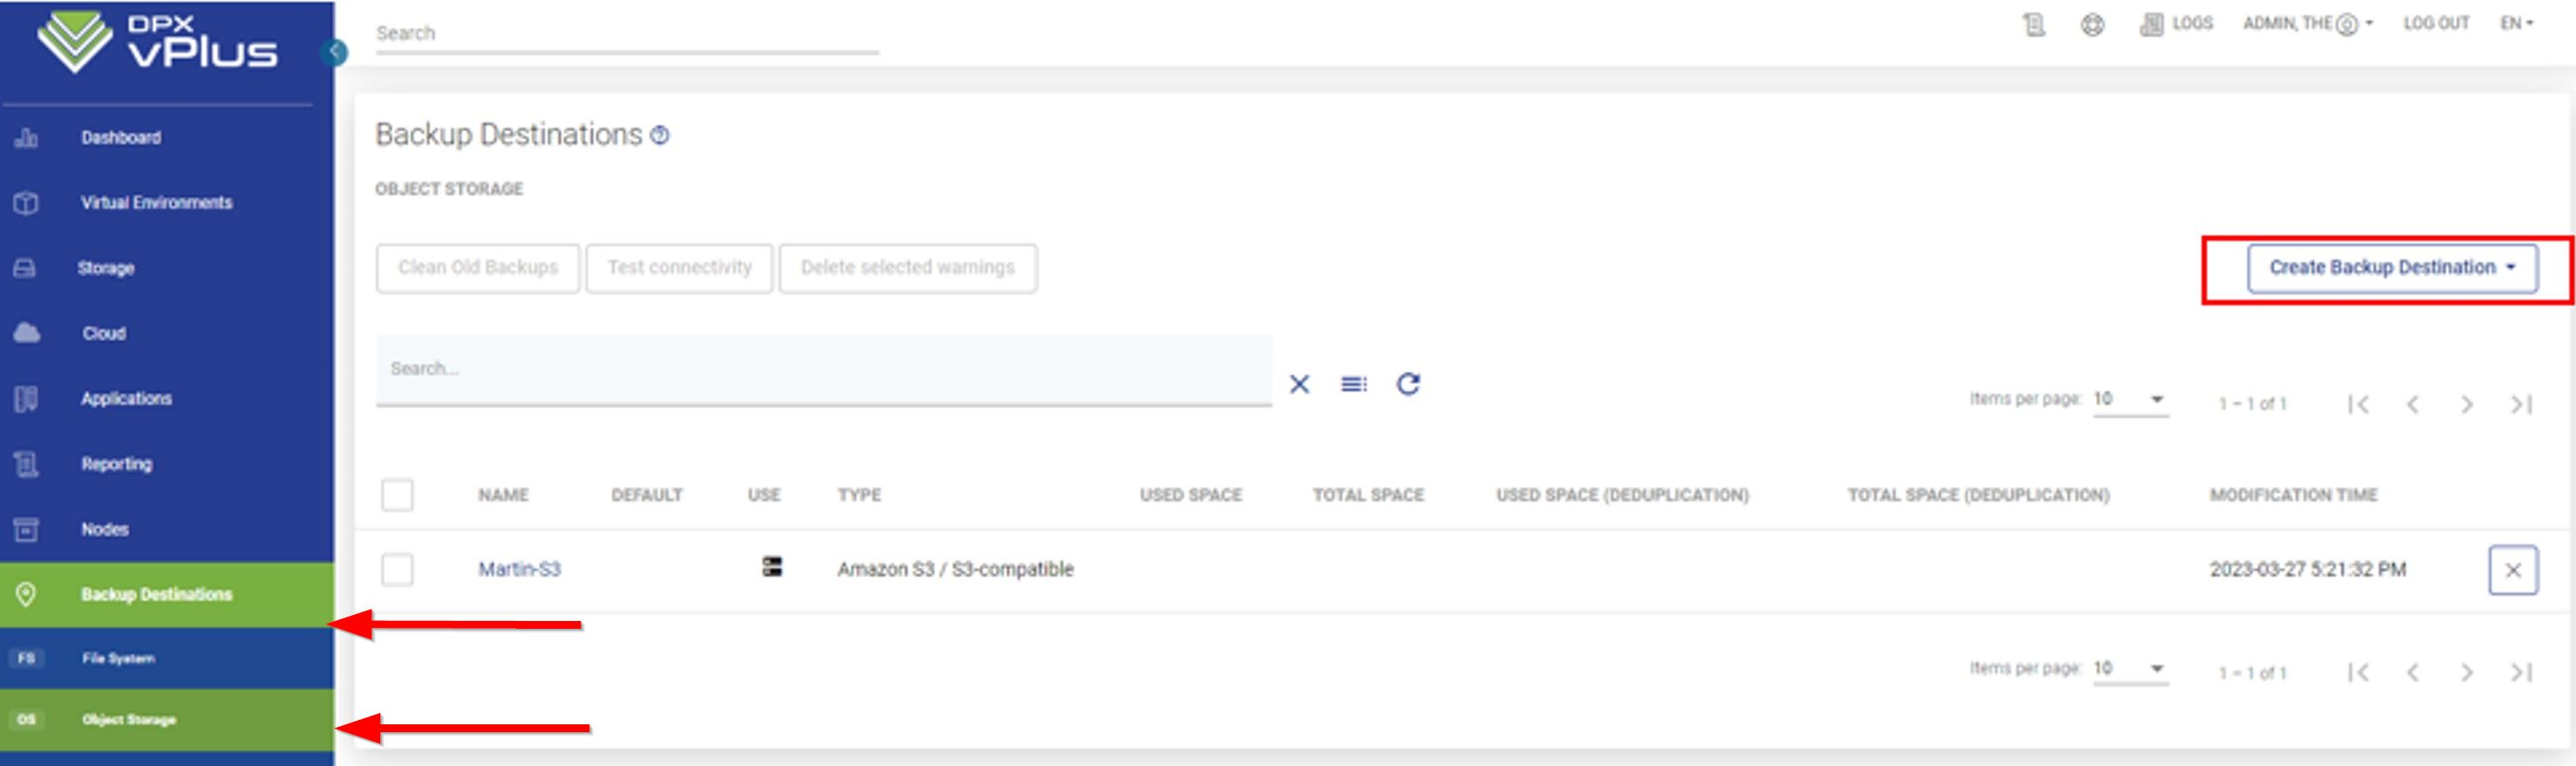
Navigate to the Backup Destinations tab and click Object Storage. Click Create Backup Destination and select Amazon S3 / S3-compatible.
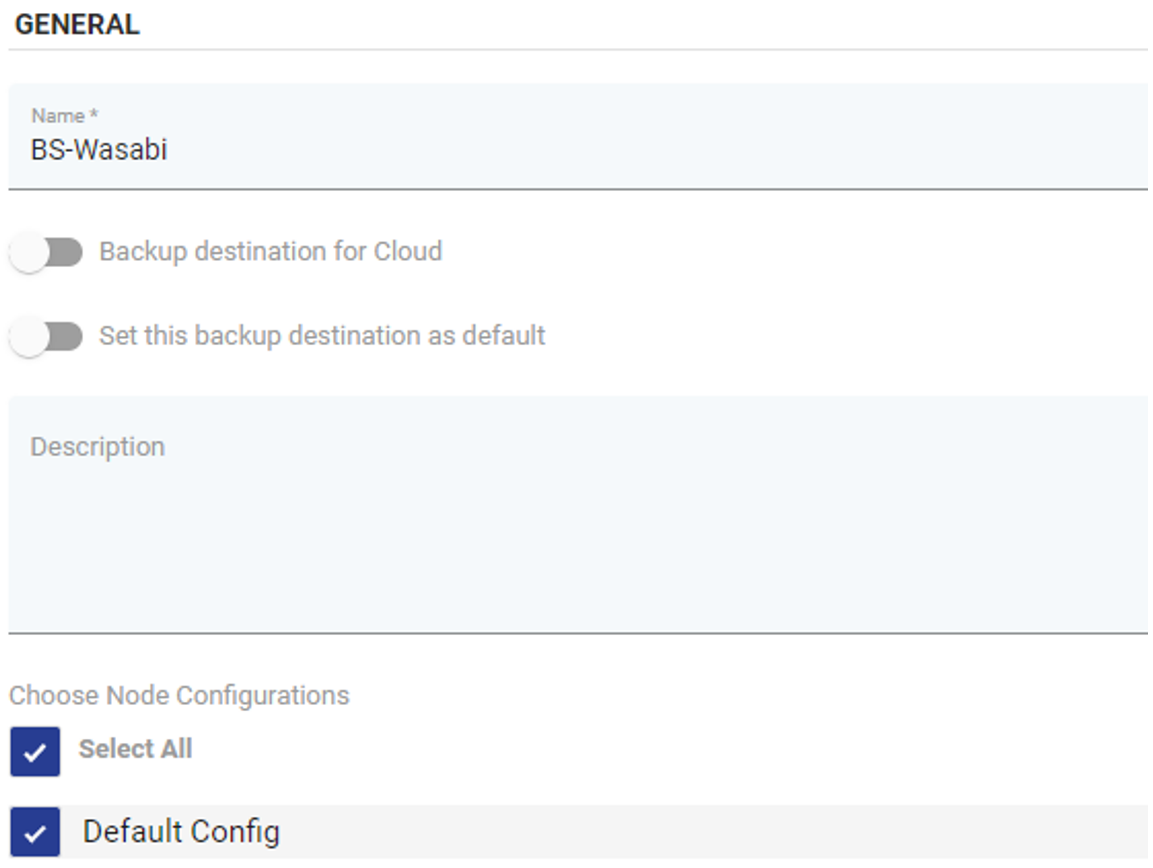
In the Create Backup Destination window, input the Name for your backup destination and select the Node Configuration options, as needed.
In Amazon S3/S3-Compatible Settings, provide the information for your Wasabi bucket.
API URL - Specify the Wasabi Data Center Service URL you wish to use. Refer to Service URLs for various Wasabi regions.
Backup Mode - Select your option.
Bucket Name - Name of the Wasabi bucket you pre-created.
Region - Wasabi Region where your bucket is stored.
Record backup time after store – This will record backup time after store is completed. This may be required for third-party S3 API implementations, which record modification time of the objects after it was stored.
Path style access enabled – This will enable path-style access. This means that you can specify the endpoint hostname as either a FQDN or the IP of the S3 proxy or the load balancer.
Resolve hostname to IP before connecting —This will use virtual-hosting access to use the hostname to differentiate between sites.
Parallel download enabled – Will allow for downloading files from S3 in parallel, which will generally increase downloading speeds.
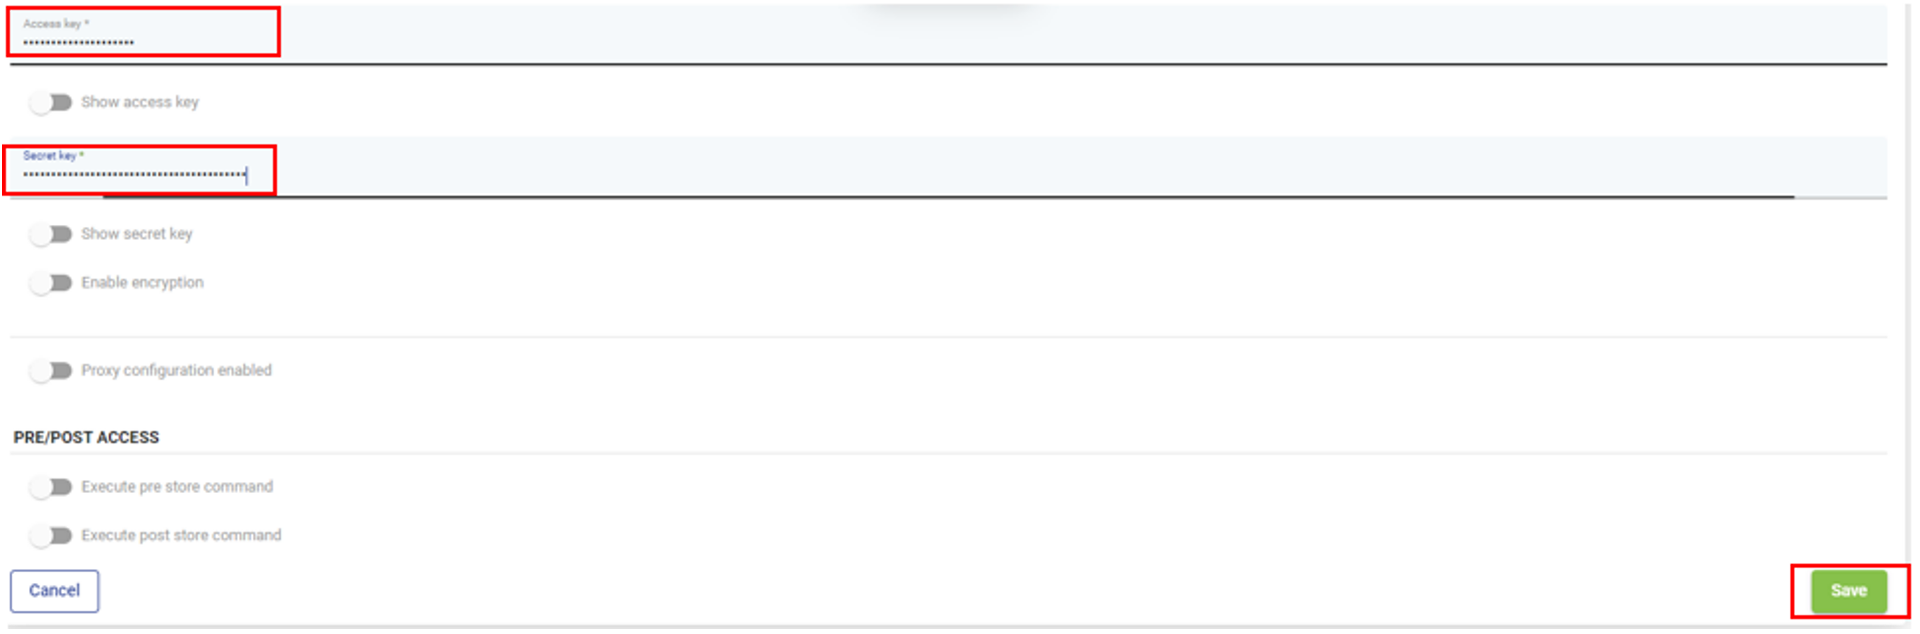
Enable encryption – This will use S3 protocols for server-side encryption.
Be sure that the flags “Path style access enabled” and “Parallel Download enabled” are enabled.
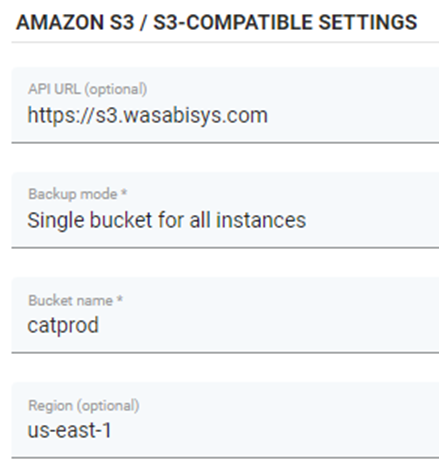
This configuration example discusses the use of Wasabi's us-east-1 storage region. To use other Wasabi storage regions, use the appropriate Service URLs for Wasabi's Storage Regions.
Input your Wasabi access and secret Keys and then click Save.
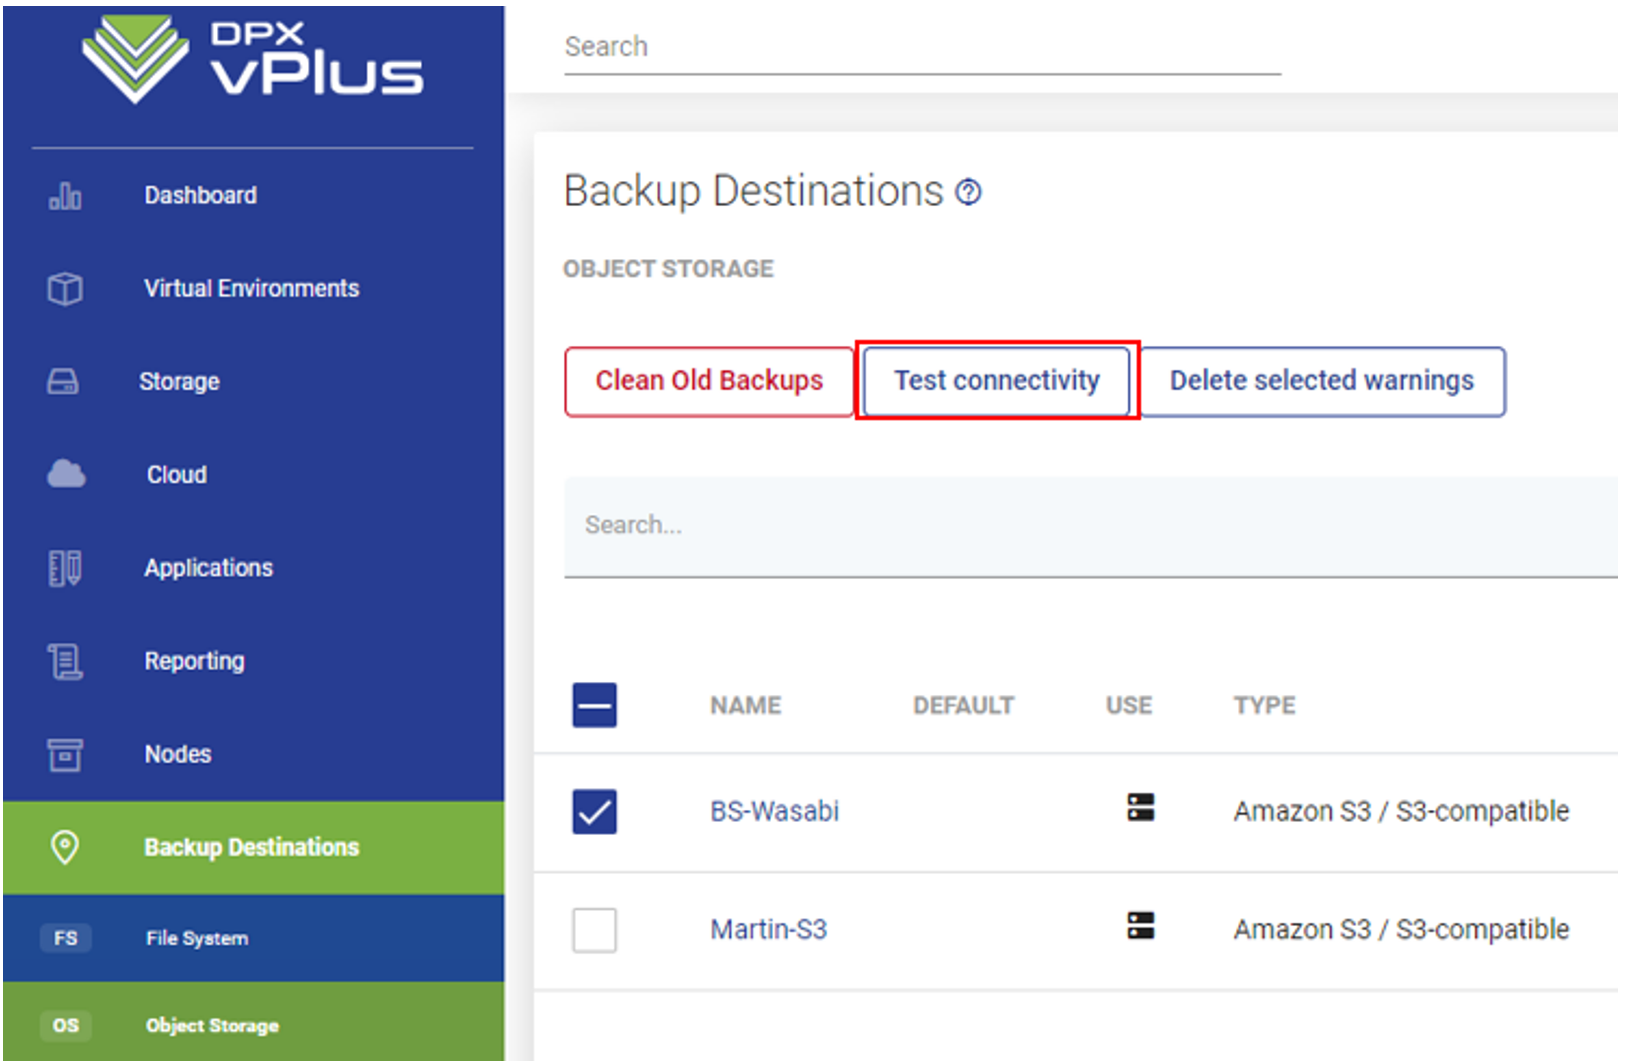
Test the connectivity by selecting the Wasabi Destination. Click Test Connectivity.
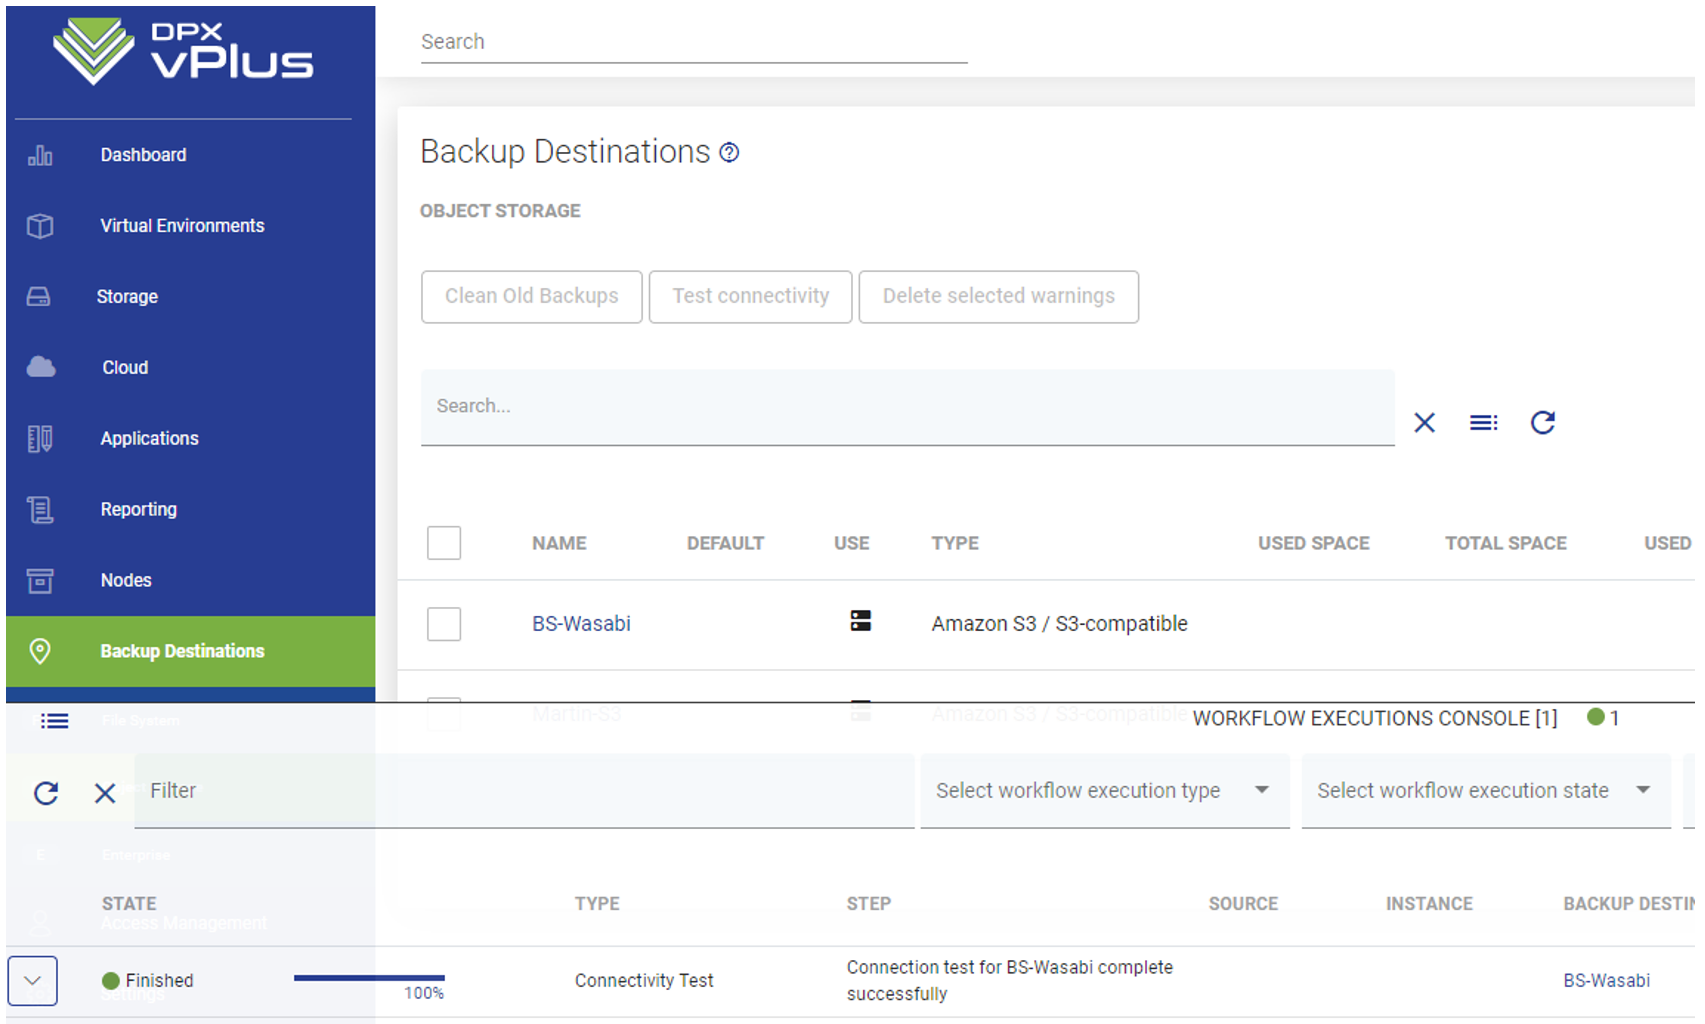
The results can be viewed in the Task Console.
Creating a Backup SLA
To create a Backup SLA to protect your environment, perform the following:
Click Virtual Environments and then Backup SLAs.
Configure the settings under General tab.
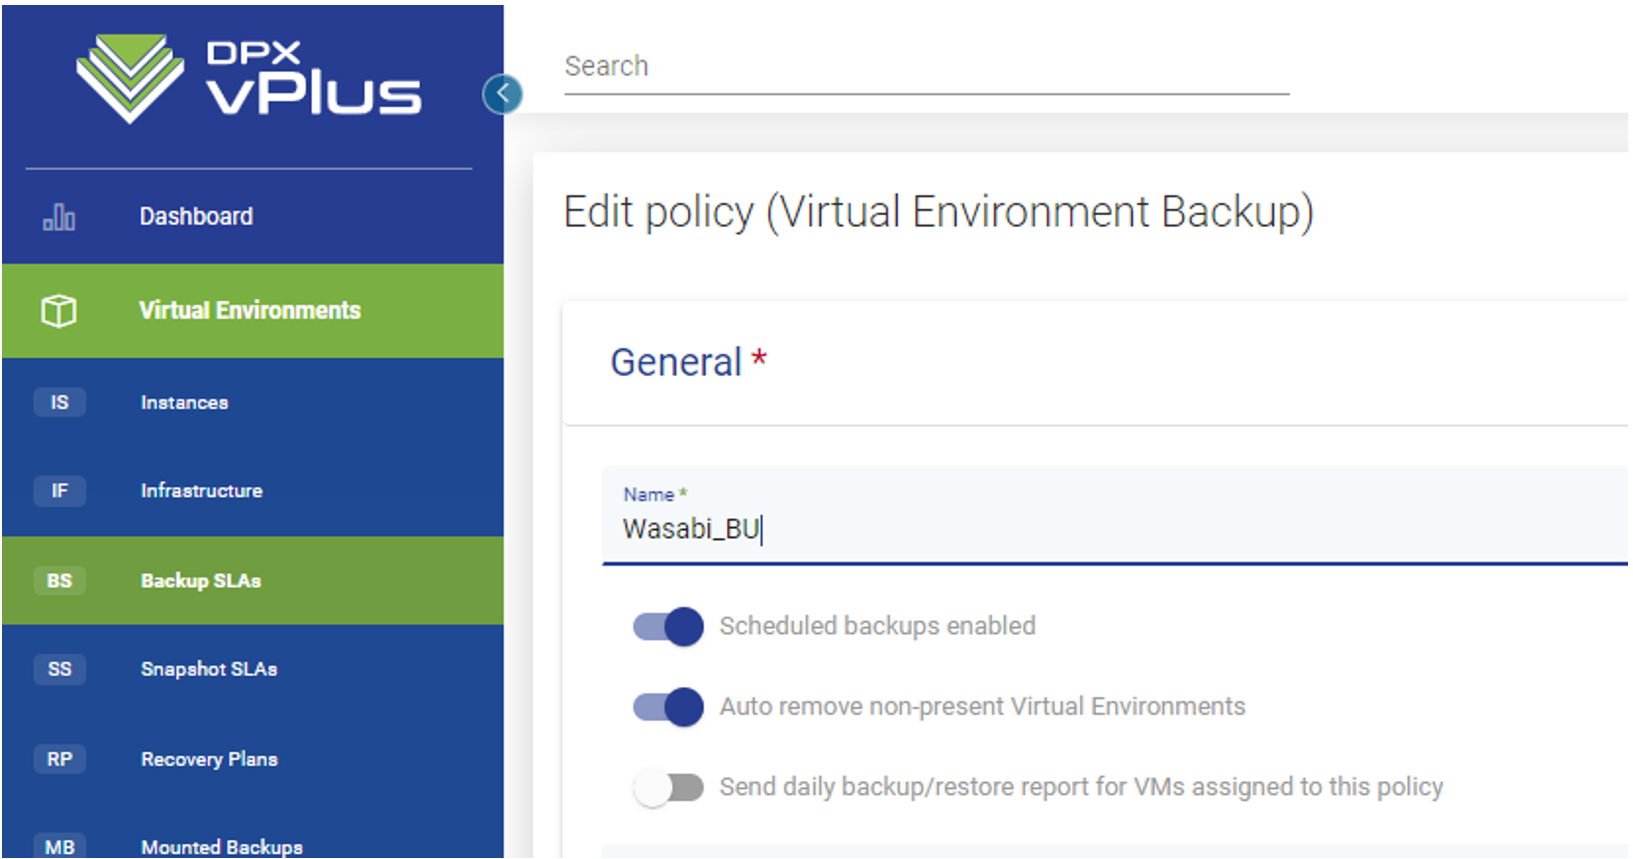
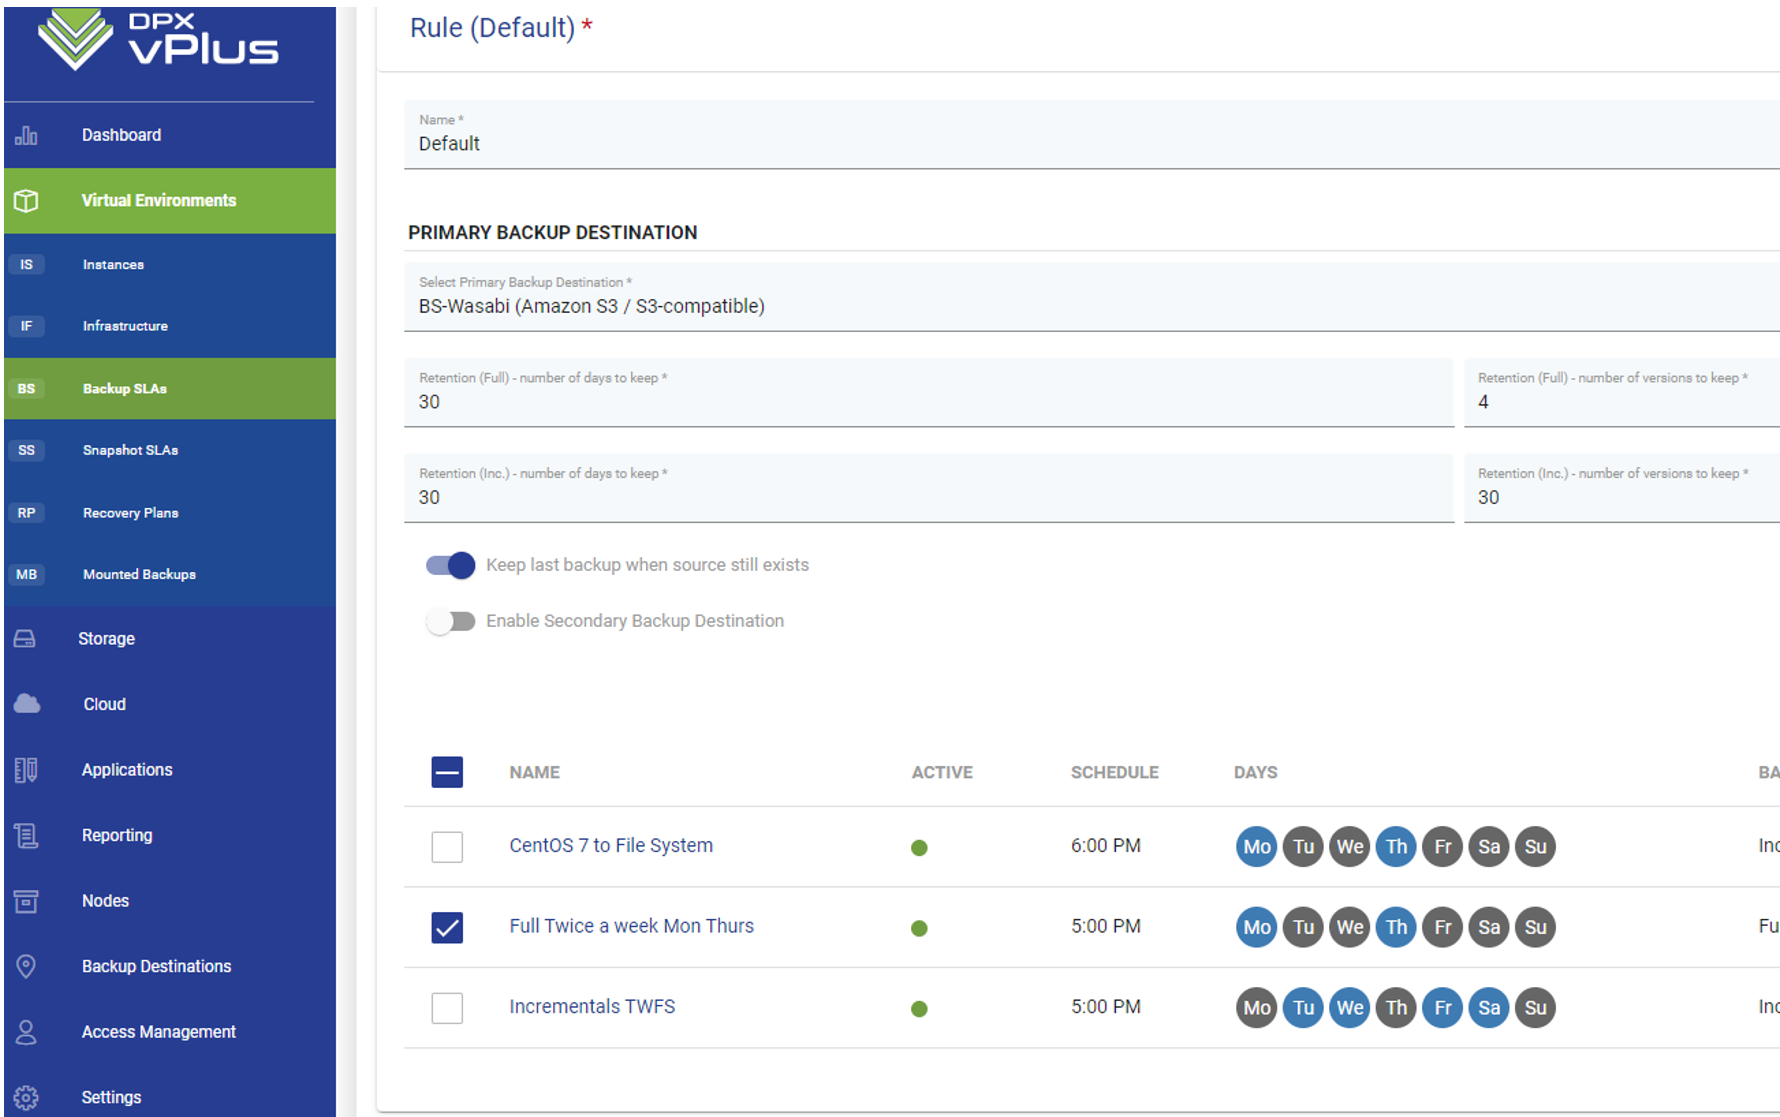
Configure Settings under the Rule tab.
Name
Select Primary Backup Destination — Wasabi Cloud Storage.
Retention (Days/Version) — Full and Incremental.
Schedule — Assign the policy to a schedule.
If you have not yet created a schedule, you can assign this policy to a schedule at a later time.
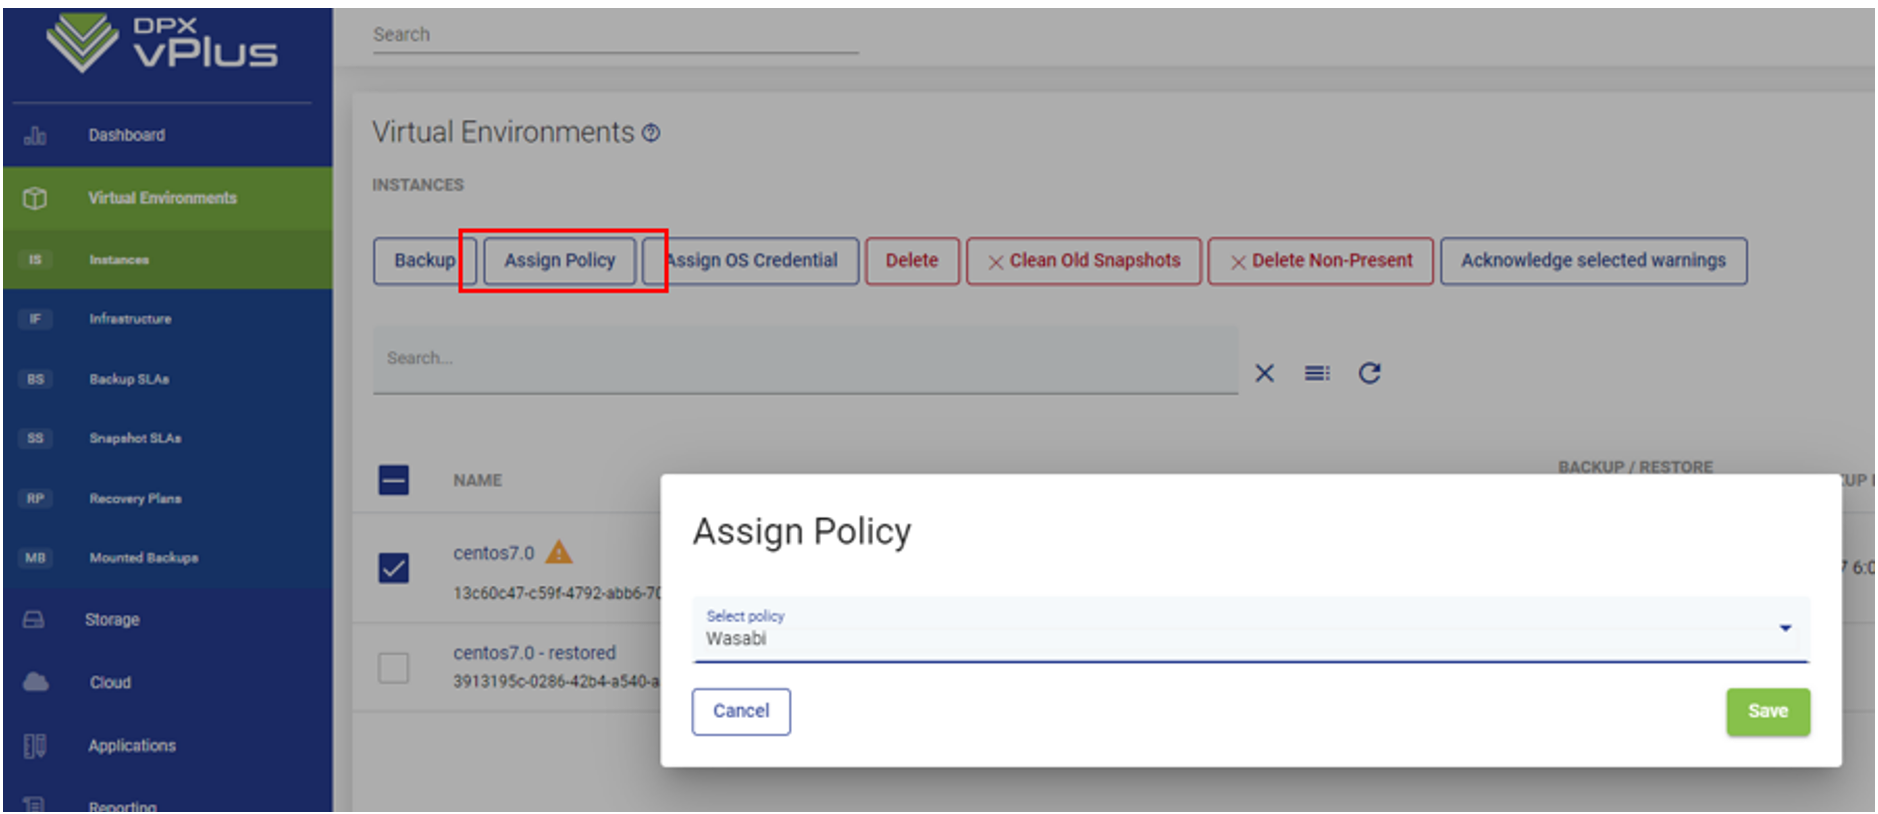
If you do not assign the policy to Virtual Machines during creation or want to assign new VMs to an existing Backup Policy, you can do so by performing the following:
Click Virtual Environments and then Instances.
Select the instance and click Assign policy.
Then select the policy created above.
Click Save to save the policy assignment.
Start a backup by selecting the instance and clicking the backup icon.
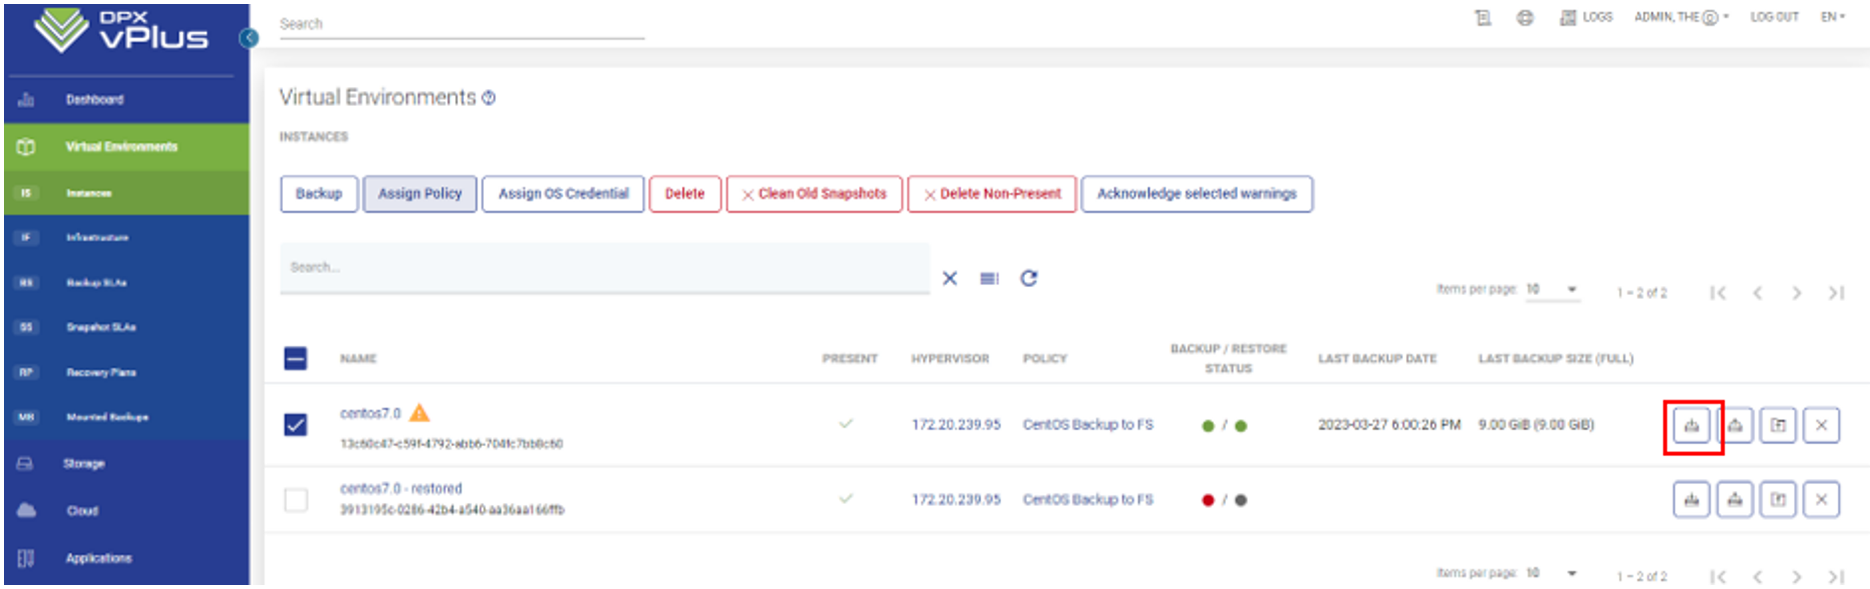
The progress of the backup can be viewed on the task console.
Recovery of Virtual Machines
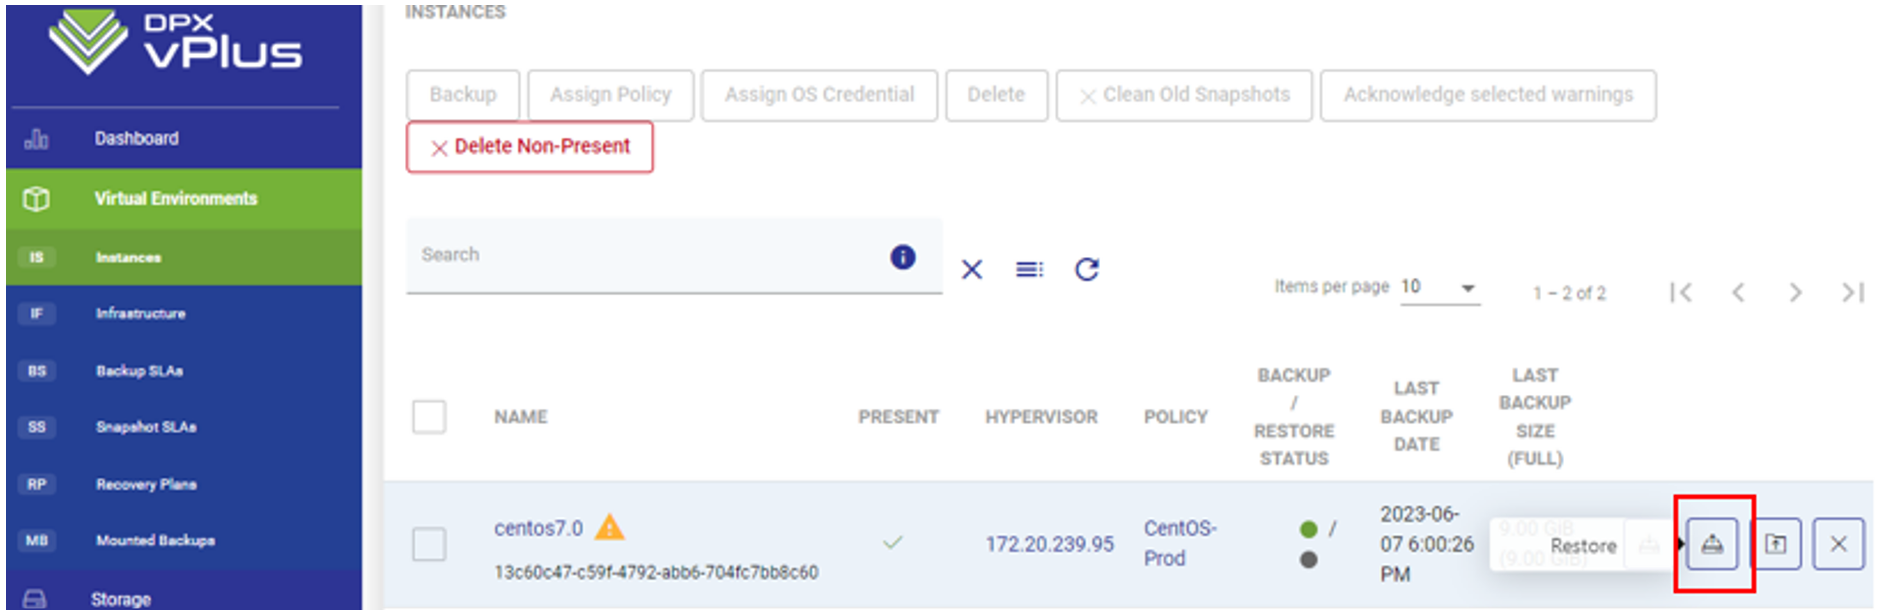
In the left-hand menu, click Virtual Environments and then click Instances. You will see the list of virtual machines discovered. Scroll or use the Search bar to find the VM in which to recover.
Select the Restore icon, as shown below. This will open the Restore job creation wizard.
In the Restore Job wizard, select the snapshot in which to recover. You will notice the snapshot name ends with the destination where that data will be recovered from. Select a copy from your Wasabi object storage.
Select Restore to Hypervisor and select the hypervisor host that you want to recover the Virtual Machine to.
Complete the rest of the restore wizard (working through a slightly different process depending on the hypervisor) including some options for deleting the existing VM, changing the name of the new VM, and so on.
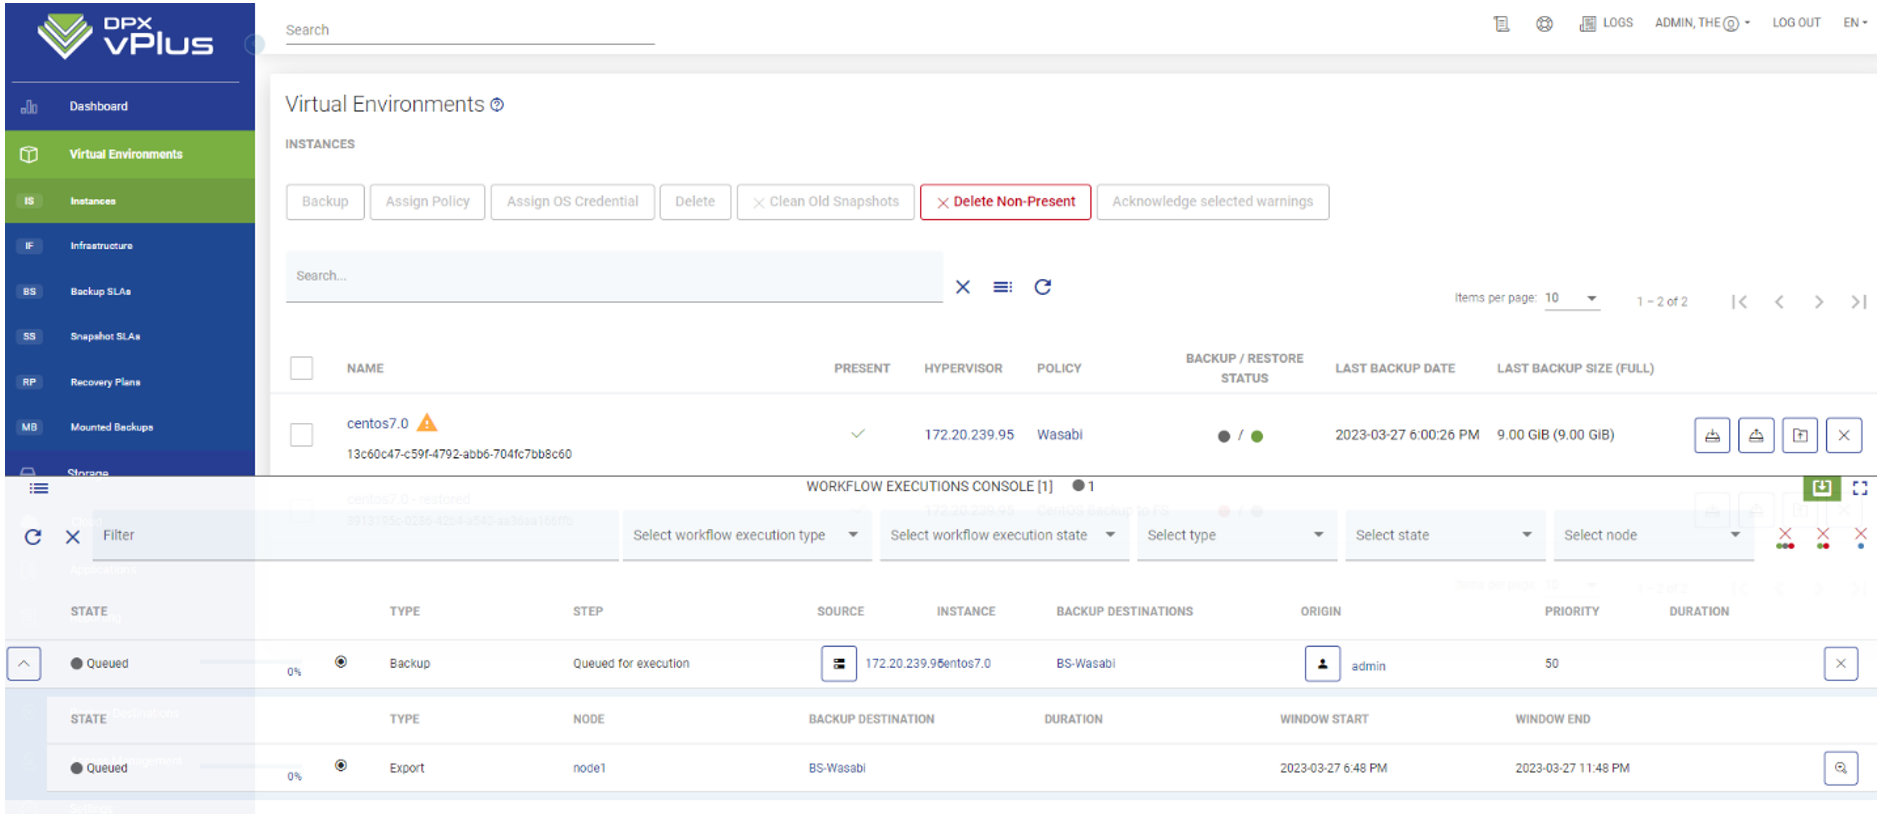
Click Restore to begin the task. This can be monitored by clicking on the Workflow Executions Console at the very bottom of the screen.
Recovery of Microsoft 365 Resources
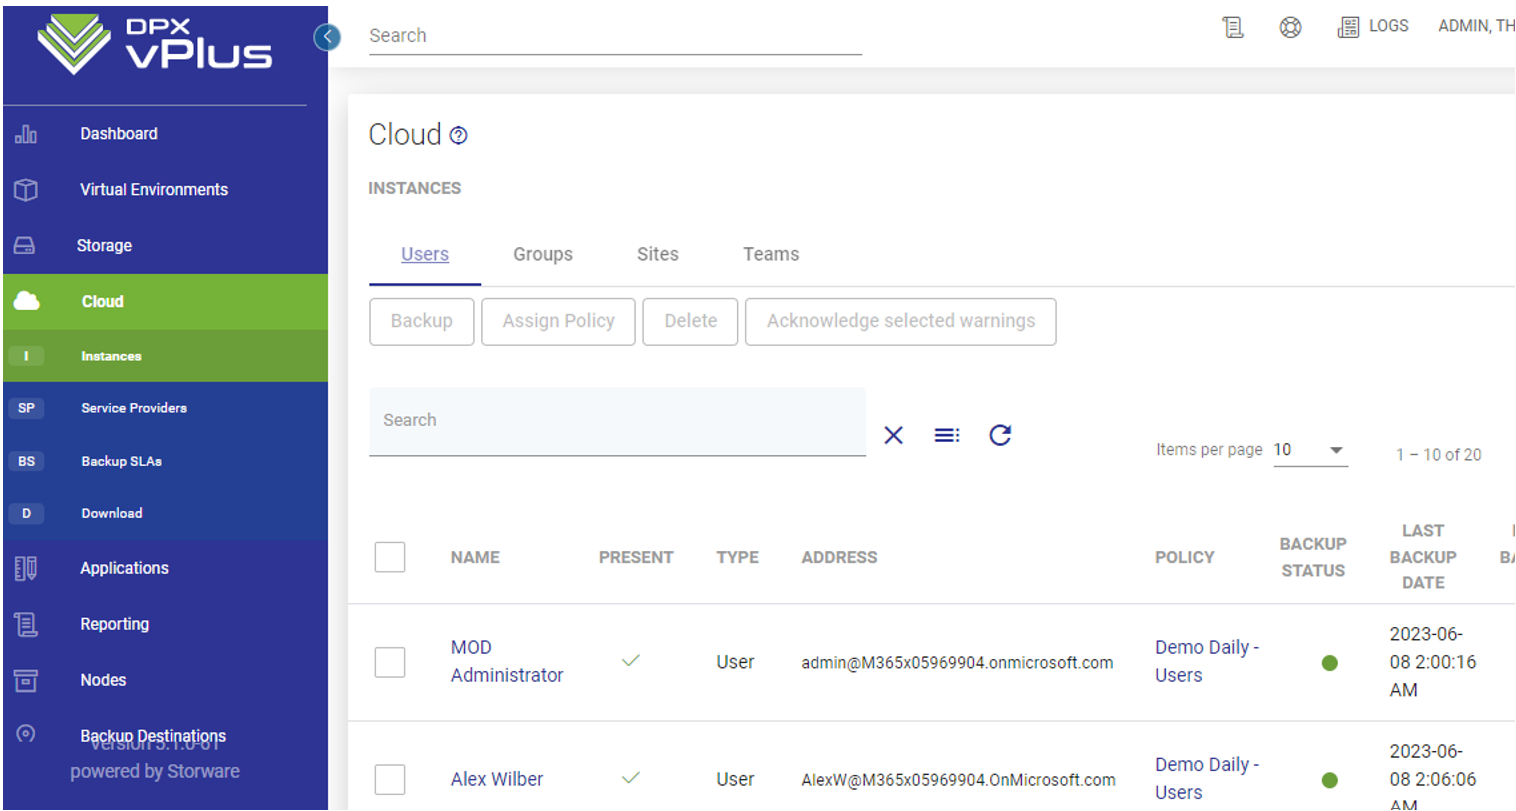
In the left navigation menu, select Cloud and then select Instances. You will see the list of Microsoft 365 resources that have been discovered. You will see several tabs for Users, Groups, Sites, and Teams specifically. Scroll or use the Search bar to find the owner of the resource that you need to recover.
Similarly to Ad-hoc restores for VMs, you can click Restore on the right side, but this will only allow you to recover the entire Mailbox, OneDrive, Sharepoint Site, and so on. This is not how you recover individual emails, files, chats, and so on. Instead, click on the name of the owner of the resource in which to recover.
In the new window, scroll down until you see the following tabs: Backup History, Restore History, Schedules, and Protected Data. Select the Protected Data tab.
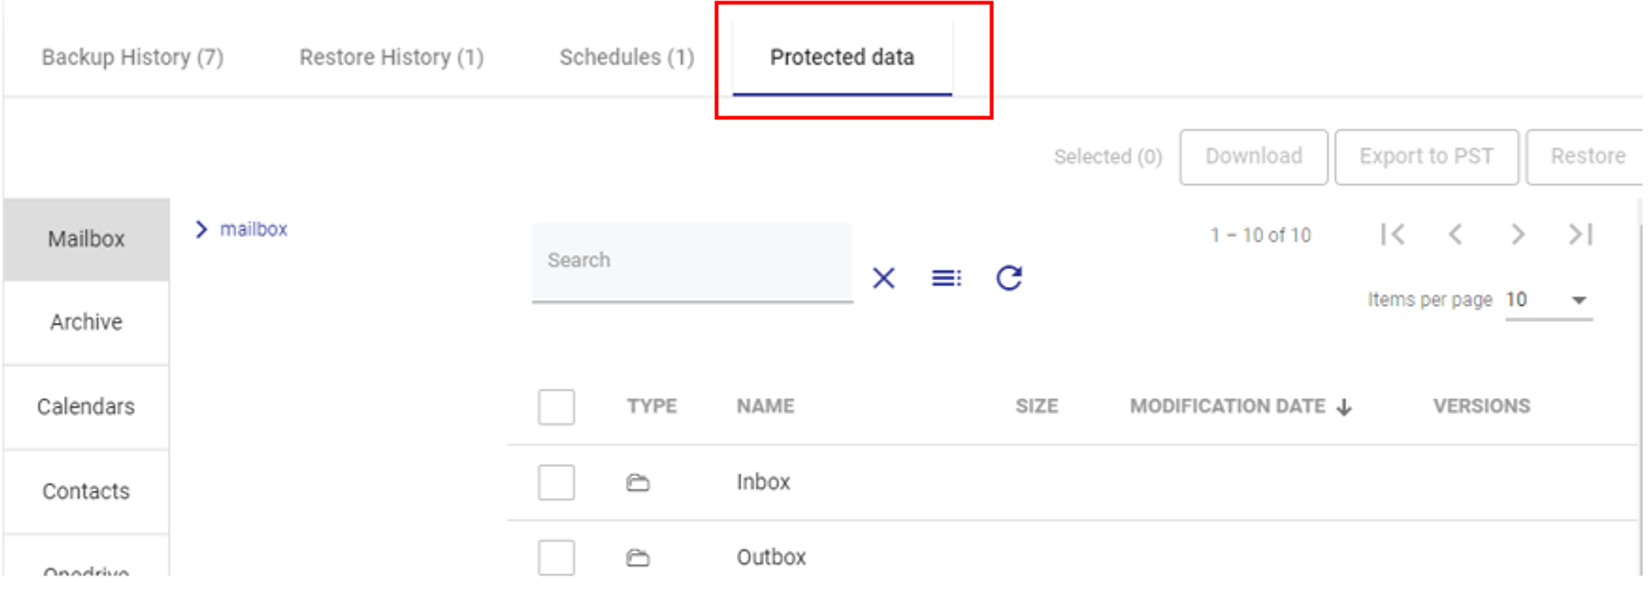
On the left you will now see tabs for each MS application that is protected for that User, Group, Team, or Site. In this example, you see Exchange, OneDrive and Chats for the User.
Browse through OneDrive, Mailbox, etc. to find the individual resource that needs to be recovered. Select the item. Now you have two Restore options.

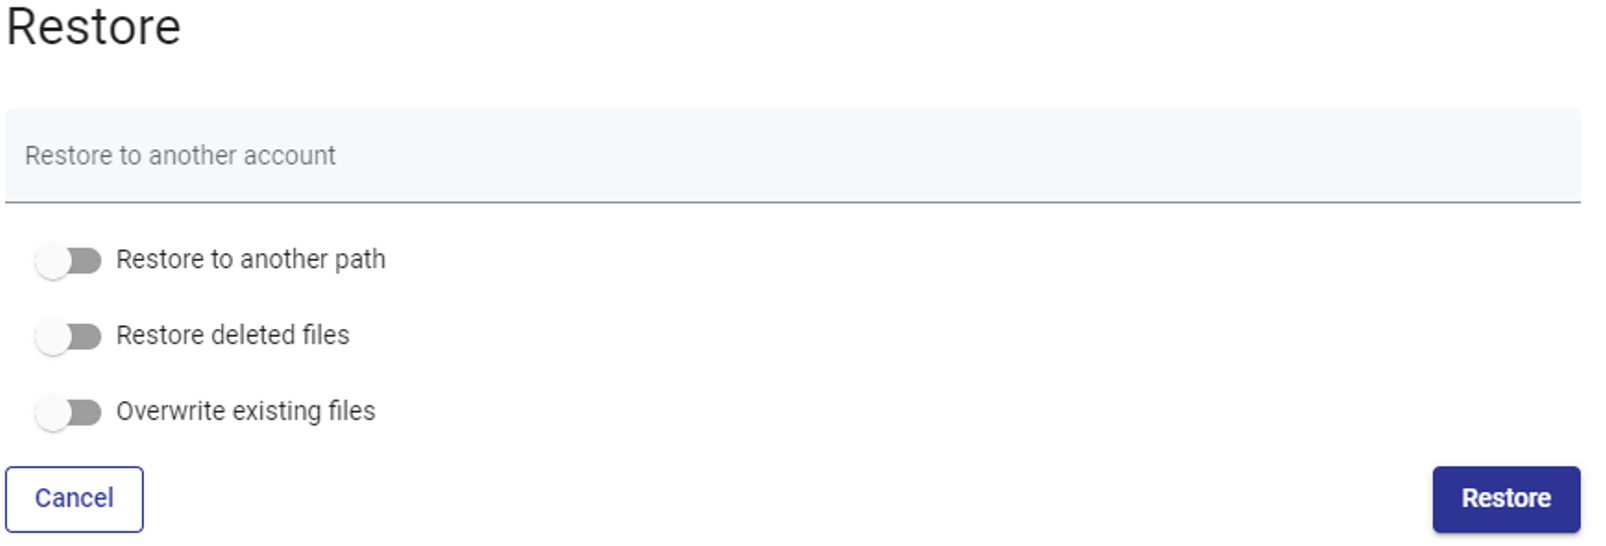
To Restore the item back to a location within MS 365 cloud, click Restore in the top-right corner. This will open a short Restore wizard, where you will specify things like alternate restoration paths, and overwrite existing files. You also have the ability to restore this item to an alternate User, Group, Team, or Site.
To Restore the item to your local machine, click Download in the top-right corner. This will prepare the item to be pulled out of the cloud and downloaded to your local machine. Once the download prep is complete, the item will be available for download in the Download section under the Cloud tab in the left-hand menu.
Scheduled Recovery Using Recovery Plans
A Scheduled Recovery Plan can be created for those recurring jobs where data needs to be restored on a regular basis. The example below uses a Virtual Machine recovery, but this can be done for Microsoft 365 as well.
In the left hand menu, click Virtual Environments and then click Recovery Plans. Click Create on the right hand side to create a new Recovery Plan.

Give the new Recovery Plan a name and click Save. Rules can be added to this policy once it is created.
Once saved, a new window will appear. We will now add a rule to this plan to schedule a recurring restore of a virtual machine. Scroll down and click Add Rule.
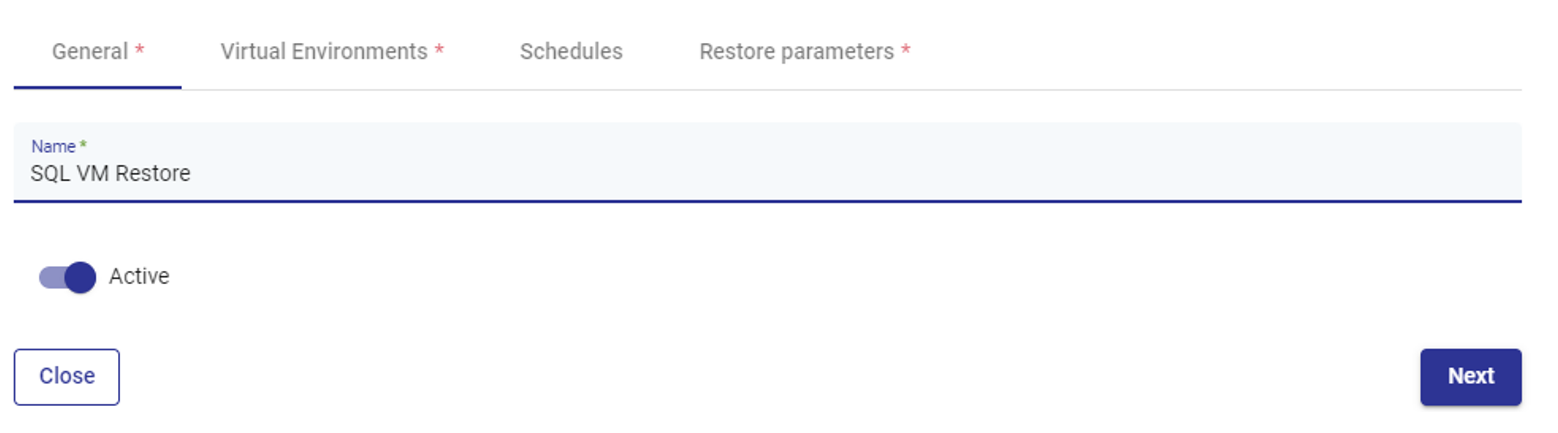
In the Rule Creation window, give the rule a name. Click Next.
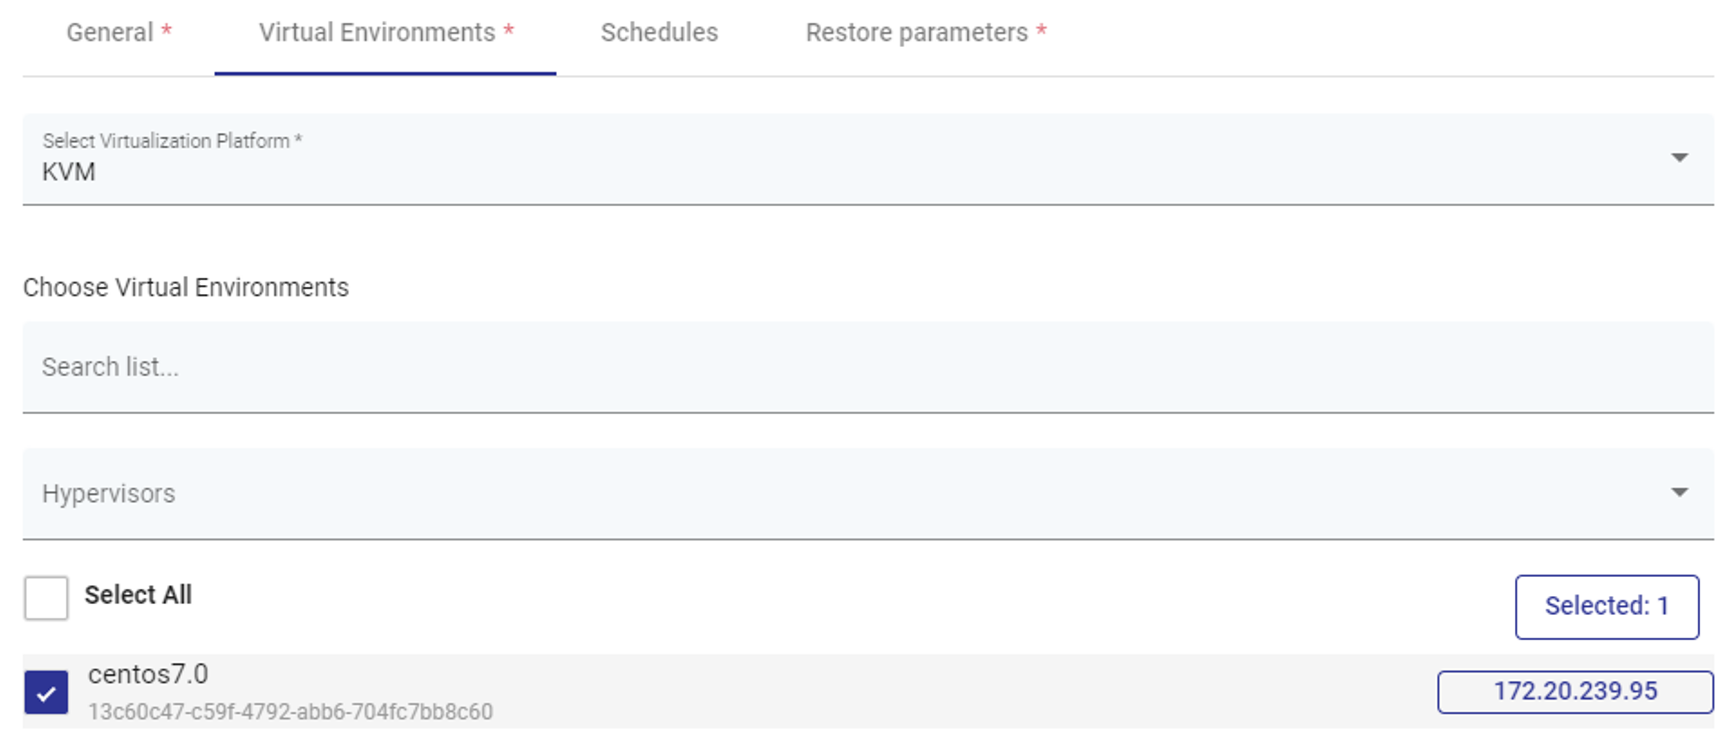
Select the Virtualization Platform and the VM(s) that you want included in this plan. Click Next.
Select or Create the Schedule that you want this Recovery Plan to use. Click Next.
Proceed through the Restore Parameters section to define which backup to use for recovery, recovery destination, storage, name for new VM, and so on. Click Save.
Logs
Logs for each mechanism in DPX vPlus can be downloaded from the vPlus GUI. To do so, click Logs in the top right menu and then download all logs. This will download logs for api, appserver, cloudserver, cloudagent, and one additional log directory for each node.

Immutability/Object Lock Support
As of vPlus version 6.2, Object Lock for S3 storage is now supported by Catalogic.
To utilize an Object Lock bucket, you will need to create a Wasabi bucket first with Object Lock settings applied to the bucket beforehand, as described in Object Lock: Enabling.
For any support or setup questions, contact Catalogic Technical Support at dpsupport@catalogicsoftware.com.