A source is a locally mounted NTFS volume or an NFS/SMB network share.
A target is your Wasabi bucket storage system.
WCN gains programmatic access on the source and bucket level to replicate your on-premise source data to your WCN storage account. Establish a source-target pair(s) in the WCN client to distribute the source data across the virtual unity. You can create as many source-target pairs as needed.
Adding a Source
You cannot set a folder as a source if its parent folder is already paired with a target.
When adding a source, all replication jobs and operations will be paused.
To enable WCN to upload an empty folder to the cloud, update the “replicate_create_file_in_empty_folder“ registry key value to 1 (default: 0). This key controls the upload of an empty folder to the bucket, which includes a dummy file of 0 B, and is created in the registry during the installation of the latest client.
On the WCN Configuration Interface, click Add Source.
.png)
You have the option to add:
Once complete, continue to Pairing a Target, below.
Adding an Entire Volume
Select the root of the volume.
Click OK.
Continue to Pairing a Target.
Adding an Existing Folder
Browse to and select the folder.
Click Select Folder.
.png)
Continue to Pairing a Target.
Creating a New Folder
Browse to the location to create the folder.
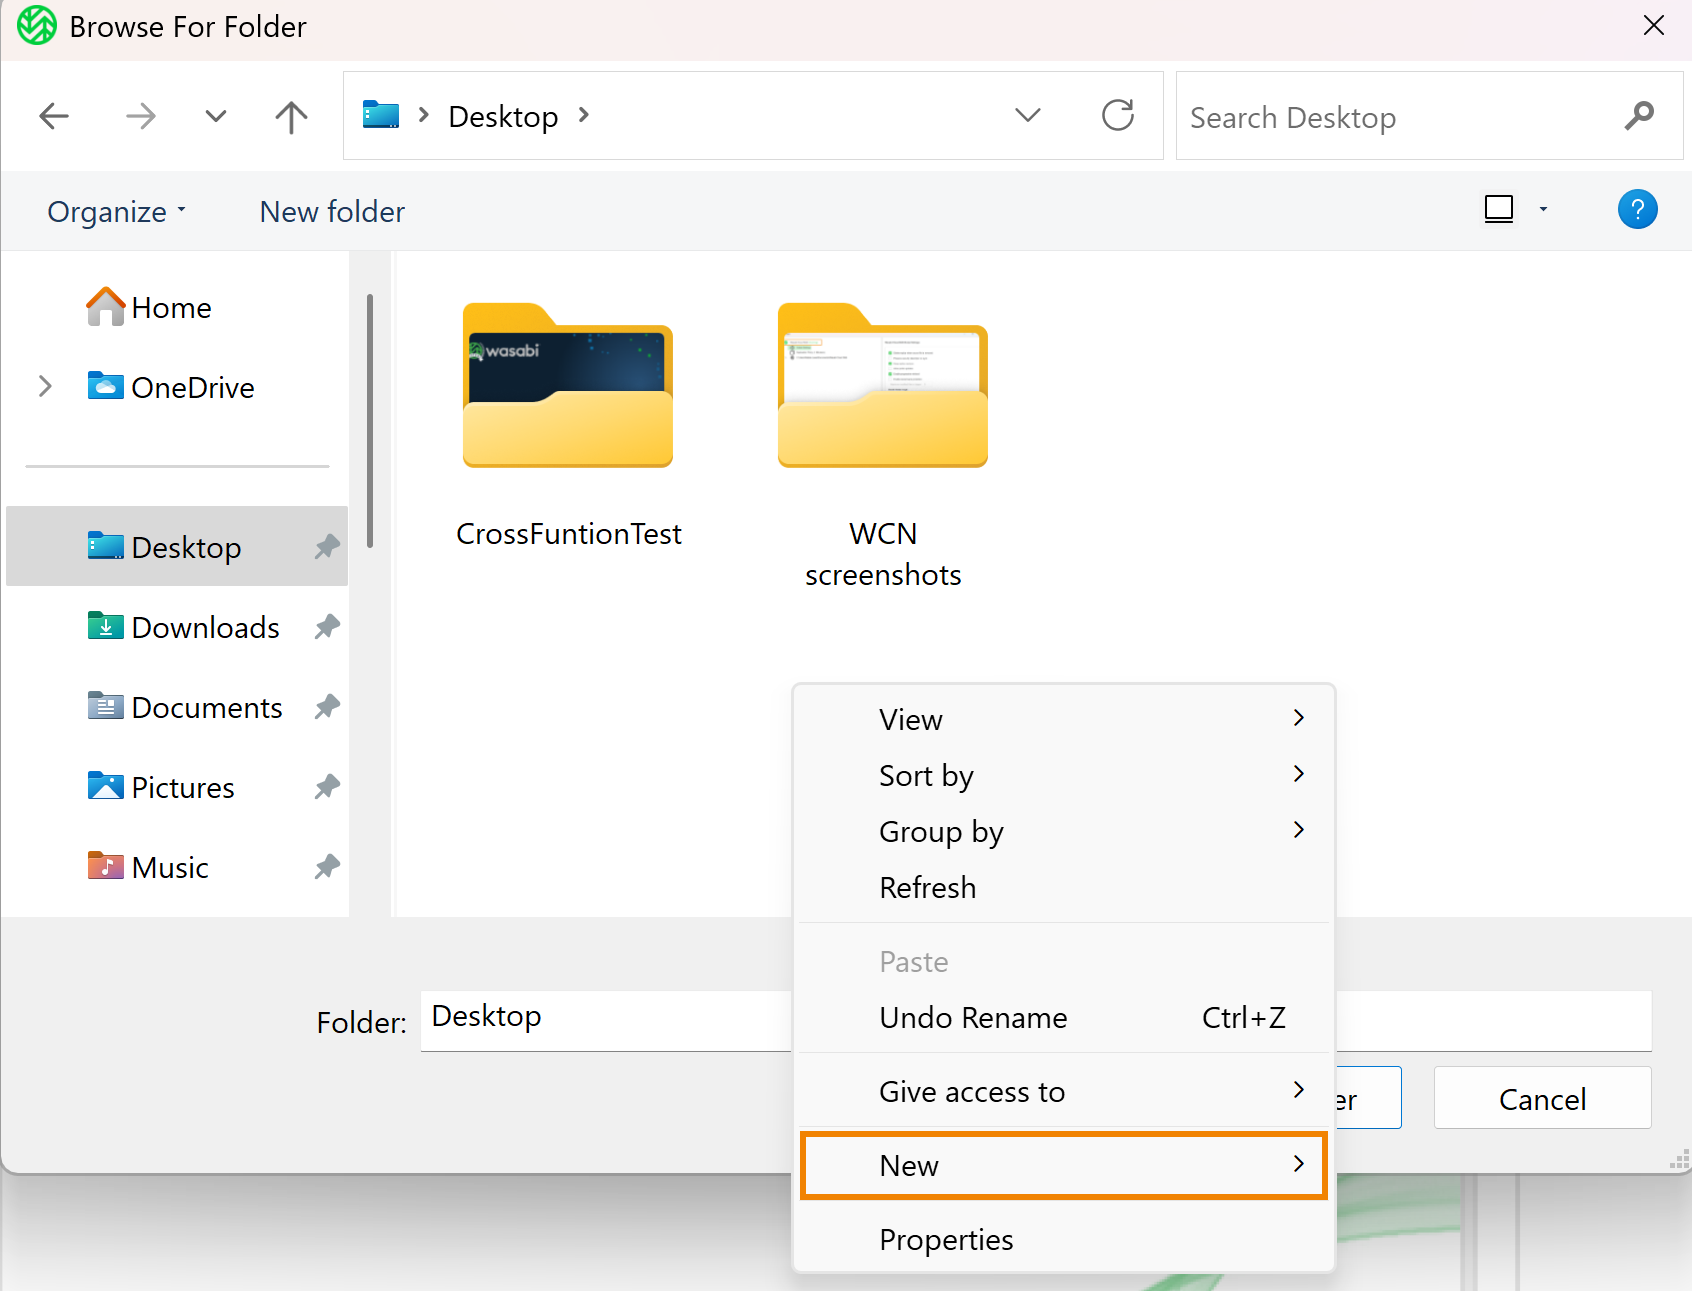
Right-click and select New.
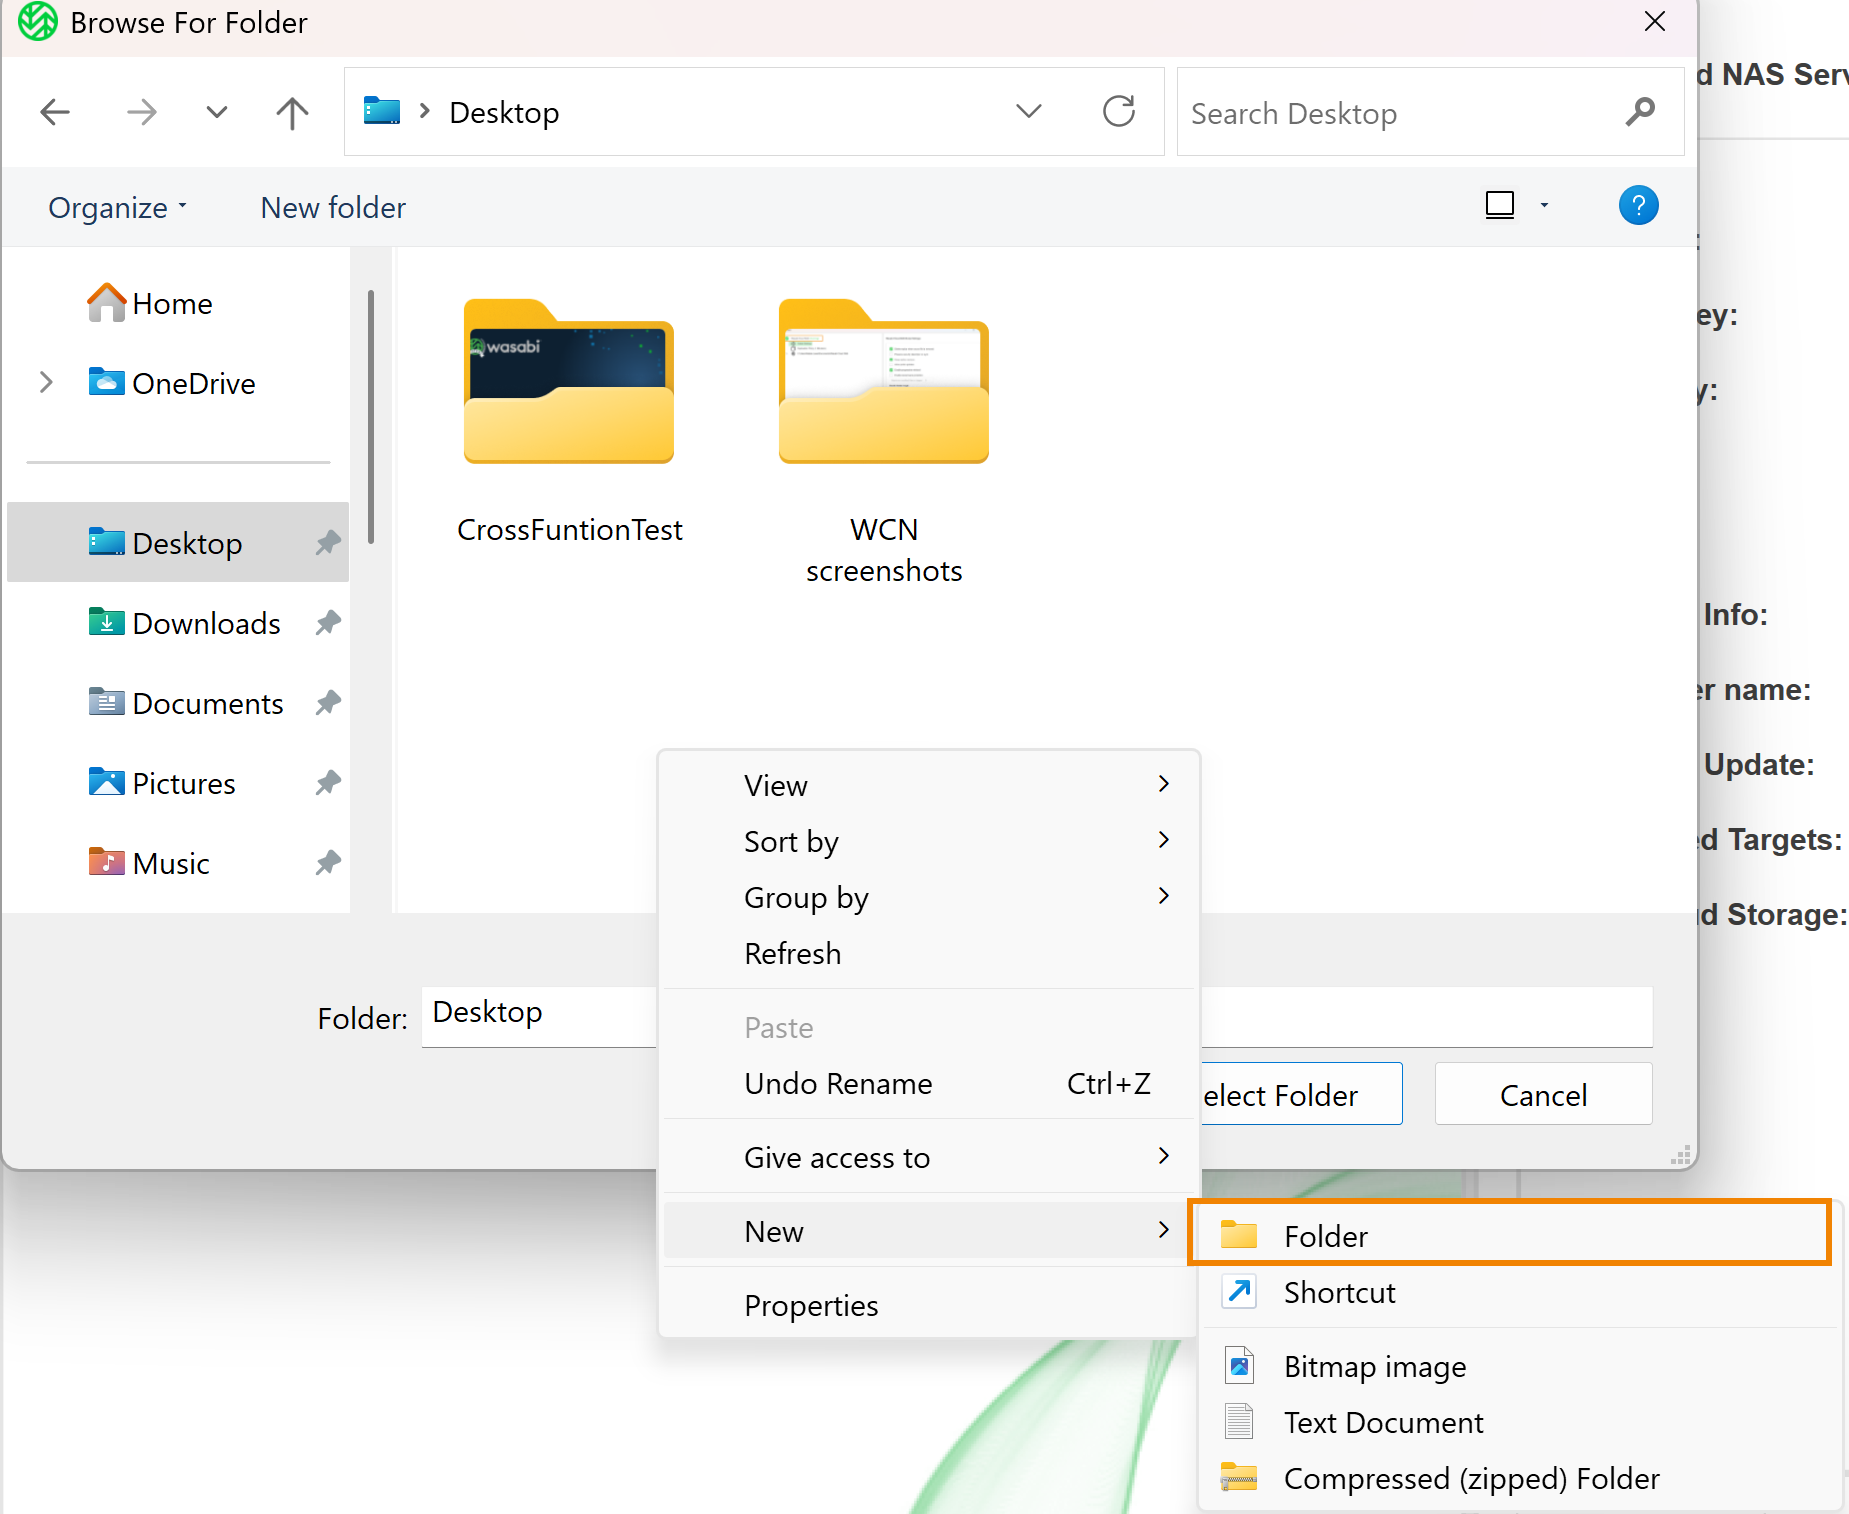
Select Folder.
Enter a name for the folder.
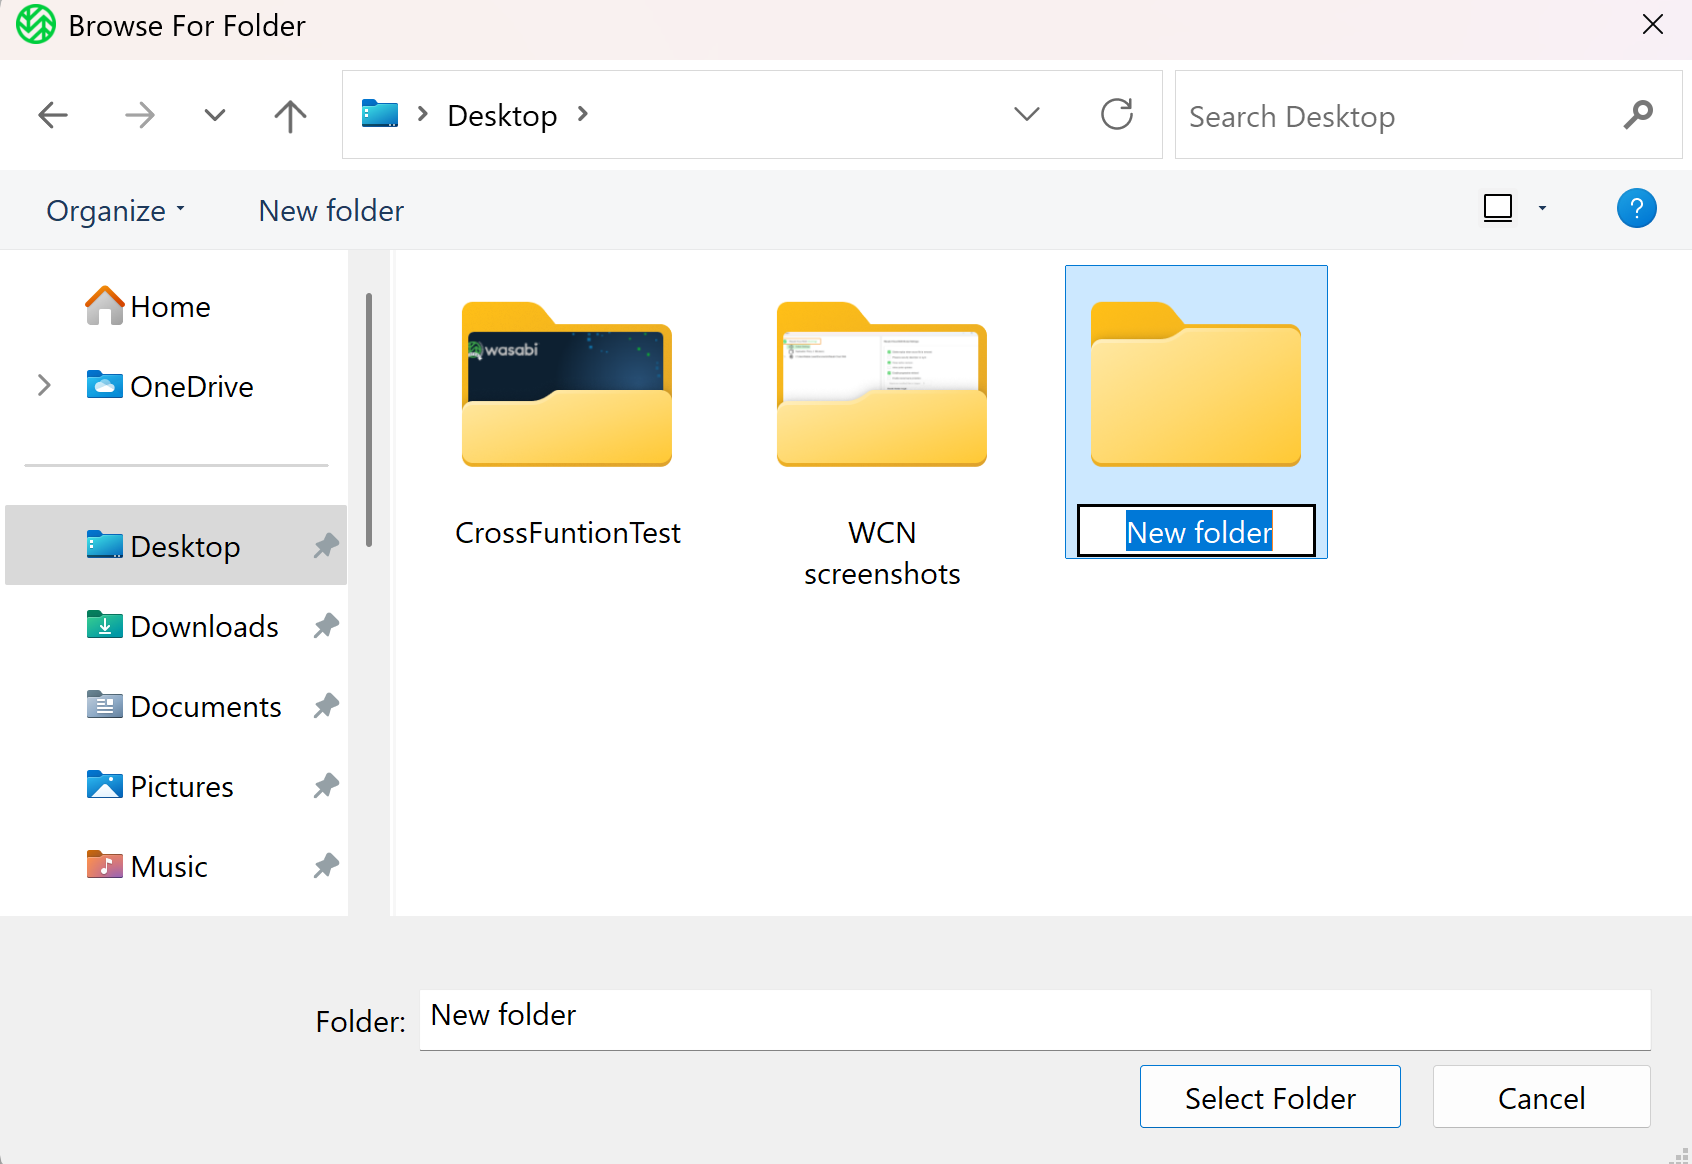
Click Select Folder.
Continue to Pairing a Target below.
Pairing a Target
A user cannot map a source to a target that is governed by a restricted access policy without the necessary permissions. Replication, sync, and delete operations performed by the WCN client may fail (depending on the permissions granted by the IAM policy on the bucket) and an error message will be logged in the Event Viewer.
Enter the following information for the target (bucket).
Source path—Auto-populates based on the selected source. To modify the local source, click Browse.
Targets—Click the drop-down to select a target.
Target name—Enter a name for the target.
Specify a unique target name to reuse its parameters when you pair another source with the same target. The target and its parameters will appear in the Targets drop-down box.
Server URL—Auto-populates based on the selected region.
Region—Click the drop-down to select a region.
Access key—For the Wasabi bucket.
Secret key—For the Wasabi bucket.
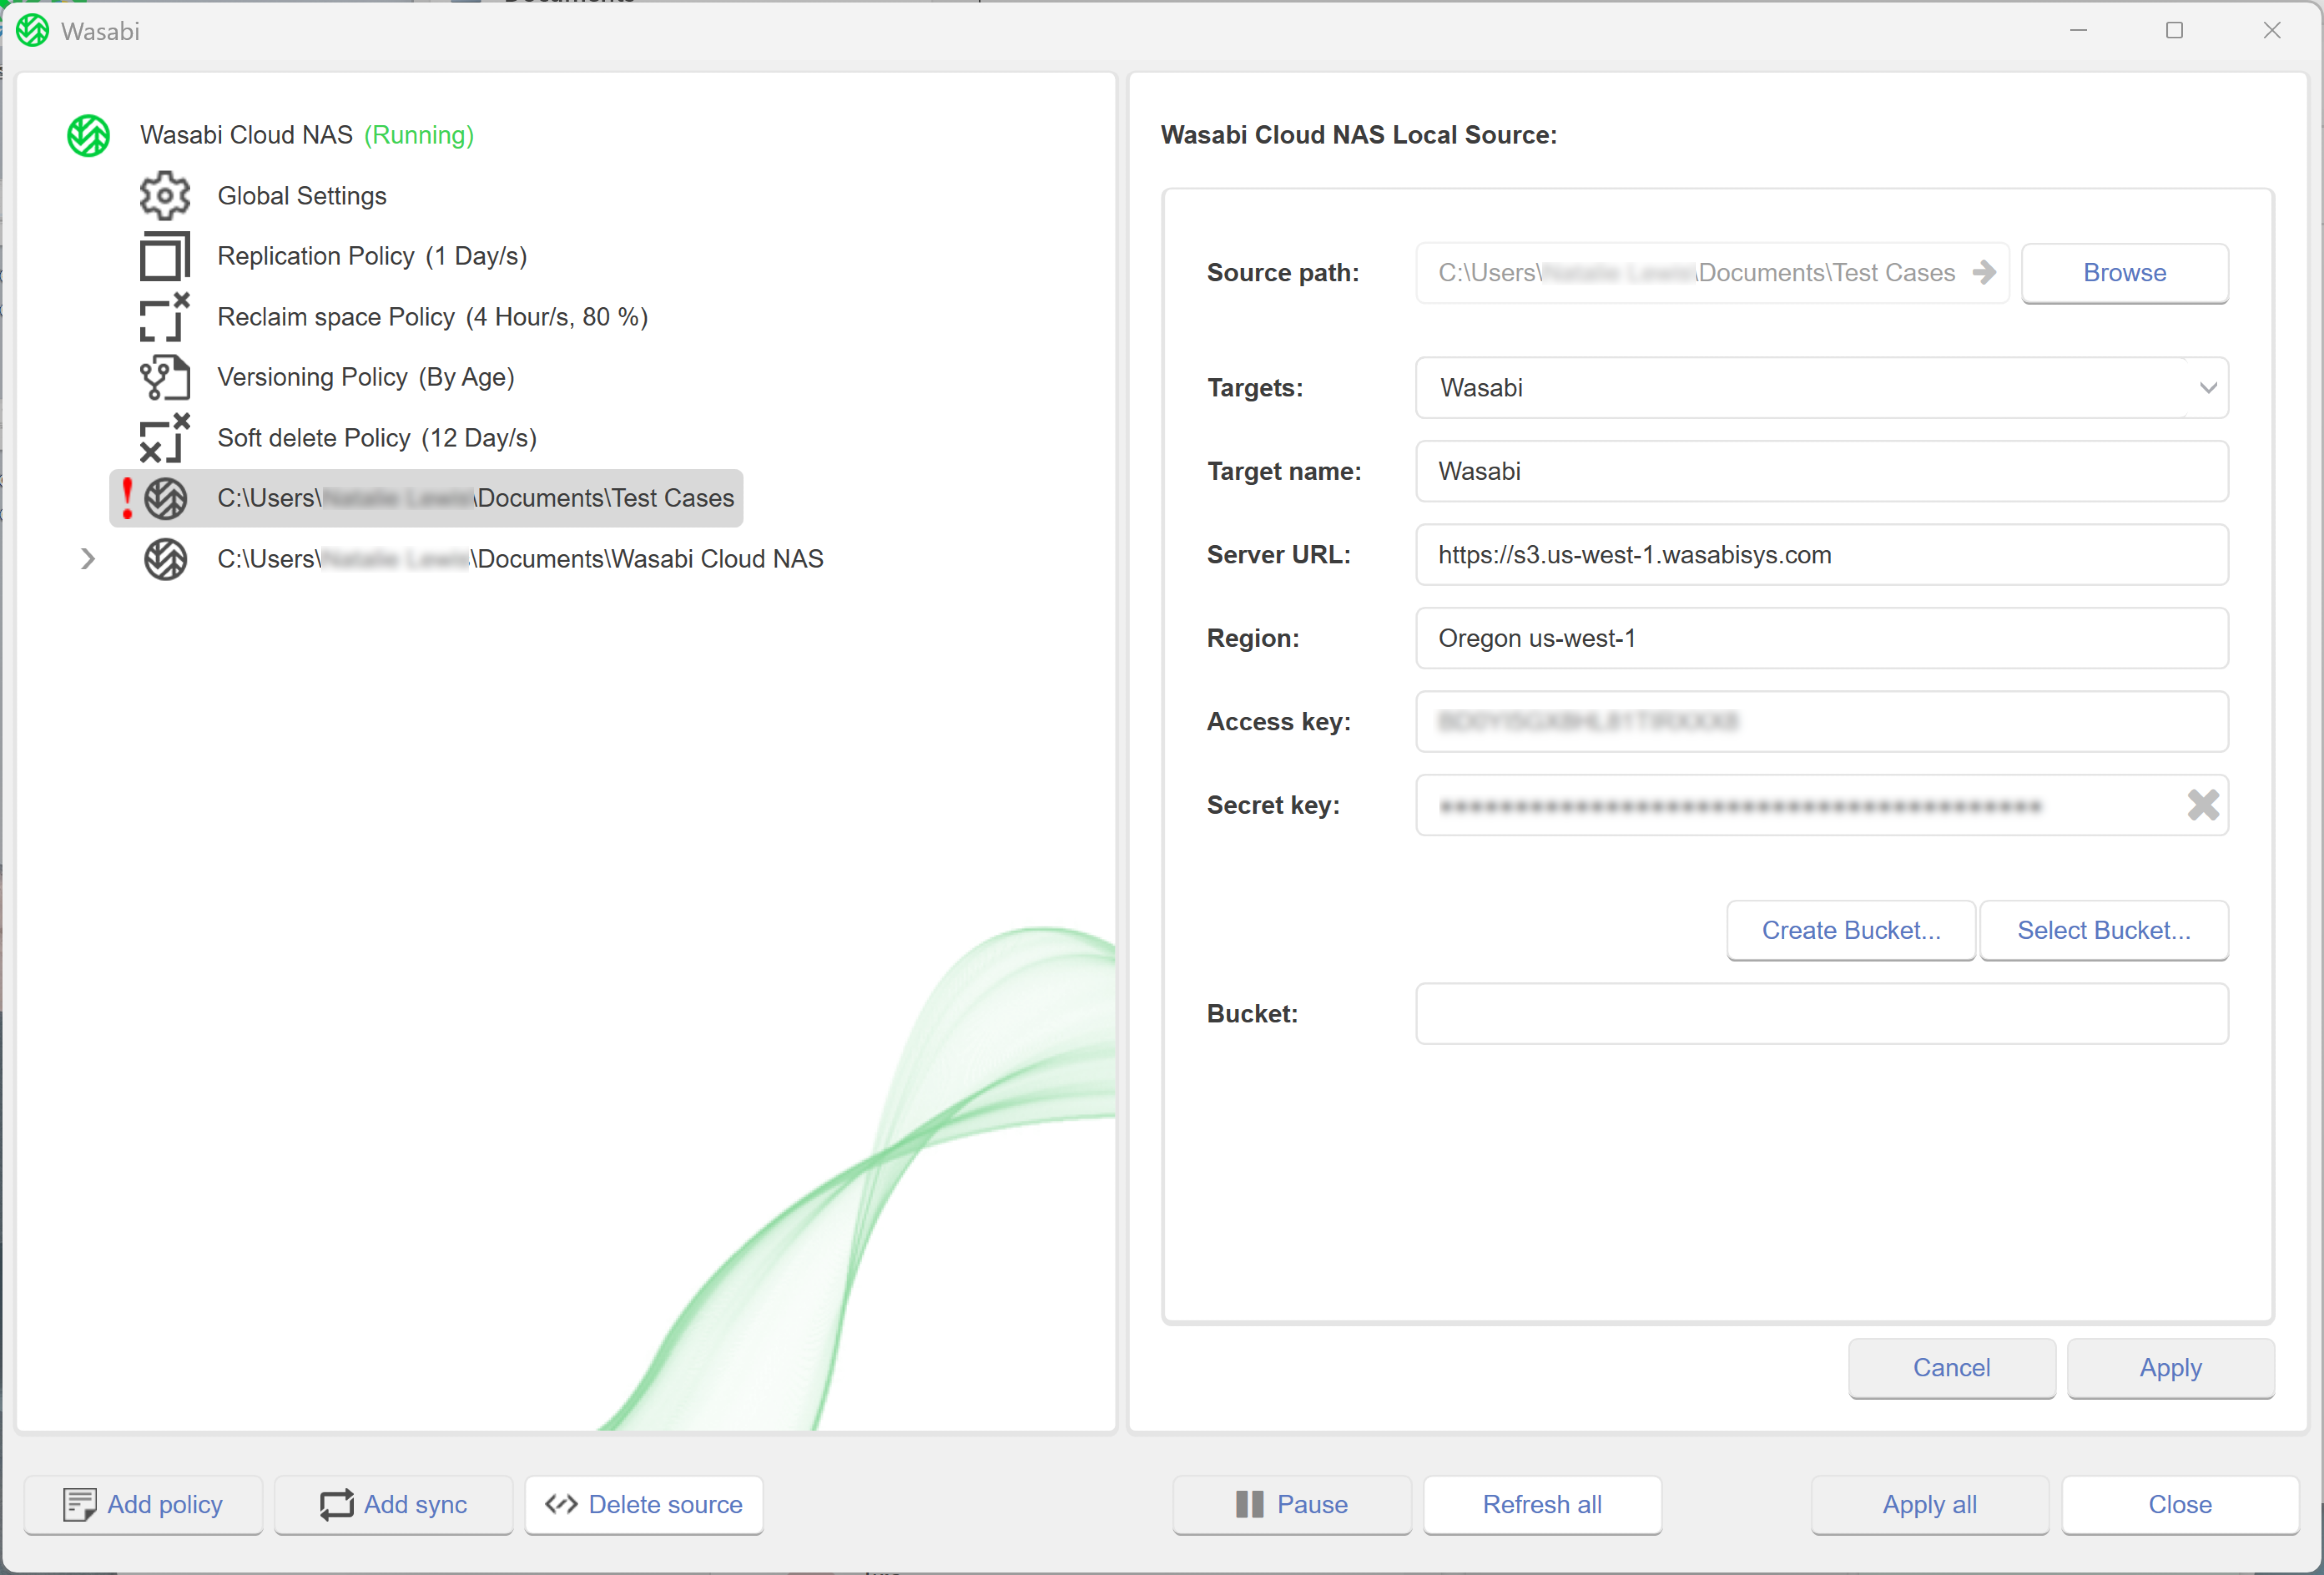
You now have the following options. Once complete, return to this step.
Creating a new bucket or selecting an existing bucket from the WCN storage account can be governed by an IAM policy assigned to the bucket. A logged in user profile can neither create nor list buckets if they do not have the necessary permissions.
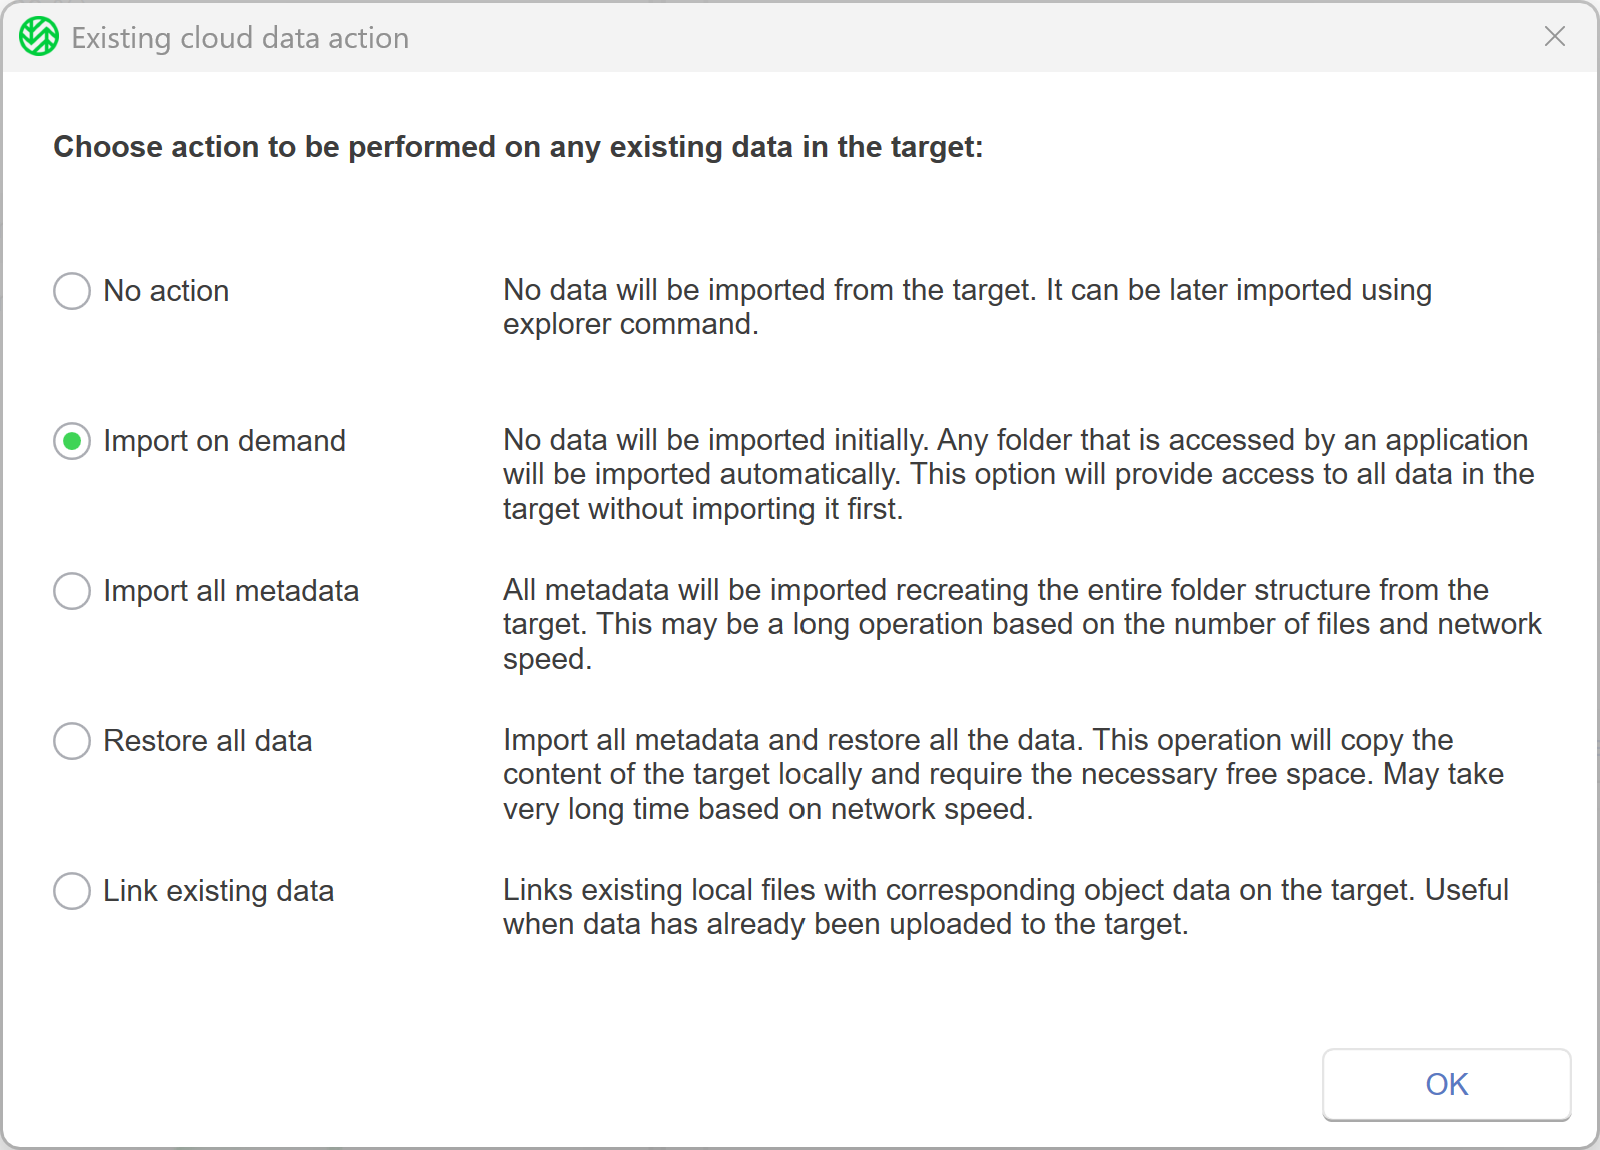
When pairing an existing bucket, WCN enables you to perform one of the following actions on the preexisting data in the bucket. Select an action.
No action—No data will be imported on your source. You can import it later by following the steps in Synchronizing Data on the Source and the Bucket.
Import on demand—WCN creates a stub file (nearline file) for each file from the bucket, only when you browse the containing folder on your source. For example, consider that there are two files (one.xml and two.xml) and a folder (“bucket folder”) containing a file three.xml in the bucket. If you choose to import these on-demand, once you browse the root of your source, WCN will create stub files one.xml and two.xml as well as “bucket folder.” The “bucket folder” will remain empty until you open it on your source. Then WCN will create a stub file, three.xml.
Import all metadata—Your source will be populated with all folders and files from the bucket, but the files will be represented by stub files (nearline files), which can either be retrieved on-demand (by attempting to open them) or manually through WCN.
Restore all data—WCN retrieves all files and folders from the bucket on your source, maintaining their hierarchical structure. All retrieved files will have a Replicated status.
The operation may take time and the free space on your source must be enough to accommodate all data found only on the bucket.
Link existing data—Files with matching metadata in both the source and bucket are linked and shown as Replicated. The latest file updates will either update in the source or the cloud. If the source file is newer, the cloud updates. If the cloud file is newer, it replaces the source. WCN creates a stub file locally if a cloud file has no match on the source.
Click OK.
A message will confirm that the changes have been successfully applied and that the WCN service is paused. Click OK.
After you pair a target, the Bucket Settings page will be displayed. WCN provides the option to configure bucket settings at this time. For more information, refer to Bucket Settings for WCN.
If you created and paired a new bucket, versioning and compliance mode settings will be disabled. If you paired an existing bucket with versioning and compliance mode already enabled, these settings will show as enabled.
To resume operations, click Wasabi Cloud NAS.
Click Resume. WCN will immediately begin replicating data to the cloud tier.
Creating a New Bucket
Click Create Bucket…
Enter a name for the new bucket. (For naming conventions, refer to Bucket Naming Rules.)
Click OK.
Click Apply.
Continue to Step 5 of Pairing a Target.
Selecting an Existing Bucket
Do not map the same bucket to two or more sources on the same server.
Click Select Bucket…
To filter the list, enter the bucket name into the search bar.
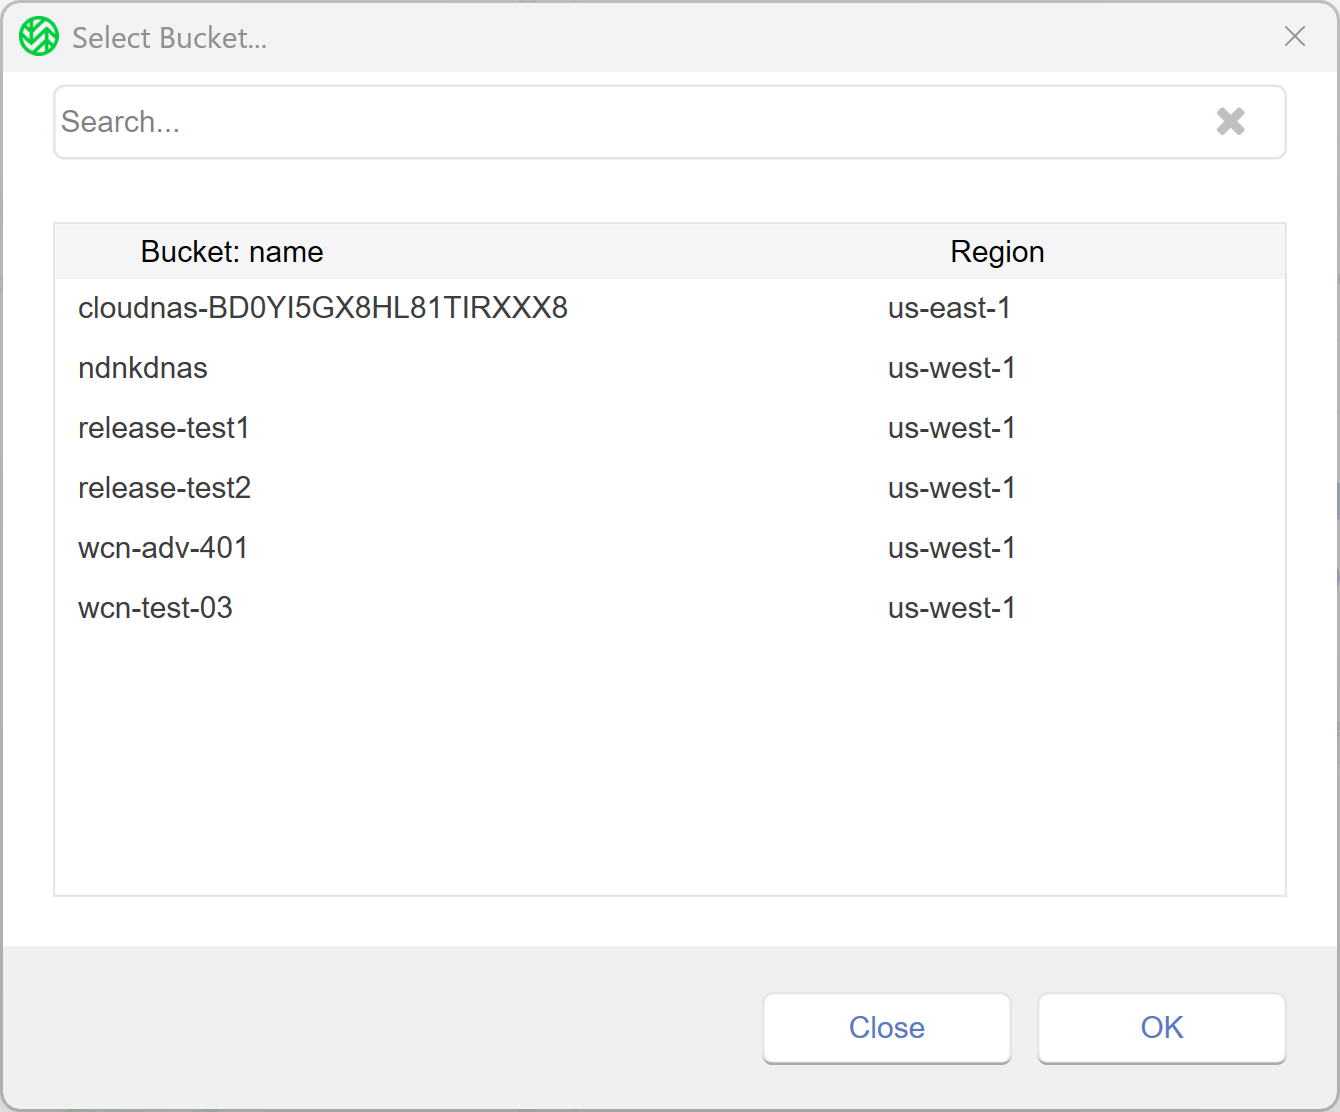
Select a bucket.
Click OK.
Optionally, if you do not have sufficient permissions to list all buckets, you can manually enter an existing bucket. To do so, click Close.
In the Buckets field, enter the name of the bucket for which you have permissions.
Click Apply.
If the selected bucket contains data, continue to Step 3 of Pairing a Target.
If the selected bucket does not contain data, continue to Step 5 of Pairing a Target.
Objectives Met!
1—Download and install Wasabi Cloud NAS.
2—Activate Wasabi Cloud NAS.
3—Configure Wasabi Cloud NAS.
Before continuing to the Product Guide, you may want to learn more about Updating Wasabi Cloud NAS.
After Getting Started With Wasabi Cloud NAS (WCN), explore more features in the Product Guide for Wasabi Cloud NAS (WCN).