Bucket-level cross-account replication enables you to utilize resources in different buckets across Wasabi account(s) for your web applications.
Creating a Job to Replicate Objects Across Different Accounts
While creating a job to replicate objects across different accounts, you will name a destination bucket. A destination bucket policy must be added to that destination bucket. For a description of how to add a policy, refer to Reviewing the Policies Panel and Creating a Policy. An example of a policy is:
{
        "Version": "2012-10-17",
        "Statement": [
        {
        "Sid": "Set-Permissions-for-objects",
        "Effect": "Allow",
        "Principal": {
        "AWS": "arn:aws:iam::<SOURCE_ACCOUNT_ID>:role/<ROLE>"
        },
        "Action": [
        "s3:ReplicateDelete",
        "s3:ReplicateObject",
        "s3:ReplicateTags"
        ],
        "Resource": [
        "arn:aws:s3:::<DEST_BUCKET_NAME>/*",
        "arn:aws:s3:::<DEST_BUCKET_NAME>
        ]
        },
        {
        "Sid": "Set permissions on bucket",
        "Effect": "Allow",
        "Principal": {
        "AWS": "arn:aws:iam:::<SOURCE_ACCOUNT_ID>:role/<ROLE>"
        },
        "Action": [
        "s3:List*",
        "s3:GetBucketVersioning",
        "s3:PutBucketVersioning"
        ],
        "Resource": "arn:aws:s3:::DEST_BUCKET_NAME"
        }
        ]
        }
Once you have a destination bucket policy added to your destination bucket, you are ready to create a job to replicate objects across different accounts.
On the Buckets list, click
 for the desired bucket. This is the source bucket.
Click Settings.
Click the Object Replication tab. If there are no existing replication jobs, you will see:

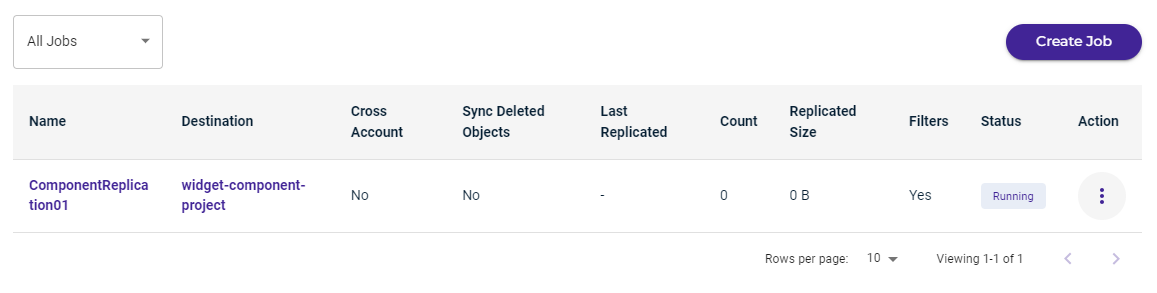
If there are existing jobs, you will see a listing such as:
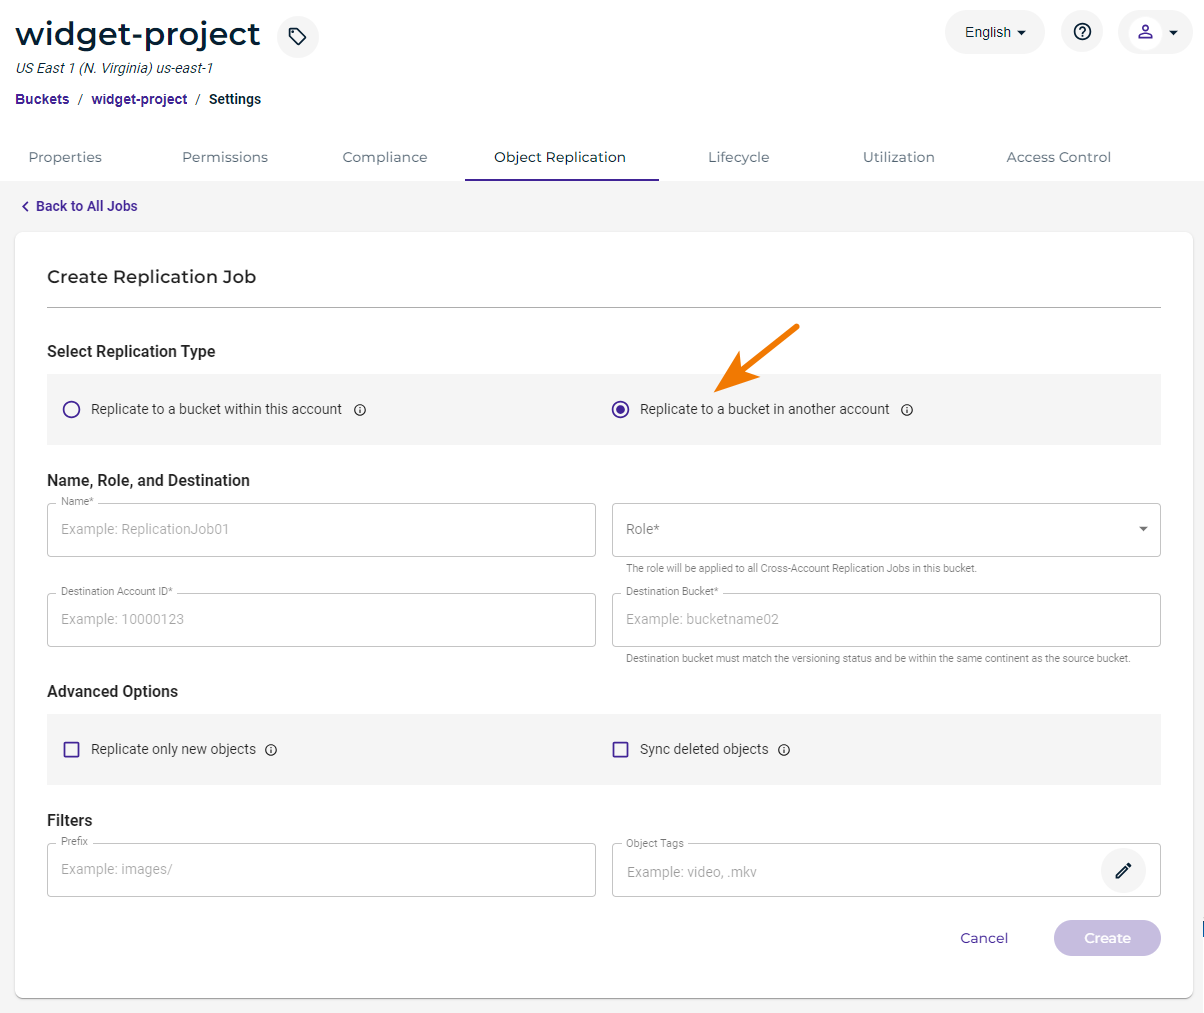
Click Create Replication Job or Create Job.
Select the replication job type: Replicate to a bucket in another account to replicate objects across different buckets in different accounts. (For the other job type, refer to Object Replication in the Same Account.)
Enter a name for the replication job. The job name is ComponentReplication02 in this example:

Select a role from the drop-down of available options:

This role will be applied to all cross-account replication jobs in this bucket.

Enter the ID for the destination account (blurred in this example):

Enter the name of the destination bucket for the cross-account. (The destination bucket must match the versioning status and be within the same continent as the source bucket.)
You can select advanced options for the job:
Replicate only new objects indicates only new data added to the source bucket will be replicated. This is "live replications." If you do not select this option, ALL existing objects from the source bucket will be replicated in the destination bucket. This is "batch replication."
Sync deleted objects indicates that objects deleted in the source bucket will also be deleted in the destination bucket.

Optionally, you can add a prefix to filter objects that will be copied from the source bucket. In the following example, only objects in the source bucket that have a name that begins with the text, schematic, will be copied to the destination bucket.

Optionally, you can add object tags on which to filter objects to be replicated. Click the pencil icon and then refer to Object Tags for instructions on adding a tag.

If you select the Sync deleted objects advanced option, you cannot filter on object tags.
If you specify both a prefix and object tag(s), all conditions must be met for the source bucket object to be copied to the destination bucket. In the following example, only objects in the source bucket that meet the following conditions will be replicated:
The object name begins with schematic AND
The object has tags of release: 101 and line: arrowhead.
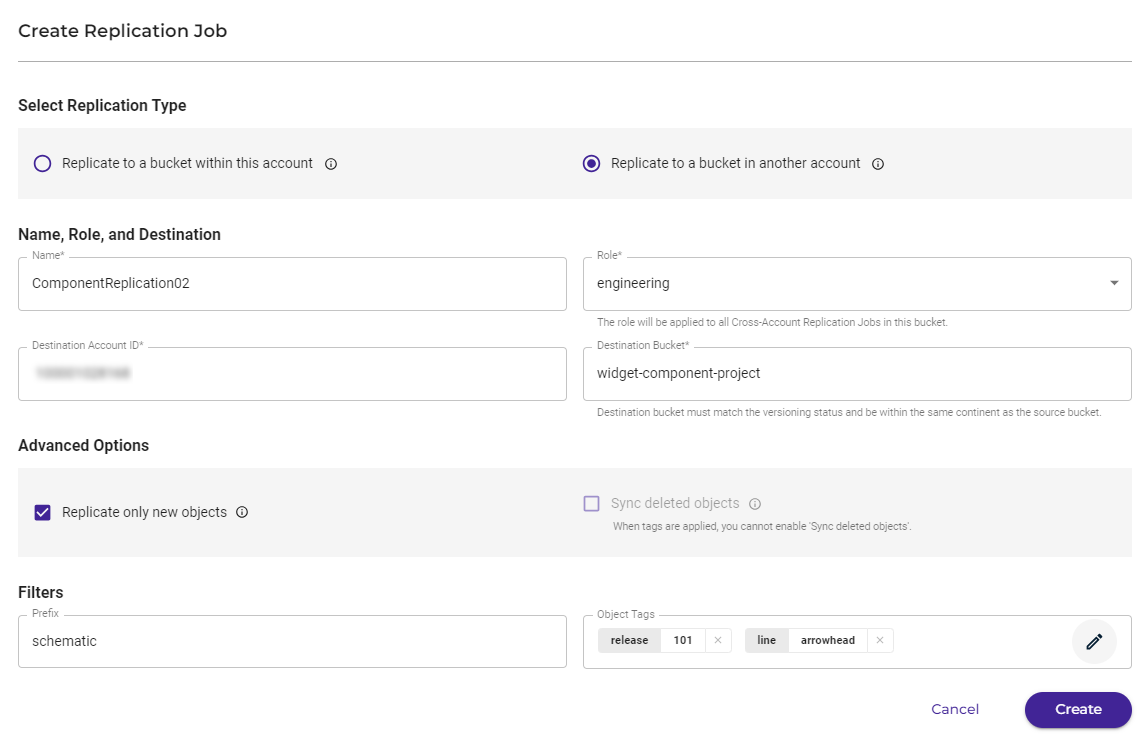
Click Create.
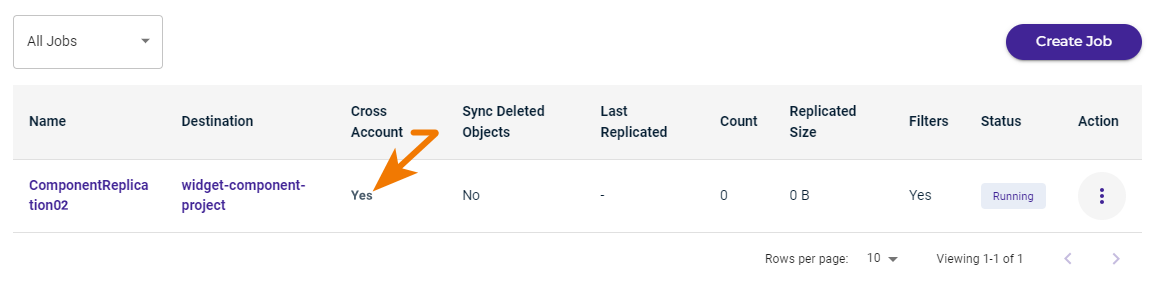
The replication job panel will appear similar to the following. Notice the indication that the job is for cross-account replication:
Reviewing the Replication Job Panel and Managing Jobs
Refer to Object Replication: Managing a Job.