How do I migrate Veeam v12 Direct to Object Storage from AWS S3 to Wasabi using WCSM?
Wasabi is a member of Veeam's cloud partner ecosystem. We have worked with Veeam closely to offer both a seamless implementation and a smooth transition to cloud storage. For more information on how Veeam works with Wasabi, refer to Veeam and Wasabi Solution Brief.
This article describes the procedure to migrate a non-immutable Veeam v12 repository from AWS S3 to Wasabi using Wasabi Cloud Sync Manager (WCSM). WCSM is a paid managed service that performs cloud-to-cloud migration without requiring the customer to download and re-upload backups.
This article covers only Direct to Object Storage. Reference the articles listed below for Scale-Out Backup Repositories (SOBRs) and Backup Copy Jobs.
How do I migrate Veeam v12 Backup Copy Job from AWS S3 to Wasabi using WCSM?
How do I migrate Veeam v12 SOBR from AWS S3 to Wasabi using WCSM?
To use the Veeam v12 Move capability that also works with immutable backups, review Migrate Veeam Backups From AWS S3 to Wasabi on Veeam v12. Using Veeam Move requires downloading and uploading your backups.
Prerequisites
- Veeam Backup and Replication (VBR) v12, or higher, installed and licensed. This solution was tested with v12.2.
- Active AWS S3 cloud storage account.
- An AWS S3 non-Object-Locked (non-immutable) bucket with access keys.
- An active VBR repository.
- Active Wasabi Cloud Storage account.
- A Wasabi non-Object-Locked (non-immutable) bucket created with access keys.
High-Level Migration Steps
Follow the high-level steps below to migrate from AWS S3 to Wasabi. These are detailed further in the sections below.
- Backups reside initially only in the AWS S3 bucket.
- The WCSM team performs an initial copy from AWS S3 to Wasabi.
- The customer disables Veeam backup job(s) before the final sync.
- The WCSM team performs a final sync.
- The customer adds a Wasabi repository.
- The customer does a test restore using a migrated backup.
- Finally, the customer points the backup jobs to Wasabi and enables the jobs.
Wasabi Cloud Sync Manager Configuration
Wasabi Cloud Sync Manager (WCSM) is a paid, managed migration service. Refer to Getting Started With Wasabi Cloud Sync Manager for more information.
- Request a WCSM Account by either completing the WCSM Questionnaire or reaching out to your Wasabi Sales contact.
- Upon approval and notification of account creation, you will be able to log into the WCSM Portal. Follow the steps outlined in 2—Entering Credentials for Cloud Migration.
- This will require you to enter your AWS S3 storage account credentials and Wasabi account credentials along with your bucket information.
Disable Backup Activities Before Final Sync is Performed
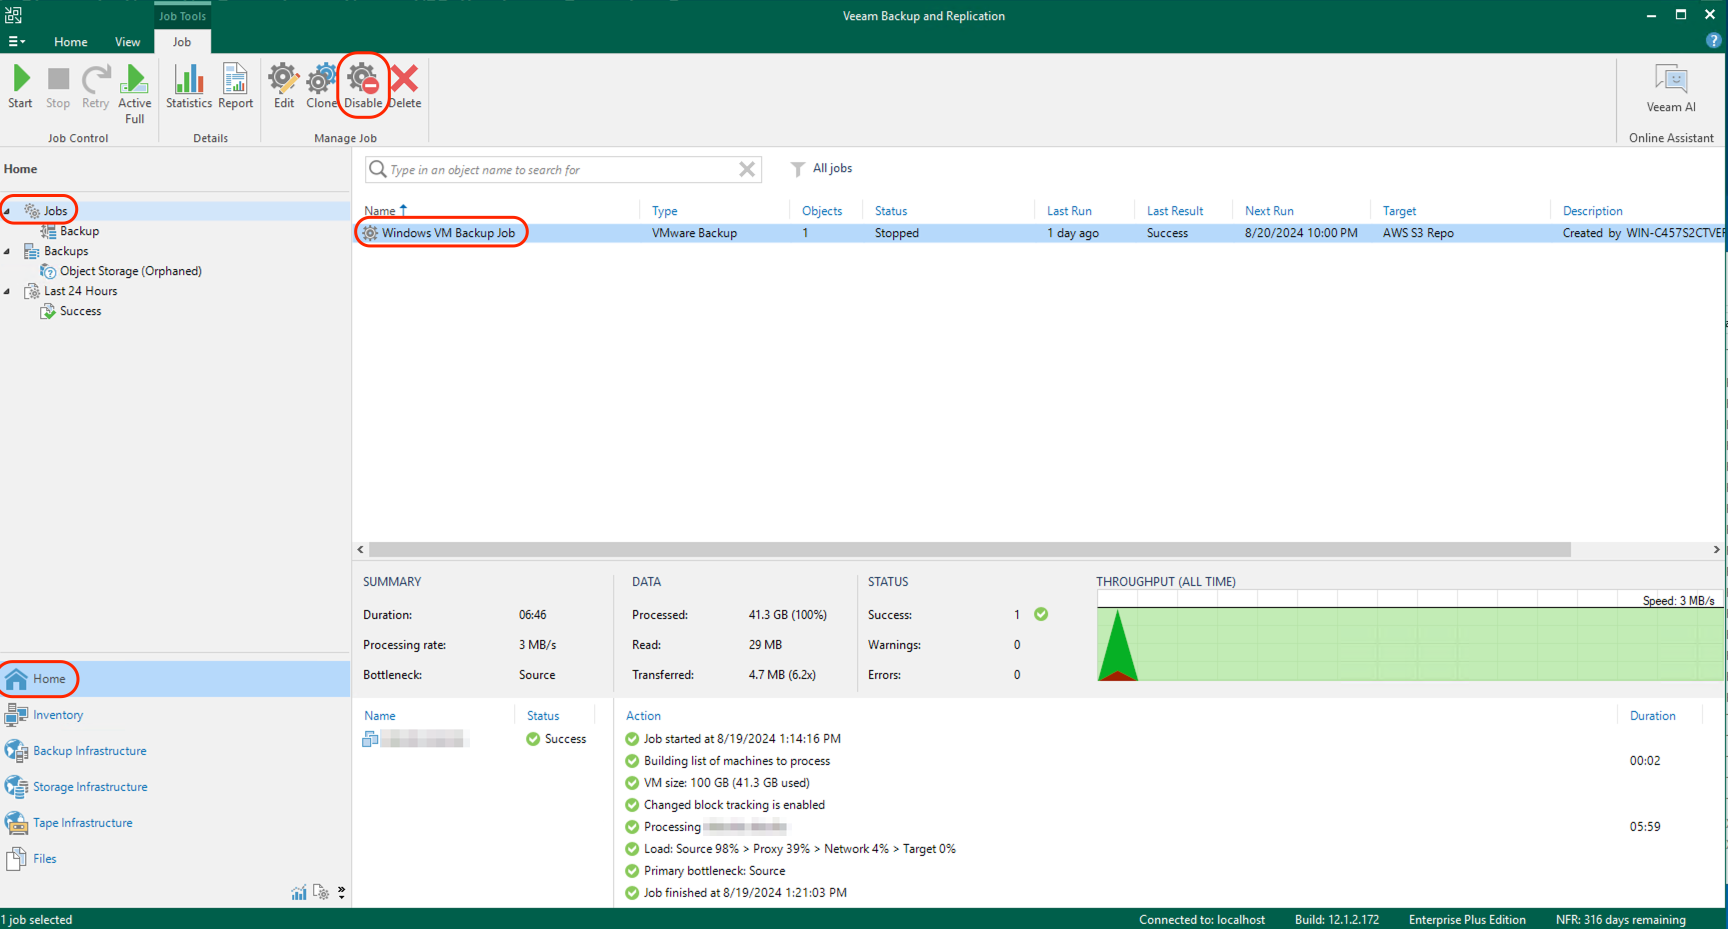
Disable the backup job(s) currently pointed to AWS S3.
- Navigate to the Home tab. Click Jobs, then select the job backing up to AWS S3. Click Disable.
Final WCSM sync will be performed on agreed upon date
The final WCSM data sync will occur on the date agreed upon by the customer and the Wasabi WCSM team. This will sync any new backups performed to AWS S3 and any Veeam backup cleanup activities/deletions from AWS S3 to ensure the same data resides in Wasabi. For a definition of the WCSM sync operation, review Migration Types.
Create the Wasabi Repository
- Navigate to the Backup Infrastructure tab. Click Backup Repositories, then Add Repository.
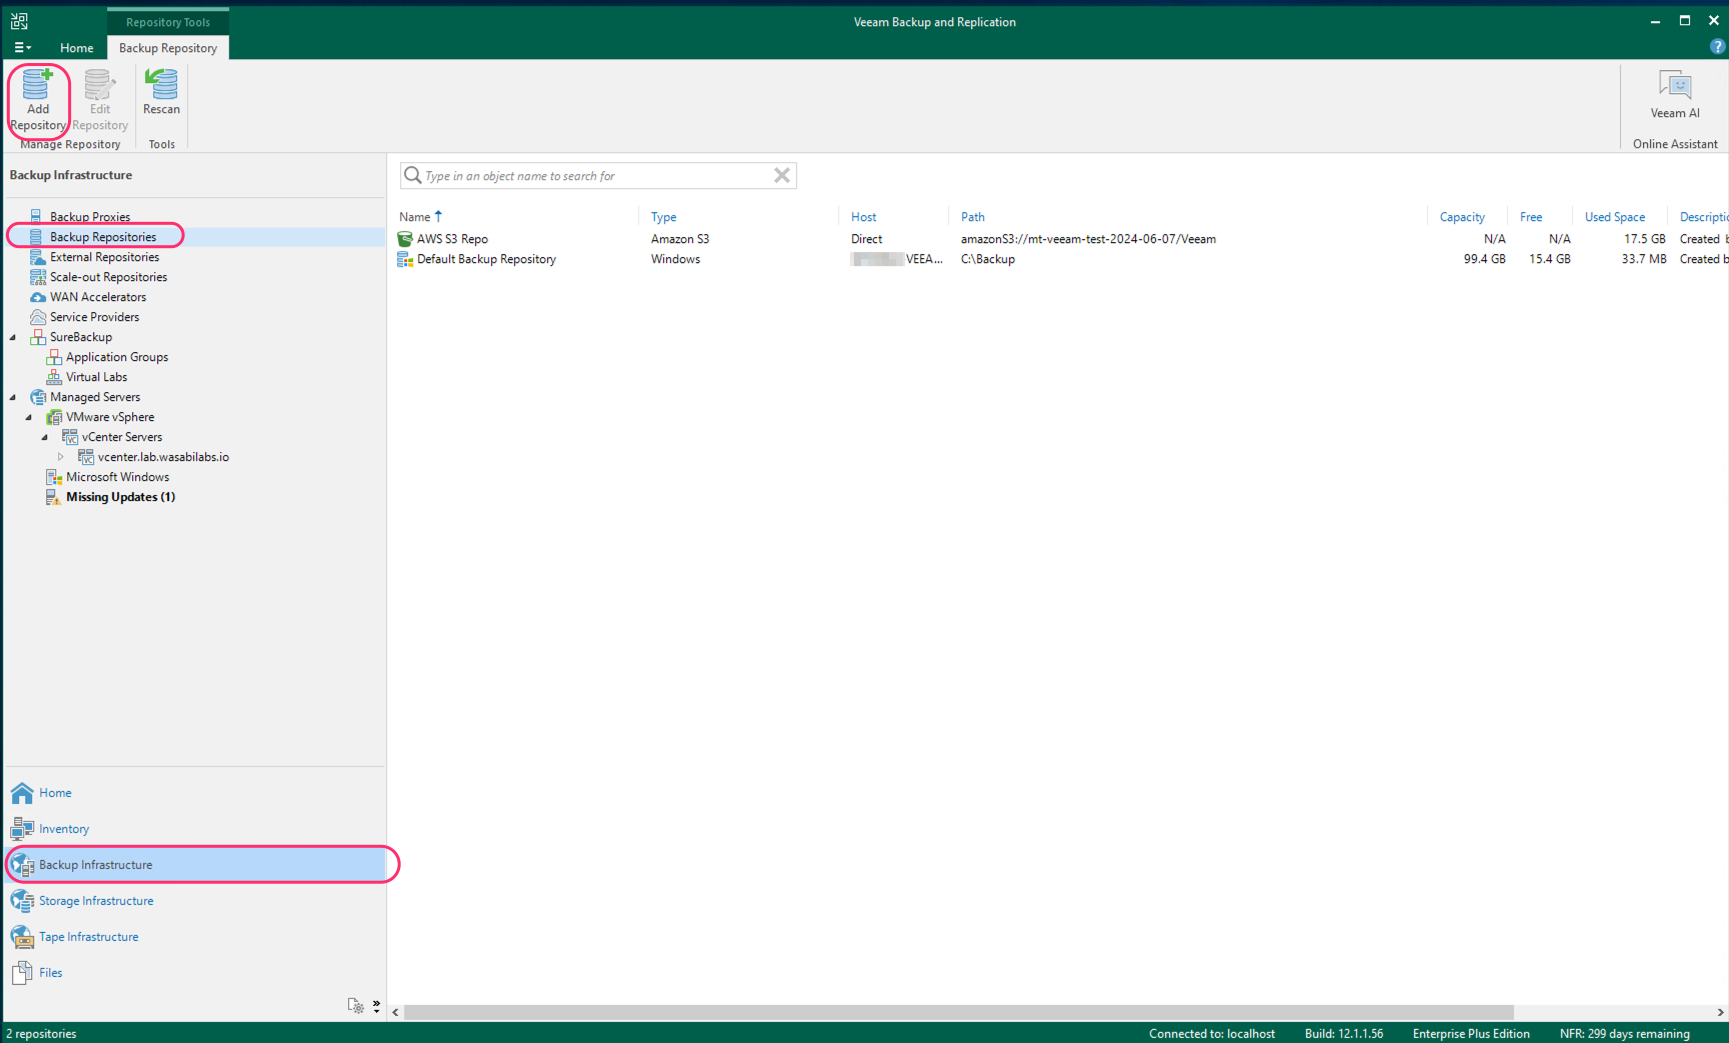
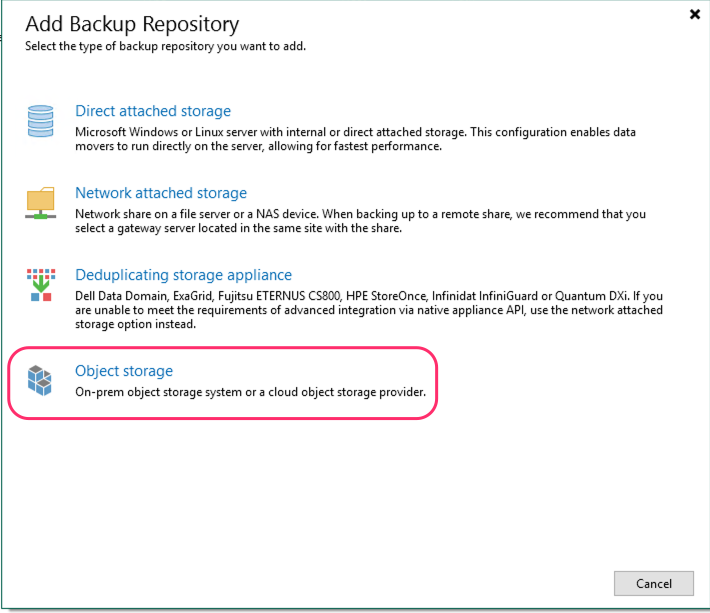
- Click Object Storage.
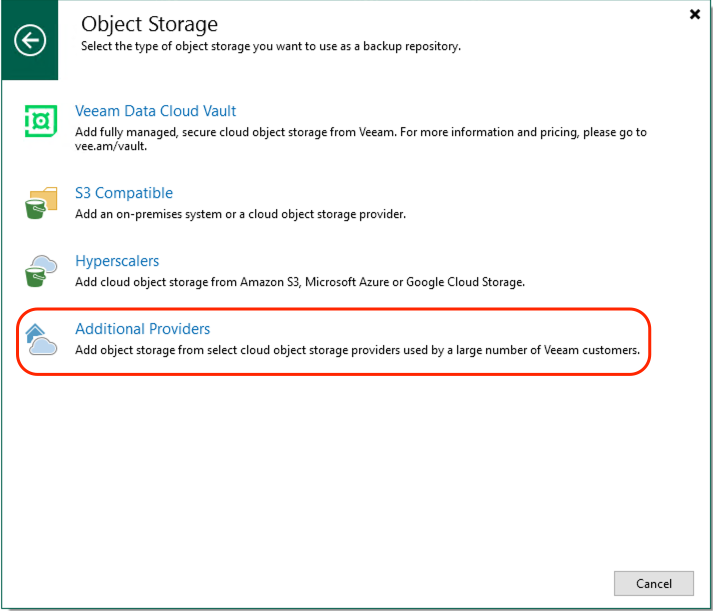
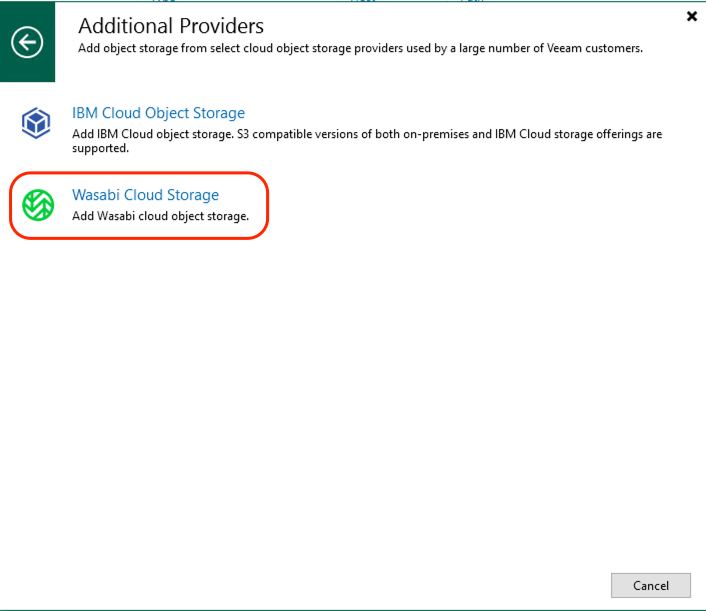
- Click Additional Providers. Note this step is new for VBR version 12.2. Previously Wasabi was located directly under Object Storage.
- Click Wasabi Cloud Storage.
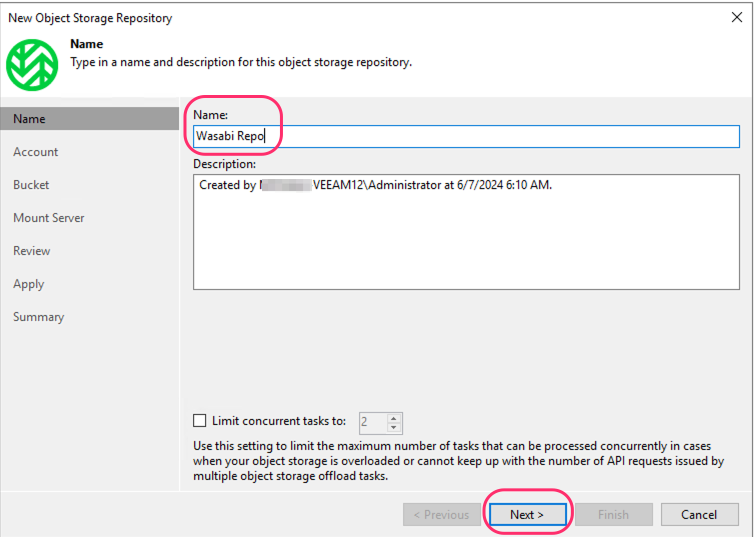
- Give the repository a Name. Click Next.
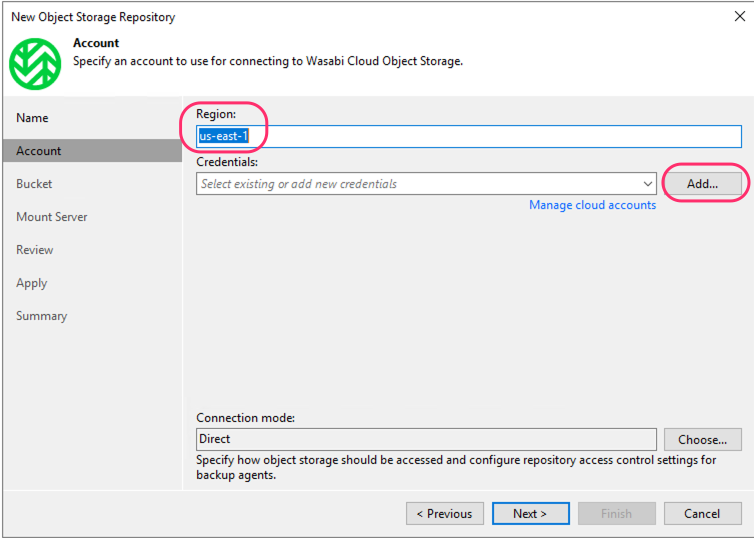
- Specify the Wasabi region that your Wasabi bucket is located in. Click Add... to add your Wasabi access and secret key account credentials.This configuration example discusses the use of Wasabi's us-east-1 storage region. Use the region your bucket is located in. For a list of regions, see Available Storage Regions.
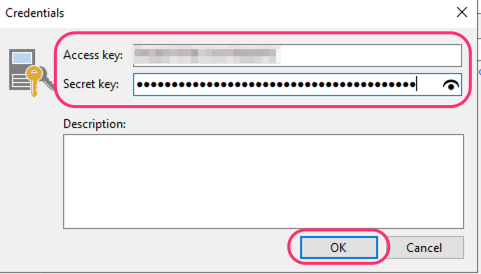
- Enter your Wasabi Access Key and Secret Key. Click OK.
- Click Next.
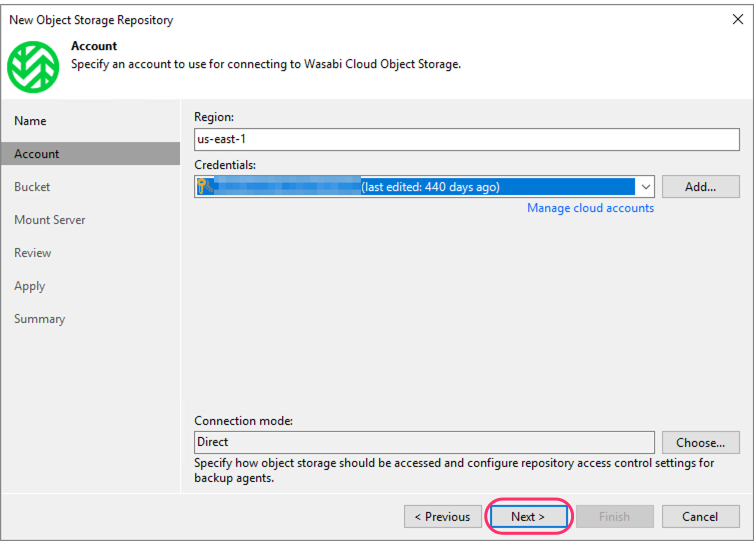
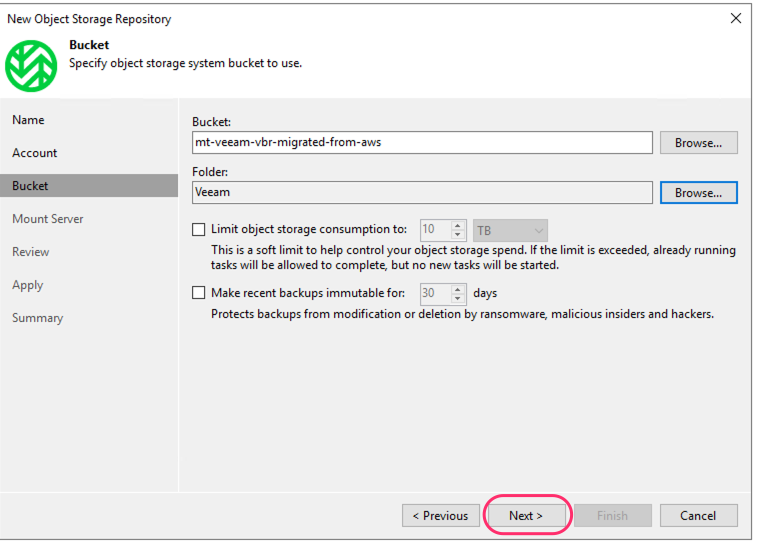
- Under Bucket, click Browse.
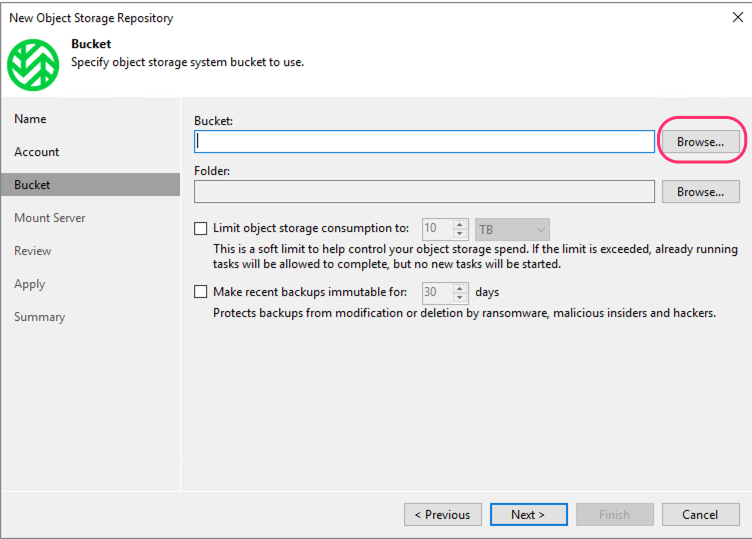
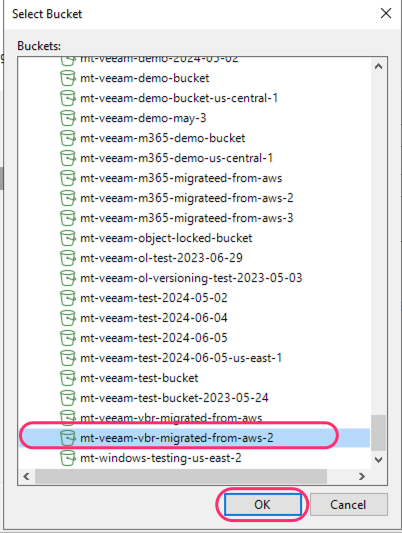
- Select the Wasabi bucket that data was migrated to and click OK.
- Under Folder, click Browse.
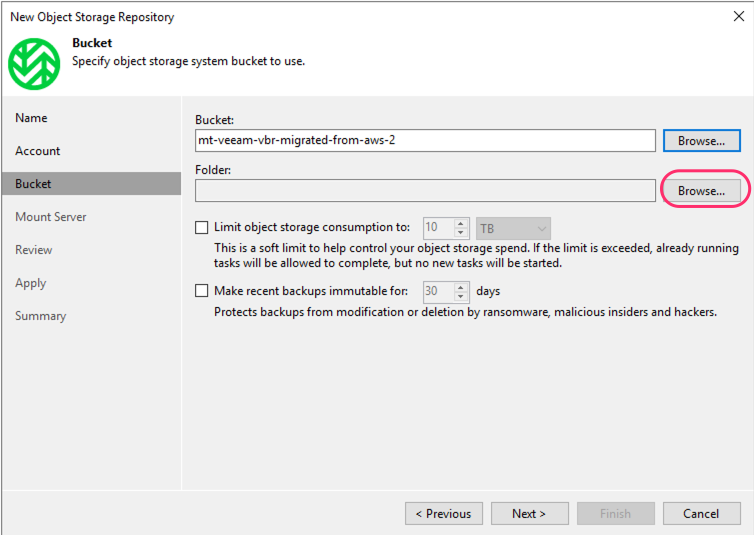
- Select the existing top-level folder in the bucket and click OK. Do NOT create a new folder.
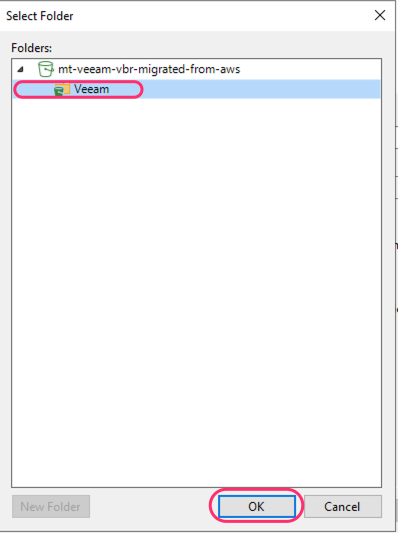
- Click Next.
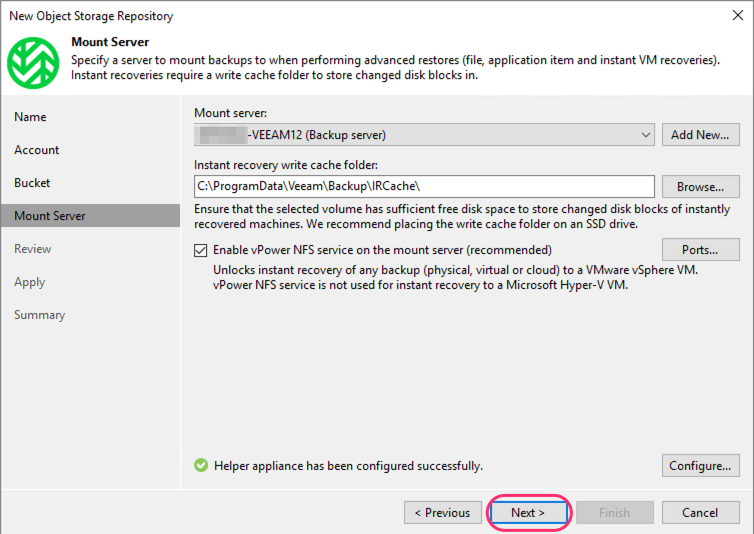
- On the next screen, click Next.
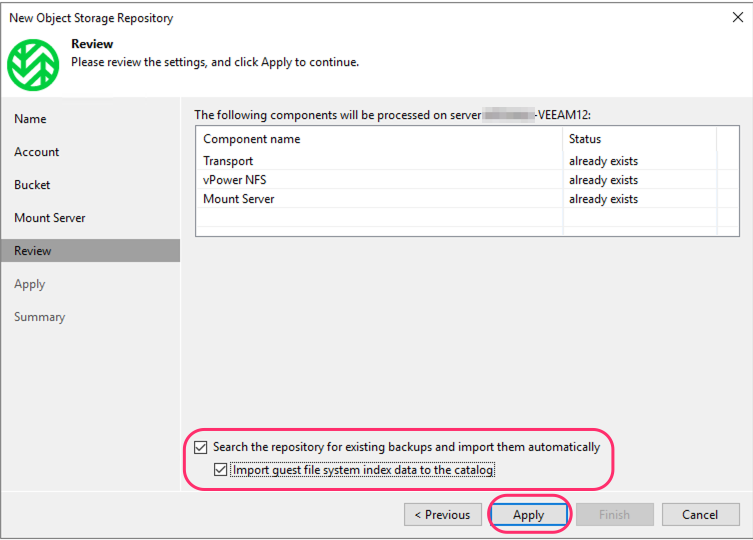
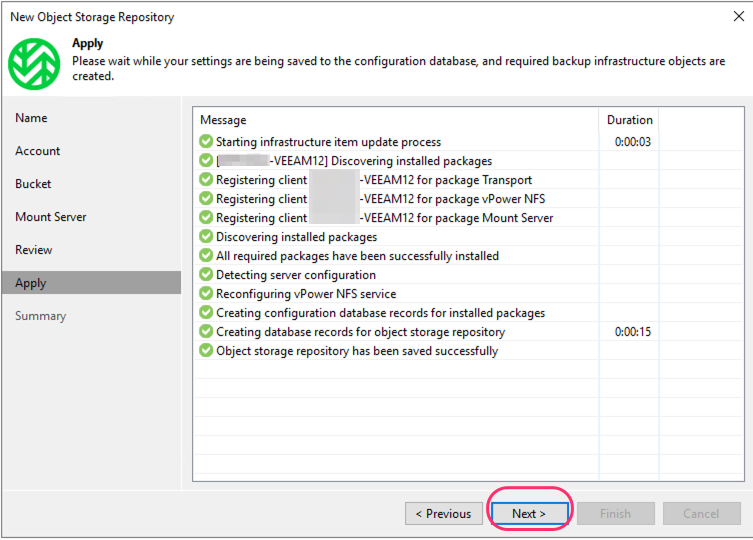
- Click the two checkboxes to search the repository for existing backups and import them automatically. Click Apply. Note that this will NOT download your previous backups to your local server.
- Click Next.
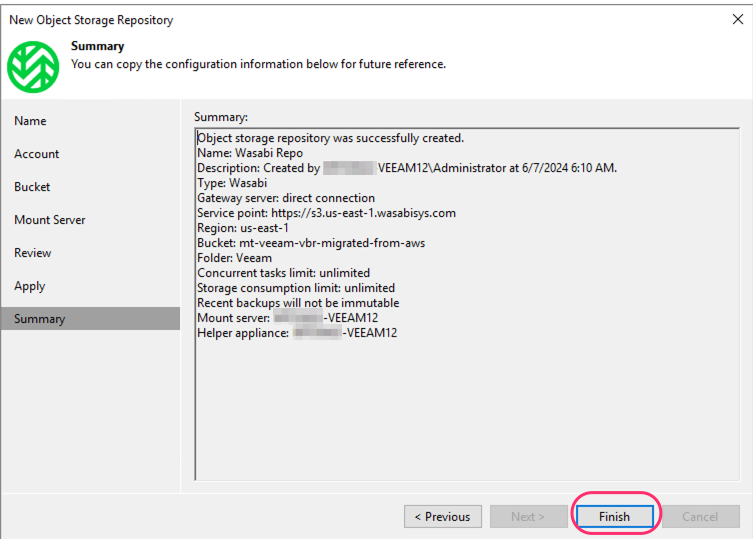
- Click Finish on the Summary screen.
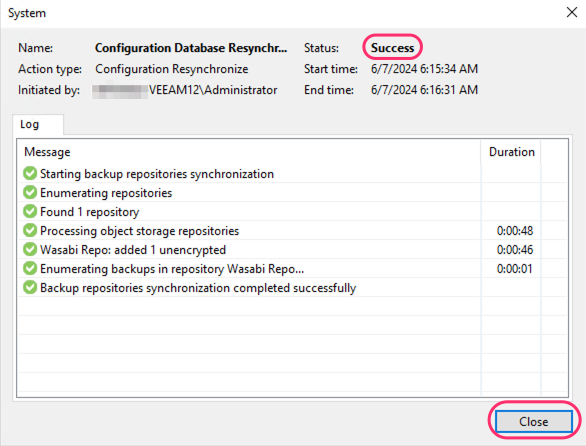
- Once the Status shows "Success" on the next screen, click Close.
Verify the Restore Points are Available in Veeam and Perform Test Restore
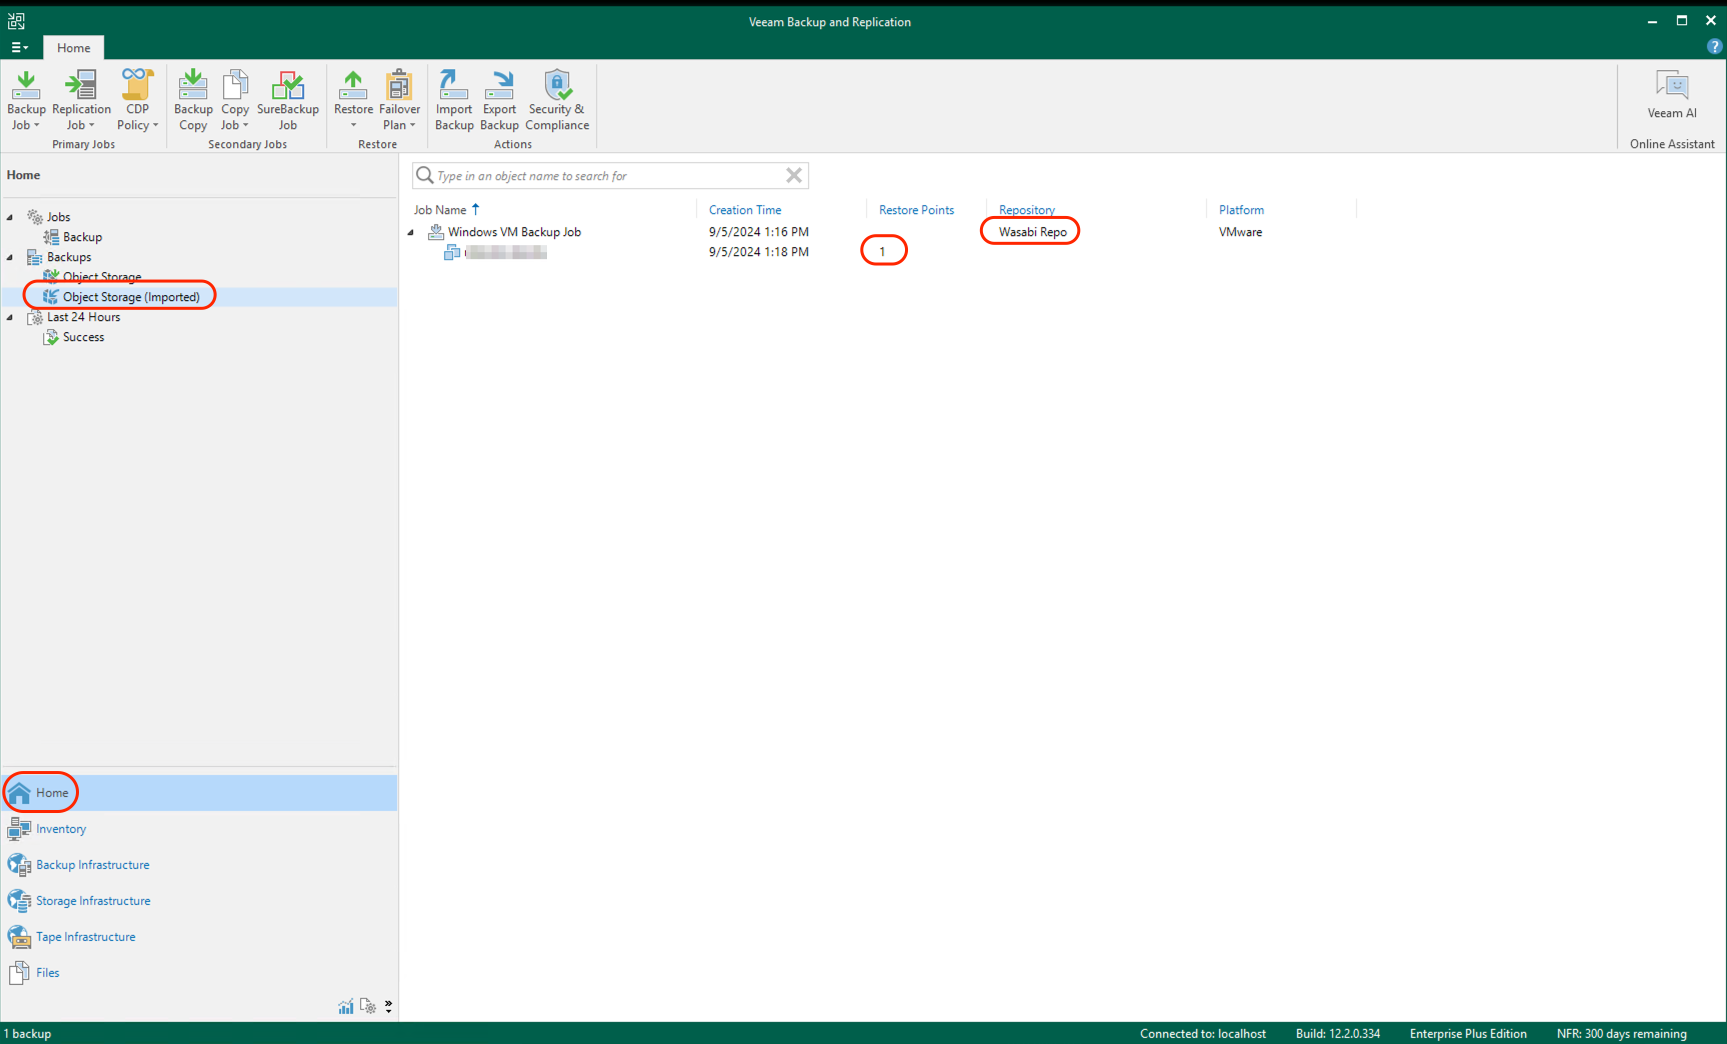
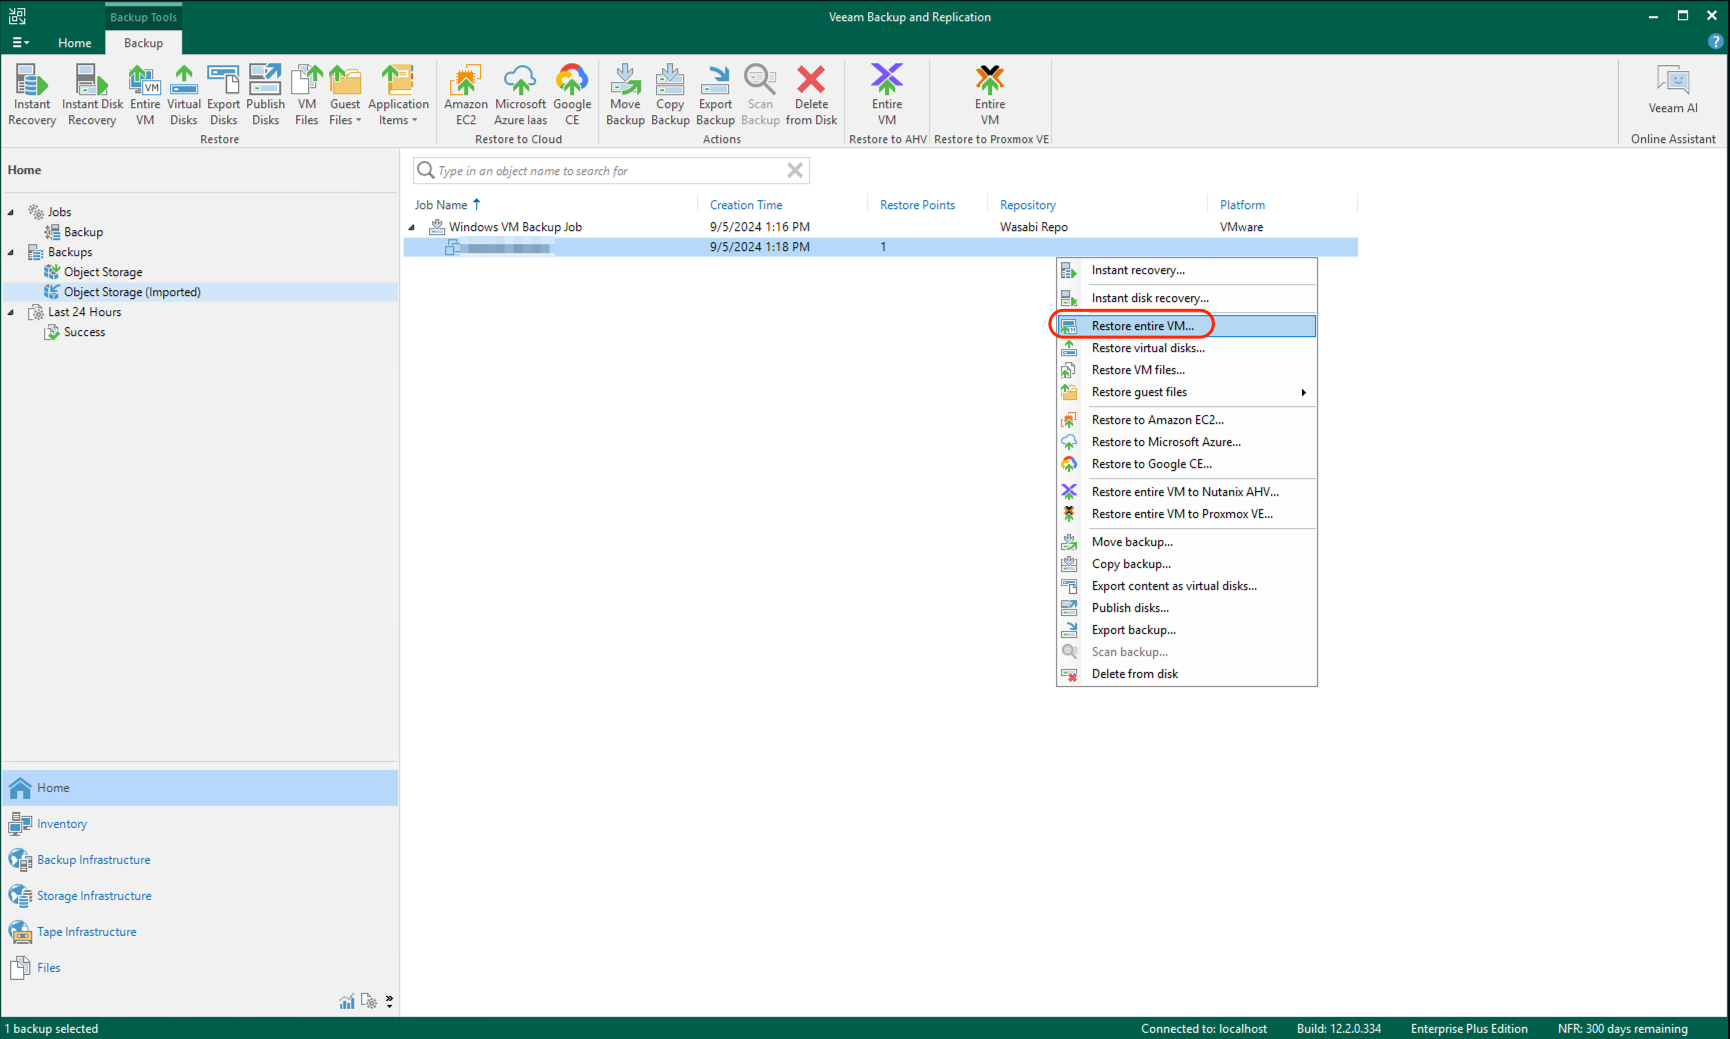
- Navigate to the Home tab. Under Backups, click Object Storage (Imported) and select a server that was previously backed up. You will see the number of restore points and it will show that they are in the Wasabi repo. In the following example, there was one restore point that was migrated to Wasabi using WCSM.
- Right-click on the name of the server. Click Restore entire VM.
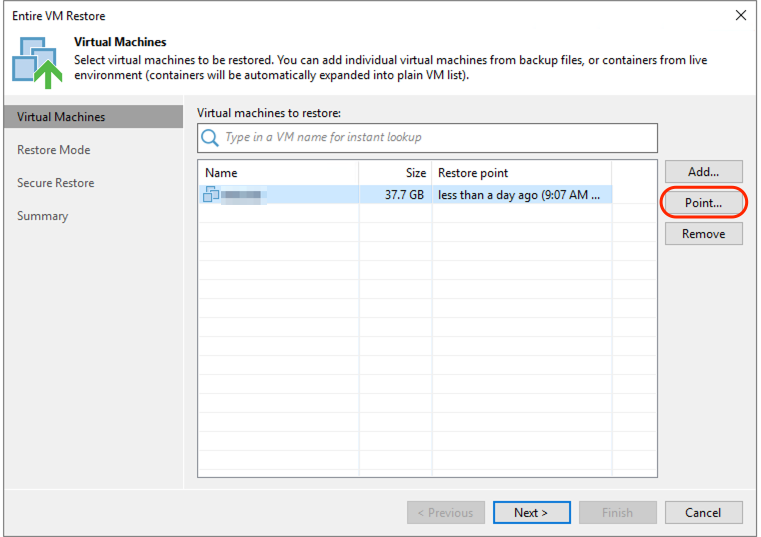
- Select the VM name and click "Point...".
- Expand the backup job shown with the Wasabi repo. You will see the available restore points. In the case shown in the following screen, there are two restore points.
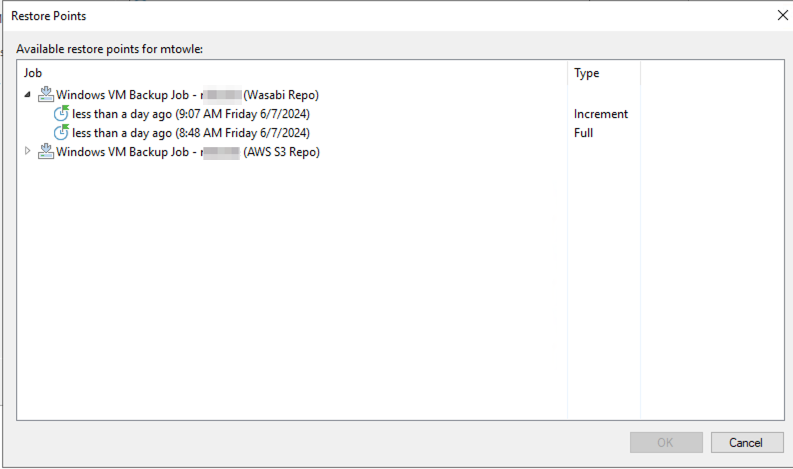 If you do not see the repository names for the Backup Jobs, please refer to Appendix A.
 - Select a restore point under the Wasabi repo and click OK.
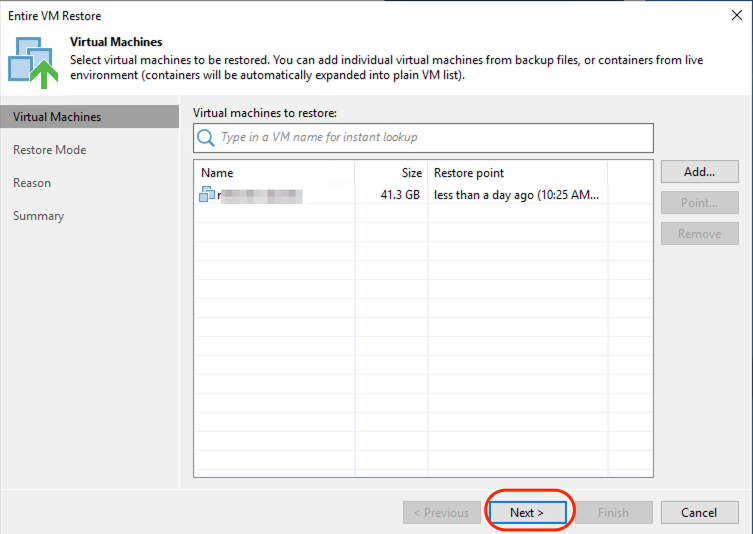
- On the Virtual Machine screen, click Next.
- Select "Restore to a new location, or with different settings" and click Next.
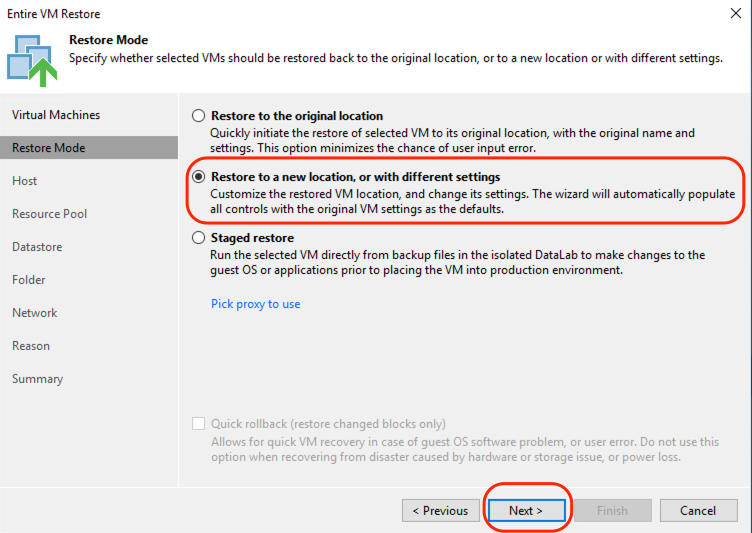
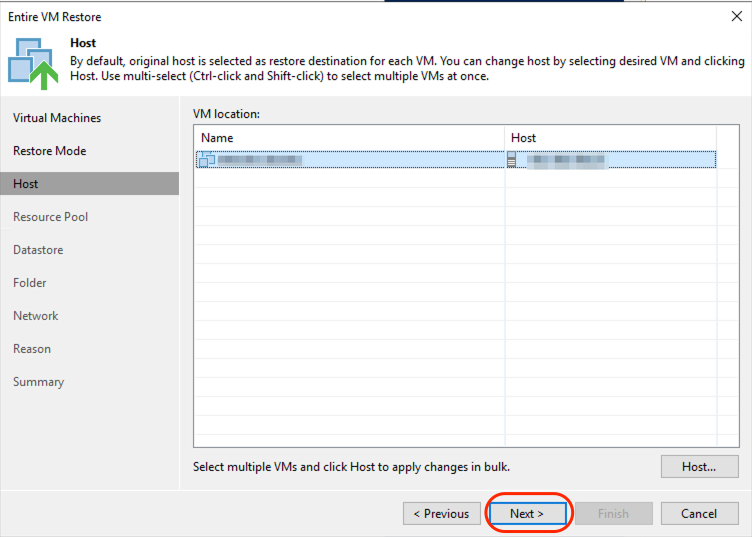
- Optionally click Host to change the host the VM is restored to. Click Next.
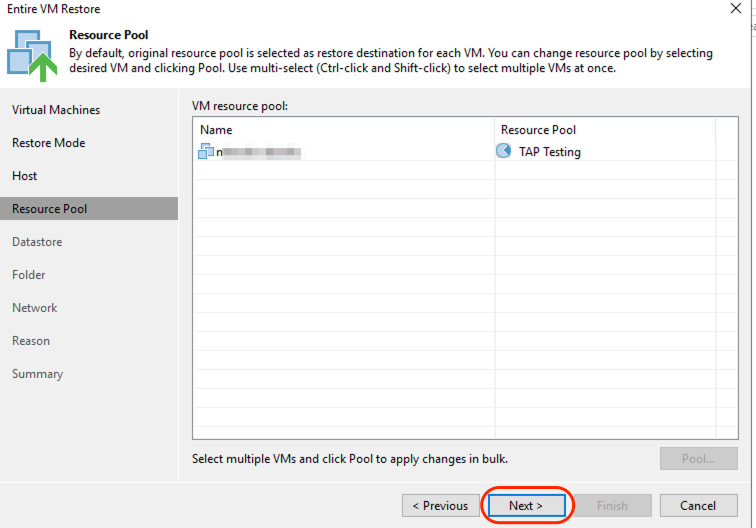
- Optionally select the VM and click Pool to change the Resource Pool. Click Next.
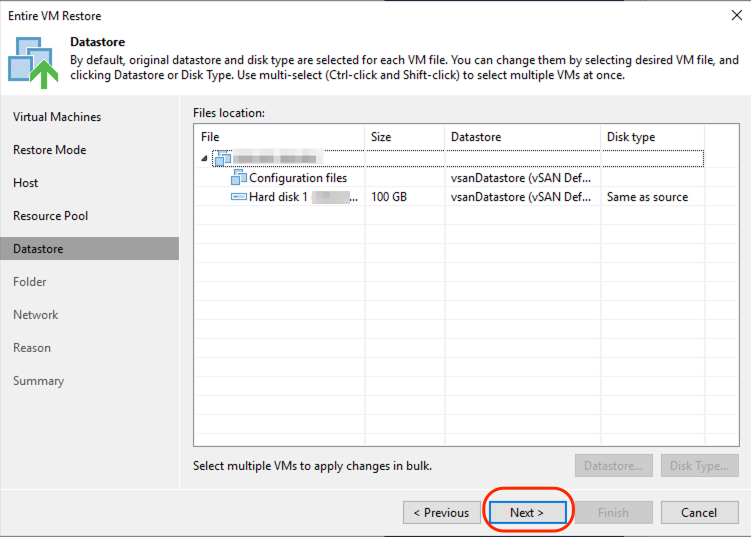
- Optionally change the Datastore. Click Next.
- Select the VM and click Name.
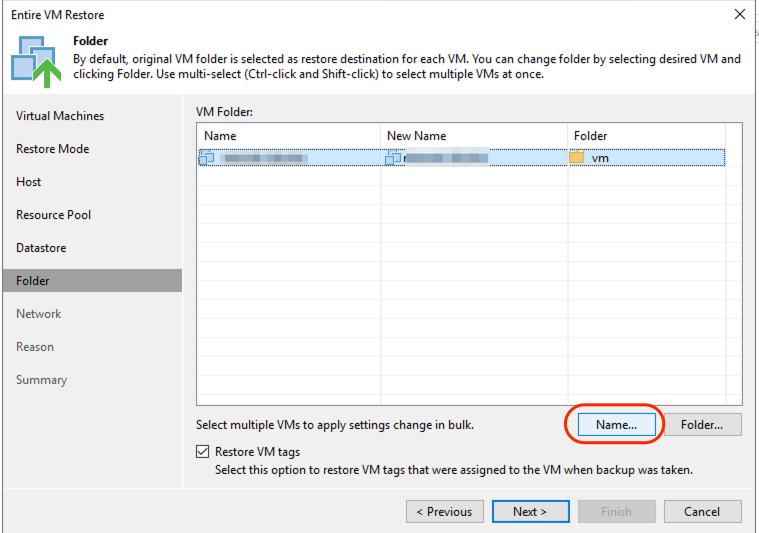
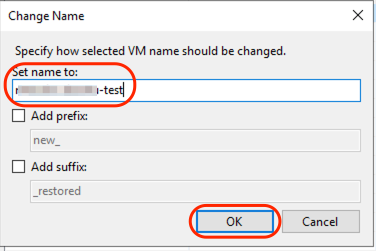
- Change the name of the VM to be different from the original VM and click OK.
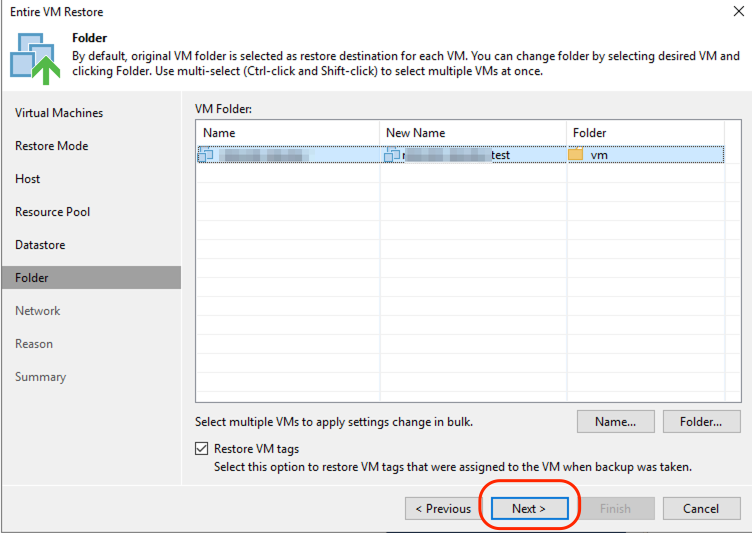
- Click Next.
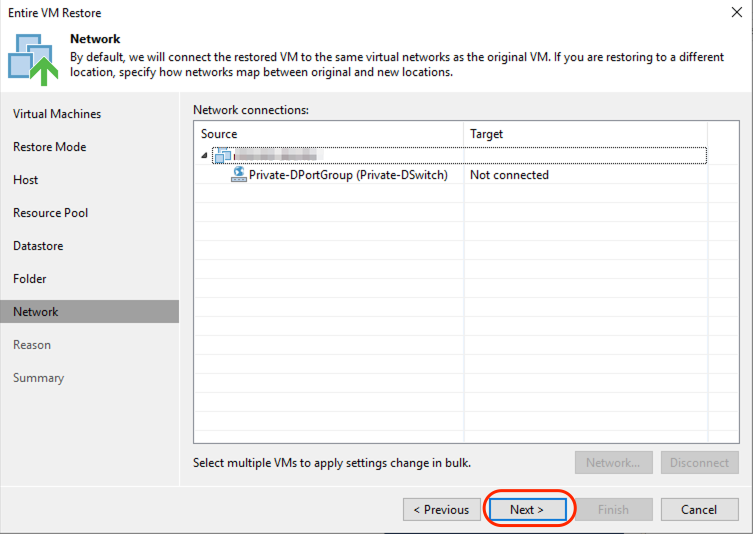
- Select the network(s) under the VM and click Disconnect to avoid any IP address conflicts on the network.
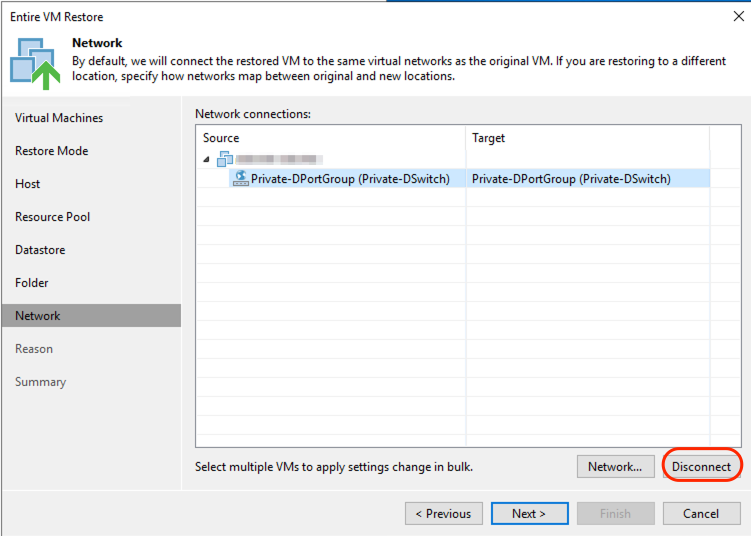
- Click Next after the network for the restored VM has been disconnected.
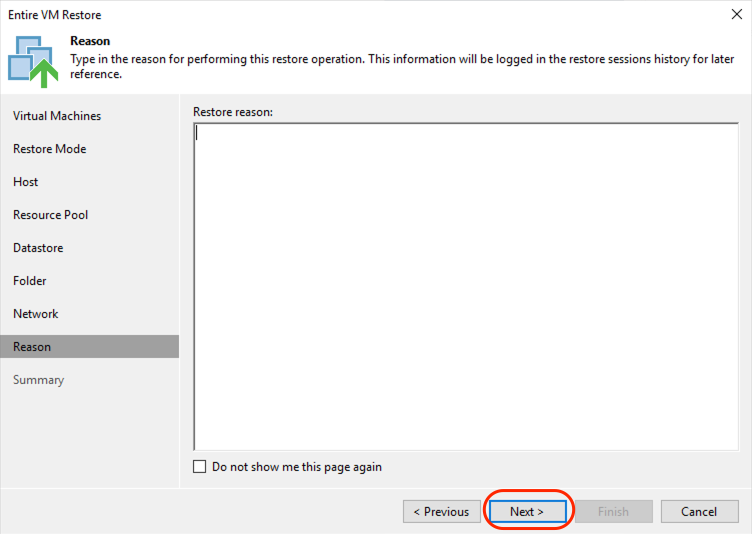
- Optionally enter a restore reason. Click Next.
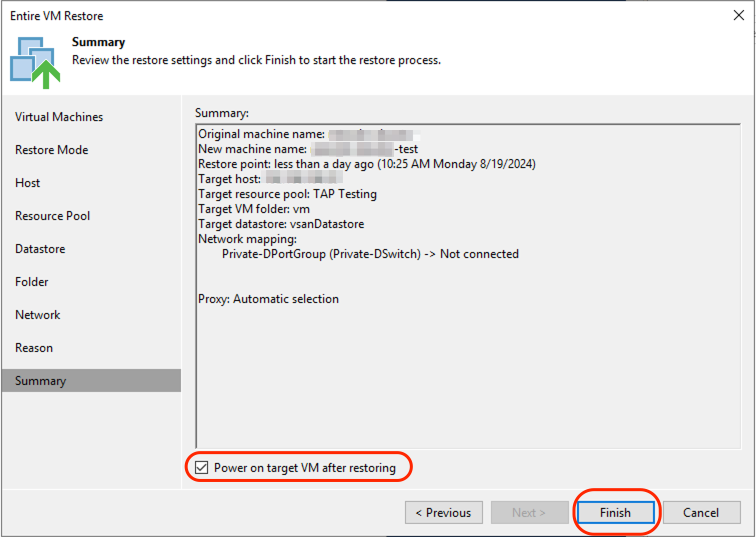
- Check the "Power on target VM after restoring" checkbox and click Finish.
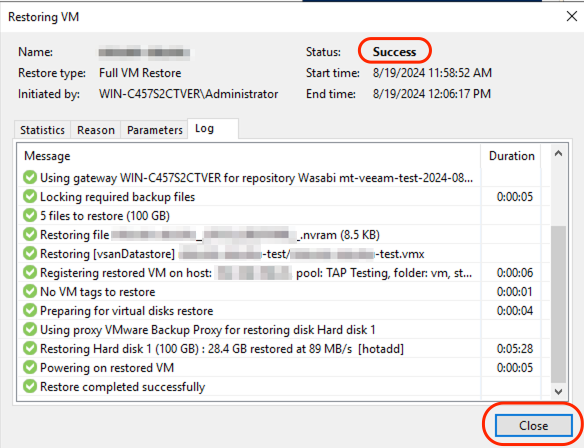
- Verify the restore job completes successfully. Click Close.
- Verify you can login to the restored VM on the VM's console, such as in VMware's or Microsoft's hypervisor console. After successfully logging in, optionally delete the restored VM. Do NOT delete the original VM.
Modify and Enable Existing Backup Job
- Navigate to the Home tab. Click Jobs and select an existing backup job. Click Edit.
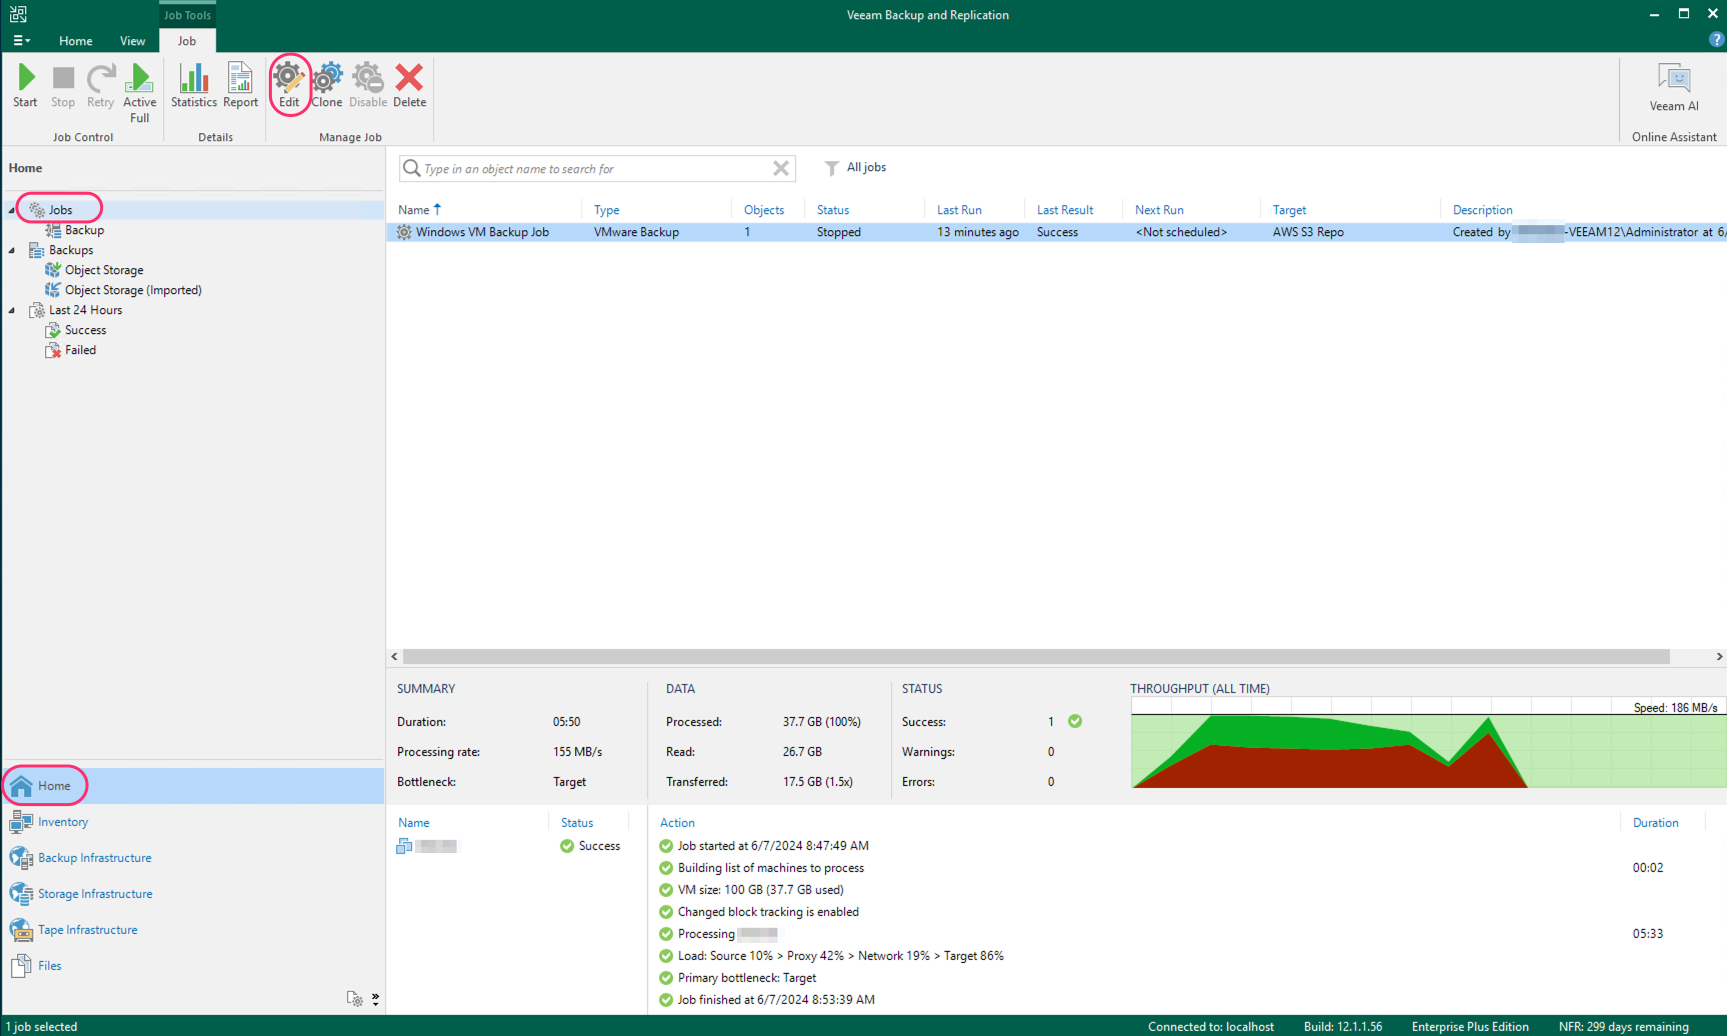
- In the Backup repository drop-down menu, select the Wasabi repository that was previously created. Click Next.
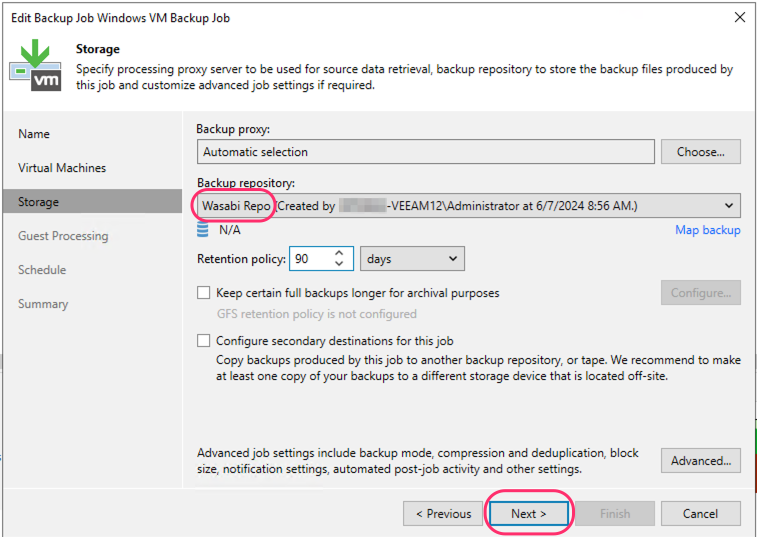
- On the next screen, click Create New. Do NOT select Move Existing.

- Click Yes.
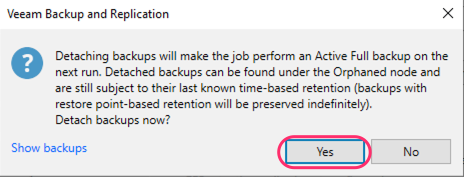
- On the following screen, click Next.
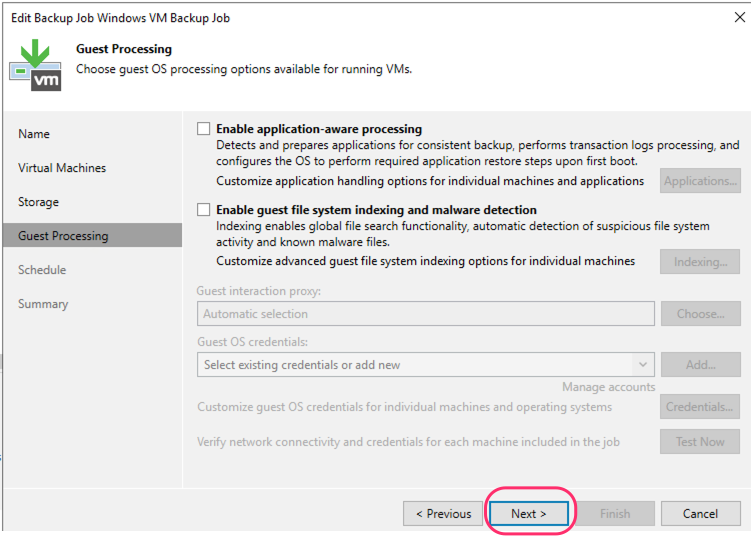
- Click Apply.
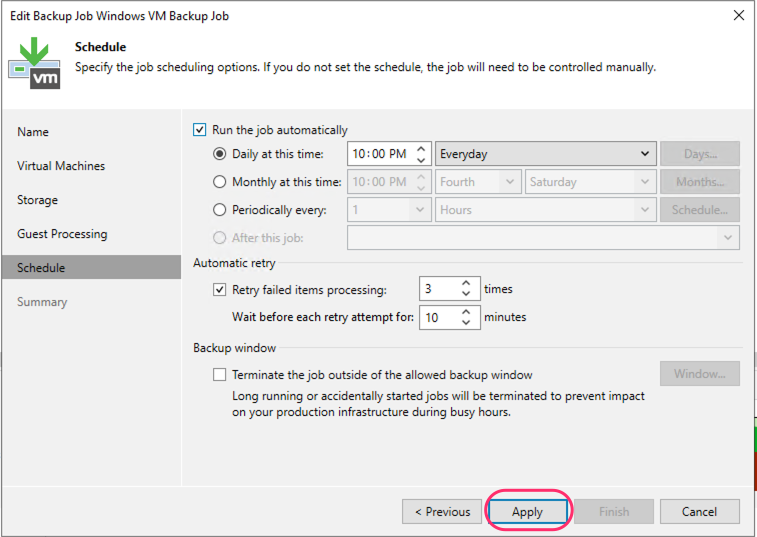
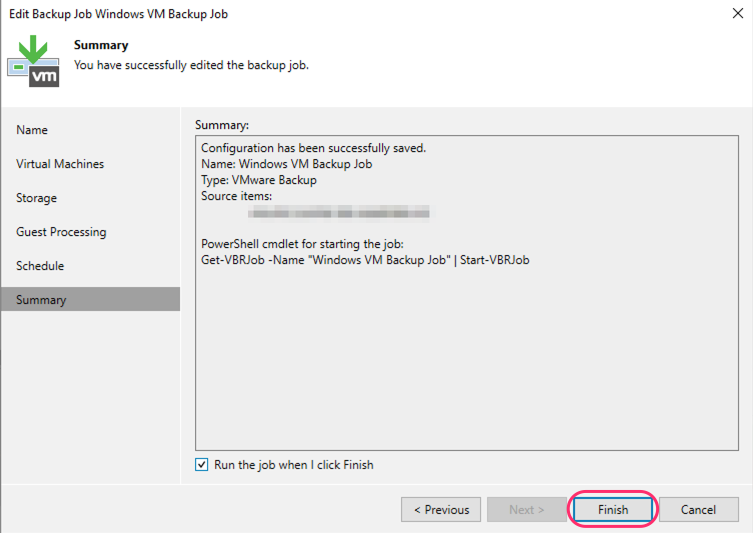
- Optionally, on the Summary screen, select Run the job when I click Finish. Click Finish.
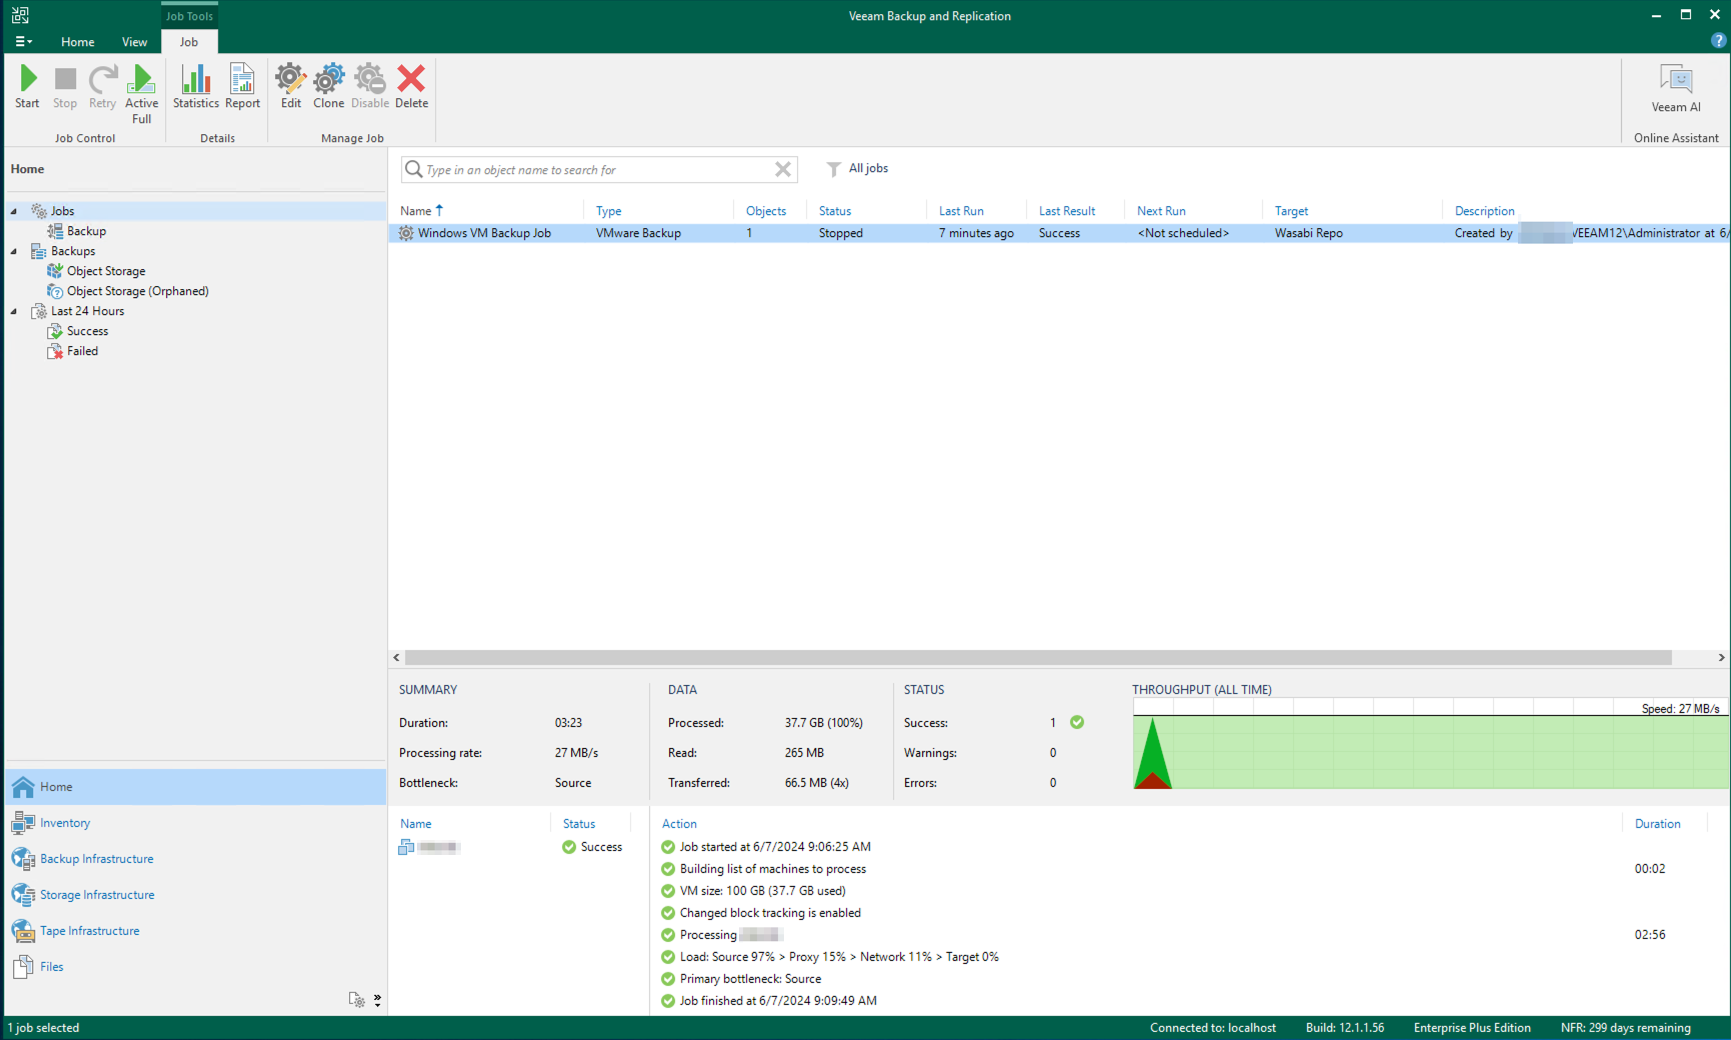
- Since "Run the job when I click Finish" was selected during our testing, the job will run and create a backup in the Wasabi repo. Here is what the successful backup looks like:
- If "Run this job when I click finish" was not selected, you must enable the job. Select the job and click "Disable" (there is no Enable button).
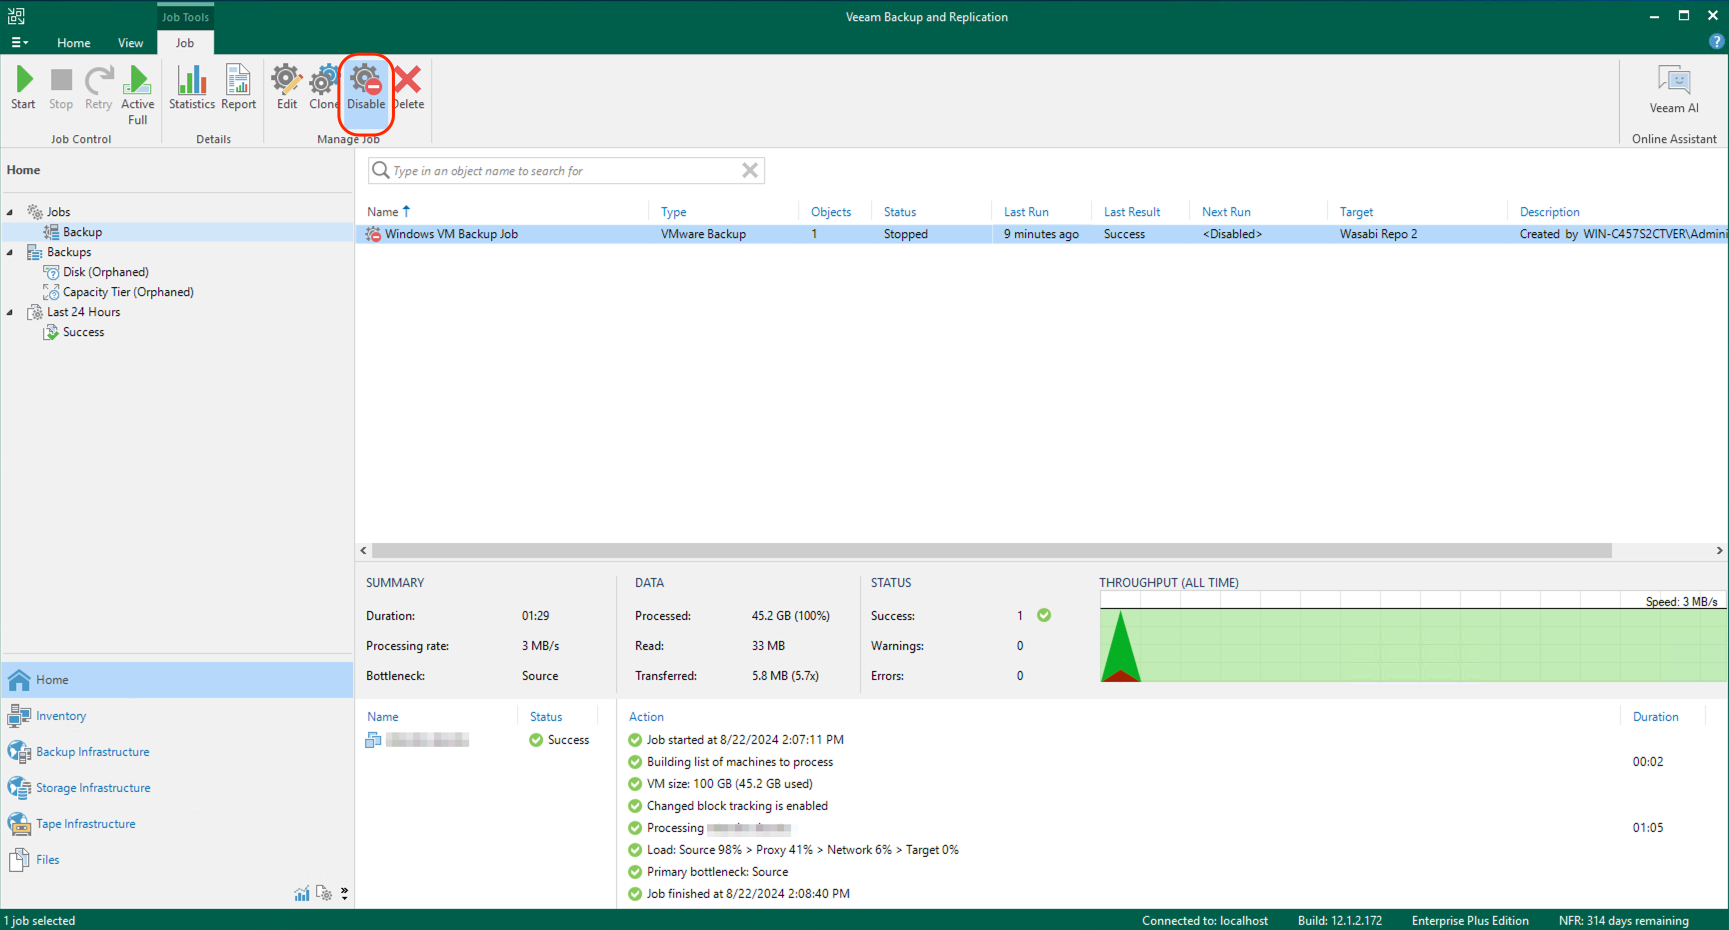
- The job will now show that it is enabled by displaying a "Next Run" date.
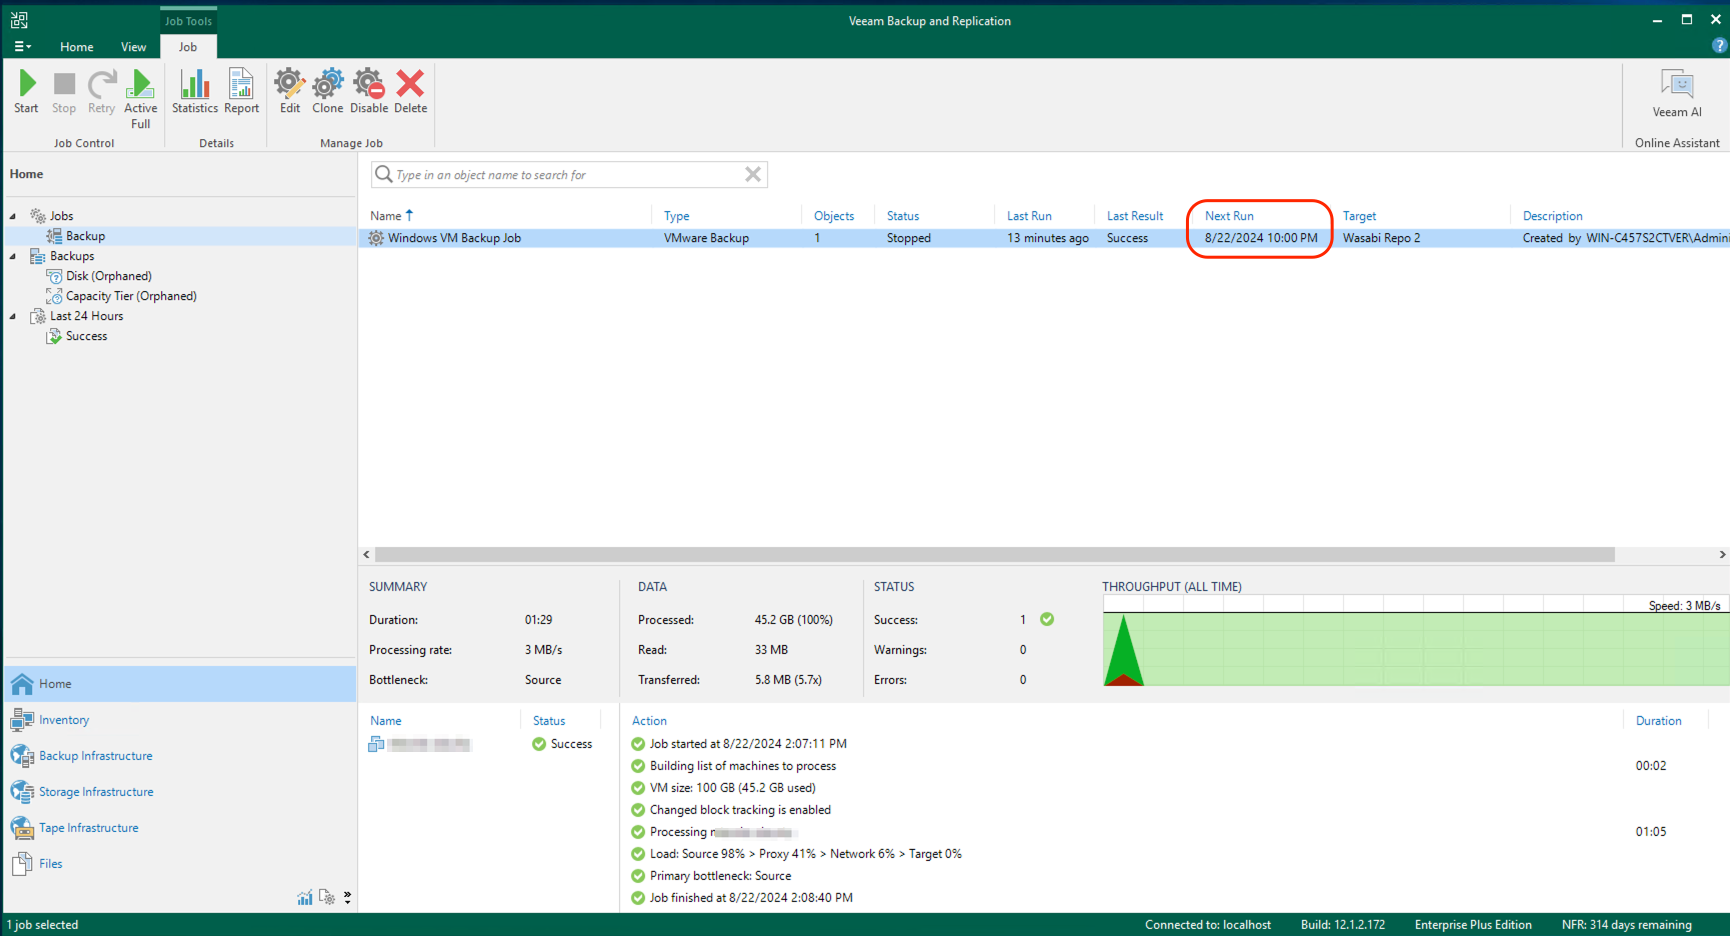
- New backups will appear under Object Storage, and migrated backups appear under Object Storage (Imported).
Appendix A
If you do not see the name of the repositories when attempting to do a test restore, proceed with this section.
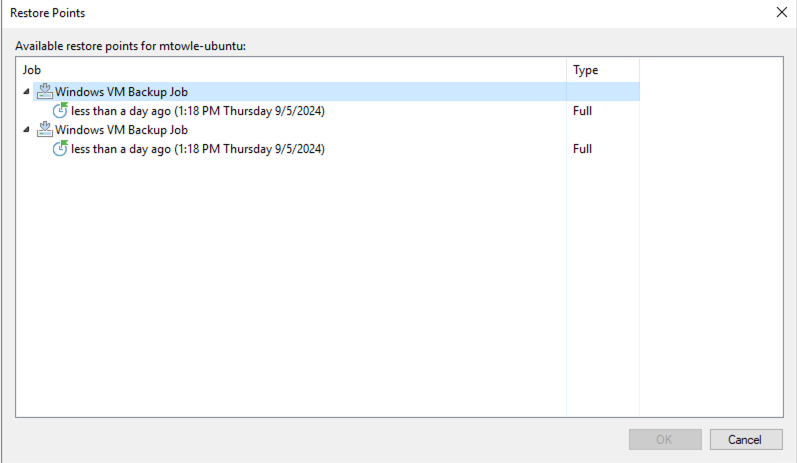
- If the restore point screen looks like the example below with no repositories listed, click Cancel.
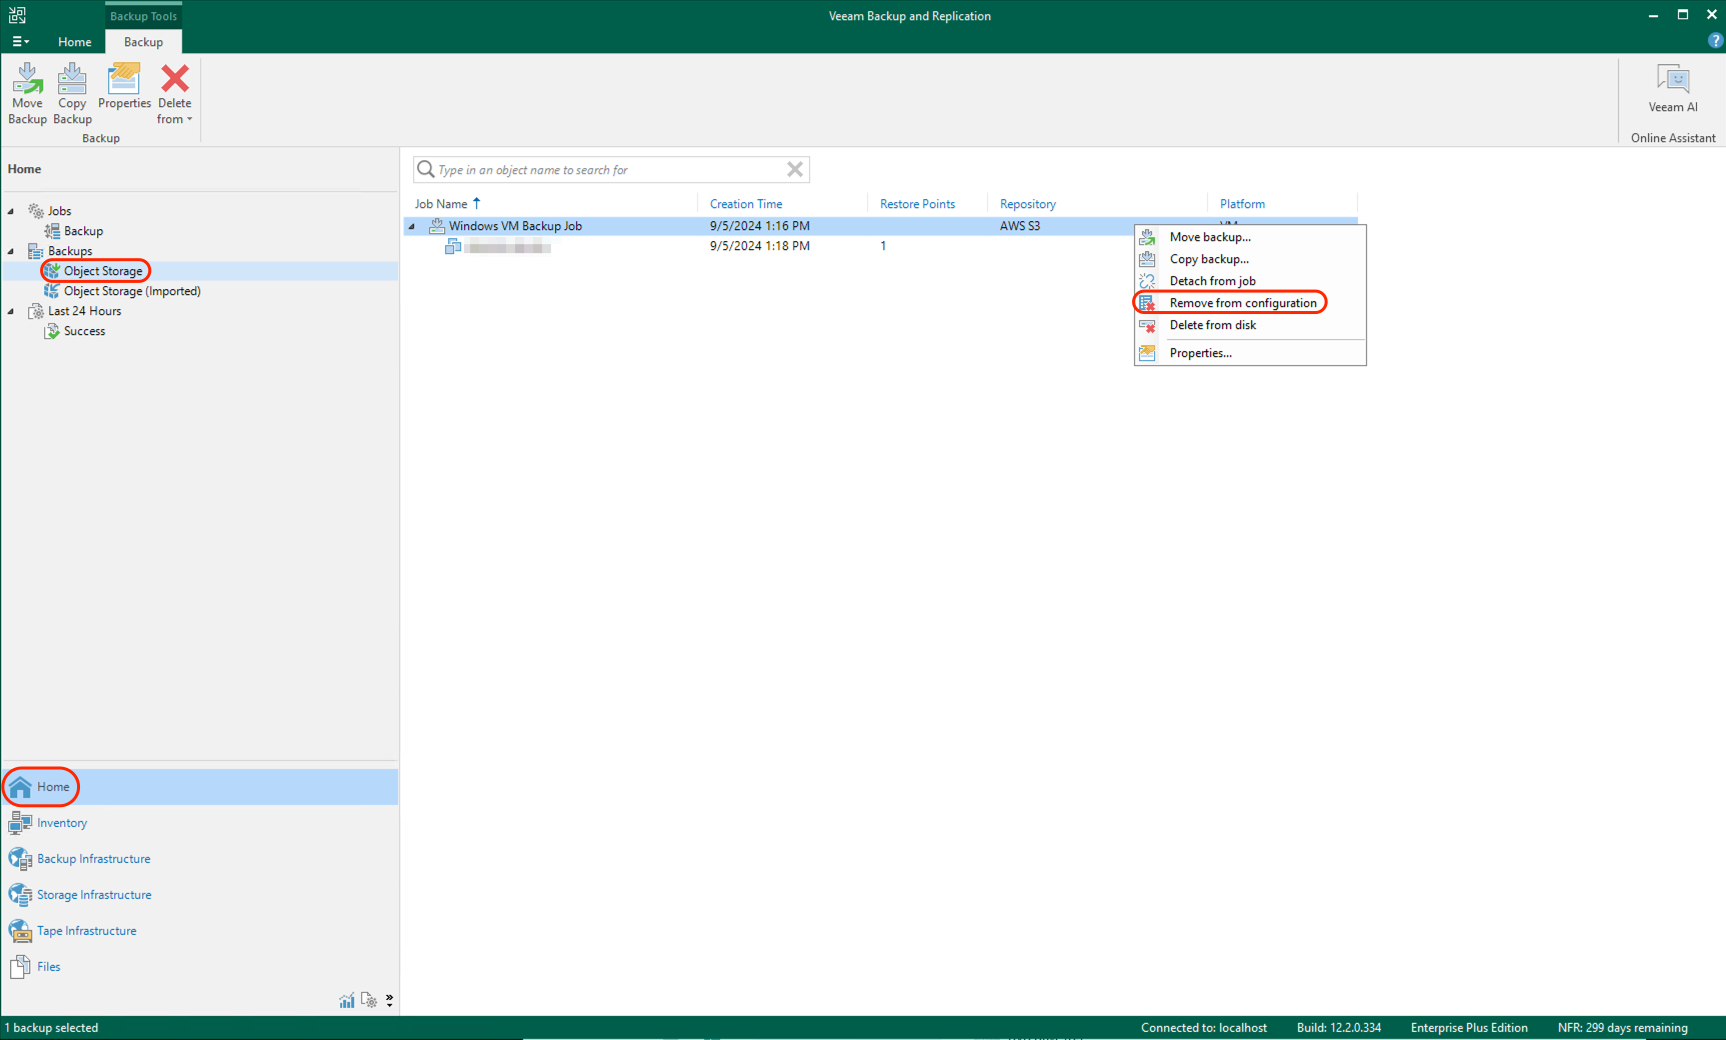
- Navigate to Home, then under Backups click on Object Storage. Select the Backup Job going to AWS S3, press and hold the ctrl key, right-click, and select "Remove from configuration".
- Click Yes.

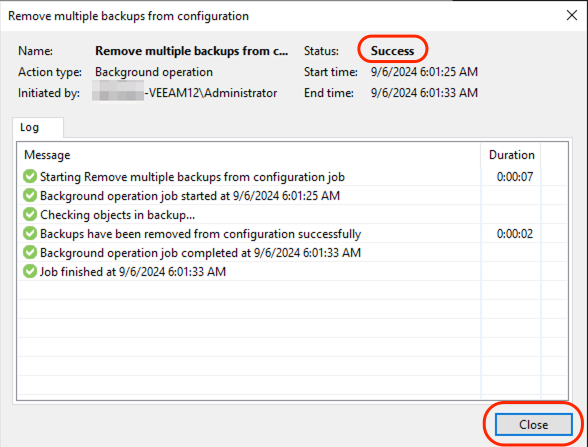
- When the Status indicates Success, click Close.
- Return to the test restore section above.
- After the test restore, if you wish to restore your backups in AWS S3 to the Veeam configuration, go to Backup Infrastructure, Backup Repositories, select the AWS S3 repo, right-click and select Rescan. Your previous backups will appear in Object Storage (Imported).