Wasabi is a member of Veeam's cloud partner ecosystem. We have worked with Veeam closely to offer both a seamless implementation and a smooth transition to cloud storage. For more information on how Veeam works with Wasabi, refer to Veeam and Wasabi Solution Brief.
This article describes the procedure to migrate a non-immutable Veeam v12 repository from AWS S3 to Wasabi using Wasabi Cloud Sync Manager (WCSM). WCSM is a paid managed service that performs cloud-to-cloud migration without requiring the customer to download and re-upload backups.
This article covers only Scale-Out Backup Repositories (SOBRs). Reference the articles listed below for Direct to Object Storage and Backup Copy Jobs.
How do I migrate Veeam v12 Backup Copy Job from AWS S3 to Wasabi using WCSM?
How do I migrate Veeam v12 Direct to Object Storage from AWS S3 to Wasabi using WCSM?
To use the Veeam v12 Move capability that also works with immutable backups, review Migrate Veeam Backups From AWS S3 to Wasabi on Veeam v12. Using Veeam Move requires downloading and uploading your backups.
The data restoration process is handled by your specific backup software application. As there are many, potential variables that will affect your unique environment, Wasabi strongly recommends that you seek the guidance of your backup software's technical support team in the event that you encounter difficulty or have application-specific inquiries.
Requirements
Veeam Backup and Replication (VBR) v12, or higher, installed and licensed. This solution was tested with v12.2.
Active AWS S3 cloud storage account.
An AWS S3 non-Object-Locked (non-immutable) bucket with access keys.
An active VBR repository.
Active Wasabi Cloud Storage account.
A Wasabi non-Object-Locked (non-immutable) bucket created with access keys.
High-Level Migration Steps
Follow the high-level steps below to migrate from AWS S3 to Wasabi. These are detailed further in the sections below.
Backups reside initially only in the AWS S3 bucket.
The WCSM team performs an initial copy from AWS S3 to Wasabi.
The customer disables Veeam backup job(s) before the final sync.
The WCSM team performs a final sync.
The customer adds a Wasabi repository.
The customer does a test restore using a migrated backup.
Finally, the customer points the backup jobs to Wasabi and enables the jobs.
Wasabi Cloud Sync Manager Configuration
Wasabi Cloud Sync Manager (WCSM) is a paid, managed migration service. Refer to Getting Started With Wasabi Cloud Sync Manager for more information.
Request a WCSM Account by either completing the WCSM Questionnaire or reaching out to your Wasabi Sales contact.
Upon approval and notification of account creation, you will be able to log in to the WCSM Portal. Follow the steps outlined in 2—Entering Credentials for Cloud Migration.
This will require you to enter your AWS S3 storage account credentials and Wasabi account credentials, along with your bucket information.
After the data has been initially copied to Wasabi, proceed with the next sections.
Disable Backup Activities Before Final Sync is Performed
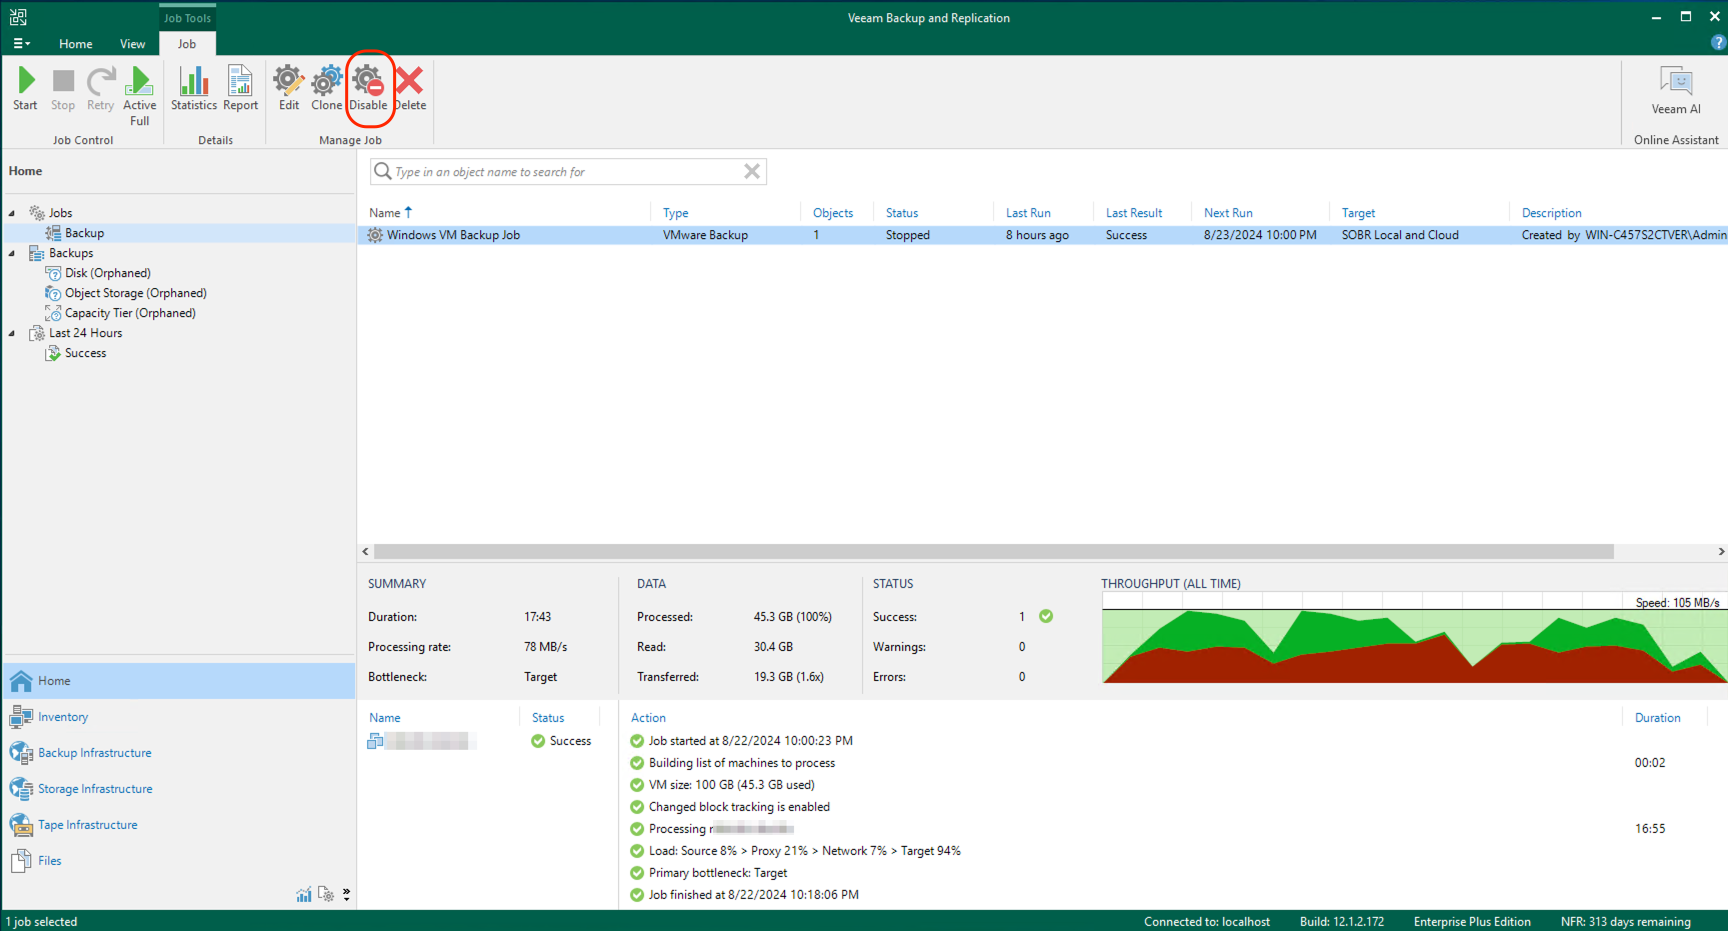
Disable the backup job(s) currently pointed to AWS S3.
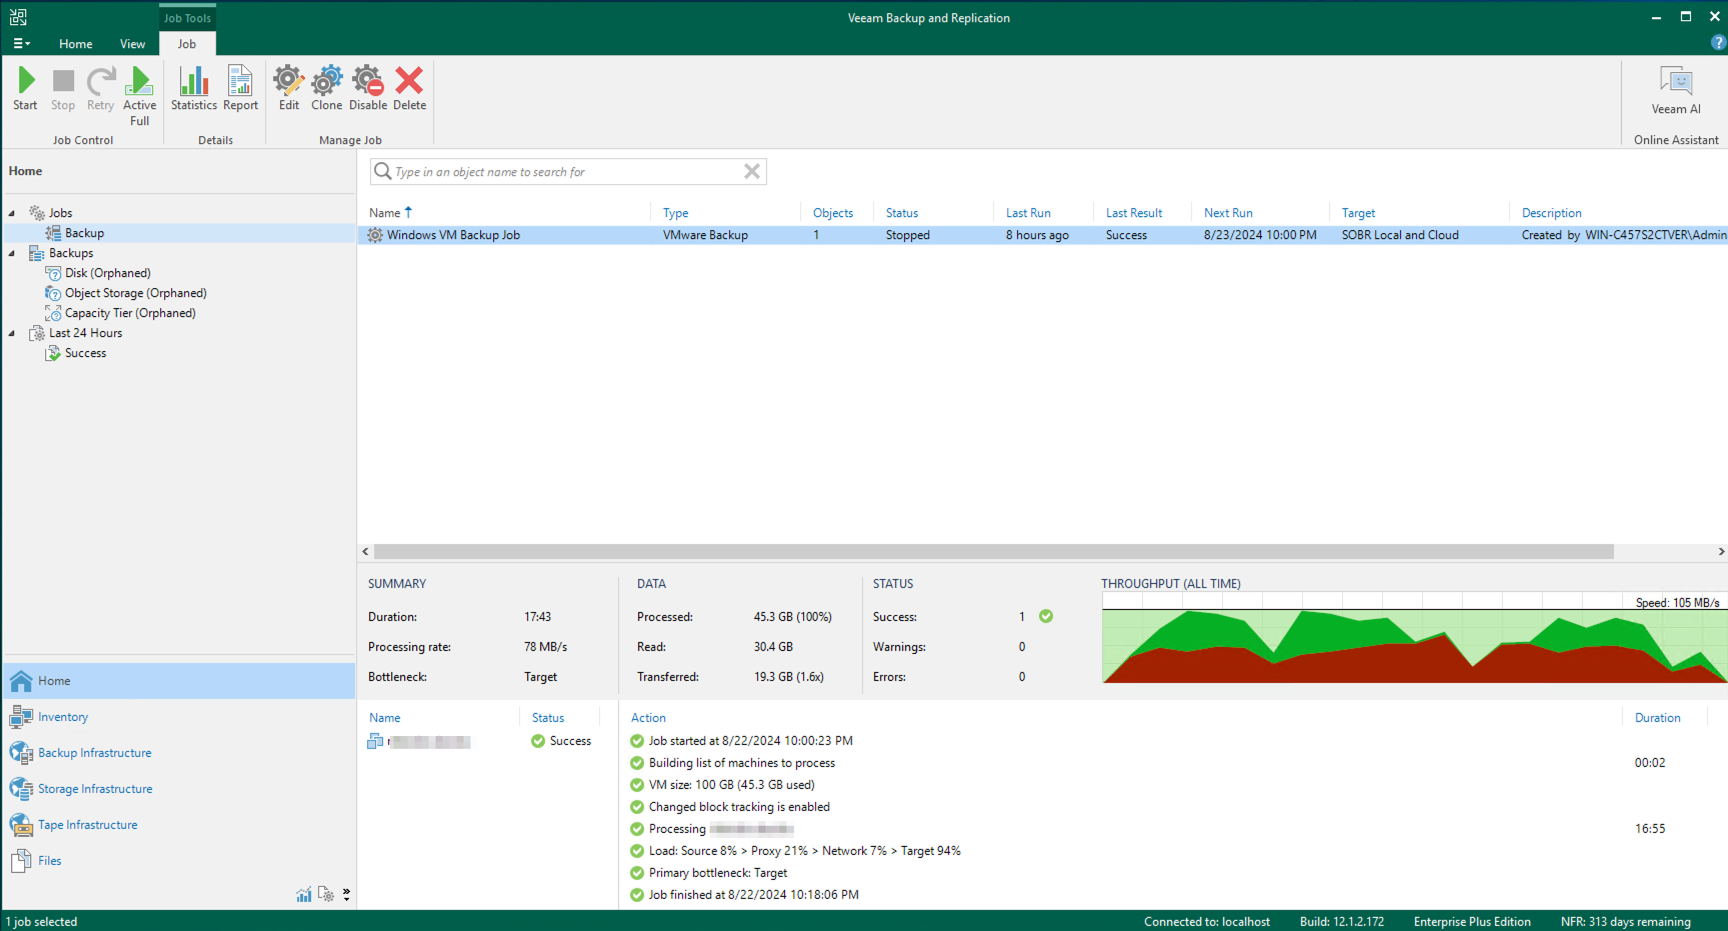
Navigate to the Home tab. Click Jobs, then select the job backing up to AWS S3. Click Disable.
Final WCSM sync will be performed on the agreed-upon date
The final WCSM data sync will occur on the date agreed upon by the customer and the Wasabi WCSM team. This will sync any new backups performed to AWS S3 and any Veeam backup cleanup activities/deletions from AWS S3 to ensure the same data resides in Wasabi. For a definition of the WCSM sync operation, review Migration Types.
After the final sync is complete, proceed to the next section.
Creating the Wasabi Repository
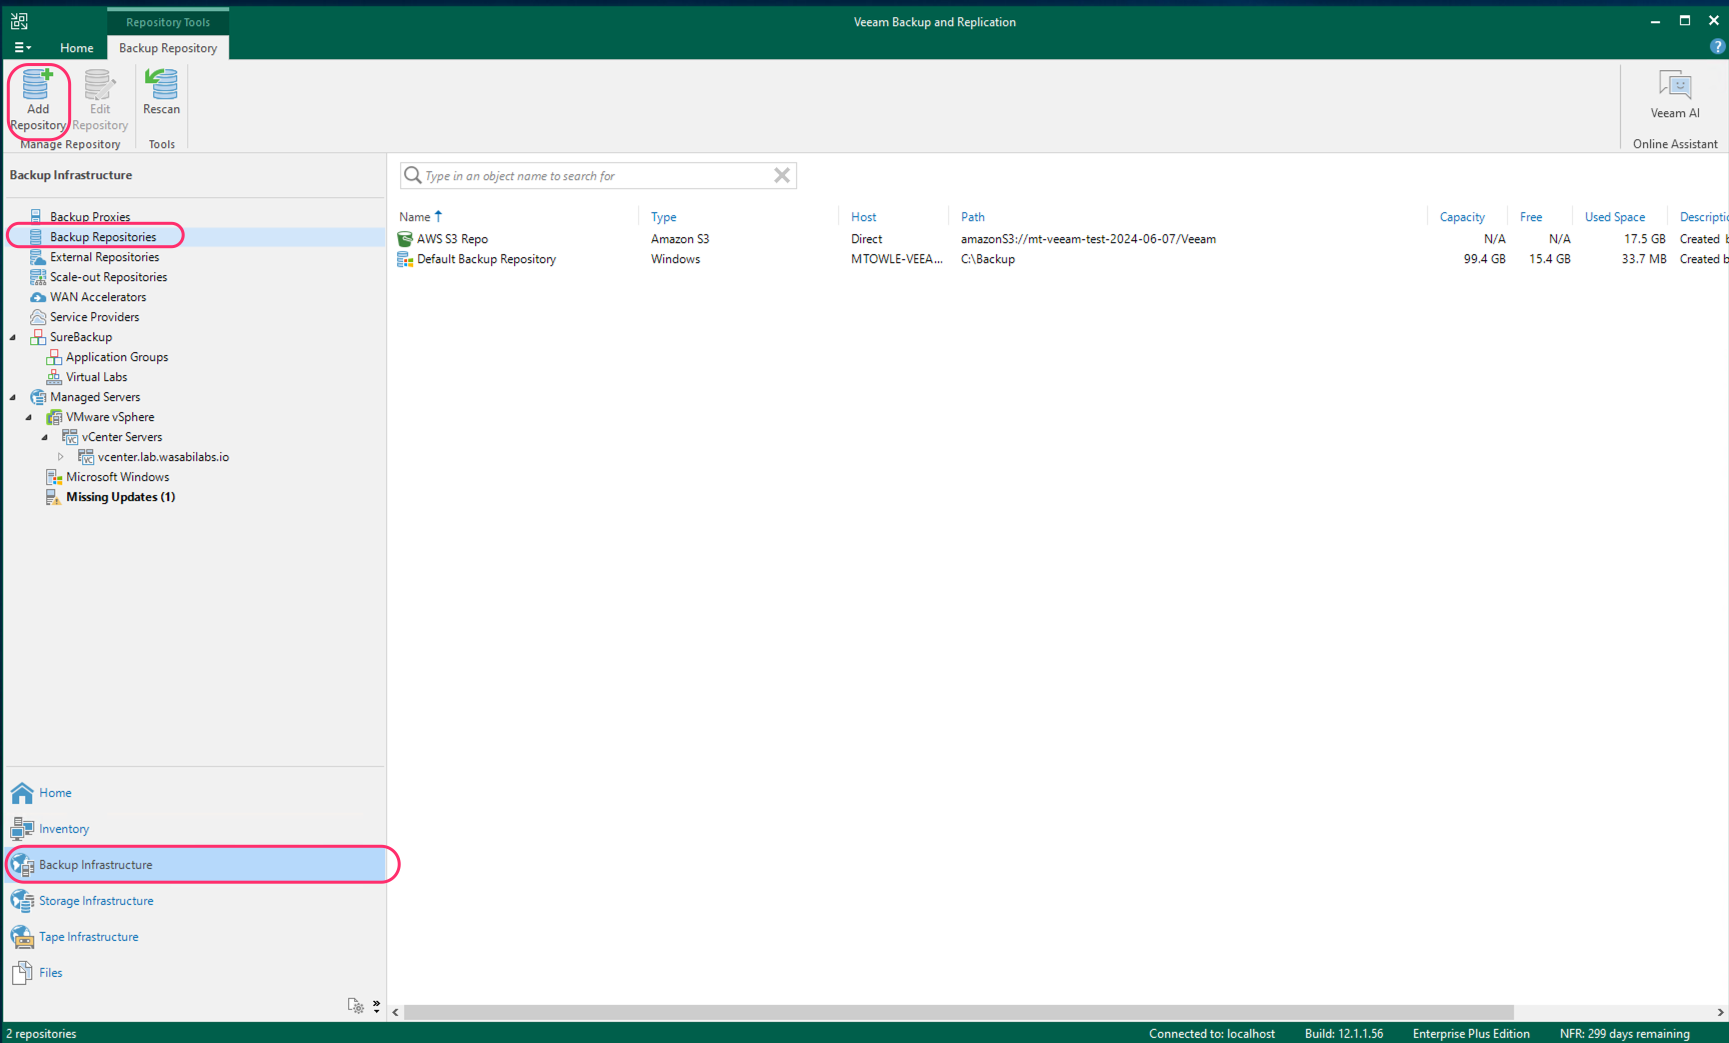
Navigate to the Backup Infrastructure tab. Click Backup Repositories, then Add Repository.
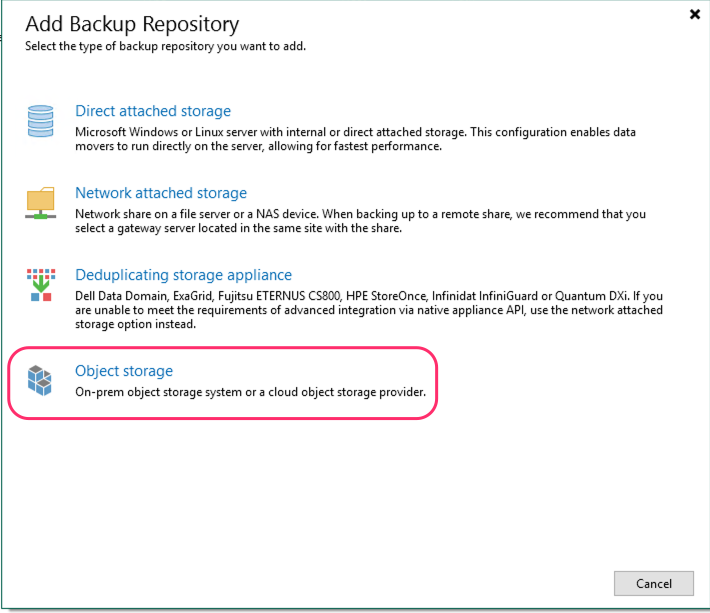
Click Object Storage.
Click Additional Providers.
Note: this step is new for VBR version 12.2. Previously, Wasabi was located directly under Object Storage.
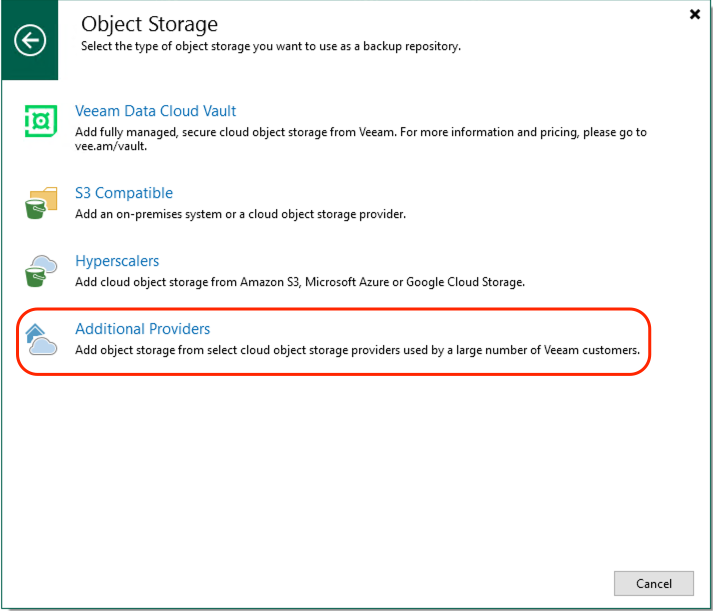
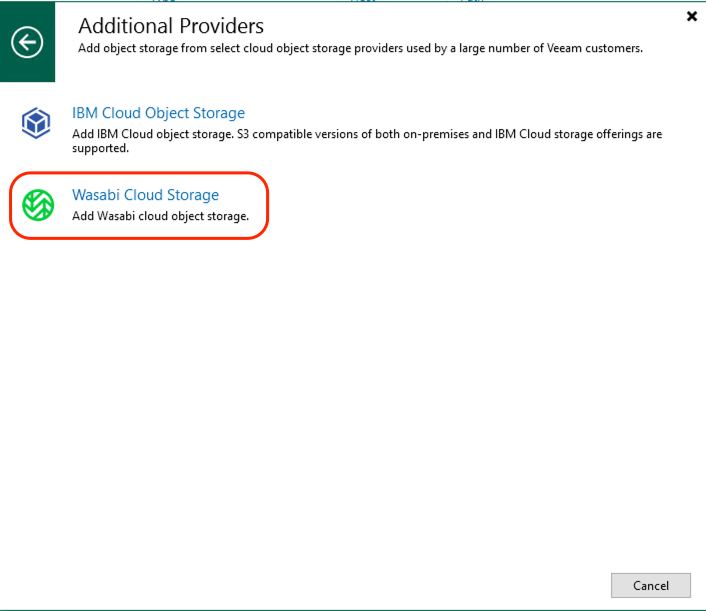
Click Wasabi Cloud Storage.
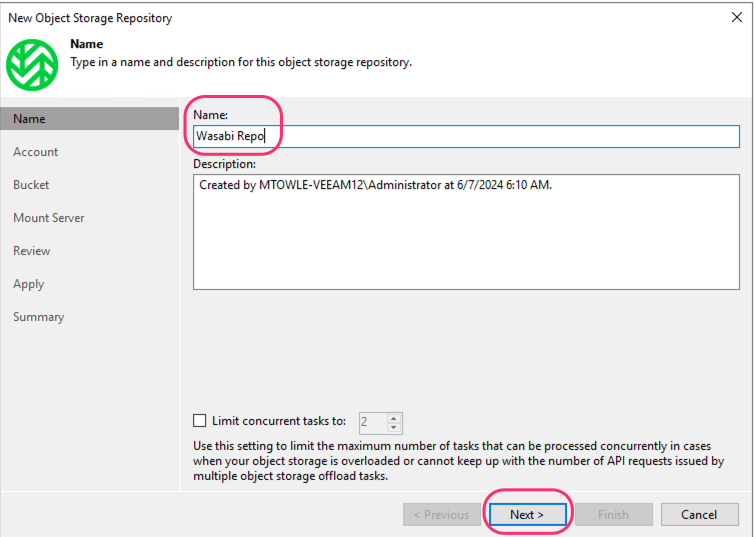
Give the repository a Name. Click Next.
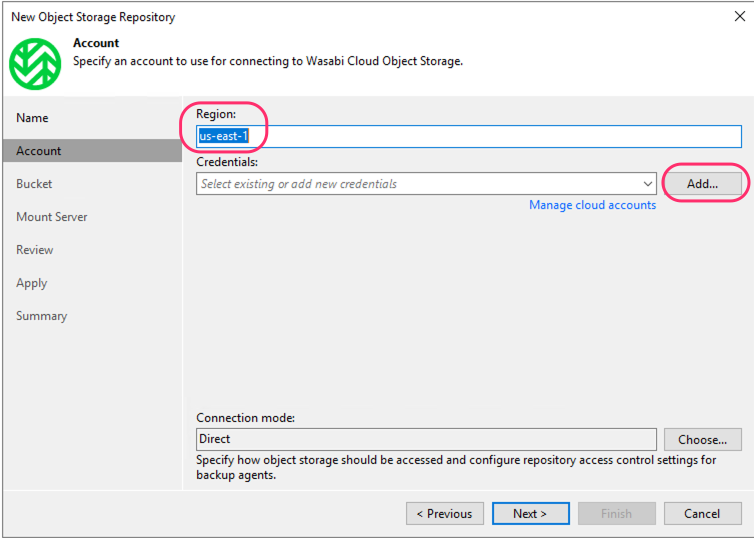
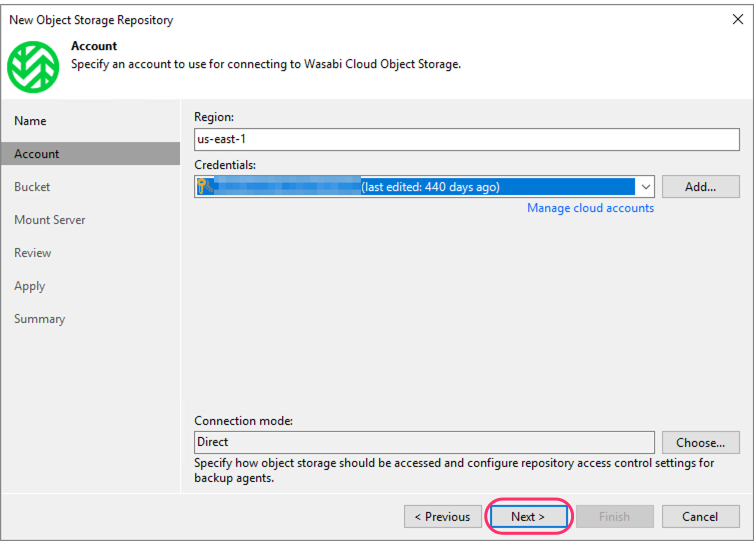
Specify the Wasabi region that your Wasabi bucket is located in. Click Add to add your Wasabi account credentials, including the access key and secret key.
This configuration example uses Wasabi’s us-east-1 storage region. Use the region where your bucket is located. For a list of regions, see Available Storage Regions.
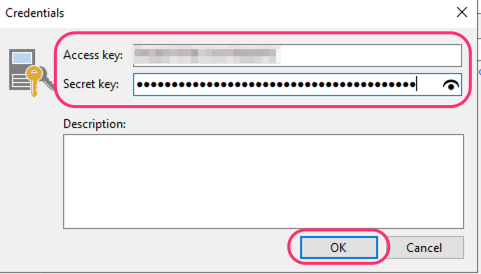
Enter your Wasabi Access Key and Secret Key. Click OK.
Click Next.
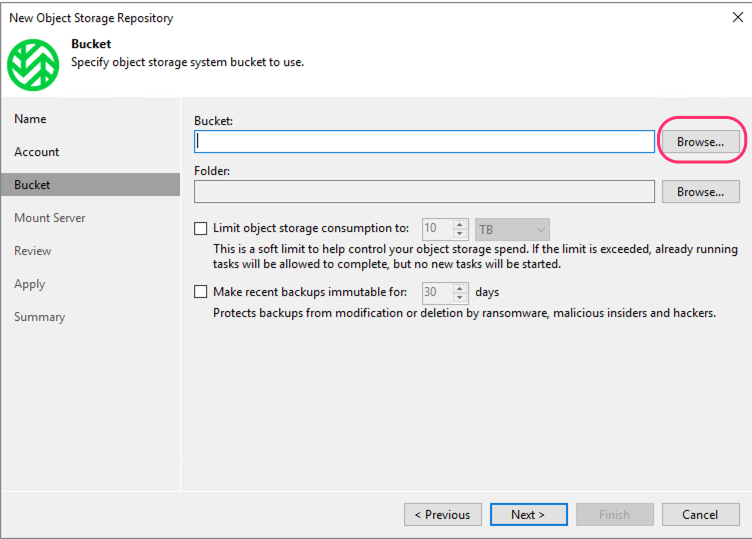
Under Bucket, click Browse.
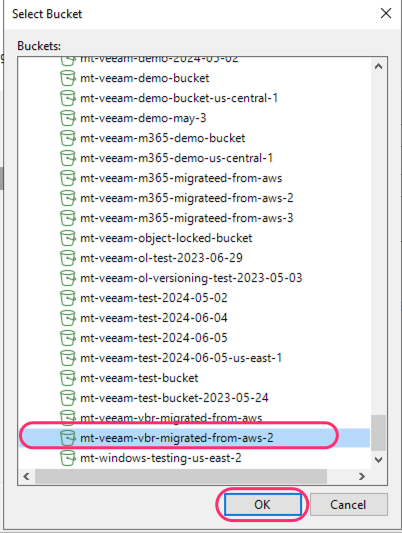
Select the Wasabi bucket that data was migrated to and click OK.
Under Folder, click Browse.
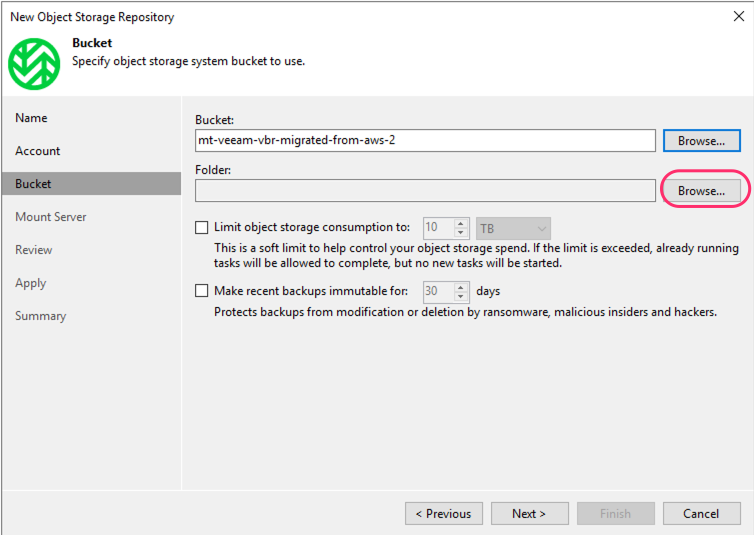
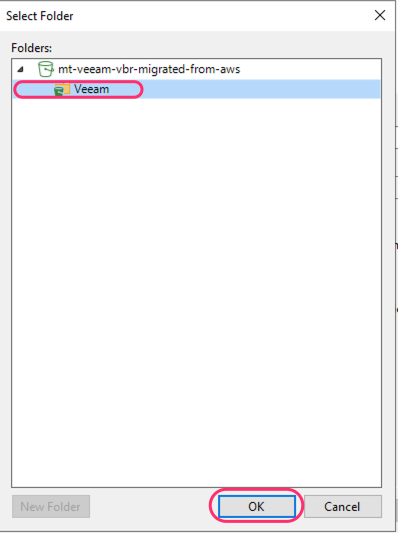
Select the existing top-level folder in the bucket and click OK. Do NOT create a new folder.
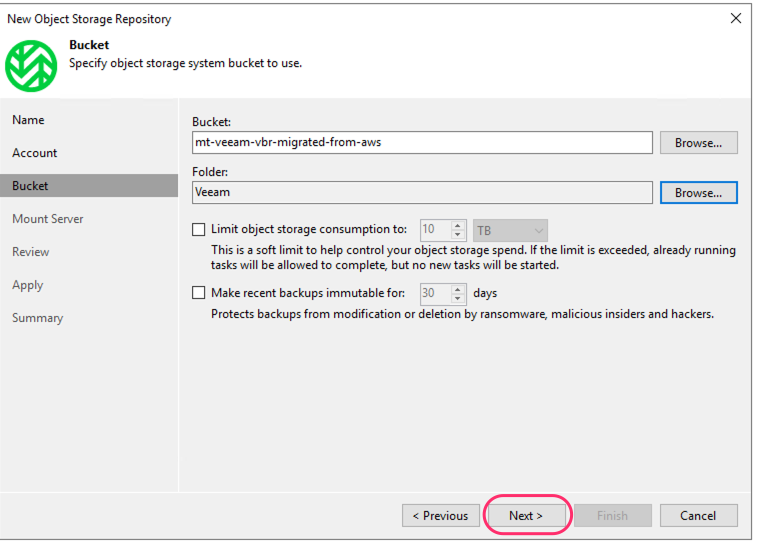
Click Next.
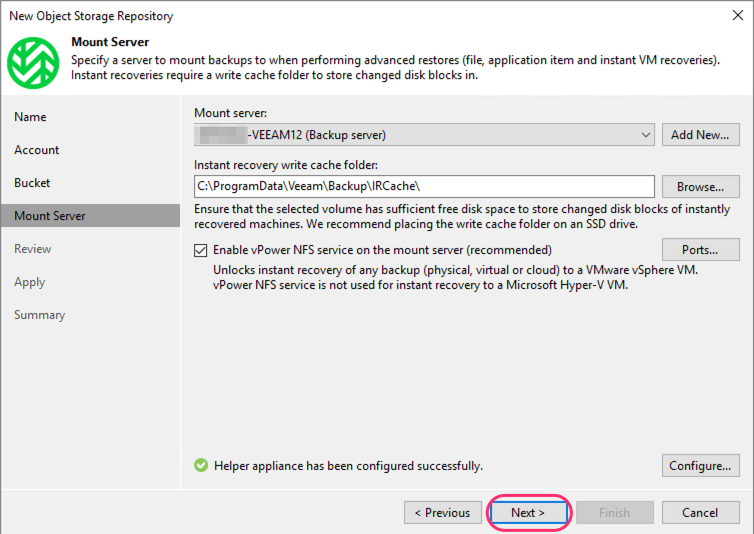
On the next screen, click Next.
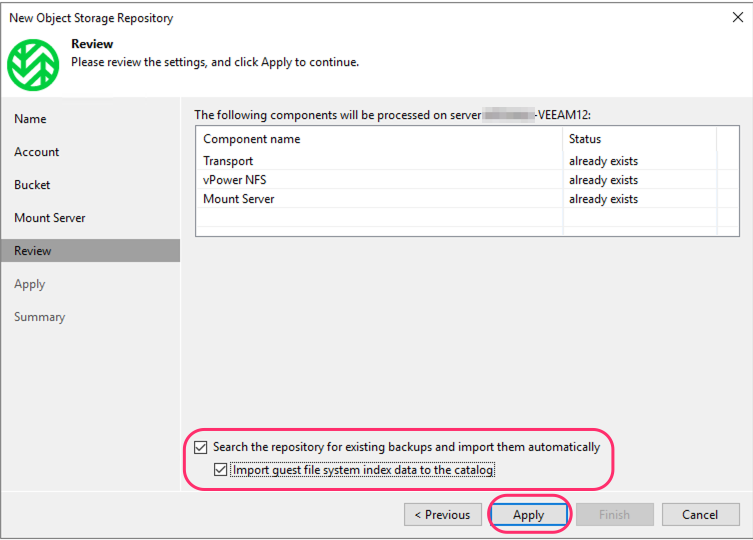
Click the two checkboxes to search the repository for existing backups and automatically import them. Click Apply. Note that this will not download your previous backups to your local server.
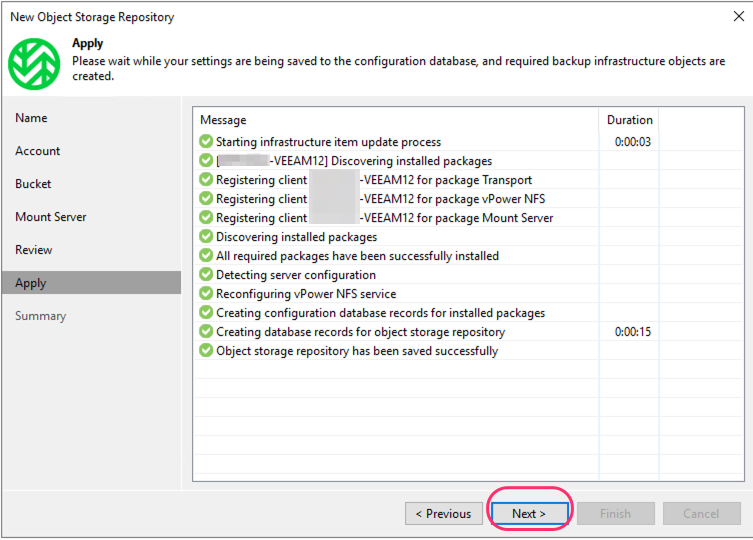
Click Next.
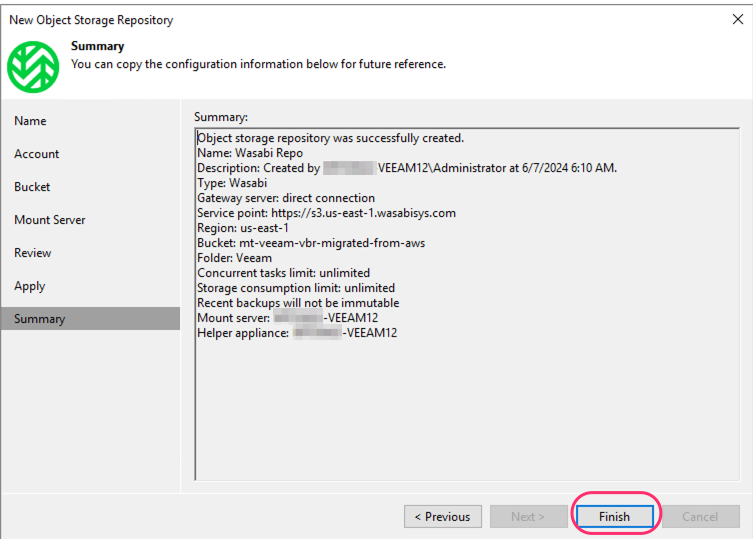
Click Finish on the Summary screen.
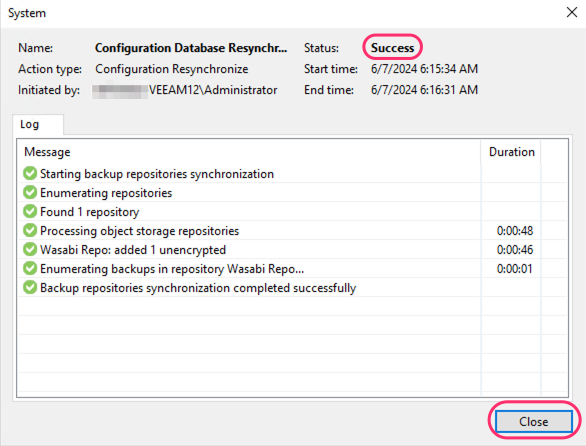
Once the Status shows Success on the next screen, click Close.
Modifying the Scale-Out Backup Repository
Navigate to the Backup Infrastructure tab, expand the Scale-out Repositories, and select the existing SOBR. Click Edit Scale-out Repository.
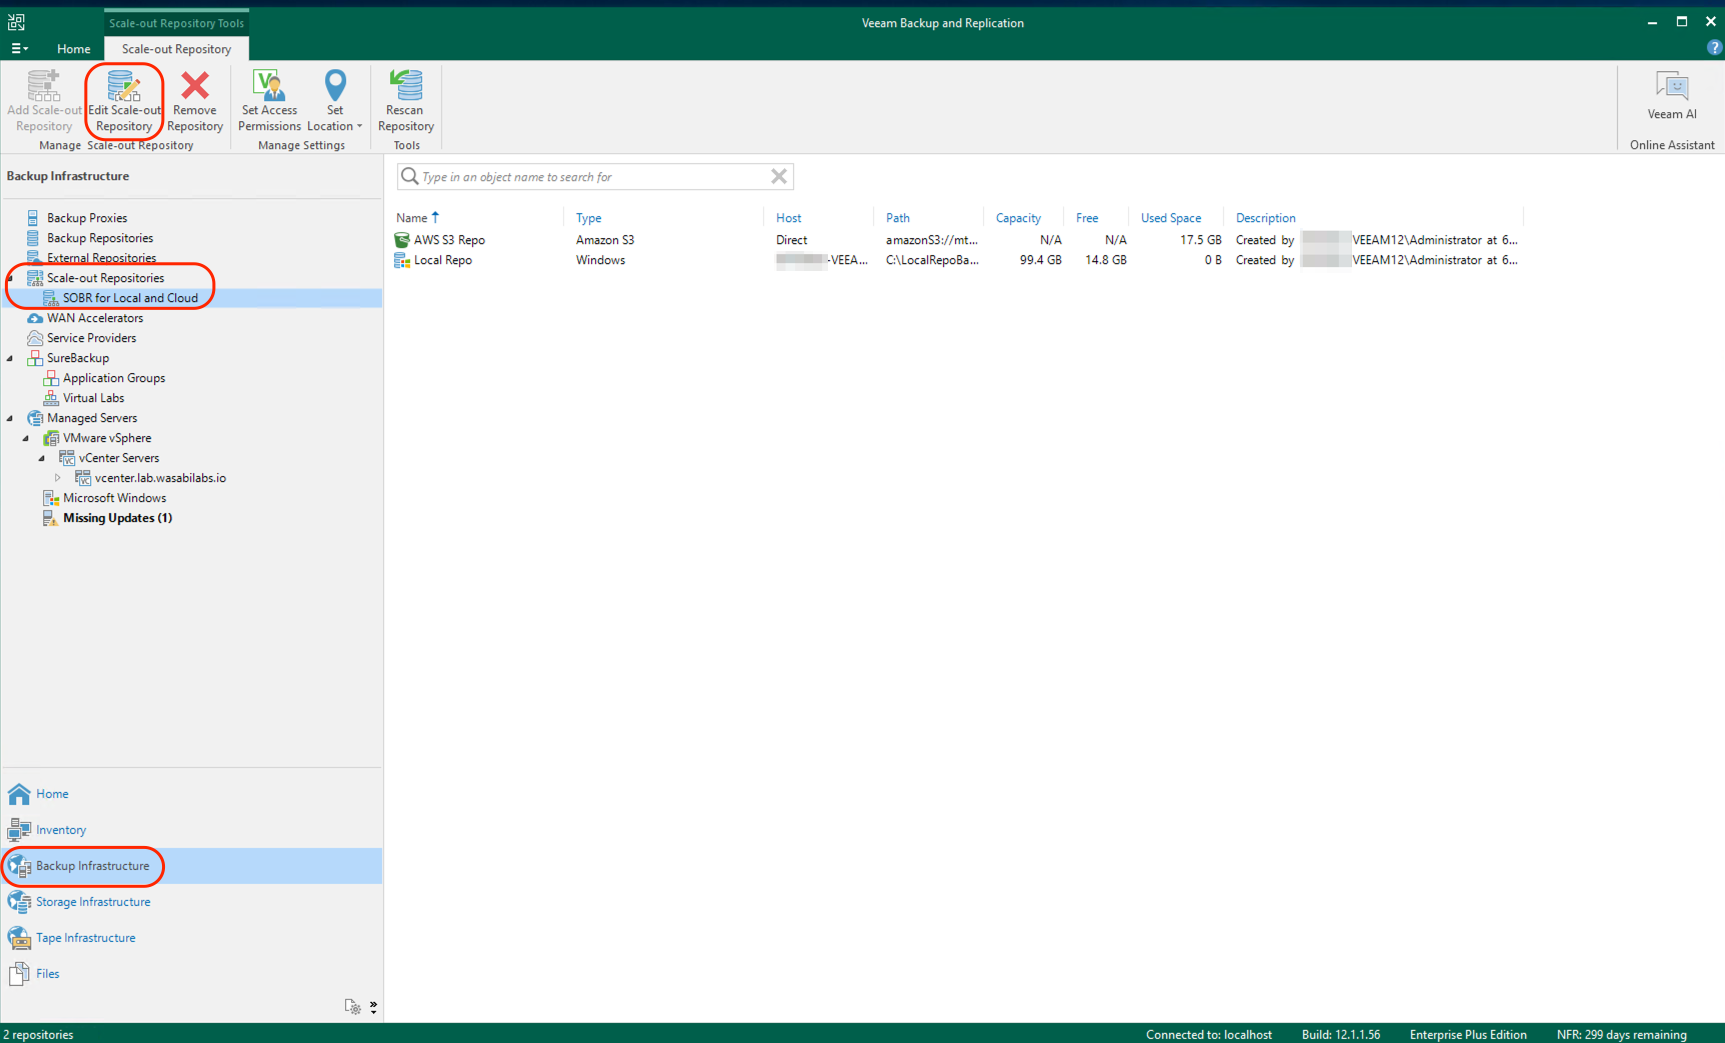
Click Next.
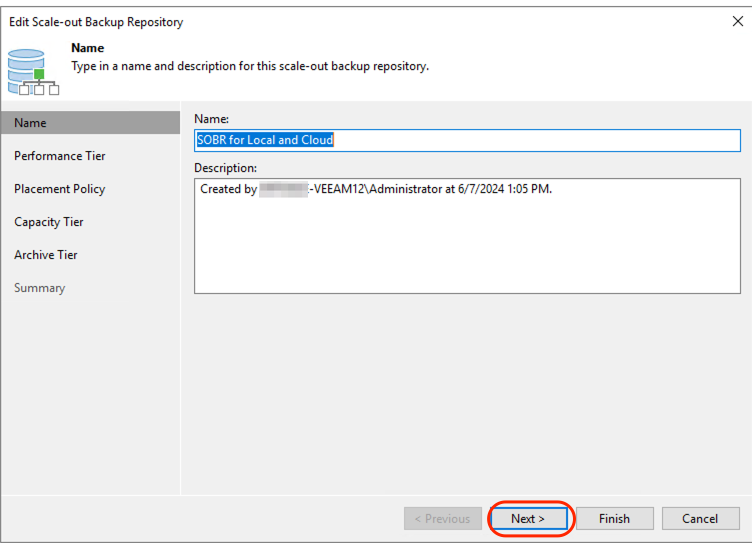
On the Performance Tier screen, click Next.
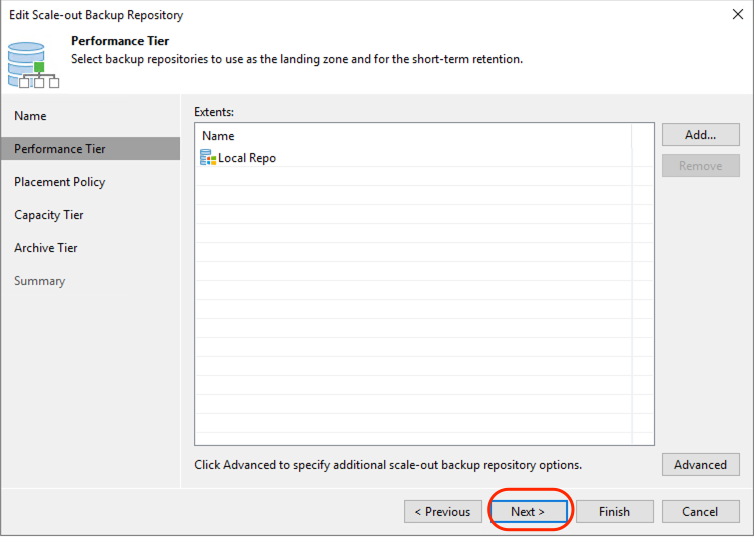
On the next screen, click Next.
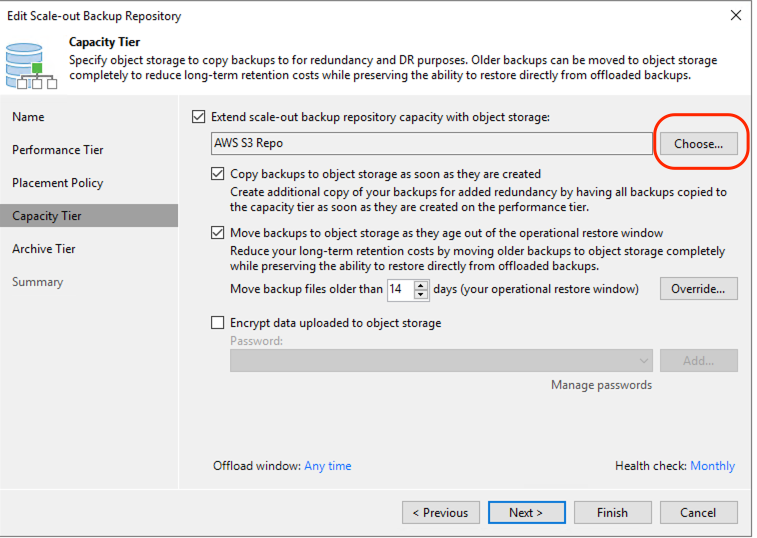
Navigate to Extend scale-out backup repository capacity with object storage, then click Choose.
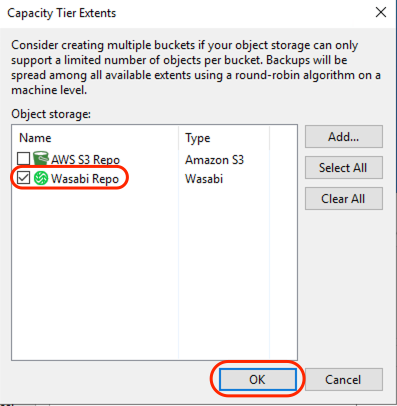
Select the previously created Wasabi Repo and uncheck the AWS S3 one. Click OK.
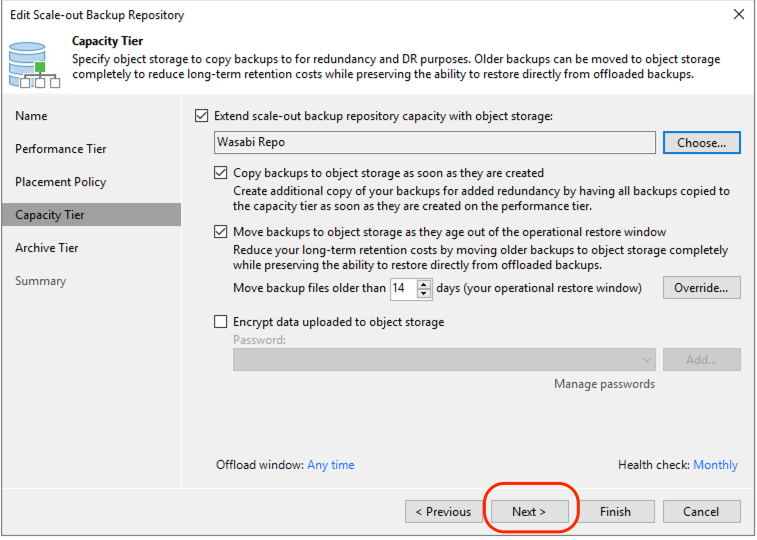
On the Capacity Tier screen, click Next.
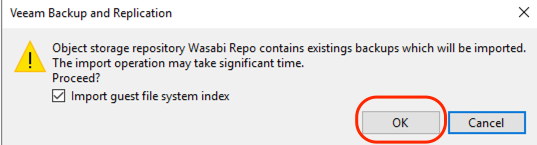
On the pop-up window, click OK. This will NOT download your previous backups to the local server.
On the next screen, click Apply.
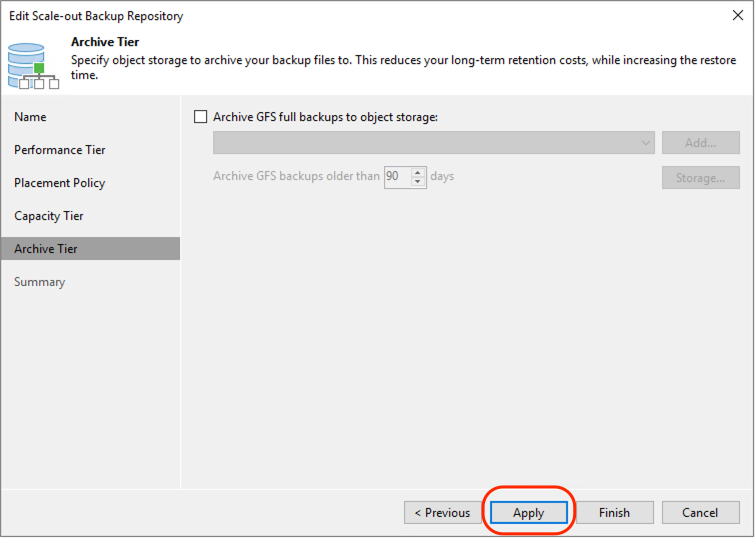
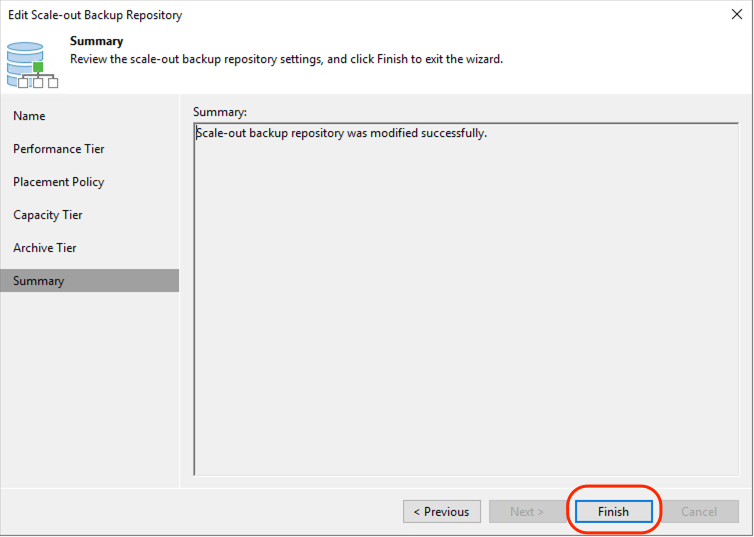
On the Summary screen, click Finish.
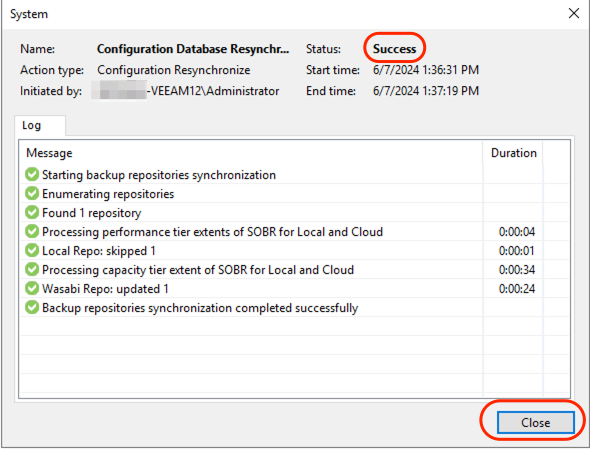
After the following screen has a status of Success, click Close.
Verifying Restore Points are Available in Veeam and Performing Test Restore
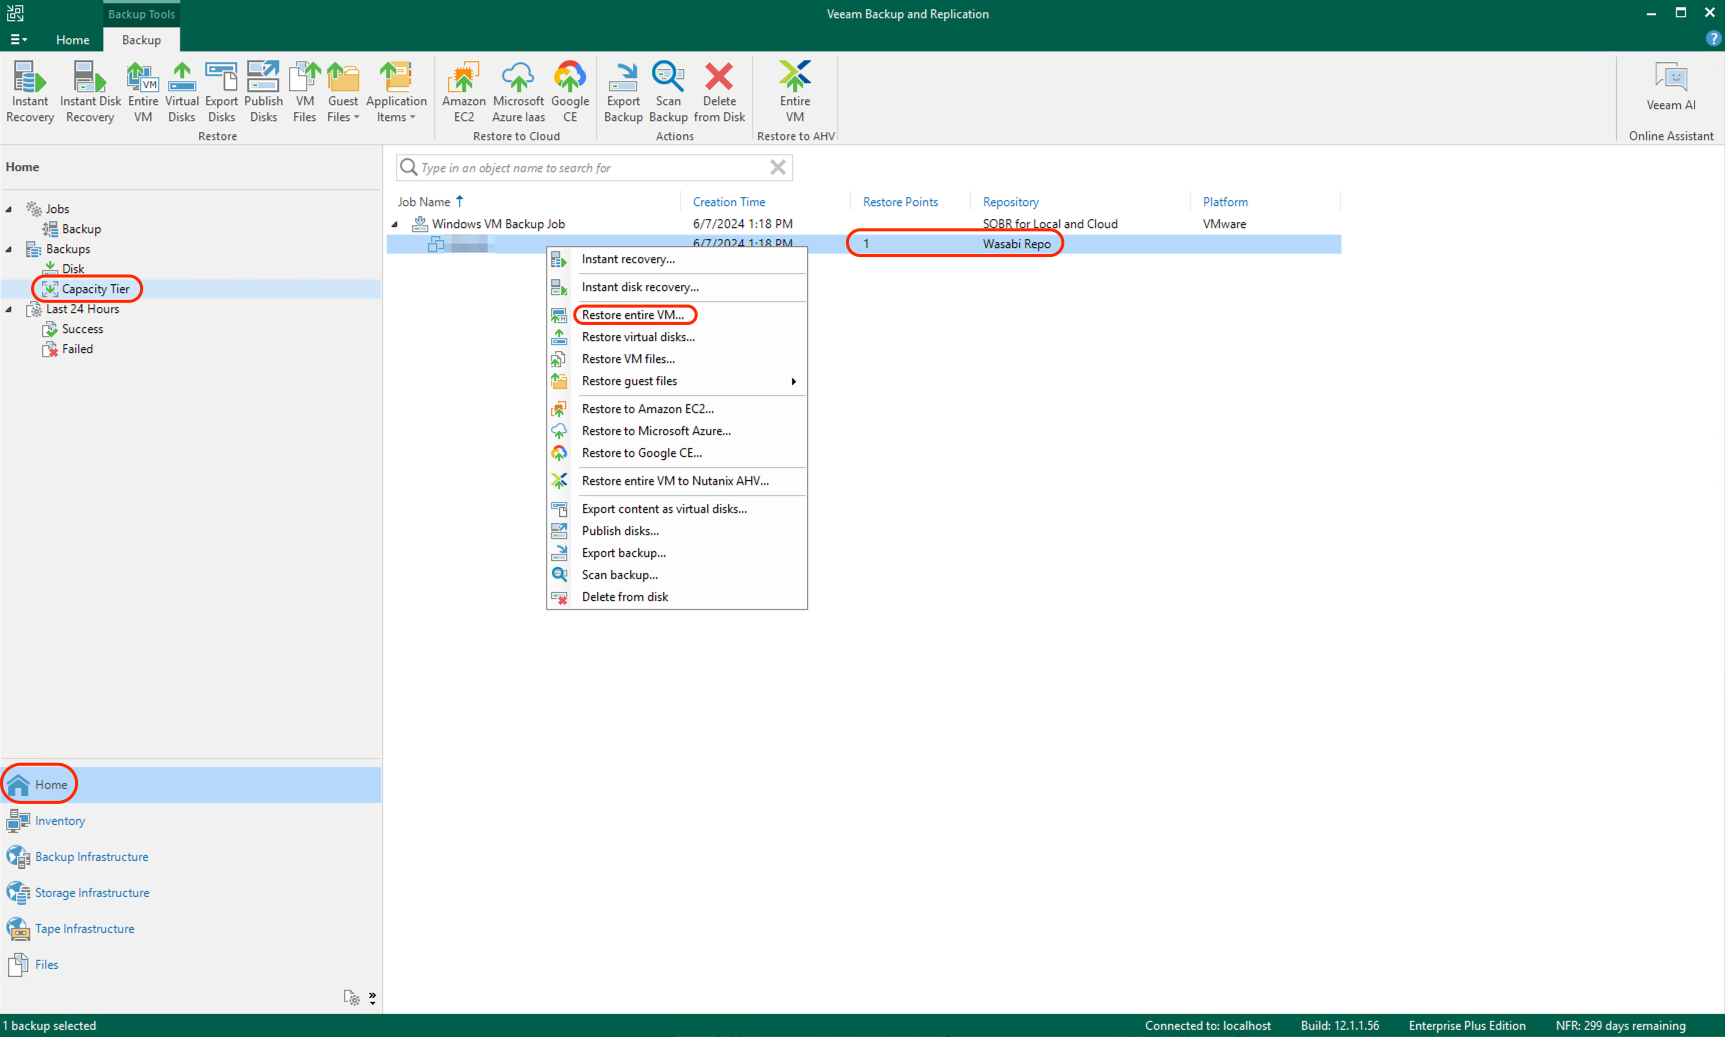
Navigate to the Home tab. Under Backups, click Capacity Tier and select a server that was previously backed up. You will see the number of restore points, and they will be listed in the Wasabi repo. In the following example, one restore point was migrated to Wasabi using WCSM.
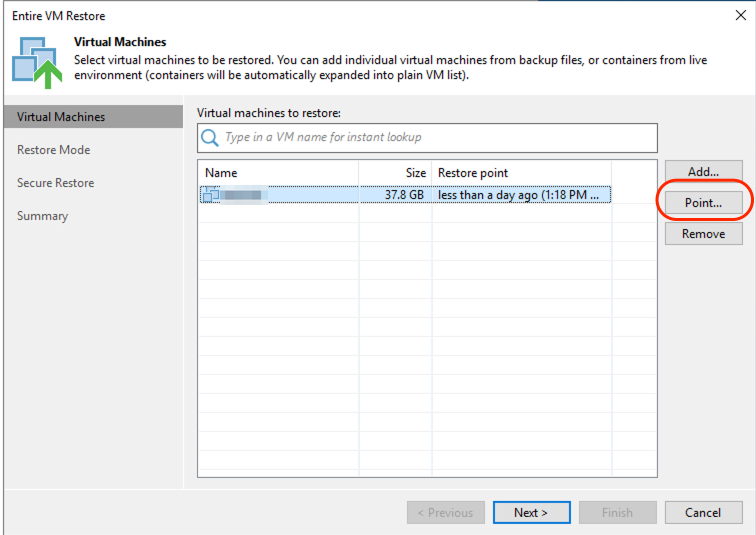
Right-click on the server name. Click Restore entire VM.
Click Point.
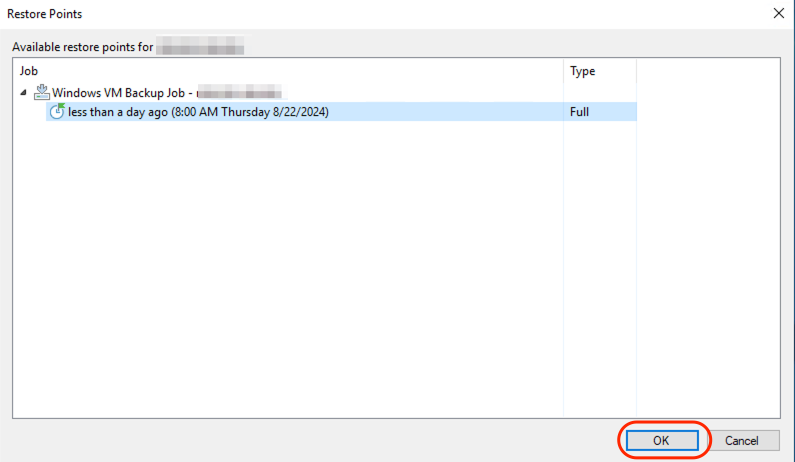
Expand the backup job shown. You will see the available restore points. In the following screen, there is one restore point. Select a restore point and click OK.
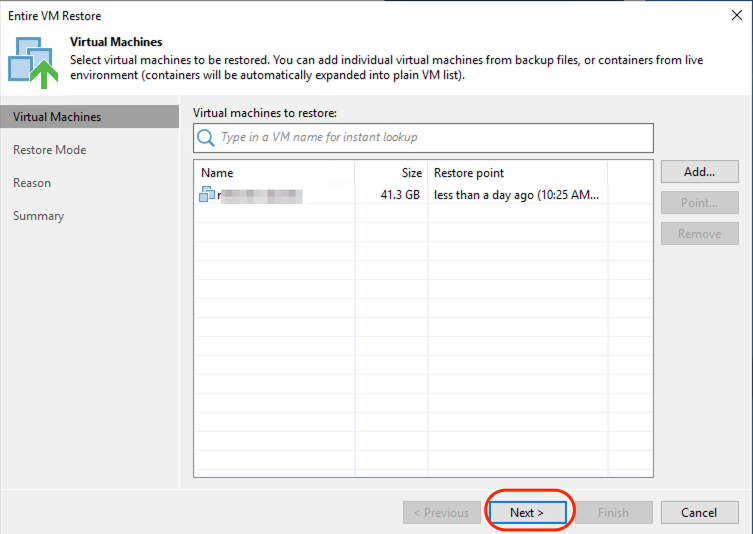
On the Virtual Machines screen, click Next.
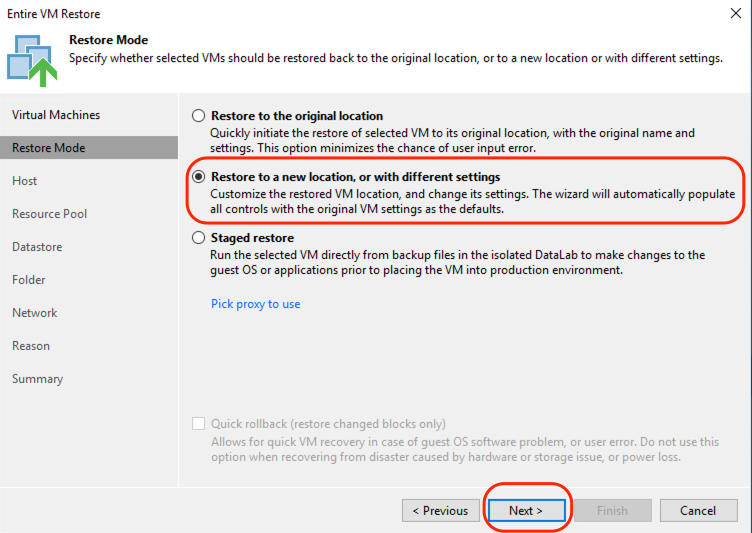
Select Restore to a new location, or with different settings, and click Next.
Optionally, click Host to change the host the VM is restored to. Click Next.
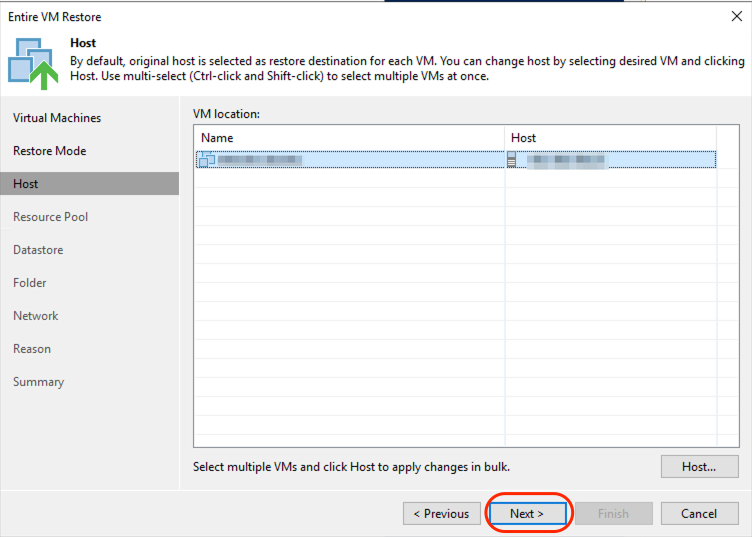
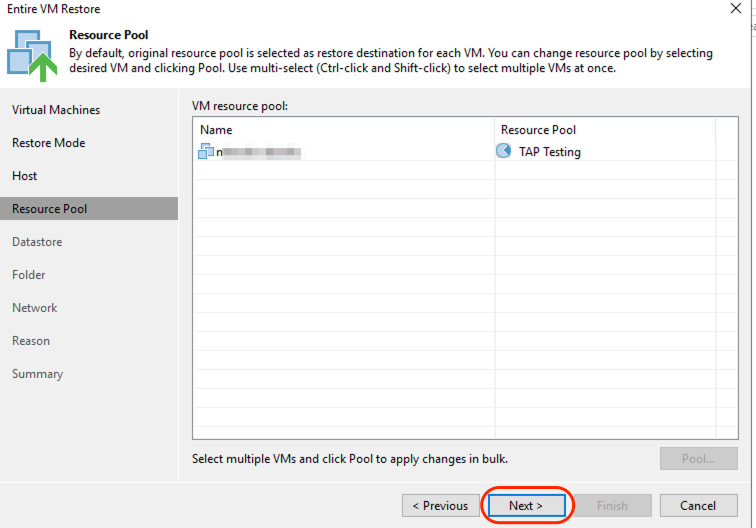
Optionally select the VM and click Pool to change the Resource Pool. Click Next.
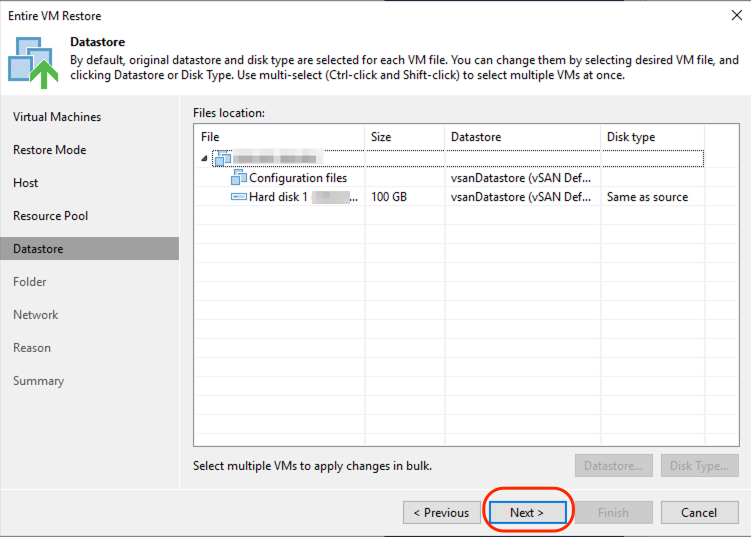
Optionally change the Datastore. Click Next.
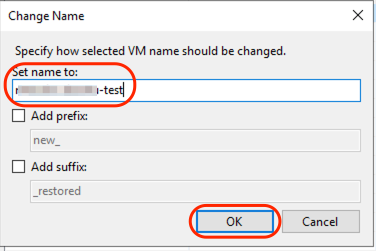
Select the VM and click Name.
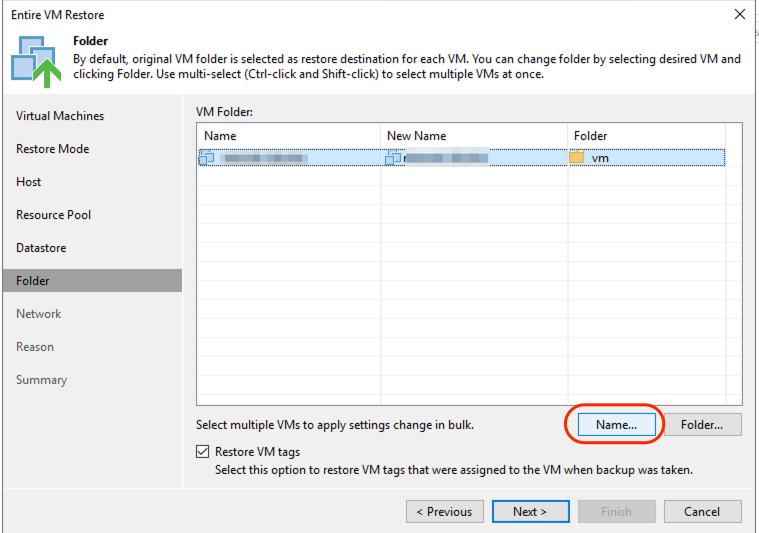
Change the VM name to something different from the original, then click OK.
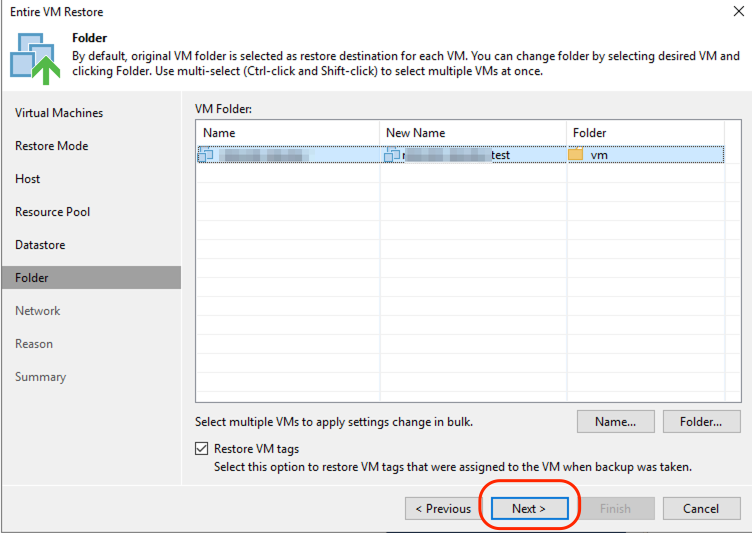
Click Next.
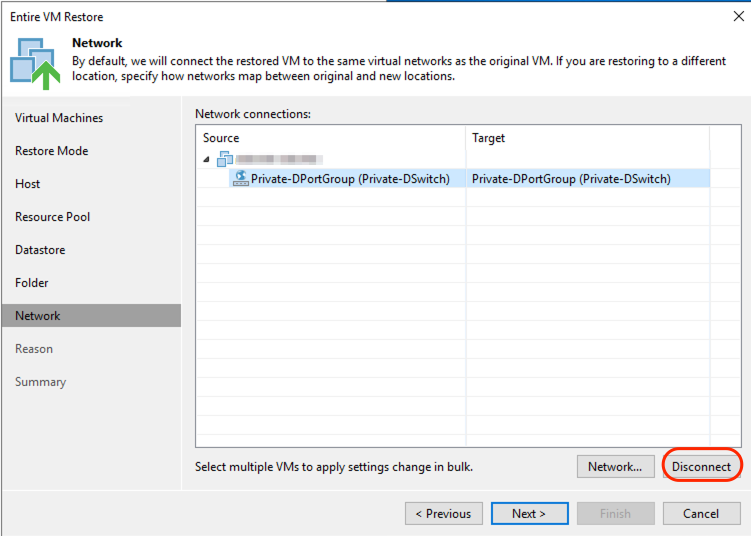
Select the network under the VM, then click Disconnect to avoid IP address conflicts on the network. Repeat for any other networks.
Then click Disconnect to avoid working for the restored VM, which has been disconnected.
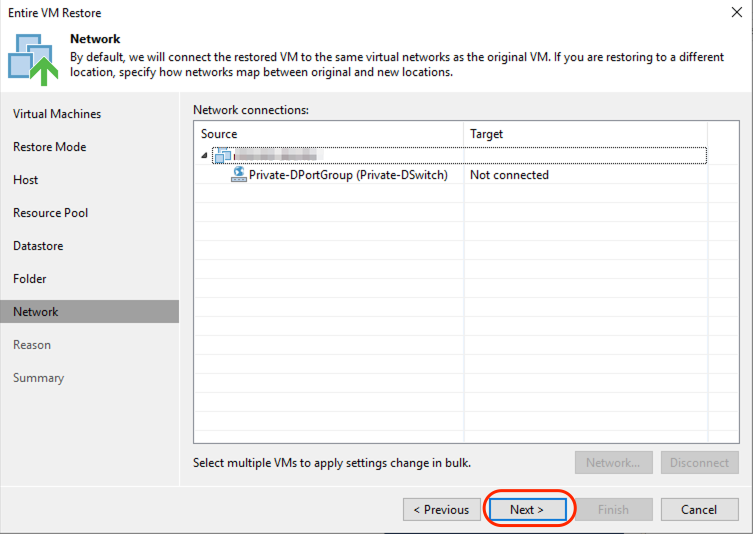
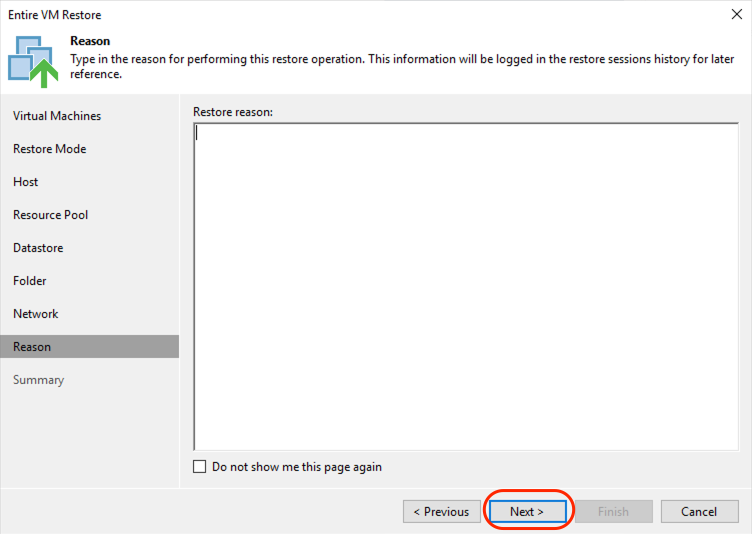
Optionally enter a restore reason. Click Next.
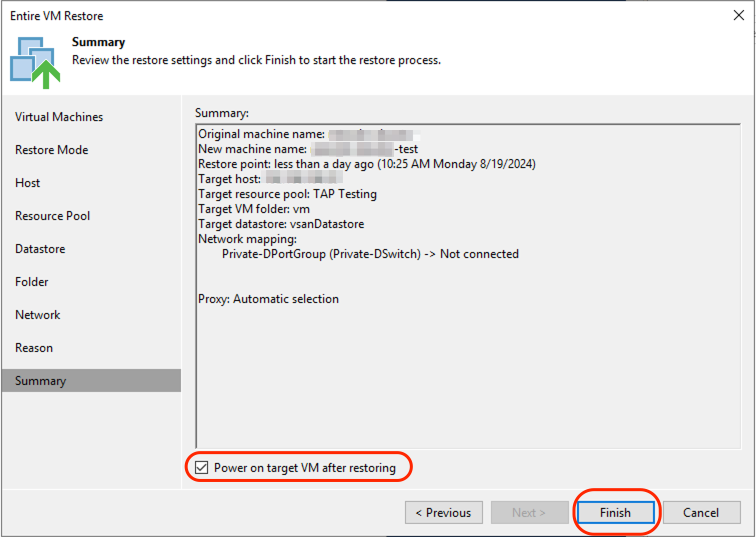
Check the Power on target VM after restoring the checkbox and click Finish.
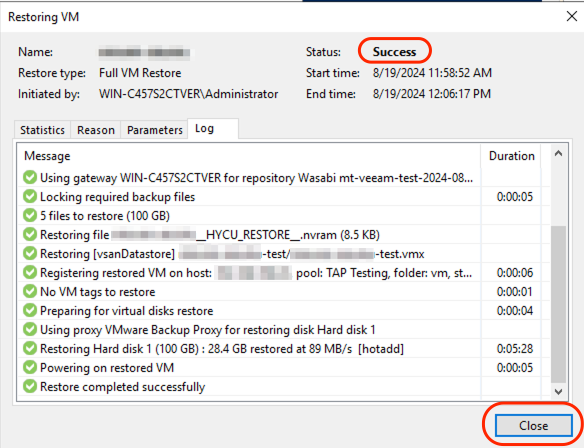
Verify the restore job completes successfully. Click Close.
Verify that you can log in to the restored VM via its console, such as VMware’s or Microsoft’s hypervisor console. After successfully logging in, optionally delete the restored VM. Do NOT delete the original VM.
Enable Existing Backup Job
Navigate to the Home tab. Click Jobs and select an existing backup job. Click Disable to enable the job (there is no Enable button).
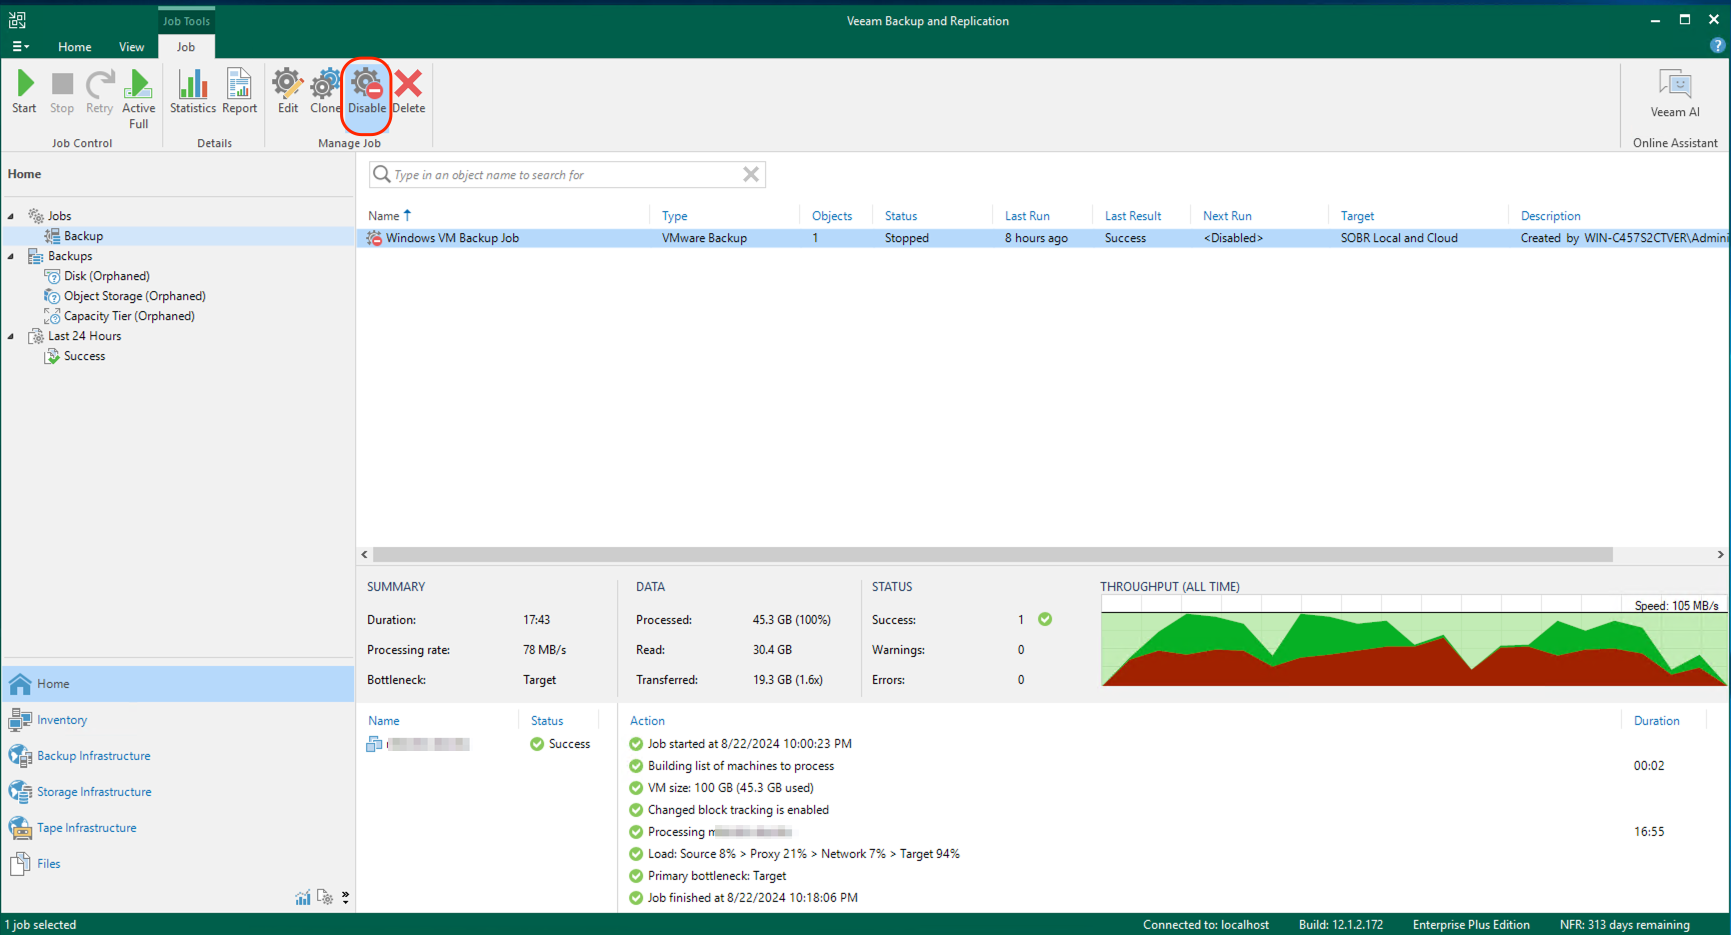
The job will now show as enabled.