Wasabi has been validated for use with HYCU, which is a leading multi-cloud backup as a service provider. To set up Wasabi with your HYCU application, follow the instructions below.
Your specific backup software application handles the data restoration process. As many potential variables can affect your unique environment, Wasabi recommends that you seek guidance from your backup software's technical support team if you encounter difficulty or have application-specific inquiries.
This article describes the procedure to use Wasabi Covert Copy to protect a Golden Copy of HYCU backups for use in case of a disaster that affects other copies of backups.
Covert Copy's incremental support functionality works with HYCU. For more information about how Covert Copy supports incremental backups, refer to Covert Copy: Using Incremental Support.
Requirements
Active Wasabi Cloud Storage account.
Active HYCU backup account.
HYCU software configured and connected to the source data for protection.
Multi-factor authentication (MFA) is enabled for the Wasabi account root user. See MFA (Multi-Factor Authentication) for details on how to enable and use MFA on your account.
Multi-user authentication (MUA) is enabled for the Wasabi account root user. See MUA (Multi-User Authentication) for details on how to enable and use MUA.
Configuring for Covert Copy
If your HYCU backup plans are not going to a Wasabi version-enabled bucket(s), you will need to create the bucket(s).
Log in to your Wasabi Console and create a new bucket.
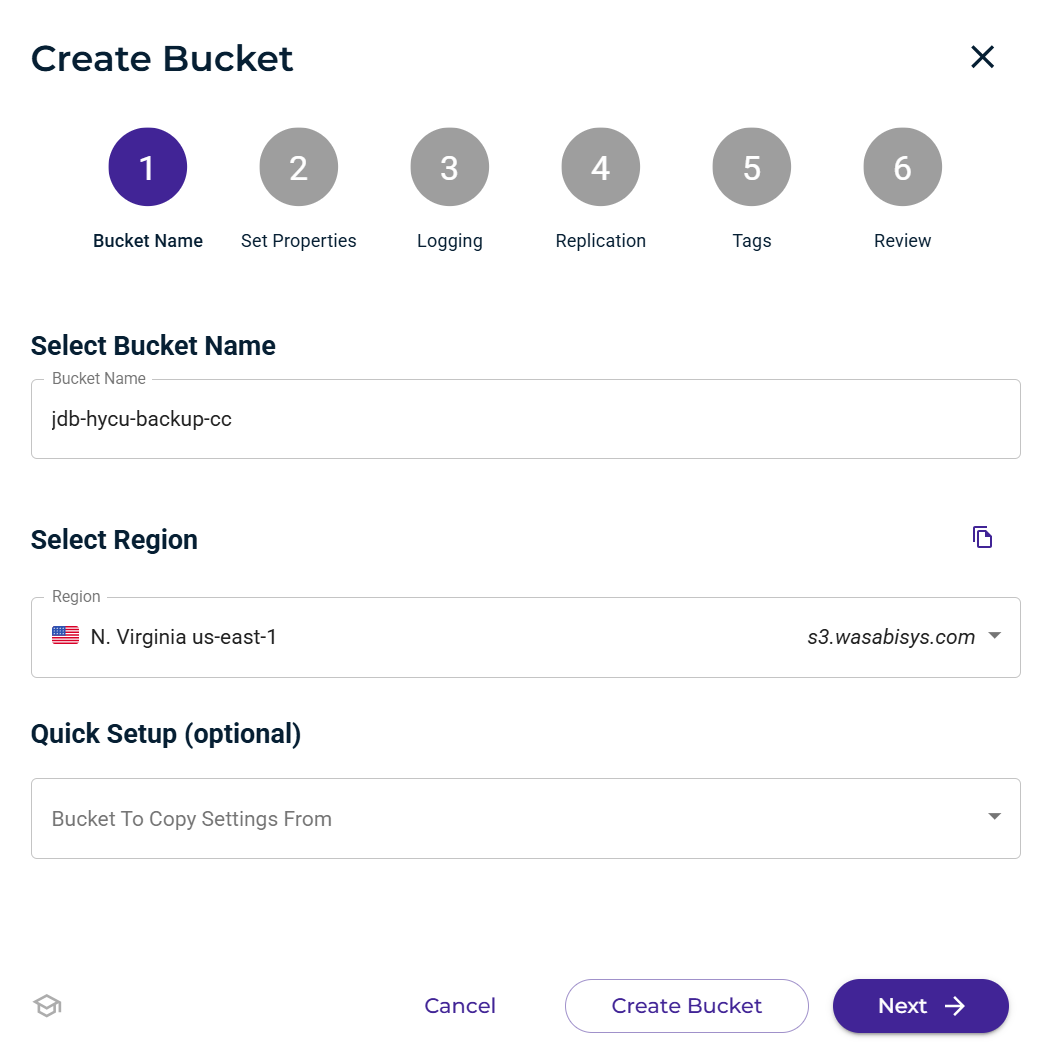
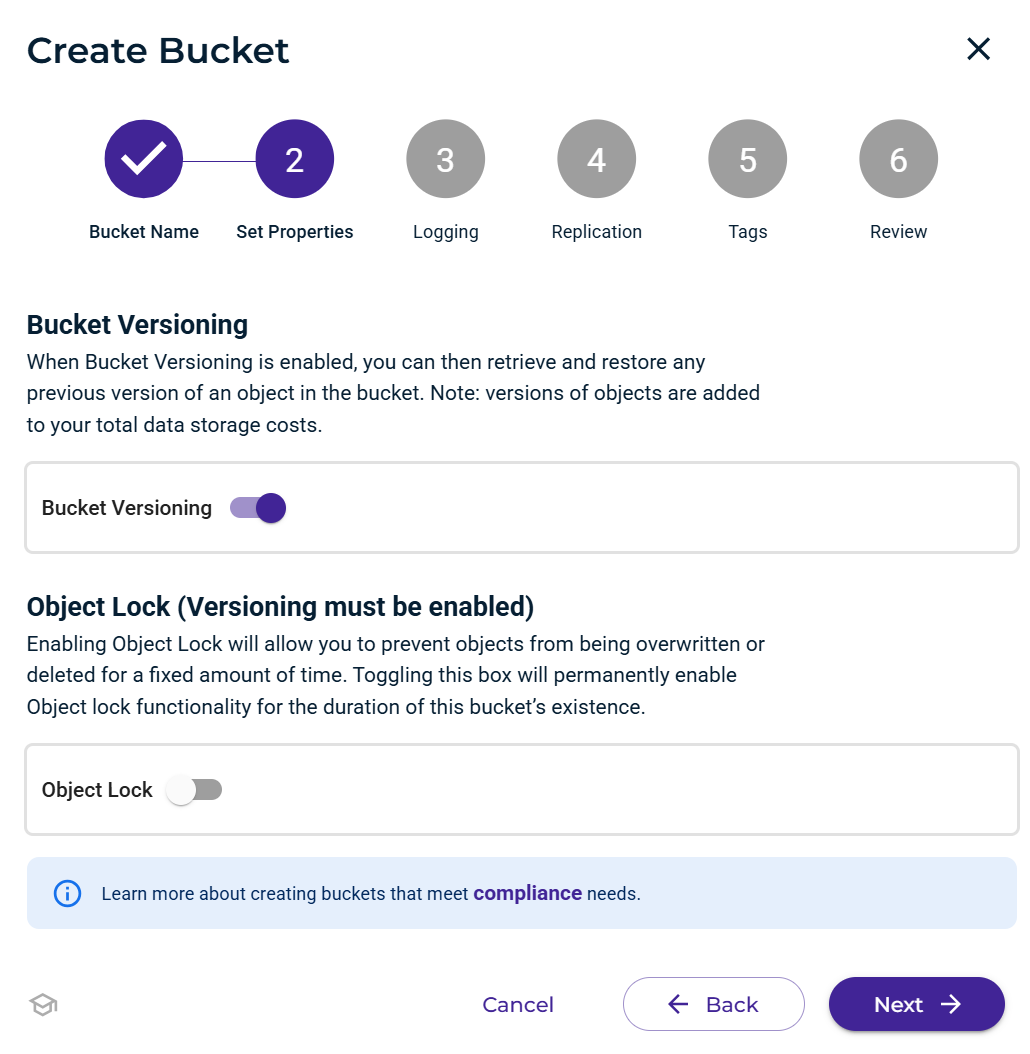
Toggle Bucket Versioning on and continue through the prompts until you create the bucket.
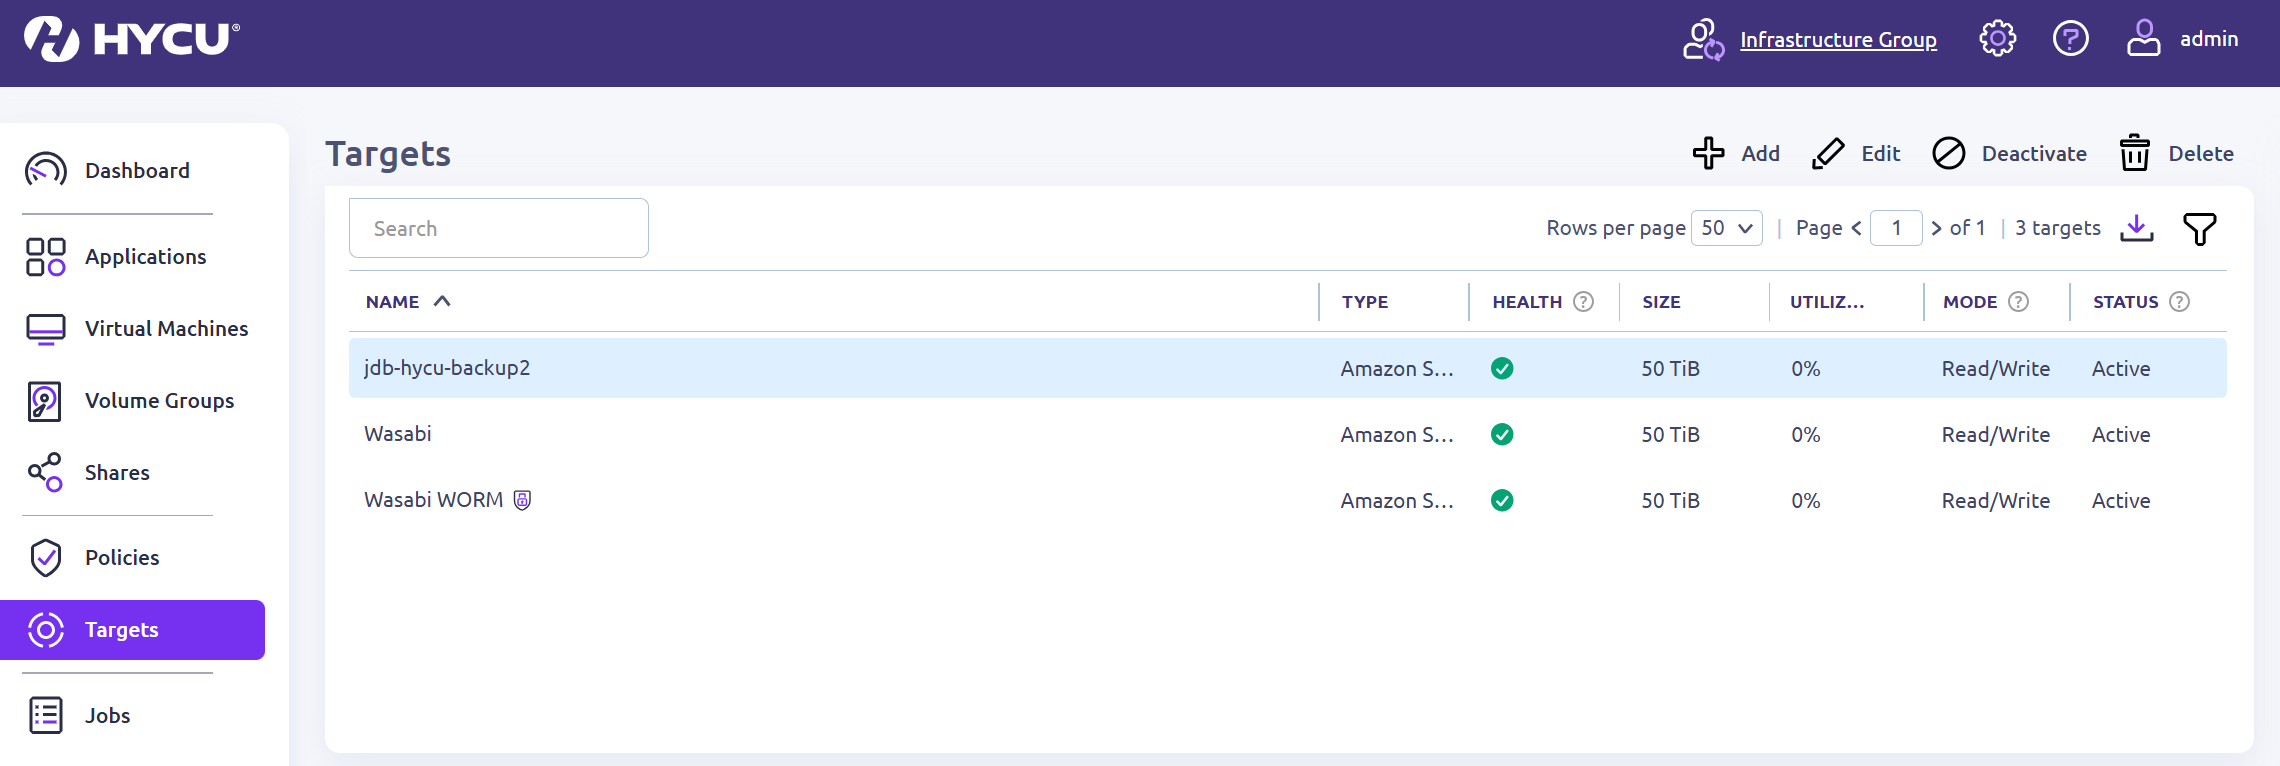
Return to your HYCU console and add that bucket as one of your Targets.
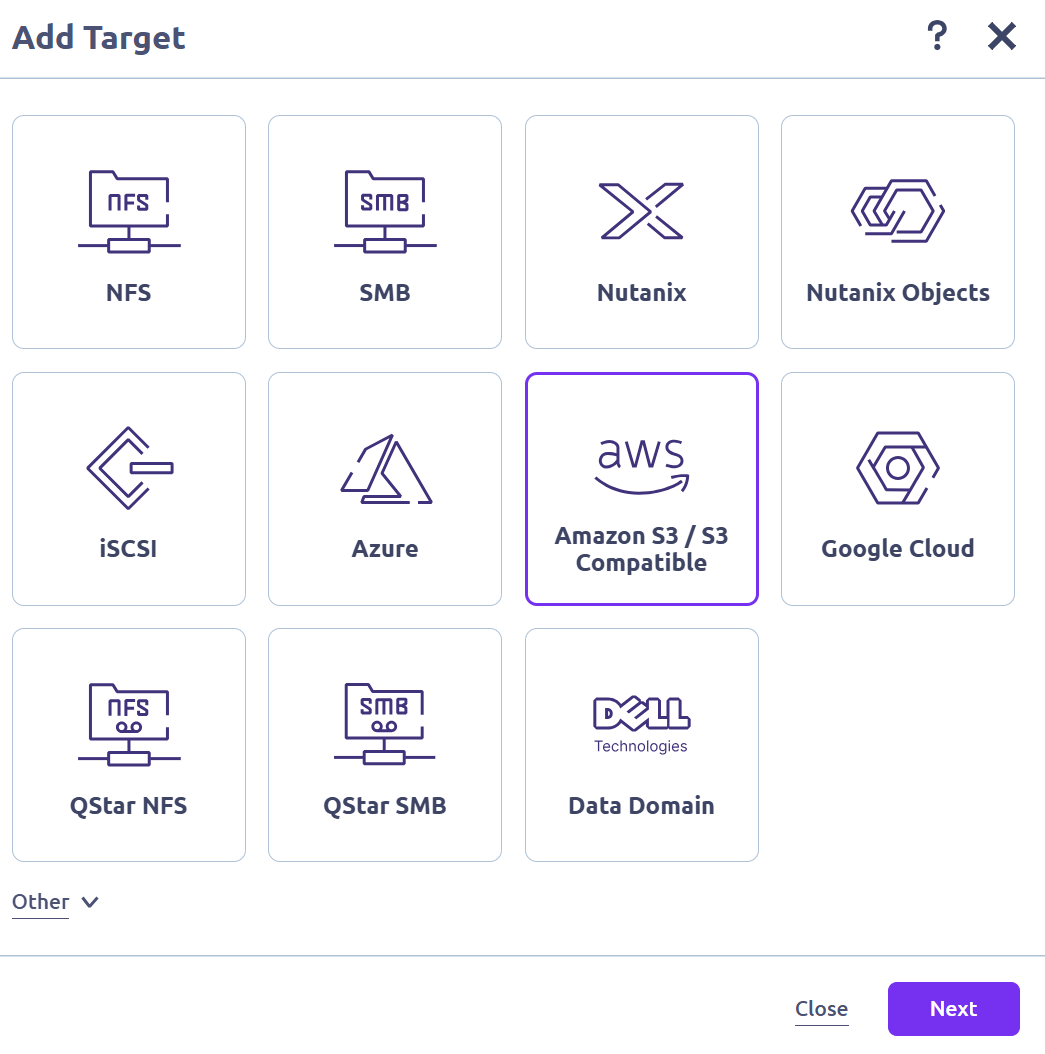
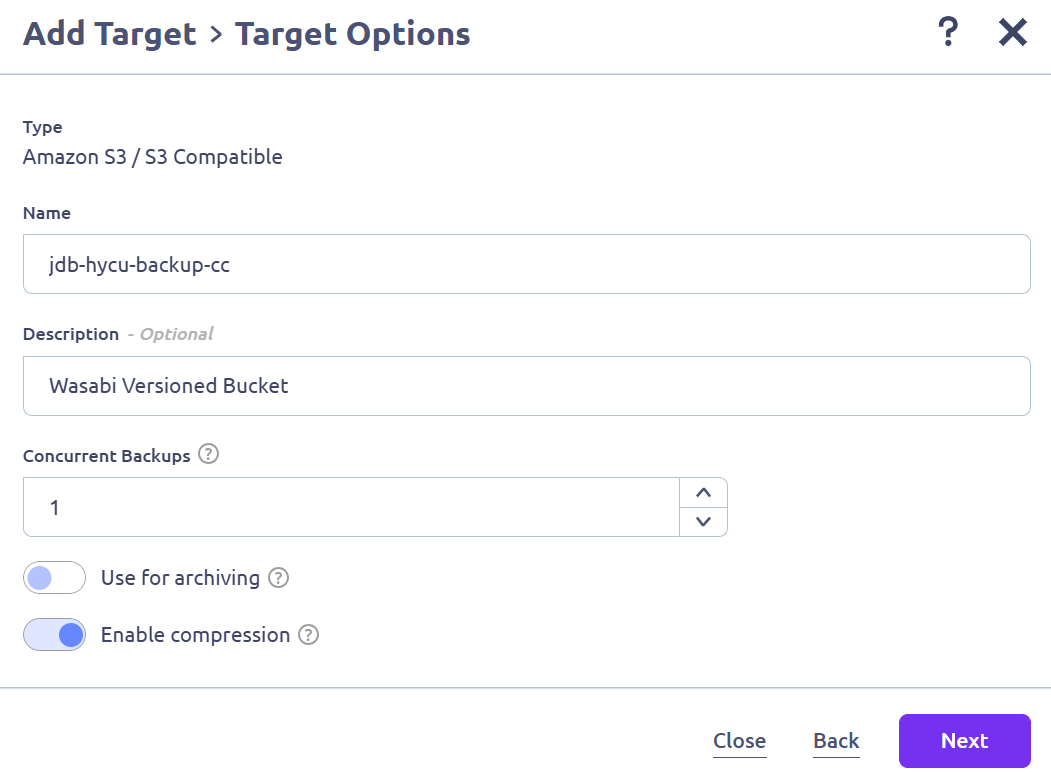
Click Add. Select Amazon S3 / S3 Compatible.
Click Next.
Give the Target a unique Name and Description.
Toggle the Enable Compression option.
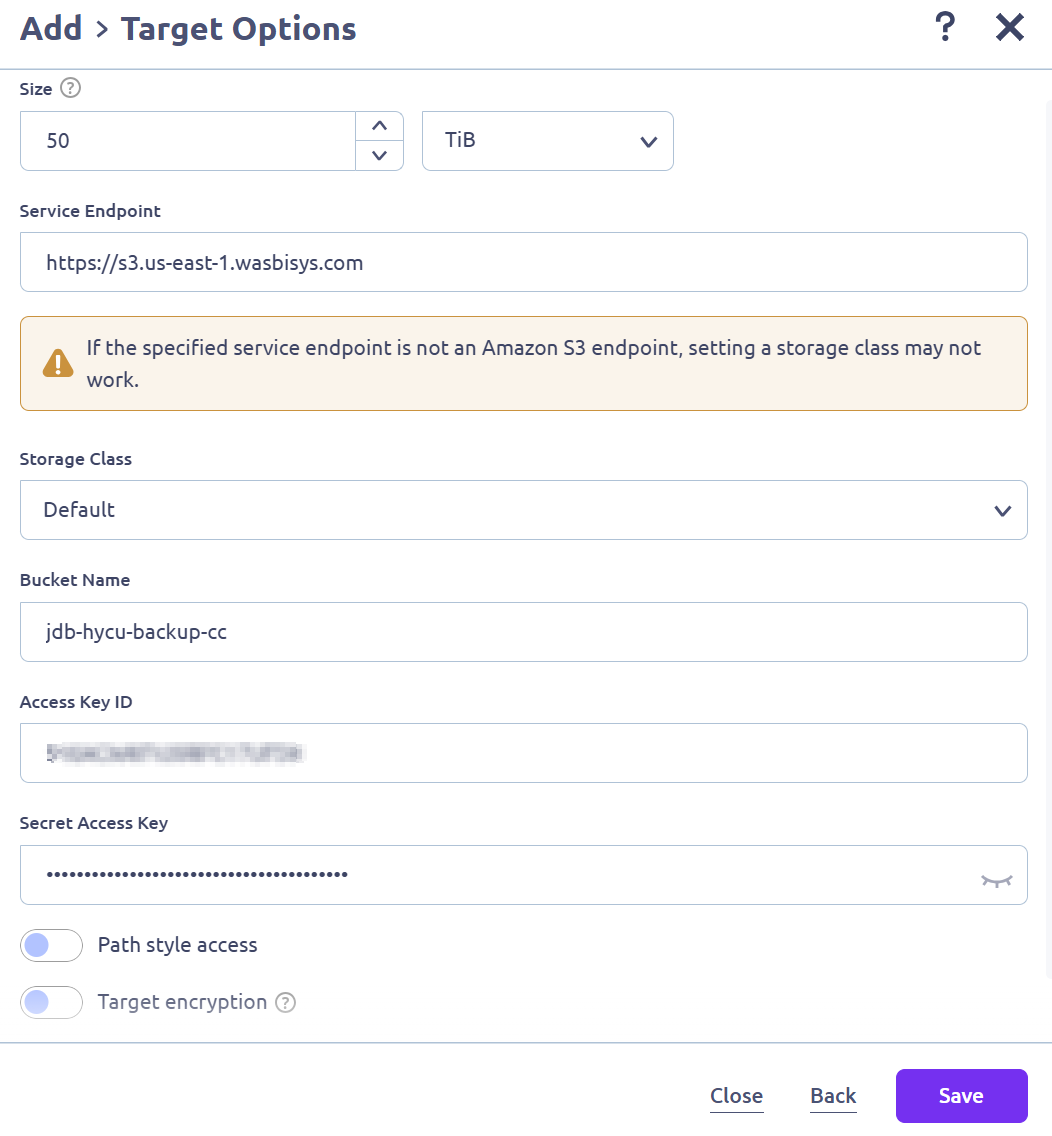
Input the following information.
Size—Specify the maximum size for your bucket.
Service Endpoint—Enter the service URL for the region your bucket is in (for example, https://s3.us-east-1.wasabisys.com). For more information, review the notes below.
Storage Class—Leave this as Default.
Bucket Name—Input the name of the versioned bucket you created.
Access Key ID—Input your Wasabi access key.
Secret Access Key—Input your Wasabi secret key.
This configuration example discusses the use of Wasabi's us-east-1 storage region. To use another Wasabi storage region, use the appropriate Service URLs for Wasabi's Storage Regions.
The HYCU application REQUIRES the service endpoint to be prepended with a transport definition (https).
Click Save.
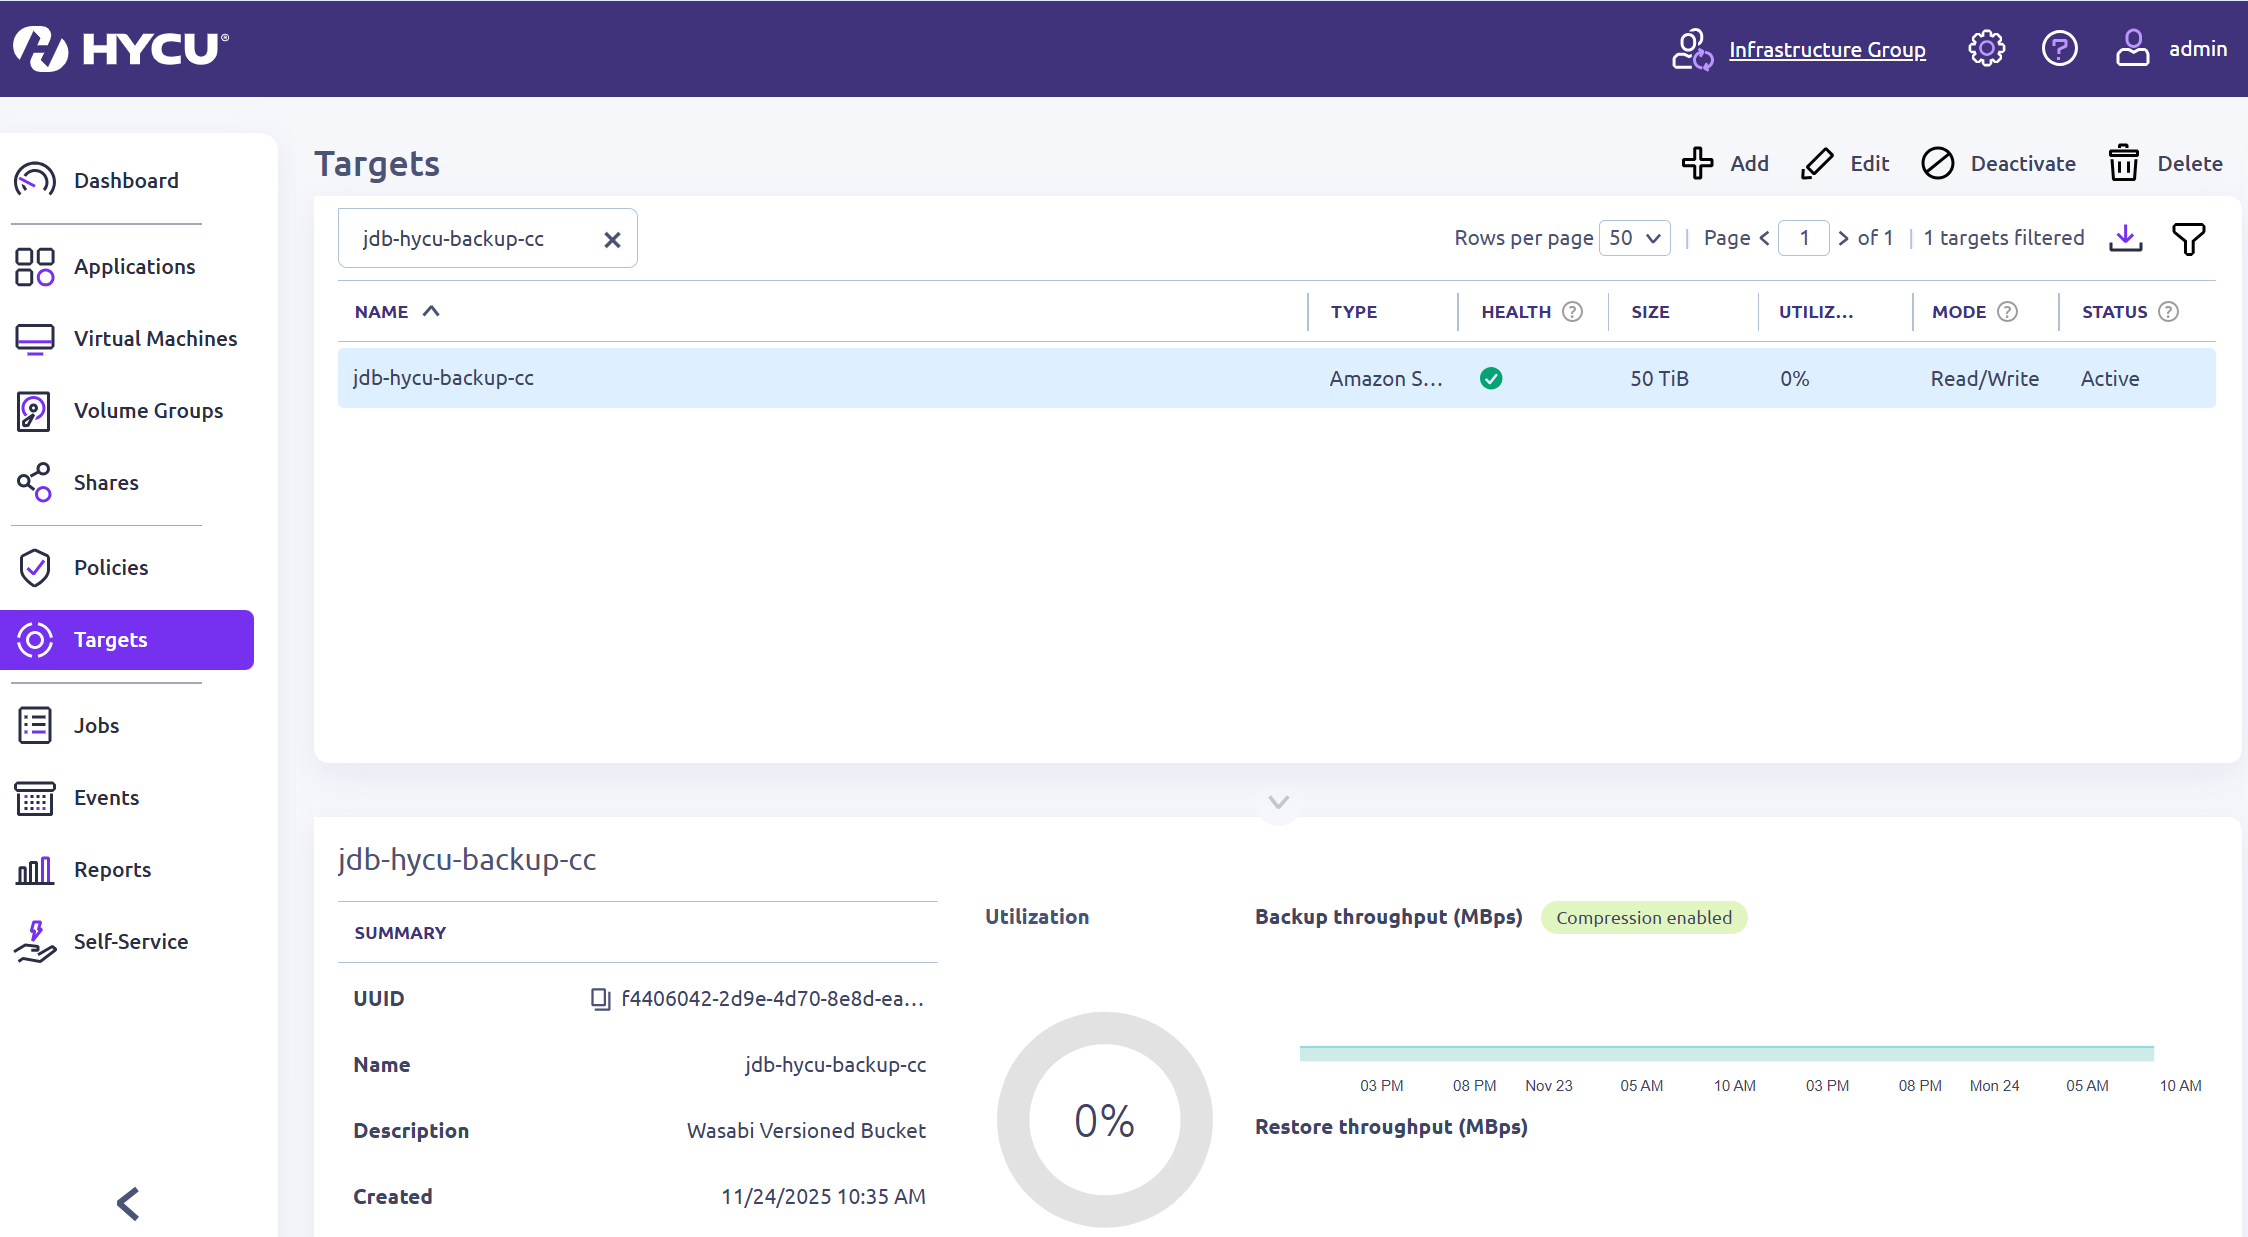
You will see your bucket listed in the Targets list.
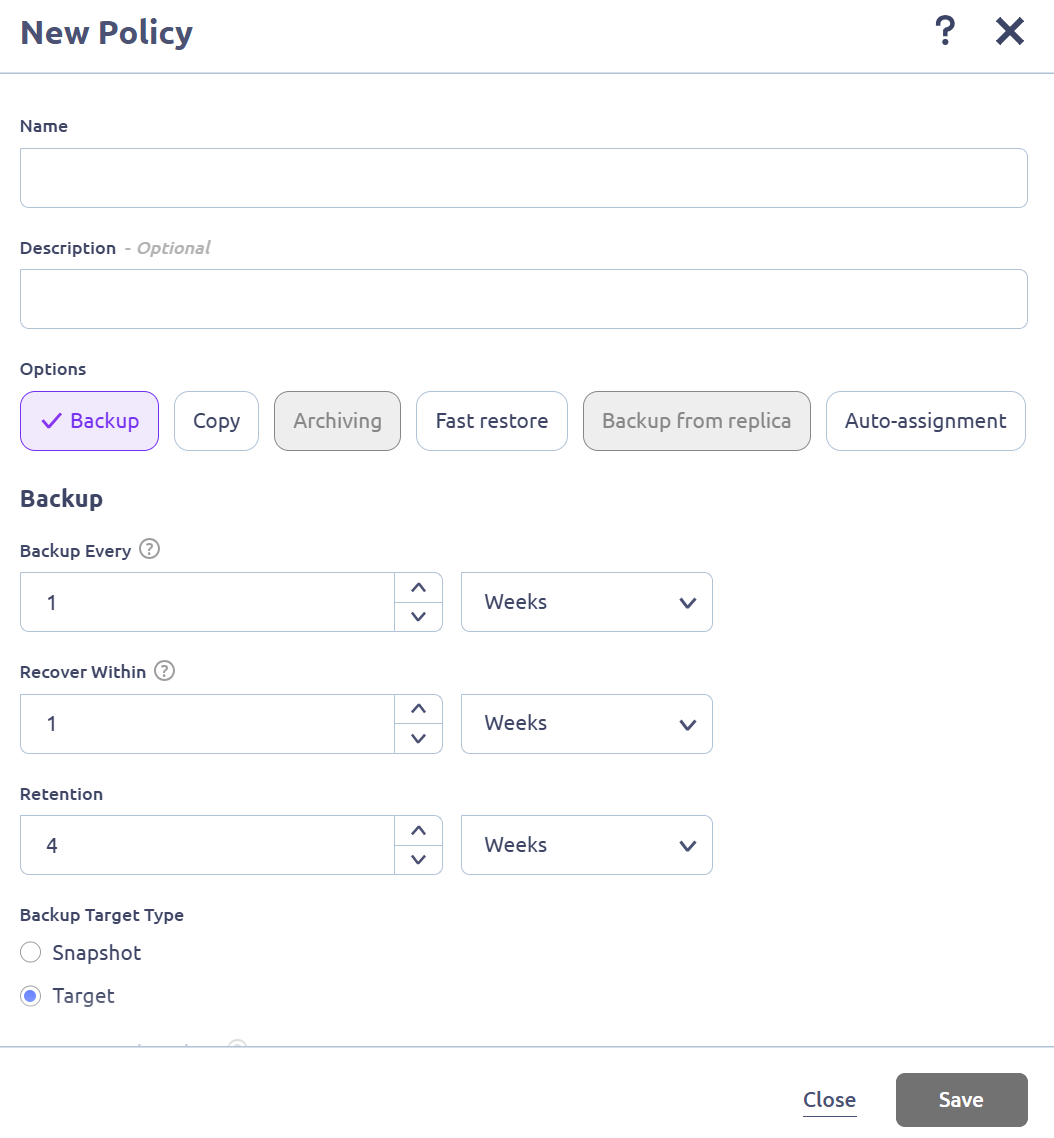
You will want to create a specific policy for this new backup target. To assign the Wasabi target to a policy, navigate to Policies on the left side pane. Select either a desired pre-existing policy and click Edit, or click New to create a custom policy.
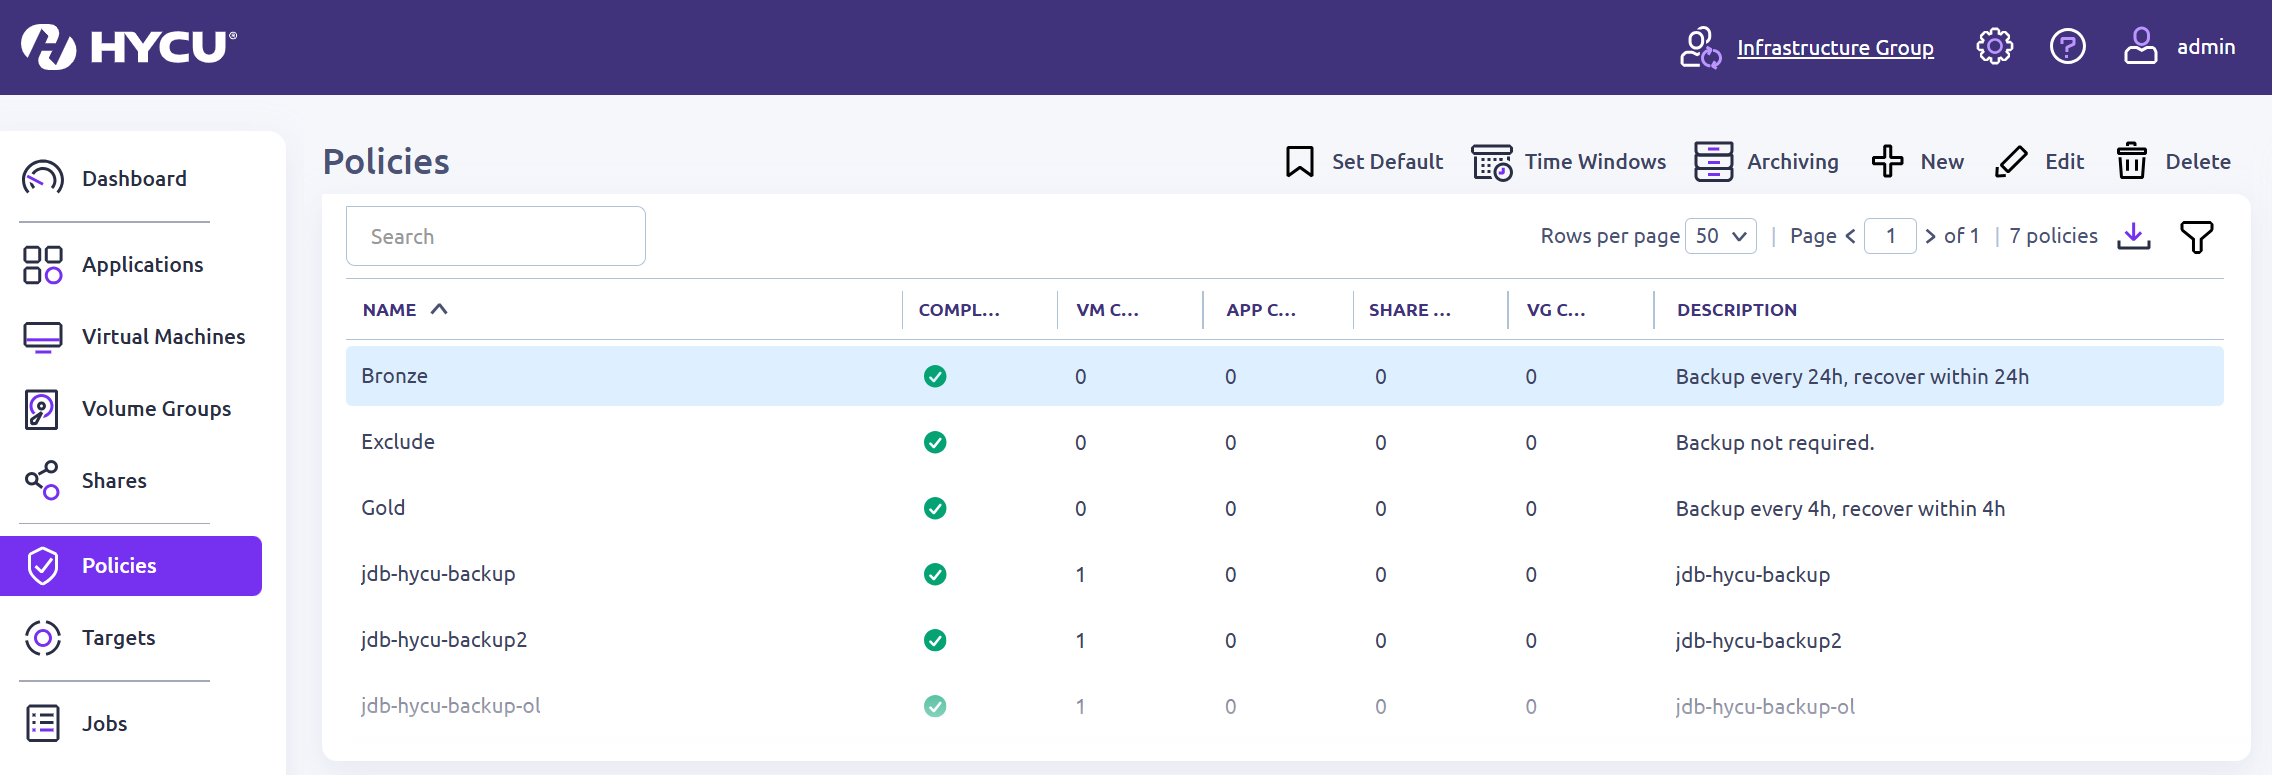
Once in the New Policy window, provide a unique Name and Description for the policy.
Set the Backup options, as needed (such as how often, recovery window, and retention period).
Set Backup Target Type as Target.
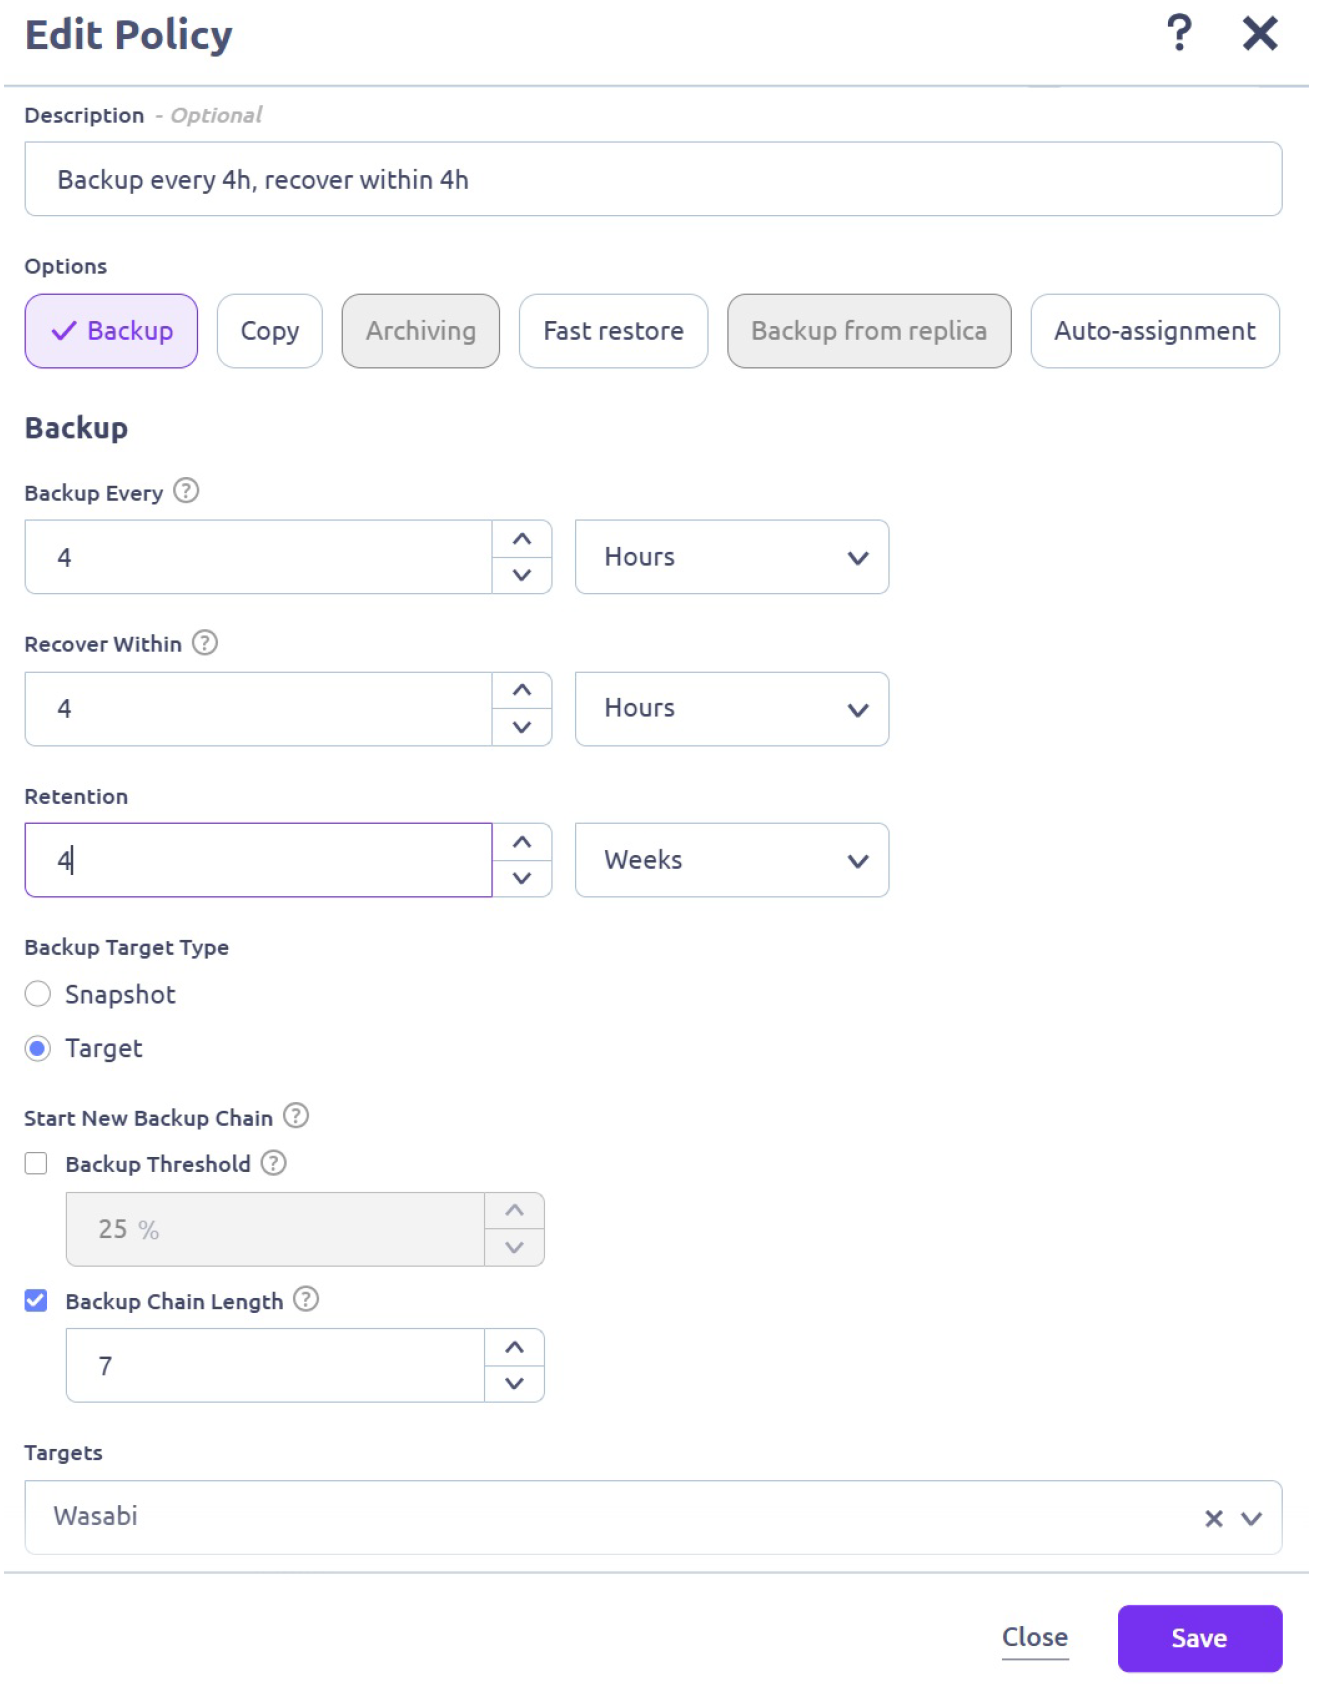
Starting a New Backup Chain Setting
Continuing from the previous instructions, select when you want a new Backup Chain to be started by selecting Threshold % or Chain Length. If you select both options, a new chain will be started whenever the first value is exceeded.
This setting can affect the size of your buckets and your storage usage.
Refer to Backup Expirations for more information.
Backup Threshold—A new backup chain is started when the percentage of the data changes since the last Full backup exceeds the specified value. The default value is 25%. This can lead to more Full backups during your specified retention period and increased storage.
Backup Chain Length—A new backup chain is started when the number of Full and subsequent incremental backups in a chain exceeds the specified value. The default value is 7. To keep the backup storage size to a minimum, set the Backup Chain length to the same value as the Retention.
The ideal Backup Chain Threshold or Chain Length setting can depend on multiple factors, such as Retention Policy, RTO, Storage Capacity, and Data Change Rate. Consult with HYCU Support to optimize these settings based on your environment variables. You can refer to HYCU's Policy Explanation for further insight. For details on the configuration elements, reference Setting up an AWS S3/Compatible target in the HYCU User Guide.
Click Save.
Assign the policy to the virtual machines that must be protected. To do so, navigate to Virtual Machines on the left pane. Select the required Virtual Machines. Click Set Policy.

The backup process will begin automatically.

Creating a Covert Copy
Once the backup has completed, depending on how often your backups are set to run and/or how big your dataset size is, you may want to pause your backup plans during this time to run the Covert Copy job without new data being placed into the bucket during replication.
After you have done that, open your Wasabi Console and log in.
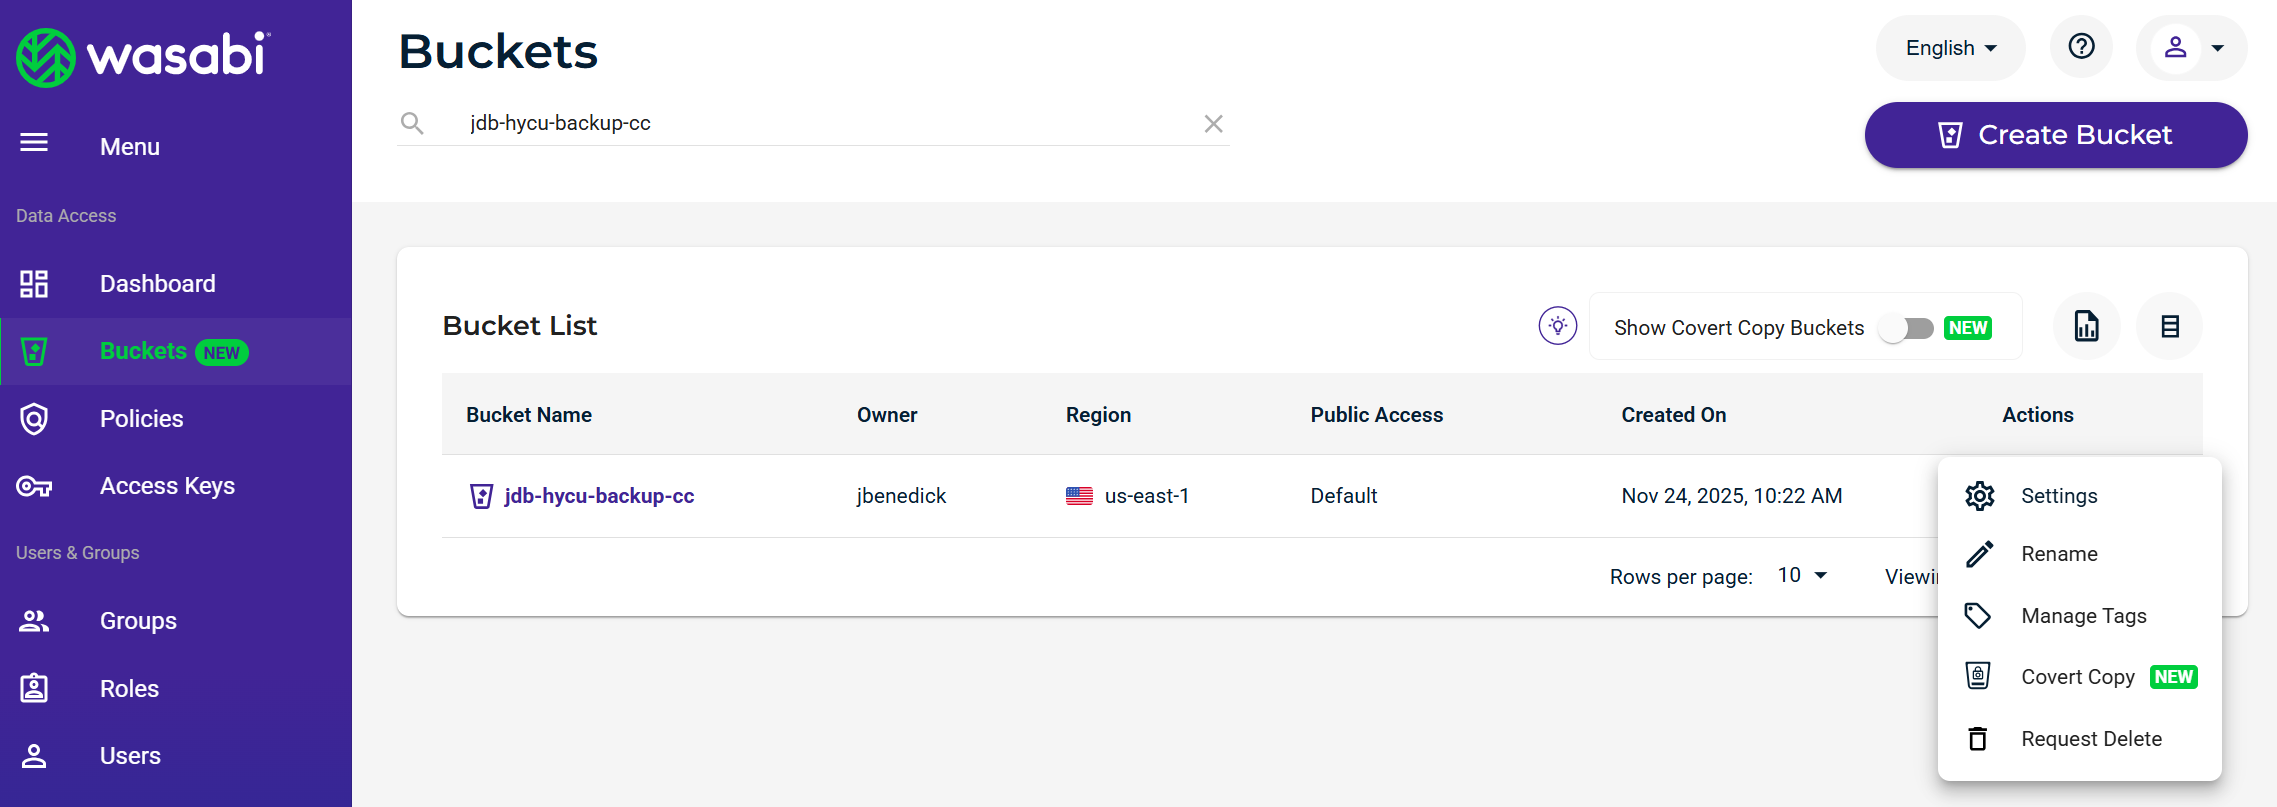
Go to the Buckets list and search for your HYCU version-enabled bucket.
Click the Actions option (three dots) to the right of the bucket name.
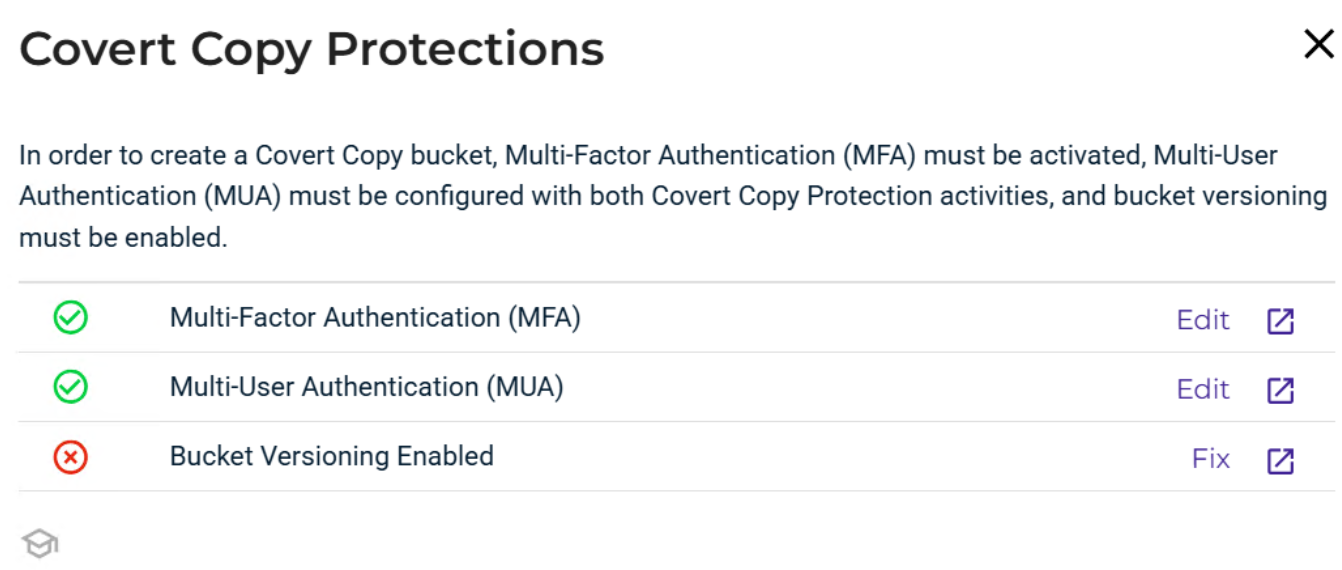
Select Covert Copy.
If you did not enable MUA, MFA, or Versioning, an error will result for the option that needs to be enabled. In this example, versioning was not enabled and this must be fixed before you continue:
Select the Region in which you want to create your Covert Copy bucket.
Because this is a new Full backup, select All versions and All objects.
Click Next.
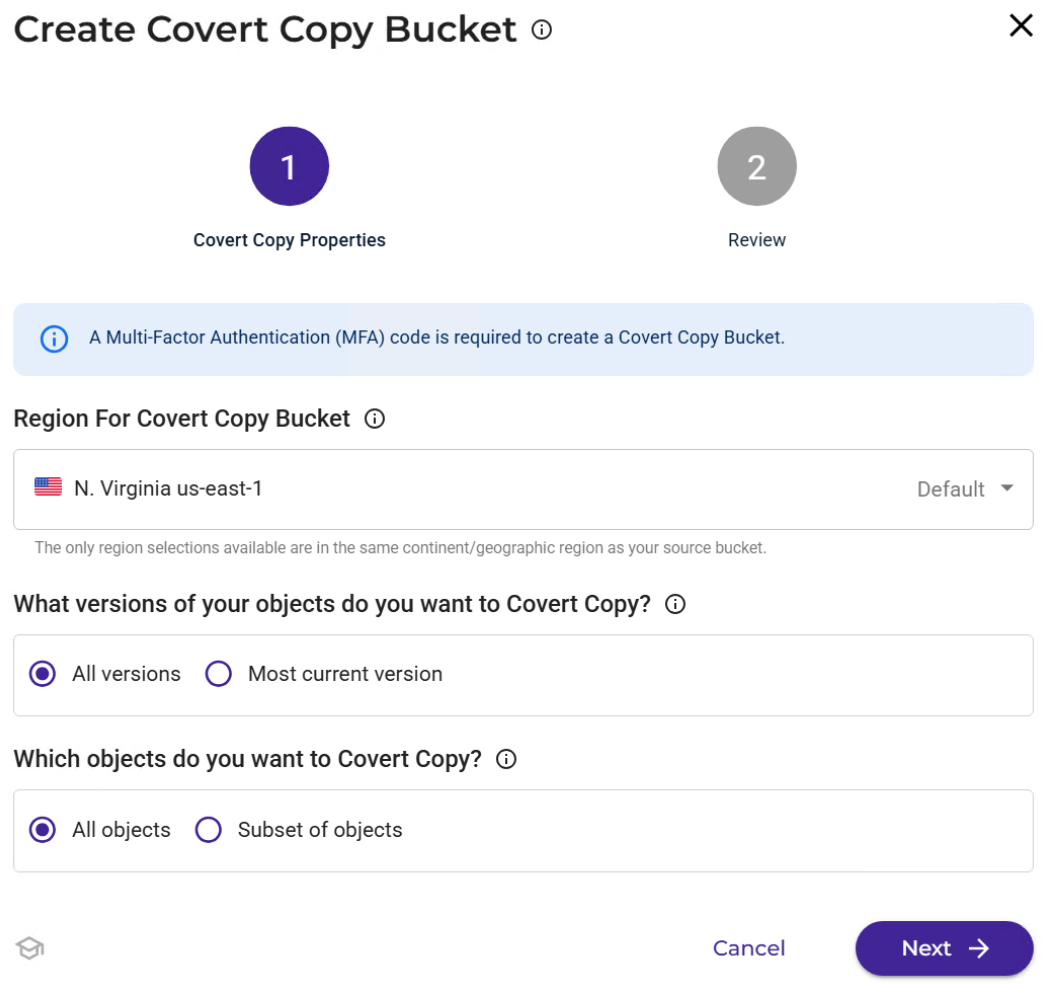
Input your MFA code. Click Create Bucket.

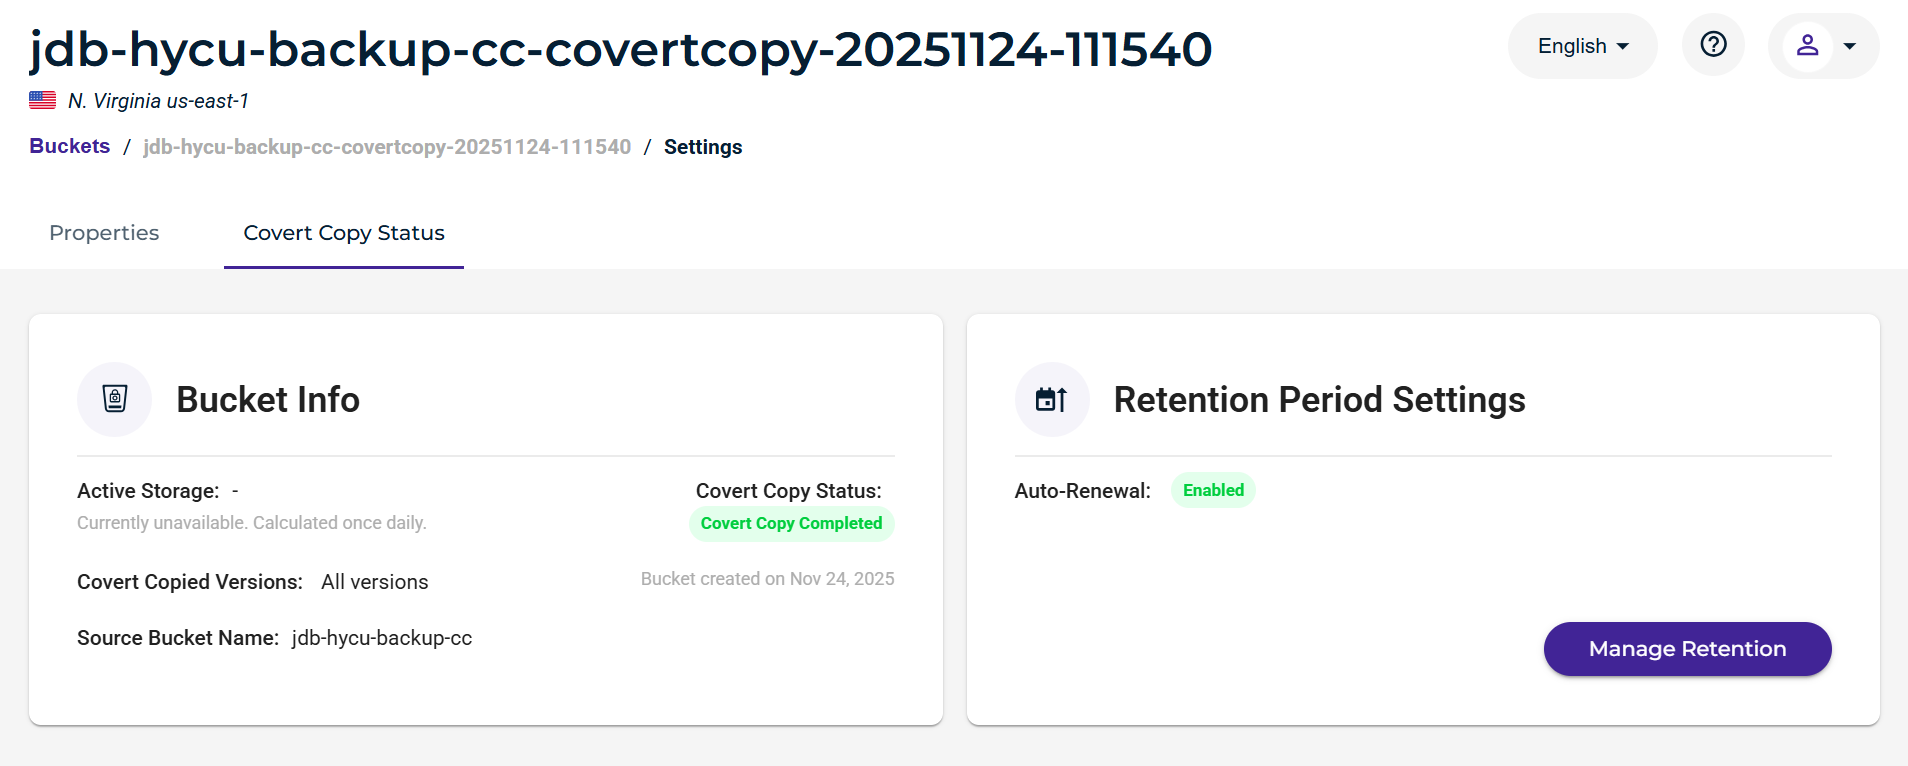
Monitor the status of the copy job. Click Actions (three dots) and select Settings to view the job progress.
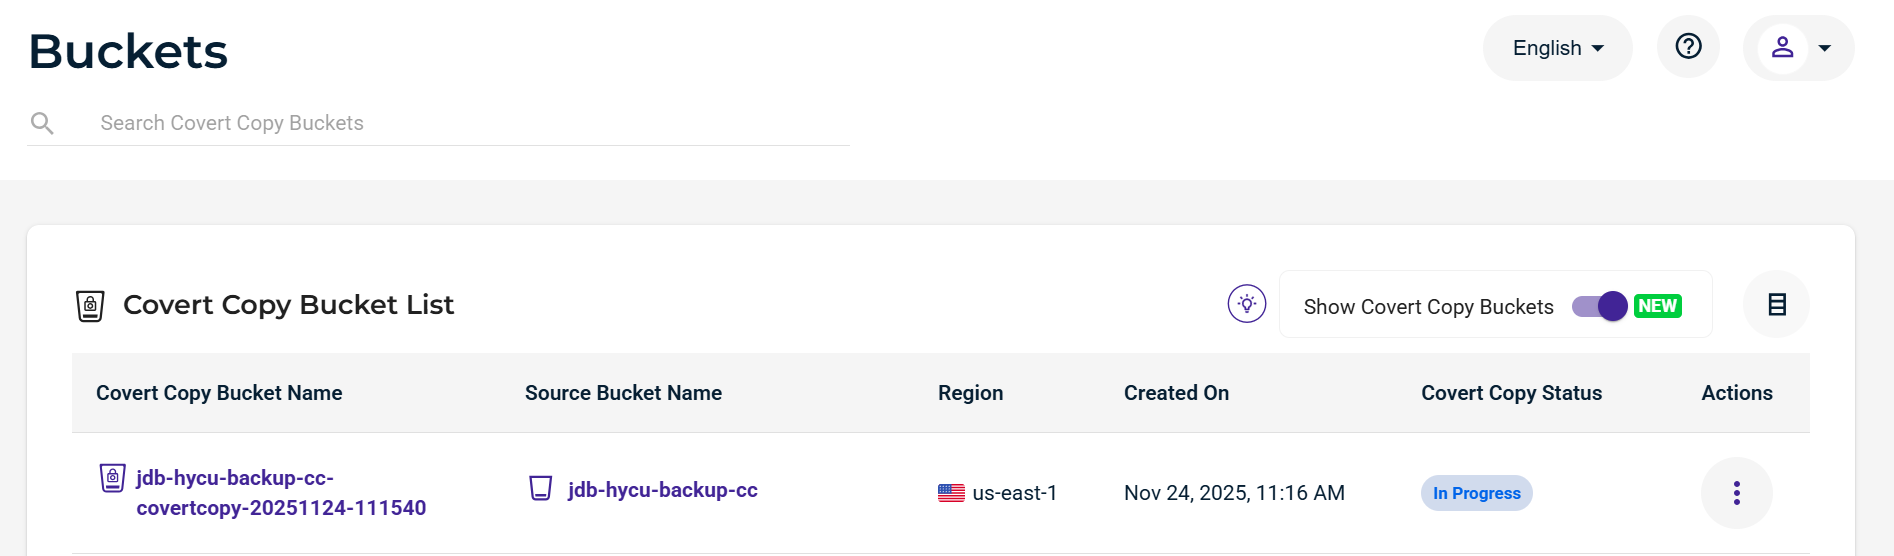
Once the job is complete, the status will update to Covert Copy Completed.
Your Golden Copy of data is protected and ready to be restored in the event of a disaster.
Viewing inside the bucket will require MUA approval. If you click on the bucket name, you will see the following prompt. To proceed, click Send Request and wait for the request to be approved.
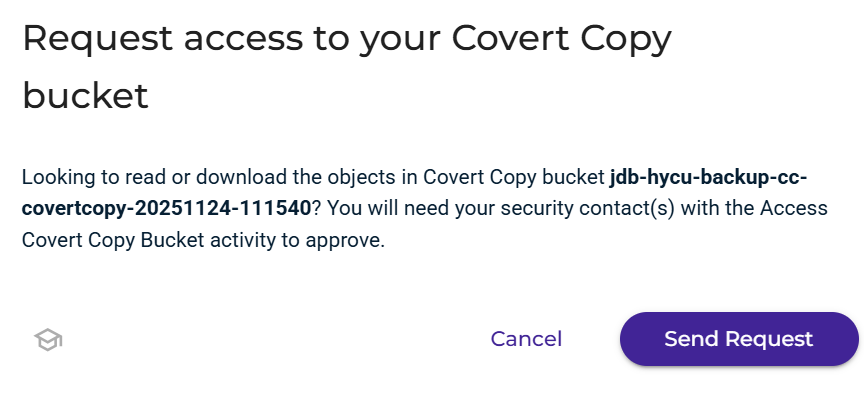
Standard Bucket access approved by the MUA request provides the ability to view the data inside the bucket and retrieve data if necessary but just not in high quantities or viewable by the backup provider. If you need to restore datasets, you will need to open a Support ticket to enable Restore Mode so that the bucket can be seen by the backup provider.
Restore Mode
To restore your data from a Covert Copy bucket with HYCU, you will need to spin up another HYCU Backup Controller instance that is running in Recovery Mode. For instructions on how to do that, refer to the HYCU User Guide under the section describing how to deploying a recovery HYCU backup controller. You will also need to make sure your previous Hypervisor or Source was added so that the data can be restored to its original location.
To restore your data from the Covert Copy bucket:
Use this email address to contact Wasabi Support so they can set your Covert Copy into a Restore Mode-only capacity: support@wasabi.com.
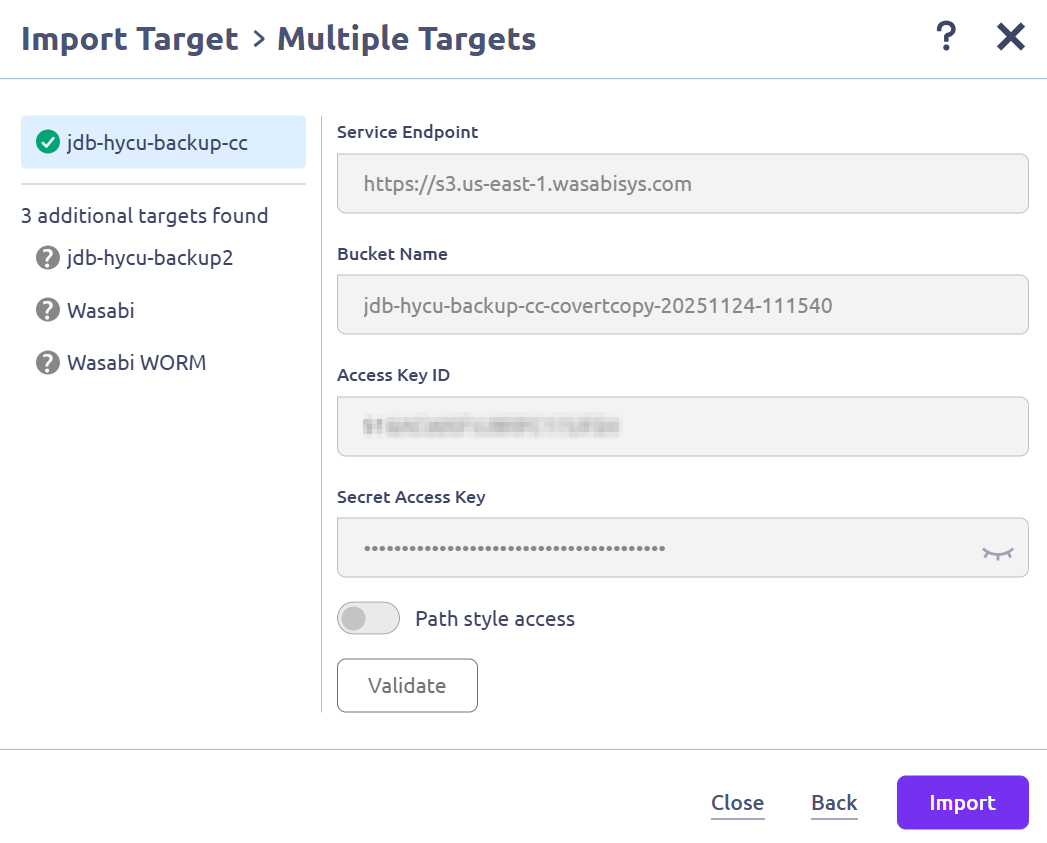
Once they have notified you that the bucket is in Restore Mode, you will need to go to the HYCU Backup Controller running in Recovery Mode and import the Target Wasabi Covert Copy Bucket.
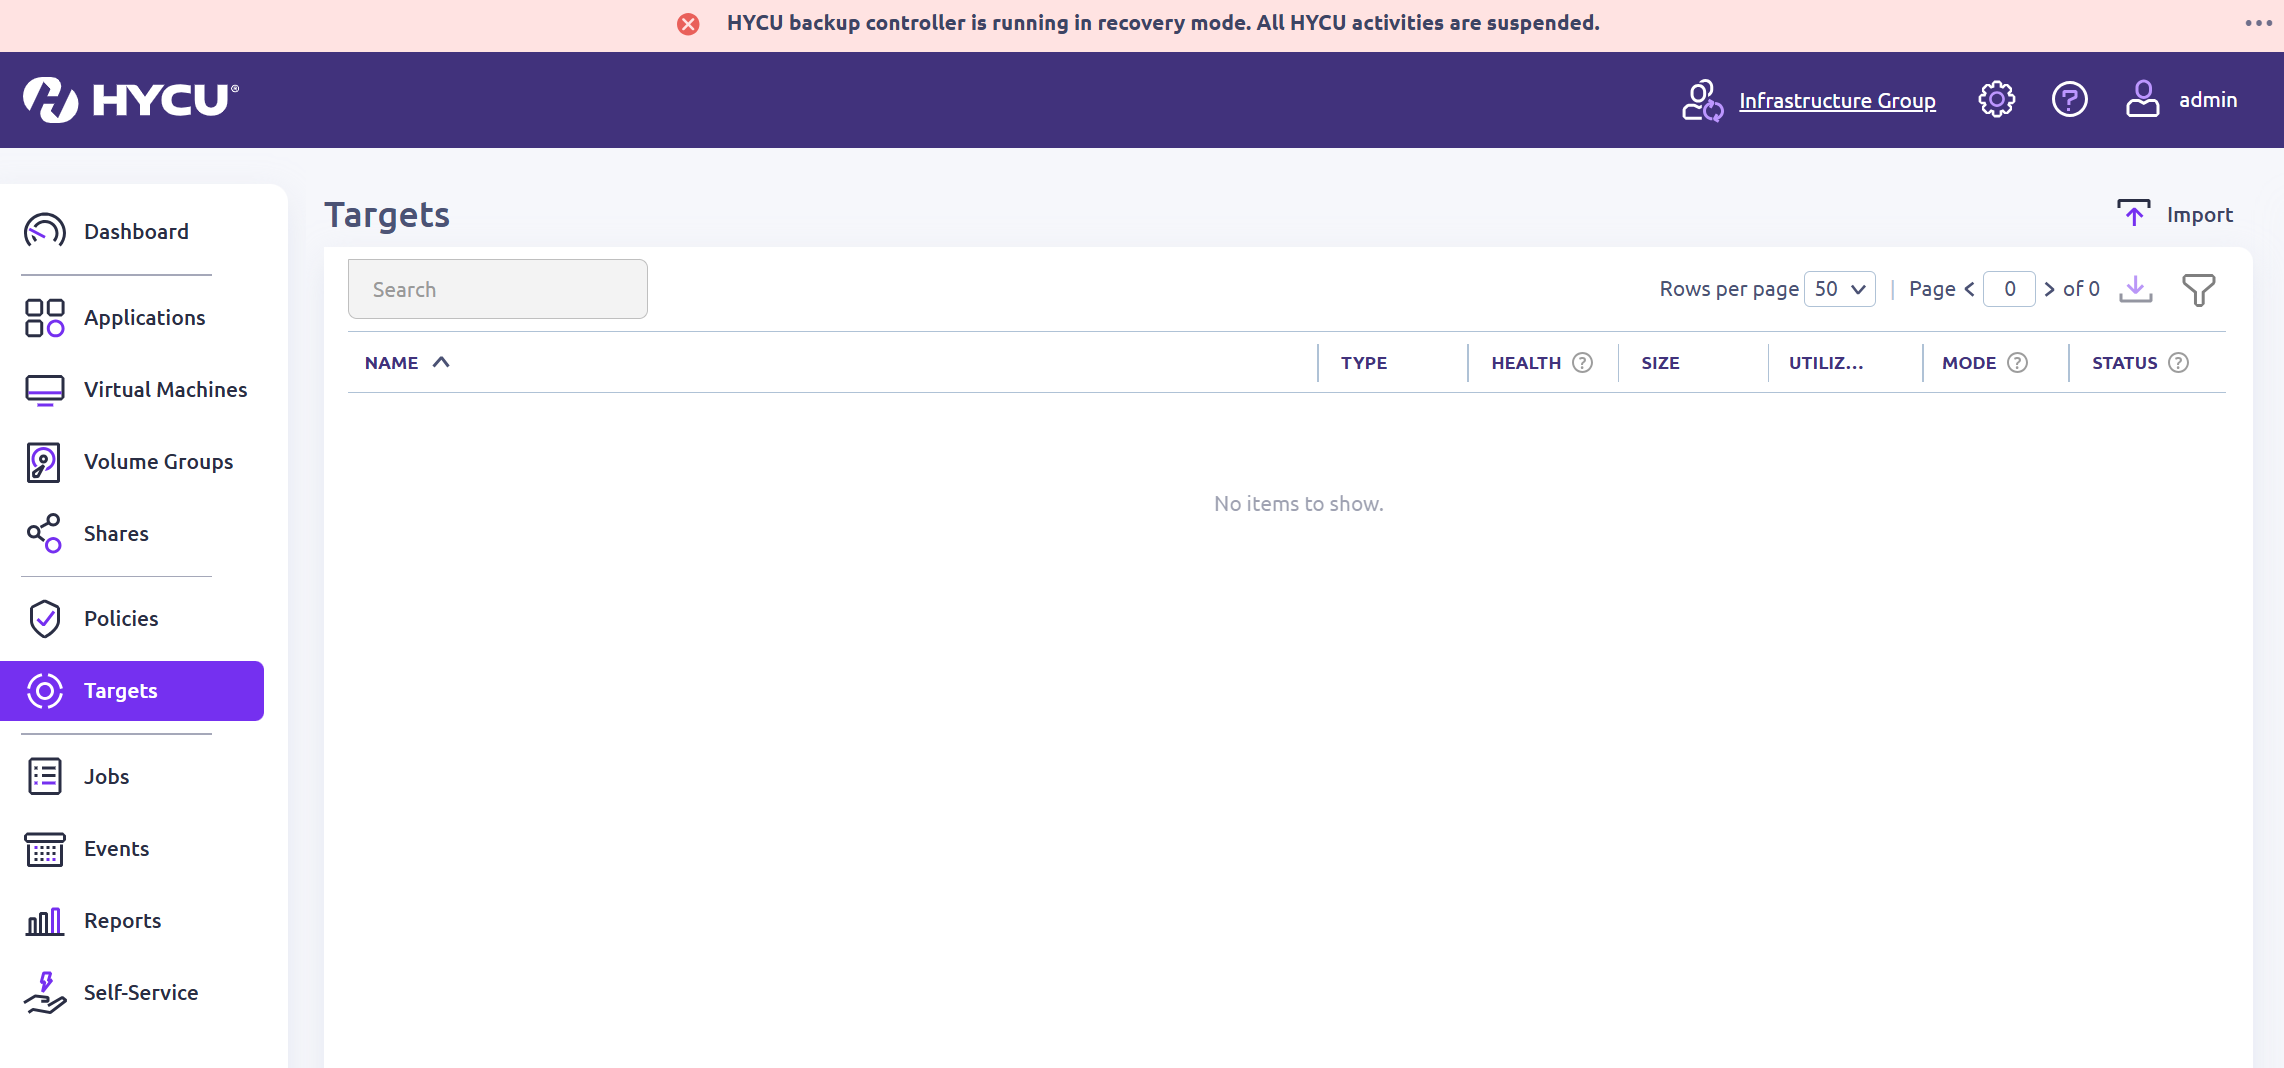
Click Import.
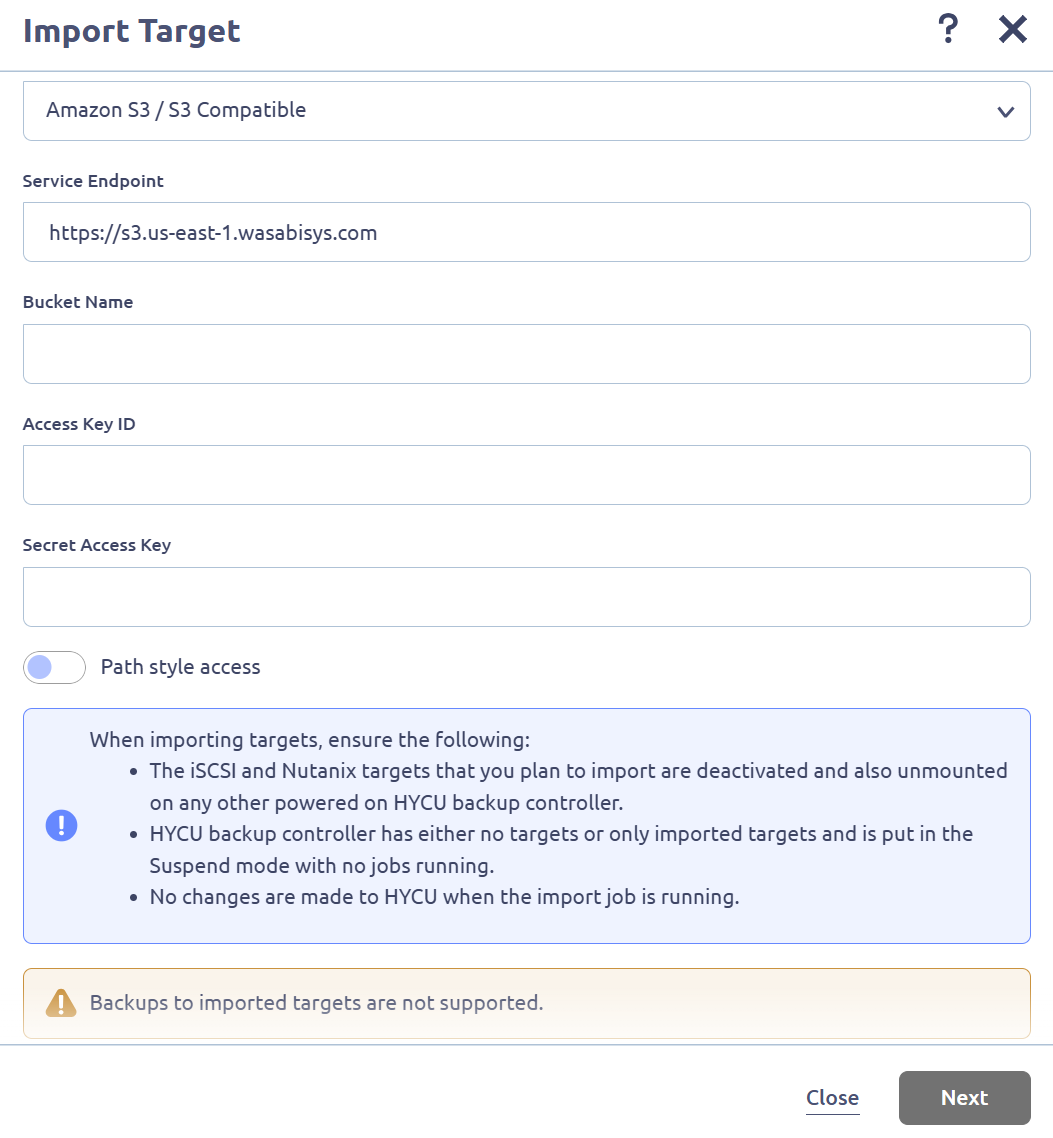
Fill in the following information.
Type—From the drop-down, select Amazon S3 / S3 Compatible.
Service Endpoint—Specify the Wasabi URL where your Covert Copy bucket is located.
Bucket Name—Get the Covert Copy bucket name from your Wasabi Console.
Access Key ID—Input your Wasabi access key.
Secret Access Key—Input your Wasabi secret key.
Click Next.
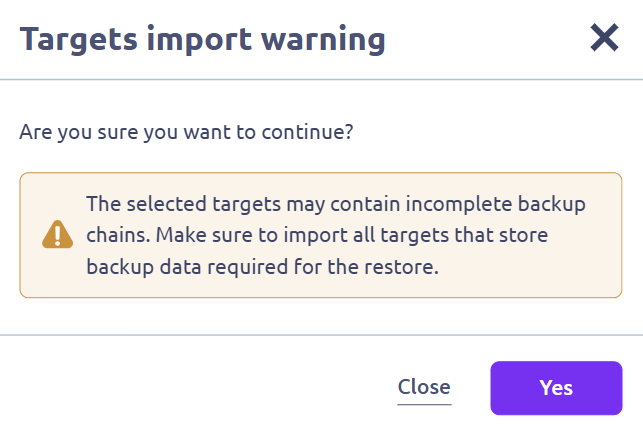
Verify the imported information. Click Next.
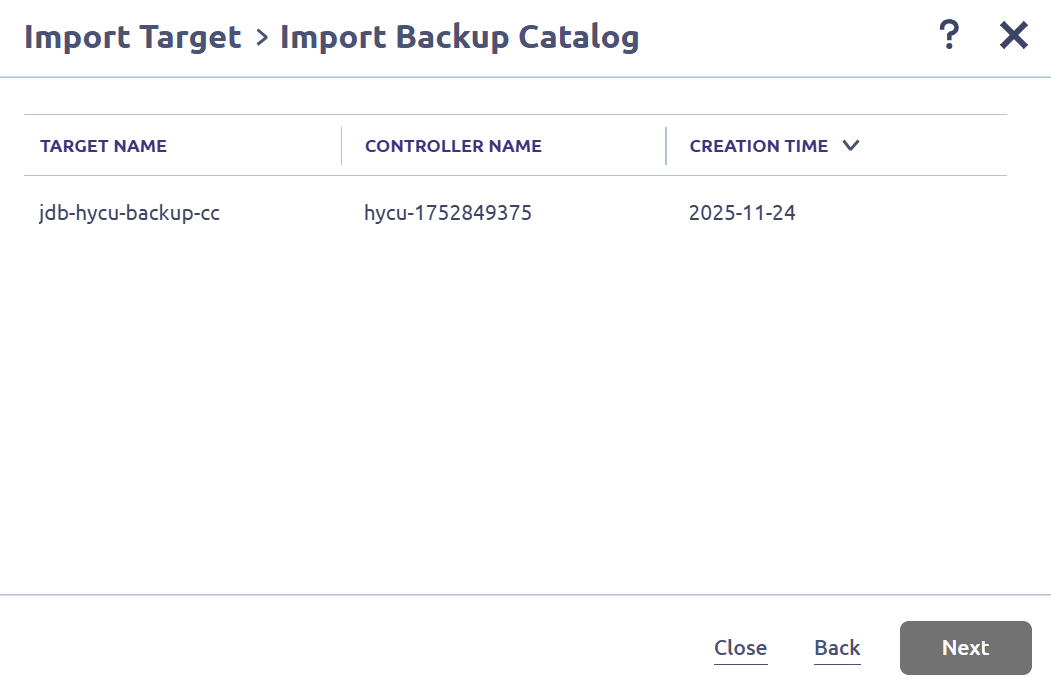
Click Import.
Click Yes.
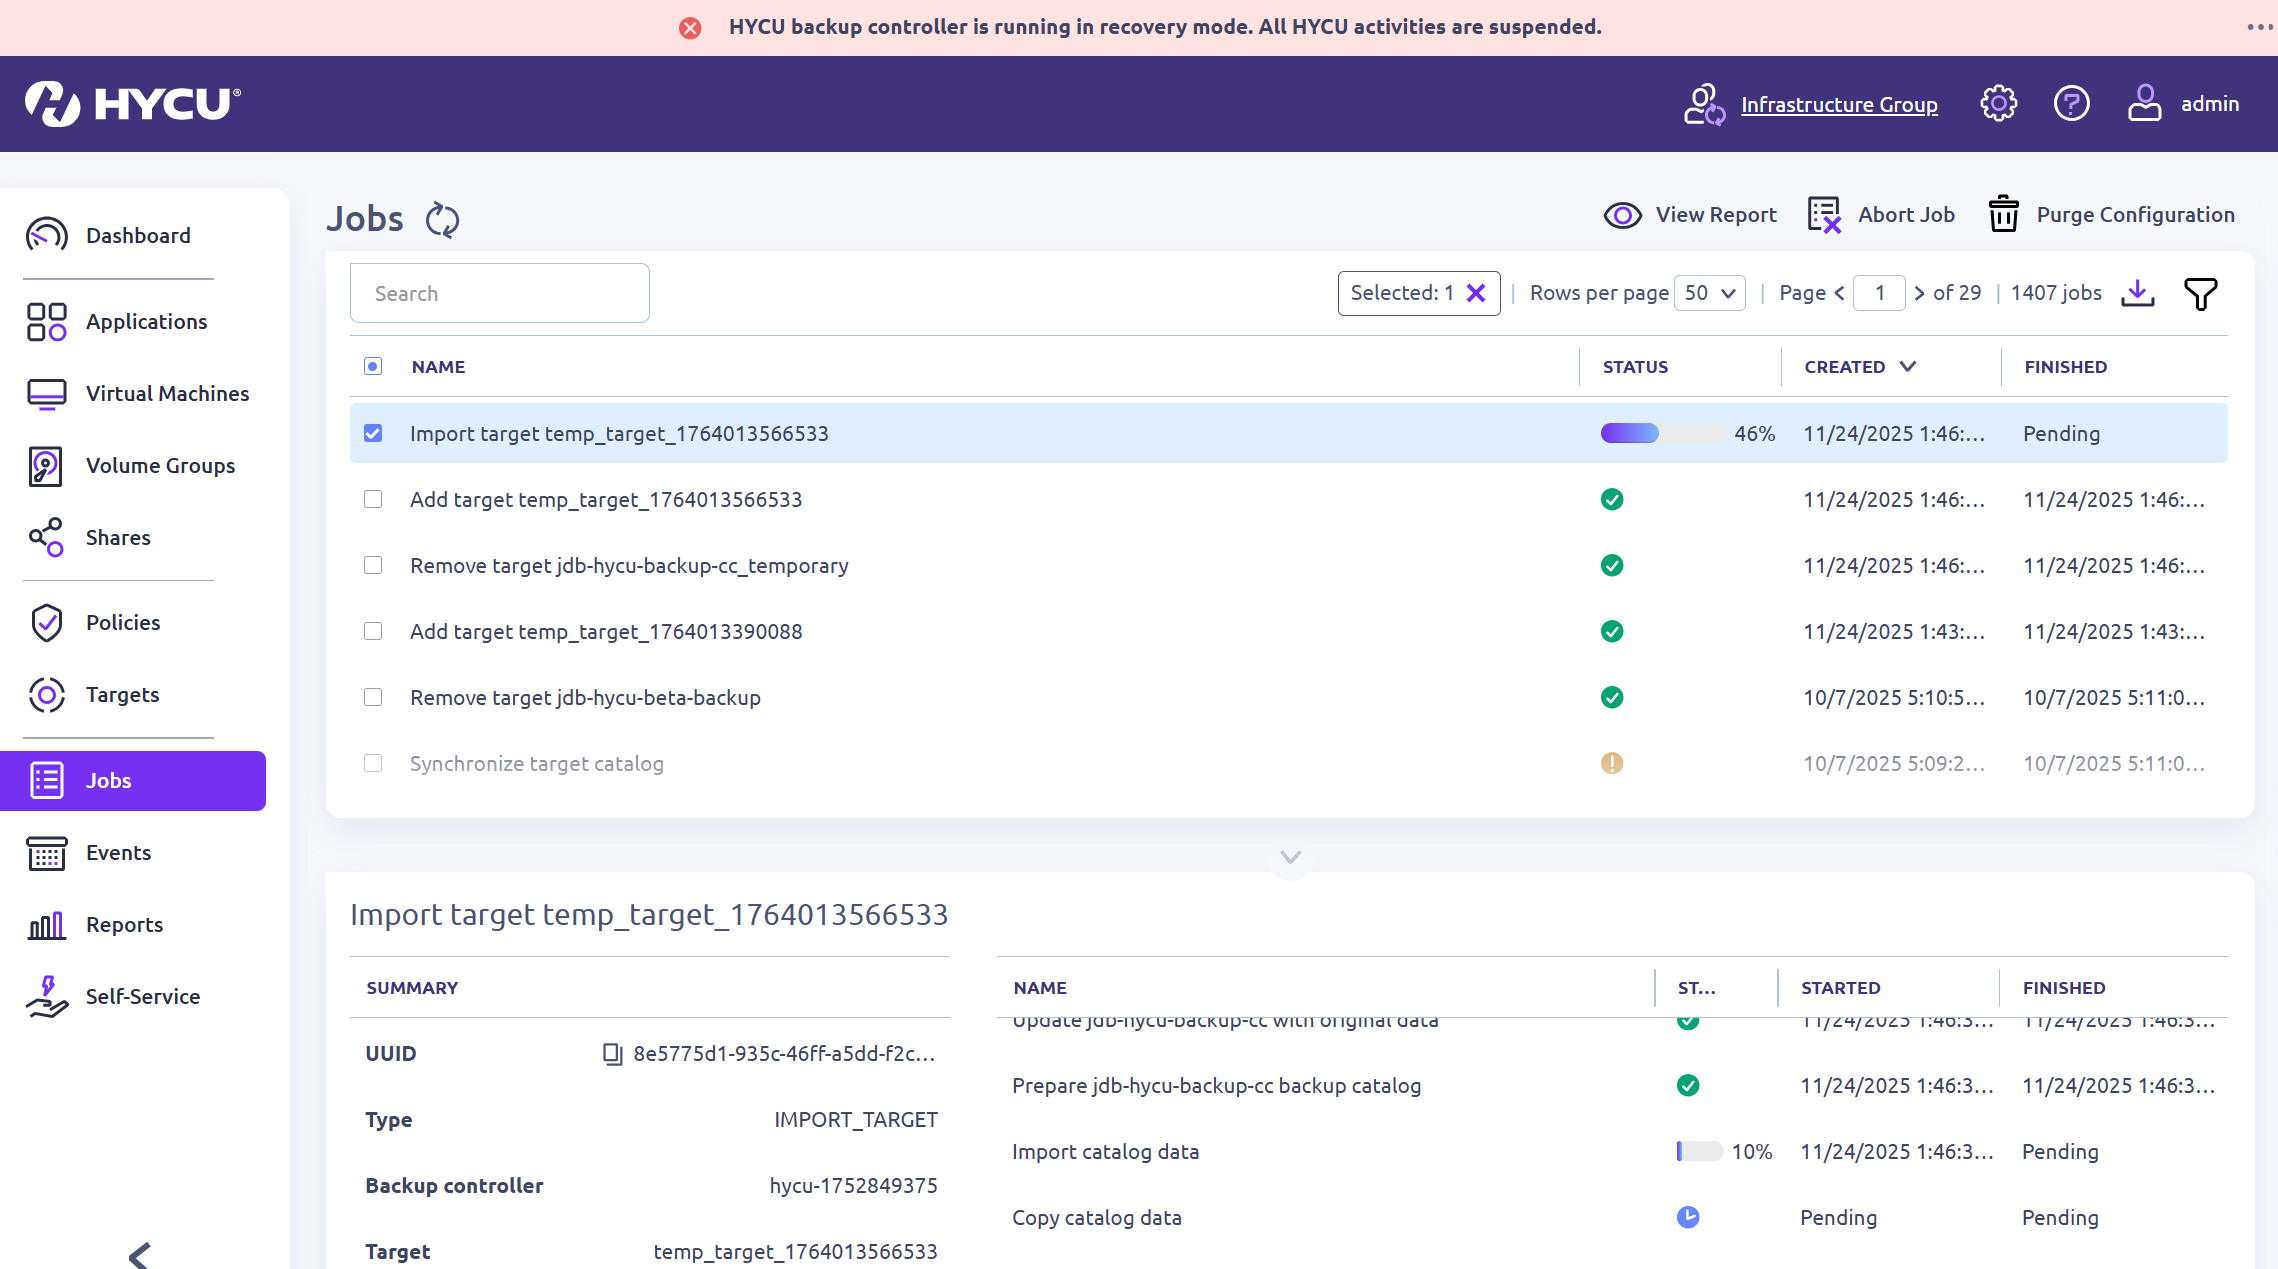
You can monitor the status of the job and wait for it to complete.
After the import has completed, you can check your virtual machines that were a part of your backup and verify that the Restore points are listed.
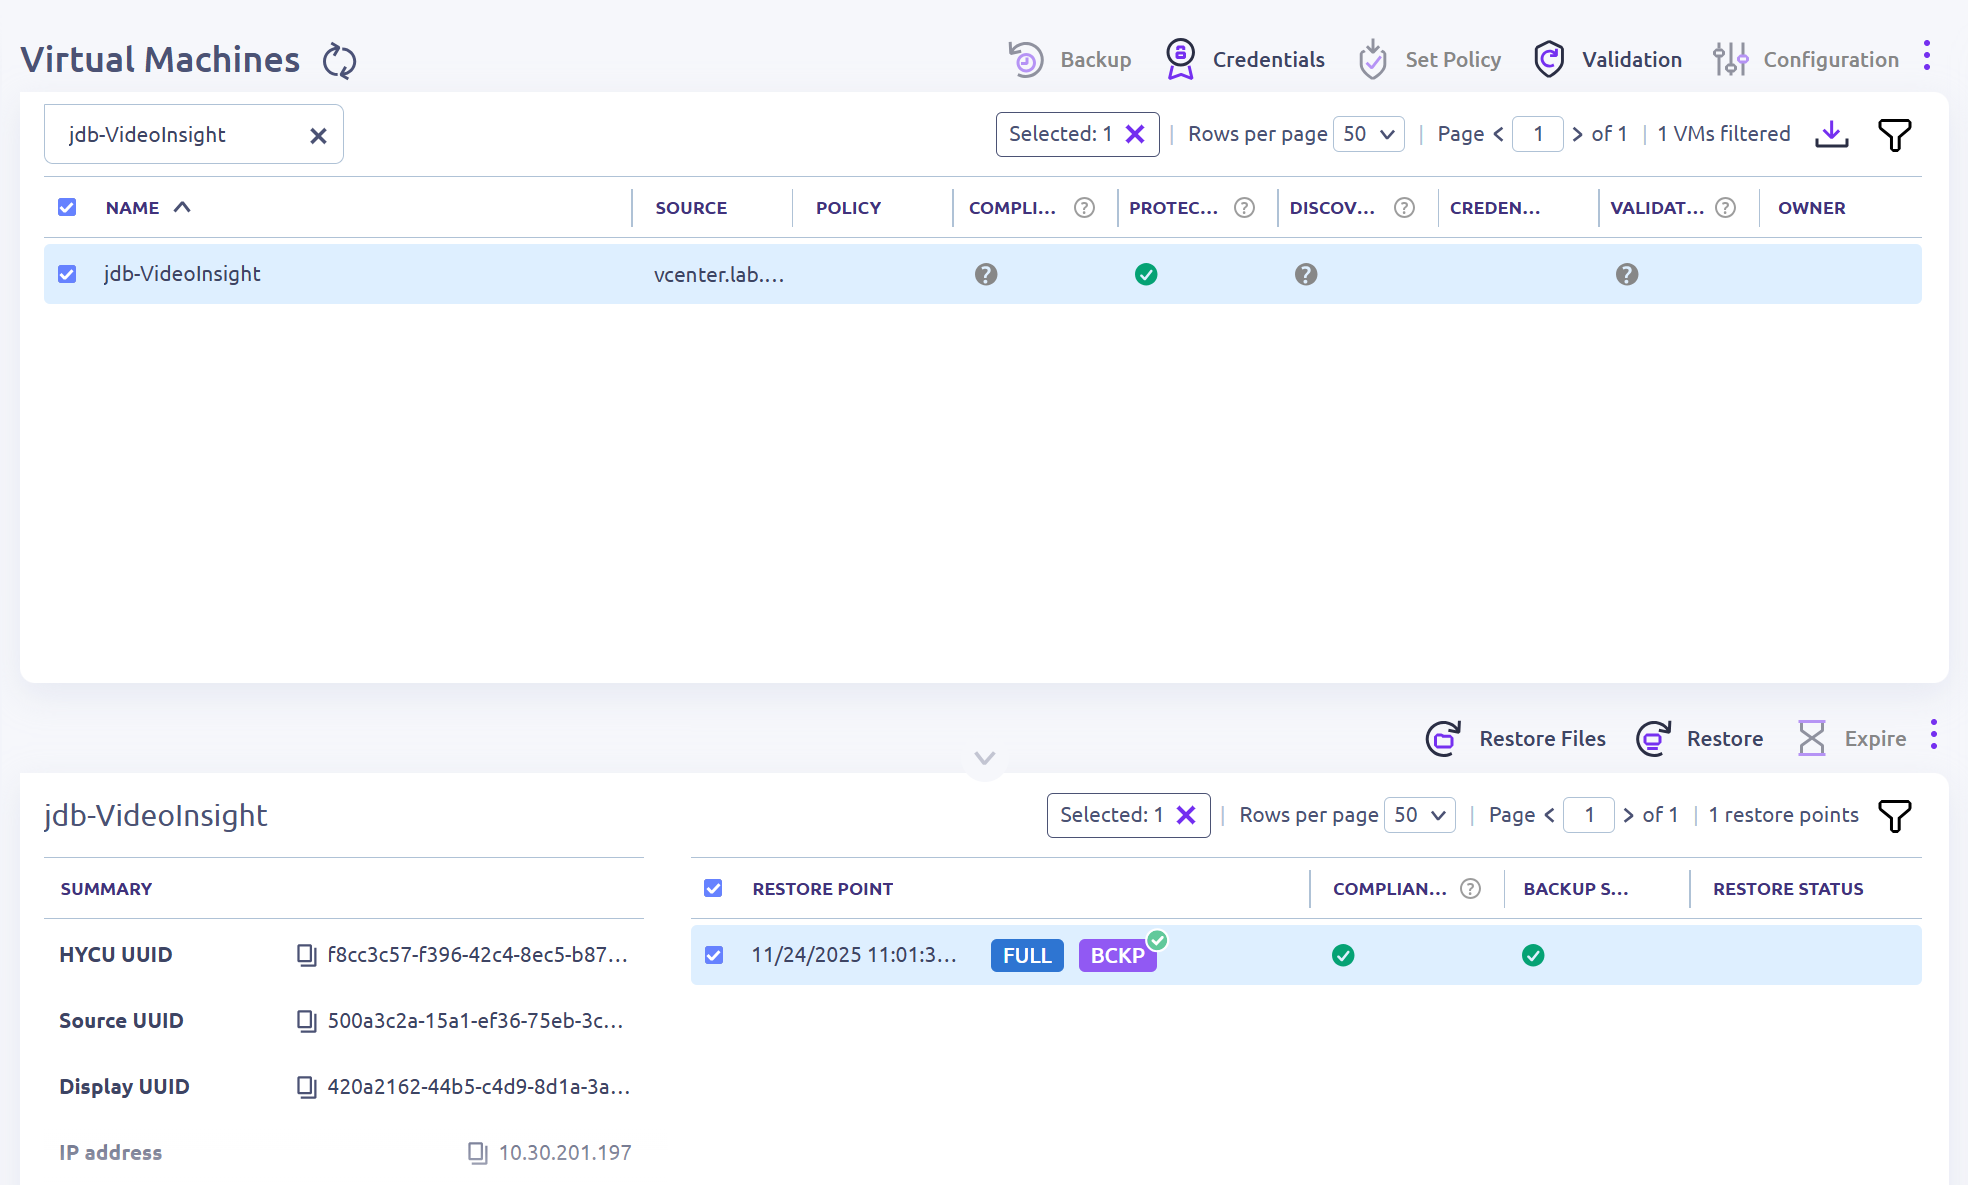
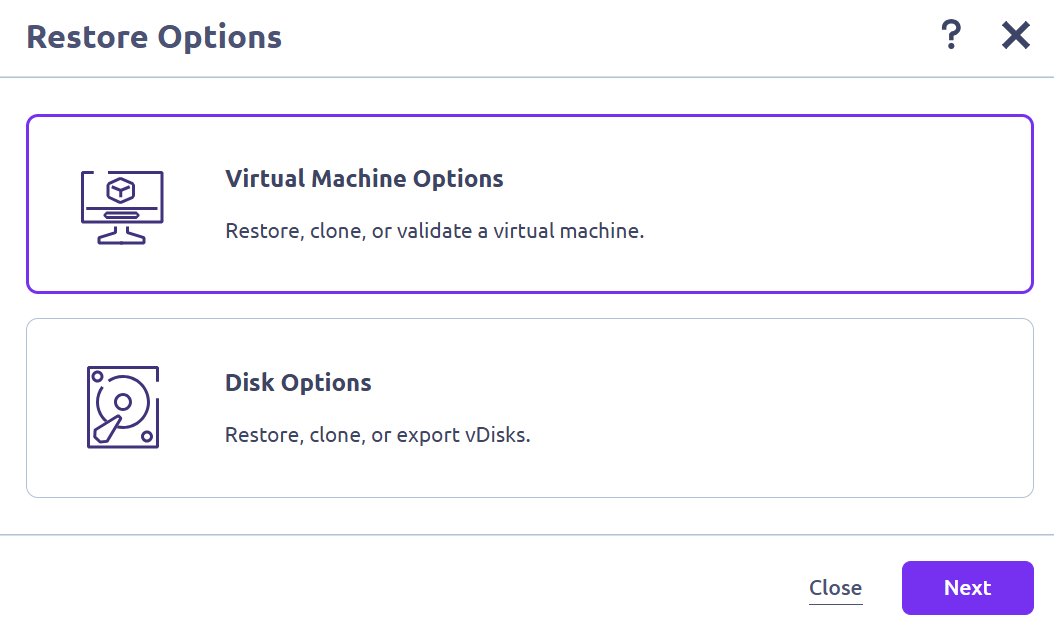
Click Restore and choose the options you want to restore.
After you complete all Restore steps for your data, delete the policy and target from the HYCU Backup Controller environment.
Once you have deleted the Covert Copy references in HYCU, use this email to contact Wasabi Support to turn off Restore Mode on your bucket so that it is hidden again: support@wasabi.com.