QNAP Hybrid Backup Sync 3 (HBS 3) has been validated for use with Wasabi. For information on how HBS 3 works with Wasabi, refer to QNAP.
This article describes the procedure to use Wasabi Covert Copy to protect a Golden Copy of HBS 3 backups for use in case of a disaster that affects other copies of backups.
Covert Copy’s incremental support functionality works with QNAP HBS 3. For more information about how Covert Copy supports incremental backups, refer to Covert Copy: Using Incremental Support.
The data restoration process is handled by your specific backup software application. As many variables can affect your unique environment, Wasabi strongly recommends that you seek guidance from your backup software’s technical support team if you encounter difficulties or have application-specific inquiries.
Requirements
QNAP HBS 3 version installed and licensed. This solution was tested with version 26.4.0.521.
An active Wasabi Hot Cloud Storage account.
Active HBS 3 backup job pointing to a Wasabi bucket.
Existing backups reside in a Wasabi Object-Locked (immutable) bucket. The Object Lock feature must have been enabled on the bucket previously.
Multi-Factor Authentication is enabled for the Wasabi account root user. See MFA (Multi-Factor Authentication) for details on how to enable and use MFA on your account.
High-Level Steps
Follow the high-level steps below to implement Covert Copy for your HBS 3 backups. These are detailed further in the sections below.
Enable Multi-User Authorization (MUA) on your account and configure Covert Copy activities that your security contacts approve.
Pause HBS 3 backup activities to Wasabi.
Enable Covert Copy on your bucket containing HBS 3 backups.
Wait for your backups to be copied to the Covert Copy bucket.
Resume backup activities.
In the case of a disaster, a Wasabi Support ticket needs to be created to place the Covert Copy bucket in Restore Mode and make it visible to HBS 3. A restore may then be performed from the Covert Copy bucket.
Enabling Multi-User Authorization (MUA) on Your Account
Log in to the Wasabi Console.
Click Security in the navigation panel. Click MUA.
.png)
If you have existing security contact(s), follow this step. If you do not have existing security contact(s), follow Step 4.
Click the three vertical dots under Action. Click Edit Activities.
.png)
Click the down arrow under Activities.
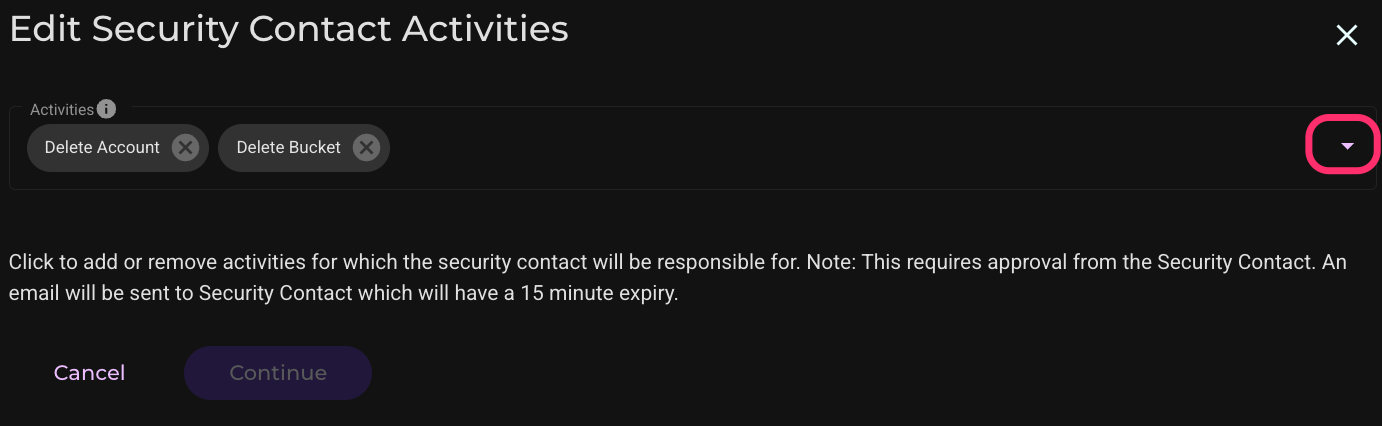
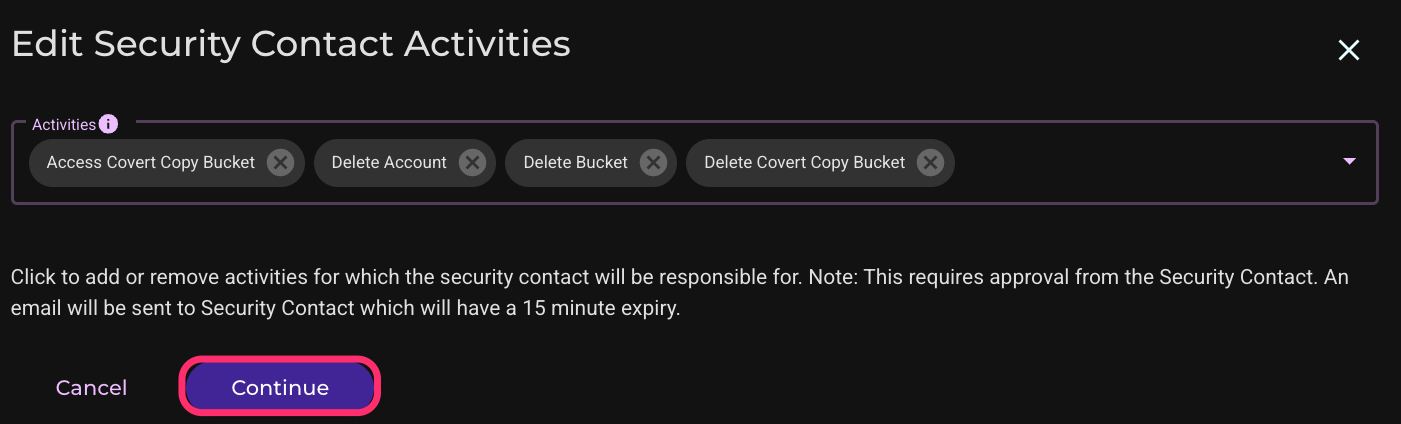
Click the checkboxes to Delete Covert Copy Bucket and Access Covert Copy Bucket.
.png)
Click Continue.
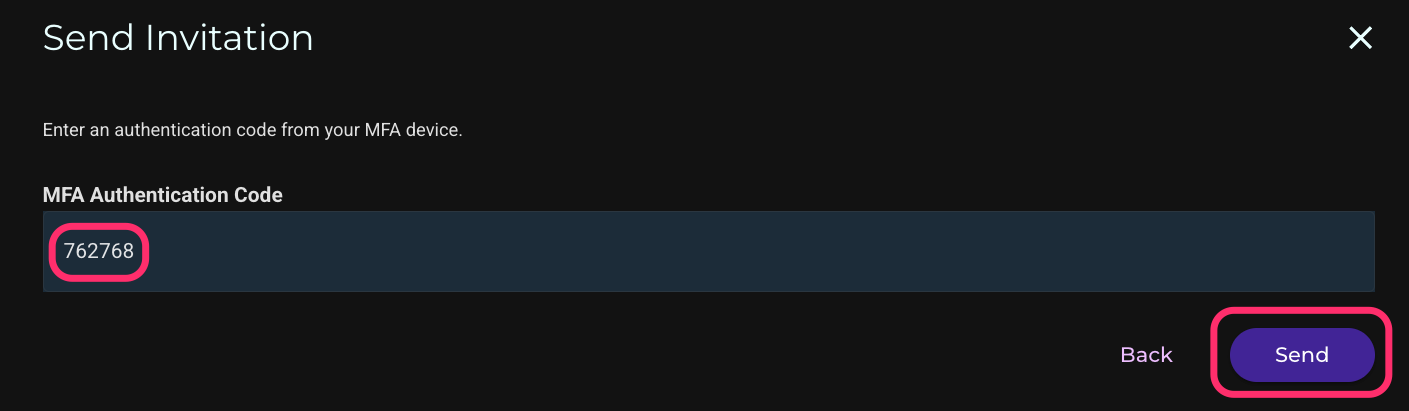
Enter your Multi-Factor Authentication (MFA) code. Click Send. This will send an invitation to your security contact, who must approve within 15 minutes for the changes to take effect.
Repeat Step 3 for your other security contact(s).
If you do not have any security contacts,
Click Add Security Contact.
.png)
Enter the security contact’s email address and select all activities.
.png)
Click Continue.
.png)
Enter your Multi-Factor Authentication (MFA) code and click Send. This will send an invitation to your security contact, who must approve within 15 minutes for the changes to take effect.
.png)
Repeat Step 4 for your other security contact(s).
Enabling Covert Copy Email Notifications
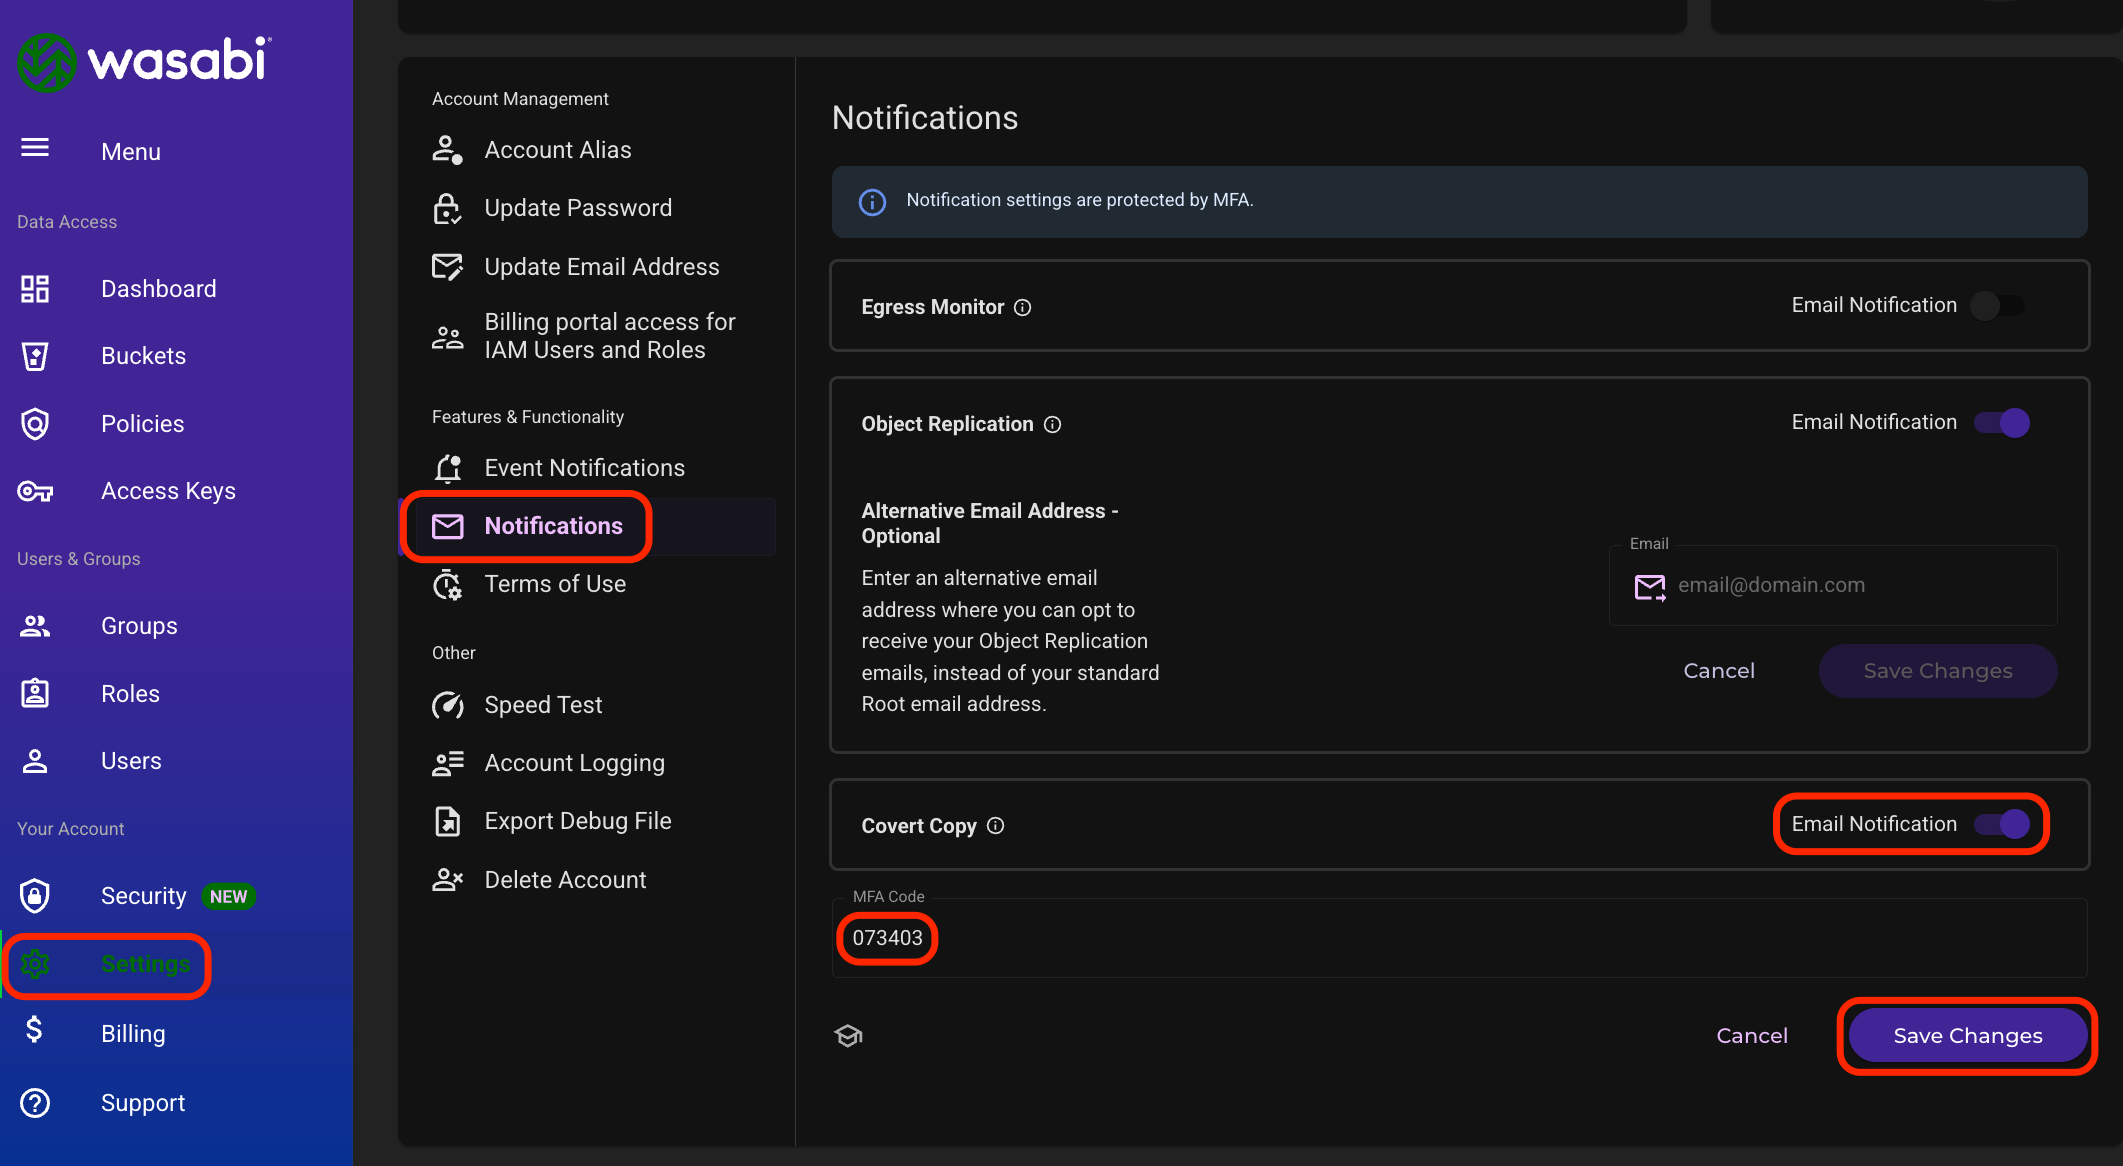
In the Wasabi Console, click Settings.
Click Notifications.
Click to toggle to enable Email Notification next to Covert Copy.
Enter your MFA code.
Click Save Changes.
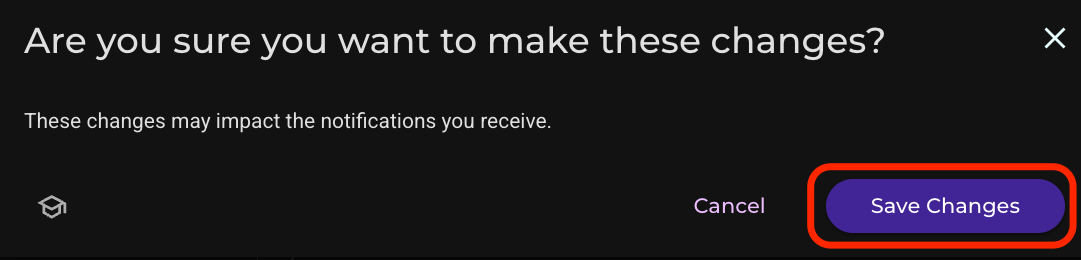
Click Save Changes on the pop-up window.
Pausing HBS 3 Backup Activities
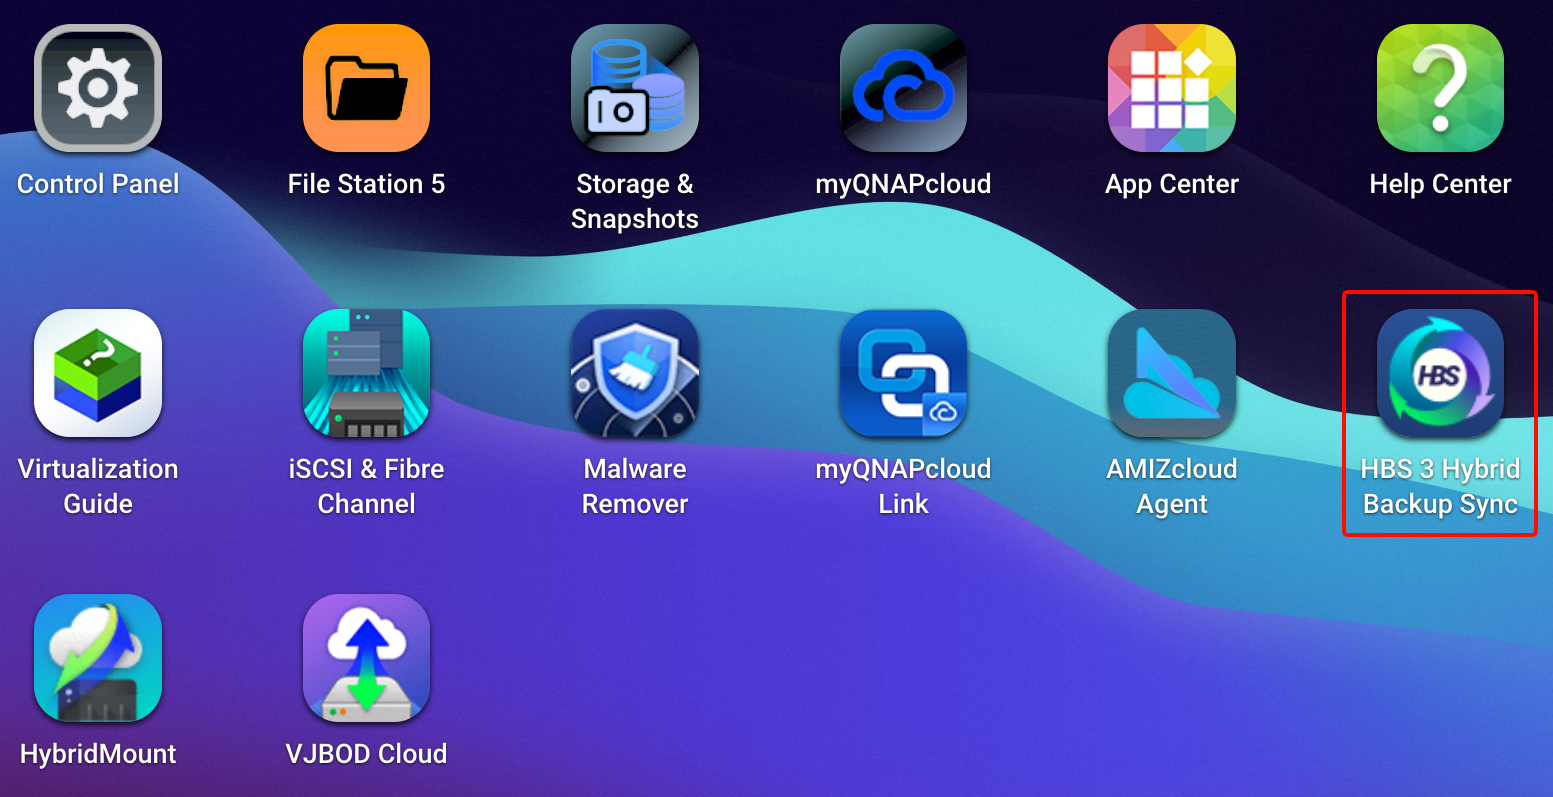
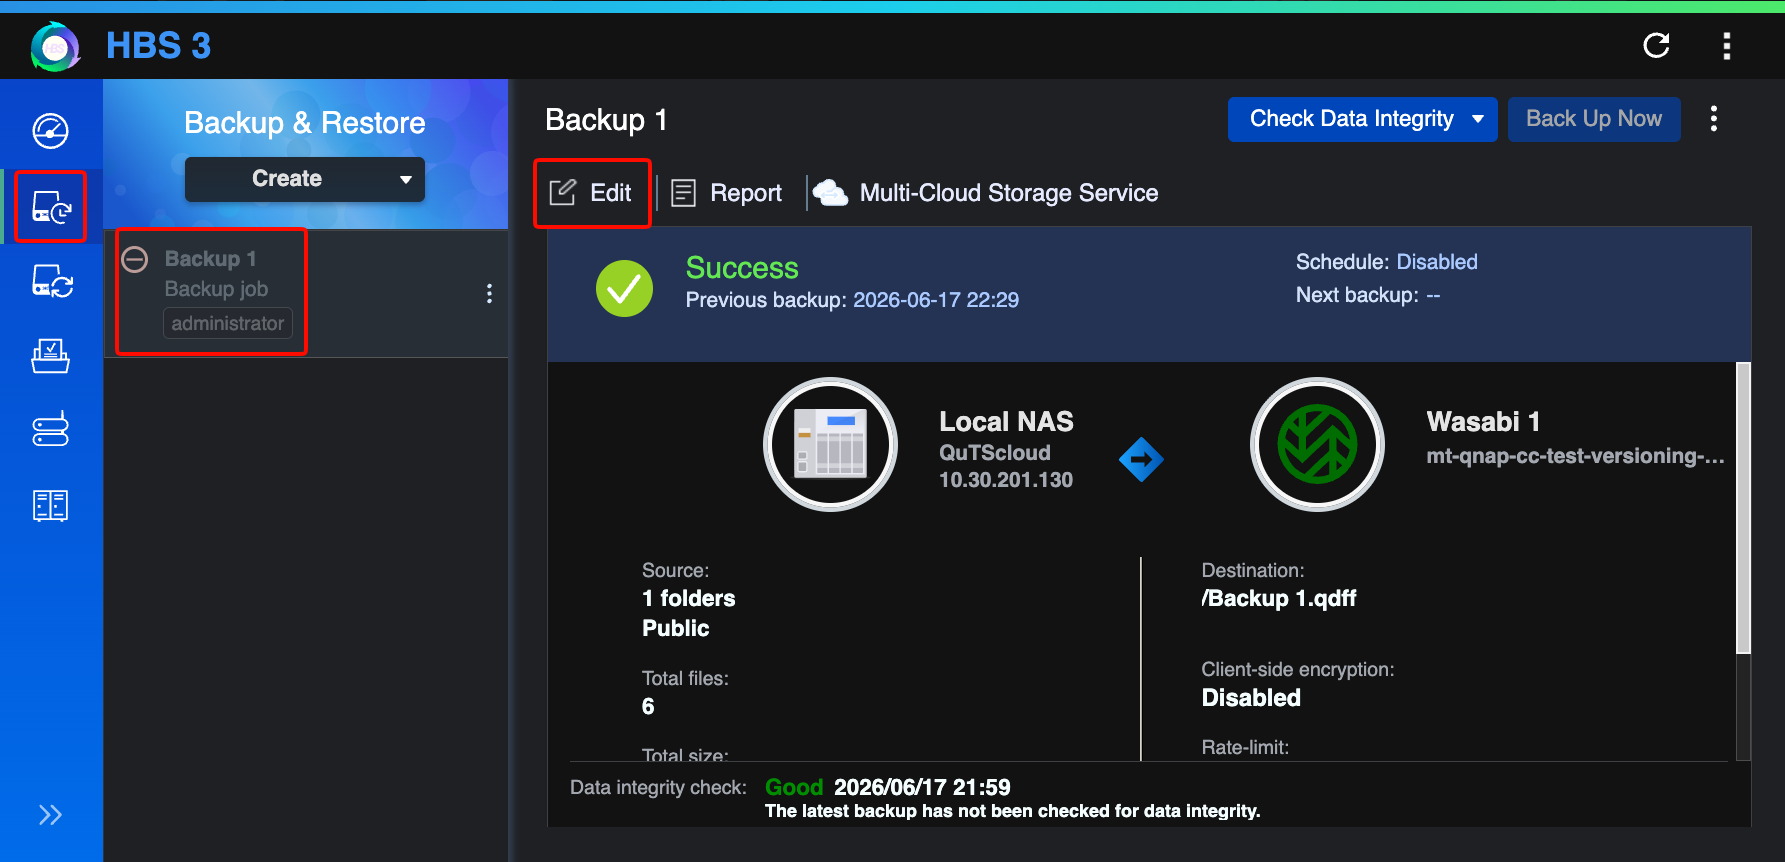
Log in to your QNAP console and click the HBS 3 icon.
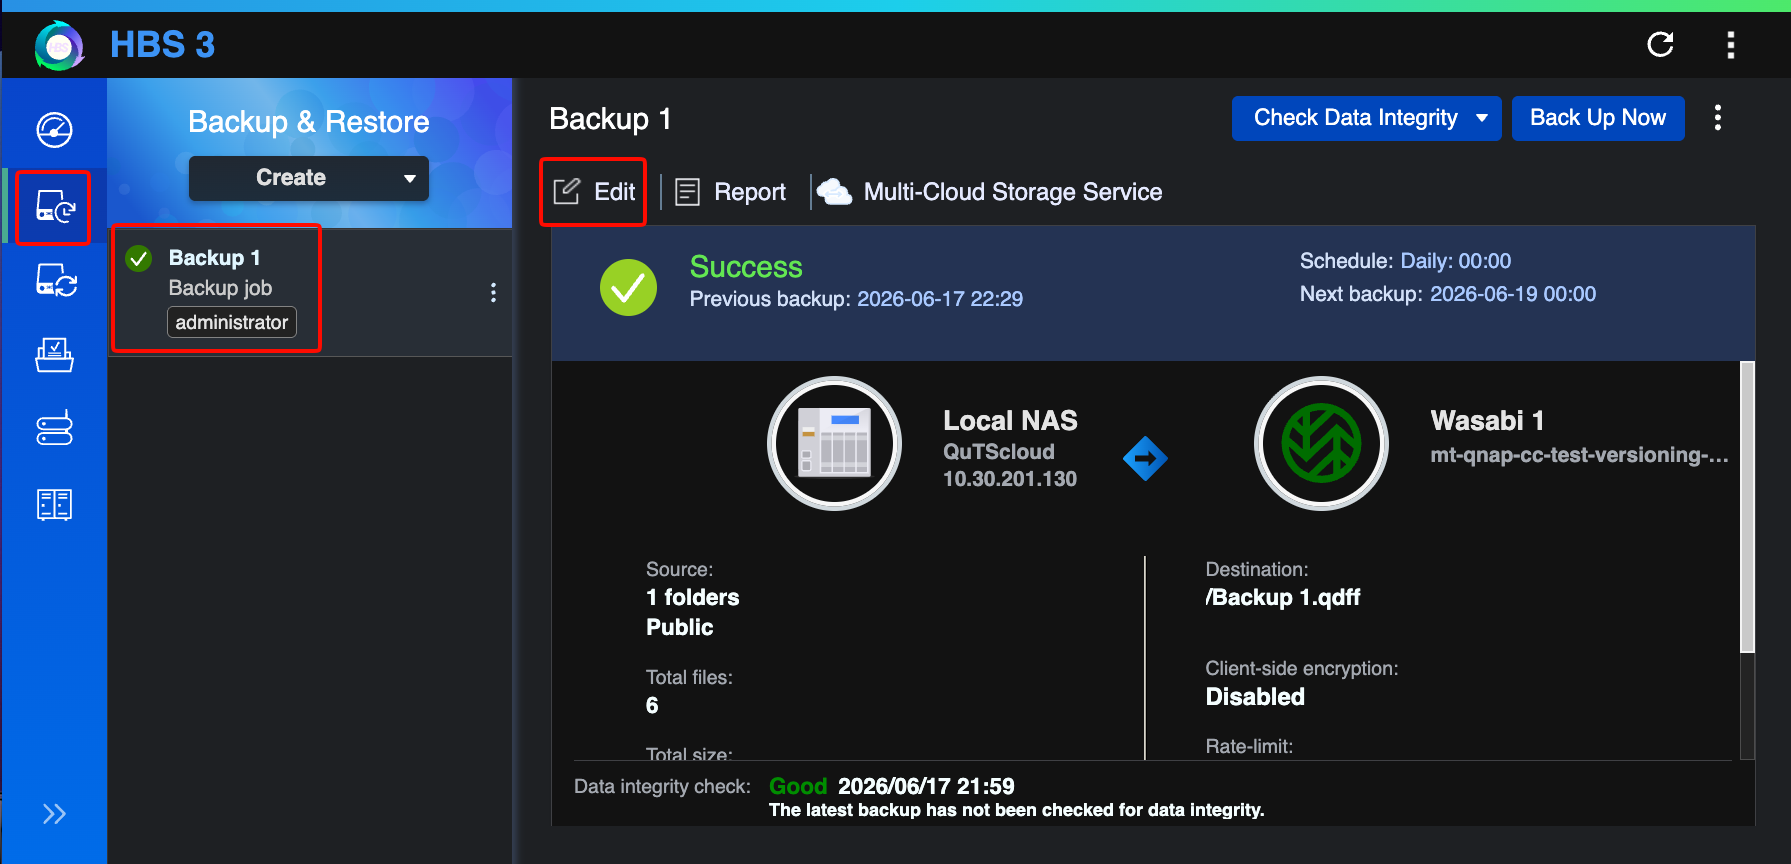
On the Backup & Restore tab, select the backup job(s) pointing to Wasabi.
Click Edit.
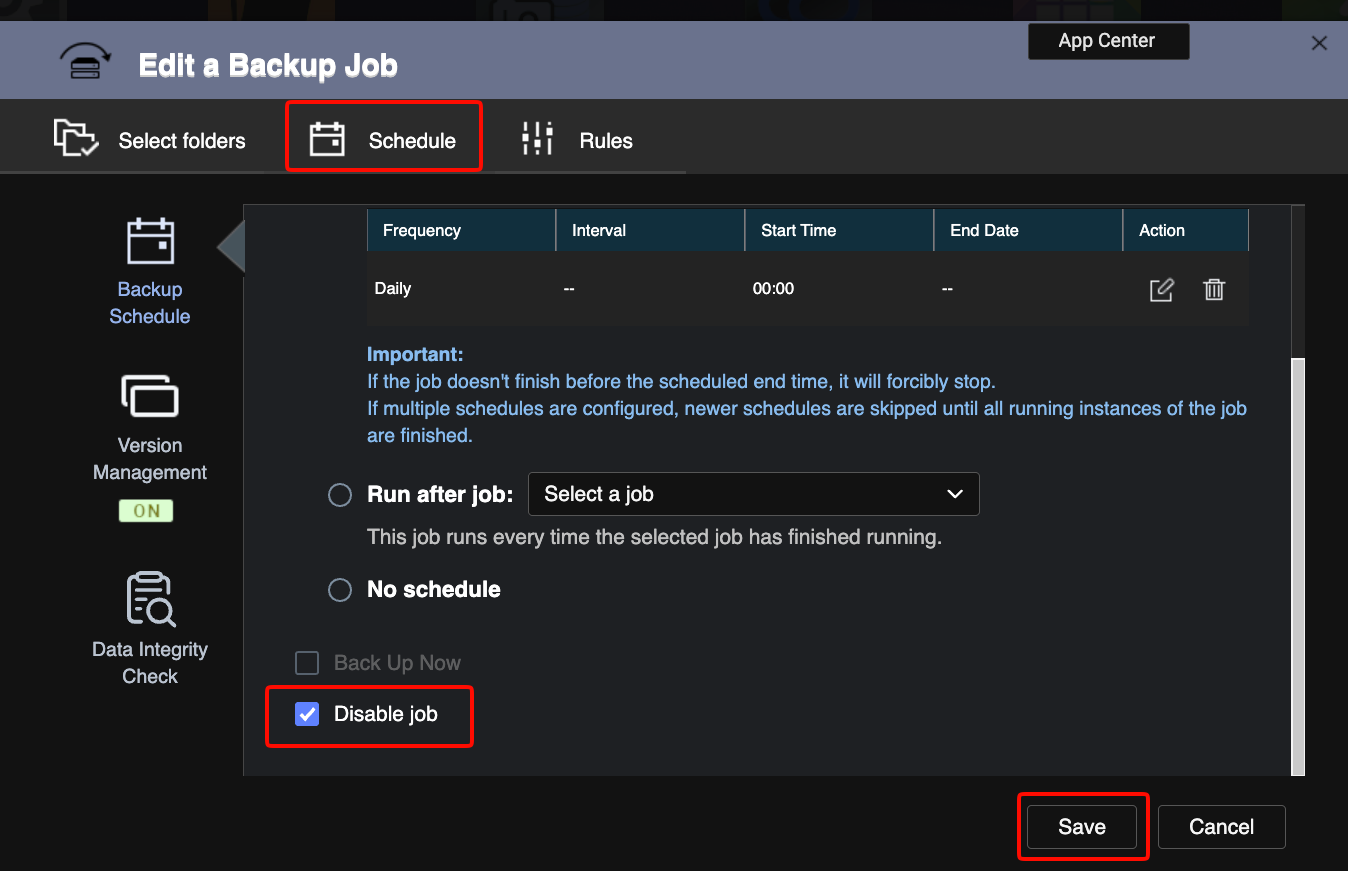
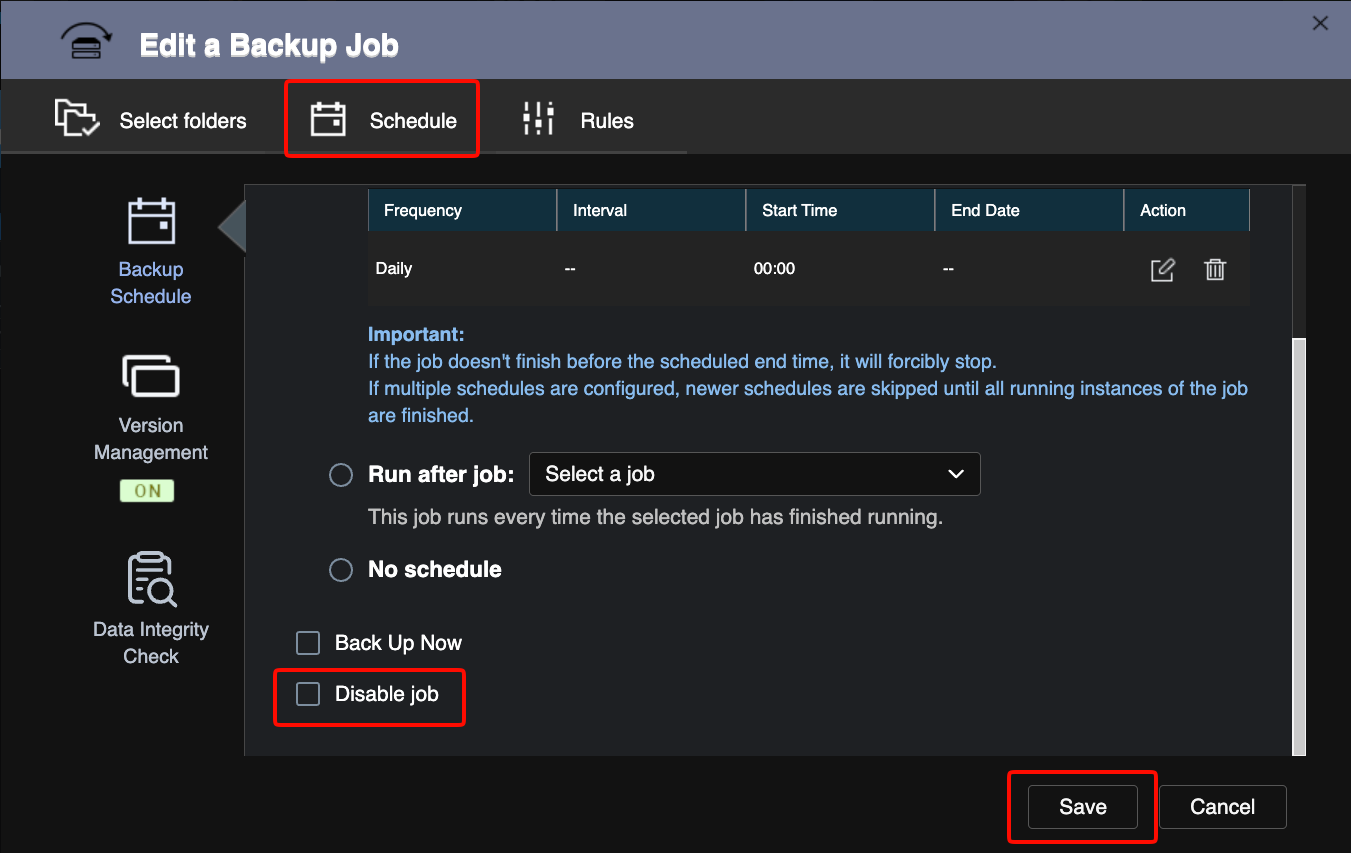
On the Schedule tab, scroll down and click the checkbox next to Disable job.
Click Save.
Enabling Covert Copy
Log in to the Wasabi Console.
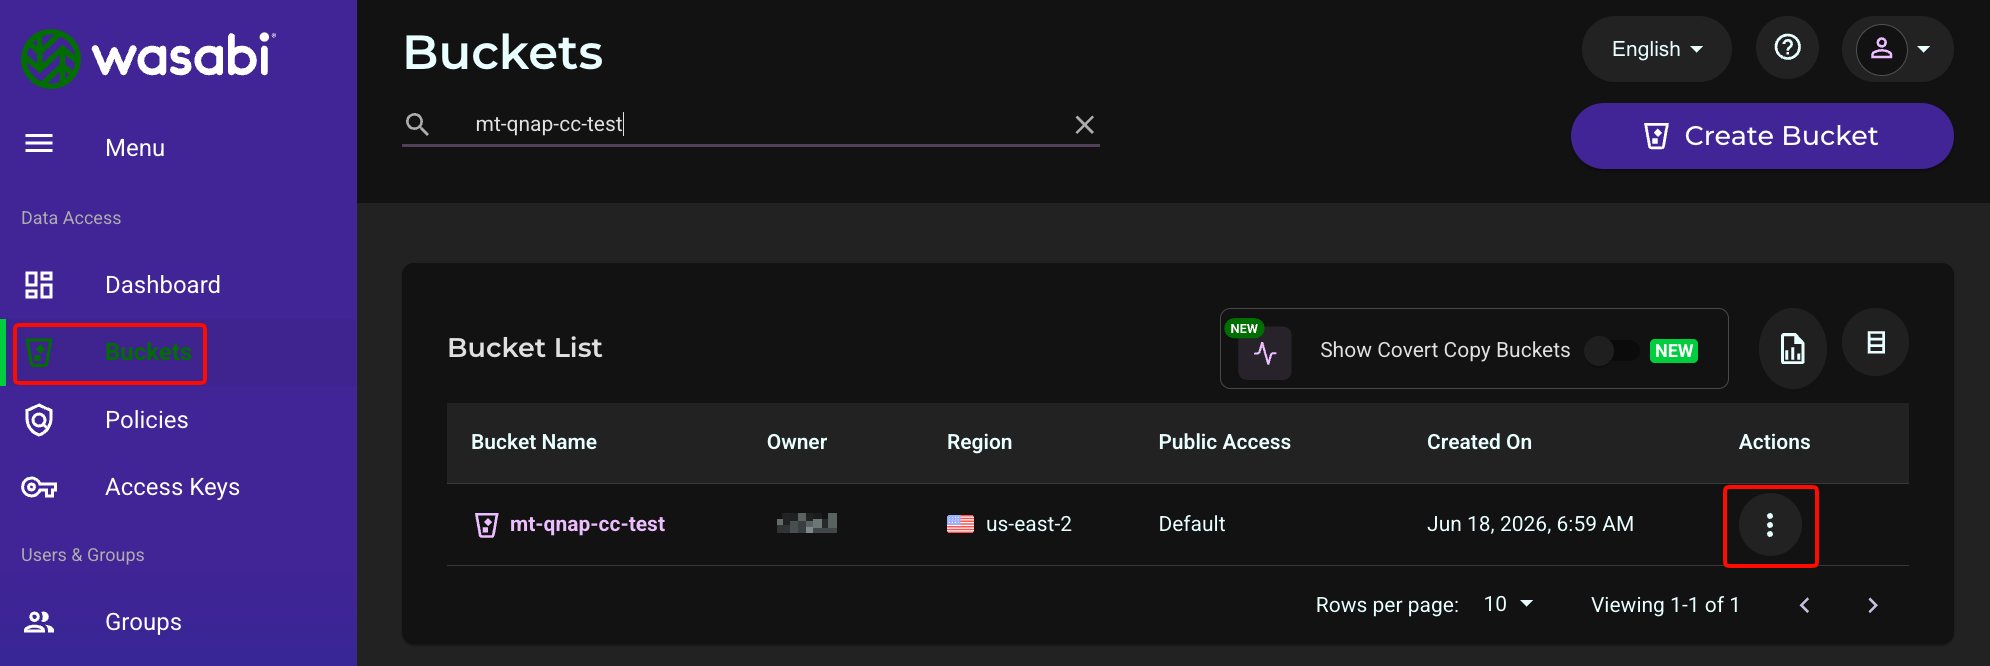
Click Buckets.
Click the three vertical dots next to the bucket containing your HBS 3 backups.
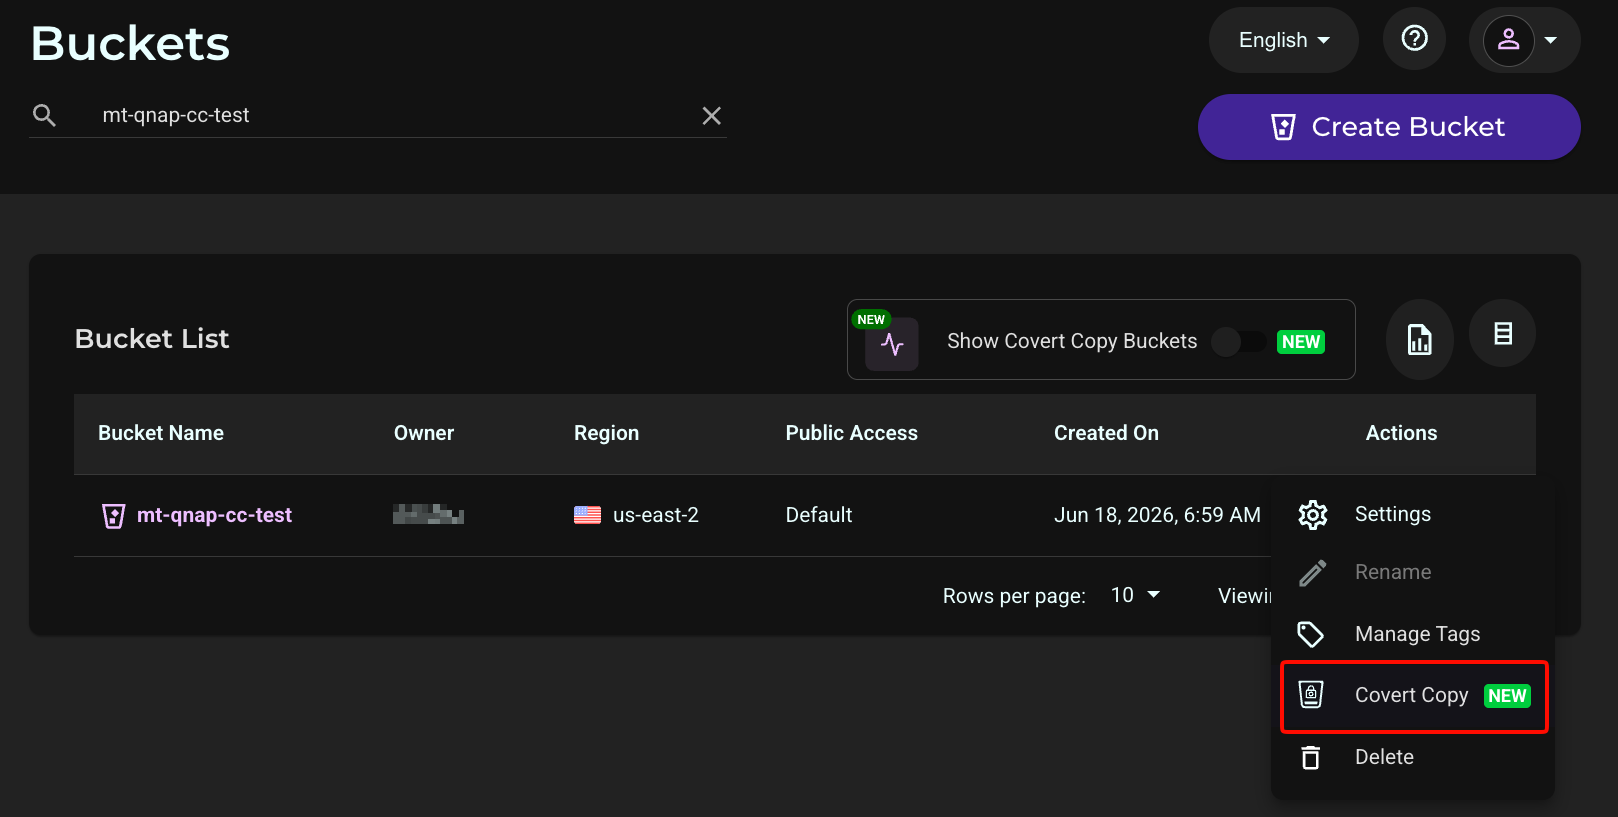
Click Covert Copy.
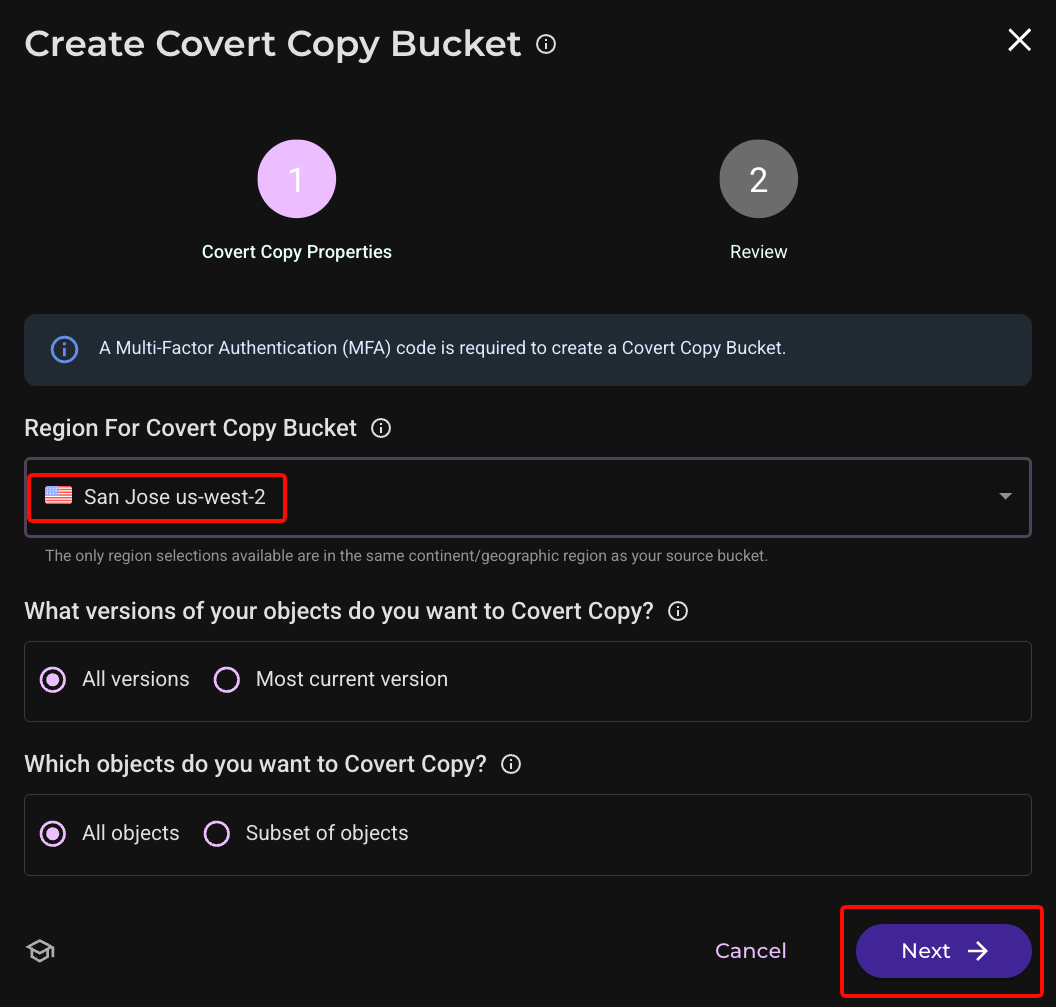
Select a region for your Covert Copy bucket that is on the same continent as your source bucket.
Click Next.
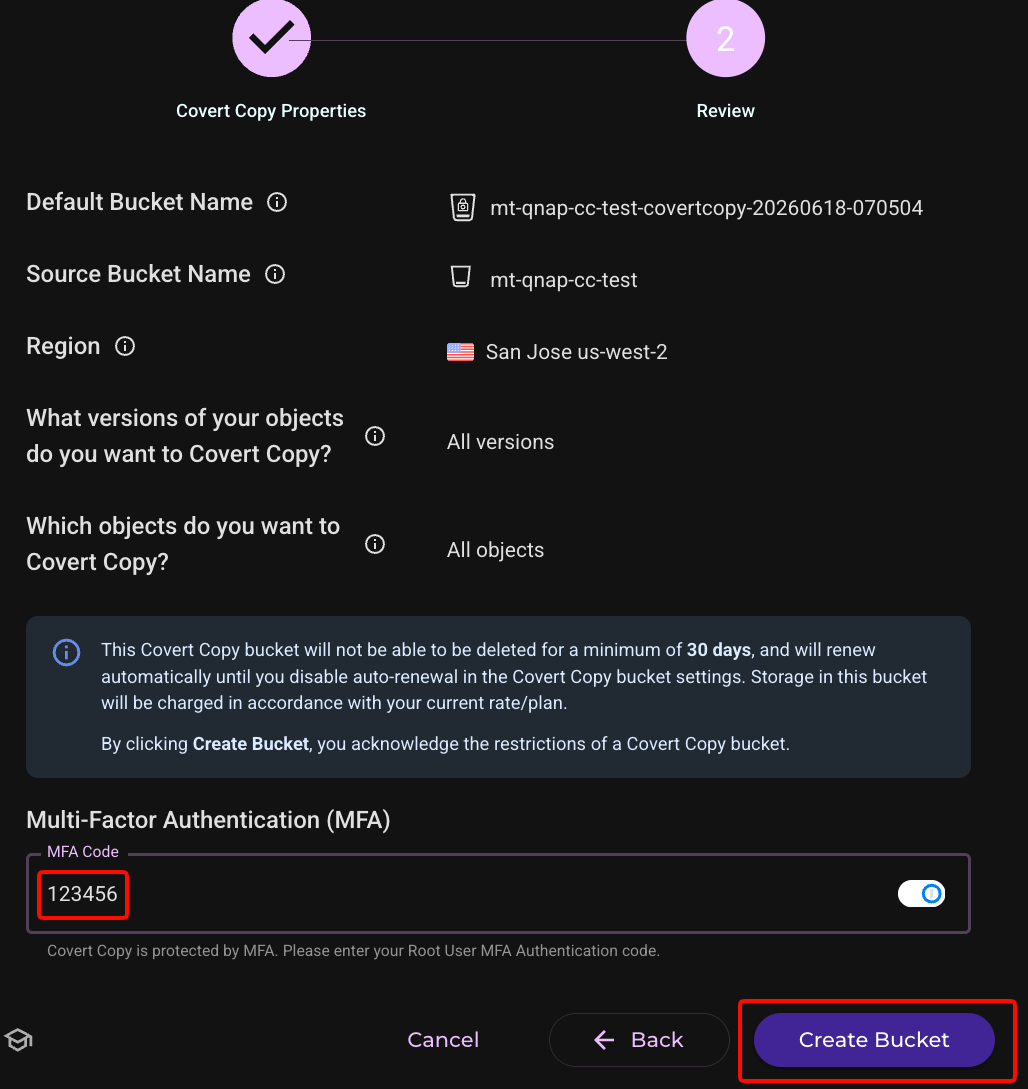
Enter your MFA code and click Create Bucket.
Click the toggle to enable Show Covert Copy Buckets on your list of buckets. The Covert Copy Status will show In Progress until all objects in the source bucket have been copied to the Covert Copy bucket.
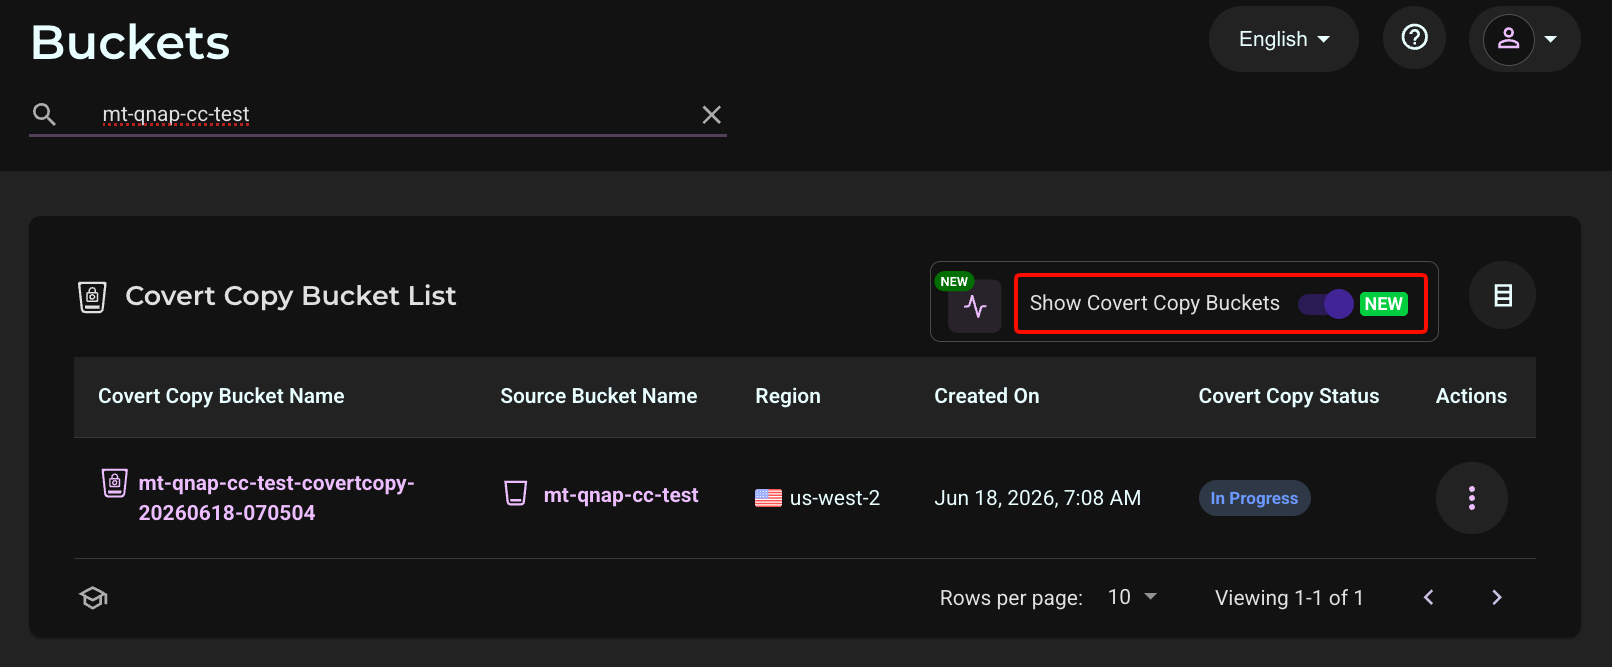
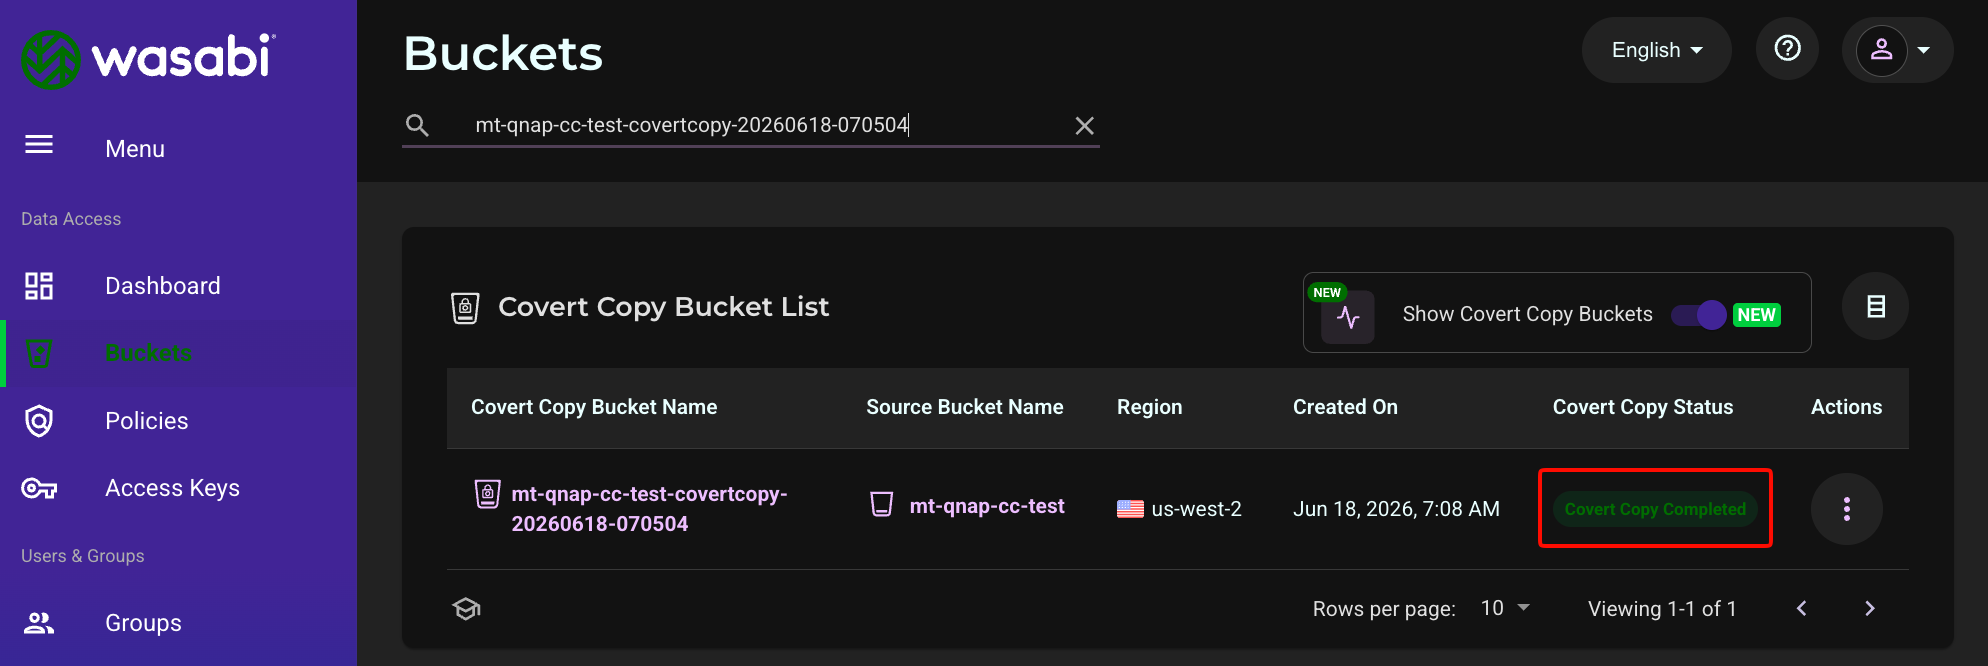
There is no estimated time for the Covert Copy process, as many variables affect it, such as the number of objects in the source bucket. It may take a significant amount of time. When the process is complete, the Covert Copy Status will show Covert Copy Completed. You will also receive an email letting you know the process has completed.
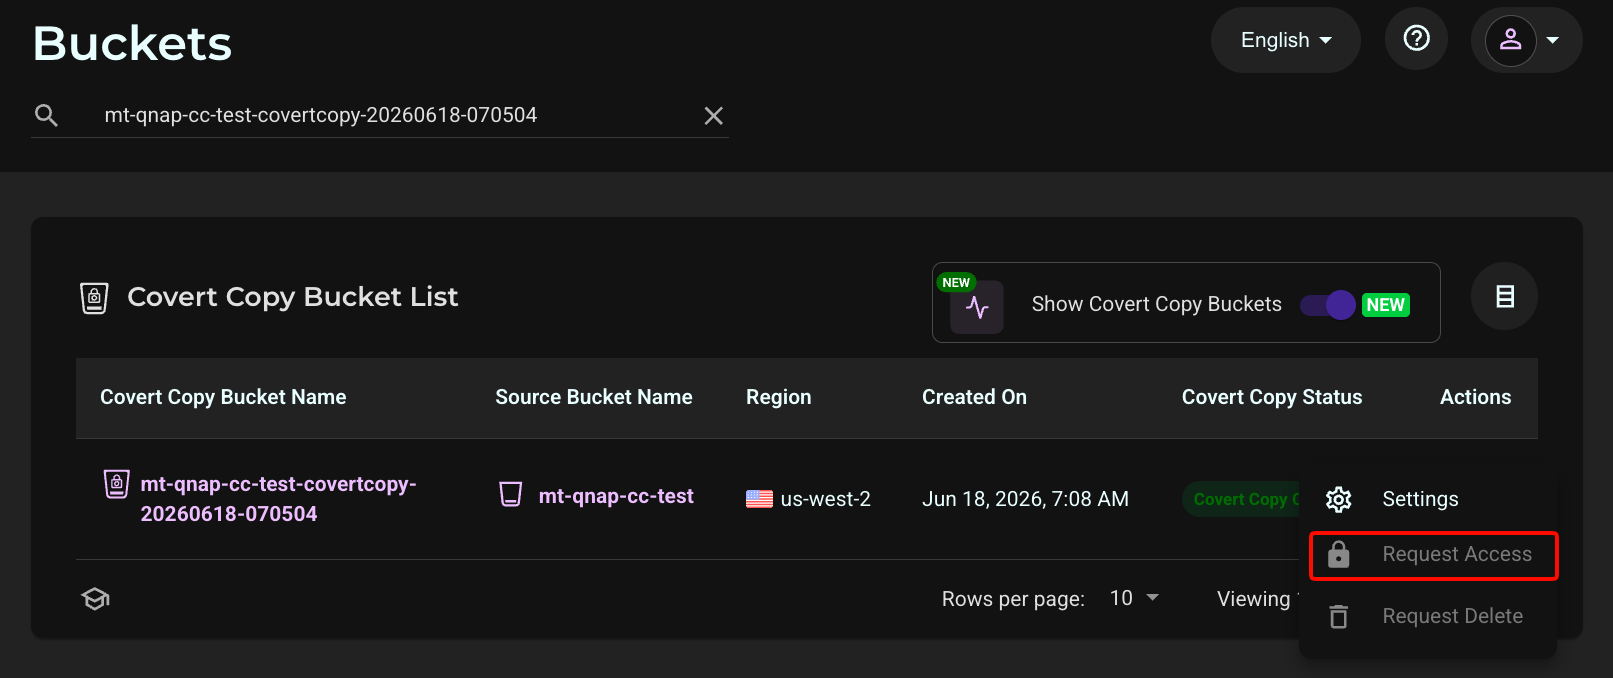
Optionally, to see the data in the Covert Copy bucket, click the three vertical dots next to the bucket on the right side of the Wasabi Console. Click Request Access.
Click Send Request to request permission from your security contact(s) to view the Covert Copy bucket contents.
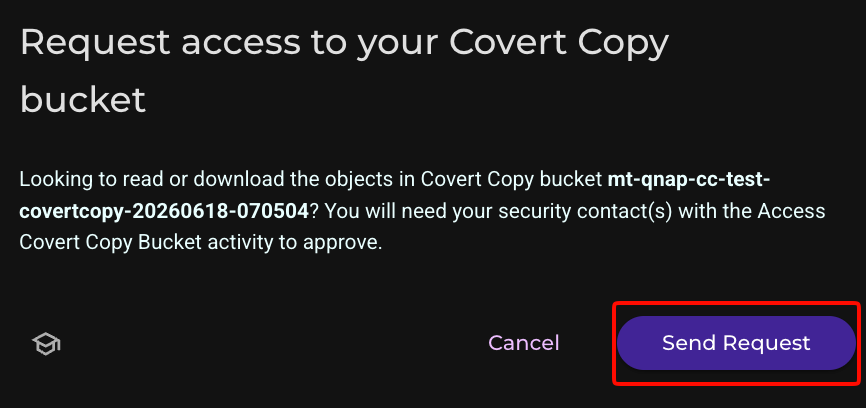
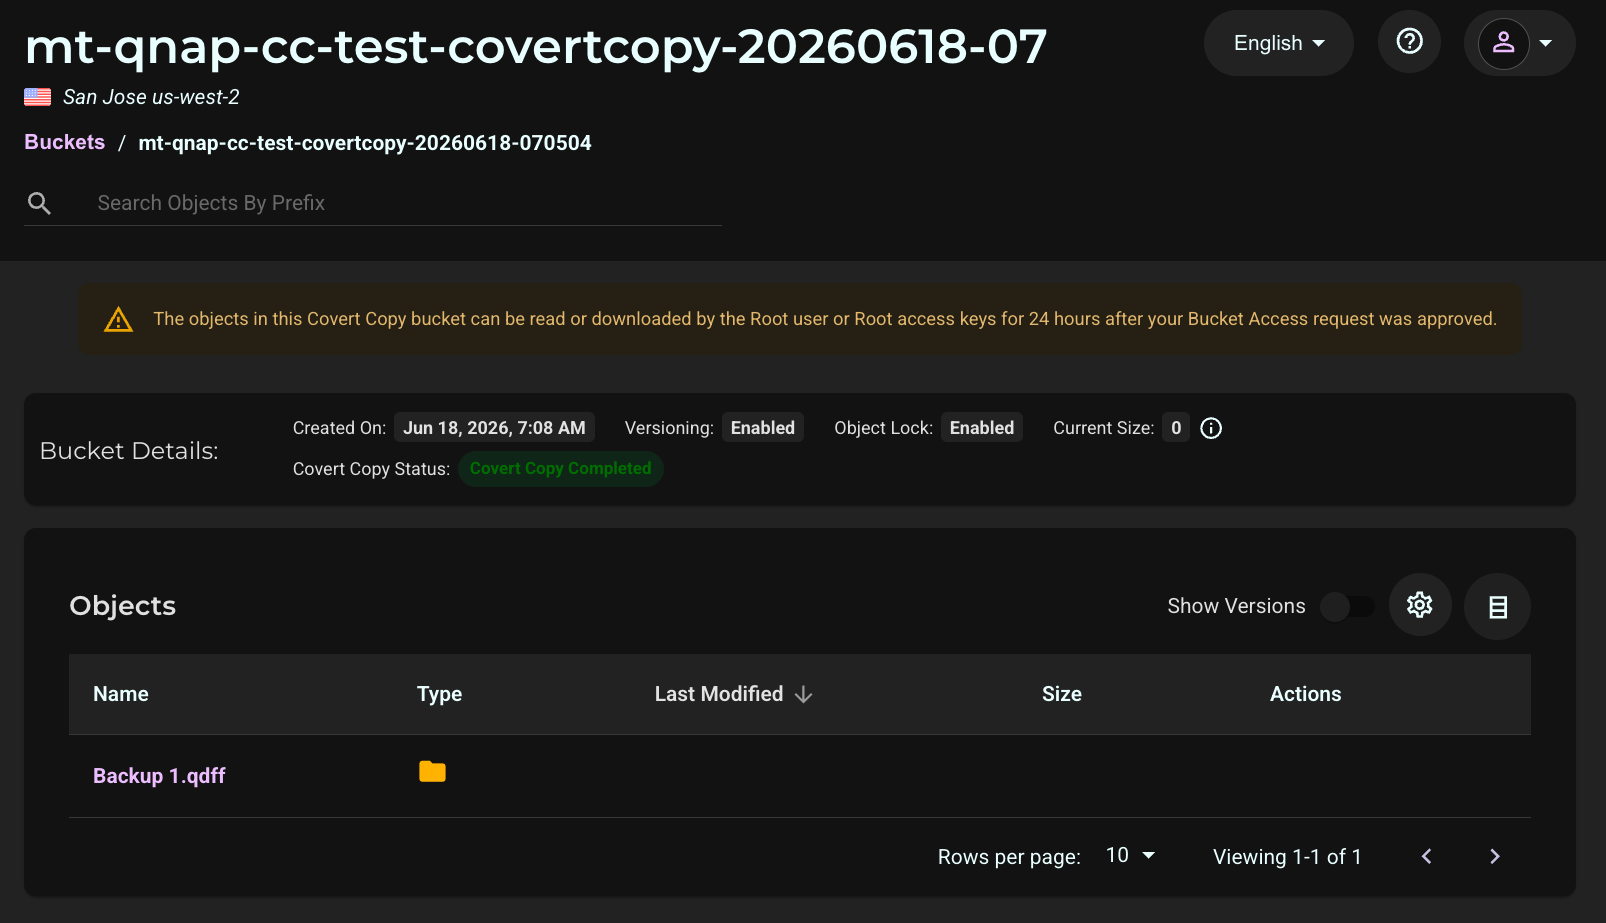
The security contact(s) have 15 minutes to approve the request. After the security contacts approve the request, you can view the bucket contents for 24 hours. Click Buckets.
Enable Show Covert Copy Buckets.
Select the name of the Covert Copy bucket.
Resuming HBS 3 Backup Activities
Log in to your QNAP console and click the HBS 3 icon.
On the Backup & Restore tab, select the backup job(s) pointing to Wasabi.
Click Edit.
On the Schedule tab, scroll down and click the checkbox to Disable job (so the box is not checked).
Click Save.
In Case of Disaster
The example below shows how to recover data from a Covert Copy bucket.
This will involve restoring the metadata first, then restoring the actual data.
In the case of a disaster, the root user must submit a Wasabi Support ticket by emailing Wasabi Support (support@wasabi.com). In the email, request Restore Mode and include the name of your Covert Copy bucket. After Support enables Restore Mode, the Covert Copy bucket will be visible to HBS 3 and will allow restores from backups in the bucket.
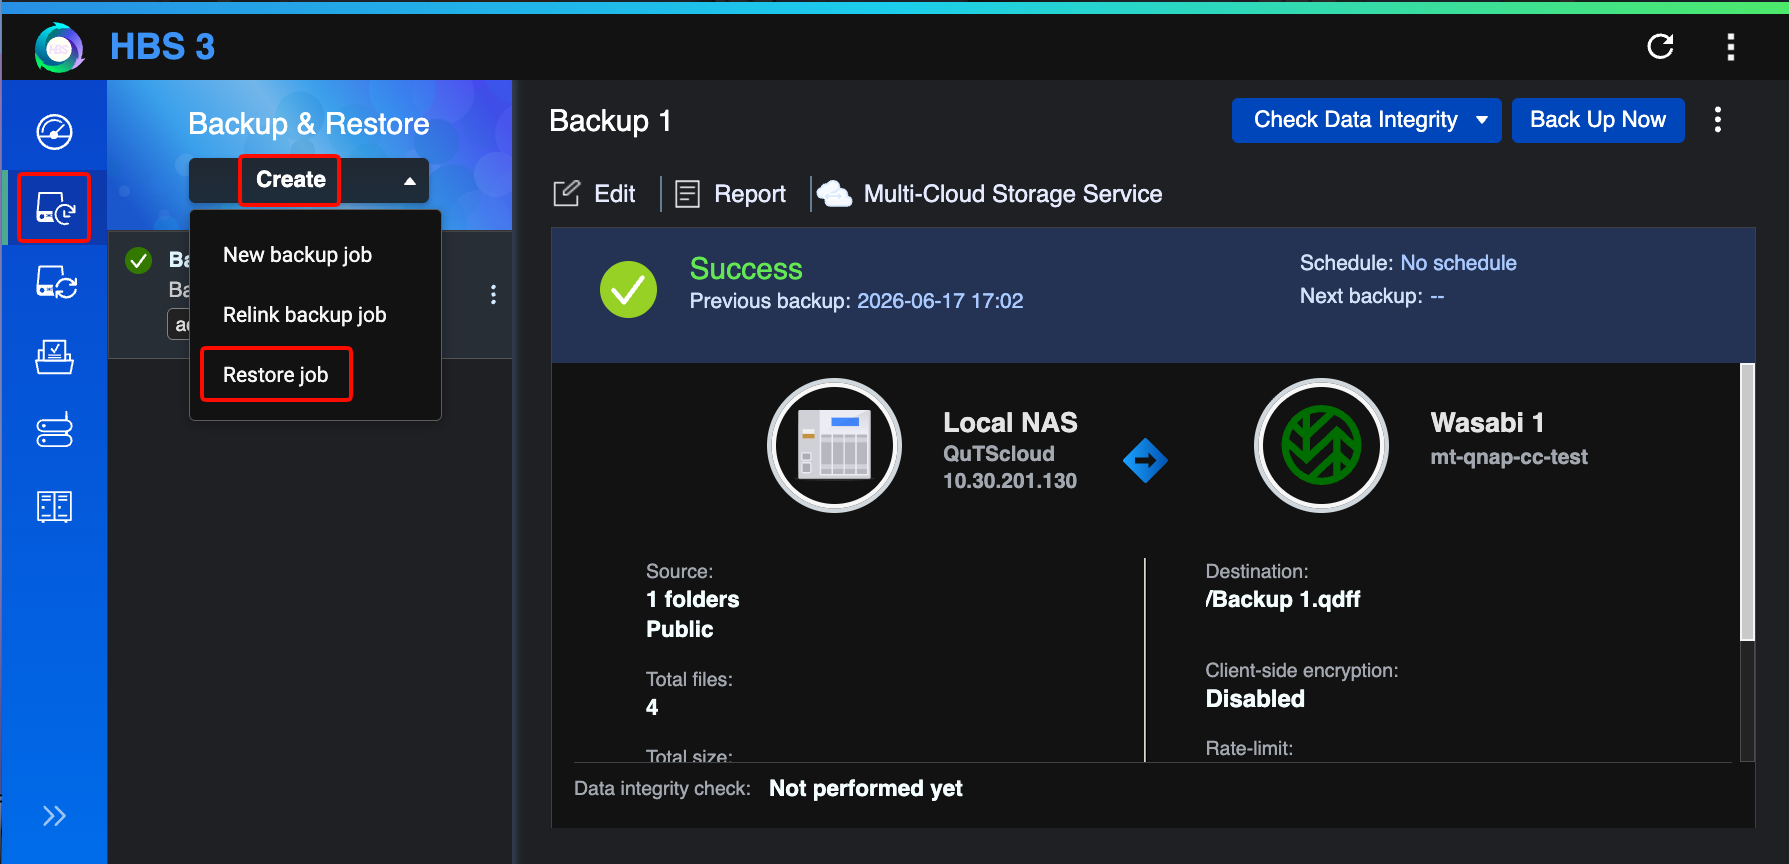
Log in to the QNAP console and click the HBS 3 icon.
On the Backup & Restore tab, click Create.
Click Restore job.
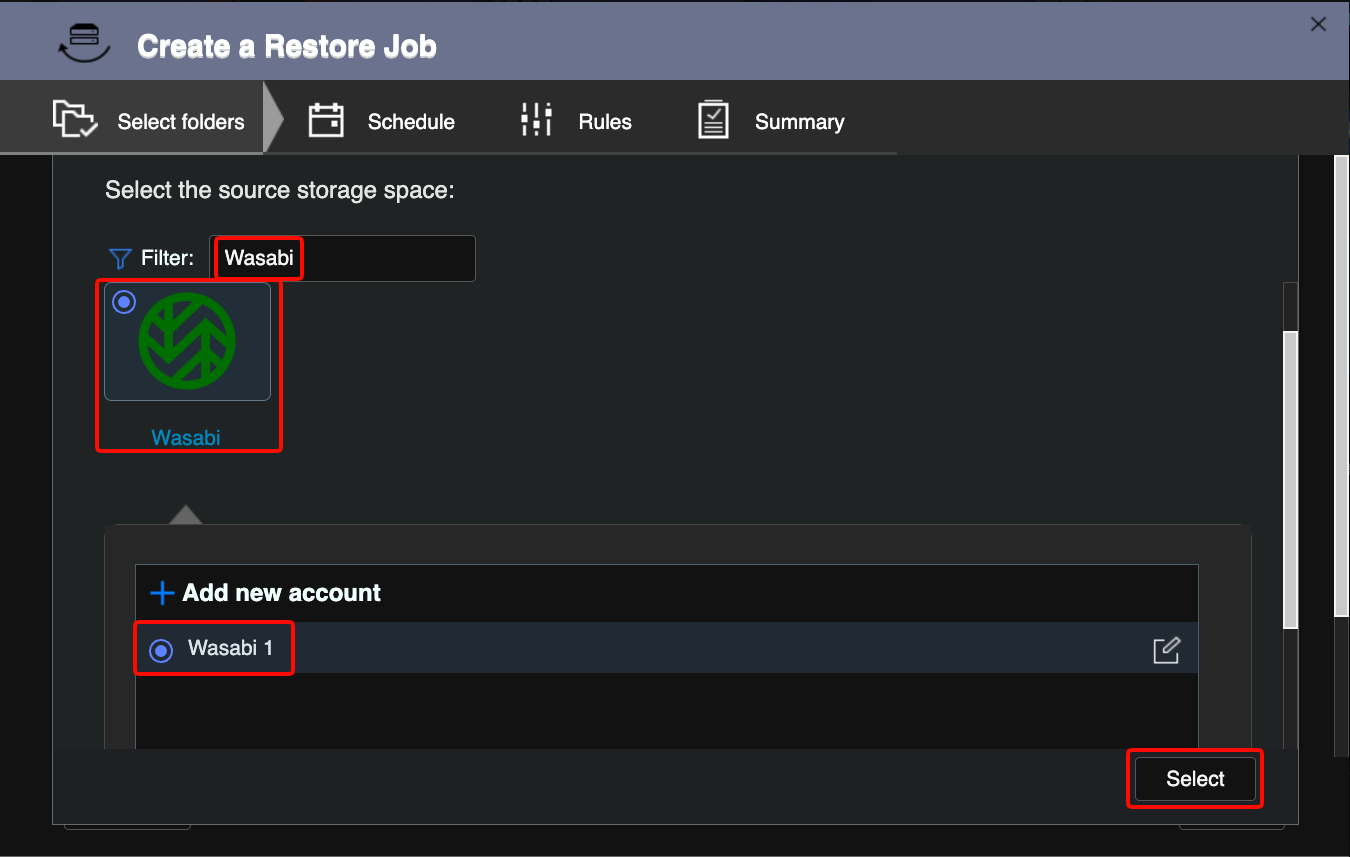
Filter on Wasabi, then select the radio button next to Wasabi. Select your Wasabi account.
Click Select.
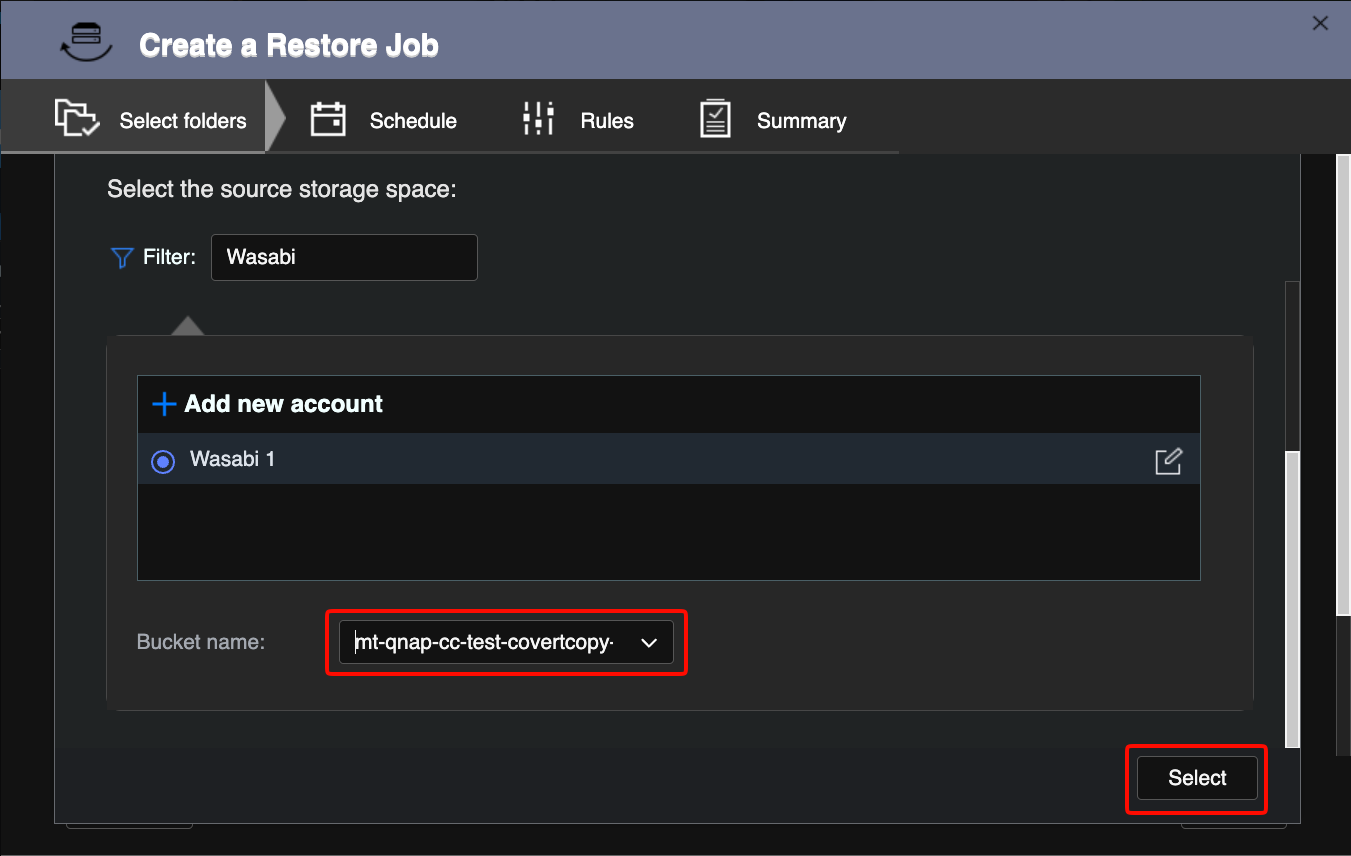
Select your Covert Copy bucket from the drop-down list and click Select.
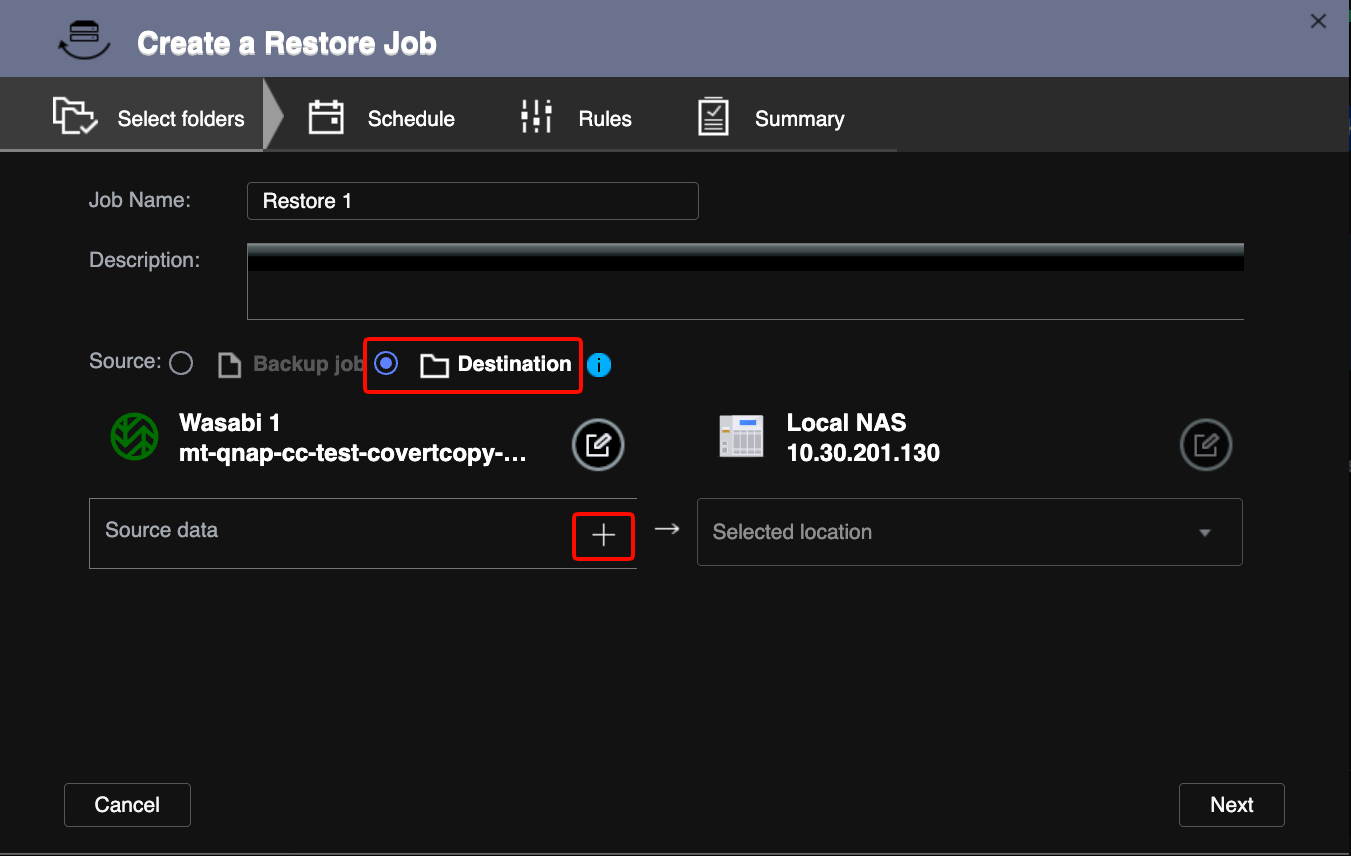
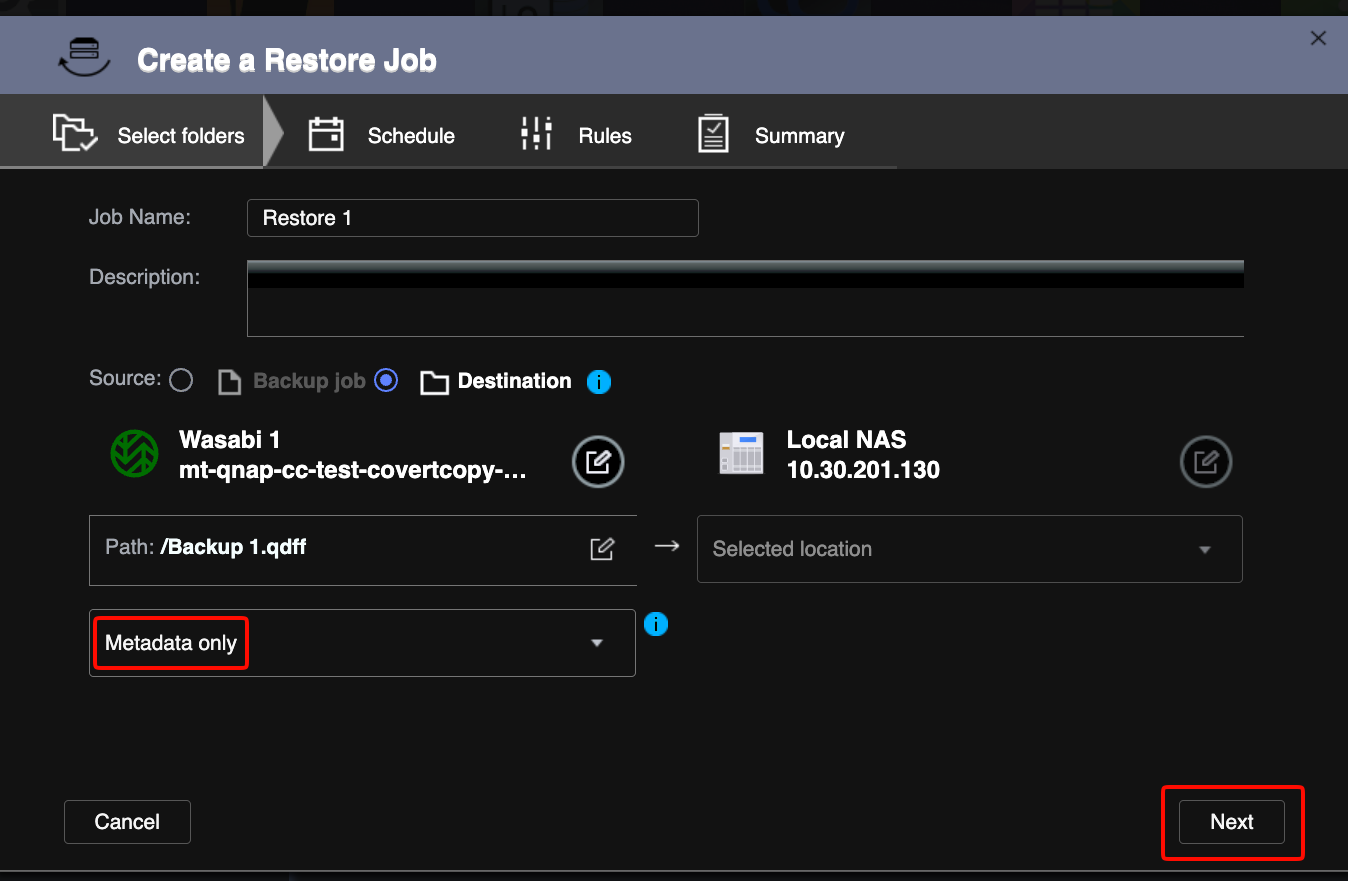
Select the radio button next to Destination.
Click + next to Source data.
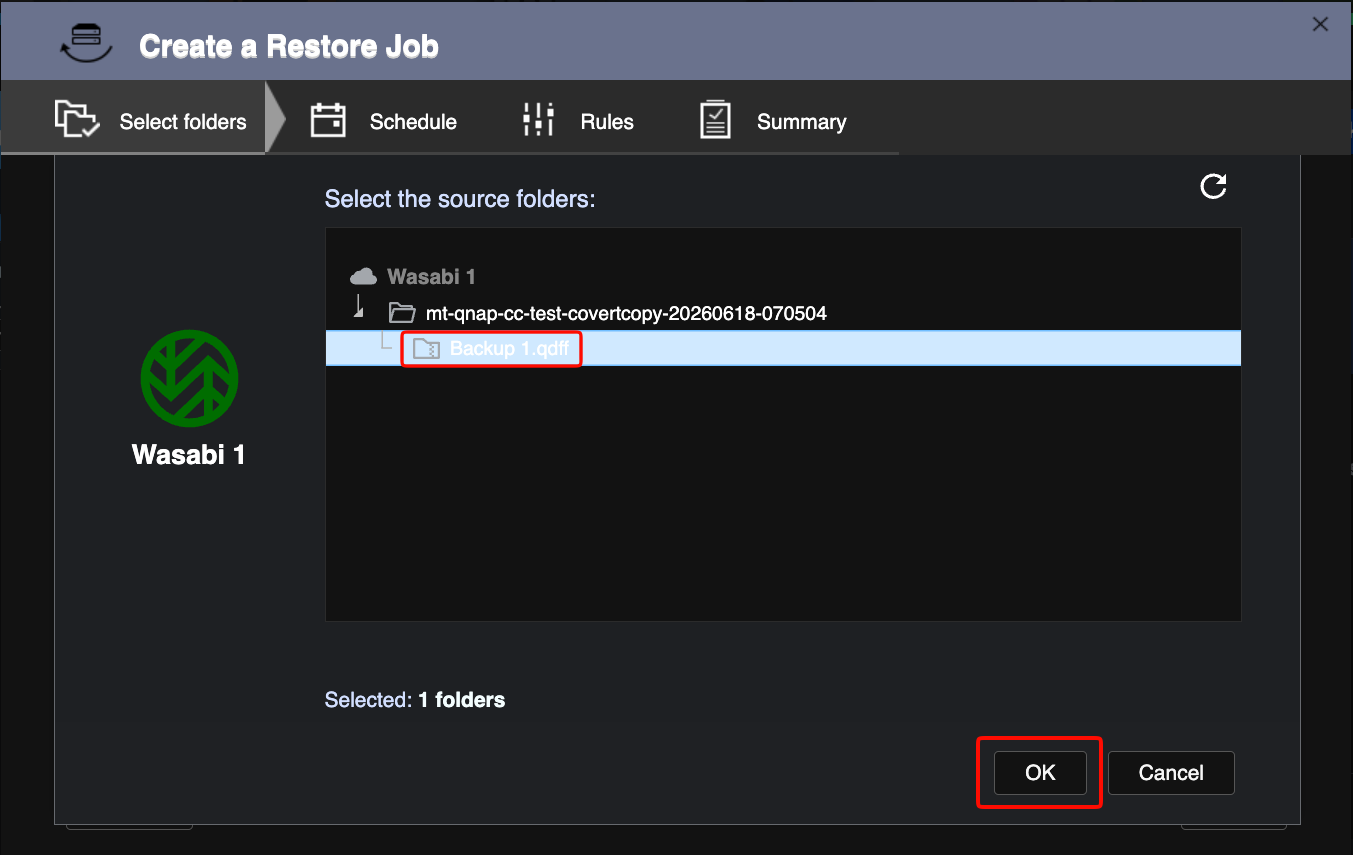
Select the top-level folder in your bucket (“Backup 1.qdiff: in our example).
Click OK.
Select Metadata only from the drop-down menu.
Click Next.
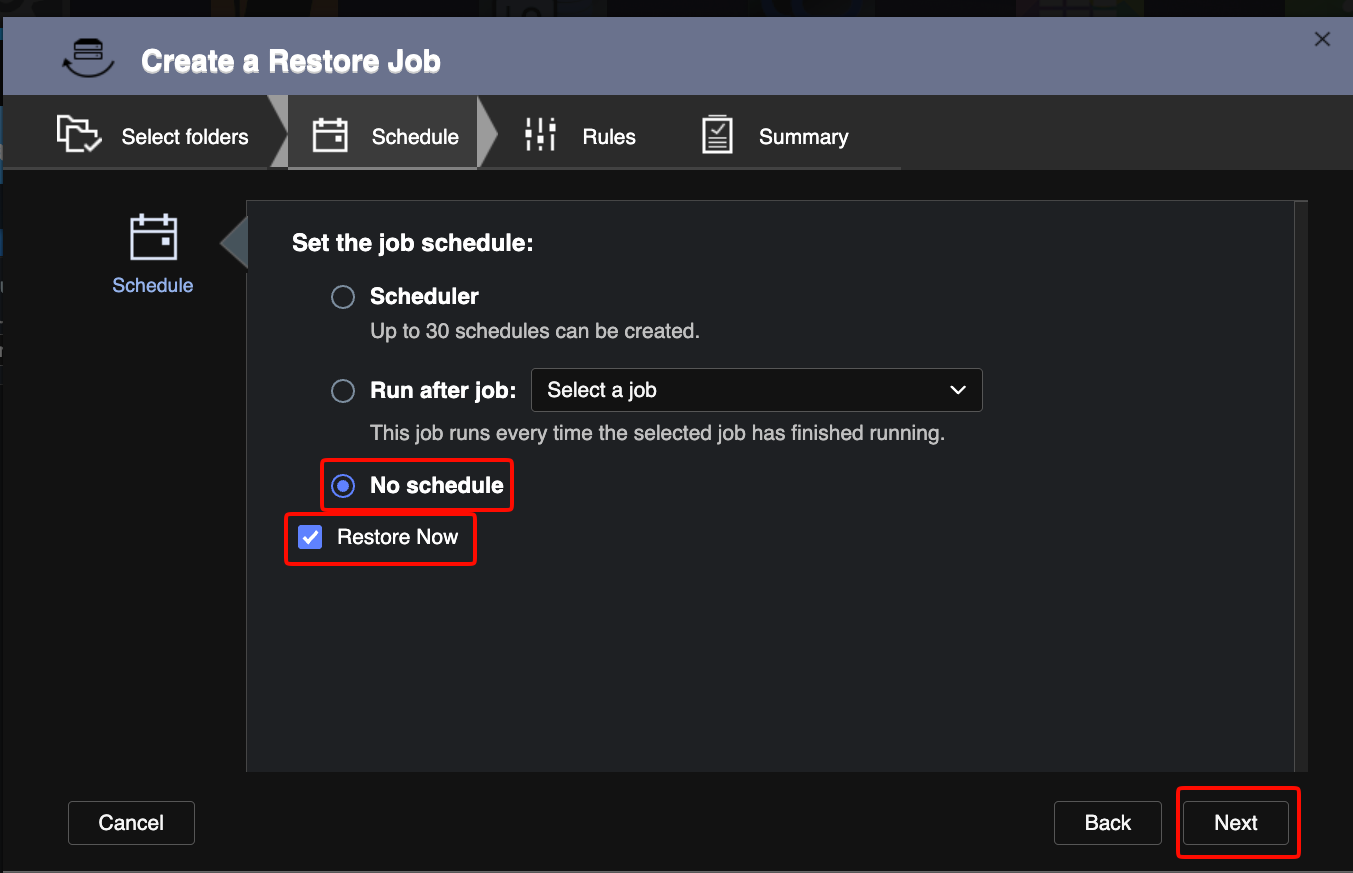
Click the radio button next to No schedule and the checkbox next to Restore Now.
Click Next.
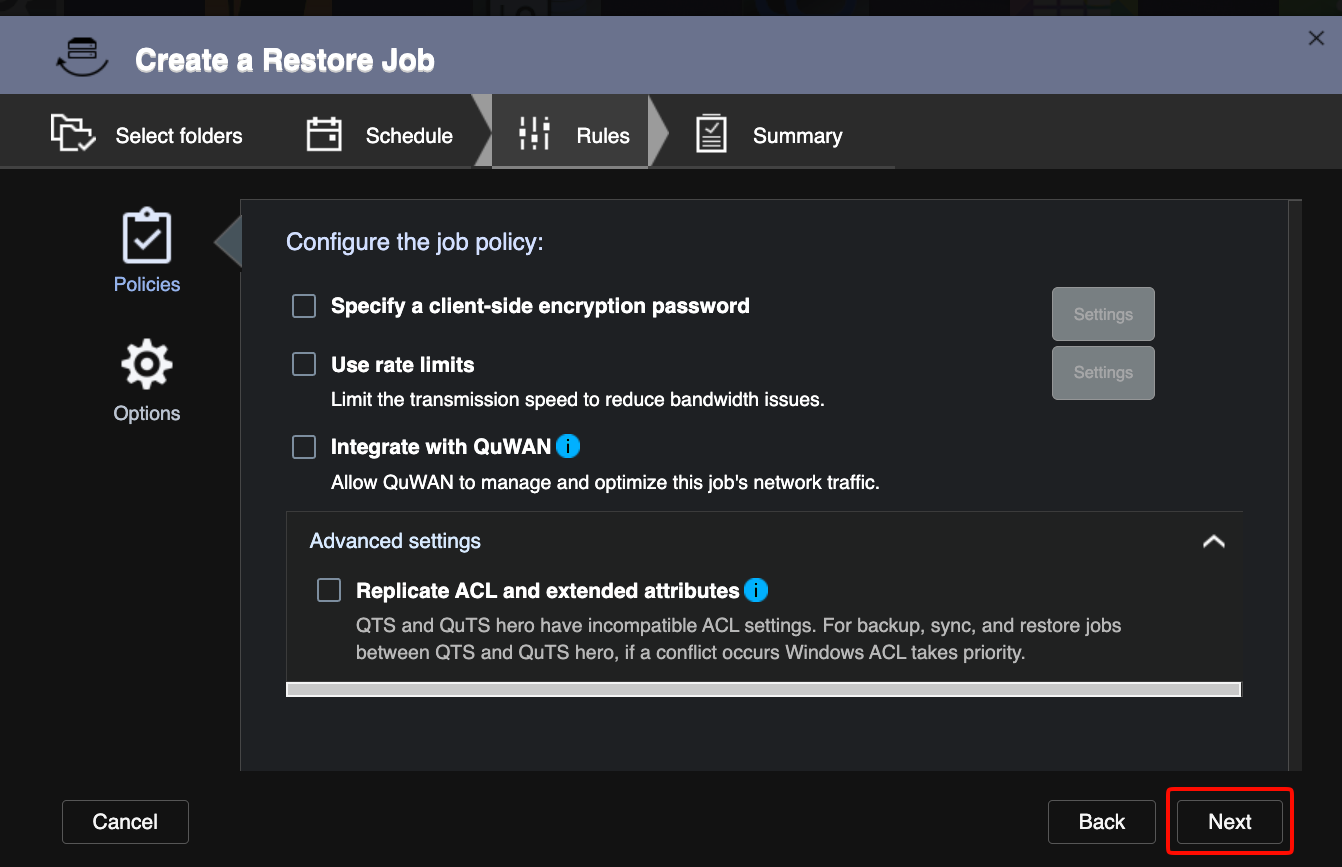
Click Next.
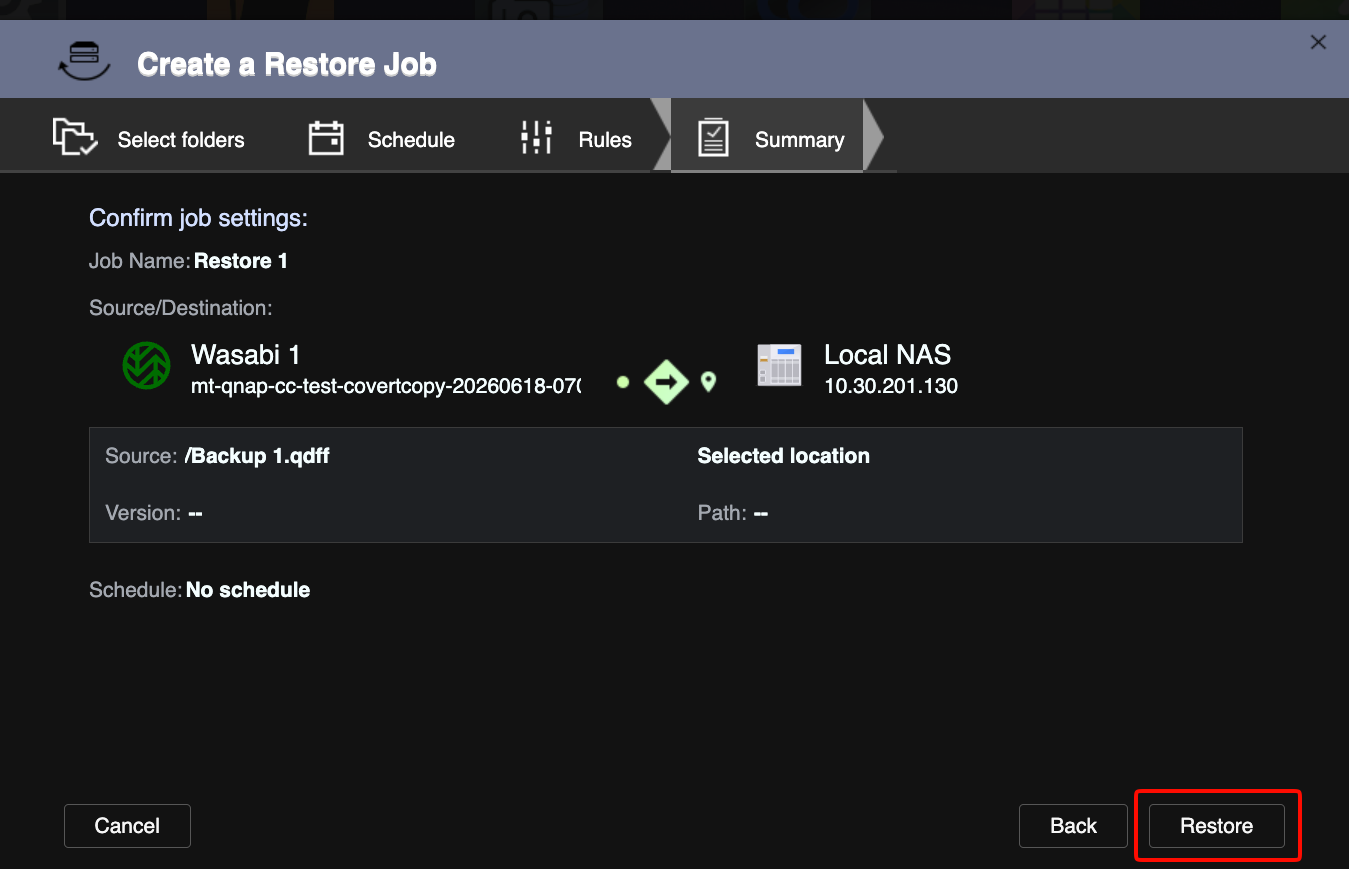
Click Restore on the Summary page.
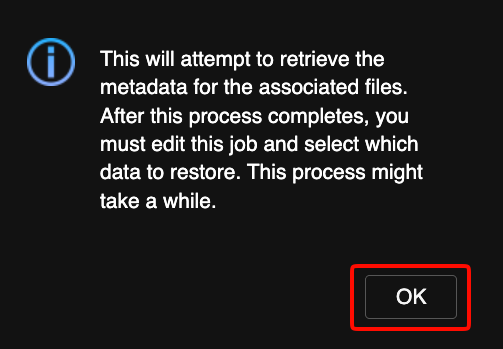
Click OK on the pop-up window.
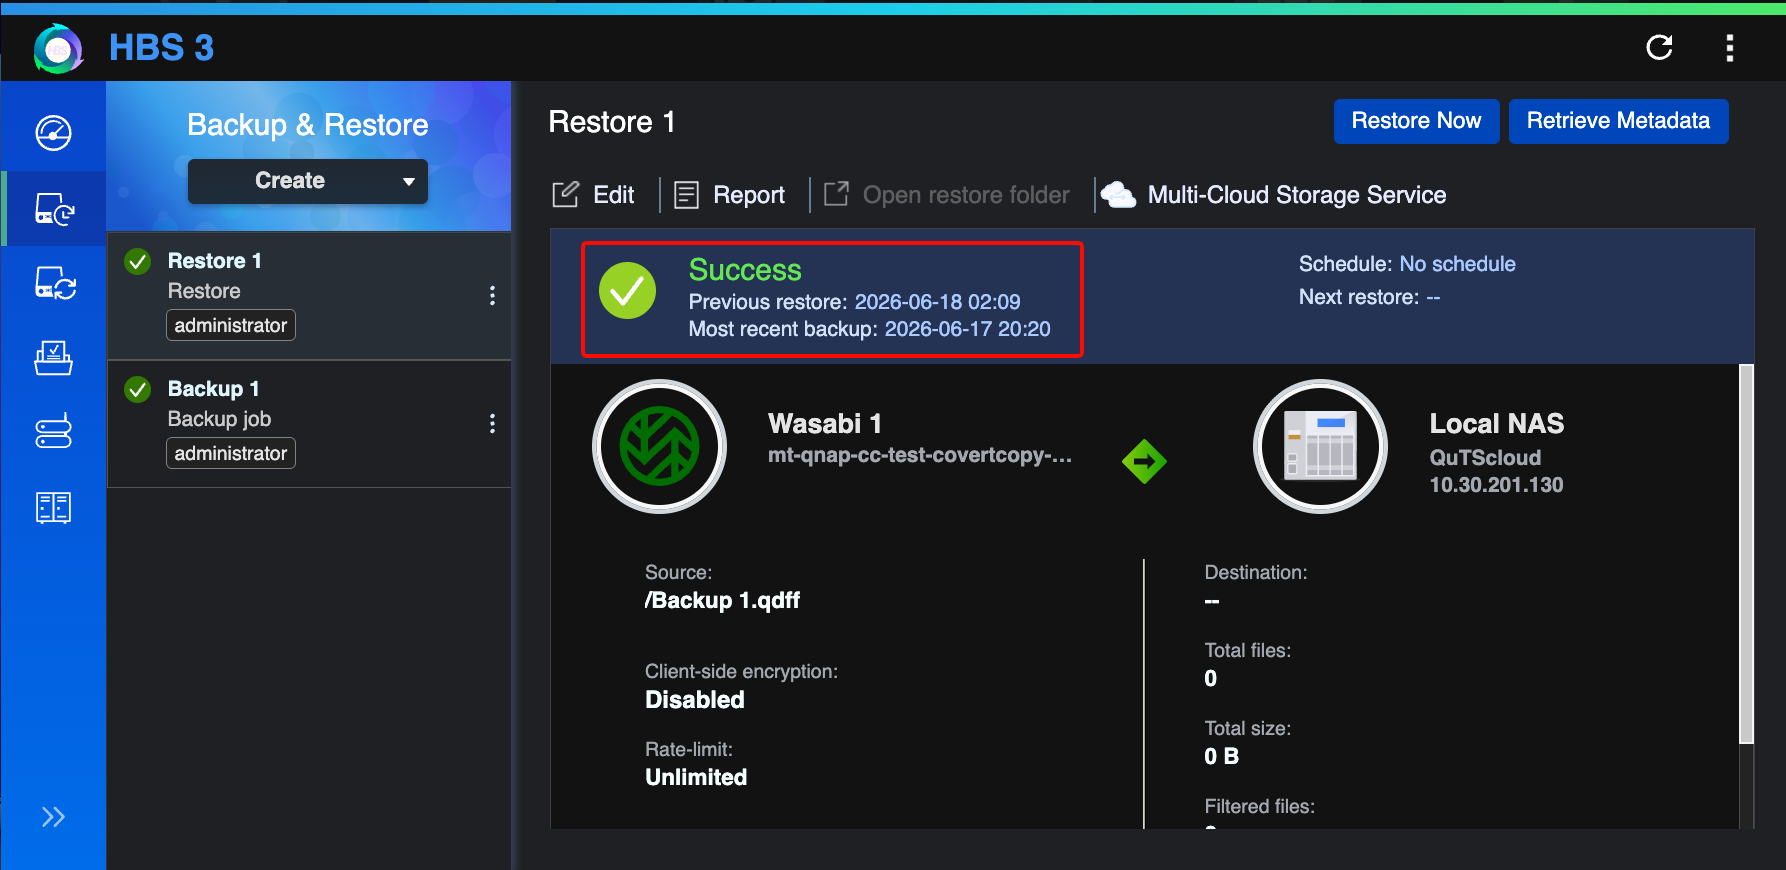
The status will show Success when the metadata has been restored.
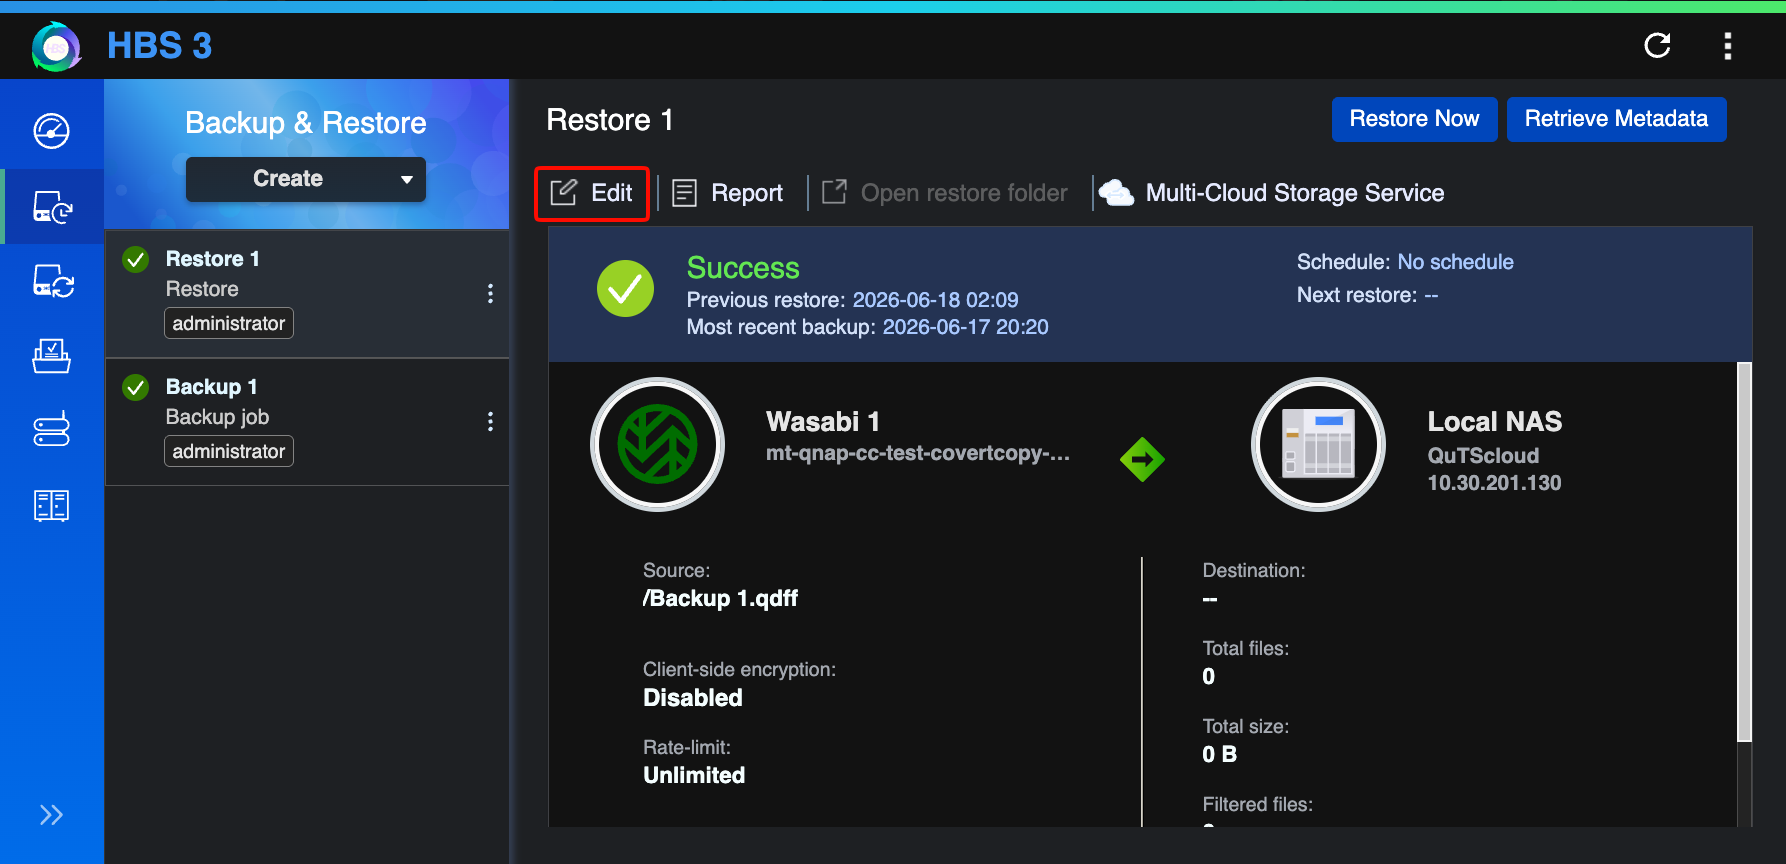
Click Edit to edit the restore job.
Click + next to Select source.
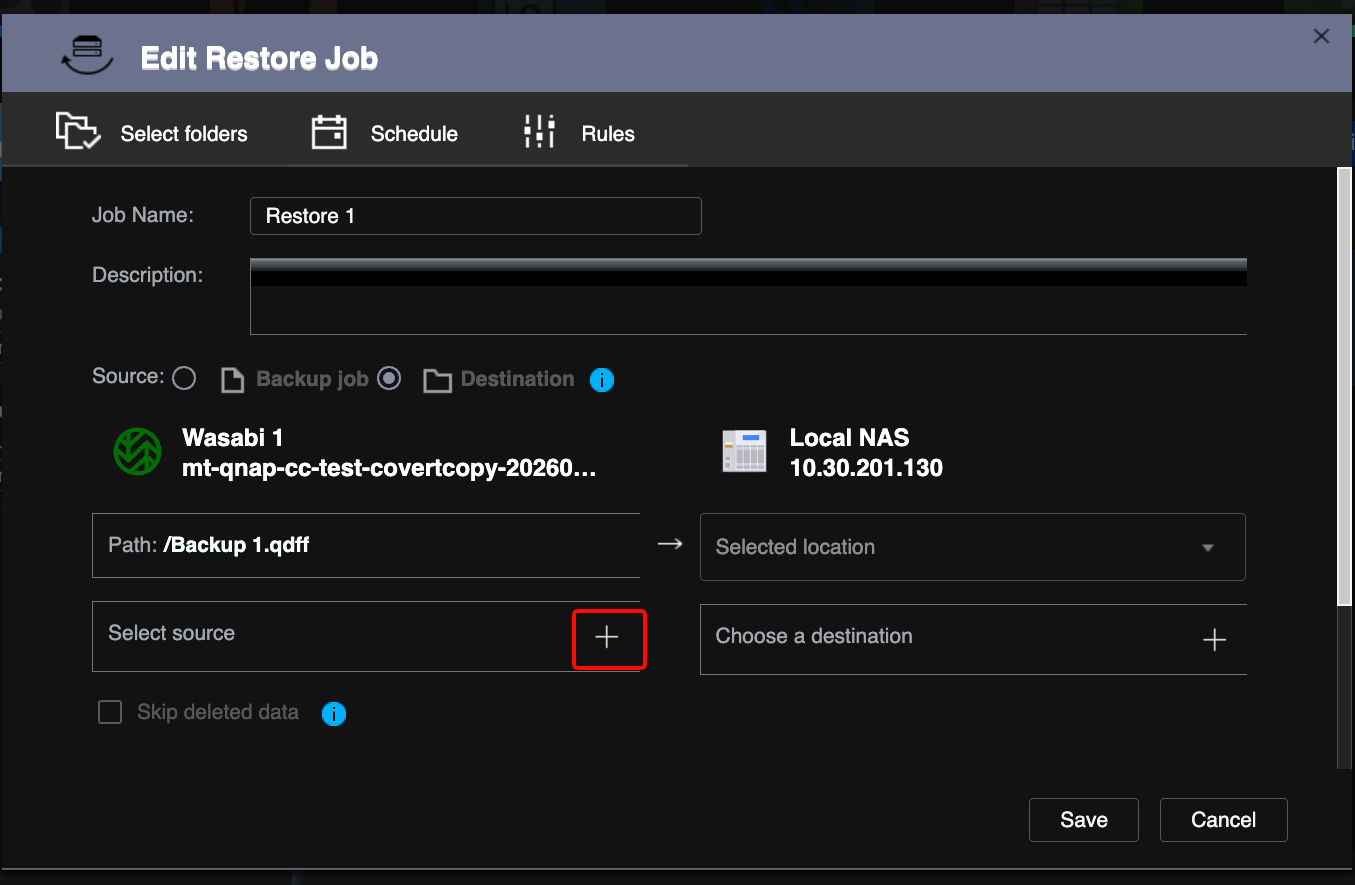
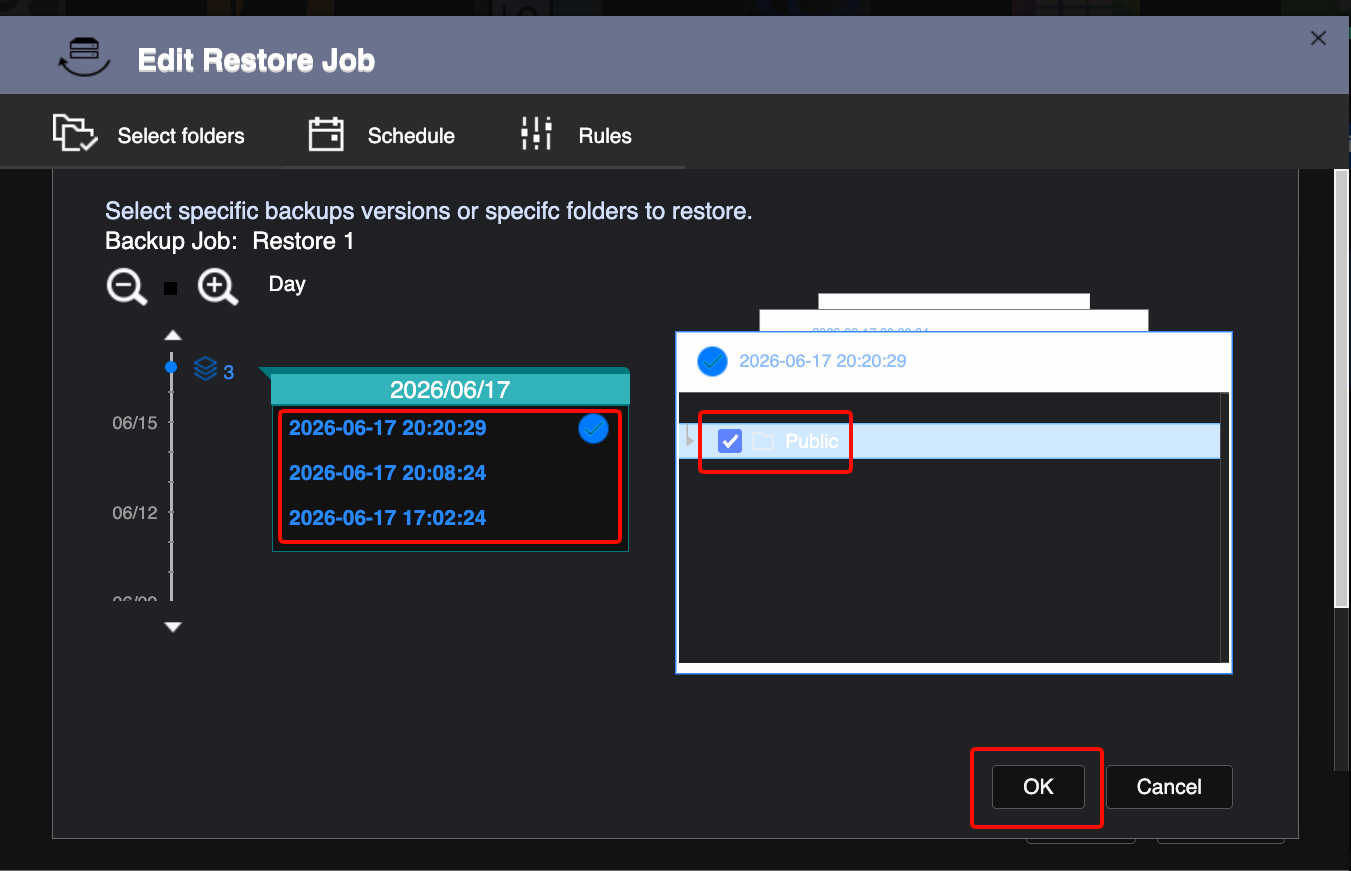
Select the appropriate backup version and folder to restore.
Click OK.
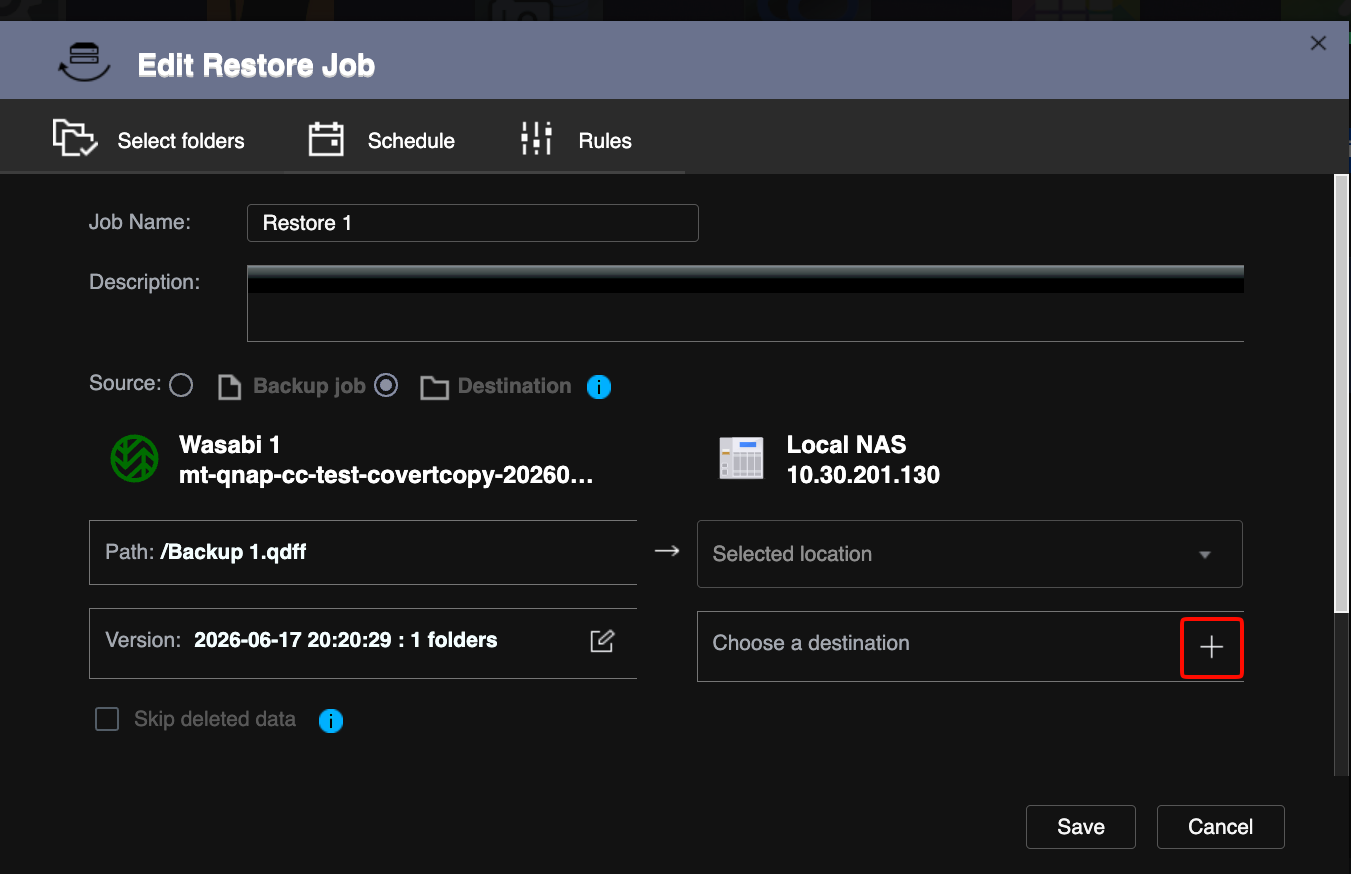
Click + next to Choose a destination.
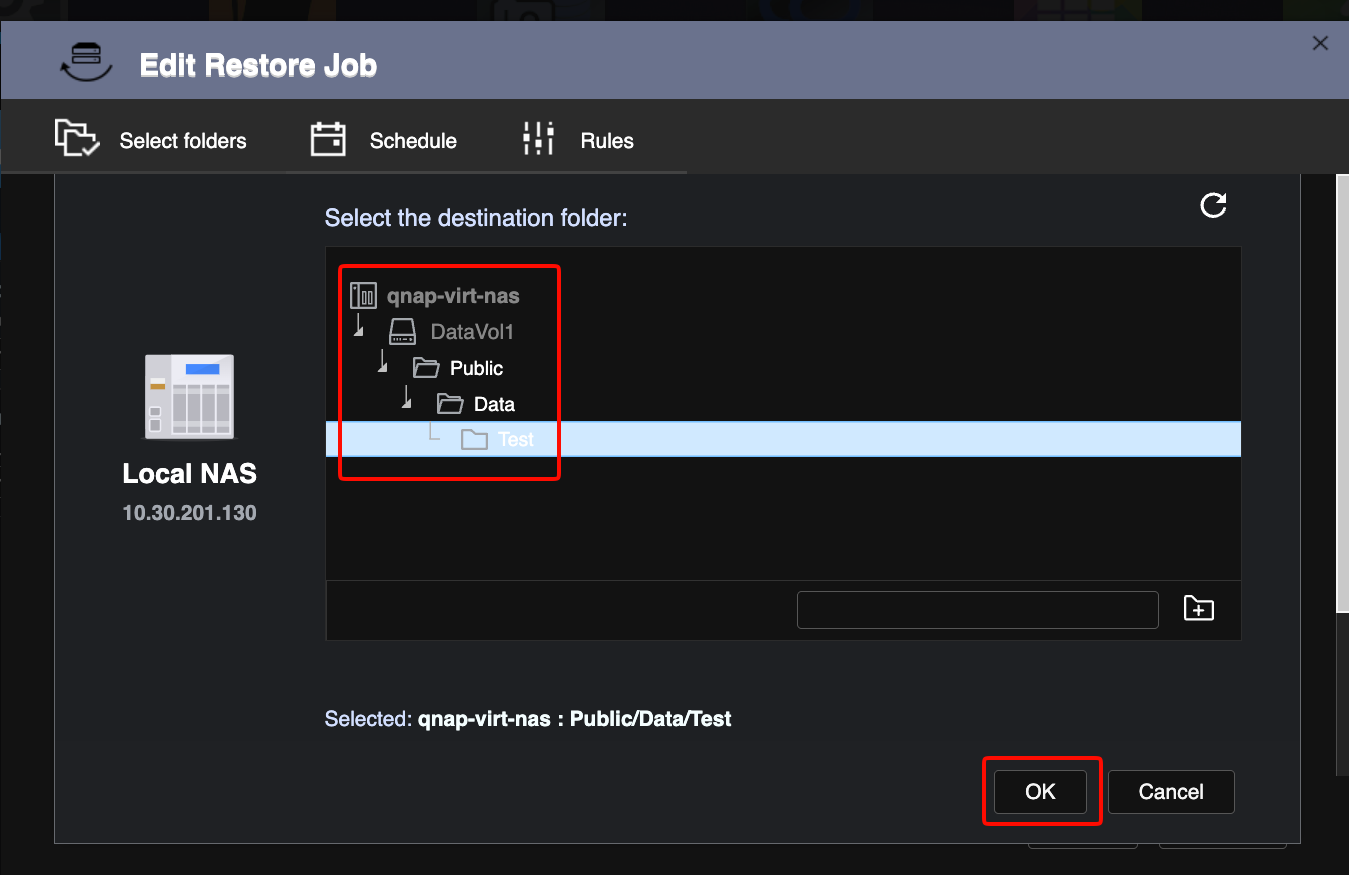
Select the destination folder and click OK.
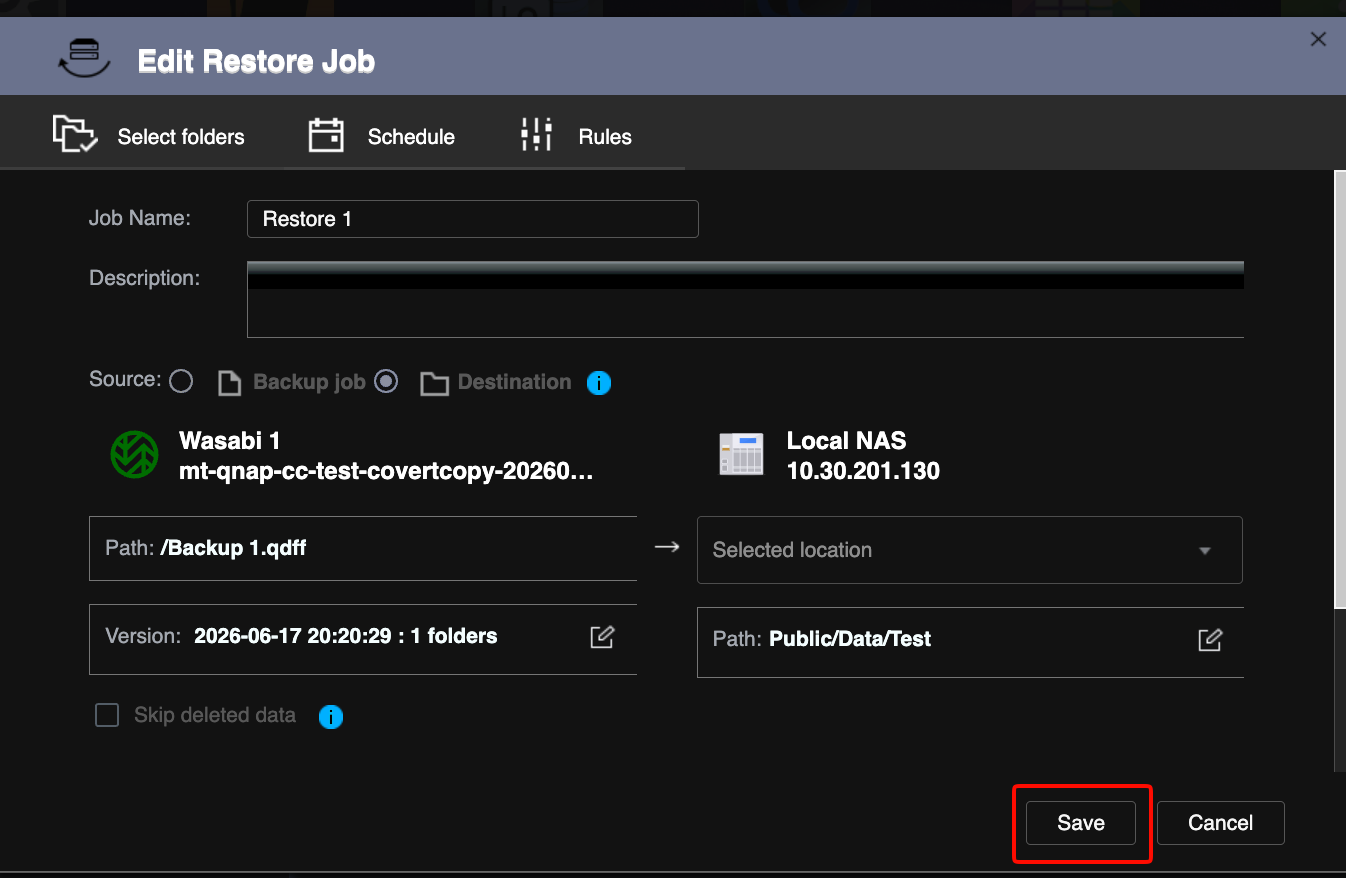
Click Save.
Click Restore Now.
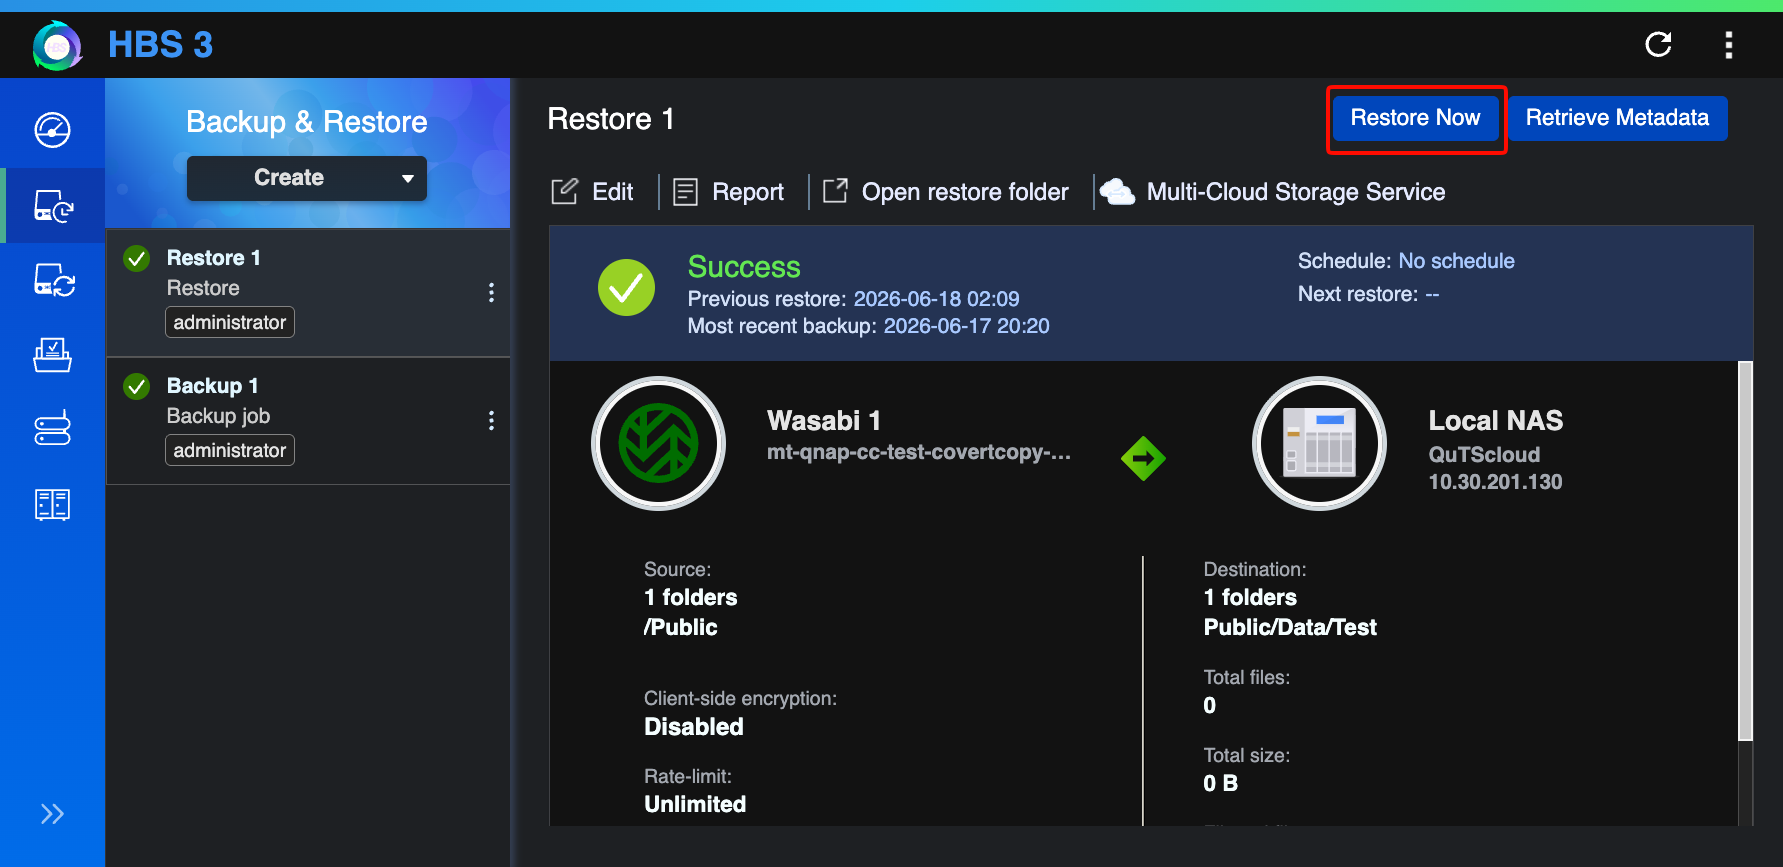
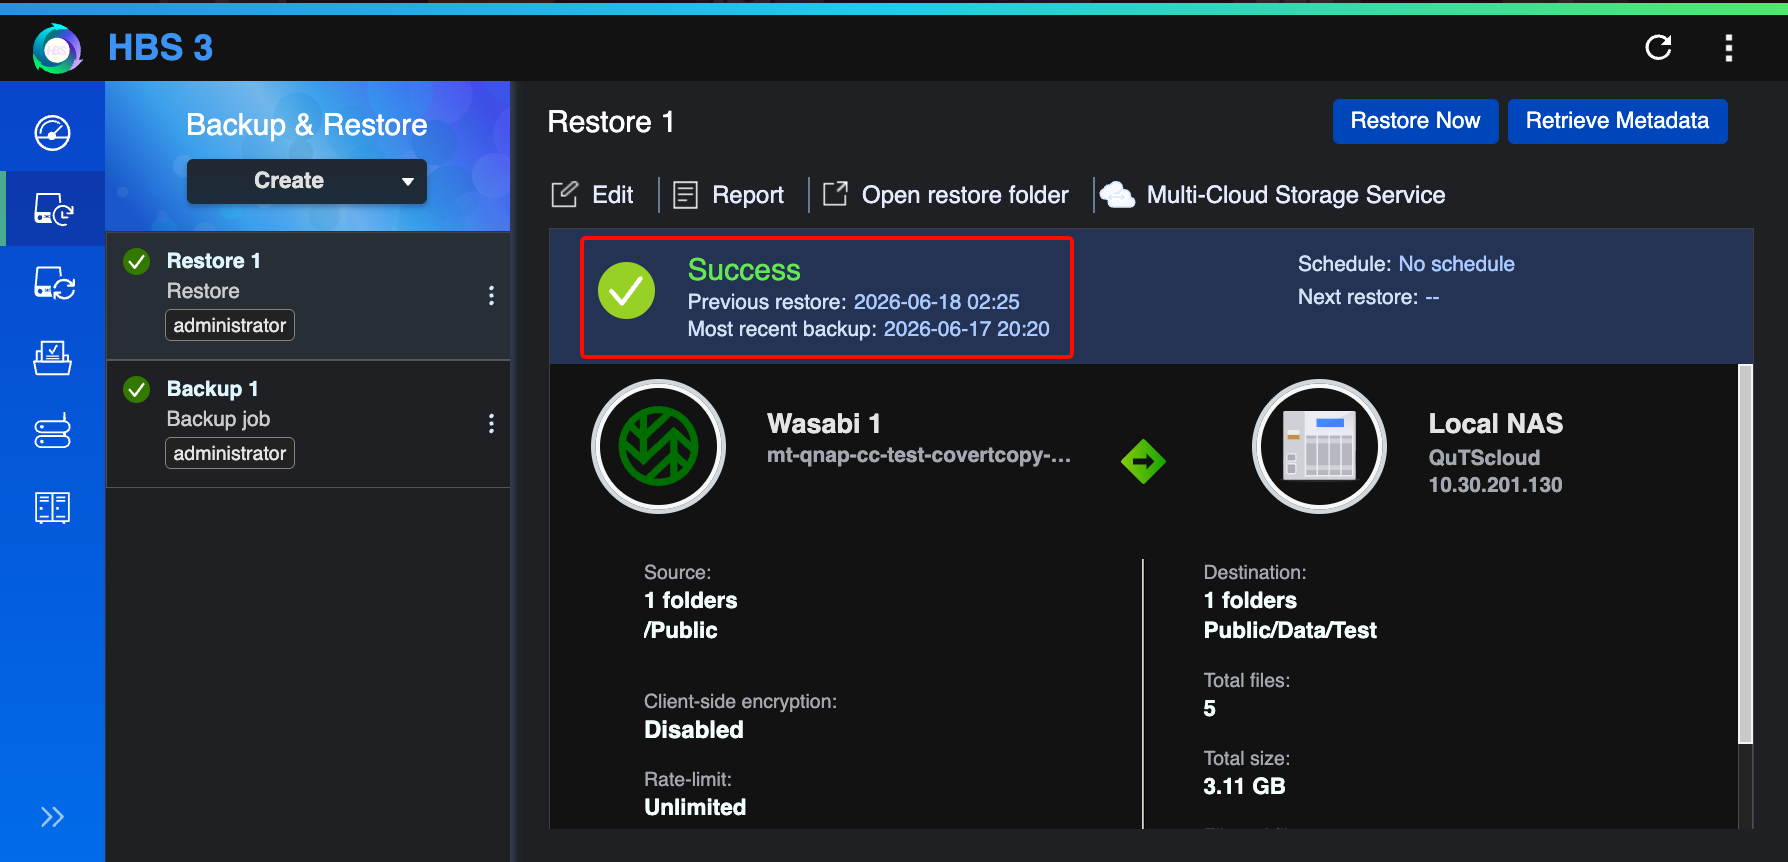
The status will show Success when the data has been restored.
Email Wasabi Support (support@wasabi.com) to turn off Restore Mode on your Covert Copy bucket.