How do I migrate Unitrends Backup from AWS S3 to Wasabi using WCSM?
Unitrends has been validated for use with Wasabi. For additional info on how Wasabi works with Unitrends, please visit this solution page. Please follow the steps outlined below to configure Wasabi as a cloud storage target for your Unitrends backups.
Prerequisites
- Unitrends Backup software installed and licensed. This solution was tested with version 10.8.7.
- Active AWS S3 cloud storage account.
- An AWS S3 bucket containing backups.
- AWS S3 access and secret keys.
- An active Backup Copy Job pointing to AWS S3.
Active Wasabi account with a bucket created for Unitrends backups. Do NOT configure Object Lock or Versioning on your bucket because Unitrends does not currently support them. See this article for details on how to create a Wasabi bucket.
High-Level Migration Steps
Follow the high-level steps below to migrate from AWS S3 to Wasabi. These are detailed further in the sections below.
- Backups in the cloud reside initially only in the AWS S3 bucket.
- The WCSM team performs an initial copy from AWS S3 to Wasabi.
- The customer disables Unitrends Backup Copy Job(s) before the final sync.
- The WCSM team performs a final sync.
- The customer deletes the AWS S3 Backup Copy Target in Unitrends.
- The customer adds a Wasabi Backup Copy Target.
- The customer points the Backup Copy Job(s) to Wasabi and enables the jobs.
- The customer does a test restore using a migrated backup.
Wasabi Cloud Sync Manager Configuration
Wasabi Cloud Sync Manager (WCSM) is a paid, managed migration service. Refer to Getting Started With Wasabi Cloud Sync Manager for more information.
- Request a WCSM Account by either completing the WCSM Questionnaire or reaching out to your Wasabi Sales contact.
- Upon approval and notification of account creation, you will be able to log into the WCSM Portal. Follow the steps outlined in 2—Entering Credentials for Cloud Migration.
- This will require you to enter your AWS S3 storage account credentials and Wasabi account credentials along with your bucket information.
Disable Backup Copy Job(s) Before Final Sync is Performed
Disable the backup copy jobs(s) currently pointed to AWS S3.
- Navigate to Jobs -> Job Manager and select the backup copy job(s) pointed to AWS S3. Click Disable.

Final WCSM sync will be performed on agreed upon date
The final WCSM data sync will occur on the date agreed upon by the customer and the Wasabi WCSM team. This will sync any new backups performed to AWS S3 and any Unitrends backup cleanup activities/deletions from AWS S3 to ensure the same data resides in Wasabi. For a definition of the WCSM sync operation, review Migration Types.
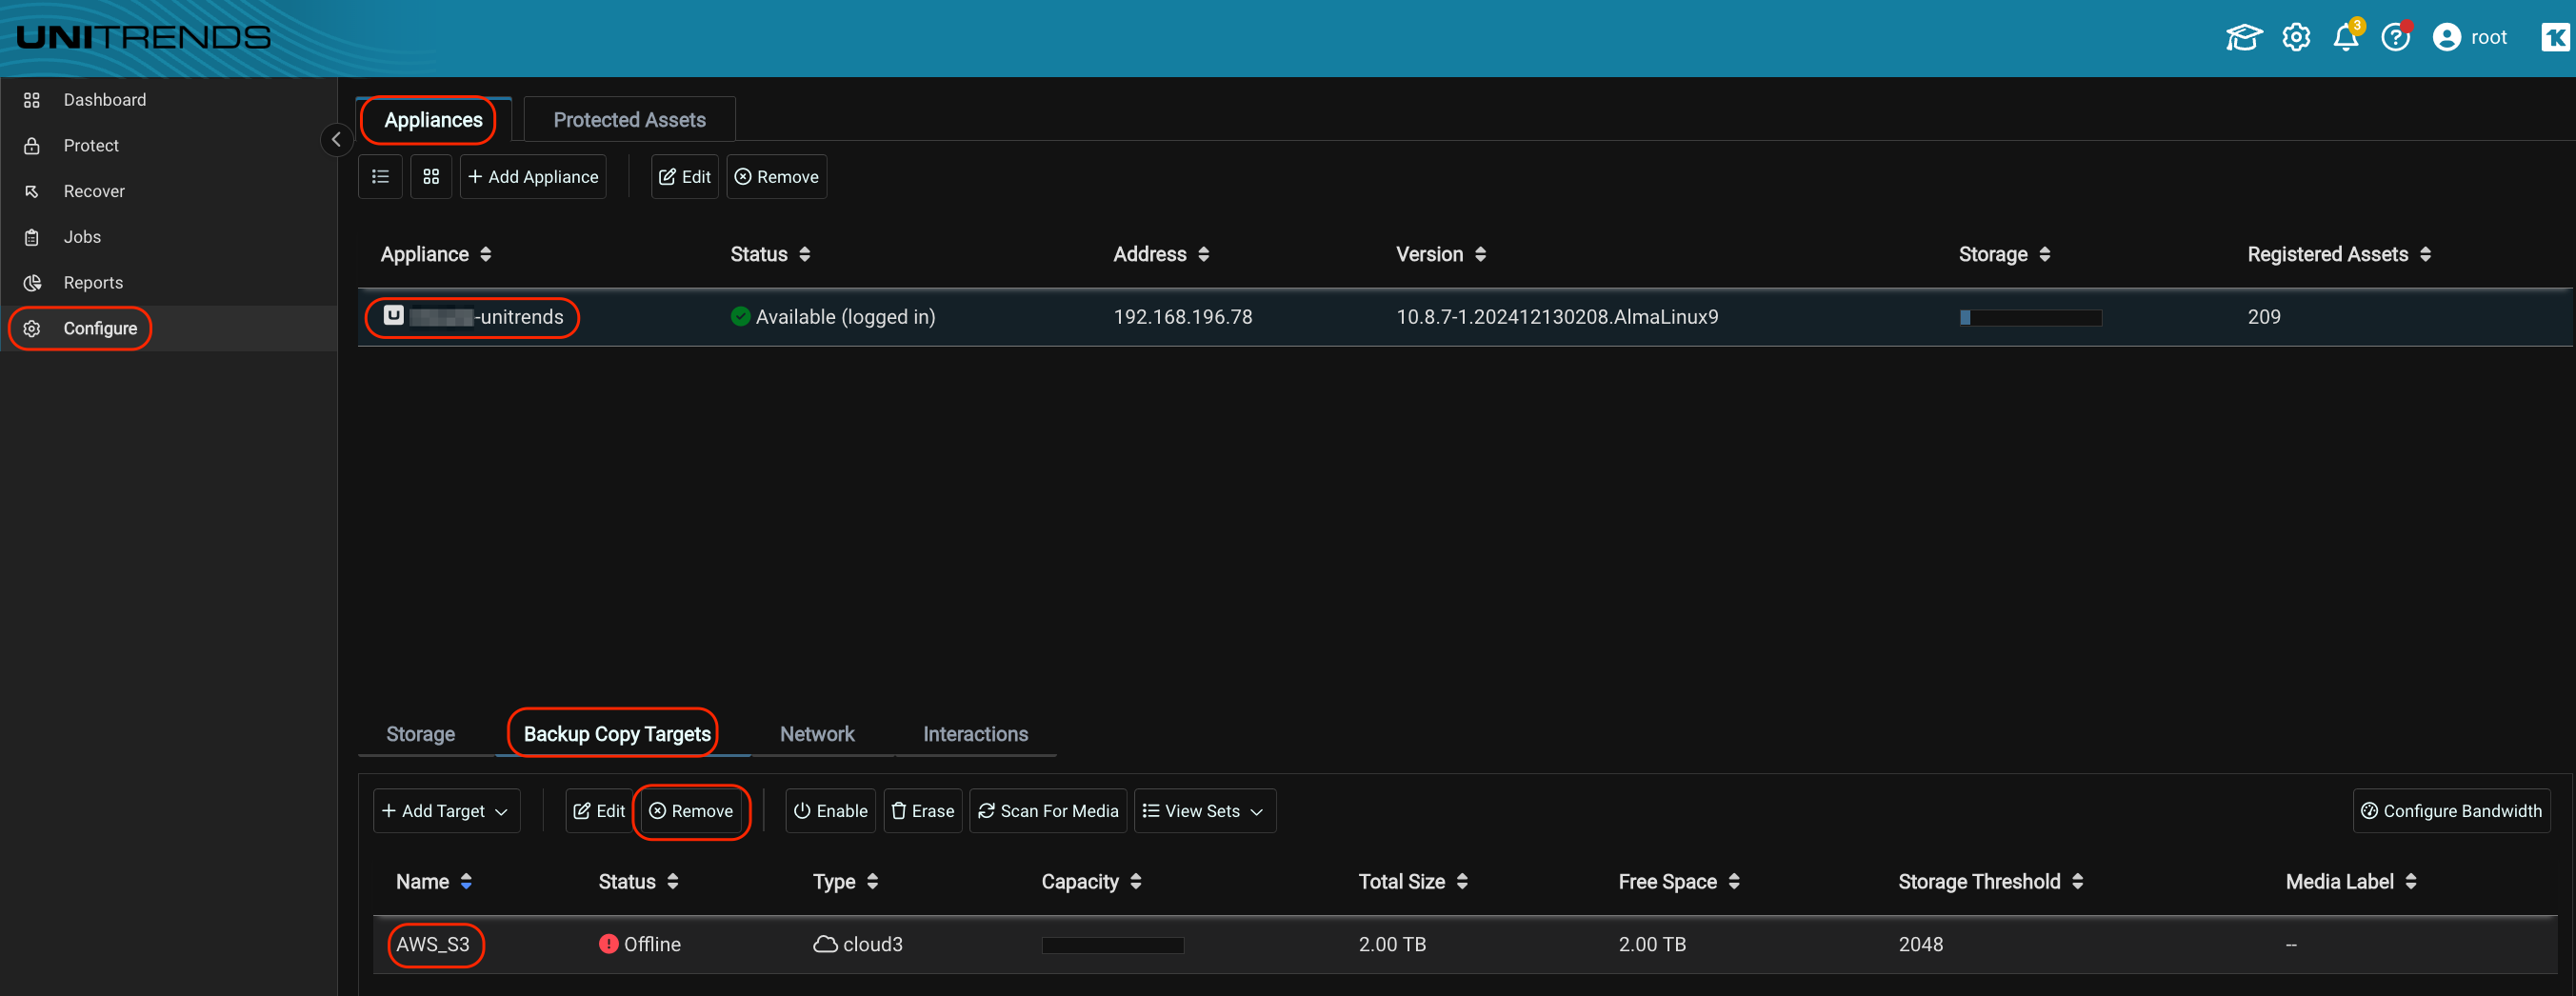
Delete the AWS S3 Backup Copy Target in Unitrends
Navigate to Configure > Appliances and select your Unitrends appliance. Click Backup Copy Targets. Select the AWS S3 backup copy target and click Remove.
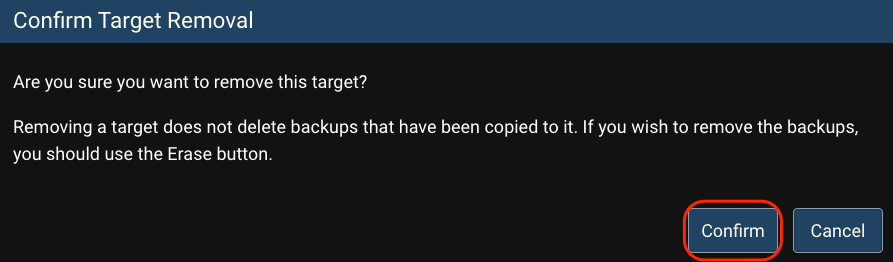
Confirm the target removal by clicking Confirm.
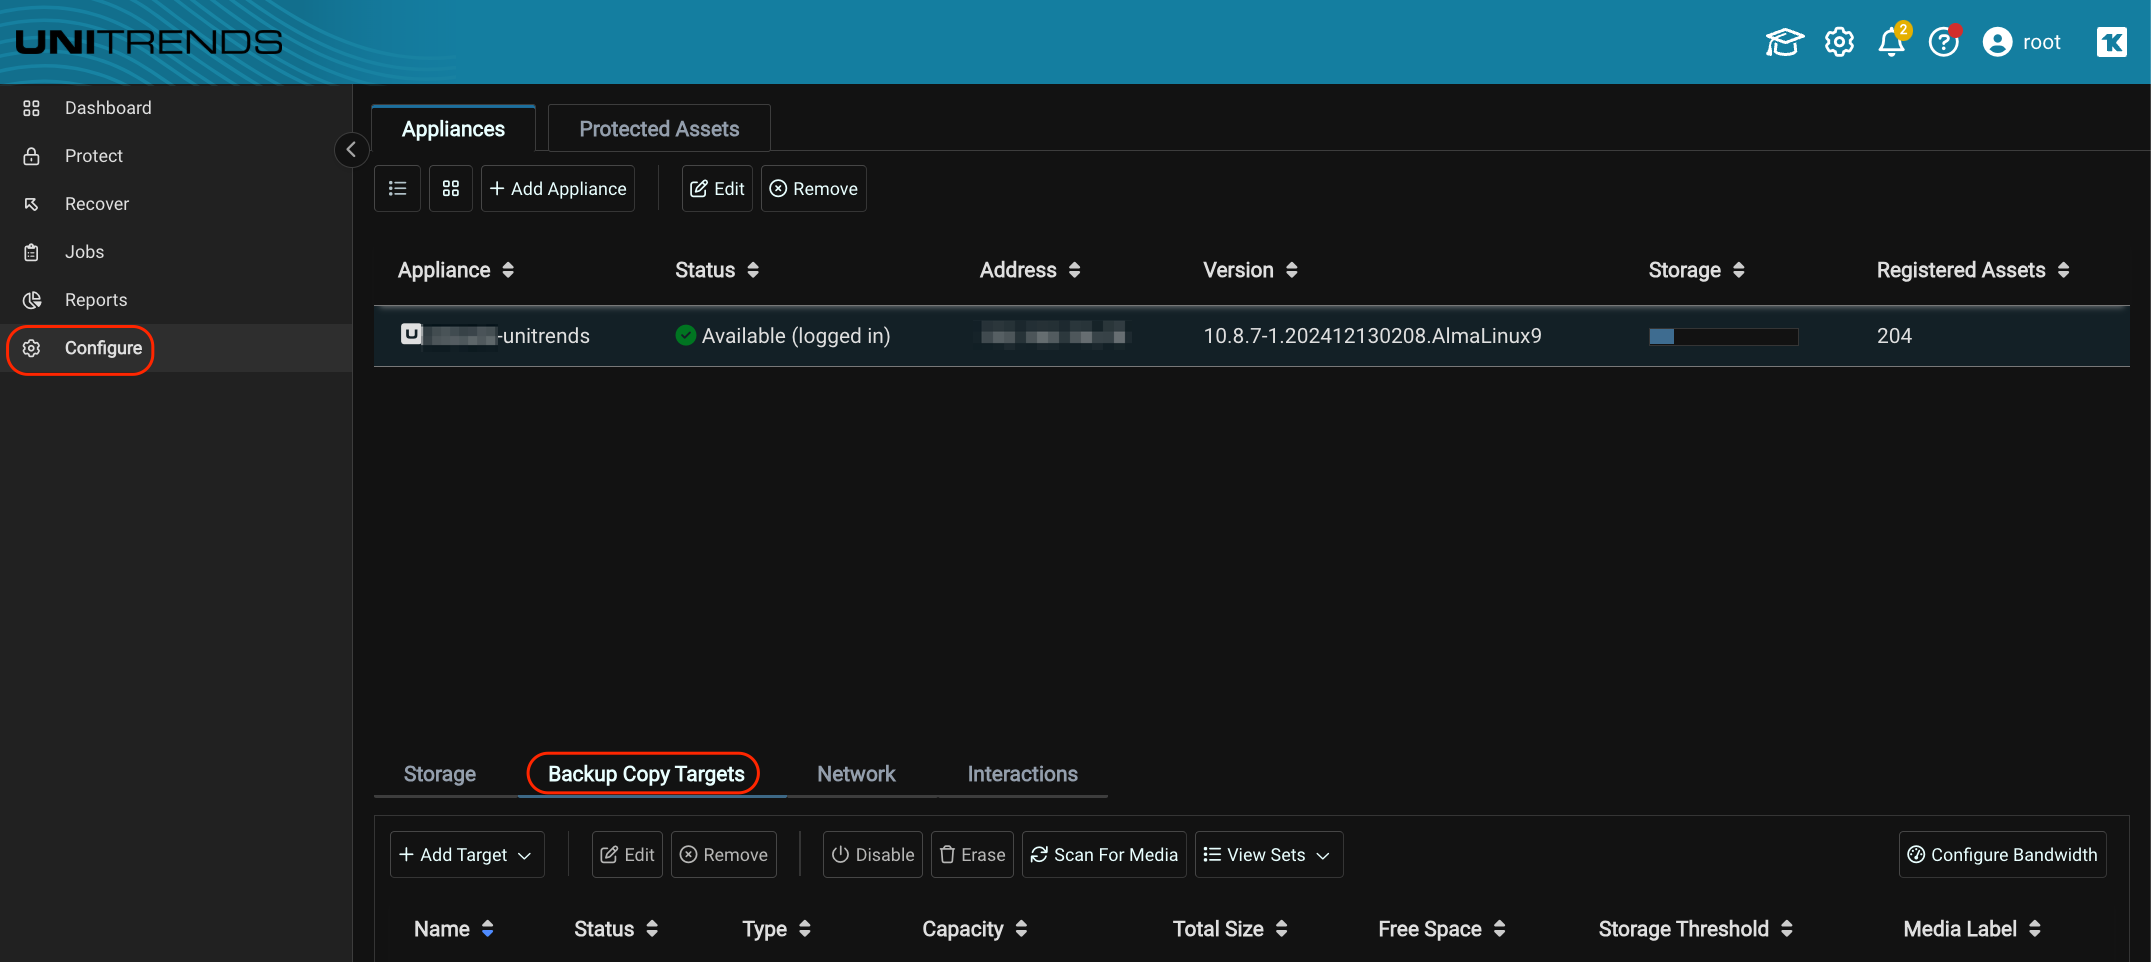
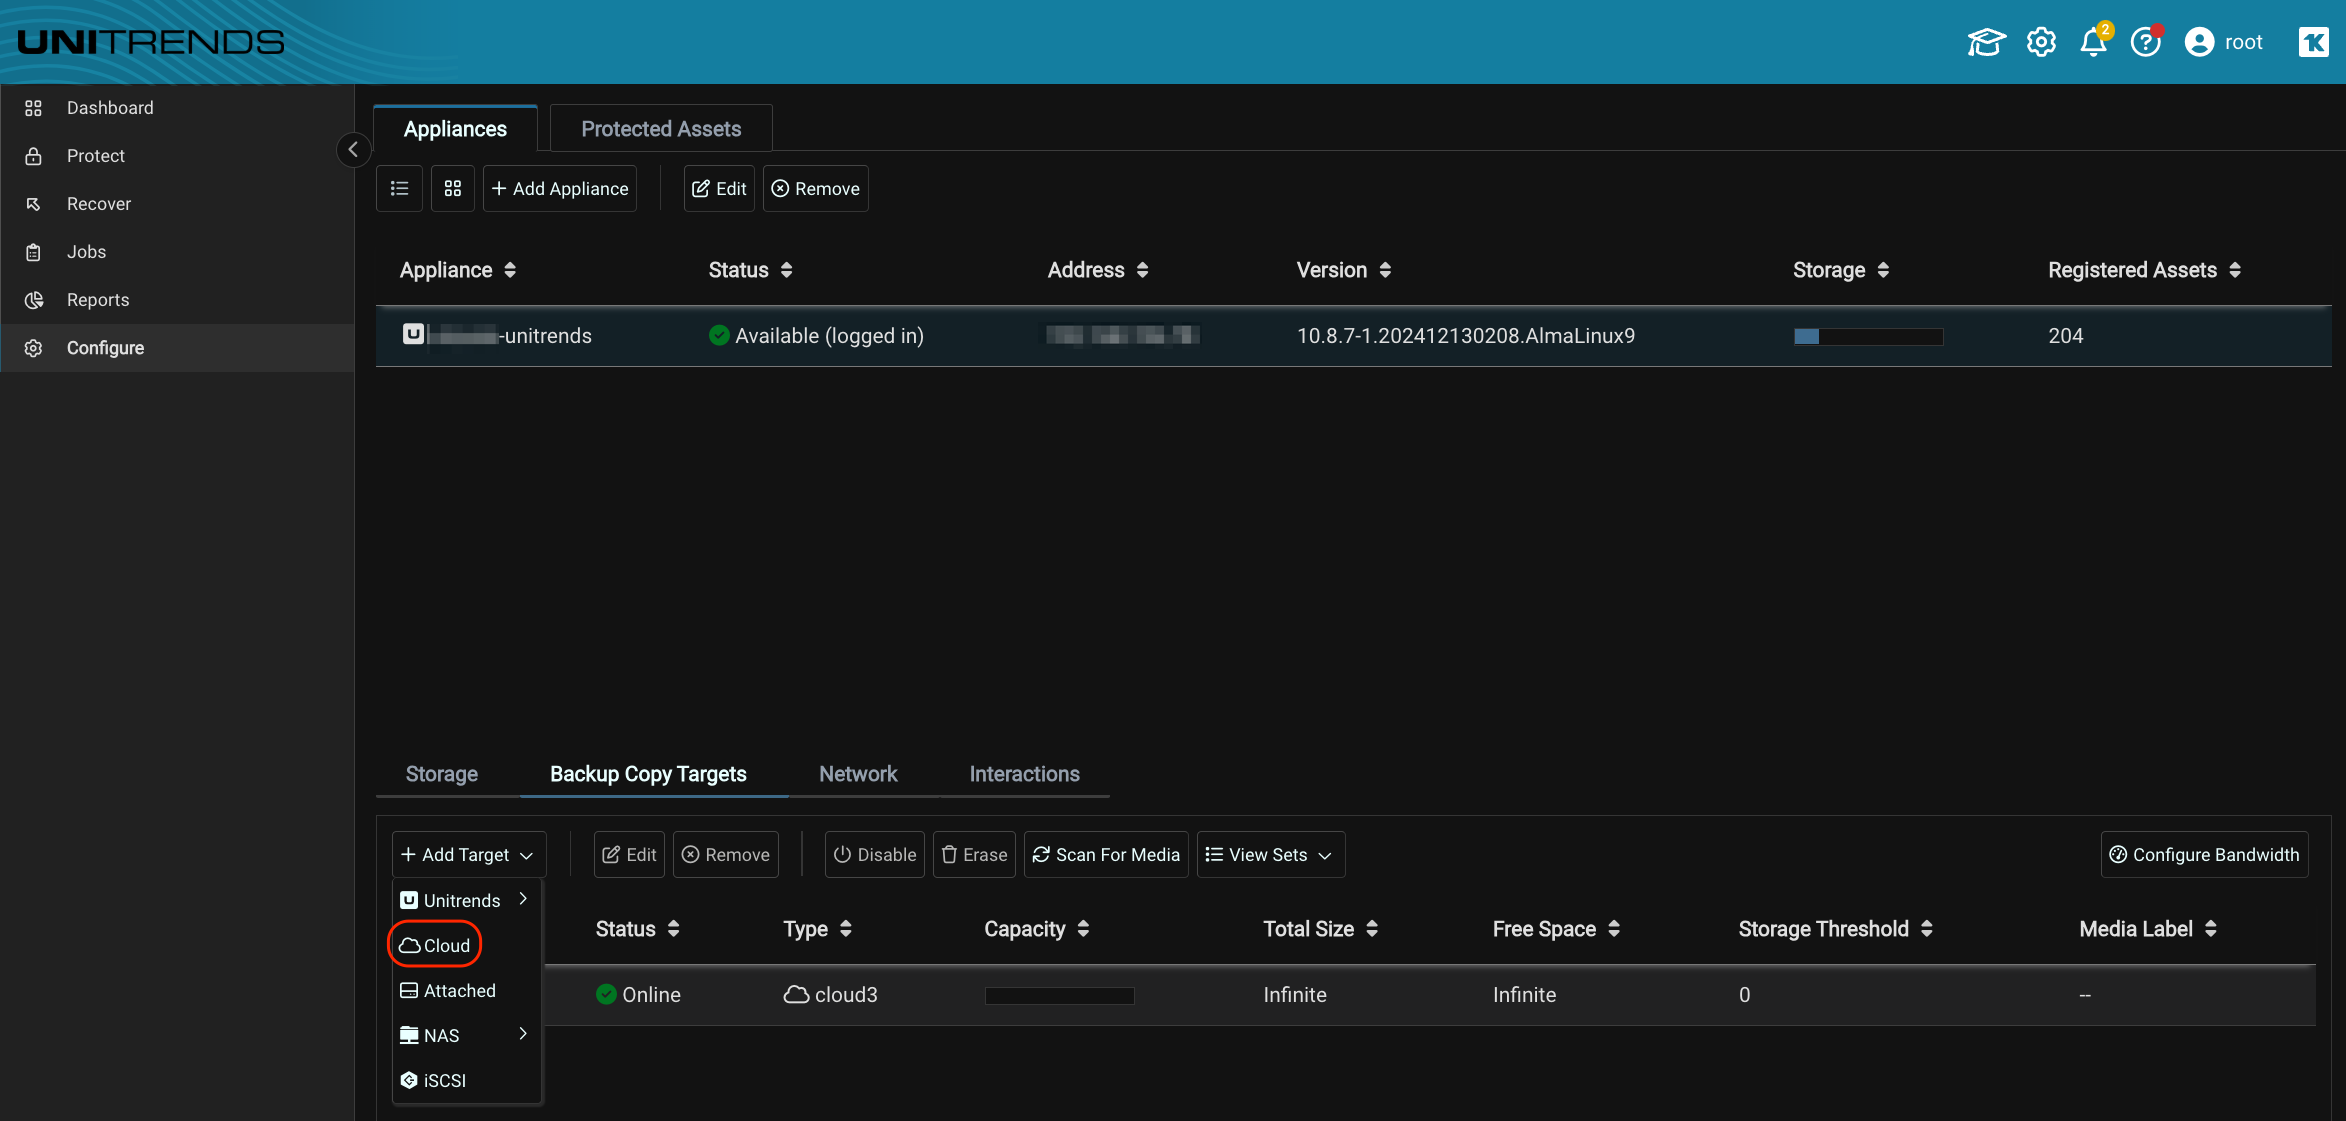
Add a Wasabi Backup Copy Target
Navigate to the Configure tab on the left side pane and go to the Backup Copy Targets section.
Expand the Add target dropdown menu and select Cloud from the list of options.
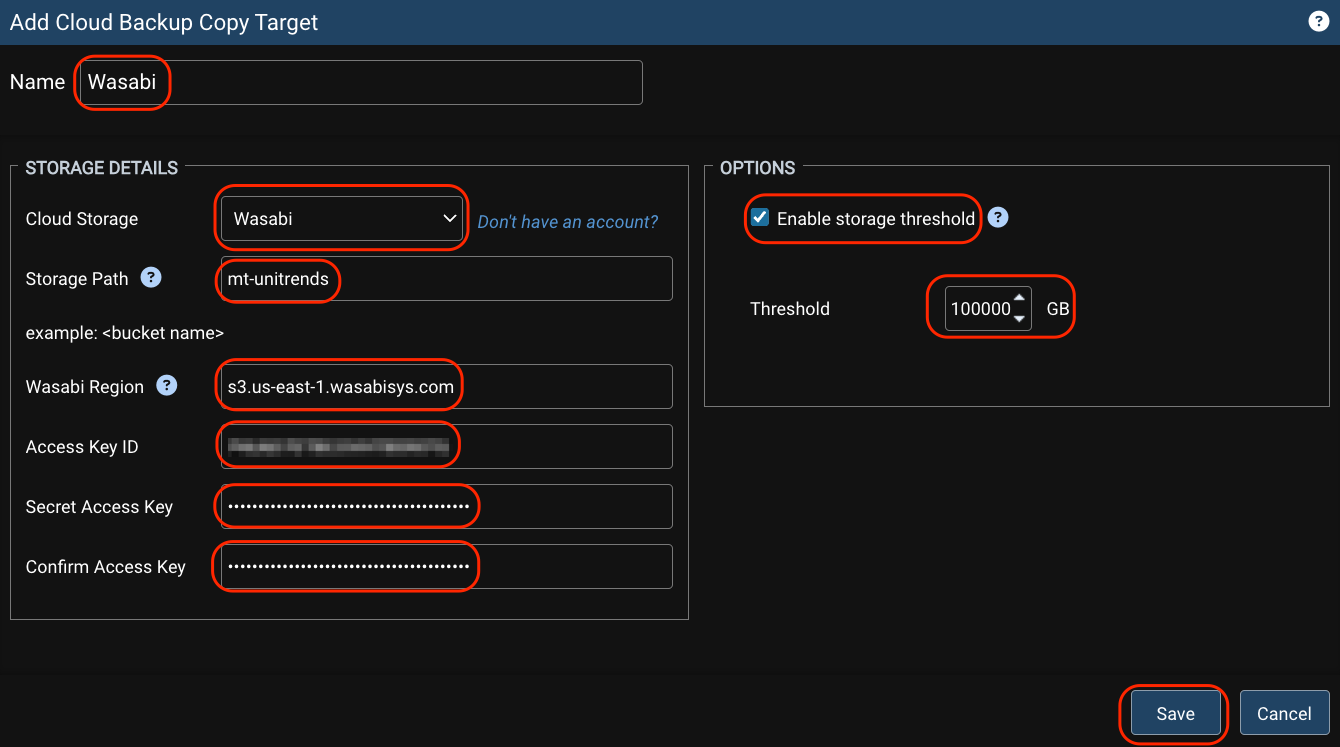
In the Add Cloud Backup Copy Target window, provide a name for the target.
Under the Storage Details section, choose Wasabi as the Cloud Storage target and enter the following details then click Save.Storage Path - Wasabi bucket name
Wasabi Region - Service URL of the Wasabi region your bucket Is located in.
Note: This config example discusses the use of Wasabi's us-east-1 storage region. To use other Wasabi storage regions, please use the appropriate Wasabi service URL as described in this article.Access Key ID
Secret Access Key
Under Options, select the checkbox next to “Enable storage threshold.” Set the Threshold to be an appropriate value for your organization. This will set the maximum amount of Wasabi storage your backups will consume. In this example, 100 TB (100,000 GB) was configured. Ensure this value is high enough to contain all your existing backups with extra room for growth.
IMPORTANT: This storage threshold must be set if you wish to limit the amount of Wasabi storage Unitrends backups will utilize. Otherwise, Unitrends will believe your Wasabi bucket has infinite space. From Unitrends documentation: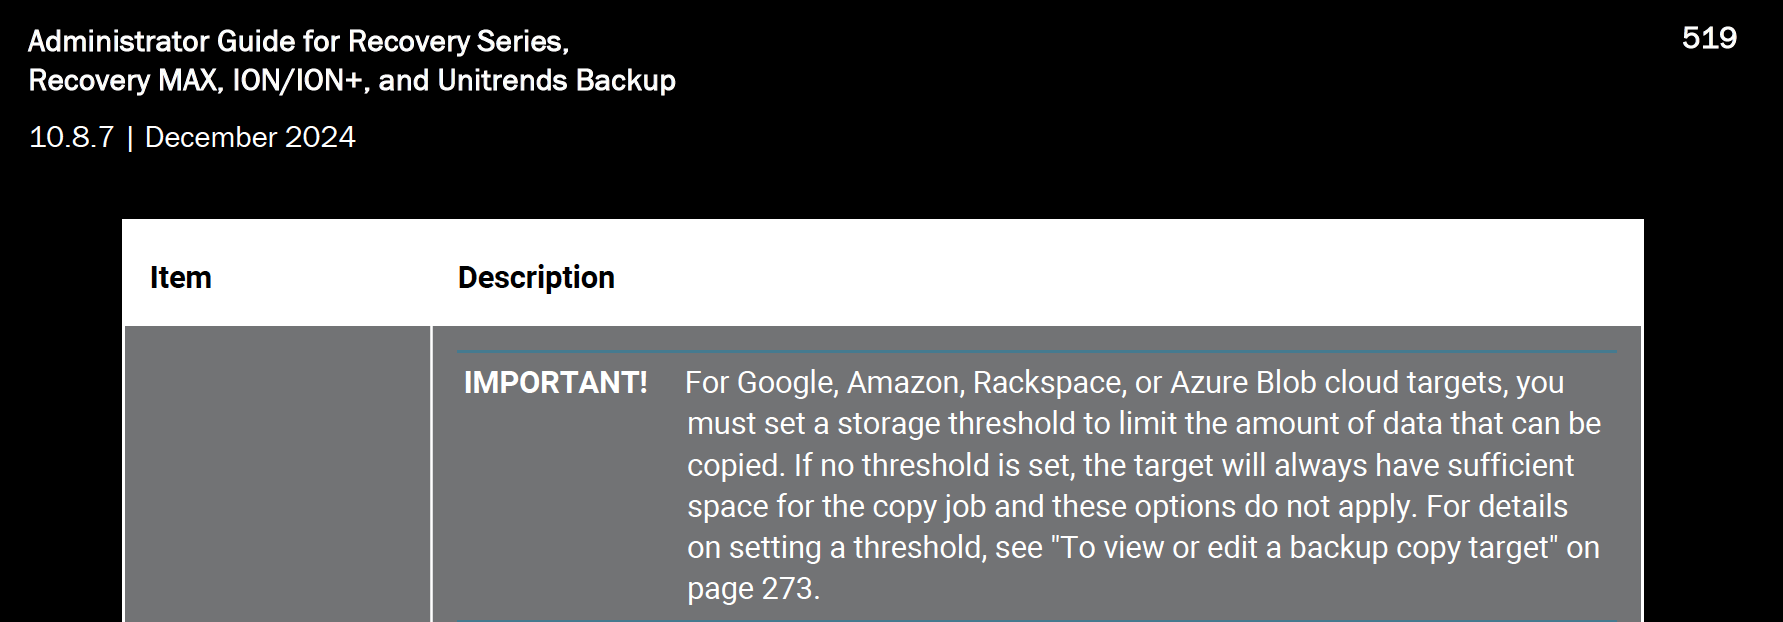
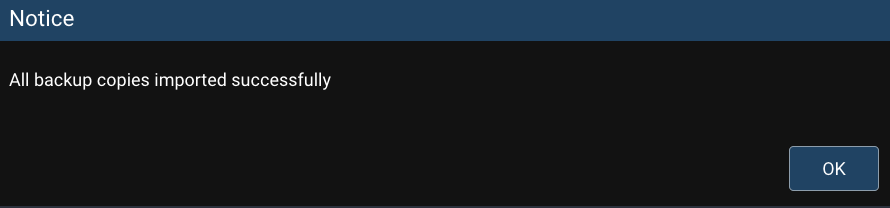
Click OK after all backup copies have been successfully imported.
- The recently added Wasabi target will show up as an Online target.

Point Backup Copy Job(s) to Wasabi
- Navigate to Jobs > Job Manager, then select the Backup Copy Job pointing to AWS S3 and click Edit.

- Click Next.
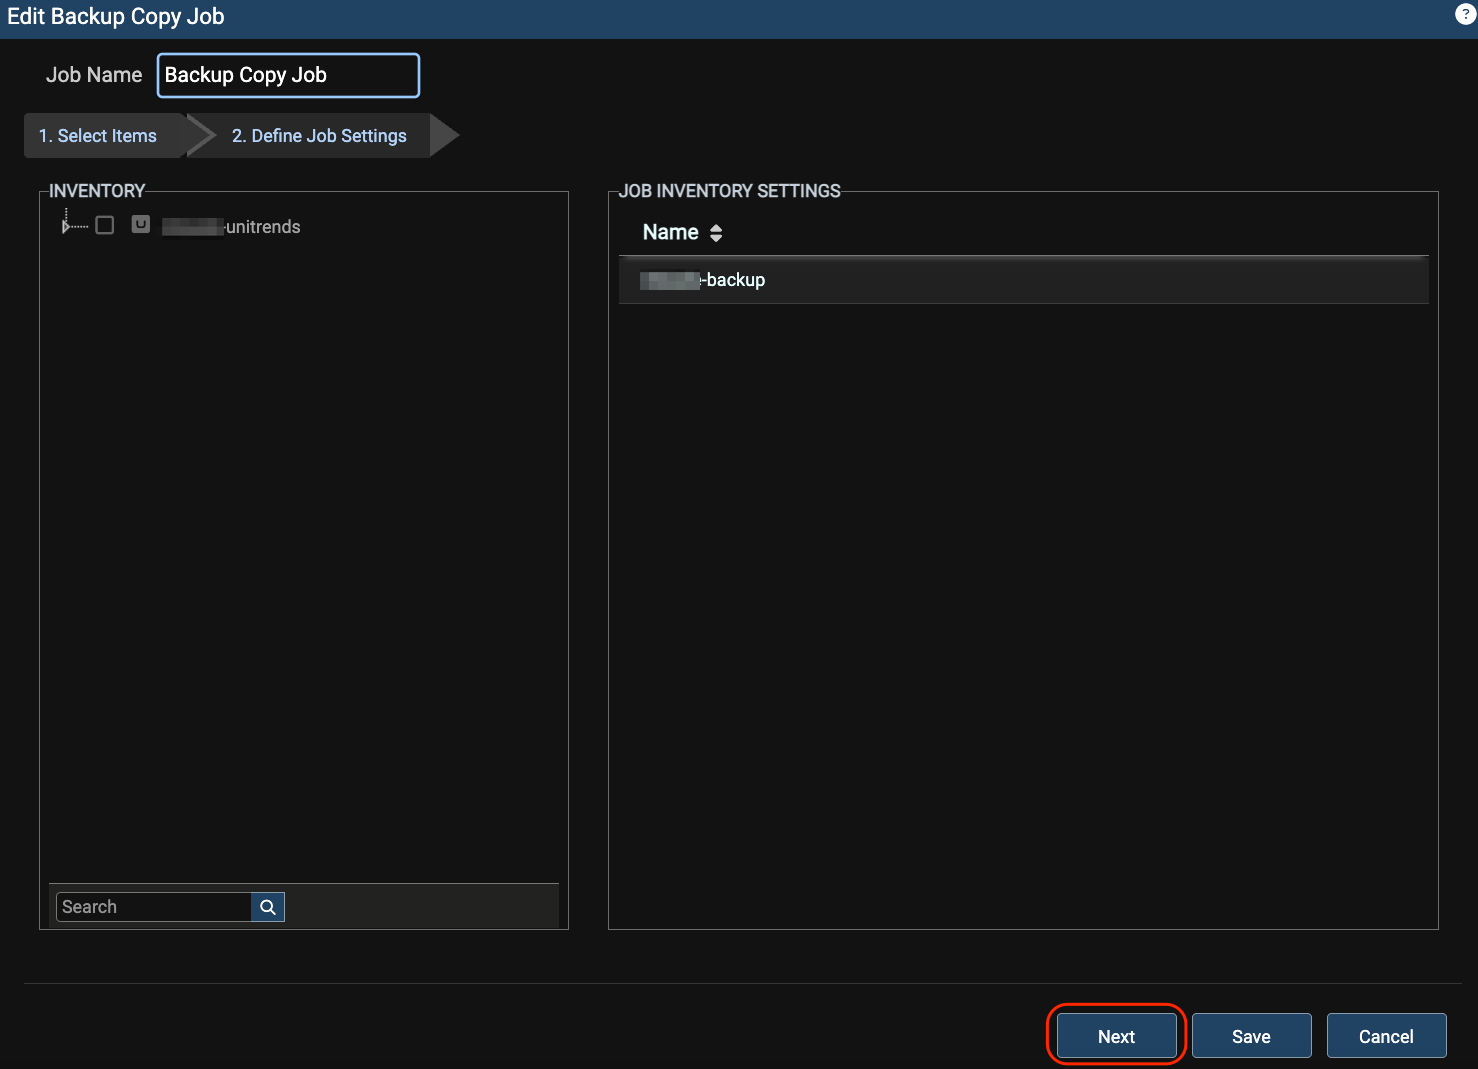
- Change the Backup Copy Target to Wasabi and click Save.
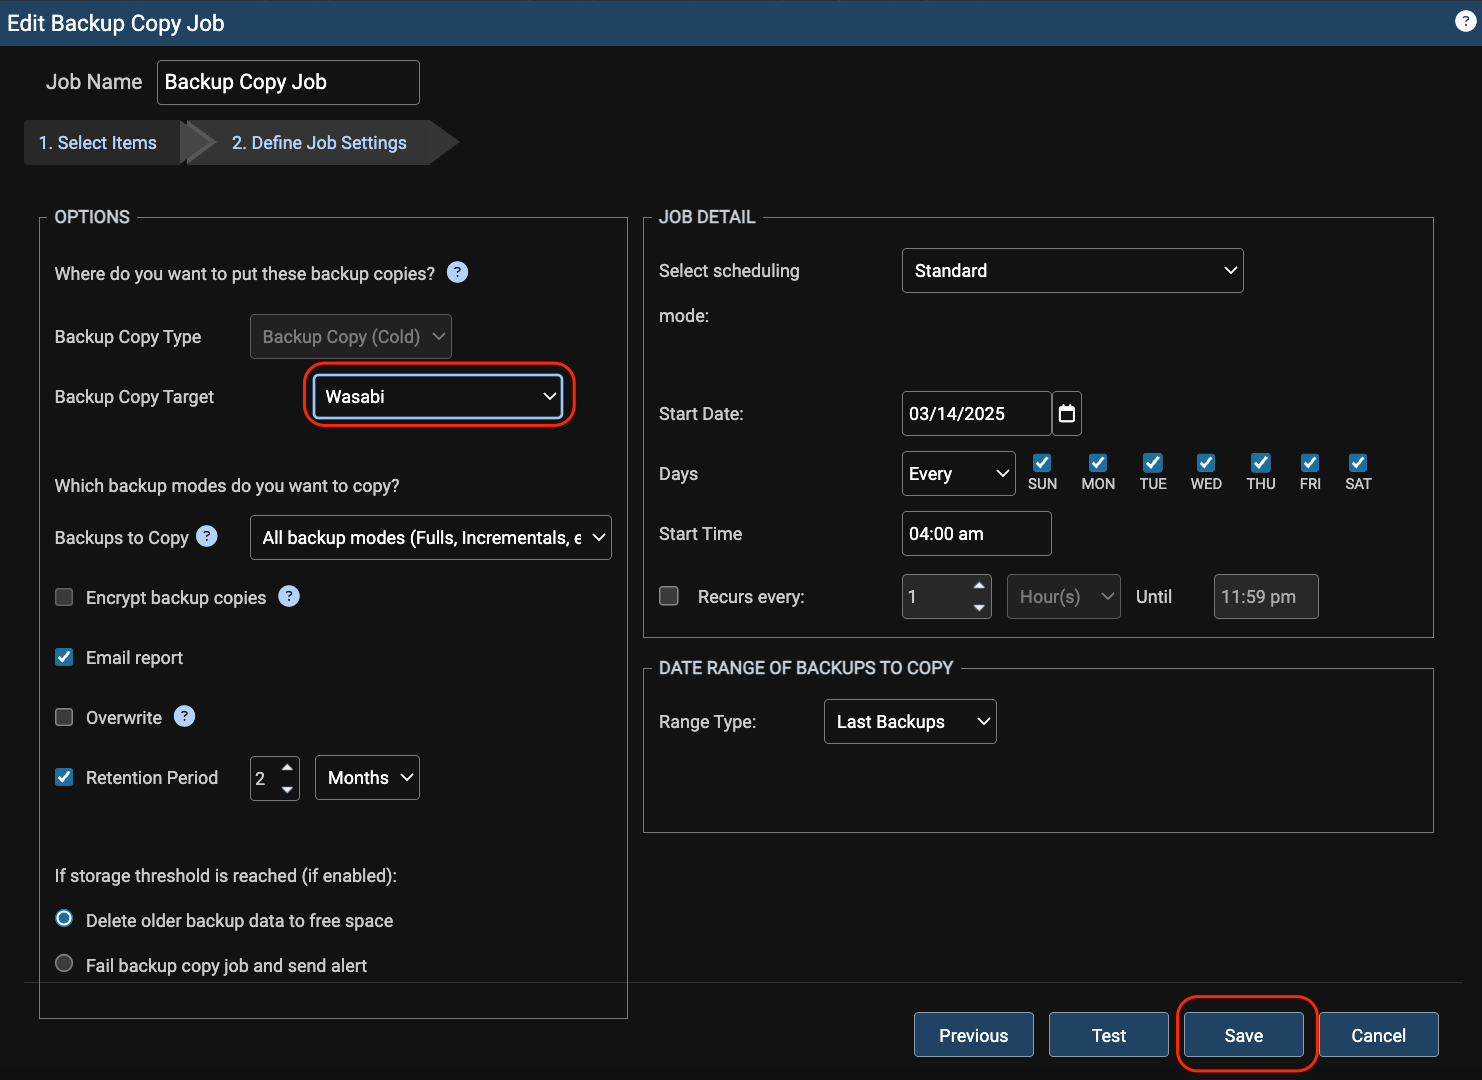
- Enable the Backup Copy Job(s) by repeated the steps in the Disable Backup Copy Job(s) Before Final Sync is Performed section above, except click Enable instead of Disable.
Verify Restore Points are Available and Perform Test Restore
- Perform the following steps to import a backup.
a. Navigate to the Recover tab.
b. Click Backup Catalog.
c. In the Filter Backup section of the screen on the right, click on Backup Copy (Cold).
d. Click Filter.
e. Click on a backup you wish to perform a restore from.
f. Hover your mouse over the backup name to verify it is stored in Wasabi.
g. Click Import to Source.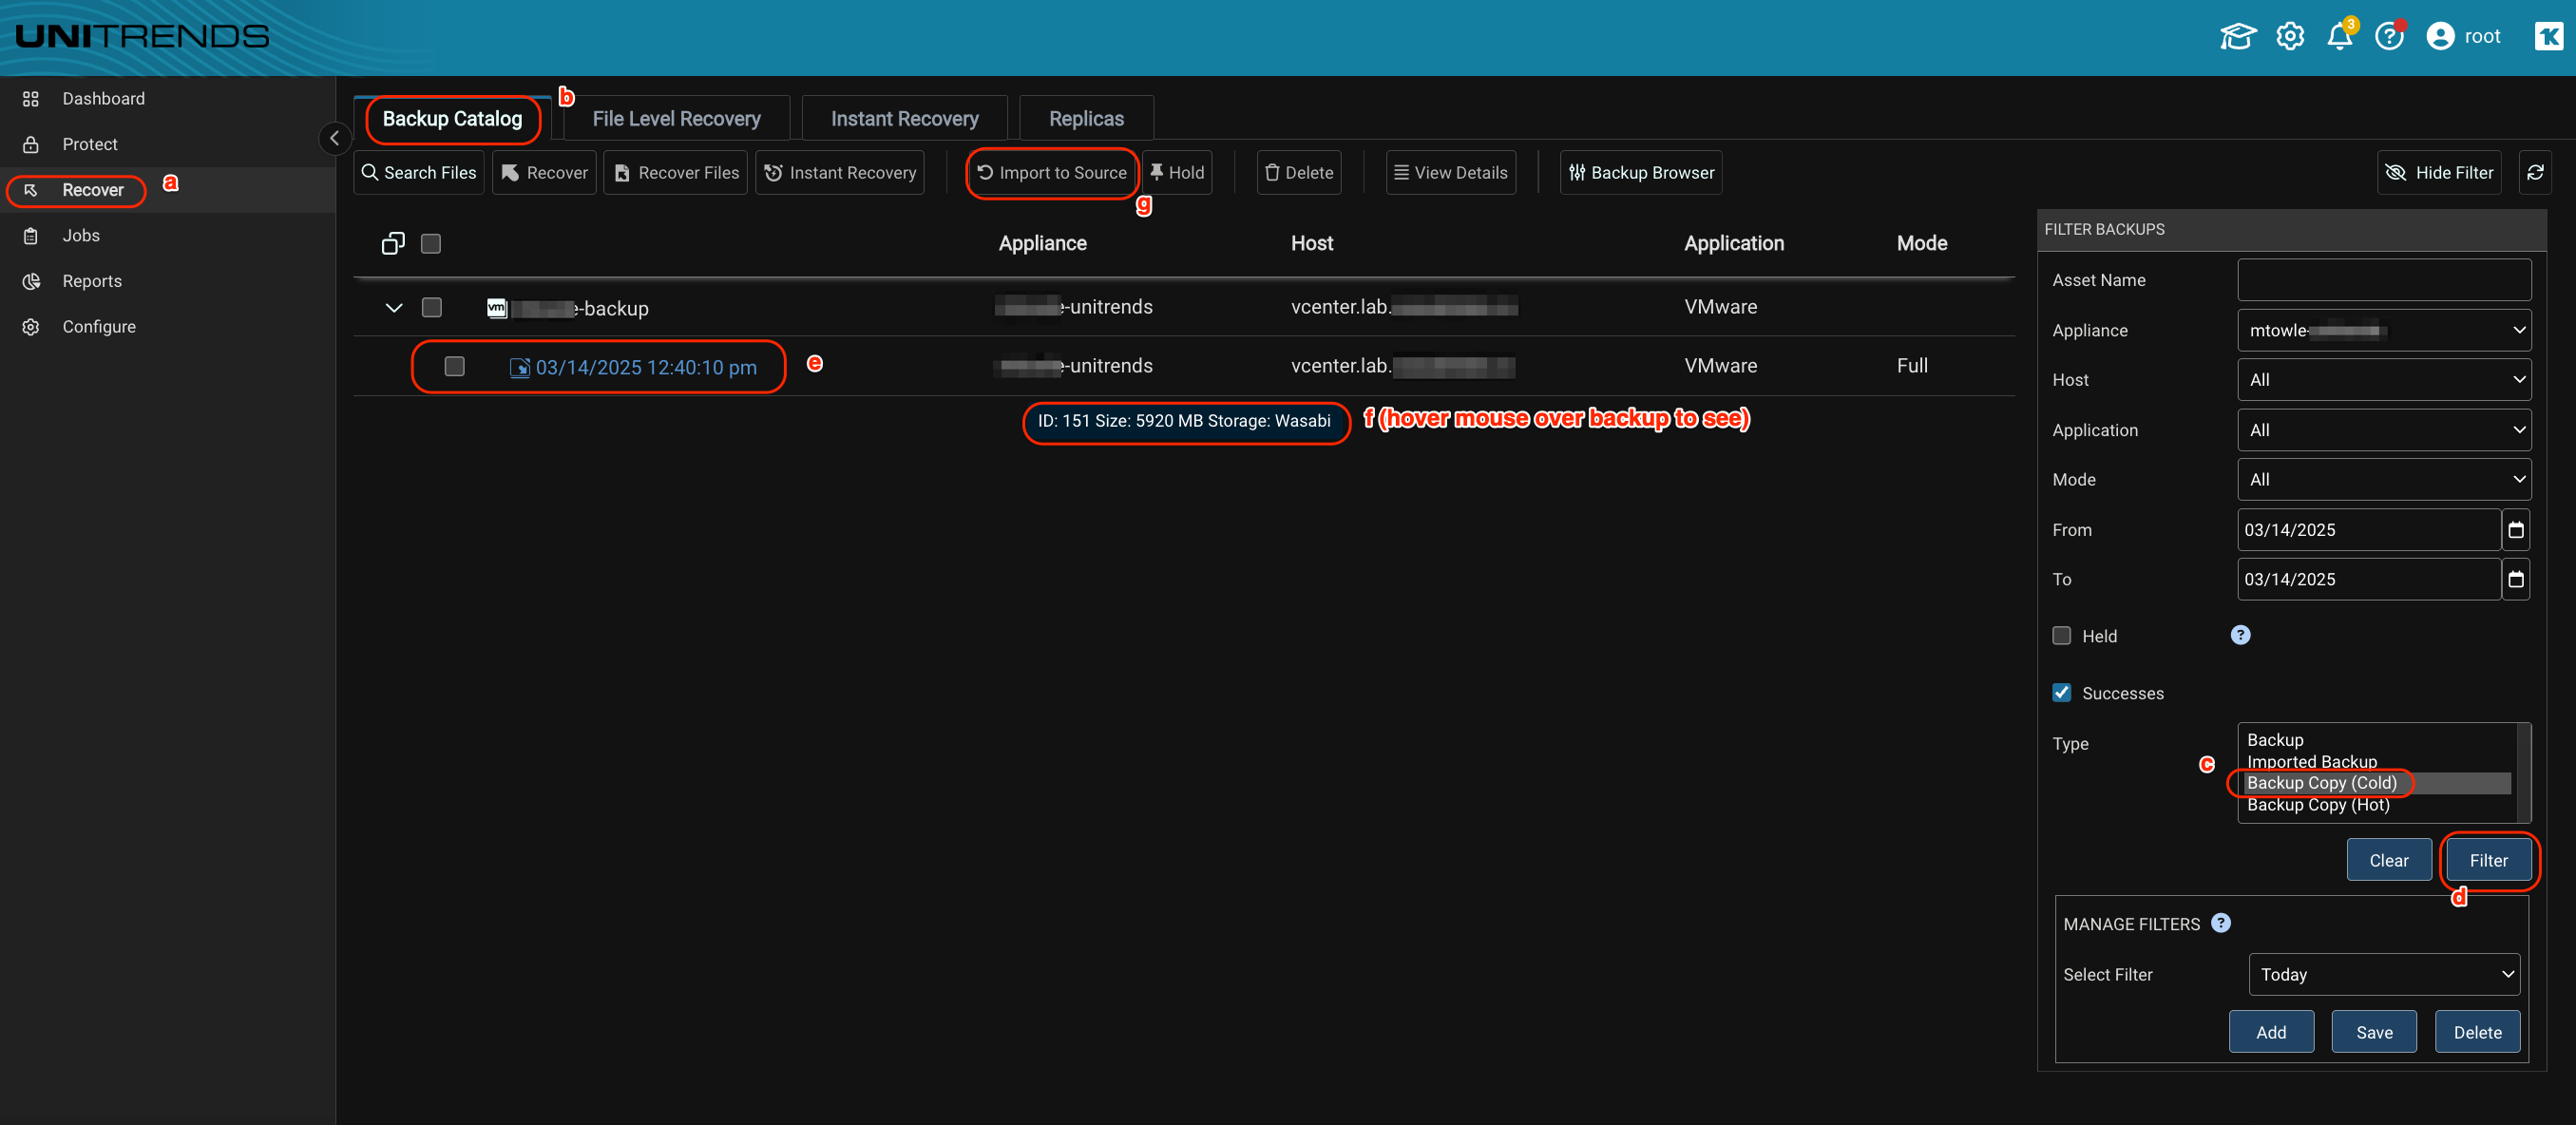
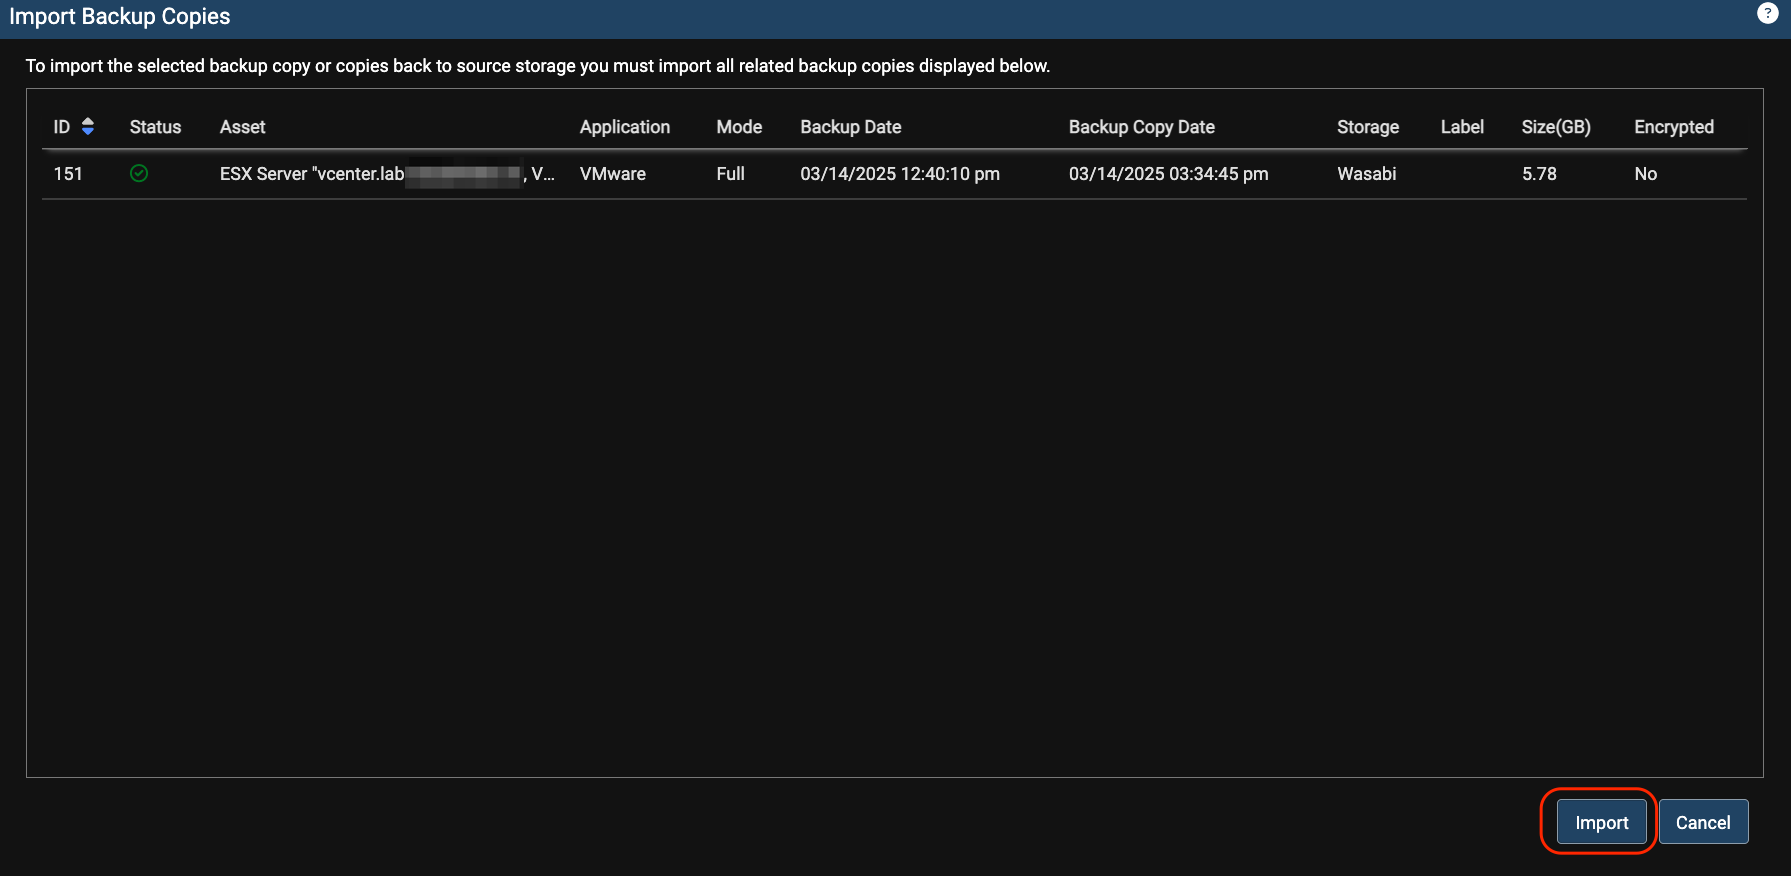
- Click Import.
- Click View Jobs.
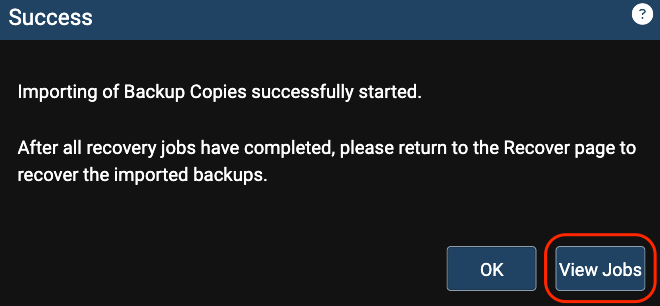
- When the job shows a status of success, proceed to the next step.

- Perform the following steps to recover from the imported backup.
a. Navigate to the Recover tab.
b. Click Backup Catalog.
c. In the Filter Backup section of the screen on the right, click on Imported Backup.
d. Click Filter.
e. Click on the backup you wish to perform a restore from.
f. Click Recover.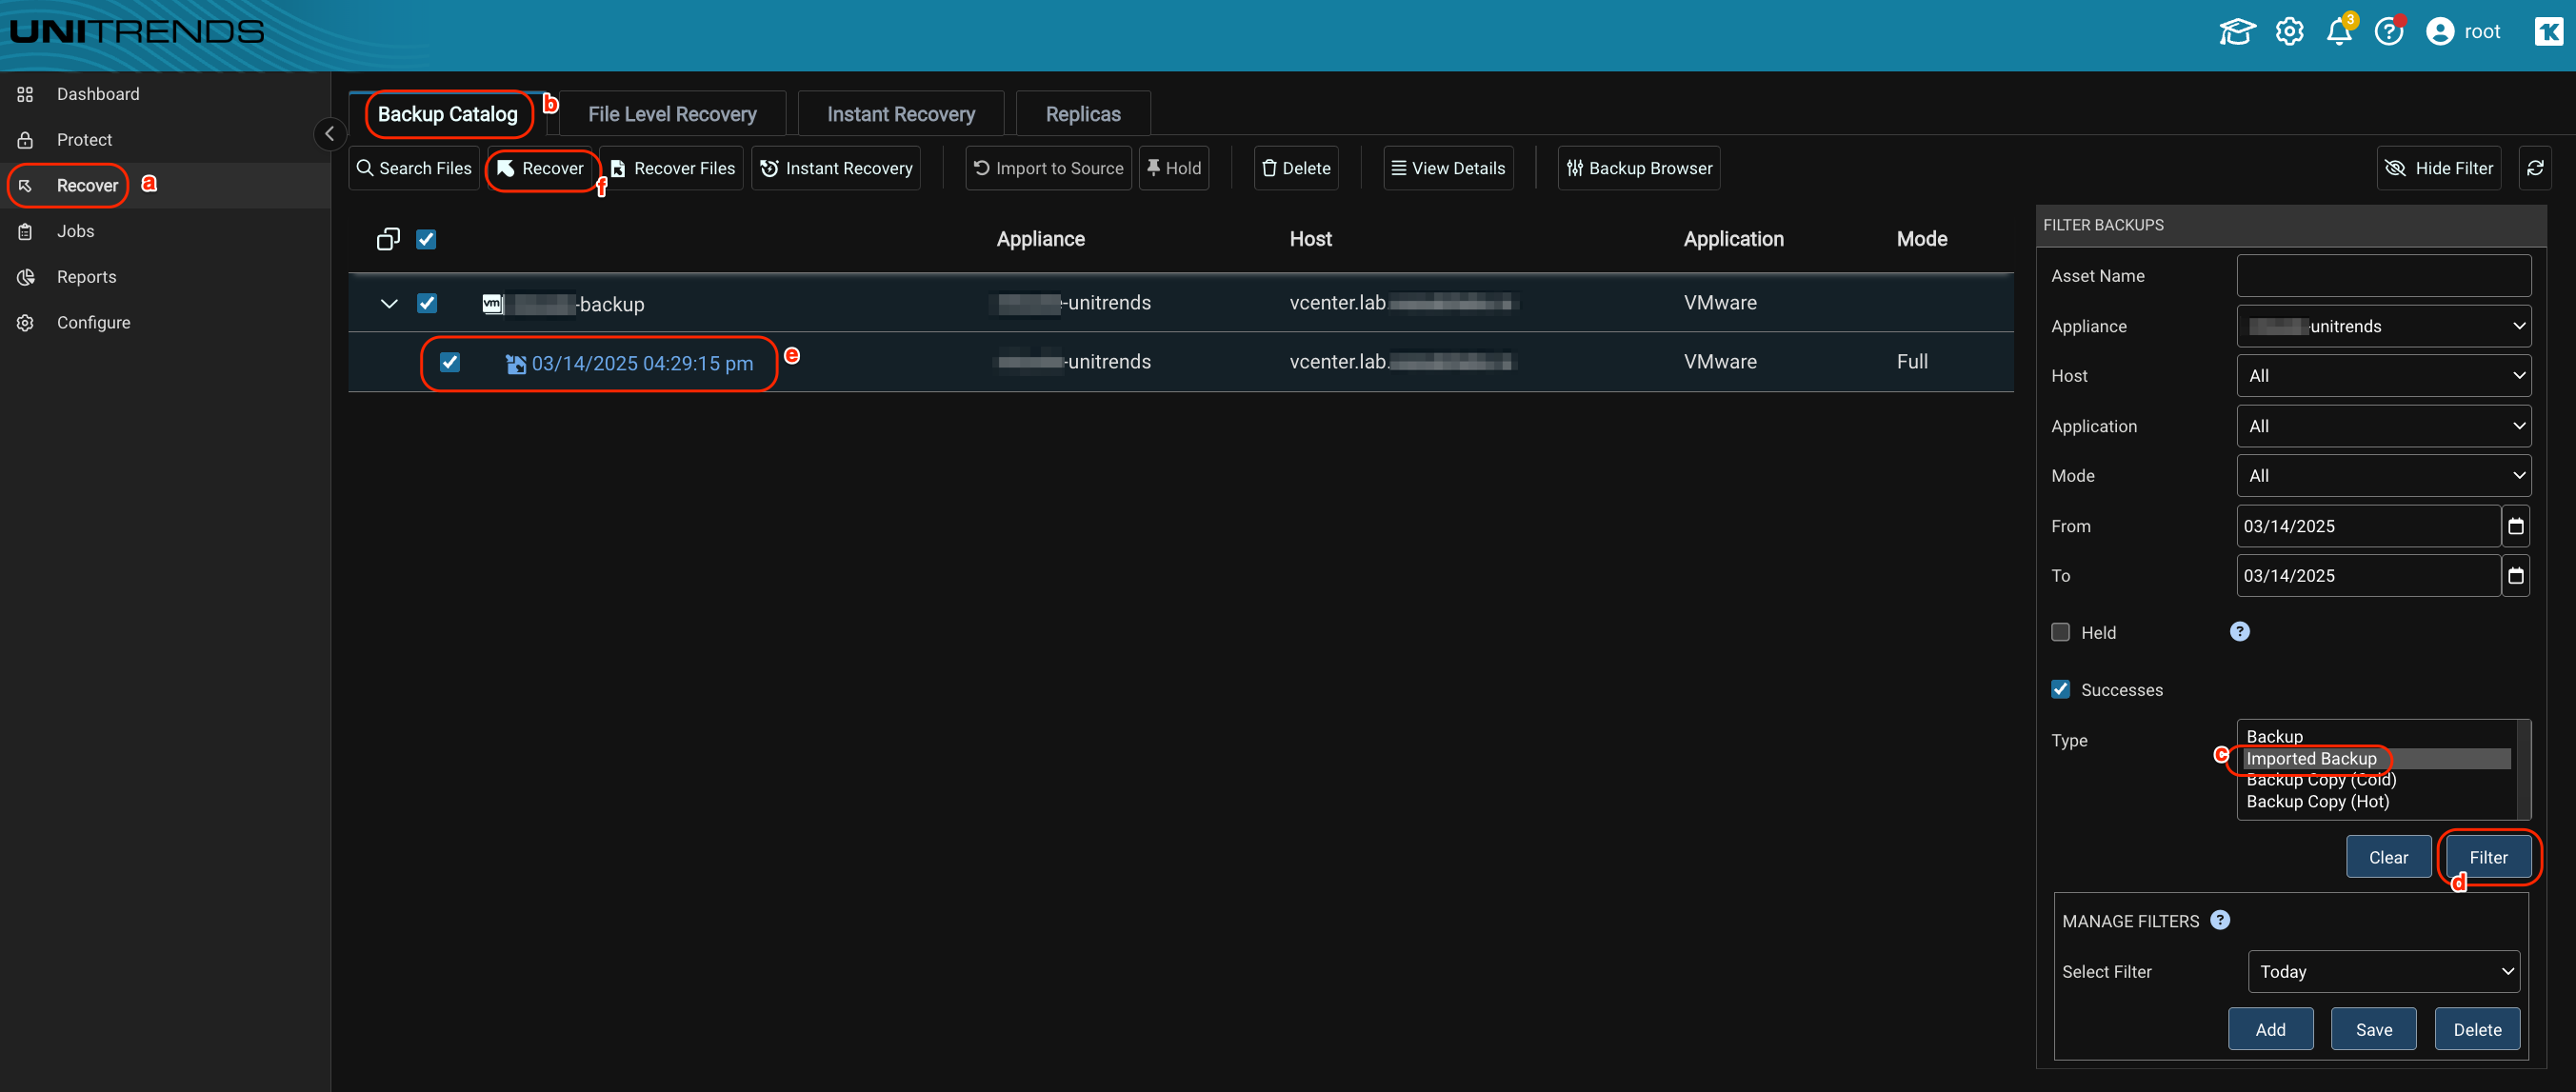
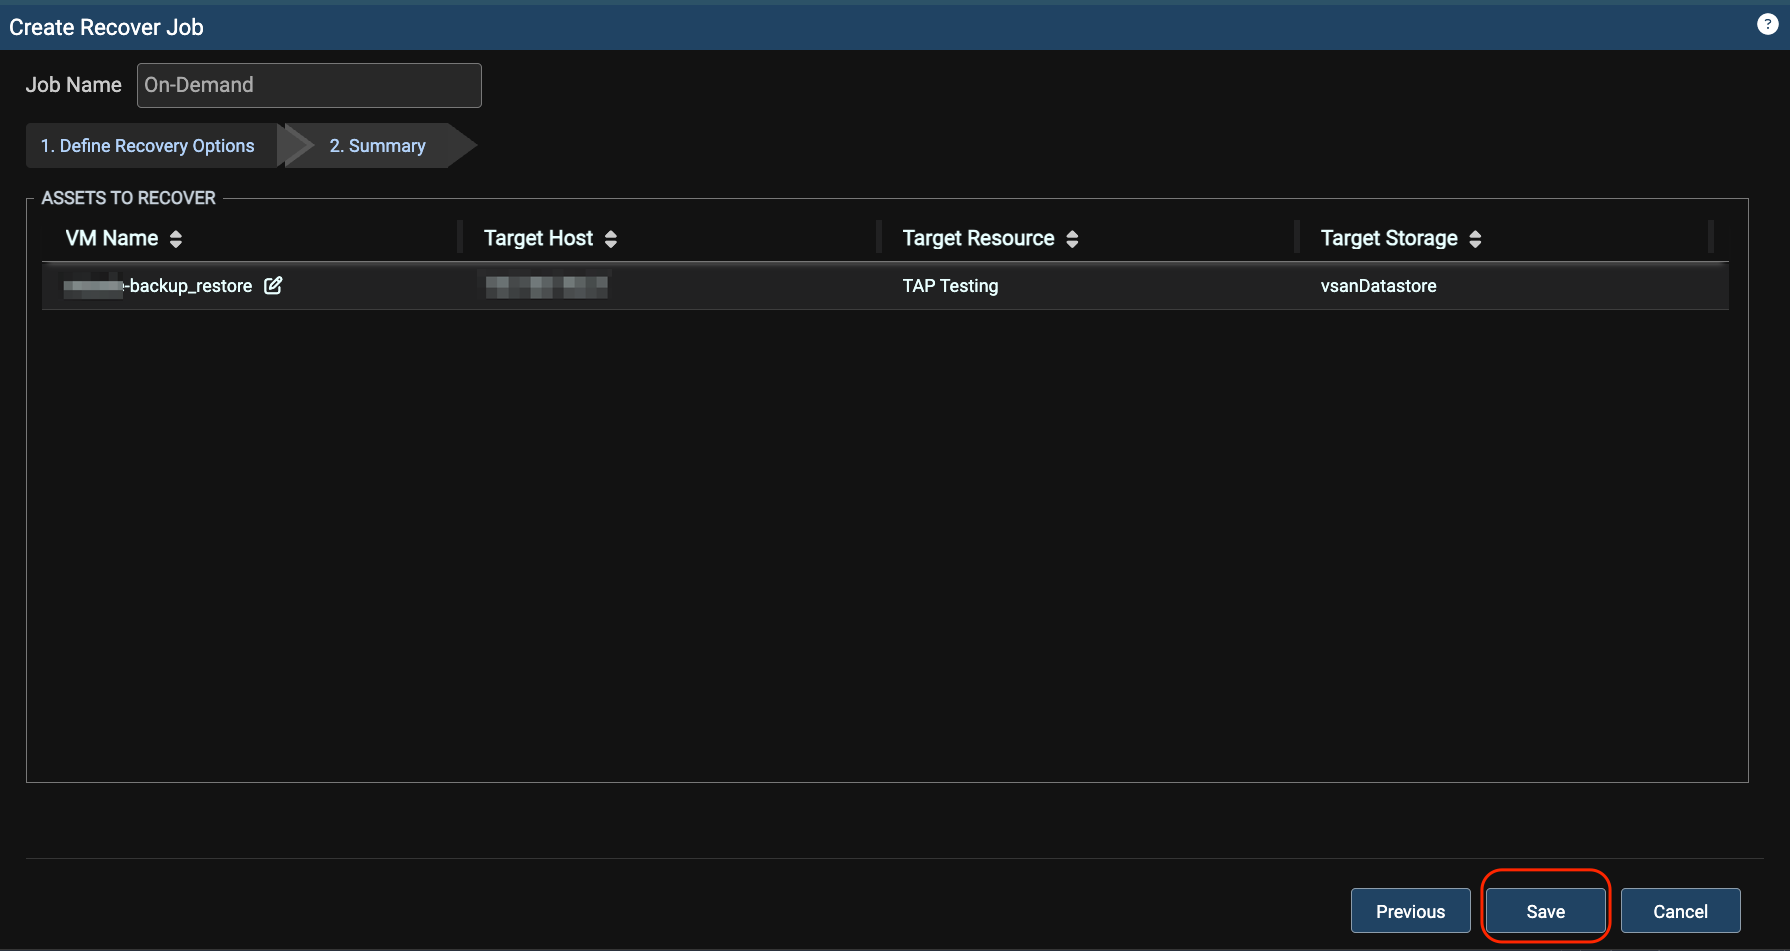
- Modify the Recovery Options as needed and click Next.

- Click Save.
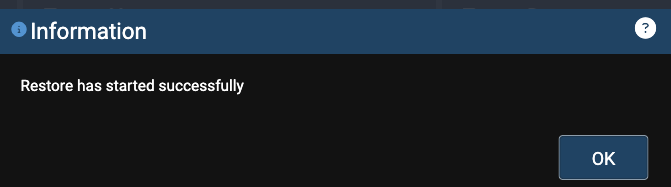
- Click OK.
- After the restore has completed successfully under Jobs > Active Jobs, verify you can login to the restored VM on the VM's console, such as in VMware's or Microsoft's hypervisor console. After successfully logging in, optionally delete the restored VM. Do NOT delete the original VM.