SkyPilot is an open-source framework for running AI, machine learning, and general batch compute workloads across a wide range of infrastructure — including major public clouds, on-prem or self-hosted Kubernetes clusters, Slurm clusters, and existing machines. Rather than writing infrastructure-specific scripts for each provider, users describe a task once in a simple YAML file, and SkyPilot handles provisioning compute, syncing code and data, running setup and job commands, and tearing resources down afterward.
This article documents the configuration required to run SkyPilot tasks that read data from and write results to Wasabi Hot Cloud Storage.
Requirements
The following software was used during testing of this configuration.
Operating System—This solution was tested with Ubuntu 26.04 Server edition.
Python—3.10. Installed automatically by uv if not already present.
uv—Tested with version 0.11.32. Astral's Python package/venv manager. Installed via the official install script.
SkyPilot—Tested with version 0.13.0.
Kubernetes distribution—MicroK8s. Tested with version v1.35.6. See “Known Issues — k3s” below before choosing a distribution. This solution was tested with Kubernetes, but other compute infrastructure such as AWS is also supported.
kubectl—Tested with v1.36.3. Installed via snap install kubectl --classic. A standalone binary is required; the microk8s kubectl alias is not sufficient for SkyPilot's internal use.
AWS CLI—Installed automatically inside the task pod during setup. Needed inside the remote pod to talk to Wasabi.
Active Wasabi account—See Signing Up for Wasabi for instructions on how to sign up.
Wasabi bucket—See Creating a Bucket for details.
Wasabi Console access.
Configuring Wasabi
Reference commands in this article use the placeholder YOUR_WASABI_BUCKET_NAME. Replace it with your own bucket name. Commands and output labeled “Example” are copied directly from the terminal during testing for this article, using a real bucket named mt-skypilot.
Log in to the Wasabi Console.
Configure a policy for a SkyPilot user (that will be created in the next step) using the following policy. Replace YOUR_WASABI_BUCKET with the actual name of the bucket you want SkyPilot to use. See Creating a Policy for details.
{
  "Version": "2012-10-17",
  "Statement": [
    {
      "Effect": "Allow",
      "Action": "s3:ListAllMyBuckets",
      "Resource": "arn:aws:s3:::*"
    },
    {
      "Effect": "Allow",
      "Action": "s3:*",
      "Resource": [
        "arn:aws:s3:::YOUR_WASABI_BUCKET",
        "arn:aws:s3:::YOUR_WASABI_BUCKET/*"
      ]
    }
  ]
}
Create a skypilot user and attach the previously created policy to it. Use the following settings for the user. See Creating a User for details.
Allow programmatic-only access, not console access.
Do not require Multi-Factor Authentication (MFA).
It is not necessary to assign the user to a group.
Save the access and secret keys in a secure location.
Configuring SkyPilot
Install UV and create a Virtual Environment.
SkyPilot requires Python 3.9–3.13 as of the writing of this article. UV is used to manage the Python environment.
curl -LsSf https://astral.sh/uv/install.sh | sh
source $HOME/.local/bin/env
uv venv --seed --python 3.10
source .venv/bin/activate
Install SkyPilot with Kubernetes (or the appropriate compute infrastructure for your environment) support into the activated virtual environment.
uv pip install "skypilot[kubernetes]"Install and configure a Kubernetes Cluster (if required).
MicroK8s is recommended for a local, single-node Kubernetes cluster on Ubuntu. See the k3s section of Known Issues below for why k3s is specifically not recommended for this use case.
sudo snap install microk8s --classic
sudo usermod -aG microk8s $USER
newgrp microk8s

microk8s status --wait-ready
microk8s enable dns
microk8s enable hostpath-storage

sudo snap install kubectl --classic

mkdir -p ~/.kube
microk8s config > ~/.kube/config
chmod 600 ~/.kube/config

kubectl get nodes
The output of
kubectl get nodesshould indicate a status of Ready for the node. Verify SkyPilot recognizes the cluster.sudo apt update && sudo apt install -y socat source .venv/bin/activate sky checkExpected output includes:
🎉 Enabled infra 🎉
  Kubernetes [compute]
    Allowed contexts:
    └── microk8s
Store Wasabi credentials locally.
Create a dedicated AWS CLI profile for Wasabi, stored in its own credentials/config files separately from any existing AWS credentials, using the Access Key and Secret Key generated earlier.
This configuration example uses Wasabi’s us-east-2 storage region. To use another Wasabi storage region, use the appropriate URL for your bucket region as described in Service URLs for Wasabi's Storage Regions.
sudo apt install awscli

mkdir -p ~/.wasabi

AWS_SHARED_CREDENTIALS_FILE=~/.wasabi/wasabi.credentials \
  aws configure --profile wasabi
# Enter the Wasabi Access Key and Secret Key when prompted.
# Region can be left blank or set to us-east-1.
# Set the output format to be json.

AWS_CONFIG_FILE=~/.wasabi/wasabi.config \
  aws configure set endpoint_url https://s3.us-east-2.wasabisys.com --profile wasabi

AWS_CONFIG_FILE=~/.wasabi/wasabi.config \
  aws configure set s3.addressing_style path --profile wasabi
Verify the profile works before proceeding. You should see a list of your buckets as the output.
AWS_SHARED_CREDENTIALS_FILE=~/.wasabi/wasabi.credentials \
AWS_CONFIG_FILE=~/.wasabi/wasabi.config \
  aws s3 ls --profile wasabi --endpoint-url https://s3.us-east-2.wasabisys.com
Minimum required task YAML sections.
SkyPilot has no native “Wasabi” storage backend or cloud provider. Because Wasabi is S3-compatible, the working approach is to provision compute normally with SkyPilot, then use the AWS CLI directly inside the task's setup and run steps, pointed at Wasabi's endpoint instead of AWS. At a minimum, a task YAML needs the following four sections.
resources—Specifies the compute target. For Kubernetes:
resources:
  infra: k8s
file_mounts—Uploads the local Wasabi credential files to the remote pod so the AWS CLI running there can authenticate.
file_mounts:
  ~/.wasabi/wasabi.credentials: ~/.wasabi/wasabi.credentials
  ~/.wasabi/wasabi.config: ~/.wasabi/wasabi.config
envs—Points the AWS CLI at the uploaded Wasabi credential files instead of the default ~/.aws location.
envs:
  AWS_SHARED_CREDENTIALS_FILE: $HOME/.wasabi/wasabi.credentials
  AWS_CONFIG_FILE: $HOME/.wasabi/wasabi.config
setup—Installs the AWS CLI (not present by default in the SkyPilot task image) and downloads data from Wasabi before the job runs. Replace YOUR_WASABI_BUCKET with the name of your bucket. Use the URL associated with the region your bucket is in (the last line).
setup: |
  export DEBIAN_FRONTEND=noninteractive
  export TZ=Etc/UTC

  apt_retry() {
    local max_attempts=30
    local attempt=1
    until sudo -E "$@"; do
      if [ $attempt -ge $max_attempts ]; then
        echo "Giving up after $max_attempts attempts."
        return 1
      fi
      echo "apt-get busy (lock held), retrying in 5s... (attempt $attempt/$max_attempts)"
      sleep 5
      attempt=$((attempt + 1))
    done
  }

  apt_retry apt-get update
  apt_retry apt-get install -y awscli

  aws s3 sync s3://YOUR_WASABI_BUCKET ~/data \
    --profile wasabi \
    --endpoint-url https://s3.us-east-2.wasabisys.com
Why the apt_retry wrapper is necessary: SkyPilot installs its own runtime dependencies (rsync, curl, openssh-server, and so on) in the background when a pod first starts, using apt-get. If a task’s setup step also calls apt-get at the same time, both processes compete for dpkg’s lock file, resulting in errors such as "Could not get lock /var/lib/dpkg/lock-frontend." Wrapping apt-get calls in a retry loop (rather than trying to detect the lock ahead of time with tools like fuser, which may not be installed on the task image) reliably resolves this.
DEBIAN_FRONTEND=noninteractive and TZ=Etc/UTC are also required — without them, installing awscli pulls in tzdata as a dependency, which prompts interactively for a timezone and hangs indefinitely, since no terminal is attached during setup.
Full example task YAML.
The following complete example downloads data from a Wasabi bucket, generates a simple summary report and status file, and uploads the results back to the same bucket under an outputs/ prefix. Replace YOUR_WASABI_BUCKET (listed twice) and the endpoint URL with your own values. Name the file
wasabi_task.yaml.resources: infra: k8s cpus: 4+ file_mounts: ~/.wasabi/wasabi.credentials: ~/.wasabi/wasabi.credentials ~/.wasabi/wasabi.config: ~/.wasabi/wasabi.config envs: AWS_SHARED_CREDENTIALS_FILE: $HOME/.wasabi/wasabi.credentials AWS_CONFIG_FILE: $HOME/.wasabi/wasabi.config setup: | export DEBIAN_FRONTEND=noninteractive export TZ=Etc/UTC apt_retry() { local max_attempts=30 local attempt=1 until sudo -E "$@"; do if [ $attempt -ge $max_attempts ]; then echo "Giving up after $max_attempts attempts." return 1 fi echo "apt-get busy (lock held), retrying in 5s... (attempt $attempt/$max_attempts)" sleep 5 attempt=$((attempt + 1)) done } apt_retry apt-get update apt_retry apt-get install -y awscli aws s3 sync s3://YOUR_WASABI_BUCKET ~/data \ --profile wasabi \ --endpoint-url https://s3.us-east-2.wasabisys.com run: | echo "=== Data synced from Wasabi ===" ls -la ~/data mkdir -p ~/outputs echo "=== Processing files ===" { echo "Wasabi Sync Test Report" echo "Generated: $(date -u)" echo "Hostname: $(hostname)" echo "" echo "Files found in ~/data:" ls -la ~/data echo "" for f in ~/data/*; do if [ -f "$f" ]; then echo "--- $f ---" echo " Lines: $(wc -l < "$f")" echo " Words: $(wc -w < "$f")" echo " Bytes: $(wc -c < "$f")" fi done } > ~/outputs/report.txt echo "Task completed successfully at $(date -u)" > ~/outputs/status.txt echo "=== Generated outputs ===" cat ~/outputs/report.txt echo "=== Uploading results back to Wasabi ===" aws s3 sync ~/outputs s3://YOUR_WASABI_BUCKET/outputs \ --profile wasabi \ --endpoint-url https://s3.us-east-2.wasabisys.com echo "=== Done ==="Create a test file in your Wasabi bucket.
Before running the task, create a small test file locally using your favorite text editor (for example, vi, vim, or nano on Linux).
nano test.txtEnter the following line of text, then save and close the file.
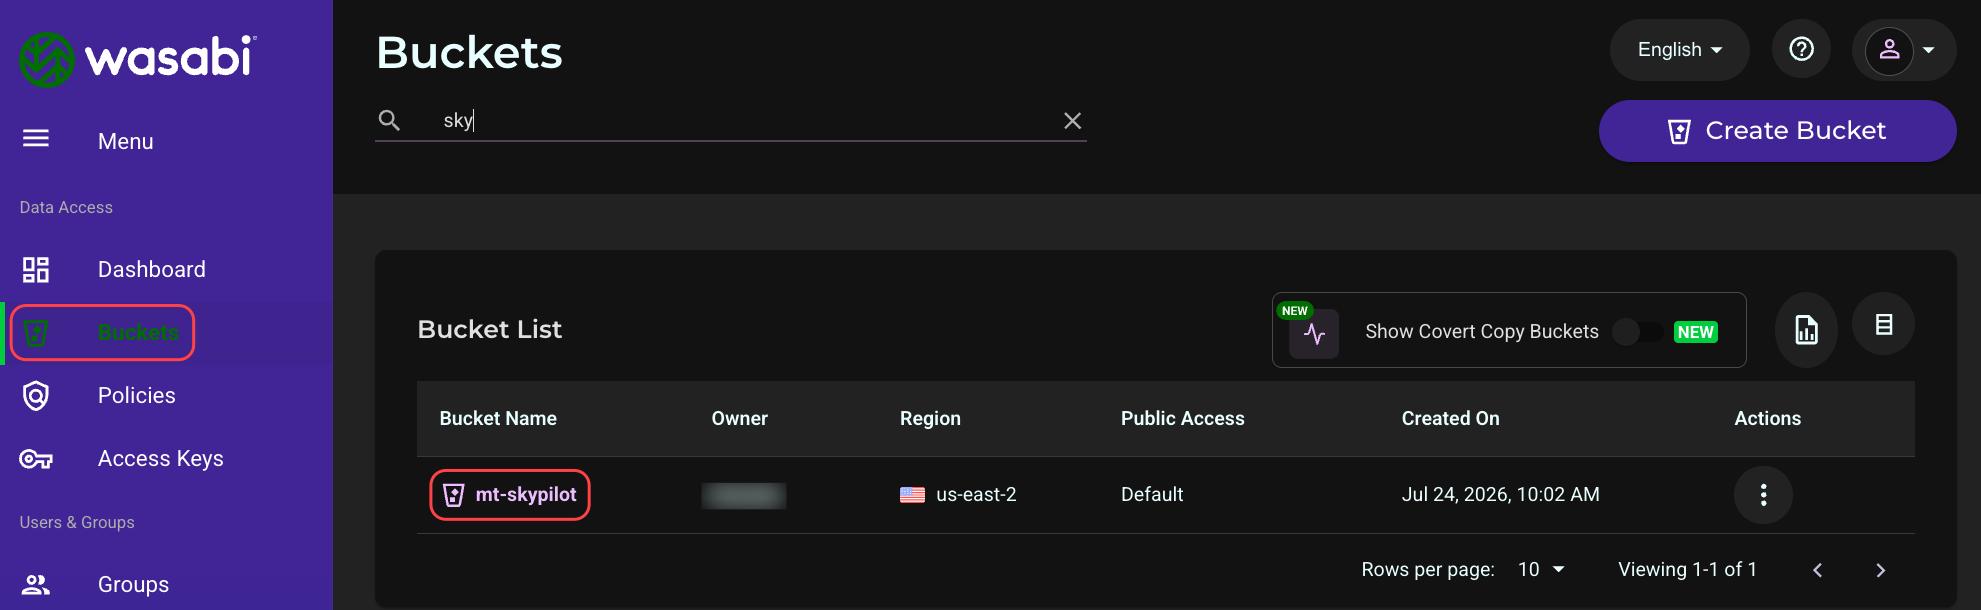
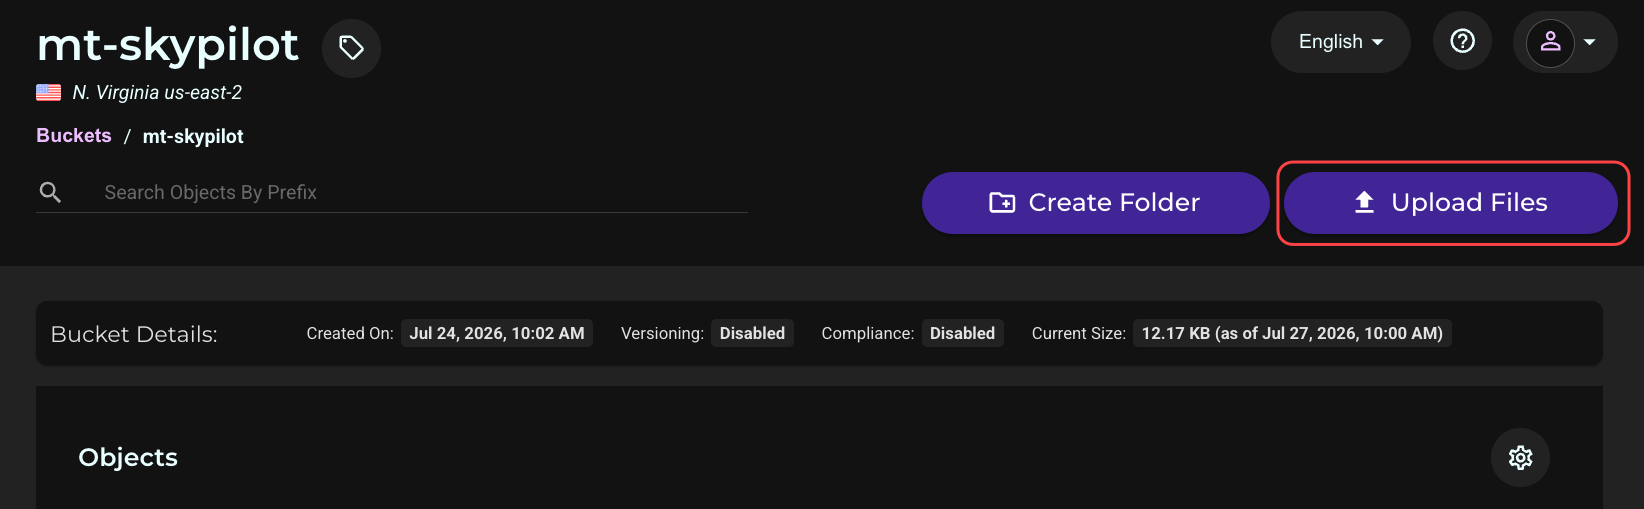
This is a test.Log in to the Wasabi Console, navigate to Buckets, select the name of the bucket, and upload test.txt using the Console’s upload feature. This gives the task’s setup step something to download in the next section.
Running and verifying the task.
sky launch -y -c wasabi-test wasabi_task.yamlTo confirm the results were written back to Wasabi, run the following commands. Replace YOUR_WASABI_BUCKET with the name of your bucket, and the endpoint URL with that of the region of your bucket.
AWS_SHARED_CREDENTIALS_FILE=~/.wasabi/wasabi.credentials \
AWS_CONFIG_FILE=~/.wasabi/wasabi.config \
  aws s3 ls s3://YOUR_WASABI_BUCKET/outputs/ \
  --profile wasabi \
  --endpoint-url https://s3.us-east-2.wasabisys.com
You should see report.txt and status.txt listed.
Useful cleanup and follow-up commands:
sky status — list active clusters
sky logs wasabi-test — view job logs
sky down wasabi-test — terminate the cluster and stop billing/resource usage
Known Issues
k3s: Sky Launch Hangs Indefinitely During Provisioning
During testing, a single-node k3s cluster (the Kubernetes distribution bundled by some Ubuntu server setups) caused every sky launch — including a trivial task with no file_mounts at all — to hang indefinitely at the Preparing SkyPilot runtime (1/3 - initializing) stage.
Investigation ruled out the following as causes:
DNS resolution and general internet/package-mirror connectivity (all confirmed working)
The host firewall (ufw was inactive)
kubectl client/server version skew (both were identical)
Basic and multi-line streaming kubectl exec sessions (both completed successfully)
CPU, memory, and disk resource contention (all had ample headroom)
The kubectl exec transport protocol (forcing KUBECTL_REMOTE_COMMAND_WEBSOCKETS=true made no difference)
The hang was isolated to SkyPilot’s internal file-sync step, which uses rsync tunneled through kubectl exec to transfer its runtime files into the pod. The actual rsync worker process inside the pod was found sleeping indefinitely, but the container’s security context blocked all process introspection tools (strace, ptrace-based inspection via /proc) even for the root user — consistent with a restrictive seccomp profile in this k3s configuration blocking ptrace() outright. This prevented the determination of the exact underlying cause.
Resolution: Switching from k3s to MicroK8s on the same machine resolved the issue completely; the same trivial task was completed successfully on the first attempt after the switch. Until the root cause is identified, MicroK8s (or another distribution such as kind or minikube) is recommended over k3s for running SkyPilot locally on Ubuntu.
aws: Command Not Found
The default SkyPilot task image does not include the AWS CLI. It must be installed explicitly in the task’s setup step, as shown in the example YAML above. Installing it pulls in tzdata as a dependency, which requires DEBIAN_FRONTEND=noninteractive and a pre-set TZ environment variable to avoid an interactive prompt that would otherwise hang the setup step indefinitely.
E: Could not get Lock /var/lib/dpkg/lock-frontend
This occurs when the task’s apt-get call runs concurrently with SkyPilot’s internal background provisioning (which also uses apt-get to install its own runtime dependencies). Wrapping apt-get calls in a retry loop, as shown in the example setup step above, resolves this. If the error persists across many retries, check for a stale/orphaned apt-get process left over from a previous interrupted run (for example, one that hung on the tzdata prompt before this fix was applied) that may still be holding the lock; such a process can be found and terminated from inside the pod with ps aux | grep apt-get and sudo kill -9 <pid>.