Objectives
1—Sign up for Wasabi and sign in.
2—Work with buckets and objects.
3—Create a user account and access key.
Signing Up
You can use your free trial to store up to 1 TB of storage for 30 days, without the requirement of a credit card.
You will not be charged to work through the exercises in this quick start tutorial, and you will not be charged for Wasabi until you use it for data storage. For more information about your trial, refer to Trial Limit and Expiration. For FAQs and information on Wasabi features and pricing, go to the Wasabi product page. If you choose to delete your Wasabi account after signing up, refer to the instructions in Deleting an Account.
Go to the Wasabi webpage (www.wasabi.com) to sign up.
As a user new to Wasabi, you need to set up an account by completing this procedure. But, check with your administrator to determine if your organization has a Wasabi account and security credentials that you should use. If you already have an account, sign in and then continue by Working with Buckets and Objects.
Click the Try Free (or Sign Up) button. A page to create your Wasabi account is displayed:
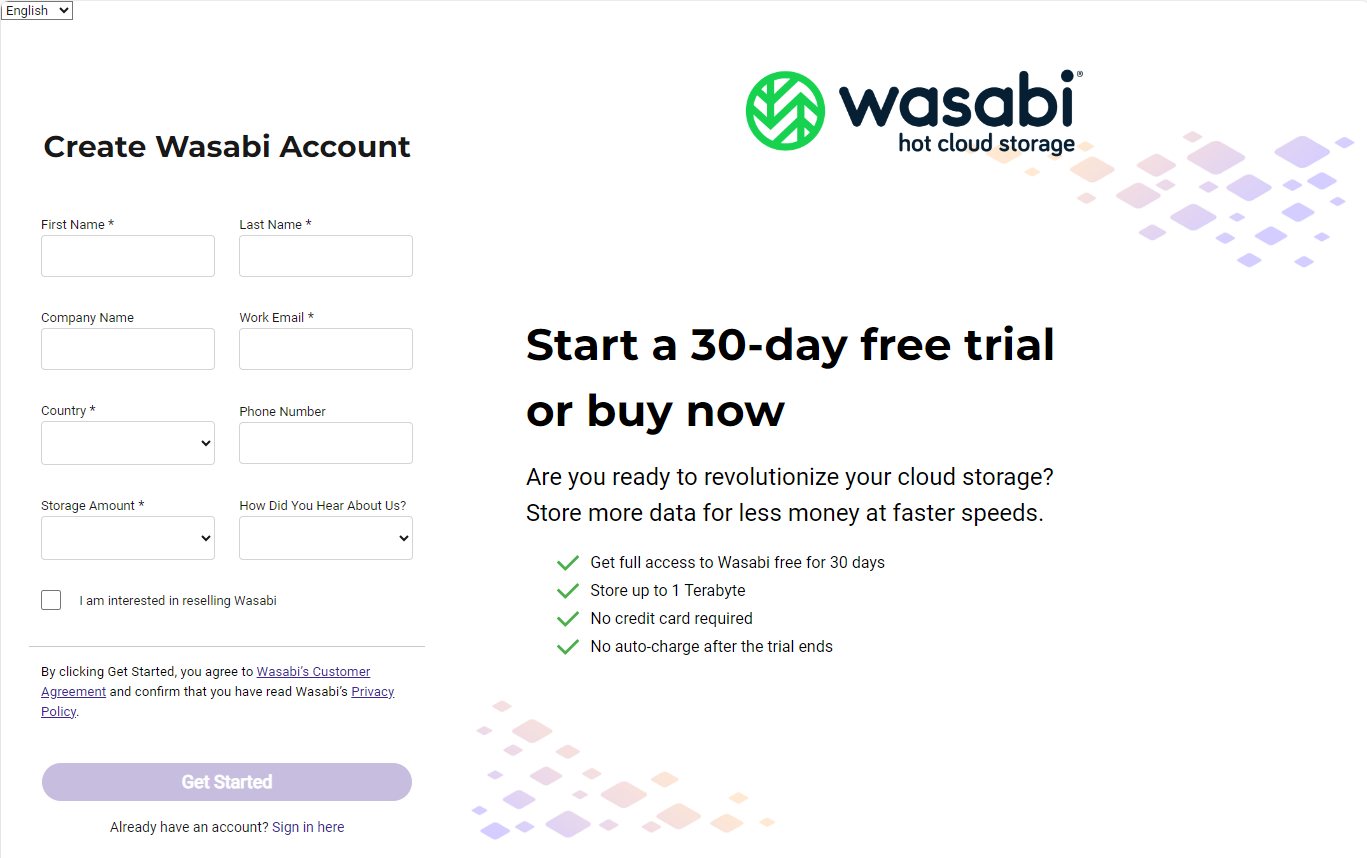
Notice the language option in the upper left corner of the screen. You can change the displayed interface language at any time.

Enter required information (marked with an asterisk *):
Your first and last names
Work email address at which you will receive a free trial invitation
Country
Approximate amount of storage you believe you would be using (this is not a commitment)
Optionally, enter your company name and telephone number.
Optionally, indicate how you heard about Wasabi.
Optionally, check the box if you want information about reselling Wasabi.
Depending on the country selected in Step 4, you may need to answer additional questions.
Click Get Started. Wasabi will email an invitation as your link to the Wasabi Console.
In your email (“Welcome to Wasabi Hot Cloud Storage”), click Create Account to create your free trial account.
You are prompted to enter a password. (Your email is automatically entered as your account name.) Enter a password of at least 8 characters and re-enter it to confirm.
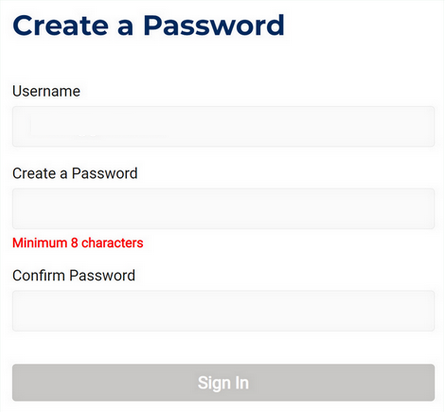
Click Sign In.
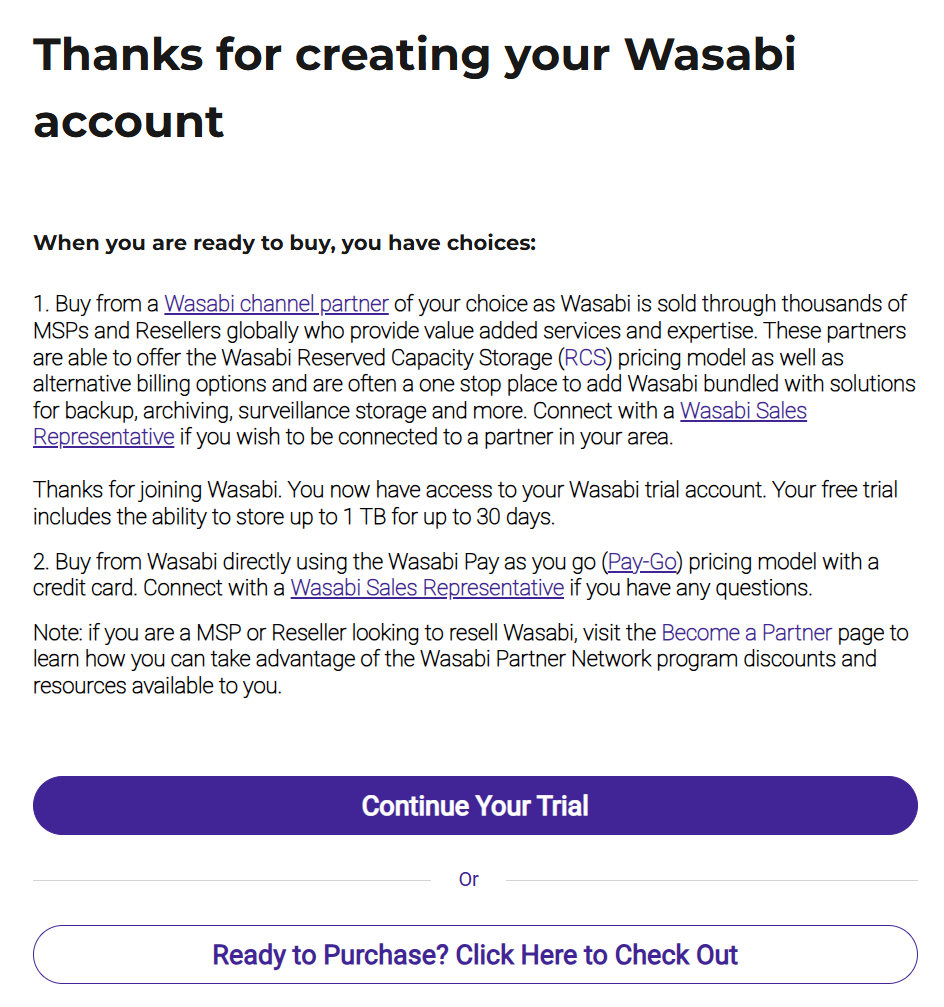
A message thanks you for creating your Wasabi account and explains your purchasing choices when you are ready to buy. You can:
Click Continue Your Trial and then Sign In.
Click Ready to Purchase? Click Here to Check Out if you are ready to buy. This enables you to Purchase During Sign-Up and set up billing details before you sign in. (Note that you can purchase Wasabi at any time later, as described in Upgrading to a Paid Plan.)
For security control, Multi-Factor Authentication (MFA) is required for a Trial account. A virtual MFA device (such as a smartphone) uses a software application to generate an authentication code. Account access is granted only after a user successfully provides this code—as identity evidence—during Wasabi sign-in. Security and MFA are further detailed in the Wasabi Security Center.
When you continue your trial, you will be prompted to set up MFA.
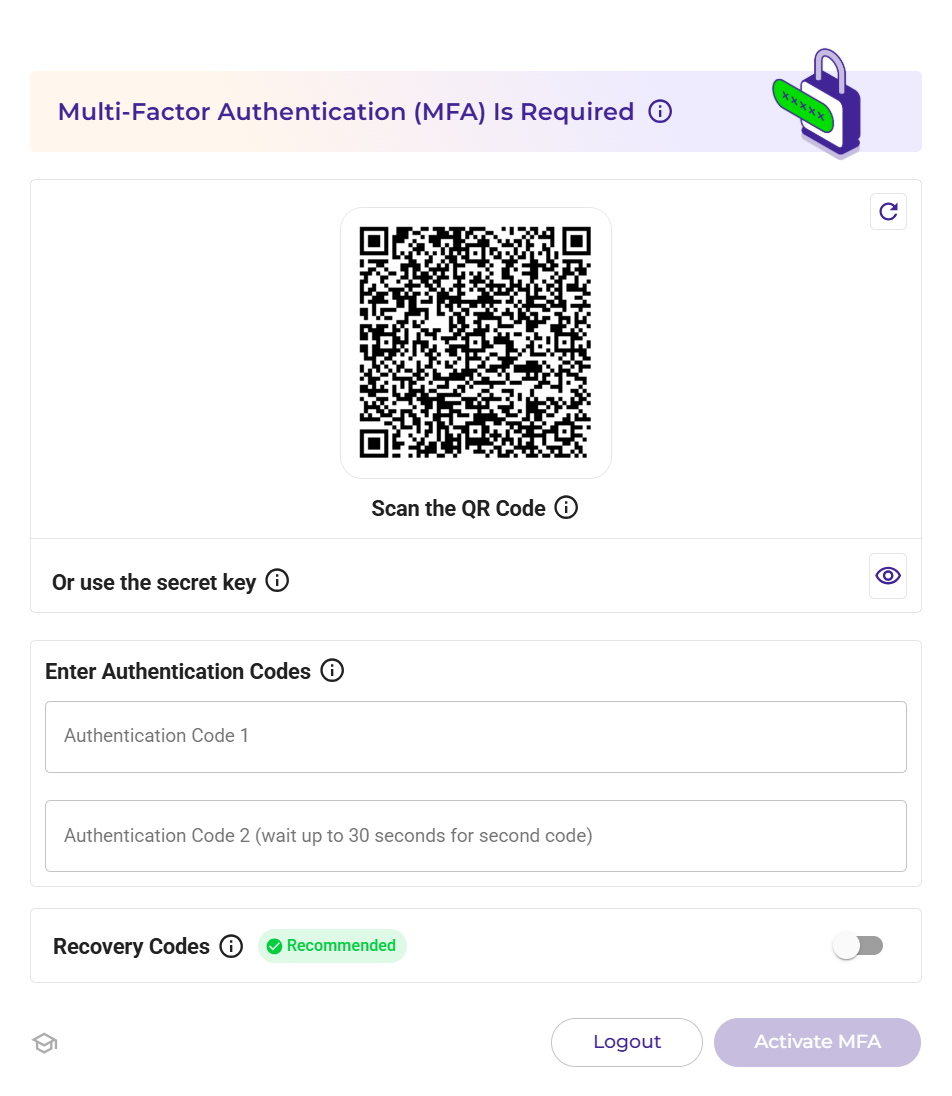
There are two ways to set up MFA on your MFA application, such as on a smartphone. You can scan the QR code or use a secret key.
Click
 to display the secret key if you want to set up MFA with that key (rather than scanning the QR code).
You can click
 to refresh/change the QR code and secret key.
Save a copy of the secret key in a secure place. You can click
 to copy it to the clipboard. If you lose the MFA device or need to reinstall the MFA software application, you can reconfigure it using the same virtual MFA without creating a new virtual MFA.
Wasabi recommends you generate recovery codes. These codes can be used to access your Wasabi account if you lose your authentication device. Enable the toggle for Recovery Codes.

Timing is important for the next steps, so you may want to review the remainder of this procedure before proceeding.
Open the virtual MFA application (such as on the smartphone). If applicable, choose the option to create a new account (a new virtual MFA device).
Scan the QR code graphic (such as by using your smartphone camera). Or, enter the secret key, where appropriate, in the MFA application.
When a one-time code appears in the MFA application, enter this code in the Wasabi area labeled “Authentication Code 1.”
Enter this code in Wasabi immediately after you receive it because it is time-based and will expire quickly.
After approximately 30 seconds, the device will generate a second one-time code. Enter this code in the Wasabi area labeled “Authentication Code 2.” (Enter it immediately because it, too, is time-based and will expire.)
If you did not enable the Recovery Codes option, click Activate MFA to complete the setup. You are ready to sign in to the Wasabi Console (as described in the next section).
If you enabled the Recovery Codes option, a window similar to the following is displayed.
Be sure to Copy, Download, or Print these codes. Once you click Finish or close this window, you can no longer access the codes from the Wasabi Console.
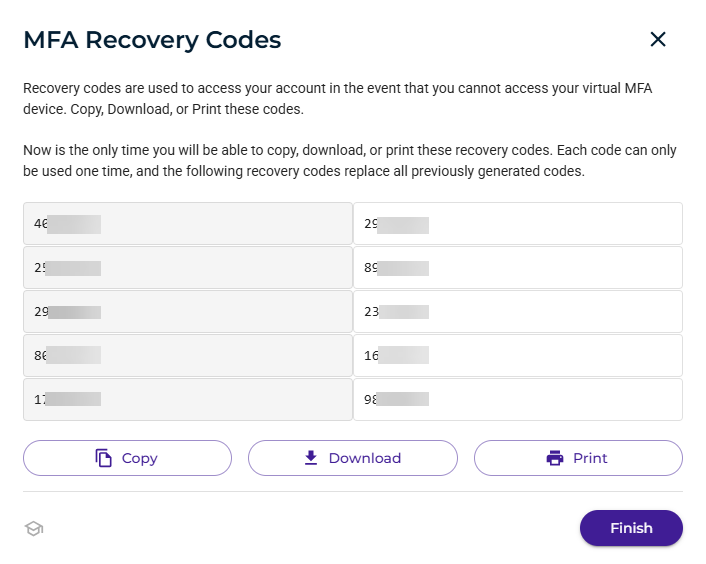
If you lose access to an MFA device, you will have the option to use one of these recovery codes to regain access to the Wasabi Console. Details to do so are provided in Signing In With an MFA Code.
Click Finish after you copy, download, or print the codes.
You are ready to sign in to the Wasabi Console.
Signing In
When you are ready to sign in to Wasabi, just follow the instructions below.
If you close or time out of Wasabi, you can sign in again by following the instructions in Signing in to Wasabi.
Enter your account (the email address you entered during sign-up) and password.

As an alternative to English, you can click English and select the language in which to display the interface.
Click Sign In.
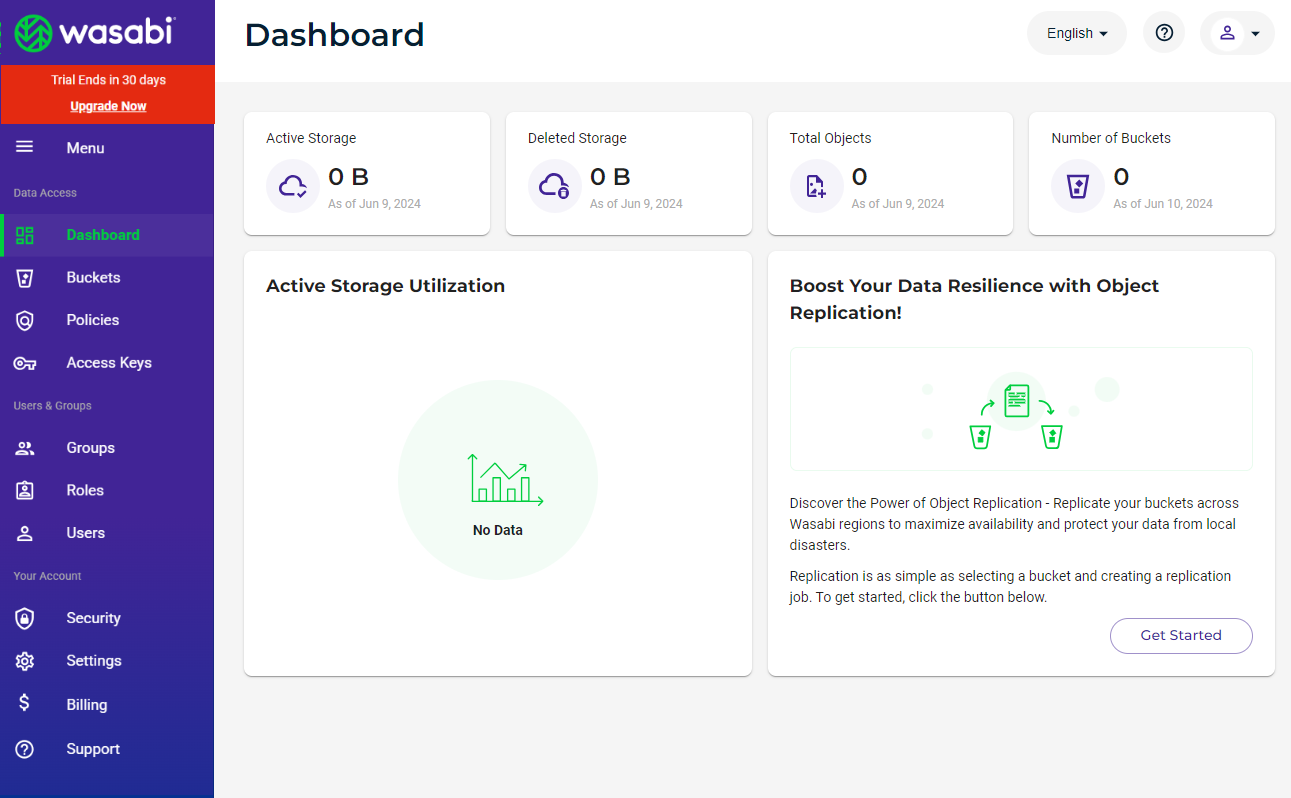
You are now ready to work with the Wasabi Management Console and add a bucket. Depending on your configuration, you may see a screen that displays the Dashboard. You may need to scroll down to see all the information. For example:
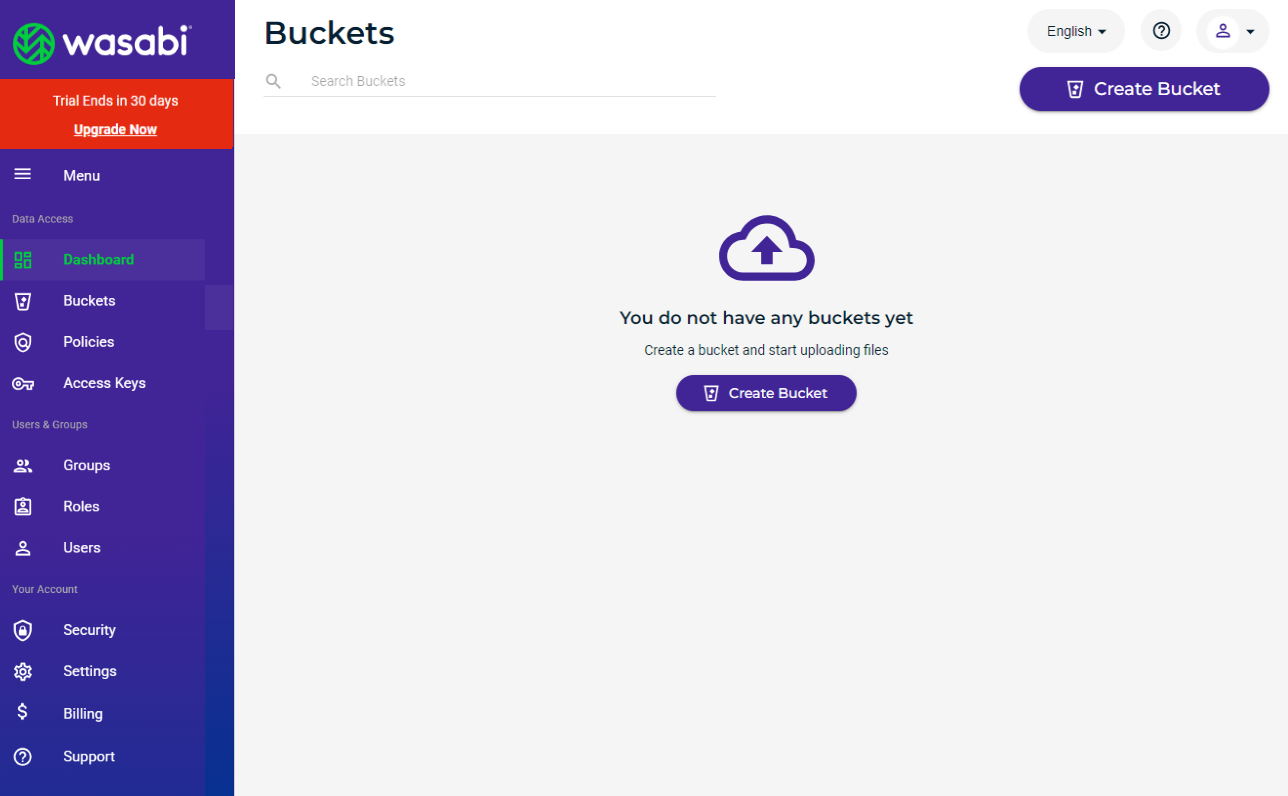
You will see a screen that prompts you to start using Wasabi by creating a bucket. For example:
When you log in to the Wasabi Management Console, a banner may display announcing new products and features, special offers, service incidents, or scheduled maintenance. This banner is visible on both the login screen and inside the Console. For example:

Logging Out of Wasabi
Open the account sign-in  drop-down. Then, click Logout.
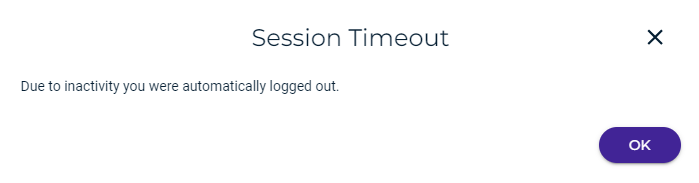
Timing Out of Wasabi
If you are not active in Wasabi, your session will time out automatically after one hour of inactivity. Note, however, that this will not occur if you are uploading objects.
Just click OK and then sign in again.
Objectives Met!
1—Sign up for Wasabi and sign in.
3—Create a user account and access key.
Before moving to Step 2, you may want to:
Review the Wasabi Management Console (the main screen and its features)
After Getting Started, there are many features to explore in the Product Guide for Wasabi Hot Cloud Storage.