The screen that you see is referenced as the Wasabi Management Console or, simply, the Wasabi Console. It consists of the following components.
Trial Countdown and Menu
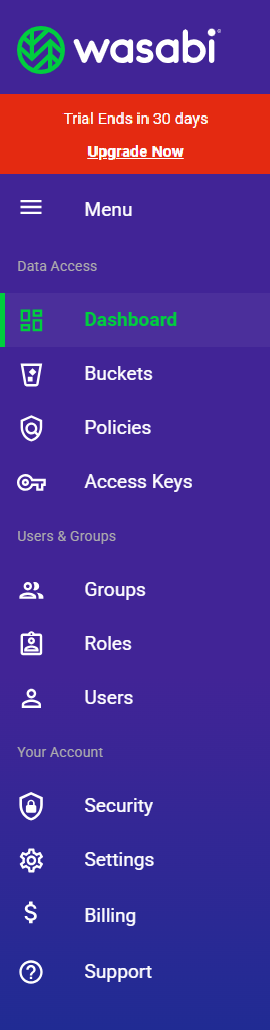
The red countdown message indicates how much longer your trial account will be active. You can click Upgrade Now to purchase Wasabi at any time during the trial period. After purchasing Wasabi, this message will no longer appear.
Click Menu to collapse the menu area so that only icons are shown and more screen space is available for your Wasabi Console panel.
The menu is divided into three basic areas:
Data Access to manage buckets and objects, policies, and access keys
Your Account to establish account settings and billing information, and access Wasabi Academy (Support)
All menu options are described with instructions in the remainder of Getting Started and the Wasabi Cloud Storage: Product Guide.
Console Panel
The largest area of your screen is the Console panel, which displays all of your Wasabi features and options. Initially, you may see the Dashboard, which is your Wasabi "landing" page, which provides current data about your account usage and additional information such as cost comparisons and descriptions of new features.
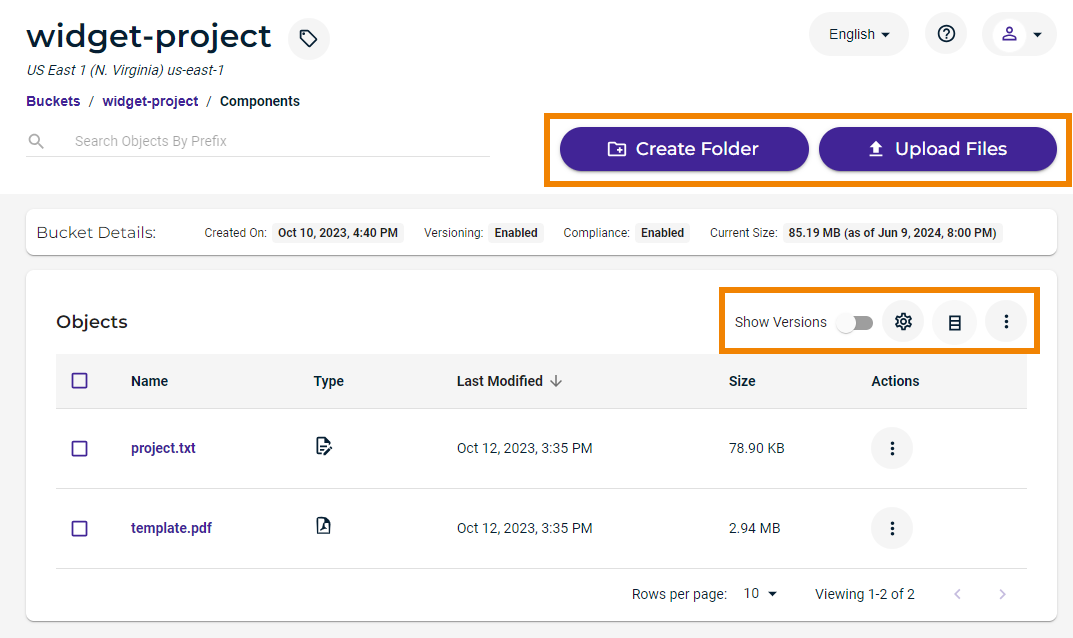
The following is an example of a Console panel that you might see once you start to work with Wasabi in Step 2—Working with Buckets and Objects.
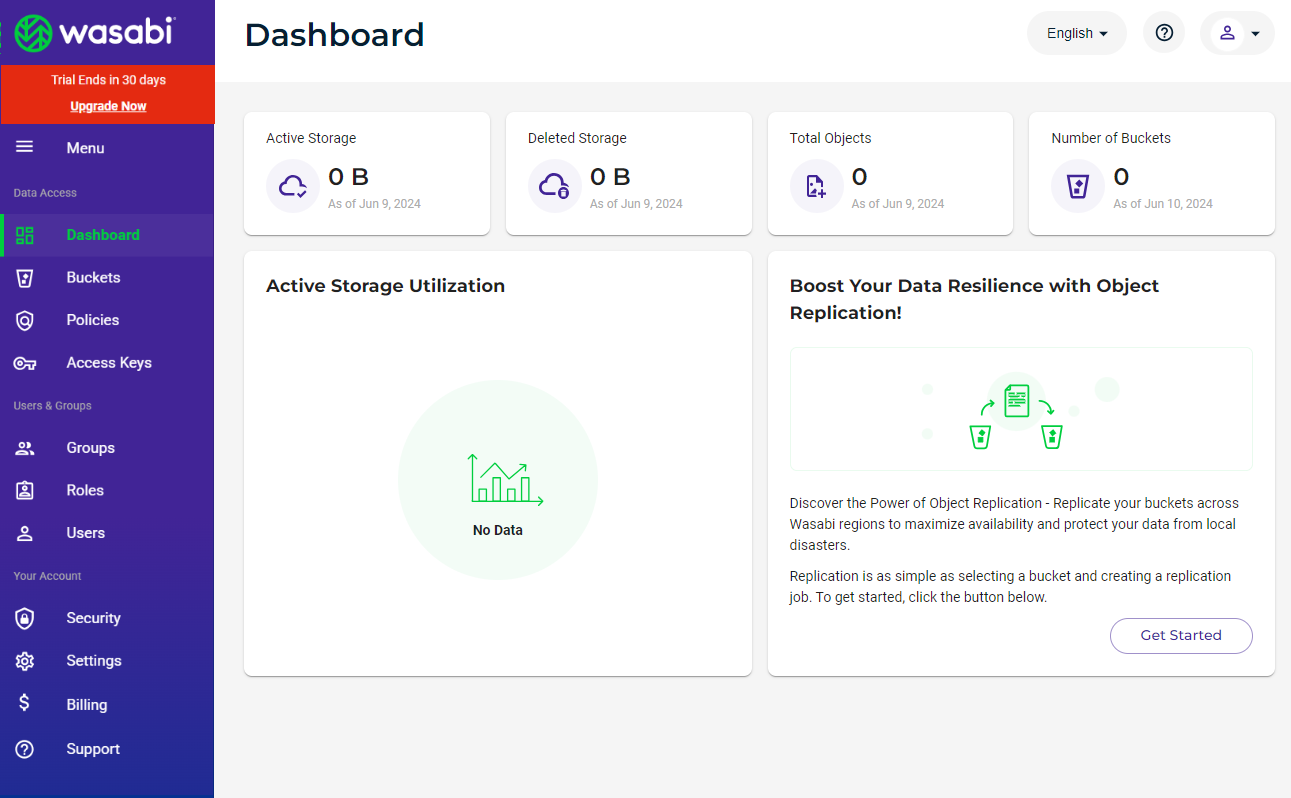
The information below is intended to familiarize you with the Wasabi Console panel. Details of all panels are described throughout the documentation.
Navigation: Where Am I?
Many panels include general information in the top left of the panel to indicate "where you are" in Wasabi. For example:
widget-project is the name of a bucket.
US East 1 (N. Virginia)-us-east-1 is the storage region of the bucket.
Buckets / widget-project / Components is a breadcrumb indicating that we are in the Buckets features, looking at a bucket named "widget-project" that has a folder called "Components."
A Search bar enables you to search for information within the displayed content. In this example, you can search the list of Objects in the Components folder.
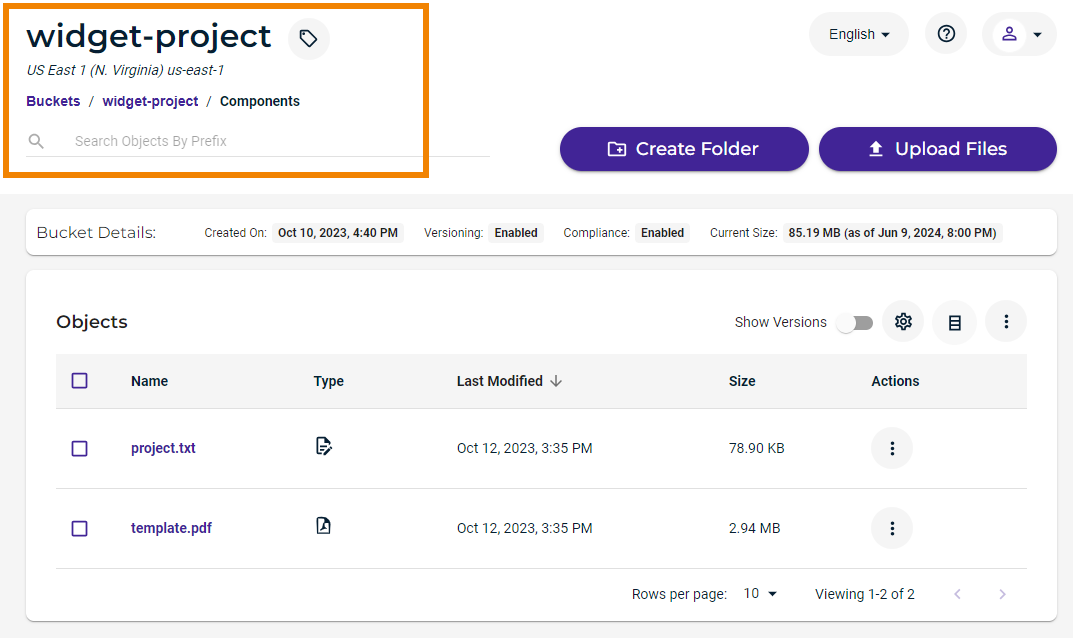
Display Options
The majority of this example panel shows the Objects list—a list of the files that are stored in the Components folder in the widget-project bucket. When any type of list is displayed, you can indicate that you want to show 10, 25, 59, or 100 rows of information per page. The rows per page, an indication of the entries you are viewing, and the total number of entries are indicated. In the following example, we are displaying 10 rows per page and viewing entries 1 to 4 of the total of 4 entries.
You can use the < and > keys to go to the previous (<) or next (>) page, when applicable.

A bucket with a large number of objects will list the first 300 objects when the bucket is first opened. As you page through the list, it will fetch 300 objects at a time. Any operation, such as searching or sorting, will take place only on these 300 objects. We recommend using Wasabi Explorer or another third-party tool that will download the entire list of objects if this is needed.
Common Tools
Common tools are displayed in the upper right of the Console panel.
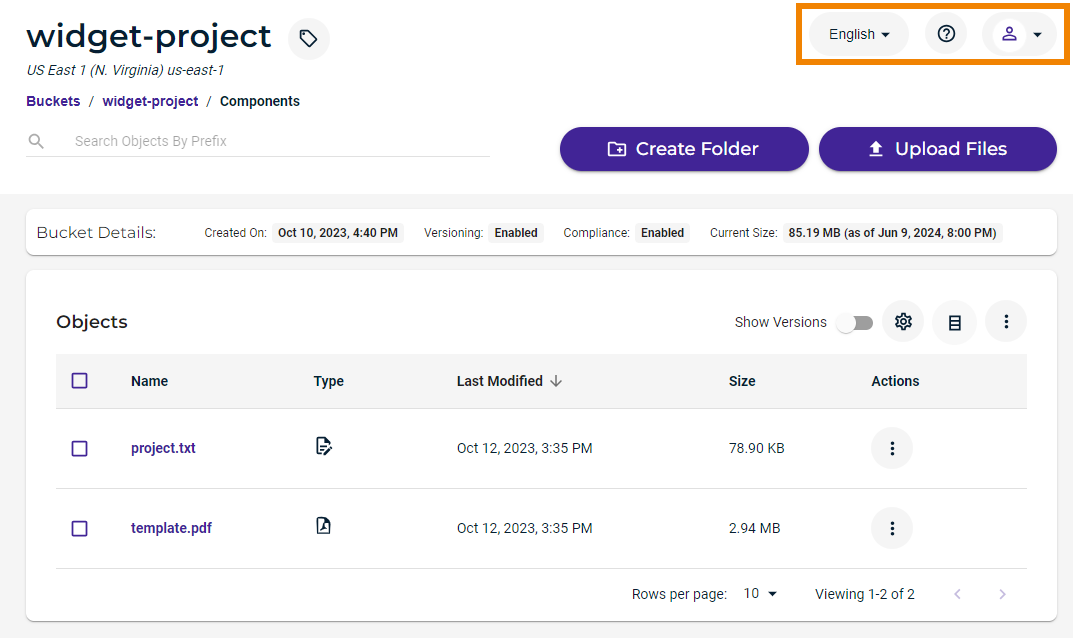
These tools enable you to click:
 to select an alternative to English for the interface display.
 to access Wasabi Academy user documentation.
 to change user settings, switch your user role, access billing, and log out.
Feature-Specific Tools
You may see tools on the Console panel that are specific to a feature. These are described for each feature throughout the documentation. Here are examples of feature-specific tools:
Announcement Banner
When you log in to the Wasabi Management Console, a banner may display announcing new products and features, special offers, service incidents, or scheduled maintenance. This banner is visible on both the login screen and inside the Console. For example:
